
'%20x='0'%20y='0'%20height='100%25'%20width='100%25'%20%0A%20%20%20%20%20%20%20%20%20%20xlink%3Ahref='data:image/jpg;base64,/9j/2wBDAAYEBQYFBAYGBQYHBwYIChAKCgkJChQODwwQFxQYGBcUFhYaHSUfGhsjHBYWICwgIyYnKSopGR8tMC0oMCUoKSj/2wBDAQcHBwoIChMKChMoGhYaKCgoKCgoKCgoKCgoKCgoKCgoKCgoKCgoKCgoKCgoKCgoKCgoKCgoKCgoKCgoKCgoKCj/wgARCAAGAAoDASIAAhEBAxEB/8QAFQABAQAAAAAAAAAAAAAAAAAAAAb/2gAIAQEAAAAAkn//xAAUAQEAAAAAAAAAAAAAAAAAAAAE/9oACAECEAAAAFf/xAAUAQEAAAAAAAAAAAAAAAAAAAAE/9oACAEDEAAAAE//xAAeEAACAQUAAwAAAAAAAAAAAAABAgQABREUIQMxcf/aAAgBAQABPwCLeIS6+7b0z5SWGuAnG+59Y4Ke4yi7FZMjBPMvX//EABYRAQEBAAAAAAAAAAAAAAAAAAEAIf/aAAgBAgEBPwA1v//EABYRAQEBAAAAAAAAAAAAAAAAABIAAf/aAAgBAwEBPwBab//Z'%3E%3C/image%3E%3C/svg%3E)
Genshin Impact 2.6 has introduced players to The Chasm, a huge new area full of quests and puzzles.
Players can expect tons of rewards for fully exploring The Chasm, including Primogems. They won't want to miss out on the area's many world quests either.
Paleontological Investigation in the Chasm is one of the most exciting quests in the area. It will task players with finding and photographing strange fossils in the Underground Mine.

The rewards for this quest are pretty good, and the story is quite interesting.
Genshin Impact quest guide: How to complete Paleontological Investigation in the Chasm
This new Genshin Impact quest will take players through The Chasm as they hunt down strange fossils that protrude from the walls of the Underground Mine. These fossils apparently hold information about monsters and creatures from Teyvat's past.
Check out the latest Genshin Leaks , here
Players can start this quest at The Chasm's base camp by interacting with Khedive. He will ask them to go out in search of these fossils and take photos of them with their Kamera.
Players will then need to journey through The Chasm to find all five hidden fossils and snap a photo of them. They can take photos of the fossils in any order.
The details on Genshin Impact Codes are available here.
This may seem tricky at first, but with all the locations in this guide, players can complete this task quickly. Here's where players can find all of these strange rocks in Genshin Impact 2.6.
Strange Rock 1:
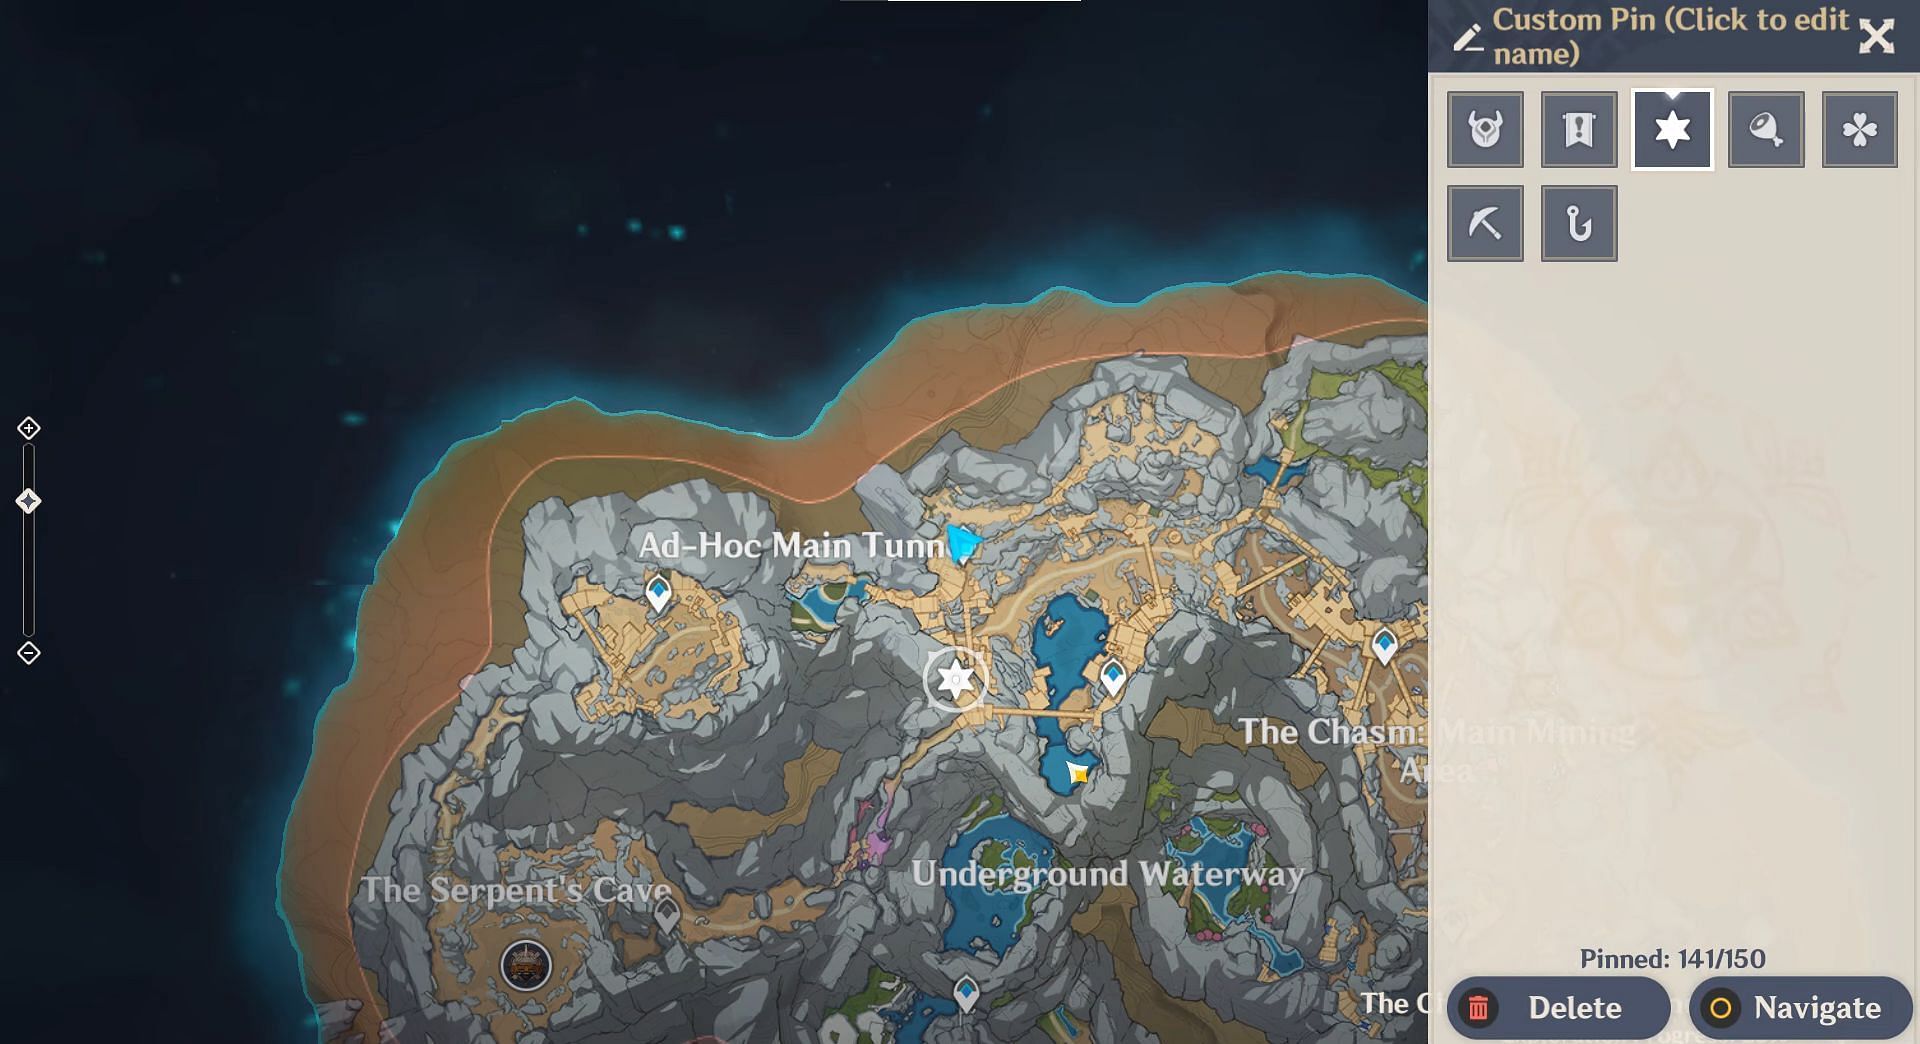
The first strange rock can be found near a waypoint in the Ad-Hoc Main Tunnel. Genshin Impact players will need to glide down from this waypoint to reach the fossil. Luckily, it is highlighted with a glowing yellow beam.
View the Genshin Impact Beginner guide here.
Players will need to clear out the enemies nearby. Once this is done, they should interact with the fossil to snap a quick photo.
There is also a chest nearby that they can claim after defeating the Treasure Hoarders who have taken up residence in the area.
Strange Rock 2:
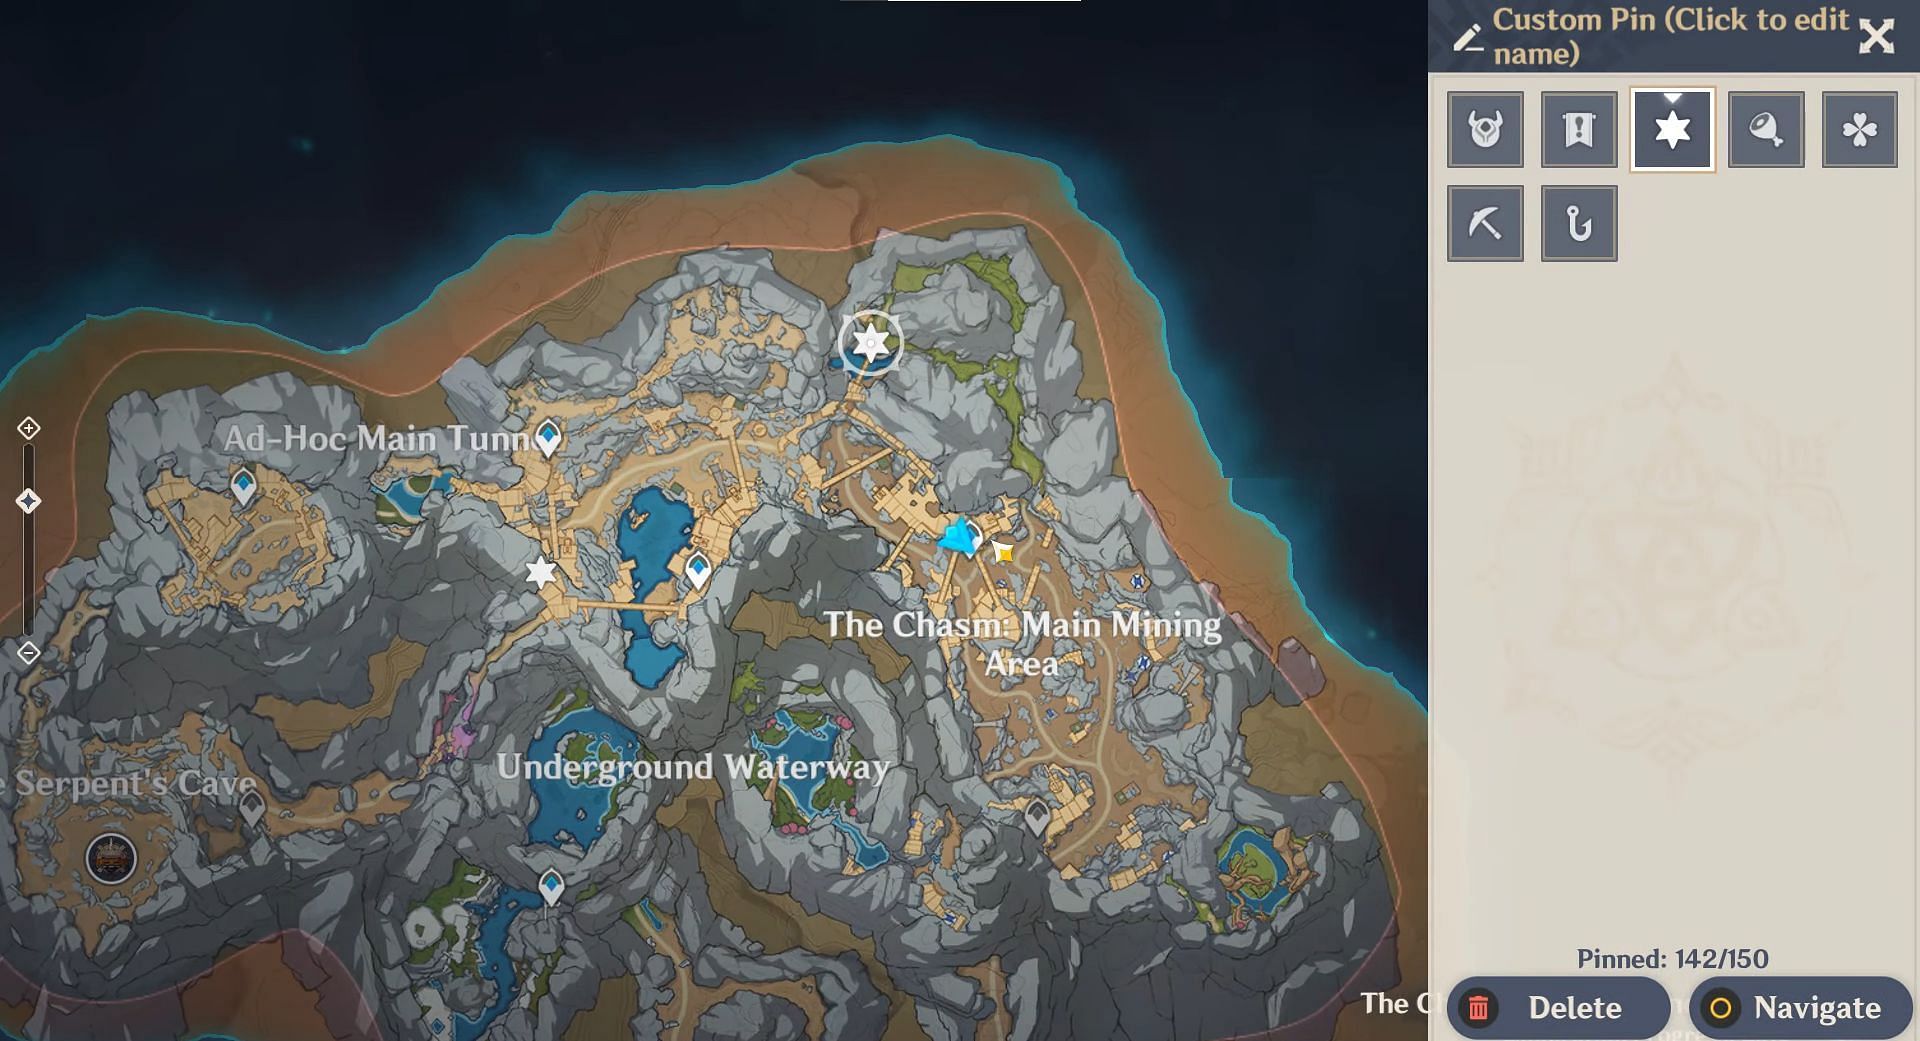
The next strange rock is located north of a waypoint in The Chasm's main mining area. Players can find this fossil by gliding north until they reach a precariously rickety bridge.
Upon crossing the bridge, players will find the strange rock, along with some more Treasure Hoarders guarding another chest.
Click here to get Genshin Impact Expert guide
After taking a photo of the strange rock, players can take out the Treasure Hoarders and collect their reward.
Strange Rock 3:
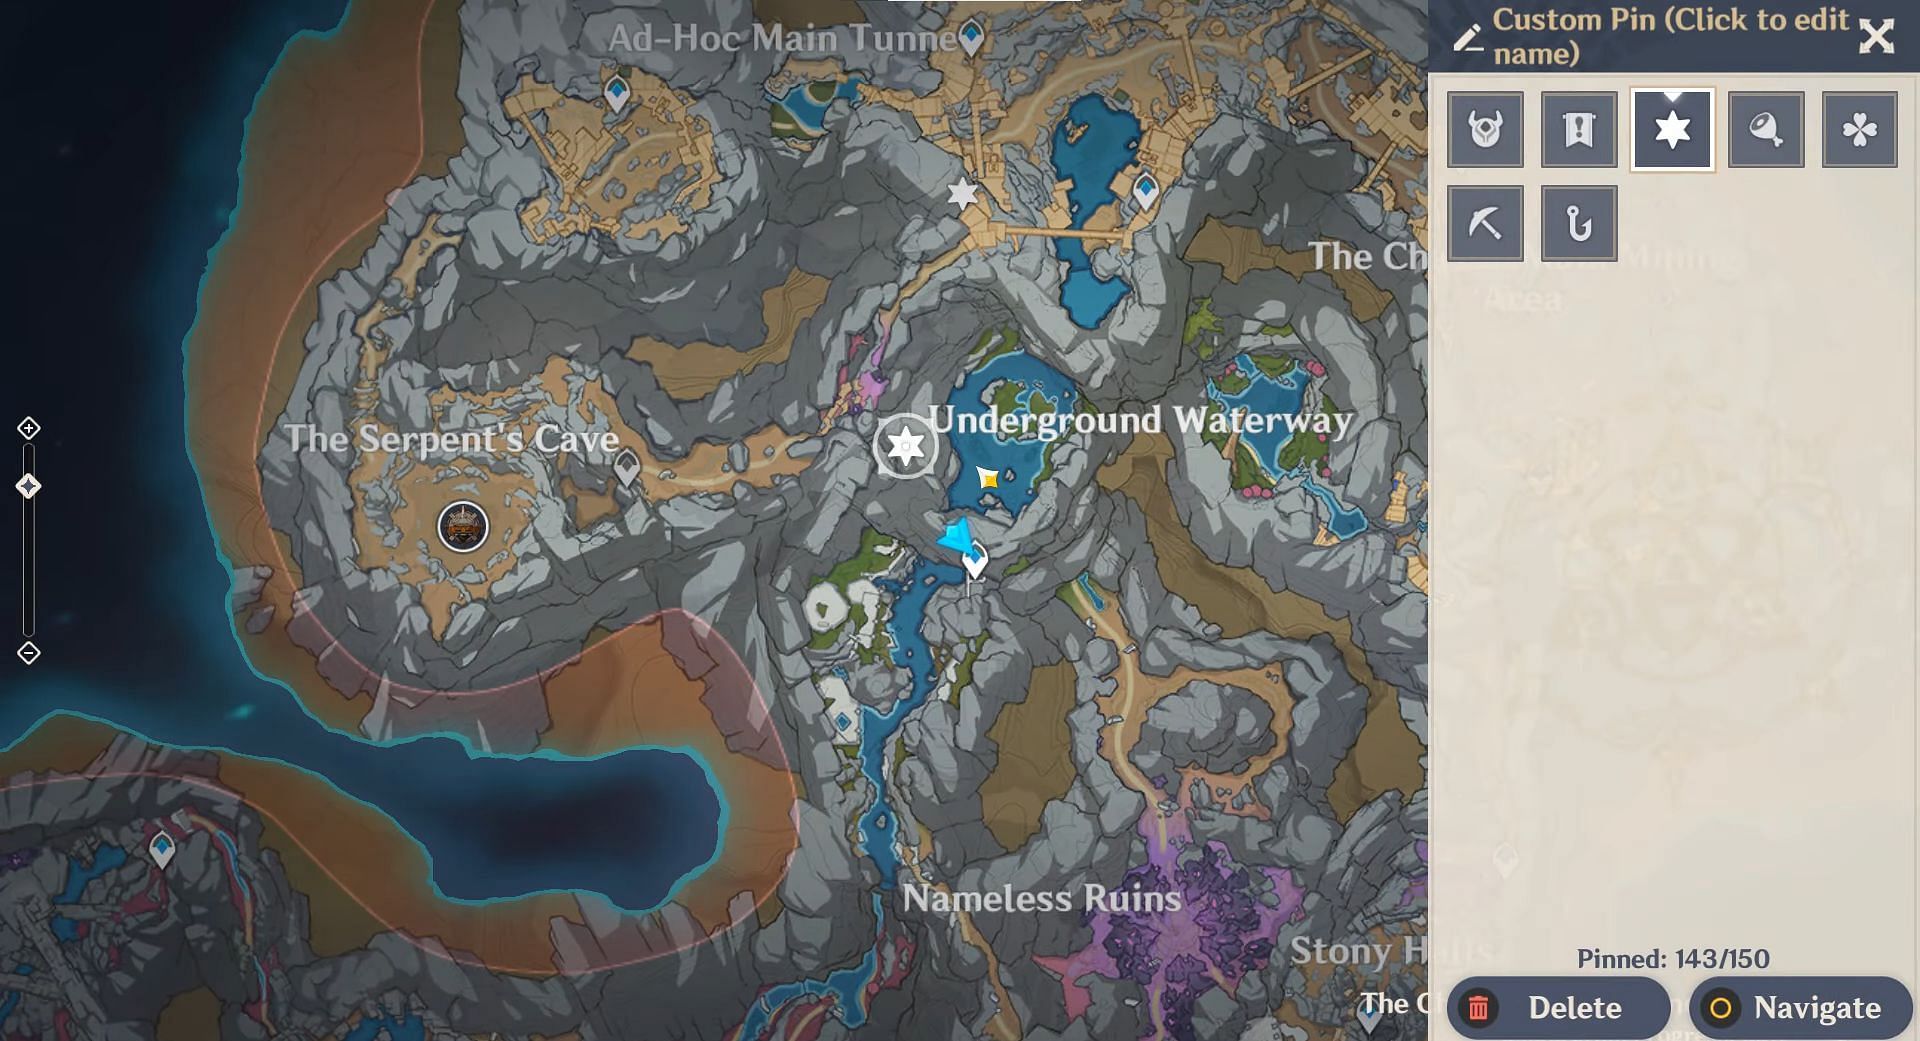
The third strange rock can be found near the Underground Waterway, through a set of spiraling tunnels.
Players will need to utilize an Anemo character to activate a wind tunnel that will allow them to reach the fossil and a hidden Luxurious Chest. This is definitely one of the areas in The Chasm that players won't want to miss.
A guide to getting this chest and a photo of the hidden fossil can be found above.
Strange Rock 4:
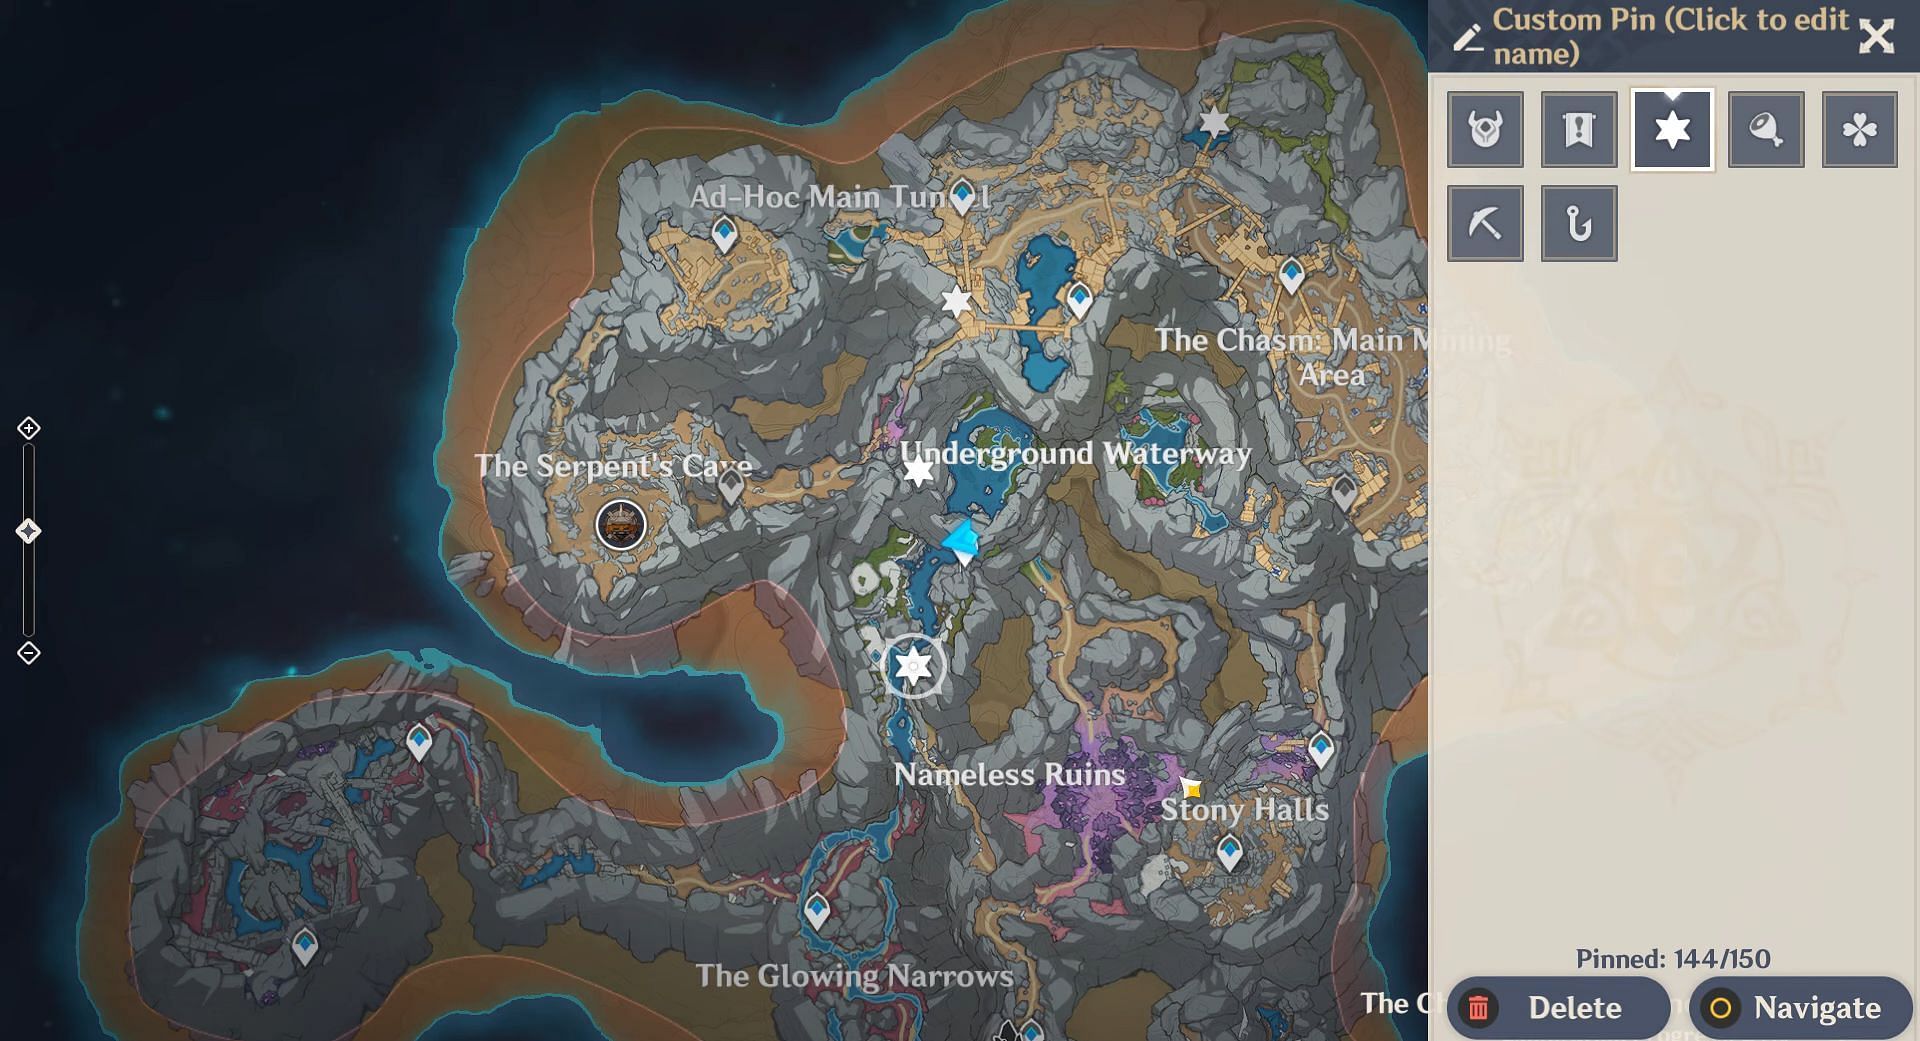
This strange rock can be found to the south of the Underground Waterway. Genshin Impact players can find it simply by gliding down the waterfront.
You can find the complete list of Genshin Impact Characters , here.
The glowing beacon is to the left, near a few Hilichurls who are resting near the river's bank. Once players have cleared them out, they can snap a photo of the strange rock and move on to the last fossil.
Strange Rock 5:
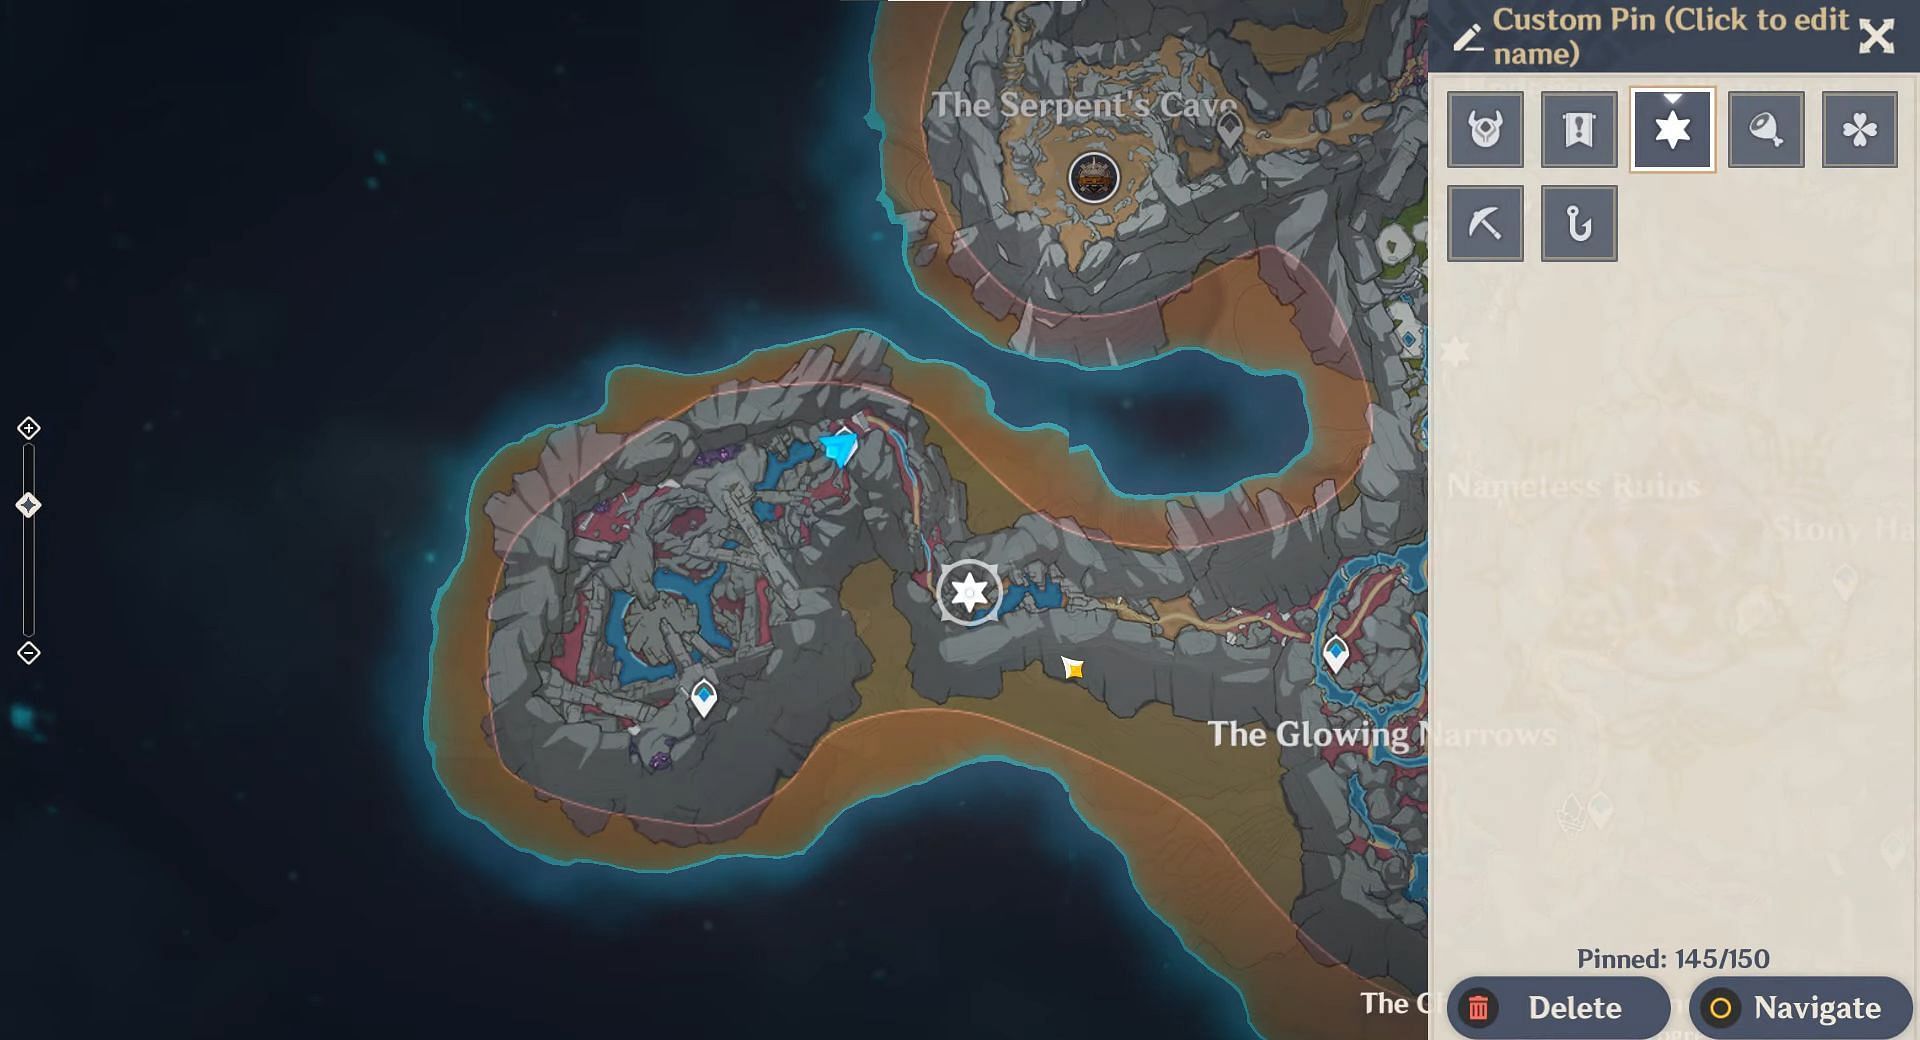
While the last strange rock is quite a distance from the rest, it isn't difficult to get to. Genshin Impact players can get to its location from either side of the Glowing Narrows, as there are two waypoints that put it within reach.
From there, players simply need to head down the small pathway until they reach the glowing beacon. They can then take the last photo for the quest.
Returning to Khedive
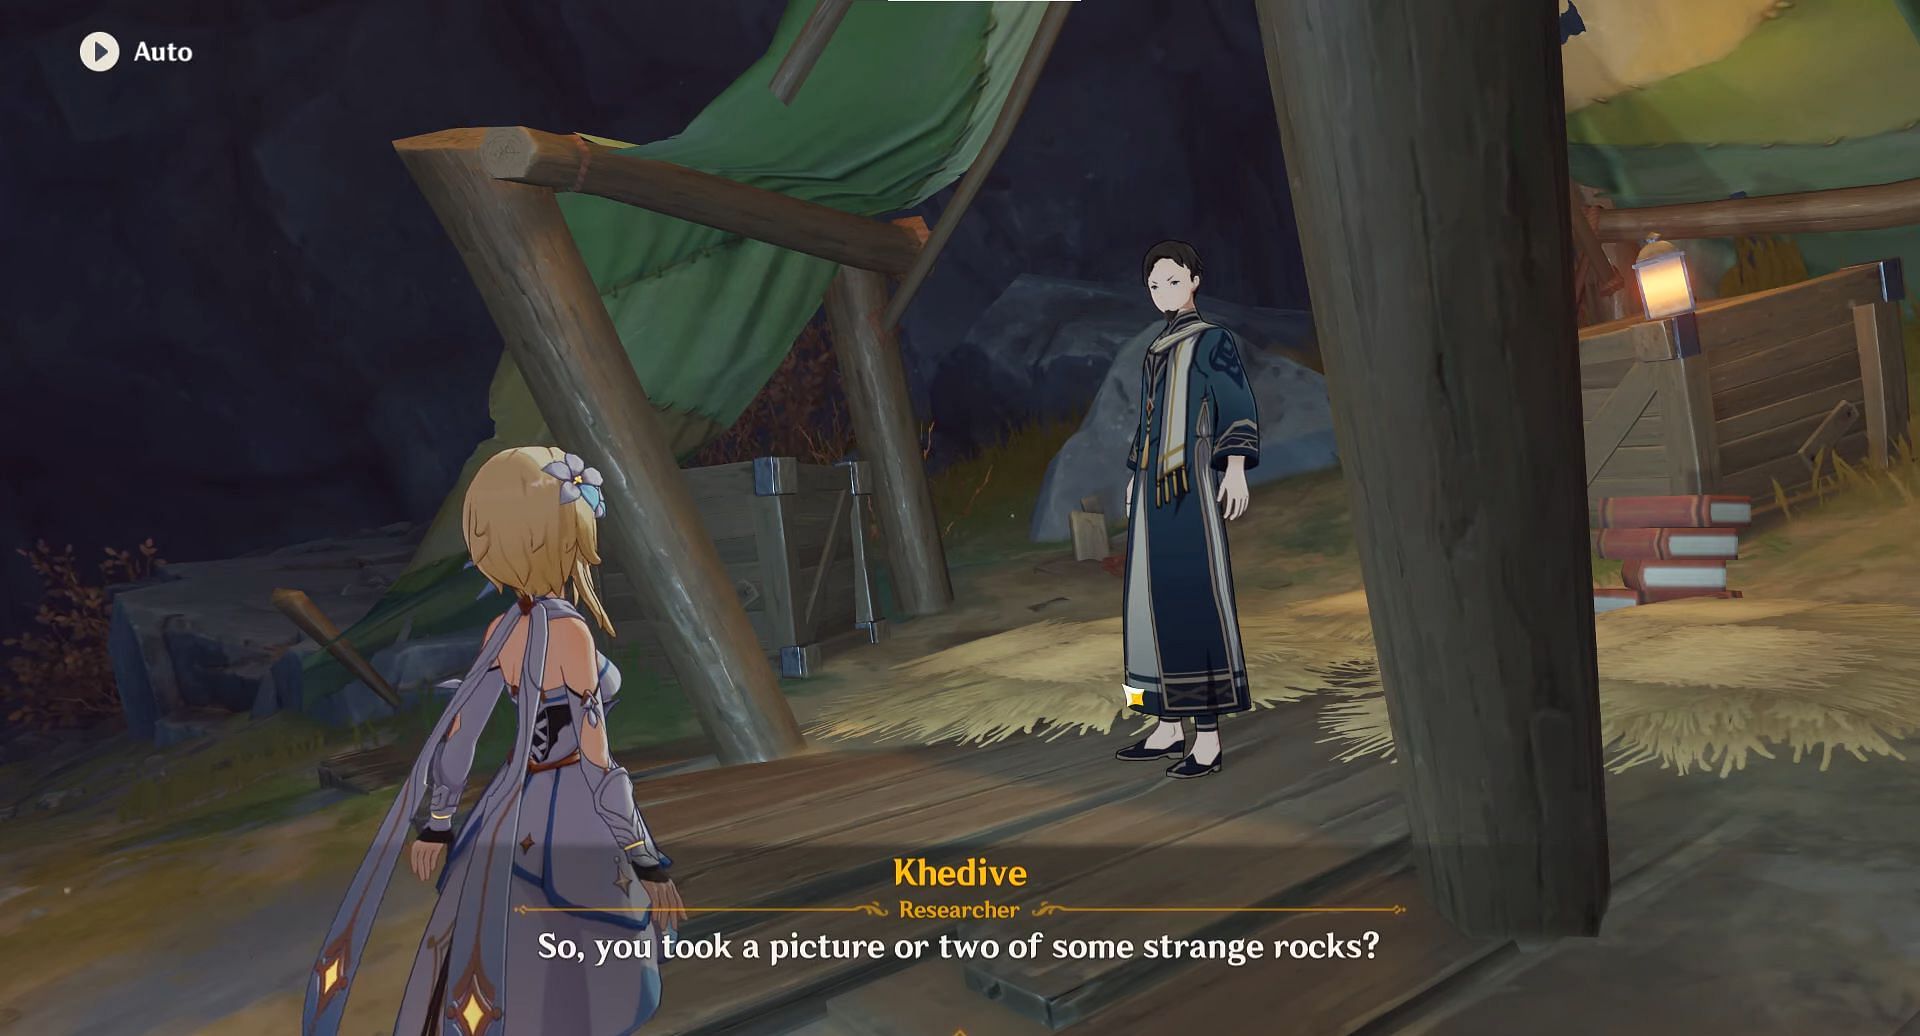
After taking all five photos, players can return to Khedive for their rewards. He will provide them with extra exposition, along with 30 Primogems, 200 Adventure Rank EXP, and 60,000 Mora.
This is definitely a great reward for a small amount of work.
