
'%20x='0'%20y='0'%20height='100%25'%20width='100%25'%20%0A%20%20%20%20%20%20%20%20%20%20xlink%3Ahref='data:image/jpg;base64,/9j/2wBDAAYEBQYFBAYGBQYHBwYIChAKCgkJChQODwwQFxQYGBcUFhYaHSUfGhsjHBYWICwgIyYnKSopGR8tMC0oMCUoKSj/2wBDAQcHBwoIChMKChMoGhYaKCgoKCgoKCgoKCgoKCgoKCgoKCgoKCgoKCgoKCgoKCgoKCgoKCgoKCgoKCgoKCgoKCj/wgARCAAHAAoDASIAAhEBAxEB/8QAFQABAQAAAAAAAAAAAAAAAAAAAwb/2gAIAQEAAAAAll//xAAUAQEAAAAAAAAAAAAAAAAAAAAF/9oACAECEAAAAD//xAAUAQEAAAAAAAAAAAAAAAAAAAAE/9oACAEDEAAAAF//xAAfEAACAQMFAQAAAAAAAAAAAAACAwEABAcFEhMhUXP/2gAIAQEAAT8AbkPWm3IMhywCZ2cYqH2gyLfyAzLO/kNf/8QAGBEAAgMAAAAAAAAAAAAAAAAAAAEEFEP/2gAIAQIBAT8AuyFoz//EABkRAAIDAQAAAAAAAAAAAAAAAAIRAAEDBP/aAAgBAwEBPwAeLErSn//Z'%3E%3C/image%3E%3C/svg%3E)
Building a crop farm is an important part of surviving in Minecraft. Players can use crop farms as a reliable source of food, which is especially useful for long-term gameplay.
However, building a crop farm can be time consuming to do. Luckily for Minecraft players, there are more efficient ways to do this.
One relatively simple way for players to build a crop farm in Minecraft is by using the game’s villager mobs. Here’s a guide on how you can create a crop farm using villagers in Minecraft.

How to use villagers to make a crop farm in Minecraft
As players proceed further in the game, their time gets taken up by various activities that are significantly more important.
Therefore, it's important to create crop farms so players can automate the food process, and focus on their adventures.
Here are the steps to create a basic crop farm:
Step 1: Clear the area for the farm. Make sure that the ground is made of either dirt or grass blocks.
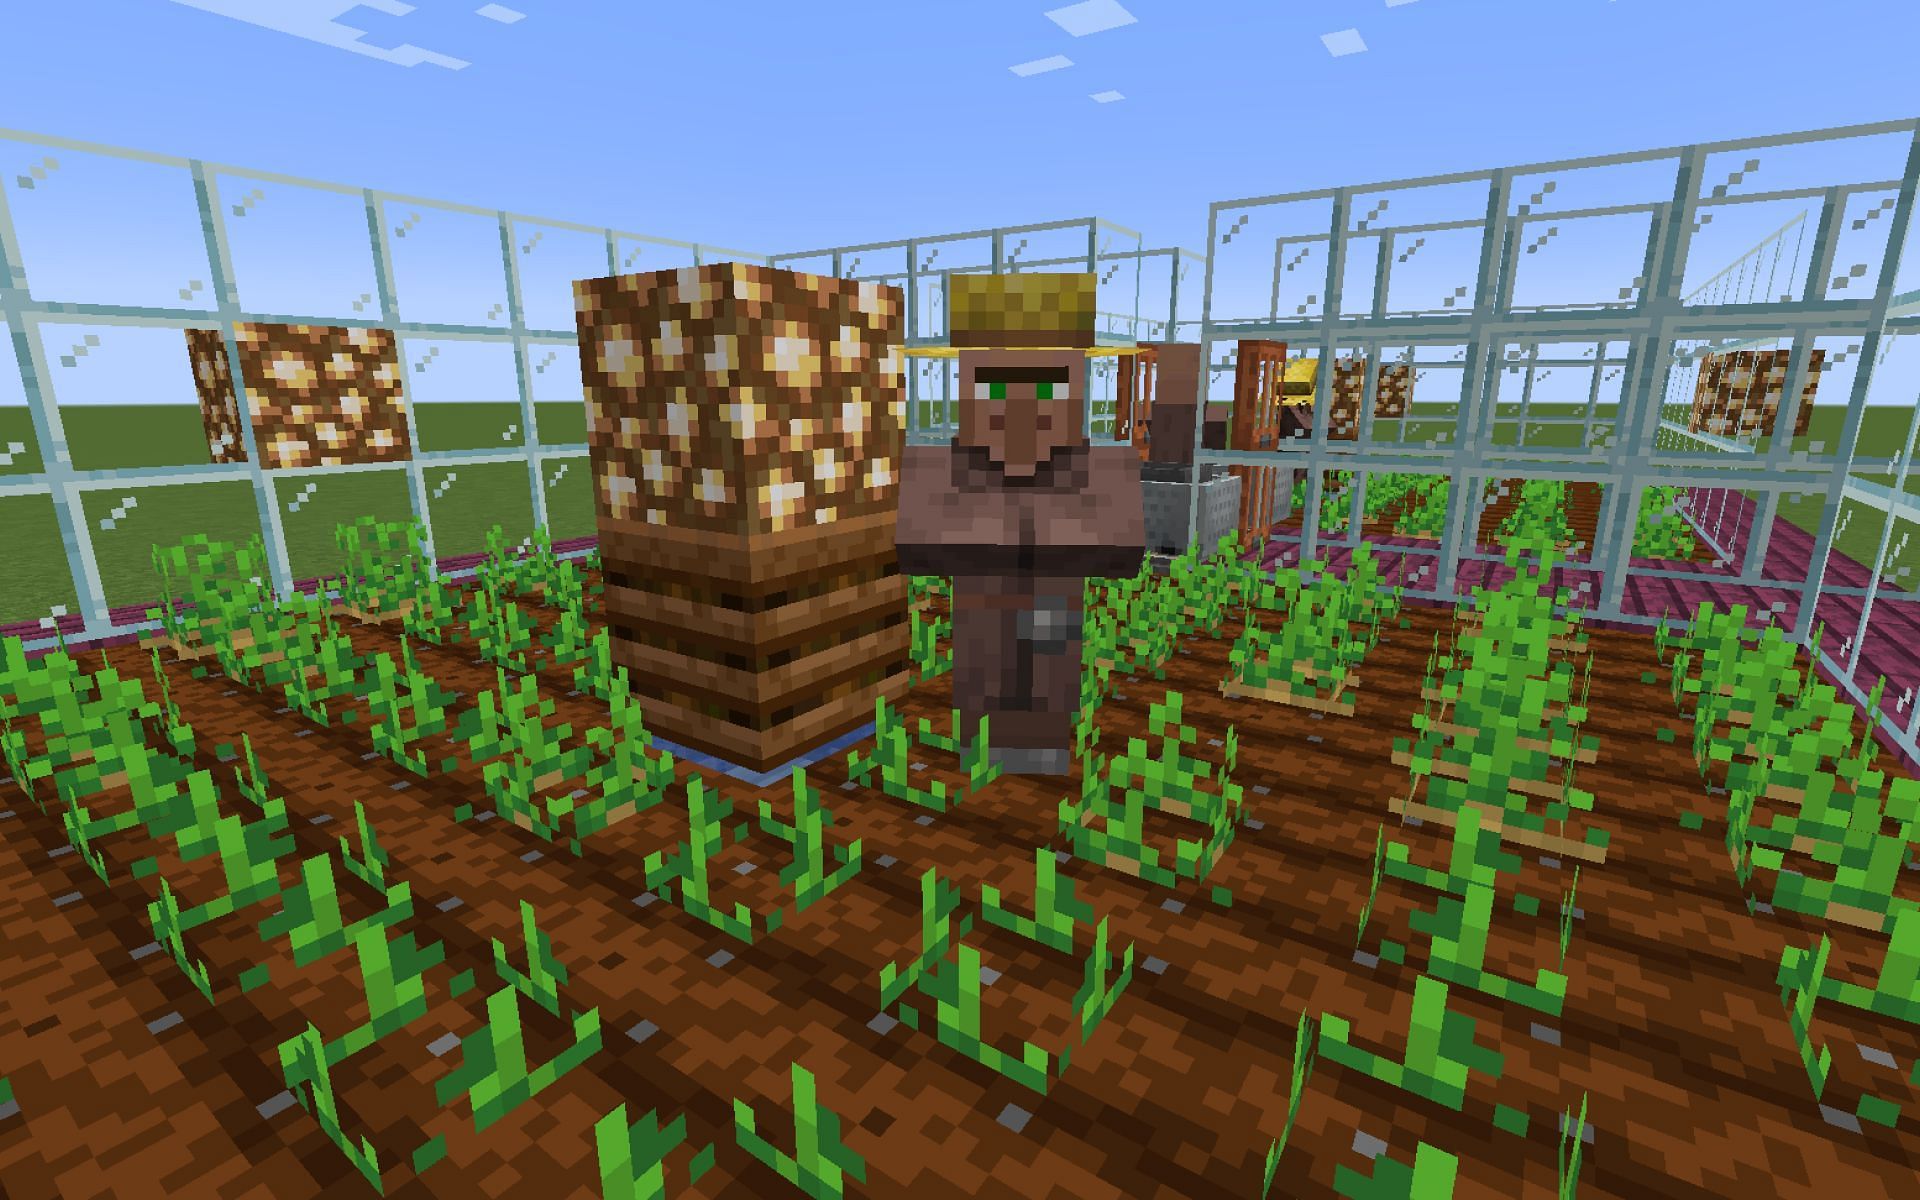
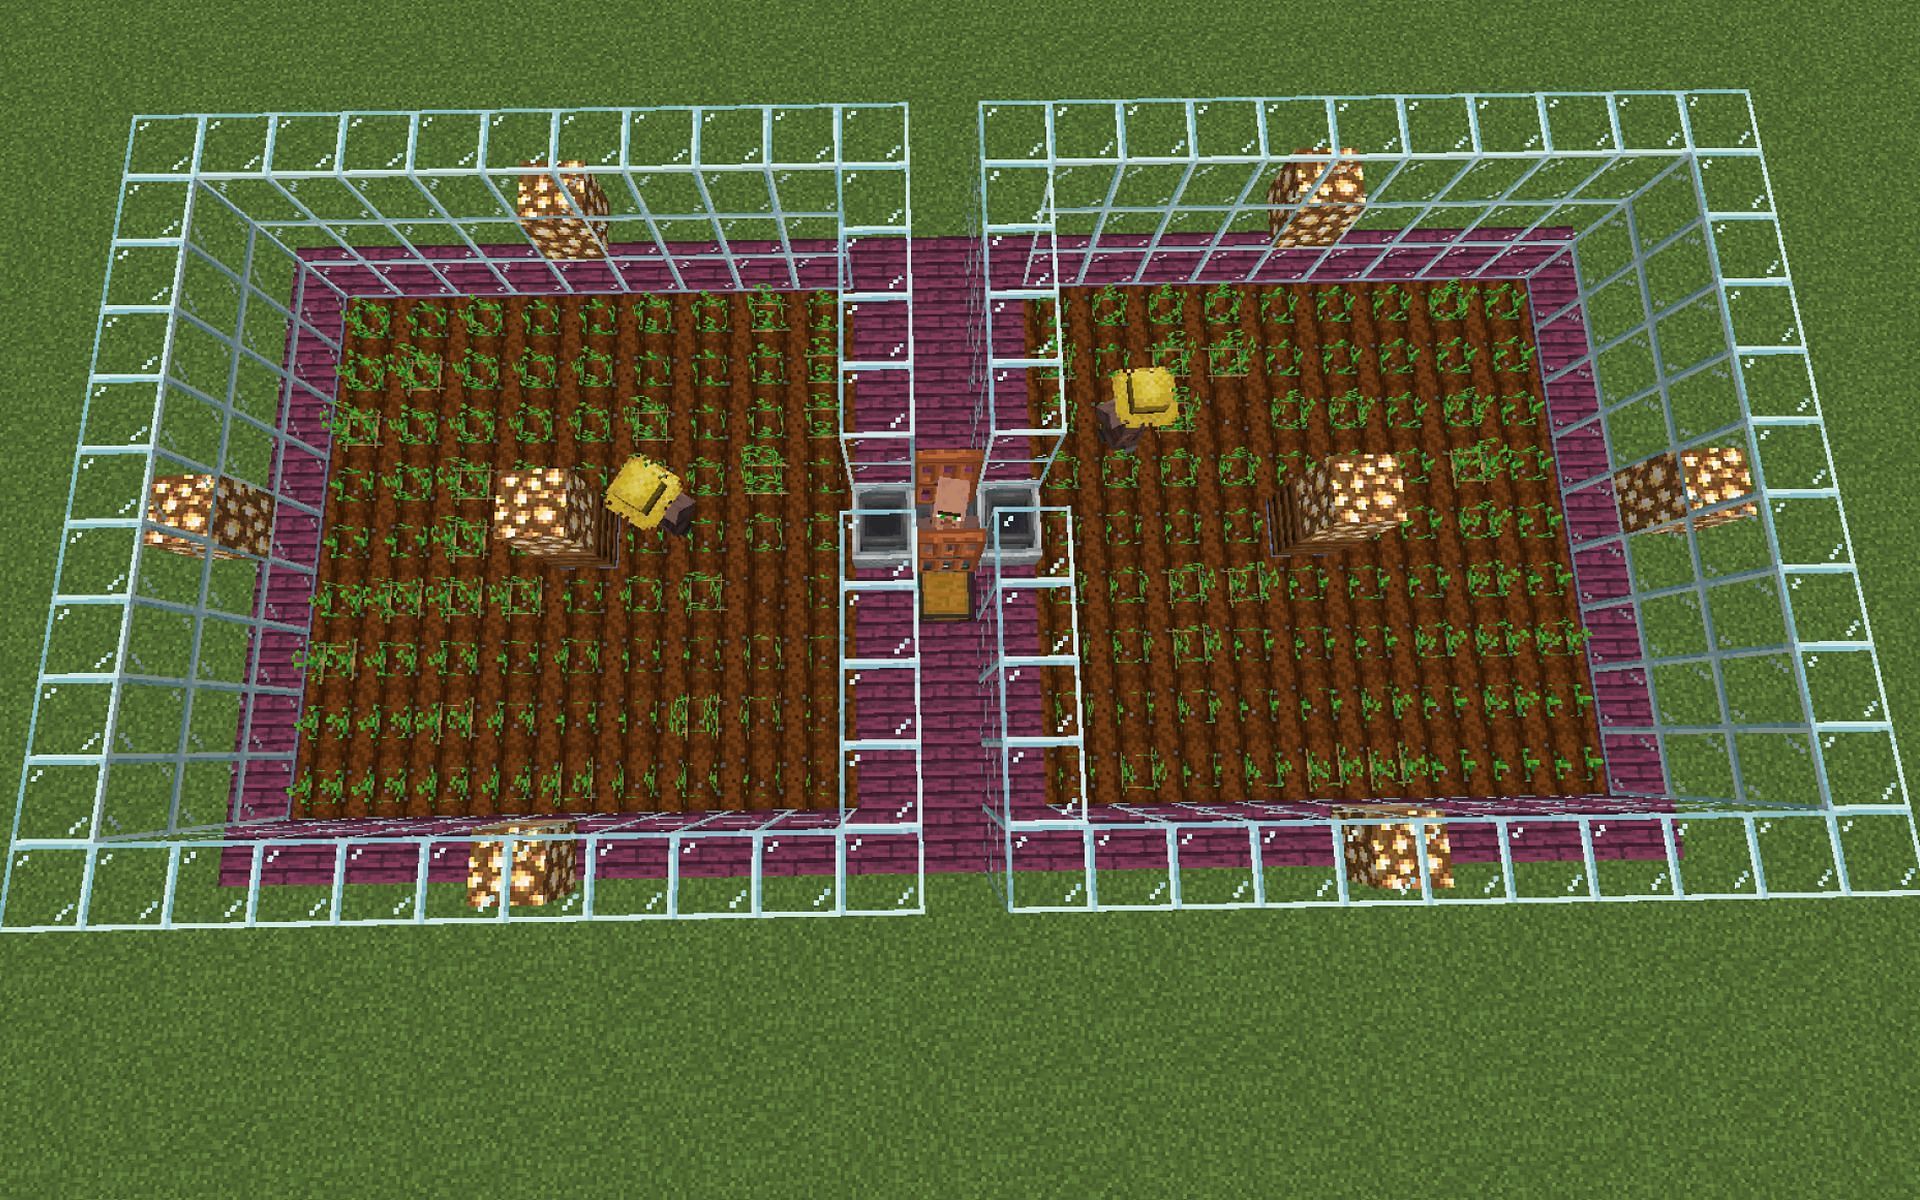
Step 2: Outline your farming area with glass walls, and trap two villagers inside.
Step 3: Replace a few glass blocks with glowstone. This is to keep the farm well-lit, so that the crops will grow.
Step 4: Split the farming area in half, making sure to leave a small walkway in the middle. This walkway should be no less than three blocks wide.
Step 5: Return to your farming areas. Ideally, these should be no more than 9x9 blocks in size. Find the center, and place a slab after digging a block down. Waterlog this slab.
Step 6: Crouch down and put a composter on top of the slab. Then, place a glowstone block over top it.
Step 7: In the walkway between the farms, place a chest with several hoppers leading into it. Place two rails on top of the hoppers, perpendicular to the farm.
Step 8: Cover the central hopper with blocks and place trapdoors on the sides. Now, break these blocks and leave the trapdoors.
Step 9: Place a minecart with hopper on each rail and a villager next to it. Wall the villager in by placing a minecart with a hopper on the other rail.
Step 10: Repeat the process to get more villagers for your farm. Alternatively, you can bring one more villager, and feed the two for getting a baby villager. Continue breeding them to get the desired number of villagers.
Step 11: Make sure the starter crops have been planted and wait for the villagers to farm for you.
Automated and efficient, villager crop farms are an excellent source of food. They're a valuable resource for Minecraft players and are an excellent addition to any in-game base.
