
'%20x='0'%20y='0'%20height='100%25'%20width='100%25'%20%0A%20%20%20%20%20%20%20%20%20%20xlink%3Ahref='data:image/jpg;base64,/9j/2wBDAAYEBQYFBAYGBQYHBwYIChAKCgkJChQODwwQFxQYGBcUFhYaHSUfGhsjHBYWICwgIyYnKSopGR8tMC0oMCUoKSj/2wBDAQcHBwoIChMKChMoGhYaKCgoKCgoKCgoKCgoKCgoKCgoKCgoKCgoKCgoKCgoKCgoKCgoKCgoKCgoKCgoKCgoKCj/wgARCAAPAAoDASIAAhEBAxEB/8QAFQABAQAAAAAAAAAAAAAAAAAABQP/2gAIAQEAAAAAHsaJ/8QAFAEBAAAAAAAAAAAAAAAAAAAABP/aAAgBAhAAAAA//8QAFAEBAAAAAAAAAAAAAAAAAAAABP/aAAgBAxAAAABP/8QAIxAAAgEDBAEFAAAAAAAAAAAAAQMCBREhAAQSEwYUFSIxQf/aAAgBAQABPwBW0a6iNqEVdiFNKuwz45Aza+ZYI+tJqMQqHByRHiLABZ162tRpUaZtGL9ug0TkmcQYT/Te5uSTp/ilUD2BLkdYkePyIxr/xAAYEQACAwAAAAAAAAAAAAAAAAAAAQITQf/aAAgBAgEBPwC+D0//xAAXEQADAQAAAAAAAAAAAAAAAAAAAQNB/9oACAEDAQE/AHCiw//Z'%3E%3C/image%3E%3C/svg%3E)
Our lifestyles have changed over time. Bad posture, long work hours, unhealthy food habits have all led to having a negative impact on our body. One of the major issues that we face is prolonged back pain. It is a difficult experience and can act as a hindrance in all our daily activities.
Some possible reasons for back pain can be weight, lack of exercise, bad sitting posture, stress, sudden jerks due to heavy lifting etc. Some lifestyle changes that you can make in order to get rid of it are:
1. Maintain your body weight by eating healthy and exercising.
2. In case you have been sitting for a long period, walk for a minute or two.
3. Sit straight and avoid slouching.
4. In case you are lifting a heavy object, use correct techniques.
5. If you stretch to increase flexibility, make sure you do it properly. Incorrect form can increase pain and soreness.
This is not all. In case you are looking for quick relief and want to indulge in some yoga, there are some specific yoga poses that you may do to reduce your back pain. These exercises can be done anywhere and does not require any additional equipment. Just some peace of mind, a yoga mat and some determination and you are all set.
Yoga Pose #1
Supine Twist
Instructions:
Step 1: Lie down on your back and extend your arms sideways such that your body forms a T.
Step 2: Bend your knees and bring them close to your chest. Keep your legs together. This is your initial position.
Step 3: Keep your back flat on the ground and lower both knees to your right side. You may either face the ceiling or face the opposite direction.
Step 4: Keep your shoulder on the floor and hold this position for 45 seconds.
Step 5: Get back to the initial position and repeat for the other side.
Do 3 reps on each side.
Yoga Mats: Shop Online Yoga Mats at the Best Price
Next up: The Cat and Cow
Yoga Pose #2
The Cat and Cow
Instructions:
Step 1: Get down on all your fours, placing your palms and knees on the floor. Maintain a neutral spine. Keep your wrist under your shoulder and your knees under your hips.
Step 2: As you inhale, lift your chest up, away from the floor.
Step 3: Now exhale and arch your back, drop your head and concentrate on your shoulder blades.
Step 4: Inhale again and lift your chest up. Exhale and arch your back. Repeat.
Do about 7-8 reps of this exercise and do not hurry. Slow and controlled motions work best.
Yoga Pants For Women | Shop Online | Up To 50% Off
Next up: Child’s Pose
Yoga Pose #3
Child’s Pose
Instructions:
Step 1: Kneel on the floor, keeping your knees about hip width apart. Your feet must be together.
Step 2: As you inhale, bend your upper body towards the ground, while keeping your hips down such that your torso is on your thighs.
Step 3: Stretch your upper body by pushing your head in front. You need to extend your arms in front of you for support. Your forehead must be on the ground.
Step 4: Hold this position for about 3 seconds and get back up. Repeat.
Do this stretch 5-6 times.
Next up: Bharadvaja’s Twist
Yoga Pose #4
Bharadvaja’s Twist
Instructions:
Step 1: Sit on the ground and extend your legs in front of you.
Step 2: Bend you knees and shift onto your left hip. Swing your legs to the right and place your feet to the side of your right hip.
Step 3: Inhale and expand your torso. Exhale and twist your body to the left, while keeping your hips on the ground. Your back must be long.
Step 4: Place your right hand under your left knee. Place your left hand on the ground and close to your left hip.
Step 5: Pull your right shoulder back and continue to twist towards your left.
Step 4: Stay in this position for 30-45 seconds and repeat for the other side.
Do 3 reps on each side.
Next up: Padangusthasana
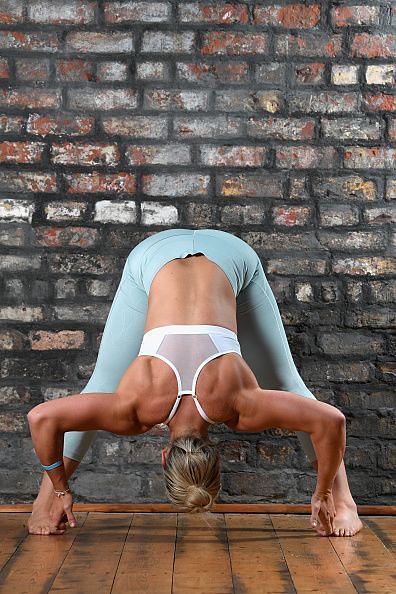
Yoga Pose #5
Padangusthasana
Instructions:
Step 1: Stand straight and keep your feet about 6-7 inches apart. Do not bend your knees. Your thighs need to be engaged.
Step 2: Now bend forward and keep going until your forehead touches your knees. It is okay if you are unable to do so. With time, your flexibility will increase. Use your fingers to hold your big toes.
Step 3: Lift your torso as you breathe in and keep your elbows straight. Note that you do not have to stand up again. Keep holding your toes and just push your torso up to straighten your elbows.
Step 4: Breathe out and go close to your knees again by bending your elbows. Repeat.
Do this exercise for about 2 minutes. It is okay if you cannot touch your toes as a beginner. Use a yoga strap or an exercise band.
