
'%20x='0'%20y='0'%20height='100%25'%20width='100%25'%20%0A%20%20%20%20%20%20%20%20%20%20xlink%3Ahref='data:image/jpg;base64,/9j/4AAQSkZJRgABAQAAAQABAAD/2wCEAAMDAwMDAwQEBAQFBQUFBQcHBgYHBwsICQgJCAsRCwwLCwwLEQ8SDw4PEg8bFRMTFRsfGhkaHyYiIiYwLTA+PlQBAwMDAwMDBAQEBAUFBQUFBwcGBgcHCwgJCAkICxELDAsLDAsRDxIPDg8SDxsVExMVGx8aGRofJiIiJjAtMD4+VP/AABEIAAUACgMBIgACEQEDEQH/xABgAAEBAQAAAAAAAAAAAAAAAAAABgcQAAIBAwQDAAAAAAAAAAAAAAECBQADBAYRISITMaEBAQEAAAAAAAAAAAAAAAAAAAQFEQACAwADAAAAAAAAAAAAAAABAgAEEQMTIf/aAAwDAQACEQMRAD8Az7UubOLZkJ5JqRGR406tfdh1IA25FSFyc1KLjgyjkhjyU9/aUoVQ9iMW9xpYtAcbgKMBWf/Z'%3E%3C/image%3E%3C/svg%3E)
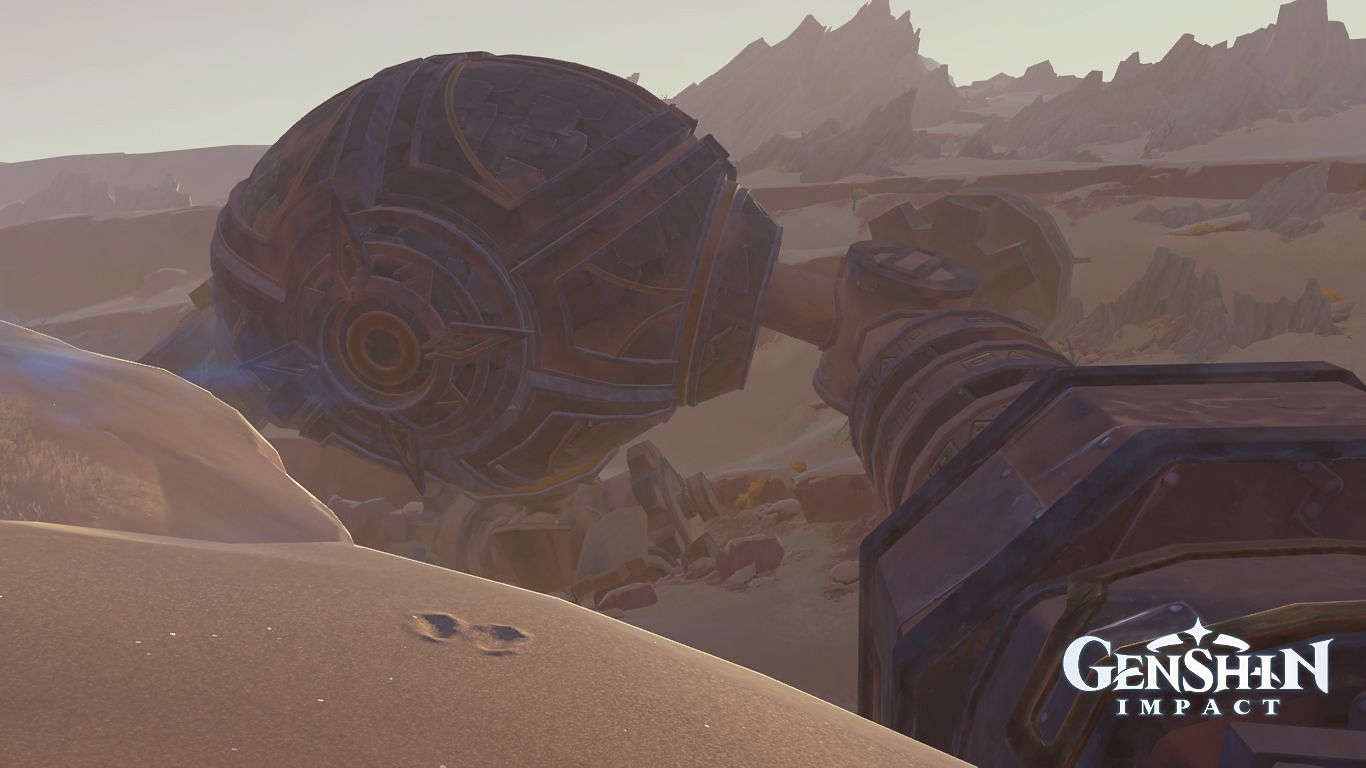
Genshin Impact 3.4 has released a new region called the Desert of Hadramaveth in Sumeru. Like the previous desert area, this location also has a bunch of World Quests, like a new entry in the Golden Slumber series, which featured the Eremite father-daughter duo of Jebrael and Jeht.
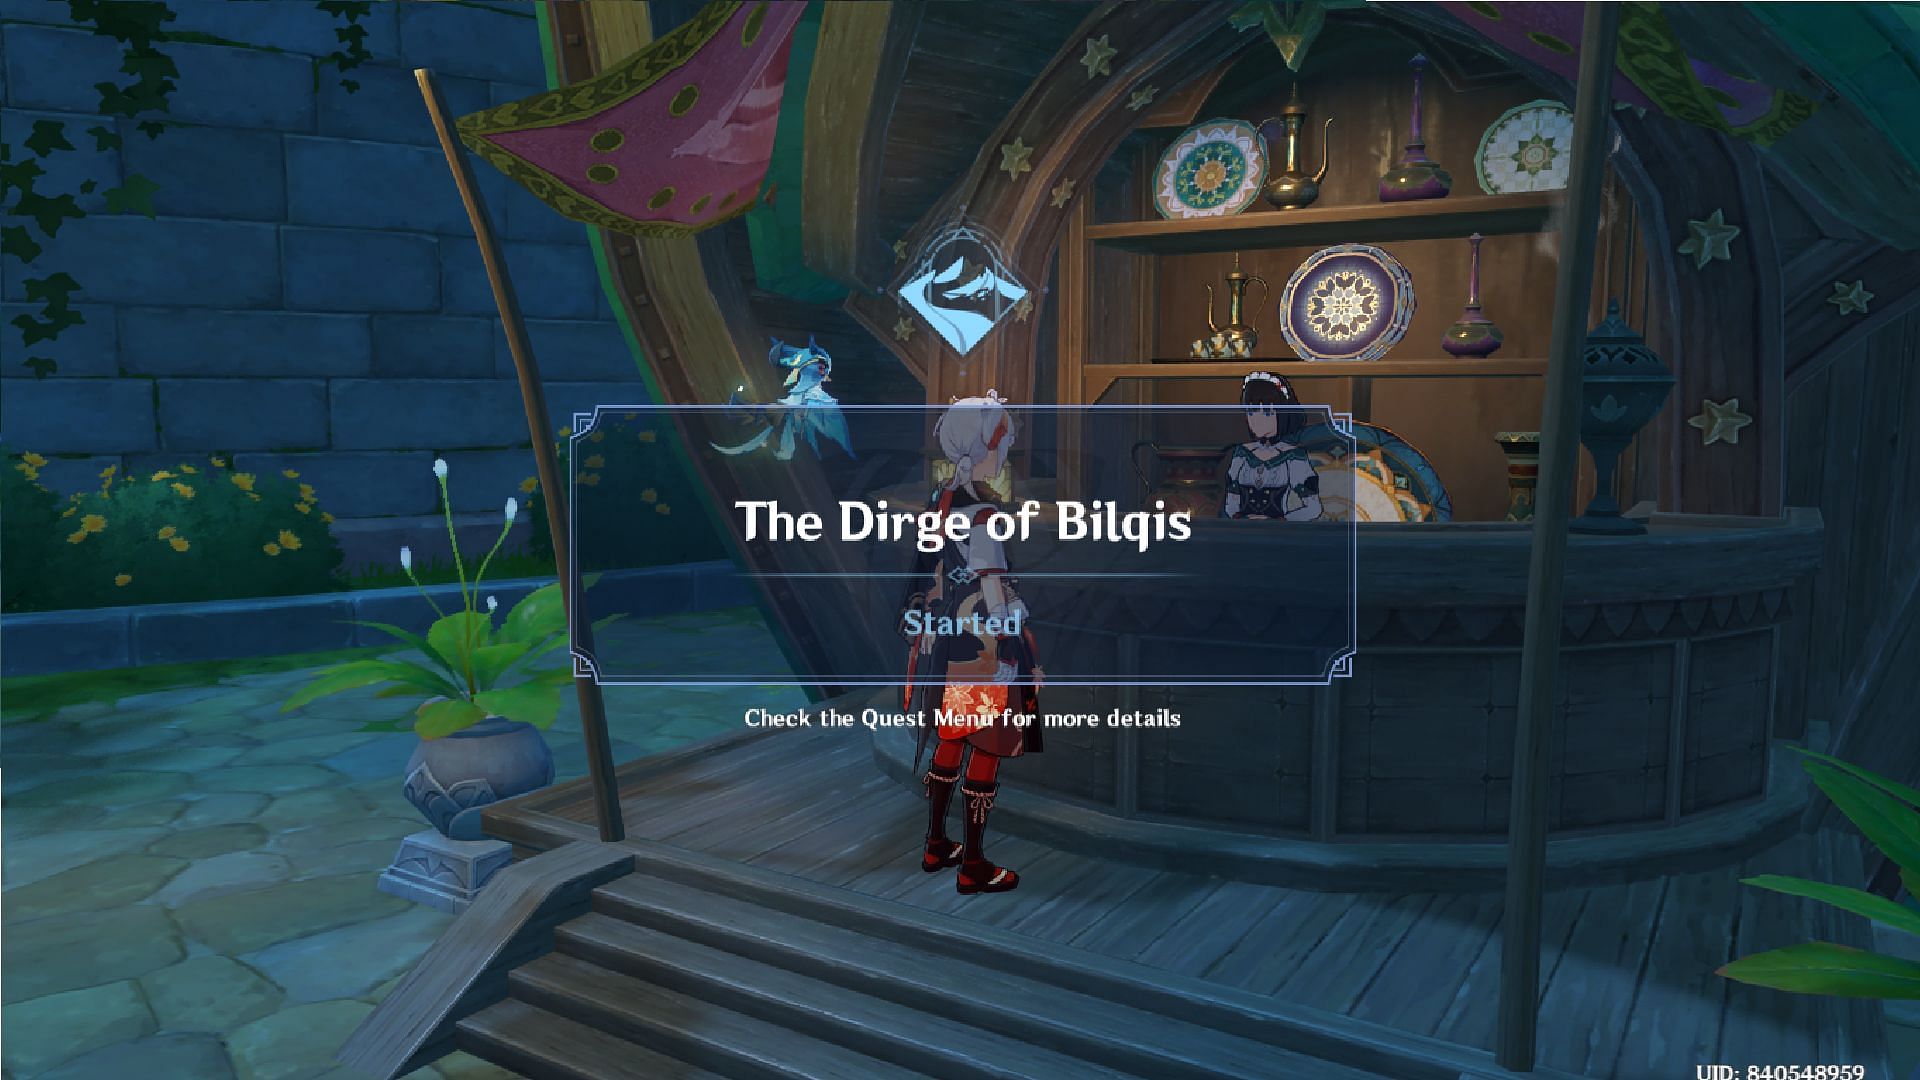
The sequel is called The Dirge of Bilqis, where you will be tasked with restoring power to the left arm of a giant robot-like structure in Part II of Dune Entombed Fecundity. It is located in the Debris of Panjhave, and you won't be able to move on with the story without activating it.
This guide will showcase how to find the energy blocks and activate the robot's arm to proceed with the Genshin Impact World Quest.
Looking for Crossword hints & solutions? Check out latest NYT Mini Crossword Answers, LA Times Crossword Answers, and Atlantic Crossword Answers
Genshin Impact world quest guide: Find energy blocks and restore power to the left arm
Jeht has returned to v3.4 with another Genshin Impact World Quest series that is a sequel to the Golden Slumber. You can trigger the Dirge of Bilqis by interacting with Katheryne in Sumeru’s Adventure Guild office. It's worth mentioning that fans can receive a lot of Primogem rewards and achievements by completing a series of quests while unlocking the hidden areas located beneath the desert.
In Part II of the Dune Entombed Fecundity, you will get a mini-quest to restore power to the left arm of the robot. To activate it, you need to find two energy blocks and place them into two special battery units located inside protective rooms near the cockpit. These blocks are golden-yellow in color and shine brightly, so they are easily visible even from a distance.
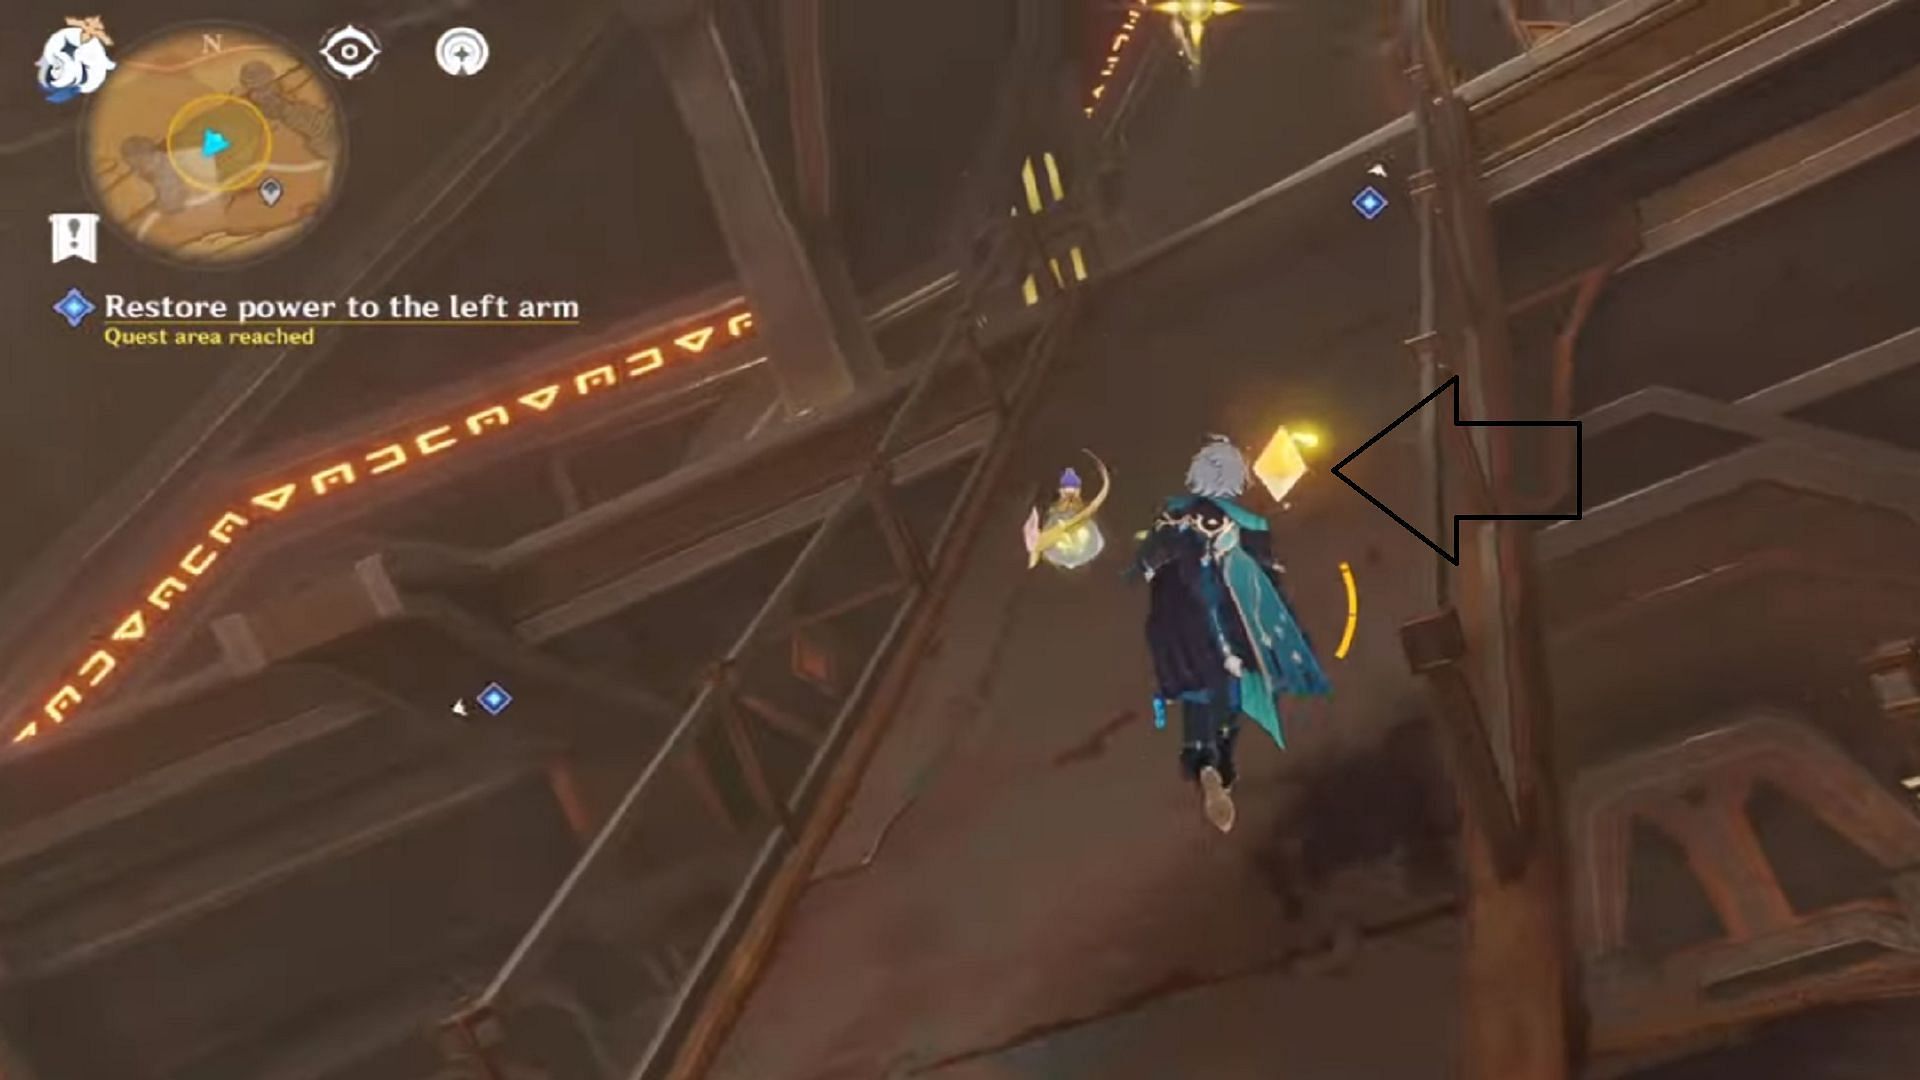
You can start by exiting the cockpit and going in the left direction. The first energy block is located on a short bridge that connects the cockpit area to the rest of the structure.
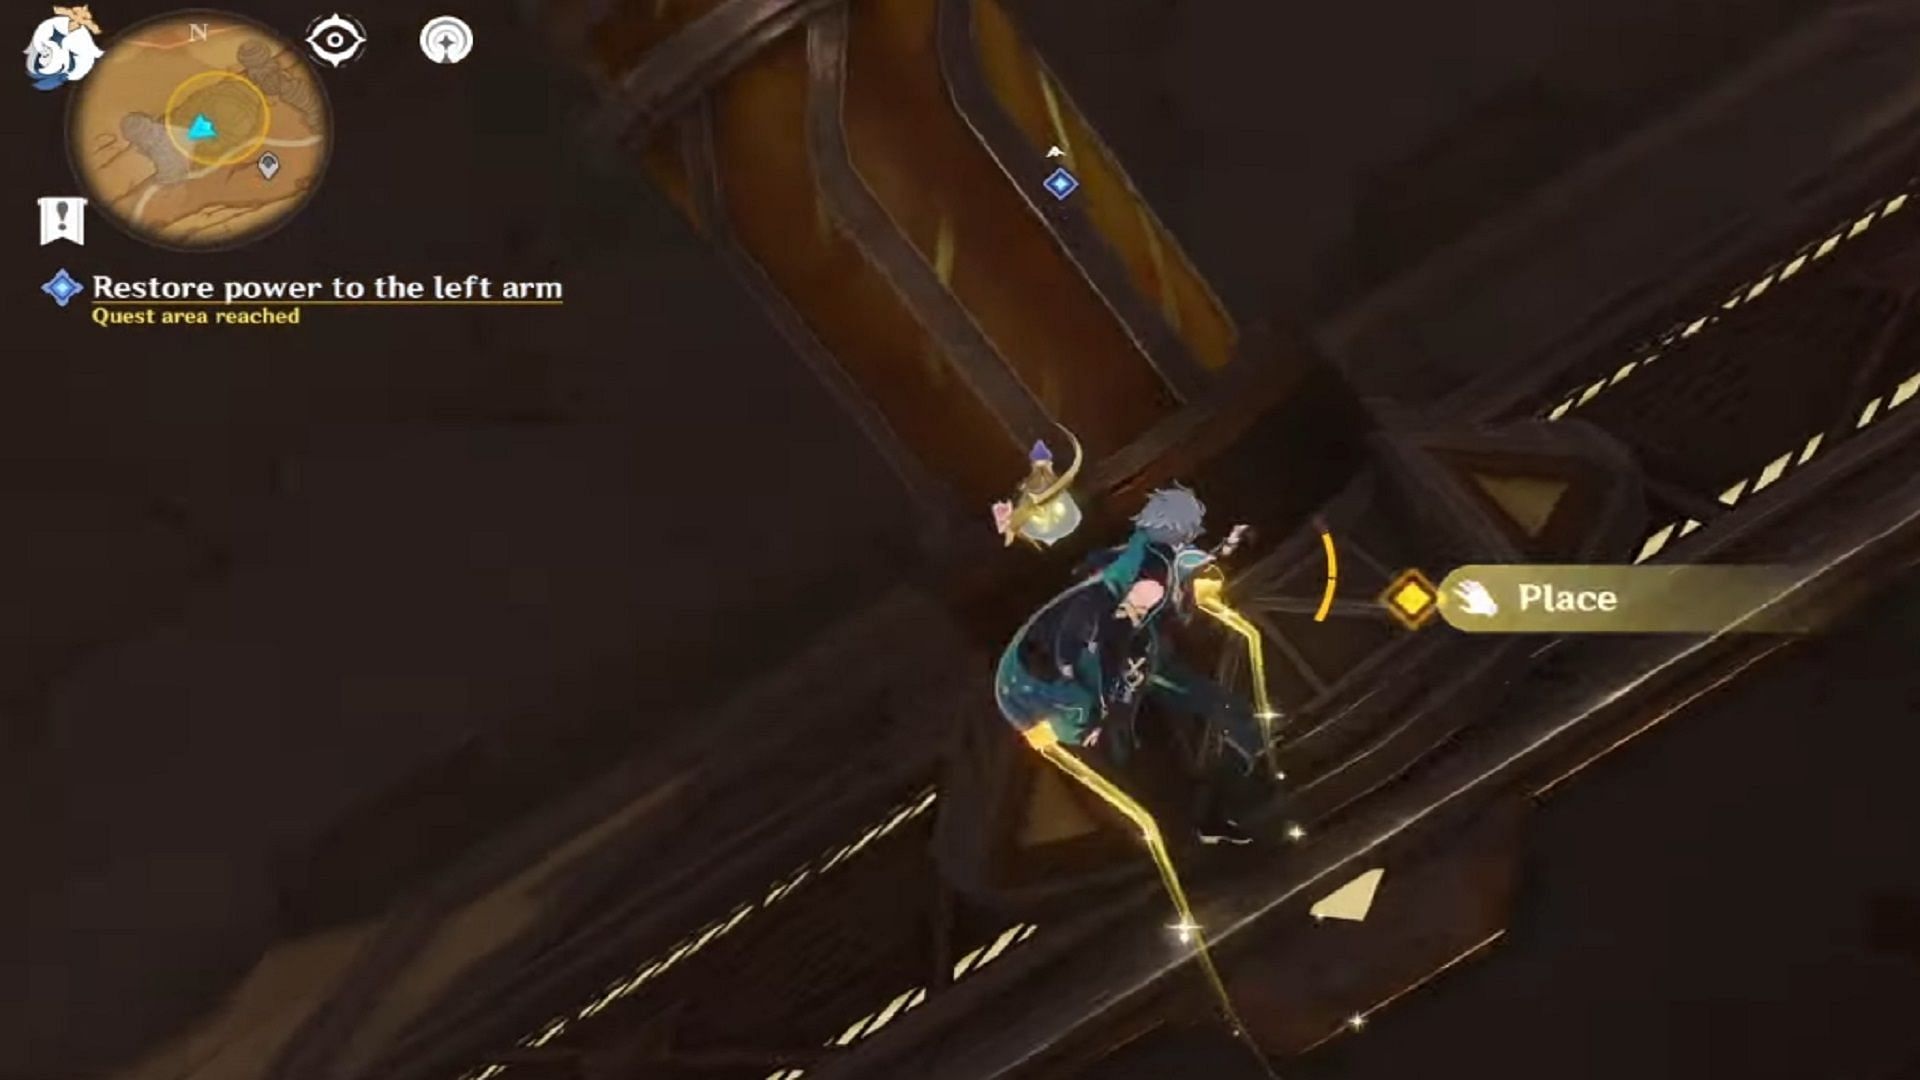
After finding the item, enter the room right in front of you and move close to the battery unit in the center. Place the energy block and it will activate the battery.
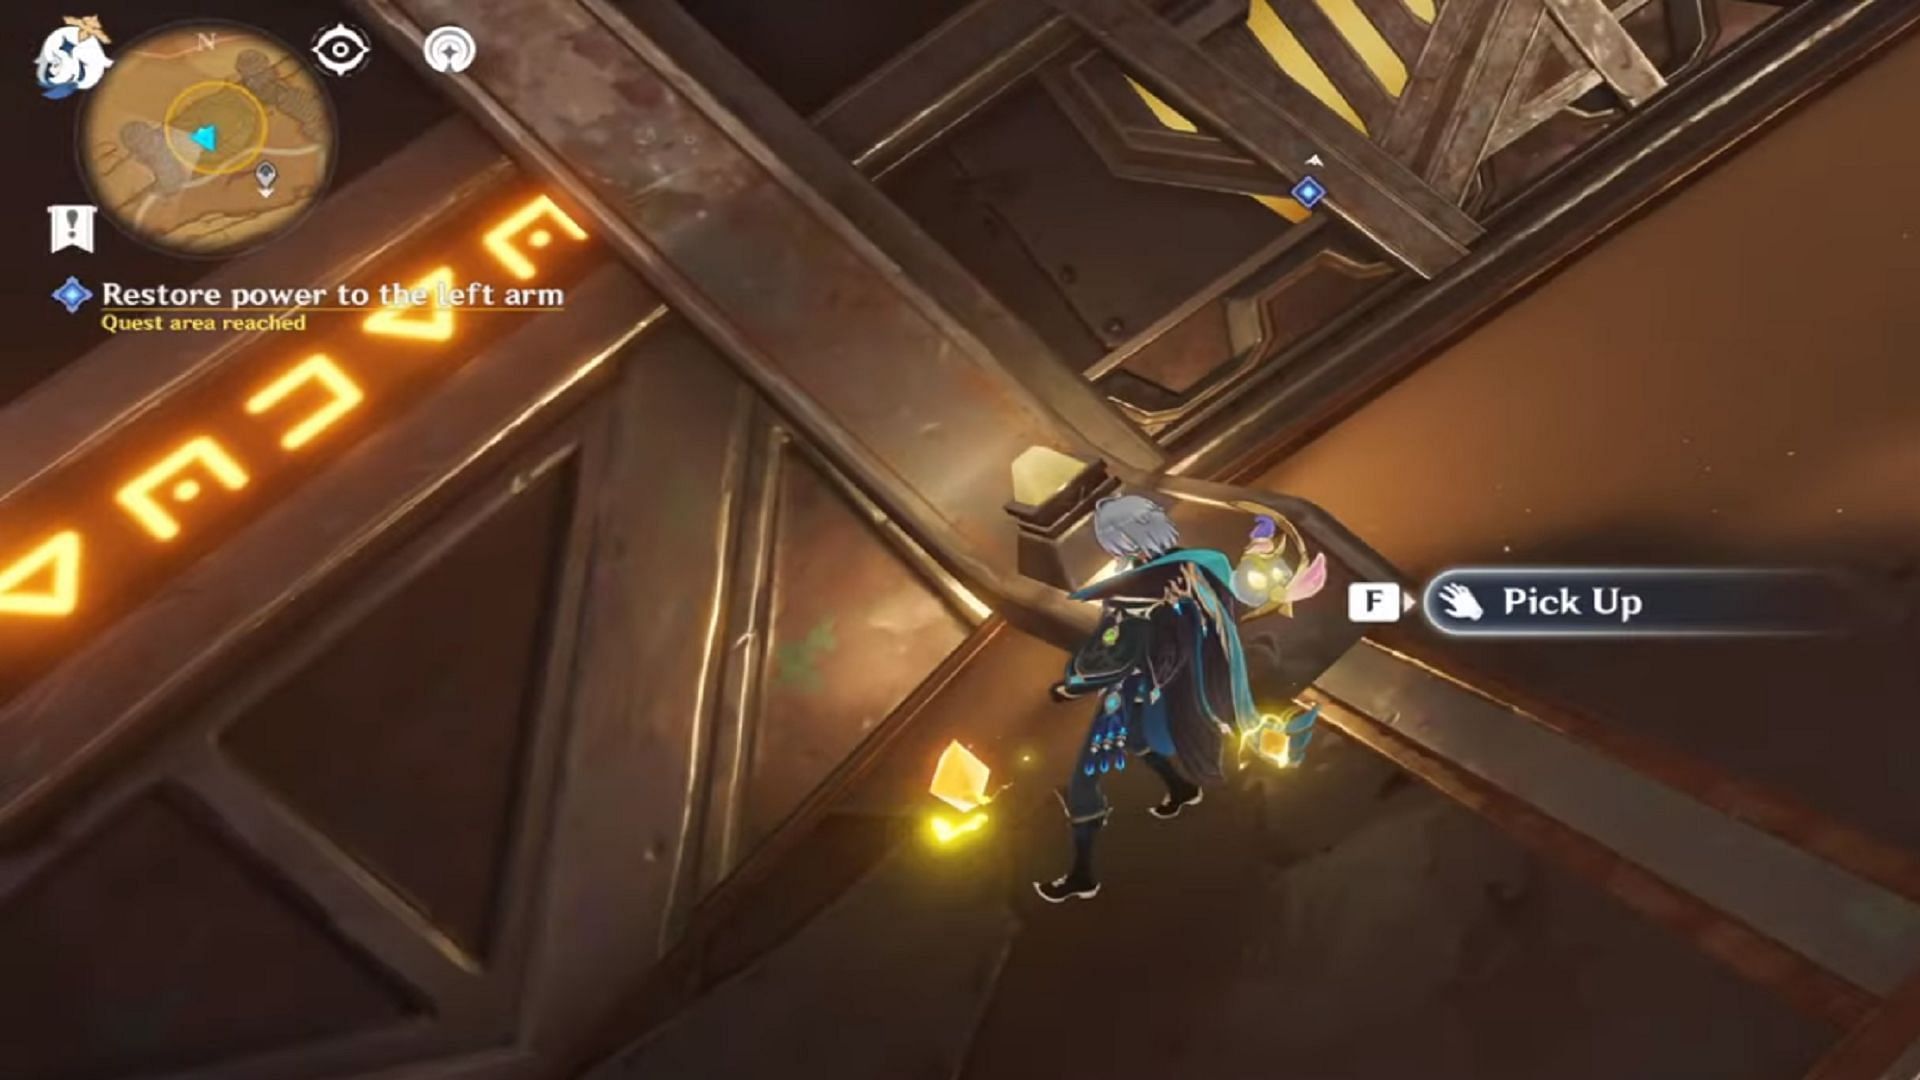
The second energy block is right next to the entrance of the aforementioned room. You can exit the place and move a few steps to the right to collect it.
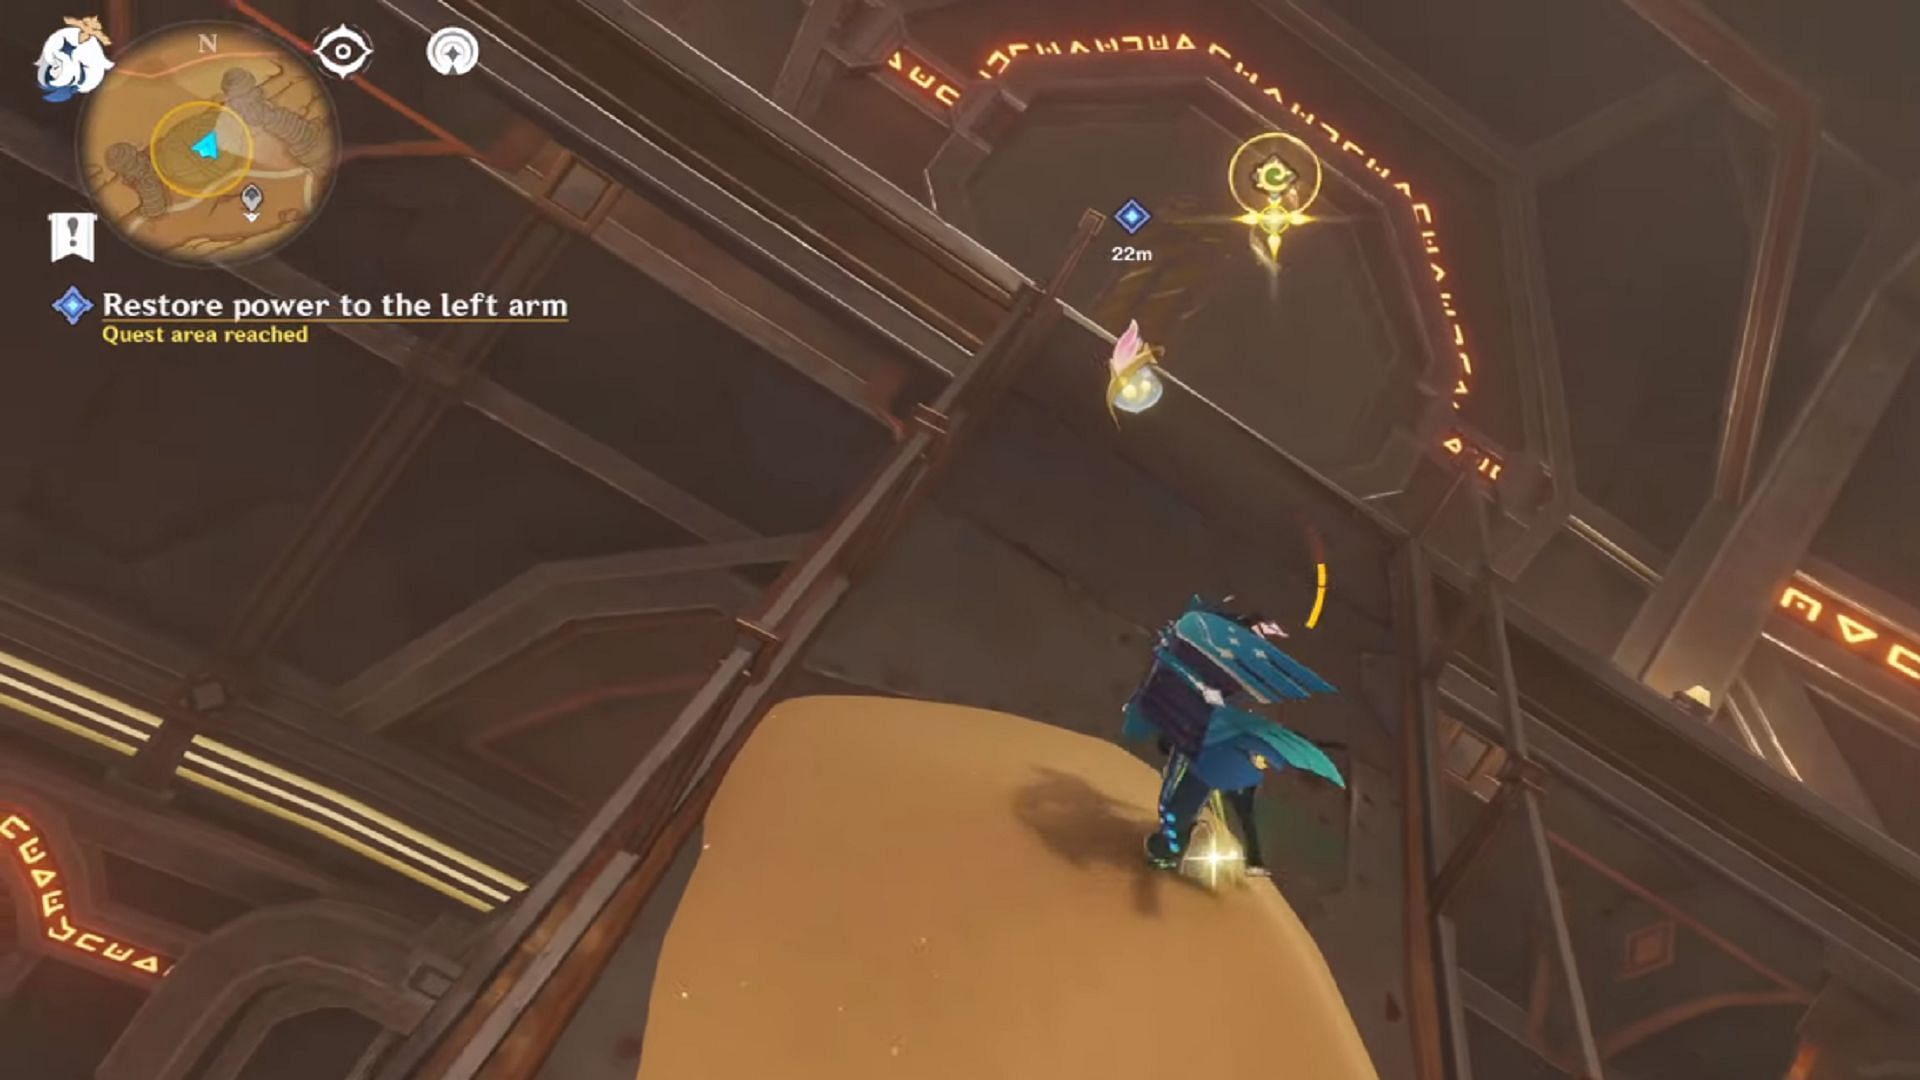
Since one battery unit can only hold one energy block, you have to find another unit to place the second block. The other unit is inside the room exactly opposite your current location. You will have to go back towards the cockpit and climb the slightly slanted bridge leading to the second room.
Similar to the first case, go near the battery and place the second energy block to activate it.
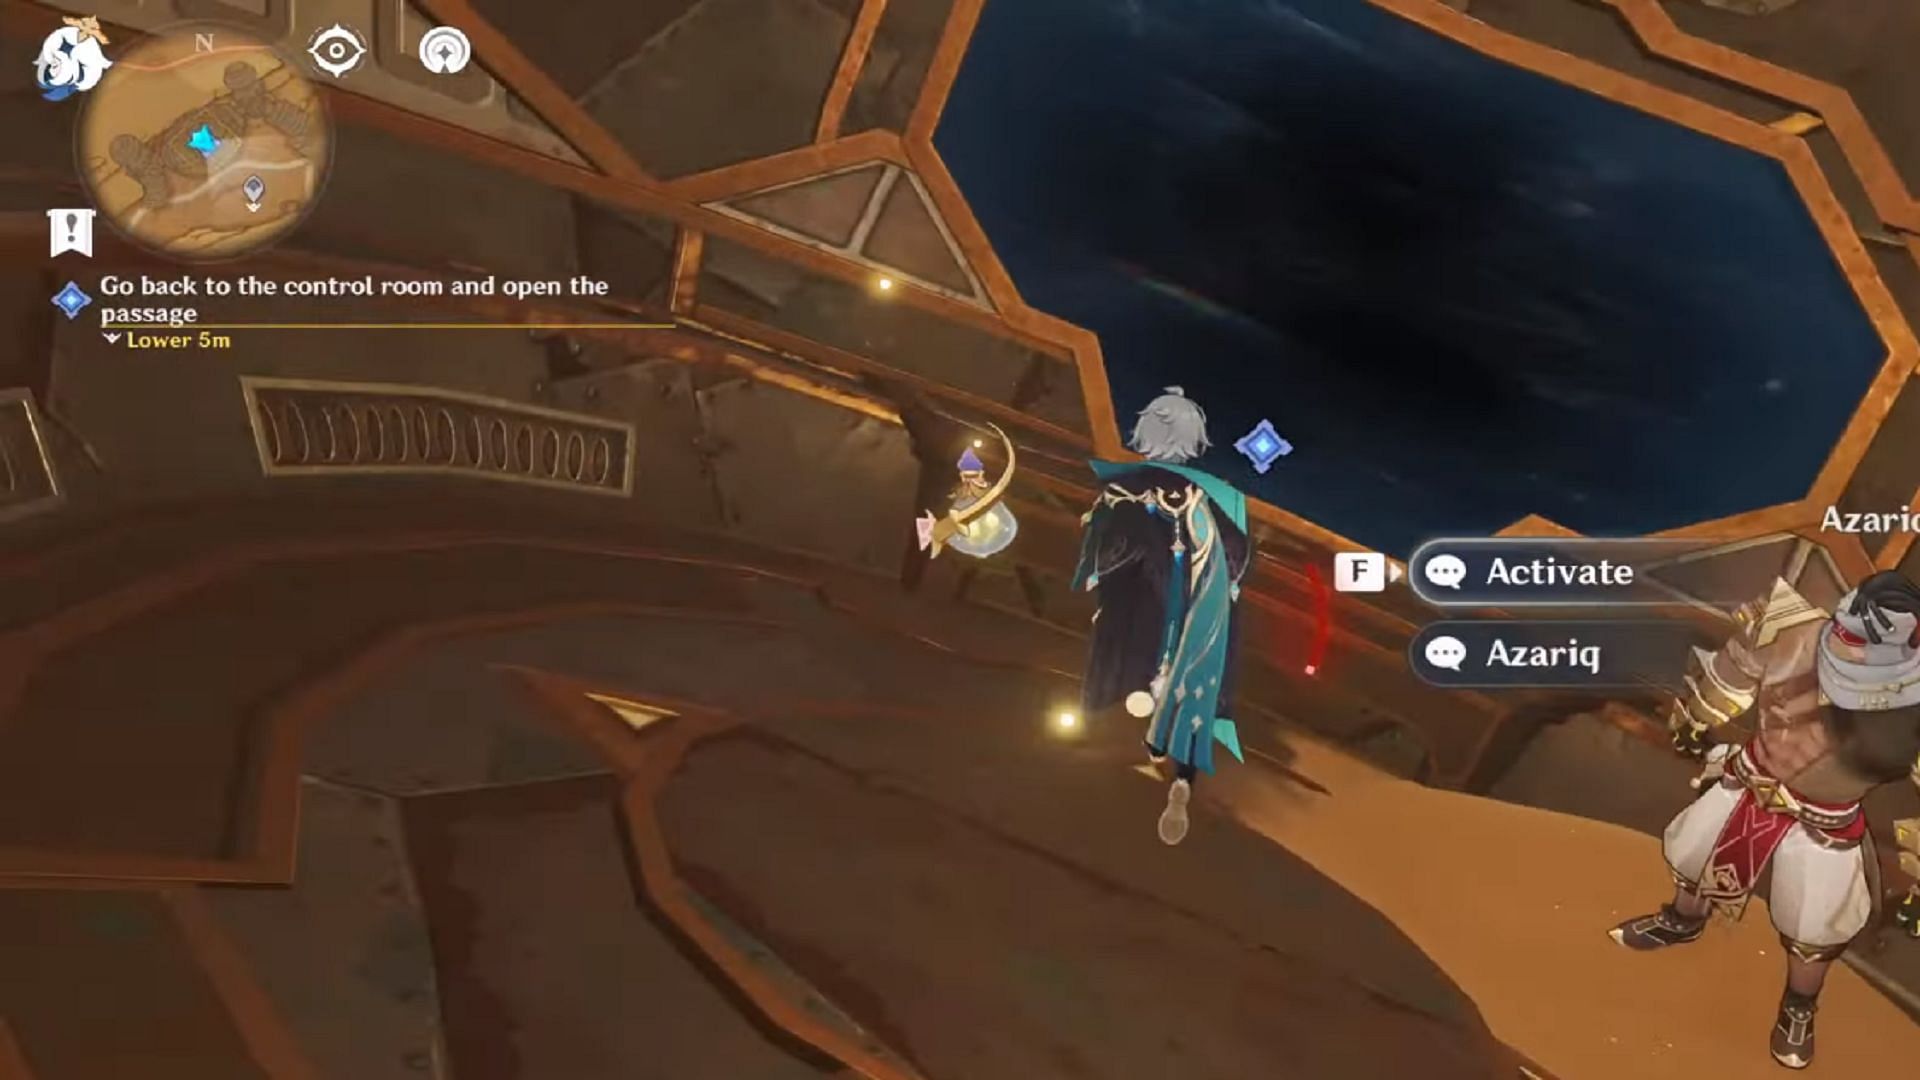
You can now go back inside the cockpit and activate the robot to complete this lengthy Genshin Impact World Quest series and unlock the rest of the desert area.

Are you stuck on today's Wordle? Our Wordle Solver will help you find the answer.