

'%20x='0'%20y='0'%20height='100%25'%20width='100%25'%20%0A%20%20%20%20%20%20%20%20%20%20xlink%3Ahref='data:image/jpg;base64,/9j/2wBDAAYEBQYFBAYGBQYHBwYIChAKCgkJChQODwwQFxQYGBcUFhYaHSUfGhsjHBYWICwgIyYnKSopGR8tMC0oMCUoKSj/2wBDAQcHBwoIChMKChMoGhYaKCgoKCgoKCgoKCgoKCgoKCgoKCgoKCgoKCgoKCgoKCgoKCgoKCgoKCgoKCgoKCgoKCj/wgARCAAHAAoDASIAAhEBAxEB/8QAFQABAQAAAAAAAAAAAAAAAAAABQb/2gAIAQEAAAAAmV//xAAUAQEAAAAAAAAAAAAAAAAAAAAF/9oACAECEAAAAG//xAAUAQEAAAAAAAAAAAAAAAAAAAAG/9oACAEDEAAAACP/xAAfEAACAgEEAwAAAAAAAAAAAAACAwERBAAFBhUSUWH/2gAIAQEAAT8Ayeet7rCNKQyFgQQwGoABofVTej3tjzJxZm2ATJ85Hq4Kr+6//8QAGhEAAQUBAAAAAAAAAAAAAAAAAwABBCExkf/aAAgBAgEBPwAU8u1xl//EABgRAAIDAAAAAAAAAAAAAAAAAAACAQQj/9oACAEDAQE/AL2DQqH/2Q=='%3E%3C/image%3E%3C/svg%3E)
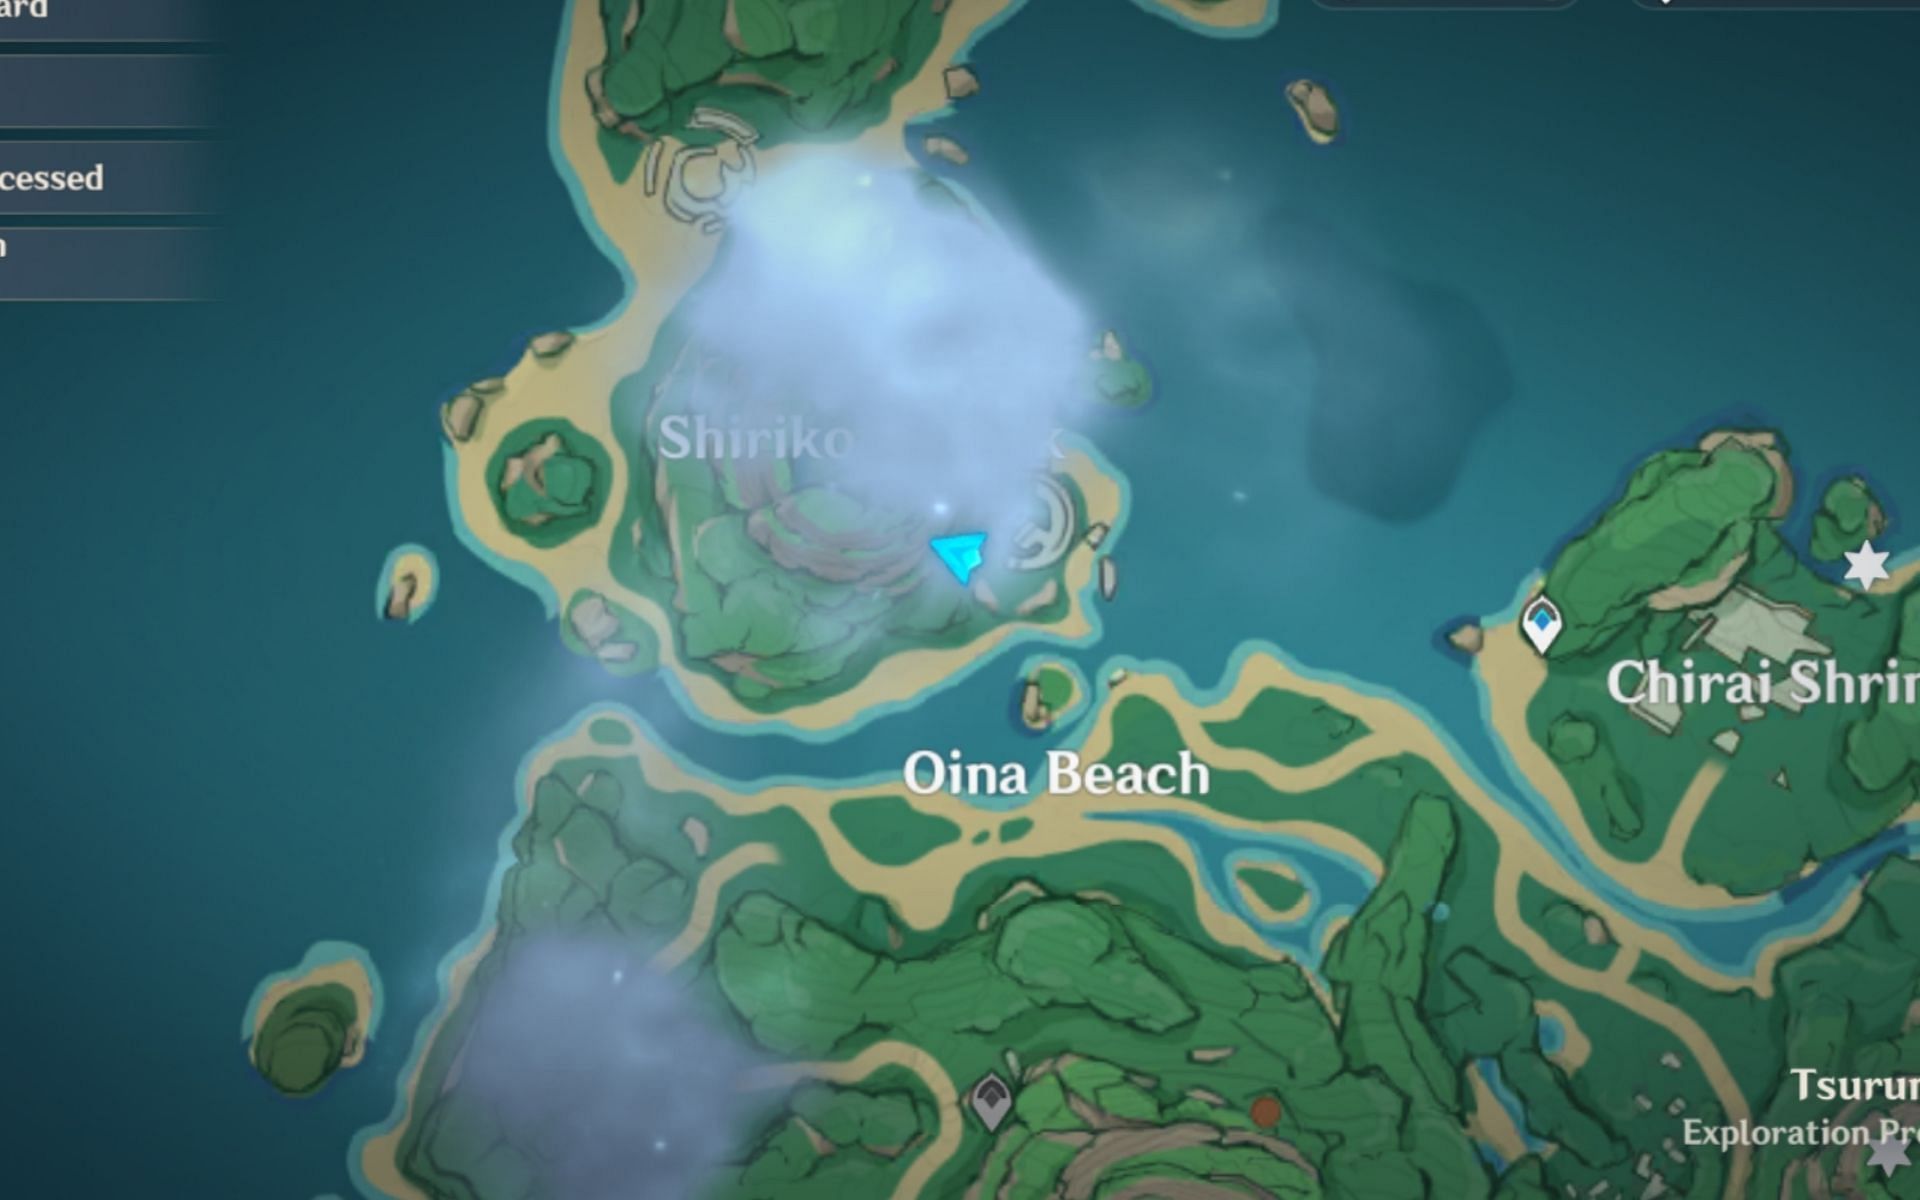
Shirikoro Peak puzzle is new to Genshin Impact and is part of the Through the Mists questline. It is located in the Northwest part of the island. The quest involves a little boy named Ruu who asks you to help him.
To complete this questline, you must complete a series of challenges, solve Relay Stone puzzles, and guide Seelie to their Seelie Courts. There will be a total of six Seelie divided into two parts. Three at the start of the quest and three later on. Shirikoro Peak is one of the new puzzles in Genshin Impact 2.2.
How to start the Shirikoro Peak puzzle in Genshin Impact
Looking for Crossword hints & solutions? Check out latest NYT Mini Crossword Answers, LA Times Crossword Answers, and Atlantic Crossword Answers
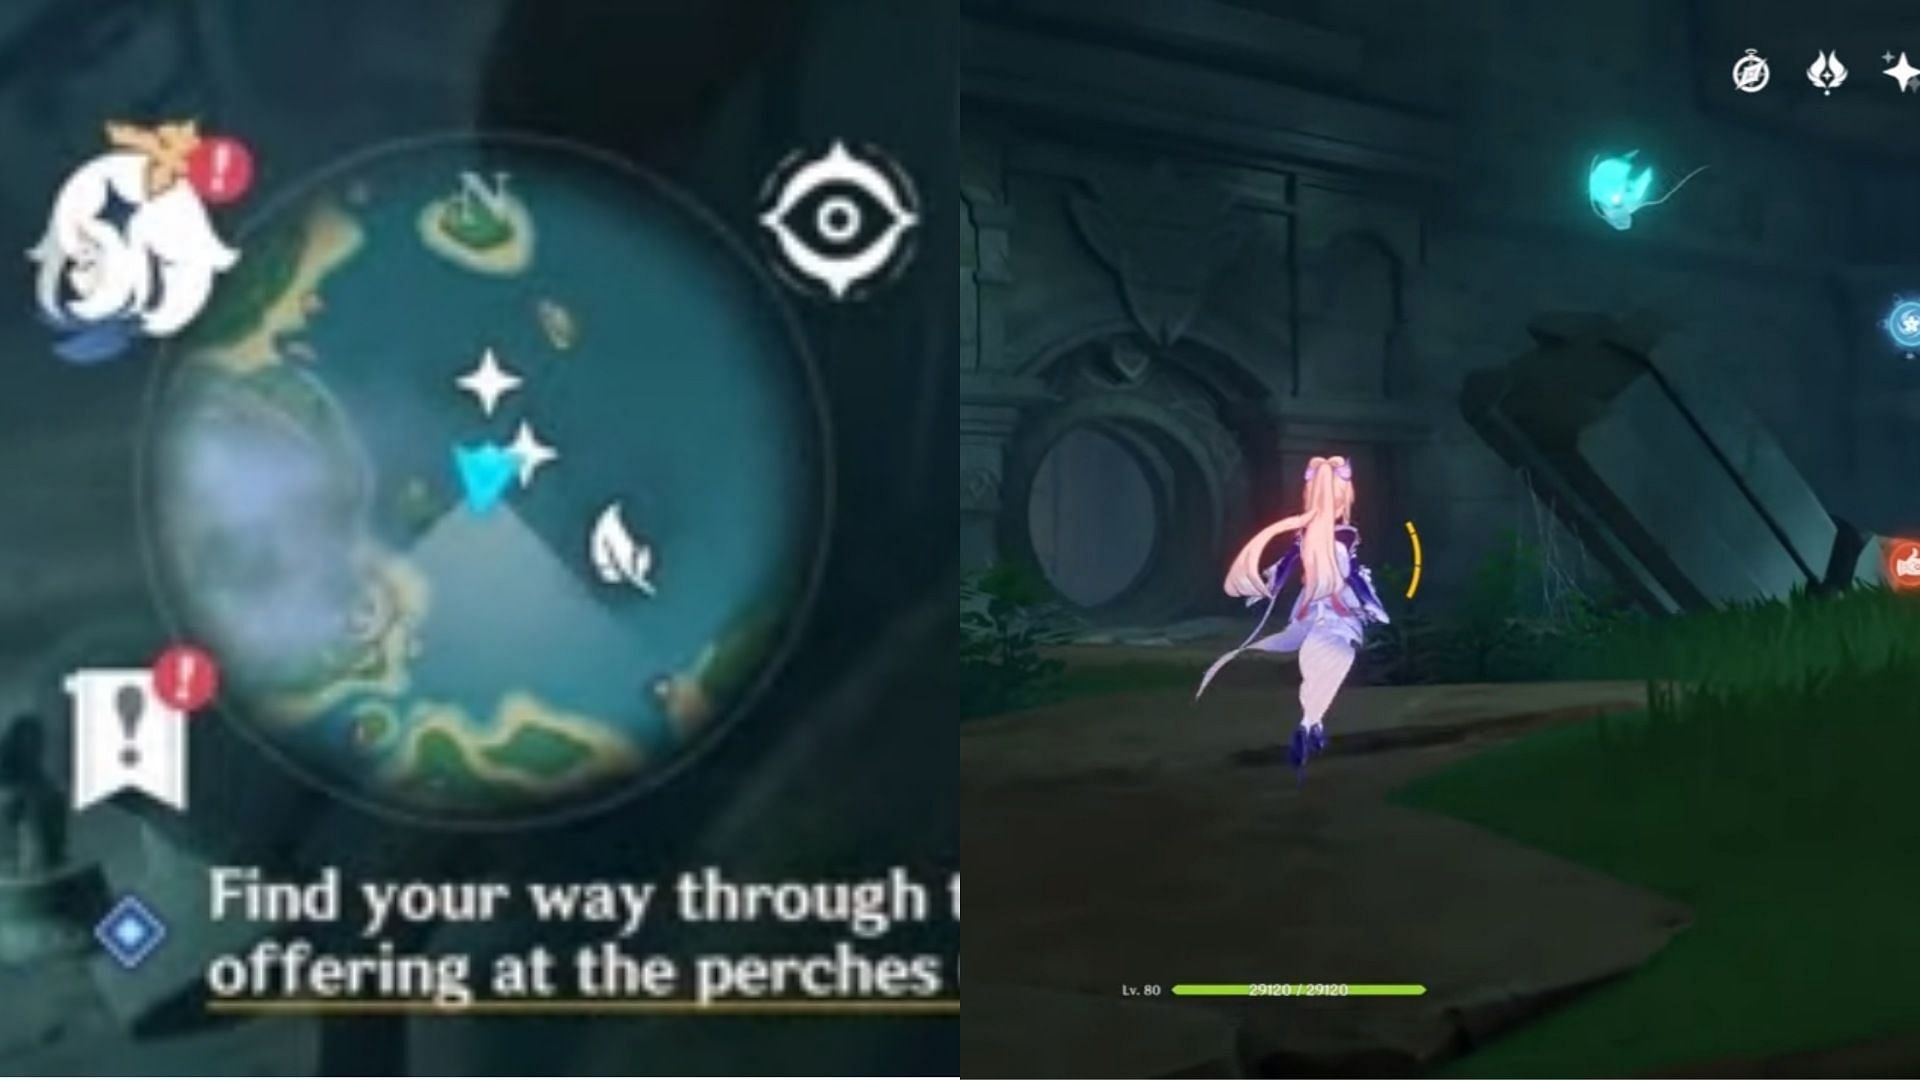
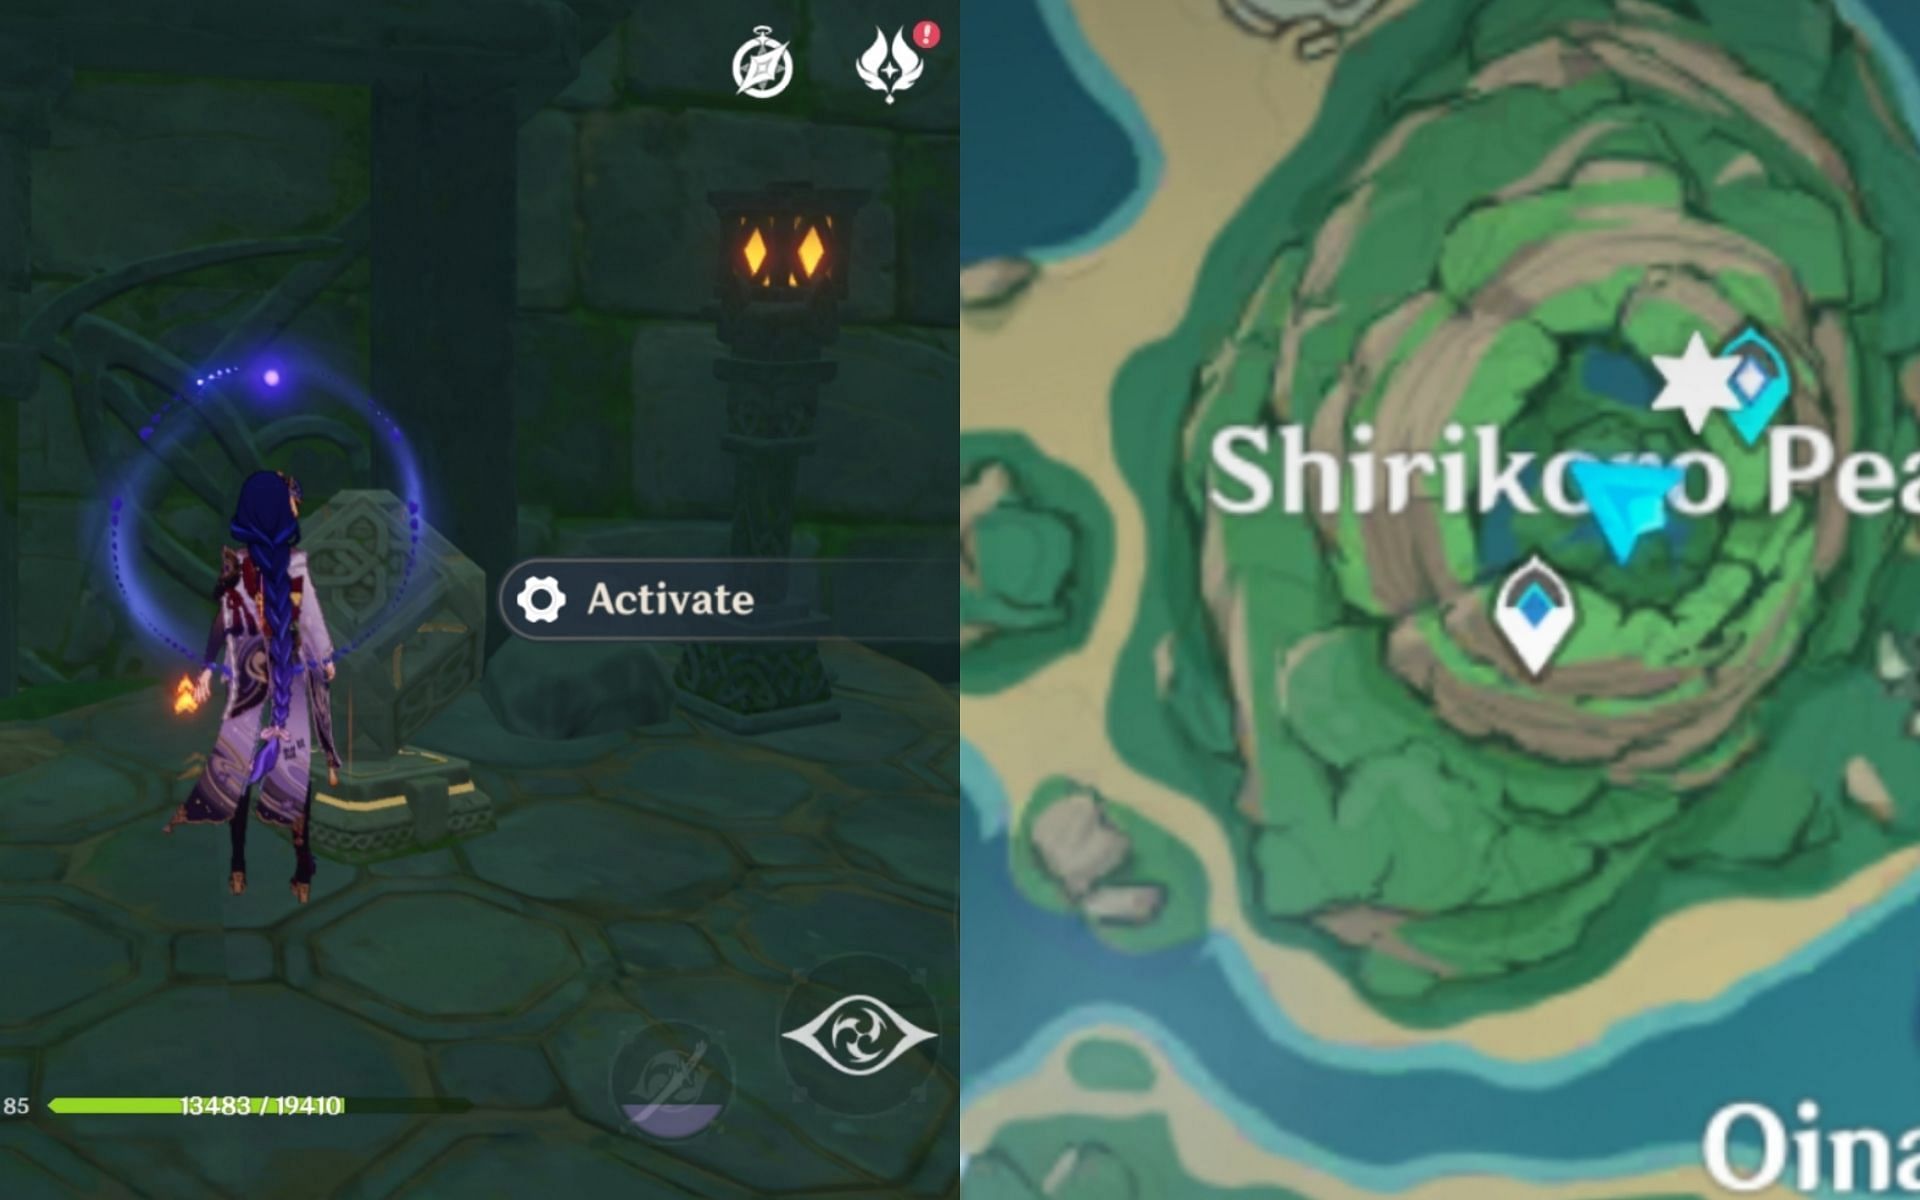
First, you need to find Ruu at the marked location. After talking to Ruu, touch the perch to summon three feathers from the tree.
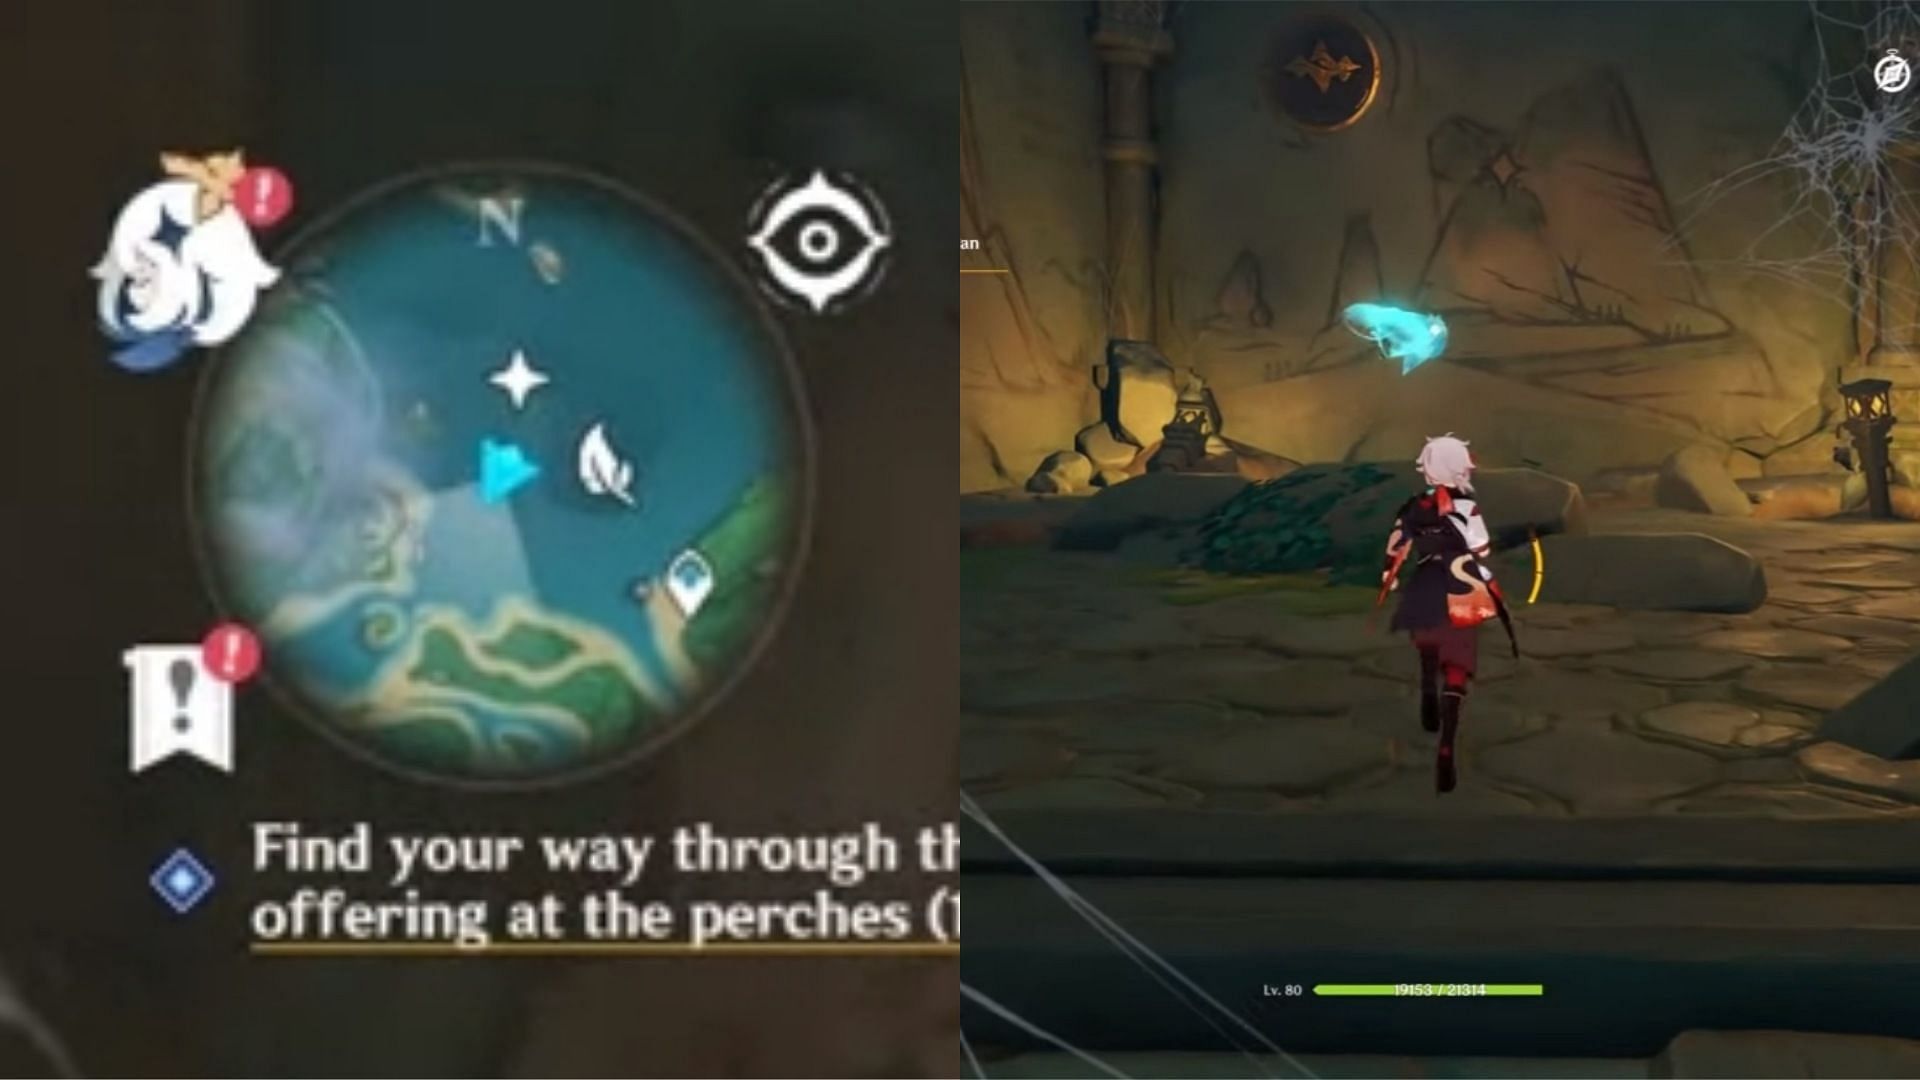
To complete the quest, you have to touch these three feathers. The feather will show up on the map, but you'll notice that the feather is located underwater if you follow it. Therefore, the first thing you need to do is drain the water.
To drain the water, you need to bring three Seelie back to their Seelie Courts. Here is the location for each Seelie.
First three Seelie location
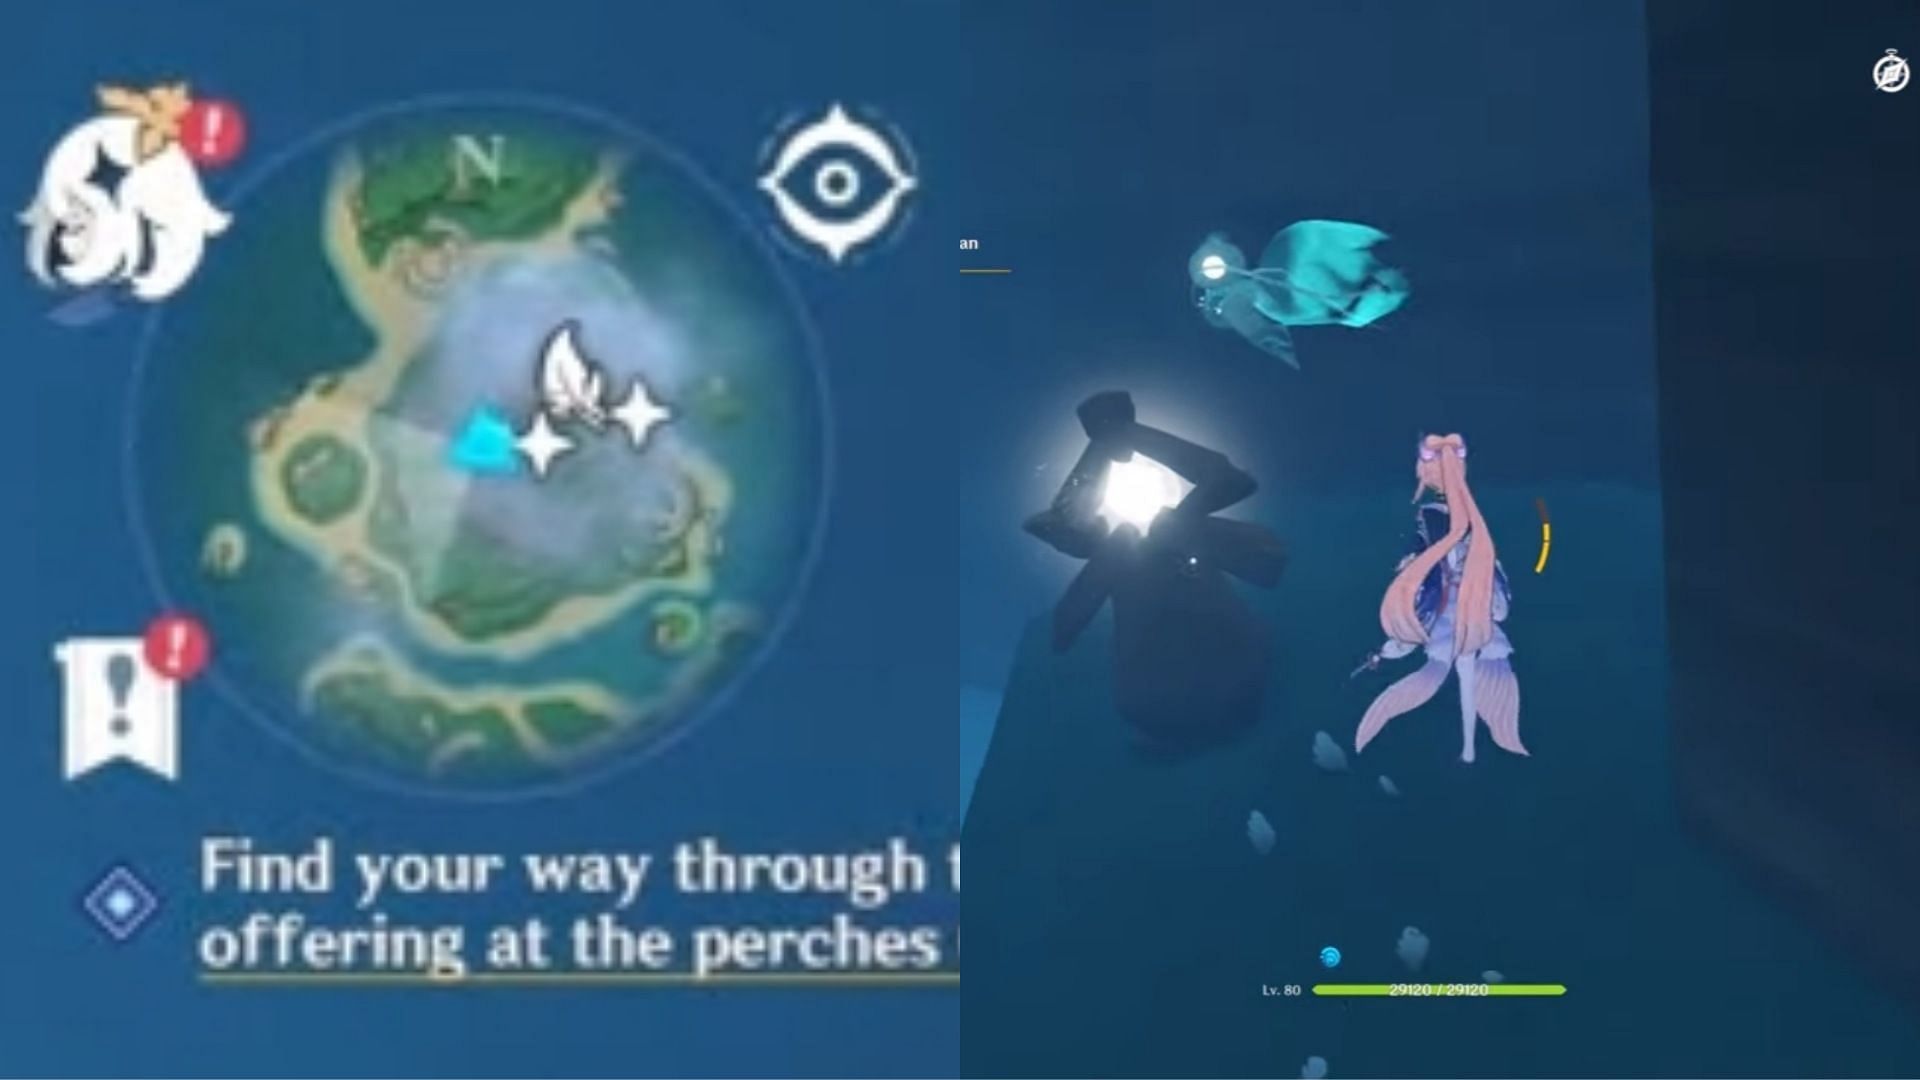
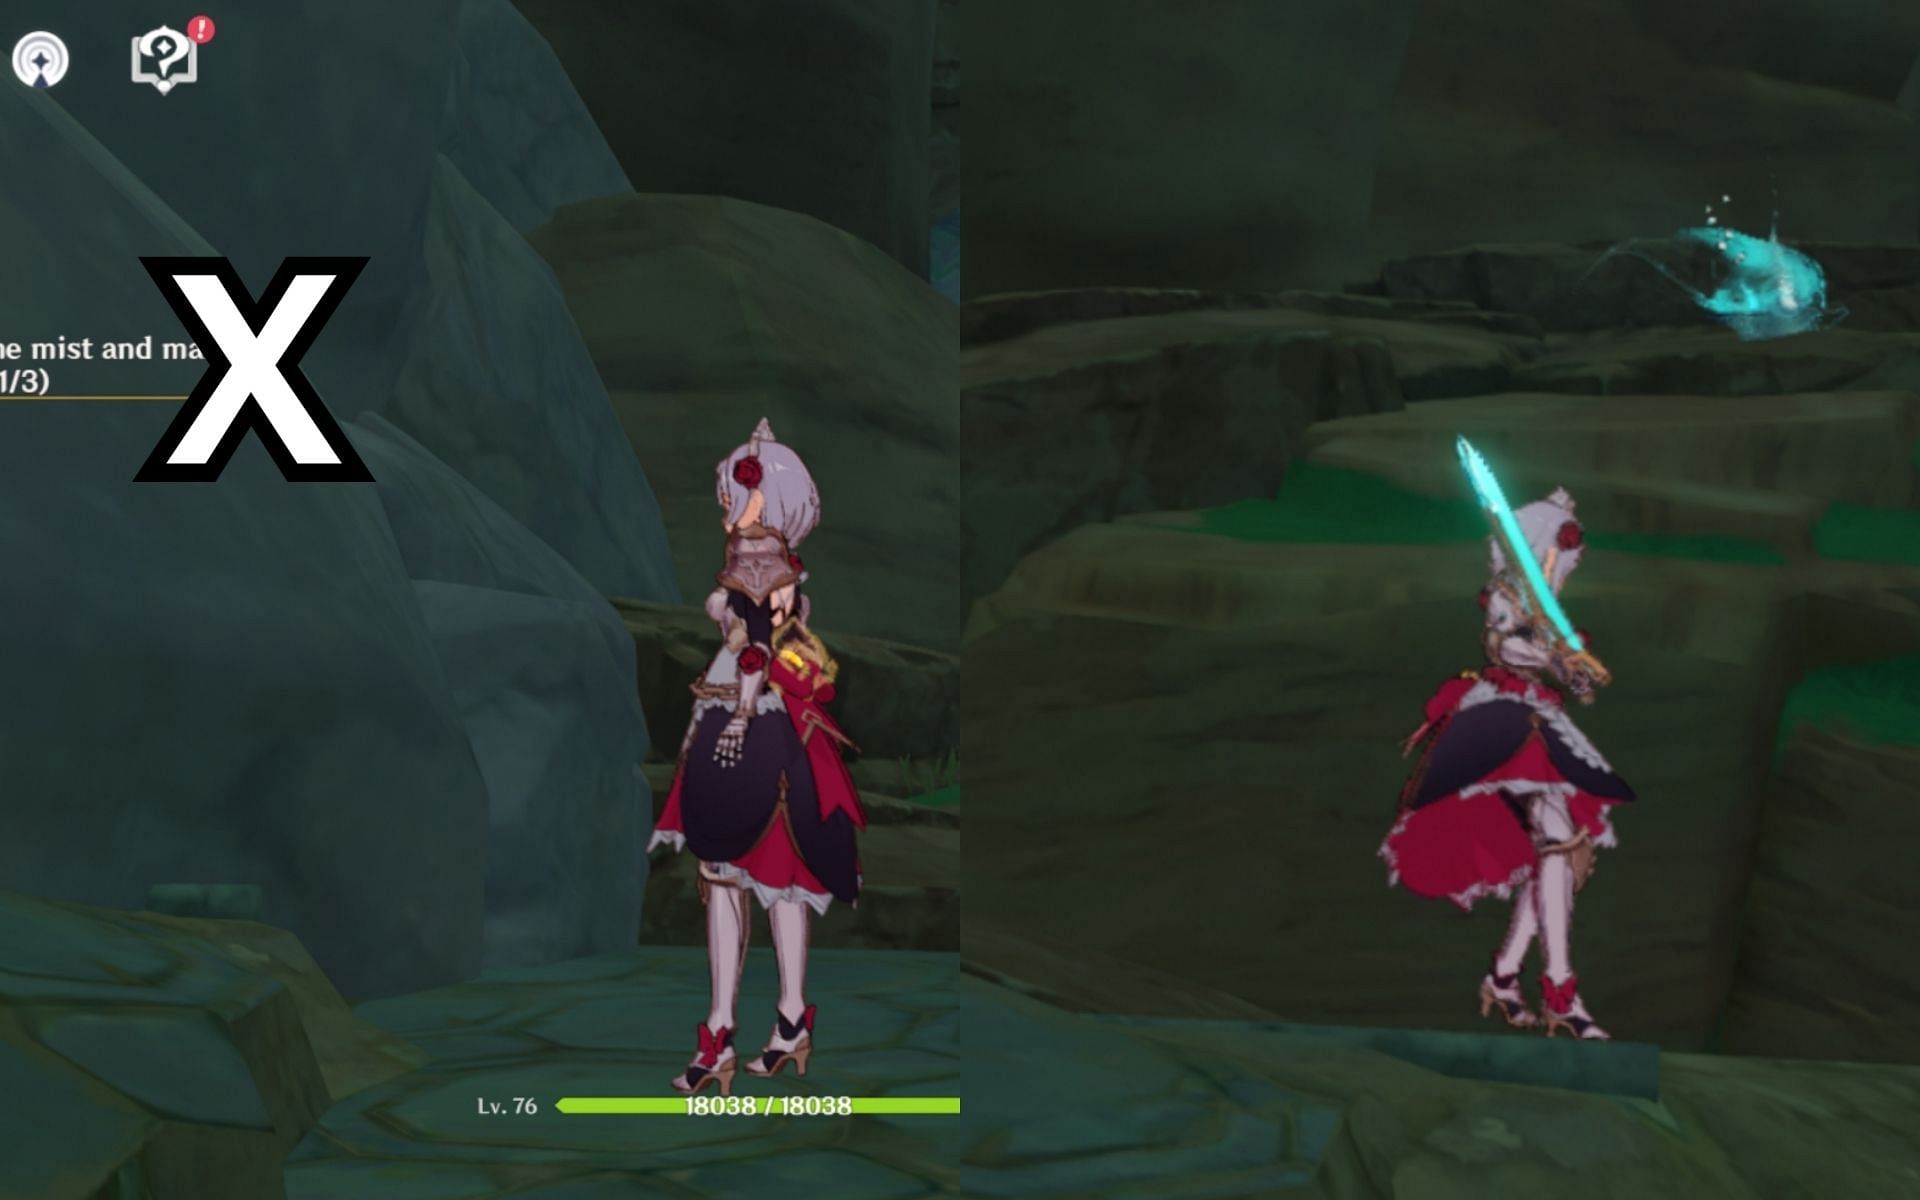
To begin, jump to the water in the middle of the Shirikoro Peak. The first Seelie is located near the shore.
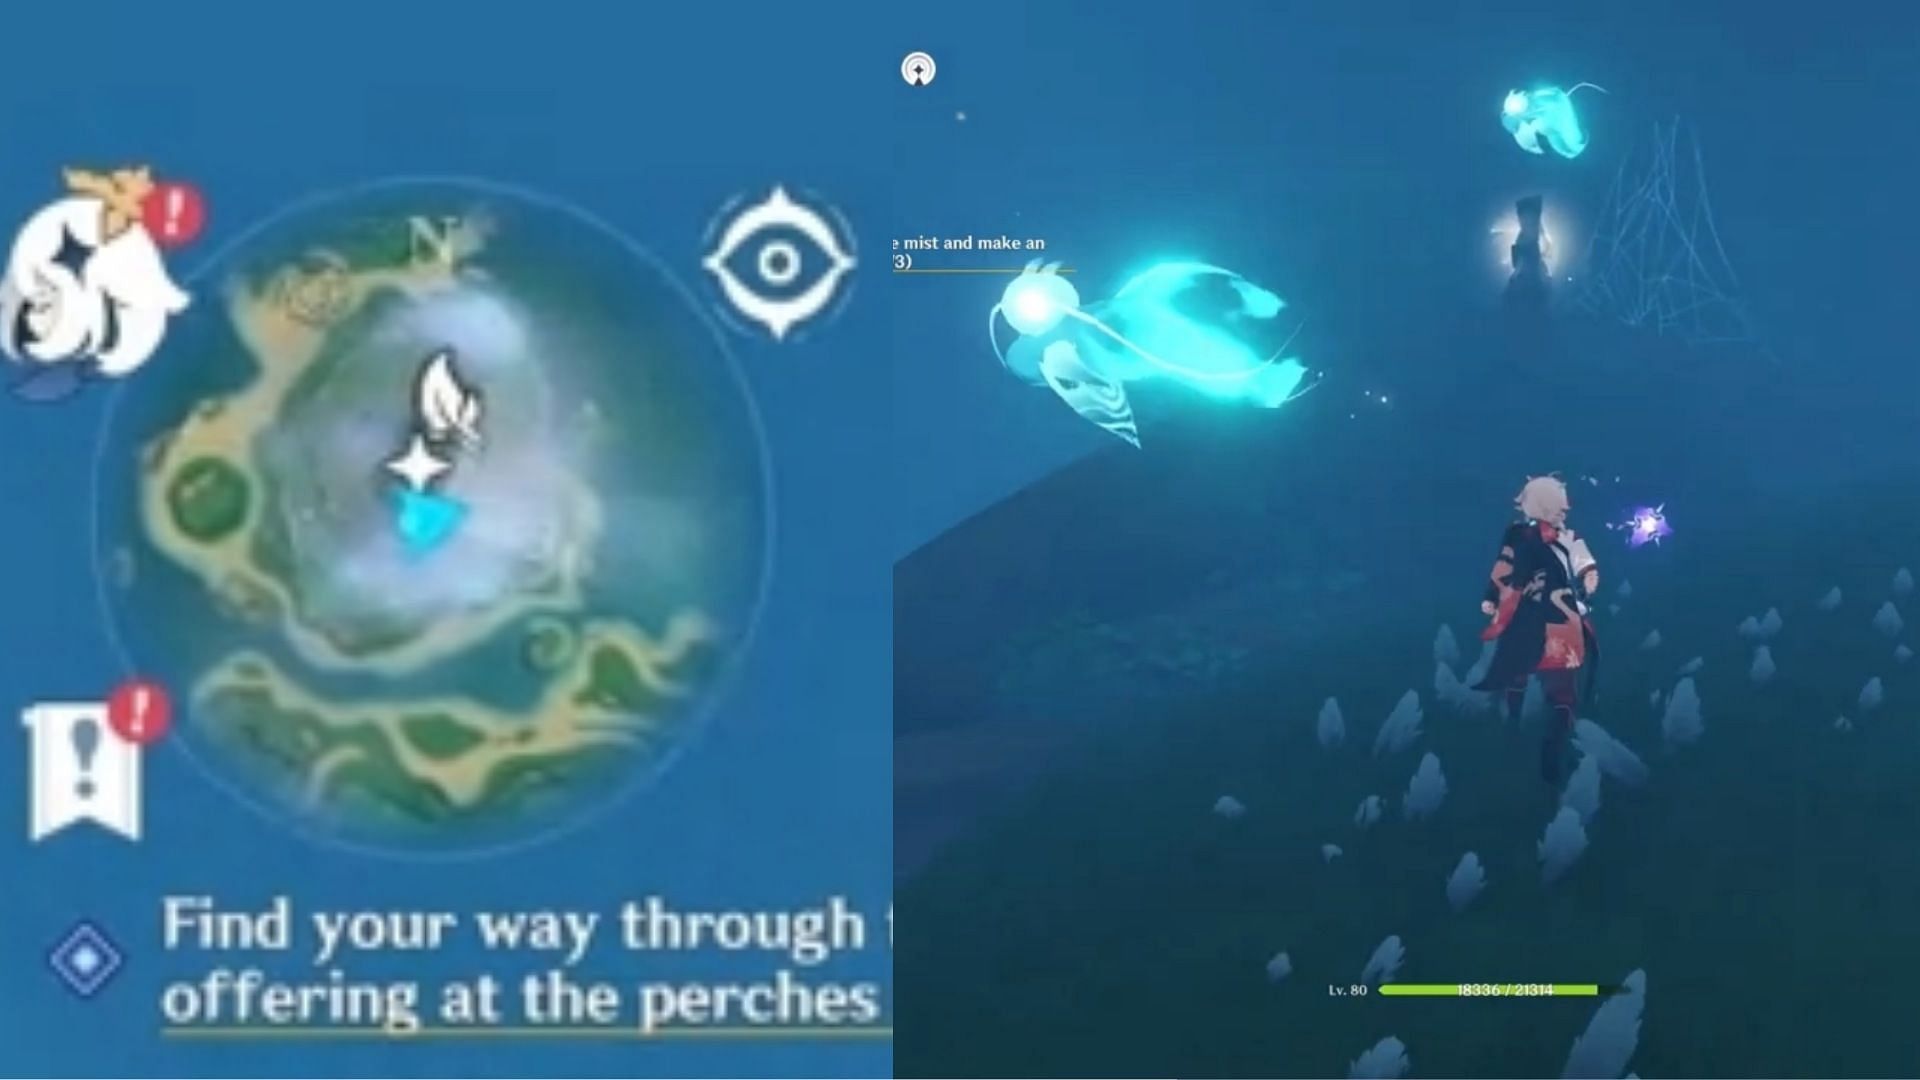
The second Seelie can be easily found, as you will notice it when following the first one.
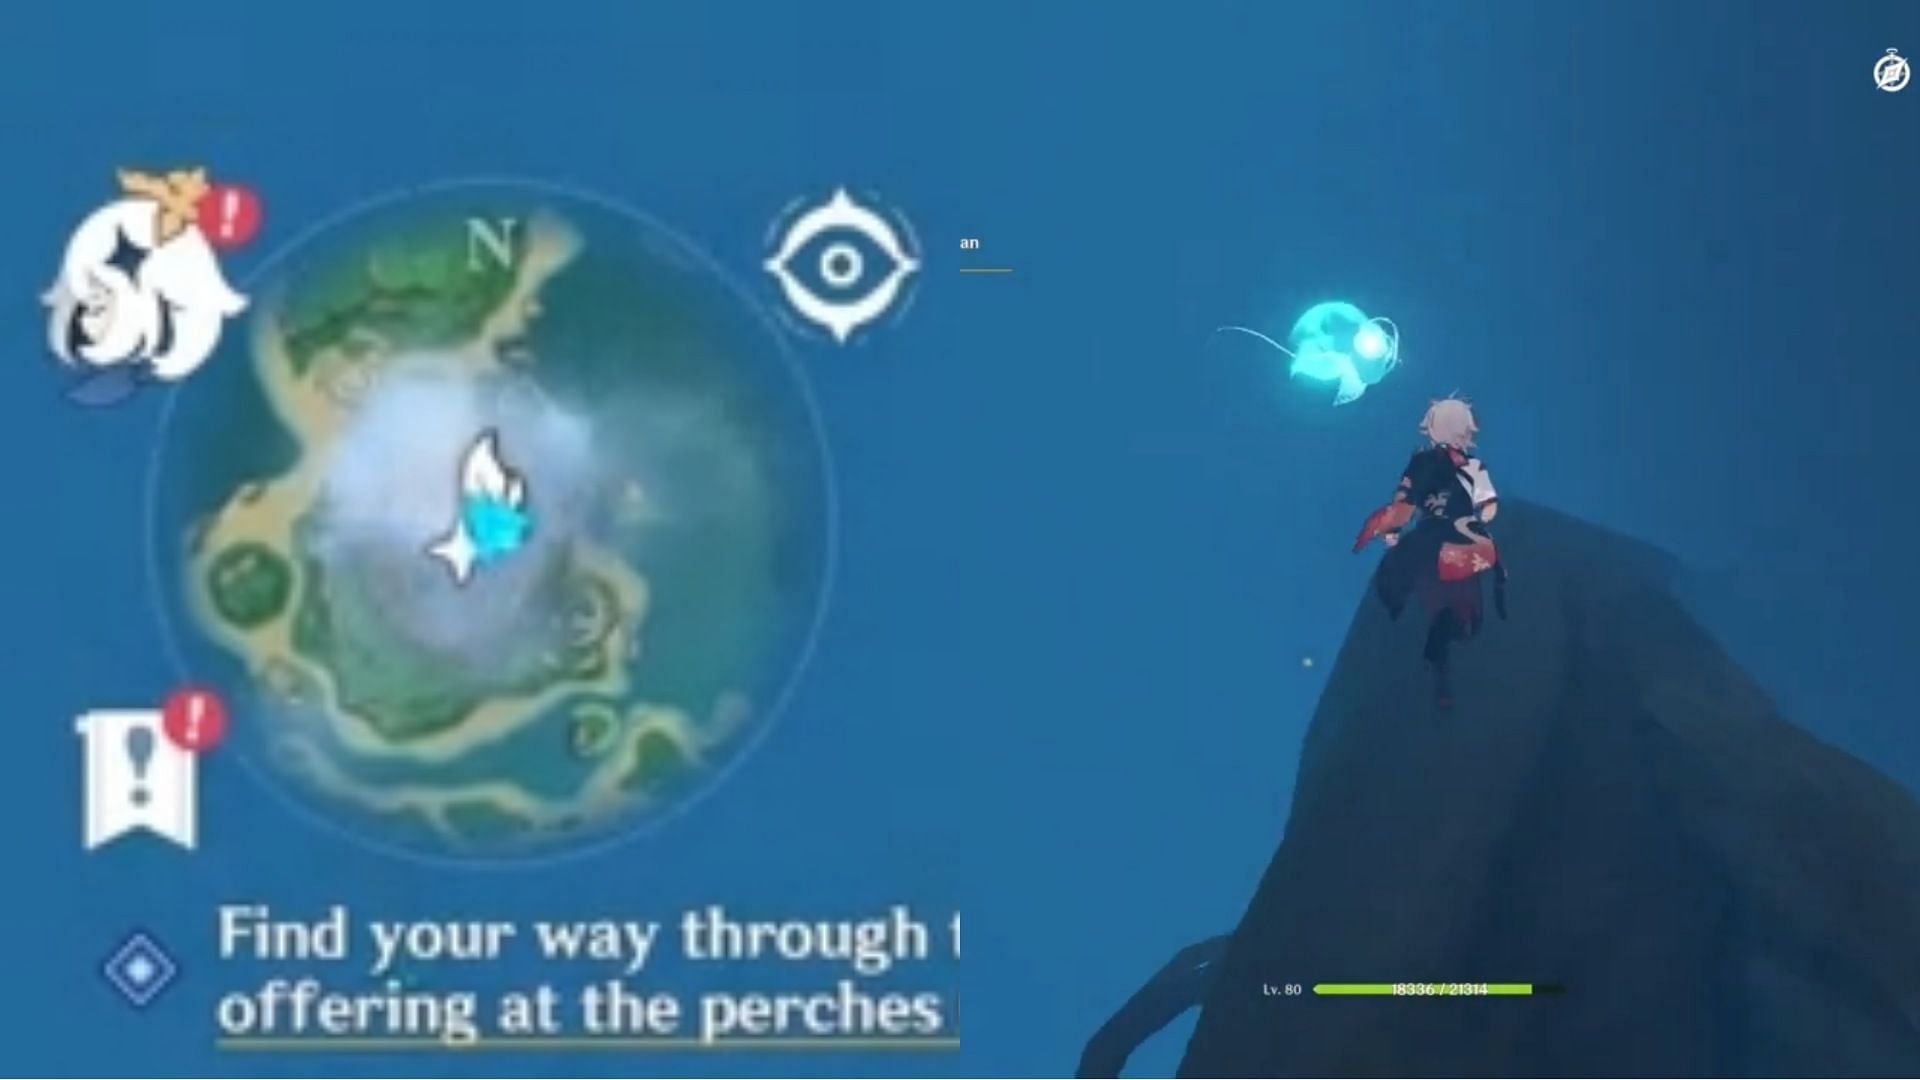
The third and final one is located on the tree branch behind the Seelie Courts. After following all of them, an Exquisite Chest will appear.
Feathers location and Relay Stone puzzles walkthrough
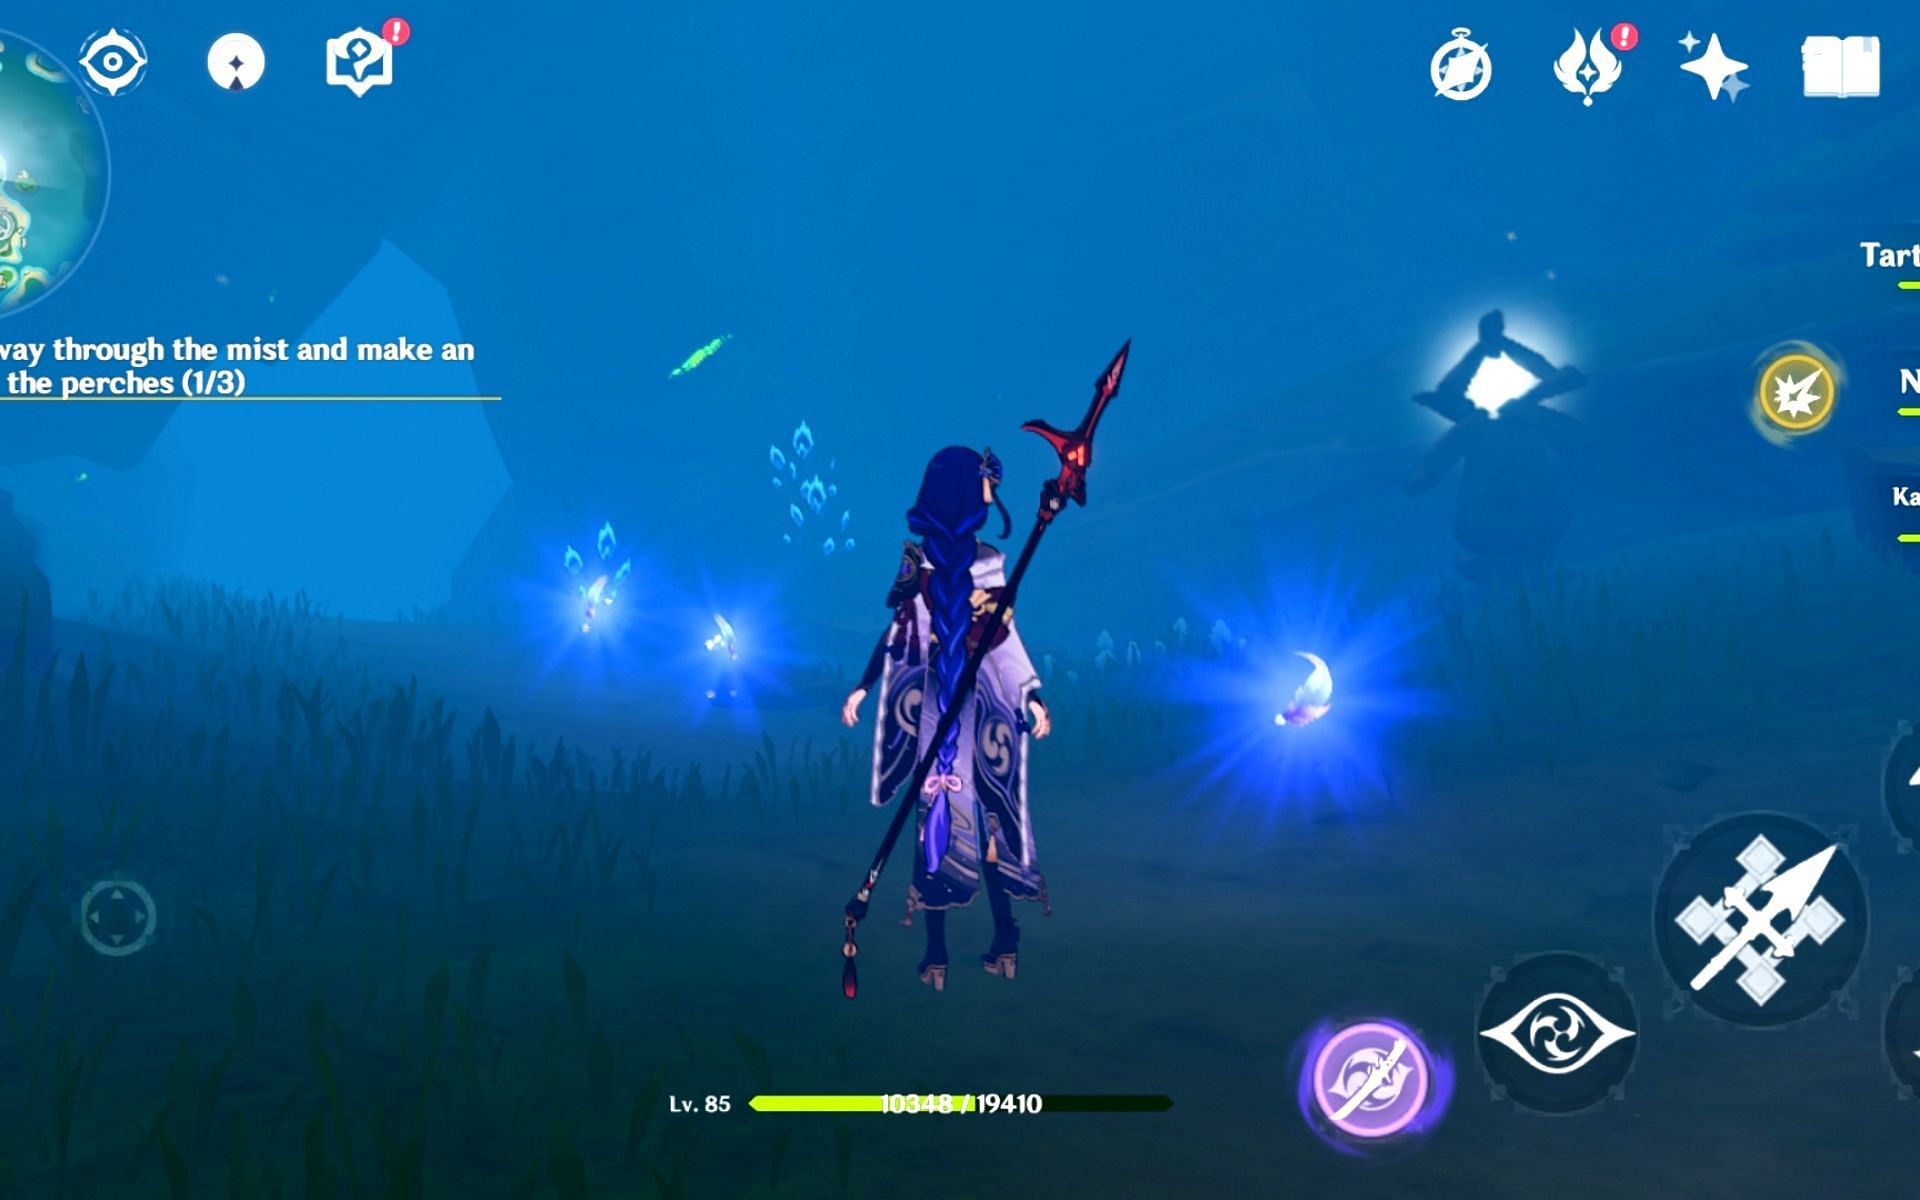
Upon bringing the three Seelie back, the water will be drained, and a new area will be accessible. You can use your Elemental Sight to find out which way to go.
After gliding down and walking a bit, you will see the three feathers next to each other. After you collect the first one, the remaining two will quickly fly away.
When chasing them, the two feathers will pass through a round door that can only be opened by solving the puzzle nearby.
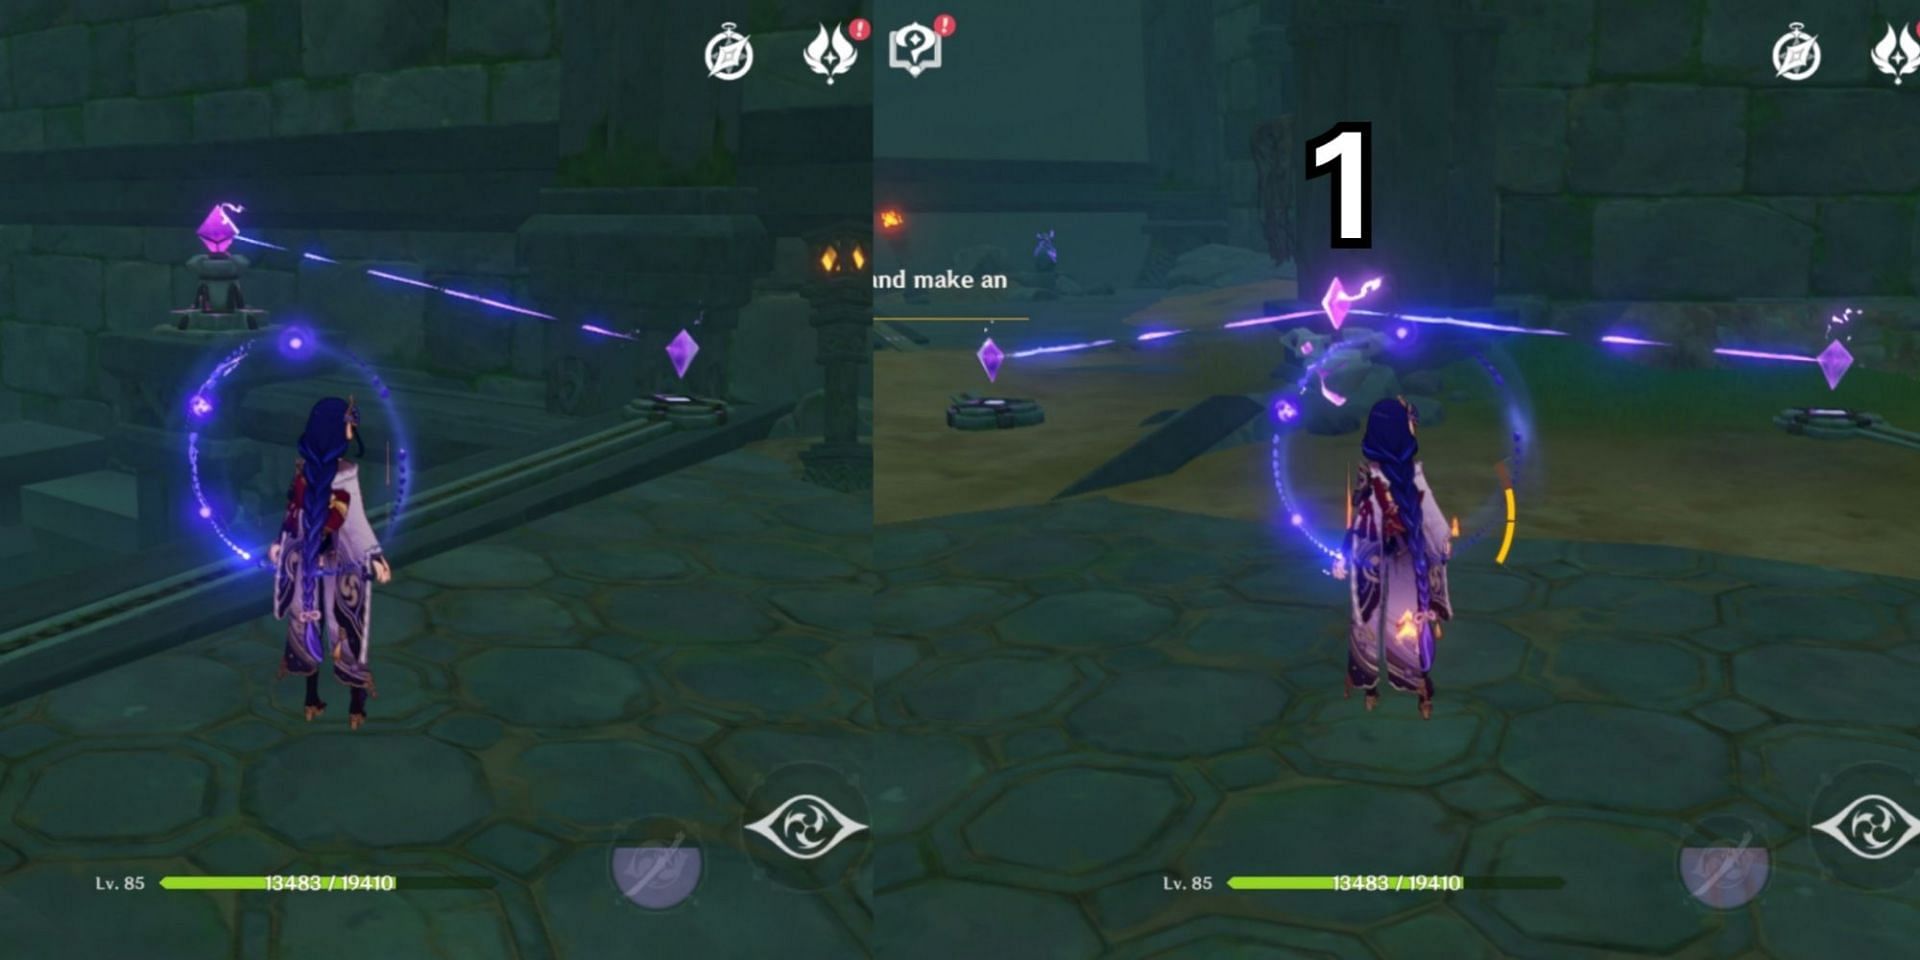
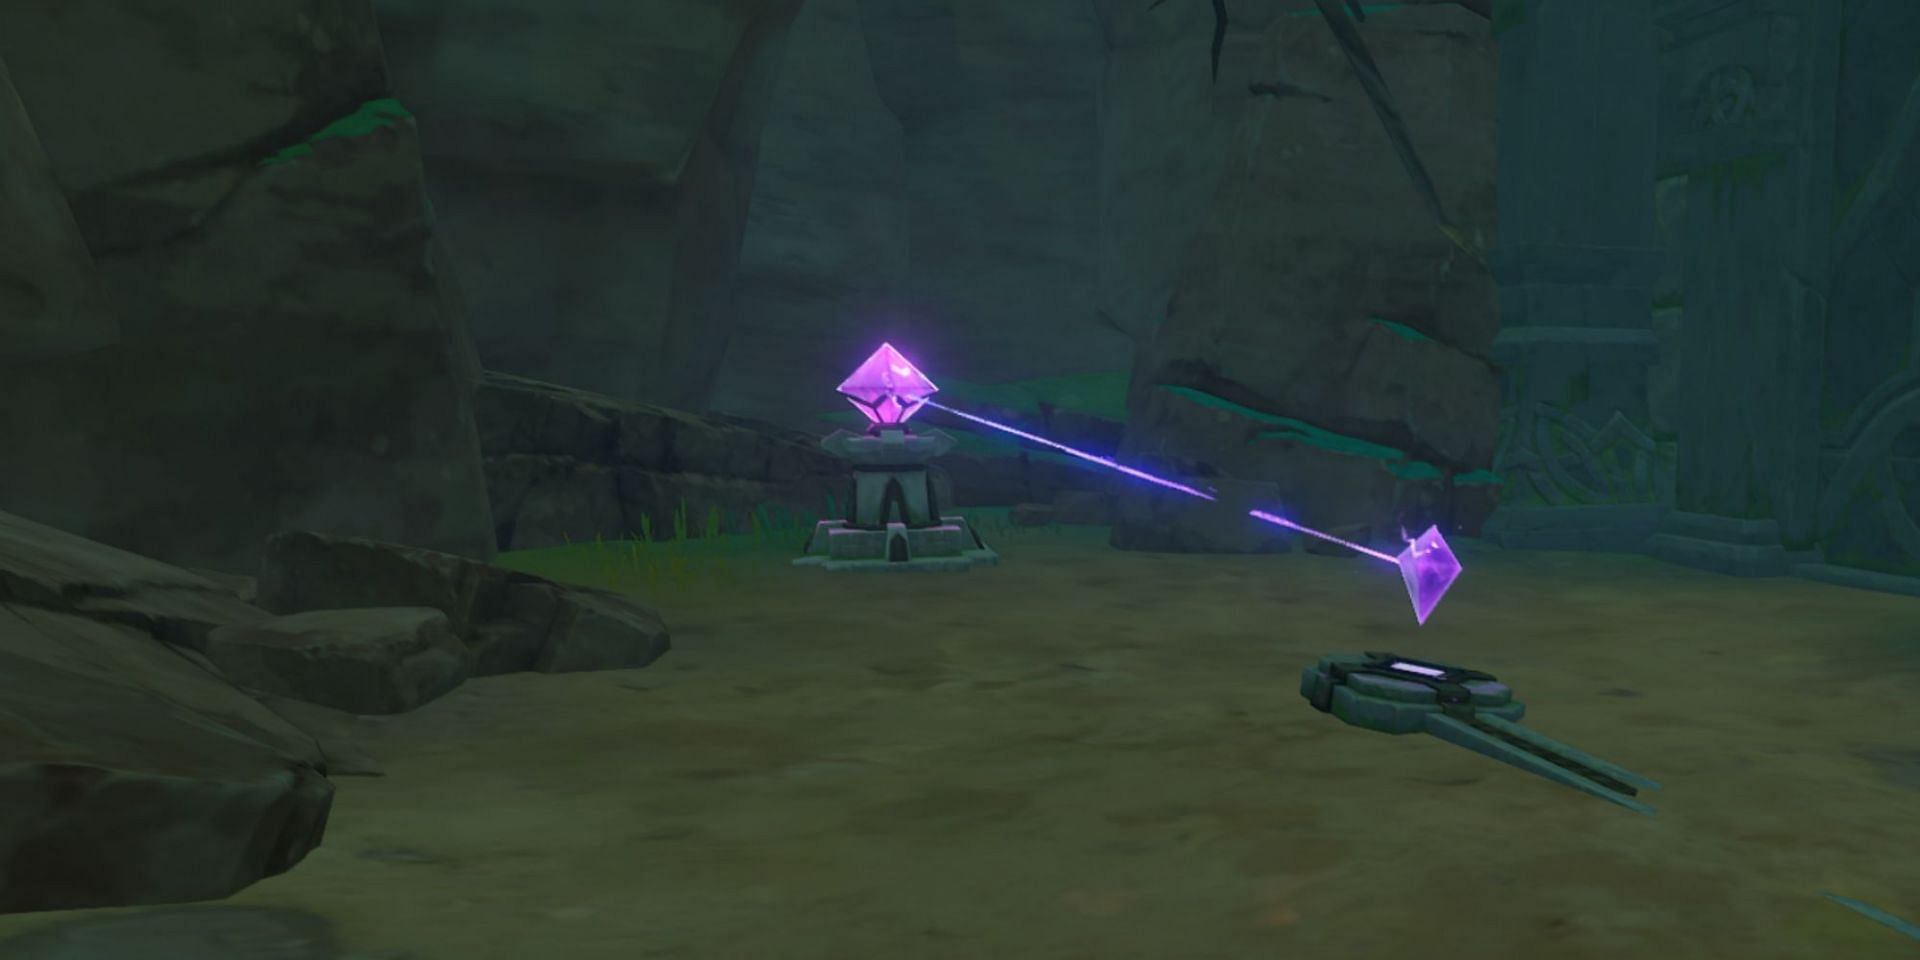
When facing the round door, if you turn to your left, another chamber will be seen, containing the first Relay Stone. Take it and place it in-between the Crystals that are on your left (when facing the round door).
Next, walk away from the door to the corridor that you came from. There should be a second Relay Stone. Take it and go back. The third Relay Stone is hidden in a small bush near the entryway.
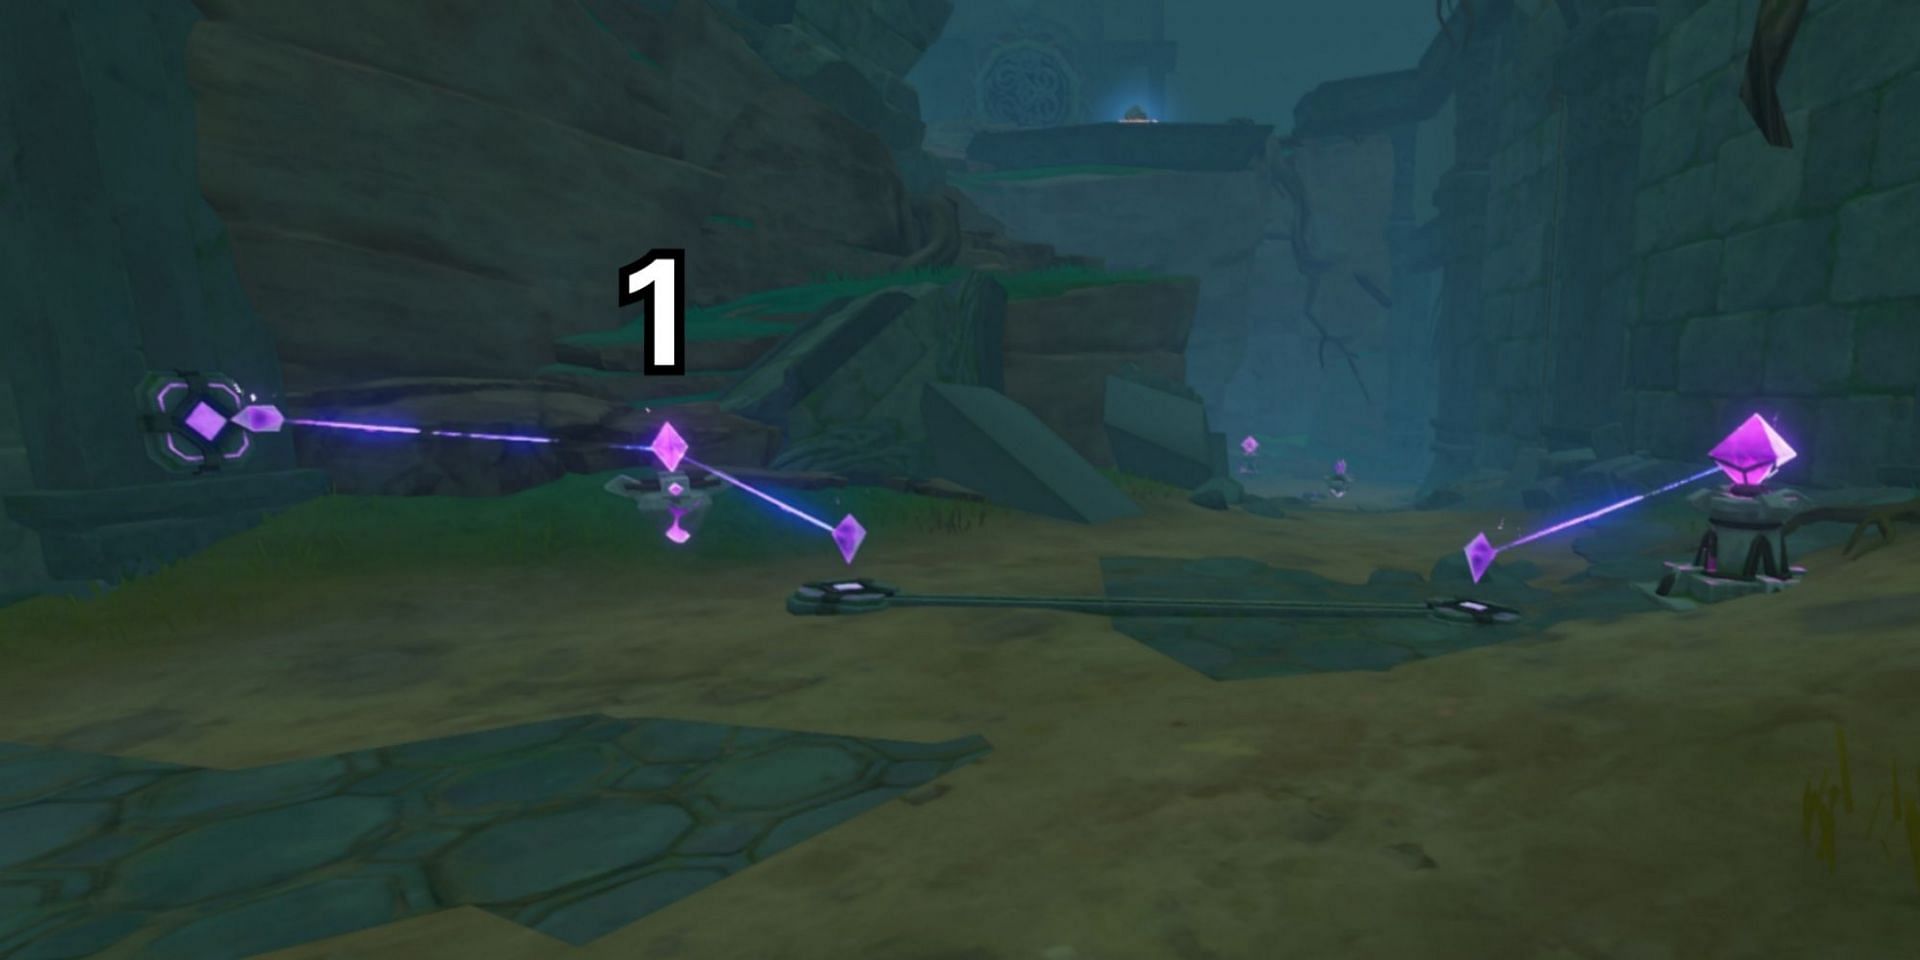
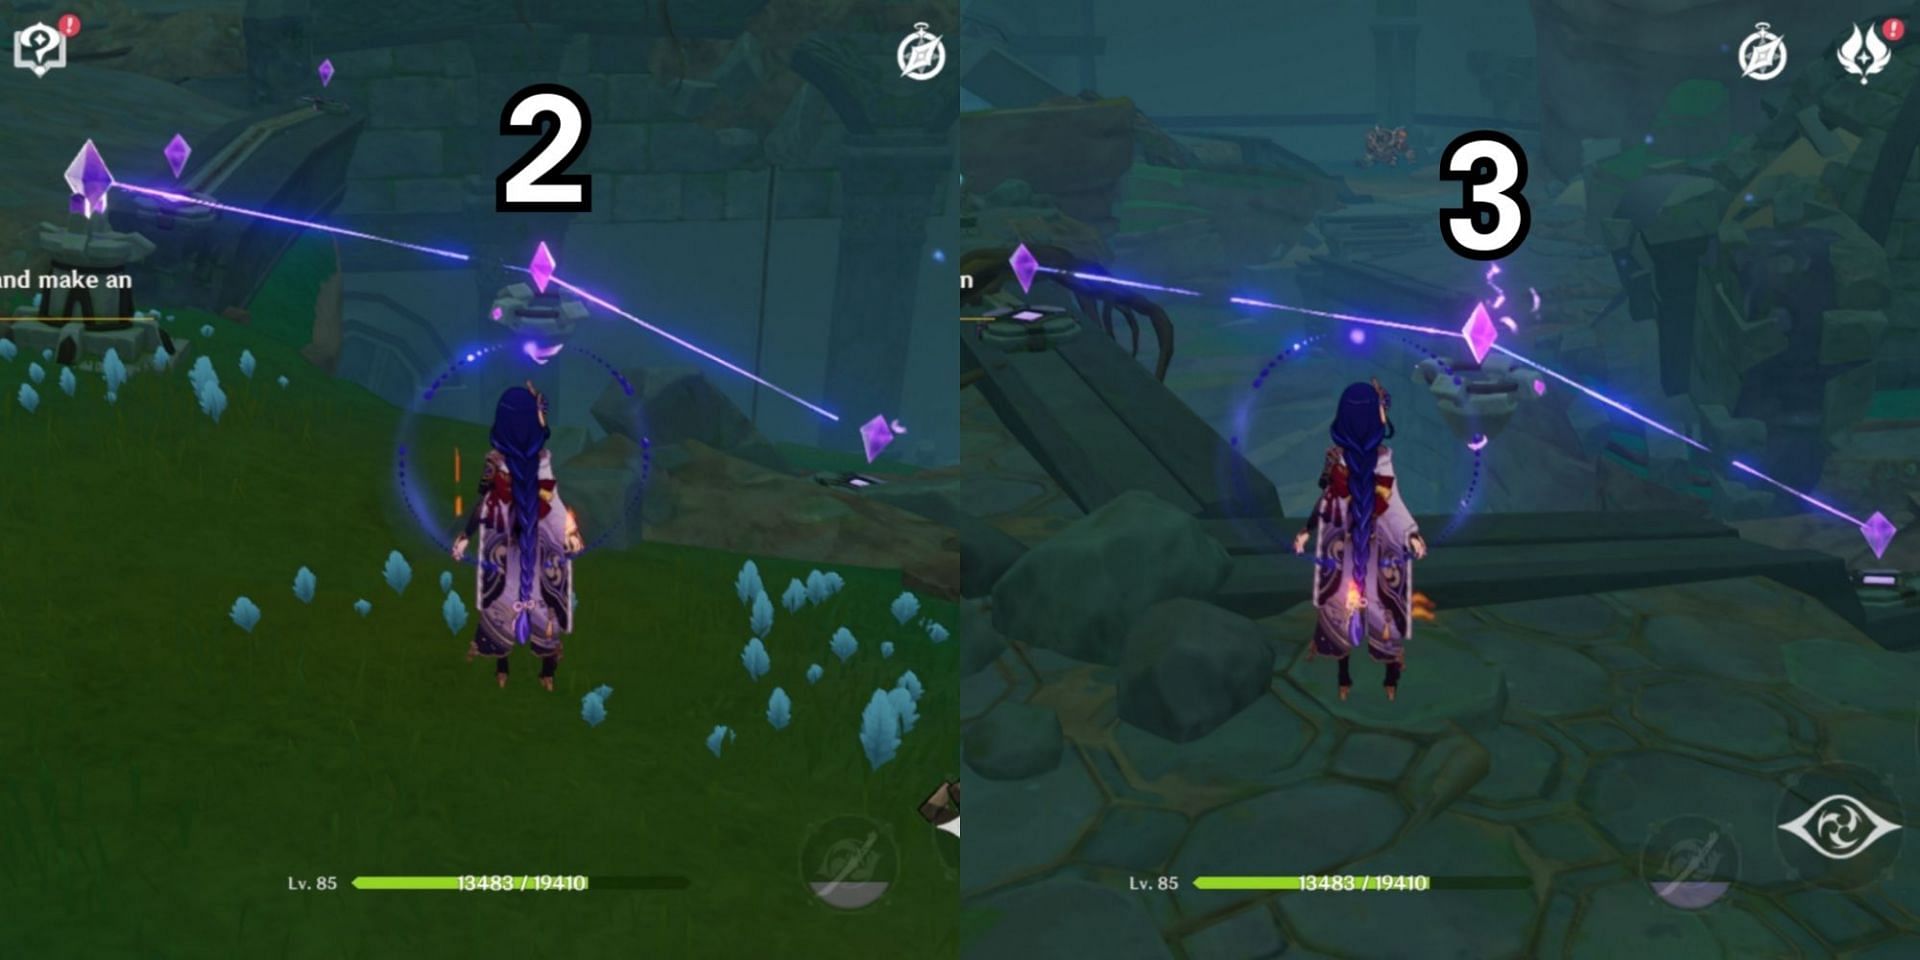
After getting the two Relay Stones, place them between the Crystals on the right side of the door.
If you do the steps correctly, the mechanism will unlock, and you can activate it to open the door. Upon entering, you will immediately notice the second feather next to a Ruin Guard and the third one a little further away. After defeating the Ruin Guard, touch the second one and follow the third one. The third feather will pass through another locked round door.
Just like before, you need to complete the puzzle. First, you have to guide three Seelie back to their Courts. This will drain the water hole nearby and allow you to finish the Relay Stone puzzle.
The first Seelie is floating on a broken column.
The second one is in a large chamber that is accessible by stairs behind the Seelie statues.
The third Seelie is hidden behind a pile of rock on the left side of the room. You can utilize Elemental Sight to find the rocks quickly. After destroying it, follow the Seelie until it reaches its Court.
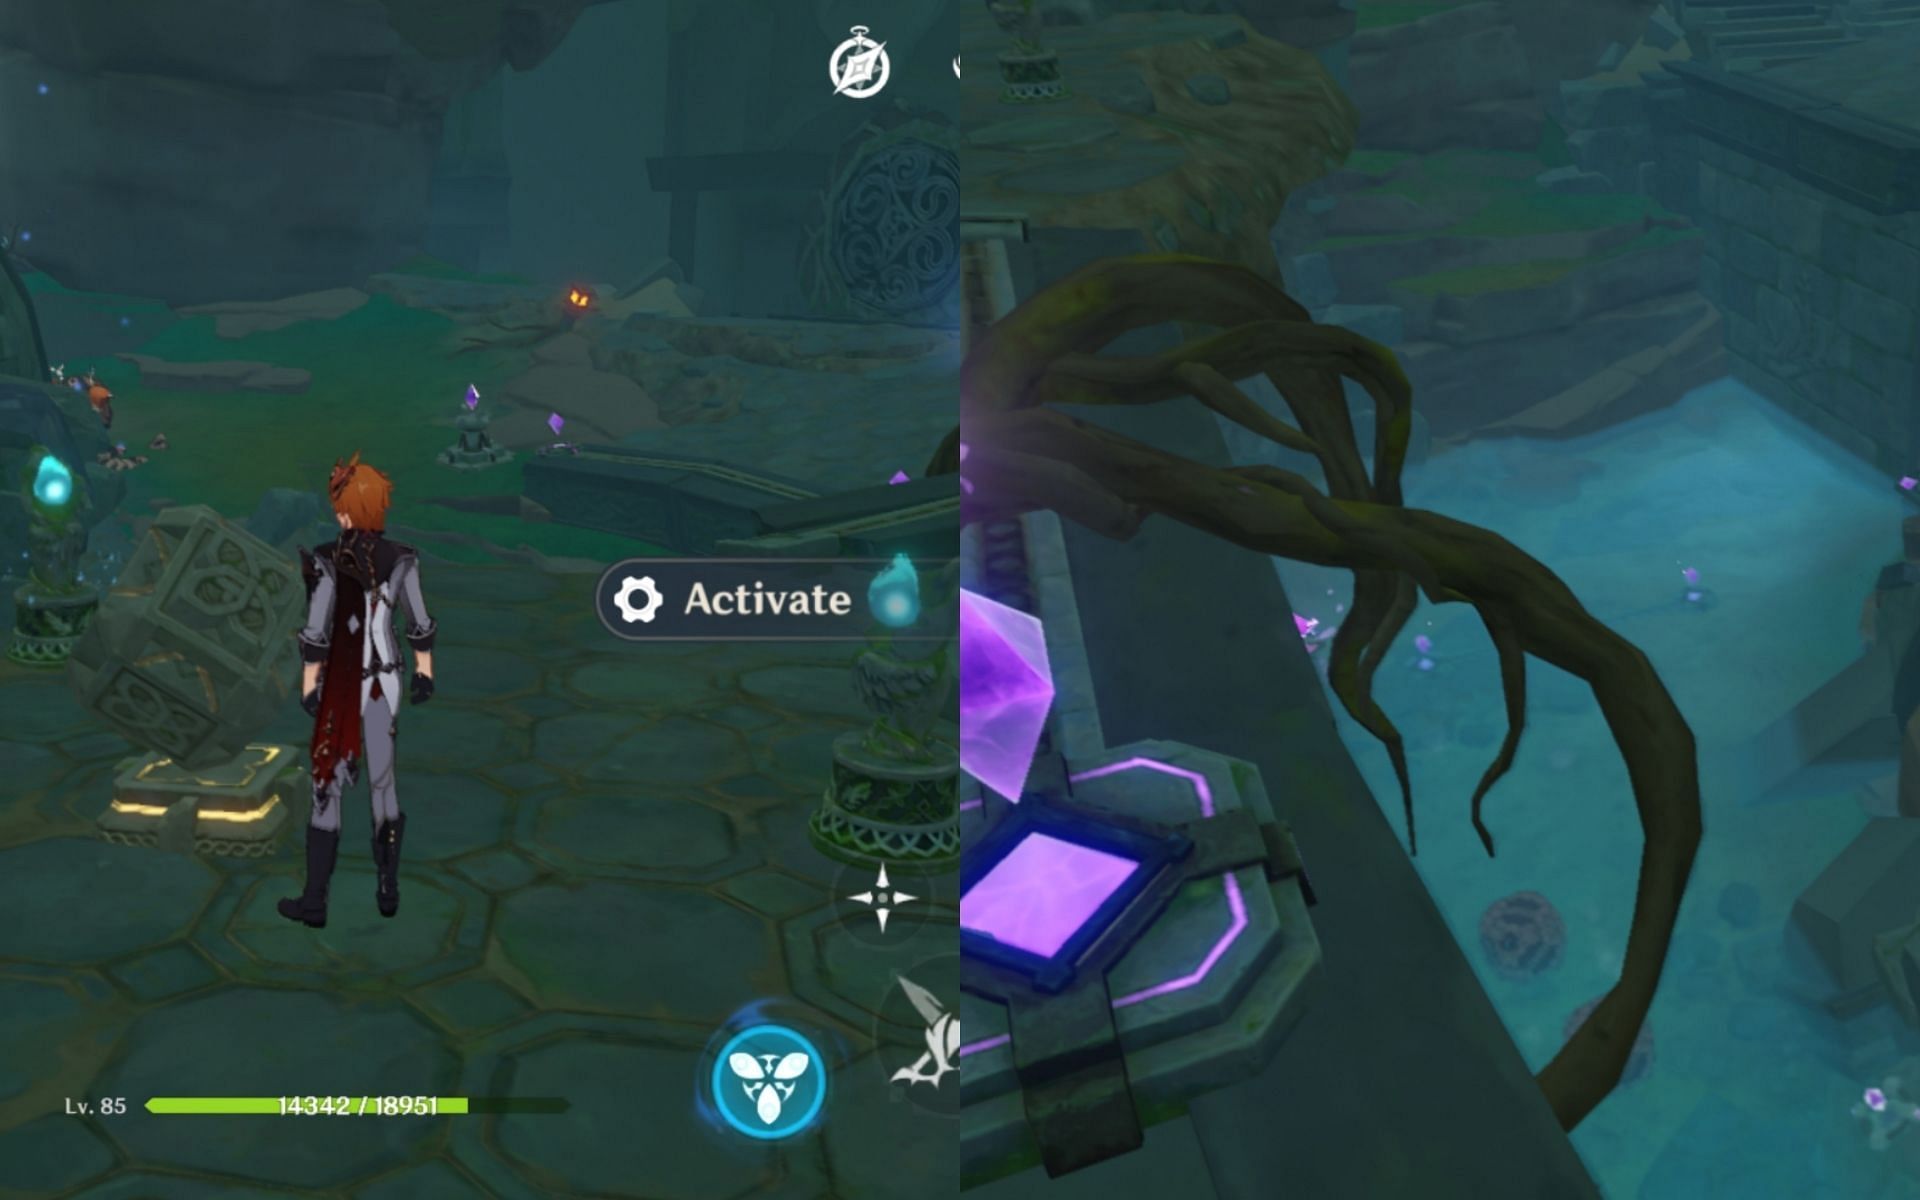
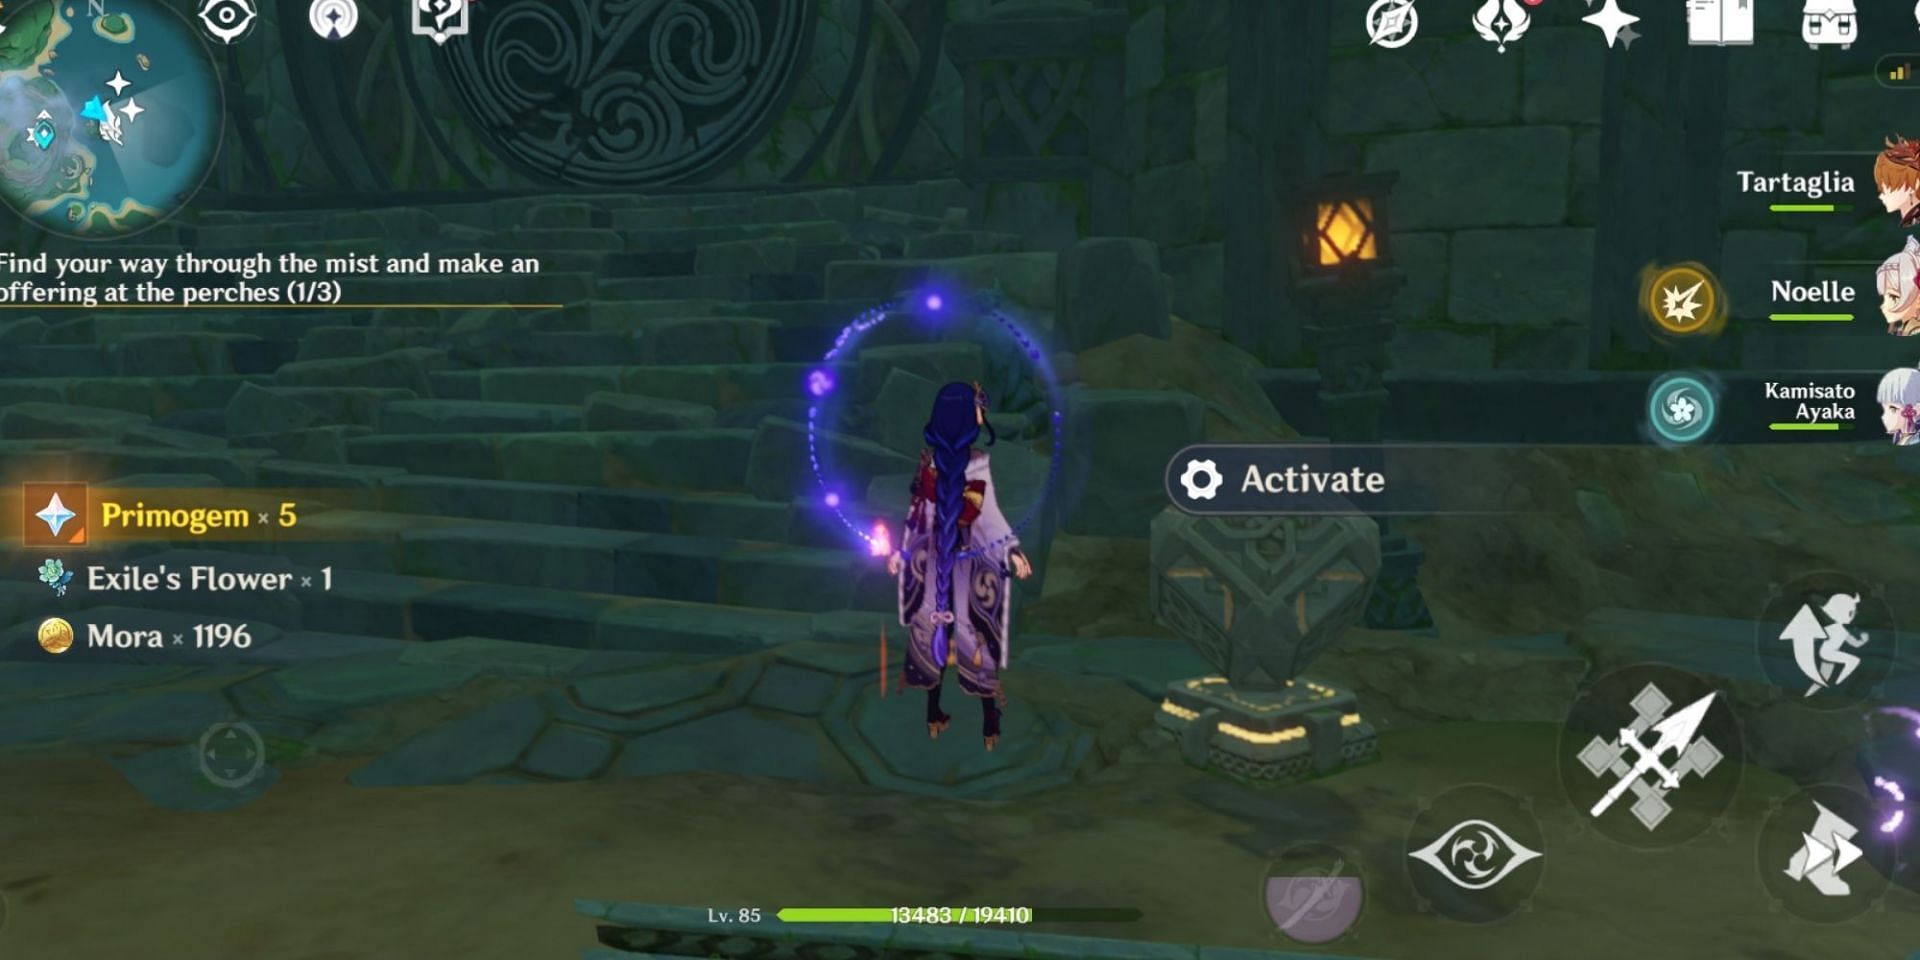
Activate the unlocked mechanism and the water level will go down.
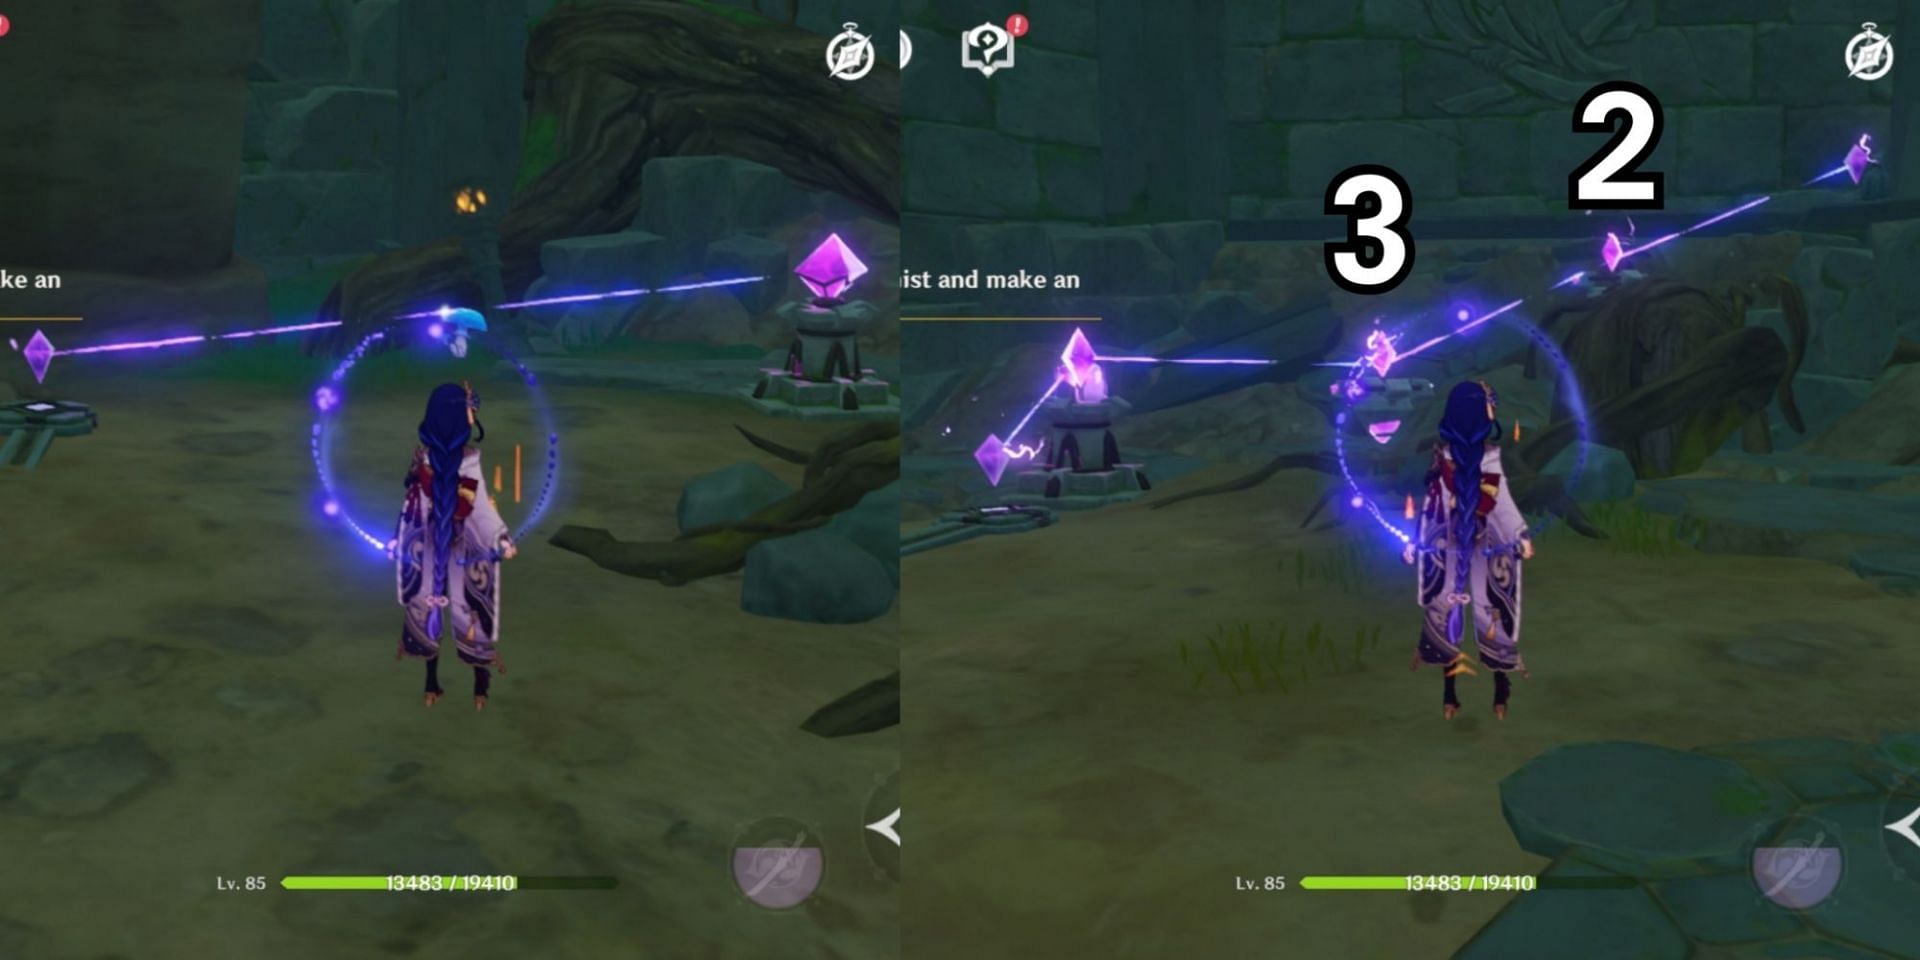
Down by the draining hole, there are three Relay Stone puzzles. Two to the left of the Seelie Court and one to the right. When descending, you will see a Relay Stone stuck in the wall. Take it, then go to the Discharged Stone on the right and take the other Relay Stone.
Place the first Relay Stone in the marked location, between the two Crystals.
Now, climb up and enter the destroyed dome. There will be a Relay Stone to grab and a Remarkable Chest to open.
Place one of the Relay Stones to the left of the door and the last Relay Stone on the opposite side.
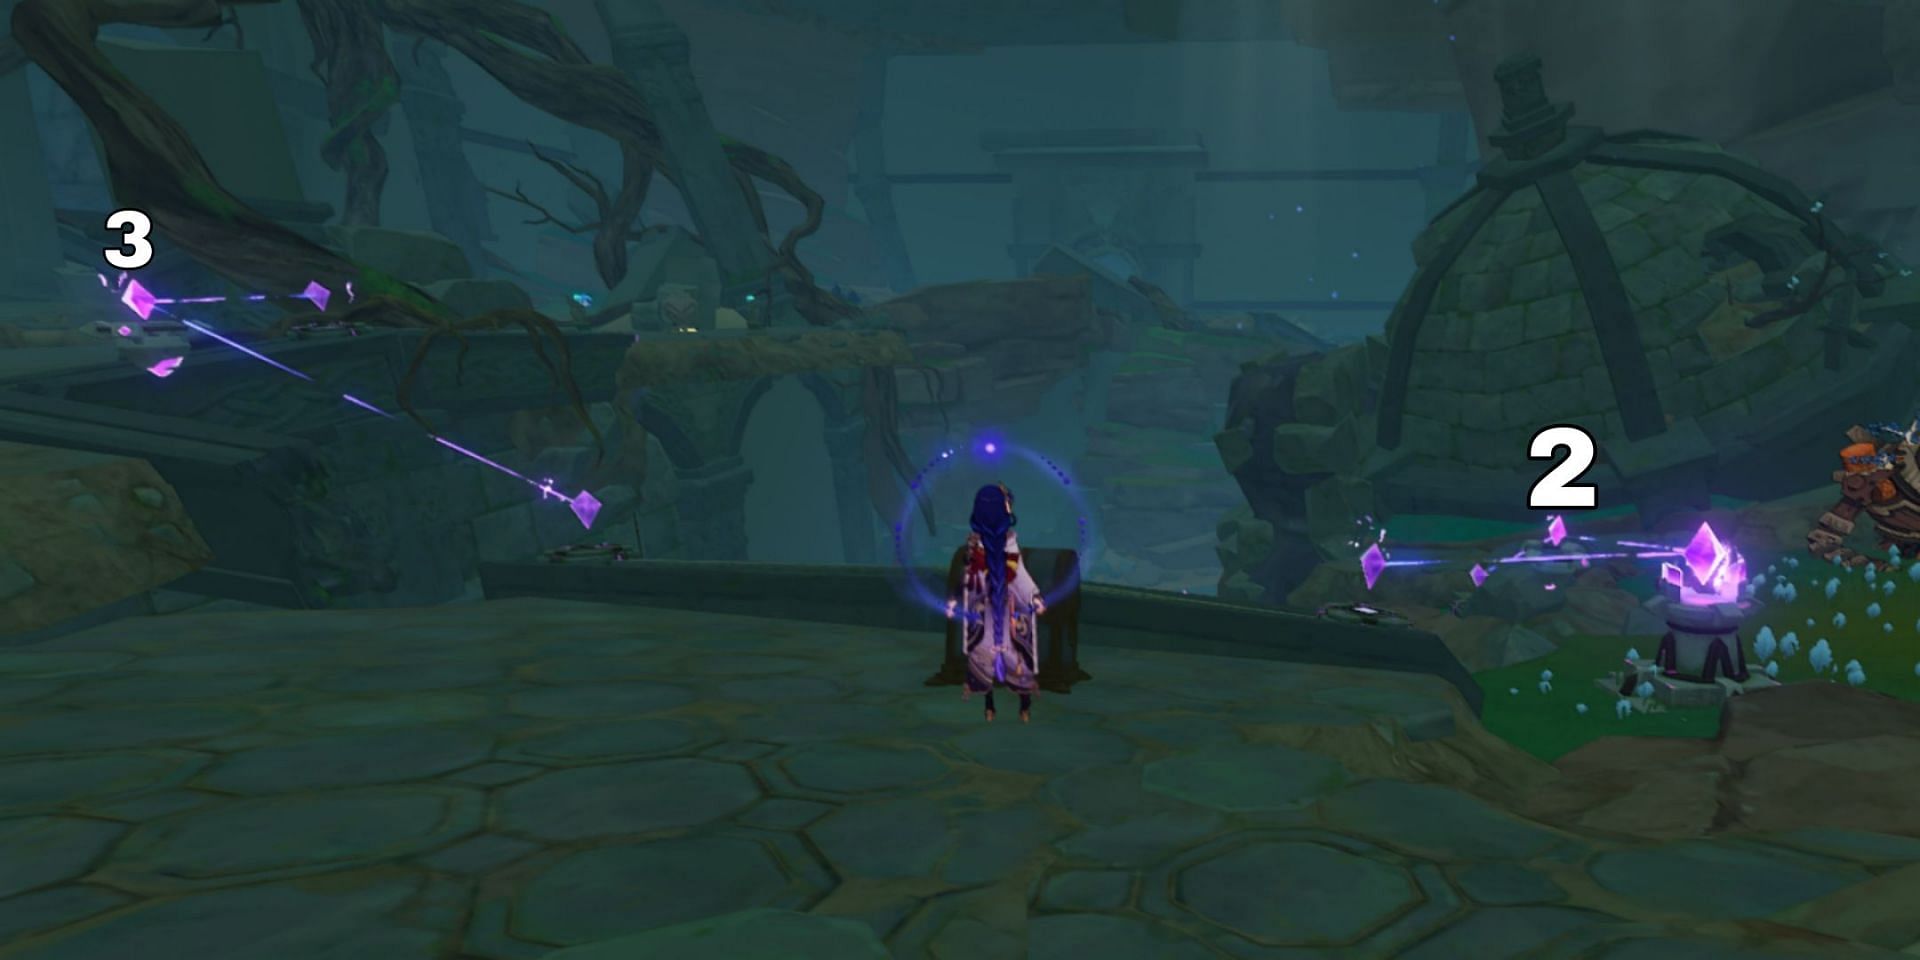
If you connect all the stones correctly, a Luxurious Chest will spawn, and the door can now be opened.
All that's left is to activate the mechanism and touch the last feather. Return to Ruu and finish the quest and watch the mist disappear.

Are you stuck on today's Wordle? Our Wordle Solver will help you find the answer.