
'%20x='0'%20y='0'%20height='100%25'%20width='100%25'%20%0A%20%20%20%20%20%20%20%20%20%20xlink%3Ahref='data:image/jpg;base64,/9j/2wBDAAYEBQYFBAYGBQYHBwYIChAKCgkJChQODwwQFxQYGBcUFhYaHSUfGhsjHBYWICwgIyYnKSopGR8tMC0oMCUoKSj/2wBDAQcHBwoIChMKChMoGhYaKCgoKCgoKCgoKCgoKCgoKCgoKCgoKCgoKCgoKCgoKCgoKCgoKCgoKCgoKCgoKCgoKCj/wgARCAAGAAoDASIAAhEBAxEB/8QAFQABAQAAAAAAAAAAAAAAAAAABQb/2gAIAQEAAAAAkDv/xAAUAQEAAAAAAAAAAAAAAAAAAAAC/9oACAECEAAAAB//xAAUAQEAAAAAAAAAAAAAAAAAAAAF/9oACAEDEAAAAEf/xAAhEAABAgYCAwAAAAAAAAAAAAACAQMABAUREiEHIhRBUf/aAAgBAQABPwCYrFaprBu+YyyTOUs65Ltd3dZZ9rohWH19WA5IcUBU5YzK2yU9rH//xAAXEQADAQAAAAAAAAAAAAAAAAAAAiED/9oACAECAQE/AMIkP//EABgRAAIDAAAAAAAAAAAAAAAAAAABAgUU/9oACAEDAQE/ALeK0H//2Q=='%3E%3C/image%3E%3C/svg%3E)
Valorant is a tactical first-person shooter game that has an array of agents with unique abilities. It relies a lot on strategizing before getting into gunfights. Killjoy is one of the best agents in Valorant, belonging to the Sentinel agent type.
In Valorant, Killjoy’s kit is centered around laying traps to improve the team’s defenses. Molly, Alarm Bot and Turret are crucial in creating setups to have an edge over the other team.
Players with enough nous can capitalize on Killjoy's abilities. This article attempts to highlight some setups on both Sites in Valorant’s latest map, Fracture.
Looking for Crossword hints & solutions? Check out latest NYT Mini Crossword Answers, LA Times Crossword Answers, and Atlantic Crossword Answers
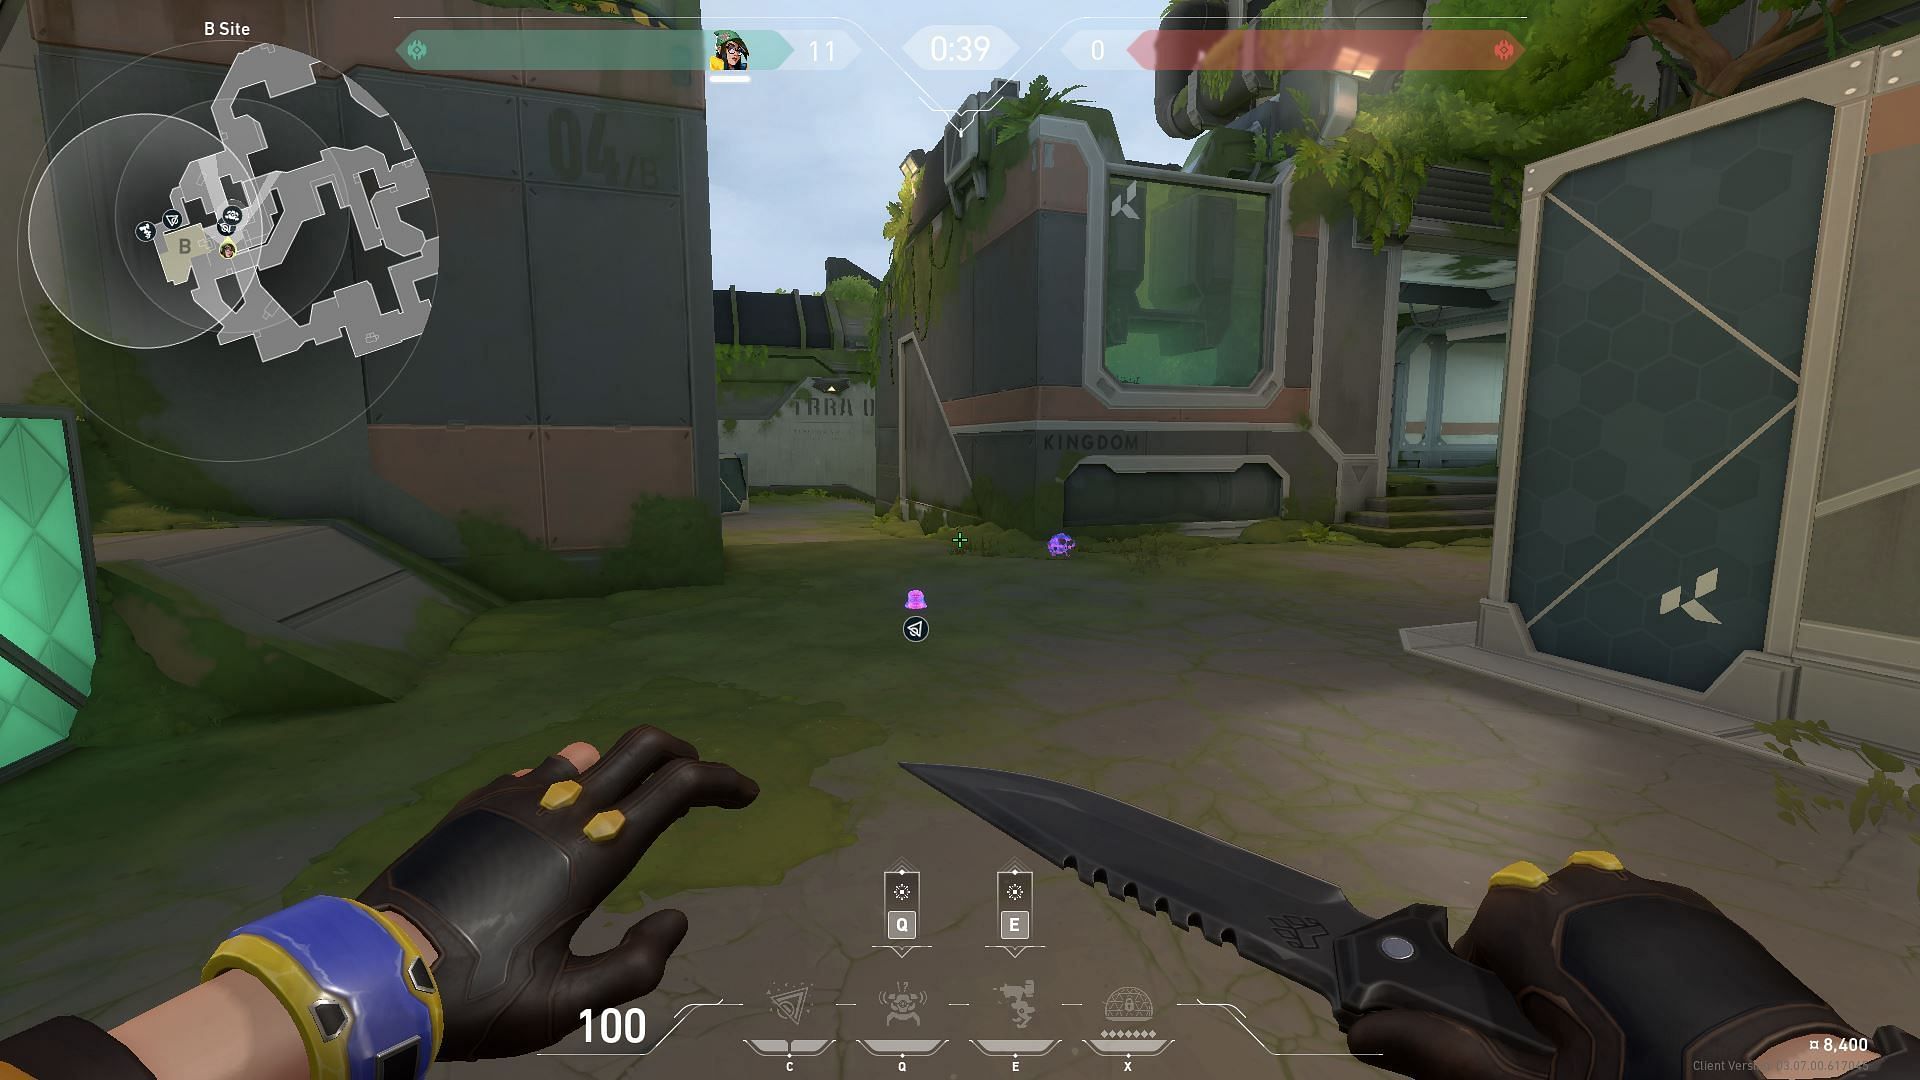
Valorant: Prudent Killjoy setups on Site A and B in Fracture
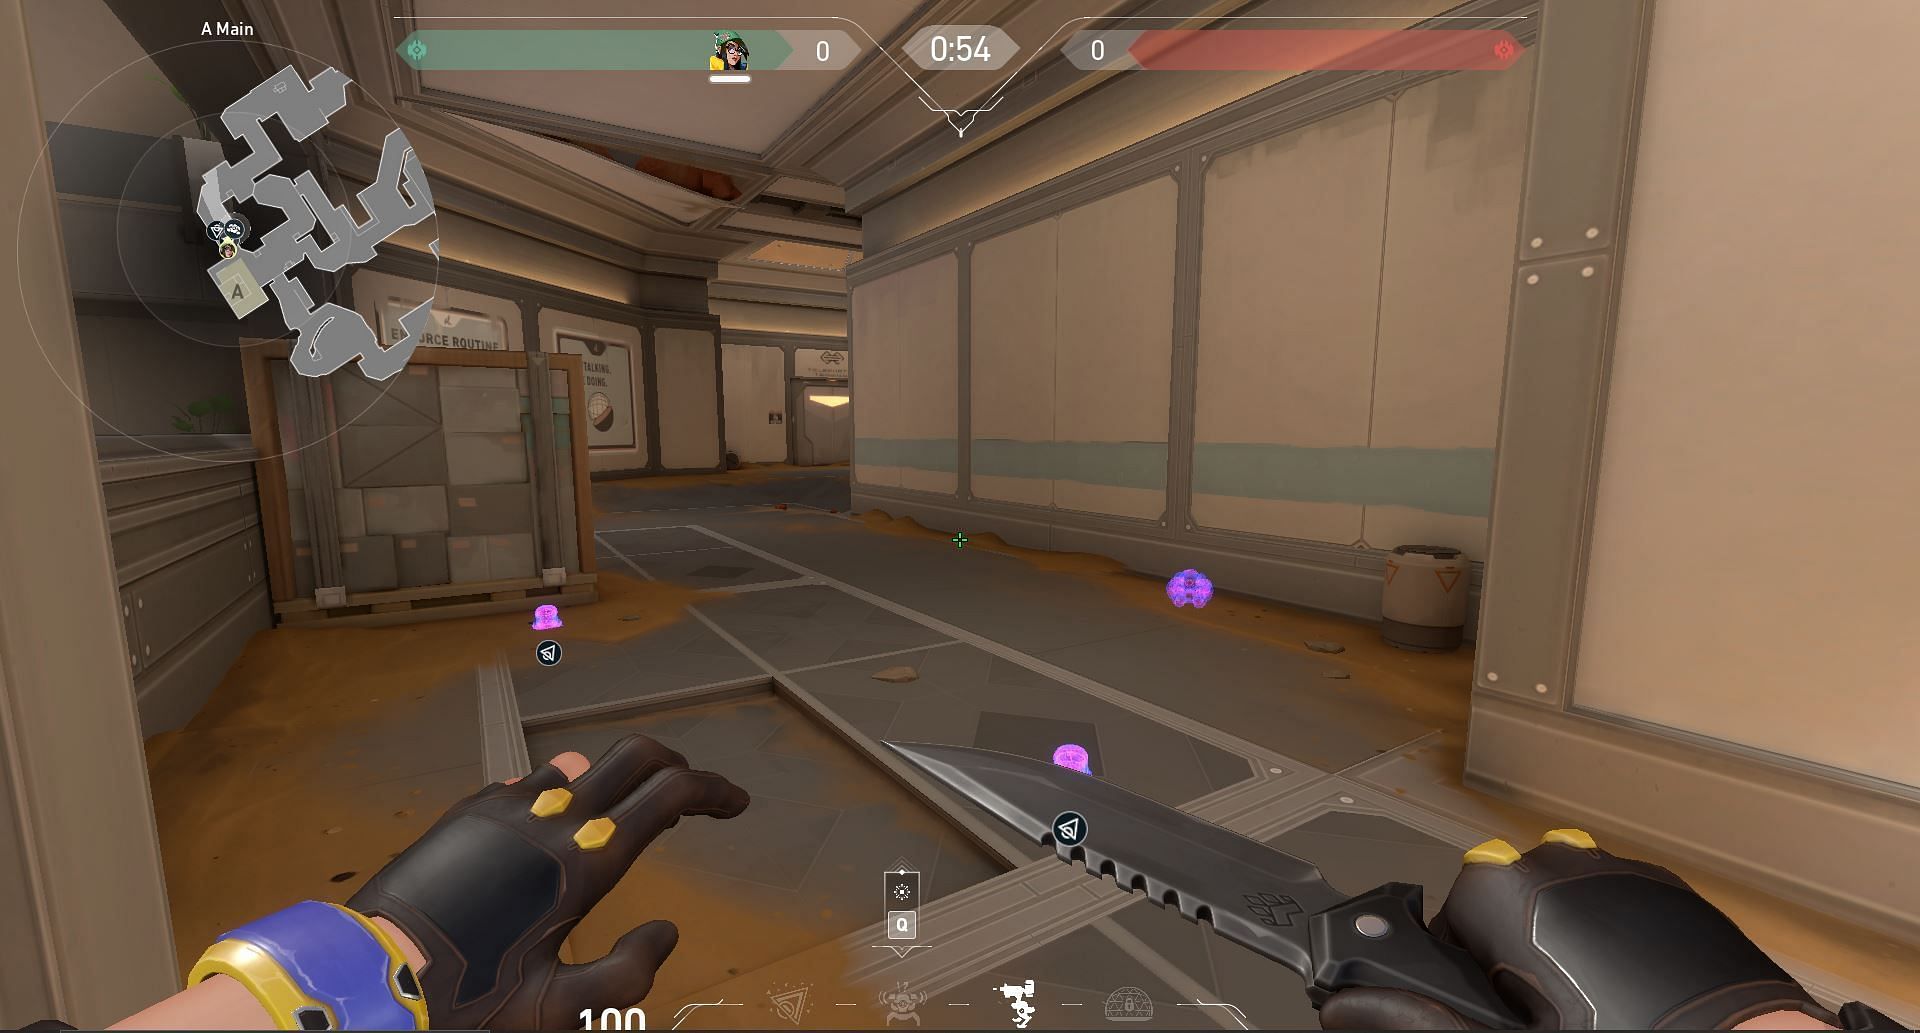
Valorant: Killjoy setup on Site A in Fracture
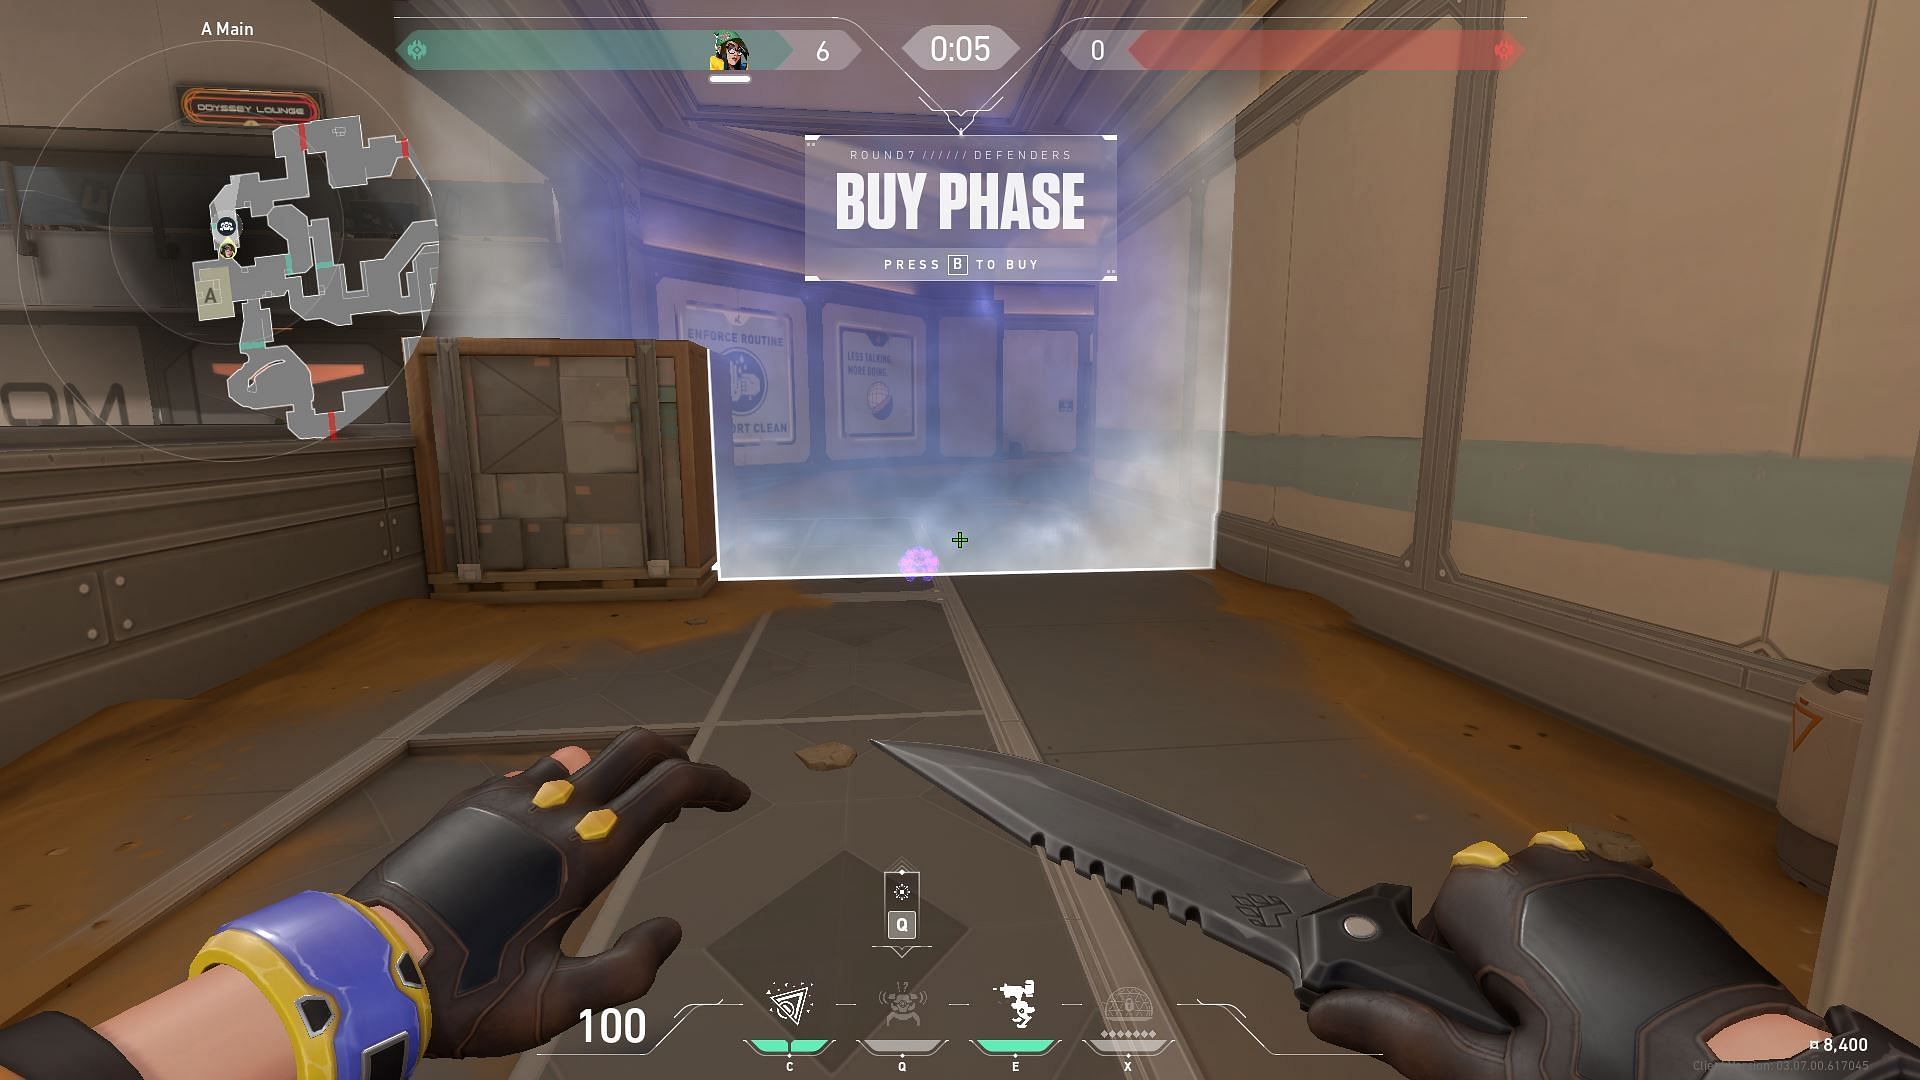
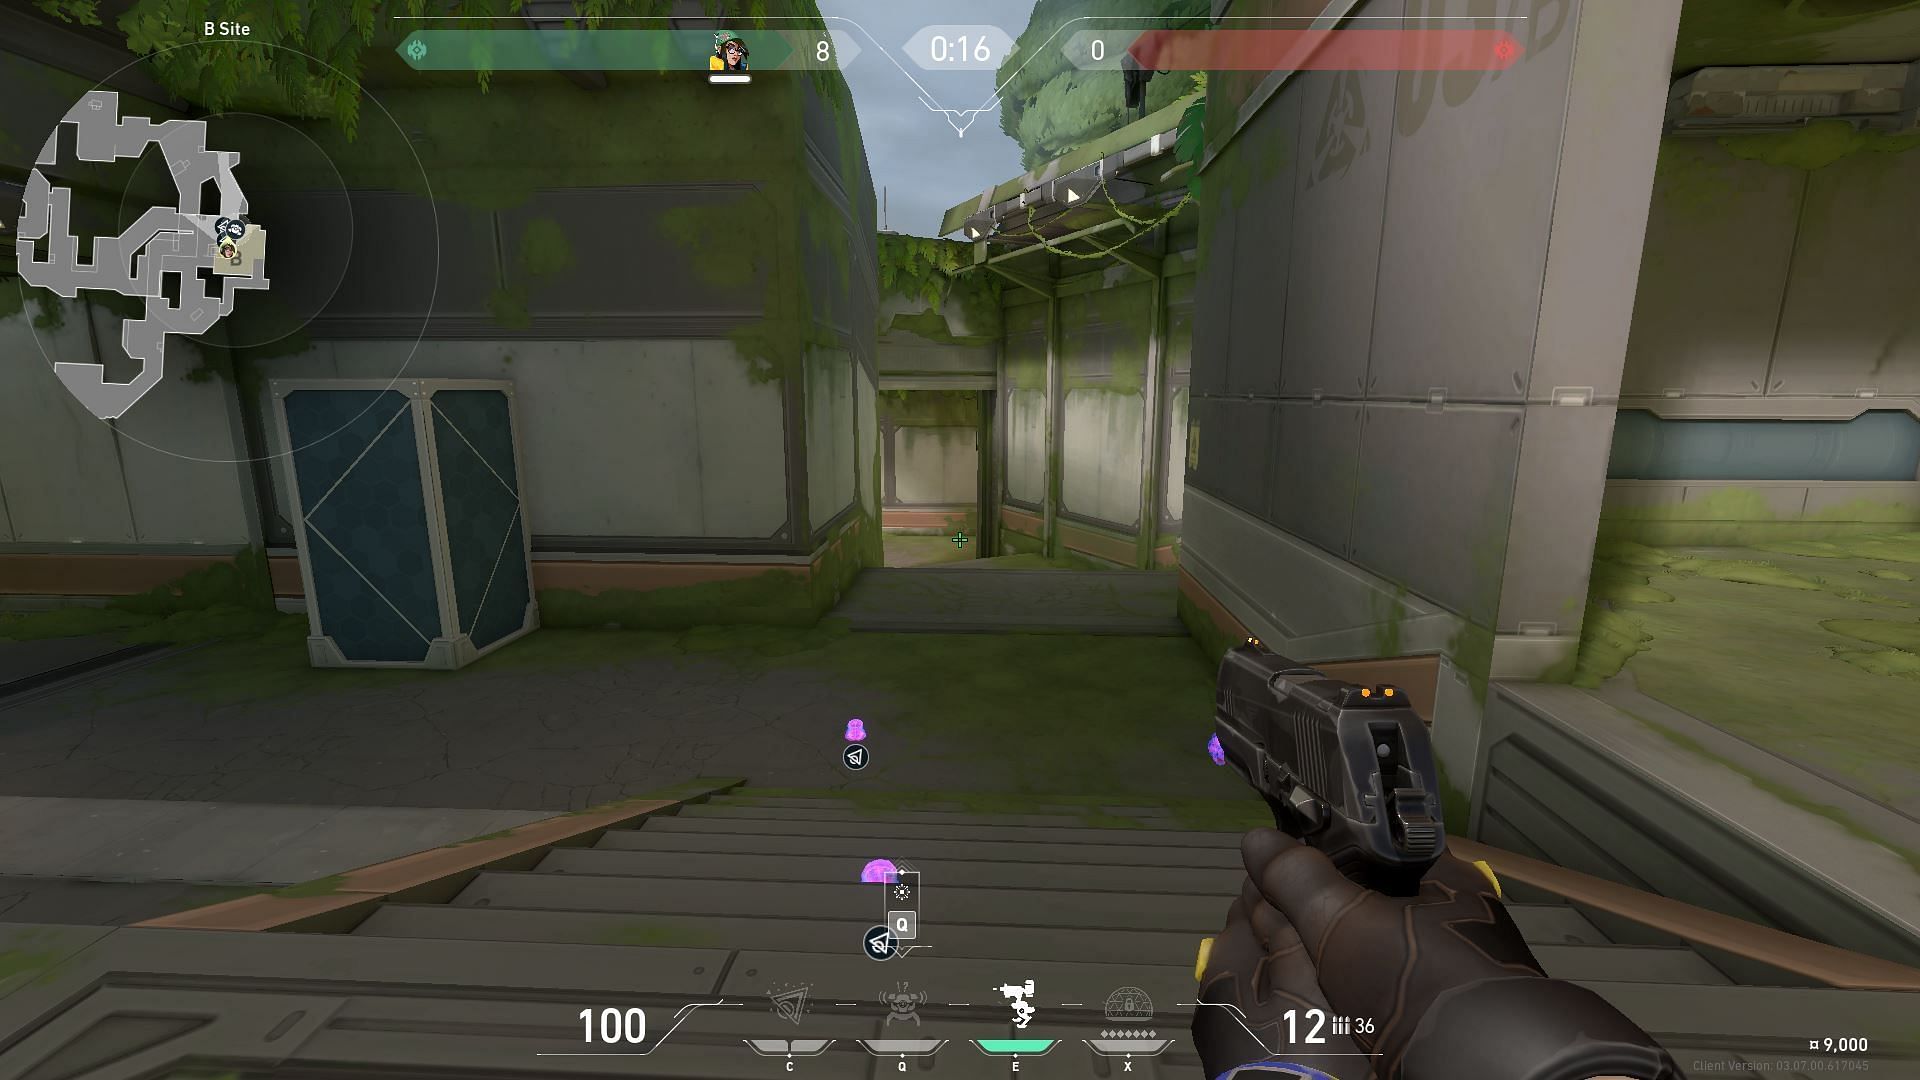
In Site A Main, players can set up two Mollies and one Alarm bot that will be helpful in getting an early kill. Even if opponents are able to avoid the Alarm Bot, the Turret will indicate their position. One can then set off the Molly.
Players can position themselves under the Site A platform and take the fight after eliminating the enemy.
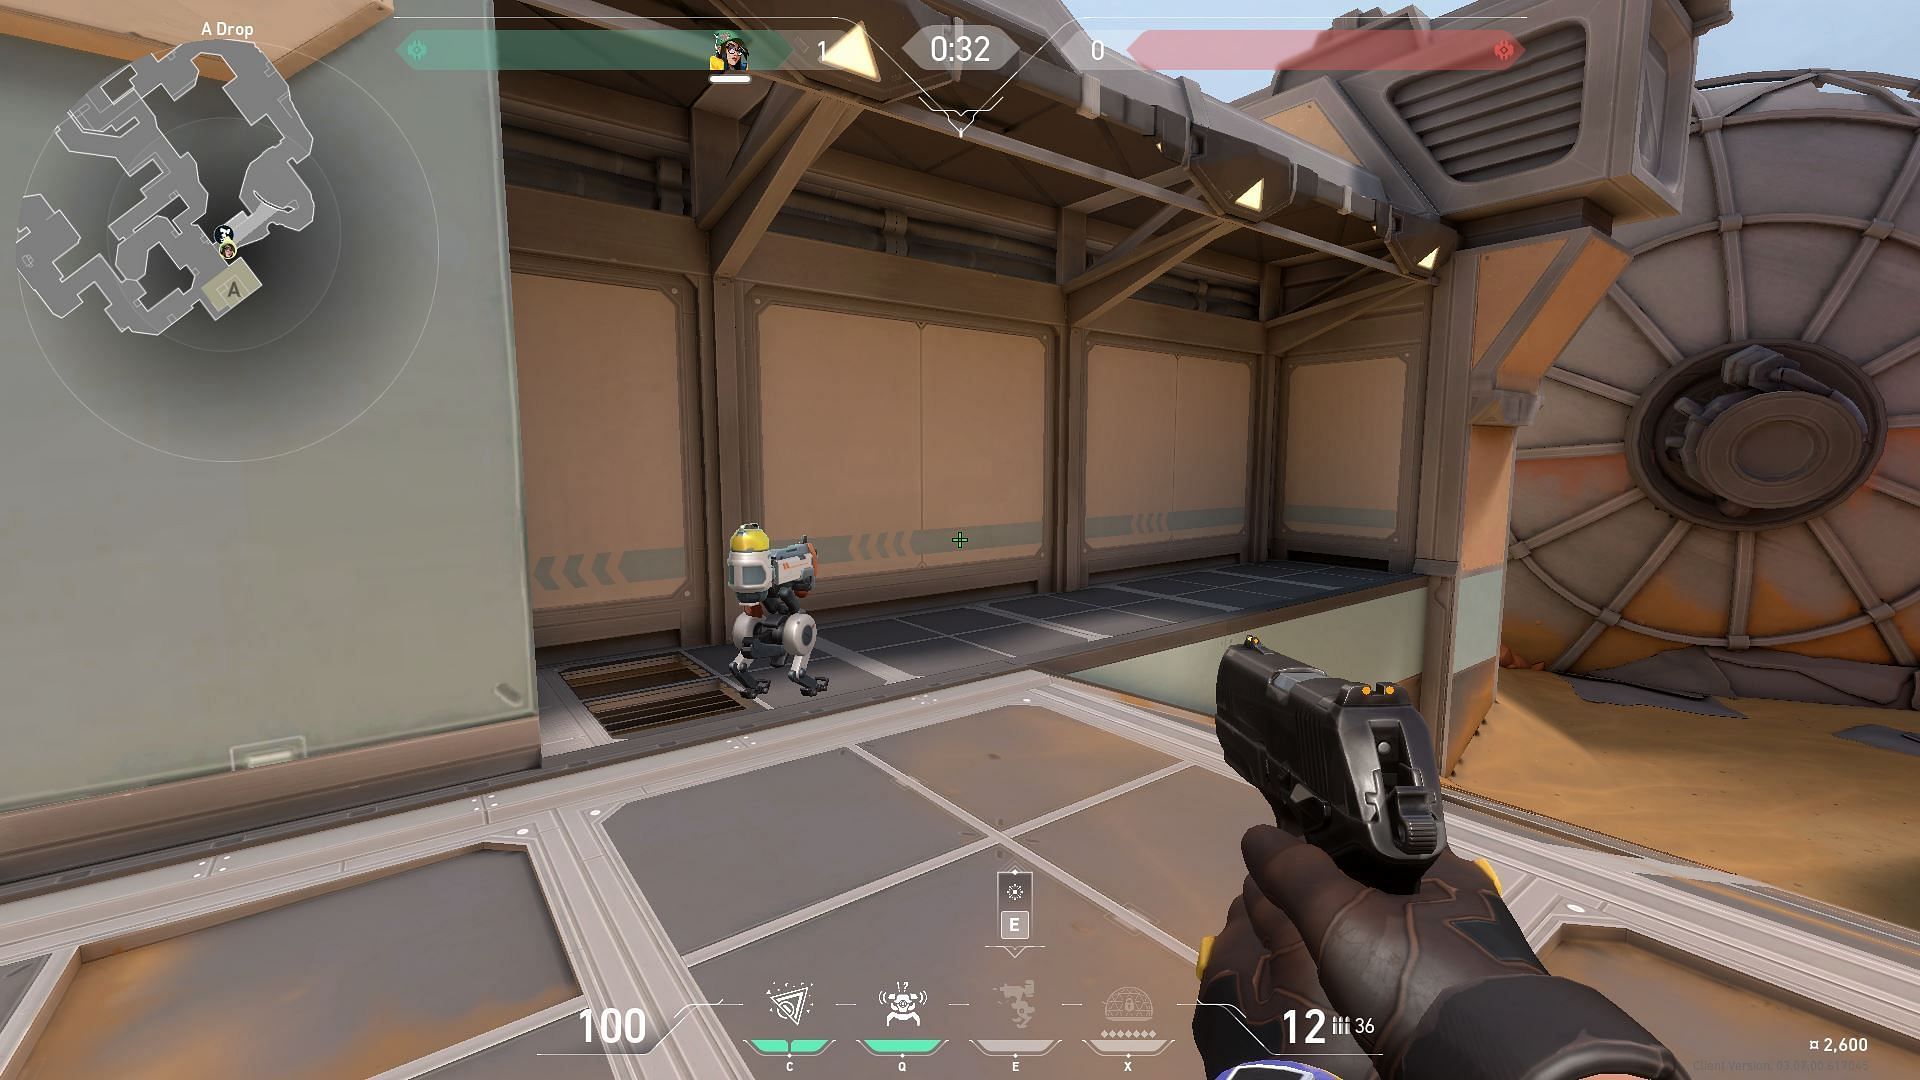
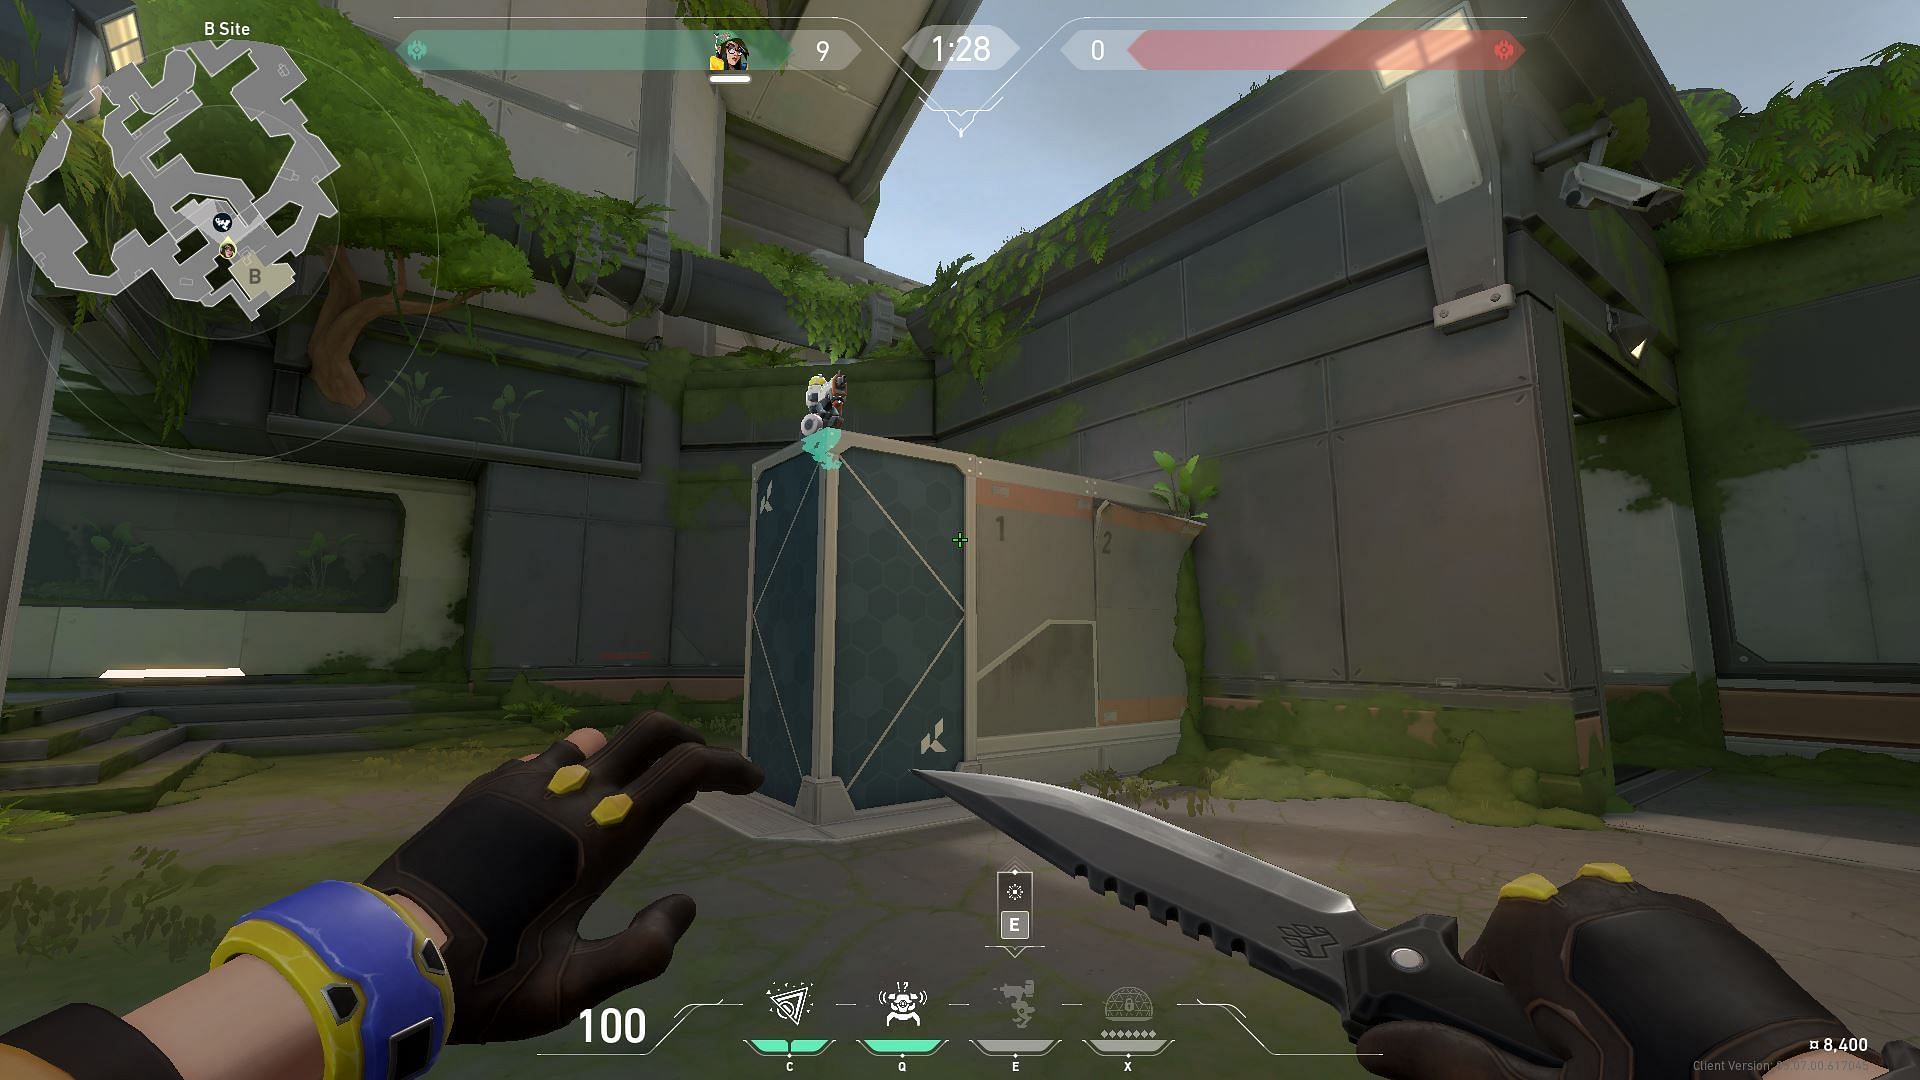
The next setup for the Valorant Sentinel will have an Alarm Bot in A Main, but the player needs to be on dish, due to the exposure. Molly should be thrown into the tiny space, next to the rocks near the satellite.
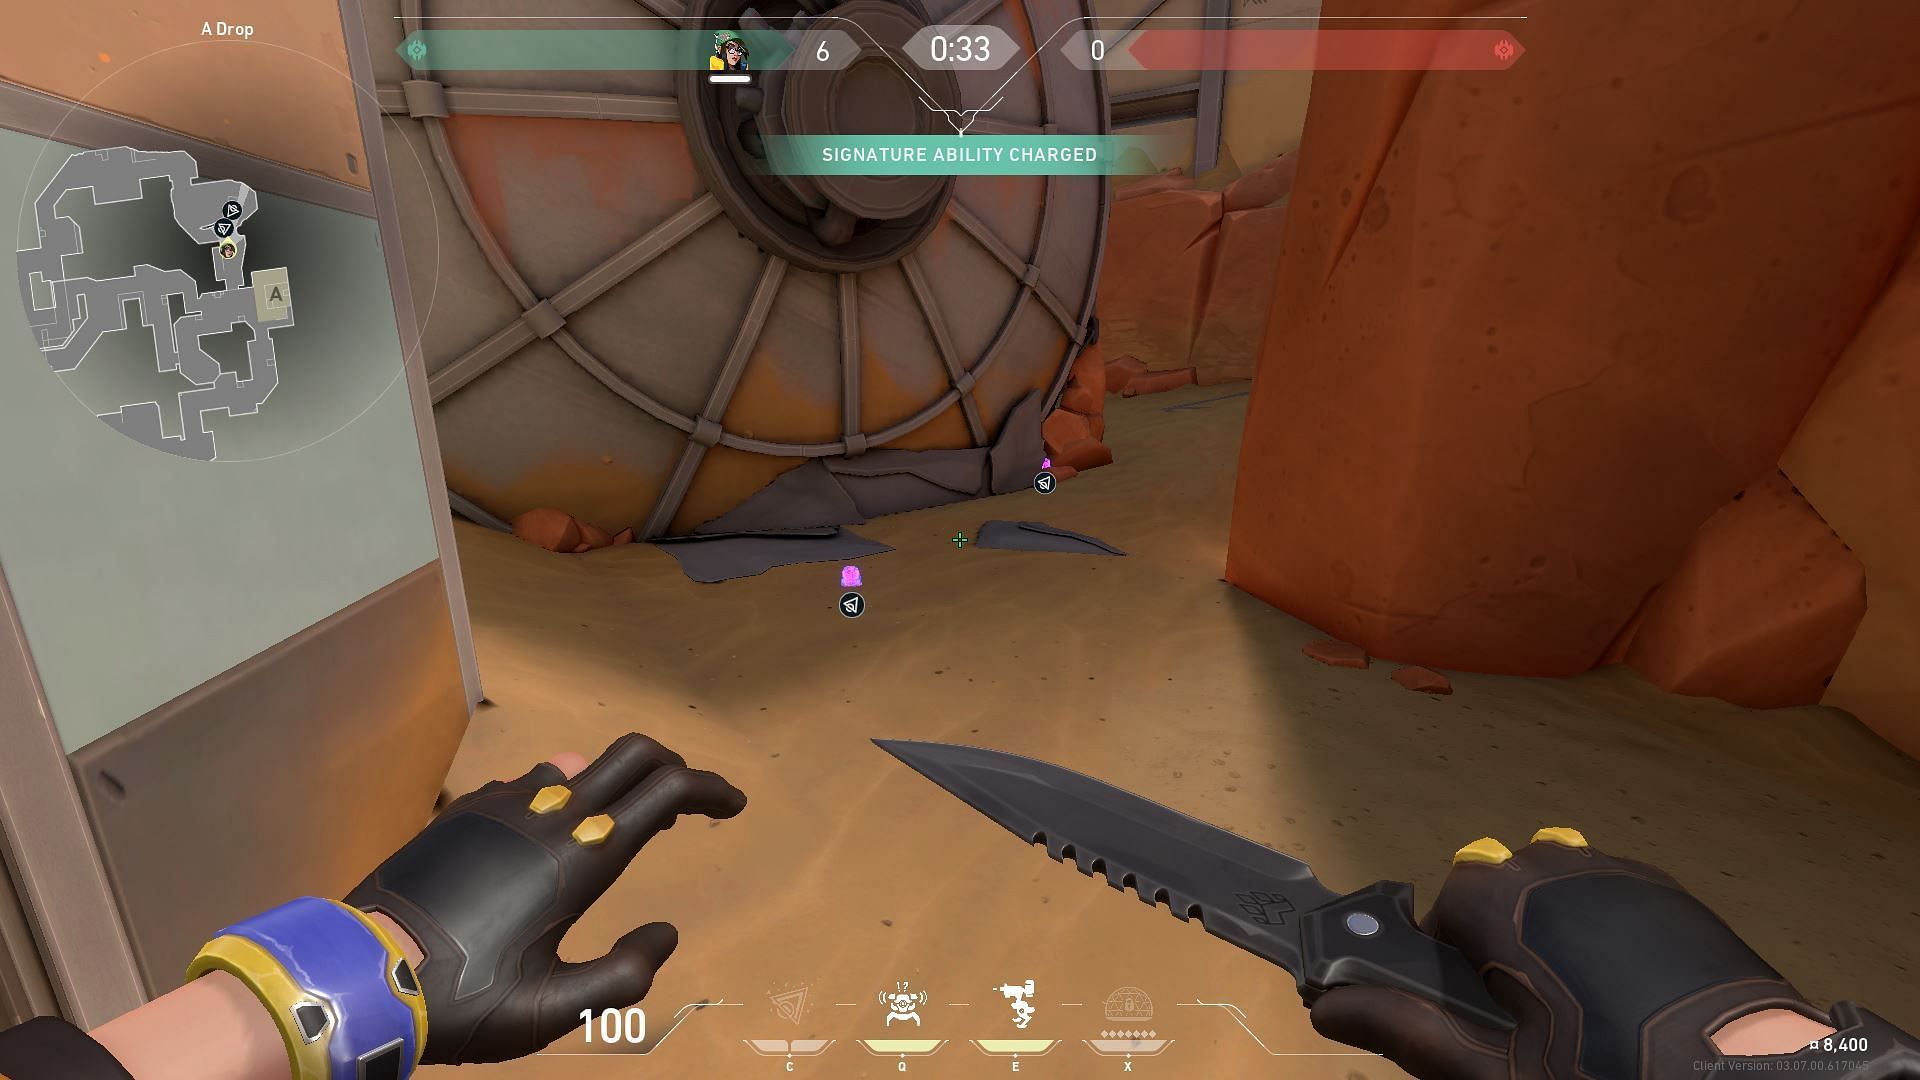
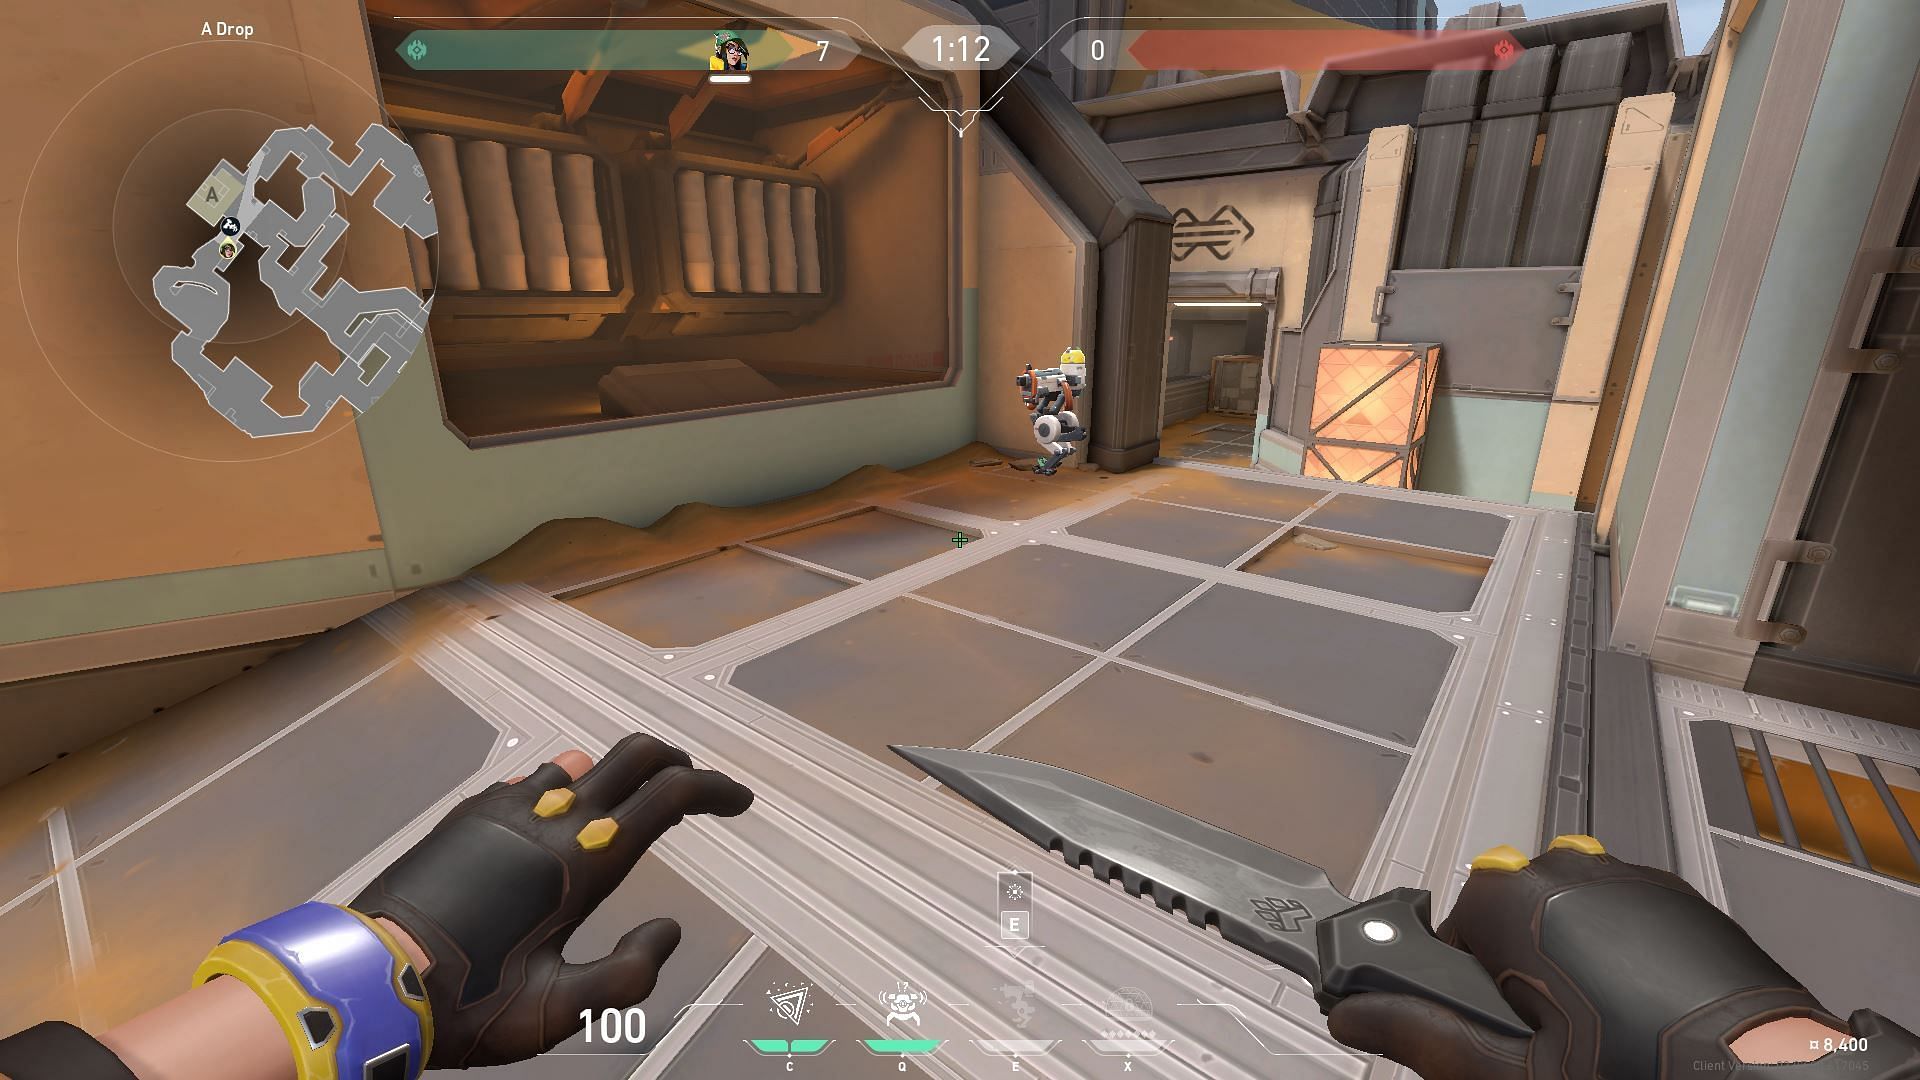
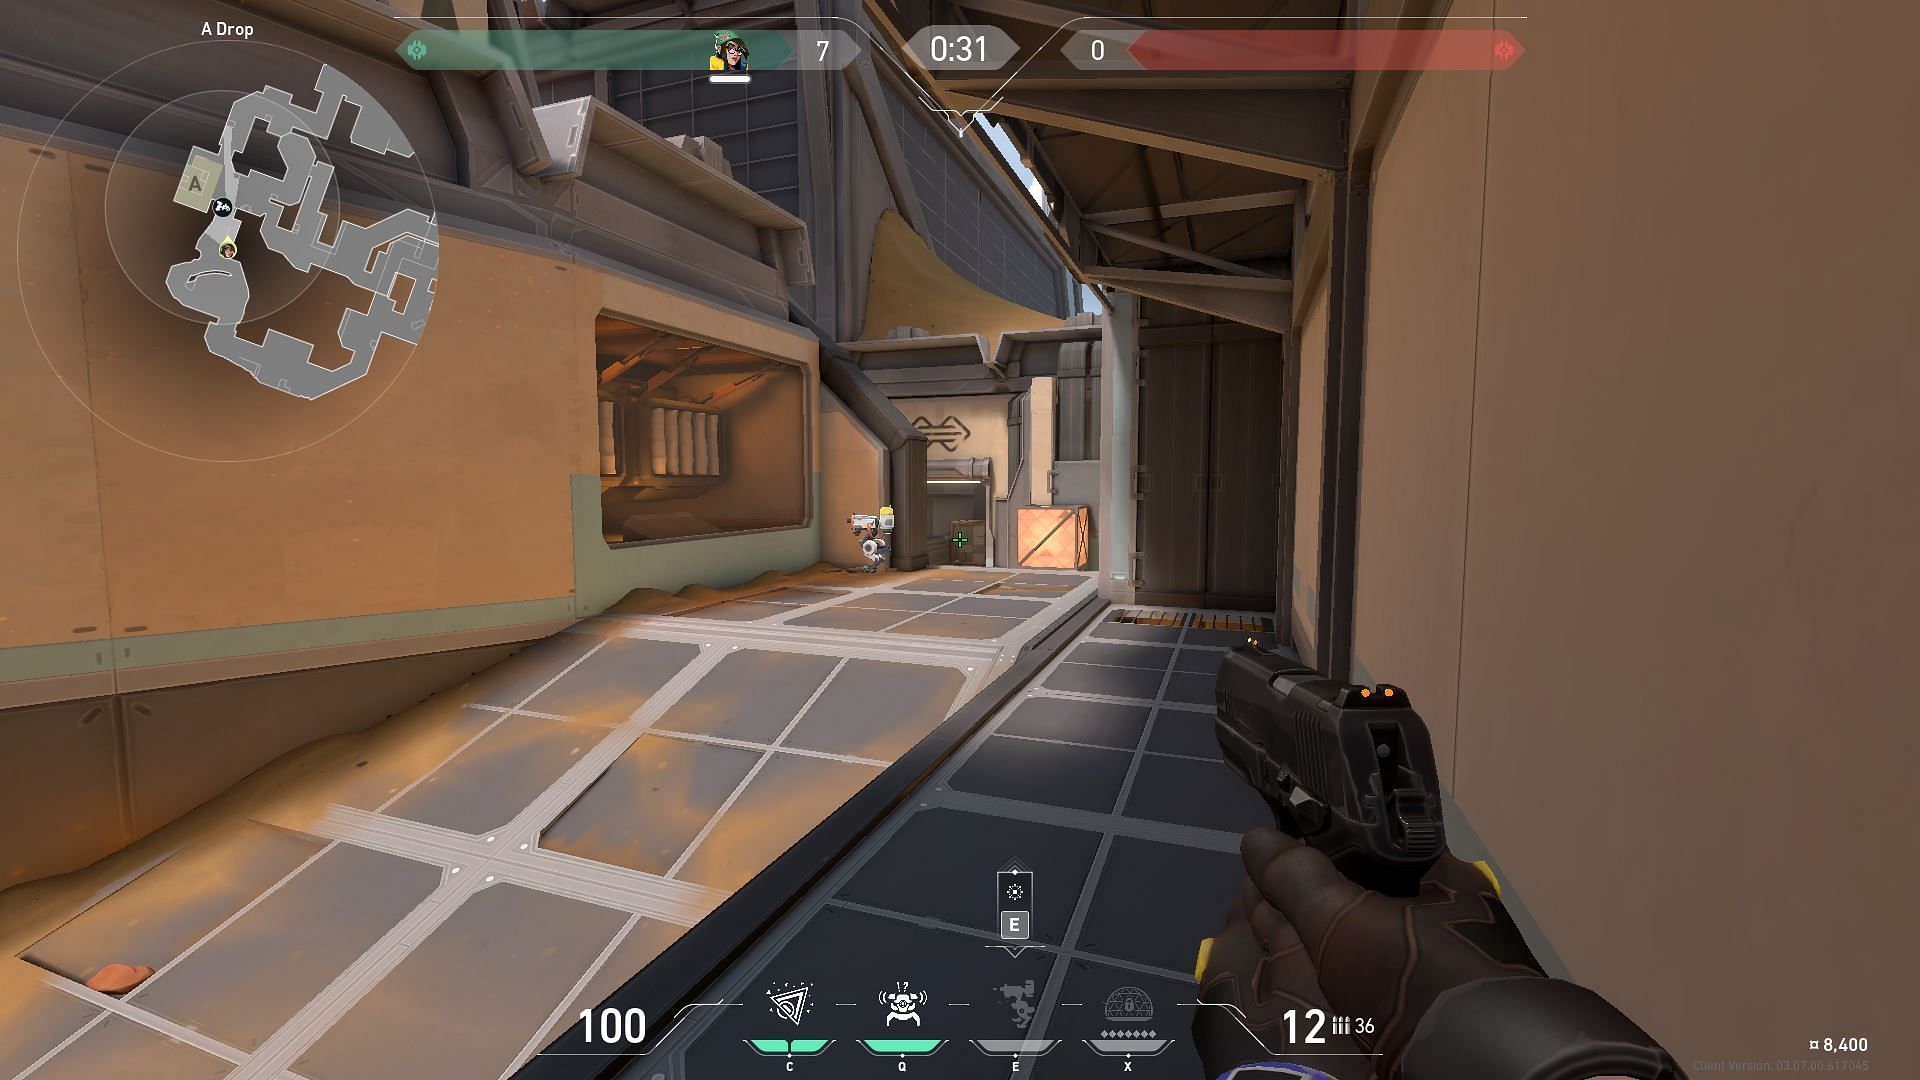
Have another Molly thrown in the general area along with the Alarm Bot right outside the main. Players must position themselves in the corner and have the Turret next to them.
Valorant: Killjoy setup on Site B in Fracture
Valorant players understand that Fracture as a map is great for Killjoy setups on Site A. While Site B might not be as good as Site A in this regard, there are plenty of opportunities that one can create with her abilities.
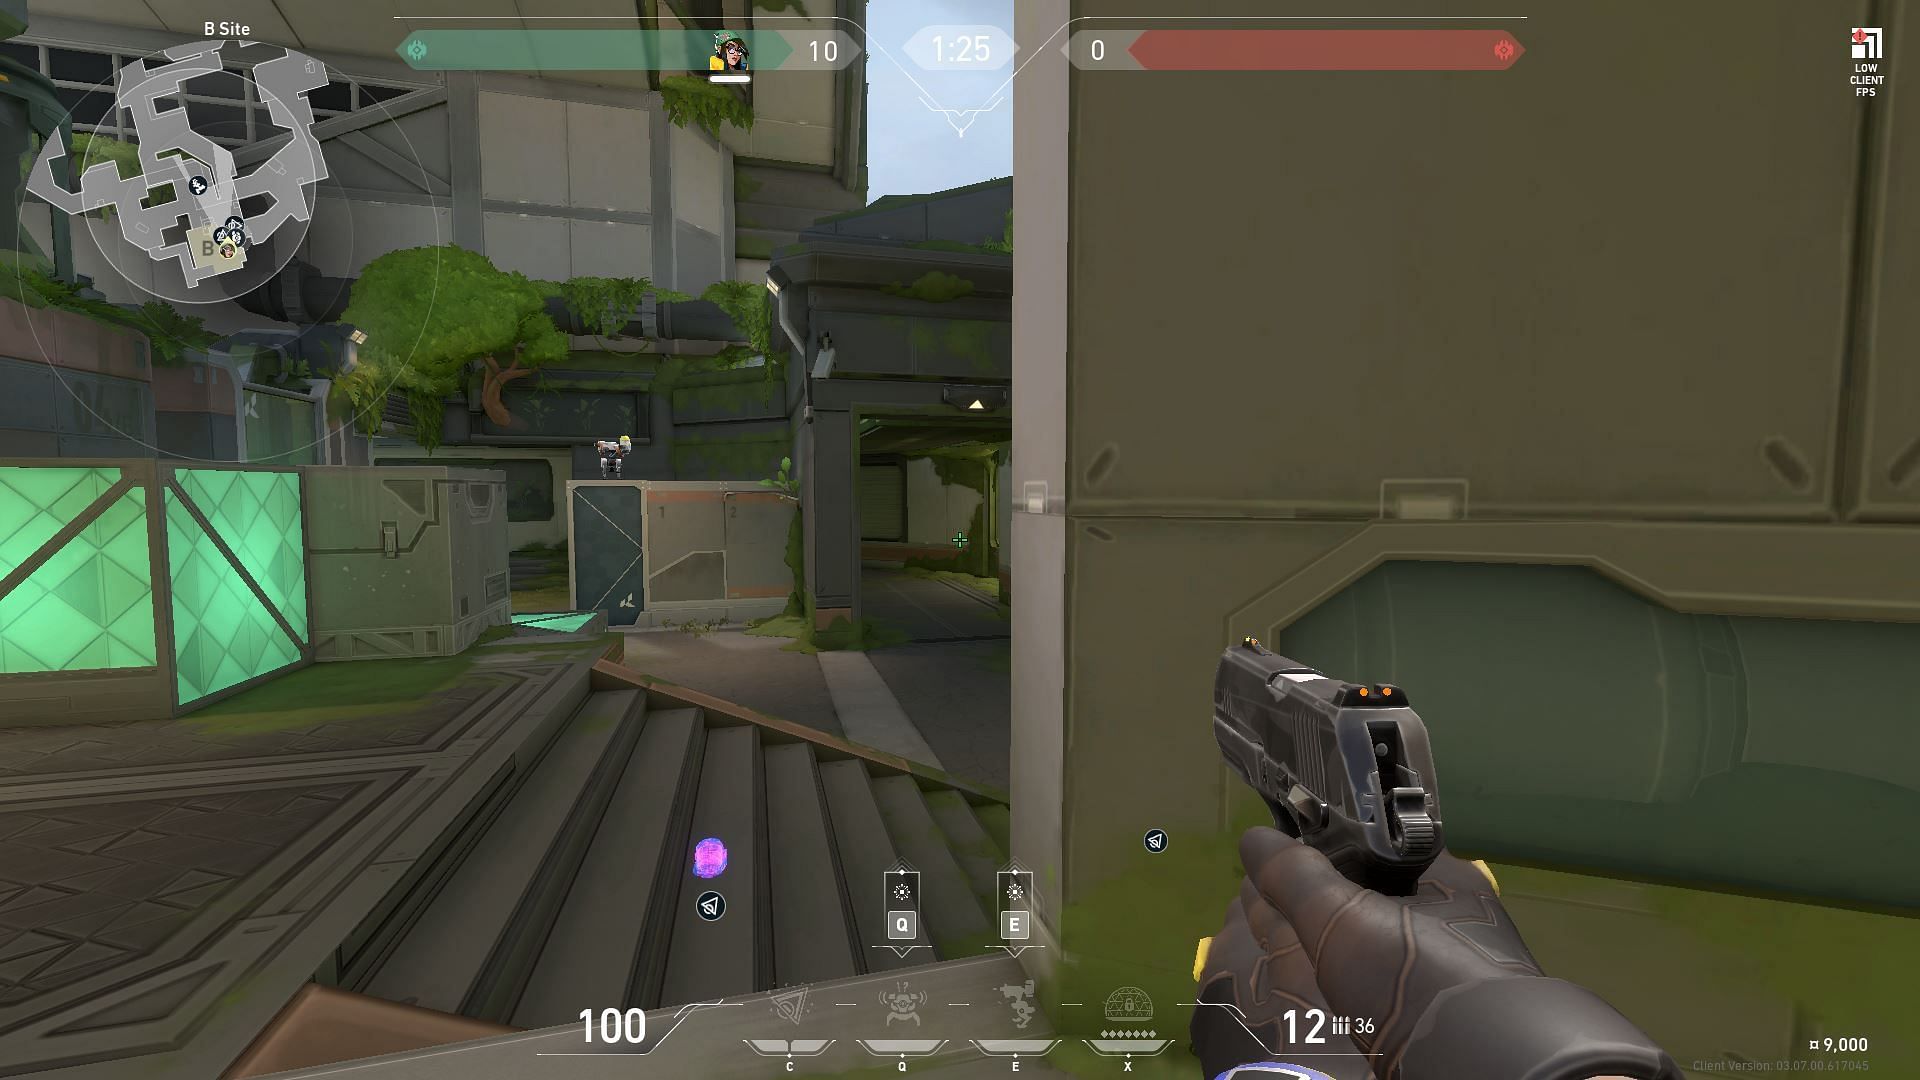
The first setup would have one Molly at the bottom of the stairs and one on the second stair from top. The Alarm bot can be placed on the right, hugging the wall next to the first Molly. Coupled with that, the Turret can be placed on the generator.
This setup is mainly for gathering information instead of kills, as the Turret can help mark the direction of the opponents. For this setup, players must position themselves close to the wall behind the green boxes.
This setup can mark opponents coming upstairs, moving from Arcade to Tower or Arcade to Site. Players must try and isolate the fight downstairs.
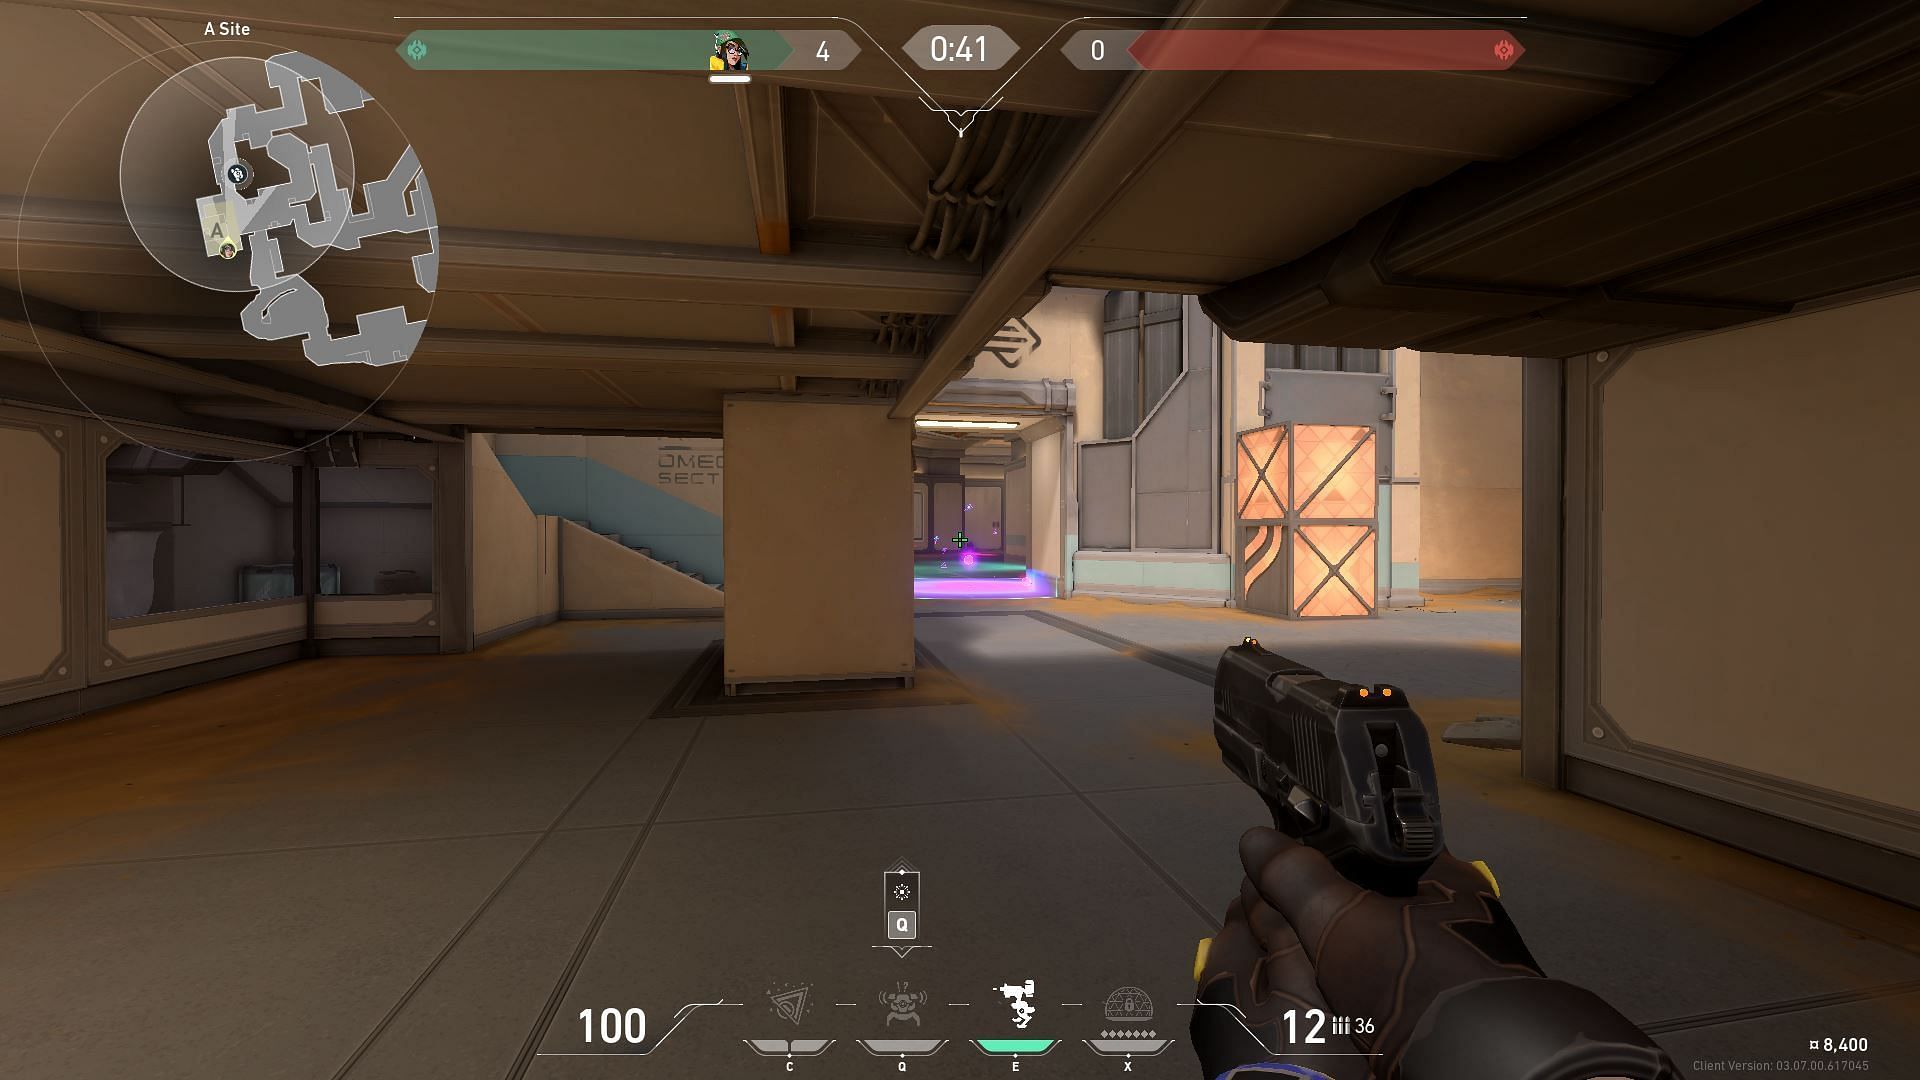
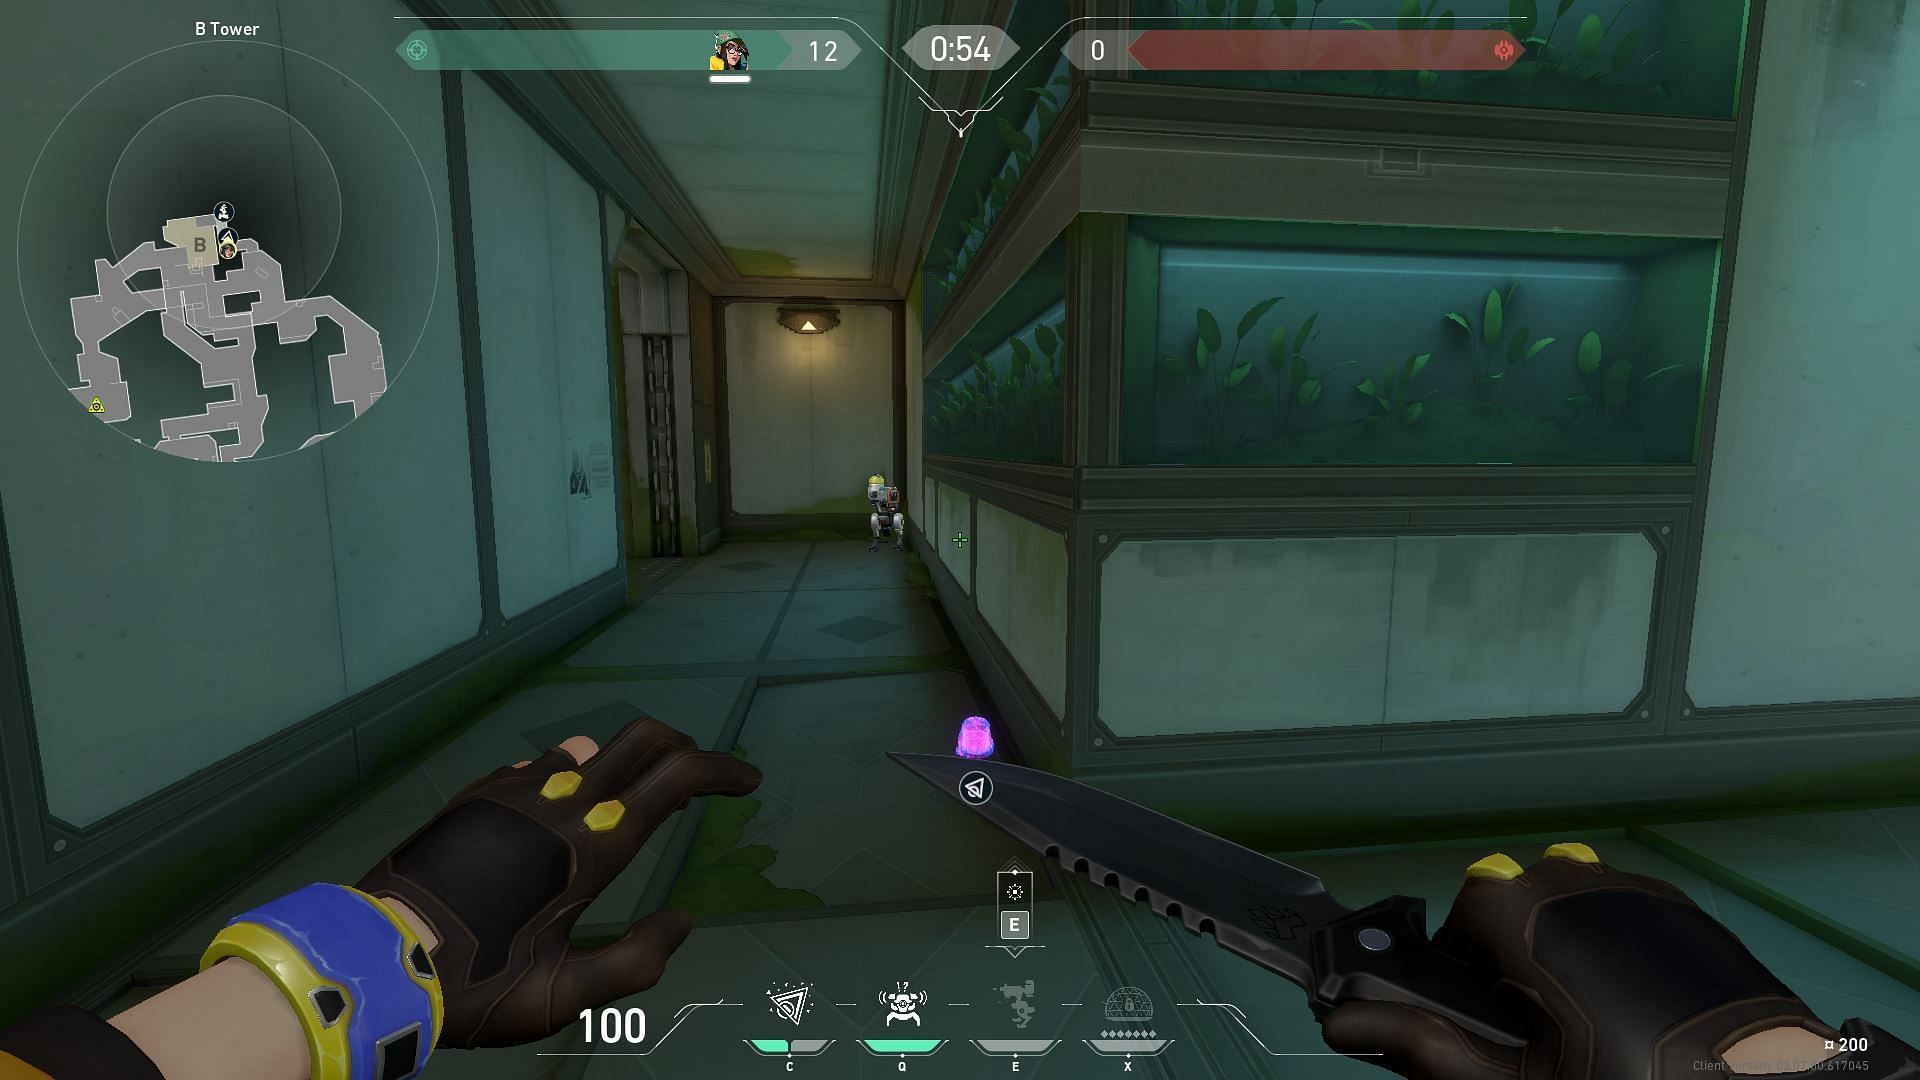
The next setup is to prevent attacks from the opposite side as Valorant players take the wire to the Bridge. Place one Molly and Turret on the corners of the path connecting Tower and Arcade. Place the remaining Molly and Alarm Bots on Site B to complete this setup.
These setups should ensure a good start to the game and can provide early kills if executed well. Players must understand that any setup guide tends to have a small margin of error.
That being said, these setups will definitely improve the team's chances of winning in Valorant.

Are you stuck on today's Wordle? Our Wordle Solver will help you find the answer.