

Killjoy is potentially one of the most potent sentinels in Valorant. She can hold a site on her own and easily push back enemies without firing a single bullet if used properly. In fact, this Agent can be an asset on any map in the game.
That said, Valorant's Pearl is a very tactical map. Players are required to have a solid strategy to control this map effectively. Killjoy is most effective during post-plant attack and defensive scenarios.
It's not that players can disregard this Agent completely before the spike has been planted, but it's just that Killjoy's ability allows her to lock down a site, which is essentially required after the spike has been planted or while defusing.
These Killjoy lineups can ensure great post-plant situations on Valorant's Pearl map
These lineups can be used while defending on the map:
1) A Site
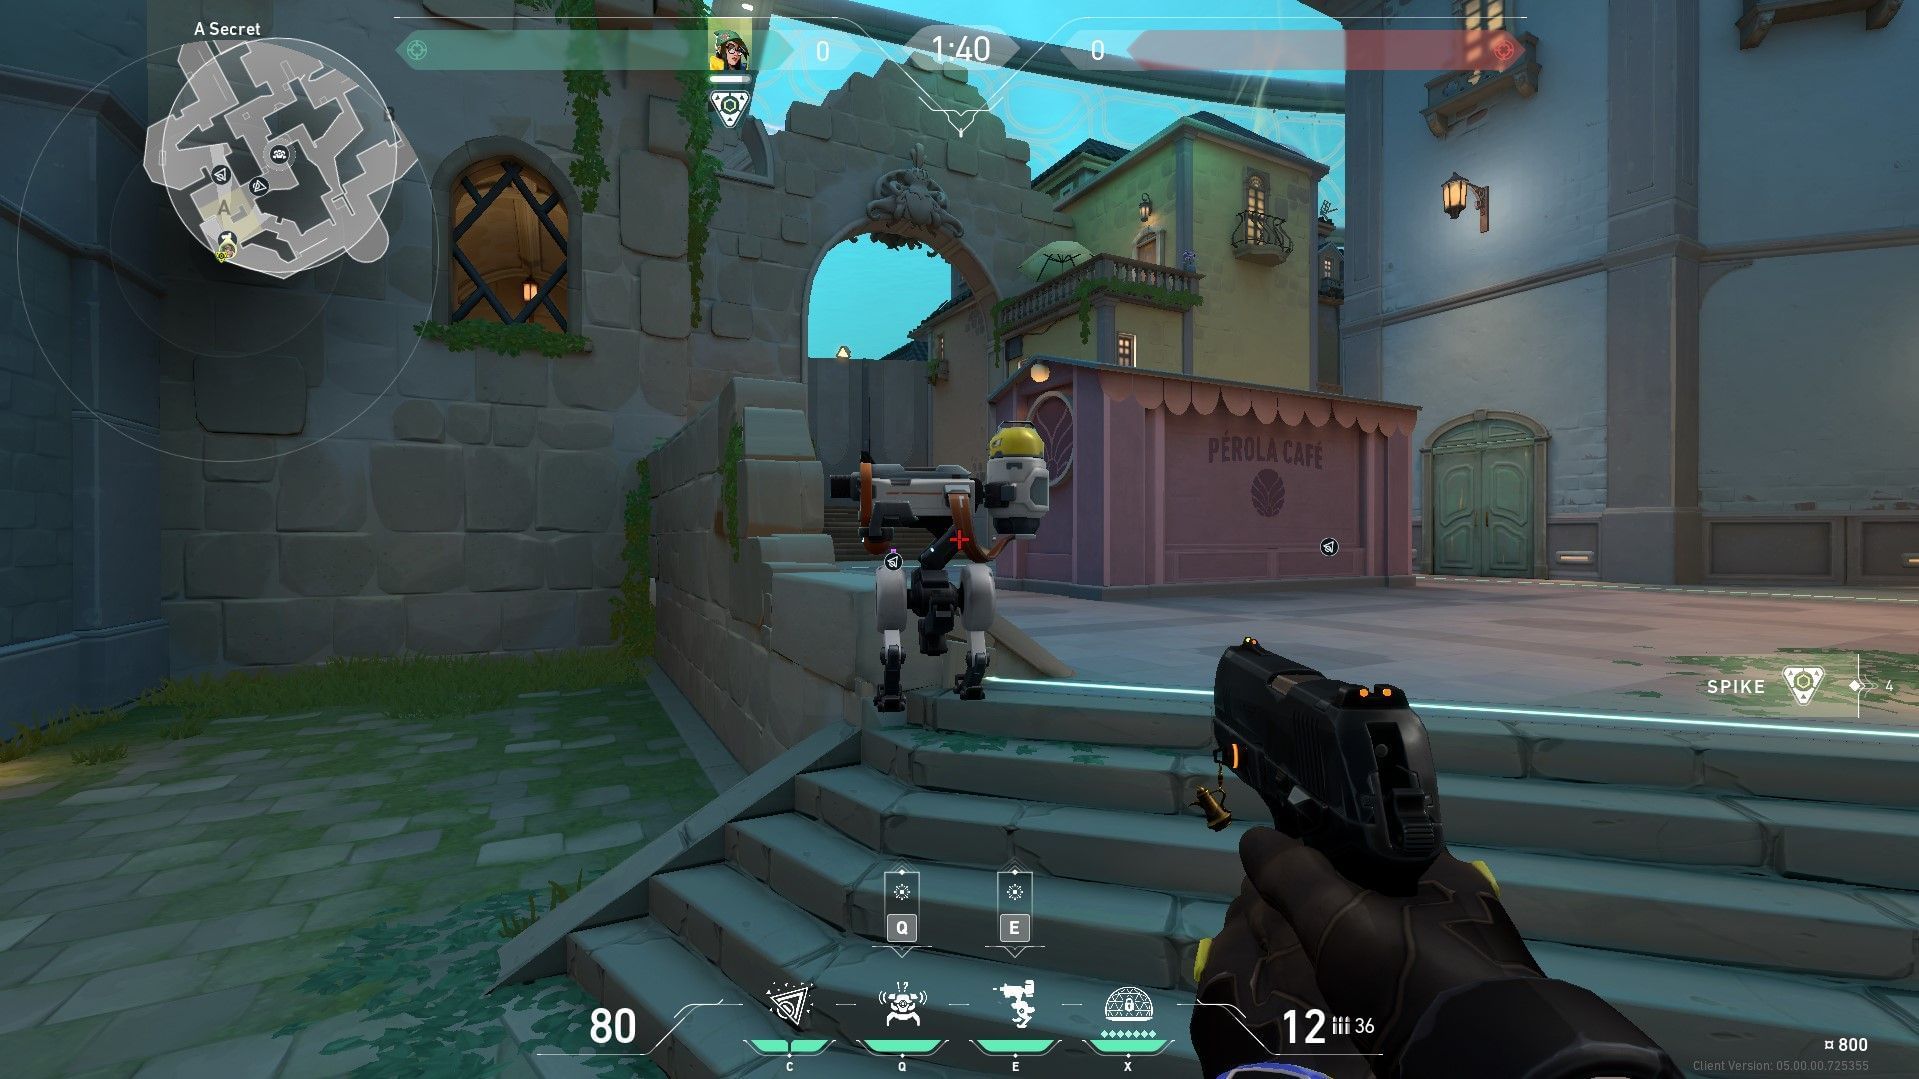
Upon entering A Site from Defender Spawn, Killjoy can place her turret at the wall of A Secret. The turret here can target anyone coming in from A Main. Since her turret isn't indestructible, placing it on the wall makes it slightly harder to hit.
Once the turret is in place, Killjoy can place her swarm grenades on both the staircases leading down from A Main and A Link, respectively. The blast radius of these grenades covers multiple stairs, so enemies will take damage if they're on these stairs and the grenades are detonated.
The setup is only complete if Killjoy can set her alarm bot at the Mid Connector between A Art and A Link. This bot comes in handy if enemies try to push into the site through Mid.
2) B Site
The setup at B Site is quite simple. Compared to the other site, it is more open, and there isn't much cover while entering from B Main.
Killjoy can place one Swarm Grenade behind the pillar below B Tower and one at the boxes on site. These two grenades can easily dissuade attackers from planting at these two spots.
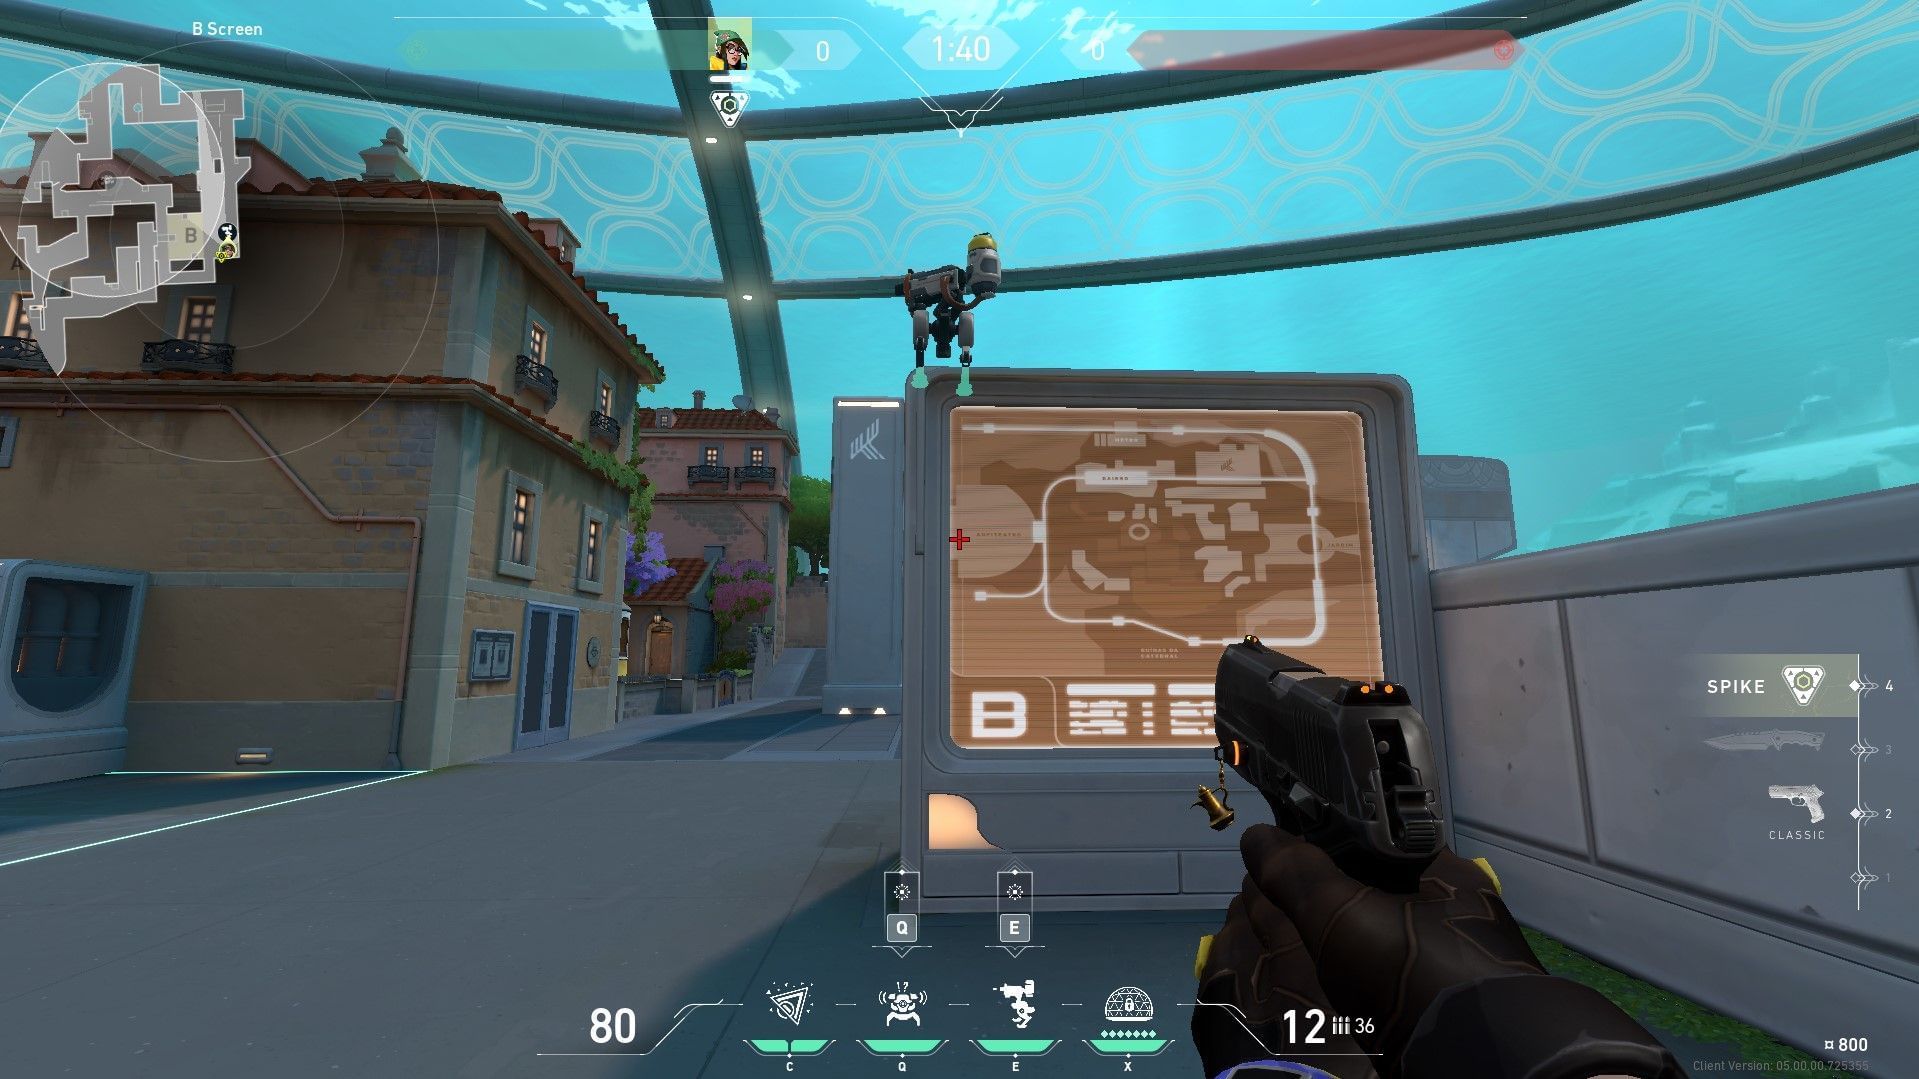
Killjoy can also place her turret atop B Screen and peek from there to bag easy turret kills. However, this does leave her open to fire from enemies on B Tower or B Link.
To combat this situation, Killjoy can place her Alarm Bot between Mid Doors and B Link. To enter the site from B Link or B Tower, enemies will have to pass through the Mid Doors anyway.
They could avoid Mid Doors altogether and enter from A via Defender Spawn, but that's a very unlikely scenario.
The strategies listed below can be used while attacking or during post-plant scenarios on Valorant's Pearl.
3) B Attack

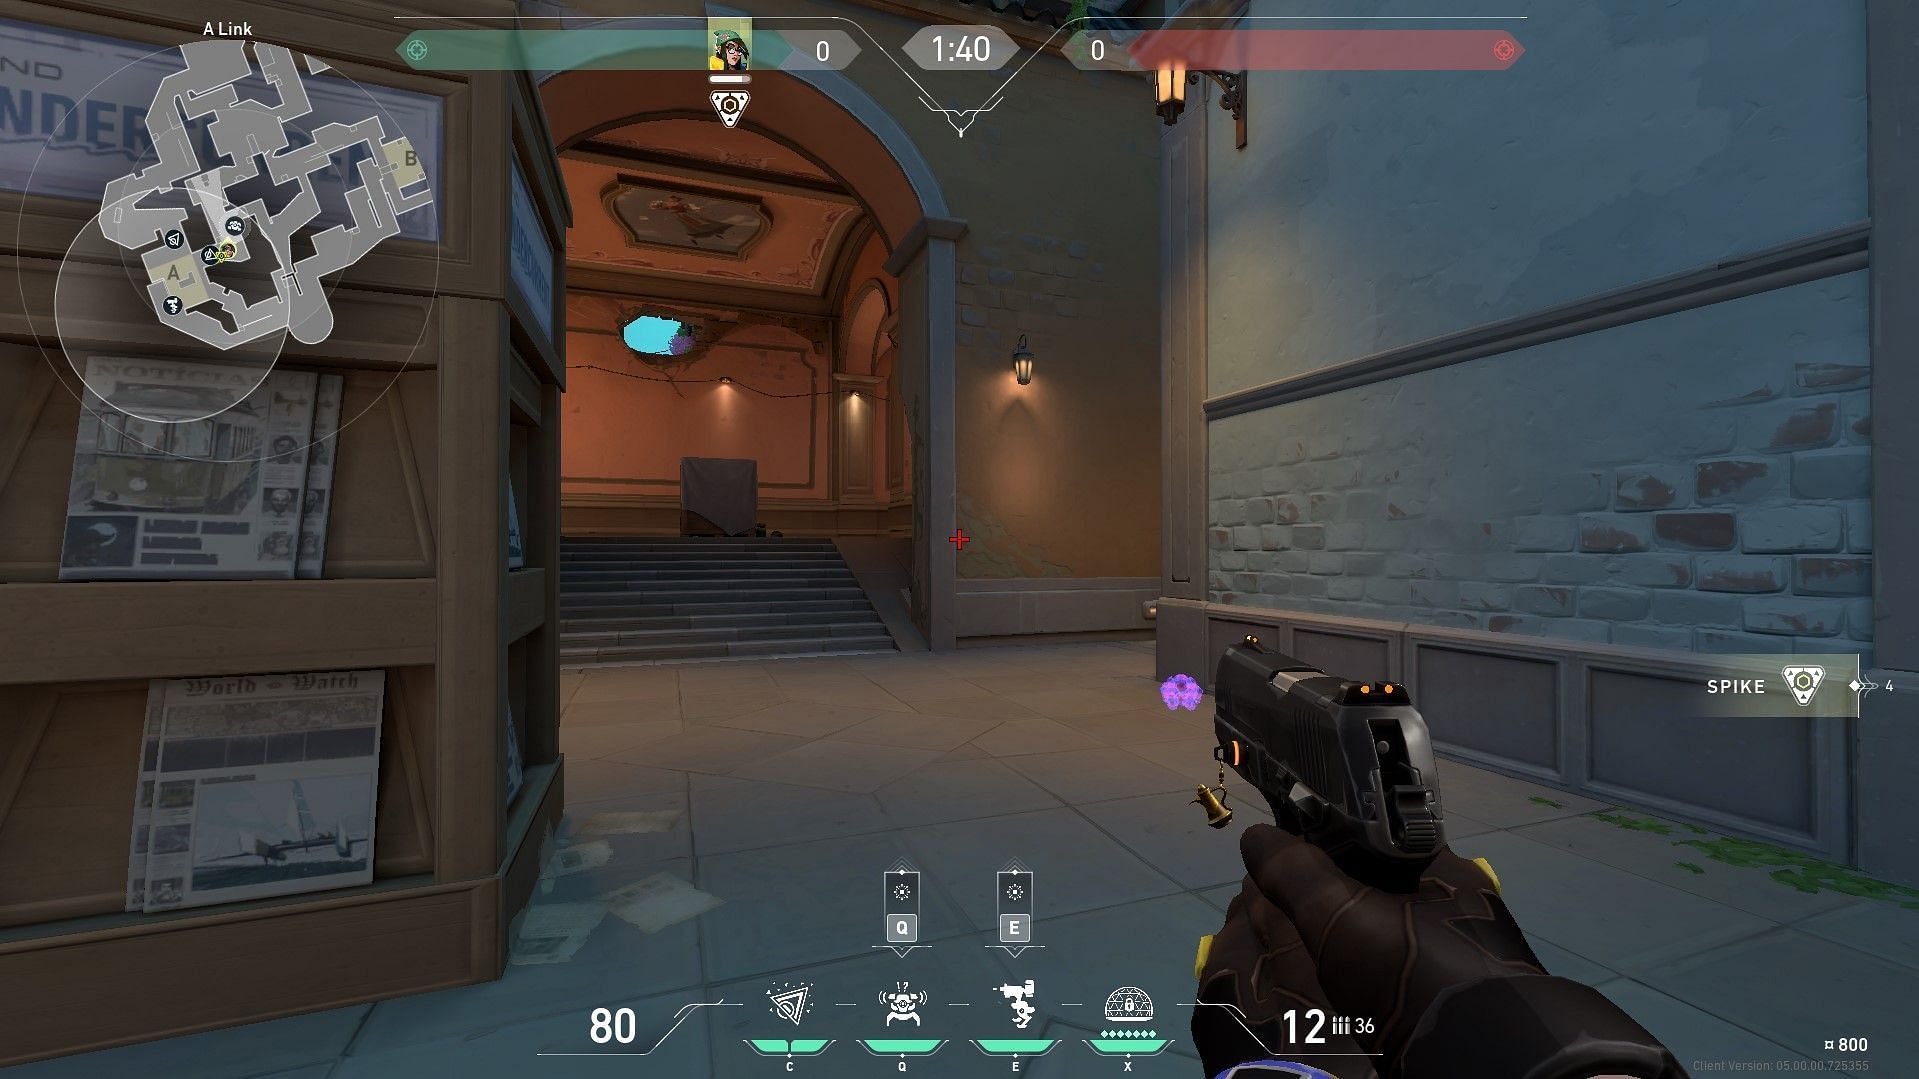
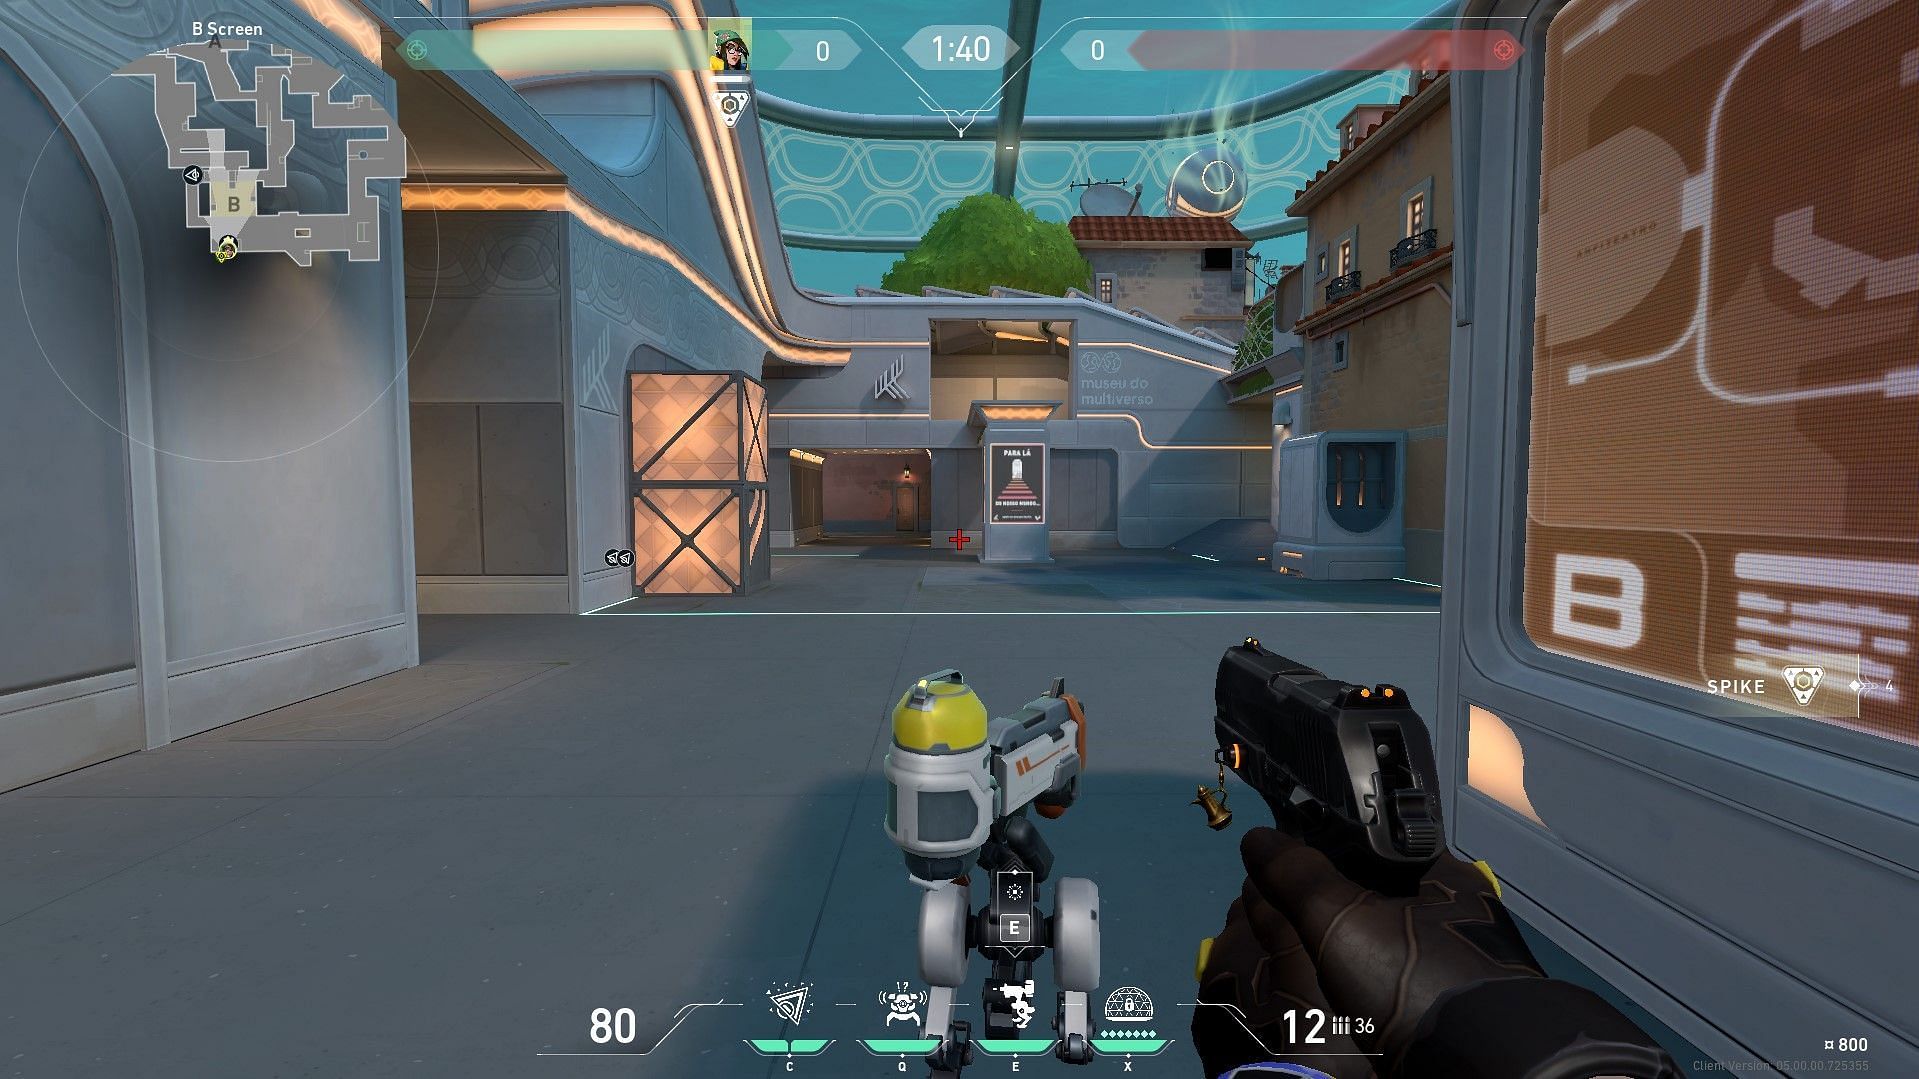
As mentioned before, Killjoy's abilities have limited functionality while attacking. But this lineup can be helpful while entering B Site. Since B Hall is where opponents can hide, players need to check it out before trying to plant on the site.
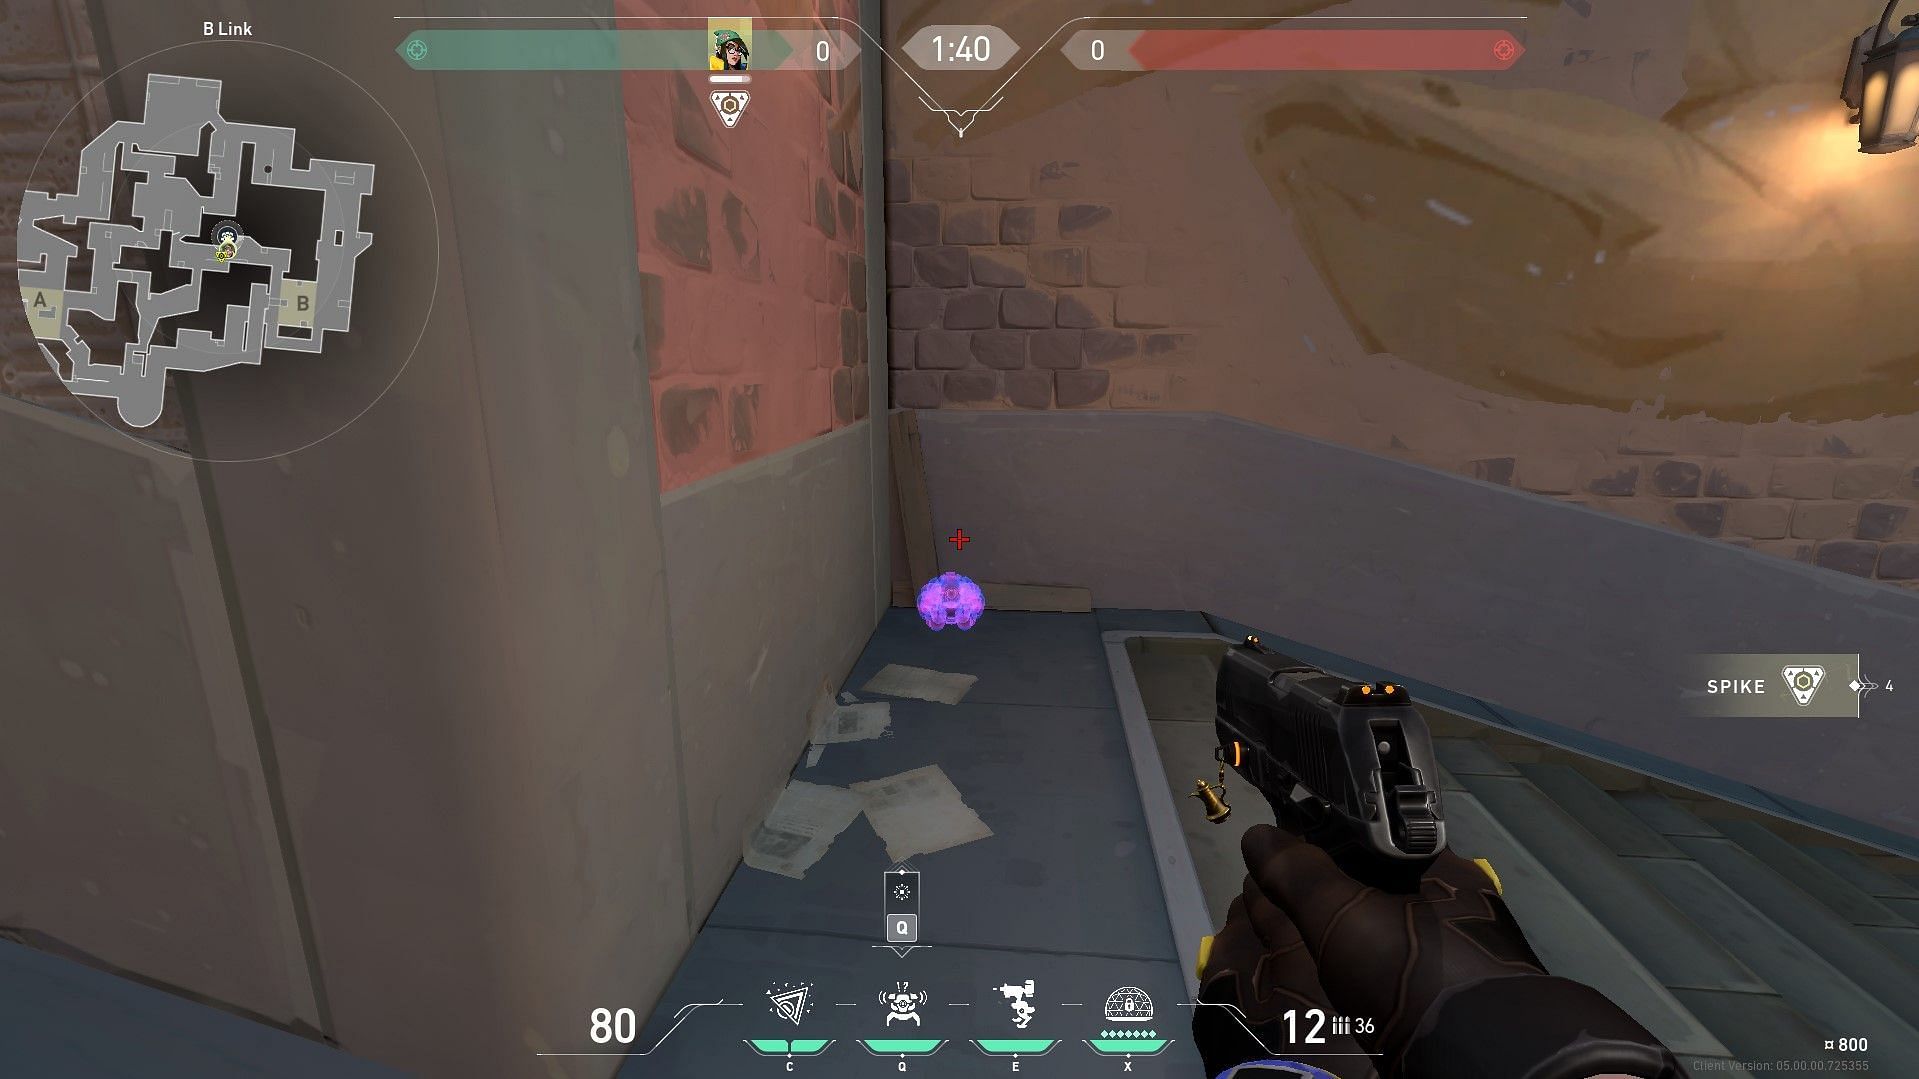
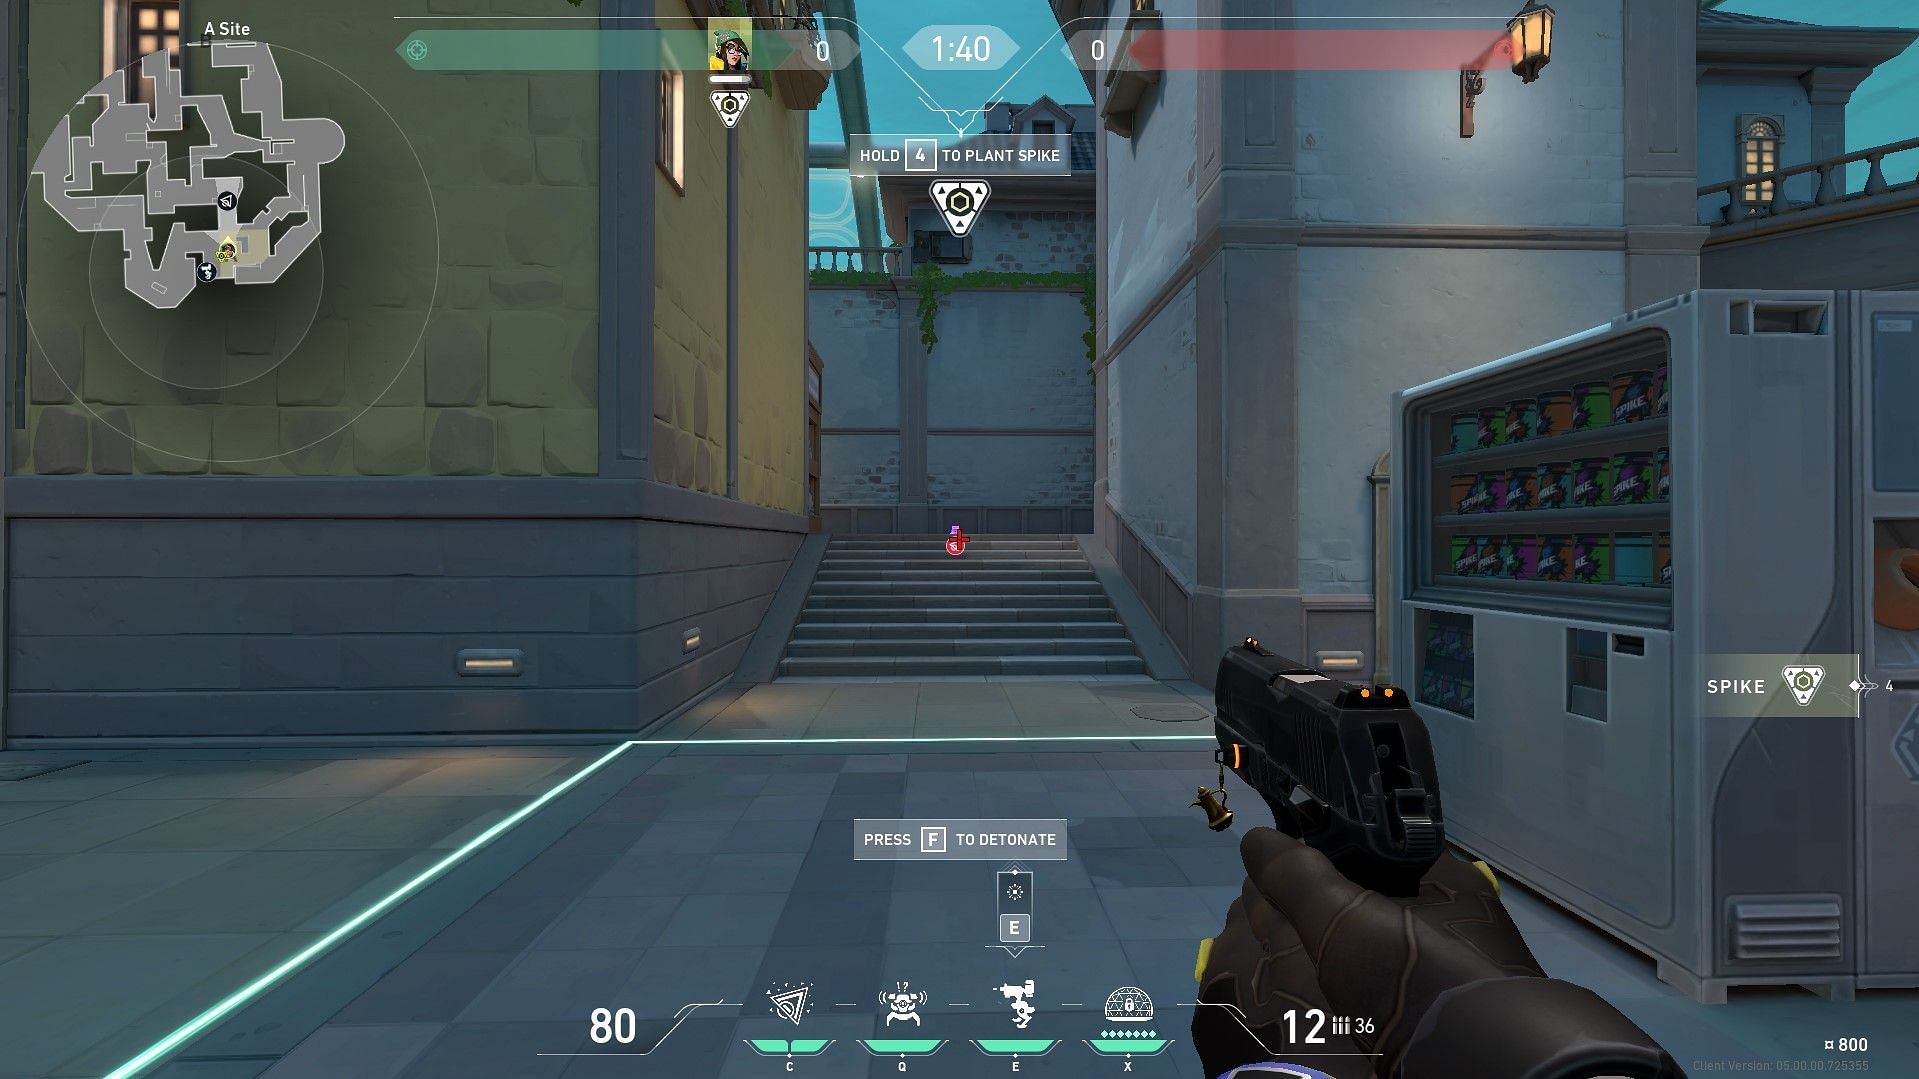
However, B Hall has two entrances. One is visible from B Main and the other from B Link. While entering the site from B Main, Killjoy can come towards the end of the alley and align with the right wall, as seen in the image above.
On the right edge, Killjoy's turret ability icon should align with the wall. Using this alignment, she can deploy her Swarm Grenade into the covered end of B Hall and then detonate it. This should be enough to clear out any enemies hiding in this area of Valorant's Pearl map.
4) B Post-Plant
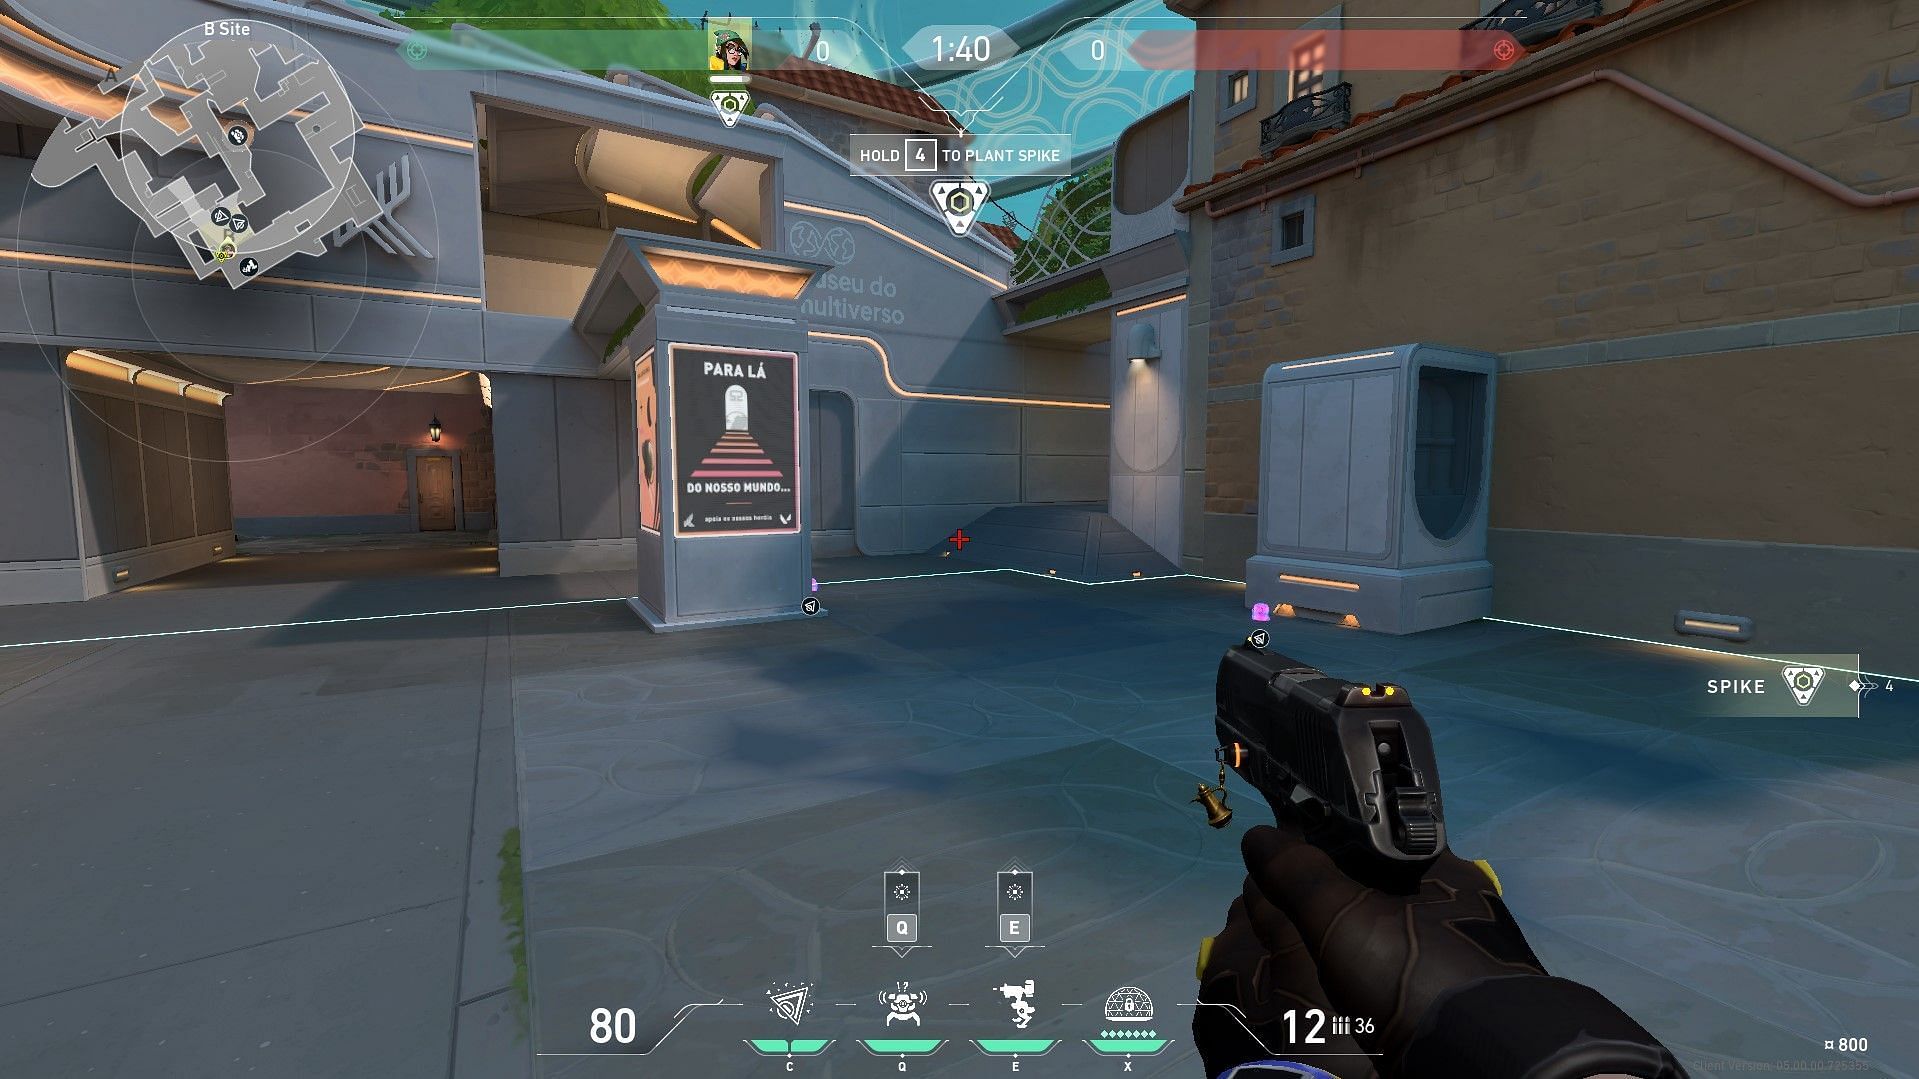
Assuming Killjoy and her team have managed to enter B Site on Valorant's Pearl and planted the spike, the first idea would be to place a Swarm Grenade on top of the spike itself and an Alarm Bot close to the spike.
If an enemy approaches the spike, the Alarm Bot will trigger, signaling Killjoy to detonate the grenade. She can place her Turret behind B Screen and camp inside B Tower or B Hall.
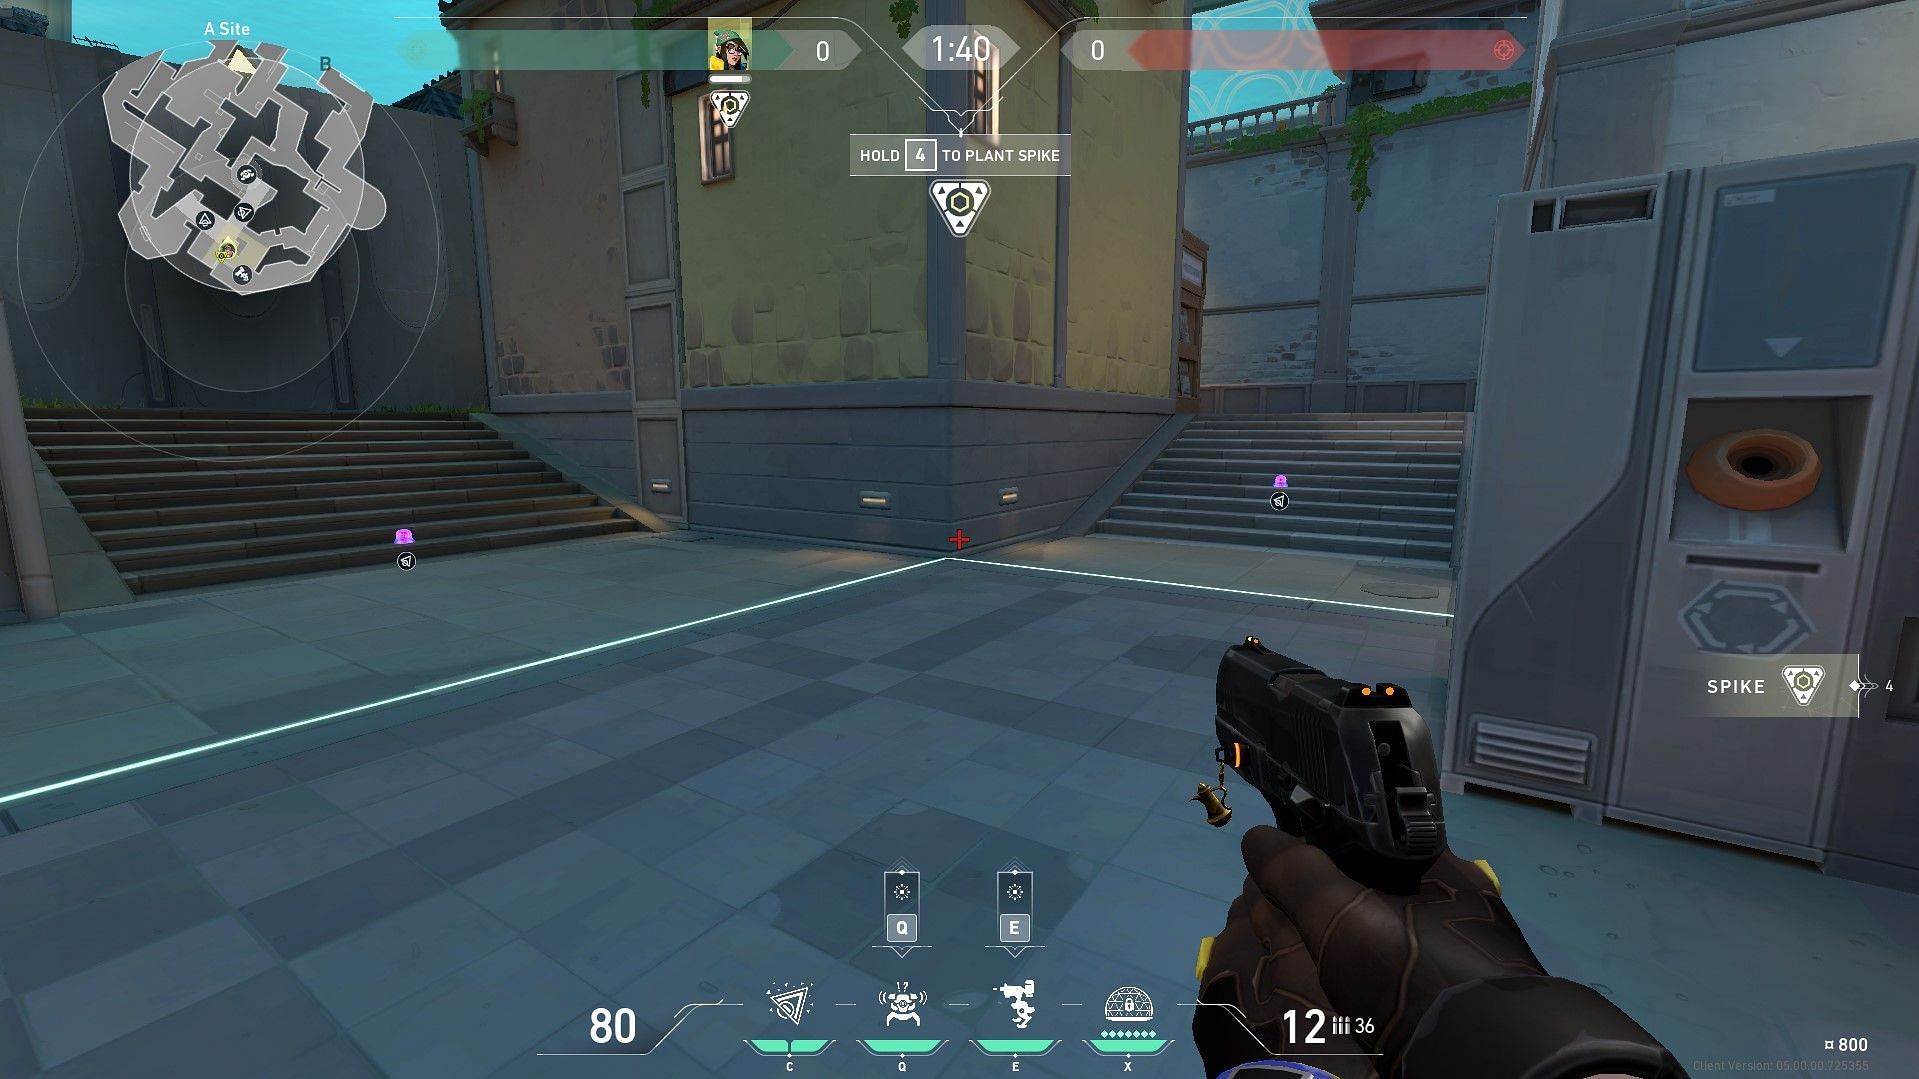
5) A Post-Plant
Once the spike has been planted at A Site, Killjoy can deploy her Turret inside A Dugout. Although it can be shot down from A Link, it can be an excellent distractor and indicate an enemy presence at the site. Moreover, it could also damage enemies coming in from A Main in Valorant's Pearl map.
One Swarm Grenade can be planted on the stairs coming down from A Link, and the other atop the spike. Finally, as a failsafe measure, the Alarm Bot can go at the Mid Connector between A Art and A Link.
Killjoy and her teammates can proceed to view the remaining entrances to A Site on Valorant's Pearl map.
That's all there is to the current set of lineups for Killjoy on Valorant's Pearl map. Once again, they aren't absolute, and gamers can always figure out which lineups work for them by trying out different permutations and combinations of the abilities.
Moreover, Pearl is still new to Valorant, and as the days go by, the community is bound to come up with stronger and even better lineups for Killjoy and her abilities.
Note: This article is solely based on the author's opinions.
