
'%20x='0'%20y='0'%20height='100%25'%20width='100%25'%20%0A%20%20%20%20%20%20%20%20%20%20xlink%3Ahref='data:image/jpg;base64,/9j/2wBDAAYEBQYFBAYGBQYHBwYIChAKCgkJChQODwwQFxQYGBcUFhYaHSUfGhsjHBYWICwgIyYnKSopGR8tMC0oMCUoKSj/2wBDAQcHBwoIChMKChMoGhYaKCgoKCgoKCgoKCgoKCgoKCgoKCgoKCgoKCgoKCgoKCgoKCgoKCgoKCgoKCgoKCgoKCj/wgARCAAGAAoDASIAAhEBAxEB/8QAFgABAQEAAAAAAAAAAAAAAAAAAAIG/8QAFQEBAQAAAAAAAAAAAAAAAAAAAAT/2gAMAwEAAhADEAAAAMXAm//EAB8QAAICAQQDAAAAAAAAAAAAAAIDAREEAAUSEwYVIv/aAAgBAQABPwDZ/HvWqEmCp7epOfcsKoAllY1VX9aceR3HwVigHKaGimo1/8QAGREAAQUAAAAAAAAAAAAAAAAAAAIDBBEx/9oACAECAQE/AIry60//xAAZEQACAwEAAAAAAAAAAAAAAAABAgADBBH/2gAIAQMBAT8A21IpXgn/2Q=='%3E%3C/image%3E%3C/svg%3E)
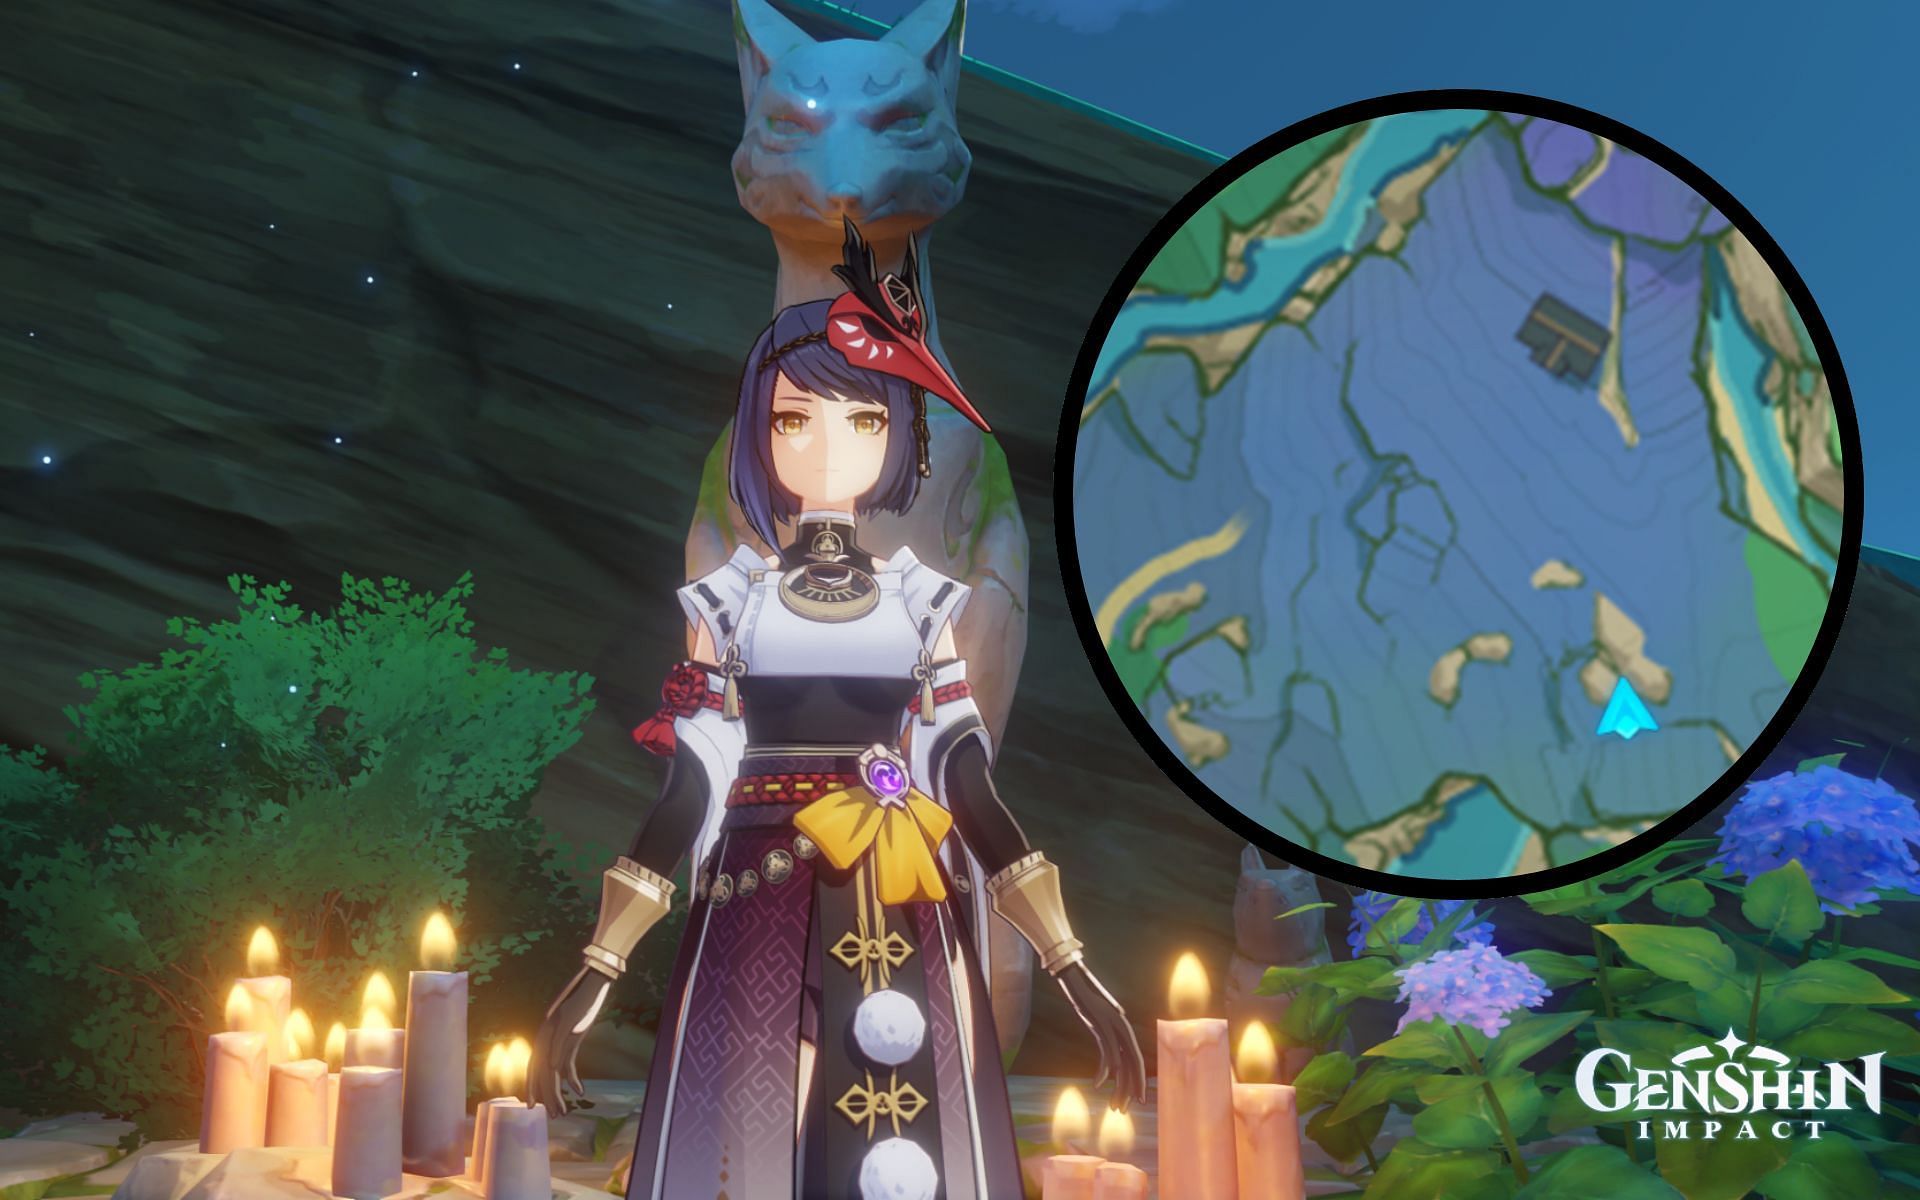
Genshin Impact's Sacrificial Offering's first few steps often confuse players due to the lack of any markers indicating where the player should go. Travelers just have to approach the shrine's general area to reach this part of the quest. For reference, it's most of the bluish area located south of Mt. Yougou (which is a lot more straightforward to understand than "northeast of Konda Village" for most players).
The "Continue the investigation at the abandoned shrine" portion involves players talking to three ghosts twice, and each of their locations is provided ahead.
Genshin Impact Sacrificial Offering guide: "Continue the investigation at the abandoned shrine"

Looking for Crossword hints & solutions? Check out latest NYT Mini Crossword Answers, LA Times Crossword Answers, and Atlantic Crossword Answers
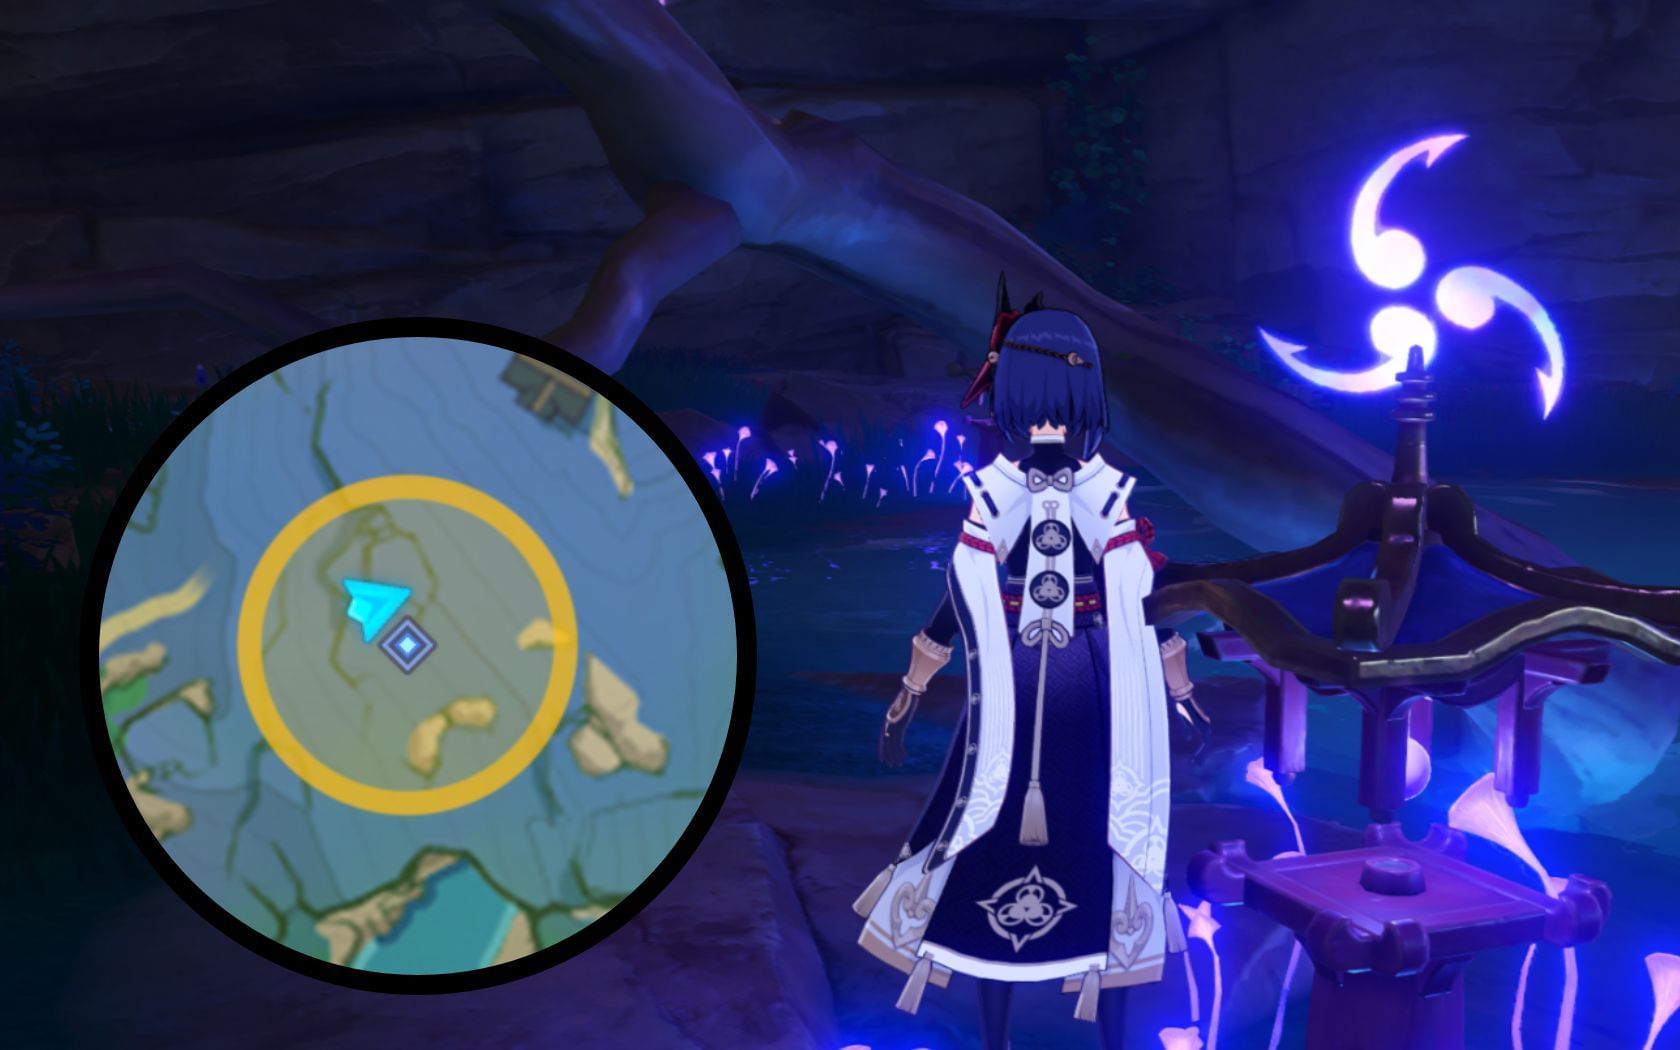
On the northern end of this area is a temple with a Kitsune statue; talk to the Mysterious Shadow nearby. She will vanish shortly afterward.
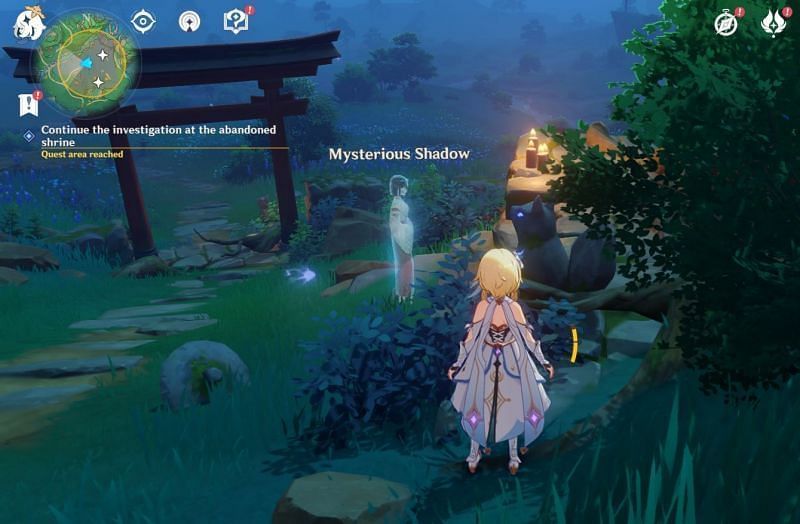
You can find the same Mysterious Shadow near another Kitsune statue west of the previous location.
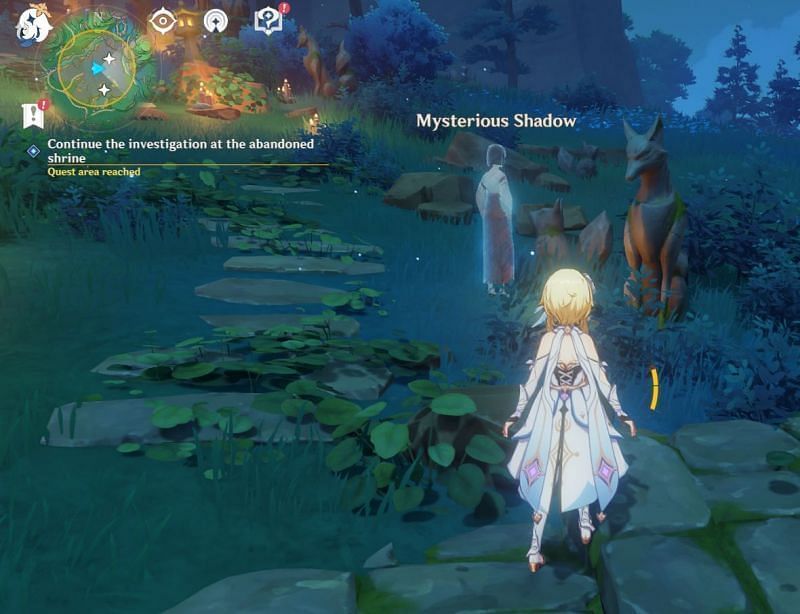
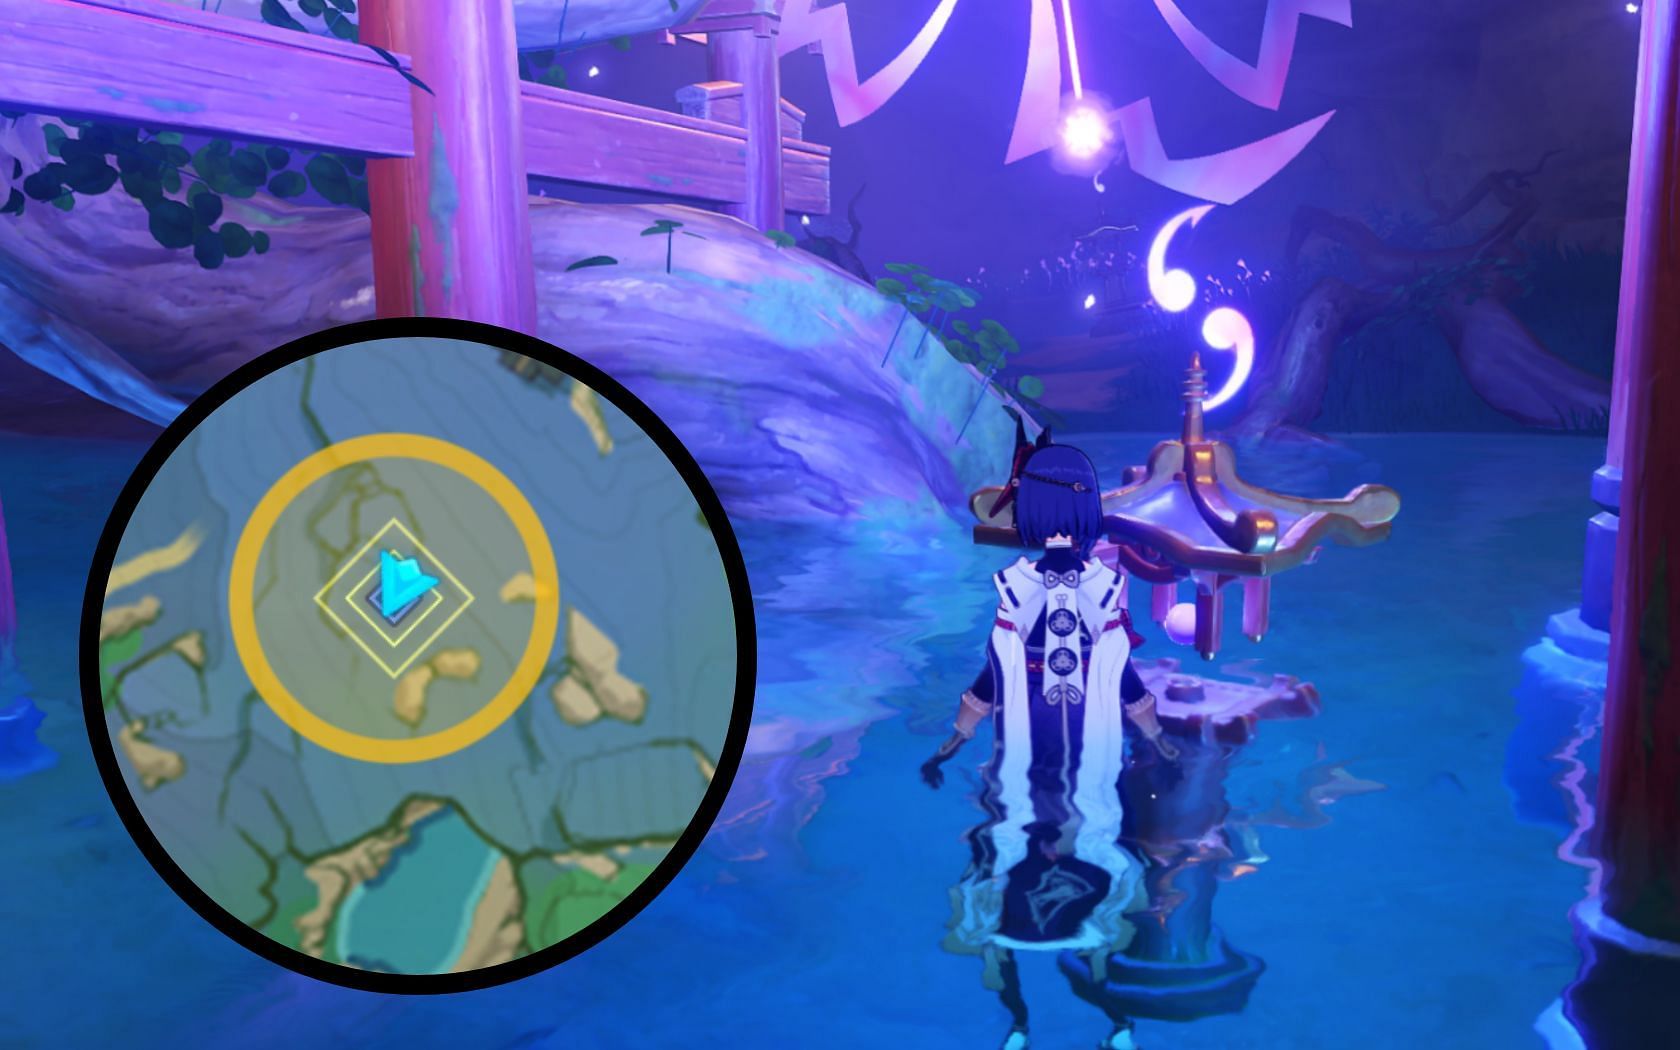
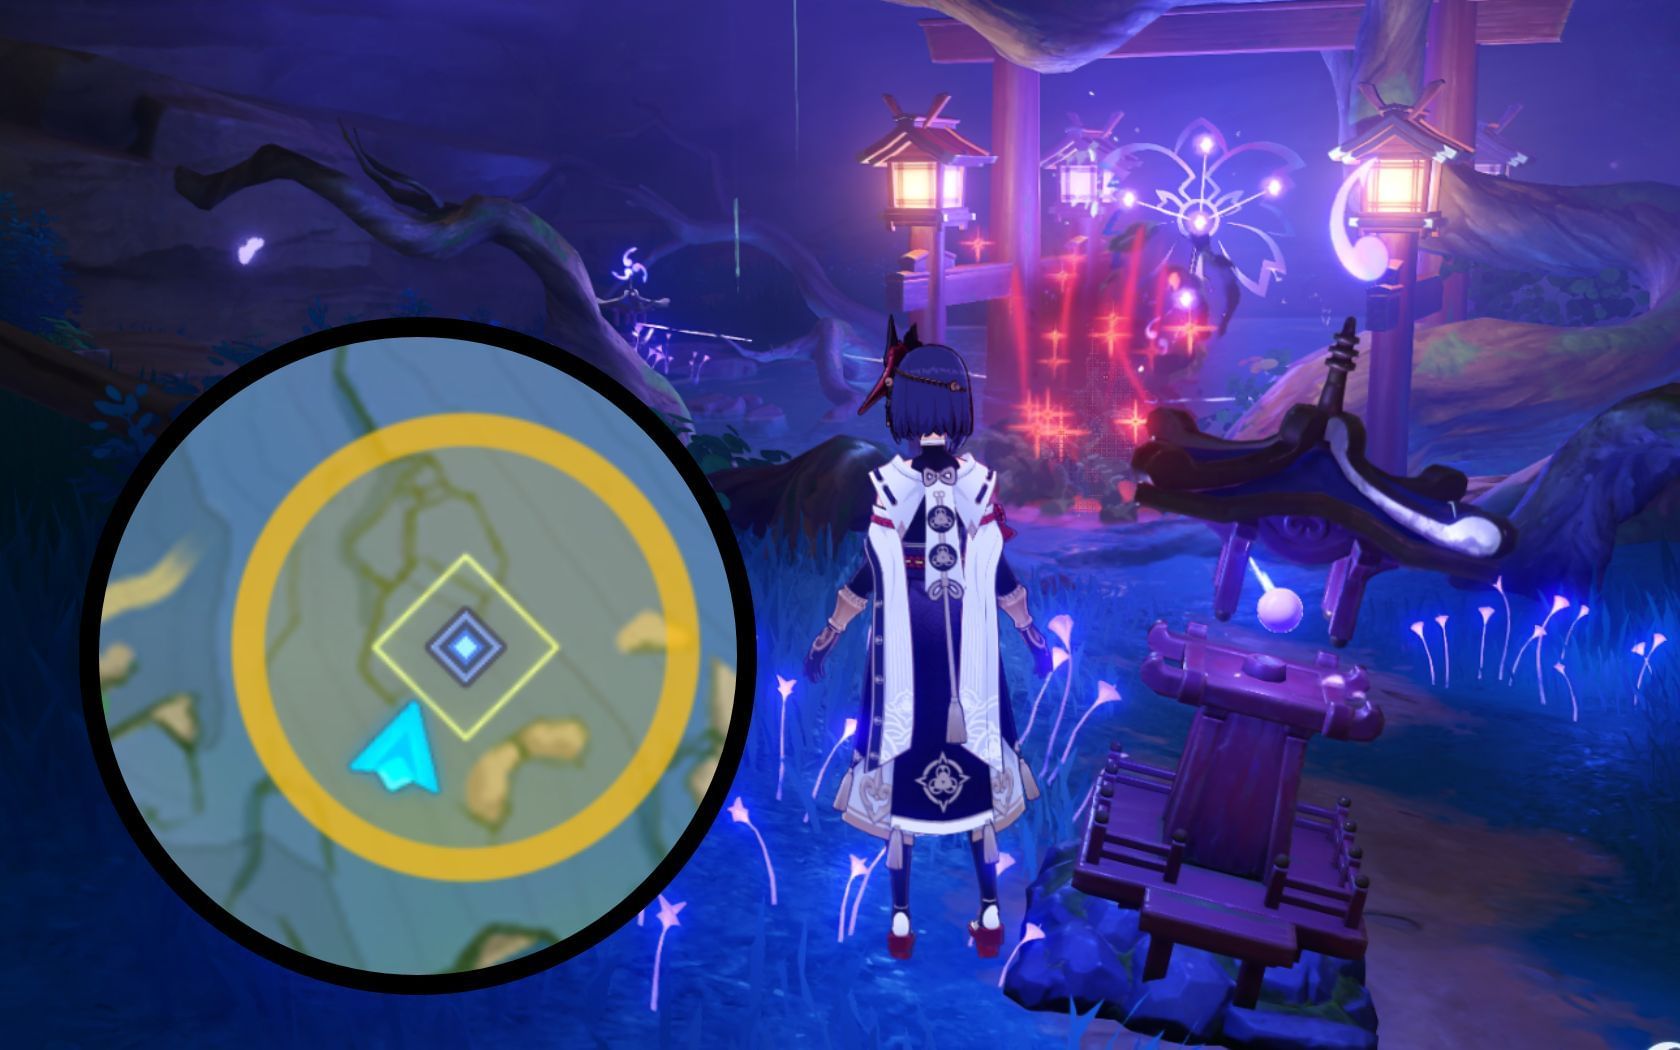
Near the center of the marked area is the second Mysterious Shadow. Talk to her before moving on to the next section.
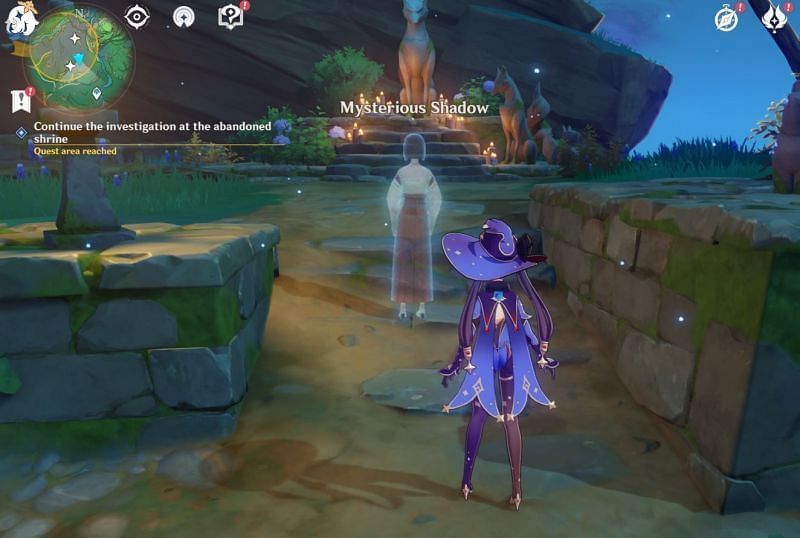
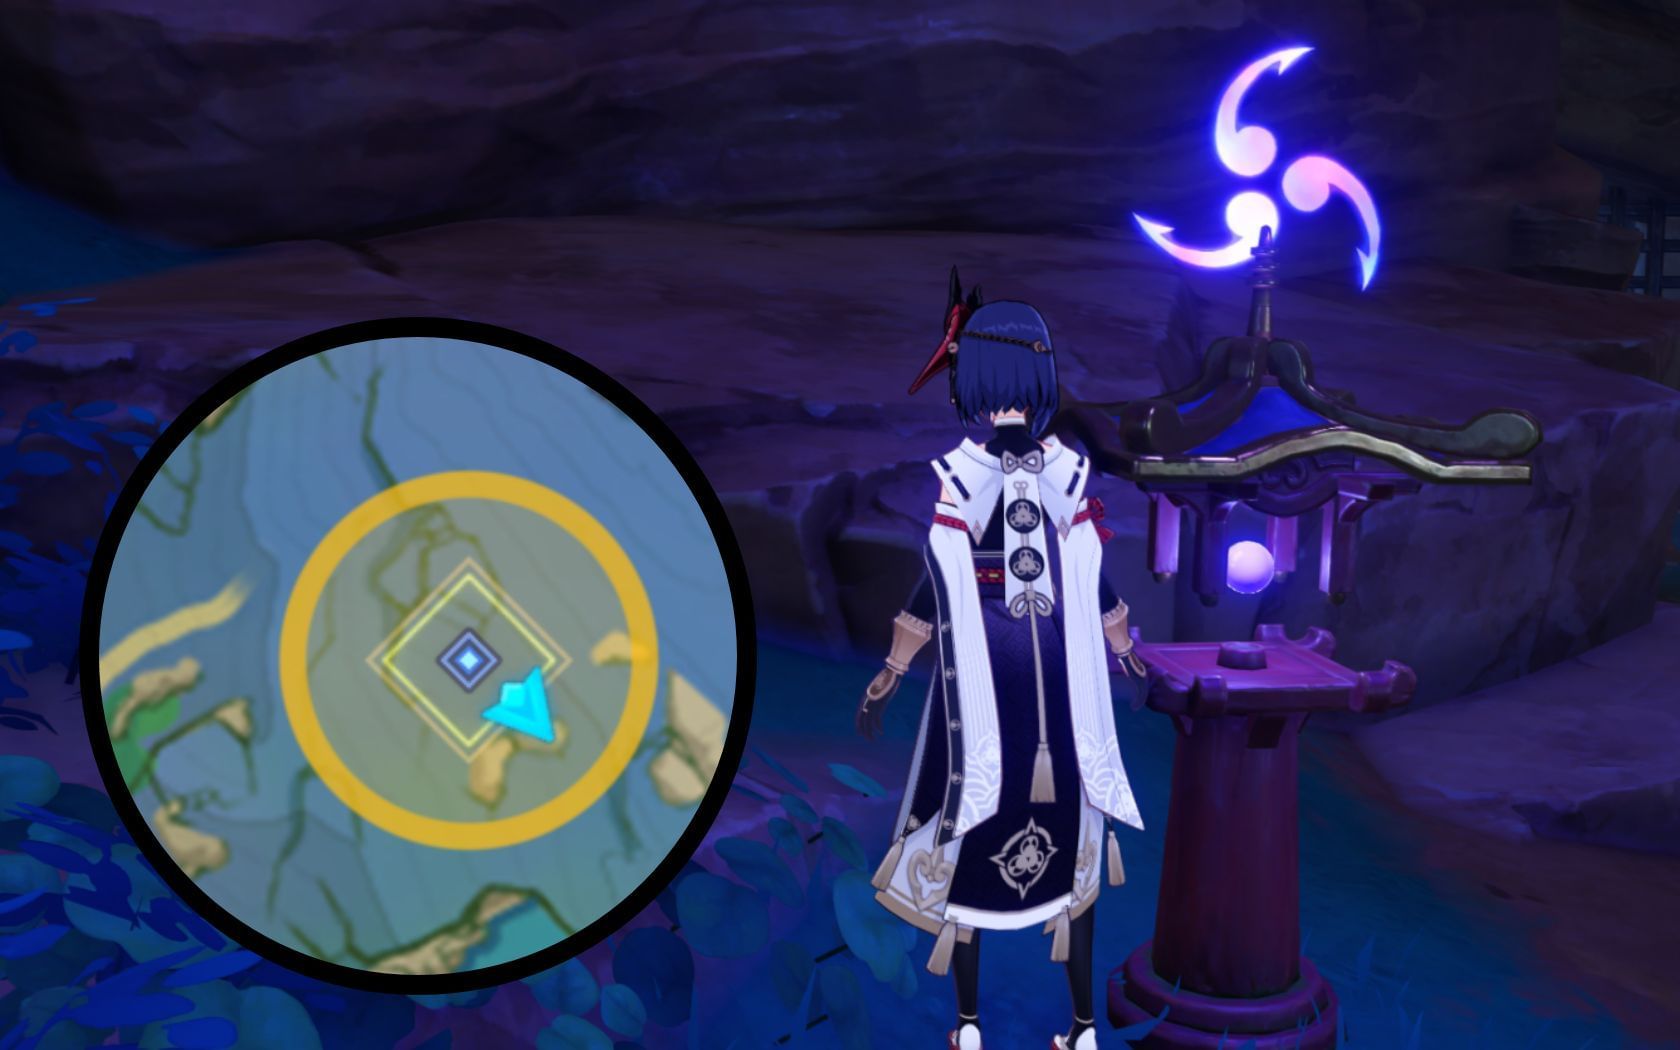
This location is near the southeastern border of the yellow circle seen on the map. There should be a large Kitsune statue, with the Mysterious Shadow staring at it. Talk to her, and she'll vanish once more.
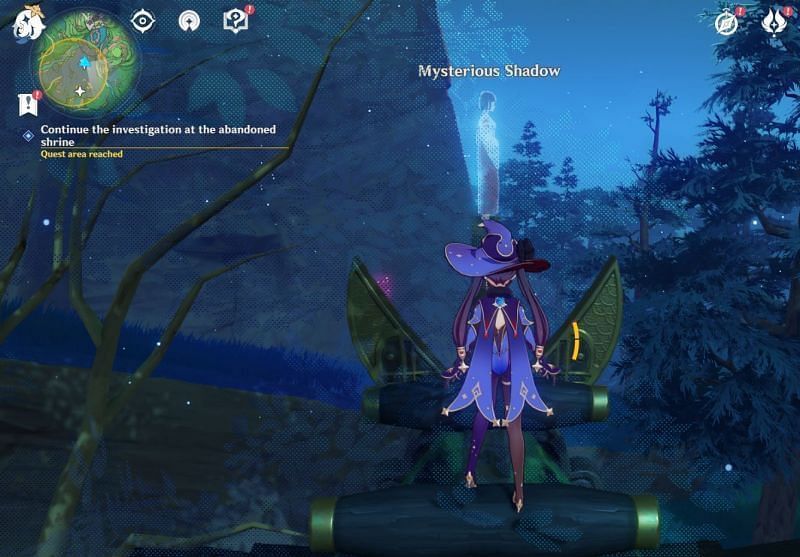
Genshin Impact players will find the next Mysterious Shadow on the roof of the northeastern shrine. It can be easy to miss due to the awkward location, and the nearby leaves may block the player's view.
Nonetheless, approach her and talk to her to move forward in this mission.
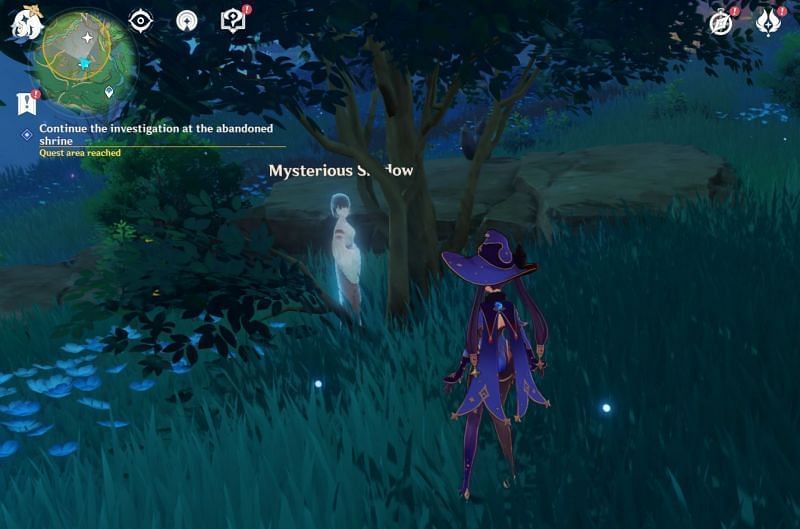
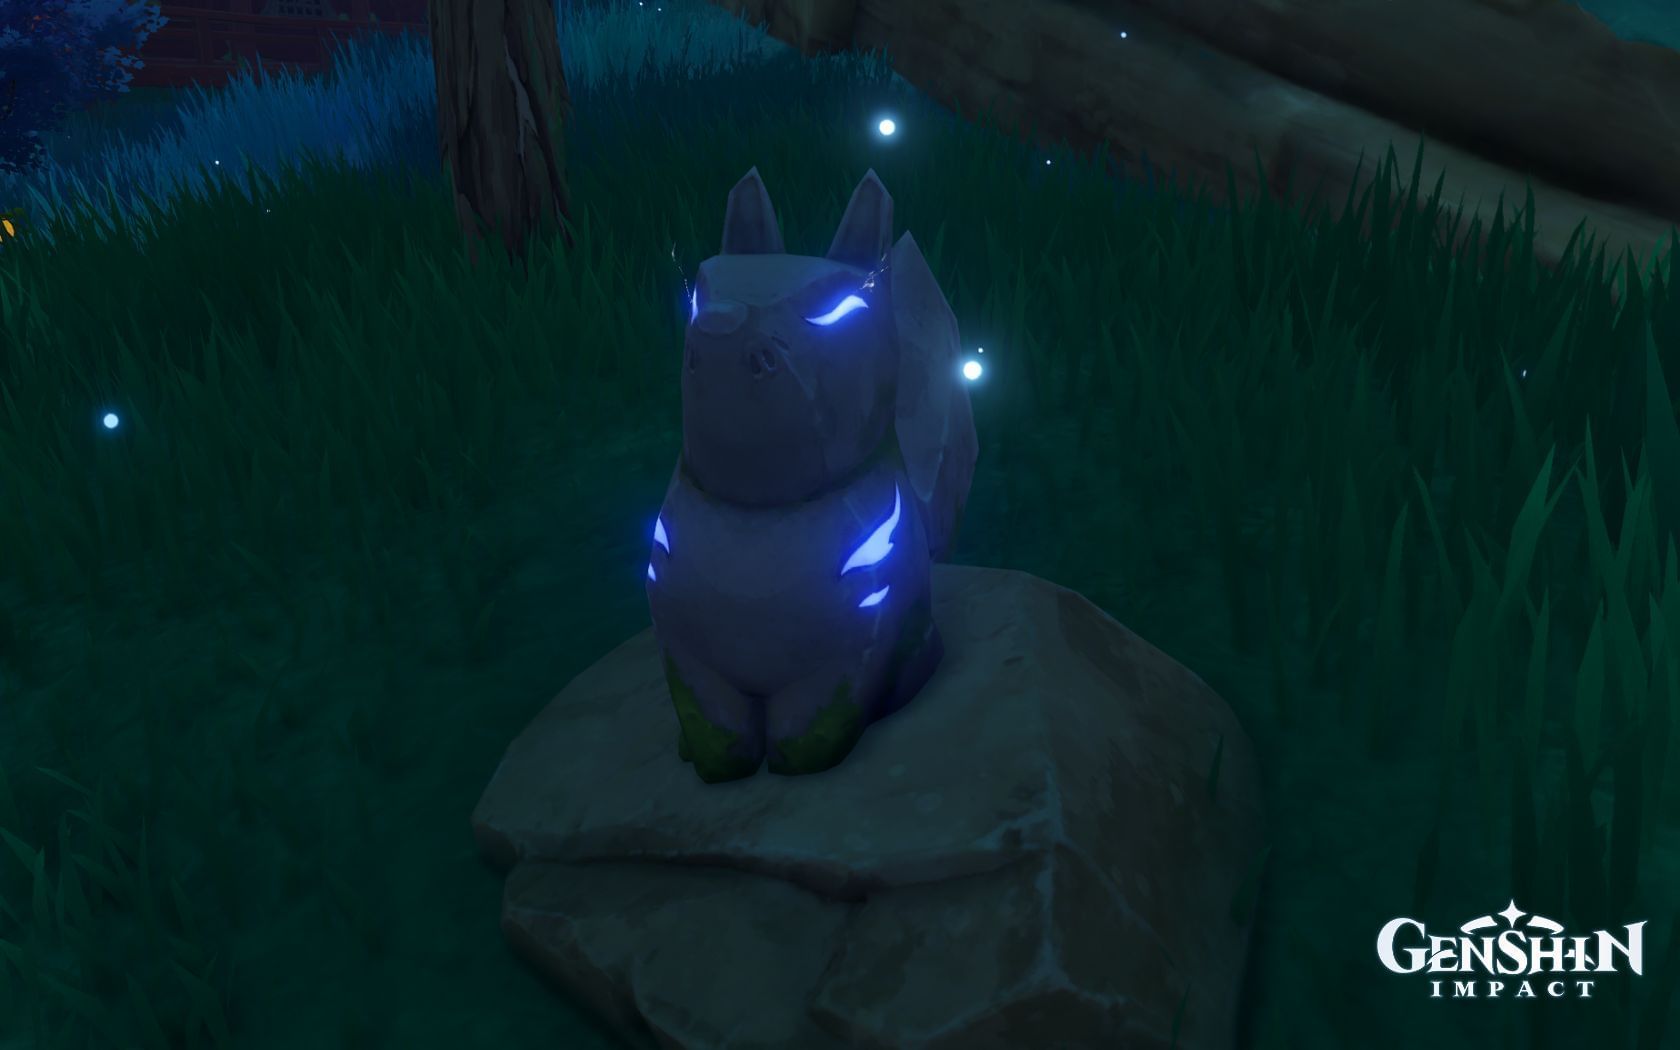
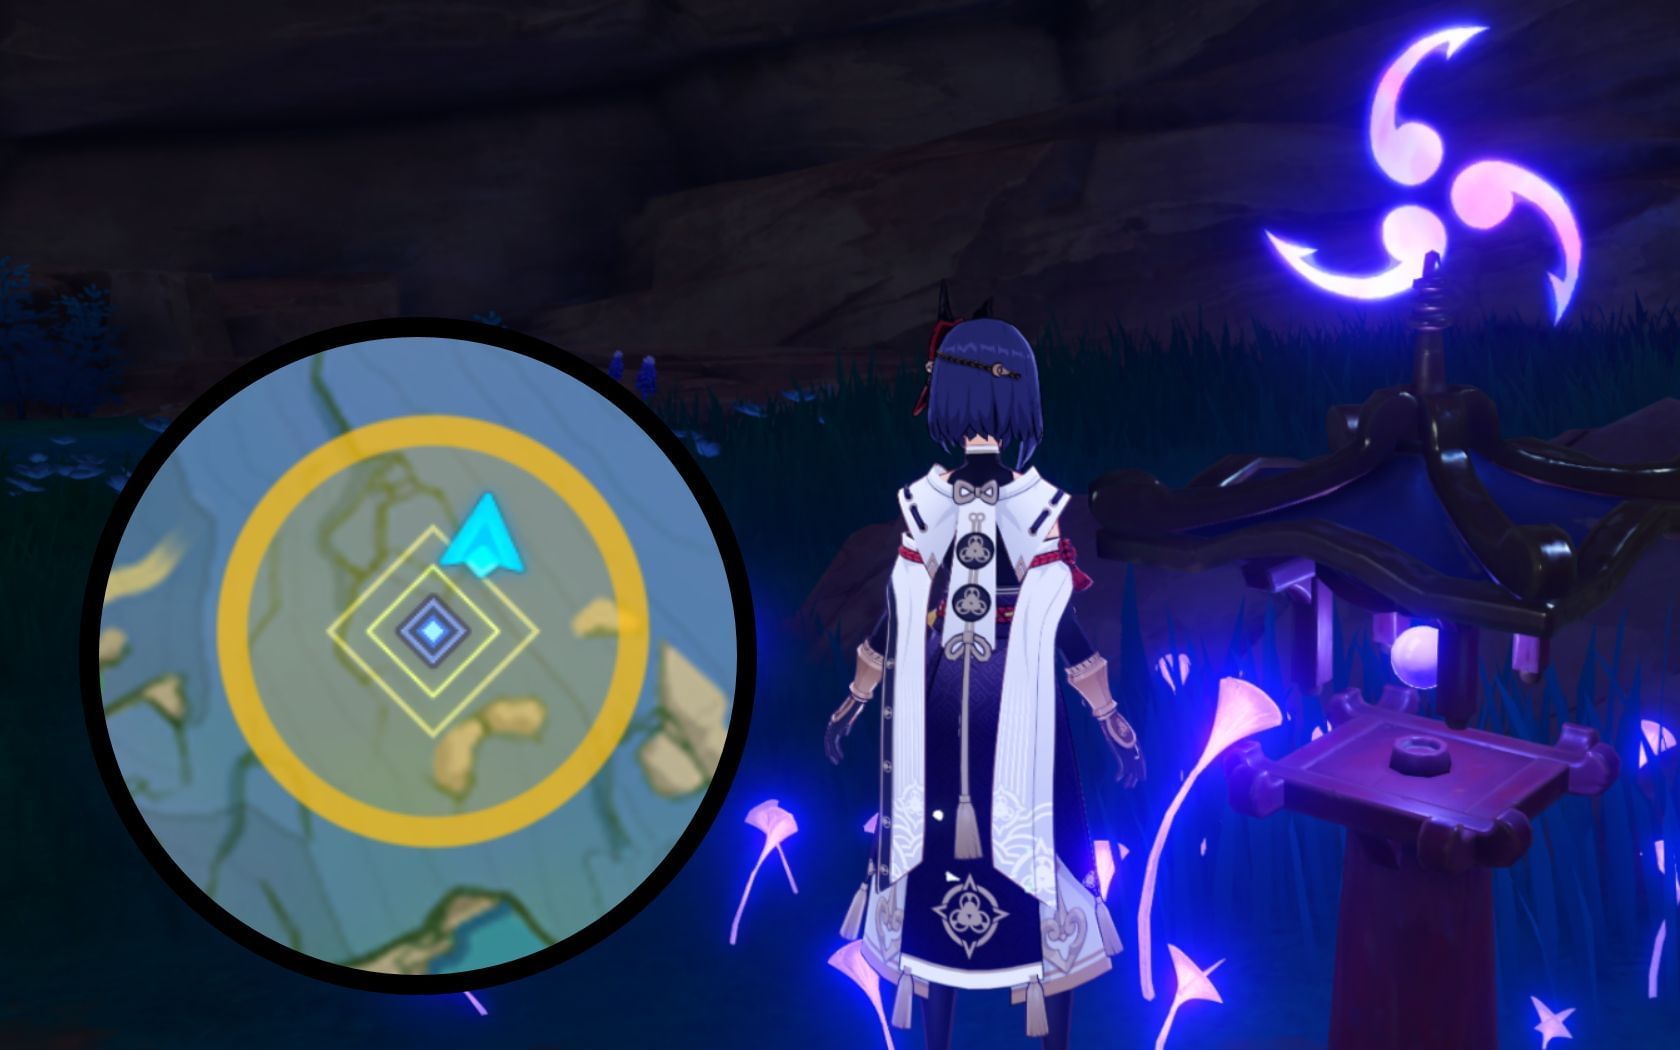
The previous Mysterious Shadow will now be located far south near a tree (as shown above). Interact with her, and three Exquisite Chests should spawn near the center of the yellow circle.
There will be three Kitsune Statues here, so it should be hard for the player to miss it. Either way, open up every chest and investigate the strange yellow glowing object nearby.
Genshin Impact players will now obtain the Sacred Sakura Cleansing Summary.
Head to the Grand Narukami Shrine to investigate
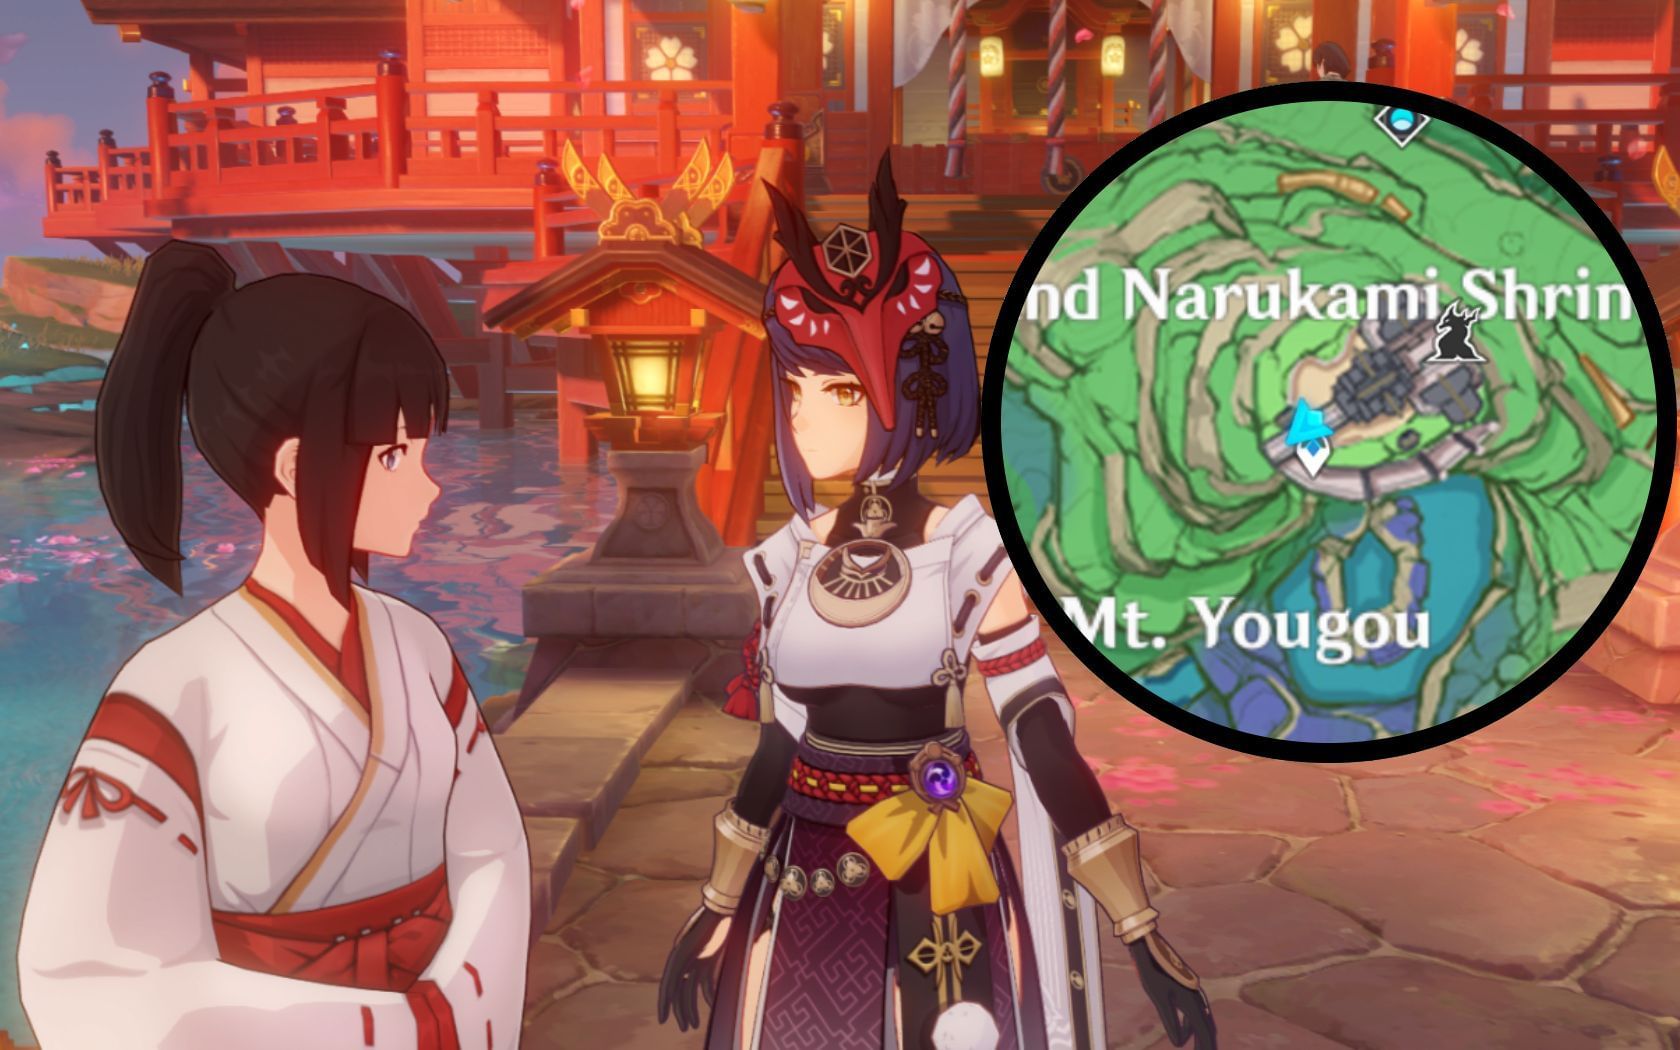
Genshin Impact players now have to head to the Grand Narukami Shrine and interact with Inagi Hotomi. After a brief dialogue sequence, they will receive the Memento Lens.
Return to the abandoned shrine and use the Memento Lens to investigate
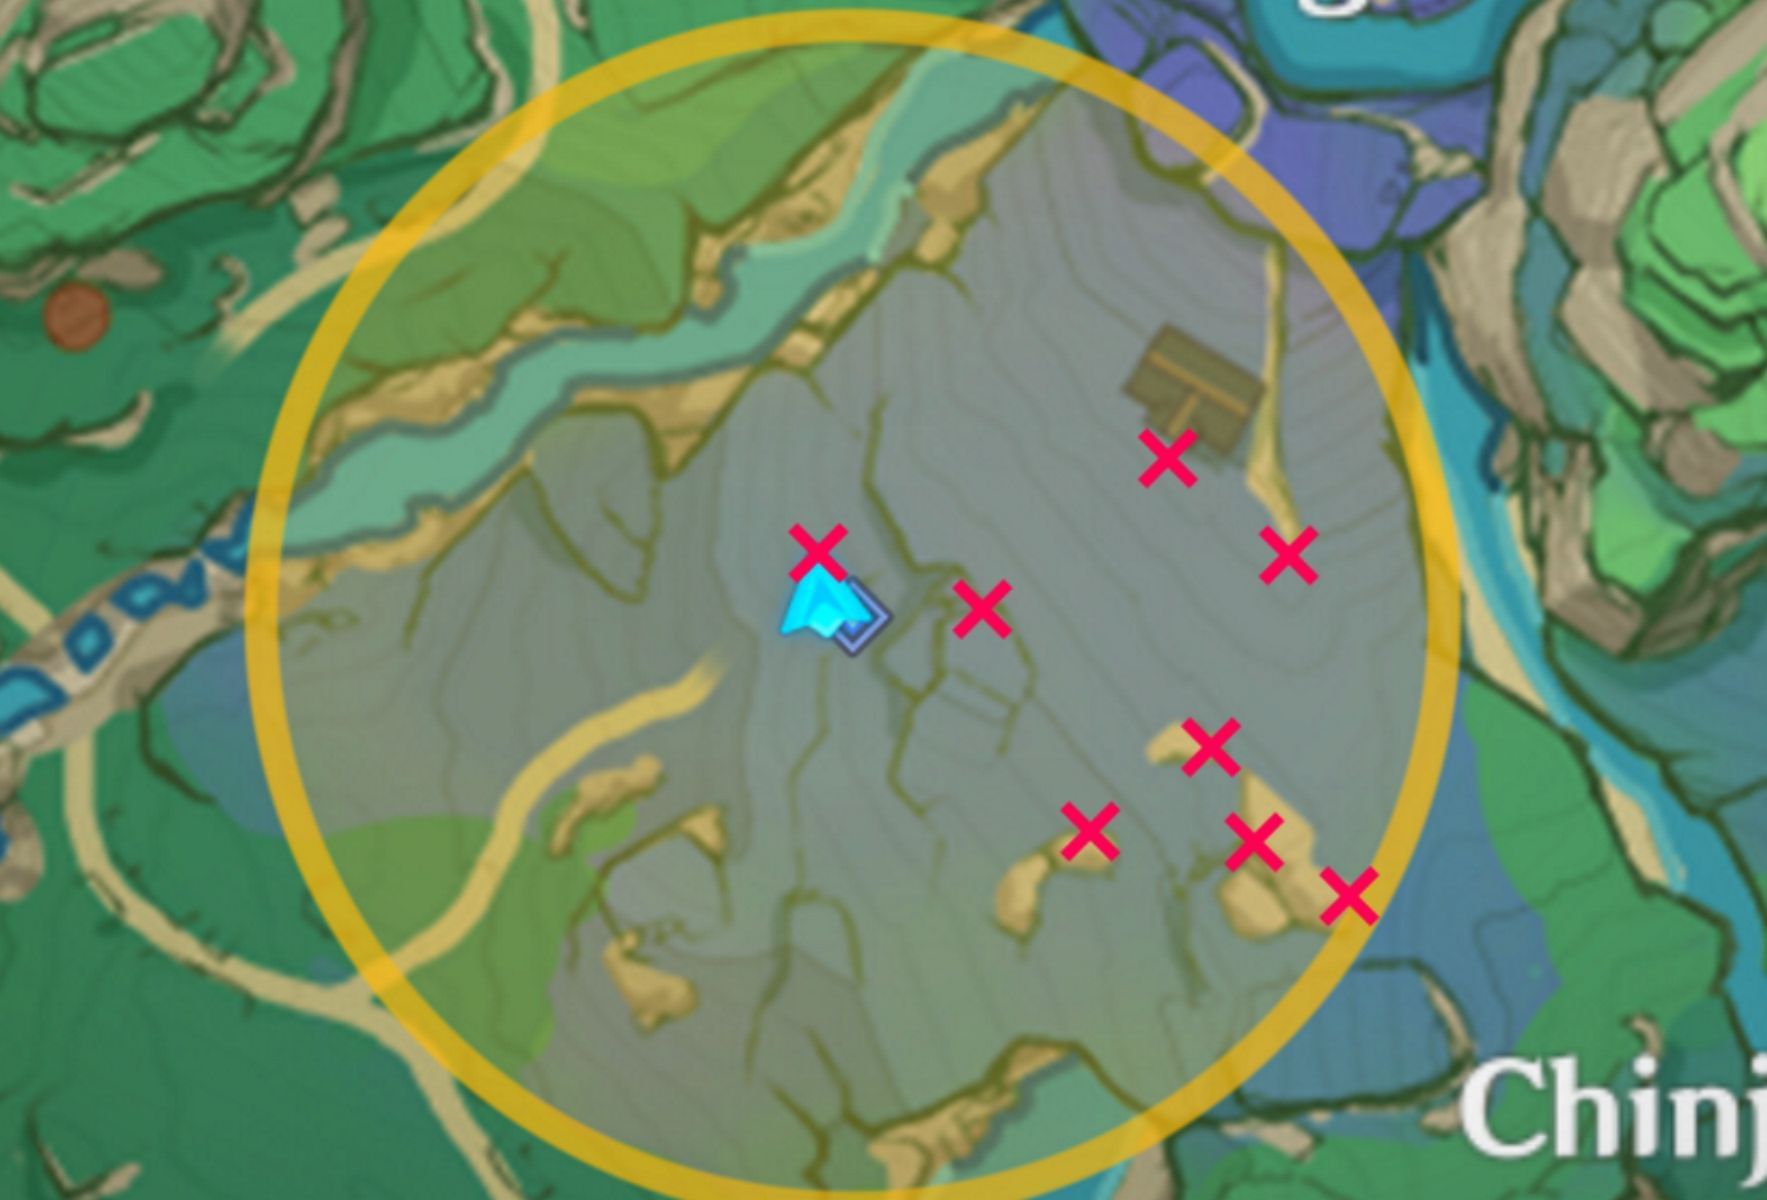
This part of the quest involves Genshin Impact players using the Memento Lens on the small Kitsune statues. There are eight of them in total and the location of each one is marked on the above map with a red "X" for simplicity.
Using the Memento Lens on every statue will unveil some brief dialogue. After players use it on all eight statues, they need to move on to the next section.
Recite the sacred words in front of the Sky Kitsune Statue
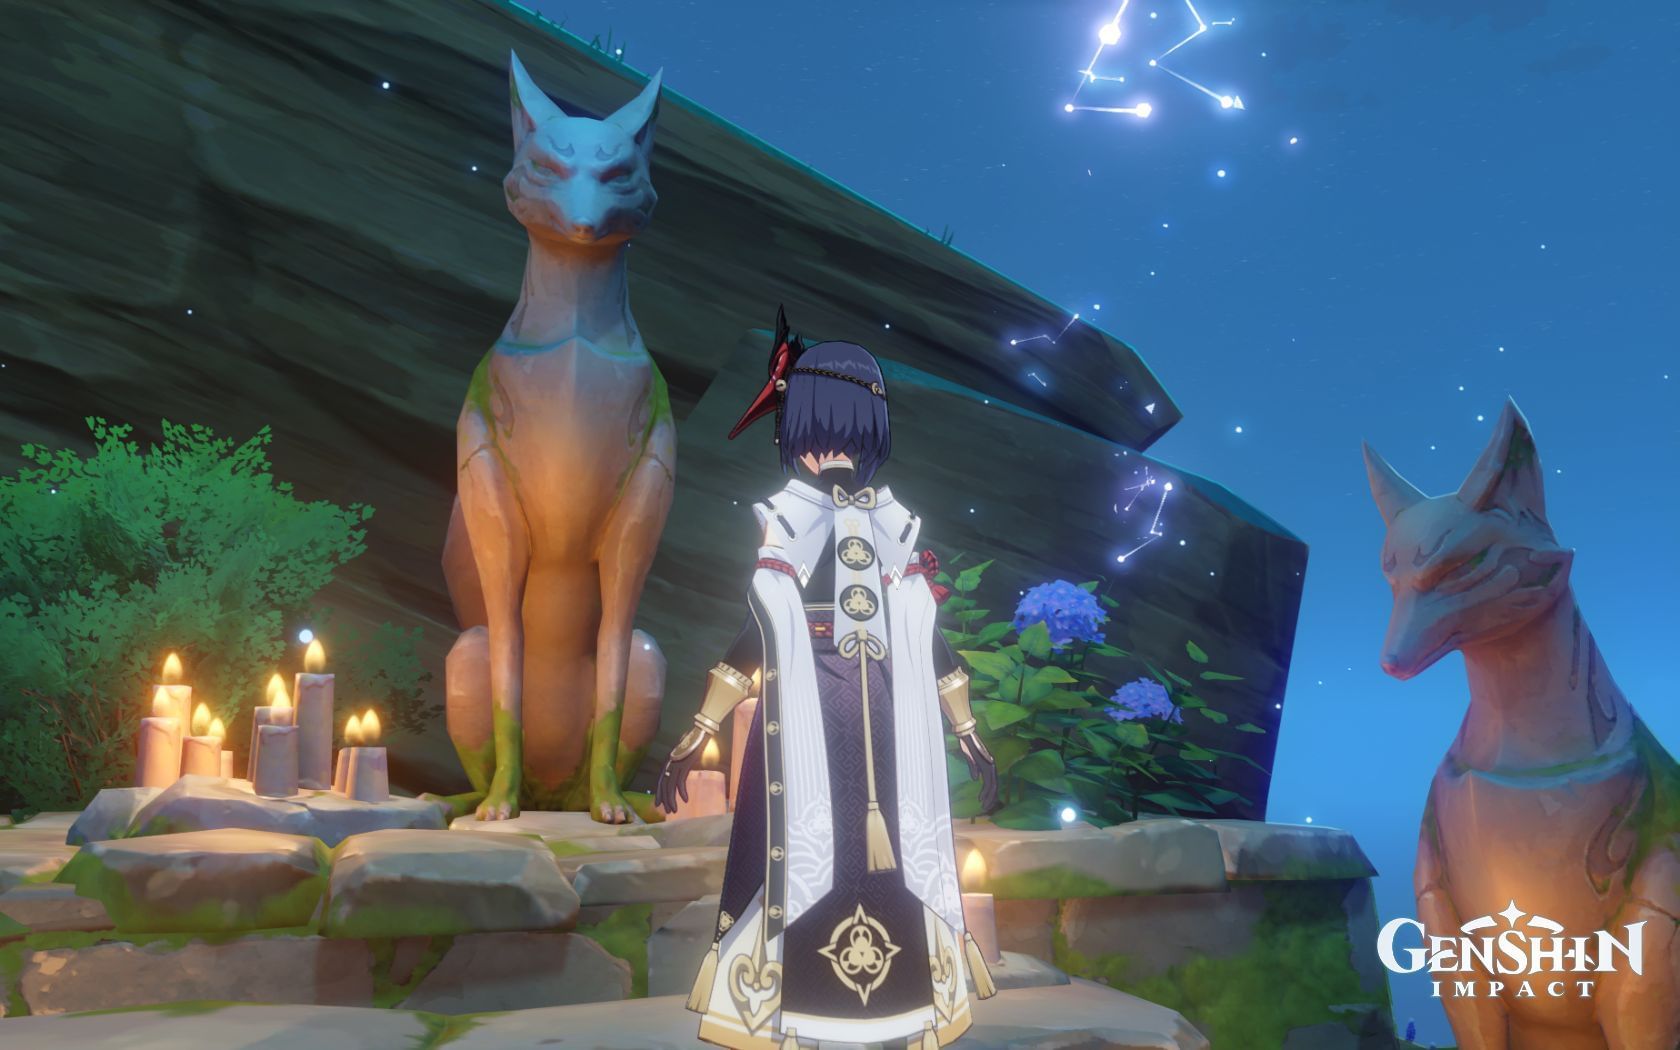
Genshin Impact players should easily find the next location for this quest, given that it's marked on their minimap. Approach the big Kitsune statue here and "Investigate" it.
This is the order for players to remember:
- "In the name of Narukami's envoy."
- "And of the Hakushin bloodline."
- "Bring forth the fried tofu!"
Afterward, Travelers will unlock the objective "Obtain the ward." The ward will be glowing in front of them, so interact with it to pick it up.
Find the barrier
The barrier in Genshin Impact isn't marked on the map, making it difficult for players to proceed. They will find the barrier south of the previous location. However, the entrance shown above requires players to have a Rust-Worn Key, which will also lead them to an Electroculus. Not every player will have the Rust-Worn Key, as it's an optional item.
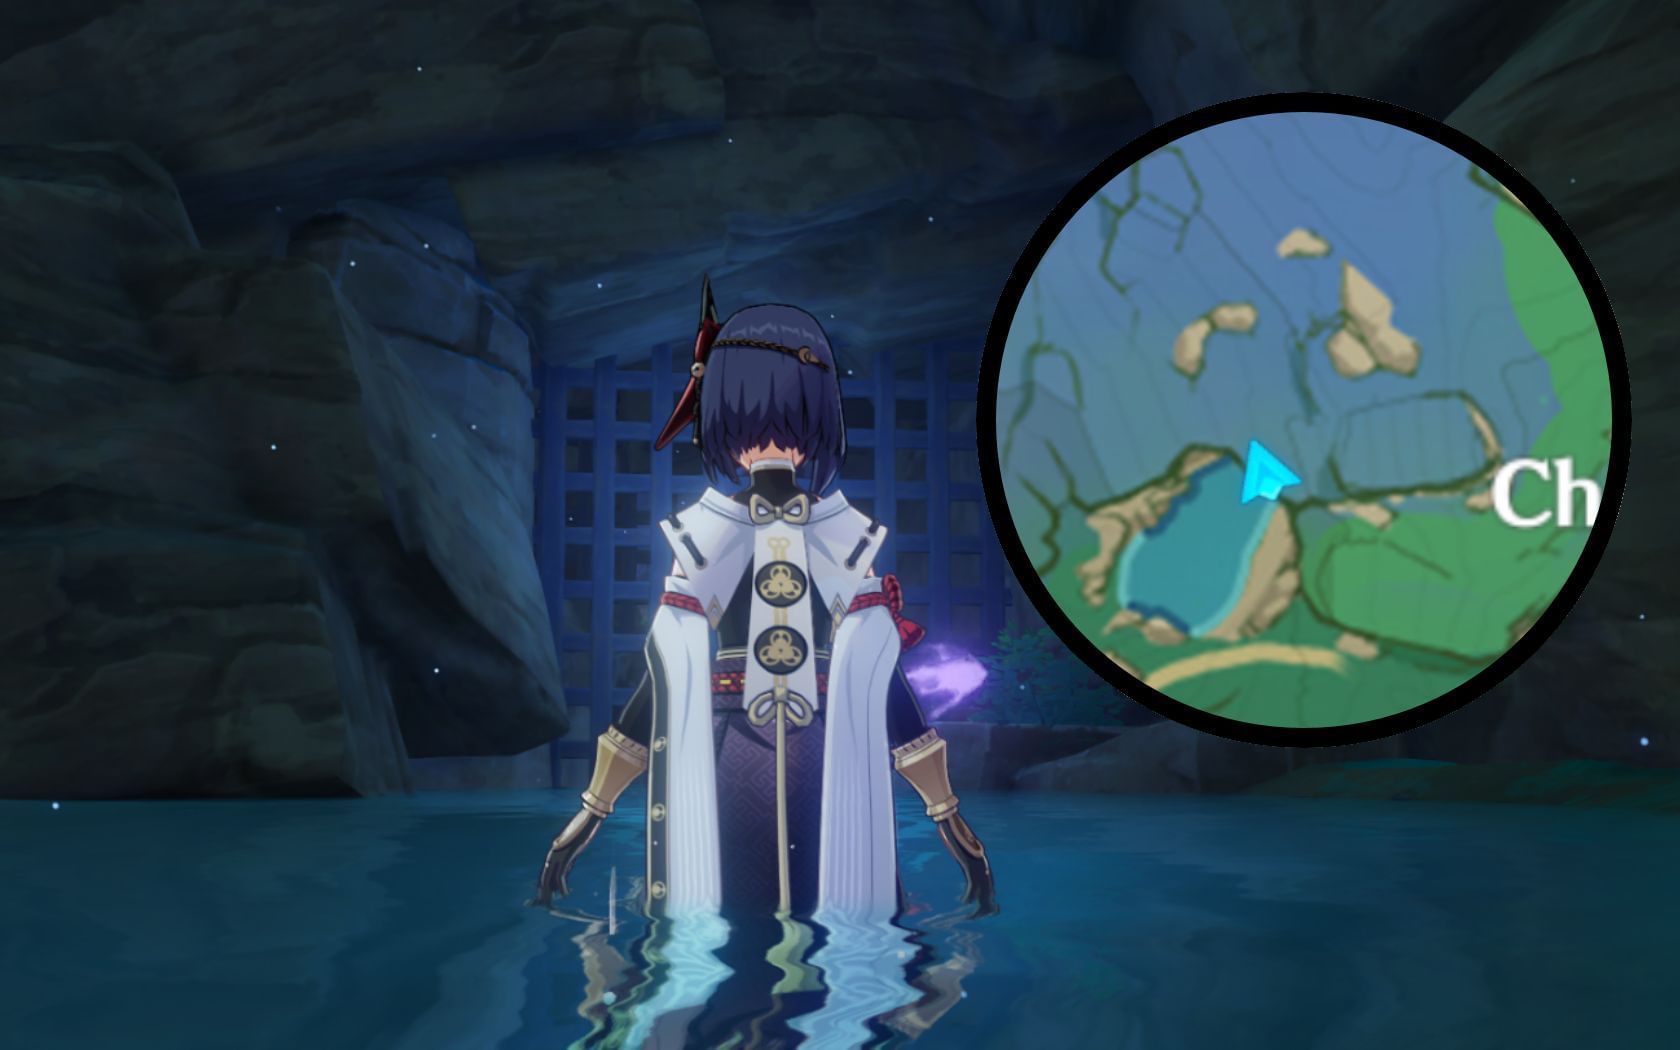
That key is located on top of a table in the well under Konda Village (which was visited in the previous Genshin Impact quest, A Strange Story in Konda). If the player doesn't have the Rust-Worn Key, they don't need to backtrack; they can instead go through an alternate entrance.
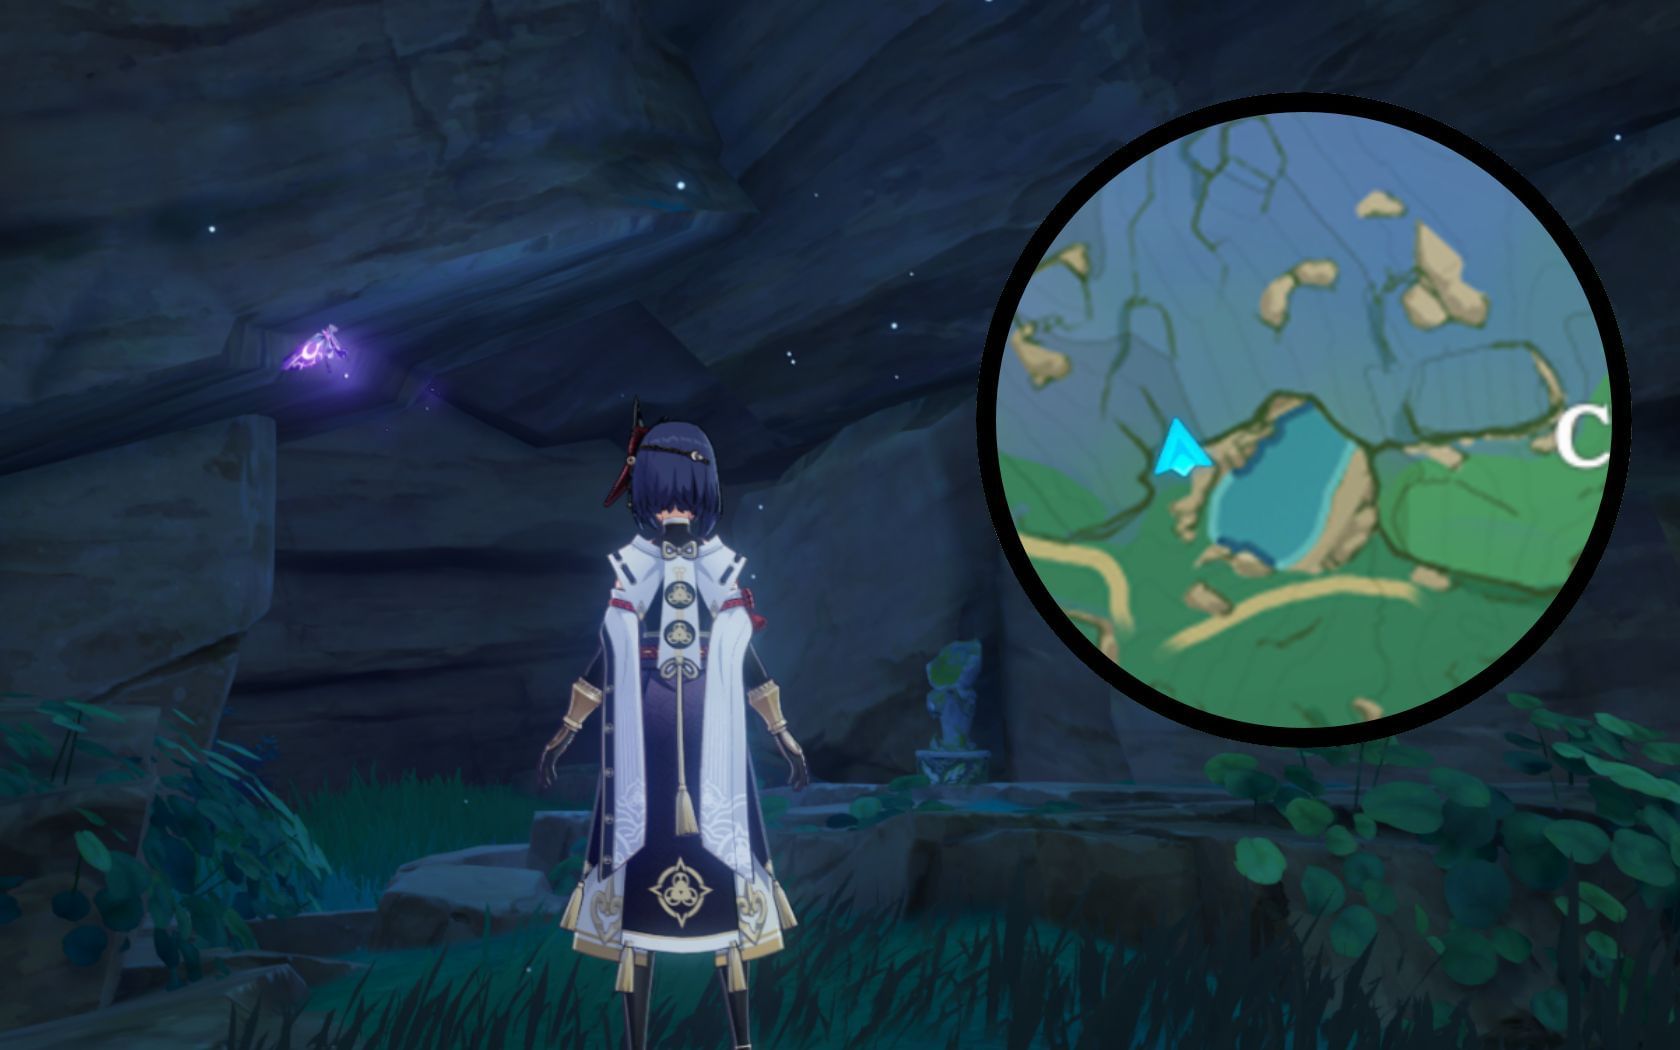
There are some Electro butterflies a little west of the previous location. Simply head into it to proceed to the next part of this Genshin Impact quest.
Destroy the barrier
Once the player is here, they should interact with an Electro lantern nearby. There will be a "Pray" option, so select that, and the player will now have to adjust the order of some nearby Electro lanterns.
Near the quest navigation point is one Electro lantern. Interact with it so it only shows two magatamas (the symbols that look like 9's).
Head southeast of the previous location and turn on this Electro lantern. Make sure it displays three magatamas.
Now go north from the last location. This Electro lantern must also display three magatamas.
There should be another Electro lantern west of the last location; it should also display three magatamas. This Genshin Impact quest only has one more major step left.
Return to the first Electro lantern and "Pray" there. A Mysterious Samurai will spawn, so defeat him. A cutscene with Kazari will play, and Travelers should now be finished with Sacrificial Offering in Genshin Impact. They will now be able to do two quests:
- Cleansing Defilement
- Tanuki-Bayashi in the Forest

Are you stuck on today's Wordle? Our Wordle Solver will help you find the answer.