

'%20x='0'%20y='0'%20height='100%25'%20width='100%25'%20%0A%20%20%20%20%20%20%20%20%20%20xlink%3Ahref='data:image/jpg;base64,/9j/2wBDAAYEBQYFBAYGBQYHBwYIChAKCgkJChQODwwQFxQYGBcUFhYaHSUfGhsjHBYWICwgIyYnKSopGR8tMC0oMCUoKSj/2wBDAQcHBwoIChMKChMoGhYaKCgoKCgoKCgoKCgoKCgoKCgoKCgoKCgoKCgoKCgoKCgoKCgoKCgoKCgoKCgoKCgoKCj/wgARCAAGAAoDASIAAhEBAxEB/8QAFgABAQEAAAAAAAAAAAAAAAAAAAUG/8QAFQEBAQAAAAAAAAAAAAAAAAAABQb/2gAMAwEAAhADEAAAAKucGpn/xAAhEAABAwQBBQAAAAAAAAAAAAABAgQSAAMGEQUTFCRBUf/aAAgBAQABPwDHmbdXHbLKxFegtPUXoiINPMetd3fi1TGateWoe/kDX//EABcRAAMBAAAAAAAAAAAAAAAAAAABAiL/2gAIAQIBAT8AU6P/xAAWEQEBAQAAAAAAAAAAAAAAAAABAAL/2gAIAQMBAT8ANrf/2Q=='%3E%3C/image%3E%3C/svg%3E)
The encounter with the final boss of Final Fantasy 7 Rebirth is one of the most lengthy and challenging fights an RPG fan is going to experience. After this introduction, there will be spoilers for what players will be fighting, what party members will be involved, and more. However, I wanted to give you a chance to back out and not receive further spoilers about the ultimate encounter of the title.
There are battles in the Hard Difficulty that could be even more punishing, but that’s up to you to discover. However, if you’re looking for help on the final boss of Final Fantasy 7 Rebirth, I’ve got you covered. After spending hours fighting this boss, there were lessons learned and strategies uncovered.
Here’s everything you need to know about the final fight. Make sure every single character is equipped with plenty of materia and the best weapons/armor.
Since each phase of this Final Fantasy 7 Rebirth fight can include different party members, you can use this guide to make sure you have healing/support materia for each party ahead of time. The most important advice I have is: Do not unequip anyone’s material. Nobody’s. You’ll thank me.
Looking for Crossword hints & solutions? Check out latest NYT Mini Crossword Answers, LA Times Crossword Answers, and Atlantic Crossword Answers
Disclaimer: This article contains major spoilers for the final boss identity and strategies in Final Fantasy 7 Rebirth.
Tips for defeating each phase of the final boss of Final Fantasy 7 Rebirth
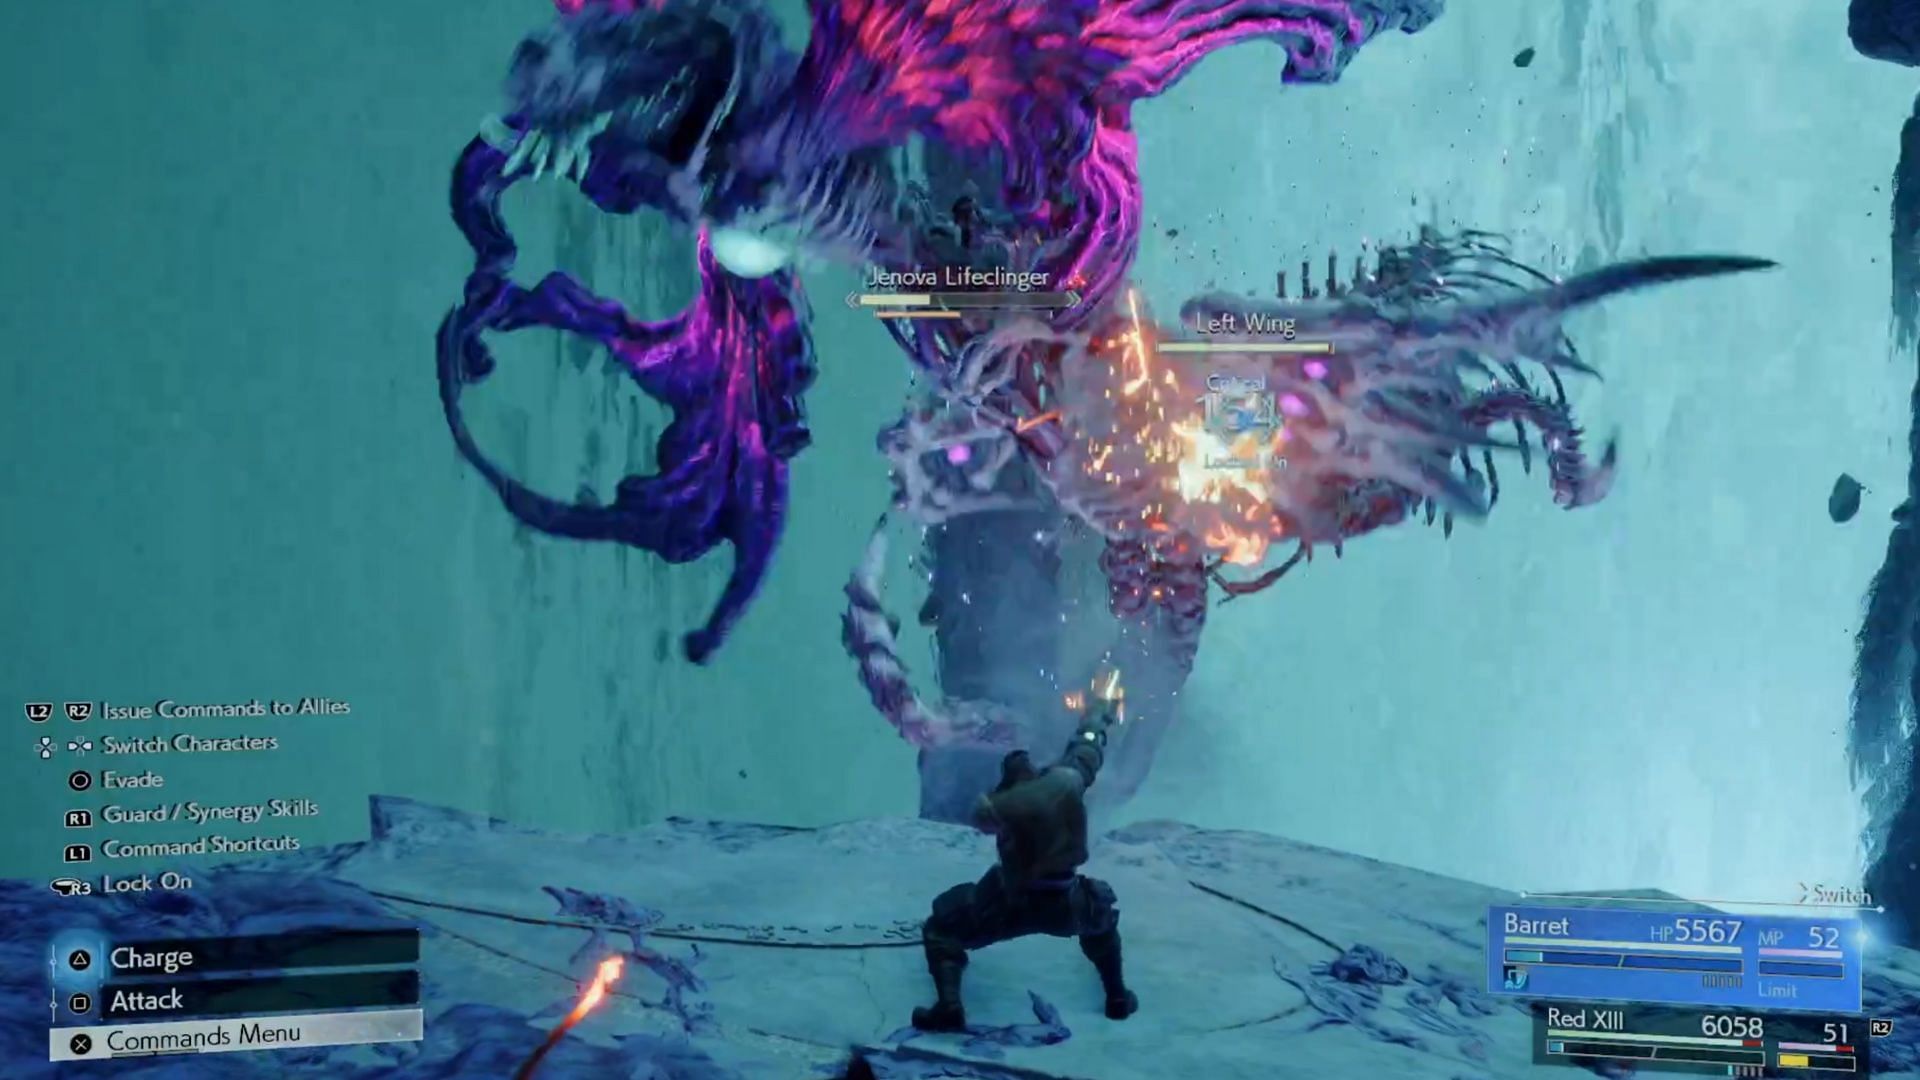
1) Phase 1: Jenova Lifeclinger (Cloud, Tifa, Barret)
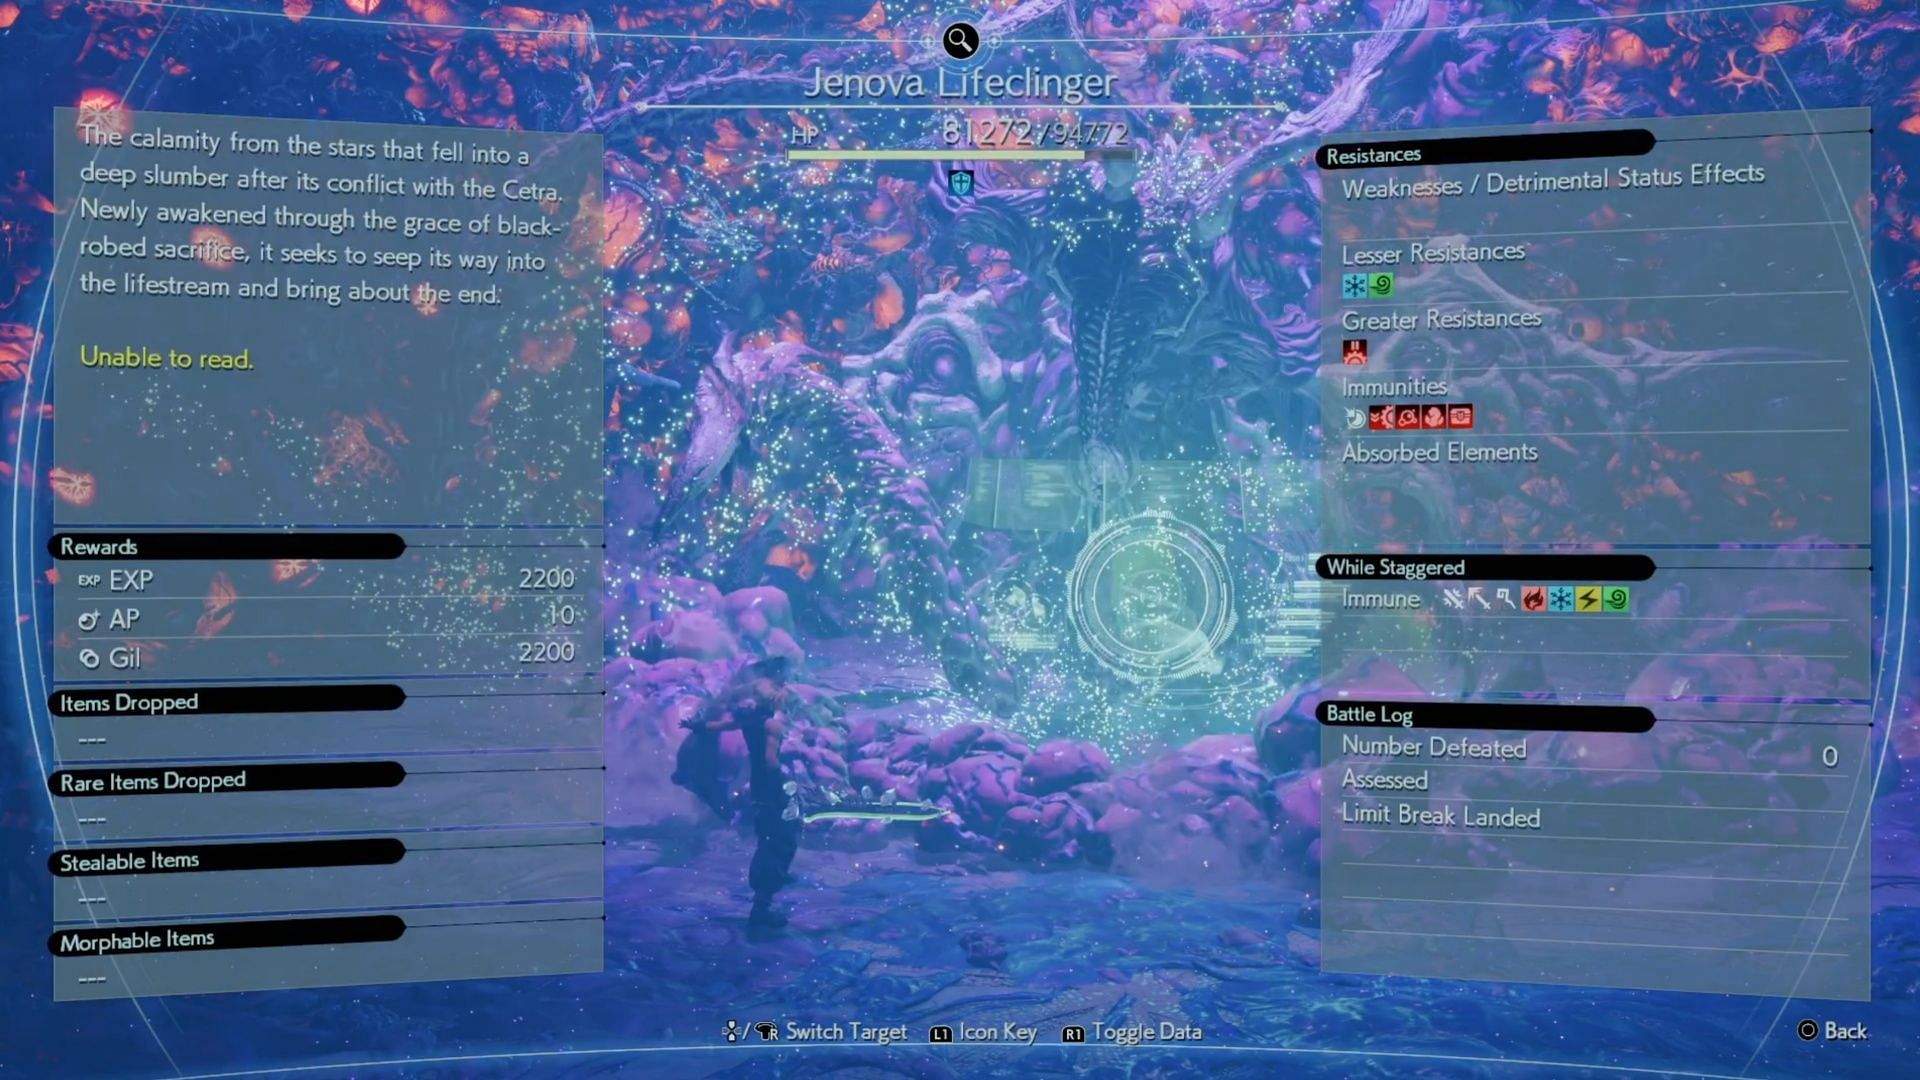
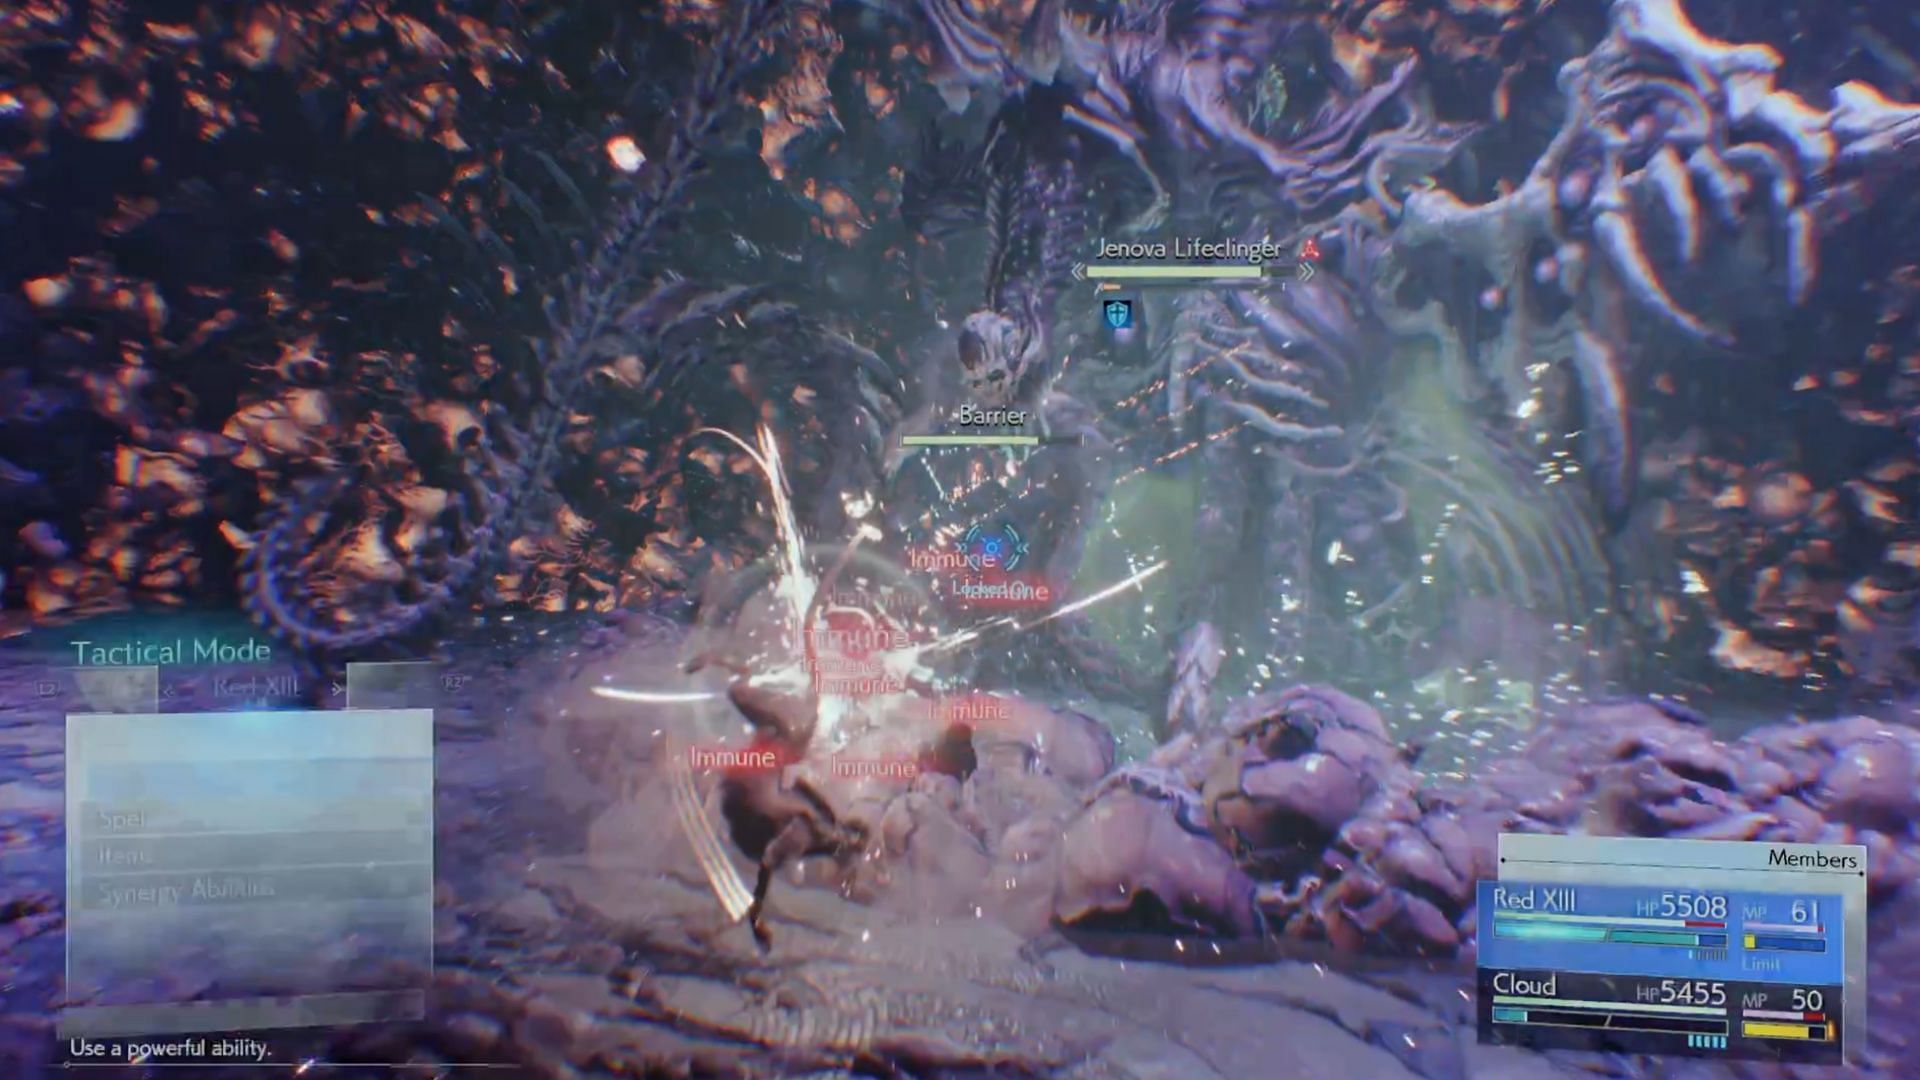
After the cutscene plays out, players will begin fighting Jenova Lifeclinger. This form of the final boss in Final Fantasy 7 Rebirth has no weaknesses, is resistant to Ice and Wind, and, while staggered, is immune to almost everything. It will look similar to previous forms, but now you’re stuck with Cloud, Tifa, and Red XIII.
Jenova will feel pretty similar to the encounter with the Emergent Boss from Chapter 5 of Final Fantasy 7 Rebirth in some ways. It will conjure up a barrier and can dart across the screen after it uses a close-range Contaminant Expulsion. It can use an AOE attack, Mourning Wail, and will also try to thrash you with its tail.
Focus on the tail, and avoid the V-shaped Azure Resplendence. Jenova also uses a melee-range attack, Castigate. There is also a rapid laser-fire attack, Vengeance. At this point, I learned that the Throw Gil materia did absolutely no good.
Jenova will keep using attacks like this and a ranged Eye of Providence until you break the barrier. You can harm it while the barrier is up, but it takes quite a while. This phase of the final boss has so many attacks. It will also use Lachrymal Exhale, a line of bubbles that spews across the room.
Jenova will temporarily stop taking damage at 85% or so health remaining, but this appears to remove the barrier. Then, closer to 70%, you’ll see a cutscene. I got here faster by using a Limit Break on Cloud (Ascension) during this phase of the Final Fantasy 7 Rebirth final boss.
2) Phase 2: Jenova Lifeclinger (Cloud, Tifa, Red XIII)
Here’s your first party change of the final boss in Final Fantasy 7 Rebirth. The boss is bigger and more intimidating, but it did not recover health or stagger, at least. The same attacks are going to occur, alongside some new ones. Desecration, for example, is a pair of huge lasers that spit out of the sides of the boss. Stay in the middle.
Dreams of Sorcery spits out bubbles that explode after a short duration. It tends to teleport away to the other side of the field after this. It may do it back to back, so keep an eye on the field for this final boss of Final Fantasy 7 Rebirth. Dreams of Frost can blast people on the ground with ice.
I tried to stay in the air as Cloud here, using Triple Slash to get airborne and dashing around to avoid the bubbles and other various attacks of Jenova Lifeclinger. You should stagger it soon, so use this time to spam Braver and any other powerful attacks you’ve got on hand.
The fight continues in this way during Final Fantasy 7 Rebirth’s final boss, so keep damaging it while it teleports and blasts you with ranged damage. Beware, though, because the boss can temporarily capture a party member and pelt them with lasers. Once you get it to around 40% HP, the phase will change.
Also read: All Final Fantasy 7 Rebirth Chapters
3) Phase 3: Jenova Lifeclinger (Tifa, Cait Sith)
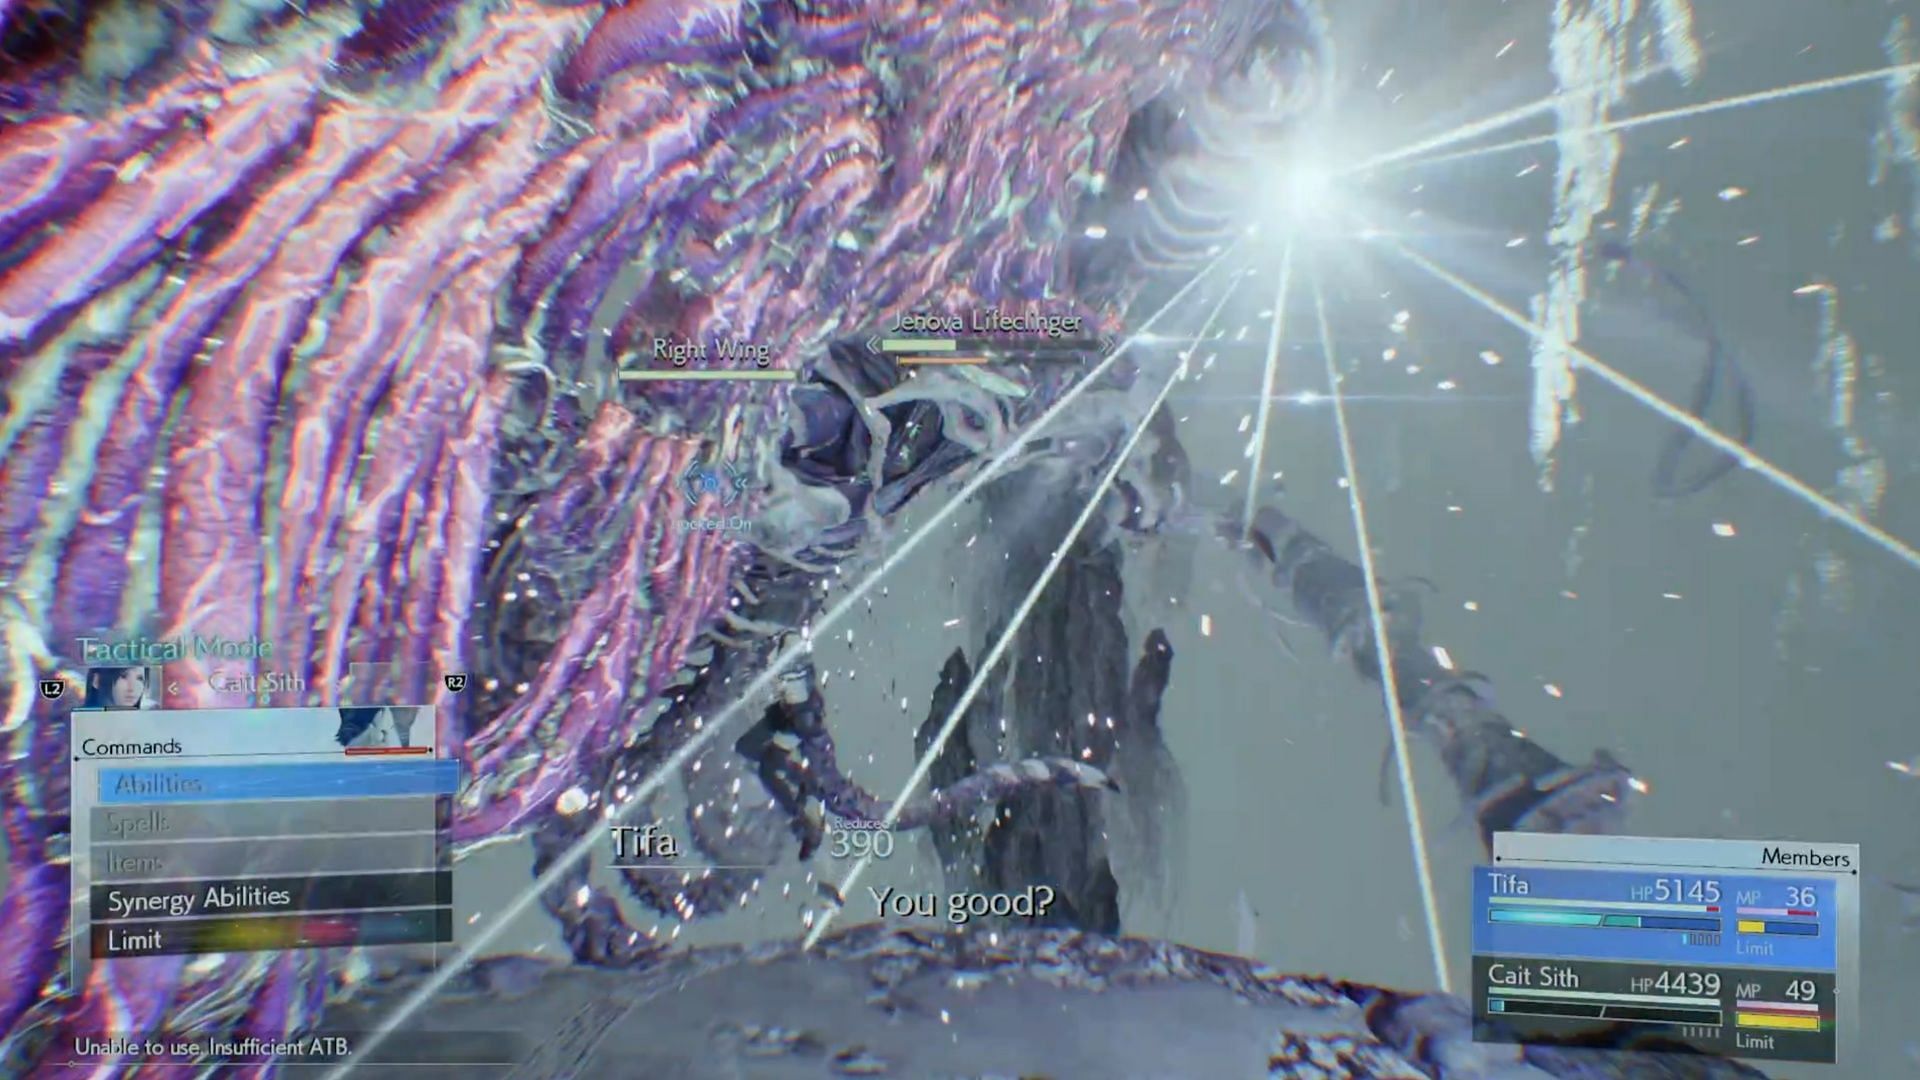
Now you just have two party members! Put all of your efforts into destroying the Right Wing - use Tifa’s hardest-hitting abilities, and if you have any Limit Breaks (like on Cait Sith), now is a great time to pop them off.
The boss will still spam attacks on you and use abilities like Desecration. Keep up the onslaught on the Right Wing. Breaking it will let you move on to the next phase of the battle. None of the attacks have changed, so it’s just a matter of hitting as hard as possible.
4) Phase 4: Jenova Lifeclinger (Barret, Red XIII)
The same as the previous phase of the final boss of Final Fantasy 7 Rebirth, break the Left Wing. This one was much easier because Barret and Red XIII were stronger for me than Cait Sith. Slam it with Overcharge, Limits, and whatever strong attacks you have on the two characters.
Fire In The Hole, for example, took almost half of the Wing’s health. Keep an eye out for the various AOE Dream attacks, and break this wing to move on.
5) Phase 5: Jenova Lifeclinger (Cloud, Yuffie)
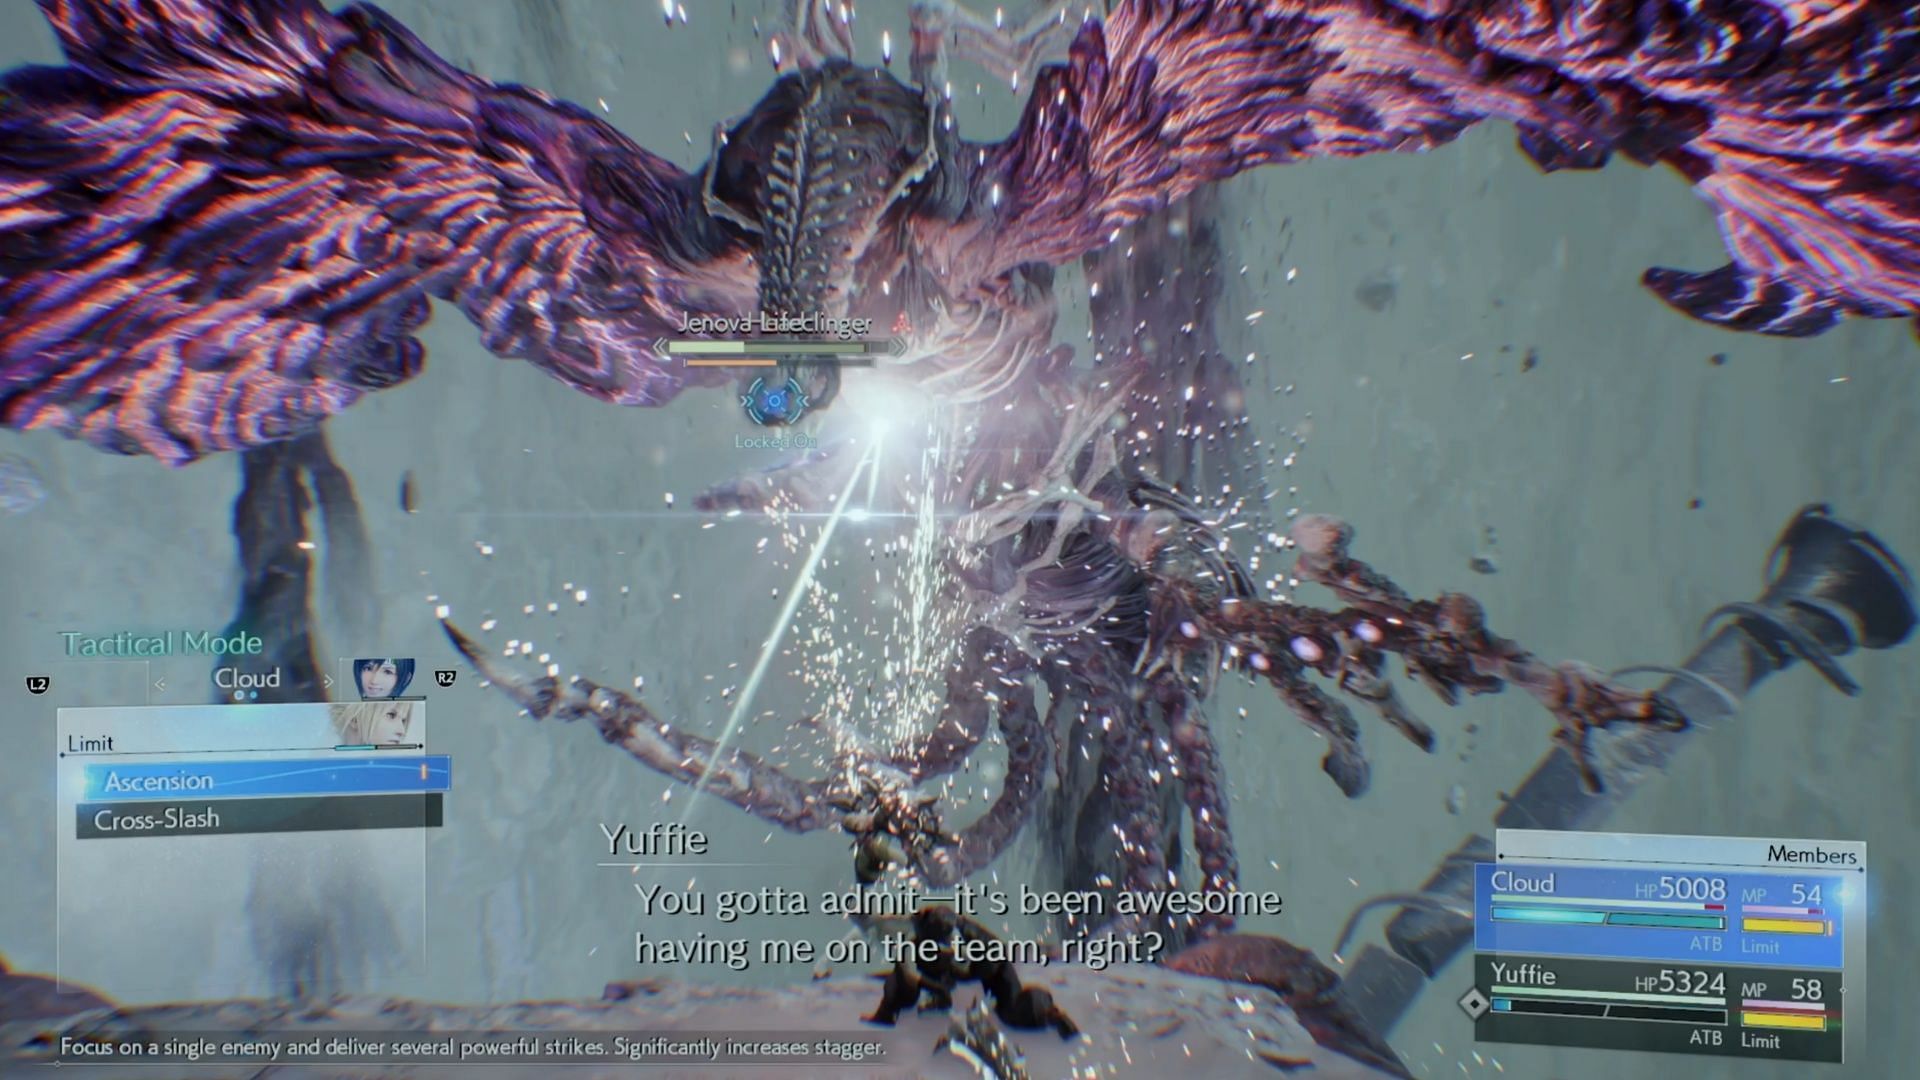
The next step for Jenova Lifeclinger is to kill the head of the boss. Cloud and Yuffie are an incredibly powerful team, thankfully.
I opened this fight with a Limit Break stocked for Cloud. Ascension took about half the head’s health, so between him and Yuffie’s non-stop damage, this was a pretty easy phase of the final boss in Final Fantasy 7 Rebirth. Enjoy the next cutscene, and get ready - we aren’t done yet.
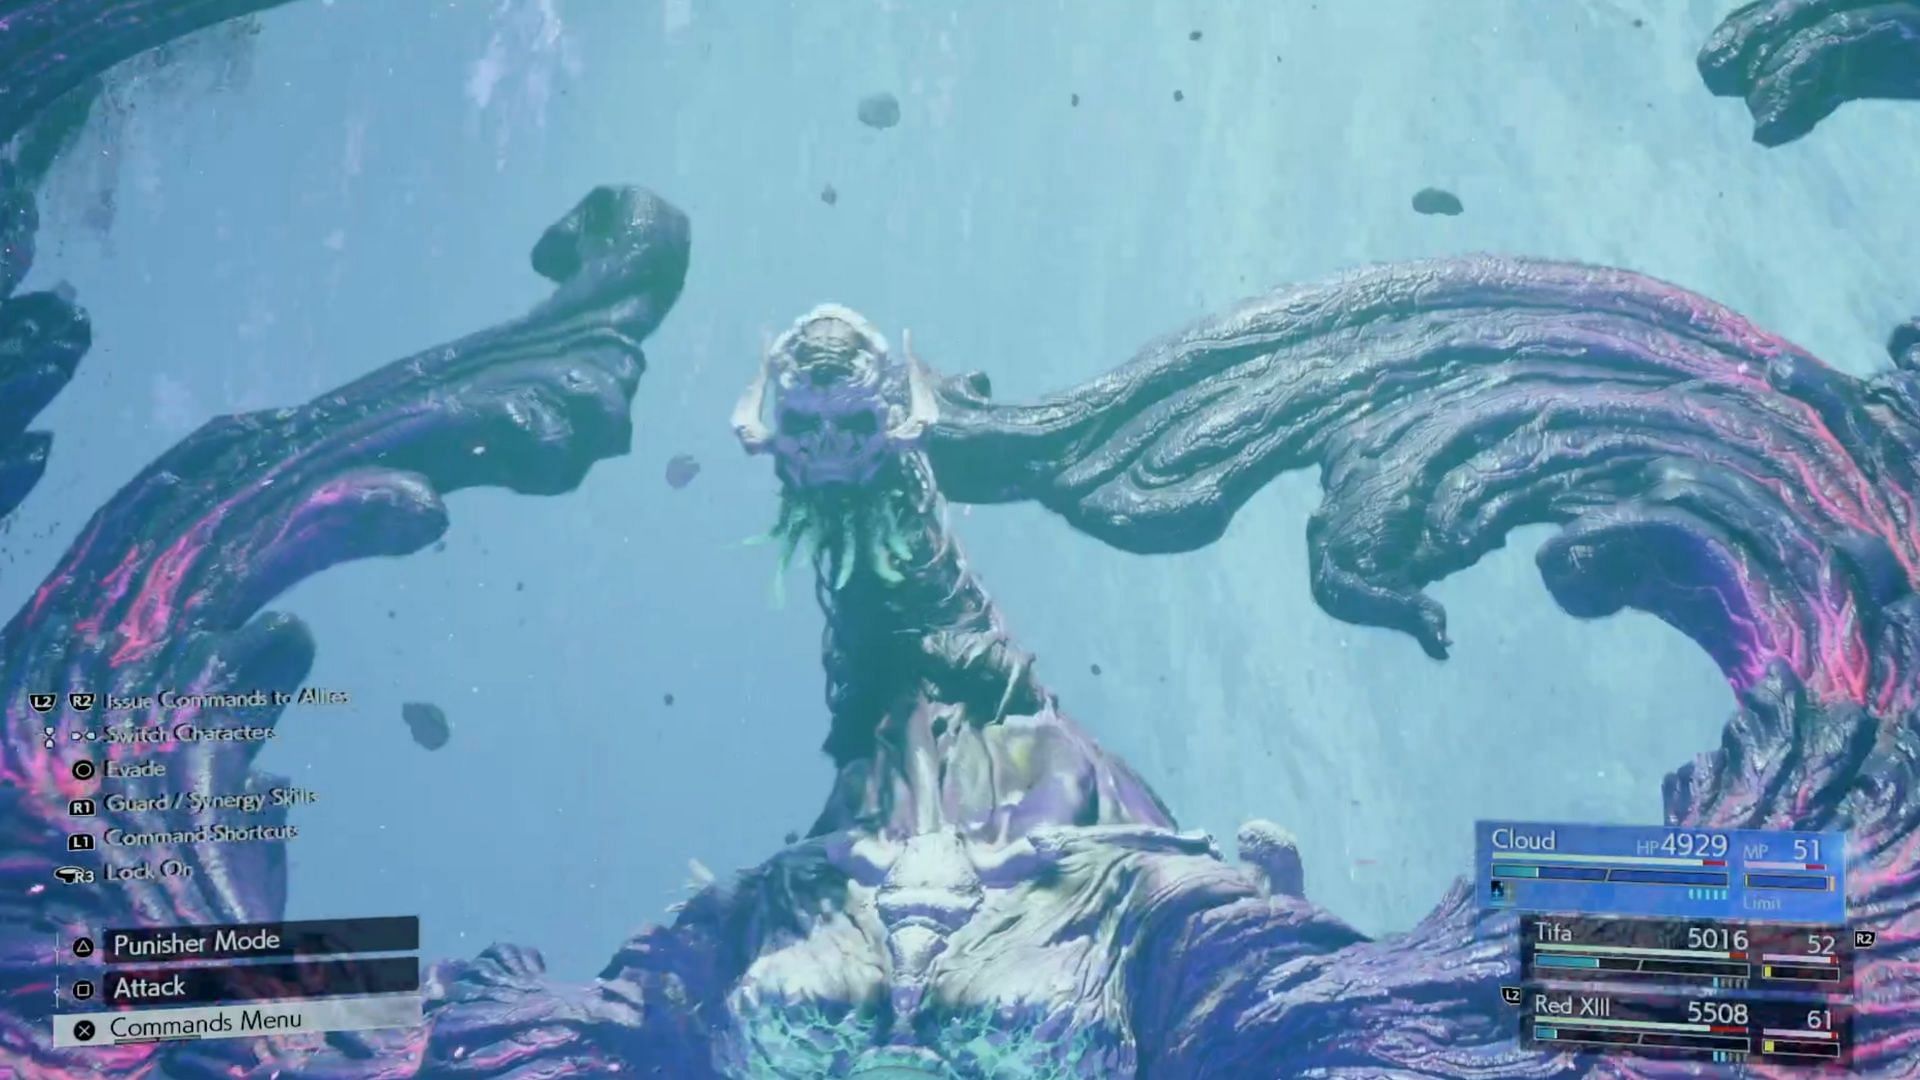
6) Phase 6: Jenova Lifeclinger (Cloud, Barret, Cait Sith)
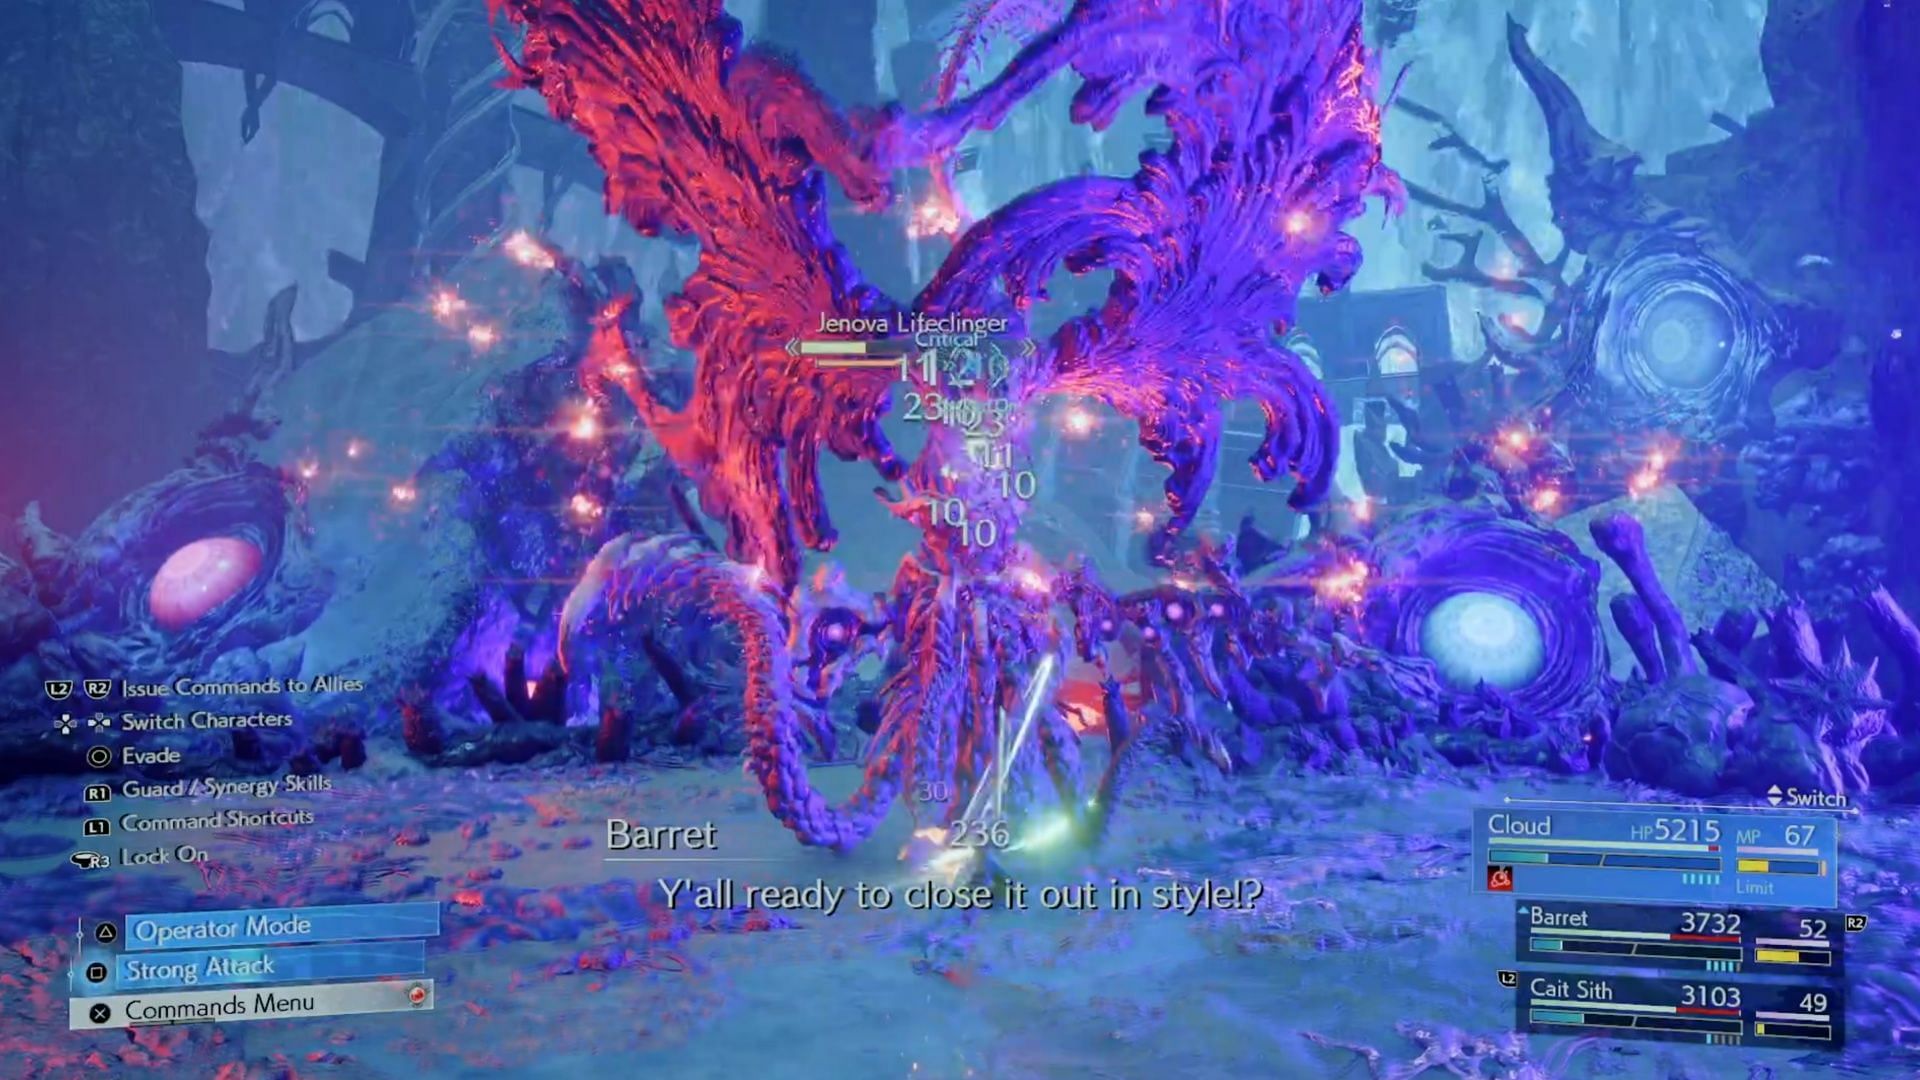
The team is back together again, fighting the final boss of Final Fantasy 7 after the epic cutscene. Castigate releases a huge array of lasers at this point in the fight, but they can be evaded. Jenova keeps using the same attacks as before, though now also occasionally casts Aeroga and Bioga.
I pressured the boss around this time, as it cast Sanguinated Flames. This attack slowly rains fire down onto the stage, so keep moving and avoid as much of the damage as possible.
Get those Focused Thrusts in while pressured to stagger Jenova. Hit it with every strong attack you have during Stagger, and you’ll defeat Jenova Lifeclinger soon. You’ll gain the following rewards, but your time isn’t up yet.
- 2,200 EXP
- 10 AP
- 2,200 Gil
- 50 Party EXP
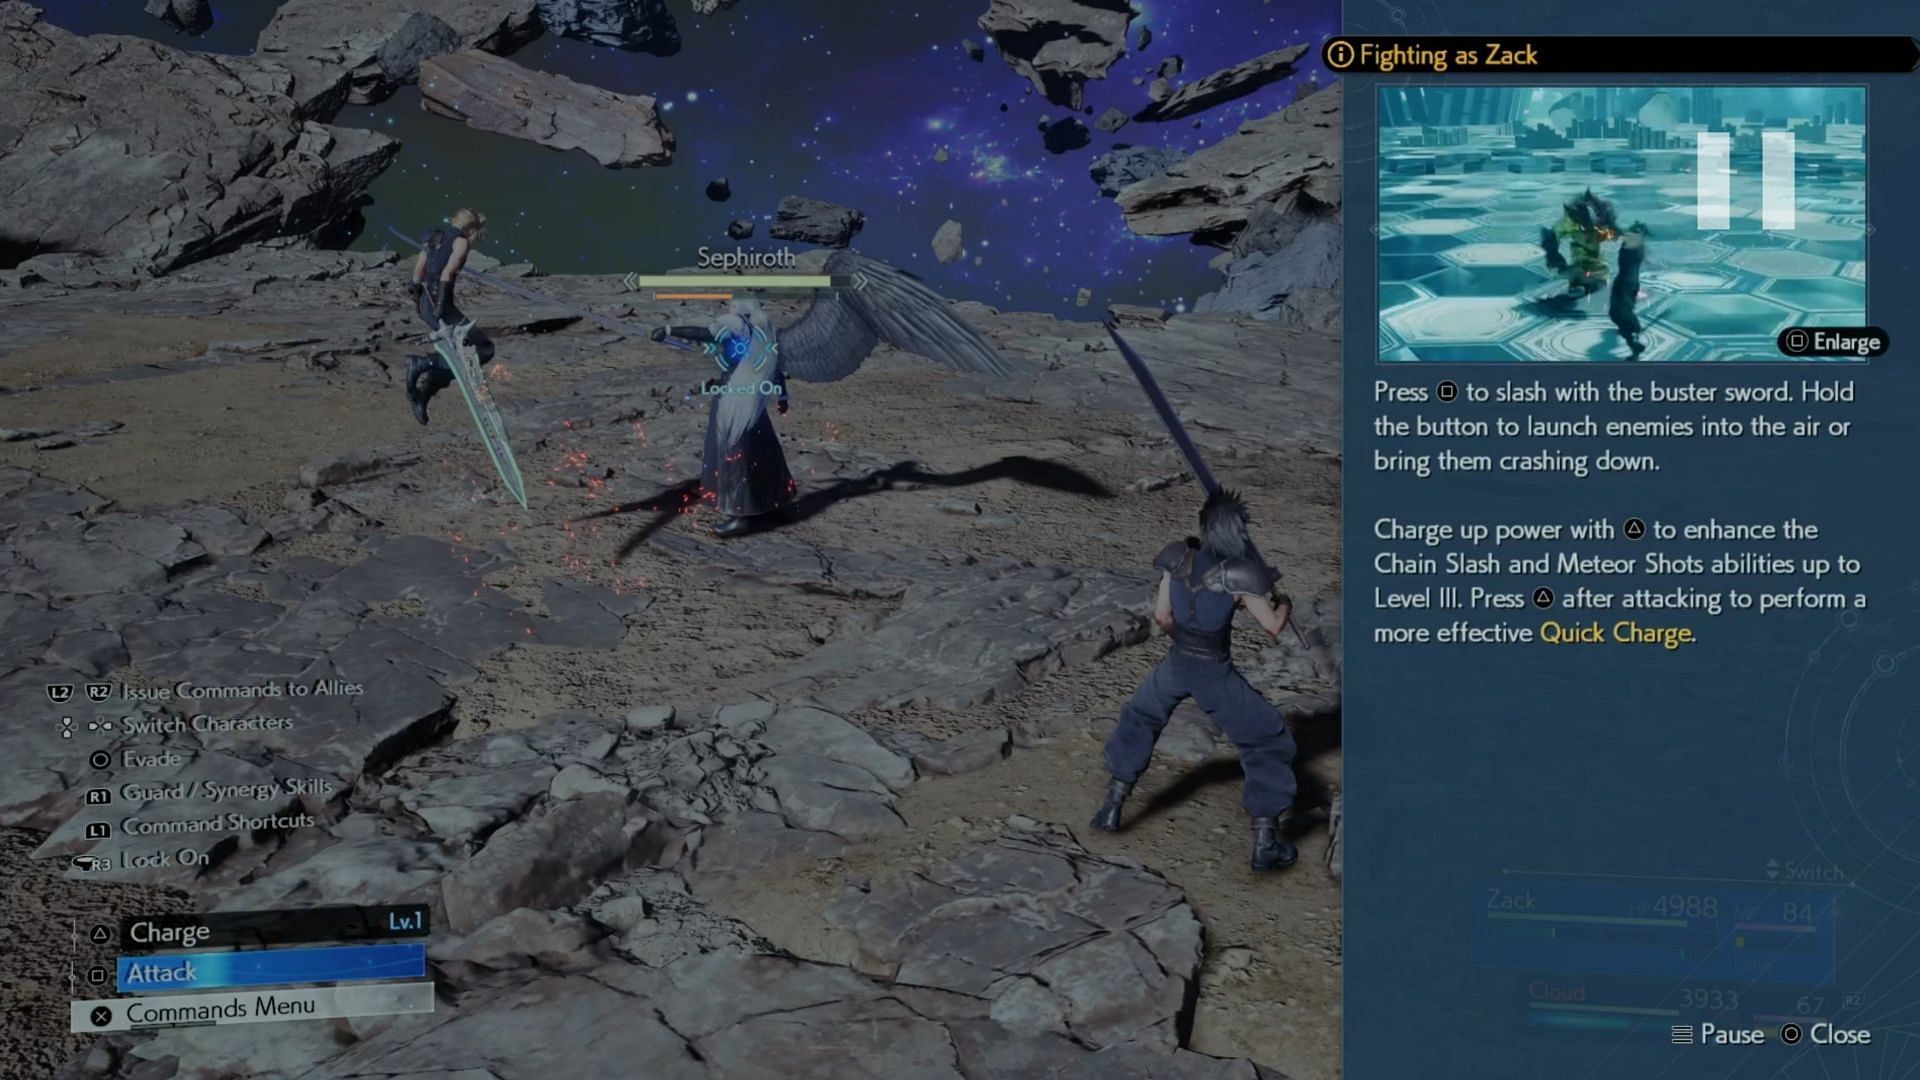
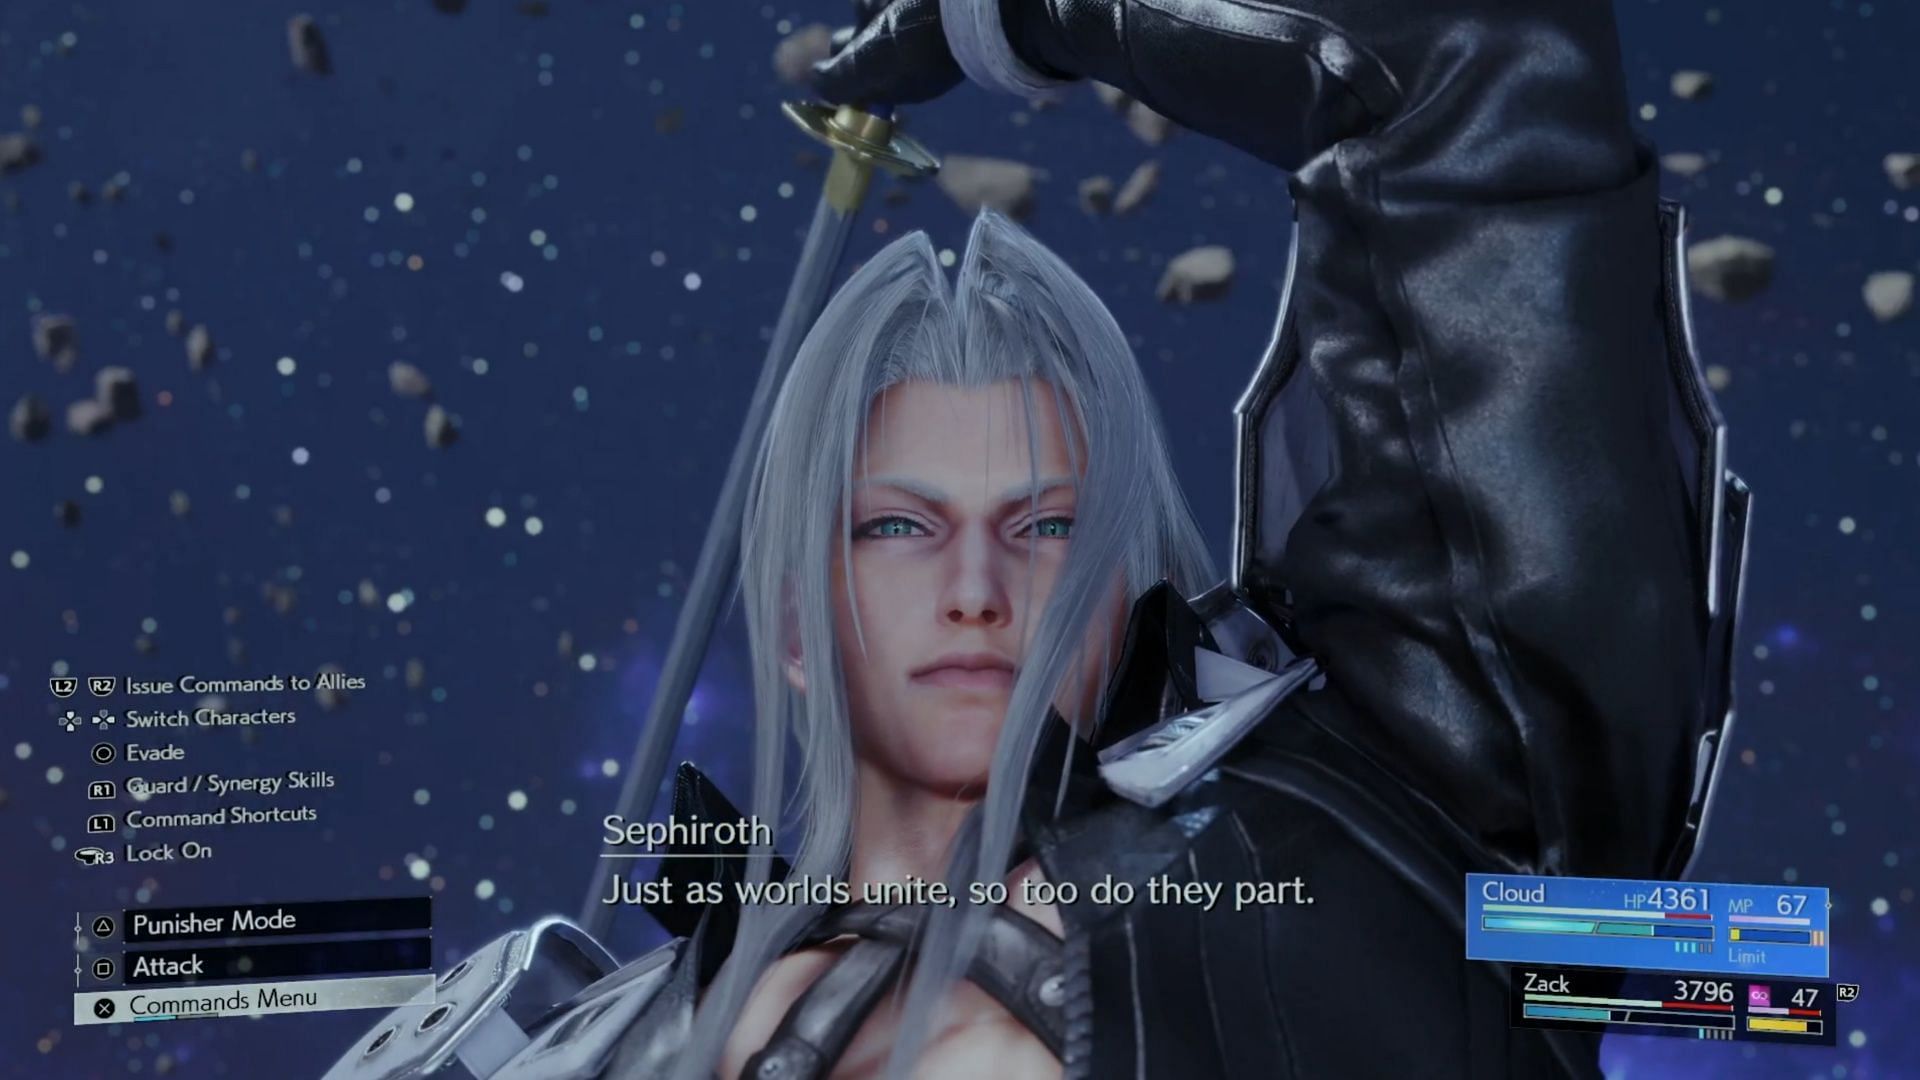
7) Phase 7: Sephiroth (Cloud, Zack)
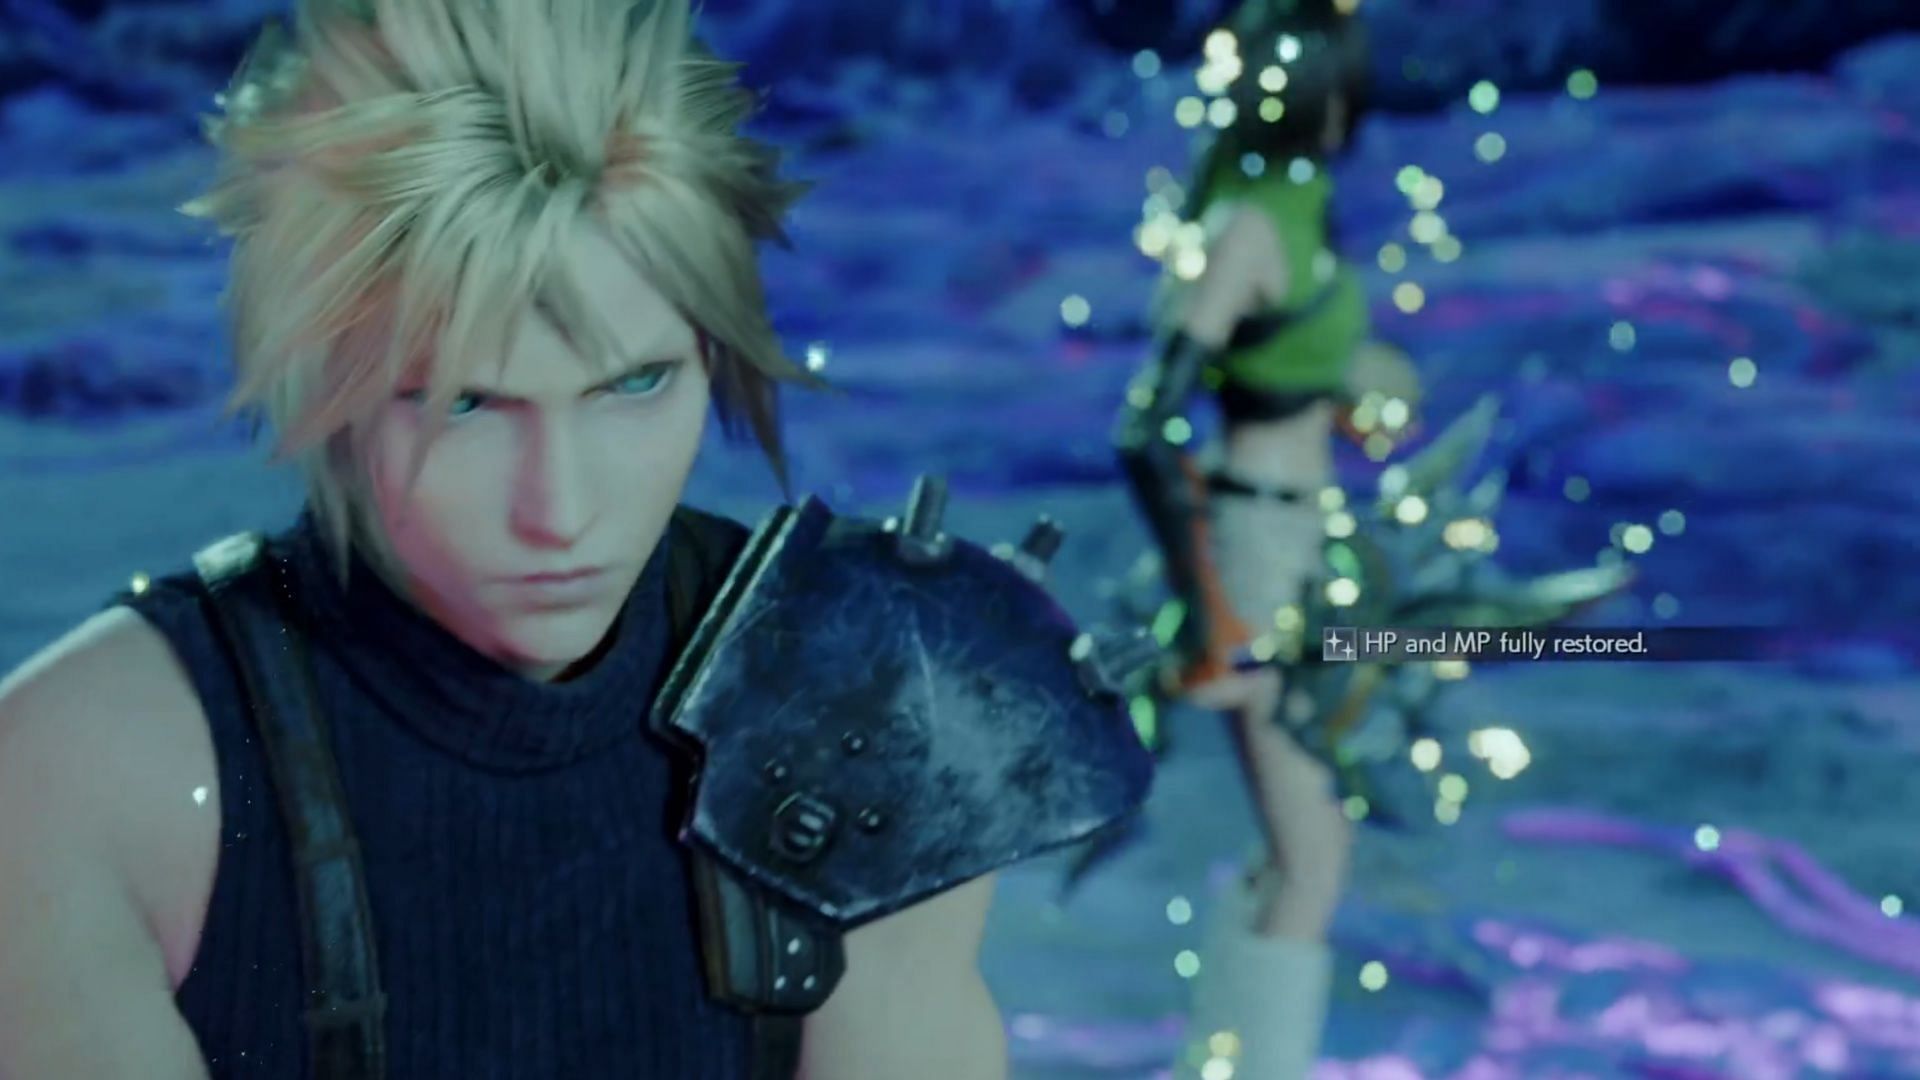
After a full restore and a cutscene, you’ll see a familiar face: It’s Zack! This is where you learn some of the attacks of Sephiroth, so keep an eye on them. You’re going to need to know these attack patterns in a phase or two.
He’s fast and ruthless, quick to use slashes and diving attacks in this final boss fight in Final Fantasy 7 Rebirth. He has no weaknesses, no resistances, and is immune to all status ailments. He can quickly knock up Cloud and combo him with ease, so you have to be careful.
Skewer is a long dash that begins after a brief delay. If it hits, he stabs Cloud and hoists him up, dealing lots of damage. You can dodge to the side to avoid this, so be quick on the movement tech. You can also swap to Zack in this fight, and you can see his gameplay on screen the moment you change to him for the first time.
Just keep building up stagger on the final boss of Final Fantasy 7 Rebirth, swapping between the two party members as needed. Sephiroth can also slice at the air and send sonic boom attacks at you, but remember, Zack also has Curaga combined with Magnify Materia.
At 75%, he’ll activate Octaslash, which will trigger after a delay. While it hits hard, the more damaging part is Octaslash Prime, which is a dash/delayed strike that he immediately uses afterward.
When I hit him with the Synergy Ability SOLDIER’S Honor, Sephiroth gained the Pressured state and was swiftly staggered. After the ability ends, hammer him with a Limit Break like Finishing Touch.
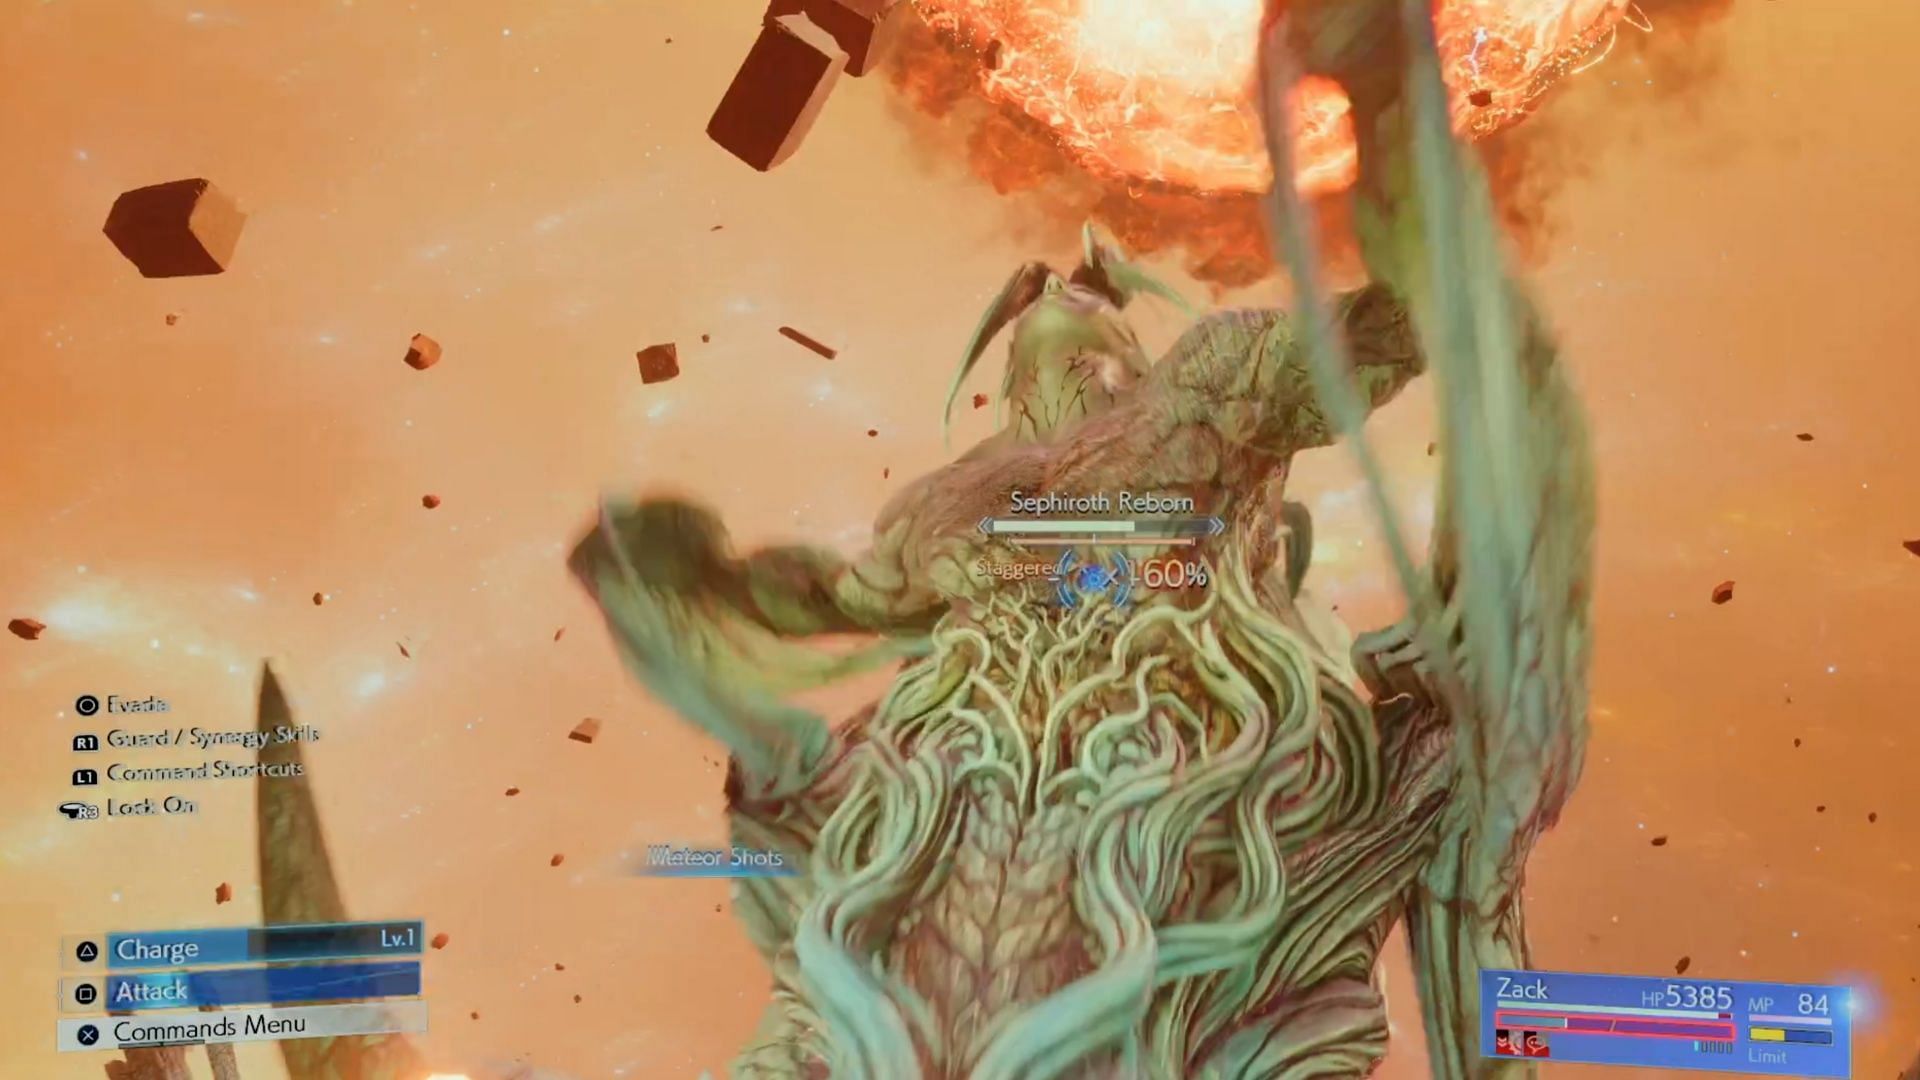
8) Phase 8: Sephiroth Reborn (Cloud)
After another tragic cutscene, you will find yourself alone with a massive version of Sephiroth. A monstrosity, to say the least. This is the next part of the final boss of Final Fantasy 7 Rebirth, but you’re getting towards the end.
Get behind the body and spam attacks like Braver and Triple Slash. It’s not especially powerful, but Sephiroth Reborn does have quite a few dangerous attacks during this phase. Maelstrom charges him forward with wind damage. He can also attack you with Whispers using Errant Whisper. Hell’s Gate is another dangerous attack, but you should break through before it hits you.
Climb up the body when prompted, and get ready to take damage. I couldn’t find a way to avoid damage during this phase as I climbed the final boss of Final Fantasy 7 Rebirth. When you get to the top, you’ll attack Sephiroth again and phase change once again. Now, you’re focused on the main body.
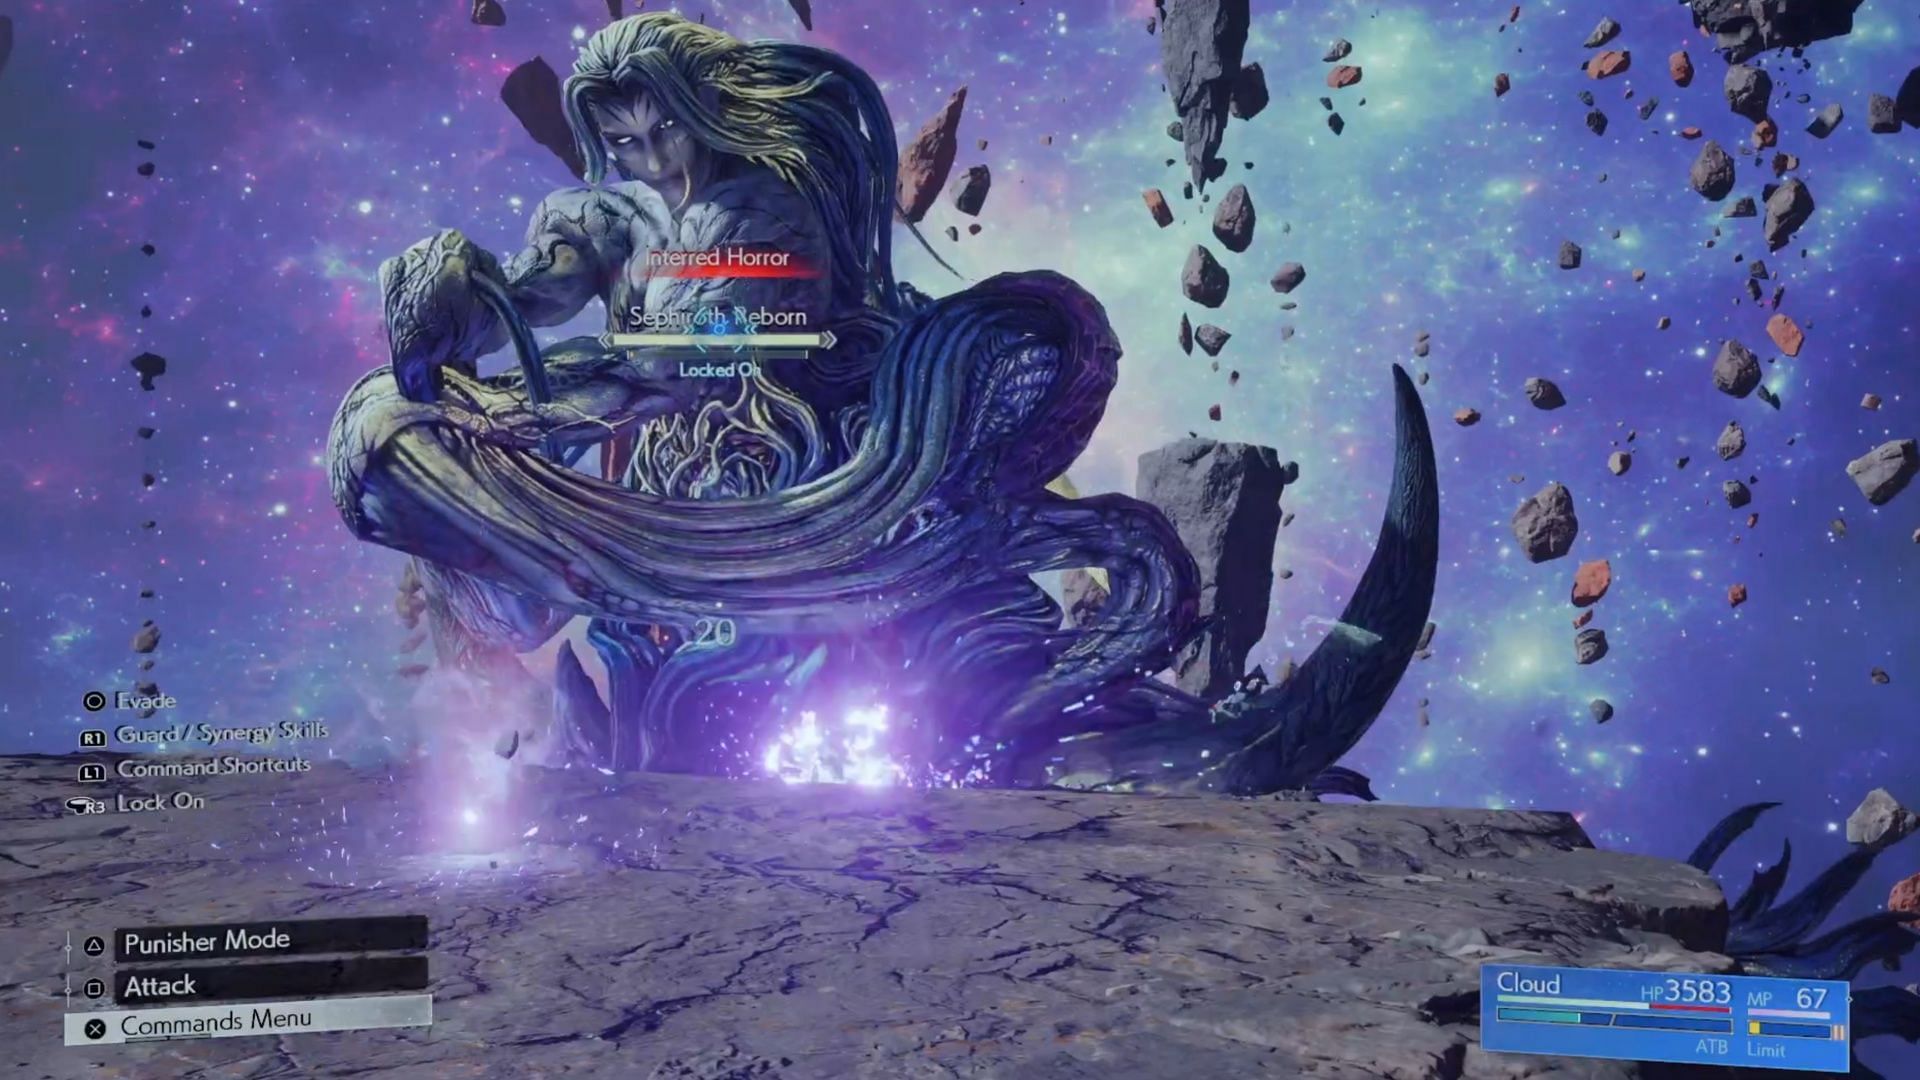
Interred Horror is a new attack, where a series of blasts hit the ground at once, and appear to chase you down. Just keep moving and attacking Sephiroth. Apocalyptic Fire has a minor delay and blasts out from him, so when you see the cast, dash backward.
Next is Swarm, which fires magical bullets that try to chase you down. He’ll do this for a few seconds. He’ll use Hell’s Gate again, which is a ground-based attack that tracks you for a few seconds. He’ll keep doing these moves over and over, so move in, hit, and get back out until you stagger him.
9) Phase 9: Sephiroth Reborn+Bahamut Arisen Whisper (Tifa, Yuffie, Cait Sith)
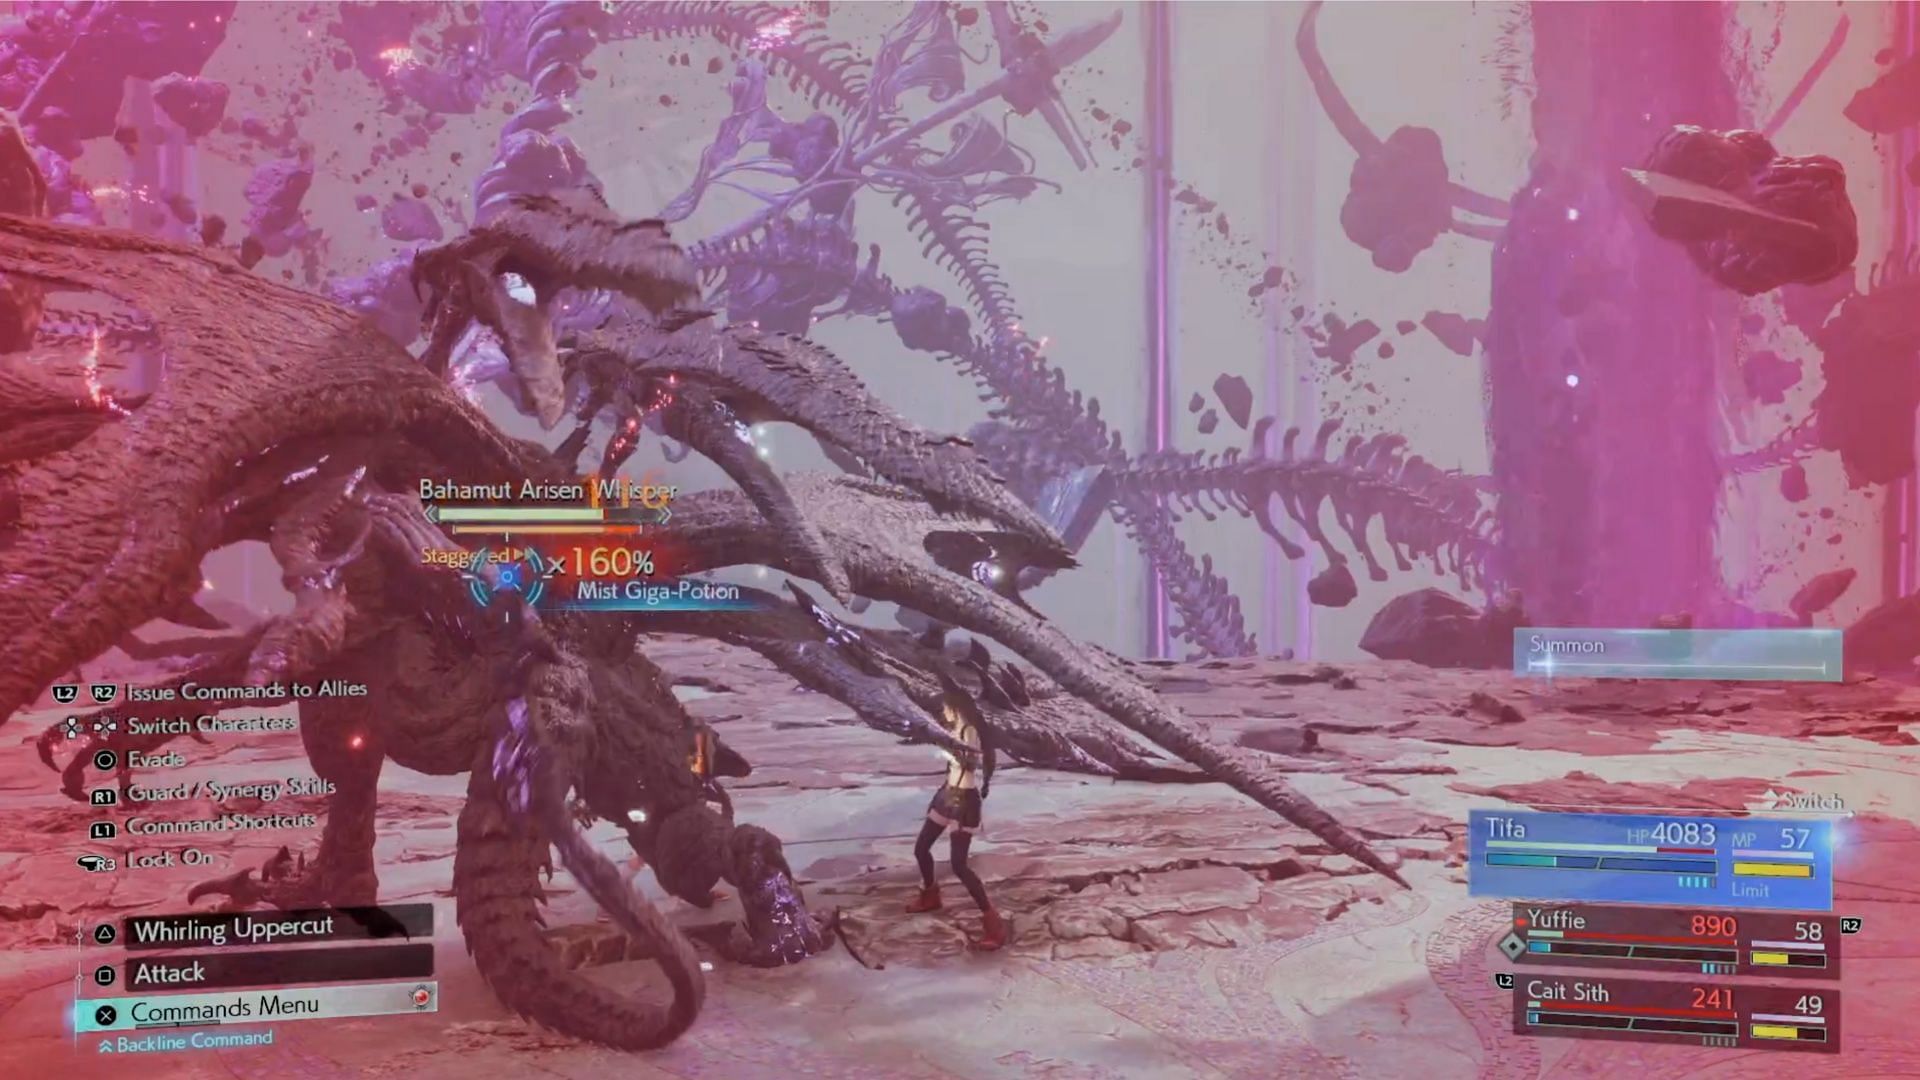
After another cutscene, Sephiroth Reborn changes once again, and now the rest of your party will put in some work. Now you have to fight Bahamut Arisen Whisper. It uses most of the same Bahamut attacks, such as Flame Breath, Thruster Spin, and Umbral Bombardment.
You need to be able to defeat the wings while also fighting this boss. If the wings are up and you defeat Bahamut, he will bring it back with the Blessing of Calamity. I couldn’t stagger it before it used Gigaflare, which was incredibly painful. Afterward, it transforms and starts using attacks like Celestial Slash and Homing Barrage.
It has so many AOE attacks: Nova Bomb and Twin Lasers on top of everything else. Stagger it, defeat it, and then you can move on. You want to focus on the wings of the boss at the same time as this entity, though. The longer you wait on the wings, the more times he respawns Bahamut.
This Final Fantasy 7 Rebirth fight then gives you some EXP and AP:
- 1,406 EXP
- 5 AP
10) Phase 10: Sephiroth Reborn (Zack)
After a beautiful, moving cutscene, you now control just Zack against a smaller version of Sephiroth Reborn. The final boss of Final Fantasy 7 Rebirth is truly a lengthy gauntlet. At this point, I had been fighting for well over a half hour. He had almost full stagger, though, but you have to kill the chest first.
Lacryma Deus is a crackling red energy beam he sweeps across the screen. However, I used Meteor Shots once to stagger the boss. He has a stronger Skewer in Retribution. It also uses Interred Horror again, as well as Apocalyptic Fire. Using the Synergy Ability Together As One, I easily crippled the chest and pressured the boss.
His attacks remain the same, except for Zanshin, which is a series of air slashes that you have to try and avoid. Unholy Gate is just a bigger Hell’s Gate. Anytime you can use Together As One, do it for tons of damage. I did this, and the phase changed around 40% HP in Final Fantasy 7 Rebirth.
11) Phase 11: Sephiroth Reborn (Yuffie, Barret, Red XIII)
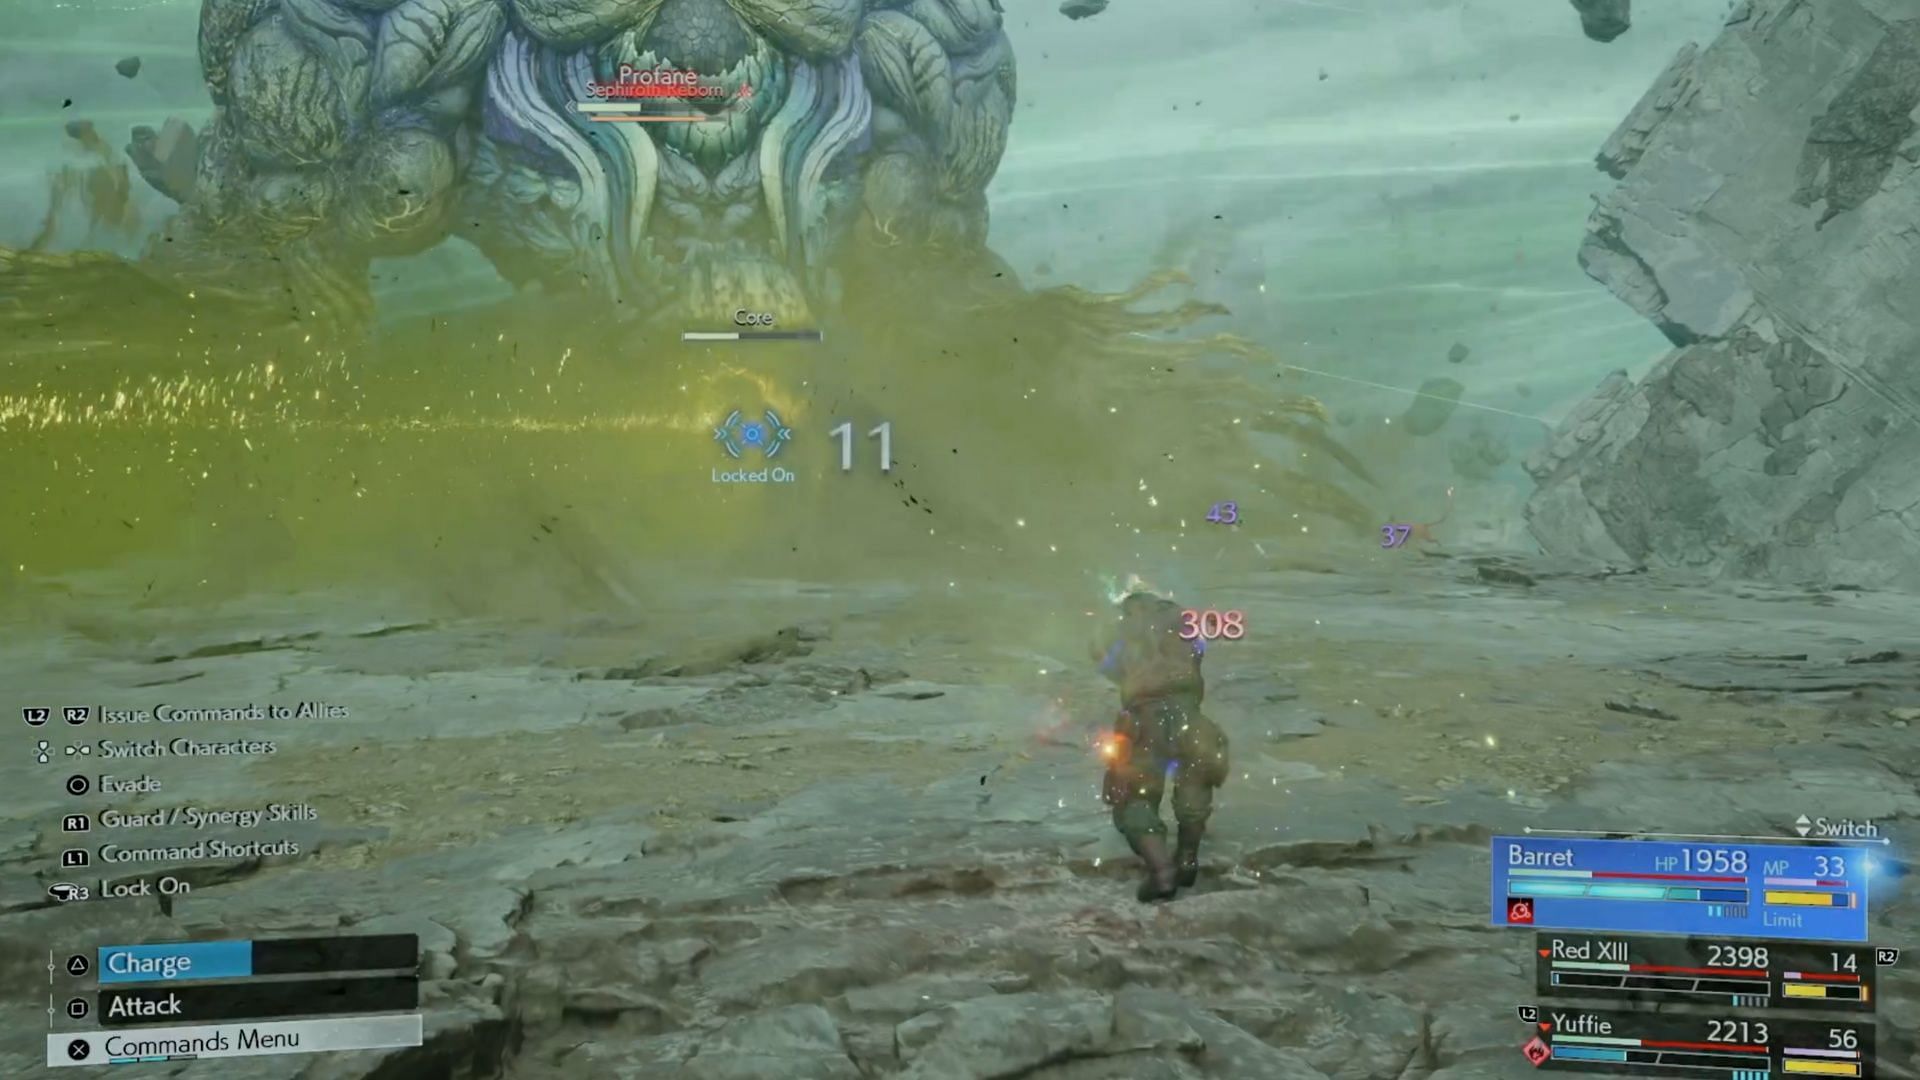
It’s time for big, mean Sephiroth Reborn again in Final Fantasy 7 Rebirth. You need to break the boss' wings before you can harm the core. The wings change elemental affinity, denoted by color. Just use attacks of the opposite element and avoid the huge AOE attacks those elements bring.
This is why I regret not having a ton of materia in my playthrough. This party did not have enough elemental attacks and had to rely on Yuffie’s ninjutsu. That meant I mostly waited for Wind Weakness and used her massive AOE attack.
- Great Tribulation: Ice
- Infernal Flare: Fire
- Keraunos: Thunder
- Rapture: Wind
The Core is incredibly weak. Watch for massive attacks like Profane and Atonement, and open fire with everything you have. I used Barret’s Maximum Fury to shred through this part of the boss and get on to the next phase.
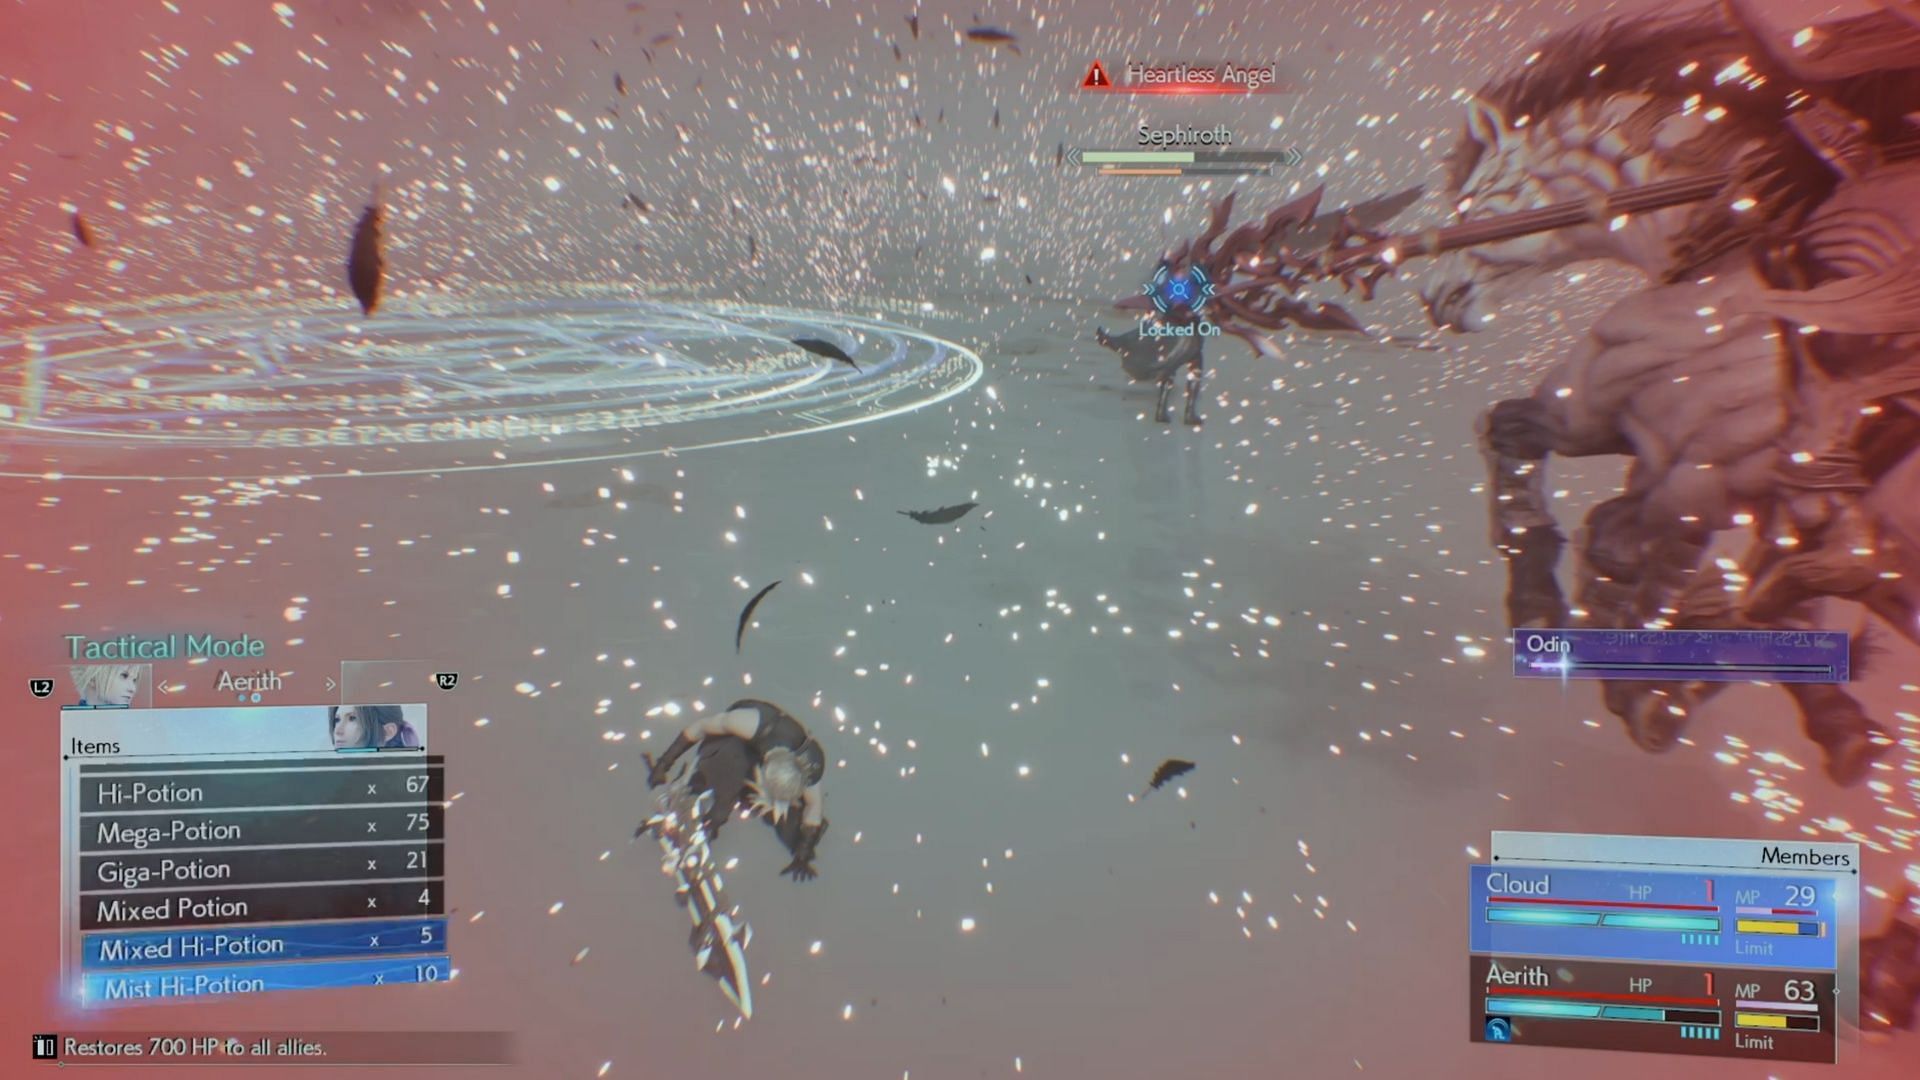
Sephiroth Reborn’s main body can now be attacked, and he’ll use some of the attacks he’s used before, like Zanshin and Octaslash. He also introduces Heartless Angel, which reduces everyone’s HP to 1.
Also read: 5 things we can expect in Final Fantasy 7 Rebirth PC
12) Phase 12: Sephiroth (Cloud, Aerith)
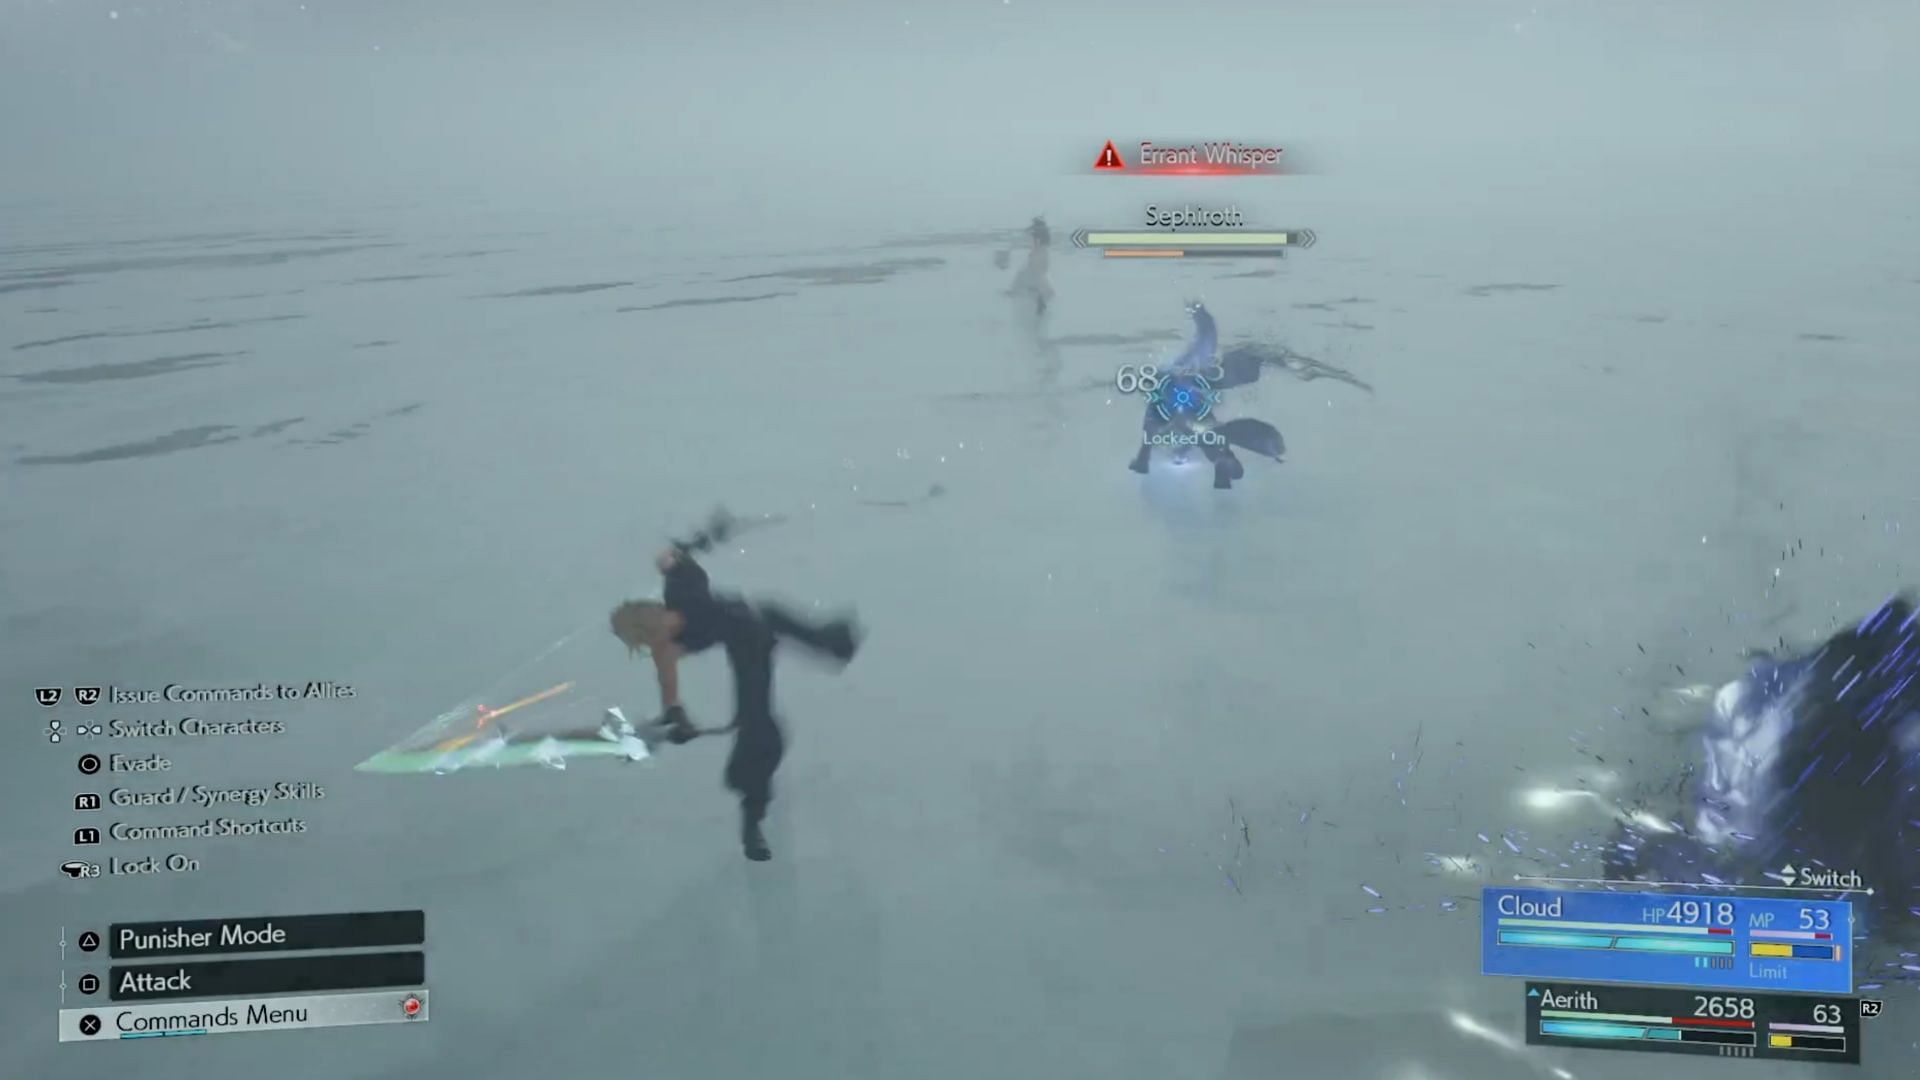
Wait, Aerith is here?! This is why you should not unequip anyone in your party before going through the final boss in Final Fantasy 7 Rebirth. You’re at the final moments of the game. You definitely should have at least one attack materia on both Cloud and Aerith. Sephiroth has a few key attacks, and he will use them frequently.
Grip of Fate shoots a Whisper to try and snare you. Dodge to the side. Failure will mean he will use Skewer immediately afterward. When he does his leap attack, it will cause a massive AOE to avoid.
The boss has two attacks that give you an opportunity to weaken him. The first is Whisper Cannon. He fires a beam that he spins in a circle. Use a pair of Fire spells (or some other spell) during this attack to break his wing. This also puts pressure on him during this part of Final Fantasy 7 Rebirth.
Wicked Augment powers him back up, and he often follows with Skewer. Errant Whisper chases you with whisper attacks, so just keep rolling away from the final boss in Final Fantasy 7 Rebirth. The next important attack is Whisper Whirlwind.
Cast a pair of Fire spells on Masamune - preferably from both Aerith and Cloud to get it done faster. Otherwise, the giant twister will keep chasing you. This will also weaken Sephiroth in the final boss fight of Final Fantasy 7 Rebirth.
Around 50% HP, he’s going to use Heartless Angel, so have ATB ready to throw a few Elixirs down. Otherwise, he can quickly defeat your party with a few simple attacks. Around 40% or so, he’ll prepare Octaslash. You need to blow up his wing and his sword before the weapon strikes to minimize the damage. If you have Magnify materia equipped, this will be a bit easier.
Sephiroth uses Wicked Augment again around 20% and a huge Whisper-based AOE attack. This also triggers his final attack: Tempus Finis. Use whatever you can to pressure him before the attack ends. If you don’t defeat him in time at this point, he will grasp both characters with Whispers and kill them. Now that you’ve bested Sephiroth, enjoy the ending of Final Fantasy 7 Rebirth.
Square Enix’s masterpiece is now available exclusively on PlayStation 5. Feel free to check out Sportskeeda's in-depth review of Final Fantasy 7 Rebirth.
Check out more Final Fantasy 7 Rebirth news updates below:
- Final Fantasy VII Rebirth PC pre-order guide: Editions, bonuses, and more
- All Summons in Final Fantasy 7 Rebirth
- What are Whispers in Final Fantasy 7 Rebirth?

Are you stuck on today's Wordle? Our Wordle Solver will help you find the answer.