
'%20x='0'%20y='0'%20height='100%25'%20width='100%25'%20%0A%20%20%20%20%20%20%20%20%20%20xlink%3Ahref='data:image/jpg;base64,/9j/2wBDAAYEBQYFBAYGBQYHBwYIChAKCgkJChQODwwQFxQYGBcUFhYaHSUfGhsjHBYWICwgIyYnKSopGR8tMC0oMCUoKSj/2wBDAQcHBwoIChMKChMoGhYaKCgoKCgoKCgoKCgoKCgoKCgoKCgoKCgoKCgoKCgoKCgoKCgoKCgoKCgoKCgoKCgoKCj/wgARCAAGAAoDASIAAhEBAxEB/8QAFgABAQEAAAAAAAAAAAAAAAAAAAQG/8QAFAEBAAAAAAAAAAAAAAAAAAAABP/aAAwDAQACEAMQAAAAh24ZP//EACAQAAICAgICAwAAAAAAAAAAAAIDAQQFEgAhBgcRE0H/2gAIAQEAAT8A8WwKbY15xlt67VZf32bz9iaezSABUO8iv4j977iOuP8AUeDsPY+xWe1zCkzZOTeO5c//xAAWEQADAAAAAAAAAAAAAAAAAAAAARL/2gAIAQIBAT8AlH//xAAXEQADAQAAAAAAAAAAAAAAAAAAARIx/9oACAEDAQE/AKeH/9k='%3E%3C/image%3E%3C/svg%3E)
Piriformis stretches are an effective way to address muscle pain in the piriformis region. The piriformis is a small muscle located deep within the buttocks or the gluteal muscles. It connects the hips to the thighs, so it is generally always in use, like psoas muscles.
Performing piriformis stretches helps with hip movements such as moving the leg, bending, or stretching. It also plays a major role in keeping the hip stable and preventing the legs from rotating outward at uncomfortable angles.
Considering it is involved in a variety of functions, weakened or tight piriformis muscles can be a cause of major discomfort.
Prolonged periods of sitting (while working, driving, etc.) can lead to tightened piriformis muscles, while a lack of activity and the dangers of sedentary lifestyle might end up weakening them.
On the other hand, excessive activity, such as running or jogging for long periods, may also cause this muscle to spasm, leading to piriformis syndrome.
5 Best piriformis stretches to ease pain
Listed below are the best piriformis stretches you can do to ease pain and get you moving normally again.
1) Seated four-figure stretch

This exercise is named after the position your legs adapt when you cross one of them over the other. It provides a stretch to your hamstrings and glute muscles.
Here are the steps you can follow to do the seated four-figure stretch correctly:
- Sit upright on a chair. Raise your right leg and place the ankle on your left thigh, just above your left knee.
- Lean forward as far as you can while keeping your spine straight
- Hold the pose for 20 to 30 seconds, then repeat on the other leg. The deeper you lean, the better the stretch.
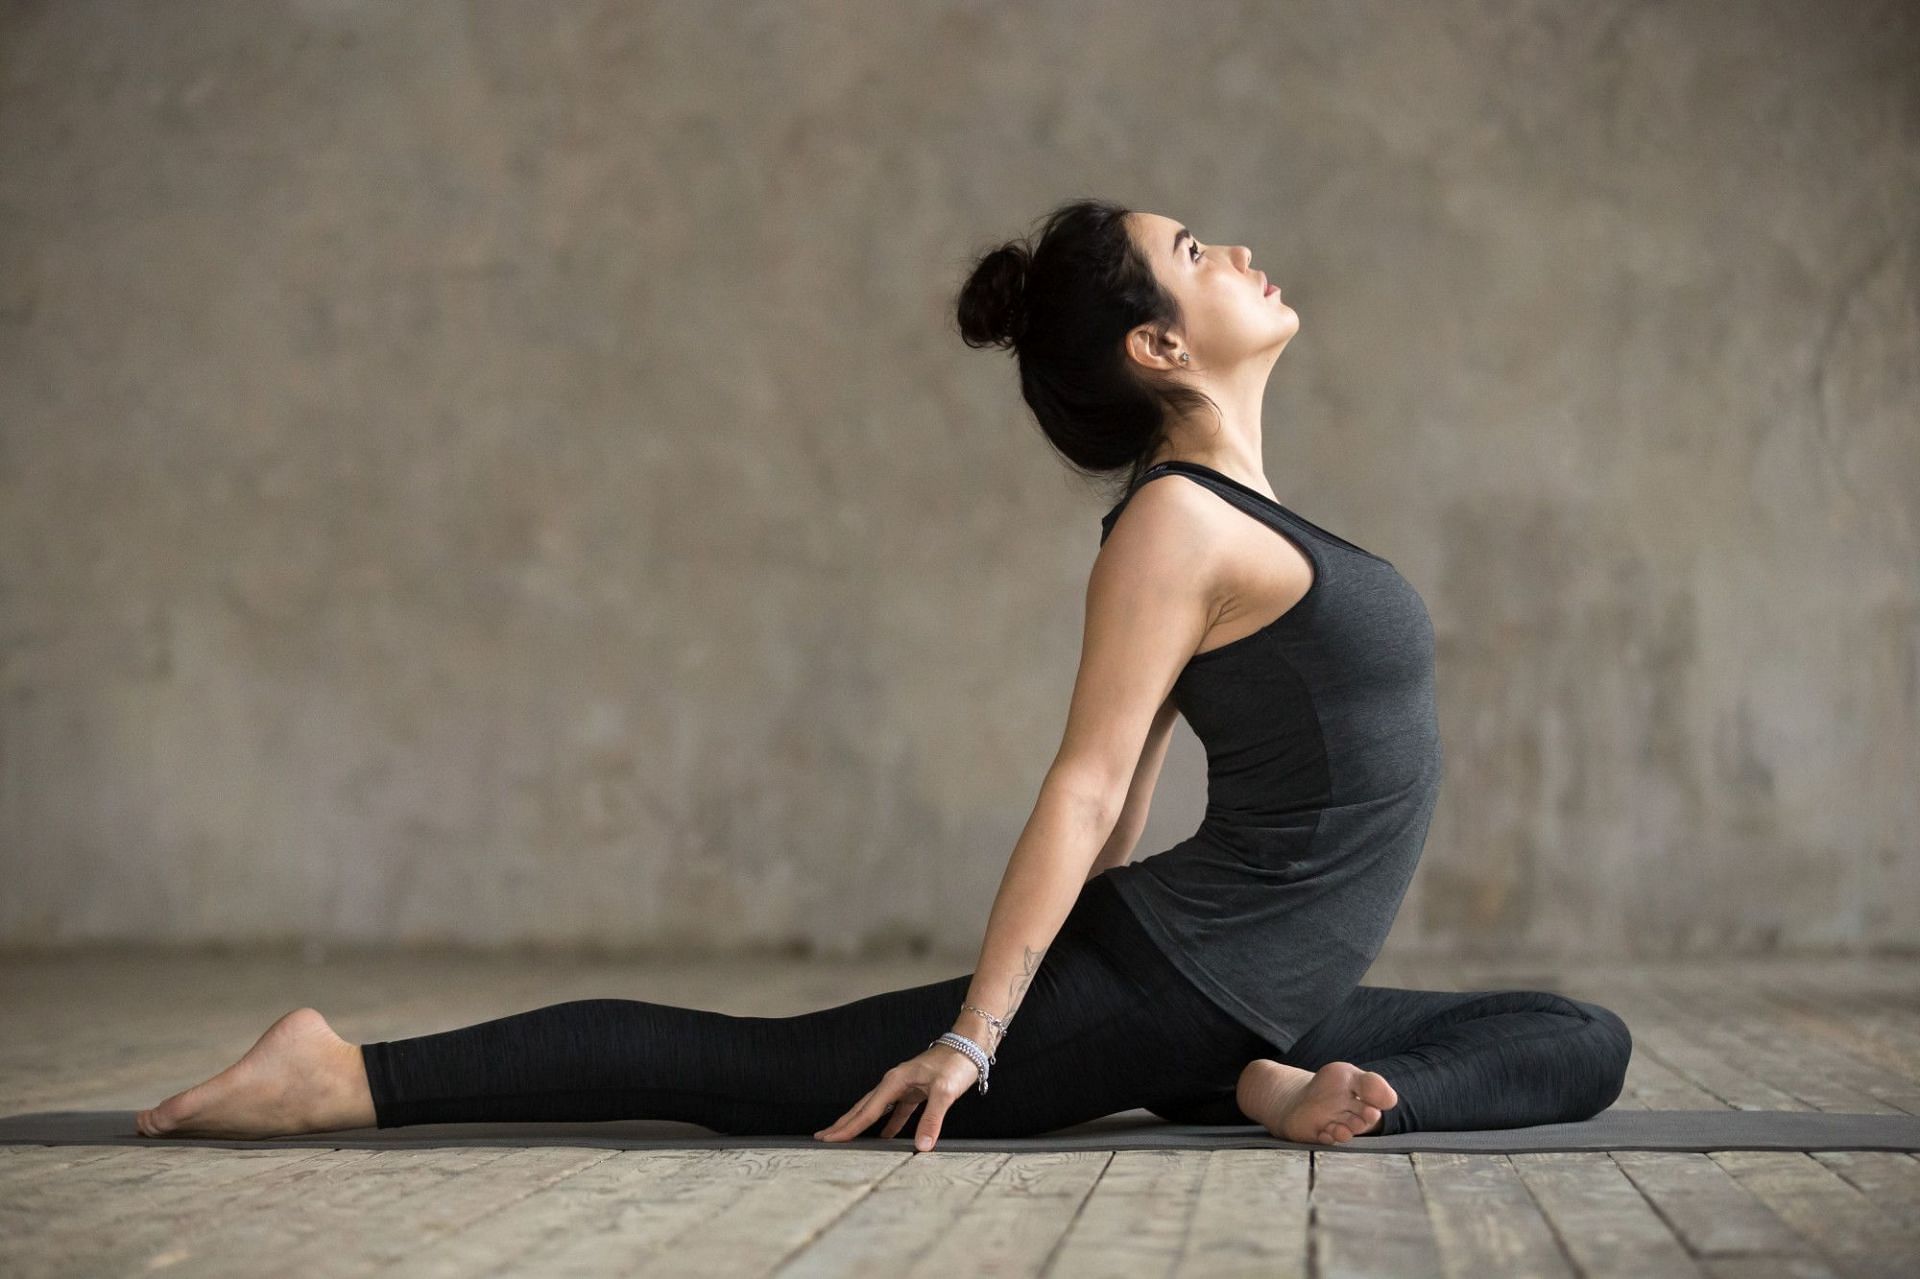
2) Lying trunk twist

This is one of the best piriformis stretches for your external obliques and hips. Here are the steps you can follow to do the lying trunk twist correctly:
- Lay face-up on the floor. Lift your right leg up and bend it at a 90-degree angle at the knee.
- Drop your right knee to the left side of your body on the floor, twisting your hips to twist with it and keeping your shoulders firm on the ground. You may use your left hand to hold your knee down and your right hand to help stabilize yourself.
- Hold the pose for 20 to 30 seconds, then repeat on the other leg.
3) Lunge stretch
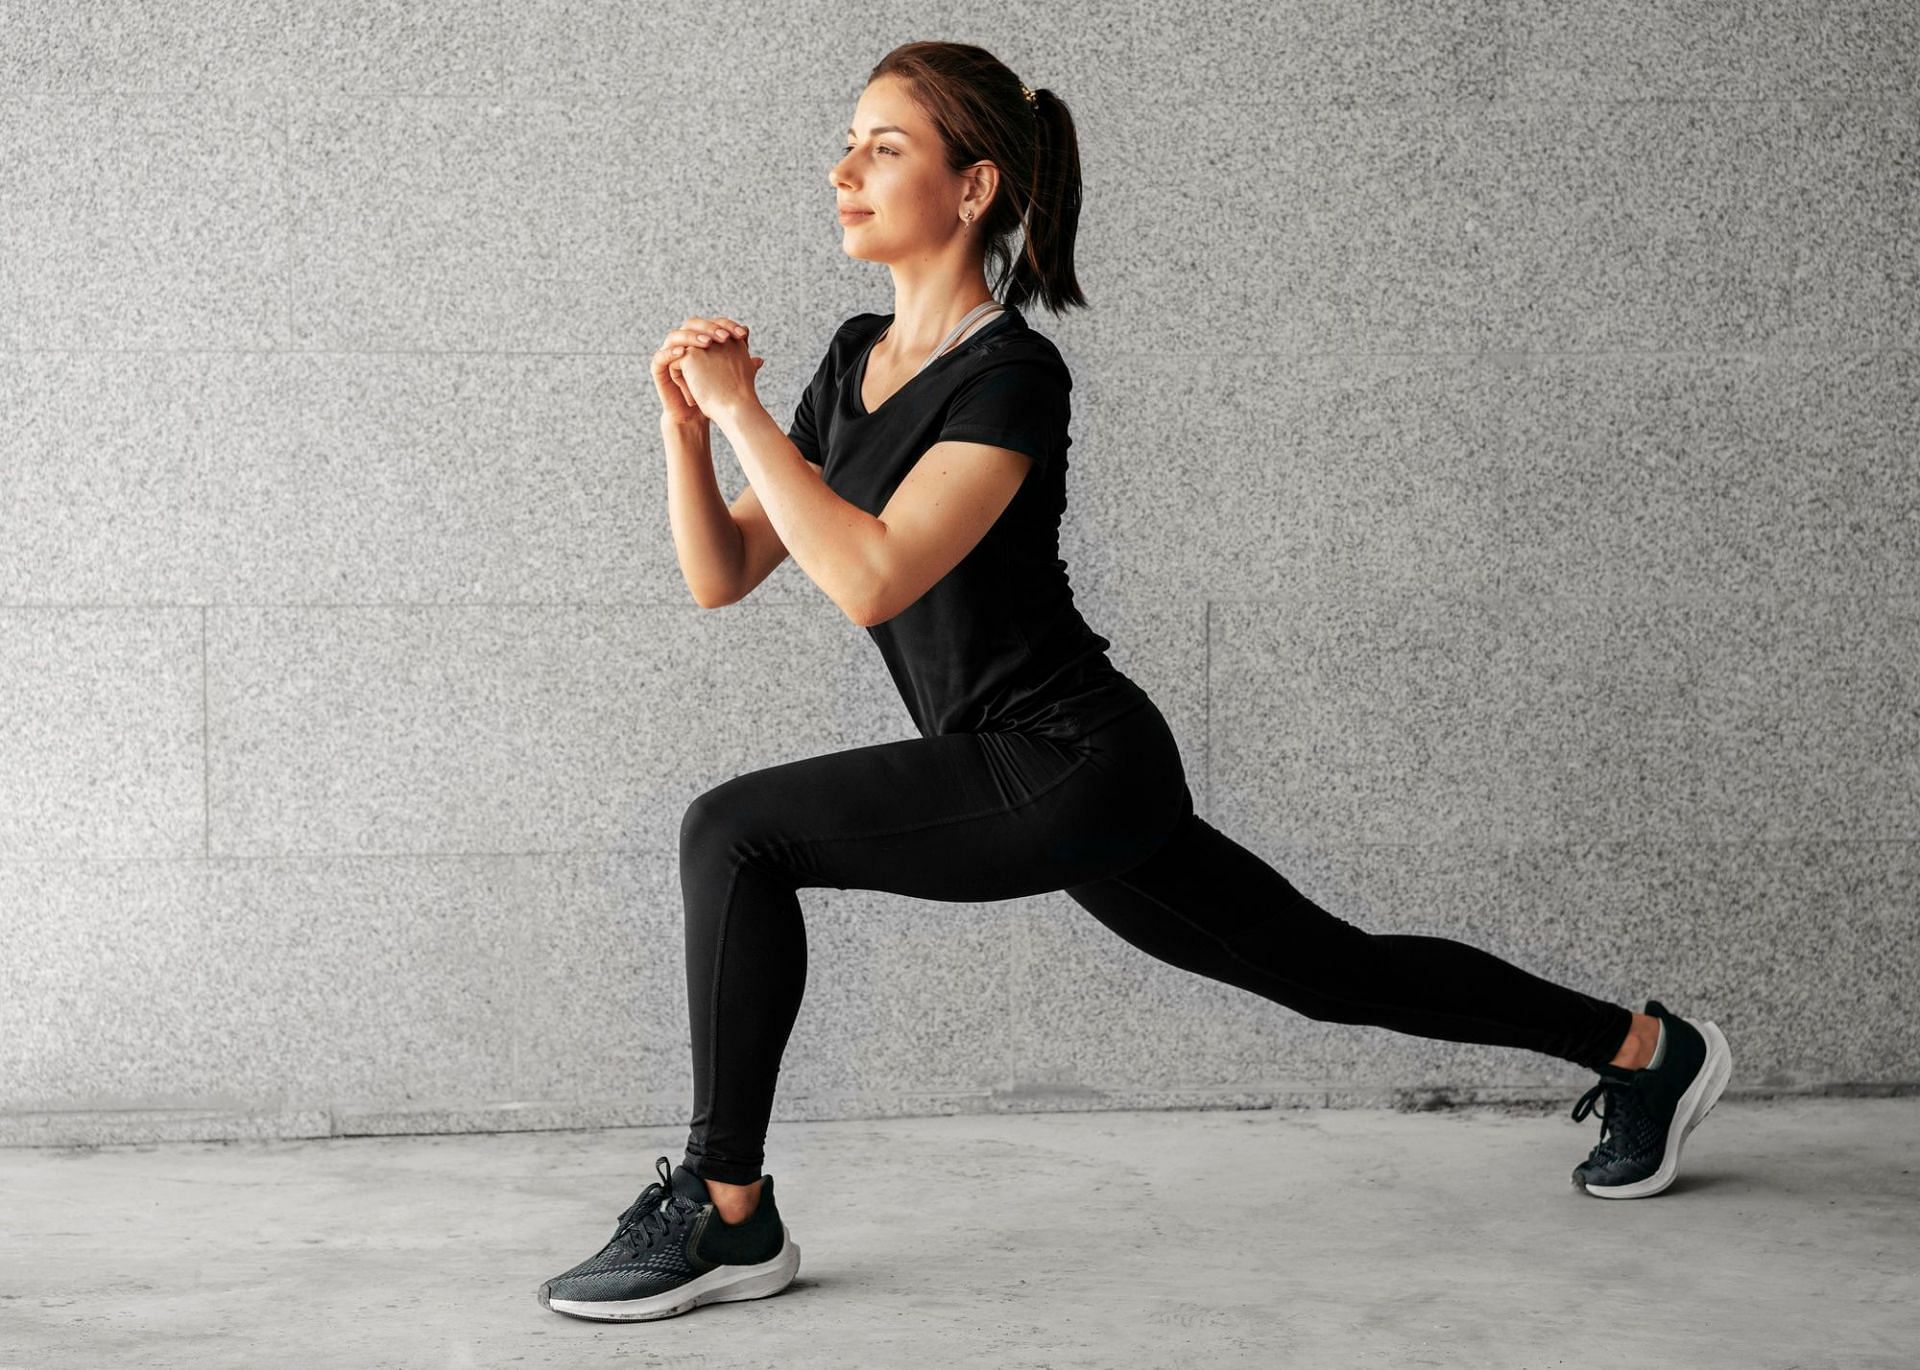
The standing lunge stretch provides a stretch to your entire leg and hip flexor complex. It’s one of the most effective piriformis stretches to add to any warm-up or morning routine to loosen up the muscles of the lower extremities.
Here are the steps you can follow to do the lunge stretch correctly:
- Stand straight with your feet together.
- Bring your right leg out and place it about a foot ahead of you. Lower your body into a lunge position and rest your left knee on the floor while keeping your back straight.
- You may raise your arms above your head and push your hips forward while looking up. This provides a deeper stretch.
- Hold the pose for 20 to 30 seconds, then repeat on the other side.
4) Glute bridge
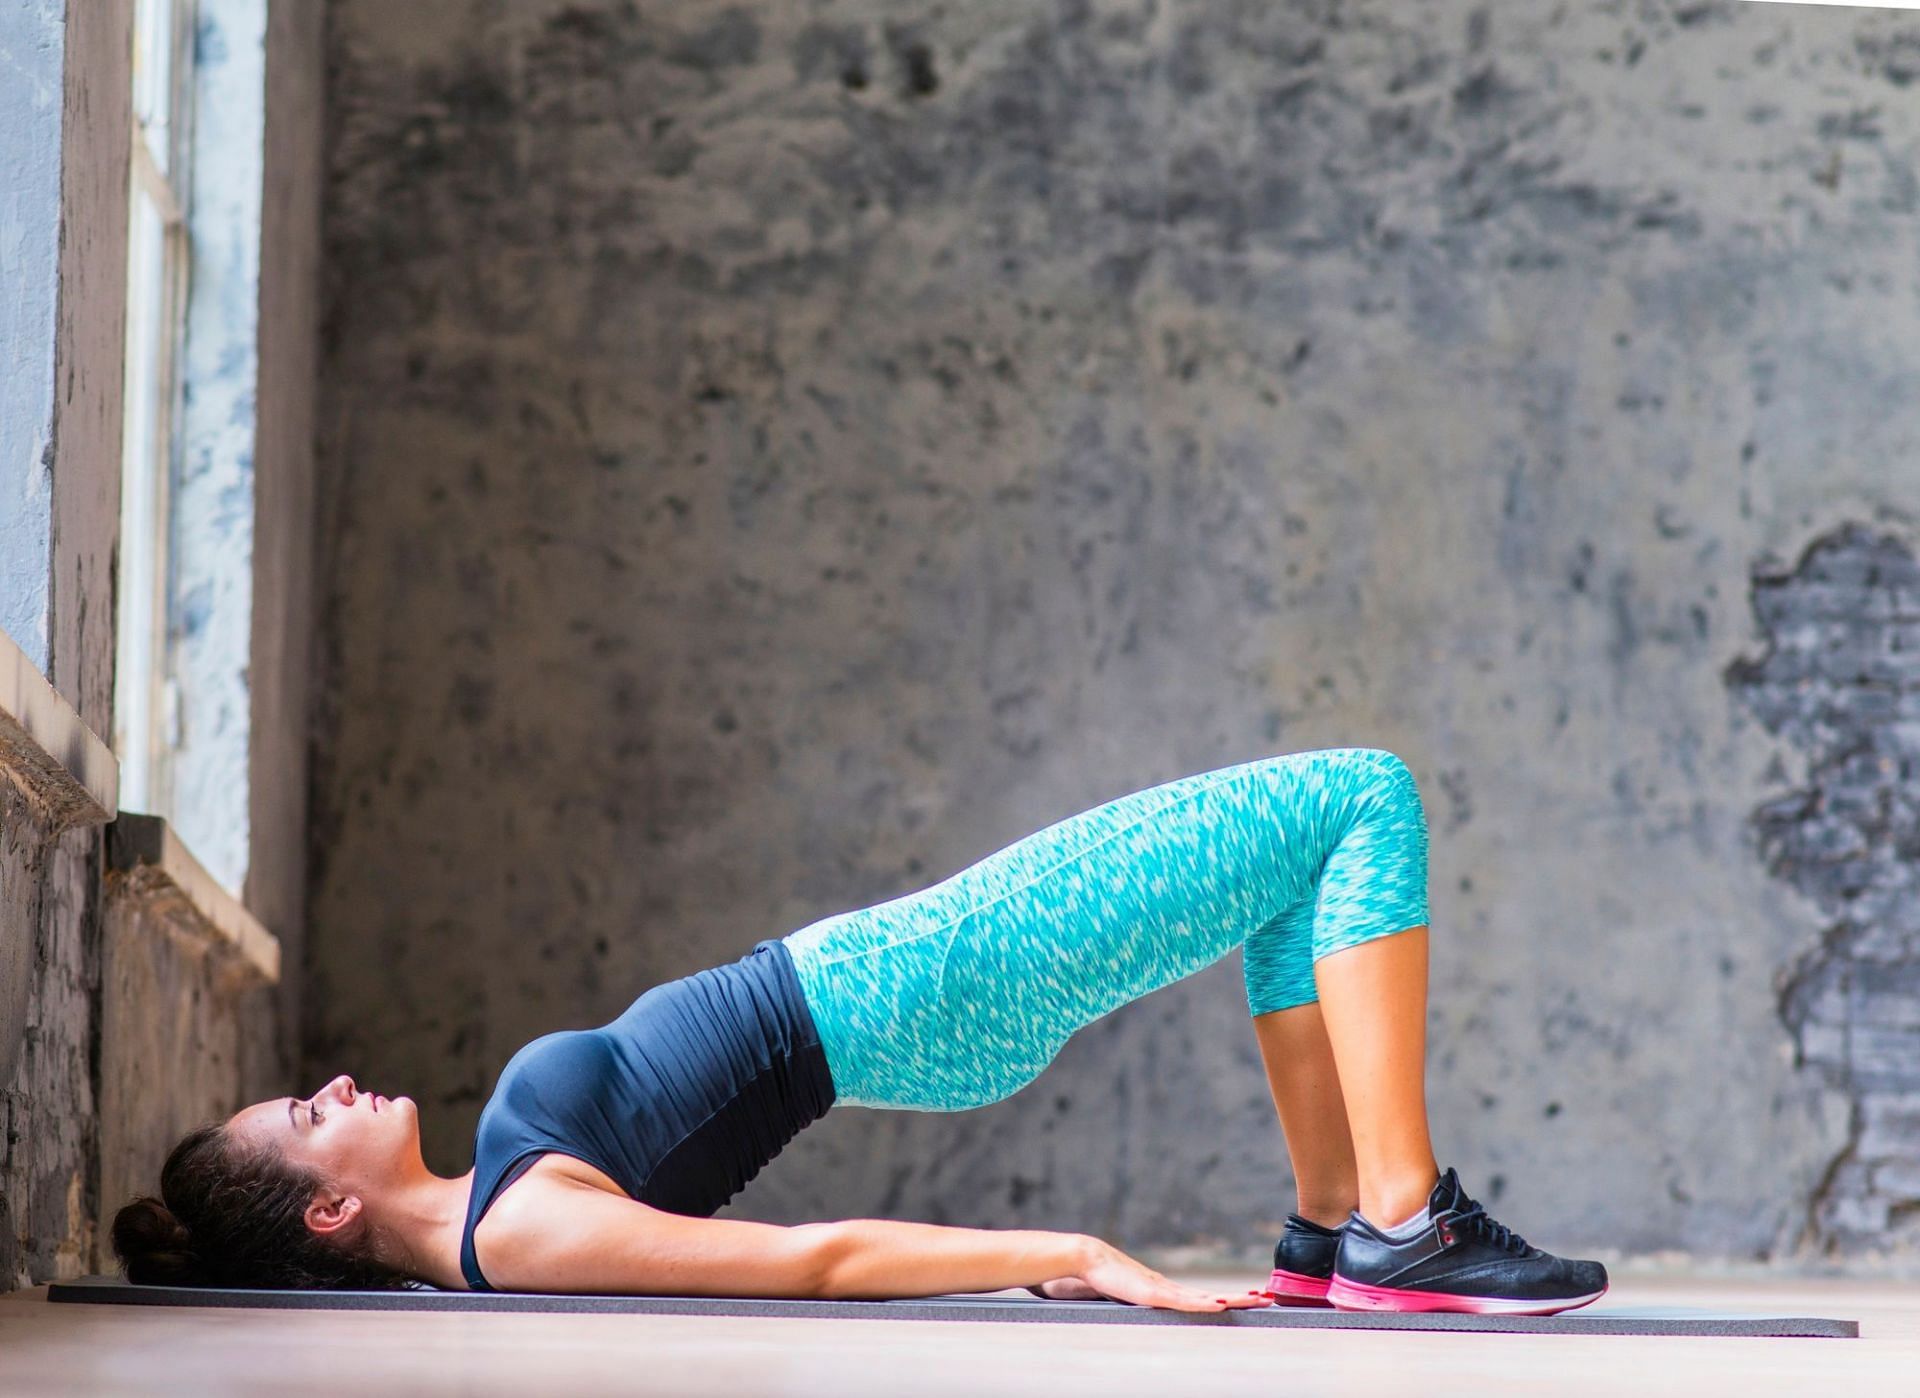
The glute bridge is effective in opening up the hips and bringing relief to the glutes and hamstrings.
Here are the steps you can follow to do the exercise correctly:
- Lay face-up on the floor and bend your legs, pointing your knees to the ceiling, with your feet hip-distance apart. Place your palms flat down on either side of you.
- Push your hips up, ensuring your shoulders and feet are firm on the ground. Align your hips with your knees and shoulders, using your hands to stabilize yourself.
- Hold the pose for 20 to 30 seconds.
5) Pigeon pose
The pigeon pose is an advanced yet effective for your entire lower body. It helps improve mobility in the hips and legs and relieves any tightness.
Here are the steps you can follow to do the pigeon pose correctly:
- Start by getting into a high plank position on the floor. Bring your right knee forward and place it between your hands. Let your right foot rest just in front of the left side of your hip.
- Straighten your left leg out behind you and drop your hips to the ground.
- To get a deeper stretch, lean forward and drop your head to the ground in front of your right knee.
- Hold the pose for 20 to 30 seconds, then repeat on the other side.
Perform these piriformis stretches a few times a day if you find yourself with an aching piriformis. Since the piriformis is located so deep within the larger muscles of the body, there is only so much you can do to relieve any discomfort in the area.
Remember to perform piriformis stretches gently and within your comfort zone. Apart from that, be sure to give the muscle some movement in the hours you spend sitting down at work. Taking the pressure off with these piriformis stretches is one way around the discomfort.
