
'%20x='0'%20y='0'%20height='100%25'%20width='100%25'%20%0A%20%20%20%20%20%20%20%20%20%20xlink%3Ahref='data:image/jpg;base64,/9j/2wBDAAYEBQYFBAYGBQYHBwYIChAKCgkJChQODwwQFxQYGBcUFhYaHSUfGhsjHBYWICwgIyYnKSopGR8tMC0oMCUoKSj/2wBDAQcHBwoIChMKChMoGhYaKCgoKCgoKCgoKCgoKCgoKCgoKCgoKCgoKCgoKCgoKCgoKCgoKCgoKCgoKCgoKCgoKCj/wgARCAAGAAoDASIAAhEBAxEB/8QAFQABAQAAAAAAAAAAAAAAAAAABAb/2gAIAQEAAAAAg2//xAAUAQEAAAAAAAAAAAAAAAAAAAAC/9oACAECEAAAAB//xAAUAQEAAAAAAAAAAAAAAAAAAAAC/9oACAEDEAAAAB//xAAdEAACAgMAAwAAAAAAAAAAAAABAgMRAAQSBUHx/9oACAEBAAE/AK1zPrwvArysg6YqALBN/cXxh5HCaoX1aEnP/8QAGBEAAgMAAAAAAAAAAAAAAAAAAAECAxH/2gAIAQIBAT8AveRR/8QAFxEAAwEAAAAAAAAAAAAAAAAAAAEDMv/aAAgBAwEBPwCWmf/Z'%3E%3C/image%3E%3C/svg%3E)
The third stage of Theater Mechanicus has been unlocked in Genshin Impact’s flagship event, titled Hues of the Violet Garden.
Travelers will have access to all three Pyro, Hydro, and Cryo Mechanici. They will also have access to Physical towers and Tandem mines, which deal massive damage when paired with certain wondrous sticks.
Players will have to clear the stage by reaching a score of 2500 or above to get a chance to win Primogems, Hero Wits, Talent Level-up Materials, and more. At this stage, enemies will have to travel in a circle before approaching the final goal.
This article will guide players to pick the correct buffs to complete the stage in normal and hard difficulty in Genshin Impact.
Looking for Crossword hints & solutions? Check out latest NYT Mini Crossword Answers, LA Times Crossword Answers, and Atlantic Crossword Answers
Genshin Impact: Theater Mechanicus Day 3 Guide
As already seen in the previous stages of Theater Mechanicus, Genshin Impact players can complete stage III with two difficulties:
- Show of Force [Normal DIfficulty]
- The Horde [Hard Difficulty]
In The Horde, the final wave will have a Ruin Grader with tons of health to tank damage from the Mechanici and Physical tower. There are two different AFK (Away From Keyboard) strategies that players can use for both stages to clear it with a perfect score.
Show of Force
The Show of Force difficulty is easy to clear and players can pick the following Wondrous Sticks before they can construct their Mechanici layout.
The layout will heavily rely on the damage dealt by Tandem Minds and Physical towers, because there will be Linebreaker enemies who can destroy nearby mechanici, except for Tandem mines.
Players need to pick the following Wondrous Sticks:
- Fortune Stick: Crumbing
- Fortune Stick: Fusillade
- Fortune Stick: Continuous Carnage
- Fortune Stick: Faint Thunder
- Fortune Stick: Culling
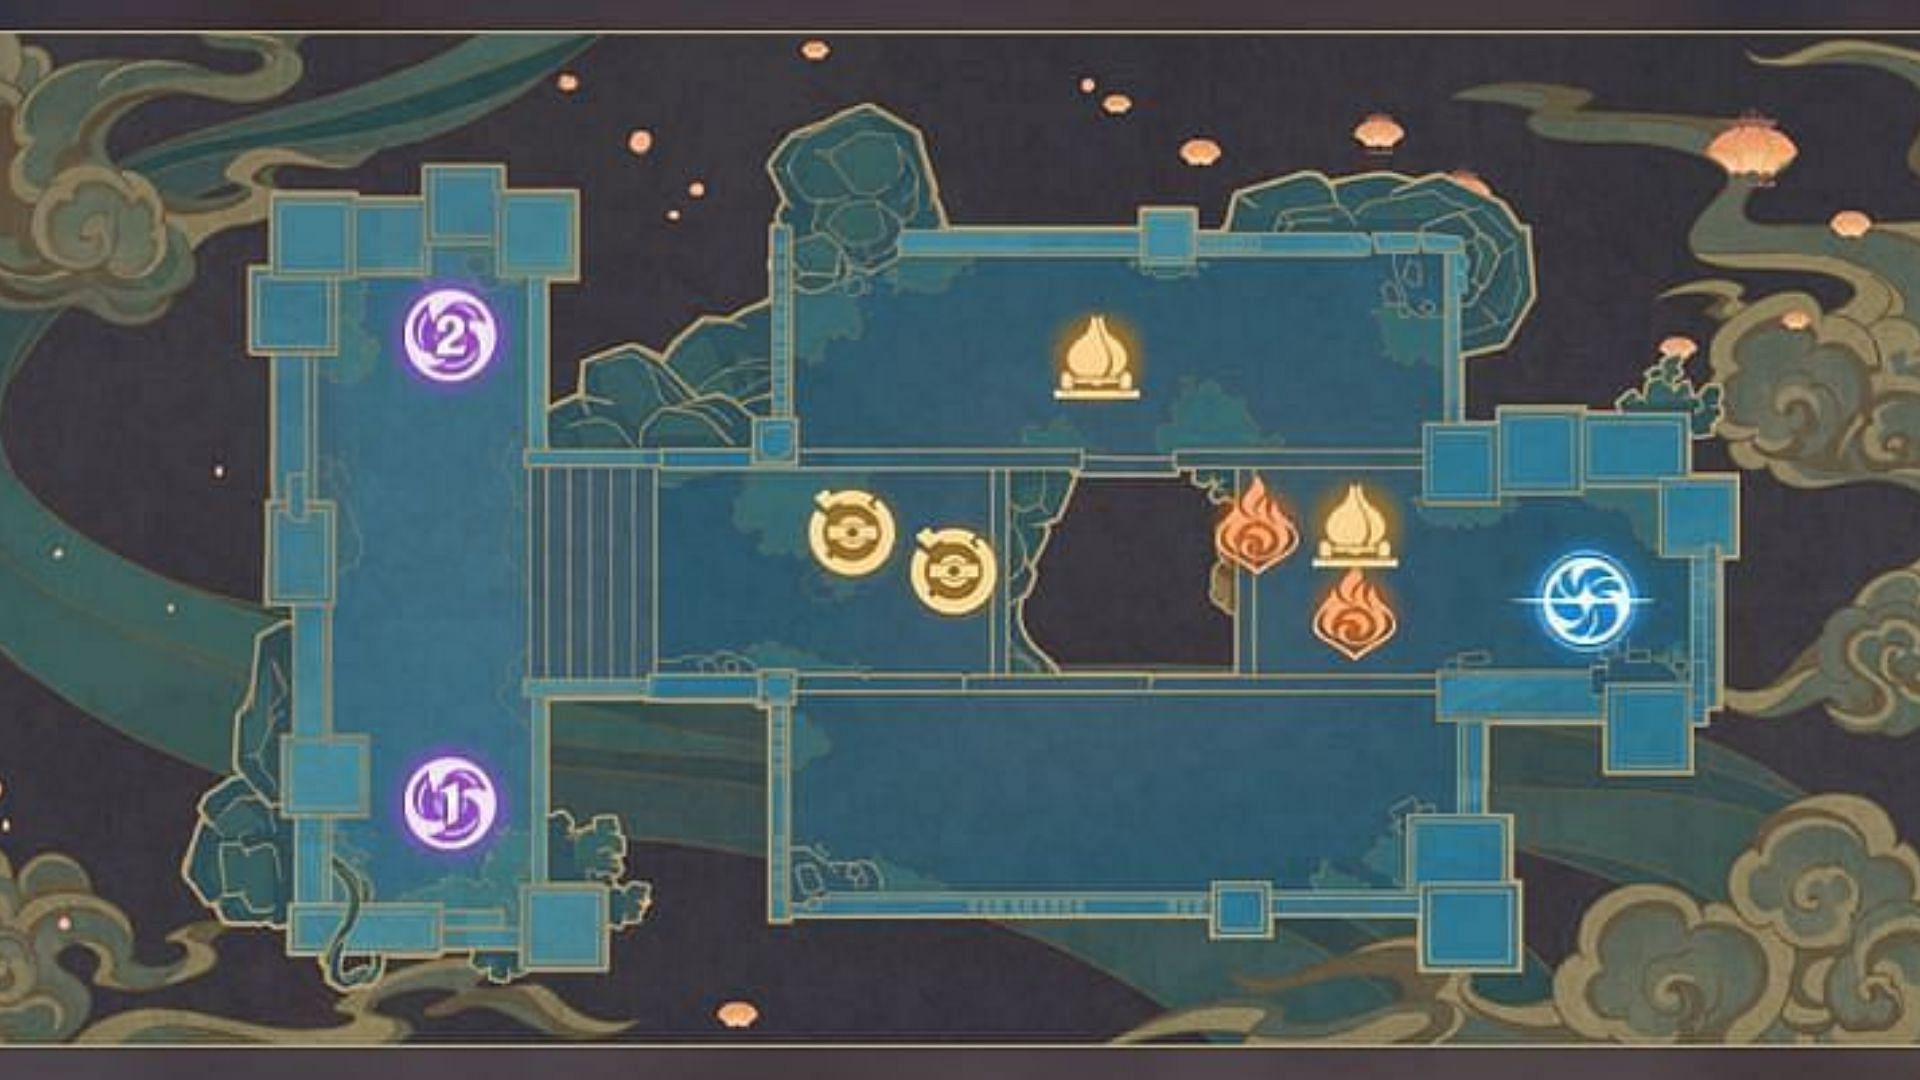
Once the stage starts, players will have time to make their changes to the pre-built setup. Before starting the wave, replace the pre-built Pyro tower on the left with a Tandem mine and remove the Pyro tower located on the right.
After these changes, move to the right lane to find a Tandem mine placed in the center. Remove the middle Tandem mine and place two Tandem mines on the right side instead. Move to the center where the physical towers are located.
Place all three Physical towers in a row by removing one of the pre-built Physical towers in the front.
Head to the left lane and place two more mines on the left side of the lane. In general, the Left and Right Lanes have an asymmetrical layout.
Start the challenge and stay AFK until the challenge ends as the self-repairing Tandem mines and Physical towers take care of all the enemies.
Enter the Horder
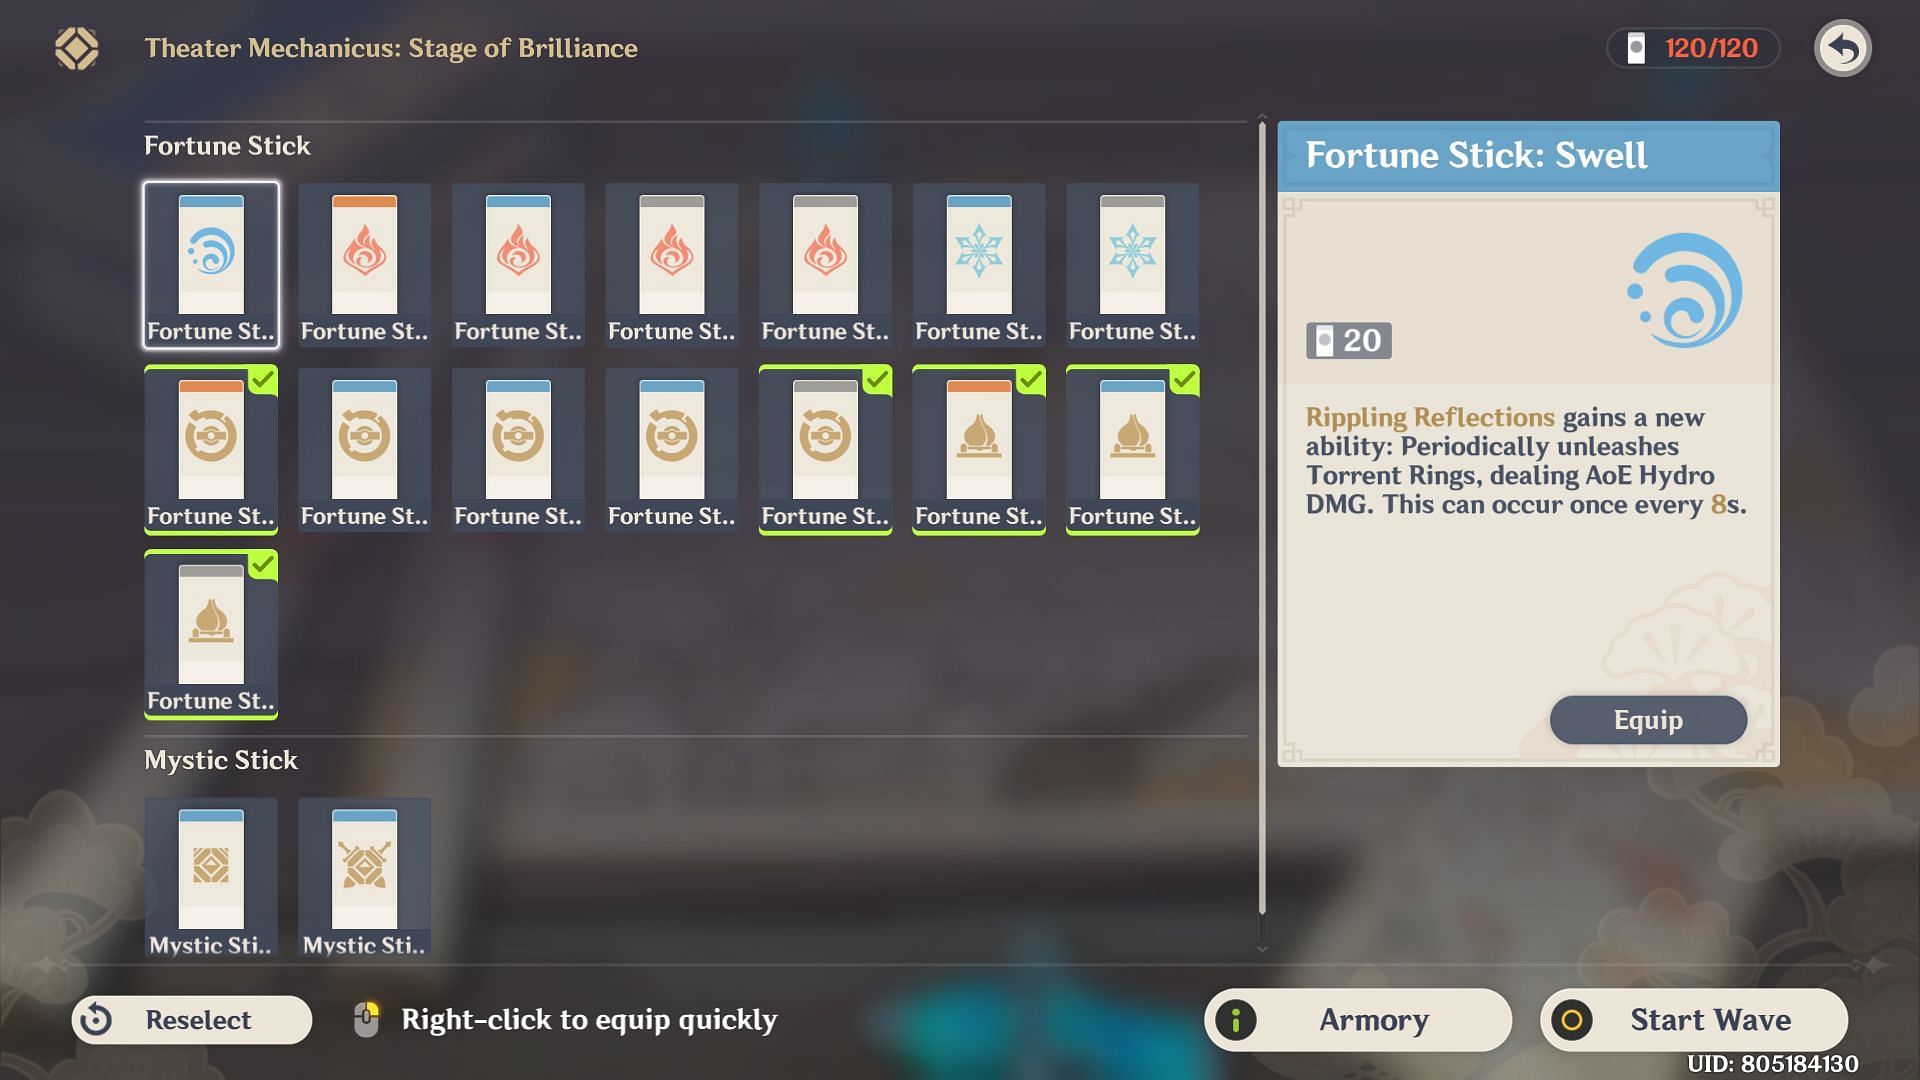
Enter the Horder provides more points to select Wondrous Sticks, increasing the player's chances of completing the stage. Make sure to use at least one Hydro character on the character selection page.
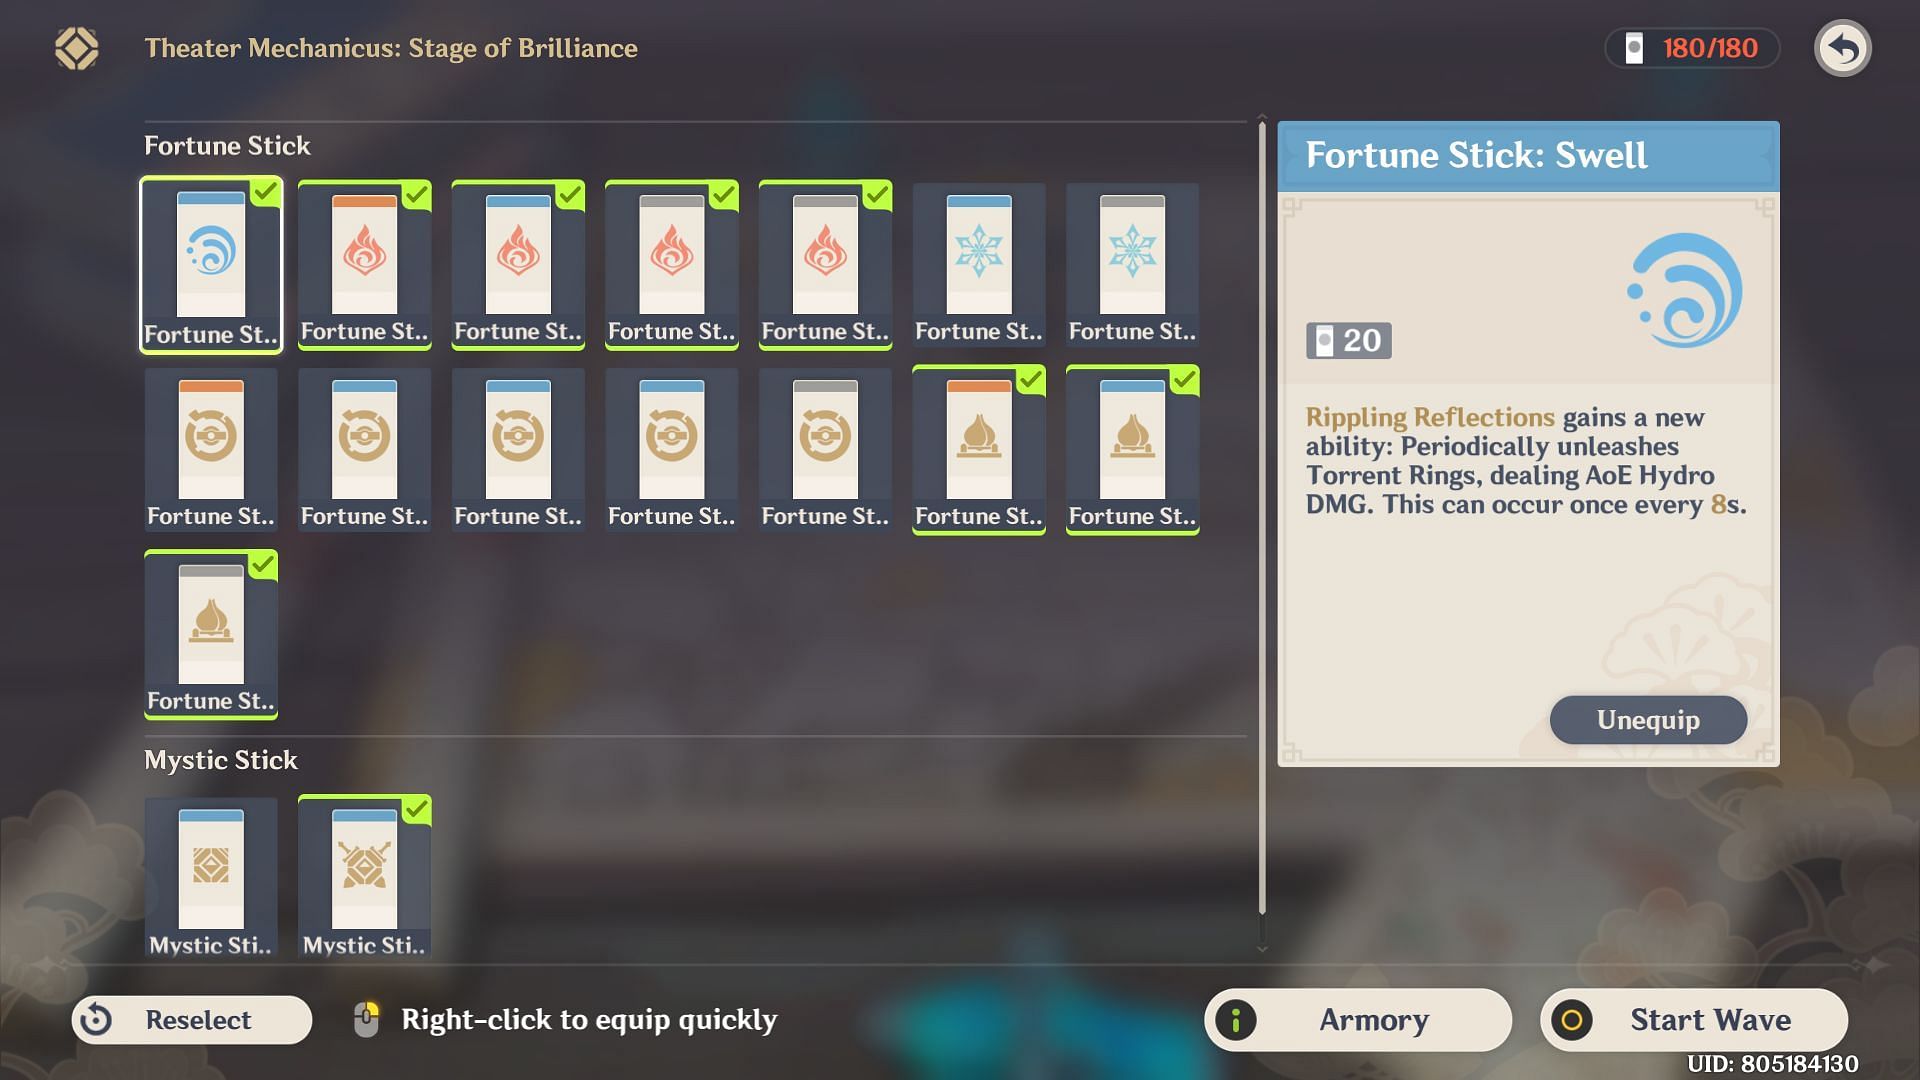
Pick the following Wondrous sticks:
- Fortune Stick: Swell
- Fortune Stick: Pyro Orb
- Fortune Stick: Beacon
- Fortune Stick: Torch
- Fortune Stick: Blaze
- Fortune Stick: Continuous Carnage
- Fortune Stick: Faint Thunder
- Fortune Stick: Culling
- Mystic Stick: Grueling Battle
Before starting the stage, remove all the towers and Tandem mines from the bottom and right lanes. Players need to place two Tandem mines on the right side of the right lane. Also, place a Hydro and Pyro tower on the left side of the right lane.
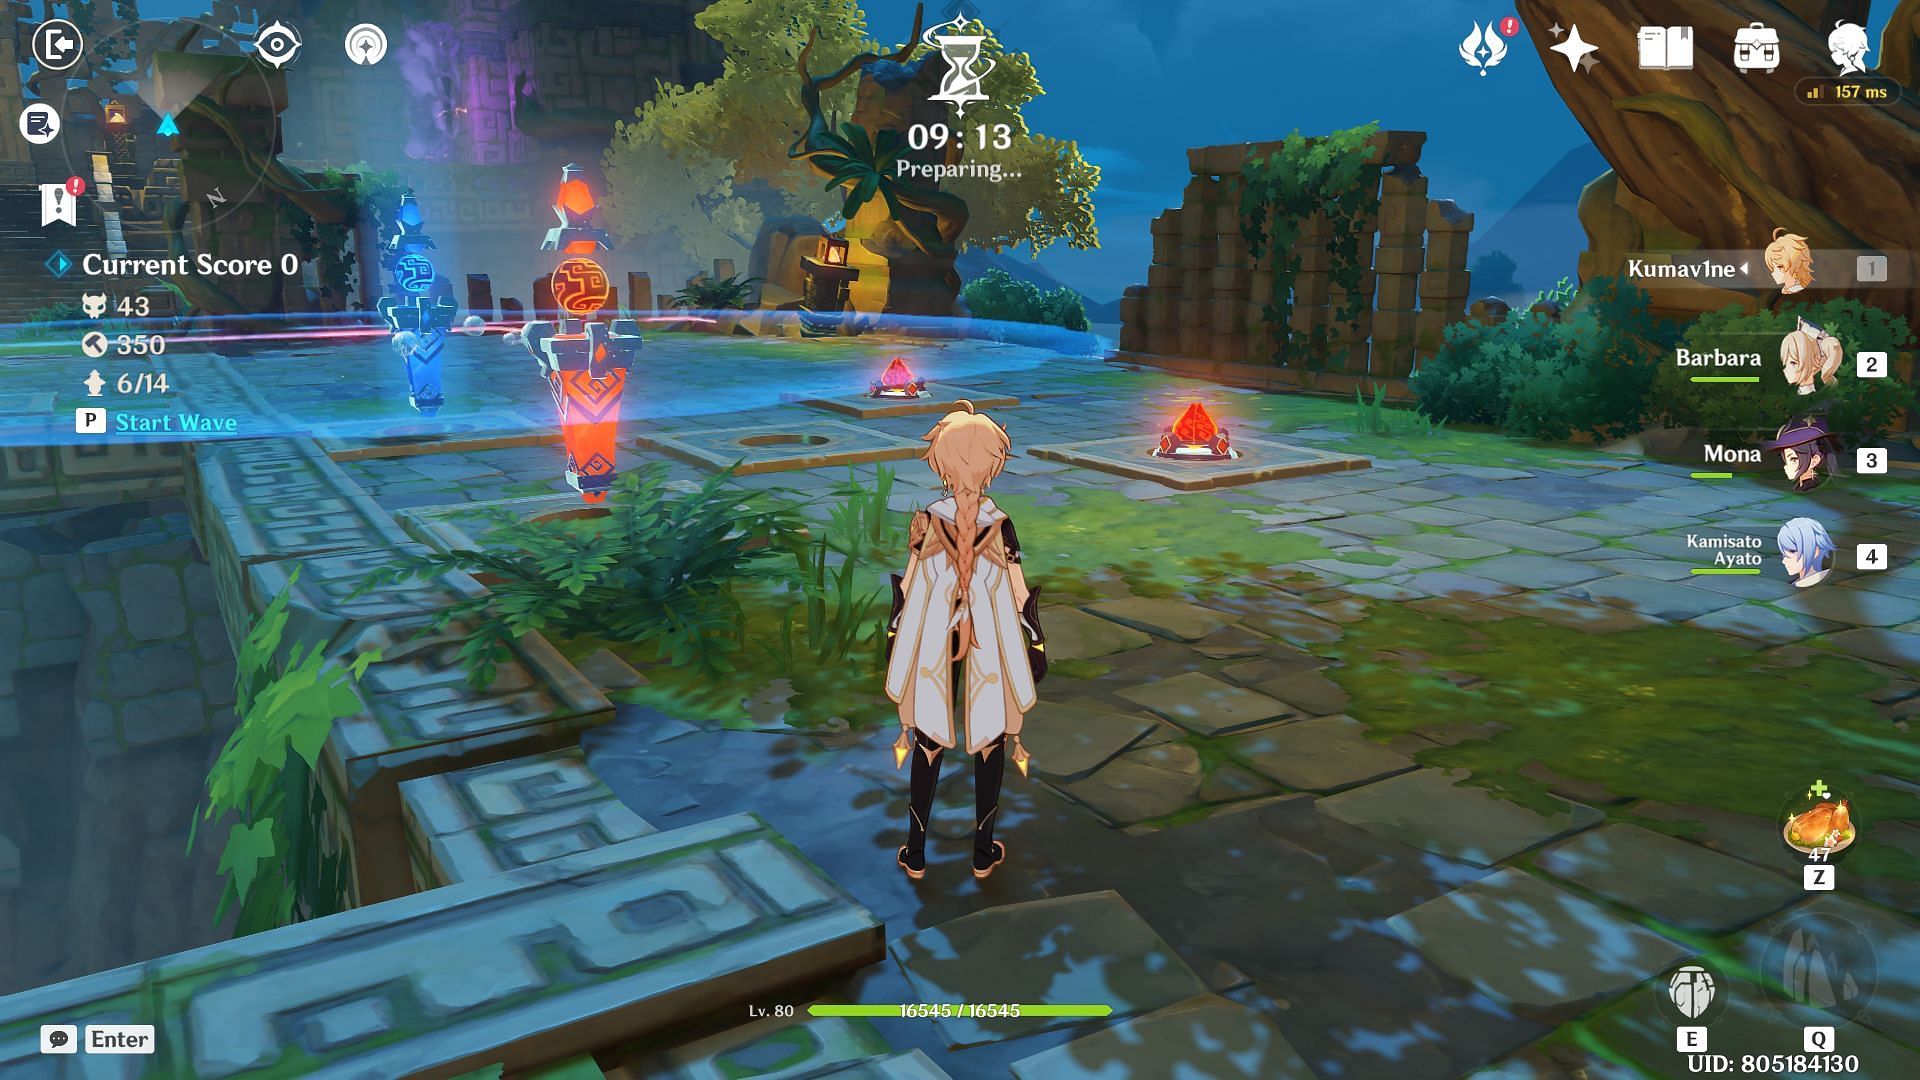
Repeat the same layout in the left lane with two Tandem mines on the left side, then one Hydro tower, and one Pyro tower. This way, both the left and right lanes should look asymmetrical.
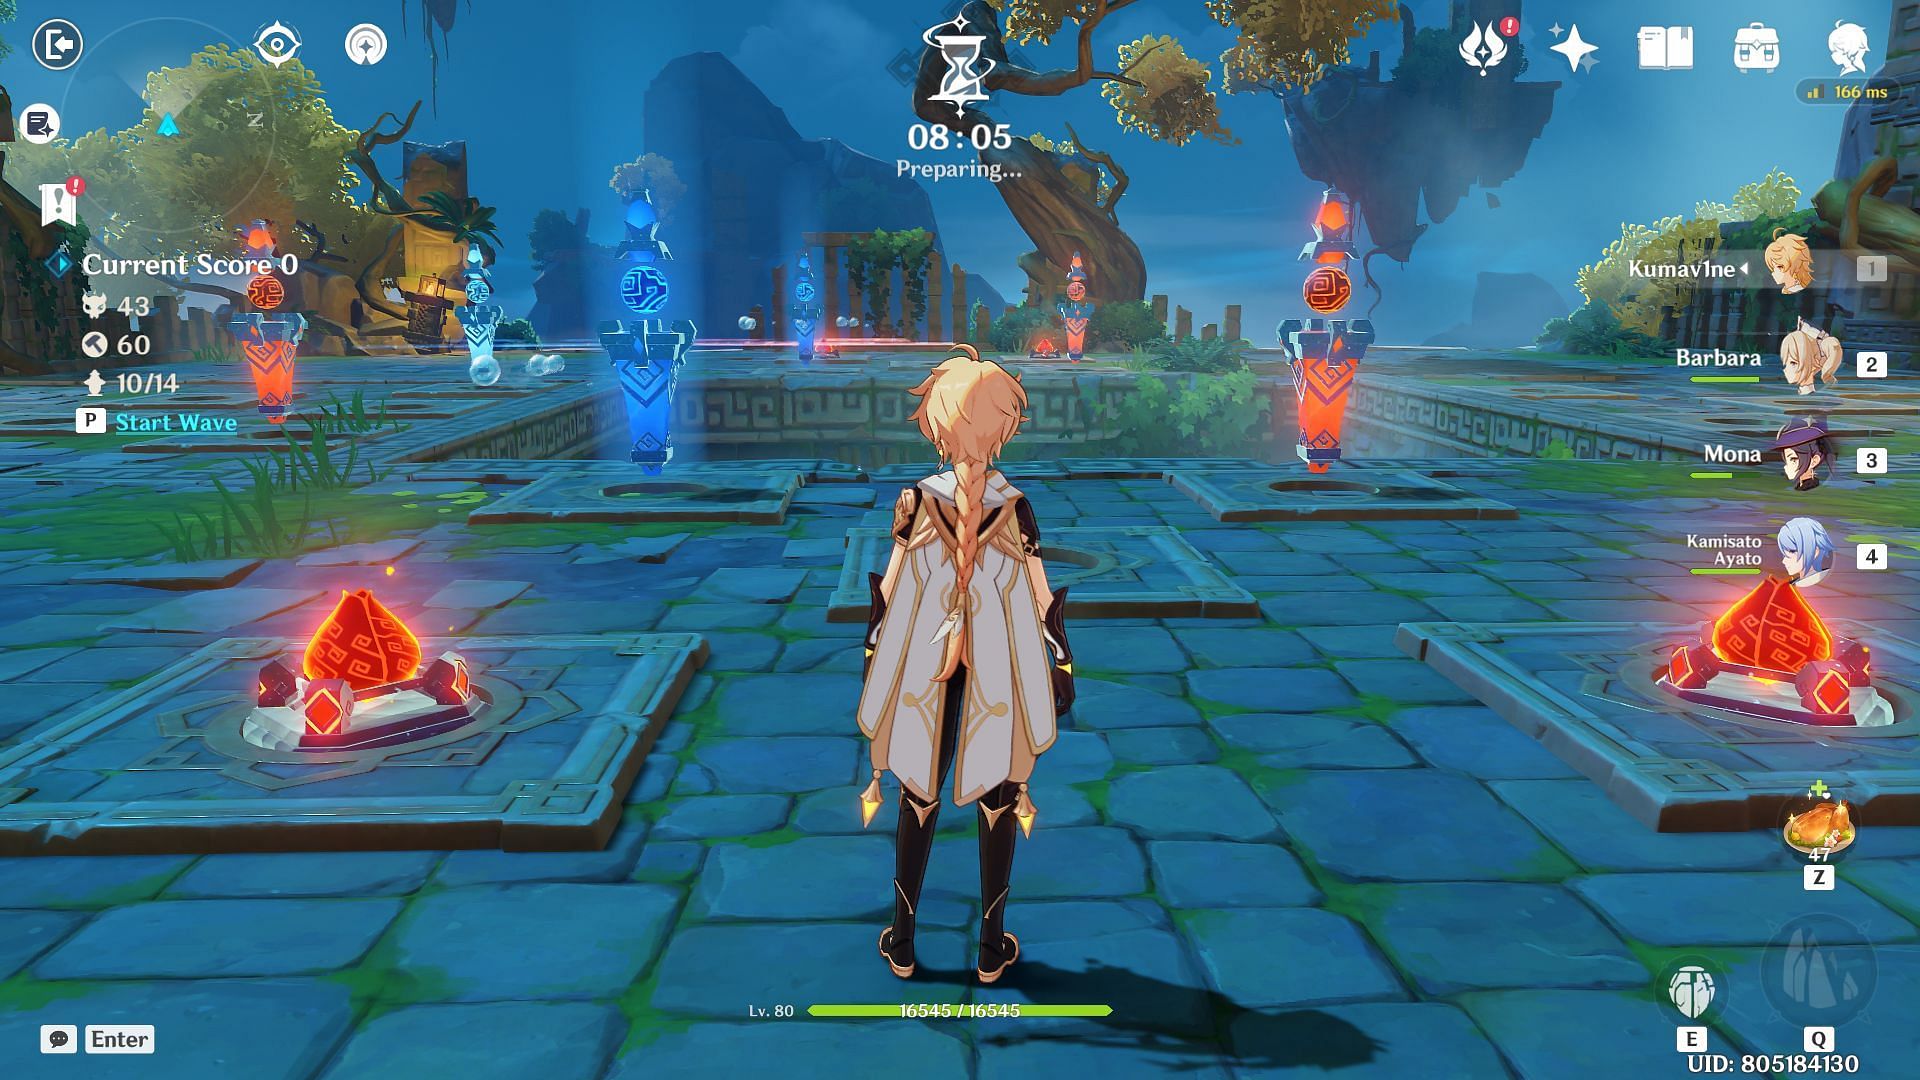
Remove all the Physical towers from the top lane and place the Pyro and Cryo towers instead. The Pyro tower needs to be placed on the left side of the top lane and the Cryo tower on the right side of the top lane.
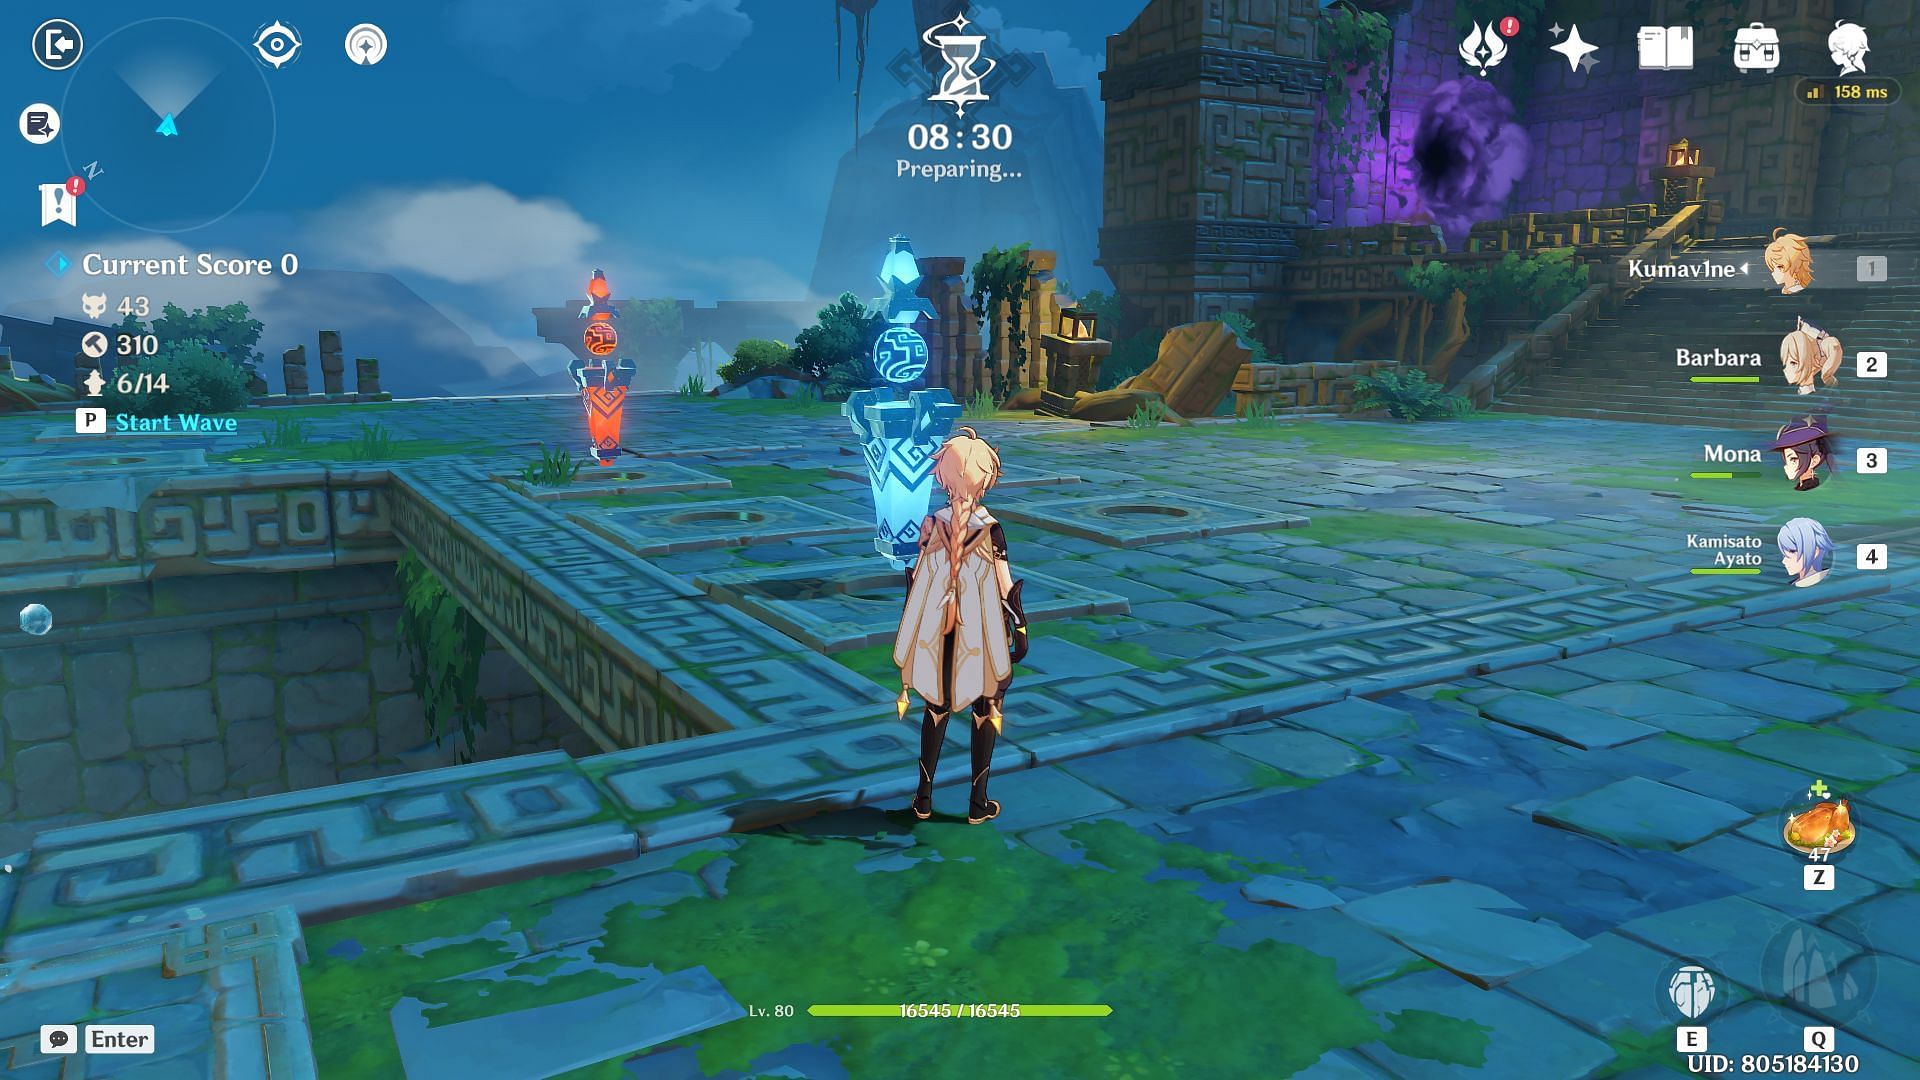
Start the wave and stay AFK till the enemy counter hits 24. The ruin grader will spawn as the 23rd enemy. Follow the Ruin Grader and keep applying Hydro so it receives more damage from the Pyro towers.
Stay AFK again and wait for the second Ruin Grader to spawn to repeat the same process to complete the stage in Genshin Impact.

Are you stuck on today's Wordle? Our Wordle Solver will help you find the answer.