
'%20x='0'%20y='0'%20height='100%25'%20width='100%25'%20%0A%20%20%20%20%20%20%20%20%20%20xlink%3Ahref='data:image/jpg;base64,/9j/2wBDAAYEBQYFBAYGBQYHBwYIChAKCgkJChQODwwQFxQYGBcUFhYaHSUfGhsjHBYWICwgIyYnKSopGR8tMC0oMCUoKSj/2wBDAQcHBwoIChMKChMoGhYaKCgoKCgoKCgoKCgoKCgoKCgoKCgoKCgoKCgoKCgoKCgoKCgoKCgoKCgoKCgoKCgoKCj/wgARCAAGAAoDASIAAhEBAxEB/8QAFgABAQEAAAAAAAAAAAAAAAAAAAEI/8QAFQEBAQAAAAAAAAAAAAAAAAAAAQL/2gAMAwEAAhADEAAAAM20Z//EAB0QAAEEAgMAAAAAAAAAAAAAAAEAAgQRAxIiQUP/2gAIAQEAAT8Abhju5FhFUaHa2jDyK//EABURAQEAAAAAAAAAAAAAAAAAAAAB/9oACAECAQE/AK//xAAVEQEBAAAAAAAAAAAAAAAAAAAAAv/aAAgBAwEBPwCX/9k='%3E%3C/image%3E%3C/svg%3E)
The Shrine Vault Puzzle in Silent Hill F is one of the first real tests that players will face in Chapter 1. You’ll need to locate missing pieces, follow cryptic hints, and deal with an enemy that refuses to stay down. Completing it rewards you with a key.
The Shrine Vault Puzzle in Silent Hill F changes slightly depending on your difficulty setting, but the steps below cover both the process and the solutions.
Solution of the Shrine Vault Puzzle in Silent Hill F Chapter 1
Finding the Shrine Vault and the missing piece
Looking for Crossword hints & solutions? Check out latest NYT Mini Crossword Answers, LA Times Crossword Answers, and Atlantic Crossword Answers
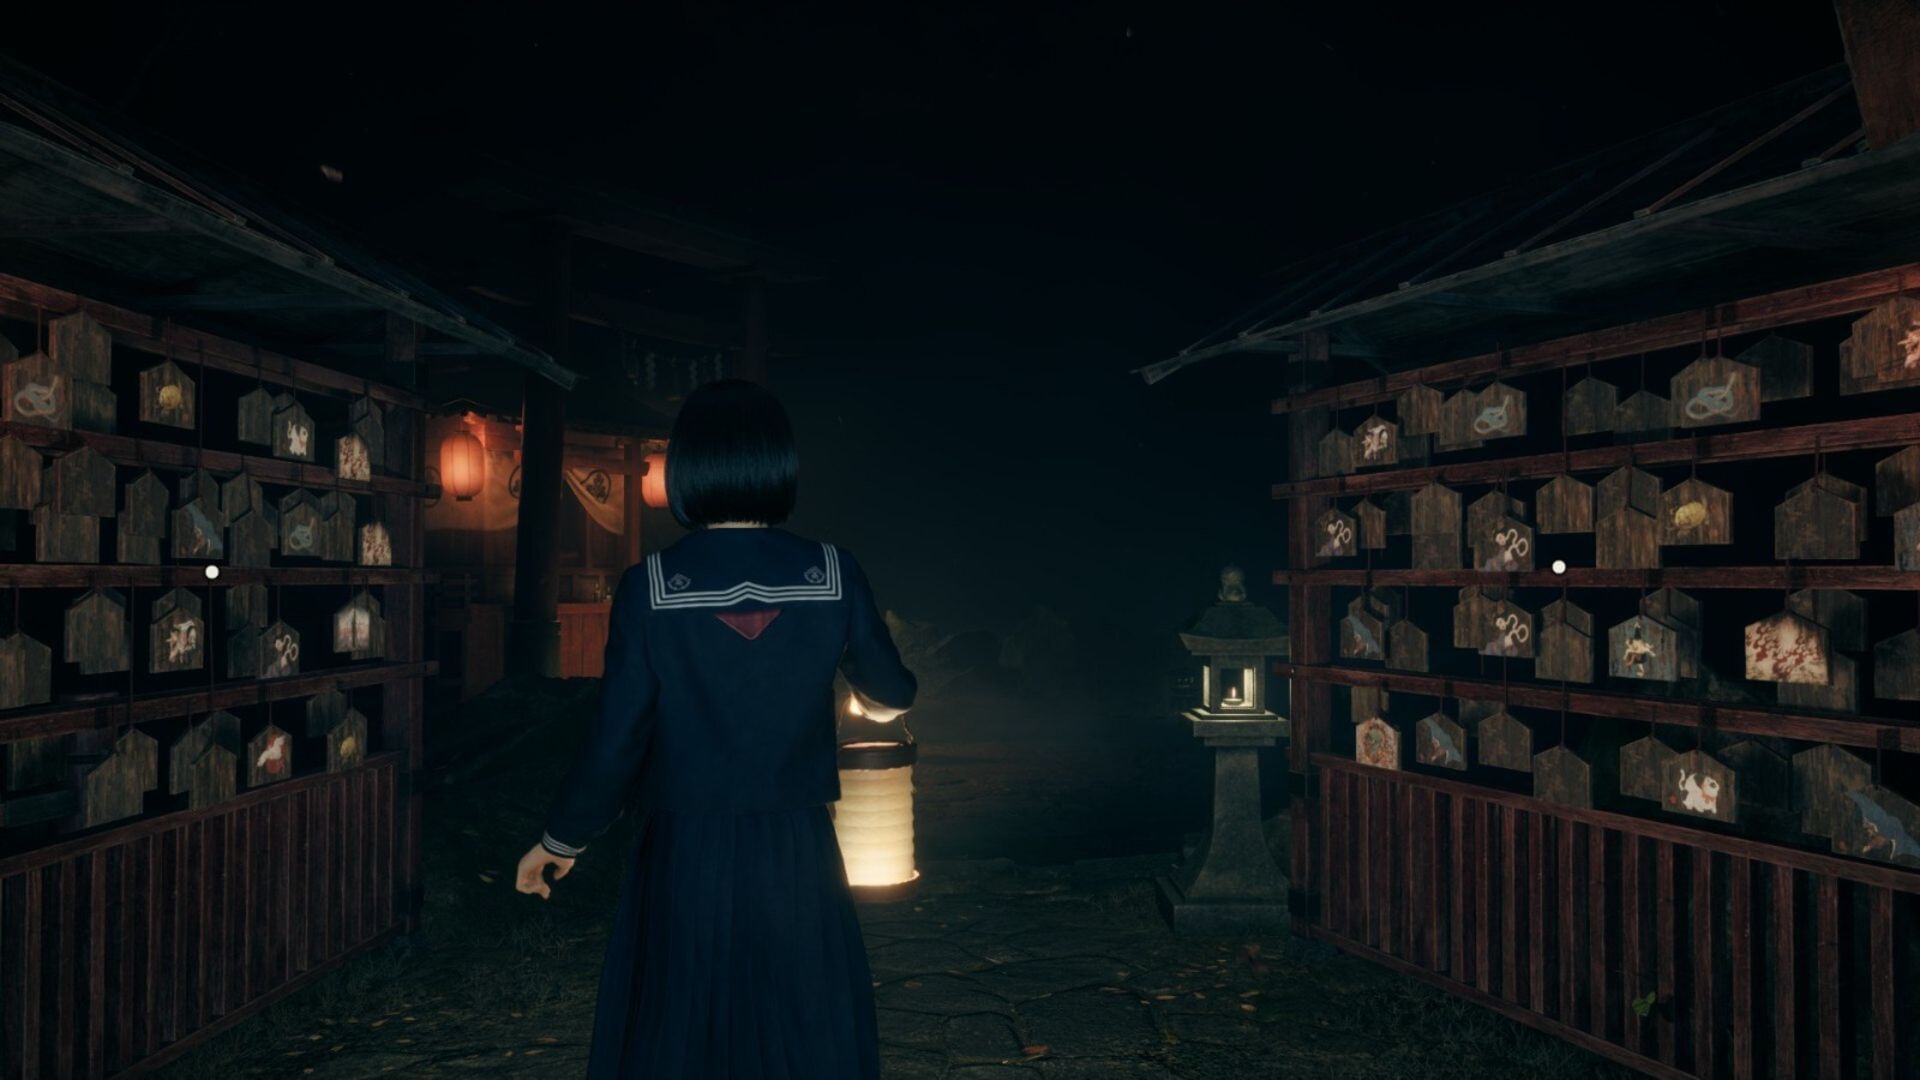
You’ll first come across the Shrine Vault at the end of the upper path, as shown in the image. Interacting with it reveals a missing piece, which kicks off the puzzle. From here, you’ll need to double-back down the path until you spot a doll.
This doll isn’t just set dressing; it provides the first hints to the puzzle. As soon as you examine it, a monster will appear. Defeat the creature, then open your journal to continue. Keep in mind that it doesn’t stay dead and it revives, so the faster you finish the puzzle, the better.
If you manage to solve everything without taking damage, you’ll also unlock a trophy/achievement in Silent Hill F (Chapter 1).
Also read: How to solve the Shrine Path Altar puzzle in Silent Hill F (Chapter 1)
Reading the Journal clues
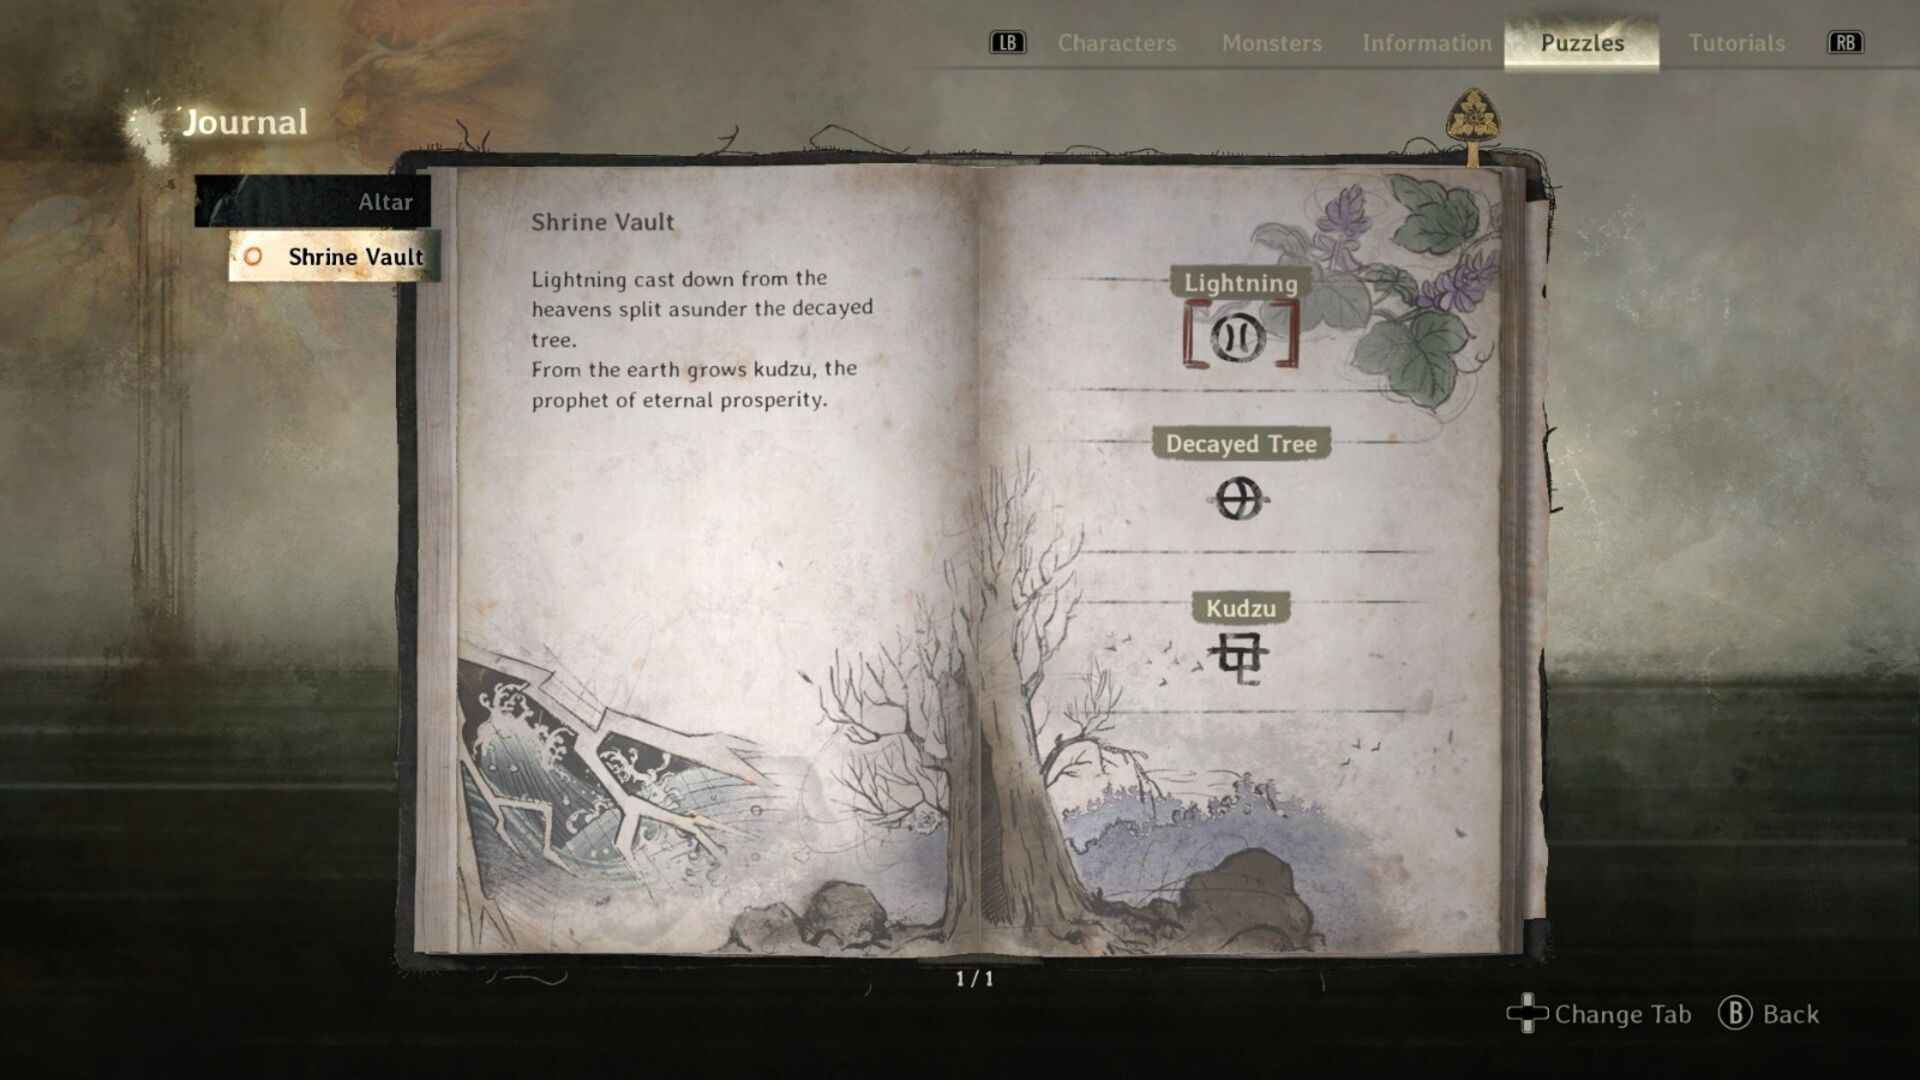
Interacting with the doll gives you a riddle-like message:
“Lightning cast down from the heavens split us under the decayed tree. From the earth grows kudzu, the profit of eternal prosperity.”
These three terms, Lightning, Decayed Tree, and Kudzu, are the key to solving the puzzle. But before you can act on them, a new enemy appears.
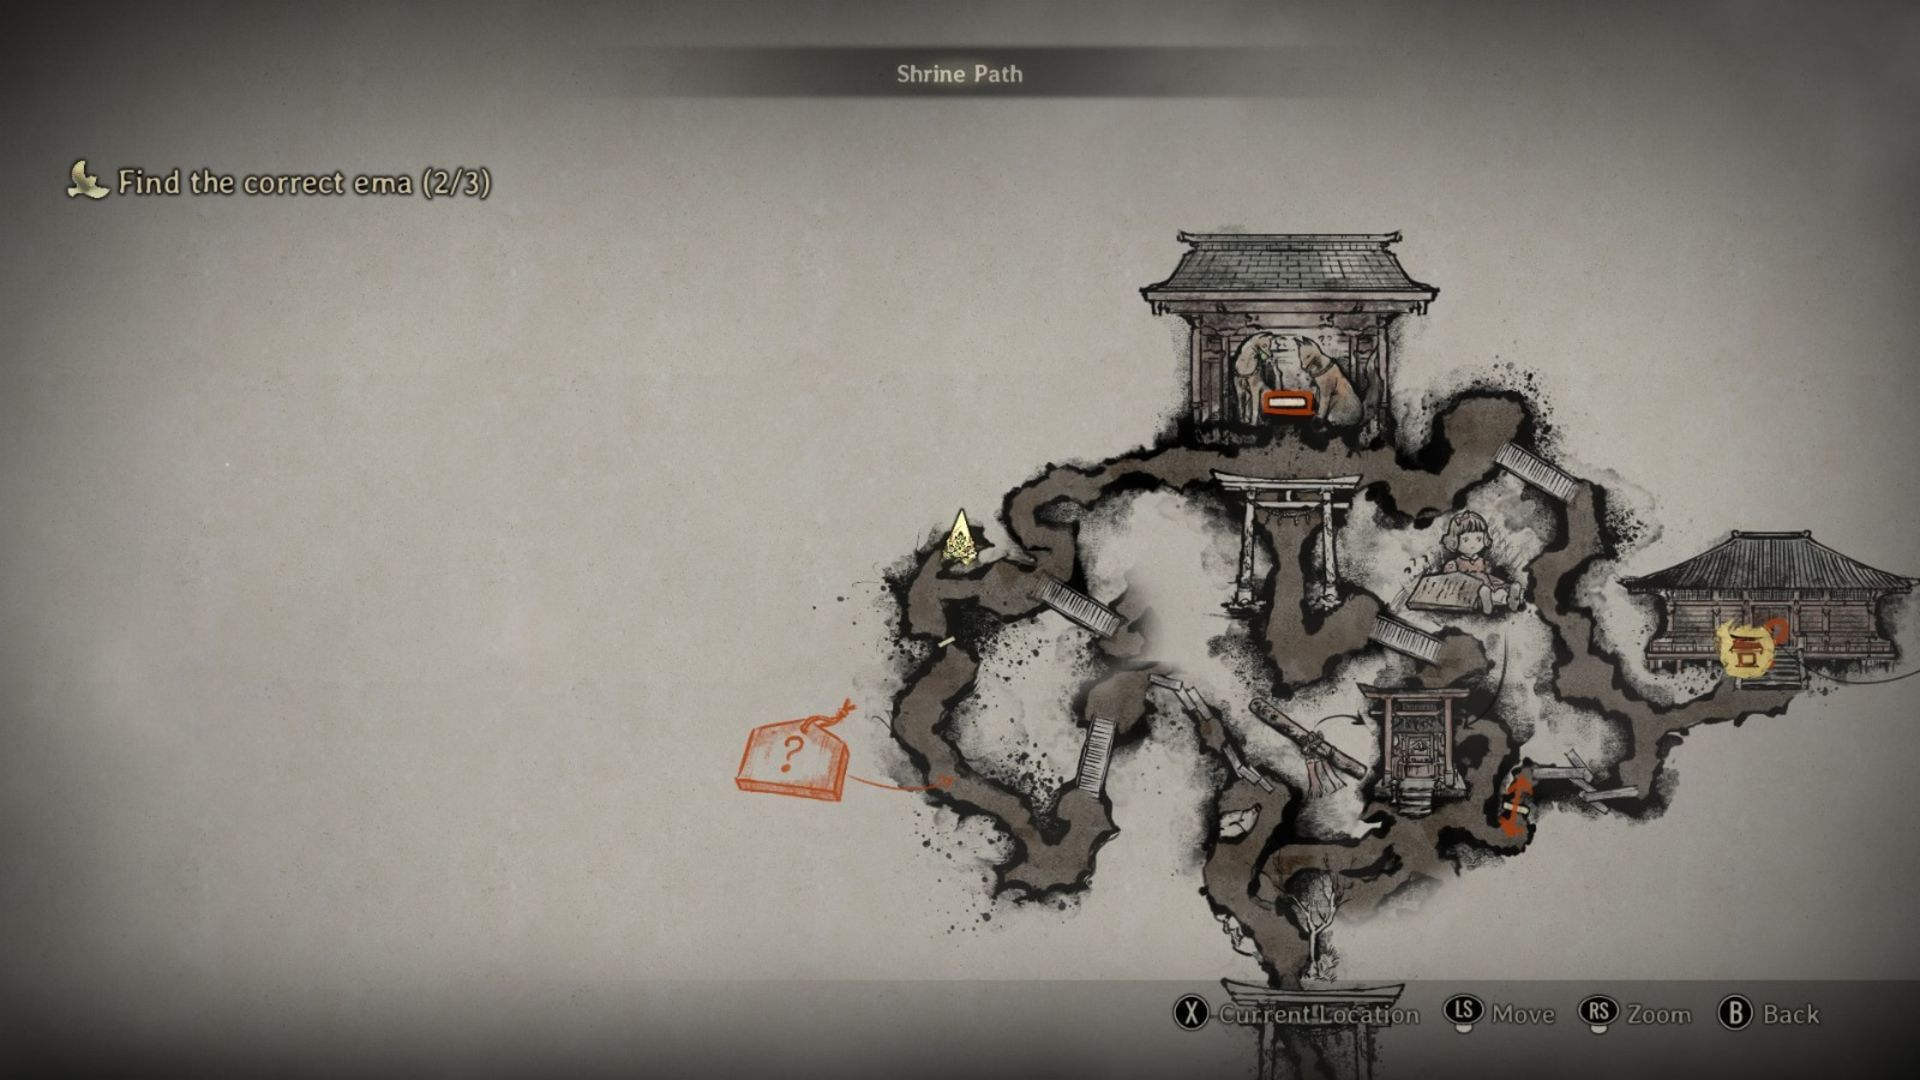
Locating the symbols
The tricky part is that the symbol locations aren’t static. They’re randomized across several possible spots, so your run won’t be identical to anyone else’s. Thankfully, the map keeps track of which places you’ve already checked, so it’s less frustrating than it sounds.
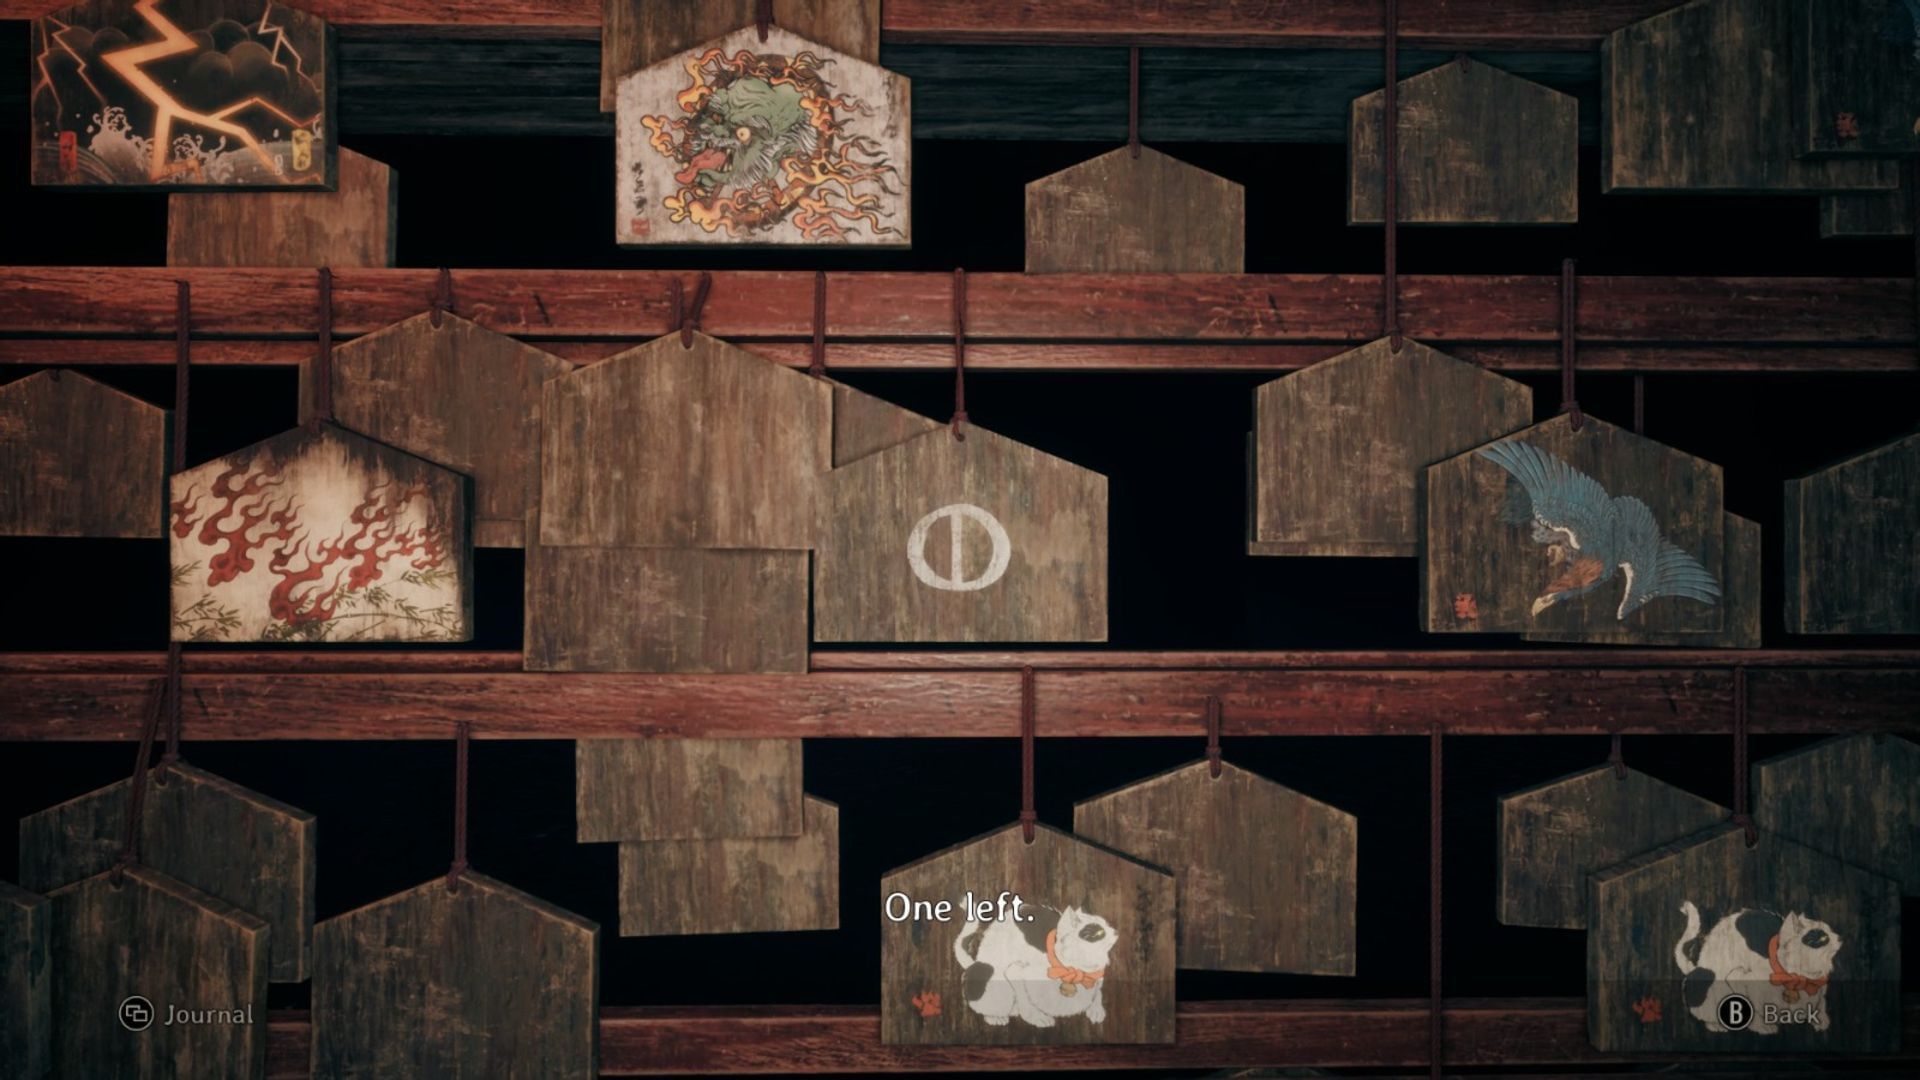
- The Tree: When you find it, the design looks like a decayed trunk. Flip and examine it carefully. Once logged in, you’ll get the confirmation to move on.
- The Lightning Symbol: Appears as a carved or etched strike, often on nearby surfaces. You’ll know you’ve got it when the journal updates.
- Kudzu Plant: This one stands out as a leafy green vine. Interact with it, and it completes the set.
Flip the Emas to reveal the right symbols. Collecting all three unlocks the Combination Lock Dial, letting you return to the Shrine Vault.
Tip: Enemies respawn while you’re examining these areas. The same monster you already fought can return, so stay alert and clear them again if needed.
Solutions for Shrine Vault Puzzle in Silent Hill F
The symbols you need depend on your difficulty setting:
Story difficulty
Enter the following sequence to unlock the vault:
- Circle with a horizontal line running through it.
- Circle with a vertical line inside.
- Snake-like “2” with a small “v” inside.
Hard difficulty
On the higher setting, the solution is different:
- Circle with two small lines inside.
- Circle with a curved vertical line and a horizontal line breaking outside the circle.
- Square containing a reverse capital J.
Returning to the Shrine Vault
With all three symbols collected, it’s time to go back to the Shrine Vault. Before you leave the area, it’s smart to save progress, just in case you missed a symbol or get knocked out by respawning enemies on the way.
Once at the vault, open your journal and match the correct sequence on the lock dial. If you’ve examined the right symbols, the solution clicks into place. Entering it unlocks the vault, and you get the Stone key, which is sitting on the Altar.
That concludes our guide on solving the Shrine Vault Puzzle in Silent Hill F (Chapter 1). For more game-related guides, make sure to follow Sportskeeda.
Check out: Does Silent Hill F have Denuvo?

Are you stuck on today's Wordle? Our Wordle Solver will help you find the answer.