
'%20x='0'%20y='0'%20height='100%25'%20width='100%25'%20%0A%20%20%20%20%20%20%20%20%20%20xlink%3Ahref='data:image/jpg;base64,/9j/2wBDAAYEBQYFBAYGBQYHBwYIChAKCgkJChQODwwQFxQYGBcUFhYaHSUfGhsjHBYWICwgIyYnKSopGR8tMC0oMCUoKSj/2wBDAQcHBwoIChMKChMoGhYaKCgoKCgoKCgoKCgoKCgoKCgoKCgoKCgoKCgoKCgoKCgoKCgoKCgoKCgoKCgoKCgoKCj/wgARCAAGAAoDASIAAhEBAxEB/8QAFgABAQEAAAAAAAAAAAAAAAAAAAUG/8QAFQEBAQAAAAAAAAAAAAAAAAAAAgX/2gAMAwEAAhADEAAAAMjUKS//xAAhEAABAwMEAwAAAAAAAAAAAAACAQMFAAQGEhUhMSJR4//aAAgBAQABPwCLyaAvr5529jHj1uETukRQiRekTnx6o8uwMDIdilePT30r/8QAFxEAAwEAAAAAAAAAAAAAAAAAAAEhMv/aAAgBAgEBPwDVZ//EABcRAAMBAAAAAAAAAAAAAAAAAAABERL/2gAIAQMBAT8A06f/2Q=='%3E%3C/image%3E%3C/svg%3E)
The Wuthering Waves 2.4 update has introduced Septimont to the map. It is by far the largest city in Rinascita, where players can discover secrets about gladiators and rare dragons. In fact, during the "Where Sky is Clear and Glory Shines: Guardian Tower" mission, Rovers get to liberate a unique creature from captivity.
Here's a walkthrough of the exploration quest in Wuthering Waves.
Where Sky is Clear and Glory Shines: Guardian Tower quest location in Wuthering Waves

Looking for Crossword hints & solutions? Check out latest NYT Mini Crossword Answers, LA Times Crossword Answers, and Atlantic Crossword Answers
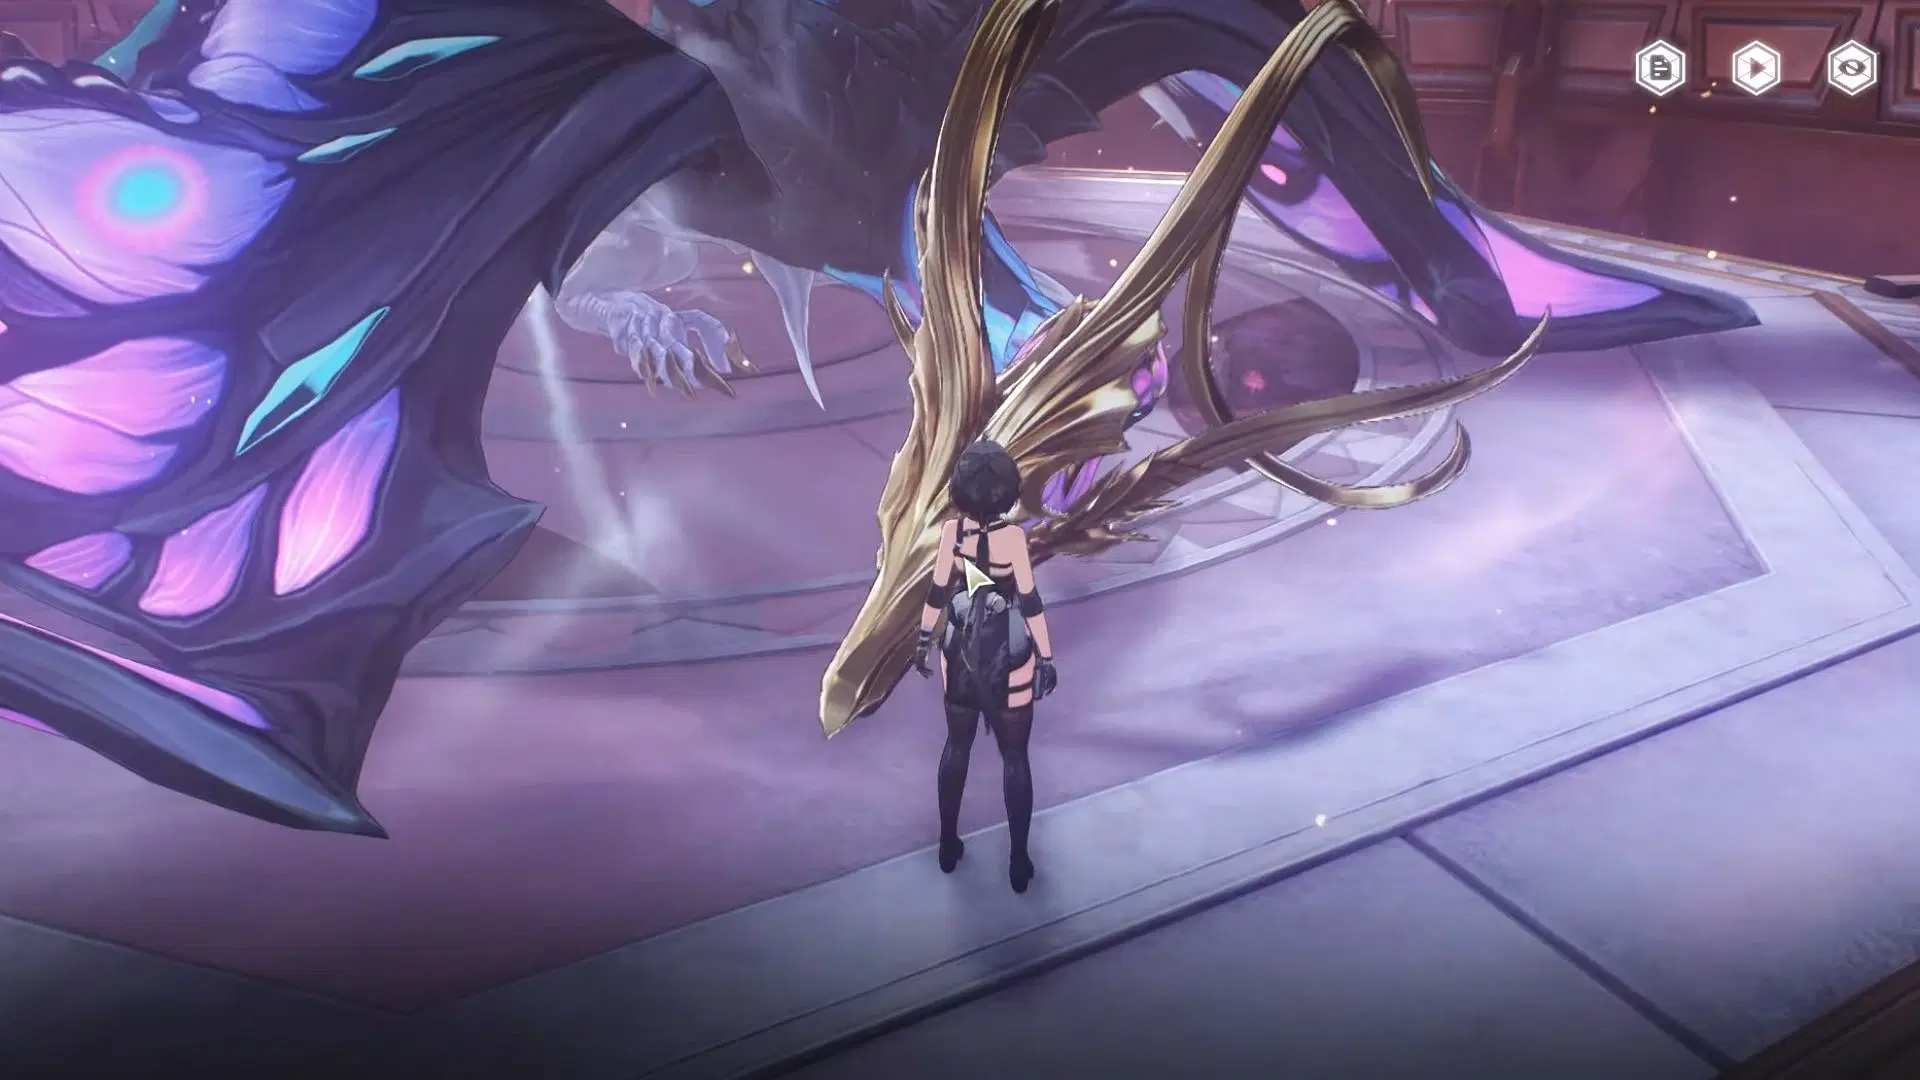
The “Where Sky is Clear and Glory Shines: Guardian Tower” quest in Wuthering Waves was introduced with the version 2.4 update.
To initiate the mission, head to the Mournfell Canyon Resonance Beacon and interact with an NPC named Tulia. She is located at the entrance of the tower north of the teleporter.
Completing Where Sky is Clear and Glory Shines: Guardian Tower quest in Wuthering Waves
Tulia will want to investigate a cry from presumably a Scourgewing, a rare dragon. You will be tasked with assisting her throughout the quest. Use the Hero’s Slash to break the seal on the entrance and continue forward.
Investigate the mysterious painting

An “Investigate the mysterious painting” prompt will appear on the screen as soon as you pass through the door. Just interact with the image with dragons on it.
Also read: All Septimont Treasure Spot chest locations in Wuthering Waves
Eliminate the enemies
As the next prompt suggests, defeat the Tacet Discords in the next room. Once you eliminate the enemies, investigate the glowing armor on the ground. Listen to the voice of a gladiator before heading to the upper level of the tower.
Sever the threads sealing the passage

Use the Hero’s Slash once again to remove the seal from the passage. Just swing the sword diagonally this time. Also, pull down the wooden barrier to reveal the doorway.
Proceed deeper into the tower to encounter more Tacet Discords. Defeat them and pull down the obstacle after inspecting the scene outside the large window.
Inspect the painting down the stairs

Upon exploring the next room, you will come across another painting near the staircase. Investigate the image of the two gladiators. Listen to Tulia and go up the stairs to reach the massive room with the dragon.
Also read: Wuthering Waves Bloodpact's Pledge guide
Cut the threads around the platform

You must use the Hero's Slash to cut all the threads tied to the dragon. Use the Sword of the Giant Summon to make a horizontal cut. Doing so will also free Scourgewing.
Now, glide down to reach the platform and interact with the dragon.
Explore the base of the tower
Once the floating stairs appear in the room, use them to reach the base of the tower, or just jump down. There will be a room with enemies in it. Fighting them is necessary to make progress.
After defeating the Tacet Discords, investigate the paintings on the wall.
Absorb "Recollection of Heroes" and charge your slash

Interact with the glowing sword to charge your slash. Next, pull the obstacle to access the room and investigate the painting on the wall. Fight the enemies after the interaction and pick up the glowing helmet. You will now have two charges for Hero's Rend.
Absorb the Spear from the statue's hand in the other room to obtain the final charge for Hero's Rend.
Also read: How to get The Laureate glider in Wuthering Waves
Go to the broken platform and slash through the obstacles

Head to the broken platform and interact with the floating sigil to activate Hero's Rend. Hold down the attack button to unleash a massive slash, striking down every obstacle in the room. After completing the objective, use the Wingray to reach Scourgewing Isth.
Give the collected frequencies to Scourgewing Isth
Complete the interaction with the dragon and follow the floating stairs leading to the observer tower. Using the 2D perspective, get to the destination.

The quest ends once you sever the tower using Hero's Slash and examine what Scourgewing Isth leaves behind. Upon doing so, you will obtain the following rewards:
- Union Experience x500
- Astrite x50
- 26,000 Shell Credit
- Advanced Resonance Potion x3
- Advanced Sealed Tube x3
Follow Sportskeeda's Wuthering Waves hub for more information and updates.

Are you stuck on today's Wordle? Our Wordle Solver will help you find the answer.