
'%20x='0'%20y='0'%20height='100%25'%20width='100%25'%20%0A%20%20%20%20%20%20%20%20%20%20xlink%3Ahref='data:image/jpg;base64,/9j/2wBDAAYEBQYFBAYGBQYHBwYIChAKCgkJChQODwwQFxQYGBcUFhYaHSUfGhsjHBYWICwgIyYnKSopGR8tMC0oMCUoKSj/2wBDAQcHBwoIChMKChMoGhYaKCgoKCgoKCgoKCgoKCgoKCgoKCgoKCgoKCgoKCgoKCgoKCgoKCgoKCgoKCgoKCgoKCj/wgARCAAGAAoDASIAAhEBAxEB/8QAFgABAQEAAAAAAAAAAAAAAAAAAAQH/8QAFQEBAQAAAAAAAAAAAAAAAAAAAQL/2gAMAwEAAhADEAAAAM4kGP/EAB4QAAMAAgIDAQAAAAAAAAAAAAECAwQSACEFBgdh/9oACAEBAAE/AMD3jyUcGlUvSUBRCZyVF2JAGv4vG+hbsXfB2ZuySR3z/8QAFhEAAwAAAAAAAAAAAAAAAAAAAAES/9oACAECAQE/AKZ//8QAFhEAAwAAAAAAAAAAAAAAAAAAAAEC/9oACAEDAQE/AIR//9k='%3E%3C/image%3E%3C/svg%3E)
Valorant’s Fracture is one of the most complex maps the game has to offer. It features two separate sides for attackers to exploit, connected via a long zipline from the Attacker Spawn. This also makes it notoriously difficult for defenders who must keep control on multiple sides at the same time. Viper is a brilliant Controller for Fracture, and with a few well-placed lineups, her gameplay can be improved to a greater extent.
This article will go over a series of Viper lineups for Valorant’s Fracture and explain how to fully optimise your gameplay.

Viper lineup guide in Valorant’s Fracture
Poison Cloud lineups for defense and attack sides
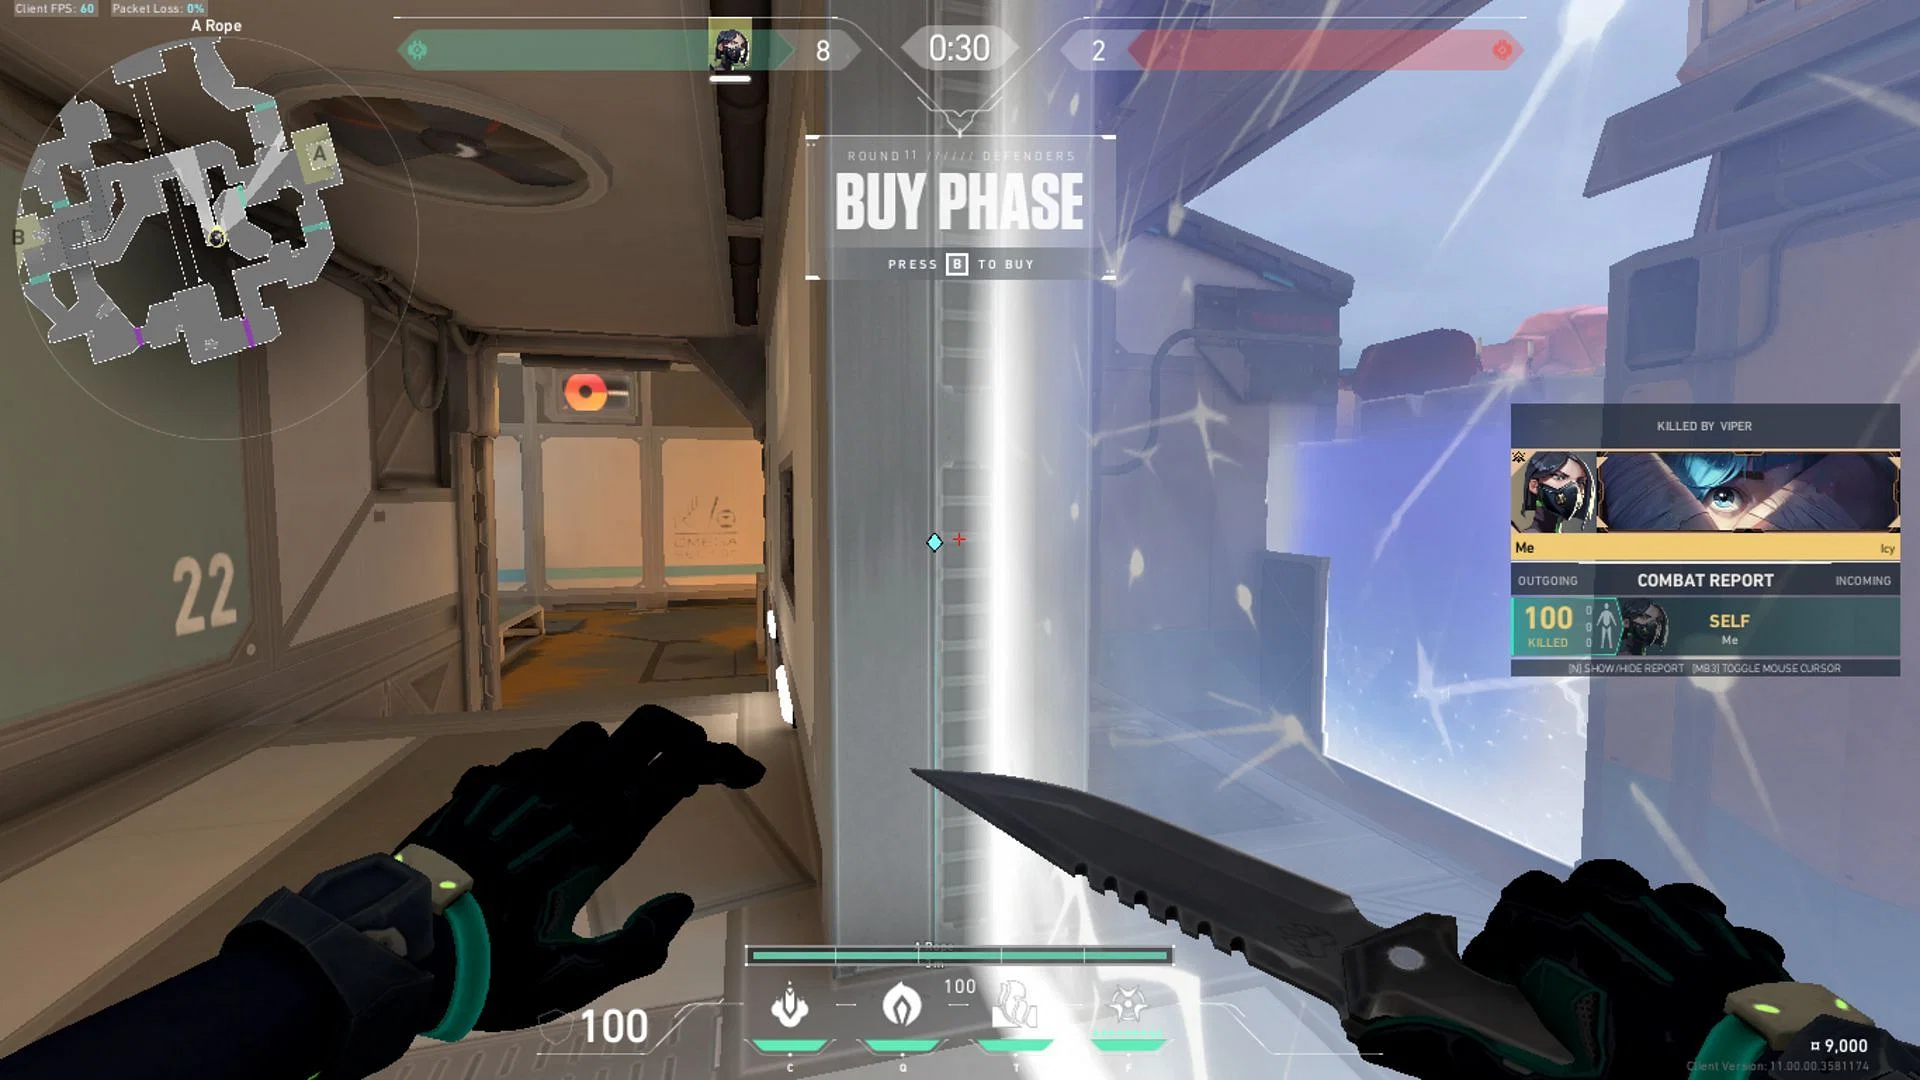
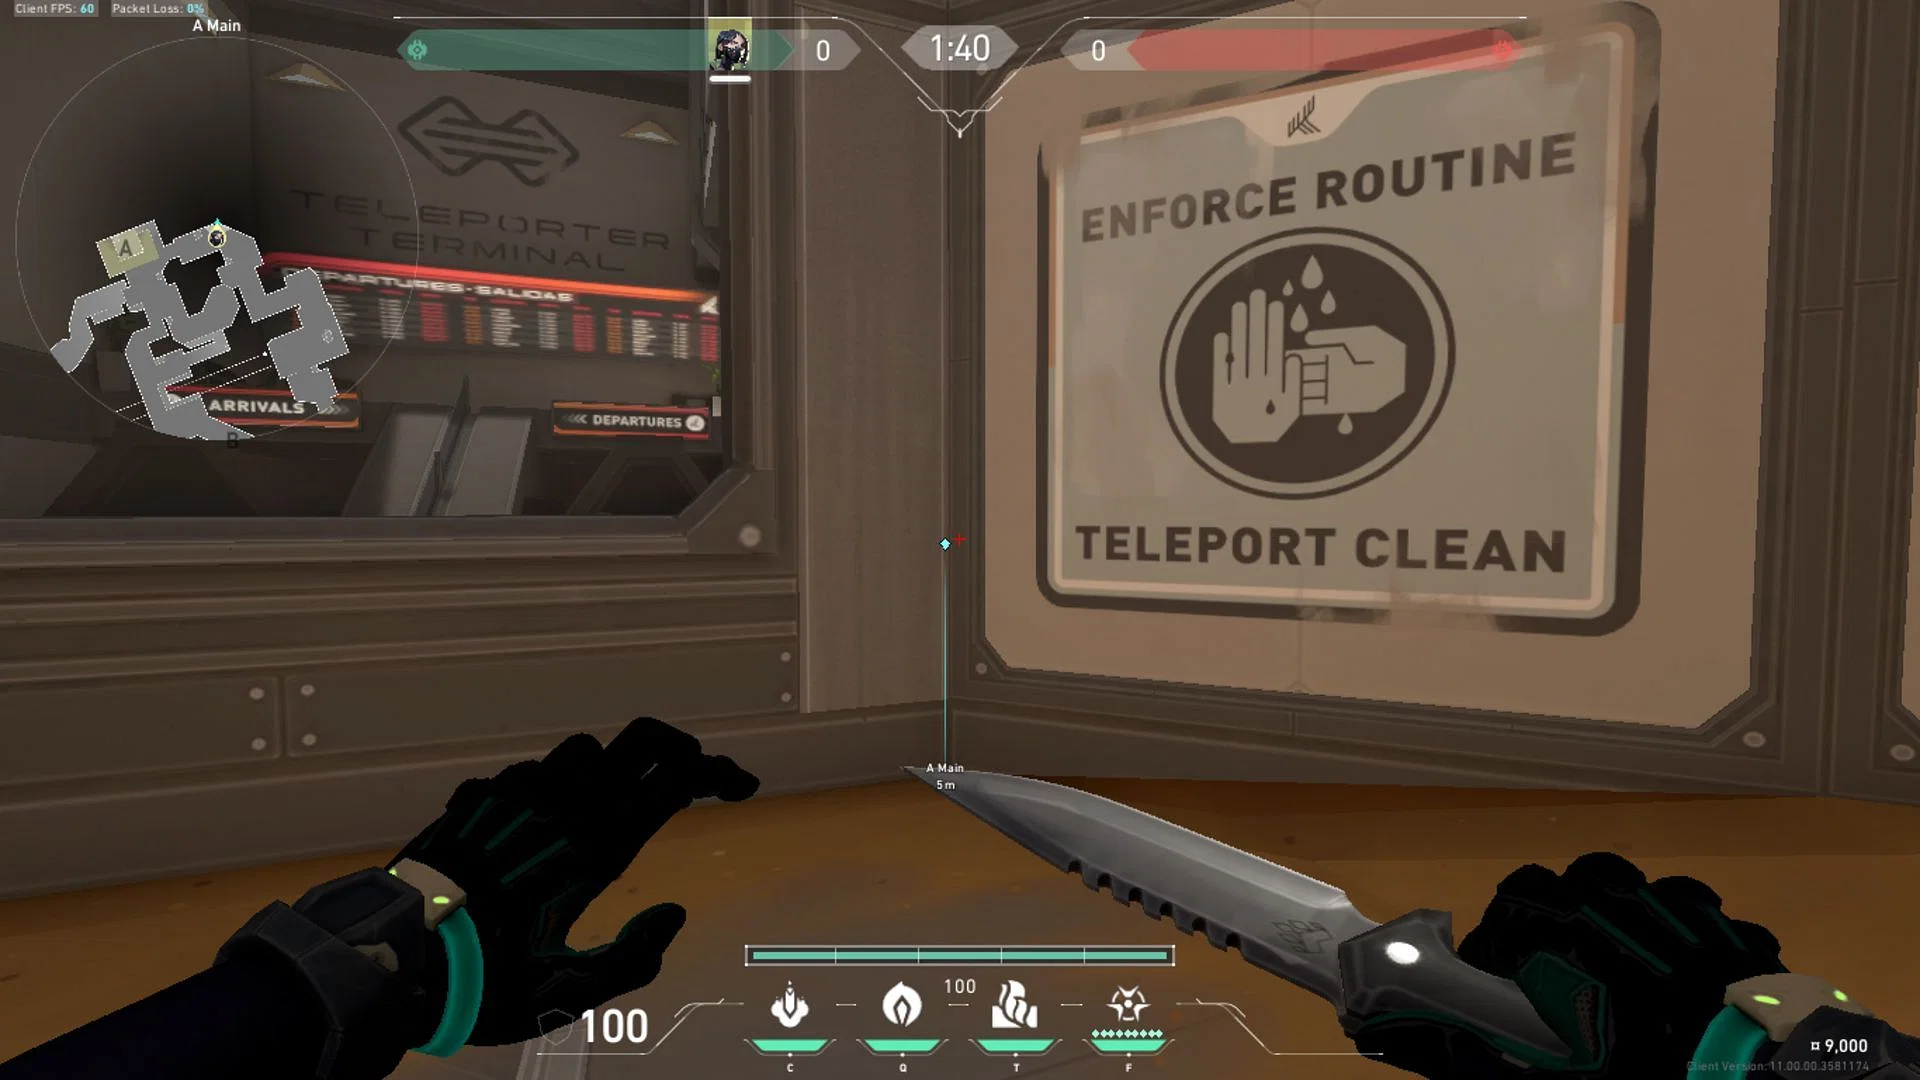
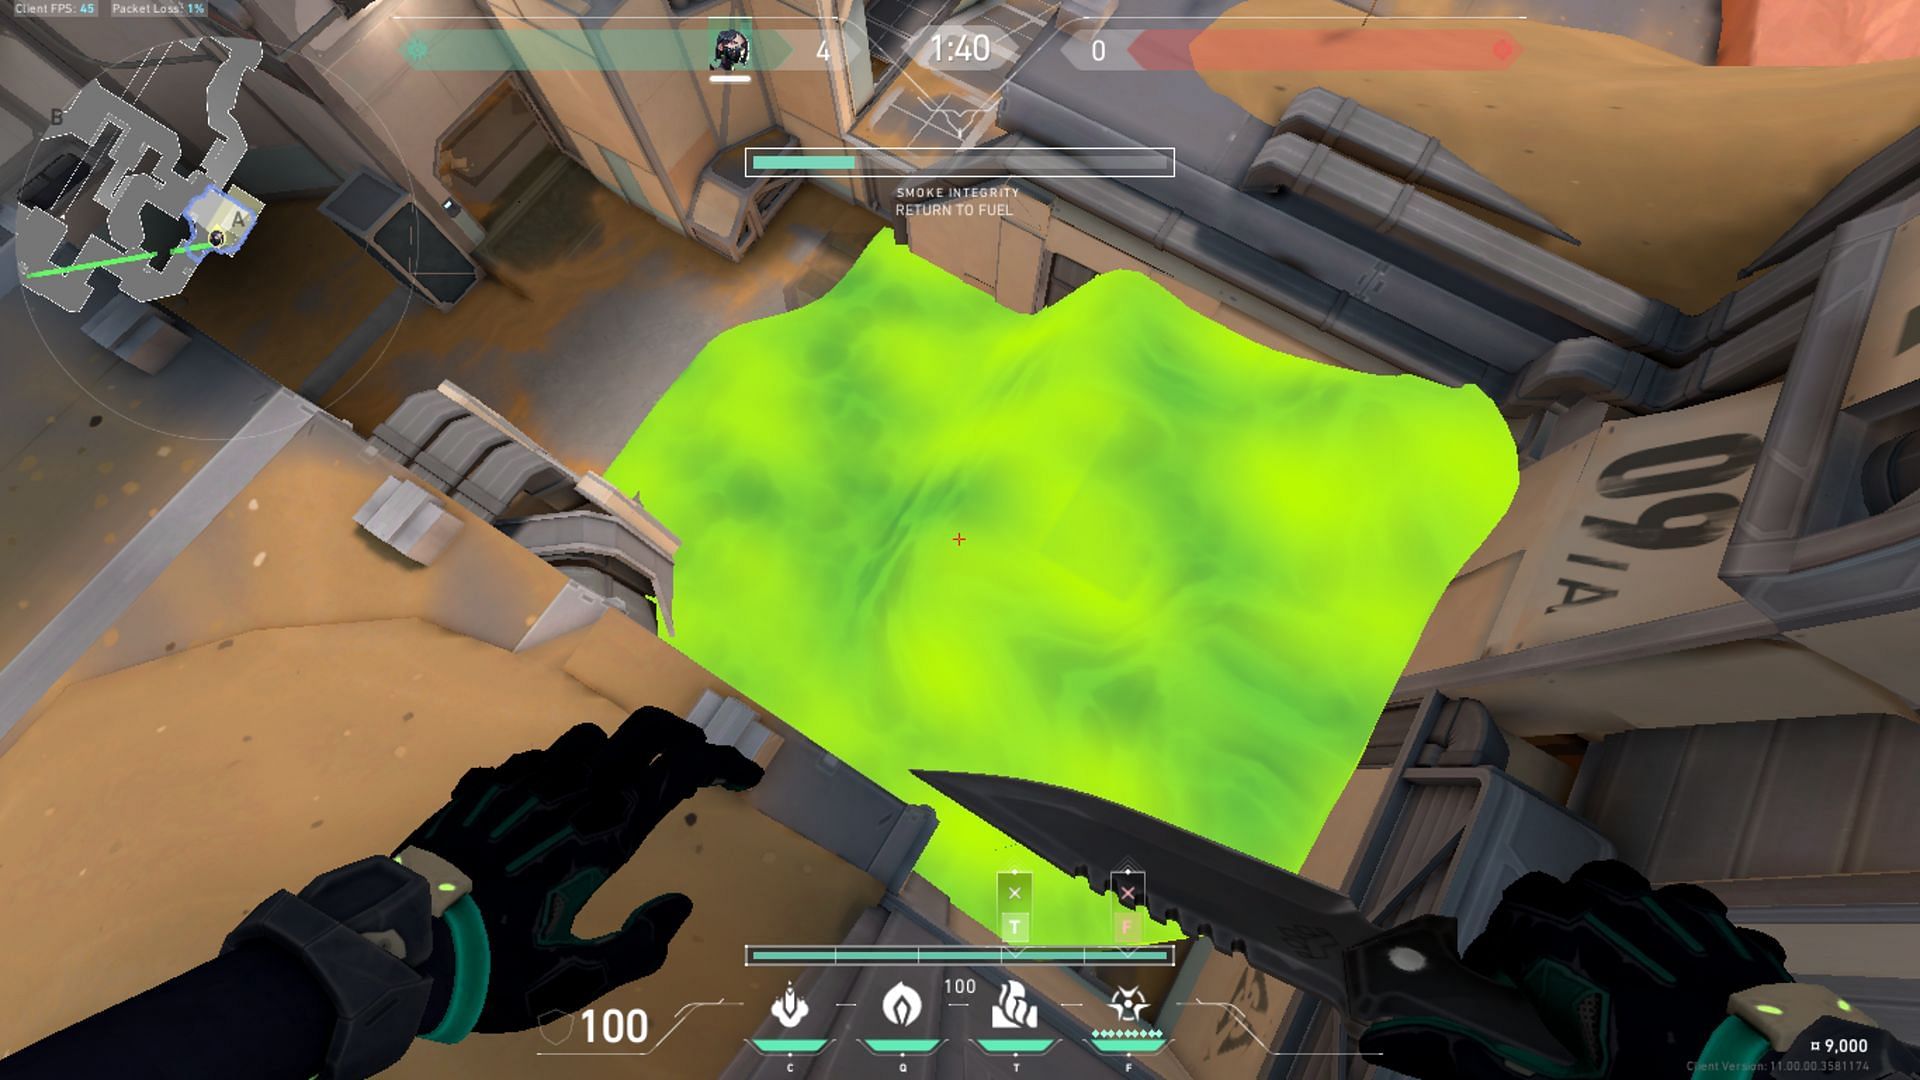
1) A Site defensive one-way
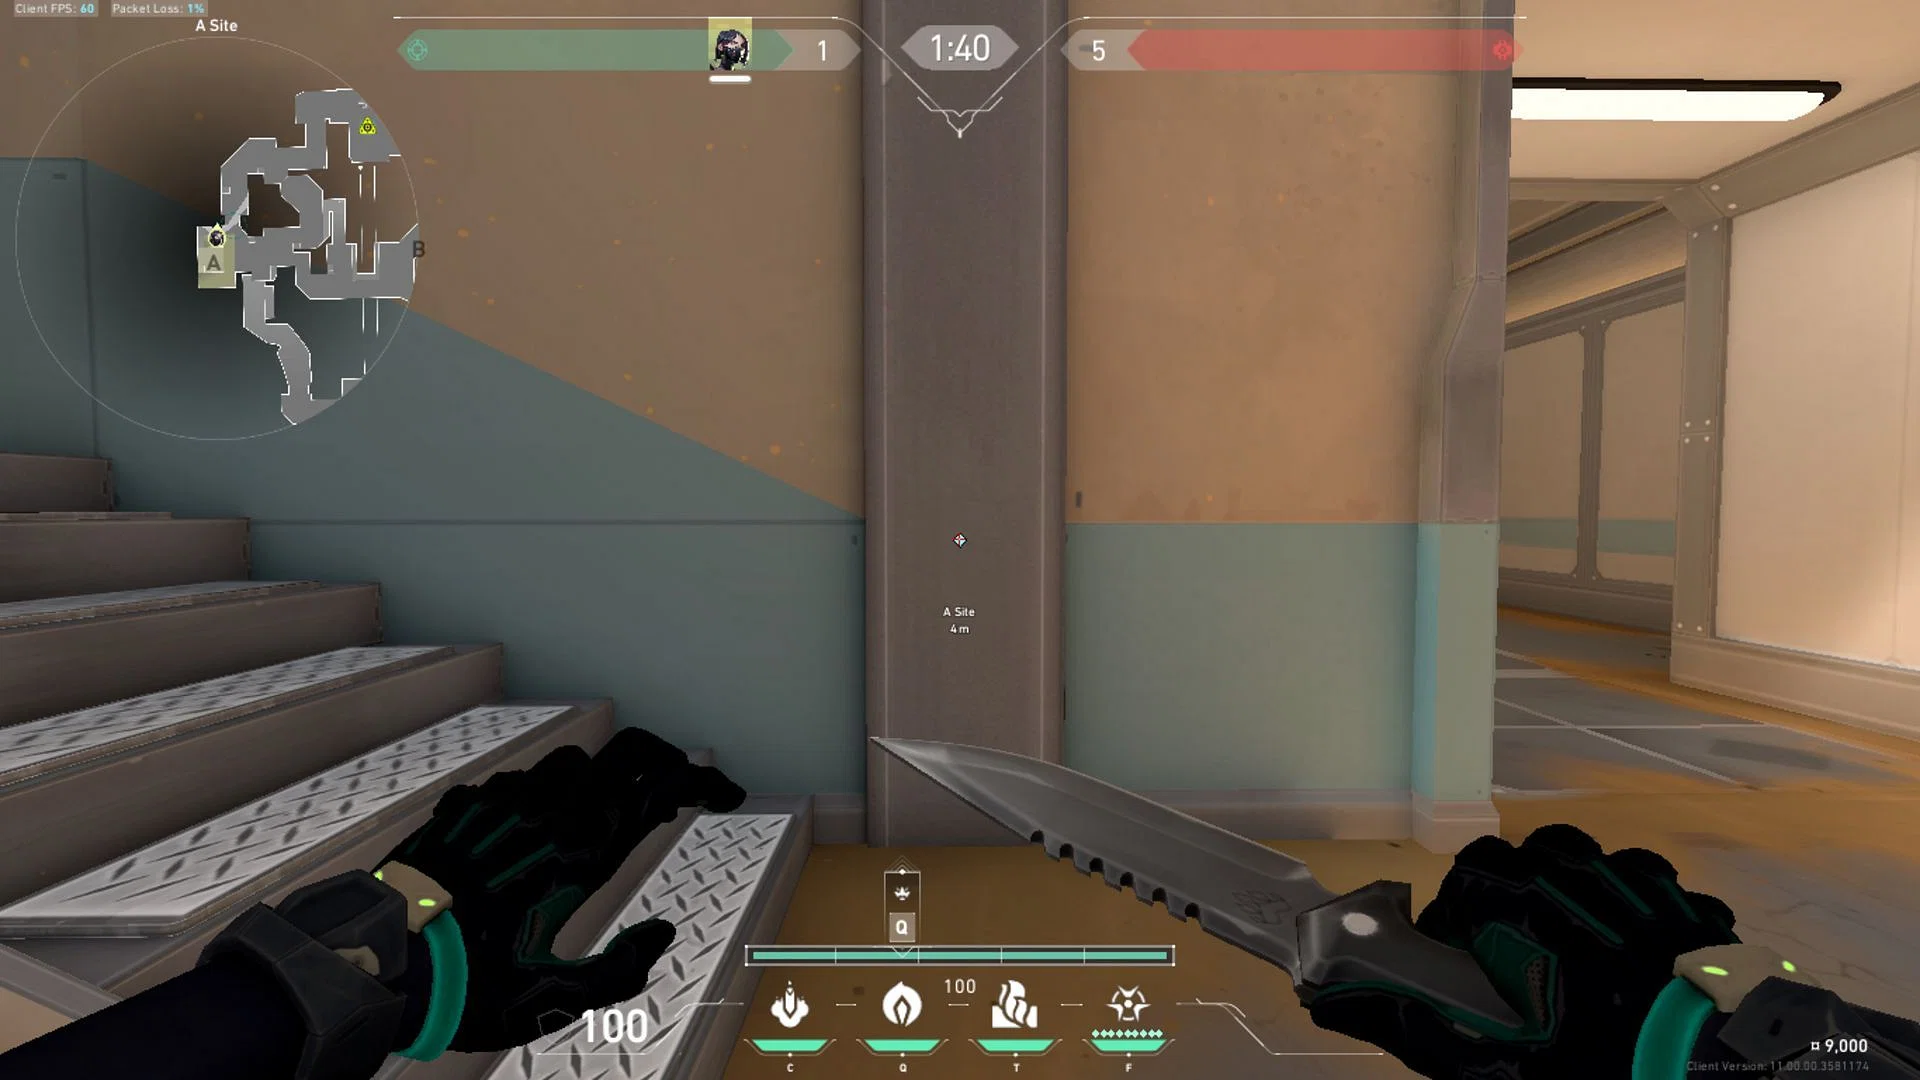
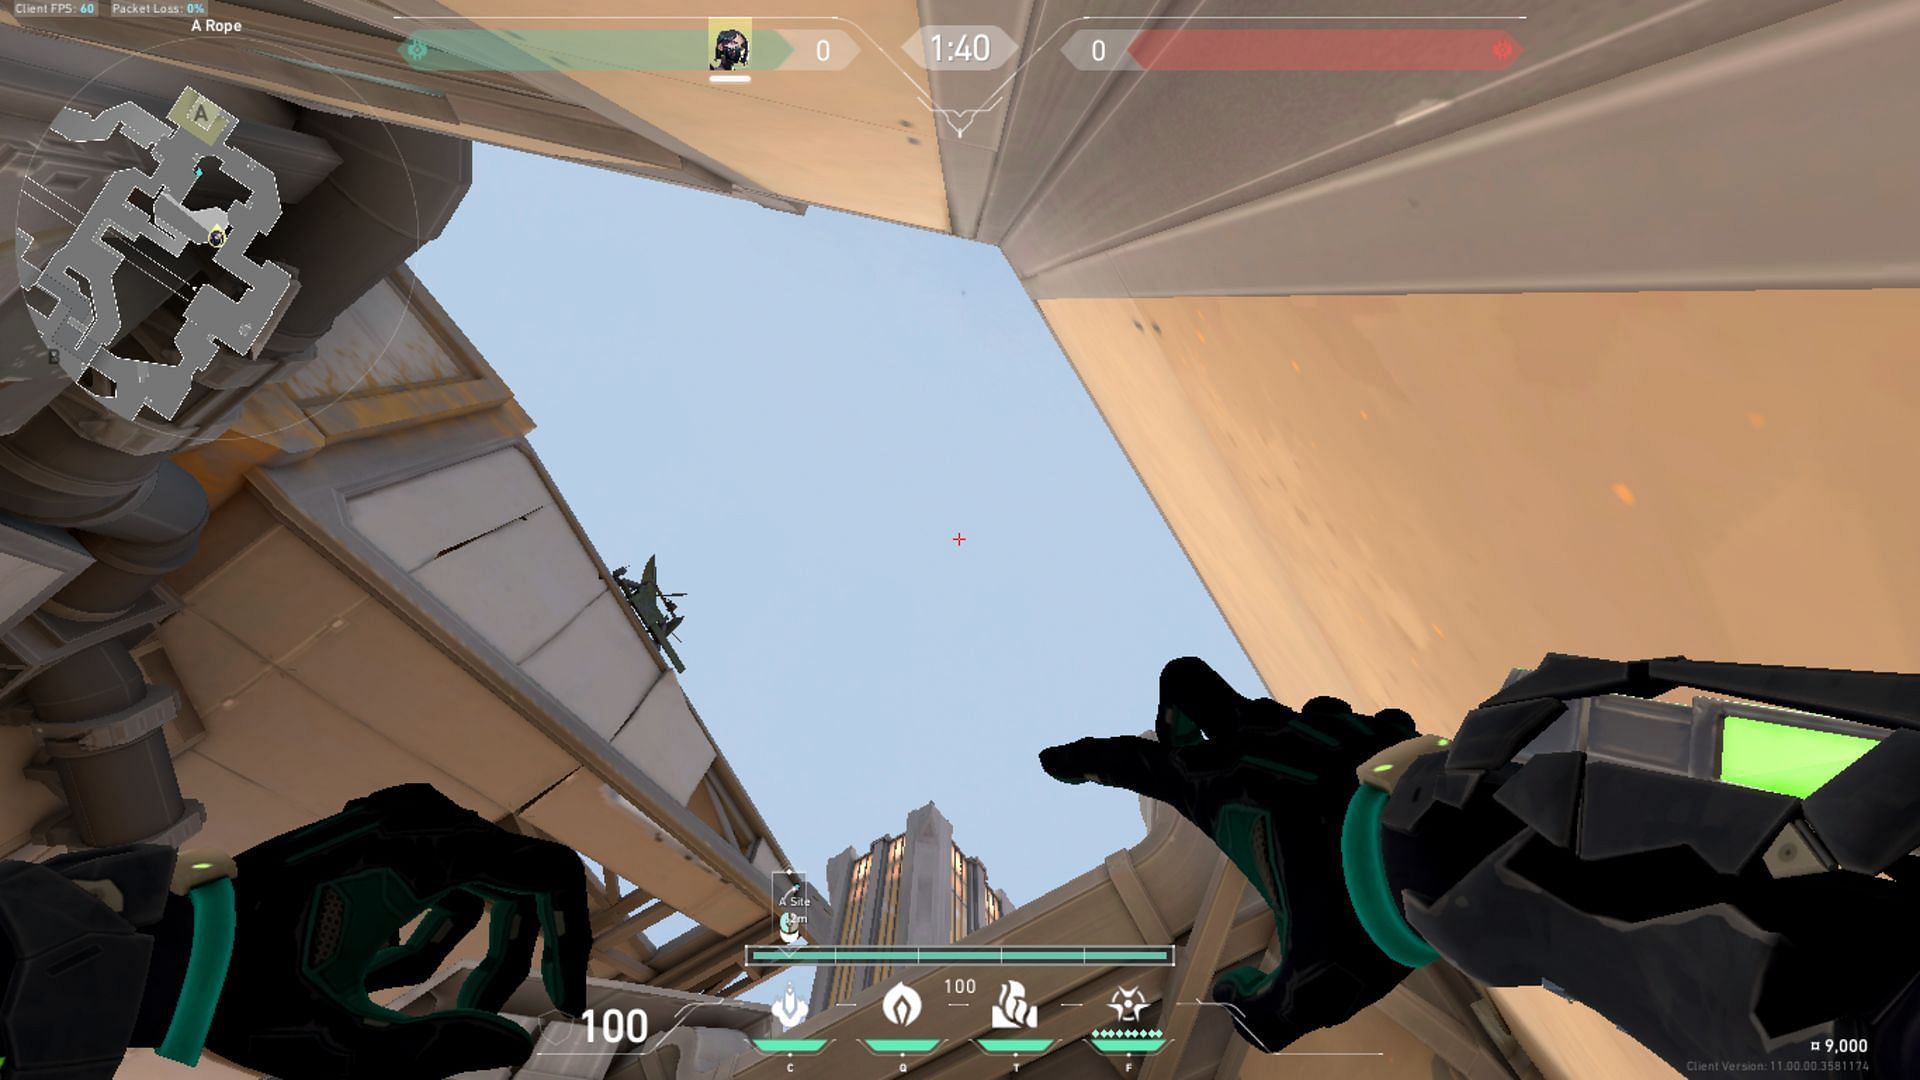
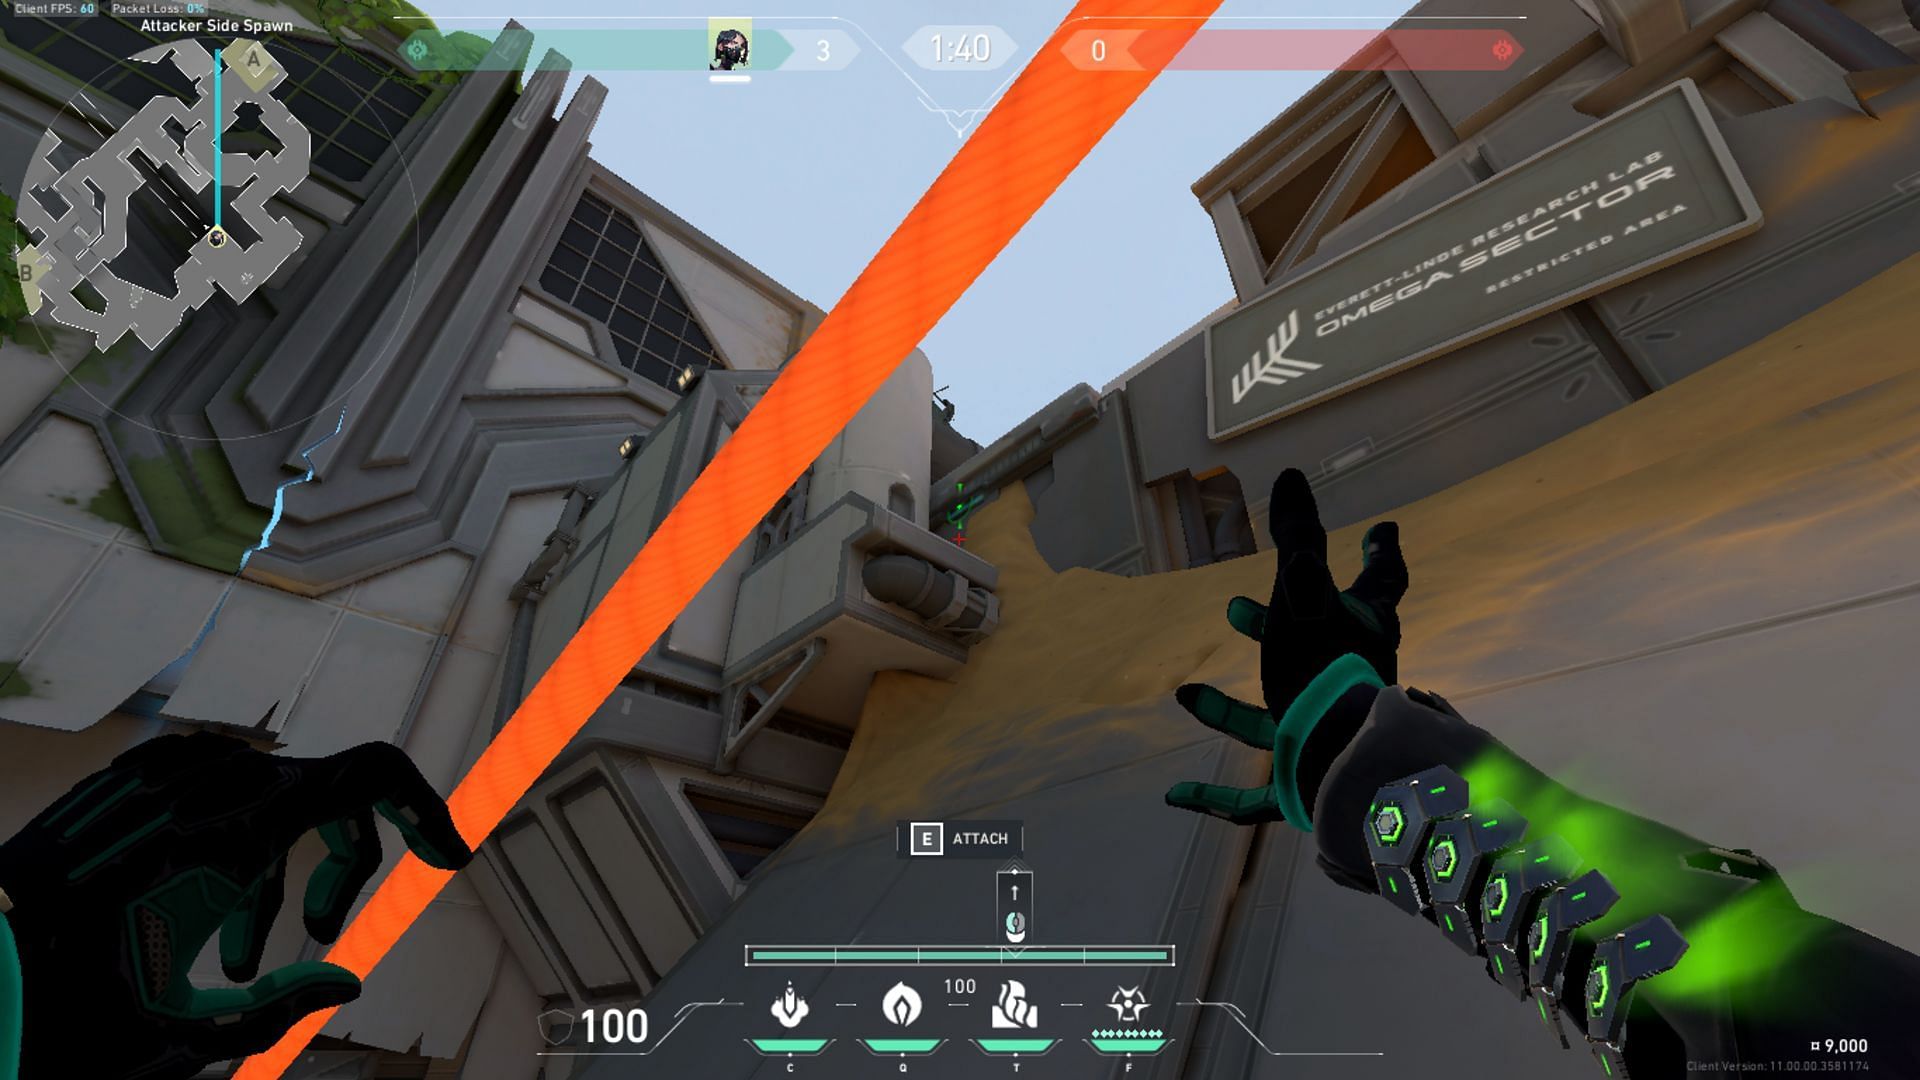
This A Site one-way sits perfectly on top of the doorway of the A Main entrance. Stand close to the metal section next to the entryway as indicated in the image.
Next, point your crosshair upwards. Your goal is to stay parallel to the metallic edge. Try to replicate the crosshair placement you see in the image above. Once you've got it all lined up, simply execute the throw. Try to do it before the barriers go up just in case you miss the lineup.
Be careful while using it because you can only benefit from it by playing on the top site. Playing from bottom site will expose you to the enemies all the same.
It's a perfect one-way for fast-paced Valorant Agents who can use the Operator well.
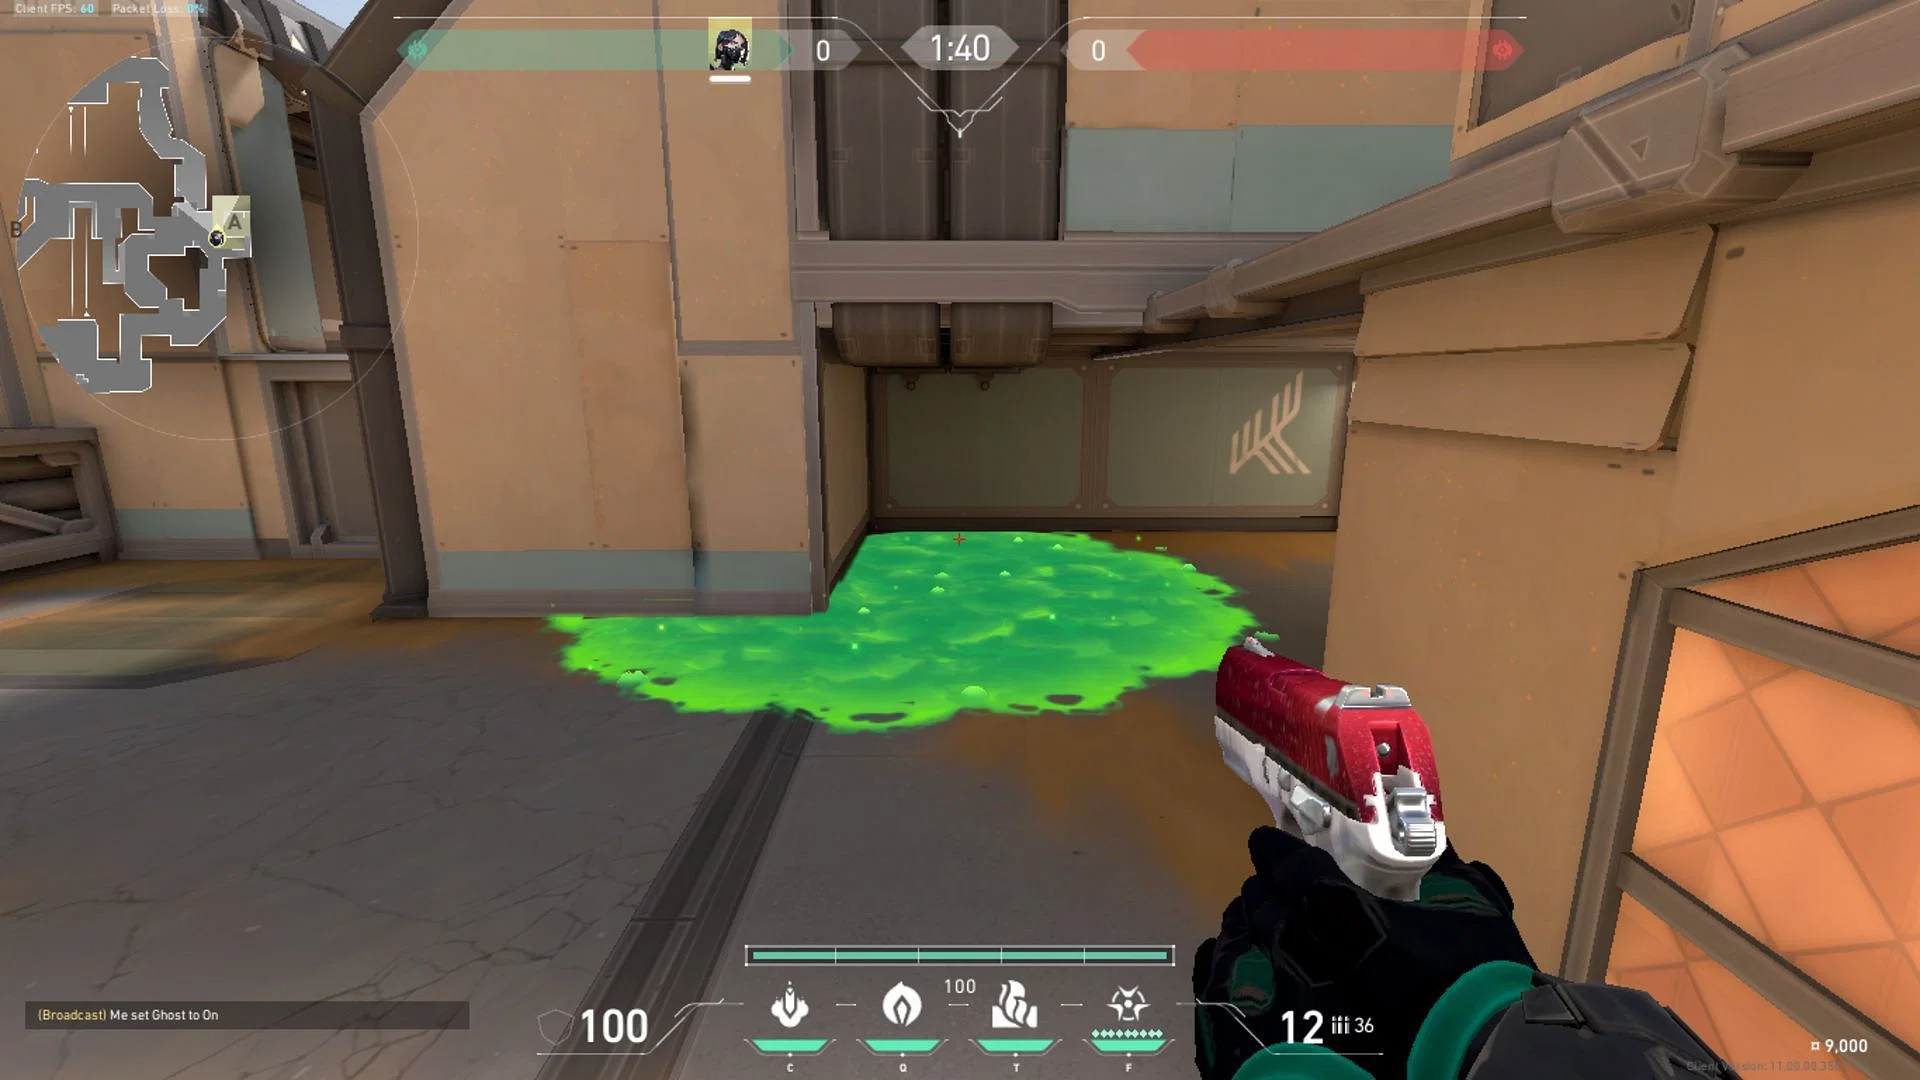
2) A Door one-way

A Door is a notoriously tricky part of the map. This one way sits right on top of the automatic metallic doors, so you can be ready for any surprise visitors from the enemy team.
Tuck yourself into the wall as shown in the image. Make sure you do this before the barriers go up. Once in the right position, line your crosshair with the black rectangular space next to the doors. Equip your Poison Cloud and once the barriers are gone, execute a left-click throw.
Also read: Valorant Tejo Fracture guide: Best lineups and tips
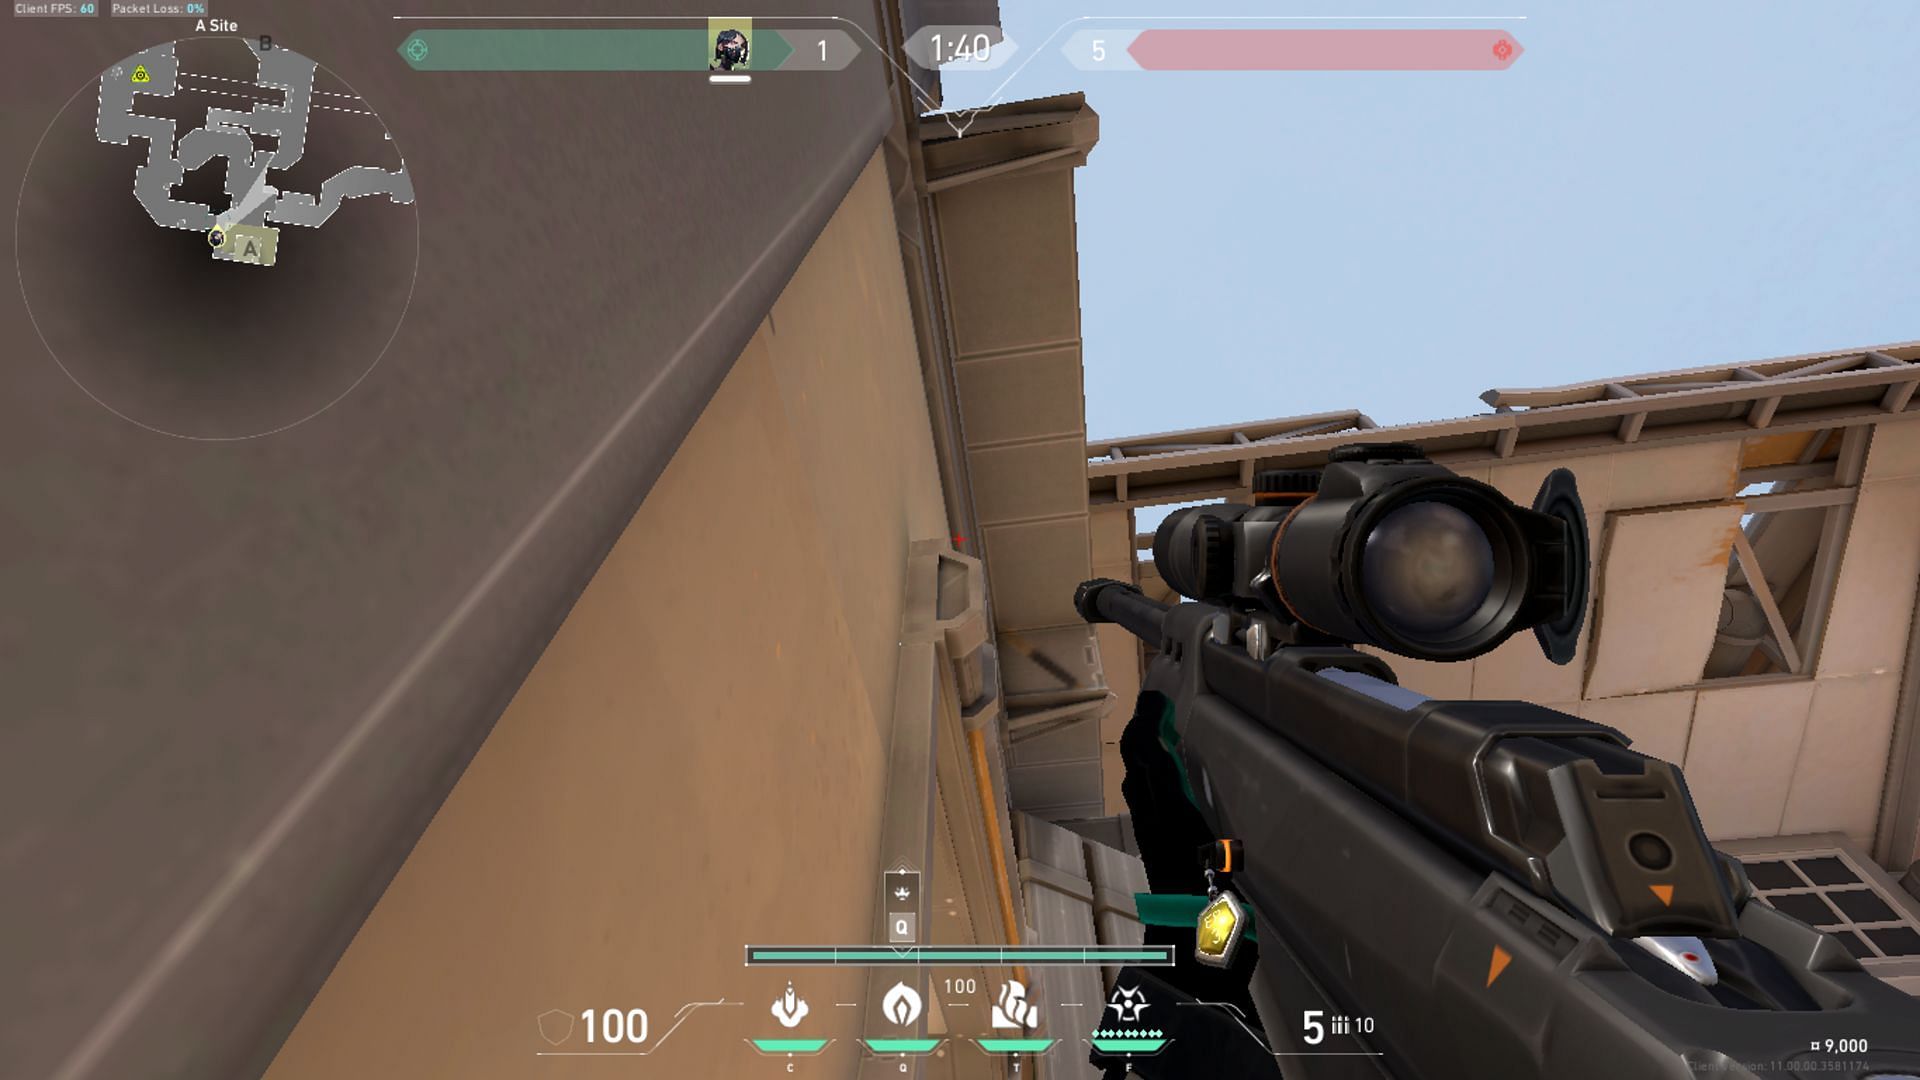
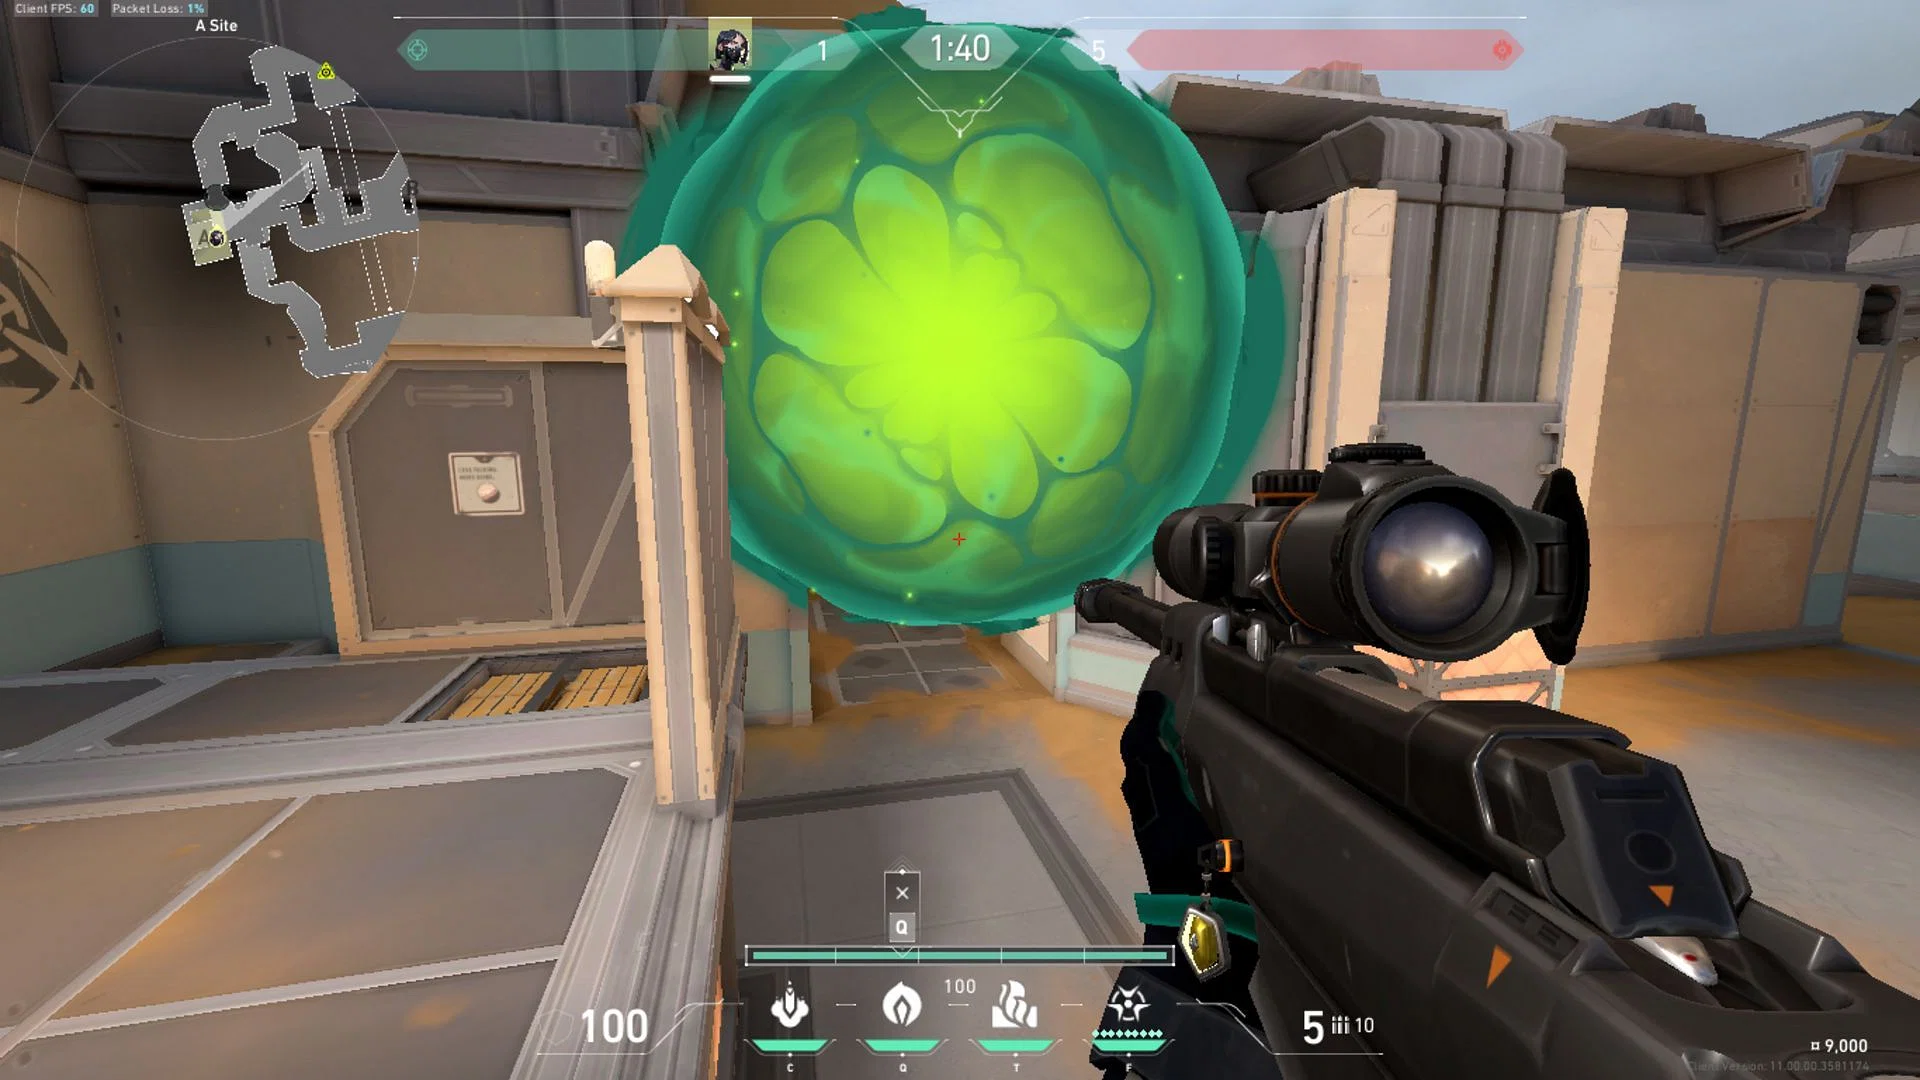
3) B Site post-plant one-way
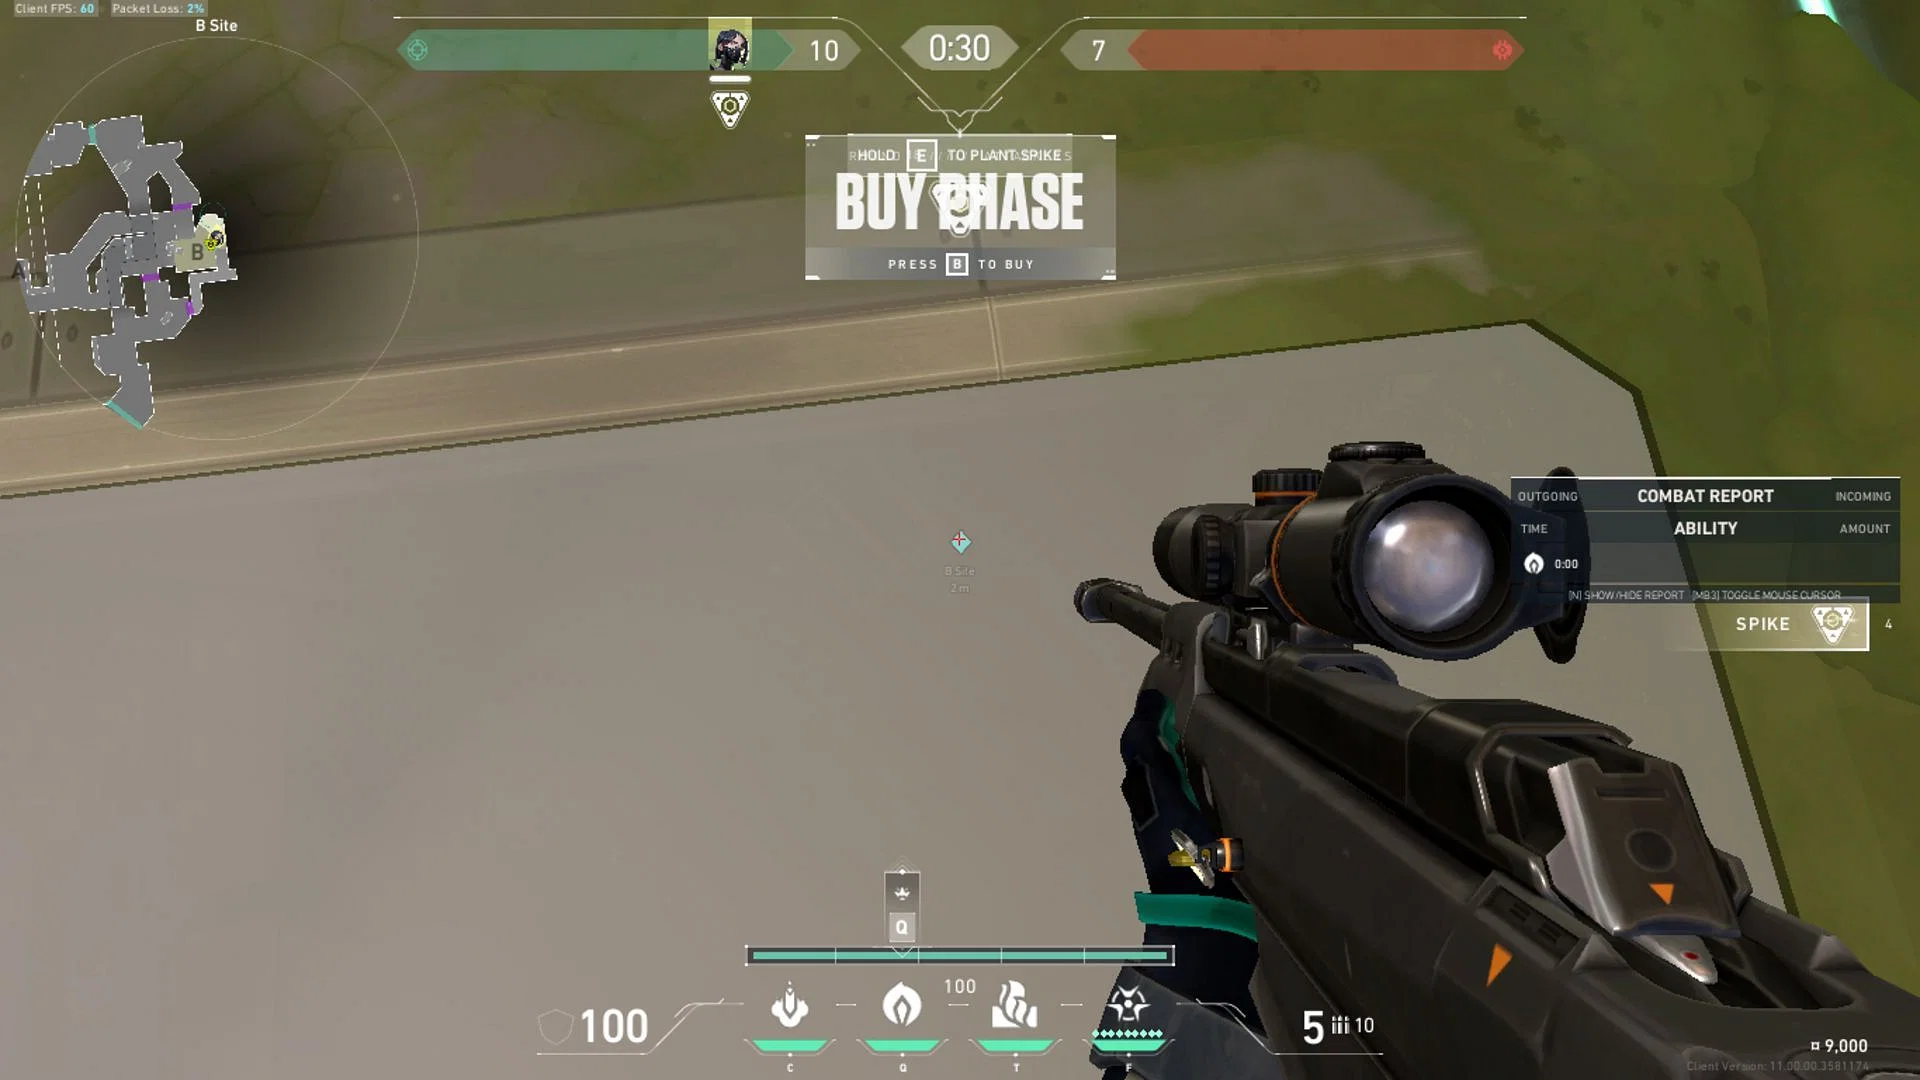

The B Site on Valorant's Fracture can be difficult to navigate, and players are often forced to plant safely opposite B Tower. This can put the game in the defenders' favor very quickly. As soon as your ally gets the plant down, position yourself anywhere in the general area as shown in the first image.
Next, aim towards the metallic box-like section on the wall as shown by the sniper's scope. It doesn't have to be a very precise spot, just make sure you keep your crosshair towards the top section of the rectangular structure. Once aligned, execute a simple left click throw to finish the lineup.
Post-plant Snakebite lineups
1) A Site default post-plant Snakebite
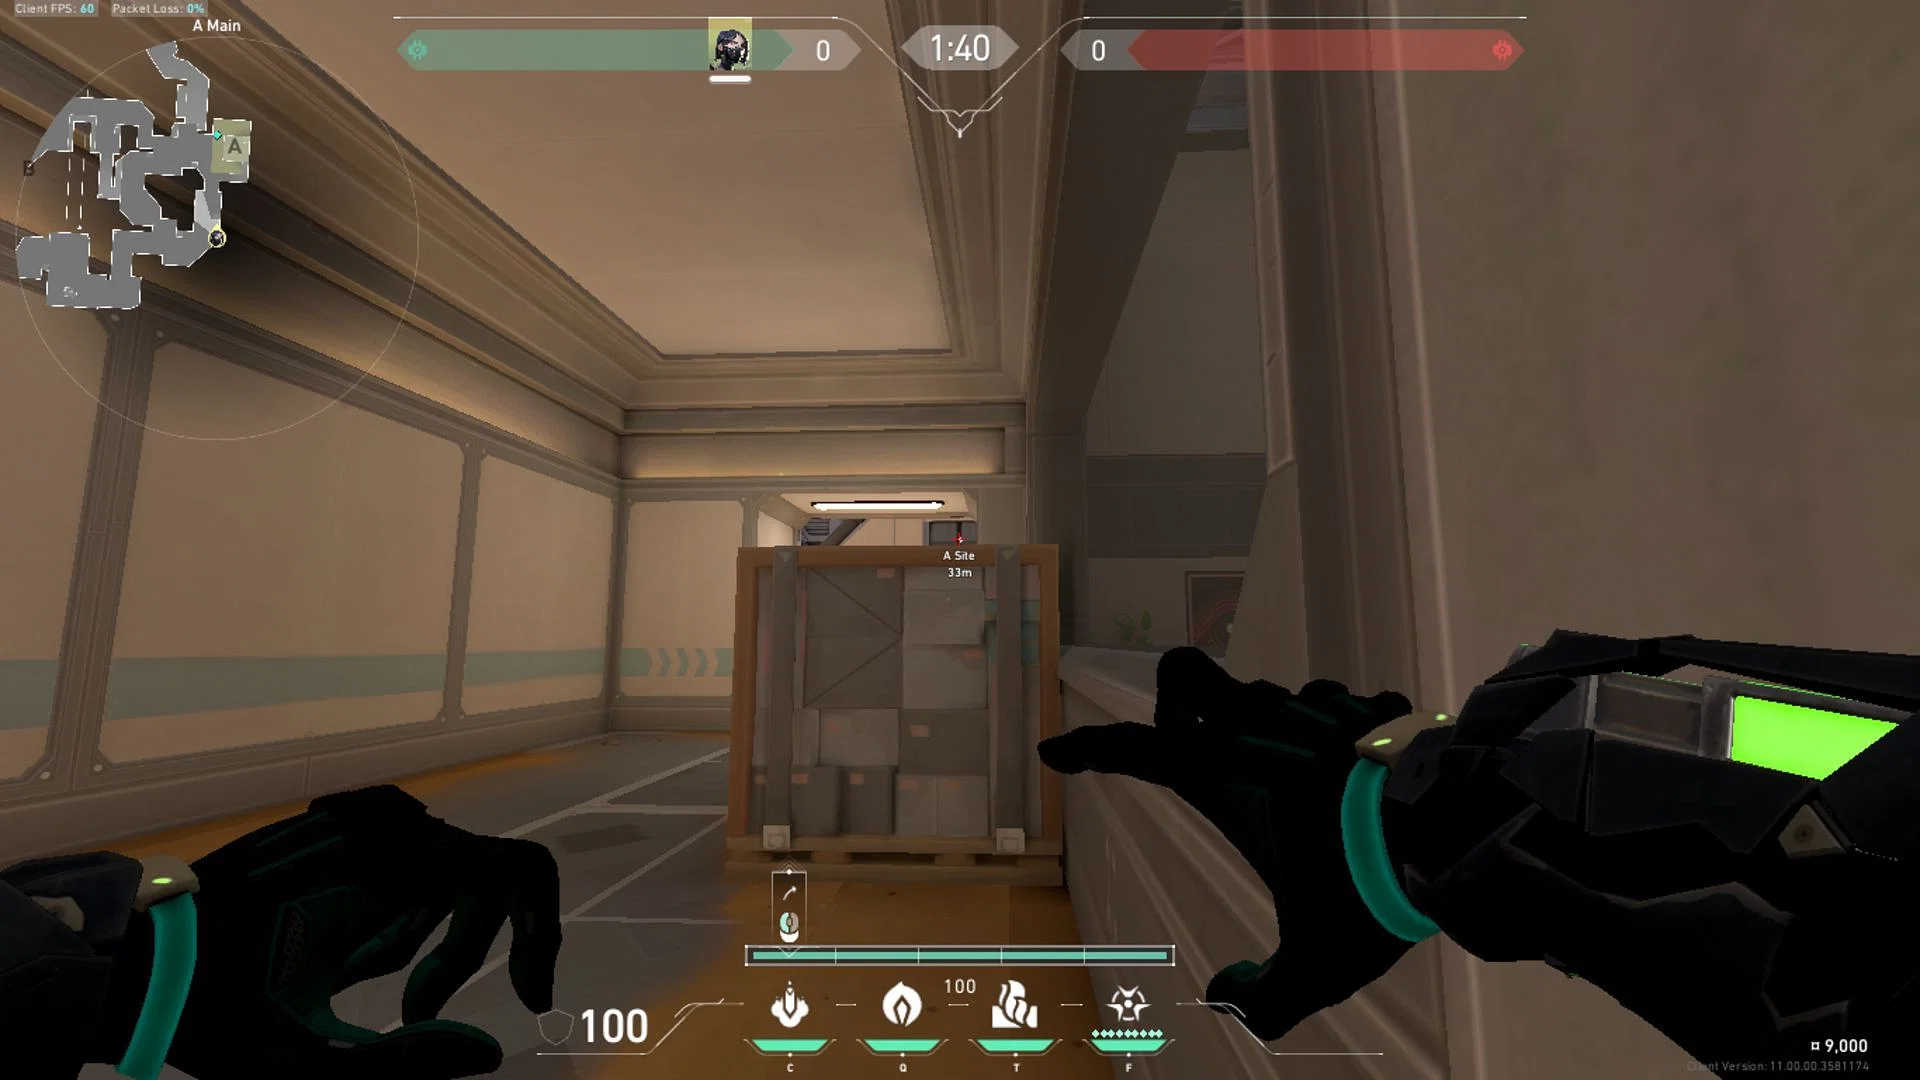
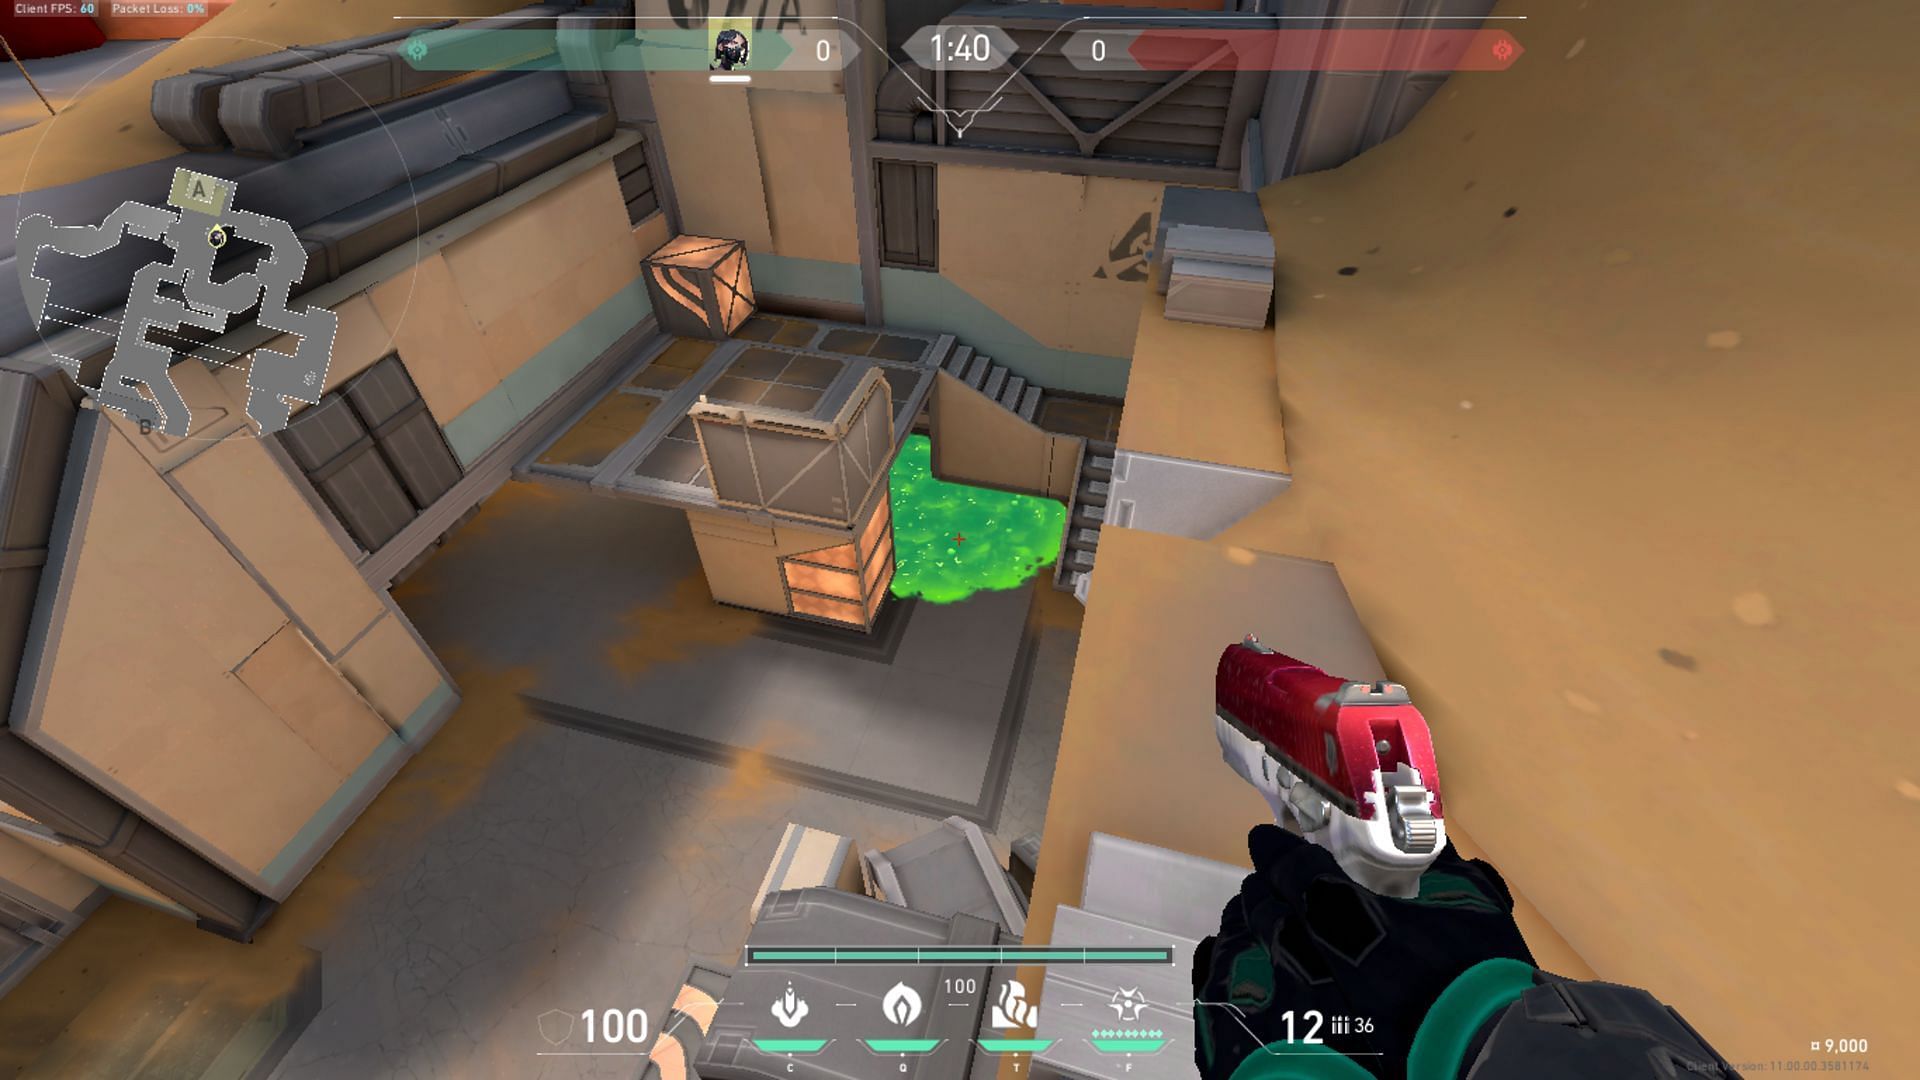
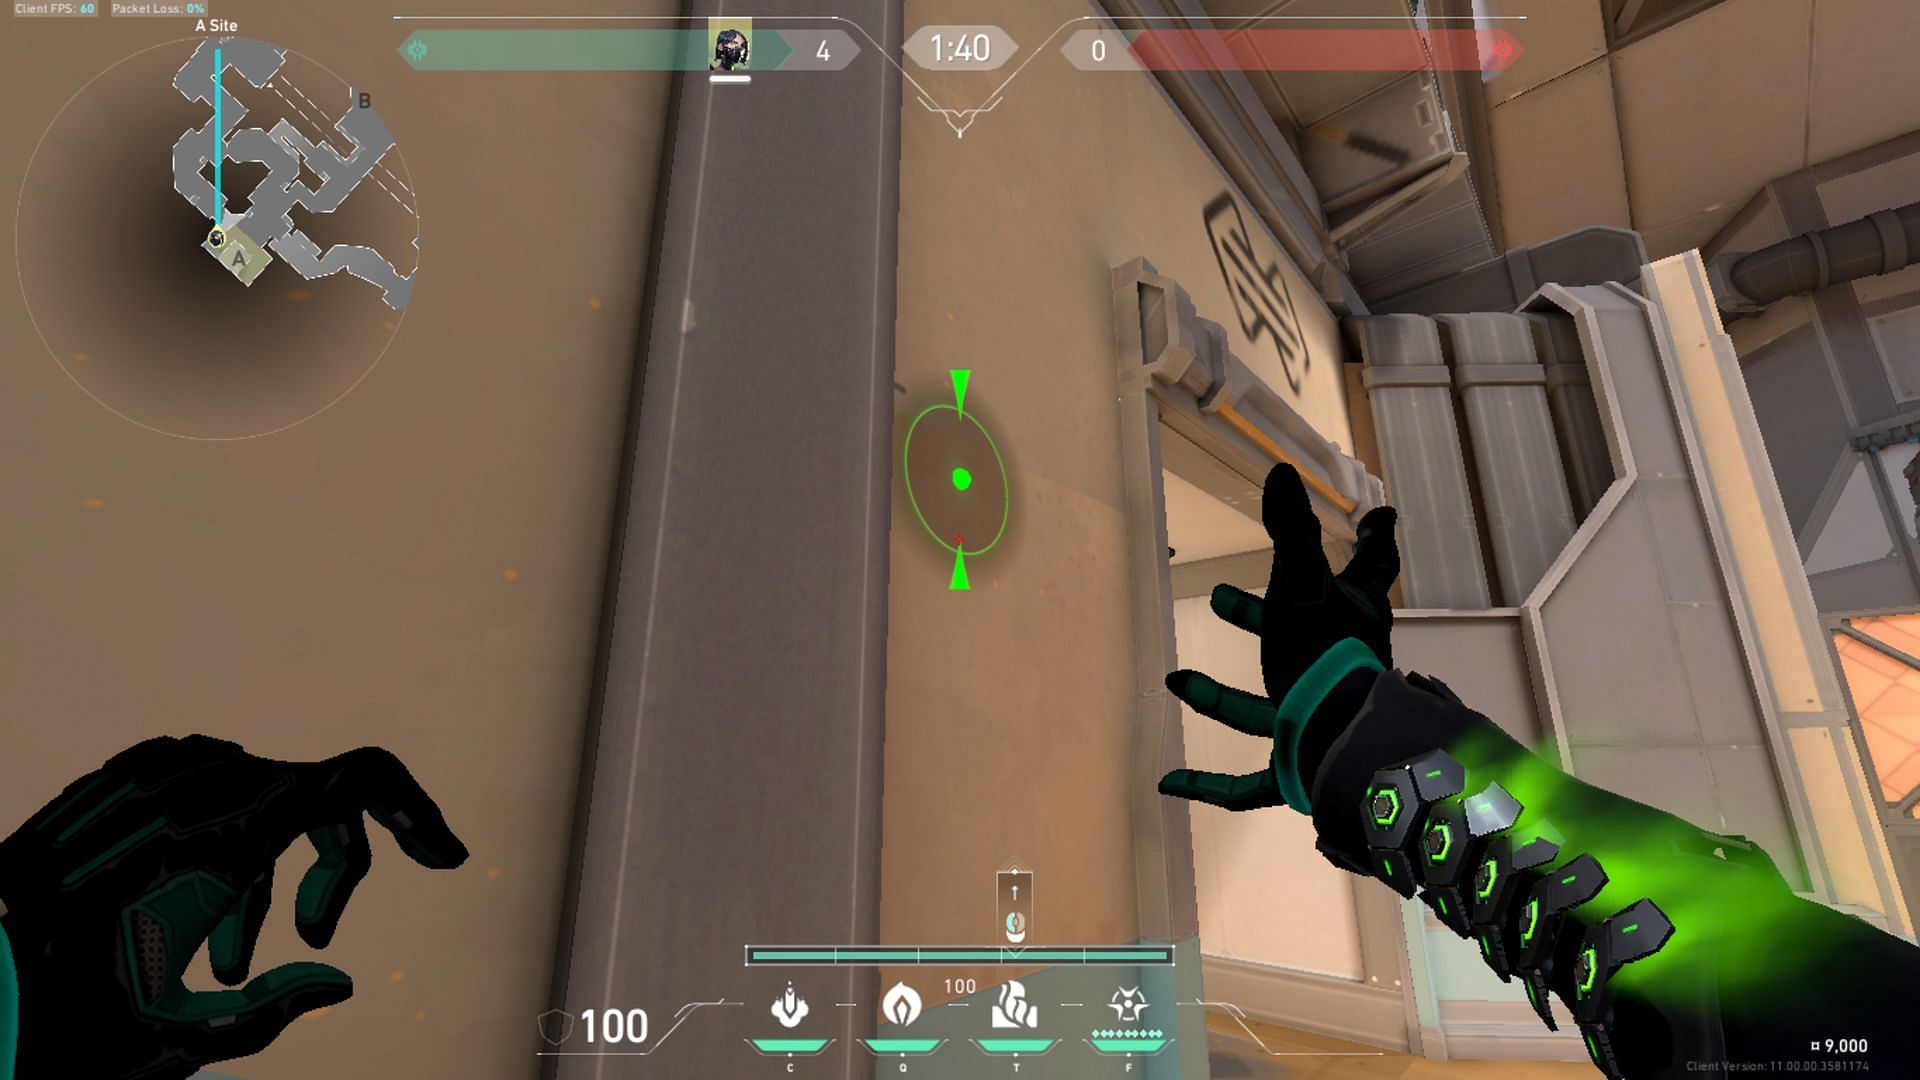
The default open plant on Fracture's A Site in Valorant is easy to defend, especially if you have this lineup. It's easy to execute and does not take a long time to figure out. Simply walk past the box in A Main, tuck into the corner shown in the images, and line your crosshair up over the box with the dark line.
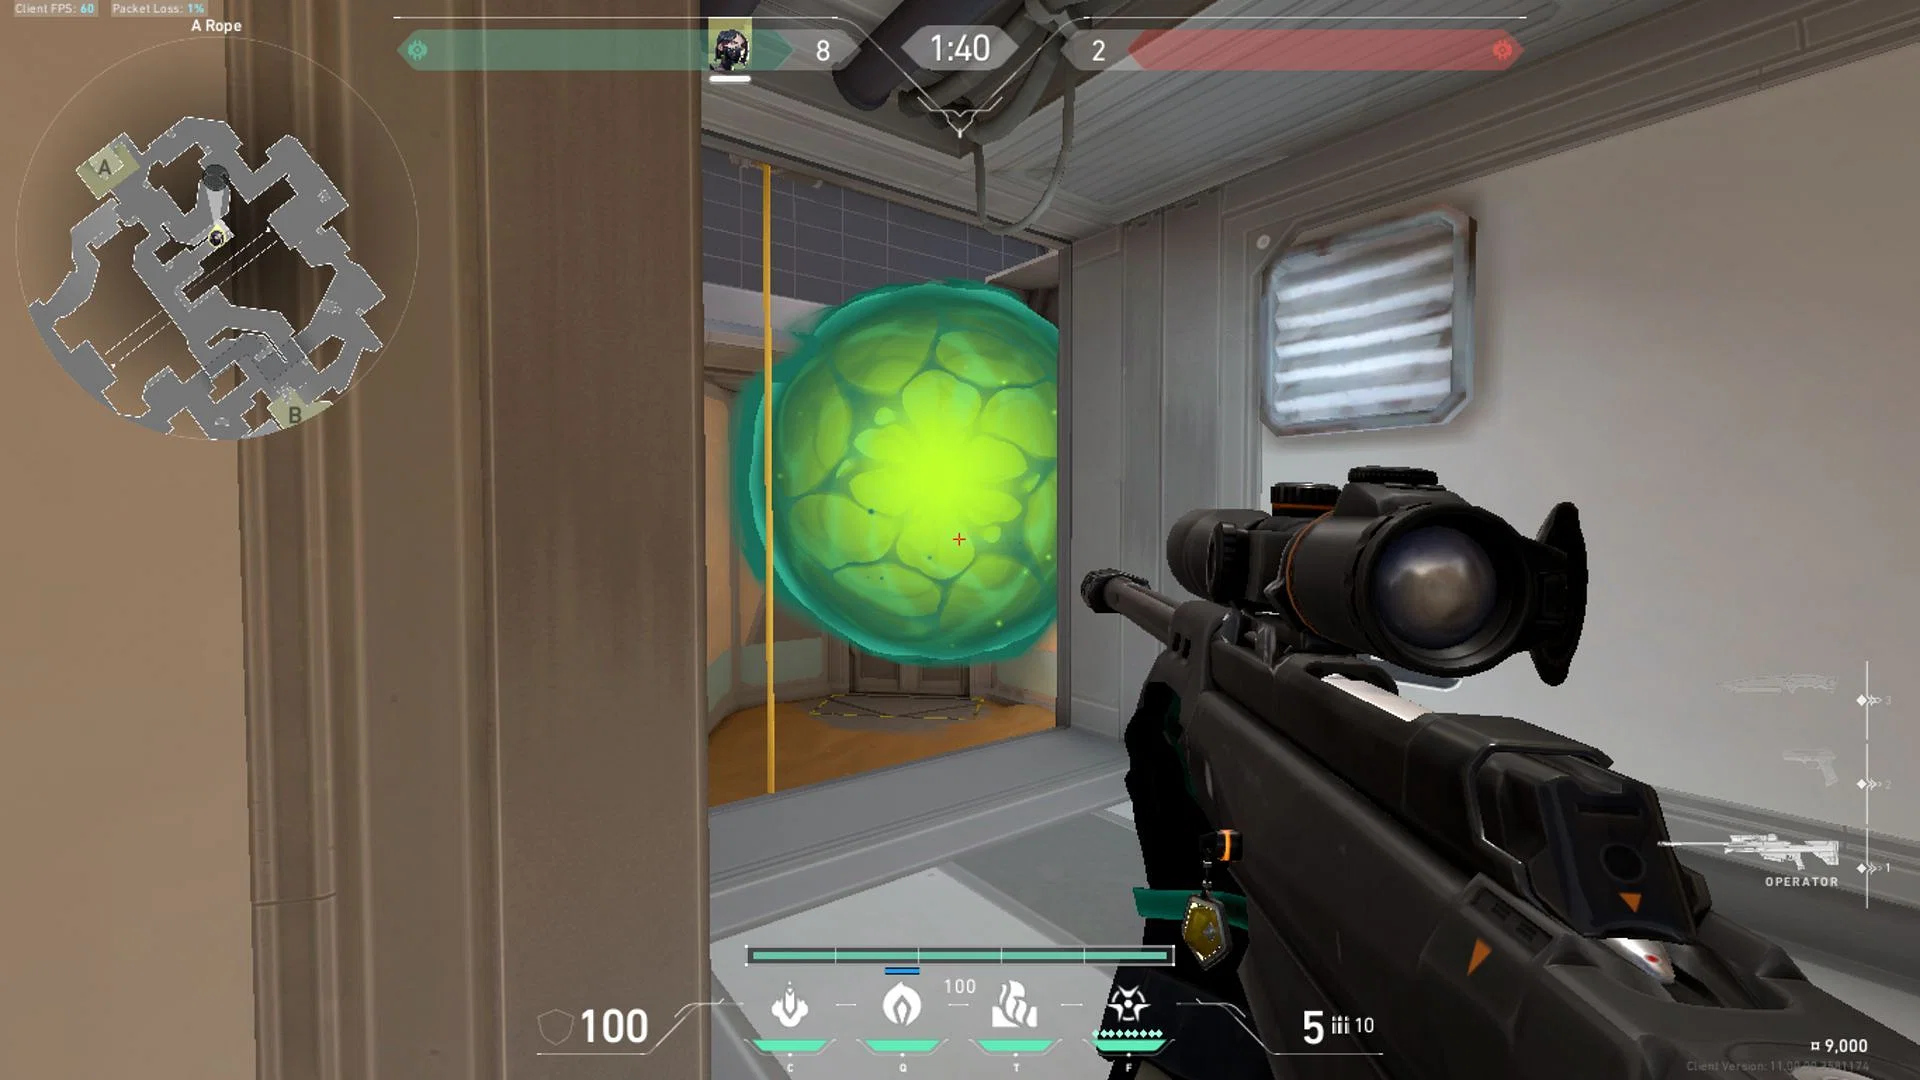
2) A Sands to safe plant
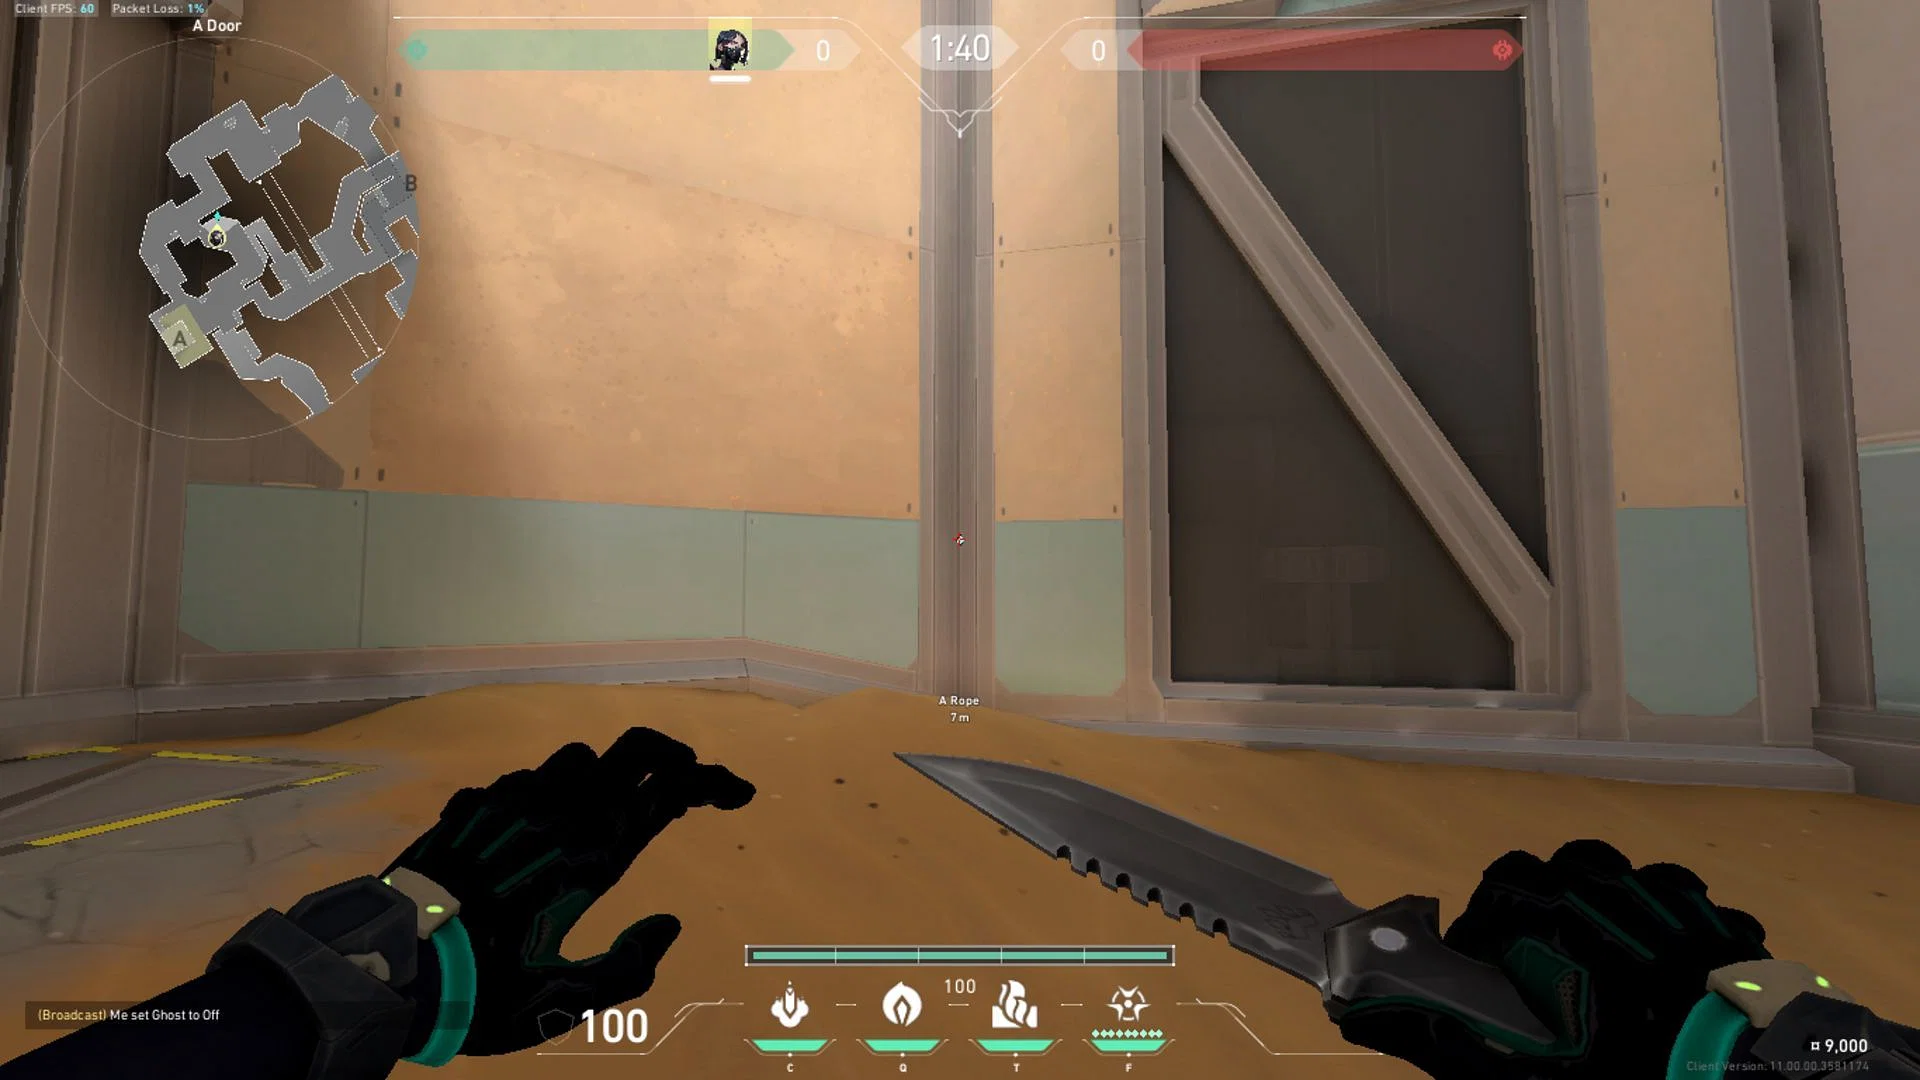
This quick lineup takes you to A Sands on Valorant's Fracture. Once you tuck yourself into the corner, look up and let the arrow of the 'left-click' mouse button align with the corner pinged in the image.
Once this is done, release the Snakebite, and it will prevent the Spike from getting defused in the safe plant location.
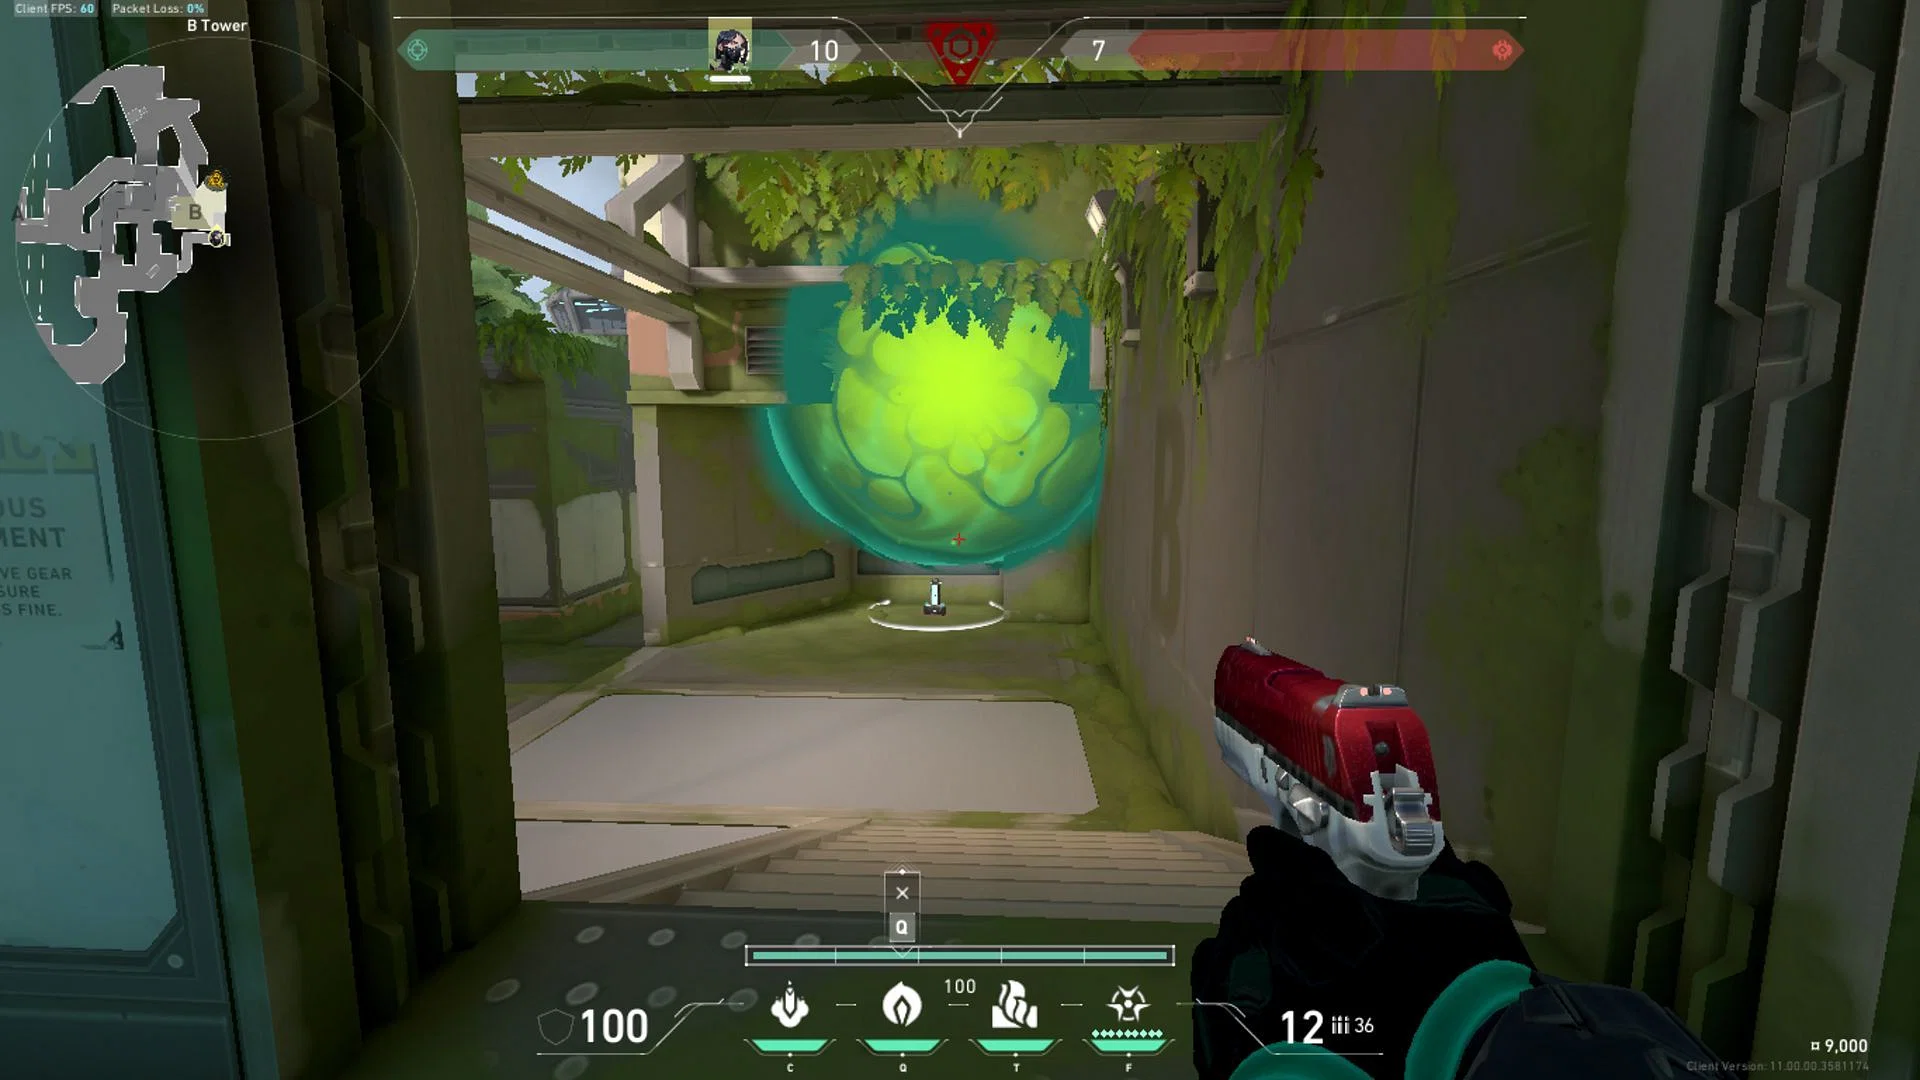
3) B Arcade to B safe plant
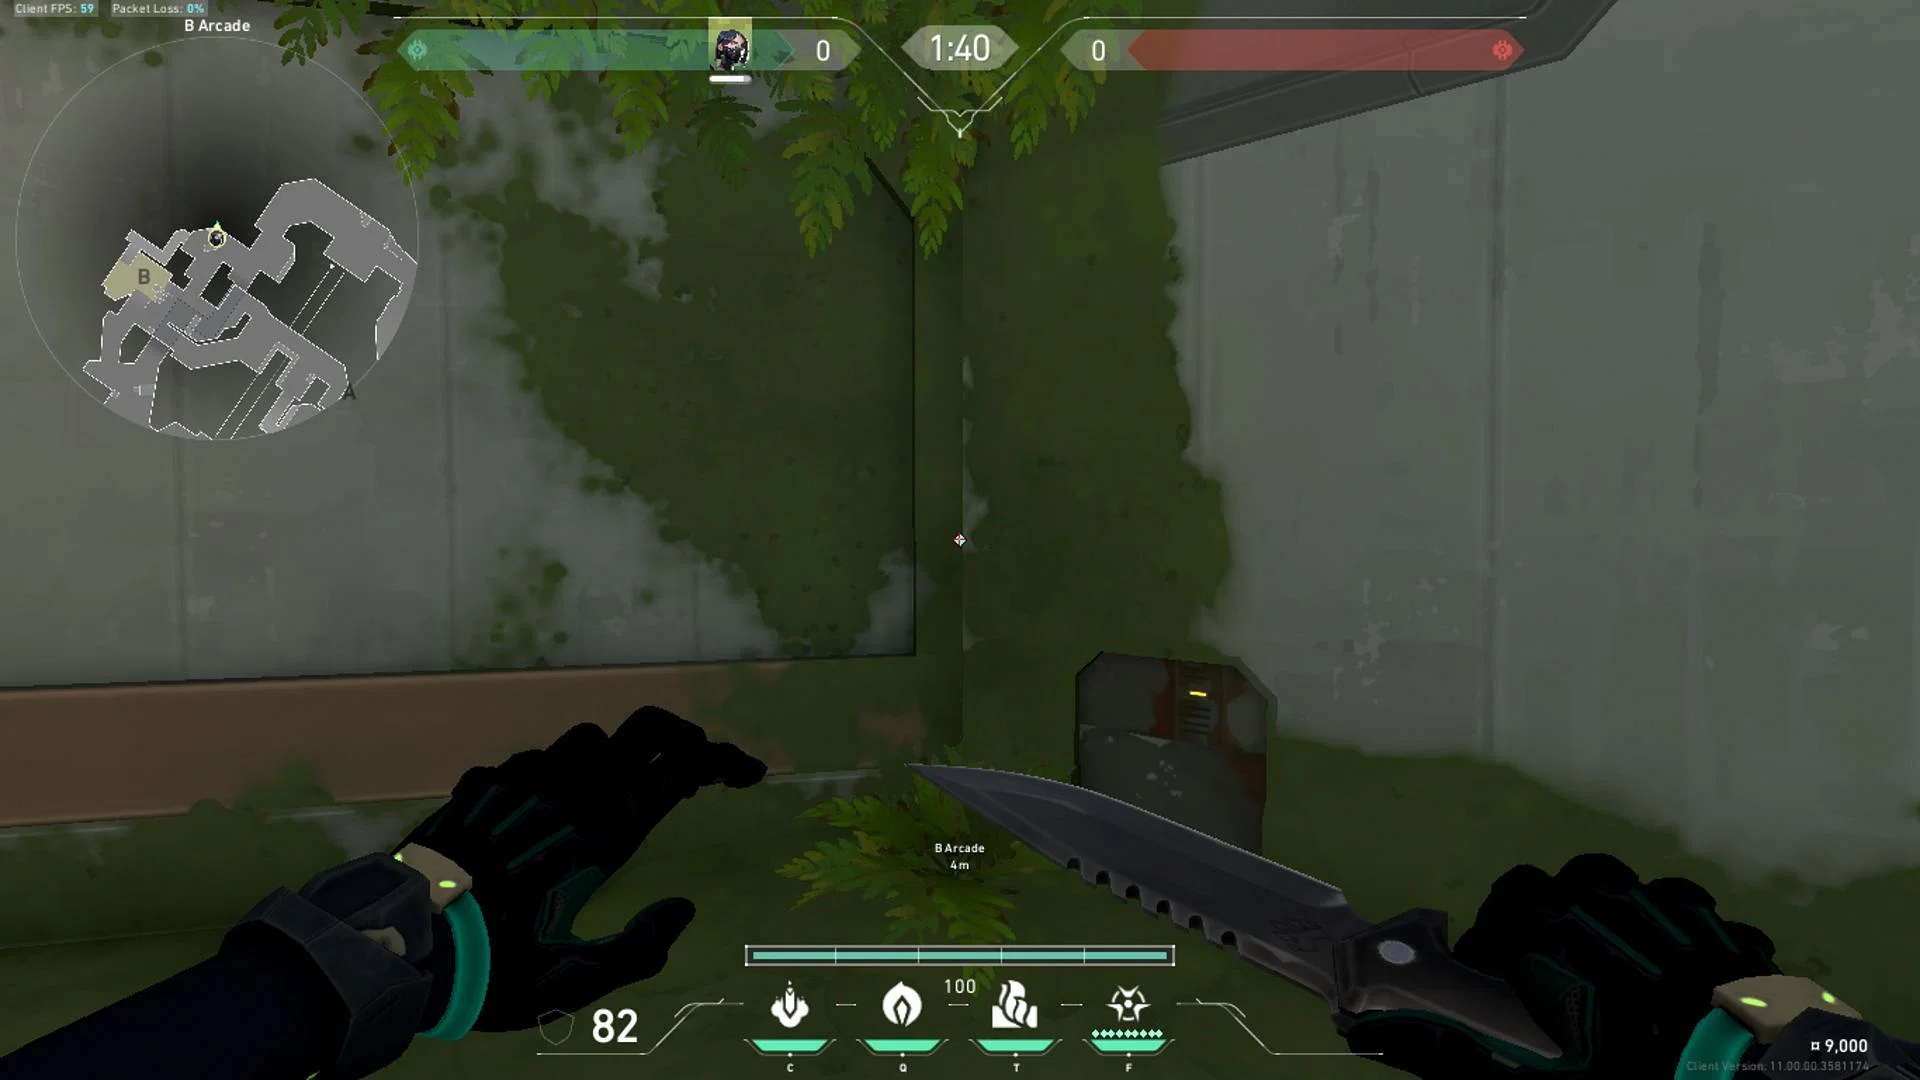
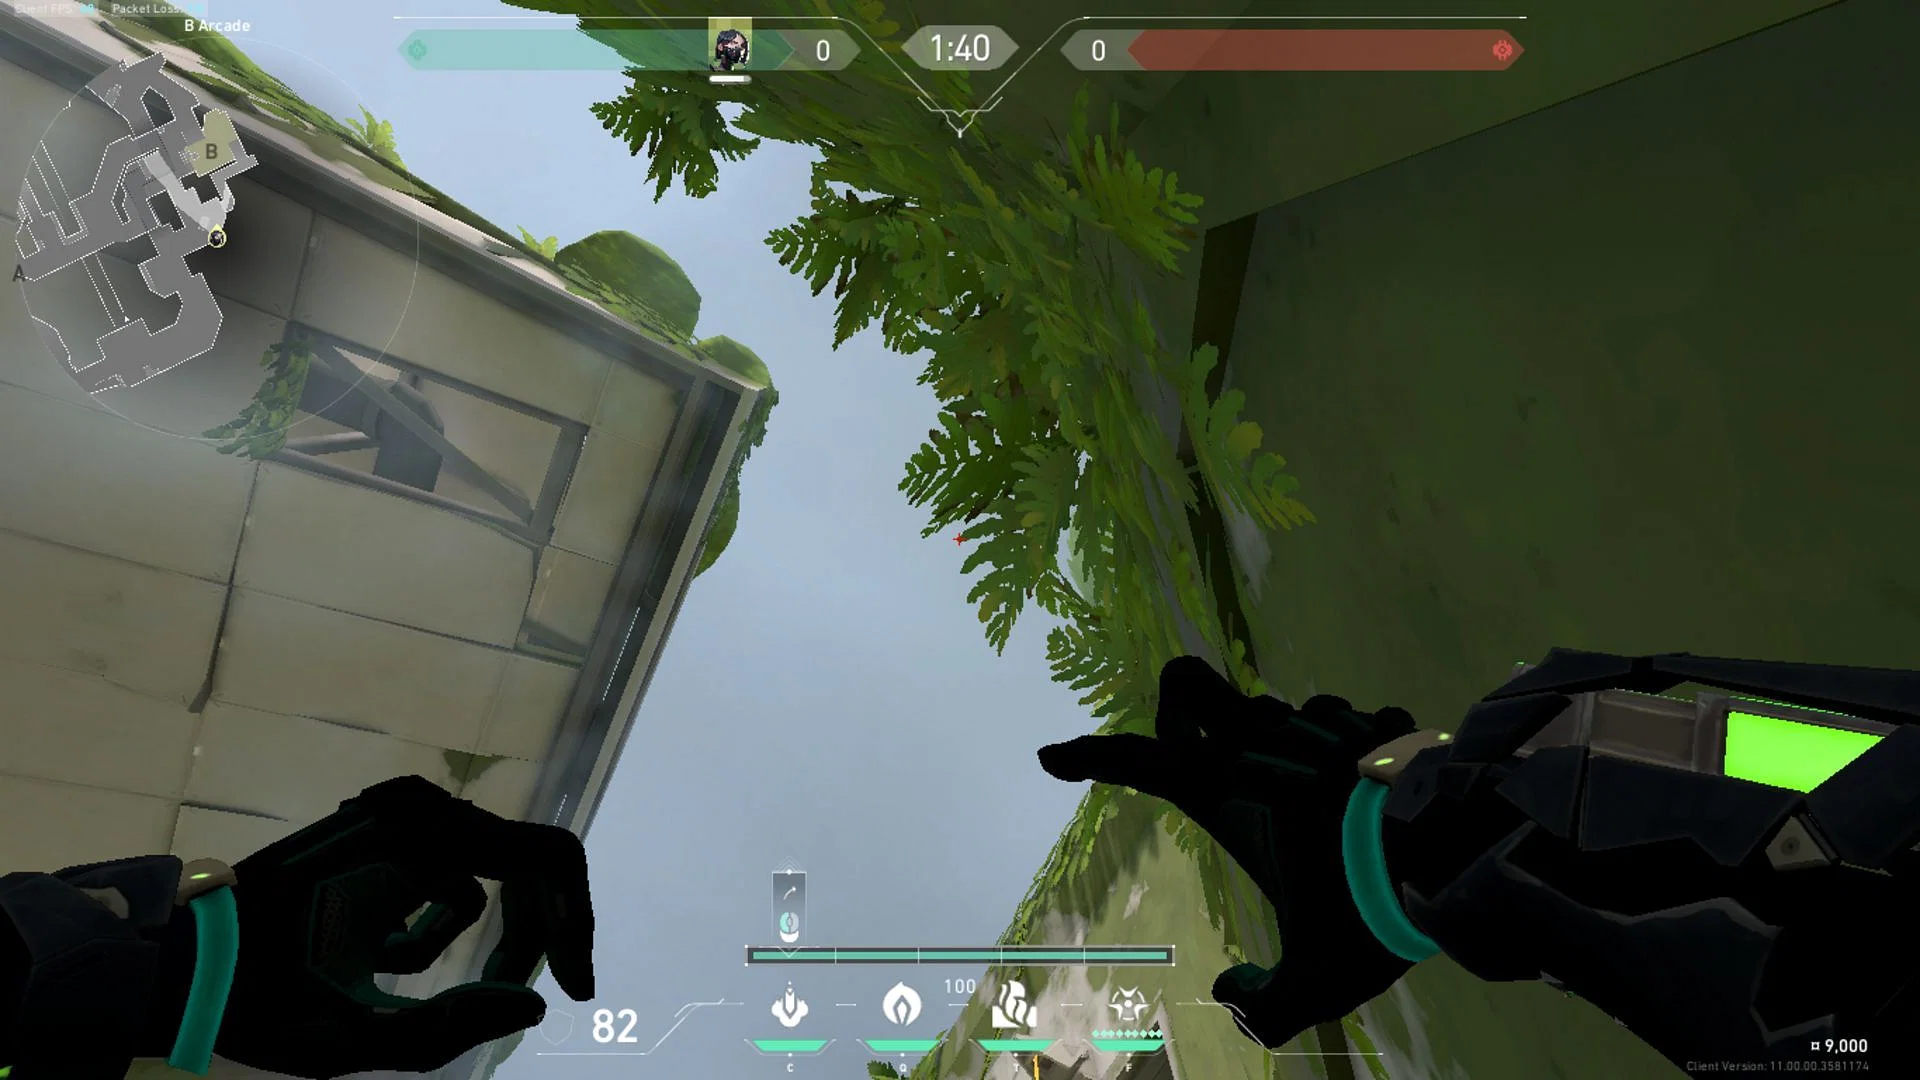
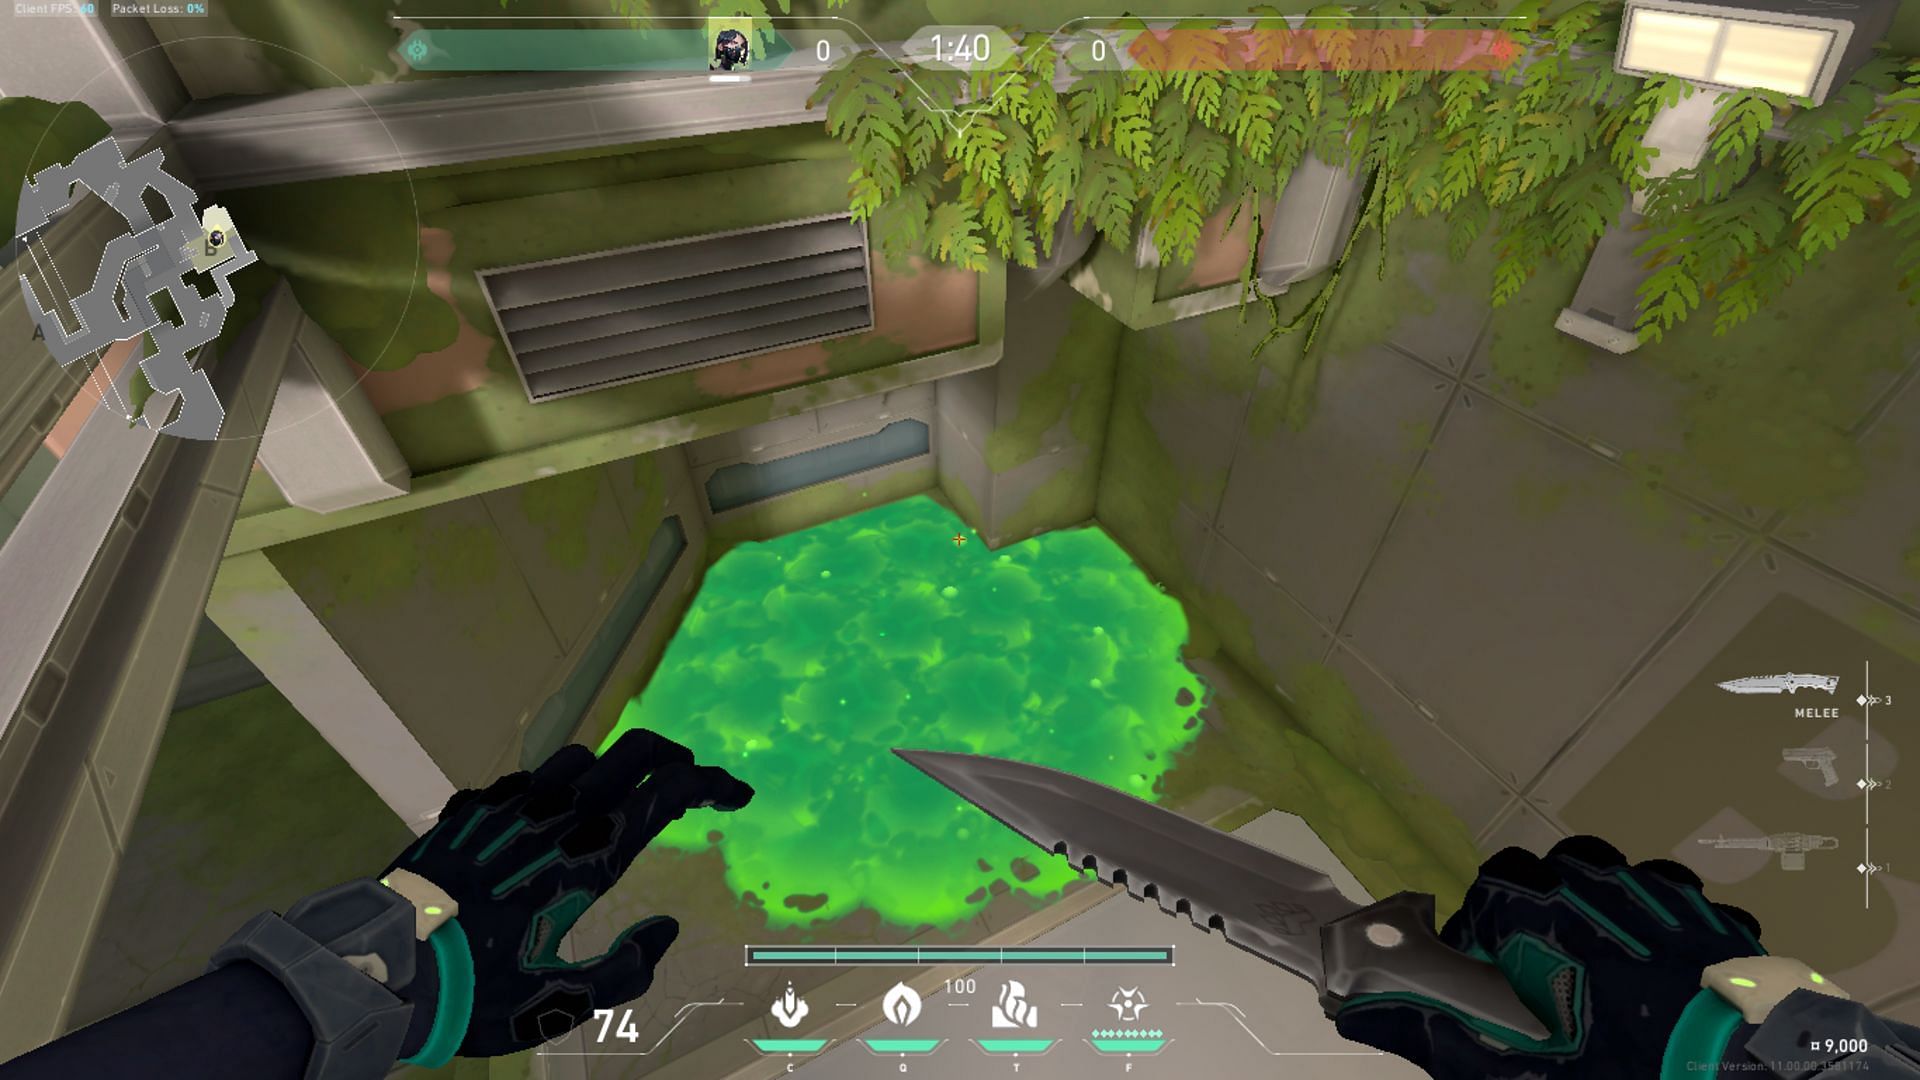
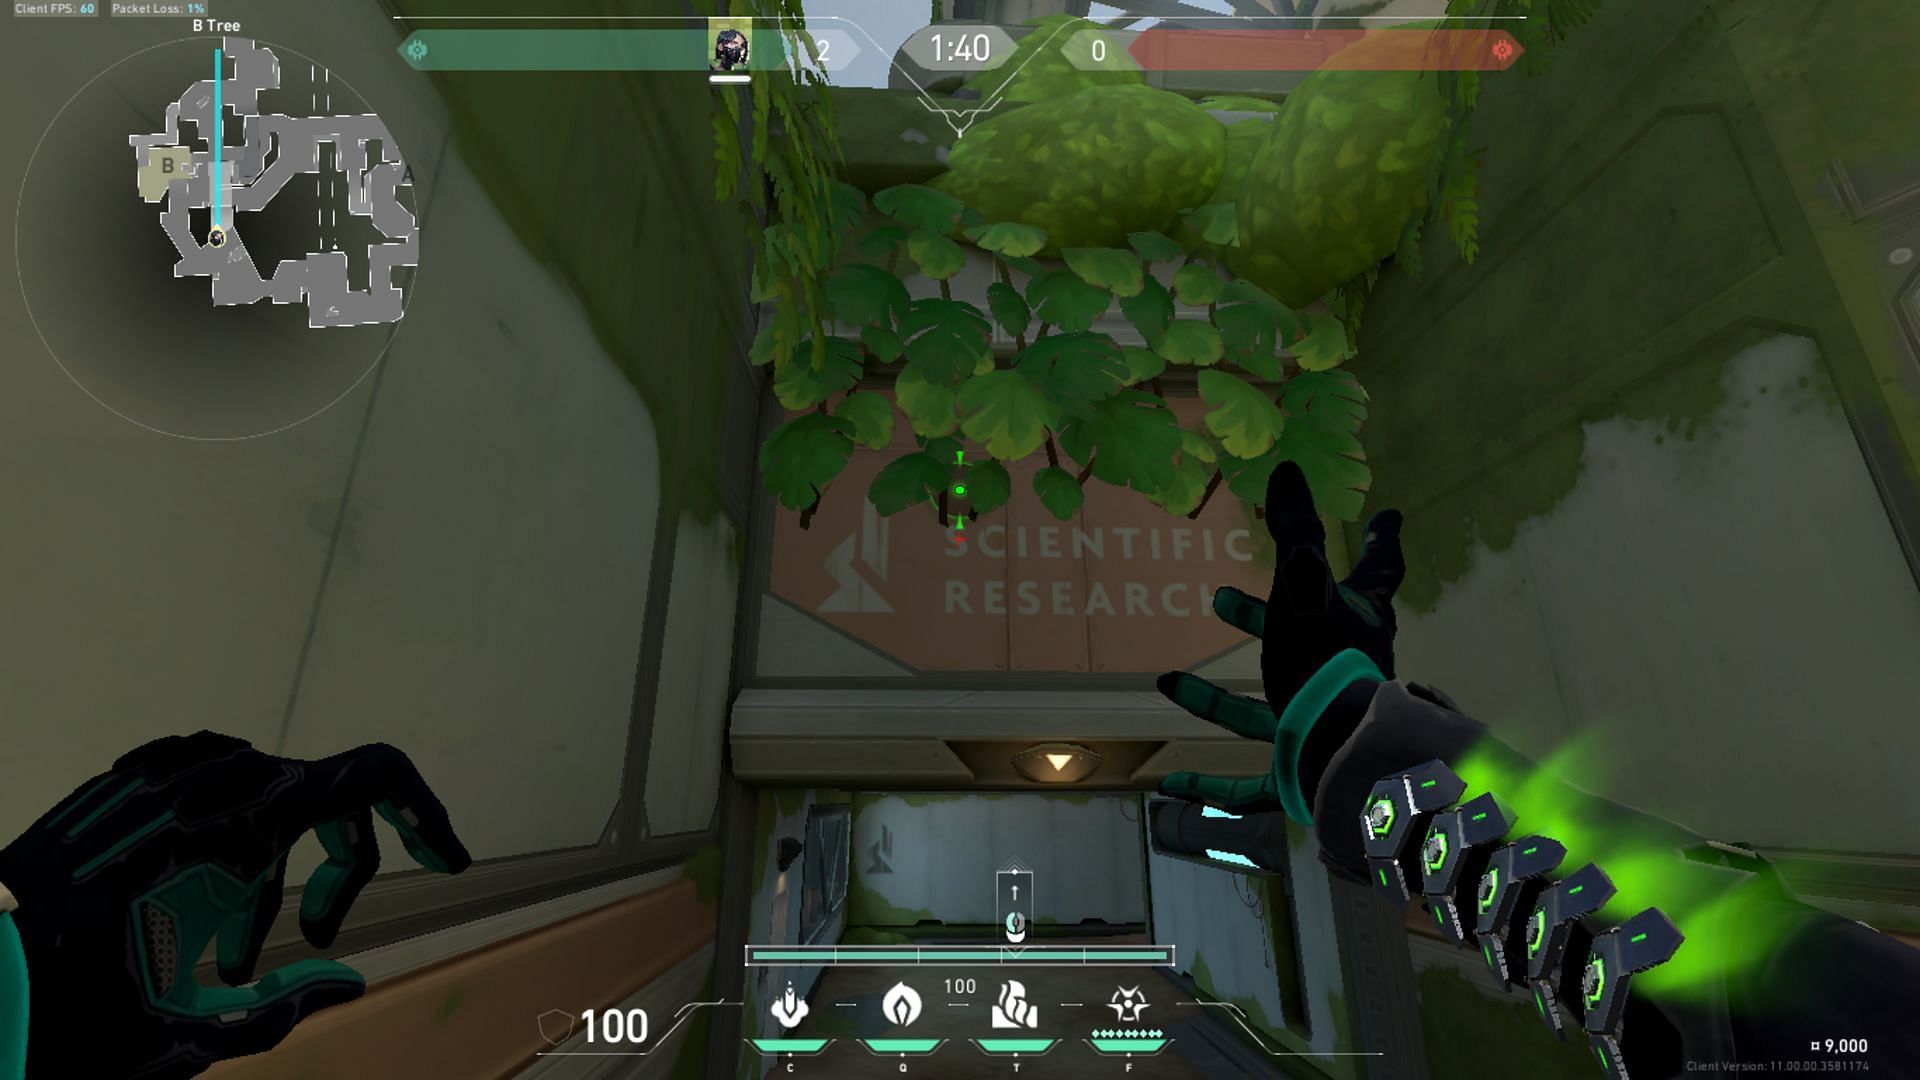
This lineup may appear daunting, but in reality, it's quite easy to get it right. Tuck yourself in the corner shown above in Valorant's Fracture. Next, aim at the tip of approximately the sixth leaf. You can also use the image as a reference. Once done, simply release the Snakebite and it will prevent the Spike from getting defused for a little while longer.
4) B Tree to B open plant
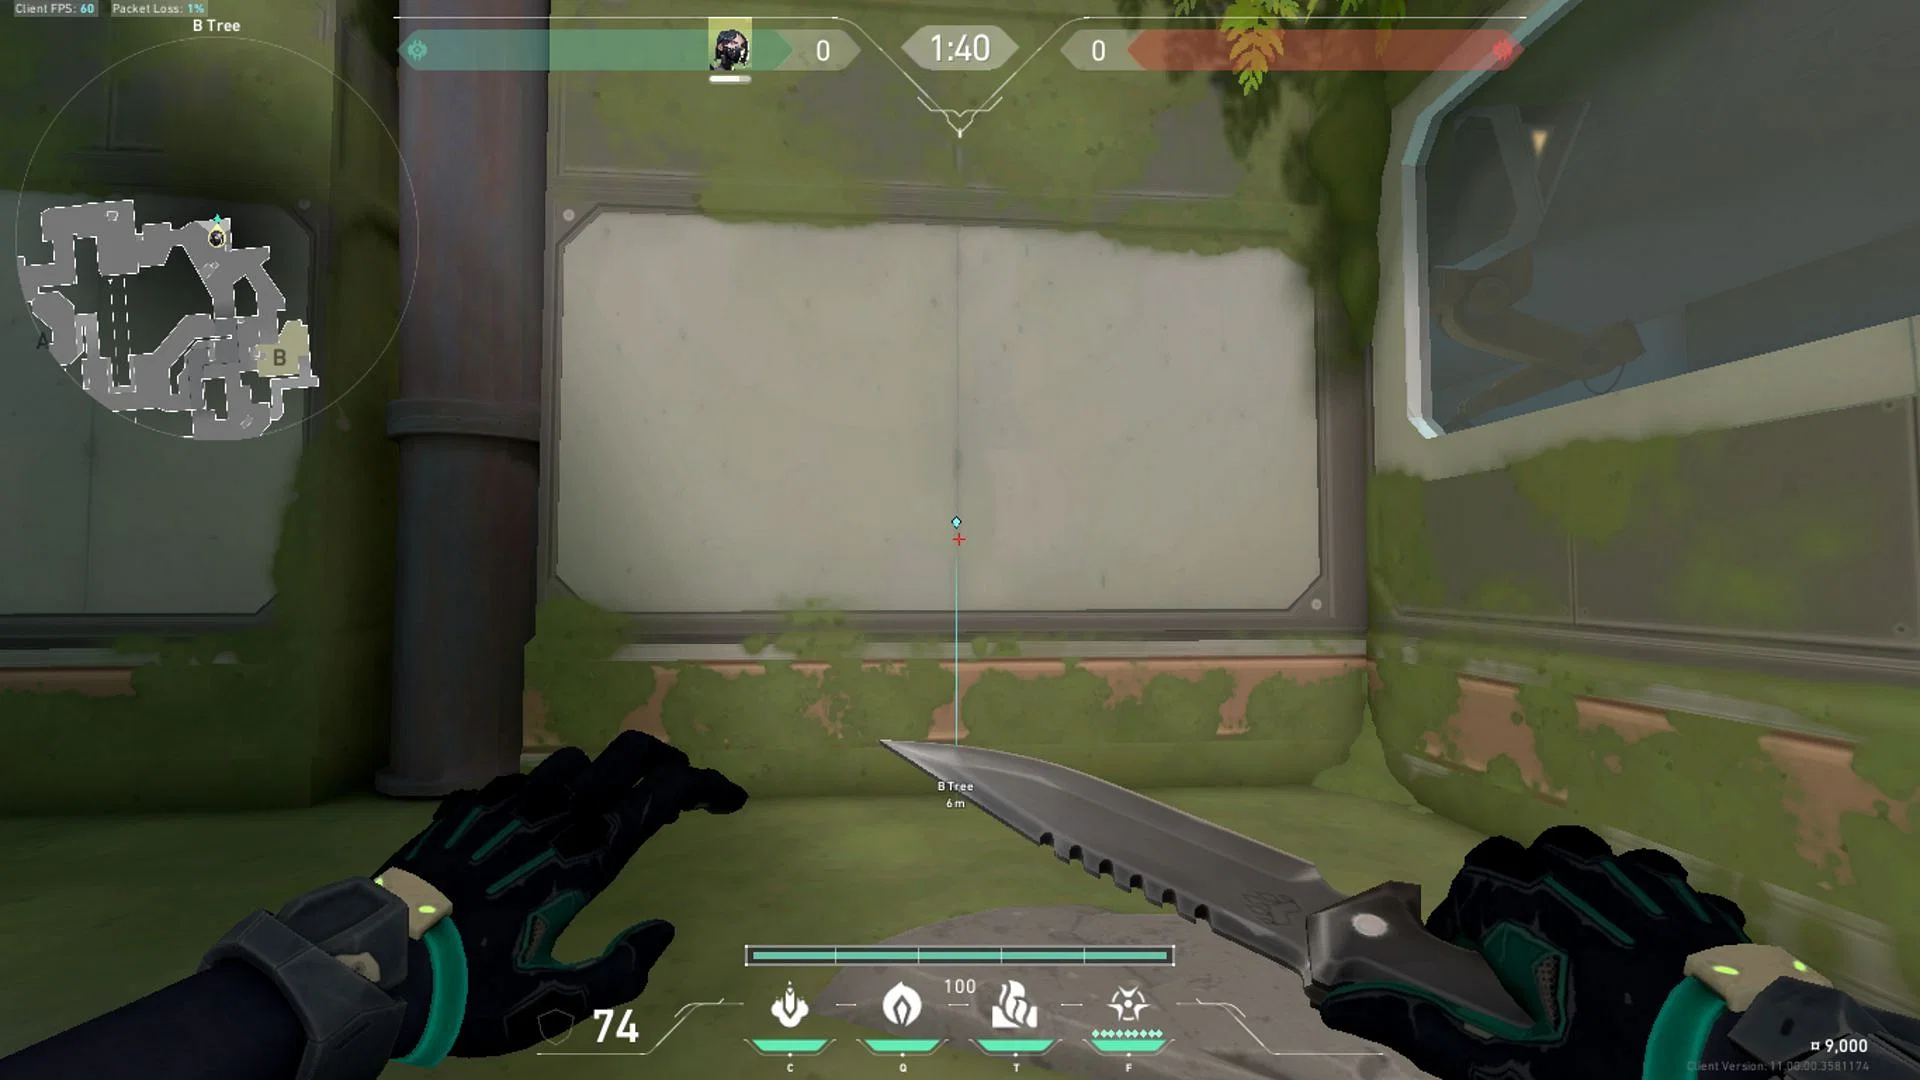
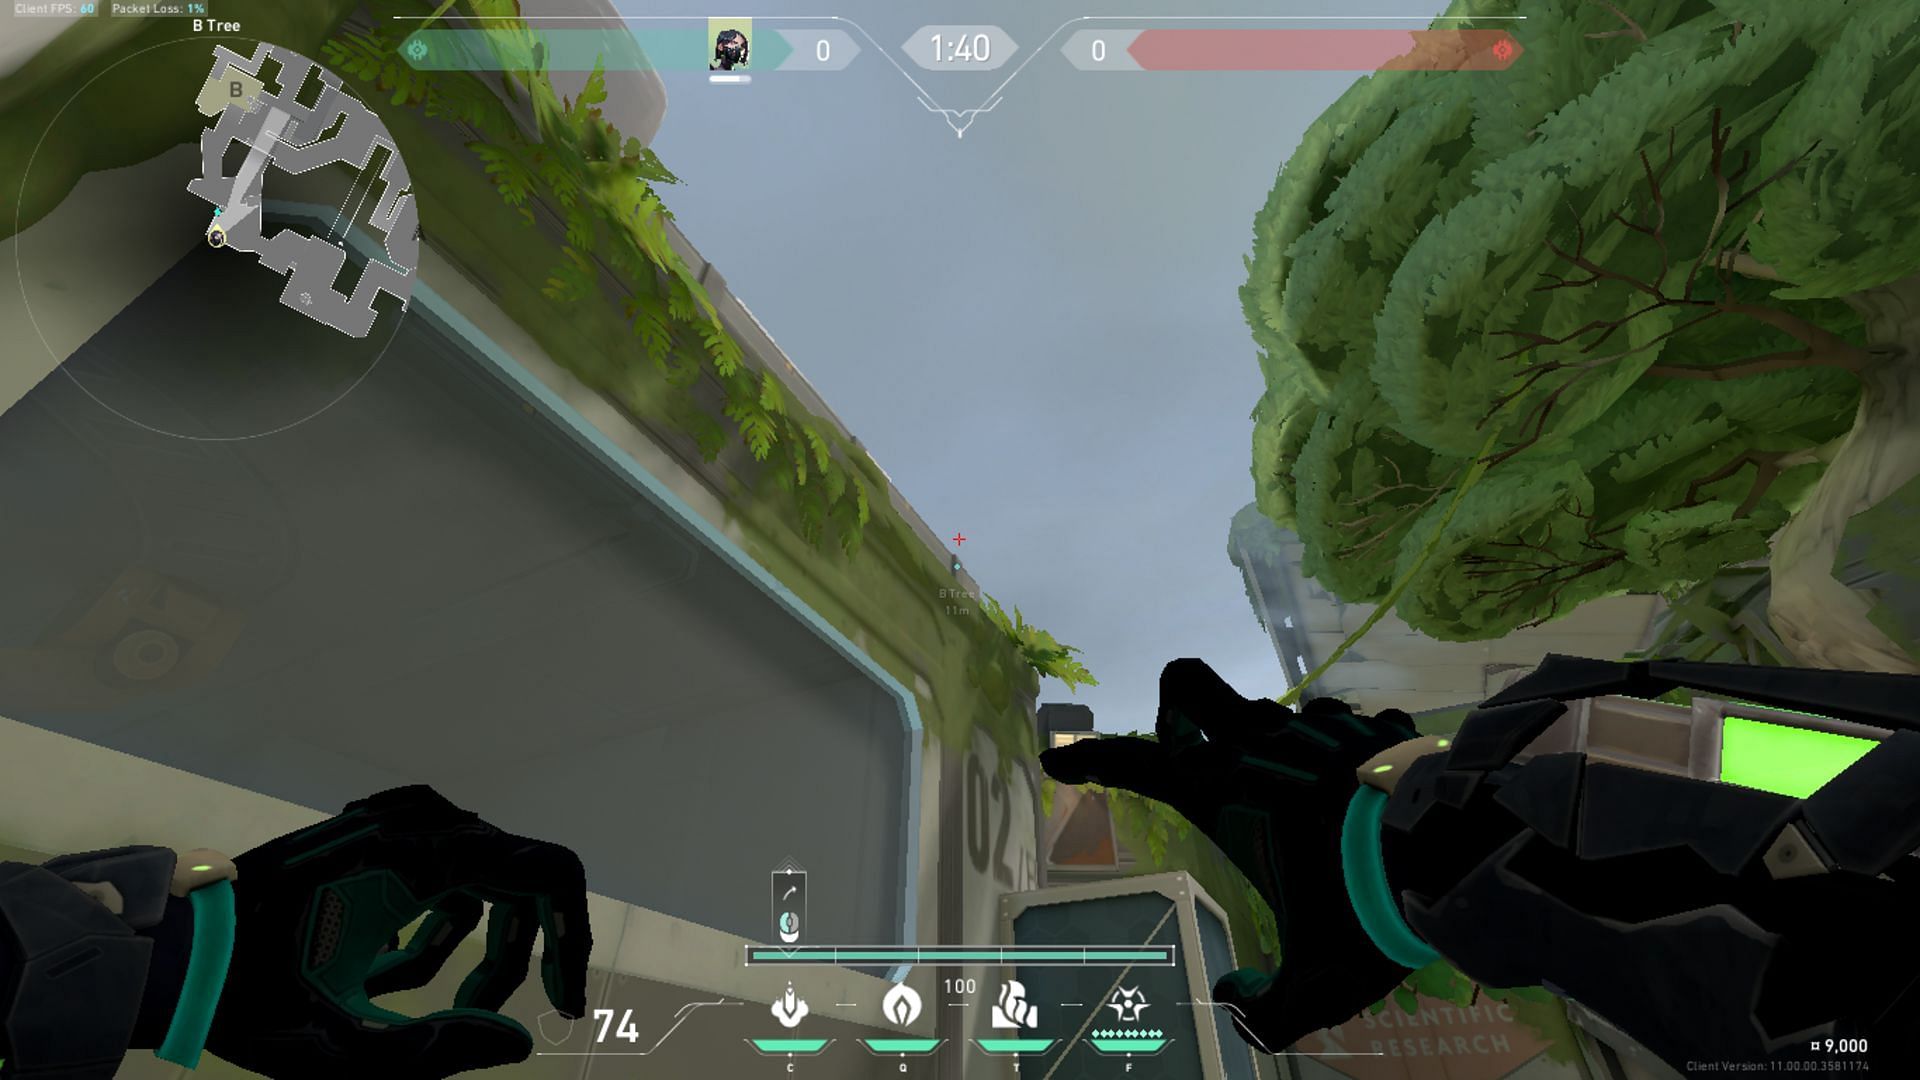
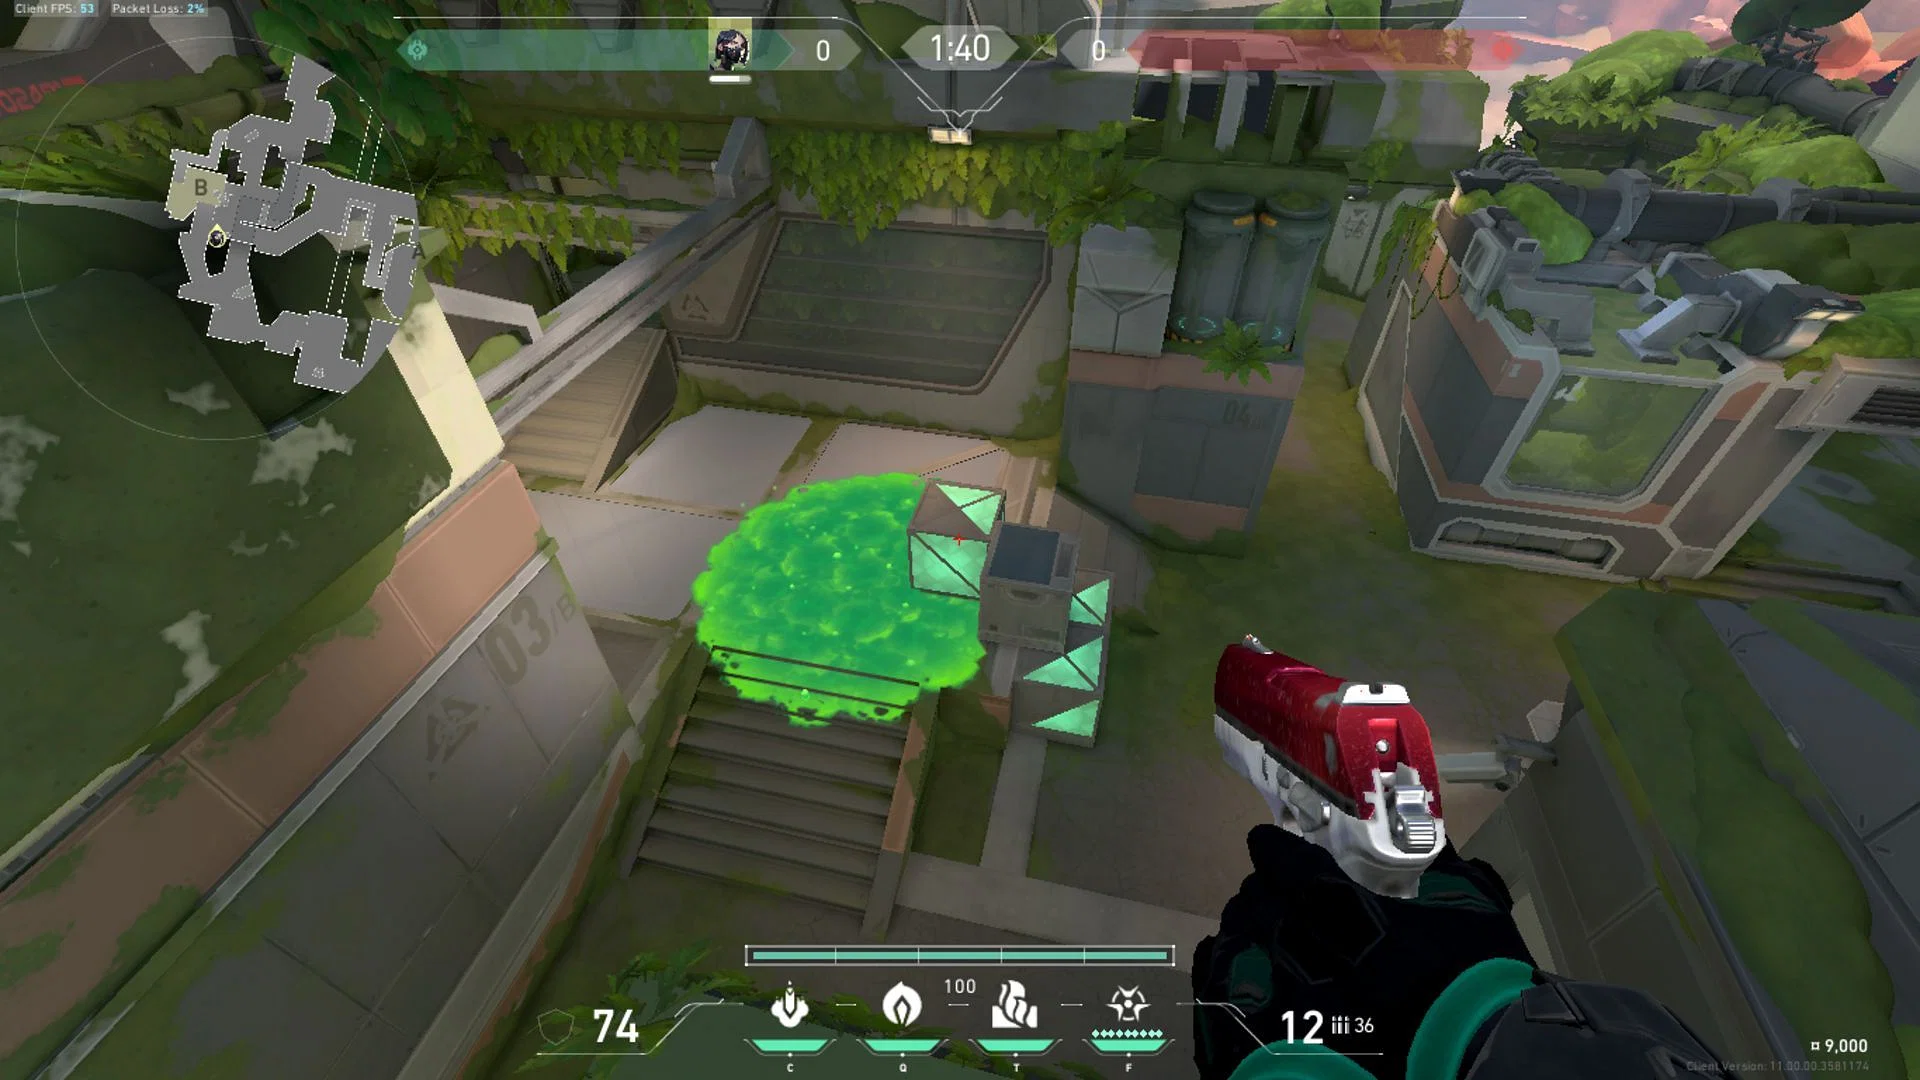
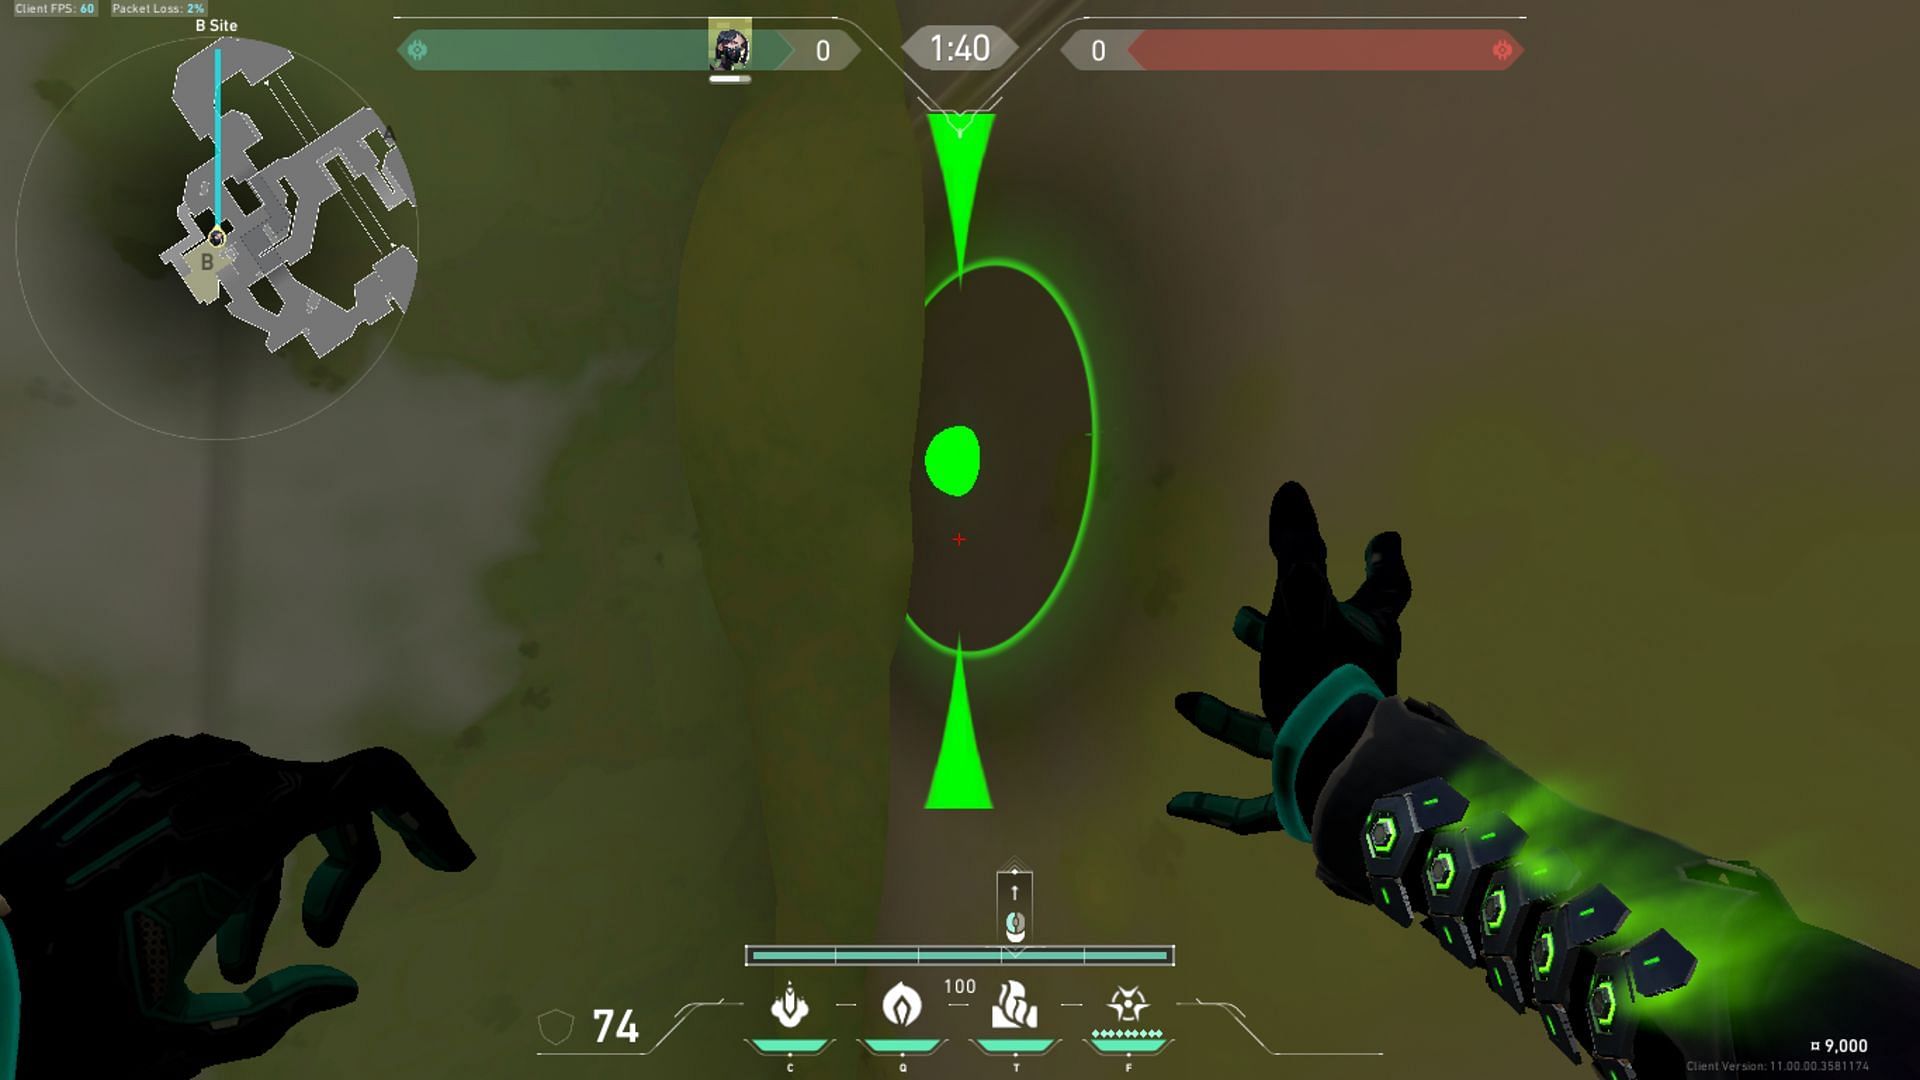
Finally, this post-plant lineup lets you protect the Spike without having to peek the opponent. Line up your HUD line on the right side of your Snakebite icon to the dark line pinged in the image. Then, let the projectile go and it will impact the intended area in Valorant's Fracture.
Also read: Valorant: Complete Iso Abyss guide
Toxic Screen setups for defence and attack
1) A Site attacking wall
This is the most essential A Site attacking Toxic Screen. It covers up all the vital spots and allows your team easy entry into the A Site in Valorant's Fracture. You can even draw it a bit closer to the plant area. This is completely upto you and your team's attack strategy.
2) A Site defensive wall
This aggressive wall takes up a lot of space in A Main. It forces the enemy team to pass through the Toxic Screen multiple times, risking damage and losing their health quickly in case they are spammed through the smoke.
You can even have your Operator wielding Duelist push to a certain extent to get a quick frag and return to safety.
Also read: Valorant: Complete Vyse Bind guide
3) B Site attacking wall
This B Site attacking wall on Valorant's Fracture covers up B Canteen as well as Generator and B Link. It essentially blocks all line of sight for the defenders as they rotate from their Spawn located in the center of the map. It's perfect for entering the site and taking the necessary space.
4) B Arcade Defending wall
This B defending wall covers up multiple spaces in Arcade. It protects the Ultimate Orb and keeps the opponents on their toes. You can have a teammate hide near the boxes or push out with a flash. You can take both aggressive and defensive positions with this wall. It really gives you a lot of options to navigate around this area in Valorant's Fracture.
Best tips to use Viper’s abilities on the Fracture Map in Valorant
Fracture has an H-shape layout design, with two attackers' sides connected by zip lines. The map is split into two contrasting environments, with several entrances to both sites. The defender spawn lies in the middle of the map. As a defending Viper main, you must optimize your gameplay by using the Poison Cloud and Toxic Screen in conjunction in the best way possible. Here are some tips:
- Try to use your Snakebite to slow down enemies even further. Release it in the space right after the Poison Cloud's range. This will help deplete enemy health after being freshly vulnerable due to the orb's effects.
- If you can have a presence on both sides, that would be beneficial. However, it's better to have a stronghold on one site than a weak one on both. Let the Sentinel player handle one site while you take the other.
- Using the Poison Cloud for one-ways can be beneficial during defence. However, to defuse the Spike safely, you will require smokes. If you are the only Controller, you can try and preserve one of the two abilities to help defuse during adverse conditions.
Best Gameplay Tips for Viper on Fracture in Valorant
Focus on rotations
Viper can be used very well on a complex map like Fracture. The rotations, especially from the attacking side, can be swift and quiet. You can use the Toxic Screen in the same manner every round to condition the enemy.
Fake one side of the map and then attack from the opposite end after traveling to it via the zipline. Exploit any corner you can and use the smokes to your advantage as much as possible.
Viper's Pit
The Viper's Pit can be used in unique ways on this Valorant map. Trigger it from the short flight of stairs on the A Site to create a cast with a wide-ranging ultimate. It allows you to navigate even unfavorable fights with relative comfort.
Similarly, you can use the ultimate from B Tower to yet again create a massive cloud of toxic gas that covers up much of the site, allowing you unique angles to take your fights.
