'%20x='0'%20y='0'%20height='100%25'%20width='100%25'%20%0A%20%20%20%20%20%20%20%20%20%20xlink%3Ahref='data:image/jpg;base64,/9j/2wBDAAYEBQYFBAYGBQYHBwYIChAKCgkJChQODwwQFxQYGBcUFhYaHSUfGhsjHBYWICwgIyYnKSopGR8tMC0oMCUoKSj/2wBDAQcHBwoIChMKChMoGhYaKCgoKCgoKCgoKCgoKCgoKCgoKCgoKCgoKCgoKCgoKCgoKCgoKCgoKCgoKCgoKCgoKCj/wgARCAAGAAoDASIAAhEBAxEB/8QAFgABAQEAAAAAAAAAAAAAAAAAAAUG/8QAFQEBAQAAAAAAAAAAAAAAAAAABAX/2gAMAwEAAhADEAAAAM9KFz//xAAiEAACAQMCBwAAAAAAAAAAAAABAgMABRIEIRETIjEyYeH/2gAIAQEAAT8Aud31UawjpaLgHOYDErj77GmM7MW5rb7+Xyv/xAAXEQADAQAAAAAAAAAAAAAAAAAAAQIR/9oACAECAQE/AIlaz//EABgRAAIDAAAAAAAAAAAAAAAAAAIDABIh/9oACAEDAQE/AGuOo7P/2Q=='%3E%3C/image%3E%3C/svg%3E)
Valorant released a new map called Sunset on August 29, 2023, to mark the beginning of Episode 7 Act 2. It is a straightforward two-site map with a wide-open mid-section based in Los Angeles. Although too early to predict what Agents will be meta on the map, Killjoy will undoubtedly be a viable option on Sunset, given the strength of her kit.
Knowing basic setups and lineups always comes in handy when playing a new map in Valorant. This tends to provide you with a significant edge over your opponent.
If you are nervous about the novel gameplay experience, we've got you covered with some of the best setups and lineups you can use on Sunset when playing as Killjoy.

Killjoy A-Site defensive setup on Valorant's new map, Sunset
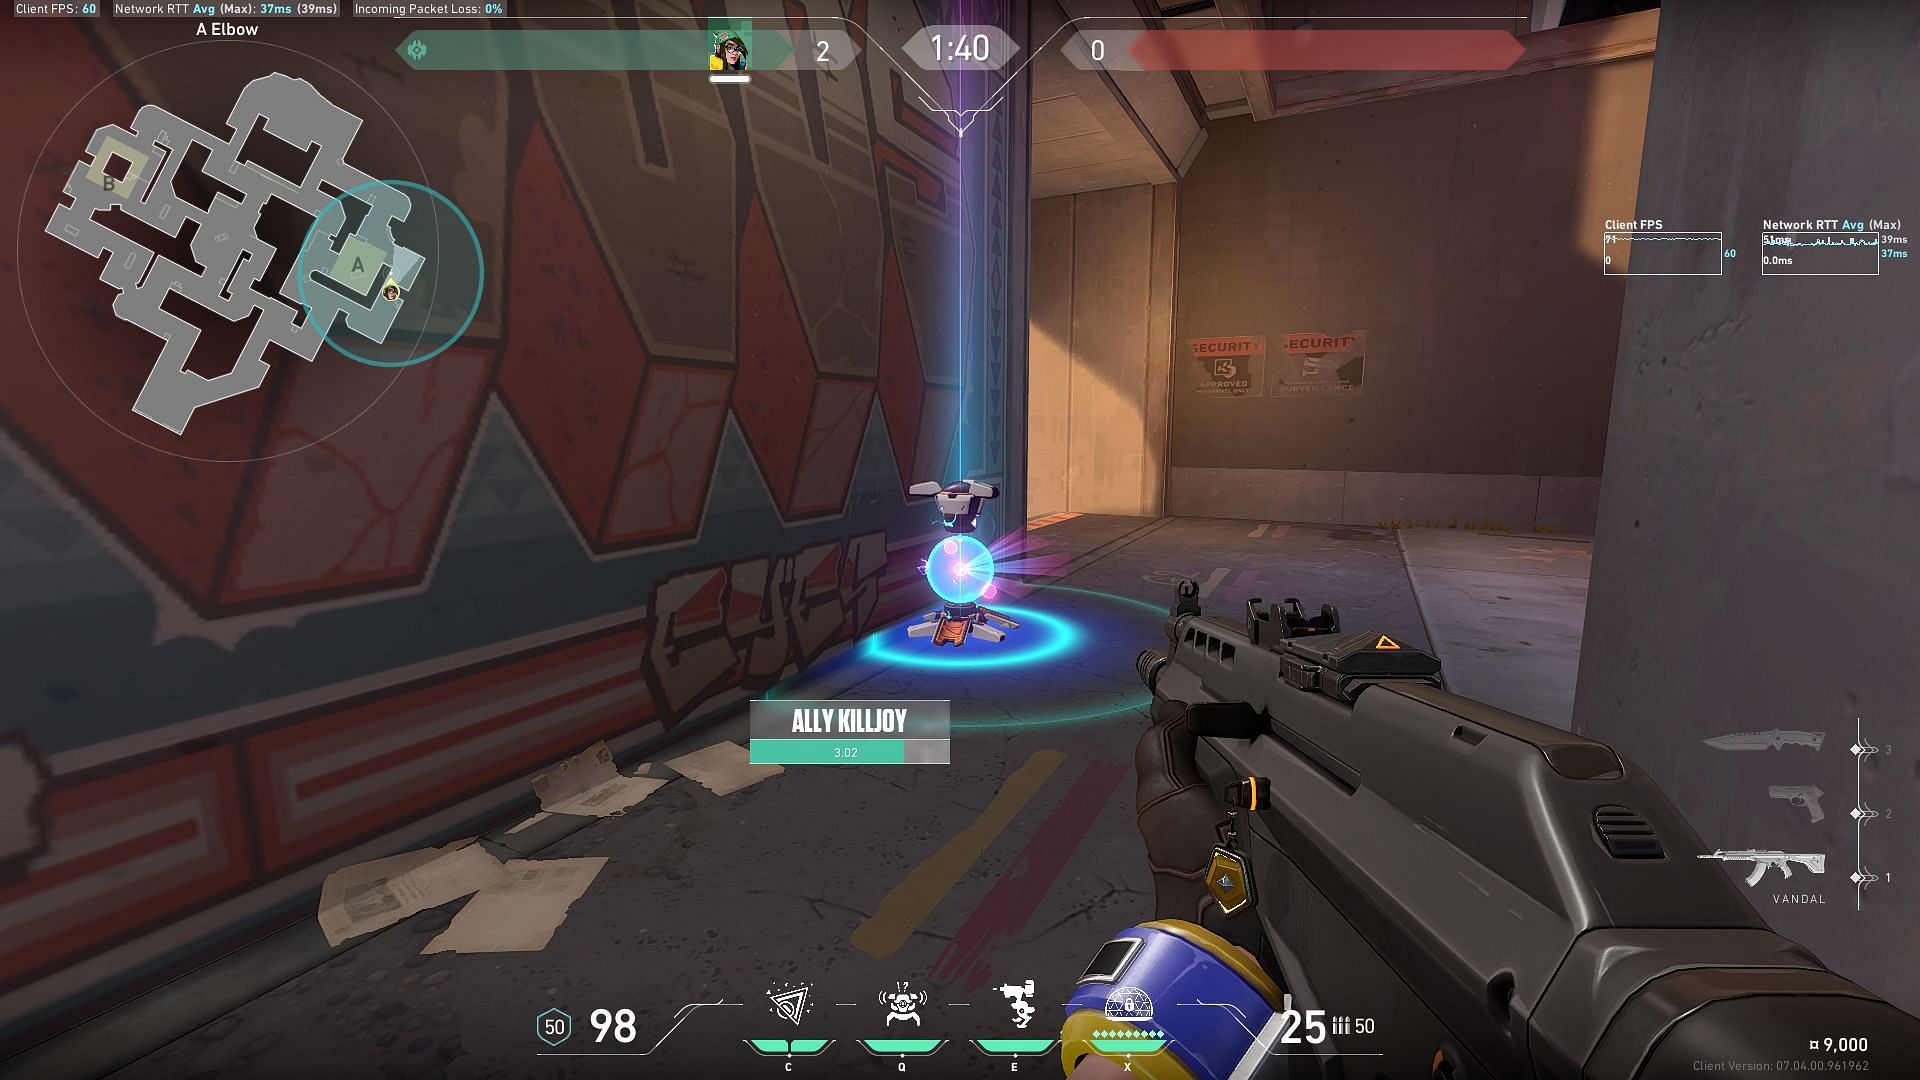
Turret Position
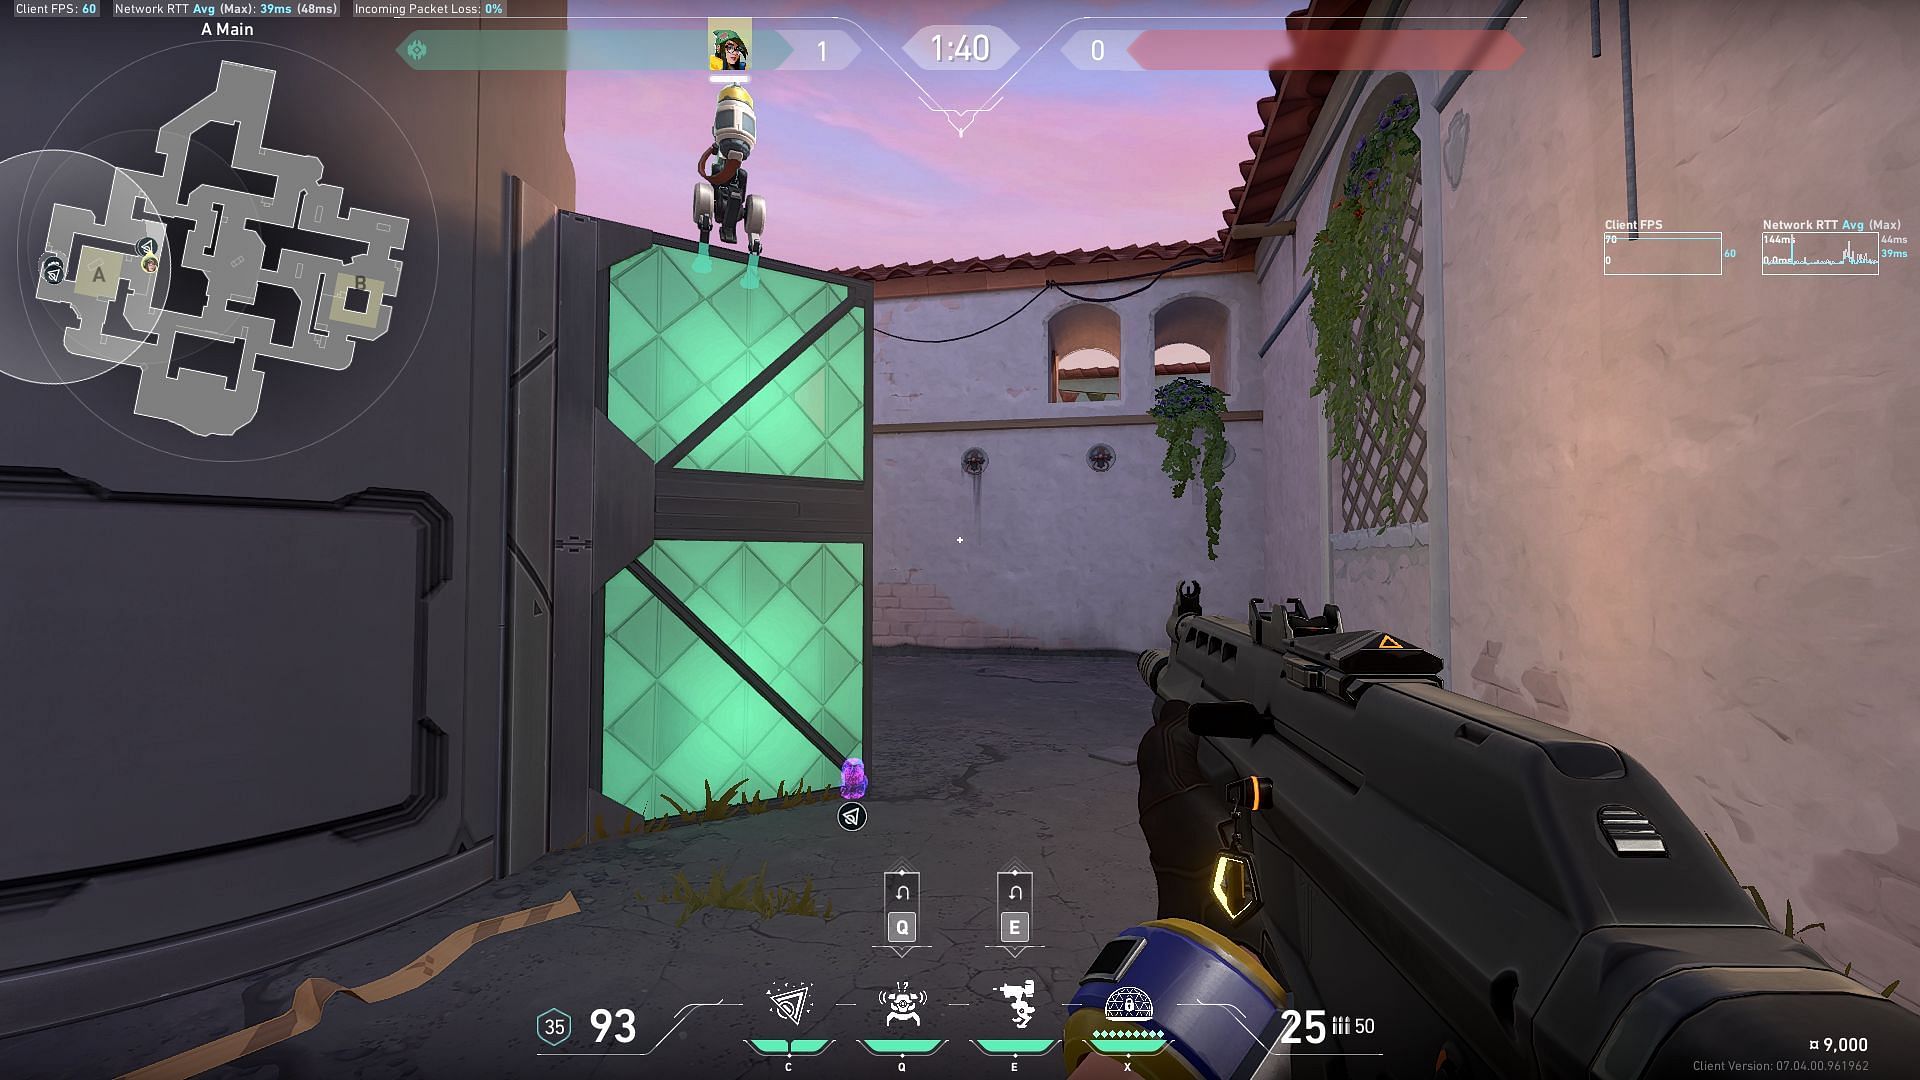
This Turret will give you early intel on whether Attackers are approaching the A-Site. You can stall them using the Nanoswarm and call for reinforcements as and when required.
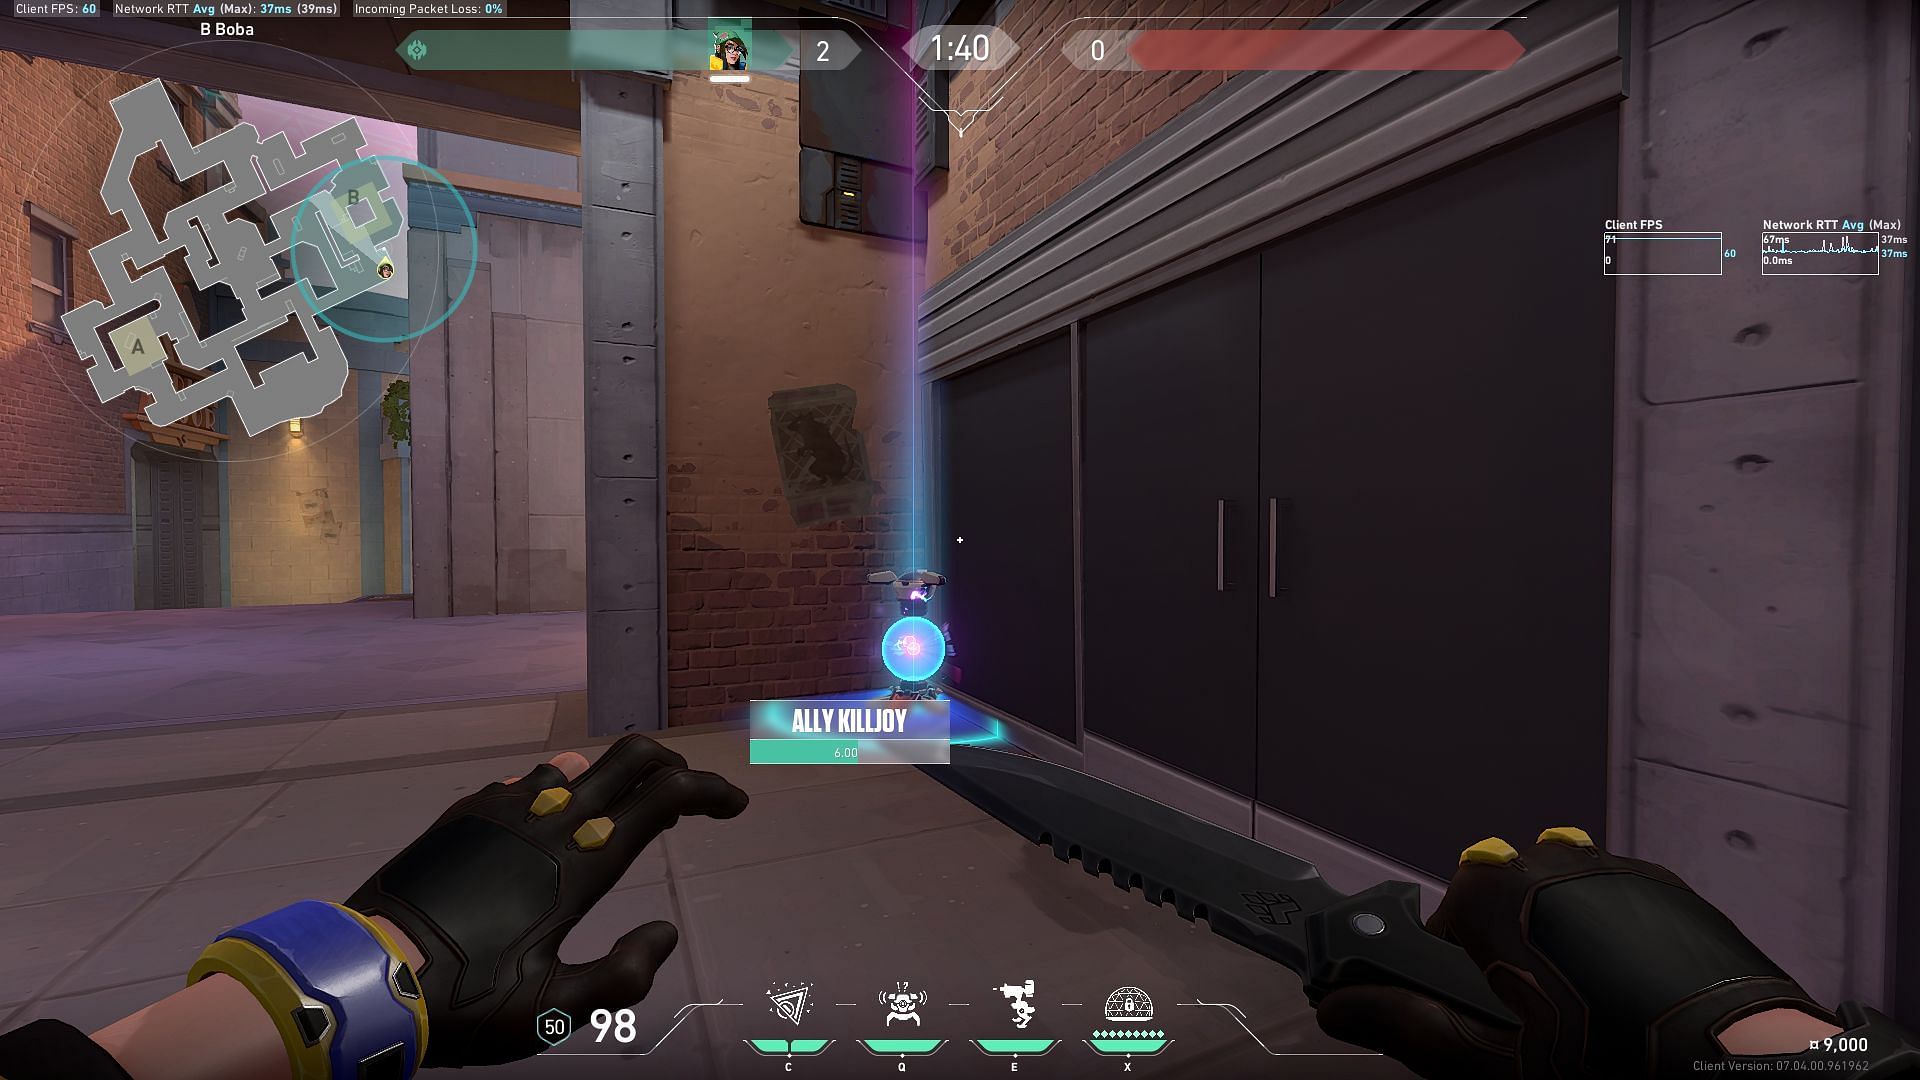
Alarmbot Position
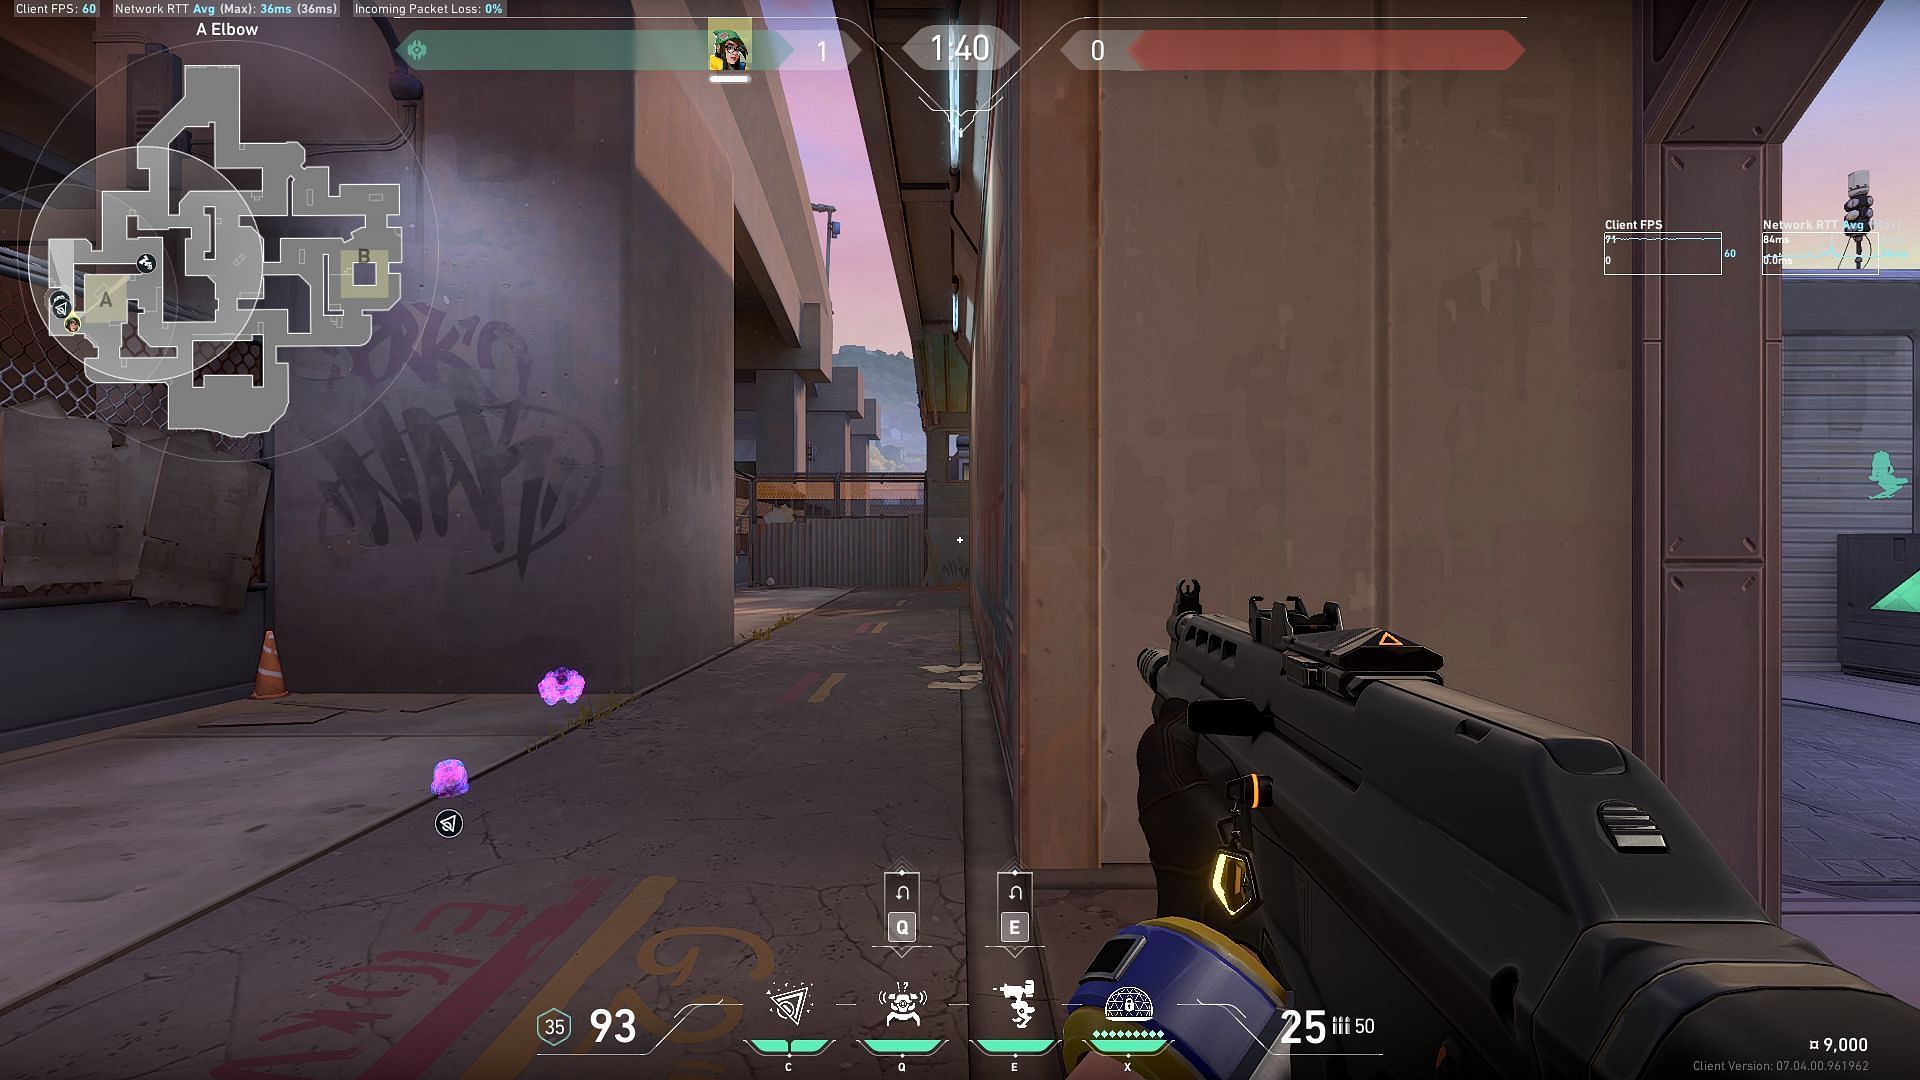
This will alert you about any pushes coming from A-Elbow. Activating the Nanoswarm might even give you a free kill, as it covers all corners in the area.
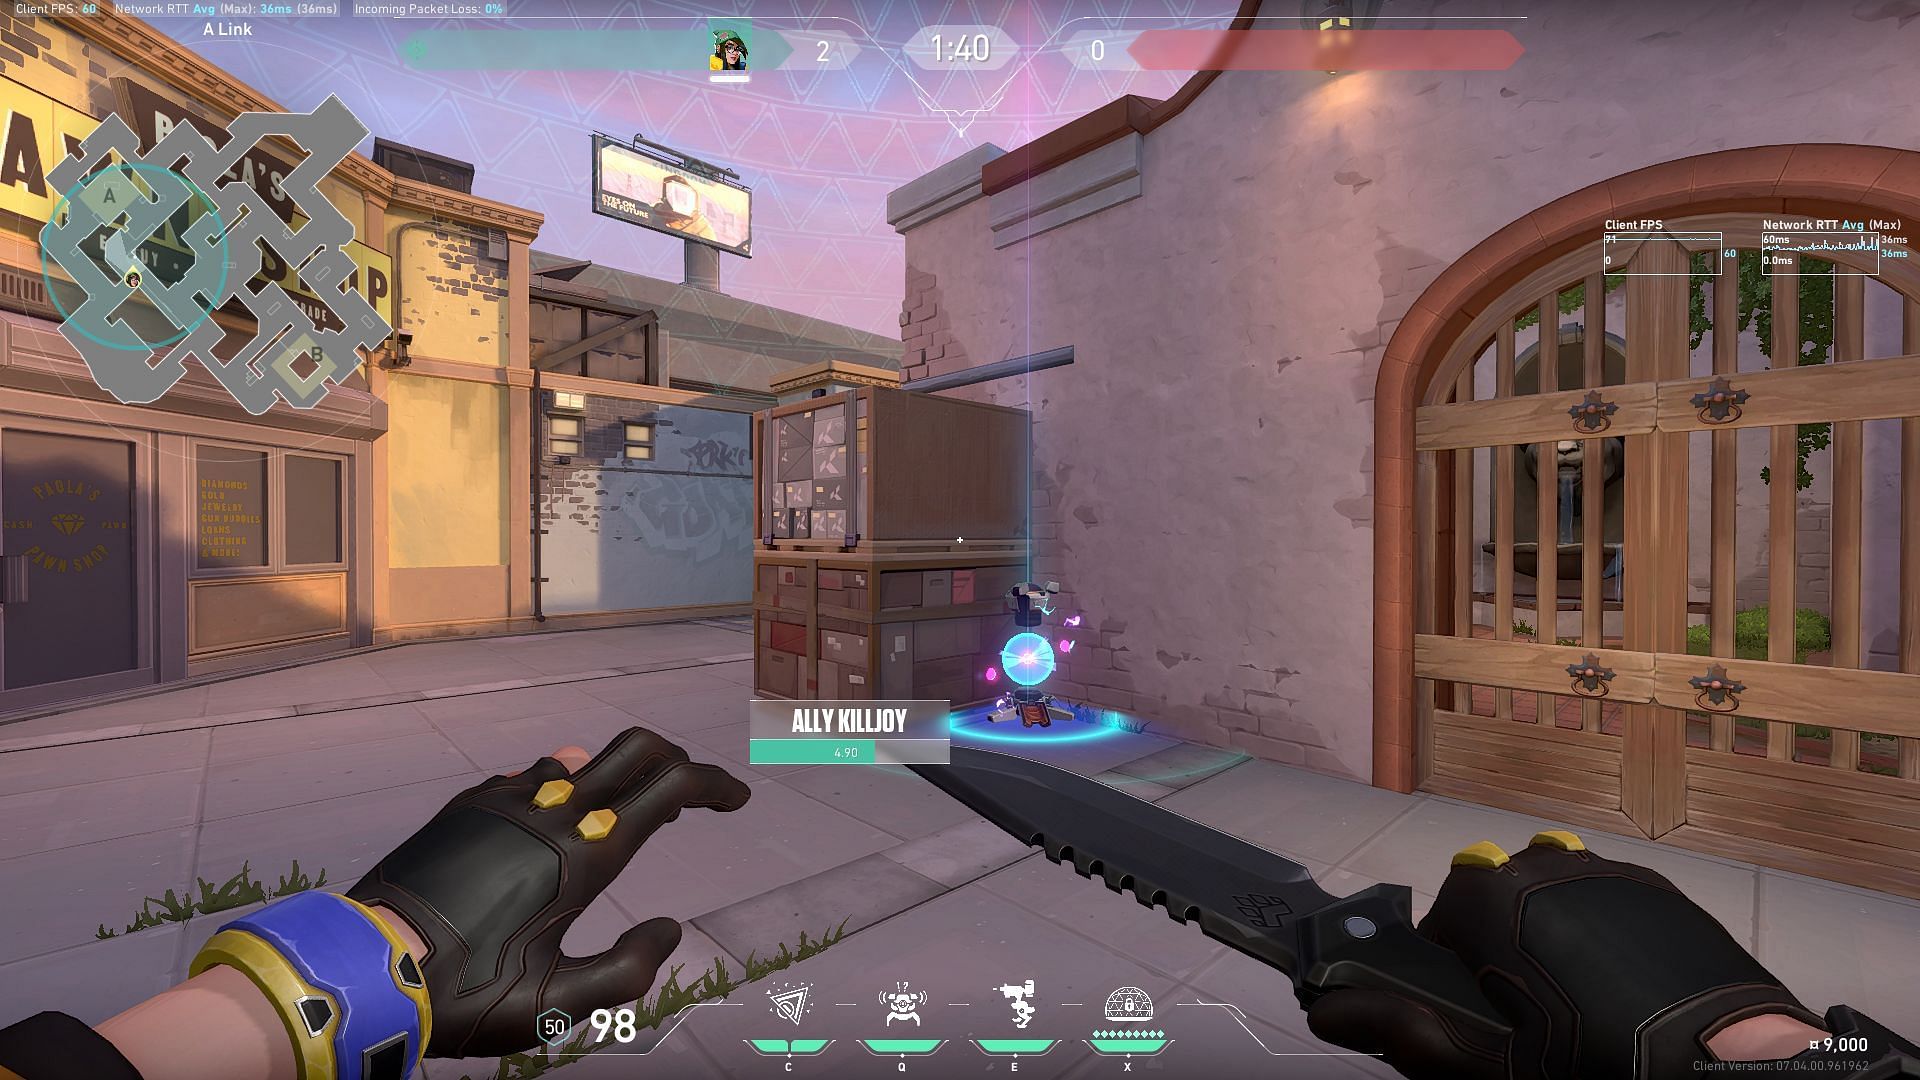
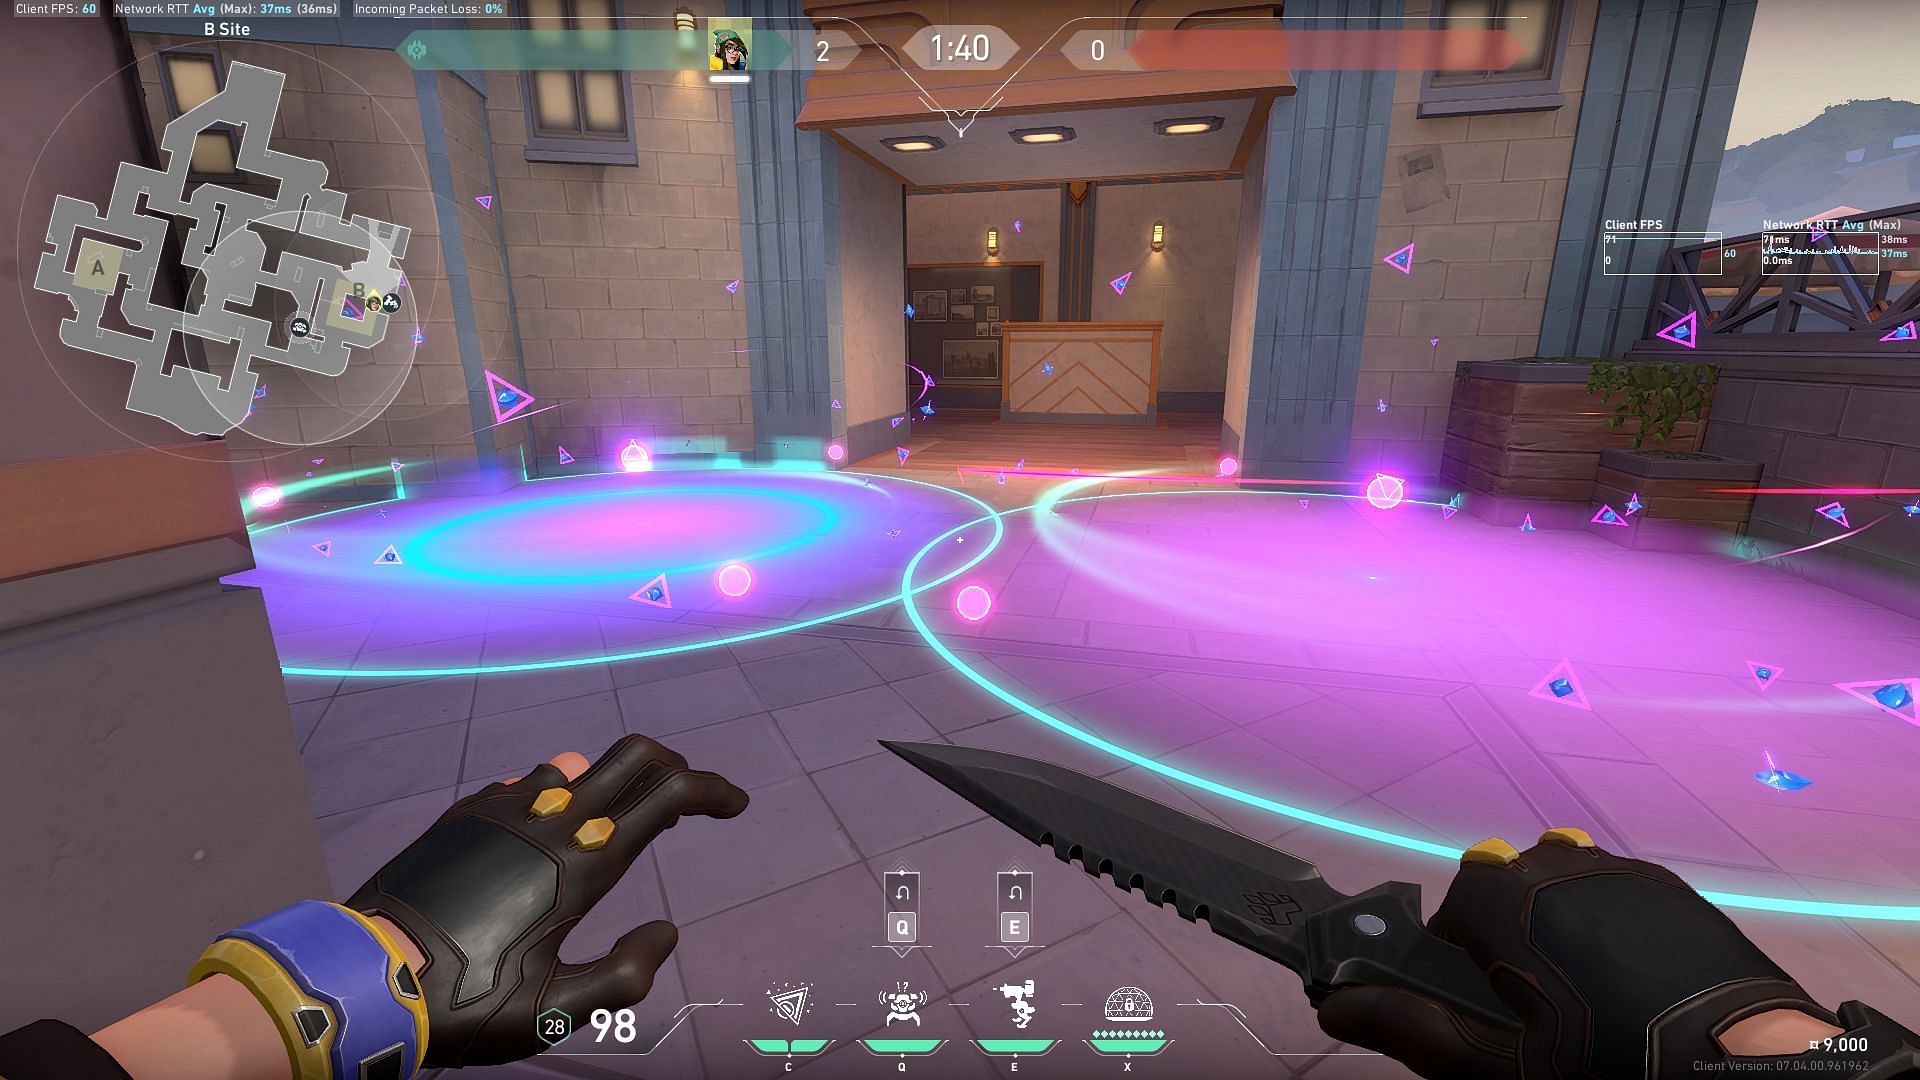
Retake Lockdown 1
Retake Lockdown 2
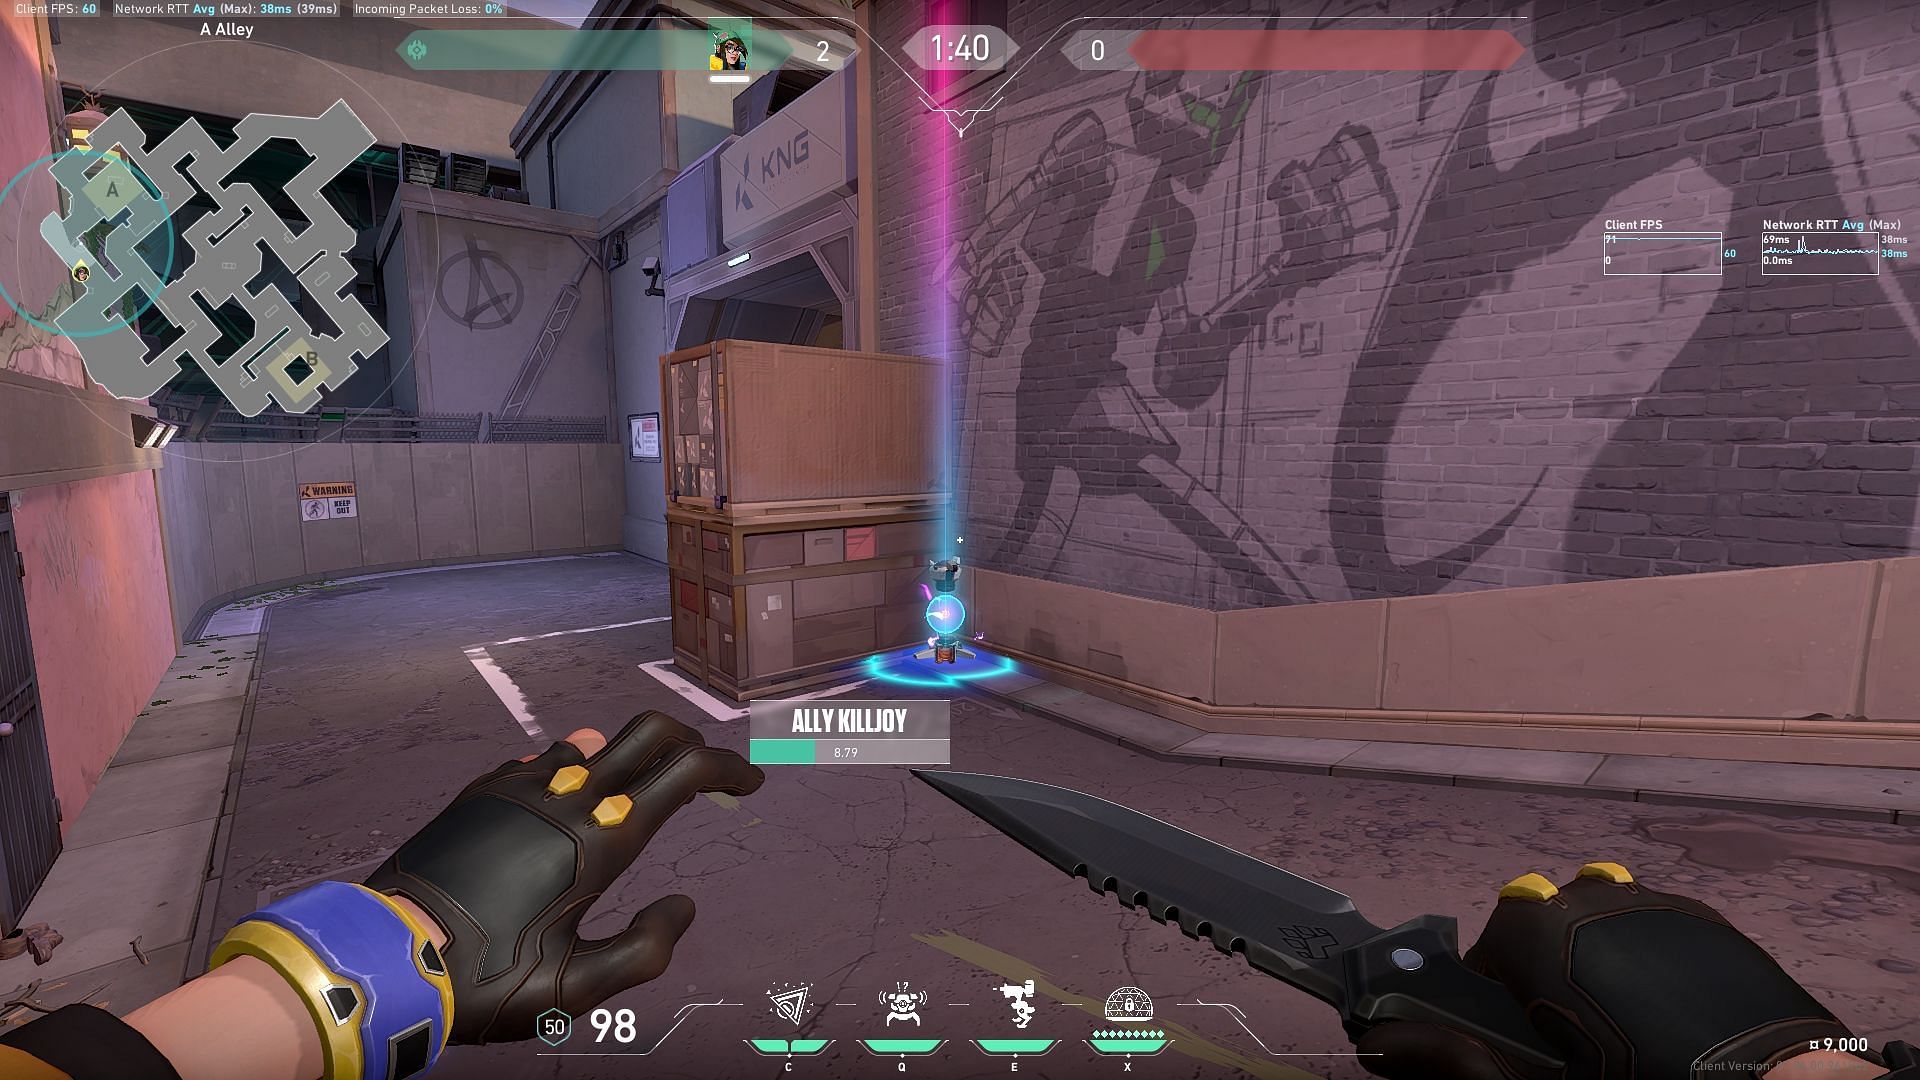
Both these Lockdown positions drive the enemies far enough for you to sneak at least half the defuse. In many cases, you can even buy ample time to get the entire defuse off.
Killjoy B-Site defensive setup on Valorant's new map, Sunset
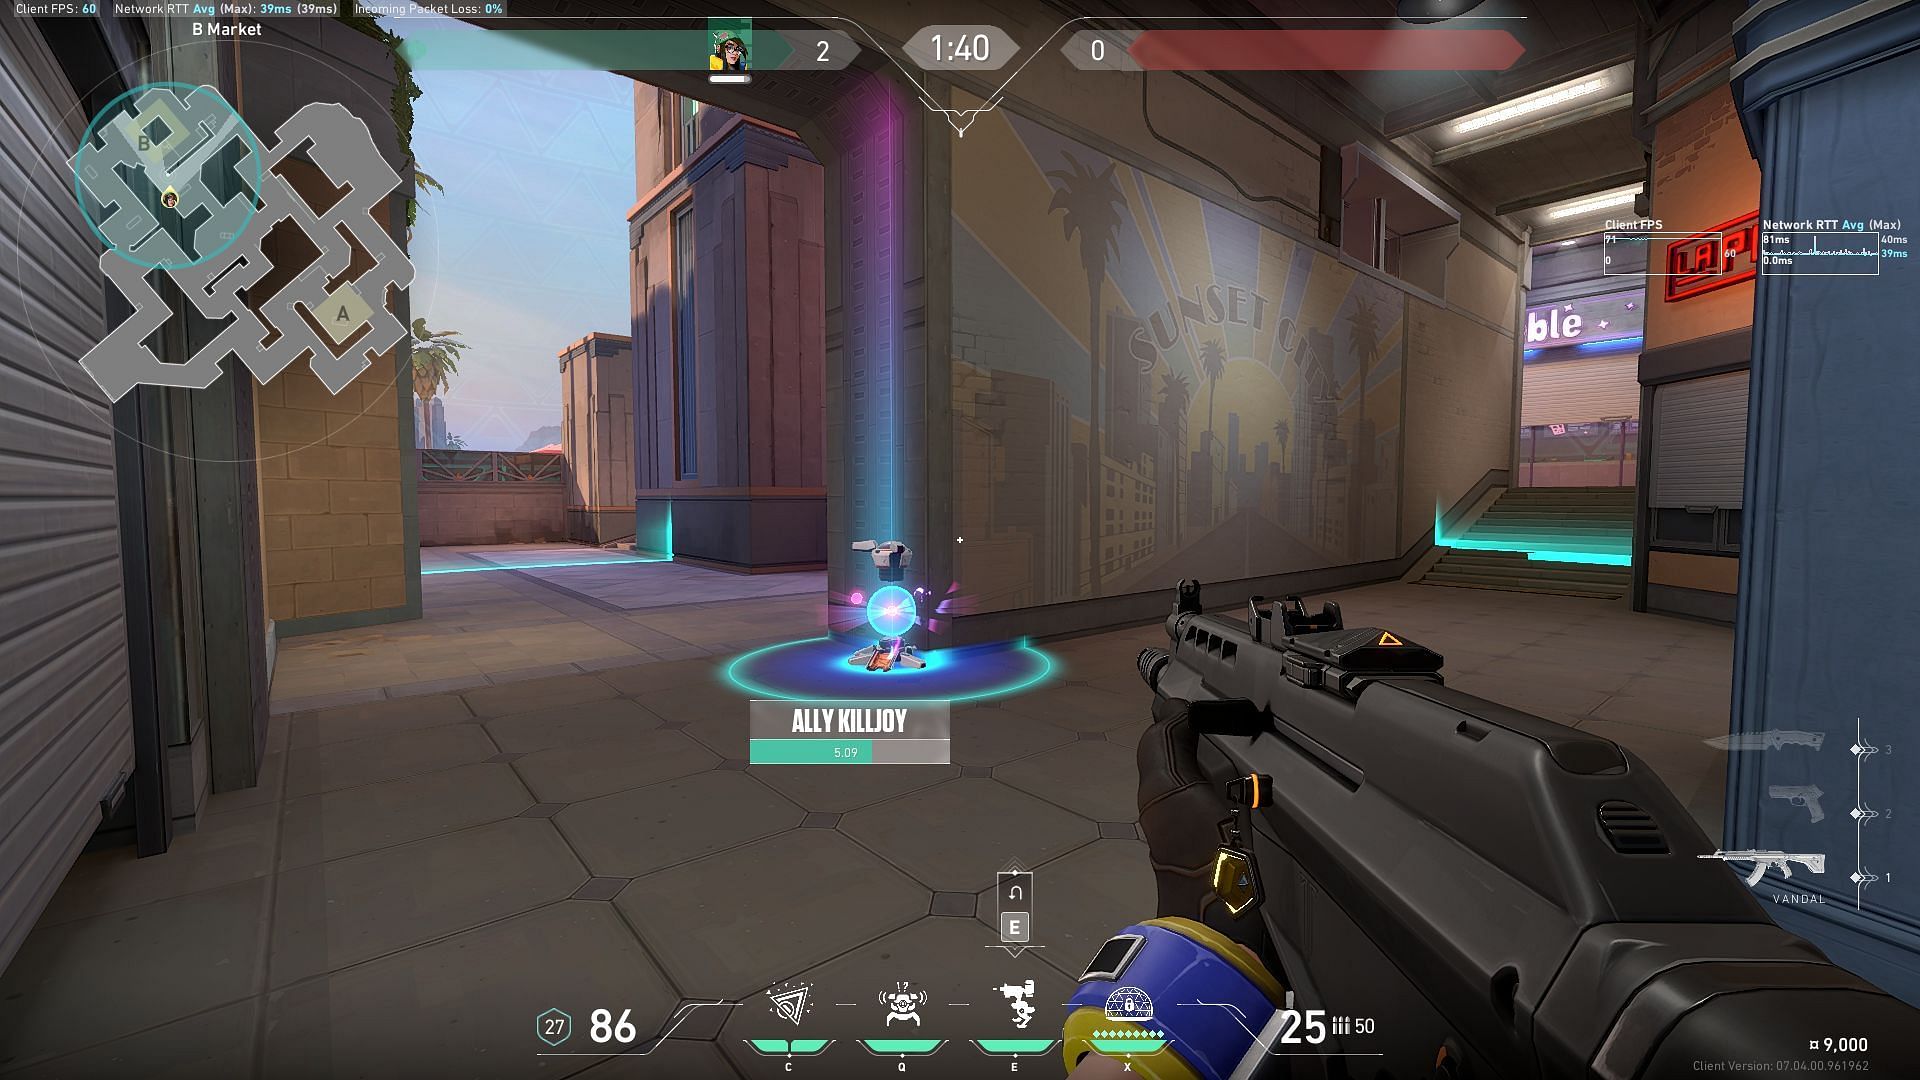
Turret Position
This Turret sees both the main as well as the market entrance towards B-Site on Valorant's new map Sunset.
Alarmbot Position
This Alarmbot will alert you of any aggression coming from the Market side to make sure the enemies cannot flank you without you knowing.
Nanoswarm 1 Position
Nanoswarm 2 Position
Result
This set of mollies at the entrance of B-Site can prove deadly to Attackers trying to blindly push through its main chokepoint.
Retake Lockdown
This B-Site retake ultimately gives you control over the region. If you have a smoke for the Spike, you can easily sneak a defuse as the enemies are escaping the site.
Killjoy Attack setups on Valorant's new map, Sunset
A-Site attacking Lockdown
This ultimate is perfect for the A-Site of Sunset since it cannot be easily destroyed by the defenders. Placing it in A-Elbow will force the defenders to retreat nearly to their spawn, effectively giving you a free site.
B-Site attacking Lockdown
There is a slight danger of someone from the site peeking and breaking this ultimate. However, if allowed to pan out, this ultimate will give you solid value, provided it stays alive for the wind-up duration.
Killjoy Lineups for Valorant's new map Sunset
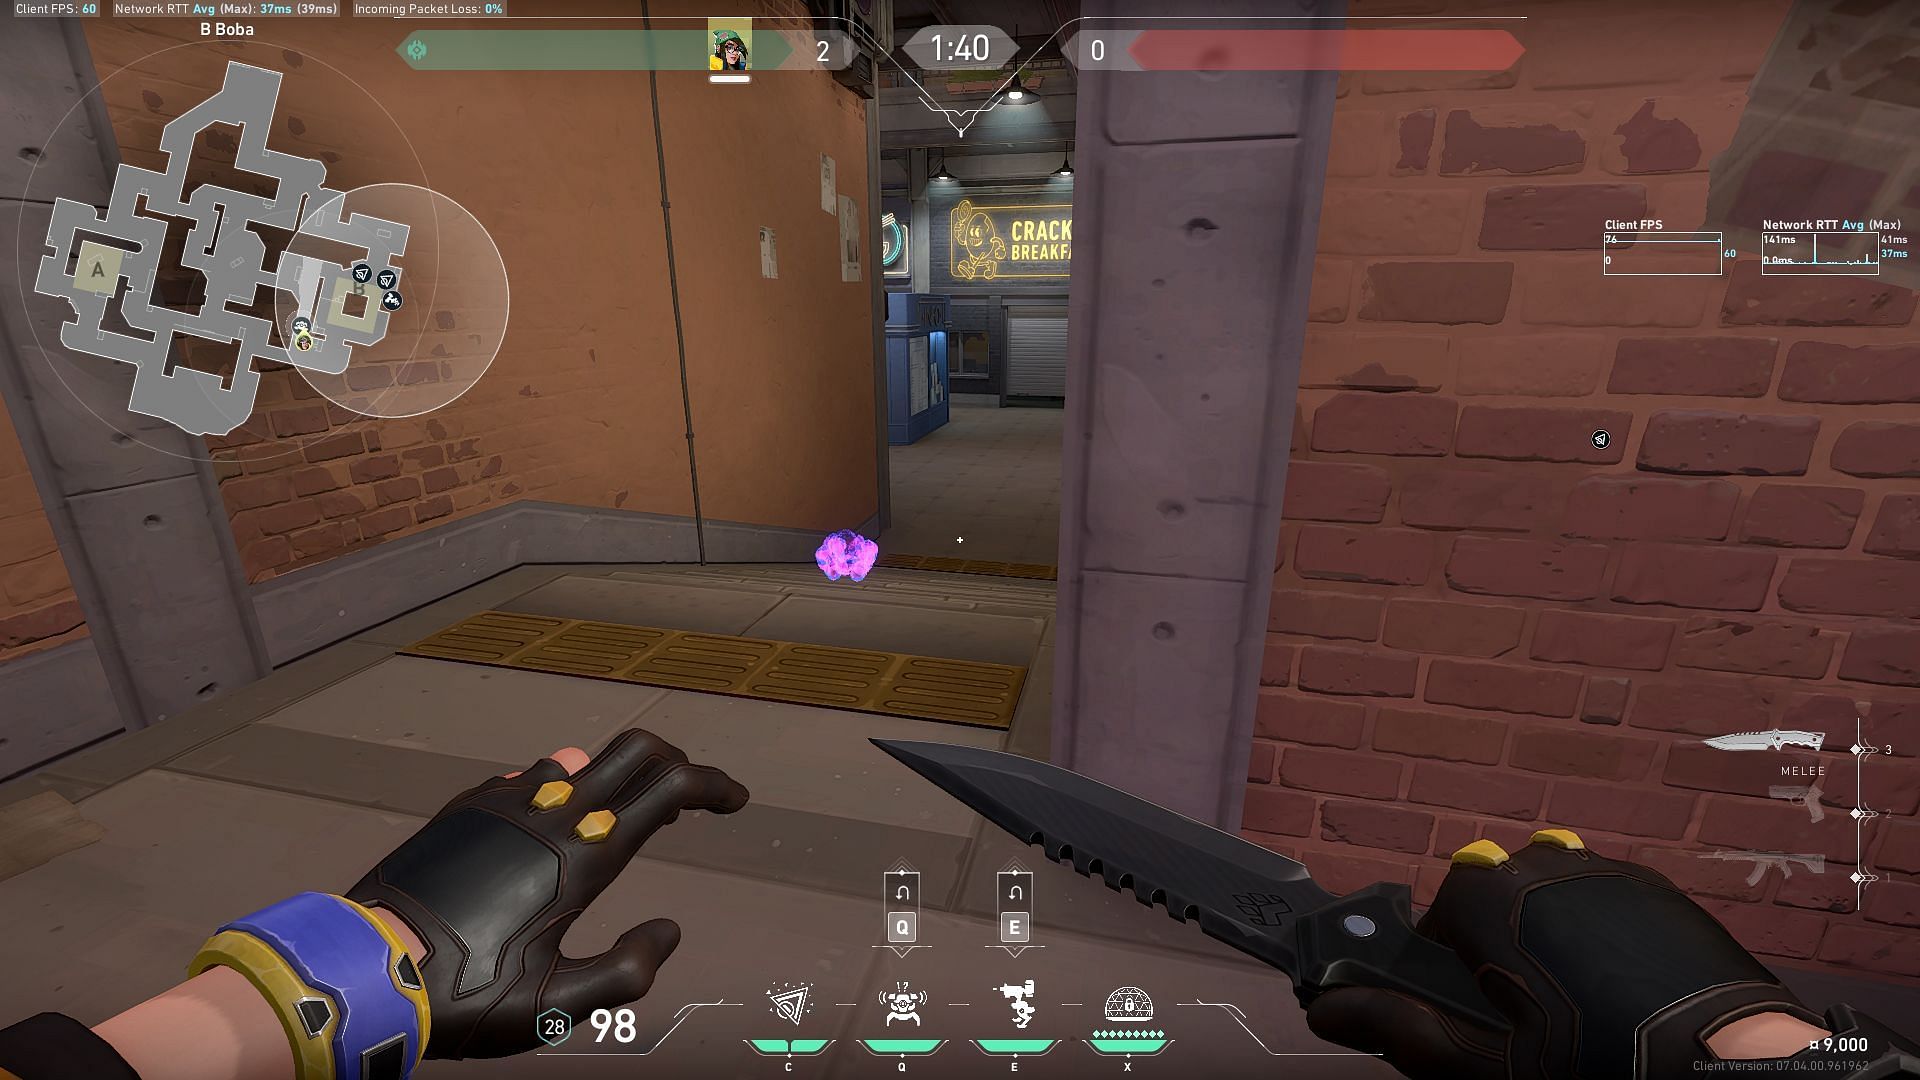
A-Site post-plant Nanoswarm 1
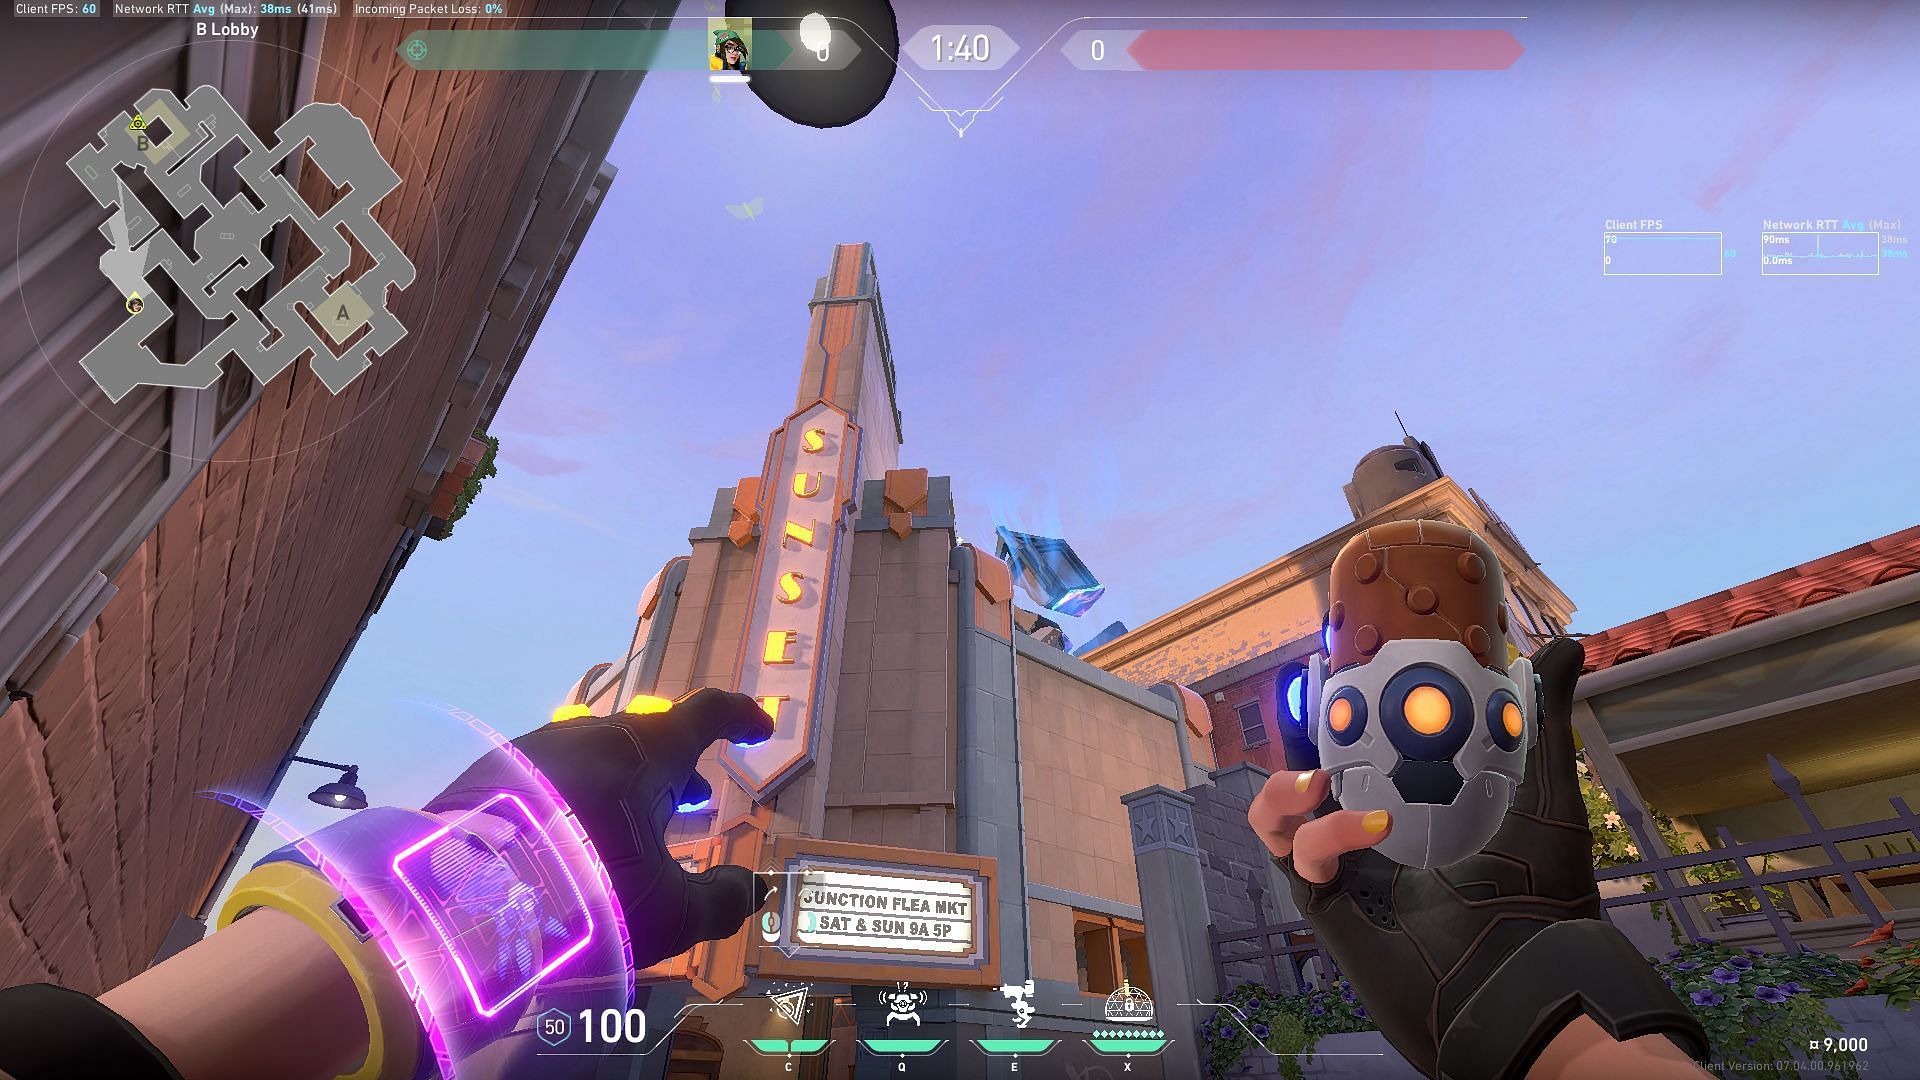
Lineup
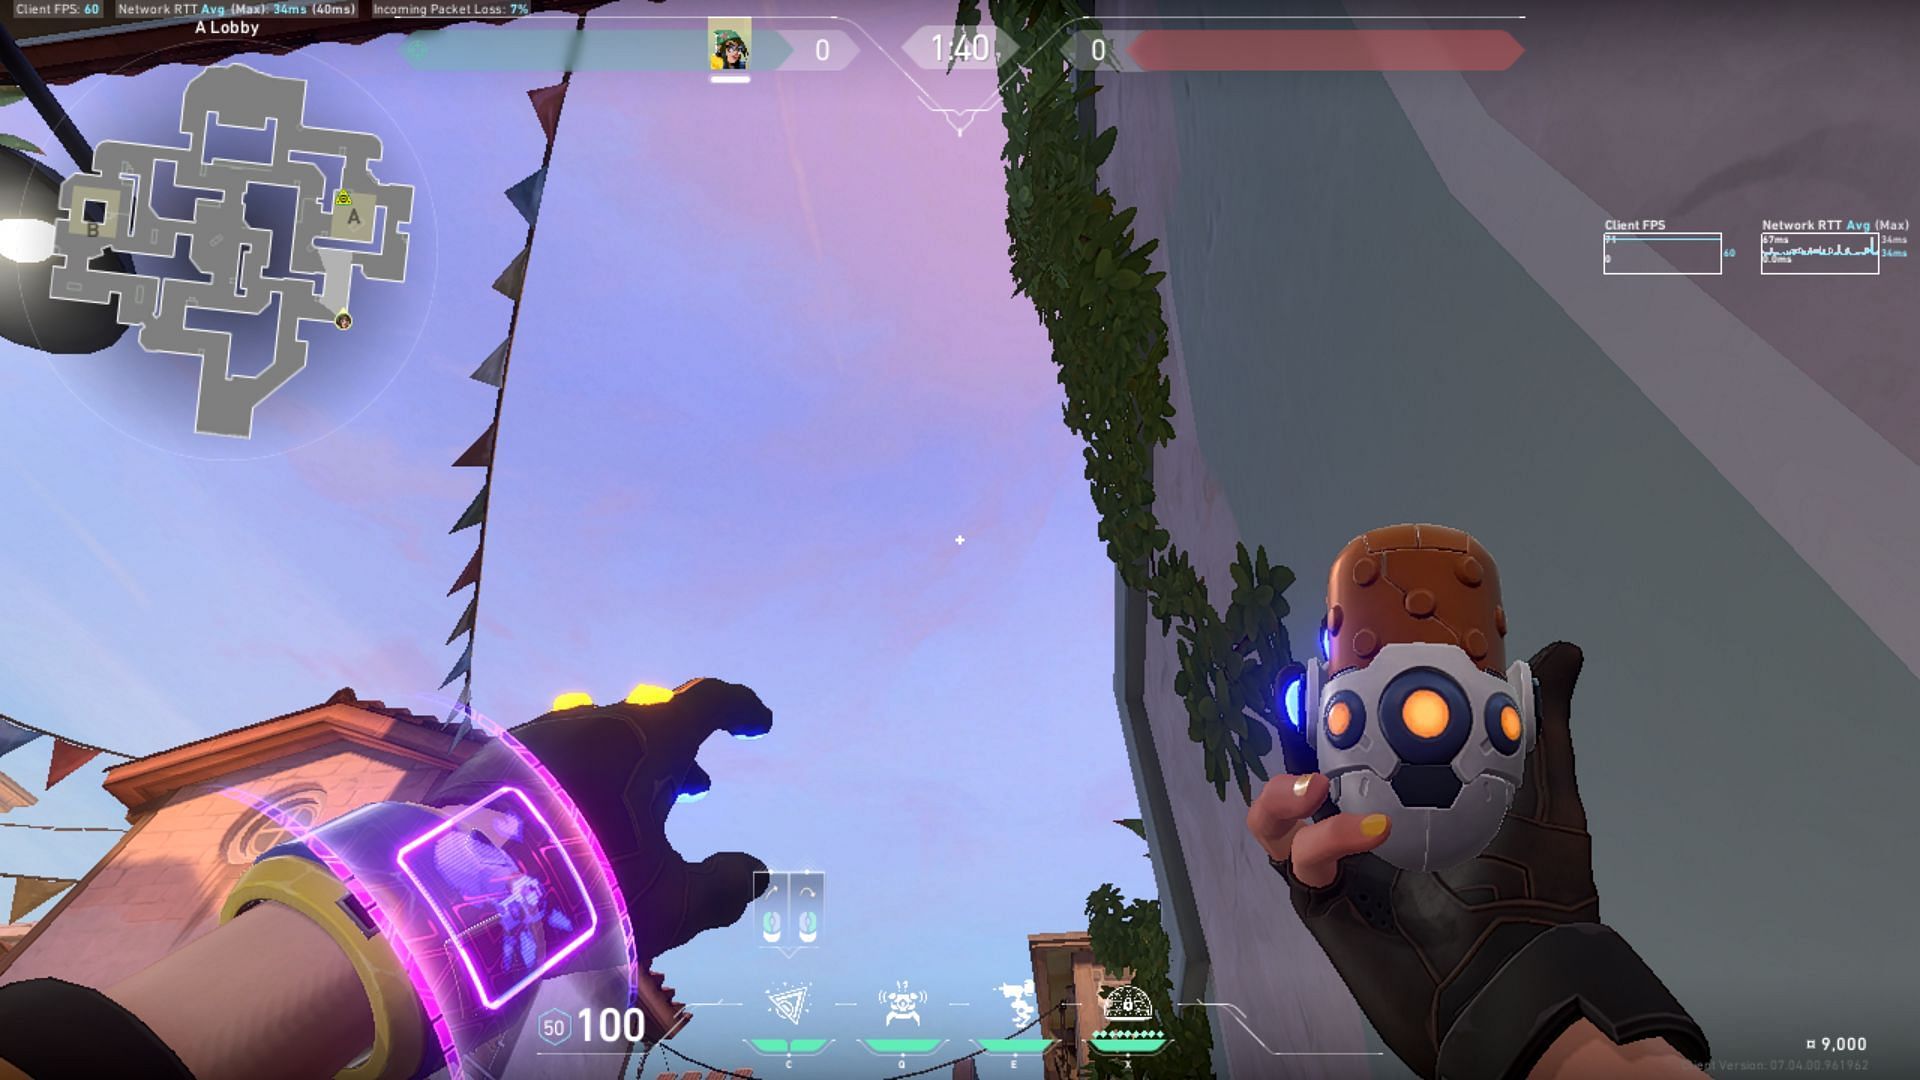
For this lineup, you have to align the Turret image on your HUD with the wire and the building as shown in this image. Aim as shown and simply throw the molly.
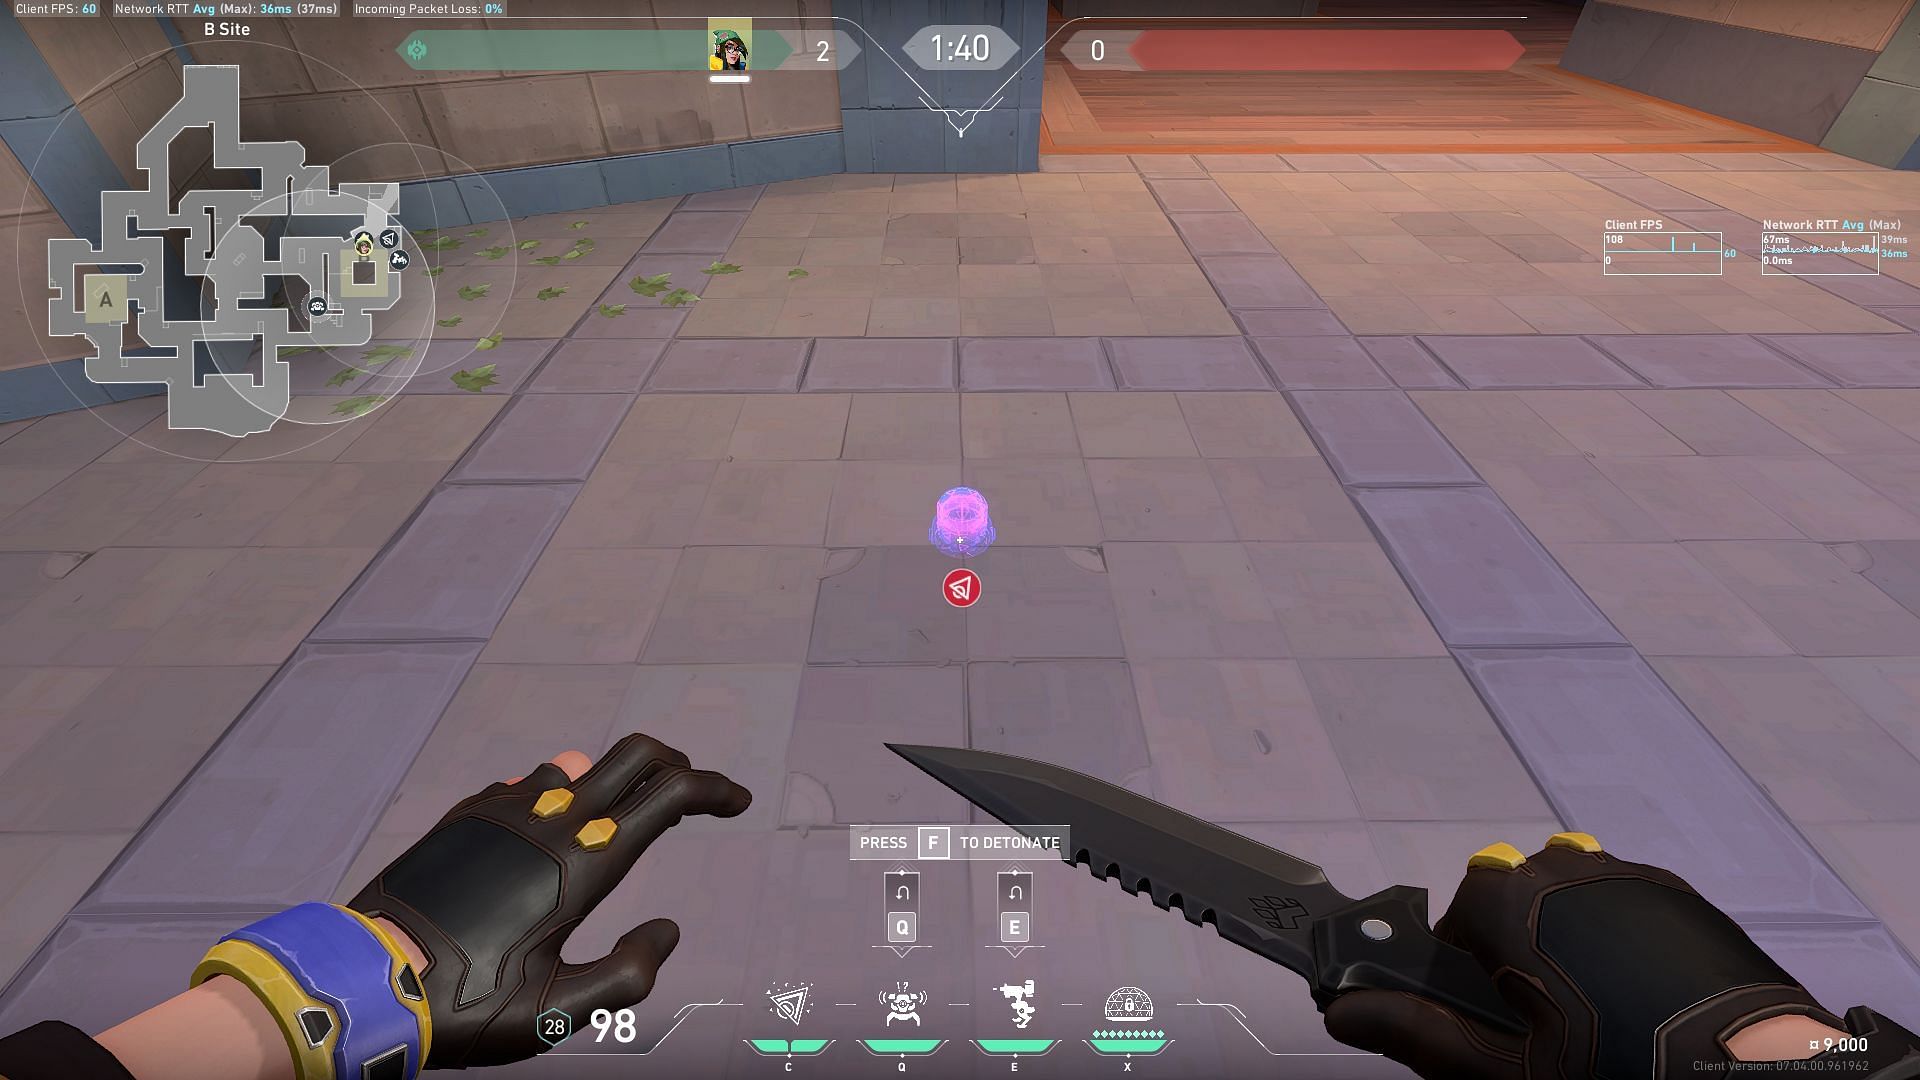
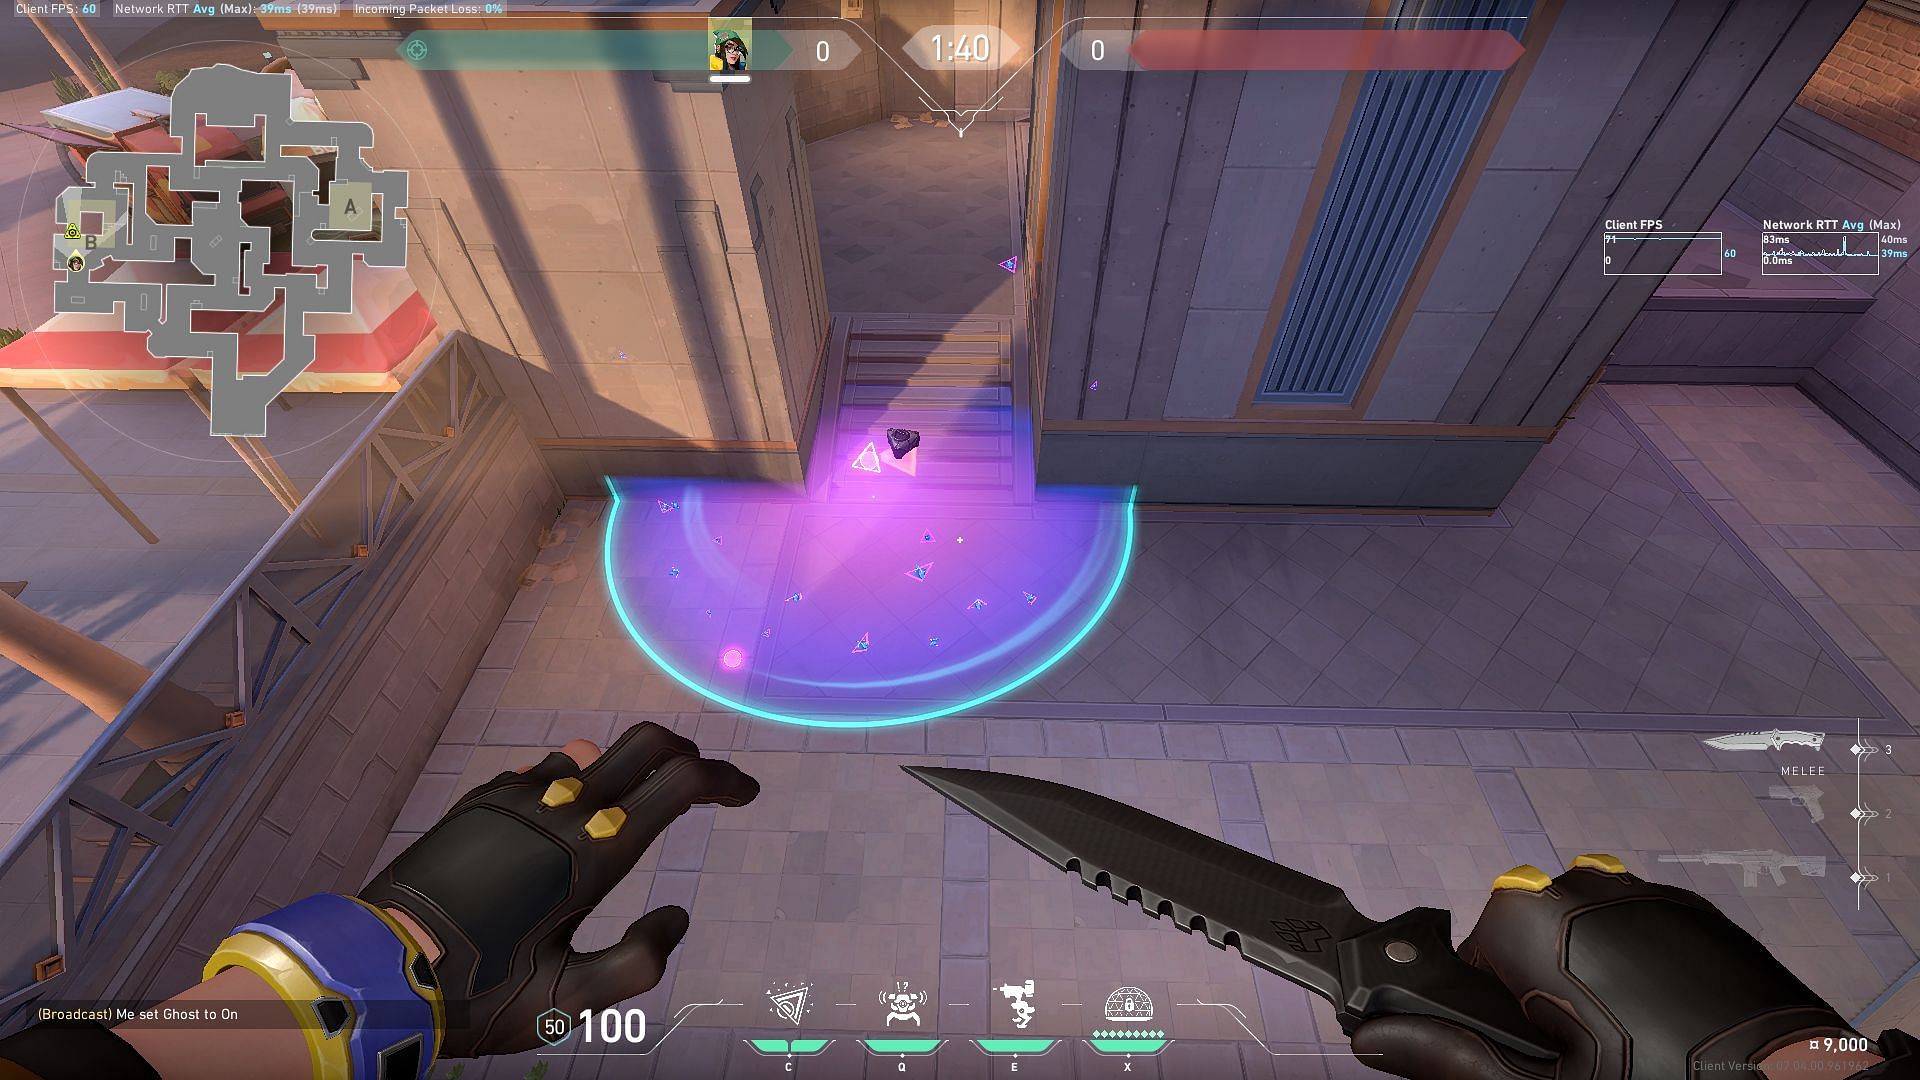
Result
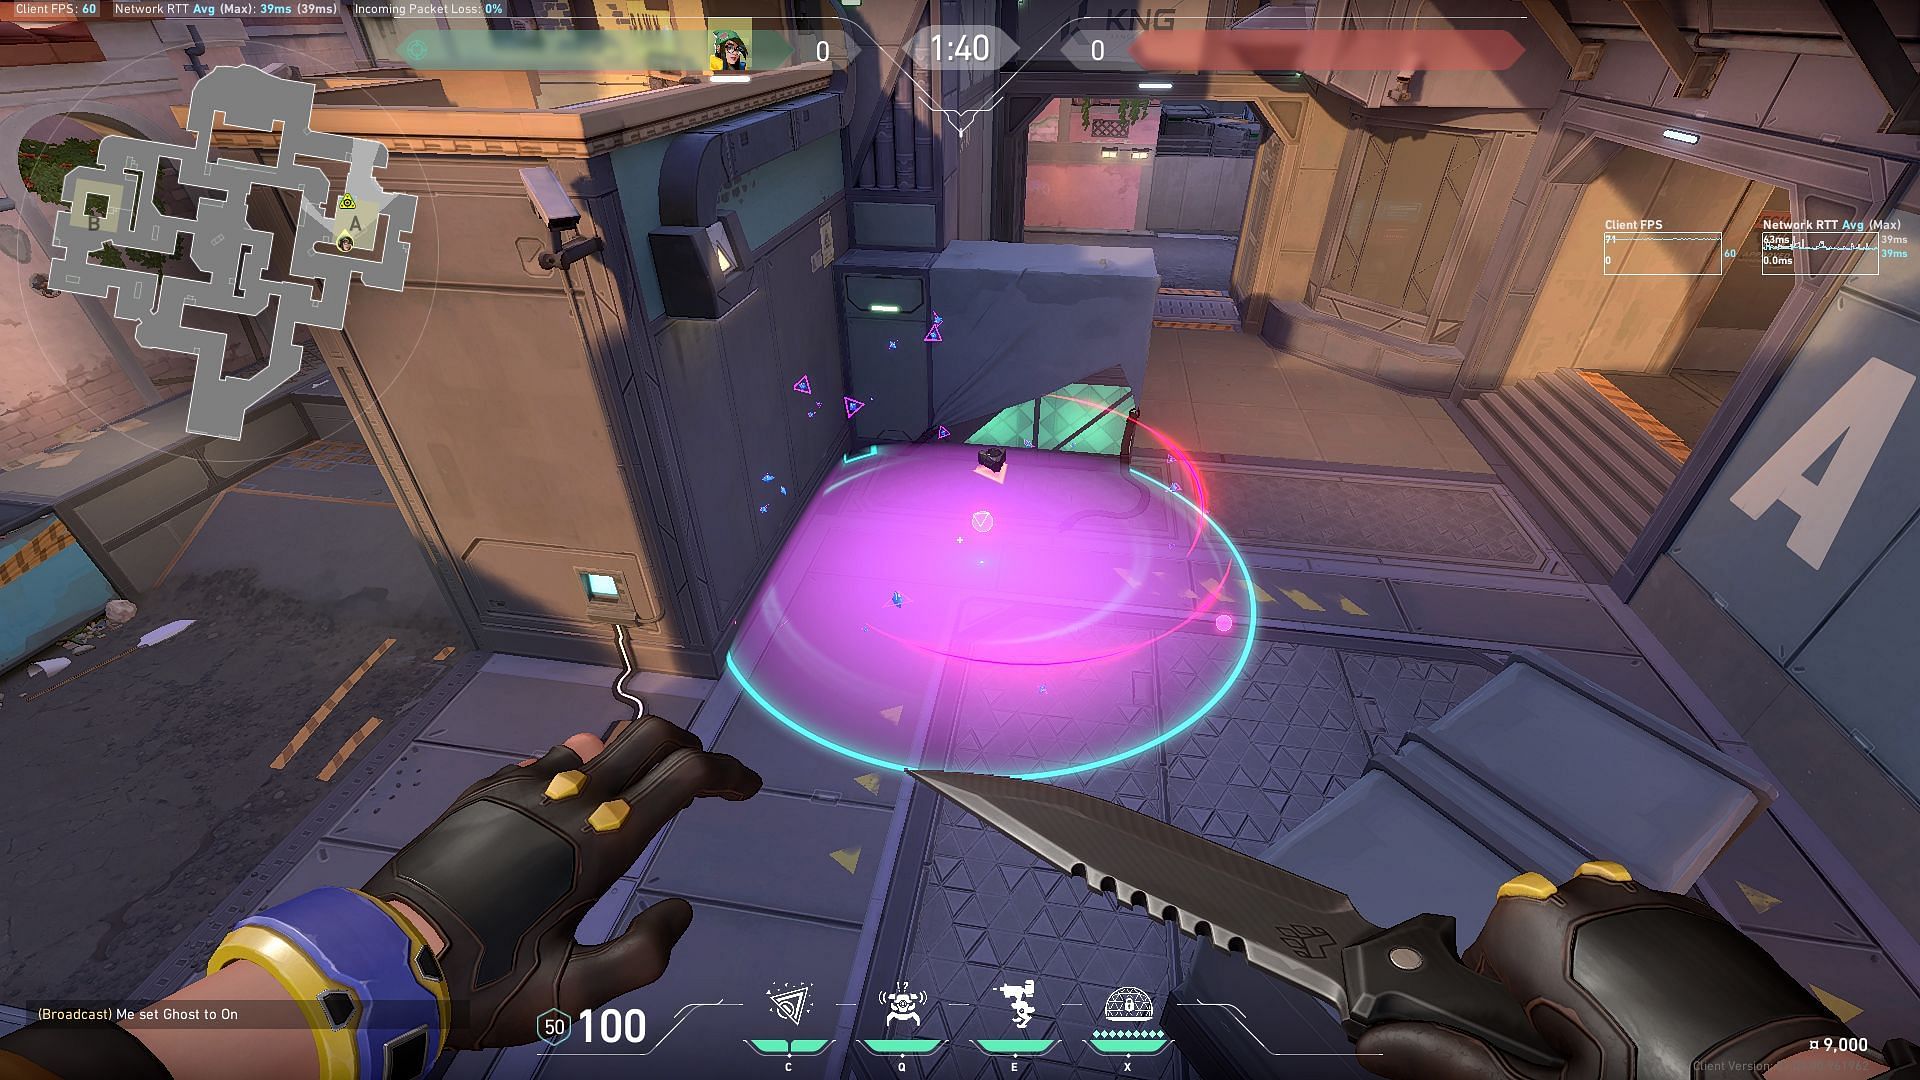
This molly lands in the default planting spot on the A-site of Sunset. No matter whether you plant close to the box or more open, activating this Nanoswarm will burn any enemy that tries to stick a defuse.
A-Site post-plant Nanoswarm 2
Lineup
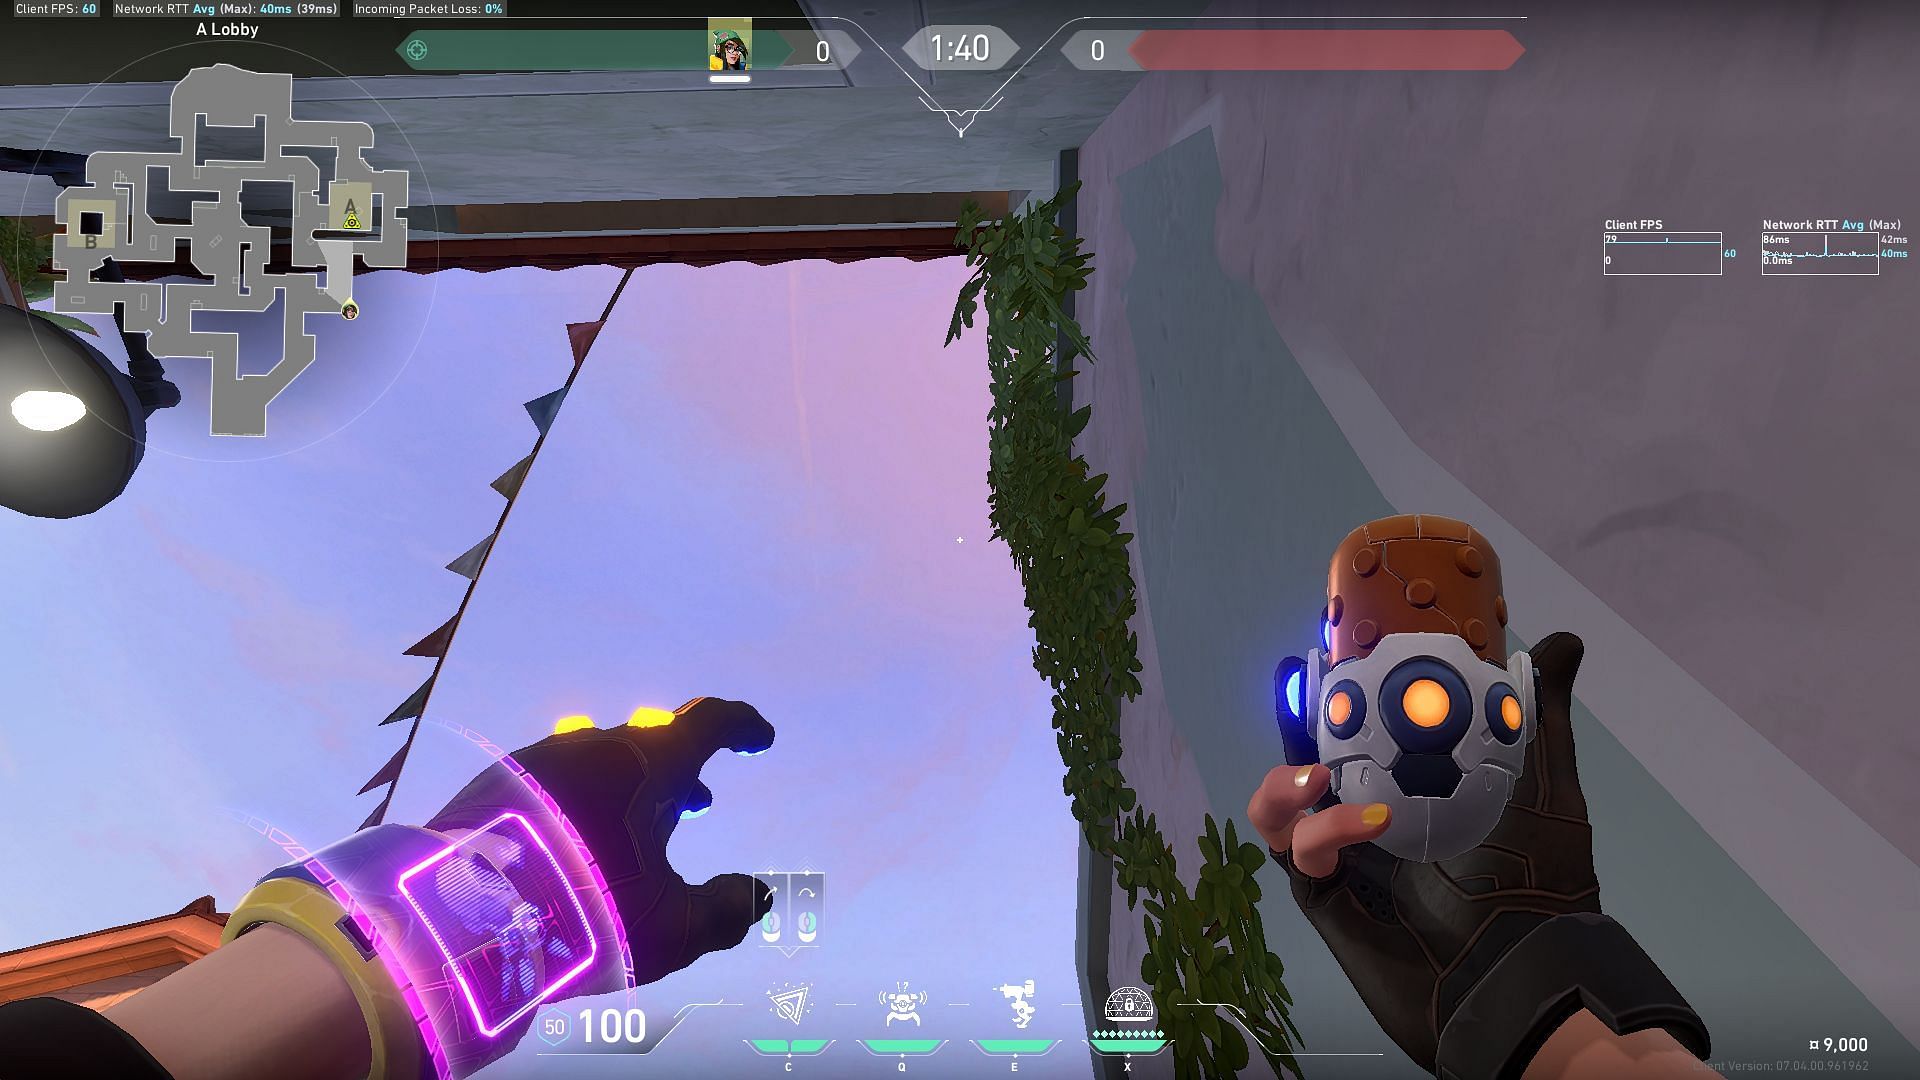
Aim your crosshair slightly to the left of the leaf as shown and jump throw for the molly to land in the safe plant spot on A-Site.
Result
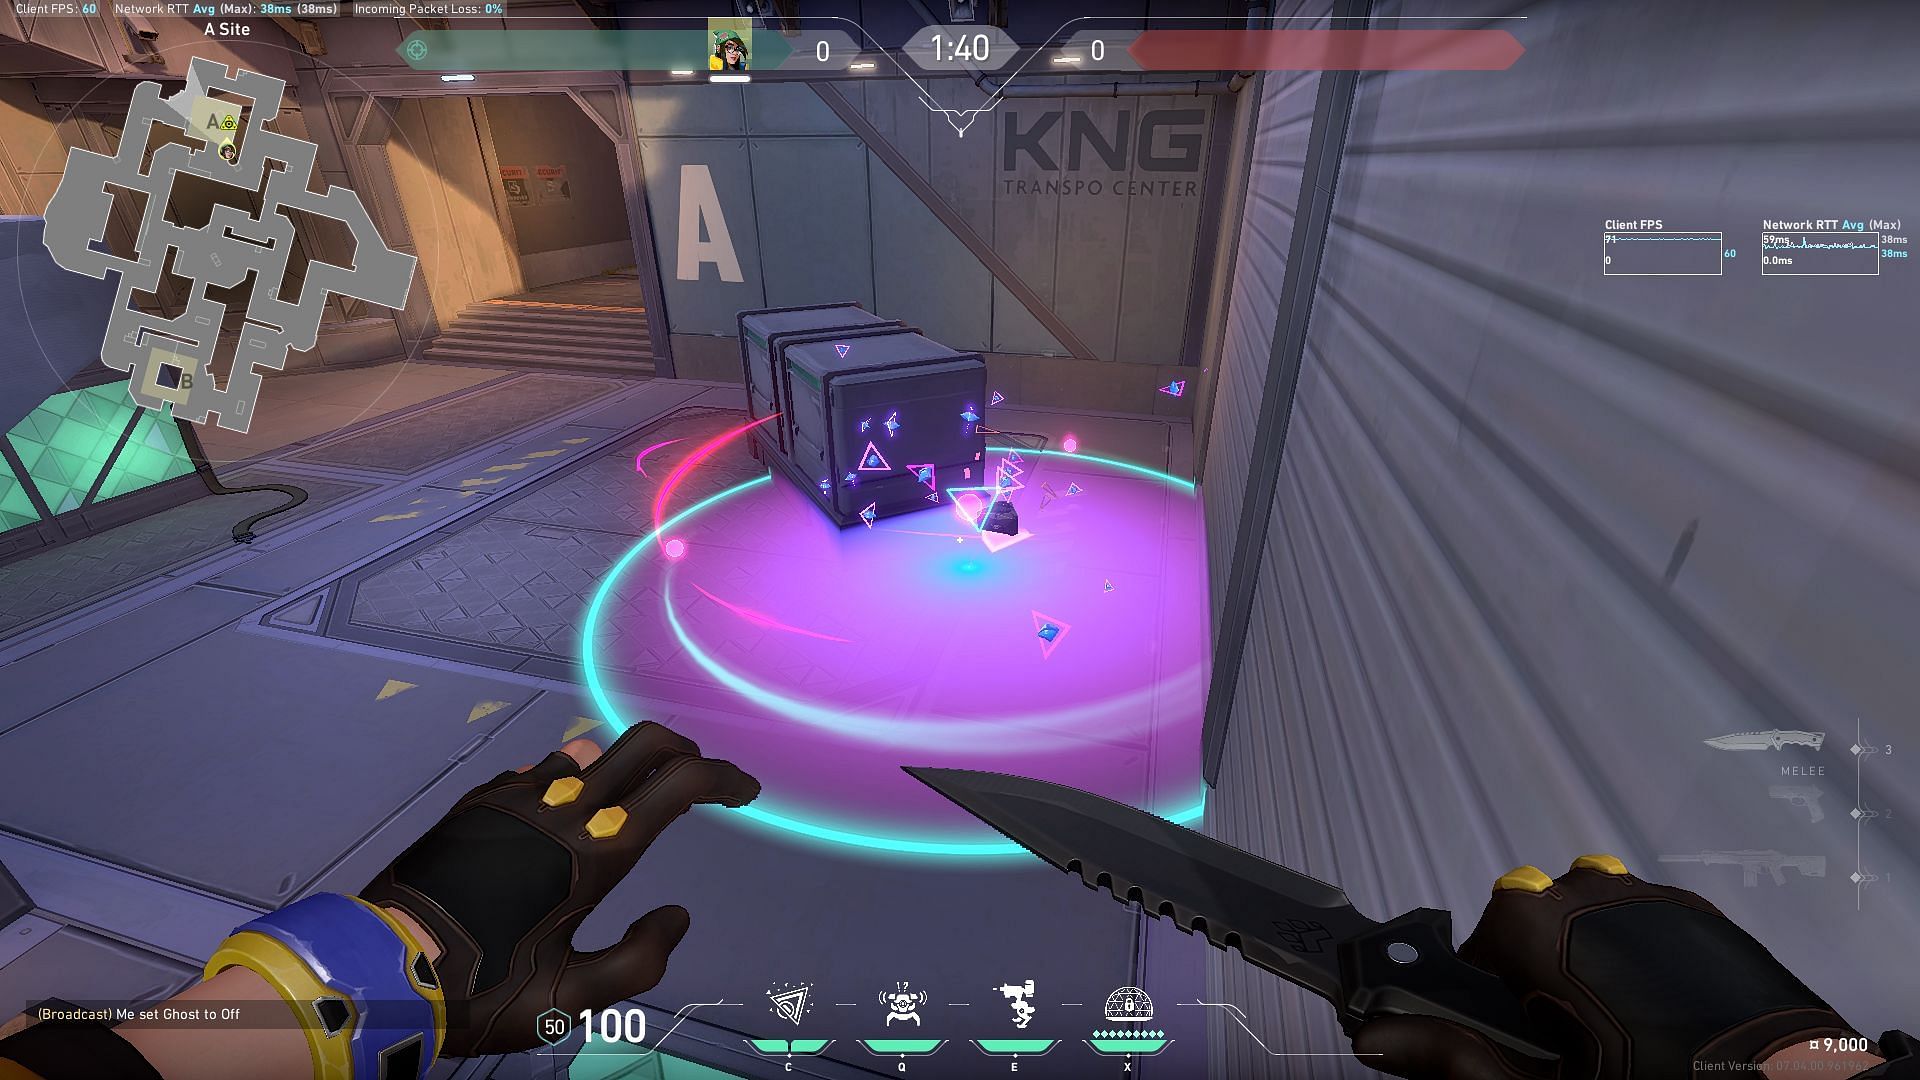
This lineup covers the safe plant spot behind the oblique box on the A-Site of Sunet.
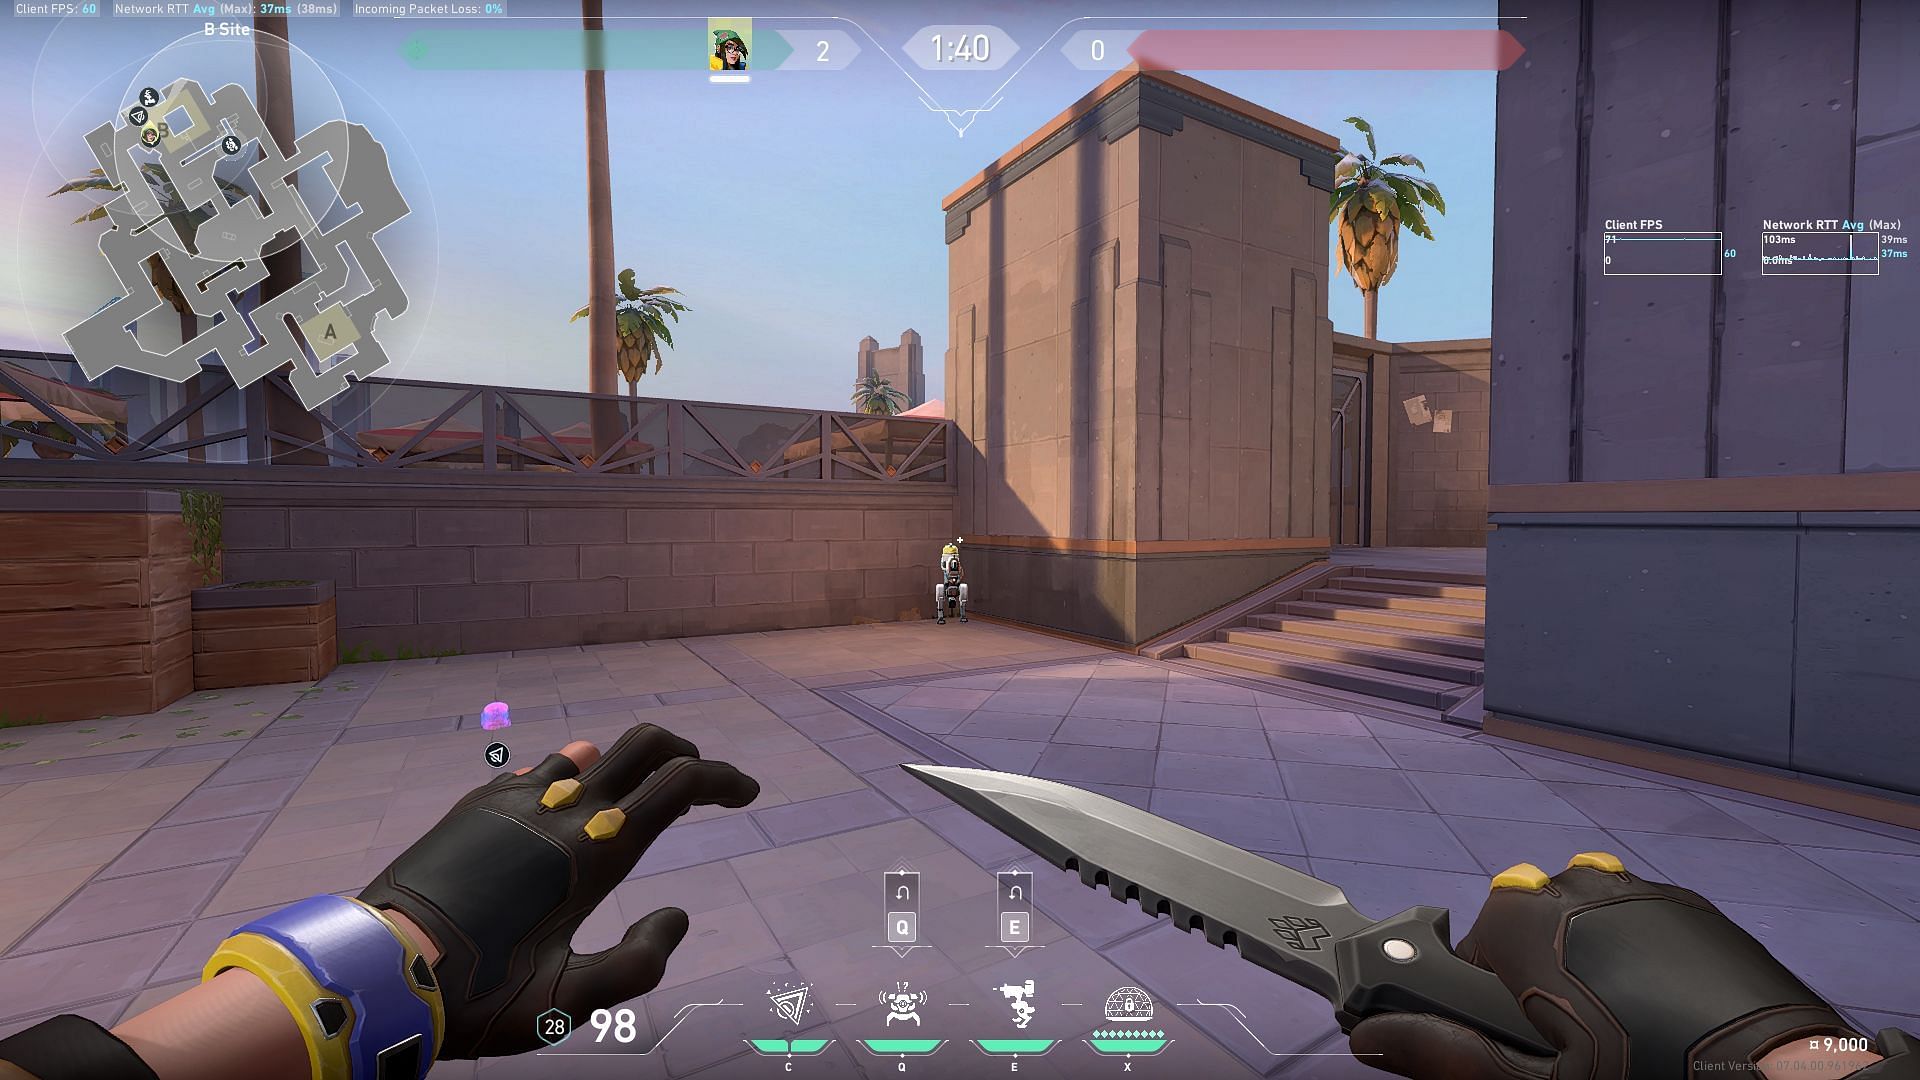
B-Site post-plant Nanoswarm
Lineup
Adjust yourself in the corner, aim at the nook in the building as shown in the image, and jump throw to make the Nanoswarm land in the designated spot.
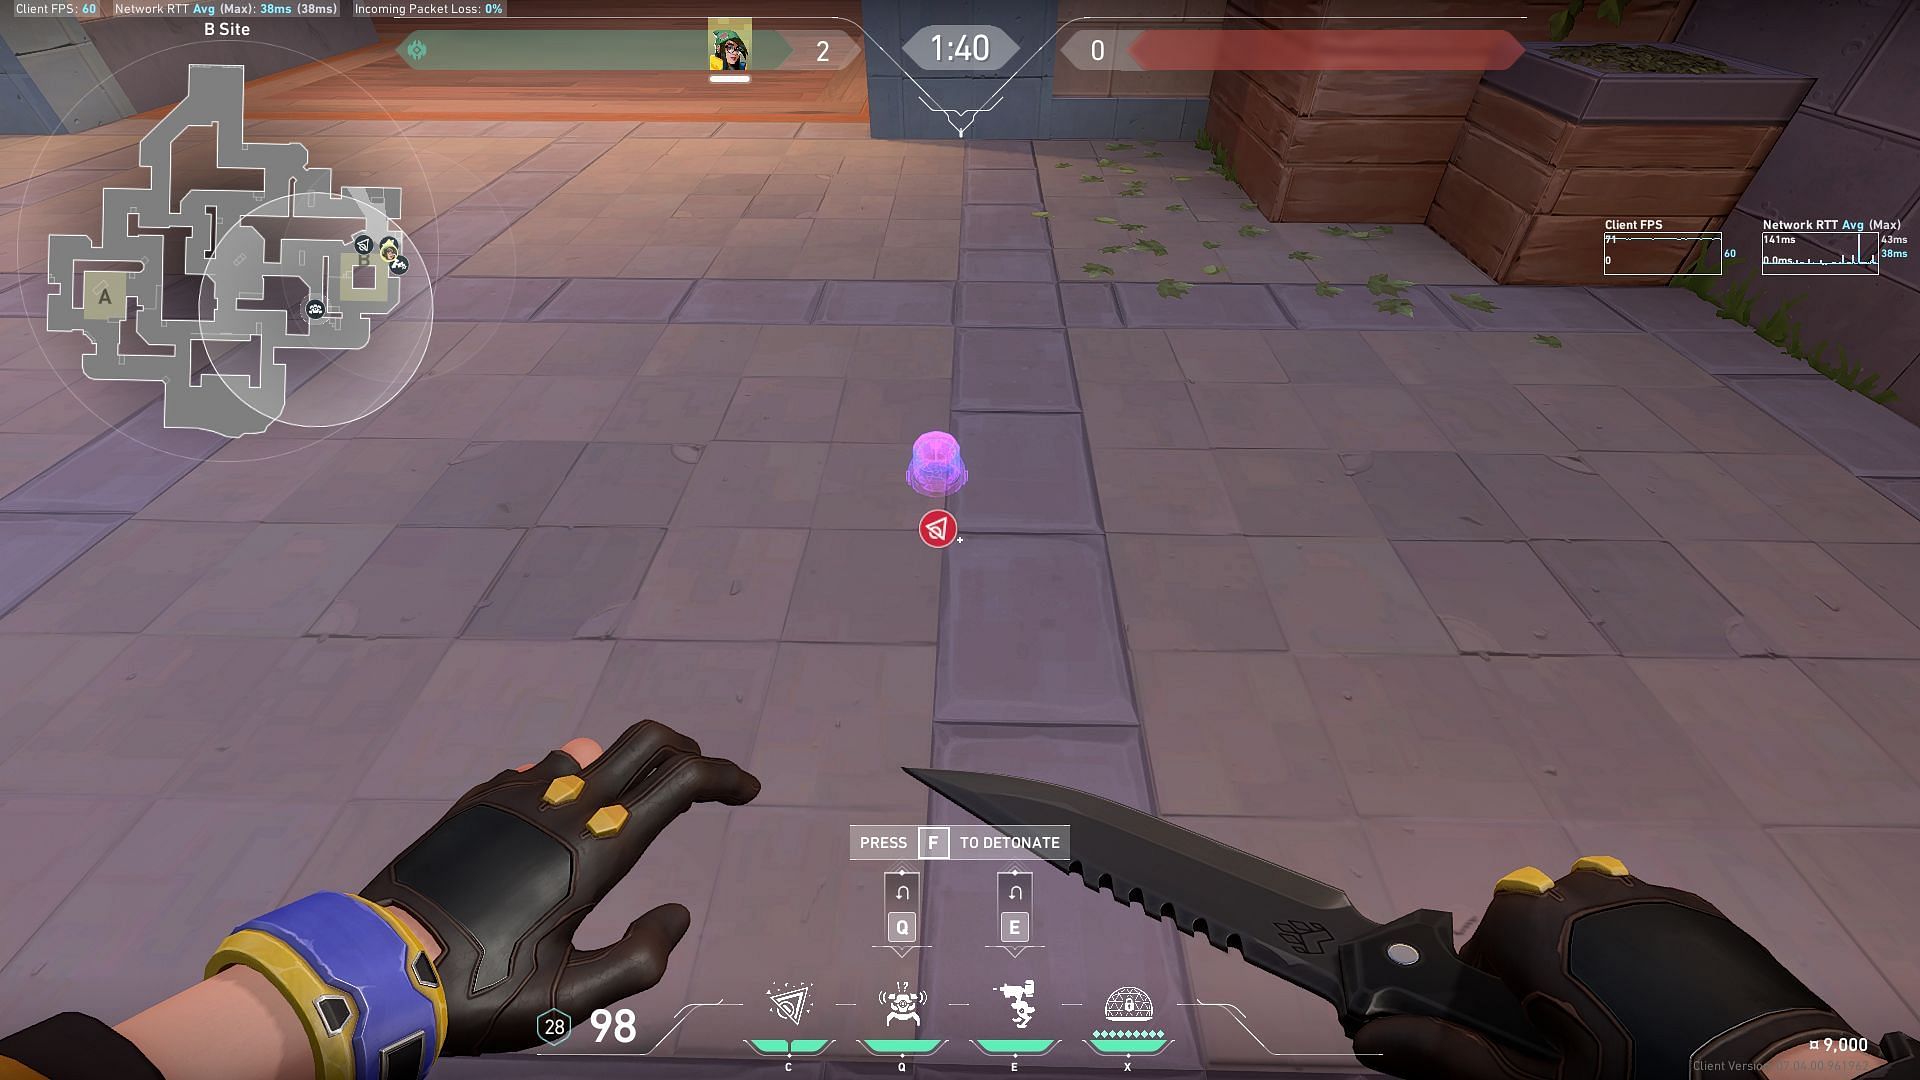
Result
This molly covers the open plant spot that can already be defended from the two entry points of the B-Site.
With these setups and lineups in play, you are all set to play the German Agent on the Valorant's new map, Sunset.