
'%20x='0'%20y='0'%20height='100%25'%20width='100%25'%20%0A%20%20%20%20%20%20%20%20%20%20xlink%3Ahref='data:image/jpg;base64,/9j/2wBDAAYEBQYFBAYGBQYHBwYIChAKCgkJChQODwwQFxQYGBcUFhYaHSUfGhsjHBYWICwgIyYnKSopGR8tMC0oMCUoKSj/2wBDAQcHBwoIChMKChMoGhYaKCgoKCgoKCgoKCgoKCgoKCgoKCgoKCgoKCgoKCgoKCgoKCgoKCgoKCgoKCgoKCgoKCj/wgARCAAHAAoDASIAAhEBAxEB/8QAFQABAQAAAAAAAAAAAAAAAAAABQb/2gAIAQEAAAAArEf/xAAUAQEAAAAAAAAAAAAAAAAAAAAF/9oACAECEAAAAEP/xAAUAQEAAAAAAAAAAAAAAAAAAAAF/9oACAEDEAAAAAv/xAAfEAABBAICAwAAAAAAAAAAAAABAgMFEQYSABVBcuL/2gAIAQEAAT8AkZvKe8iGnp4MIeD2ymWhpskBQsV5sjipTIbNZAa9fnn/xAAYEQACAwAAAAAAAAAAAAAAAAABAgAUMf/aAAgBAgEBPwCojaTP/8QAGBEAAgMAAAAAAAAAAAAAAAAAAQIABDH/2gAIAQMBAT8Aa664BP/Z'%3E%3C/image%3E%3C/svg%3E)
Valorant has emerged as one of the most successful first-person shooters in modern gaming. Its competitive scene is thriving, and players are always looking for ways to outsmart one another in the game. Players who often experiment with lineups have discovered a variety of Agents that can be used to safely take down enemies.
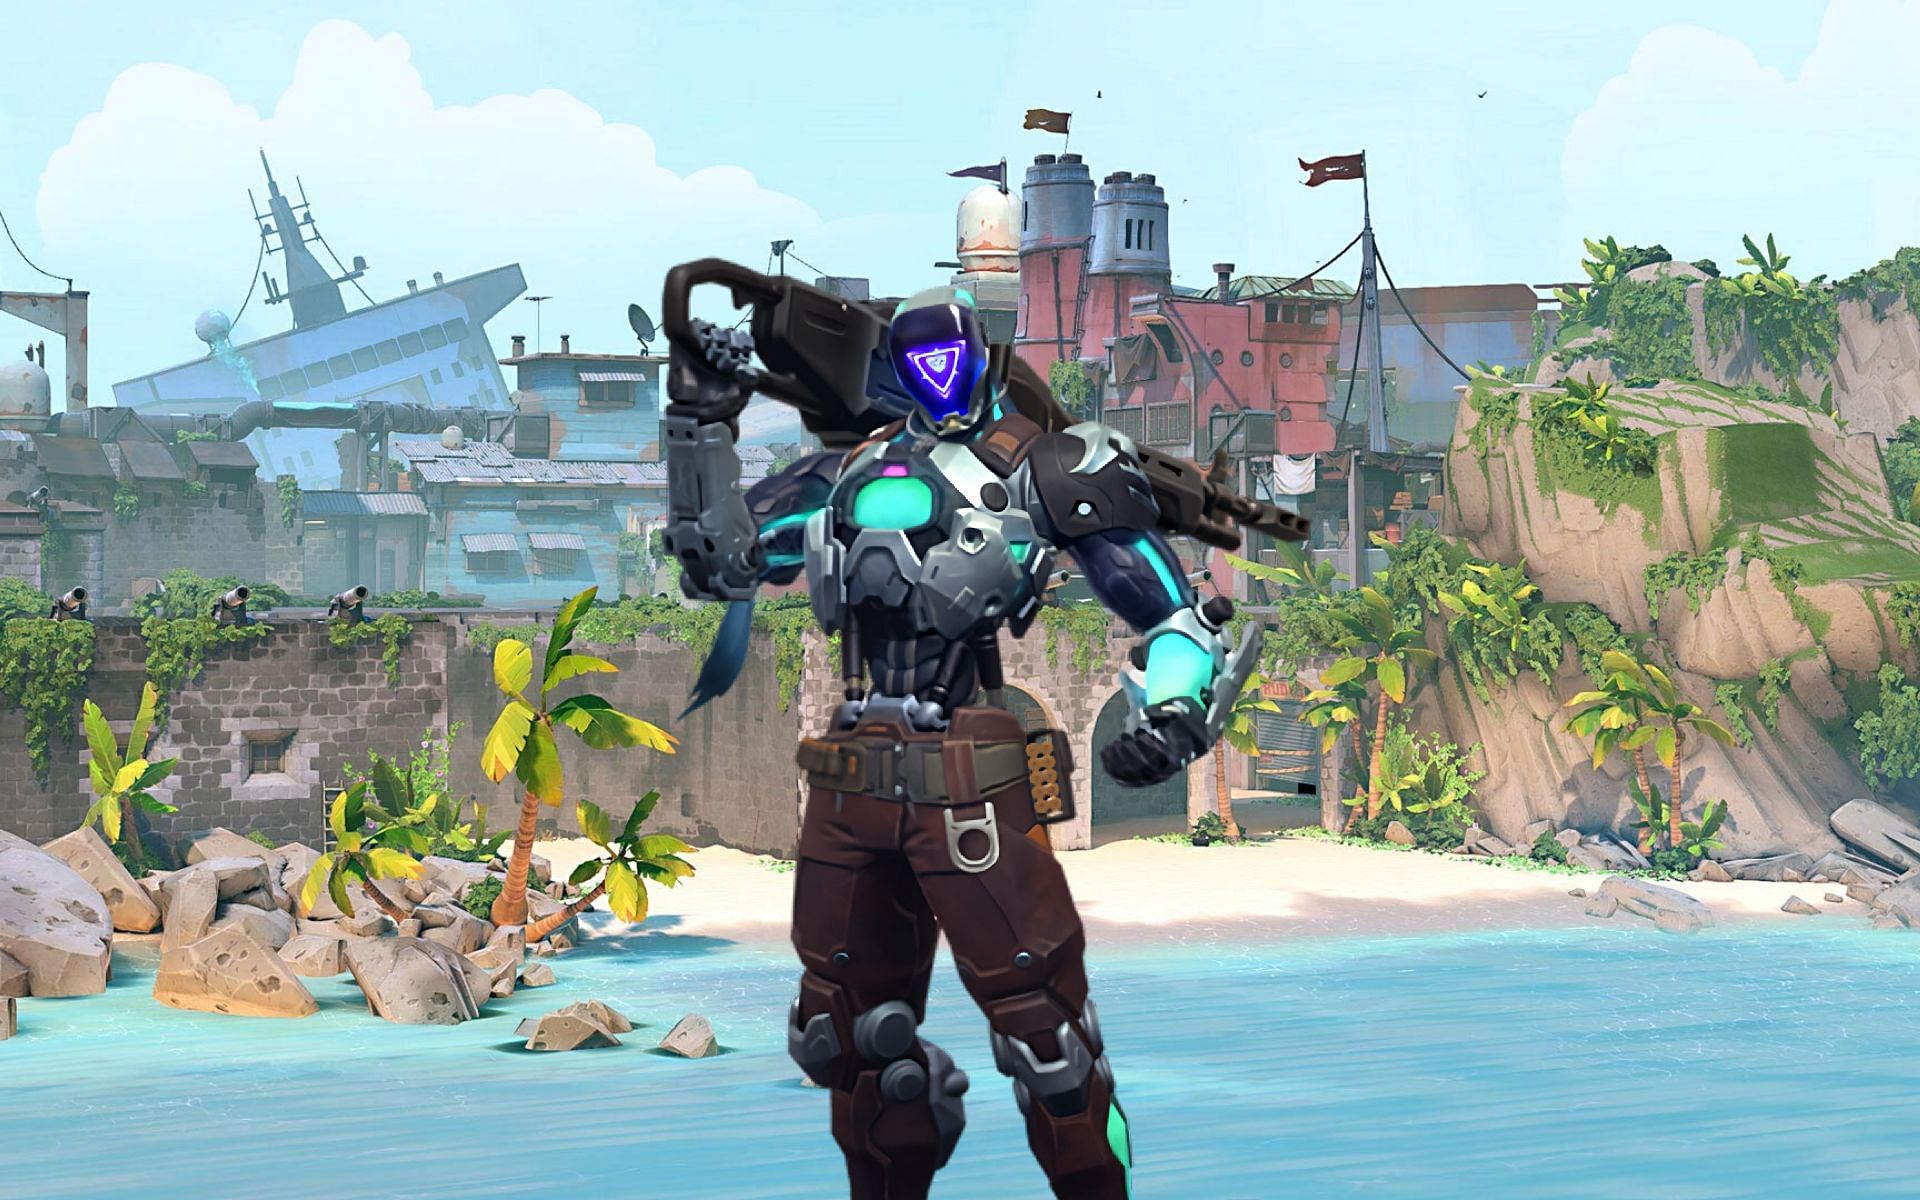
Kay/O is an Initiator Agent in Valorant. His toolkit features abilities that are effective in detecting, disorienting, and disabling enemies. He has a powerful grenade ability that can deal massive damage to enemies while also forcing them out of their hiding spots.
Breeze is a gigantic map with multiple low-rise structures, enabling players to set up lineups from safe spaces and gain an advantage. Kay/O is a great Agent for this map.
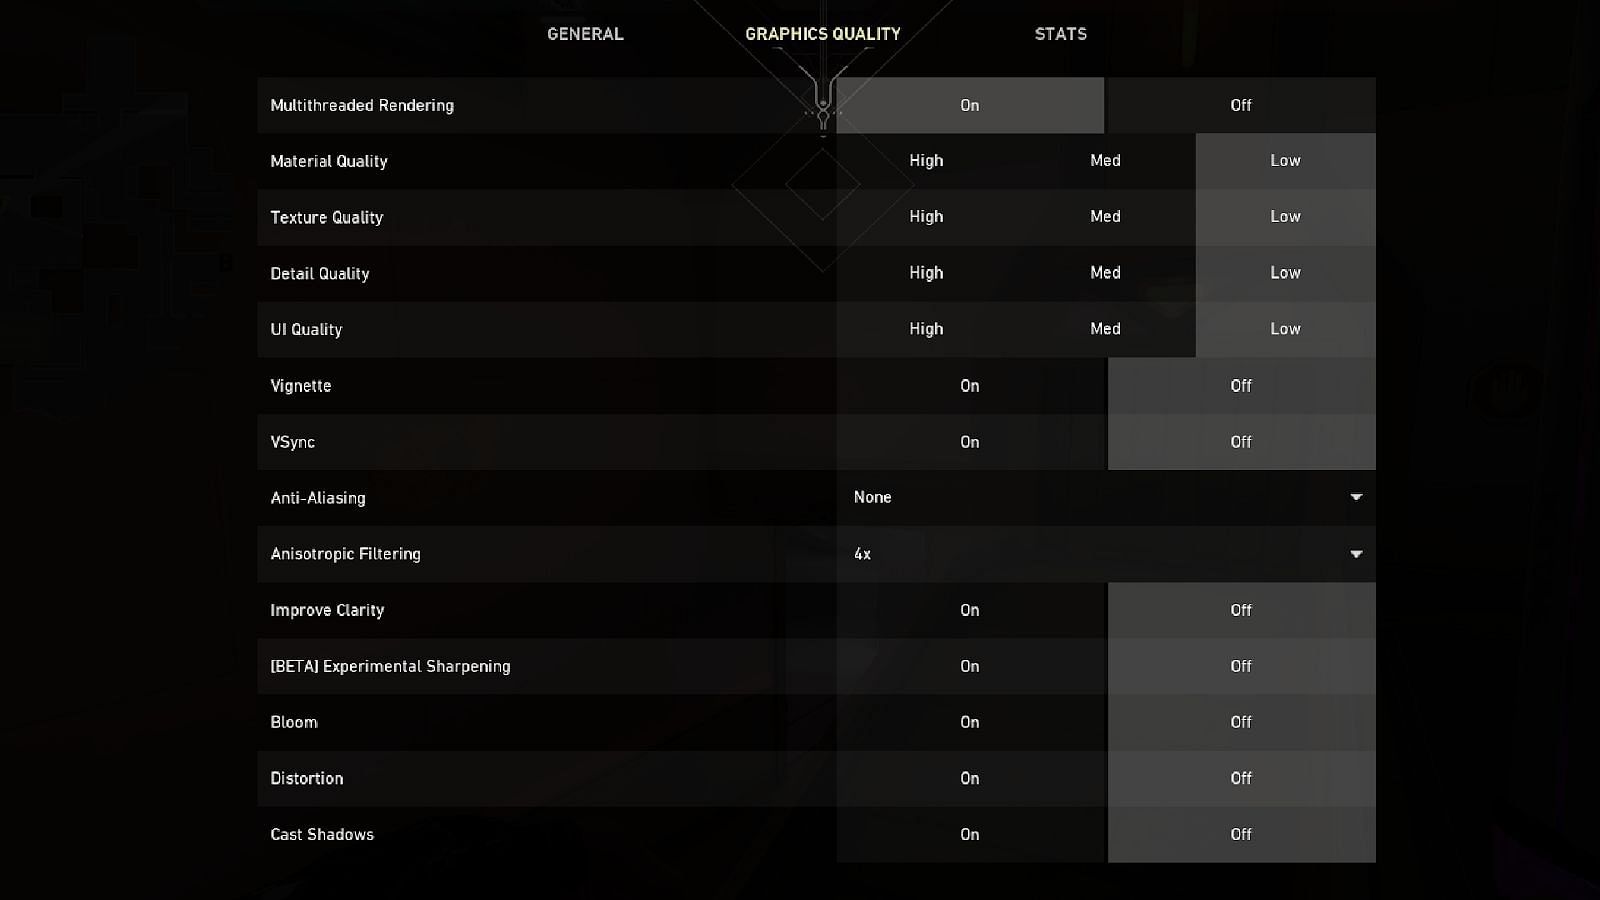
Note: This article is subjective and solely reflects the author's opinions. These lineups were performed in LOW graphics settings.
Defender Side Arches to B-Site Safe Plant and other amazing Nade lineups for Kay/O on Valorant's Breeze
1) B-Main Wooden Boxes to B-Site Safe Plant
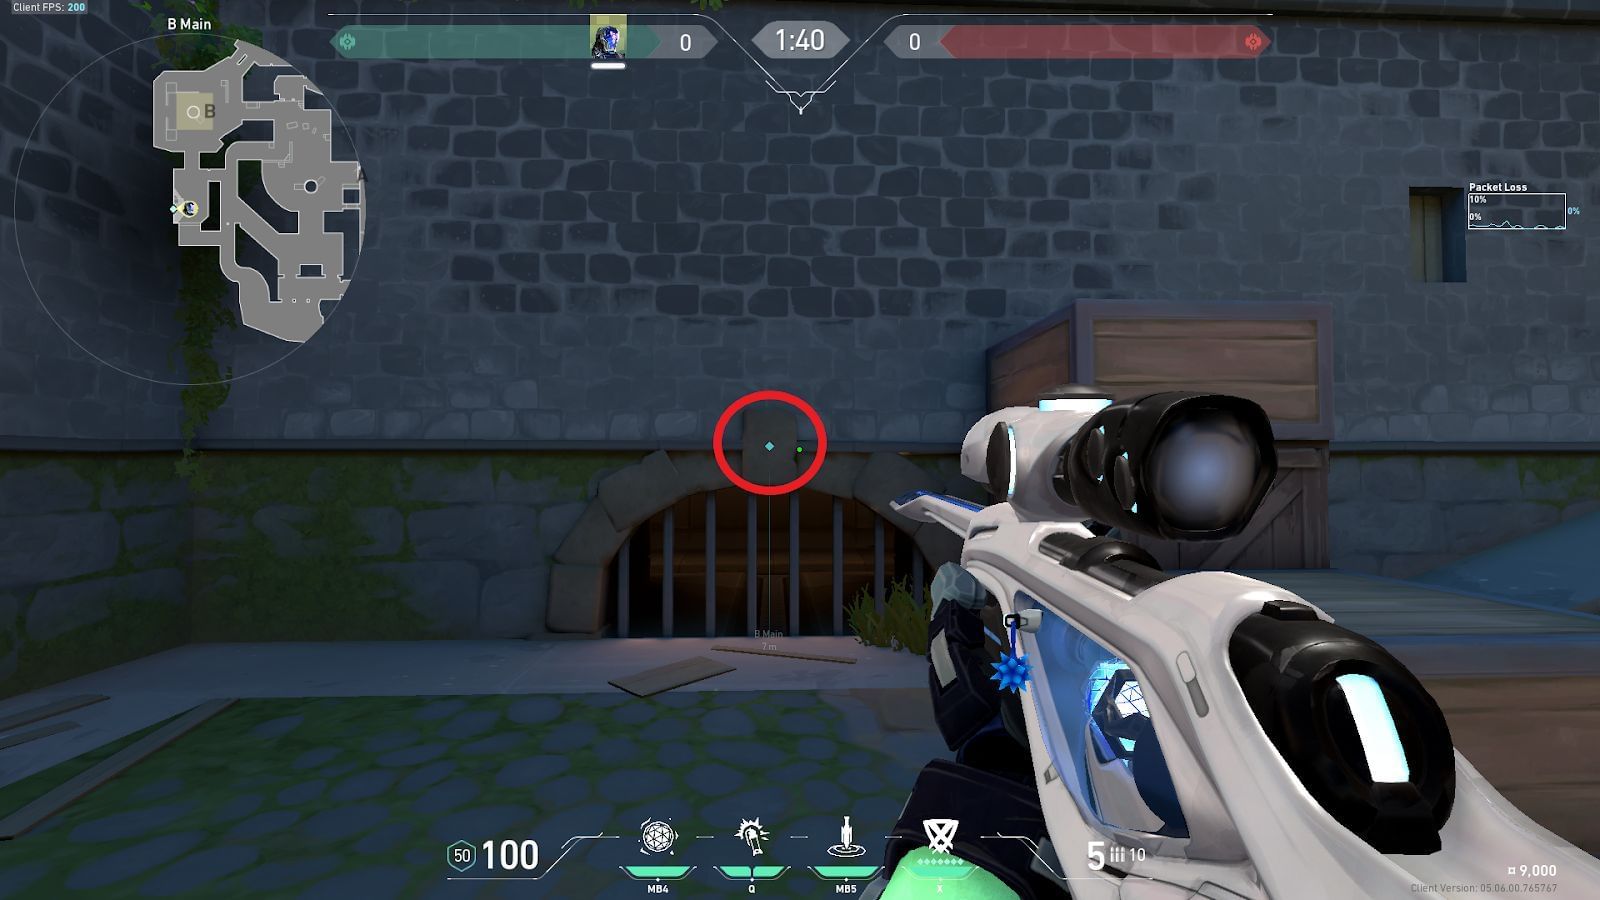
Stand directly in front of the marked spot and hug the wall.
Look towards the B-Site and place the crosshair (indicated by a circle) and perform a simple left-click throw.

The nade will directly land in the B-Site Safe Plant position. This is a great lineup for post-plant scenarios.
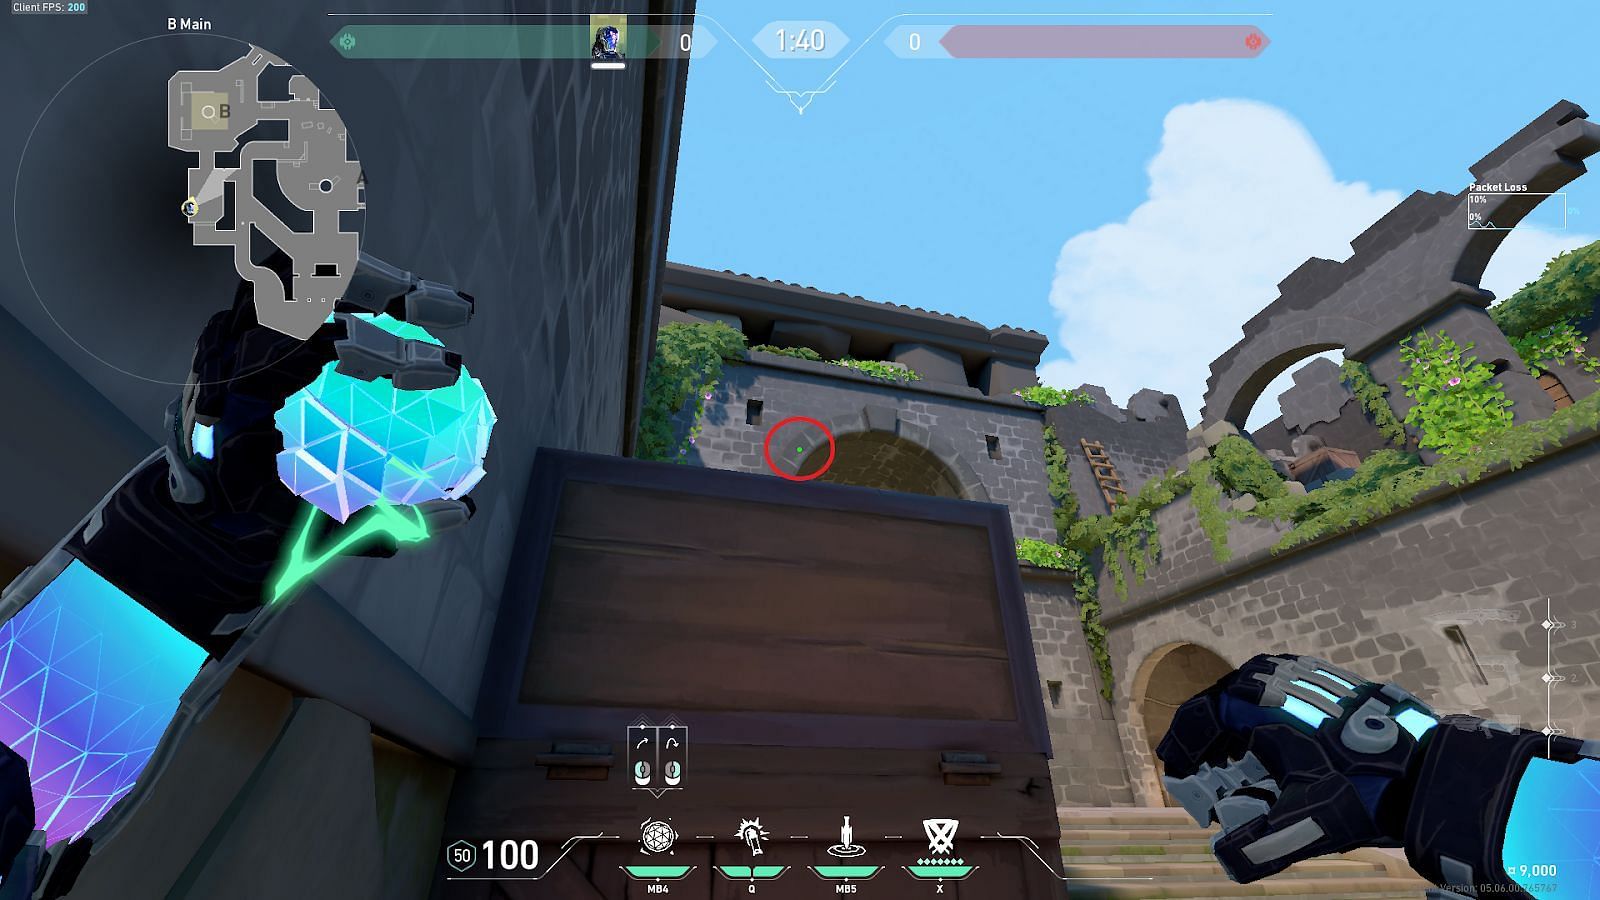
2) Defender Side Arches to B-Site Safe Plant

Position yourself in Defender Side Arches and tuck yourself in the corner between the wooden box and the wall (indicated by a circle).
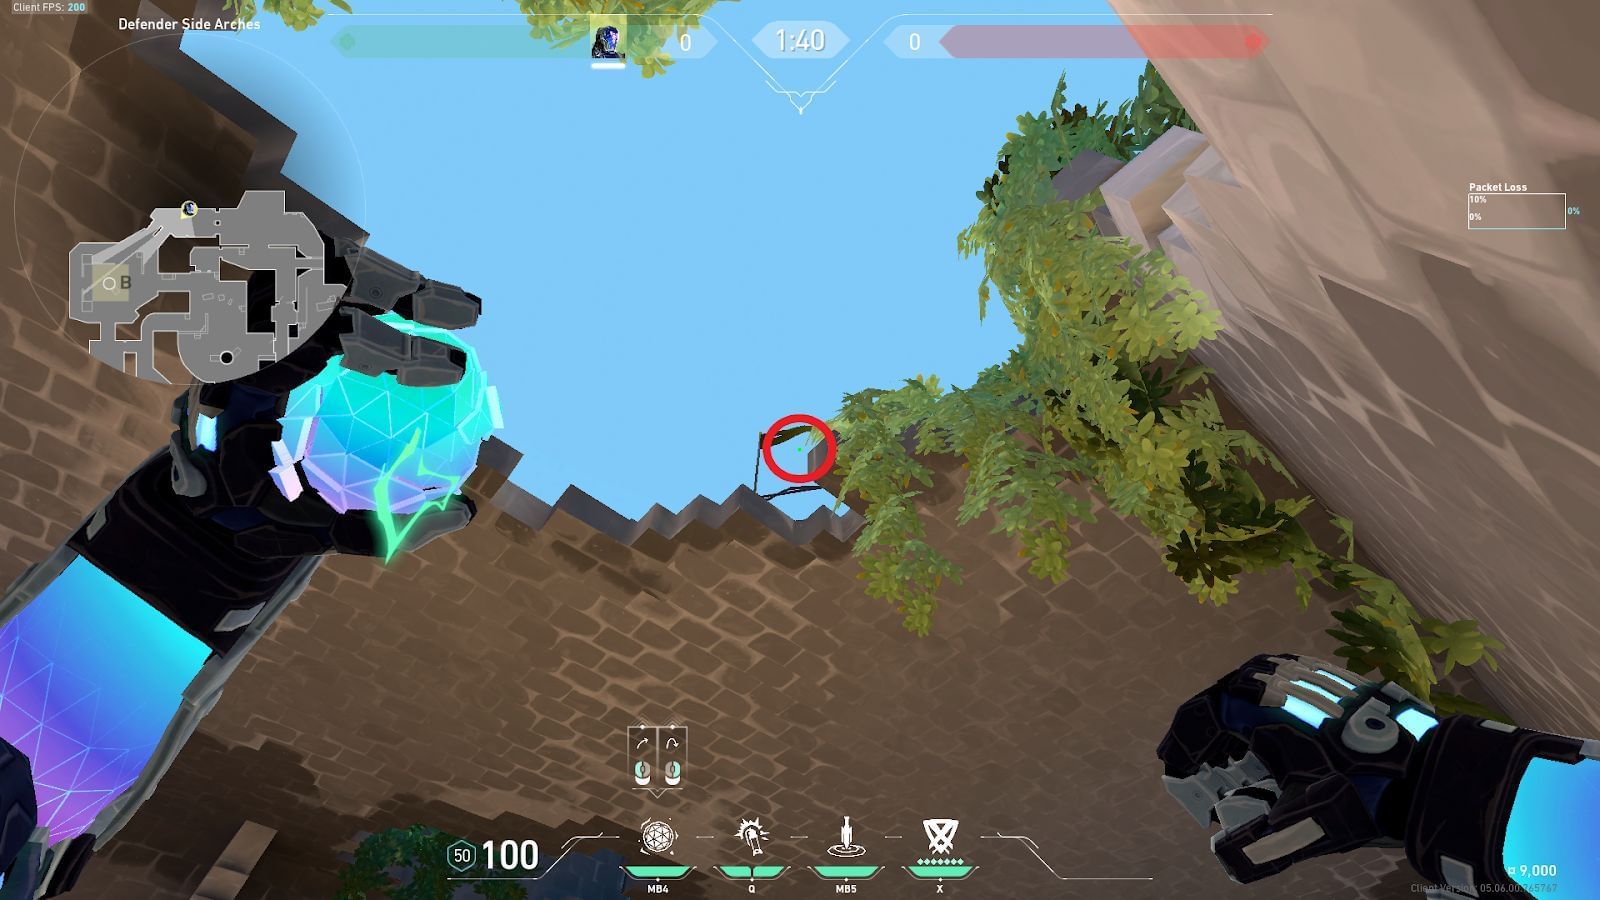
Look above towards B-SIte. Place the crosshair (indicated by a circle) and perform a jump left-click throw. The nade will land directly above the B-Site brick cover, affecting the entire B-Site Default Plant position.

This lineup can be used to deter enemies from planting the spike and delaying their execution.
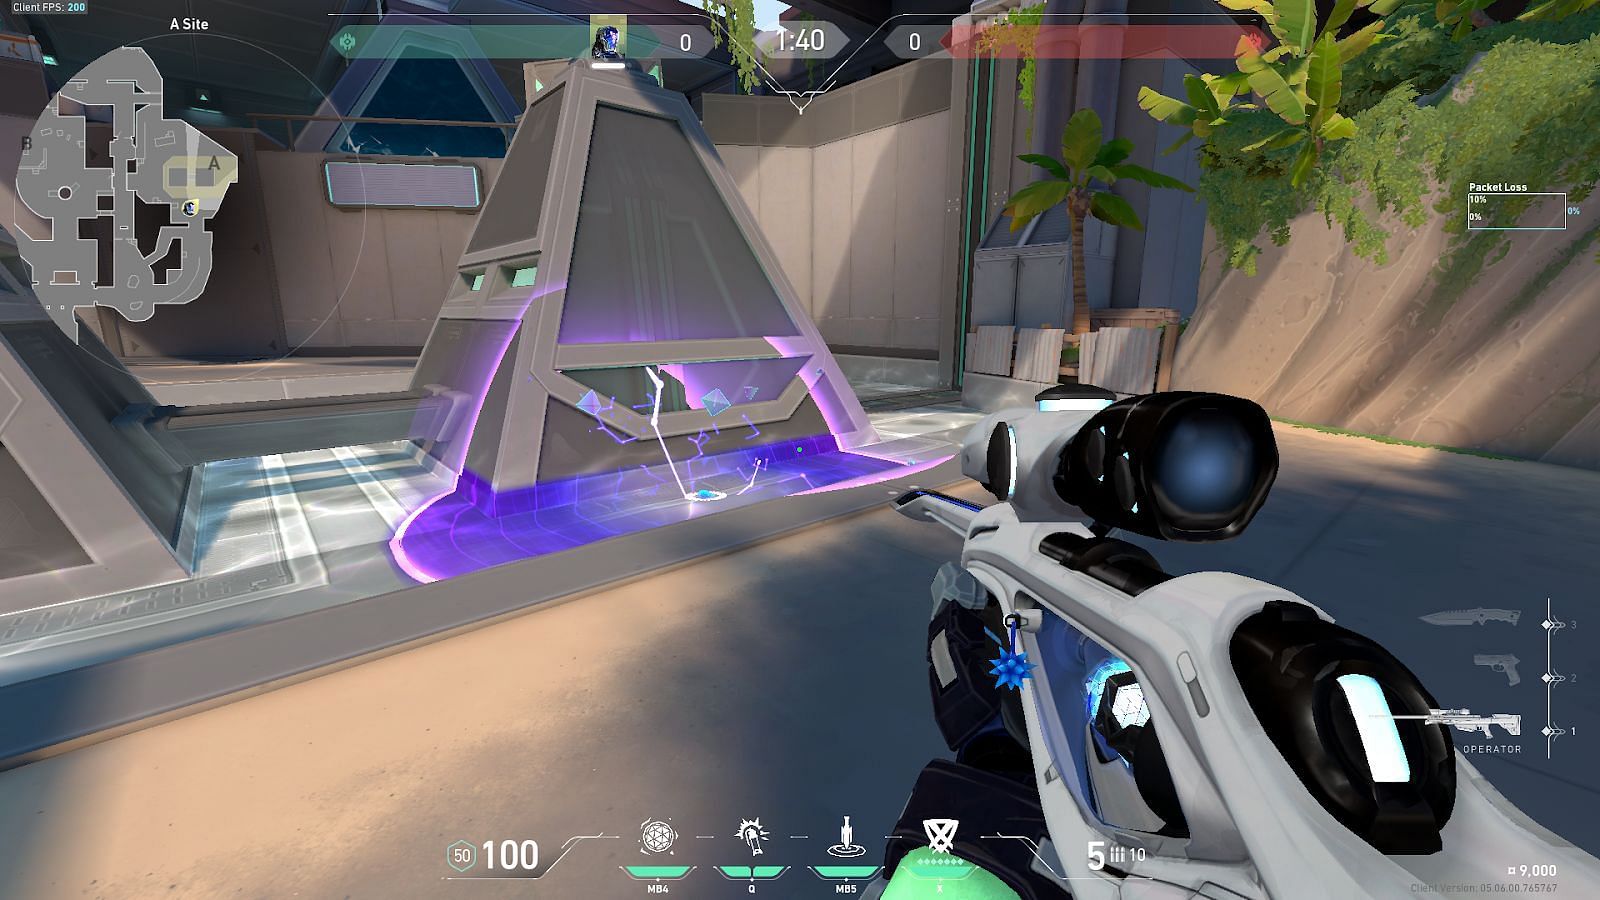
3) A-Lobby to A-Site Default Plant
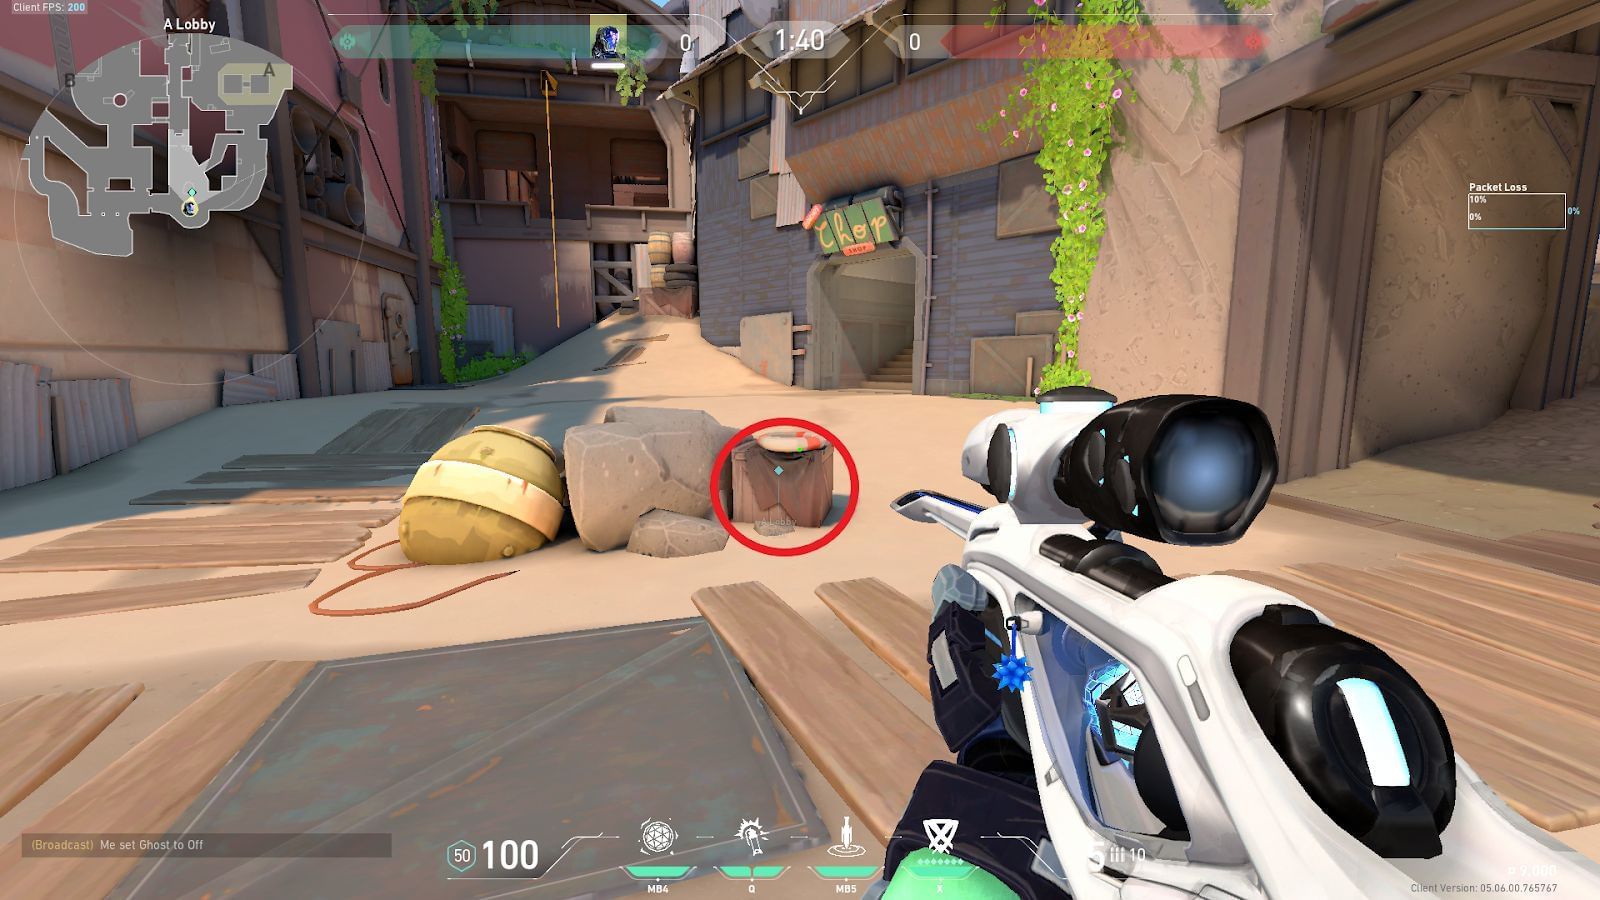
Position yourself in A-Lobby. Tuck yourself between the wooden box and the small rock (indicated by a circle).
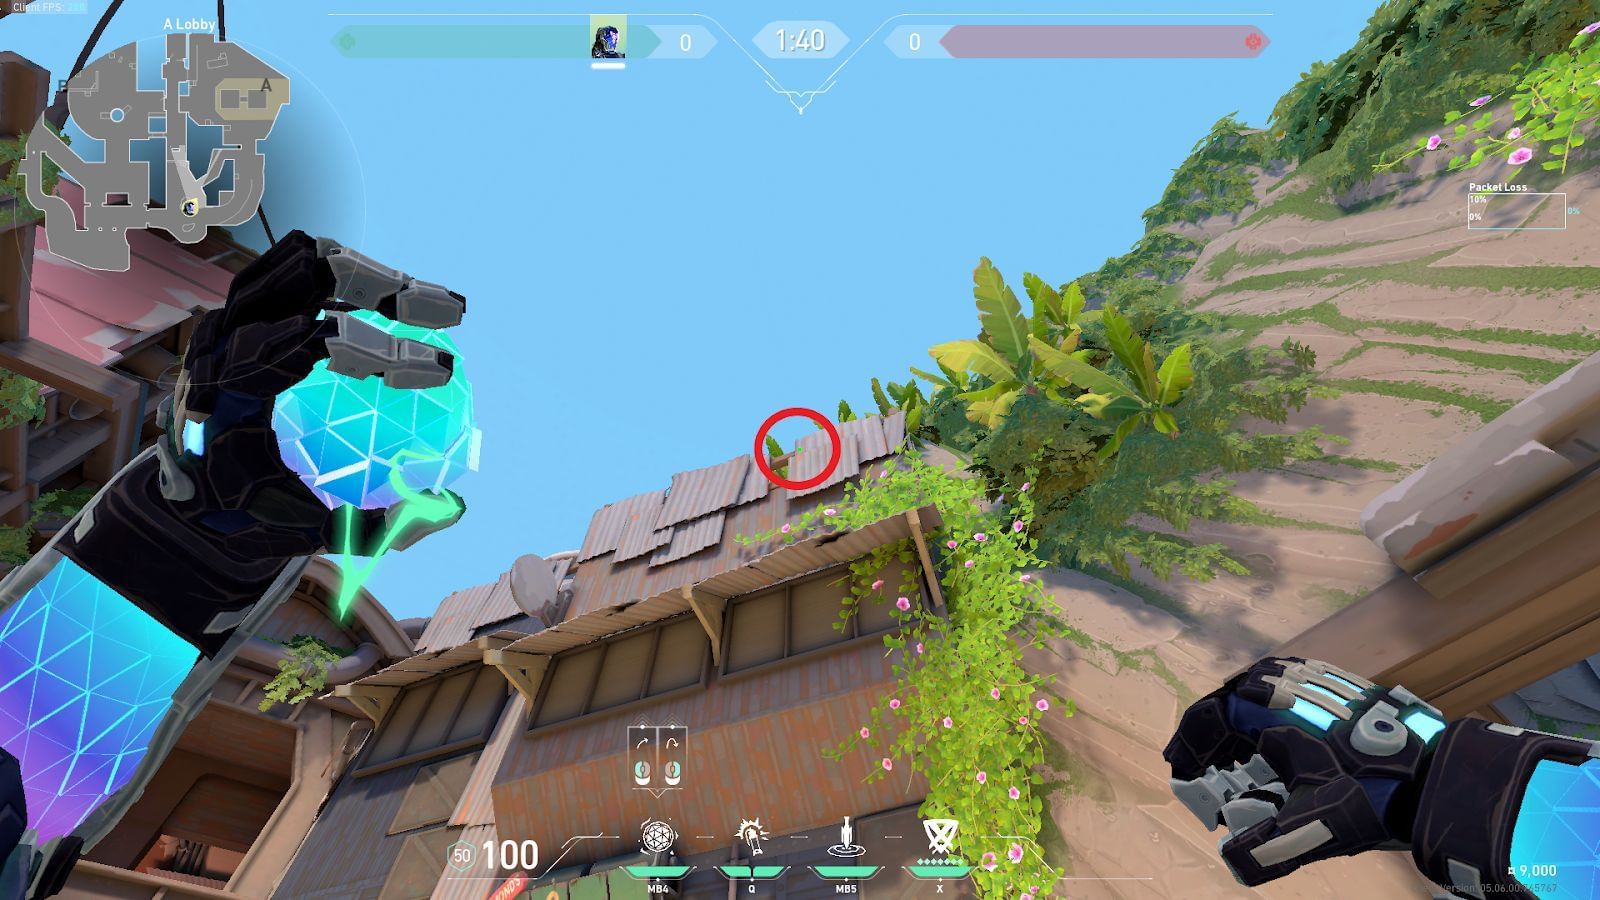
Look towards the A-Site and place the crosshair (indicated by a circle) on the roof ledge and perform a jump left-click throw. The nade will land directly in the A-Site Default Plant position.

This lineup can primarily be used in a post-plant situation. Players can also utilize it with proper flank and support from the team.
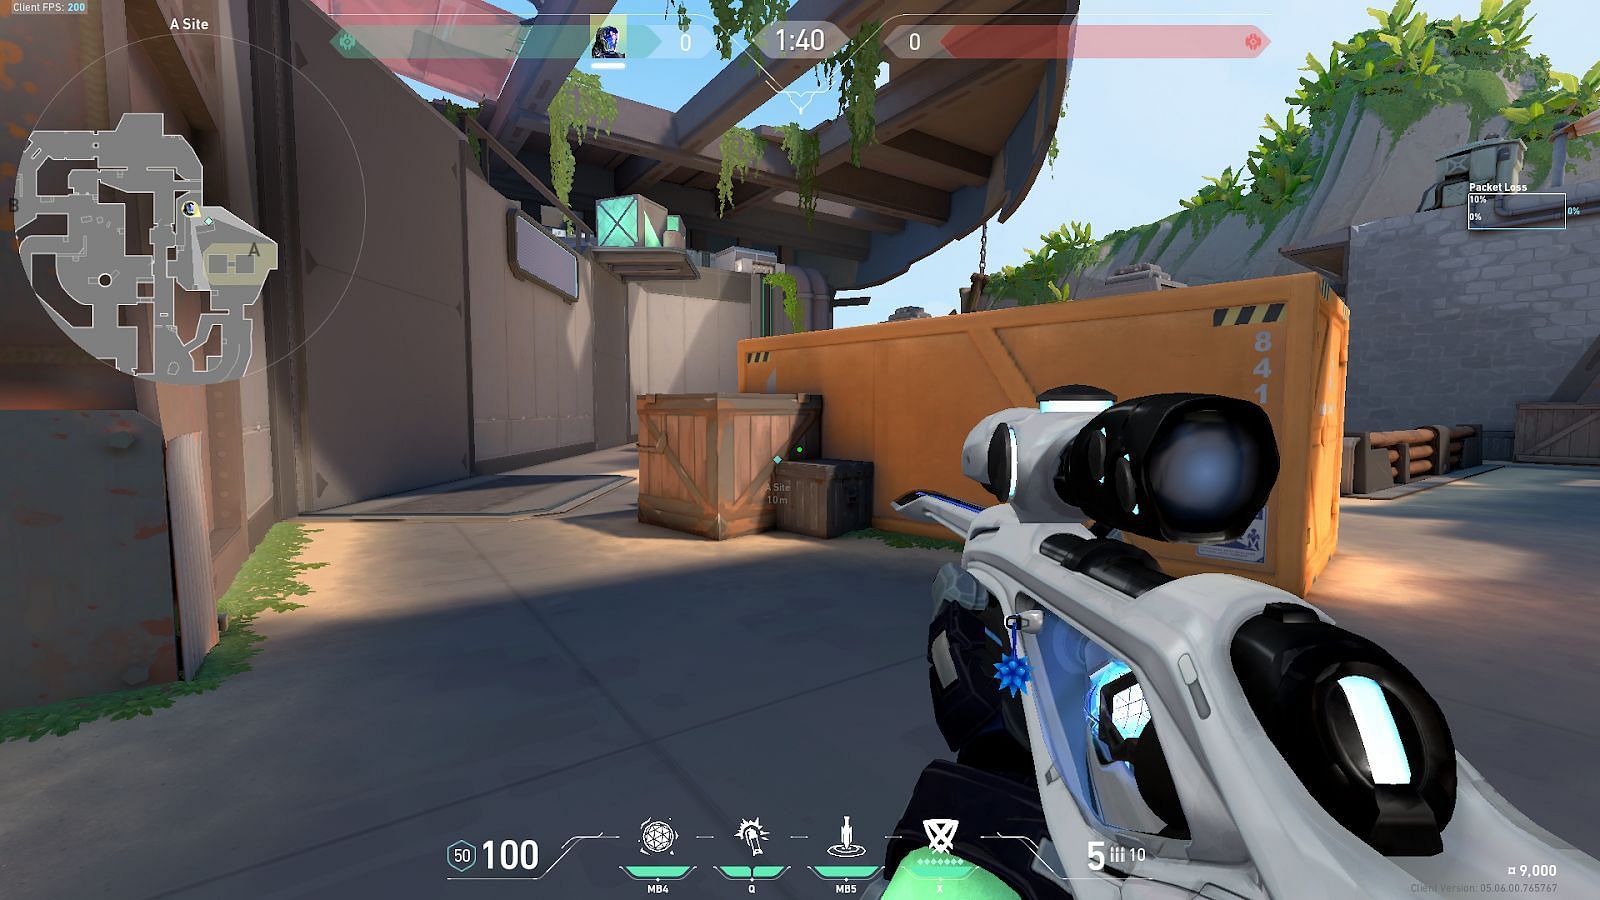
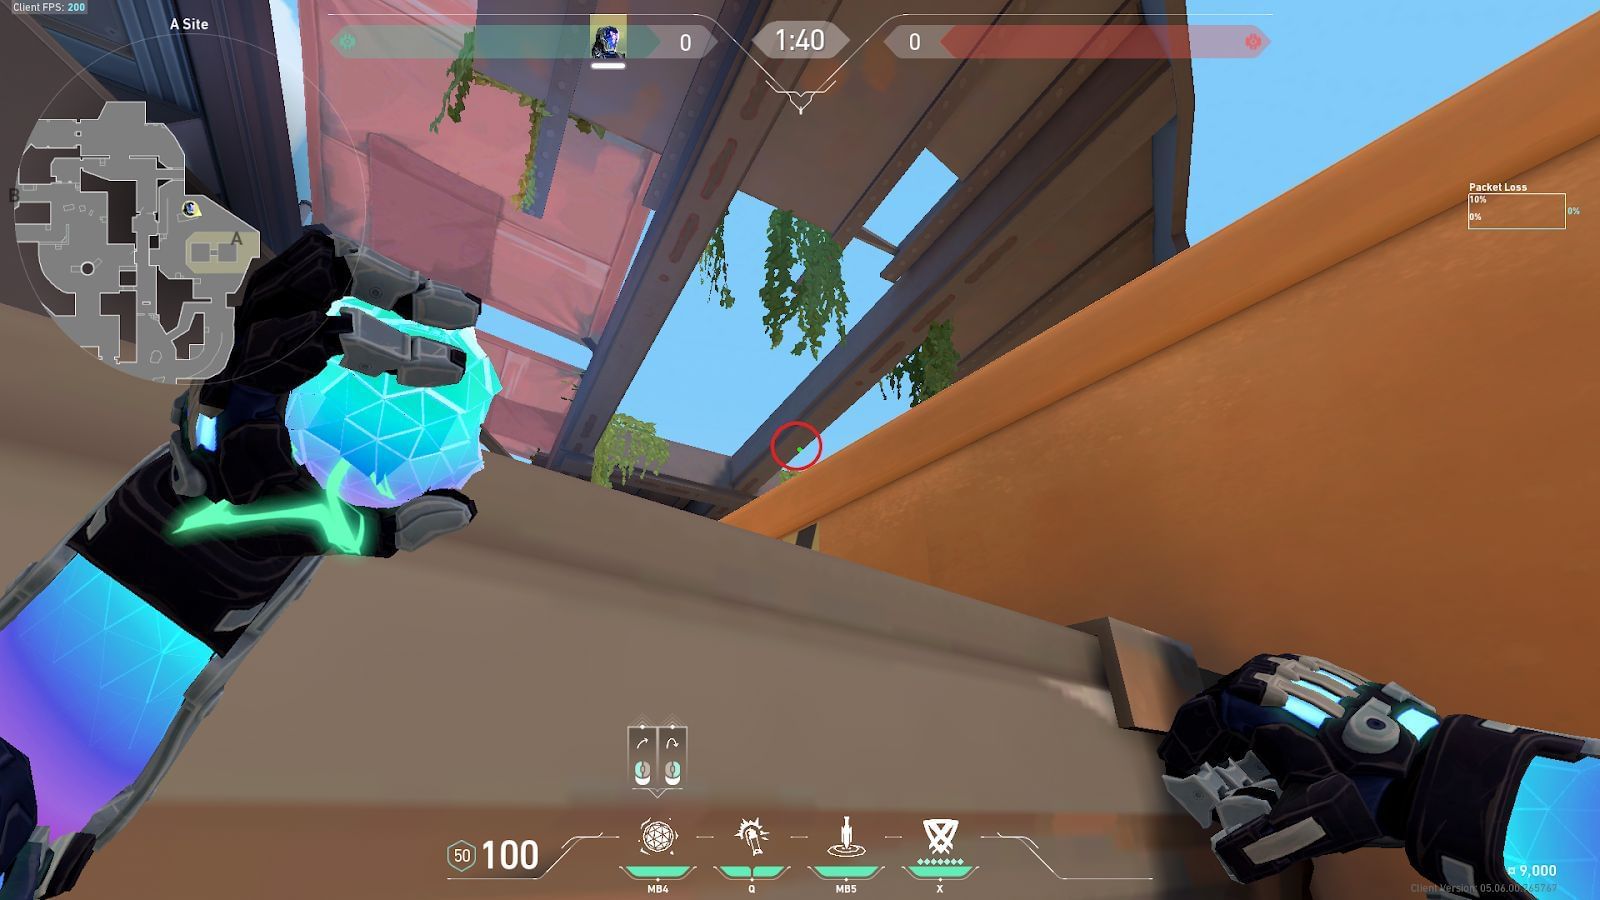
4) A-Chute to A-Site Default Plant

Position yourself in A-Halls and go inside A-Chute.

Align yourself directly in front of the thin border (as pointed out by the crosshair) and hug the wall.
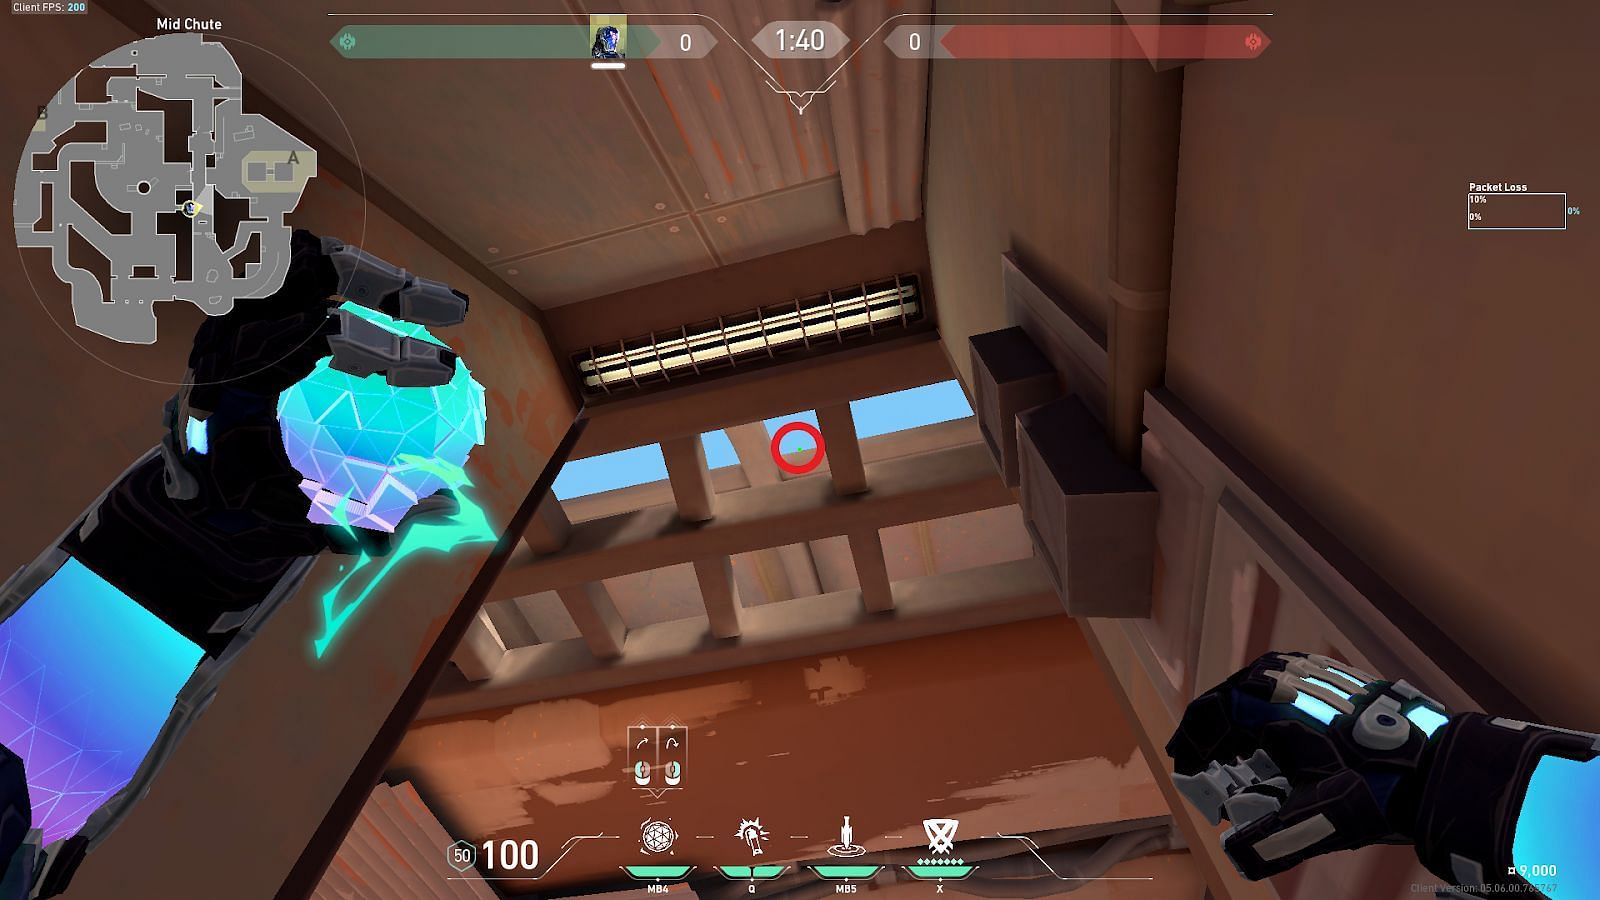
Place the crosshair on the roof ledge and perform a simple left-click throw. The nade will go over the roof and land directly on the A-Site Default Plant position.
This lineup is effective in post-plant scenarios. It can also be used to stop attackers from planting the spike.
5) A-Yellow to A-Site Safe Plant
Position yourself in front of A-Site. Tuck yourself in the corner behind A-Yellow between the large and small wooden boxes.
Place the crosshair on the roof ledge (indicated by a circle) and perform a simple left-click throw. The nade will bounce off the wall and land directly on the A-Site Safe Plant position.
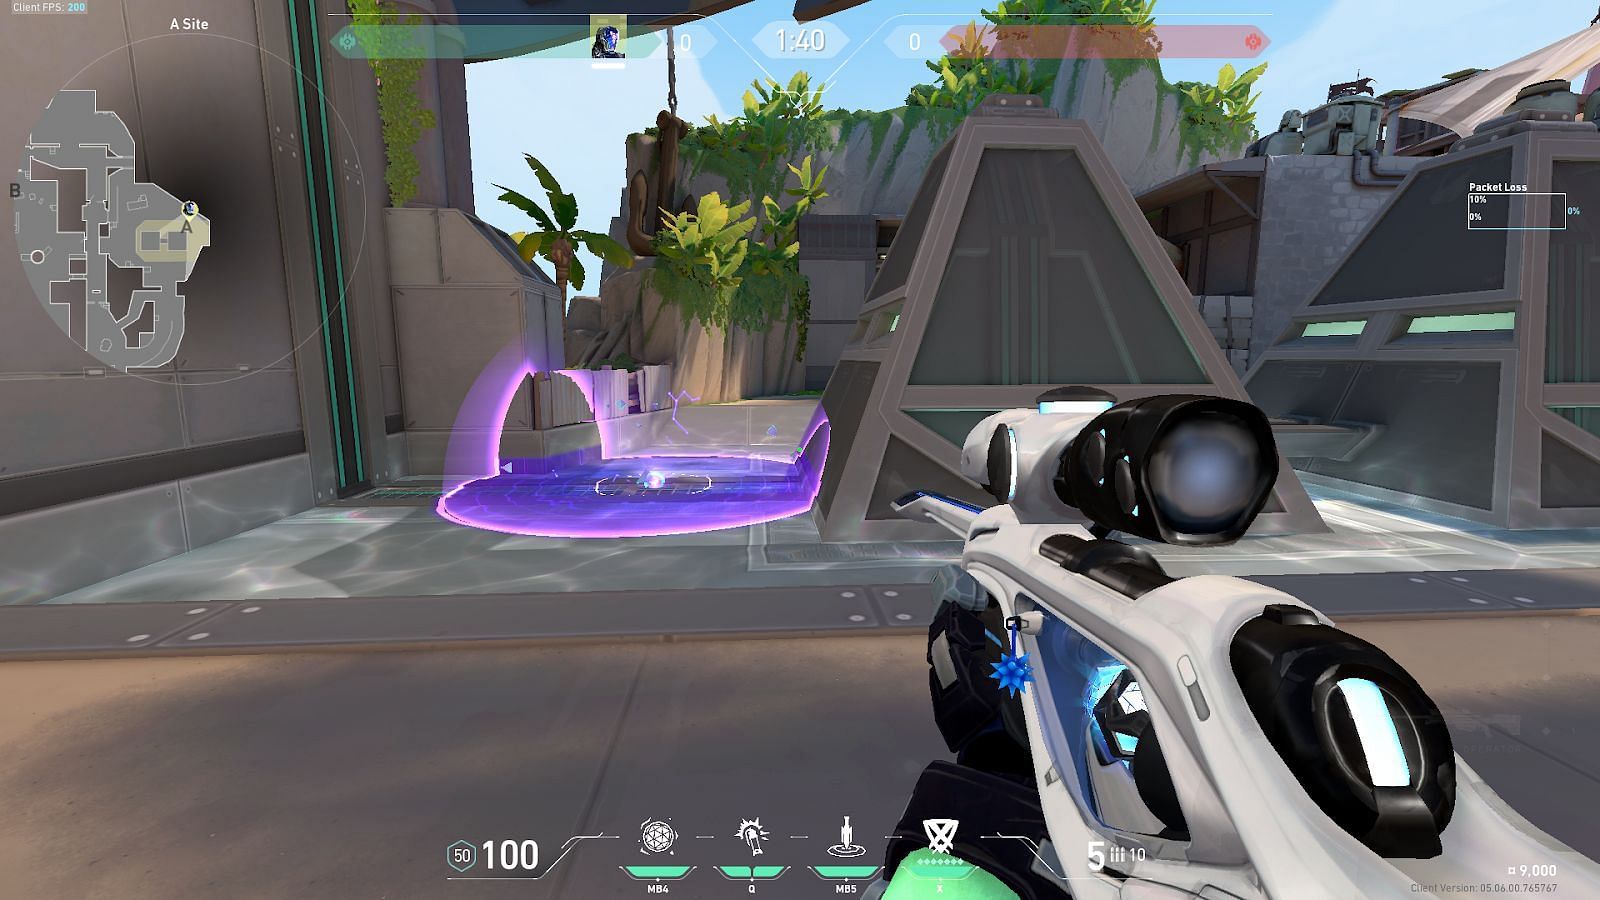
This is a very effective lineup to deny attackers a spike plant, forcing them to either walk deeper towards A-Site or back into cover in A-Cave.
