
'%20x='0'%20y='0'%20height='100%25'%20width='100%25'%20%0A%20%20%20%20%20%20%20%20%20%20xlink%3Ahref='data:image/jpg;base64,/9j/2wBDAAYEBQYFBAYGBQYHBwYIChAKCgkJChQODwwQFxQYGBcUFhYaHSUfGhsjHBYWICwgIyYnKSopGR8tMC0oMCUoKSj/2wBDAQcHBwoIChMKChMoGhYaKCgoKCgoKCgoKCgoKCgoKCgoKCgoKCgoKCgoKCgoKCgoKCgoKCgoKCgoKCgoKCgoKCj/wgARCAAHAAoDASIAAhEBAxEB/8QAFAABAAAAAAAAAAAAAAAAAAAABf/aAAgBAQAAAAAYr//EABQBAQAAAAAAAAAAAAAAAAAAAAT/2gAIAQIQAAAAT//EABQBAQAAAAAAAAAAAAAAAAAAAAT/2gAIAQMQAAAAF//EABwQAAMBAAIDAAAAAAAAAAAAAAECAwUABBIx4v/aAAgBAQABPwDN3e5WeYsNWcc9lc3RZMxXxA9ctqxazlu65JYkkT+ef//EABcRAQADAAAAAAAAAAAAAAAAAAEAAgP/2gAIAQIBAT8AvmE//8QAFxEAAwEAAAAAAAAAAAAAAAAAAAECA//aAAgBAwEBPwCdaZ//2Q=='%3E%3C/image%3E%3C/svg%3E)
Valorant maps have become a playground for players who like to experiment with their Agent abilities. These abilities are mostly deployable and can be remotely thrown to different positions on the map.
Sova is an Initiator Agent who utilizes a variety of abilities to gain information on the enemy's positioning. He has a clear set of tools optimized for clearing corners and forcing enemy players out of their hiding spots or dealing critical damage.
Breeze is a wide-open map that caters to the needs of Sova players, as it is easier to form lineups and utilize them to kill and detect enemies from a safe distance. There are multiple lineups that players can use on this map.

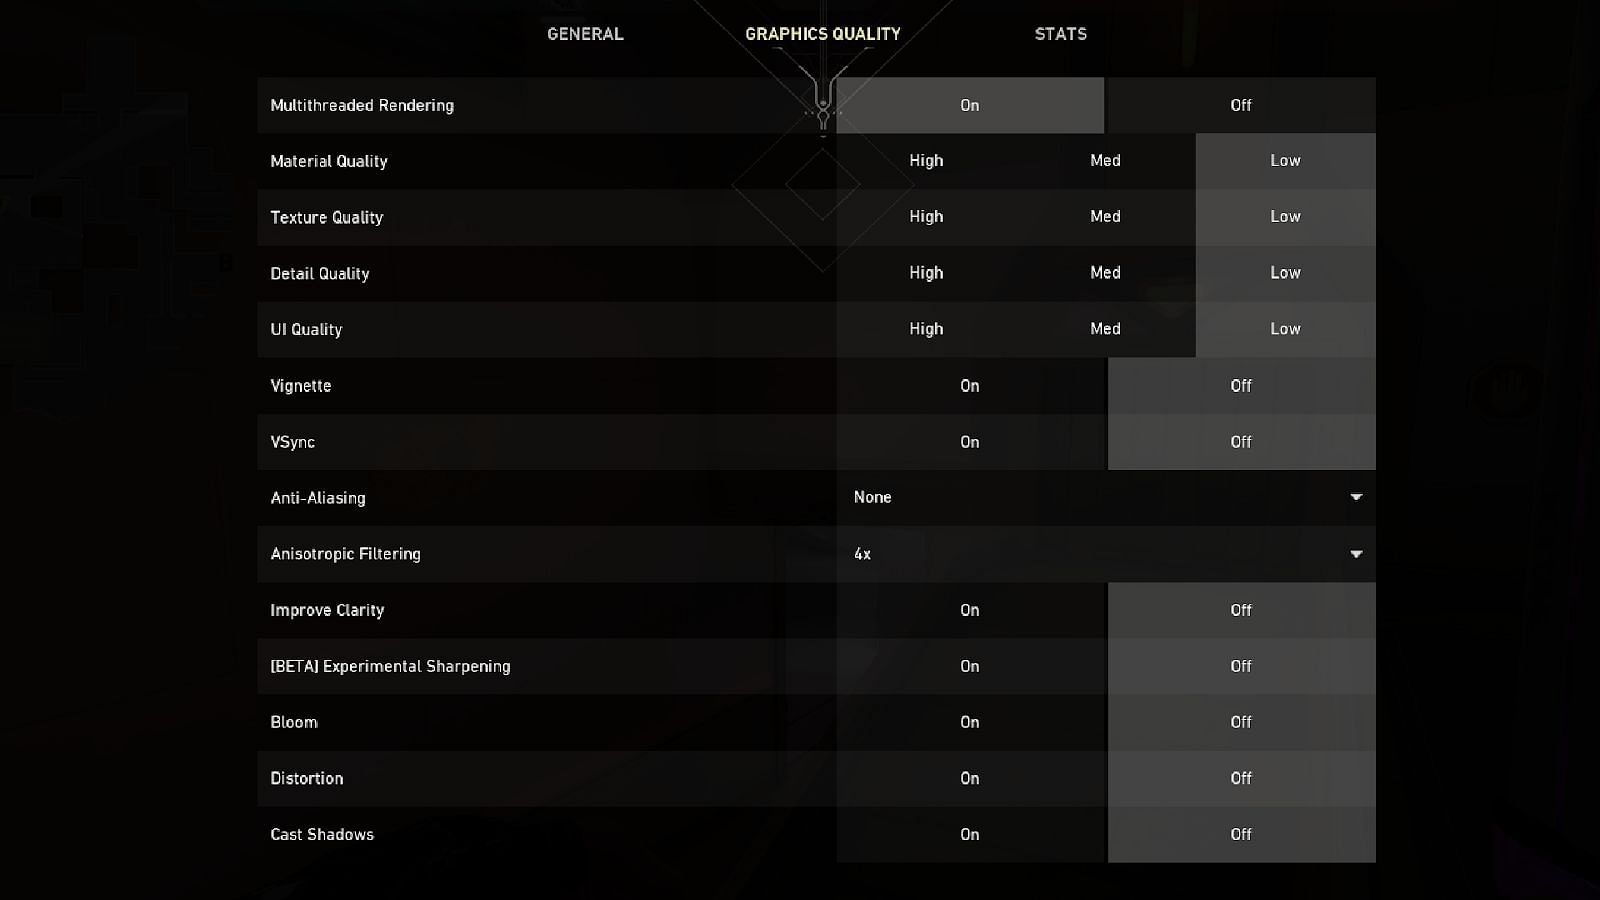
It is important to note that the lineups are performed in LOW graphics settings.
This article will take a look at the most effective Sova lineups on Valorant`s Breeze.
Note: This article is subjective and reflects the author’s opinion.
Valorant Sova`s best and most crucial double Shock Dart lineups for Breeze
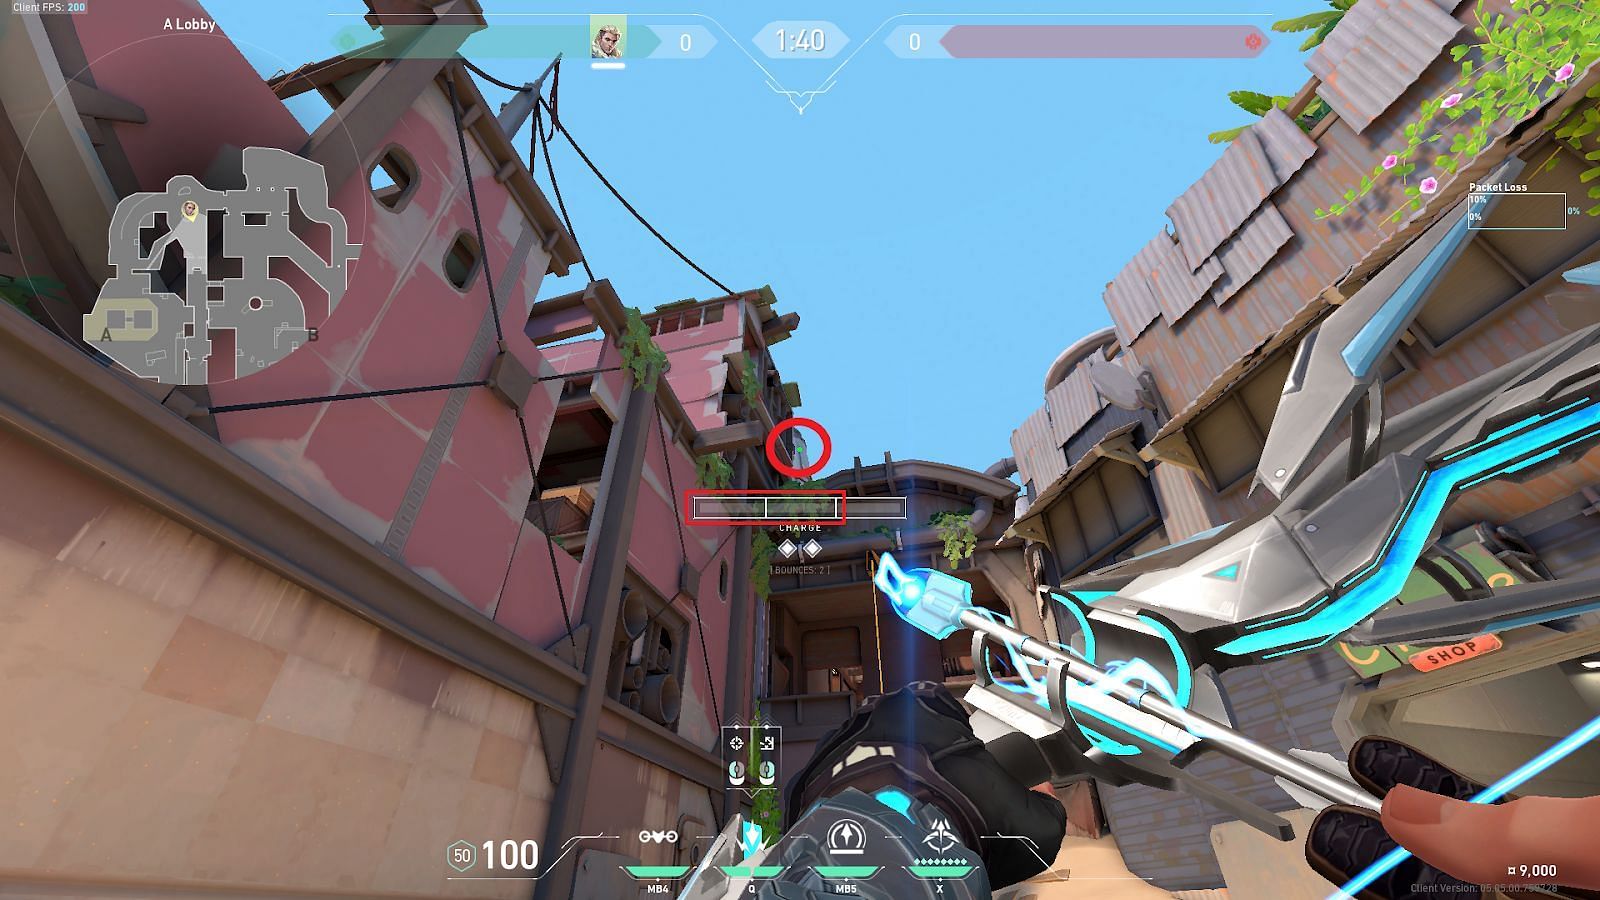
1) A-Lobby to A-Site Wooden Crates
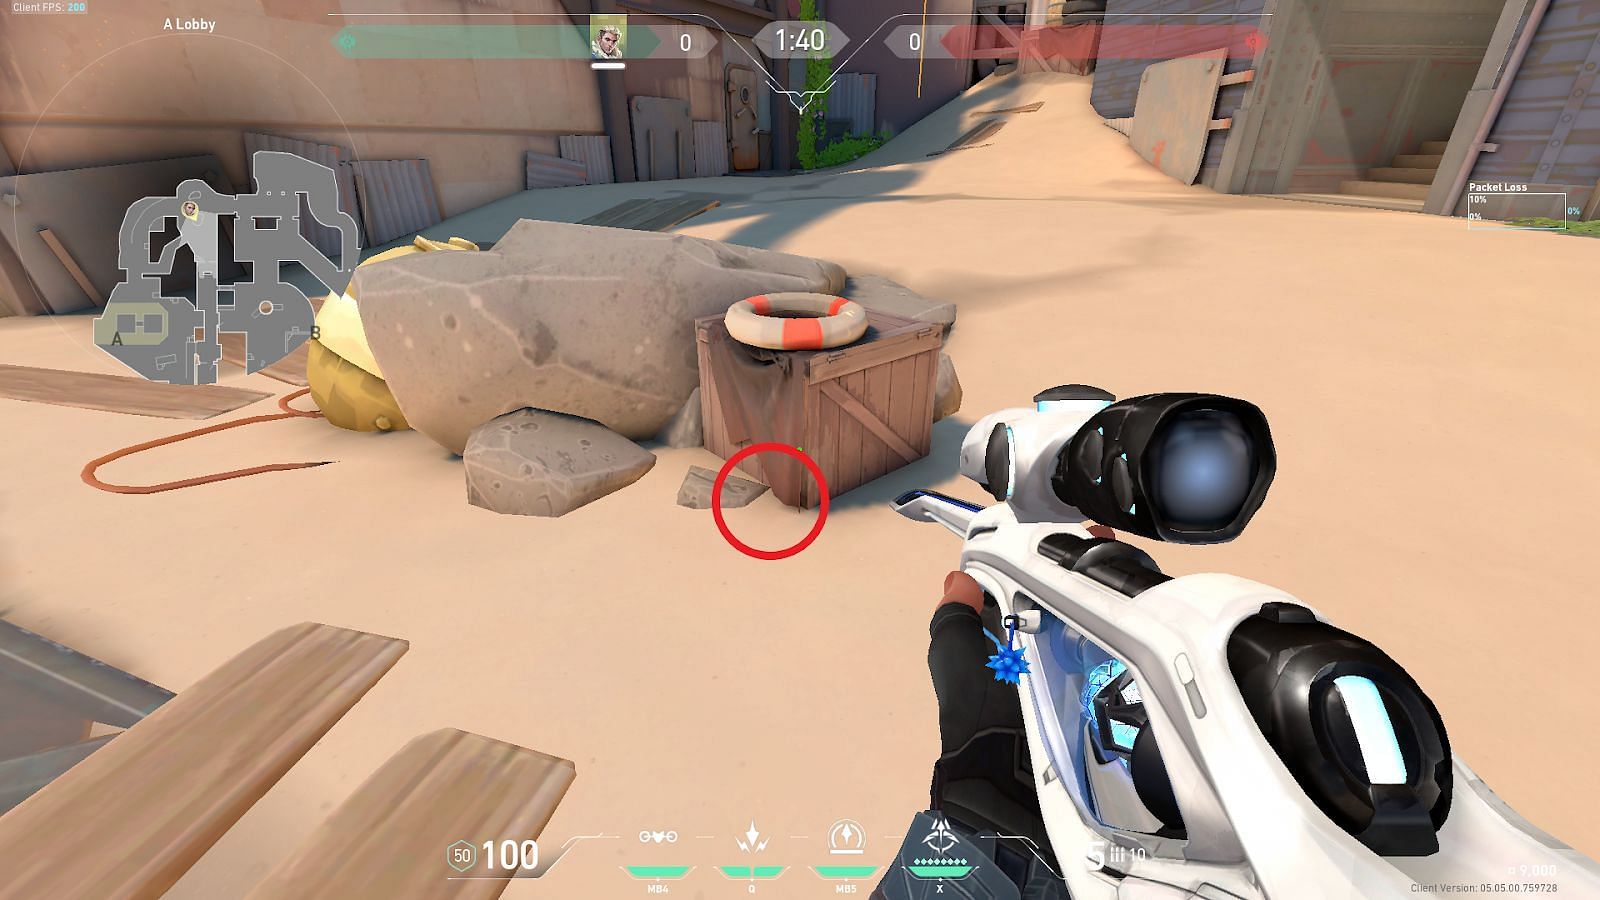
Position yourself in front of the shown corner between the box and the small rock and tuck inside between them.
Position the Shock Dart icon`s tip (shown in the circle) with the ledge of the A-Rope wall. Deploy the first Shock Dart with one bounce (right click once) and with a two-bar charge (shown in the rectangle).
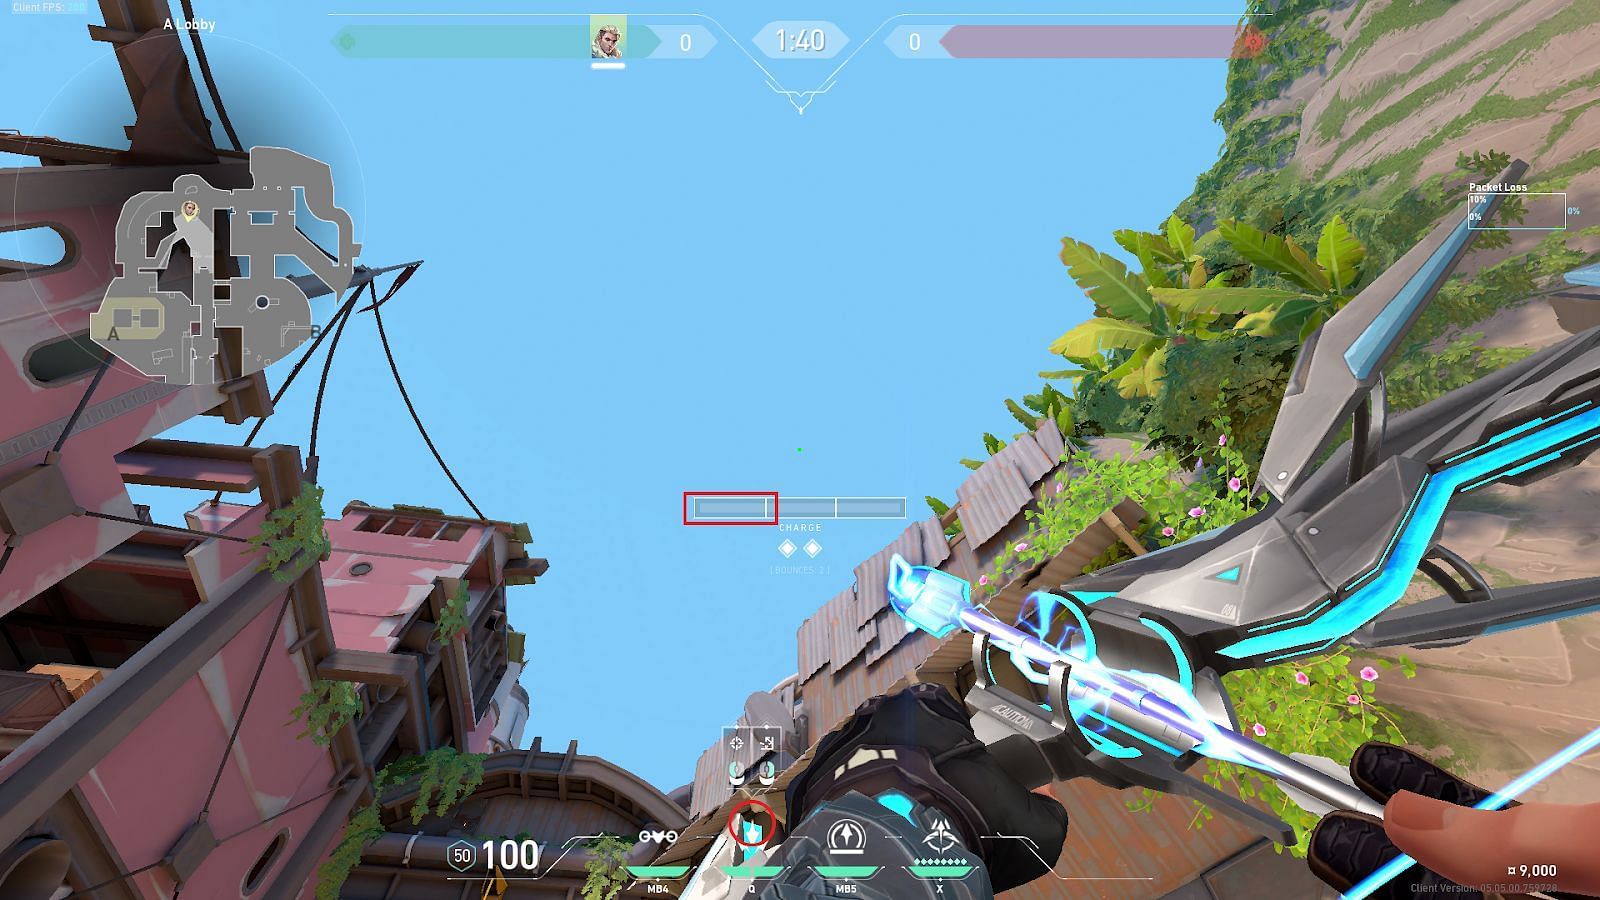
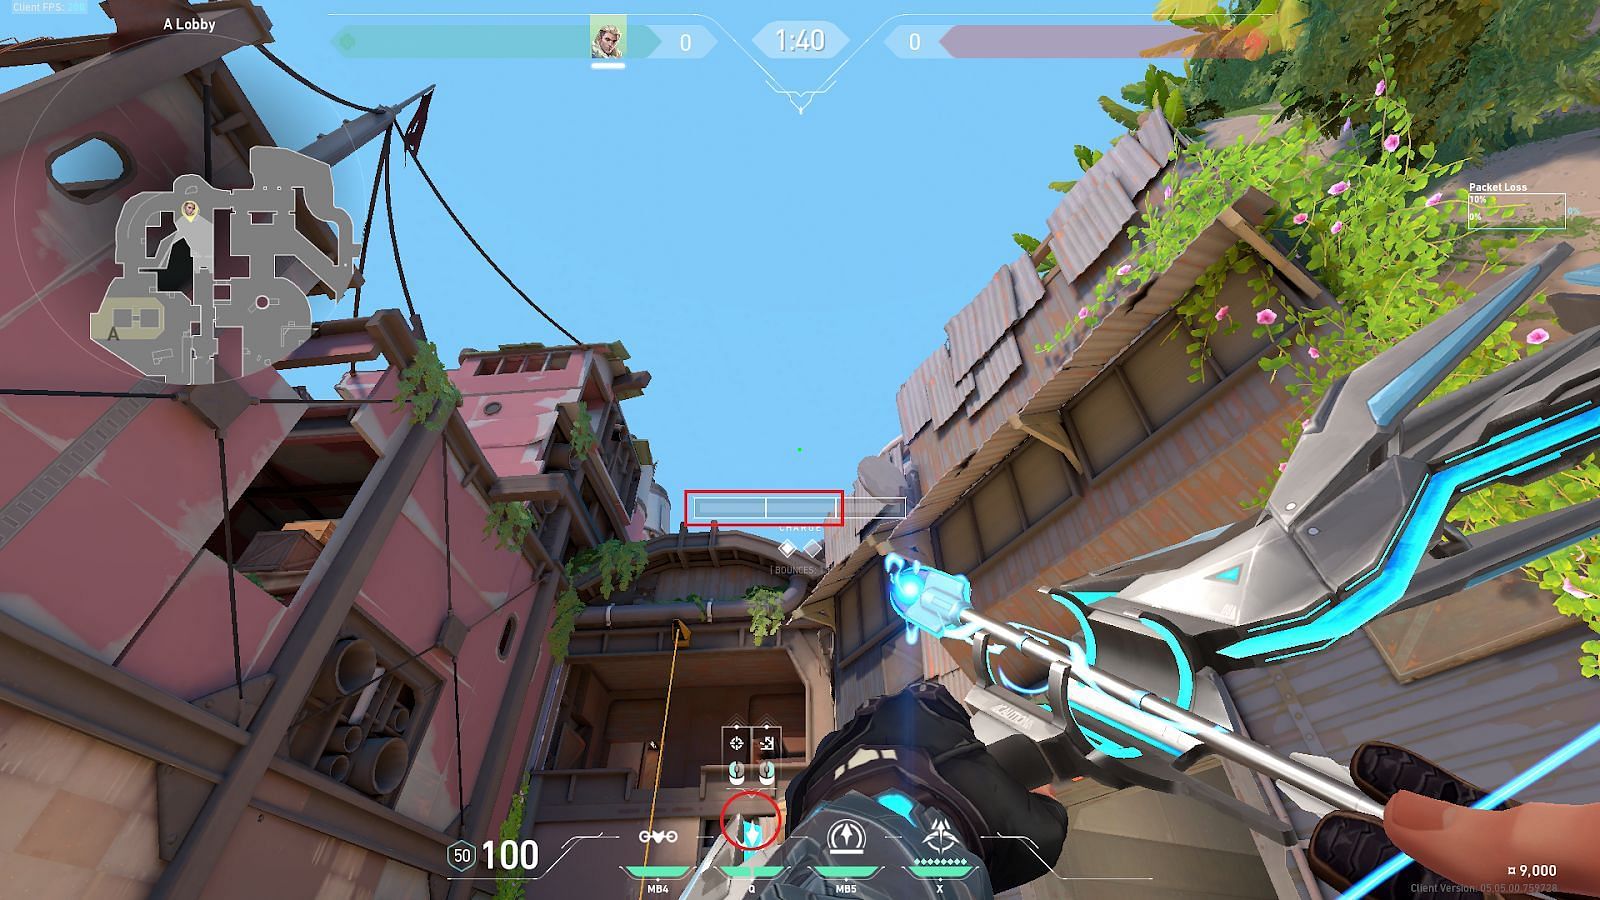
Position the Shock Dart icon`s tip (shown in the circle) below the roof ledge and launch the second Shock Dart with two bounces (right click twice) and one bar charge (shown in the rectangle).
Consecutively launch both Shock Darts, and they will land behind the A-Site Wooden Crates.
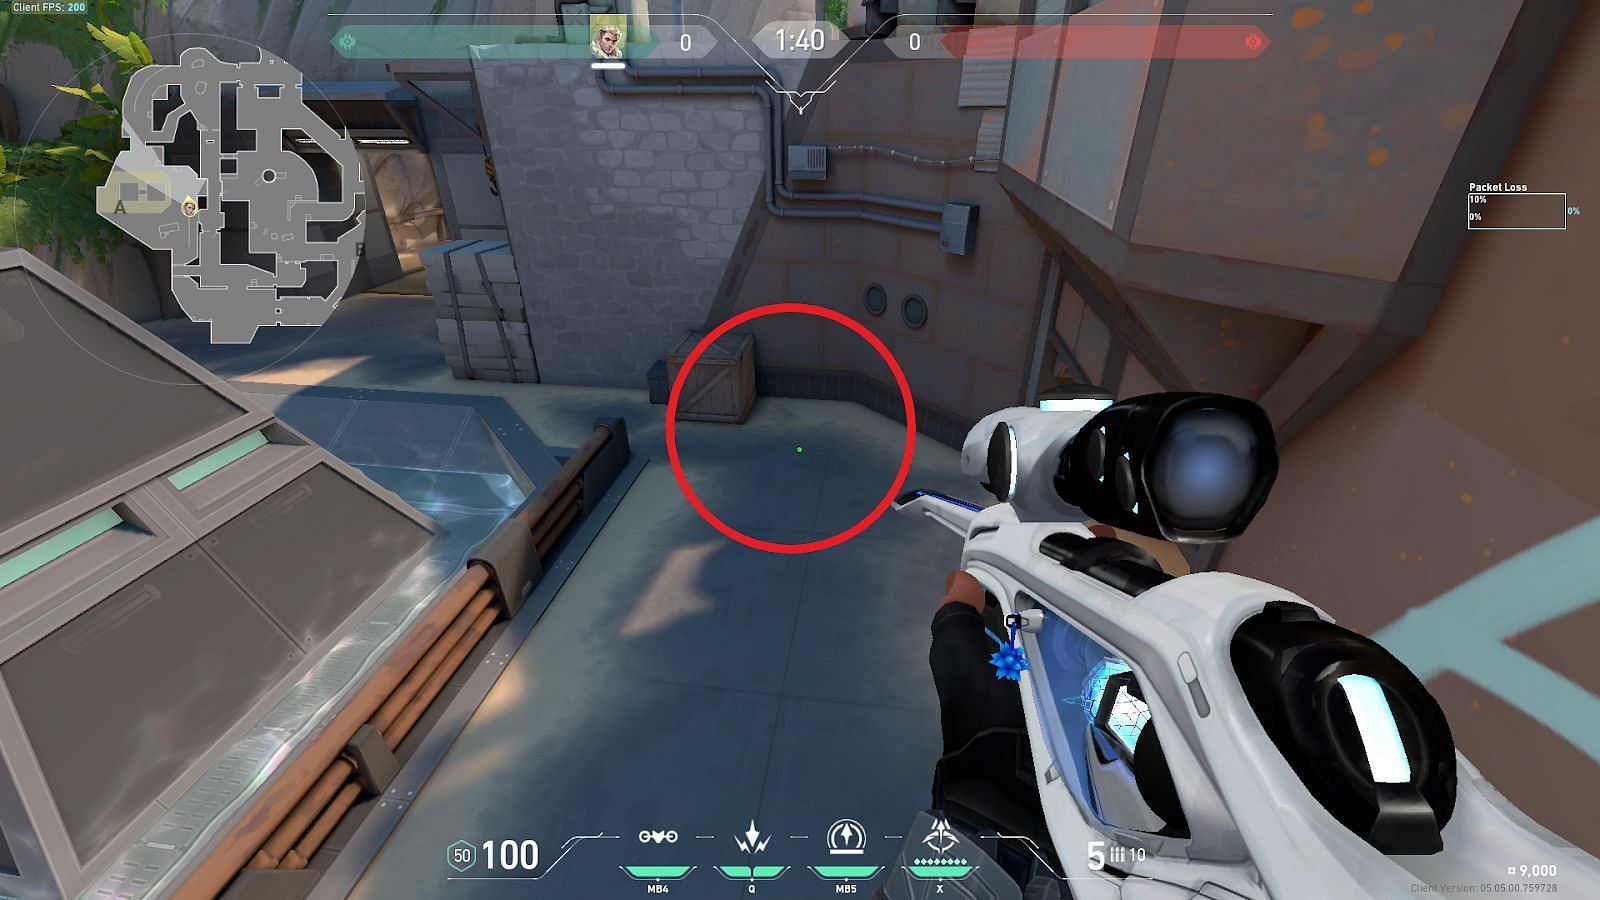
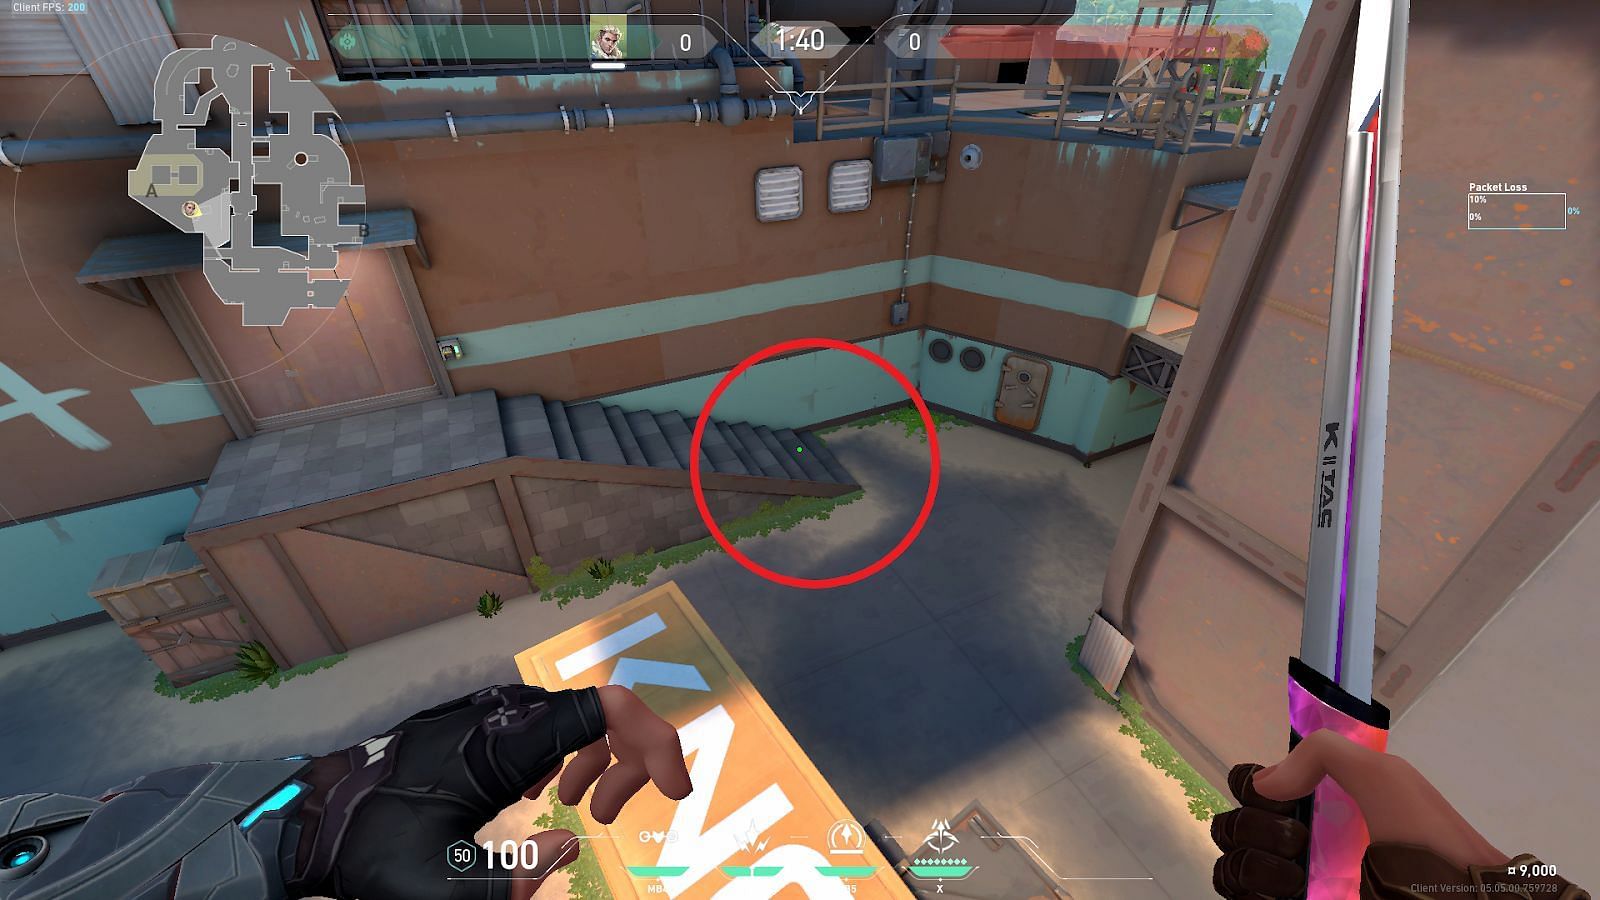
2) A-Lobby to A-Site Stairs
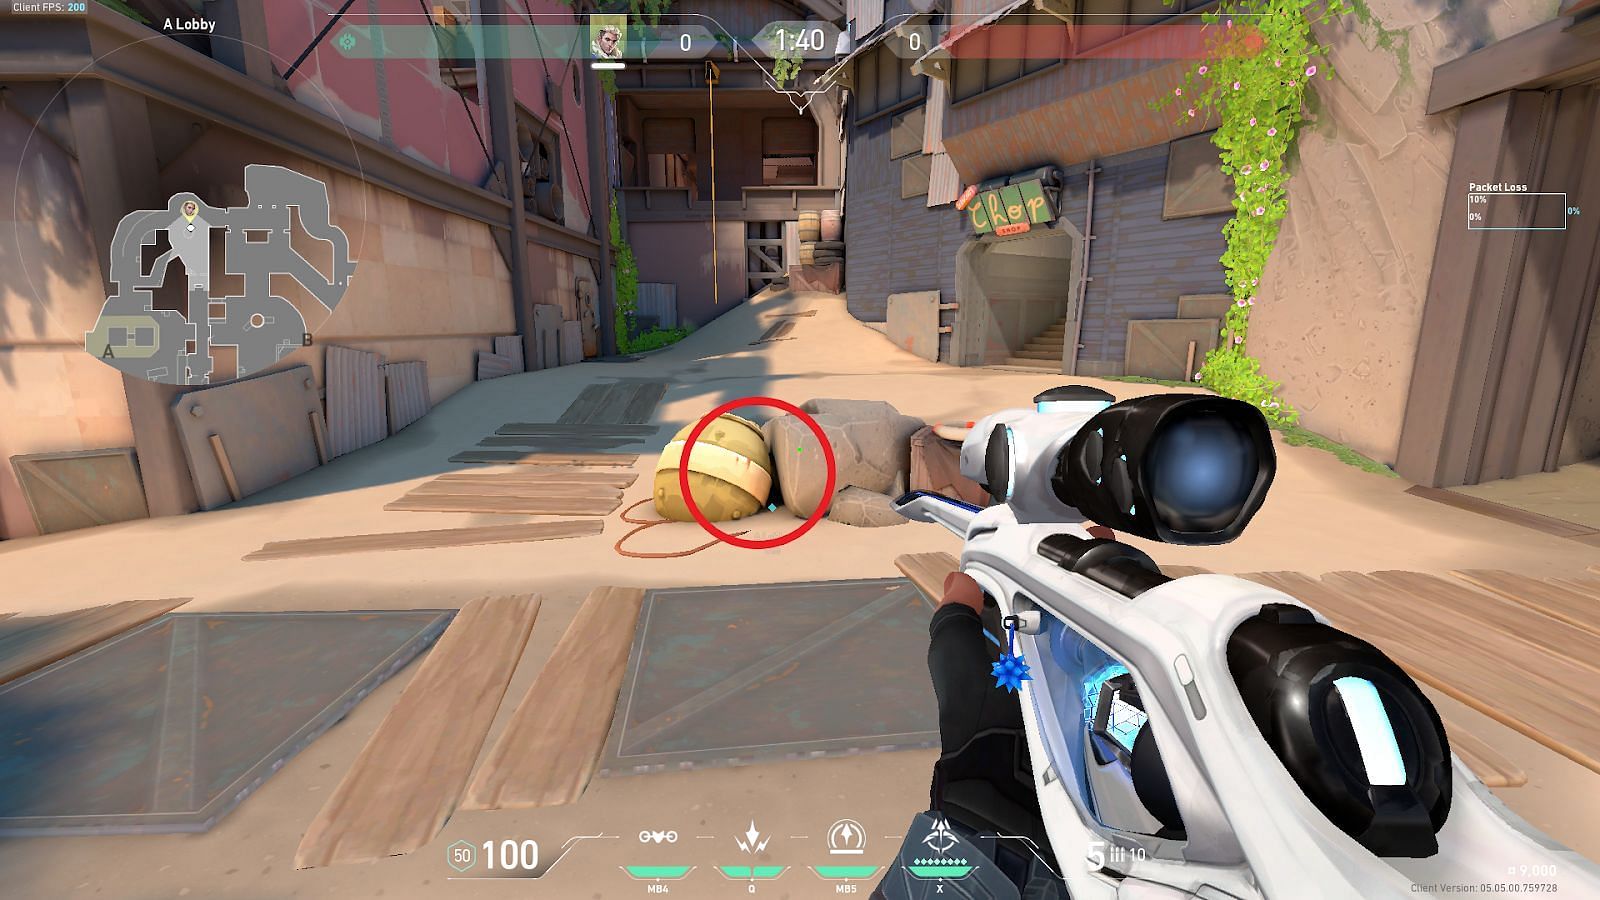
Position yourself in front of the shown corner and tuck between the rock and the yellow barrel.
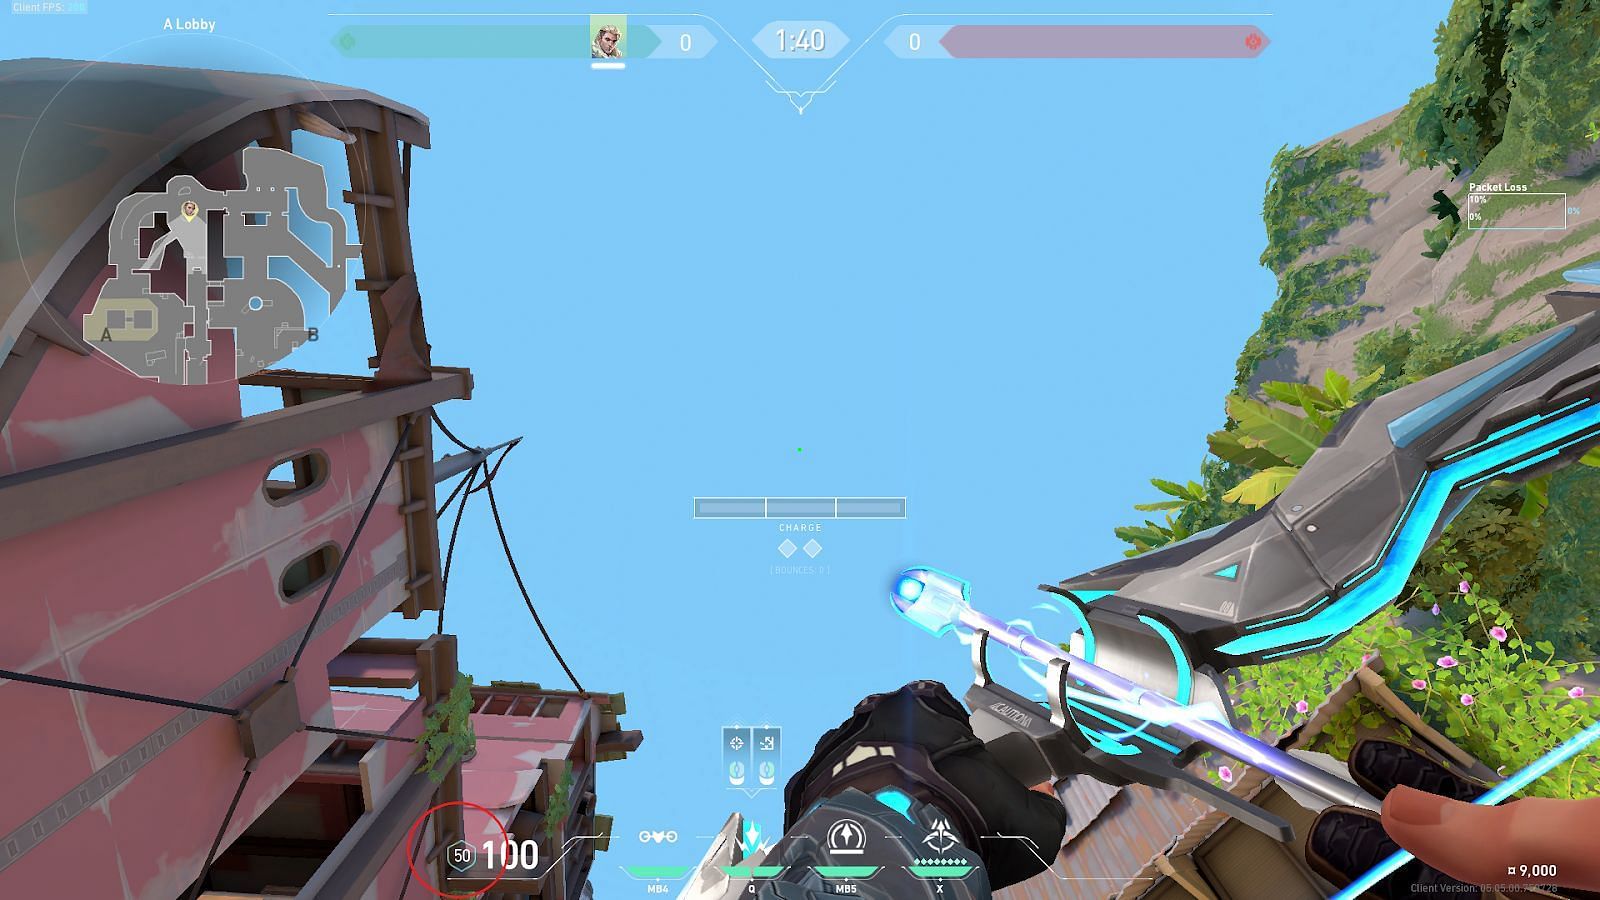
Position the Heads-Up Display (shown in the circle) on the ledge of the left roof and deploy the first Shock Dart with full charge.
Place the crosshair on the metallic edge of the water tower (shown in the circle) and launch the second Shock Dart with two bounces (right click twice) and a two bar charge (shown in the rectangle).
Timing the second Shock Dart three seconds after launching the first will result in both of them landing on A-Site Stairs together.
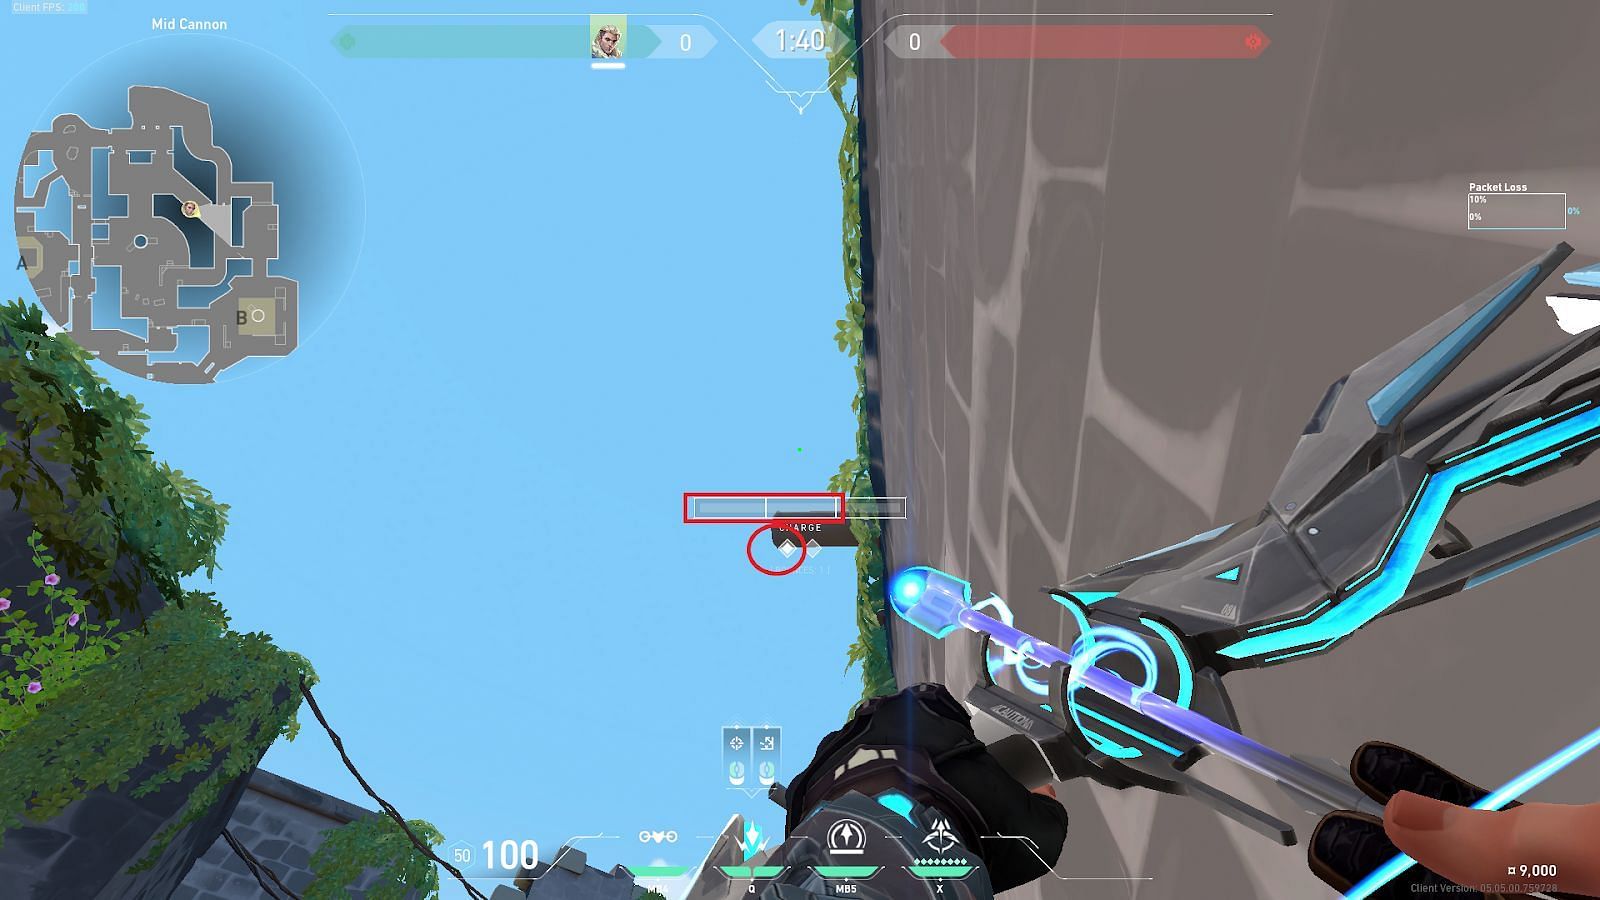
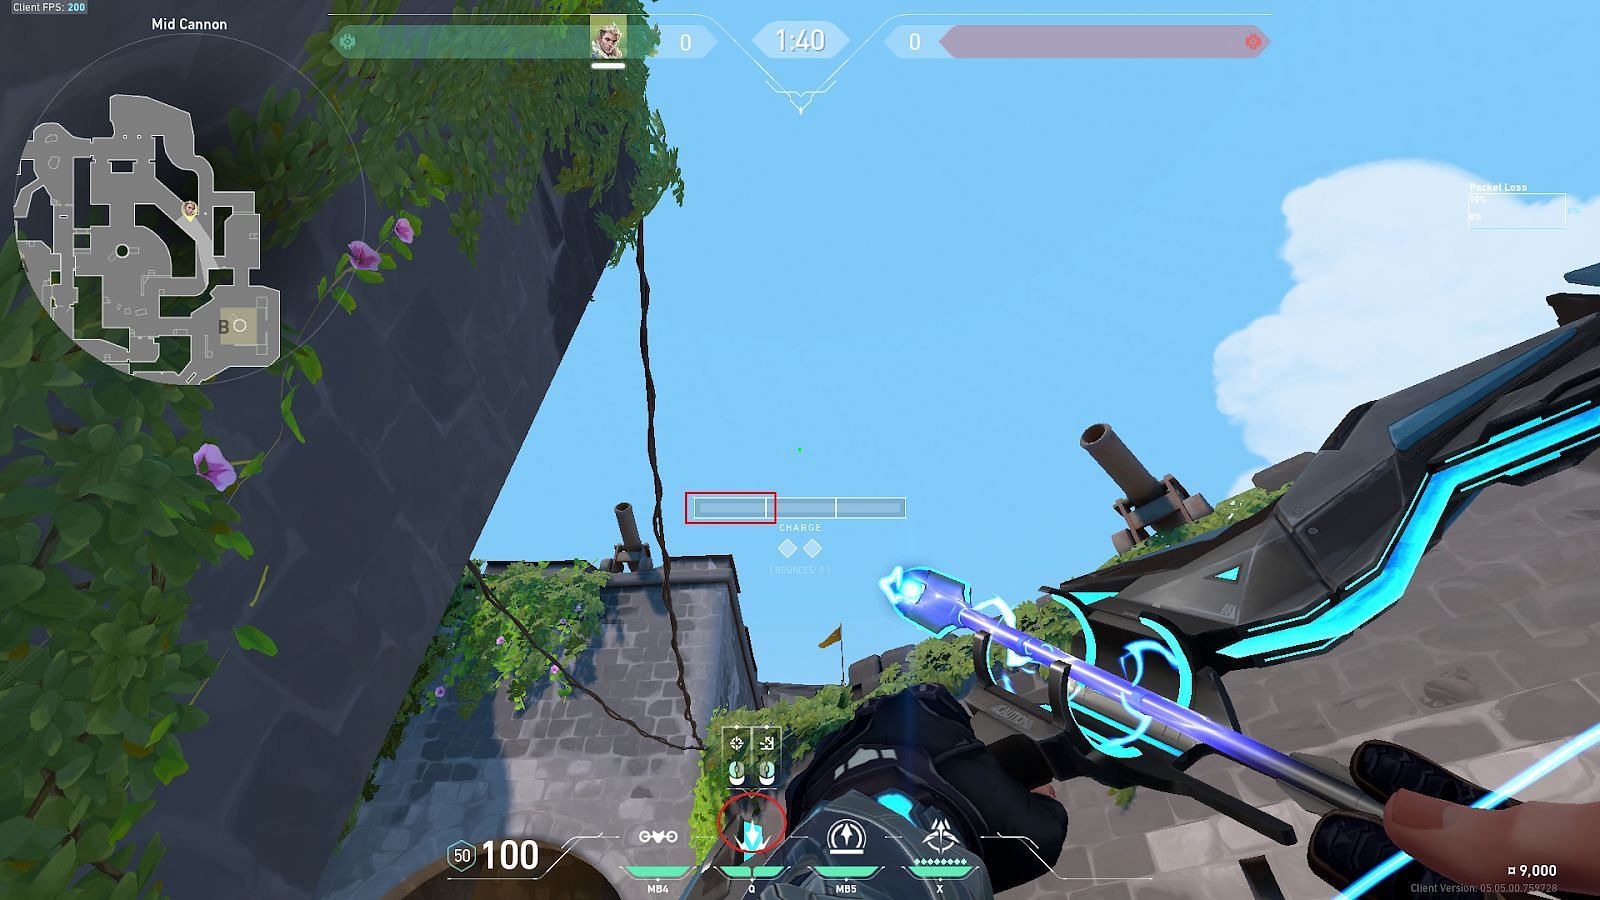
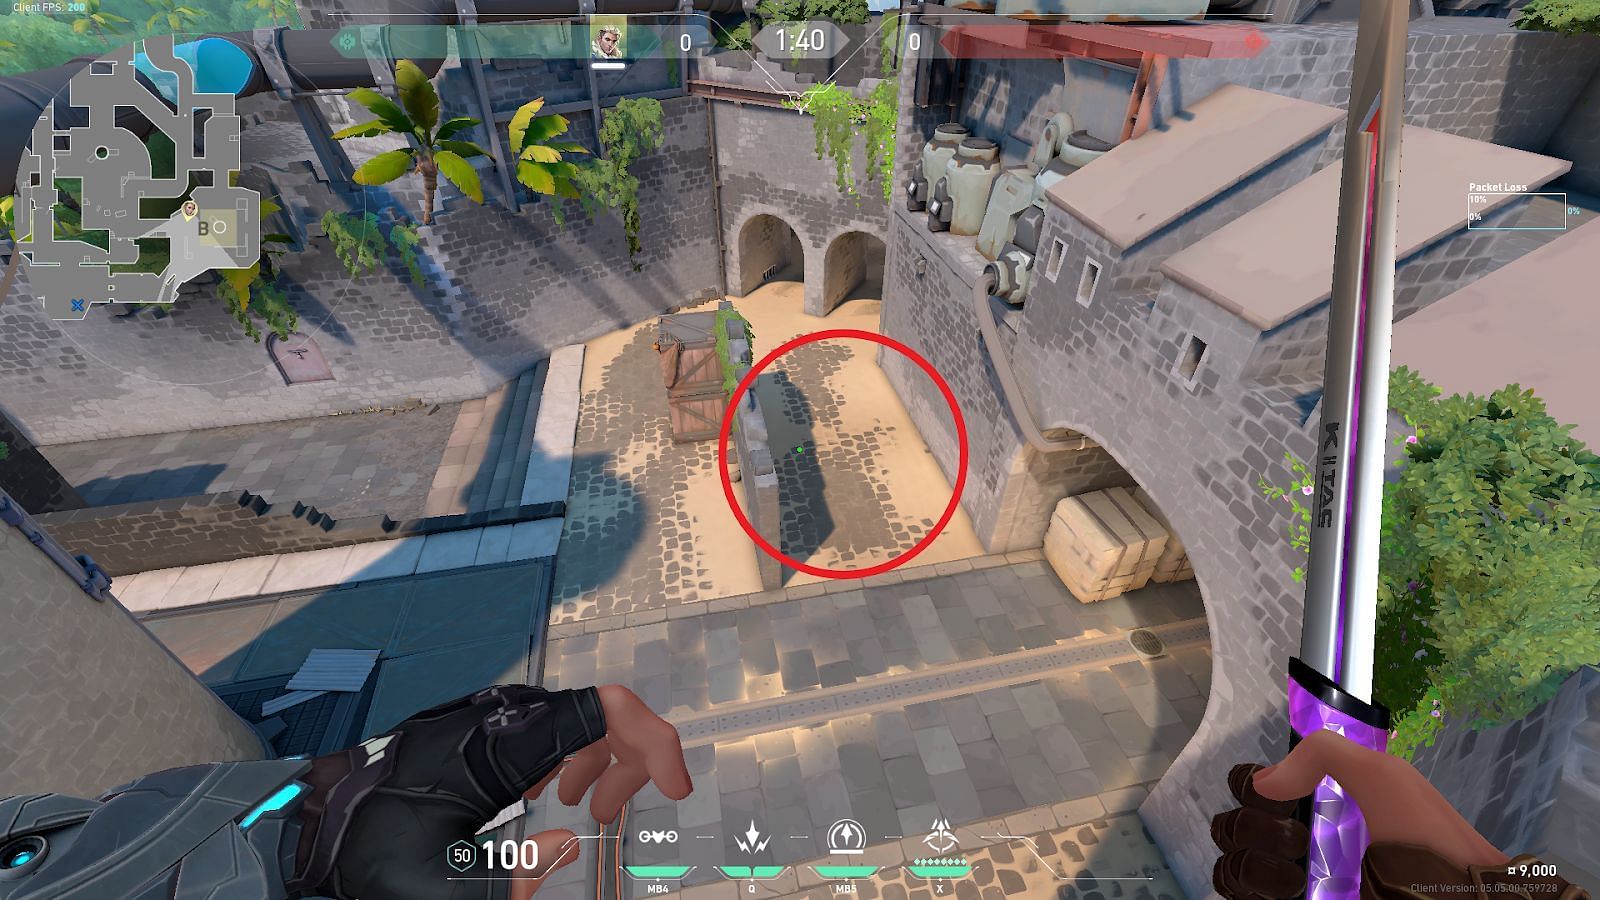
3) Mid Cannon to B-Back
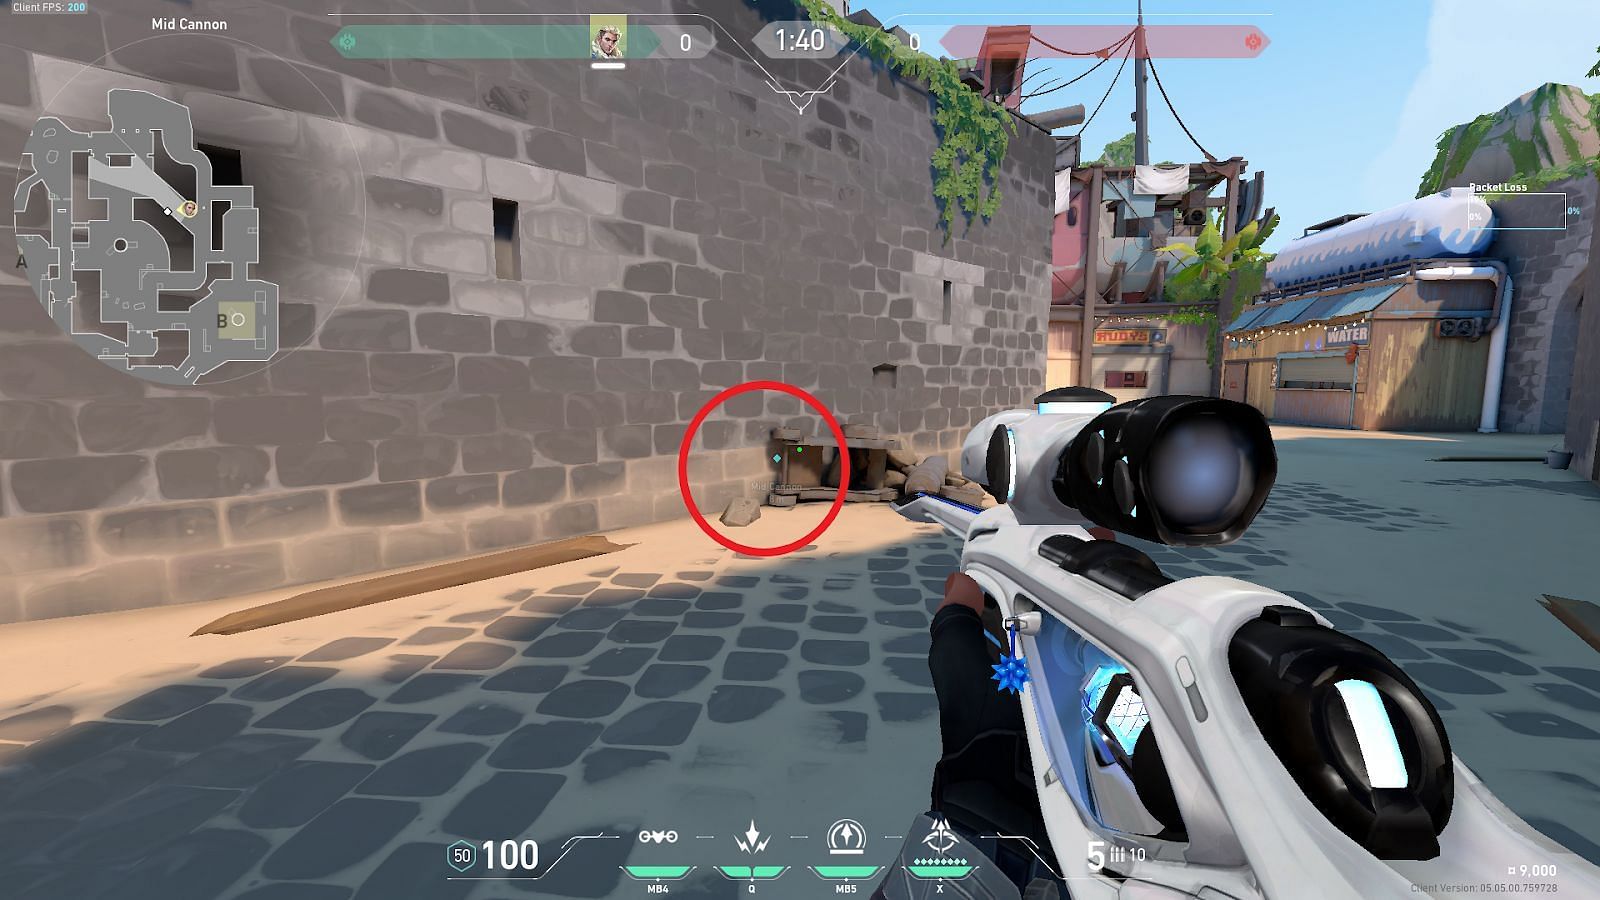
Position yourself in front of the fallen cannon in Mid and tuck inside the shown corner.
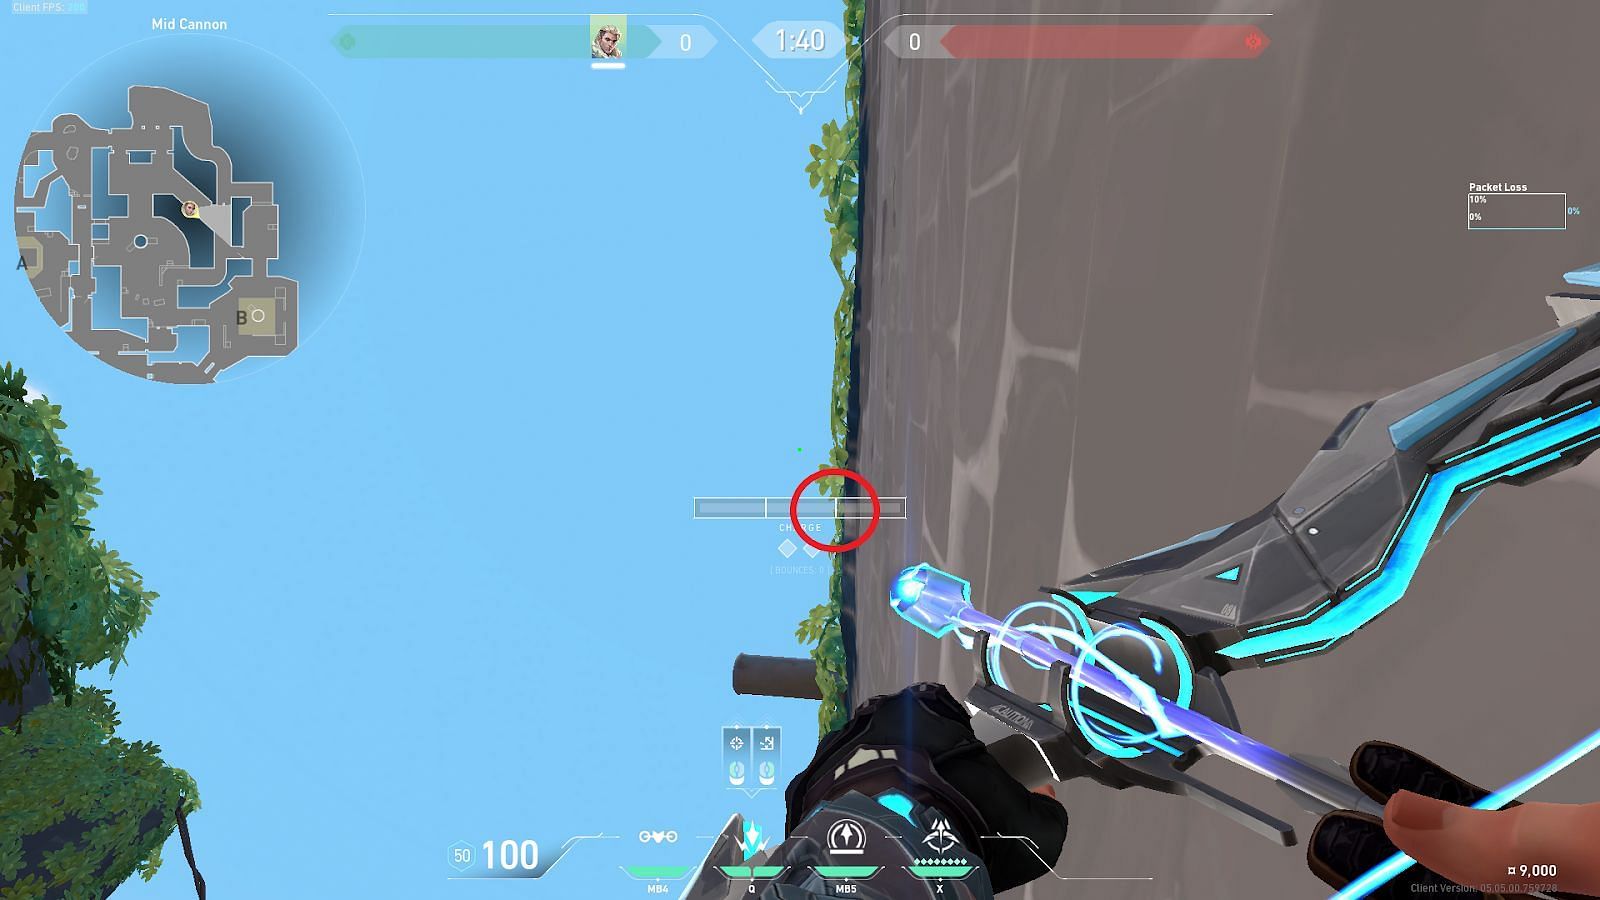
Position the second bar of the charge bar (shown in the circle) under the foliage and deploy the first Shock Dart with a full bar charge.
Place the left bounce indicator`s left tip (shown in a circle) on the roof ledge and launch the second Shock Dart with one bounce (right click once) and a two bar charge (shown in a rectangle).
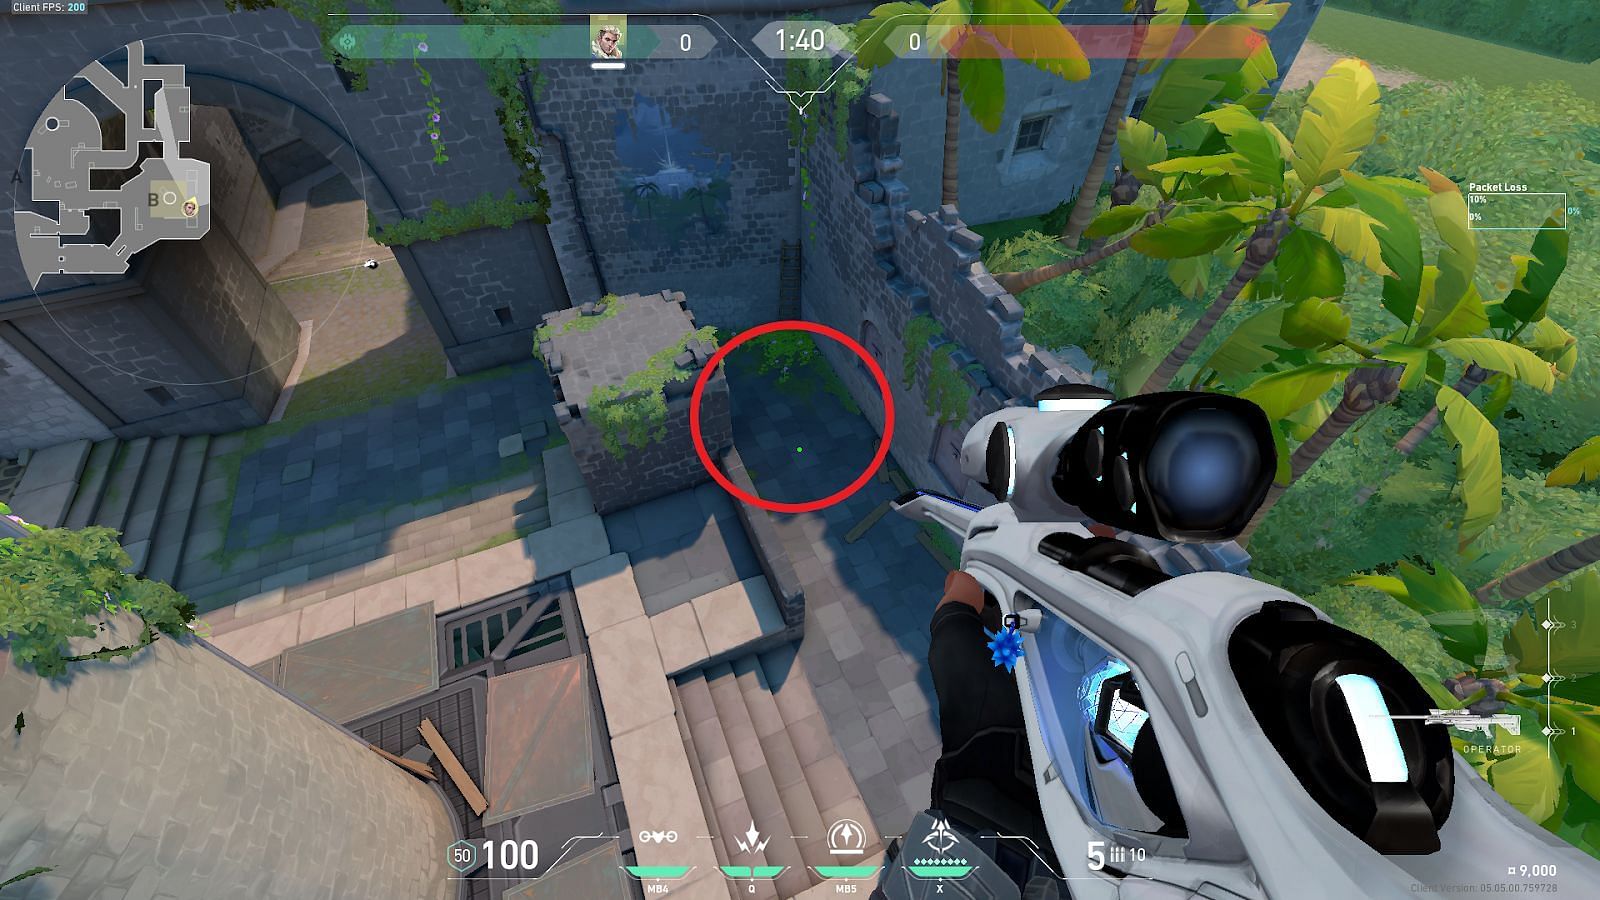
Consecutively launch both Shock Darts and they will land on the B-Back Site.
4) Mid Cannon to B-Wall
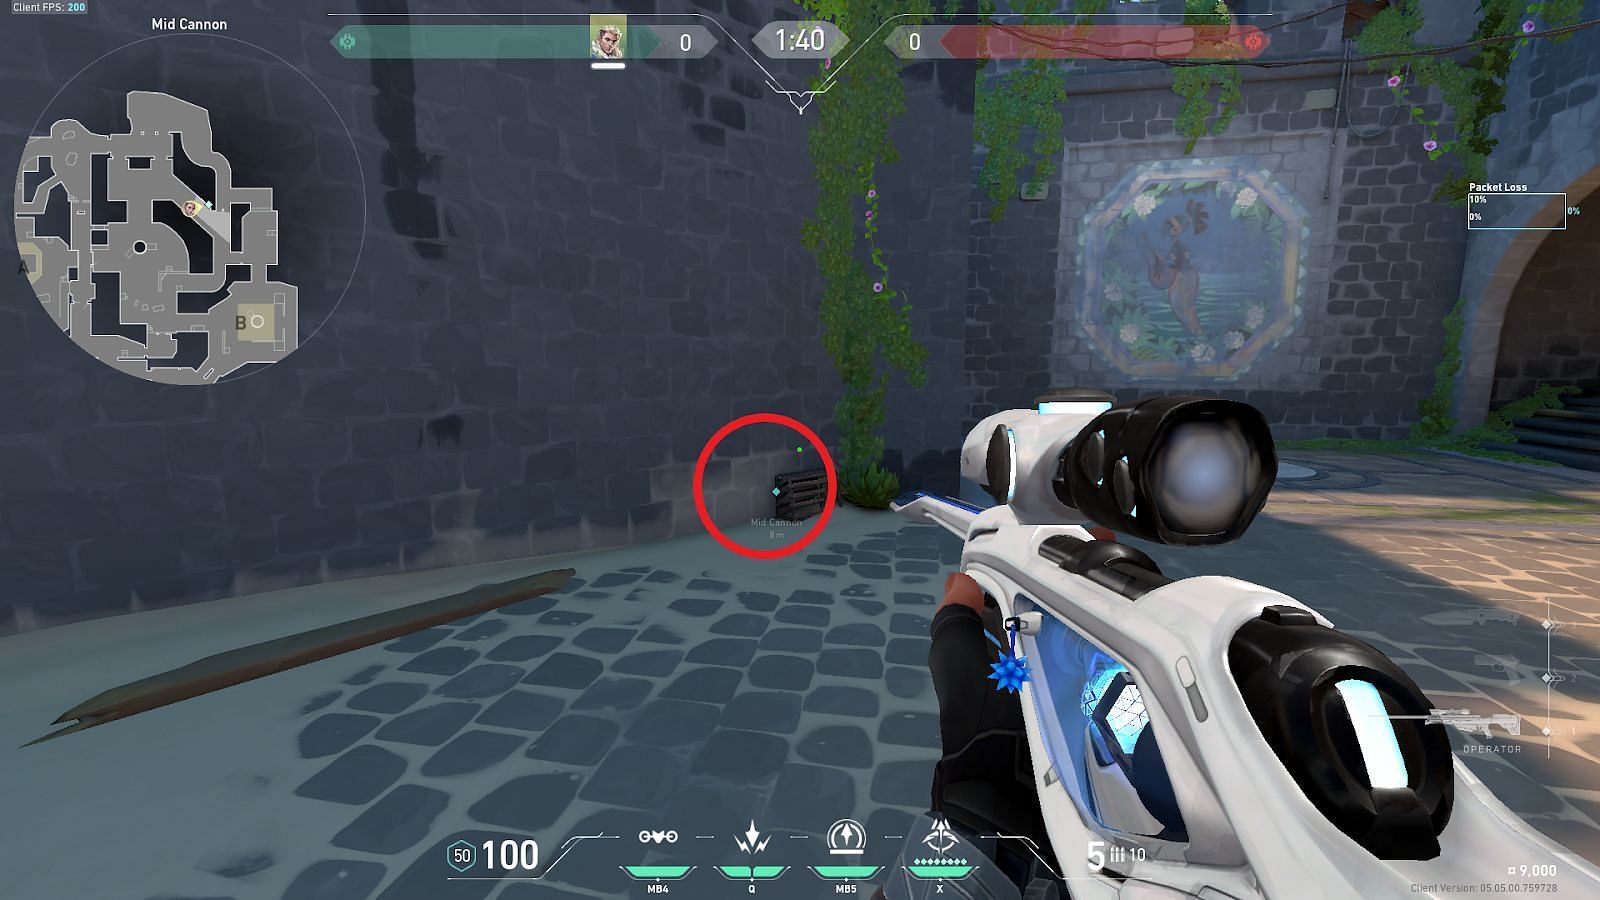
Position yourself in front of the broken cage in Mid Cannon and tuck between the wall and the cage.
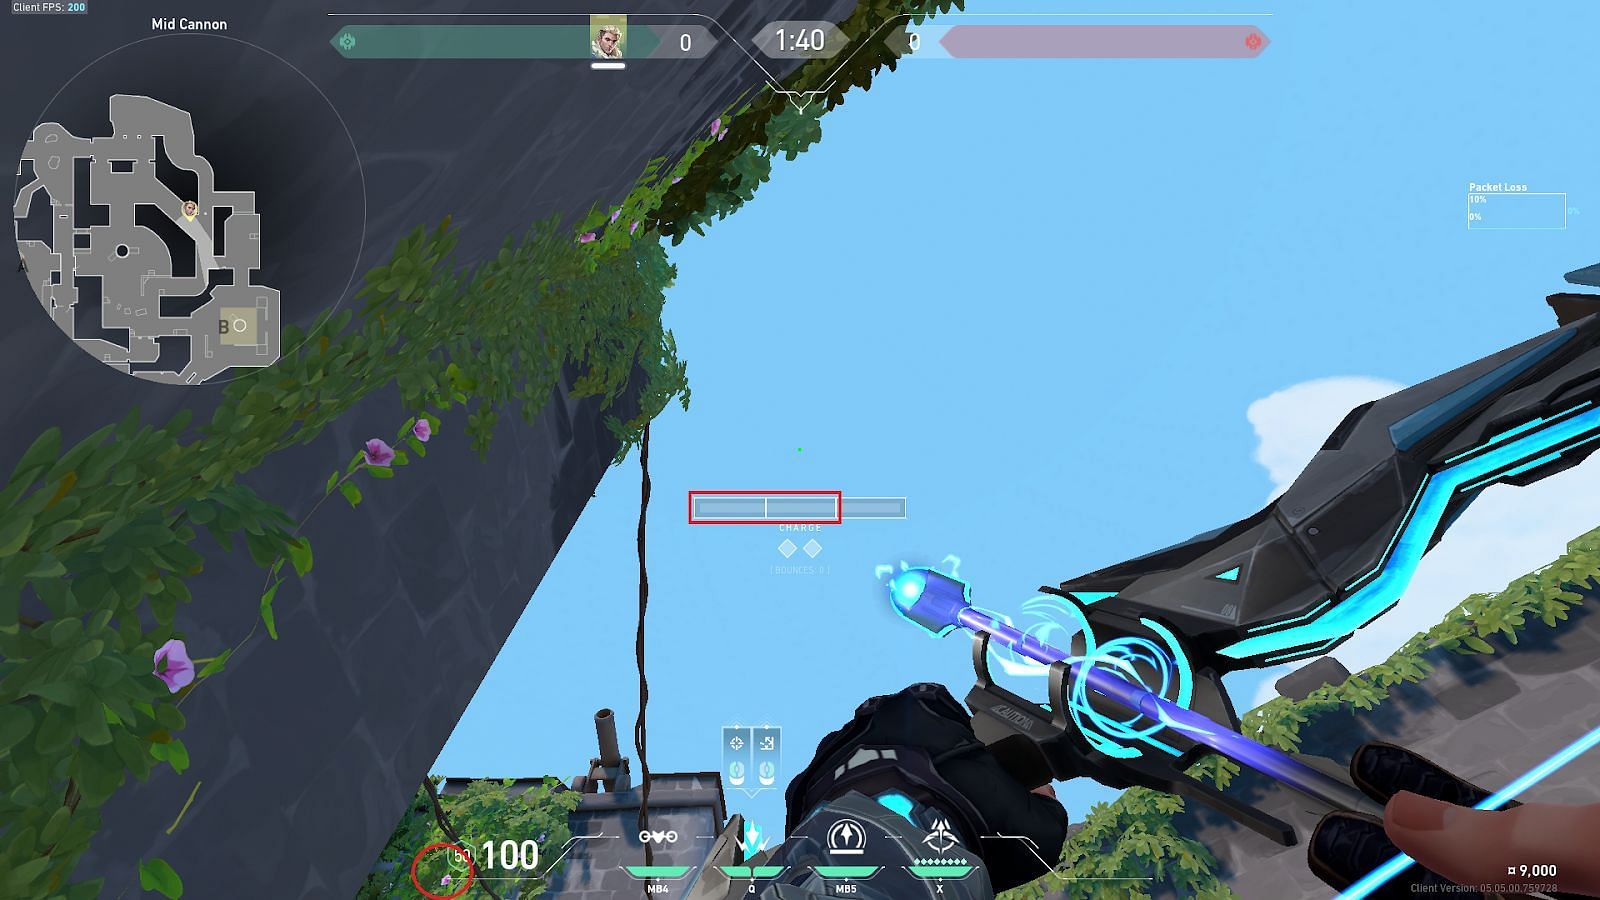
Position the left end of the HUD (shown in the circle) on the flower below the wires and deploy the first Shock Dart with a two-bar charge (shown in the rectangle).
Position the tip of the Shock Dart icon (shown in the circle) below the dark leaf and launch the second Shock Dart with a jumping one bar charge (shown in the rectangle).
Launch both the Shock Darts consecutively, and they will land behind the B-Wall position together.
