
'%20x='0'%20y='0'%20height='100%25'%20width='100%25'%20%0A%20%20%20%20%20%20%20%20%20%20xlink%3Ahref='data:image/jpg;base64,/9j/2wBDAAYEBQYFBAYGBQYHBwYIChAKCgkJChQODwwQFxQYGBcUFhYaHSUfGhsjHBYWICwgIyYnKSopGR8tMC0oMCUoKSj/2wBDAQcHBwoIChMKChMoGhYaKCgoKCgoKCgoKCgoKCgoKCgoKCgoKCgoKCgoKCgoKCgoKCgoKCgoKCgoKCgoKCgoKCj/wgARCAAHAAoDASIAAhEBAxEB/8QAFQABAQAAAAAAAAAAAAAAAAAABAb/2gAIAQEAAAAAhj//xAAUAQEAAAAAAAAAAAAAAAAAAAAE/9oACAECEAAAAHf/xAAUAQEAAAAAAAAAAAAAAAAAAAAD/9oACAEDEAAAAB//xAAgEAACAQMEAwAAAAAAAAAAAAABAwIABAUGERITFEKy/9oACAEBAAE/AH6tI8deLt0pTDkTzWDJkB8mhrdWw7MdbmfsemNf/8QAFxEBAAMAAAAAAAAAAAAAAAAAAgADEf/aAAgBAgEBPwBWLZ//xAAVEQEBAAAAAAAAAAAAAAAAAAARAP/aAAgBAwEBPwAL/9k='%3E%3C/image%3E%3C/svg%3E)
Valorant has emerged as a game where in-depth knowledge of abilities is crucial to winning a game. Solely relying on one's mechanical prowess is not enough and needs to be accompanied by the use of their respective Agent utilities.
Sova is an Initiator Agent with his kit optimized to extract information on enemy positioning. Sova can be a self-sufficient Agent, with his abilities being capable of both detecting enemies and inflicting enemies. He is efficient at clearing corners quickly and forcing enemy players to reposition.
Sova can utilize various double shock dart lineups to take out unsuspecting enemies easily or inflict critical damage. A total investment of 300 credits to buy two shock darts can easily turn the tides in the team's favor.
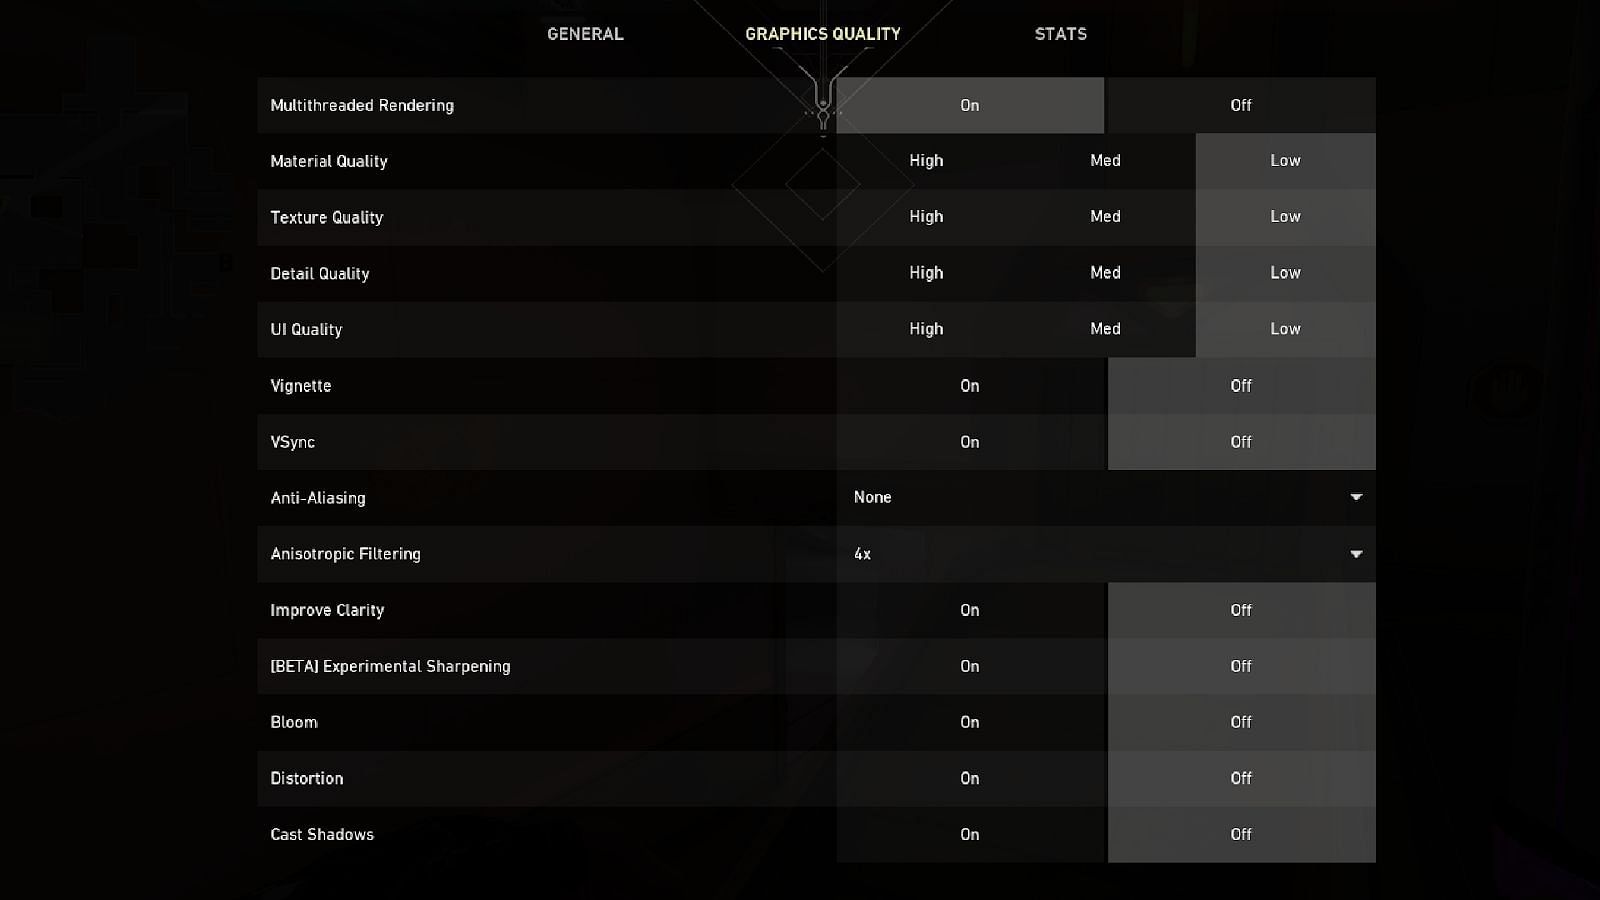
It is important to note that these lineups were performed with LOW Graphics Settings.
This article will take a look at the most effective Sova double shock dart lineups for Valorant`s Icebox.
Note: This article is subjective and reflects the author’s opinion.
Valorant Sova`s best and most crucial double Shock Dart lineups for Icebox
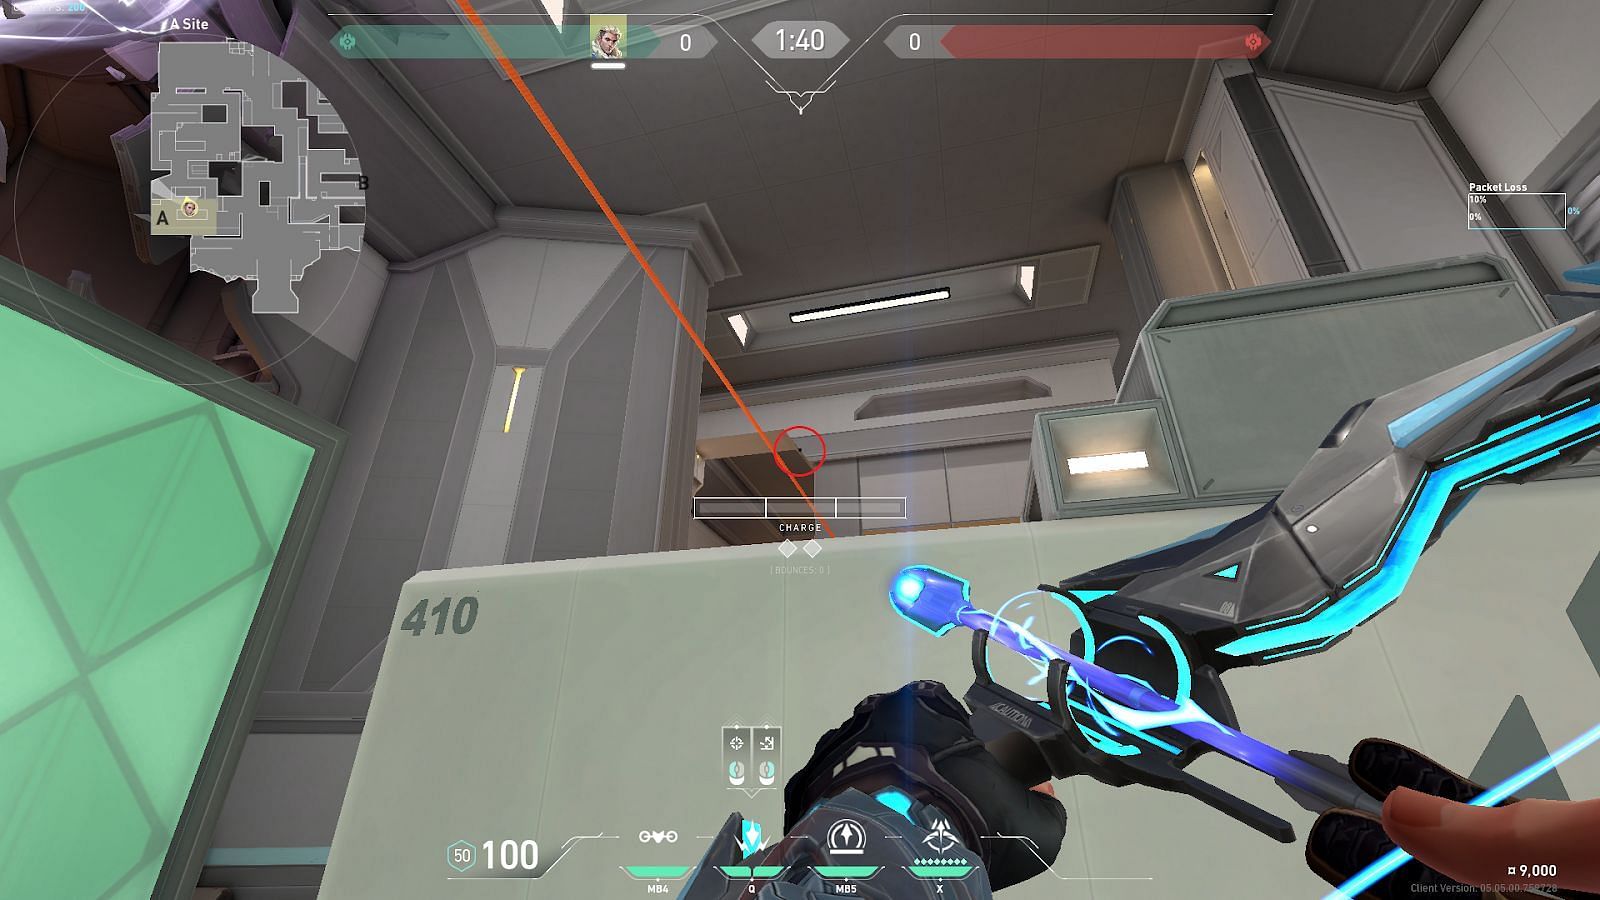
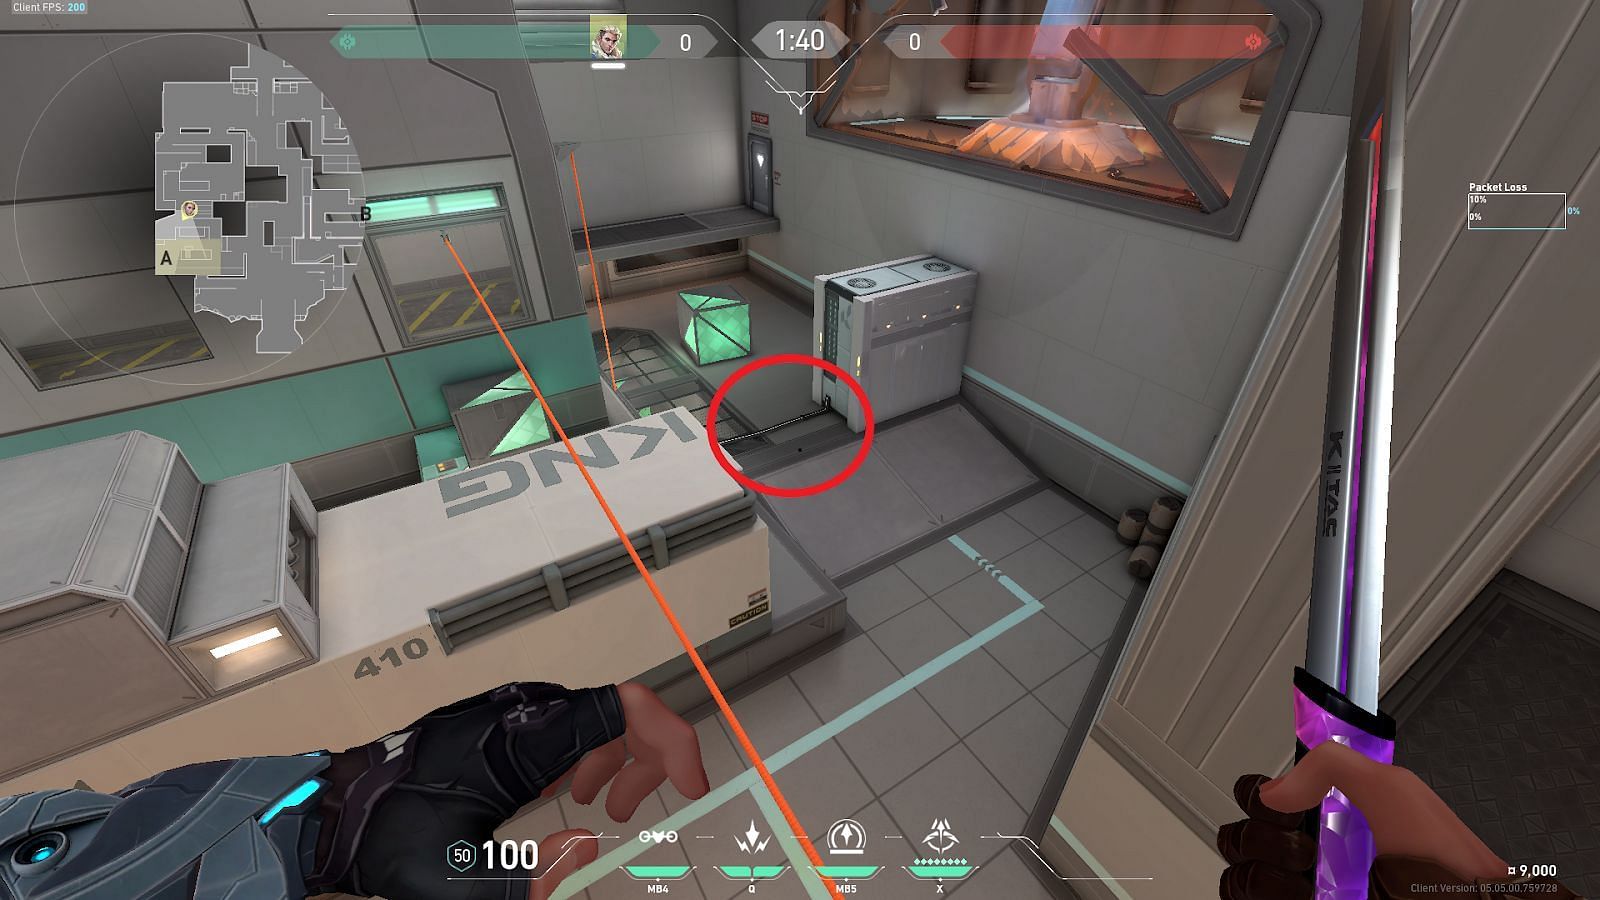
1) A-Site to A Belt
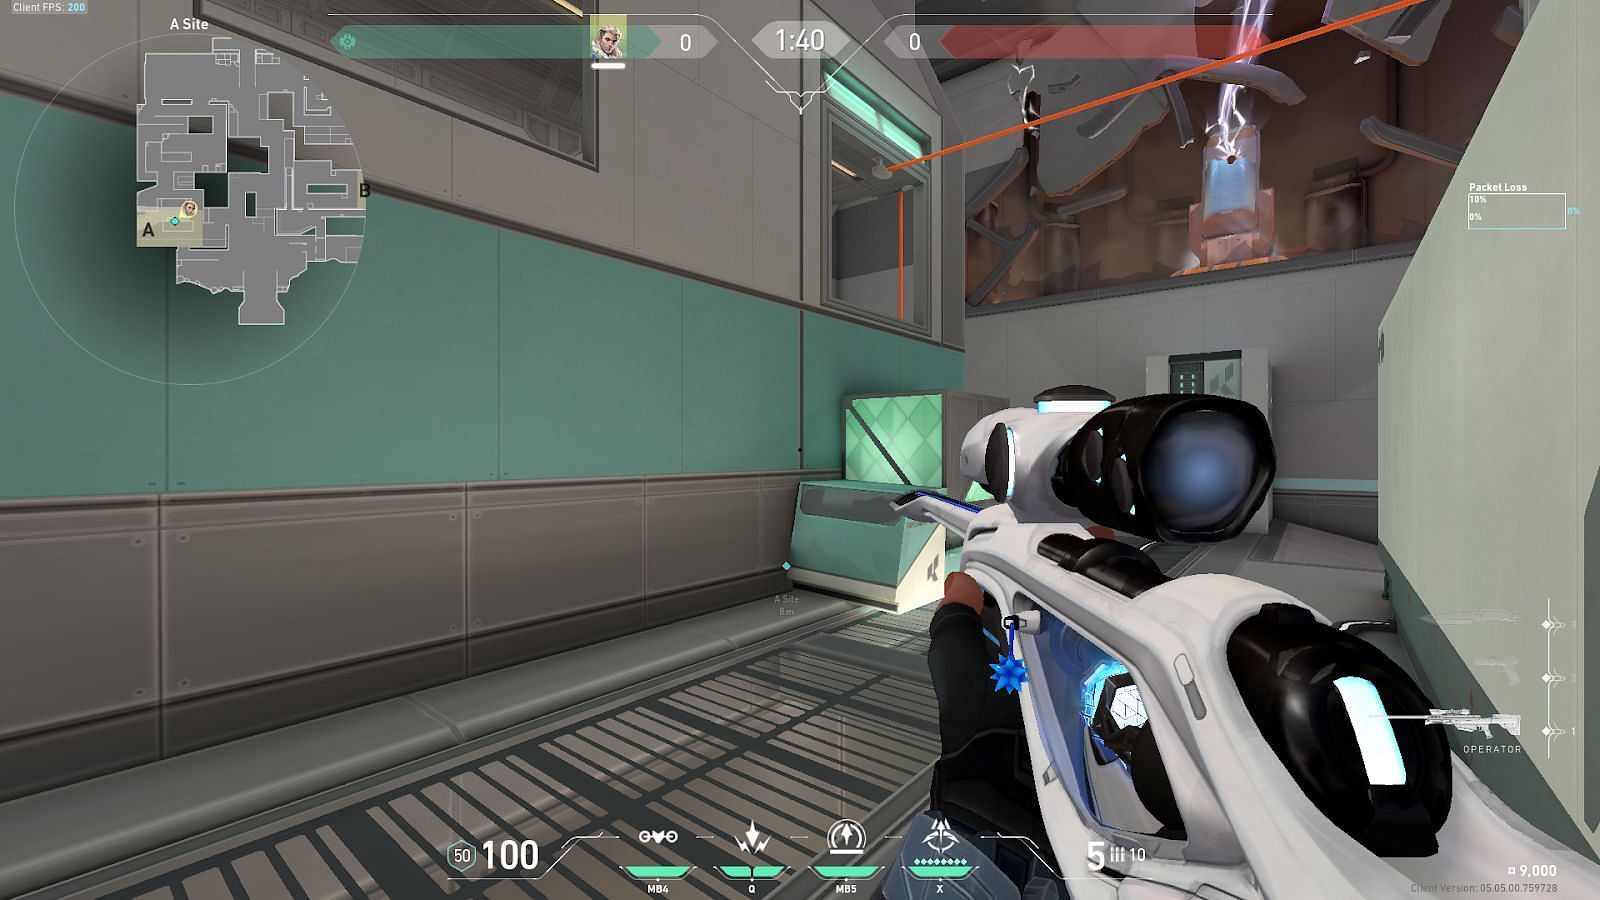
Position in front of the shown corner and tuck inside and look towards A-Belt.
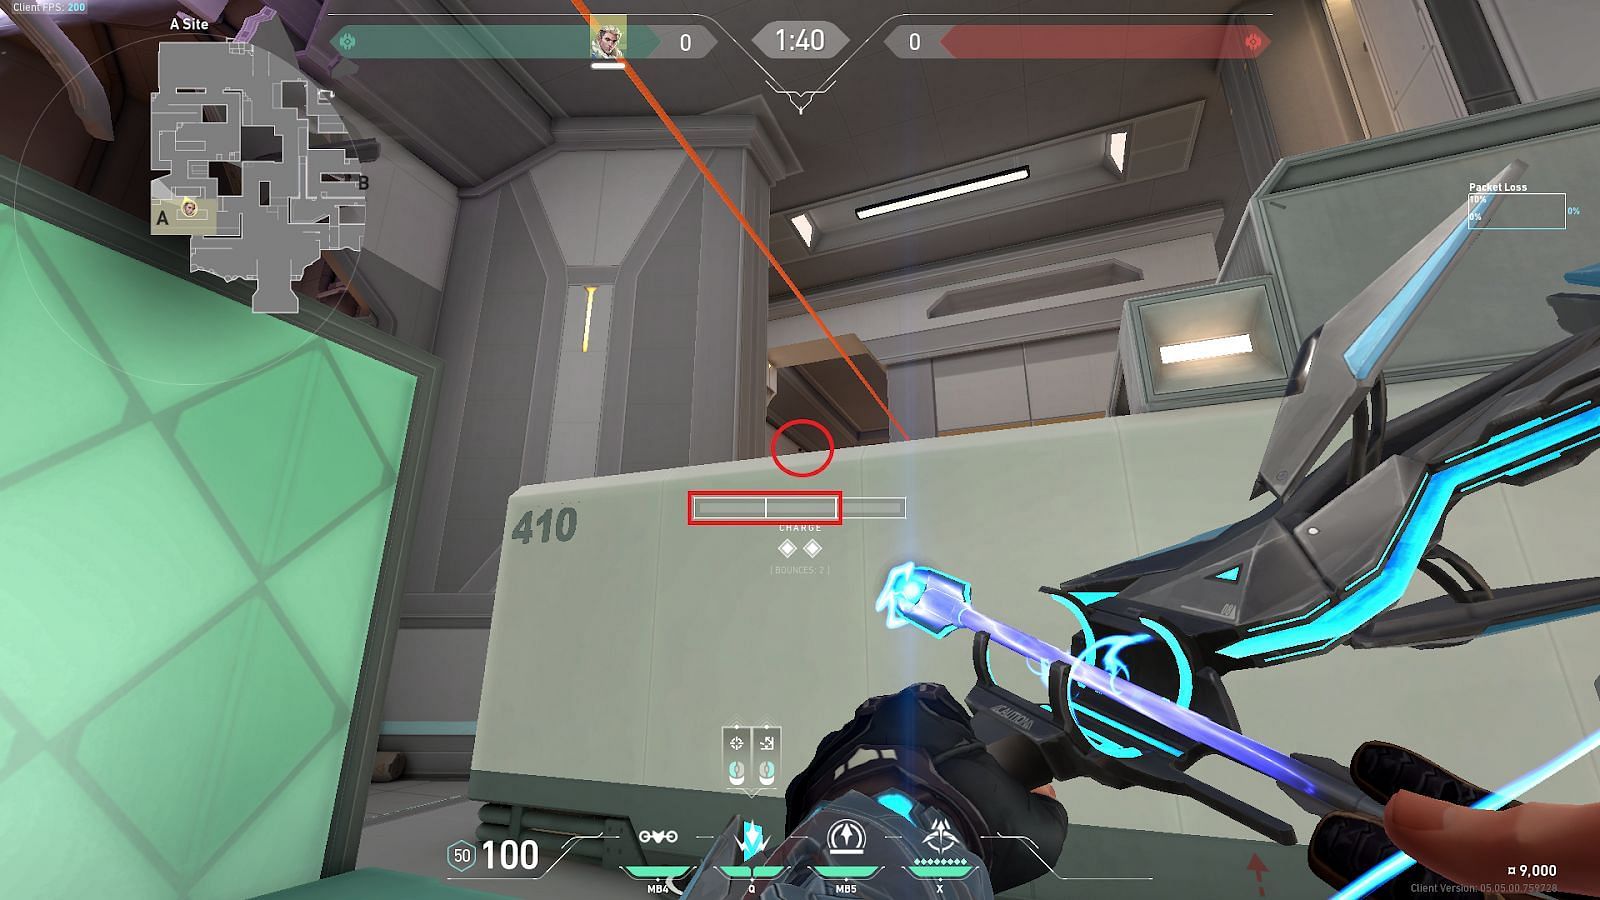
Place the crosshair on the edge where the roof ledge meets the container (shown in a circle) and launch the first Shock Dart with a double bounce (right click twice) and two-bar charge (shown in the rectangle)
Place the crosshair in the middle of the inclined roof ledge (shown in the circle) and launch the second Shock Dart with a simple left click.
Consecutively deploy both the Shock Darts to land them directly on A-Belt.
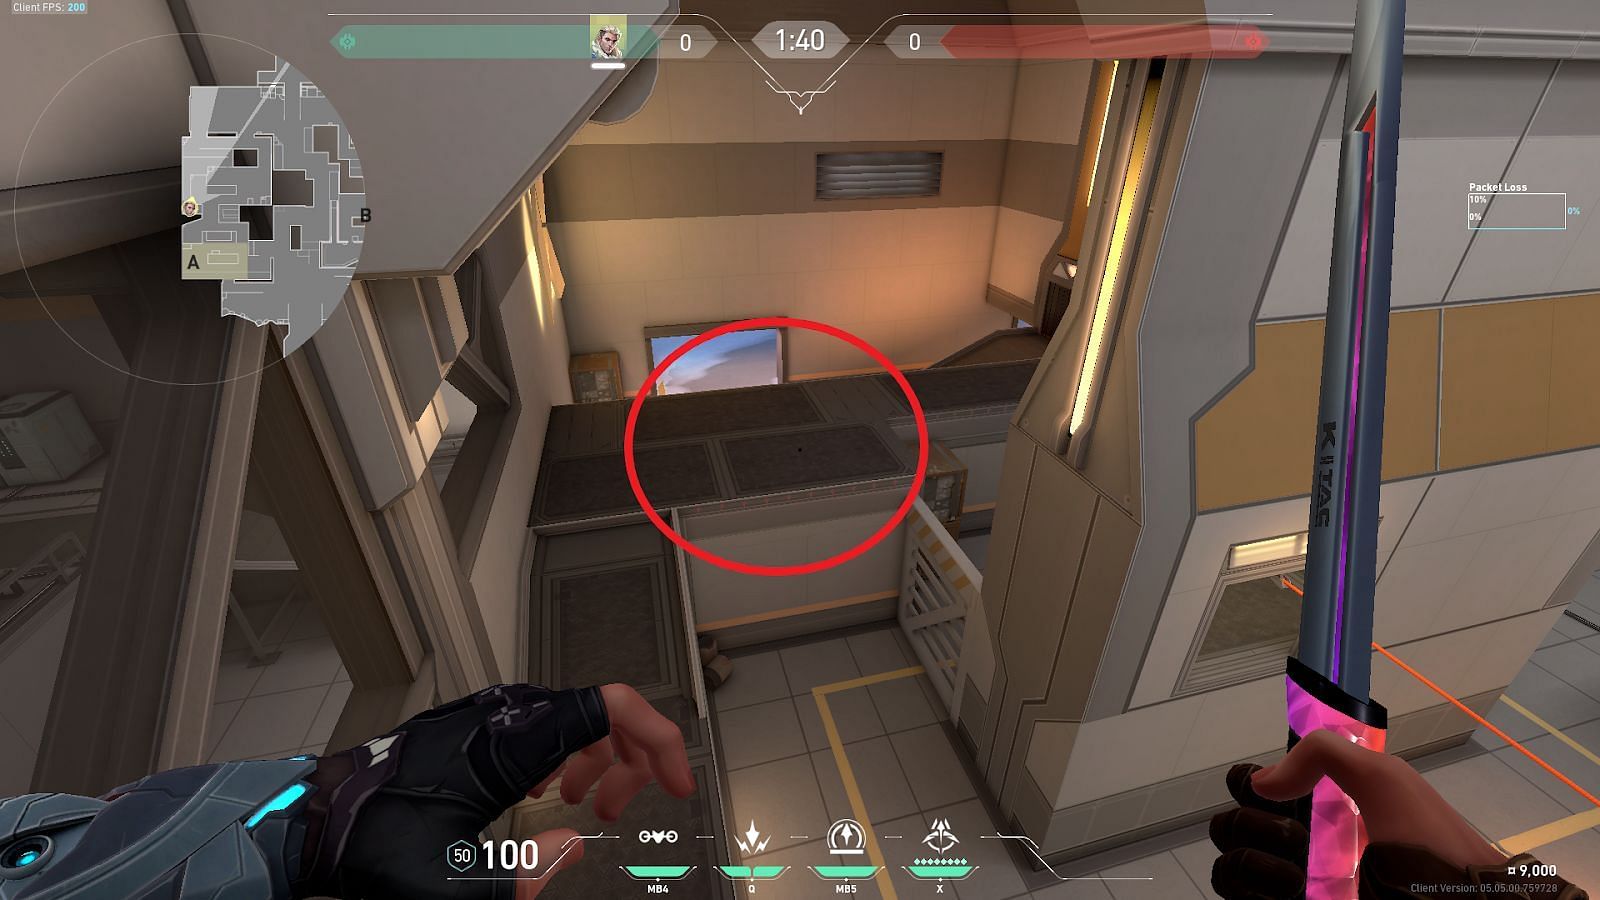
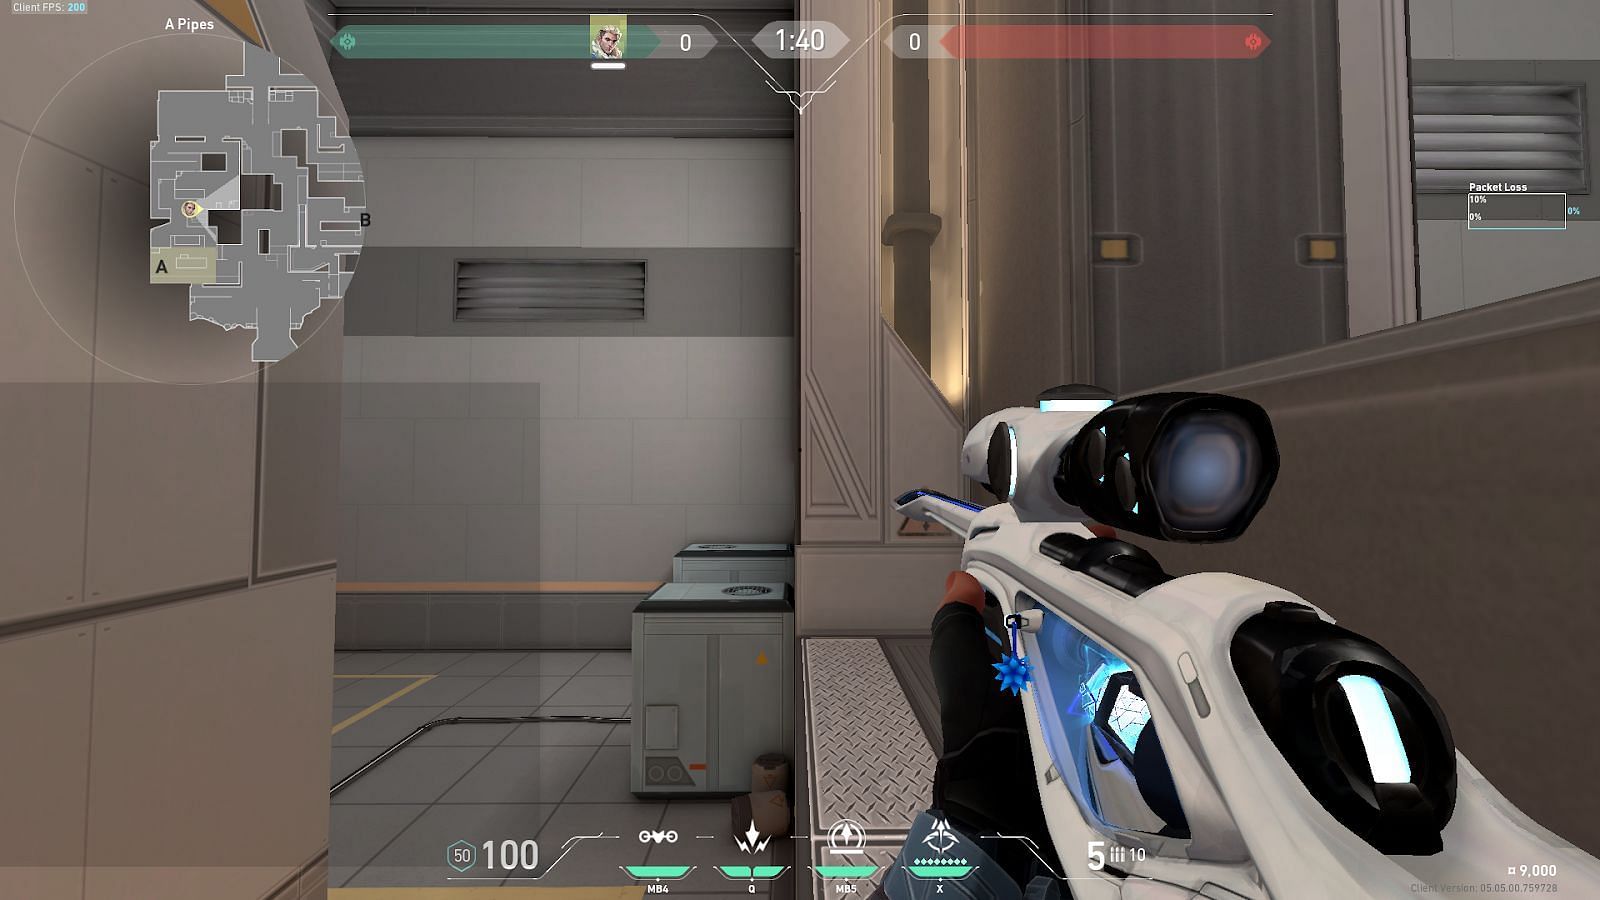
2) A-Rafter to below A-Pipes
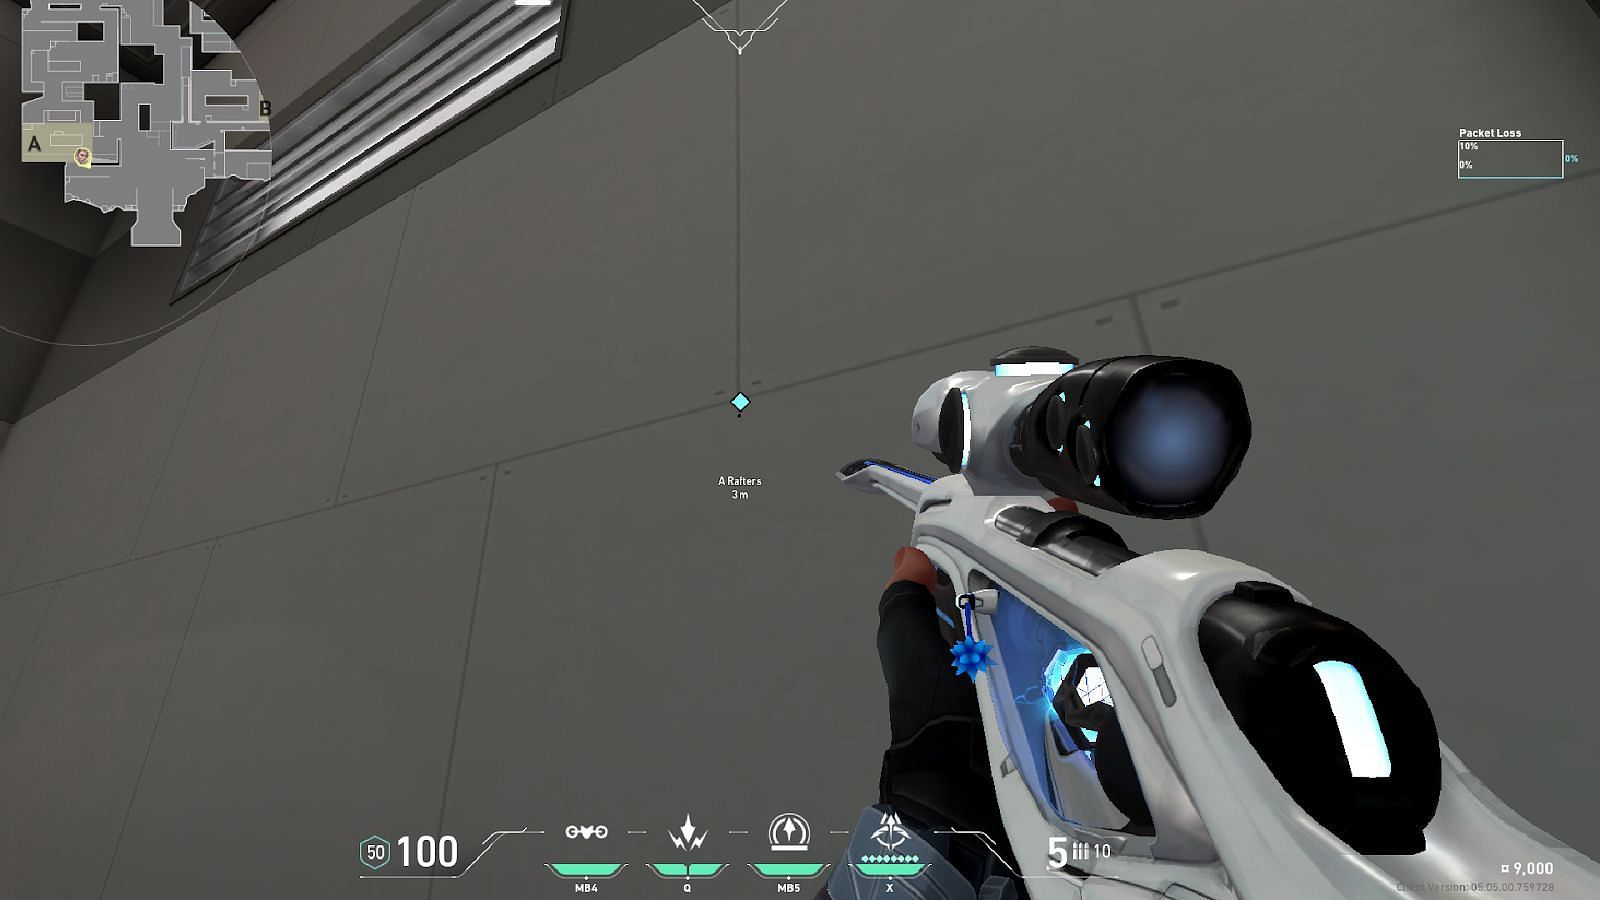
Stand directly below the marked line and hug the wall on A-Rafters.
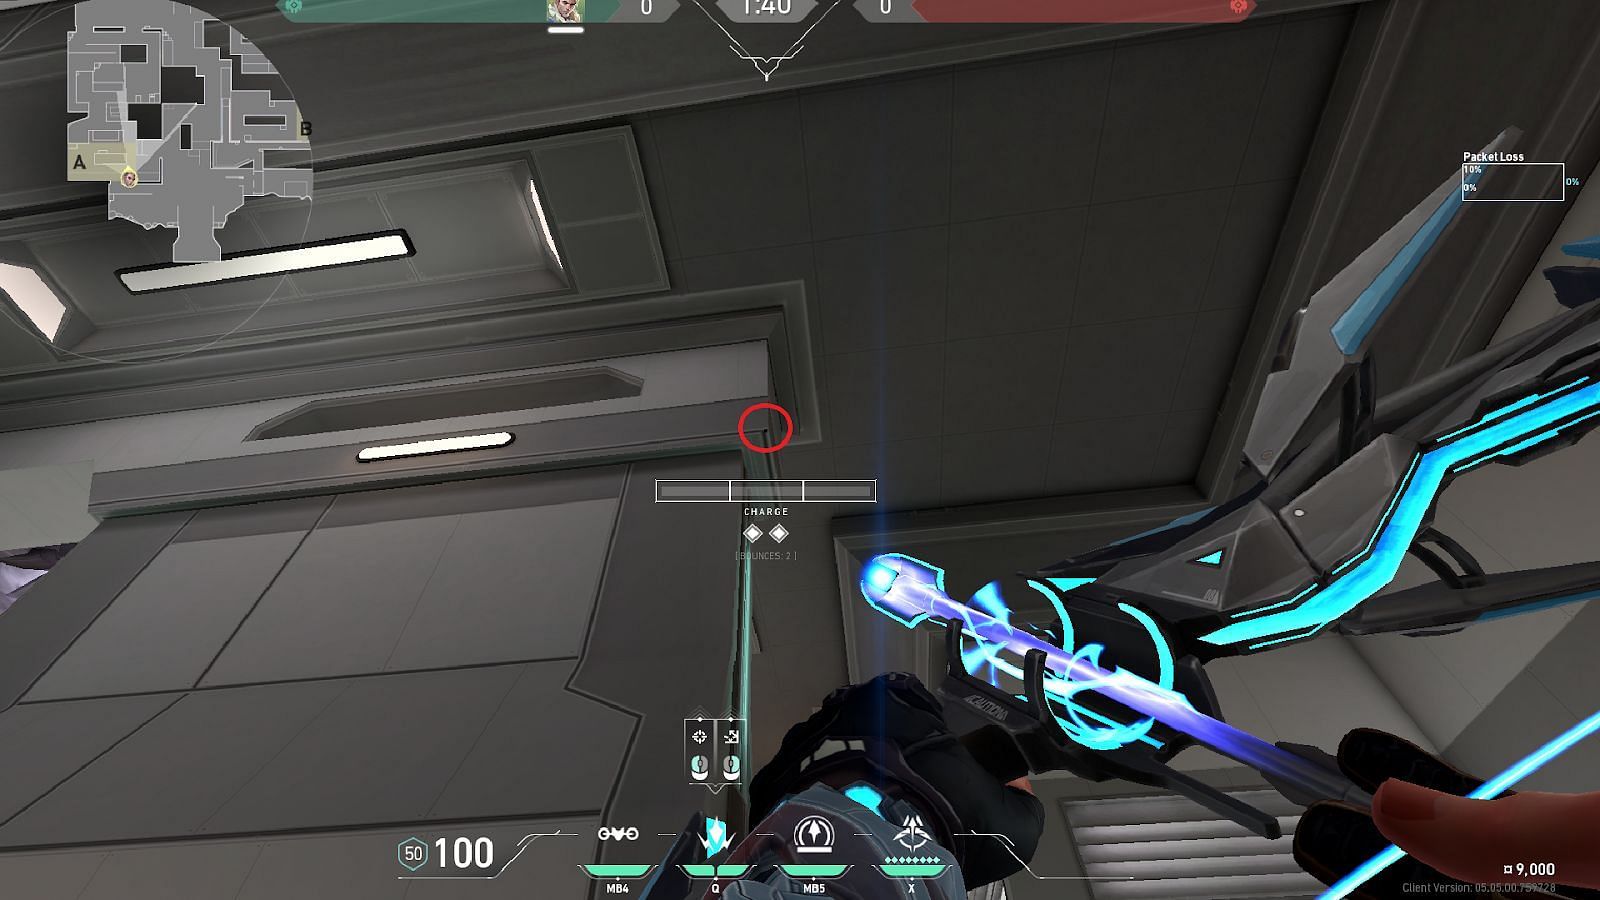
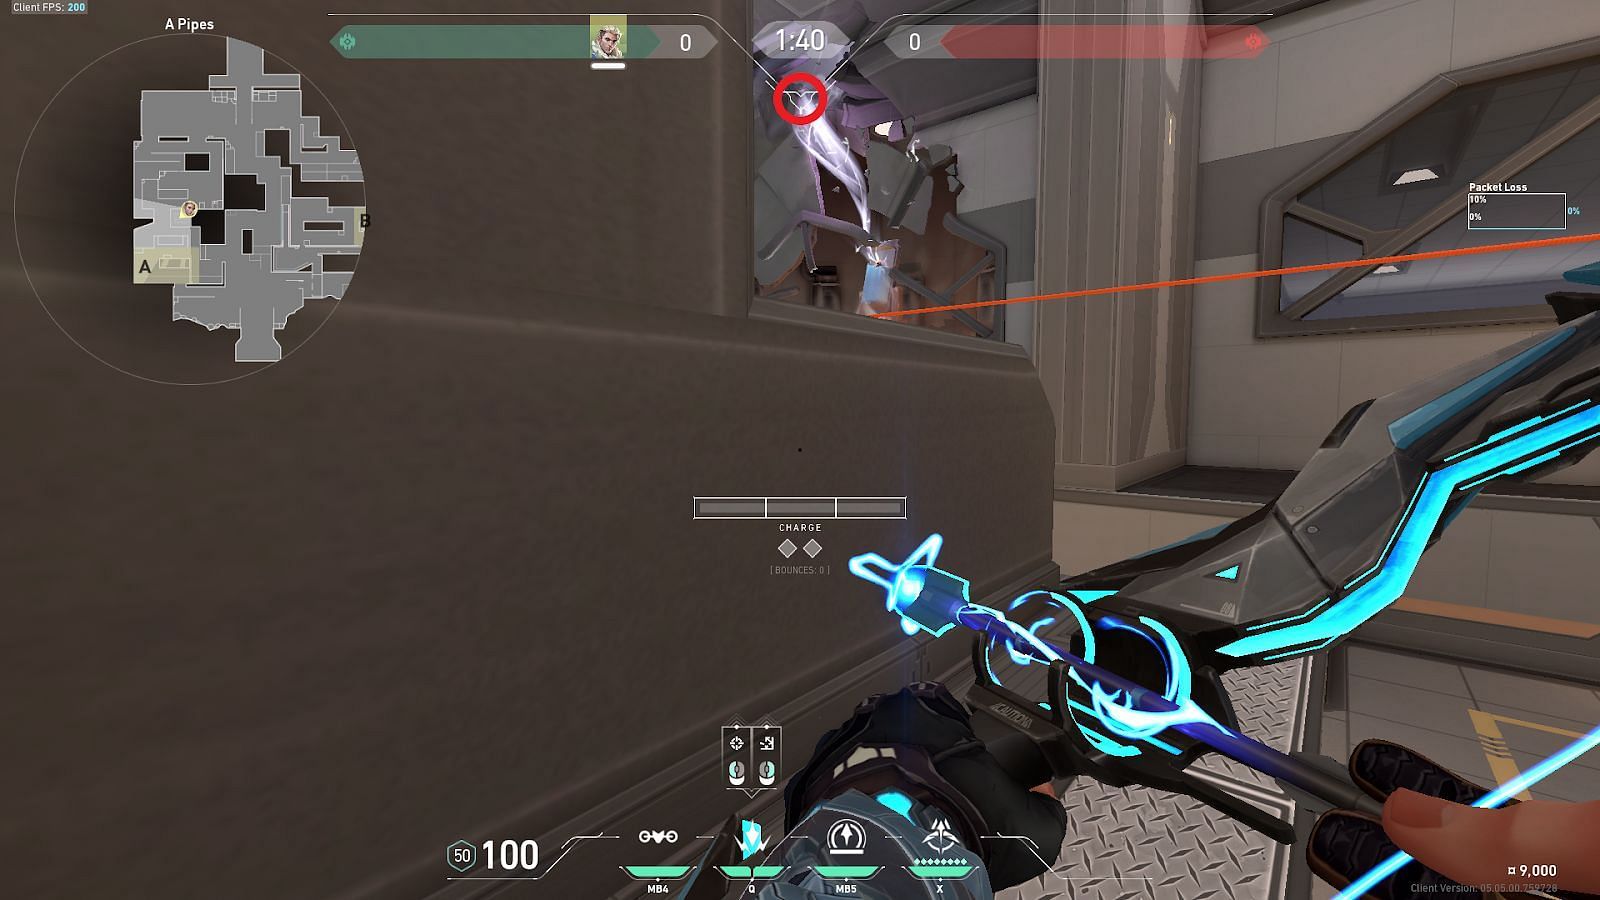
Place the crosshair on top of the roof ledge (shown in the circle) and launch the first Shock Dart with a double bounce (right-click twice) and a simple left-click.
Place the crosshair on the ledge of the A-Site nest ledge and deploy the second Shock Dart with a double bounce (right click twice) and a simple left-click.
Consecutively launch both the Shock Darts for them to land below A-Pipes.
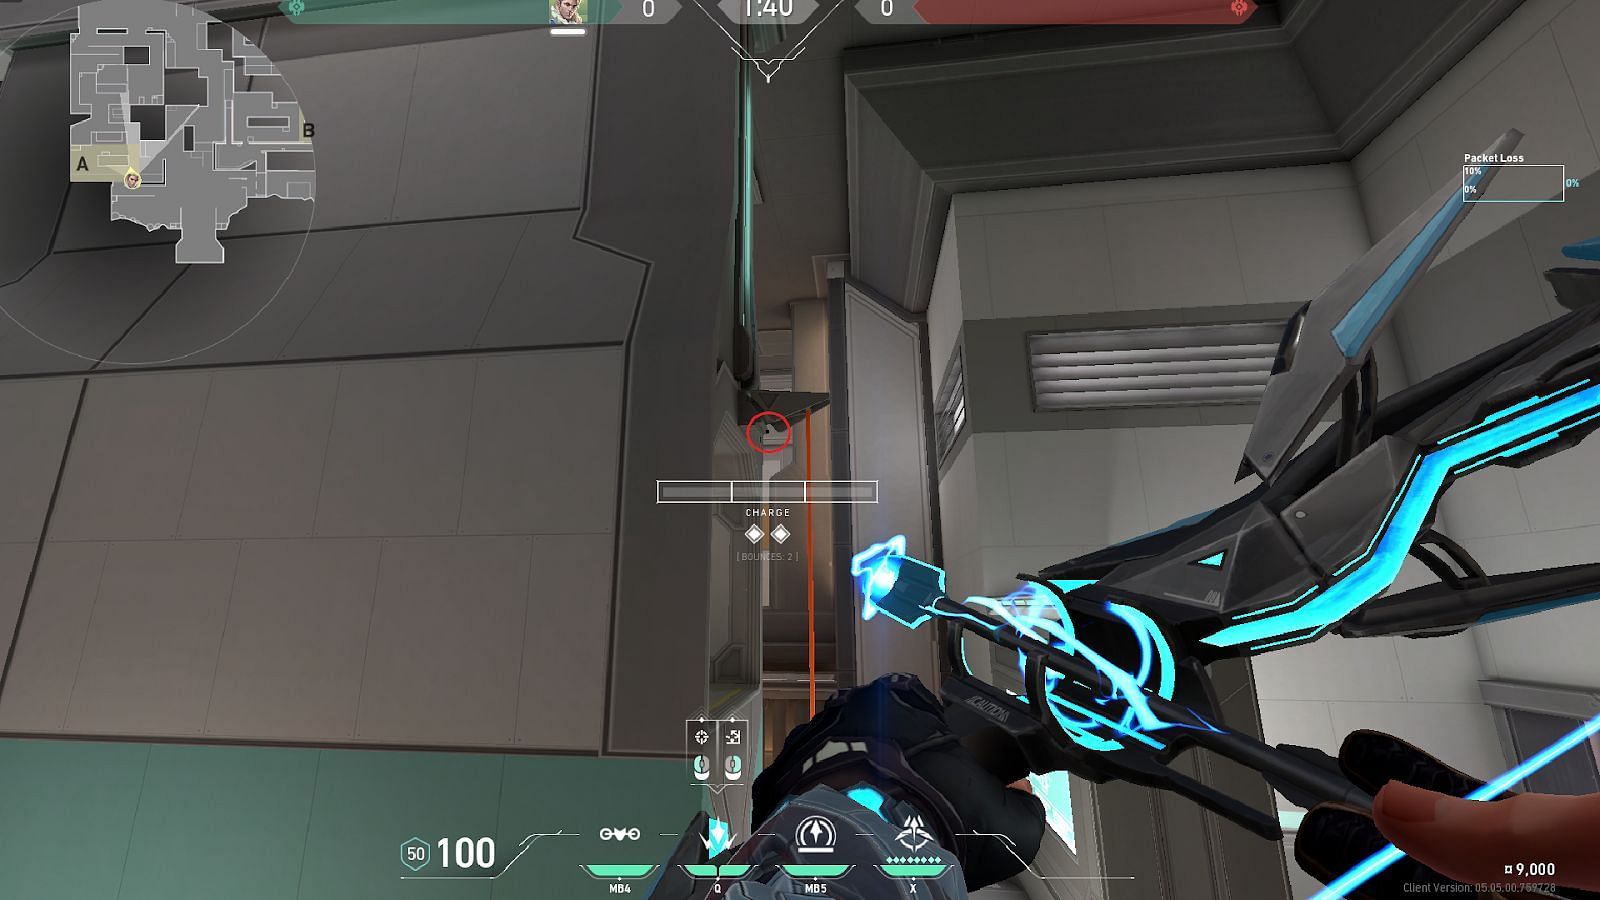
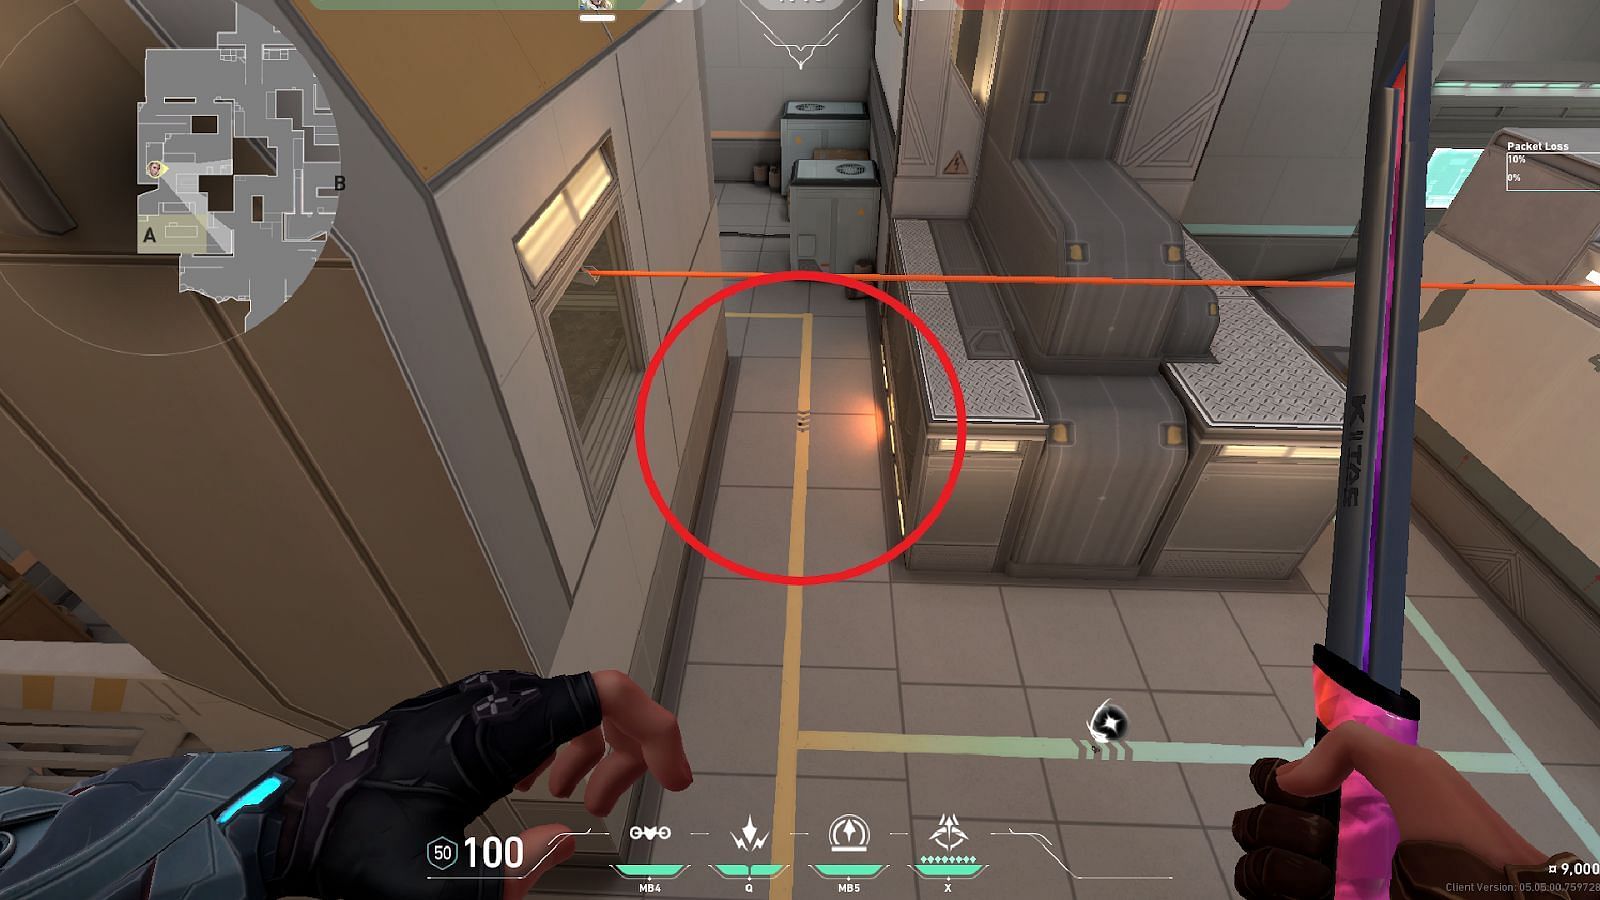
3) A-Pipes to A-Site Default Generator Plant
Stand on the edge of A-Pipes and hug the wall in front then look above towards A-Site.

Place the crosshair near the ledge (shown in a circle) and deploy the first Shock Dart with a simple left-click.
Position the Heads-Up Display (HUD) (shown in a circle) towards A-Site and launch the second Shock Dart with another simple jump left-click.
Consecutively launch both Shock Darts and they will land near the A-Site Generator Default Plant position.
4) Attacker Spawn to B-Yellow
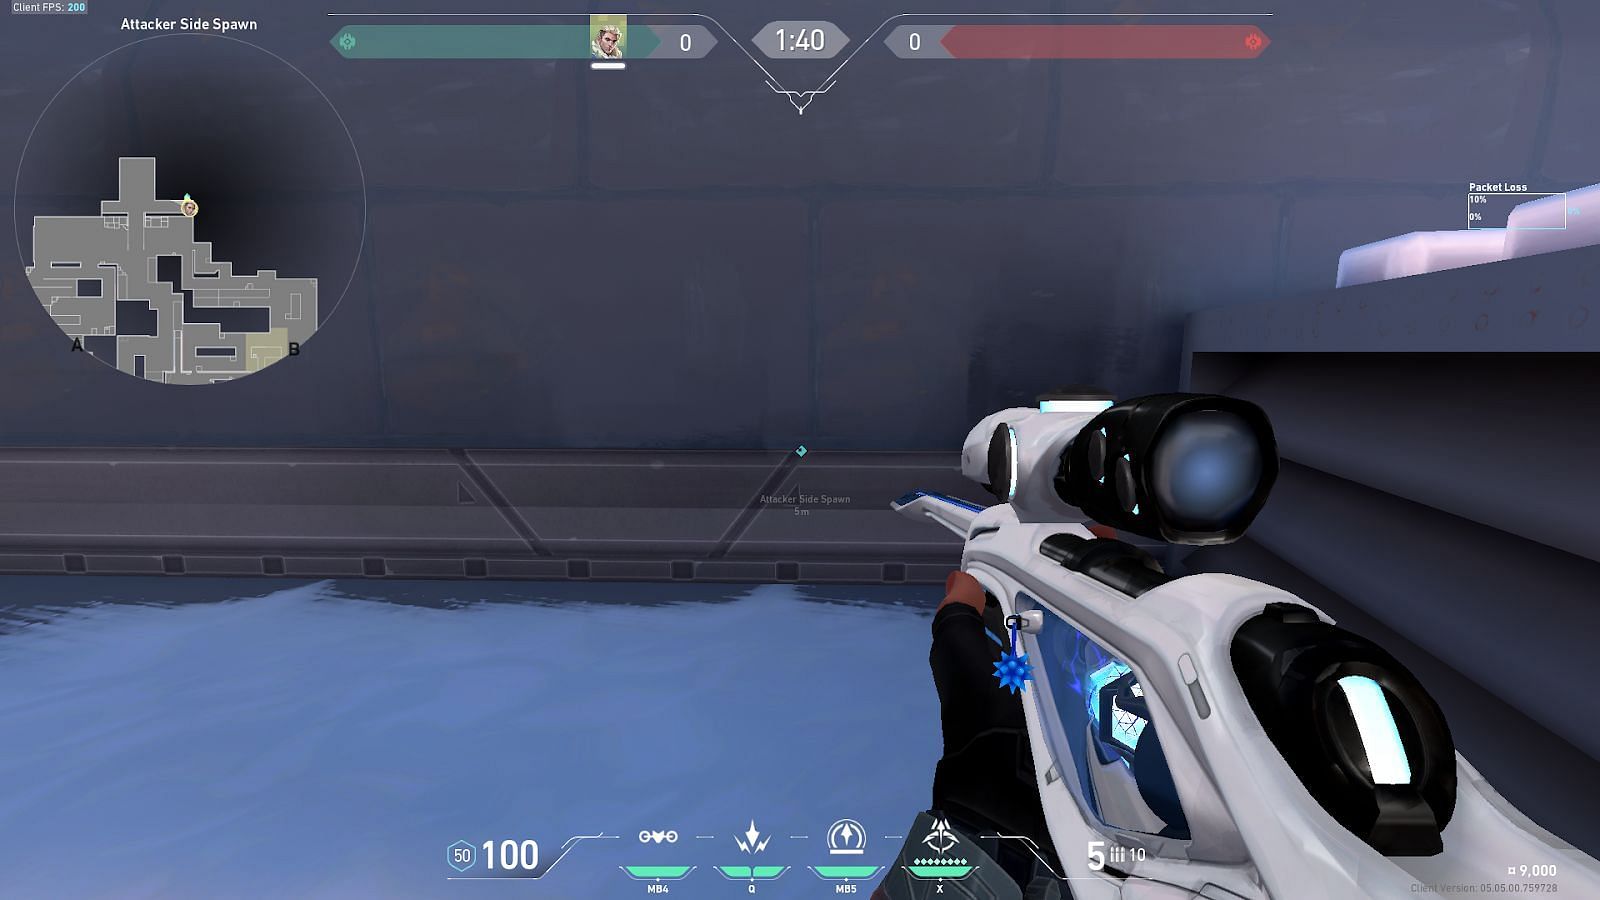
Position in front of the marked borderline and hug the wall in Attacker Spawn.
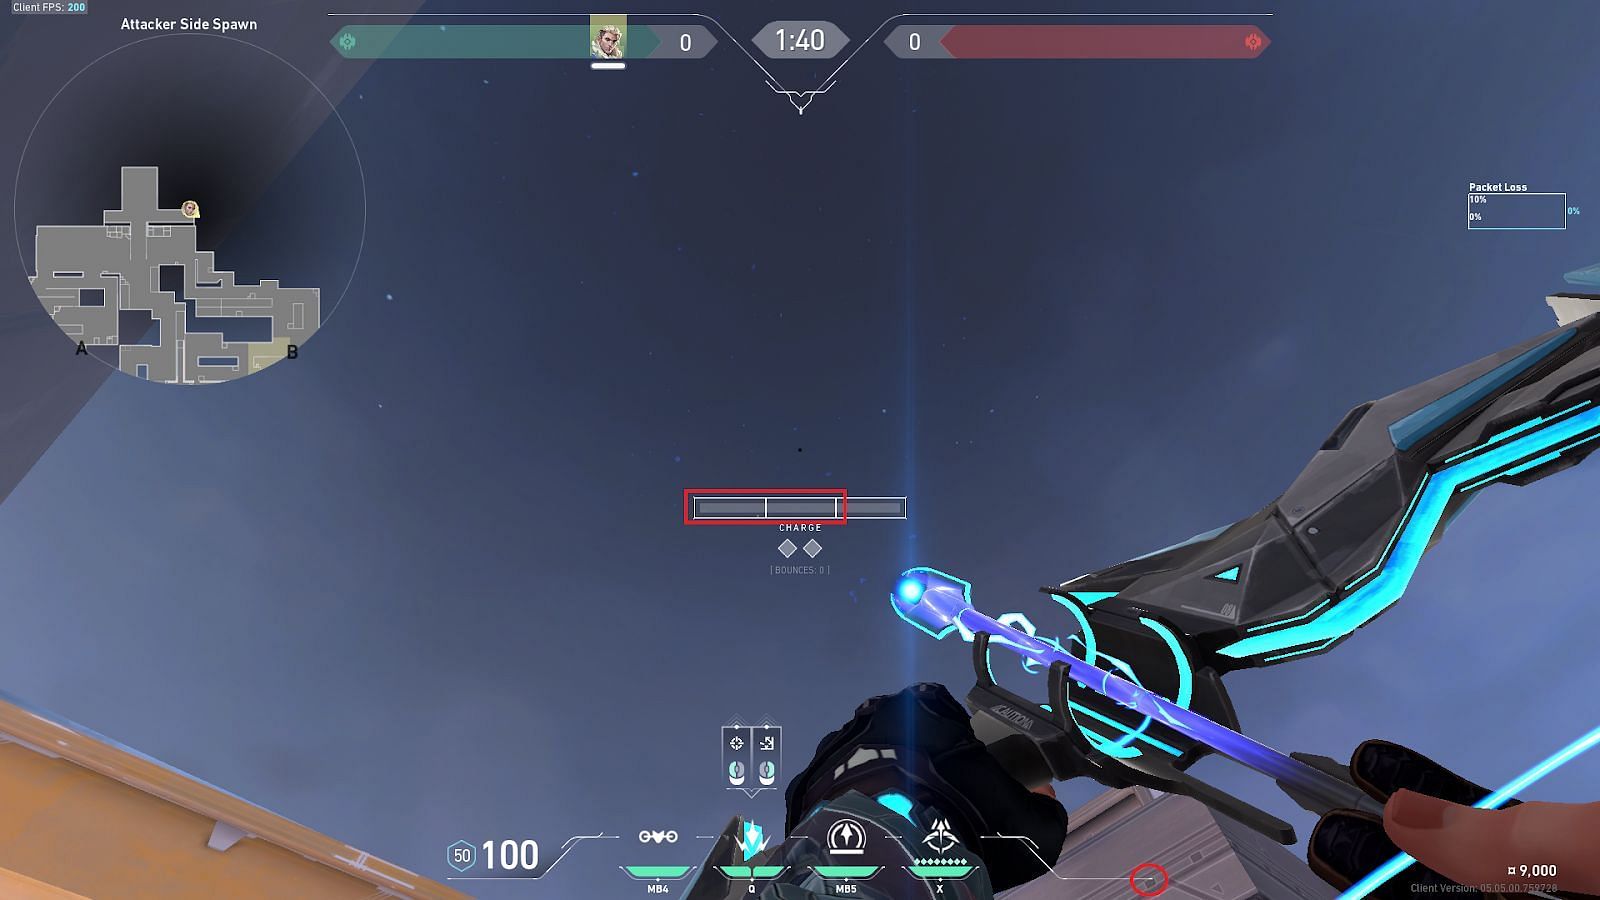
Position the right end of the HUD line on the roof of the B-Main entry building (shown in the circle) and deploy the first Shock Dart with a two-bar charge (shown in the rectangle).
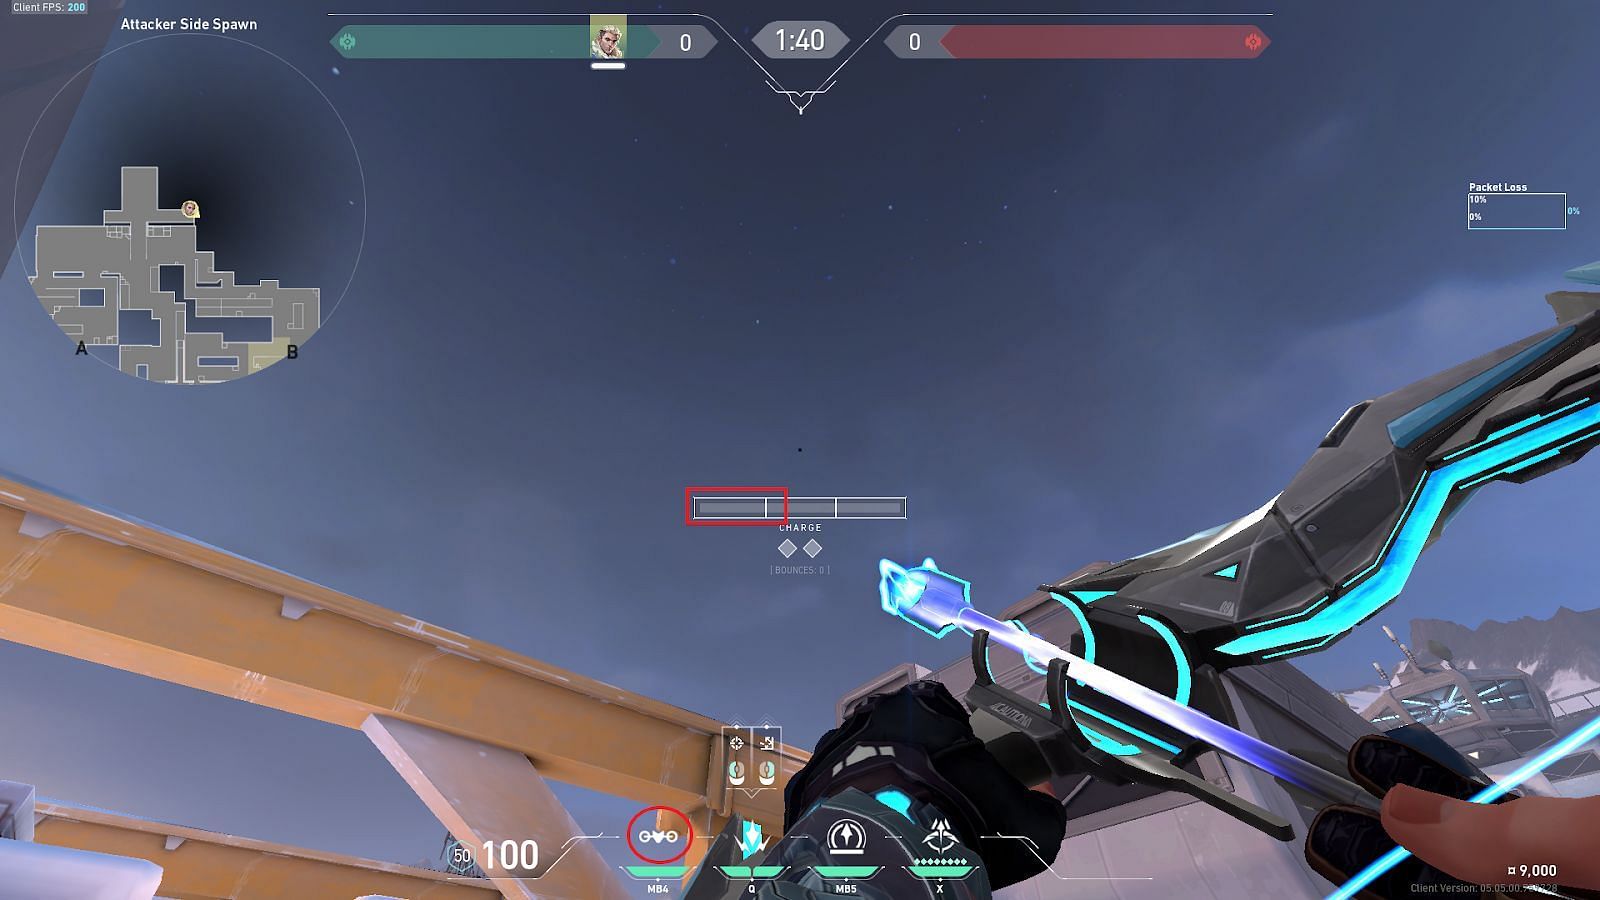
Place the Owl Drone icon`s right circle on the scaffold ledge (shown in the circle) and launch the second Shock Dart with a single bar charge (shown in the rectangle).
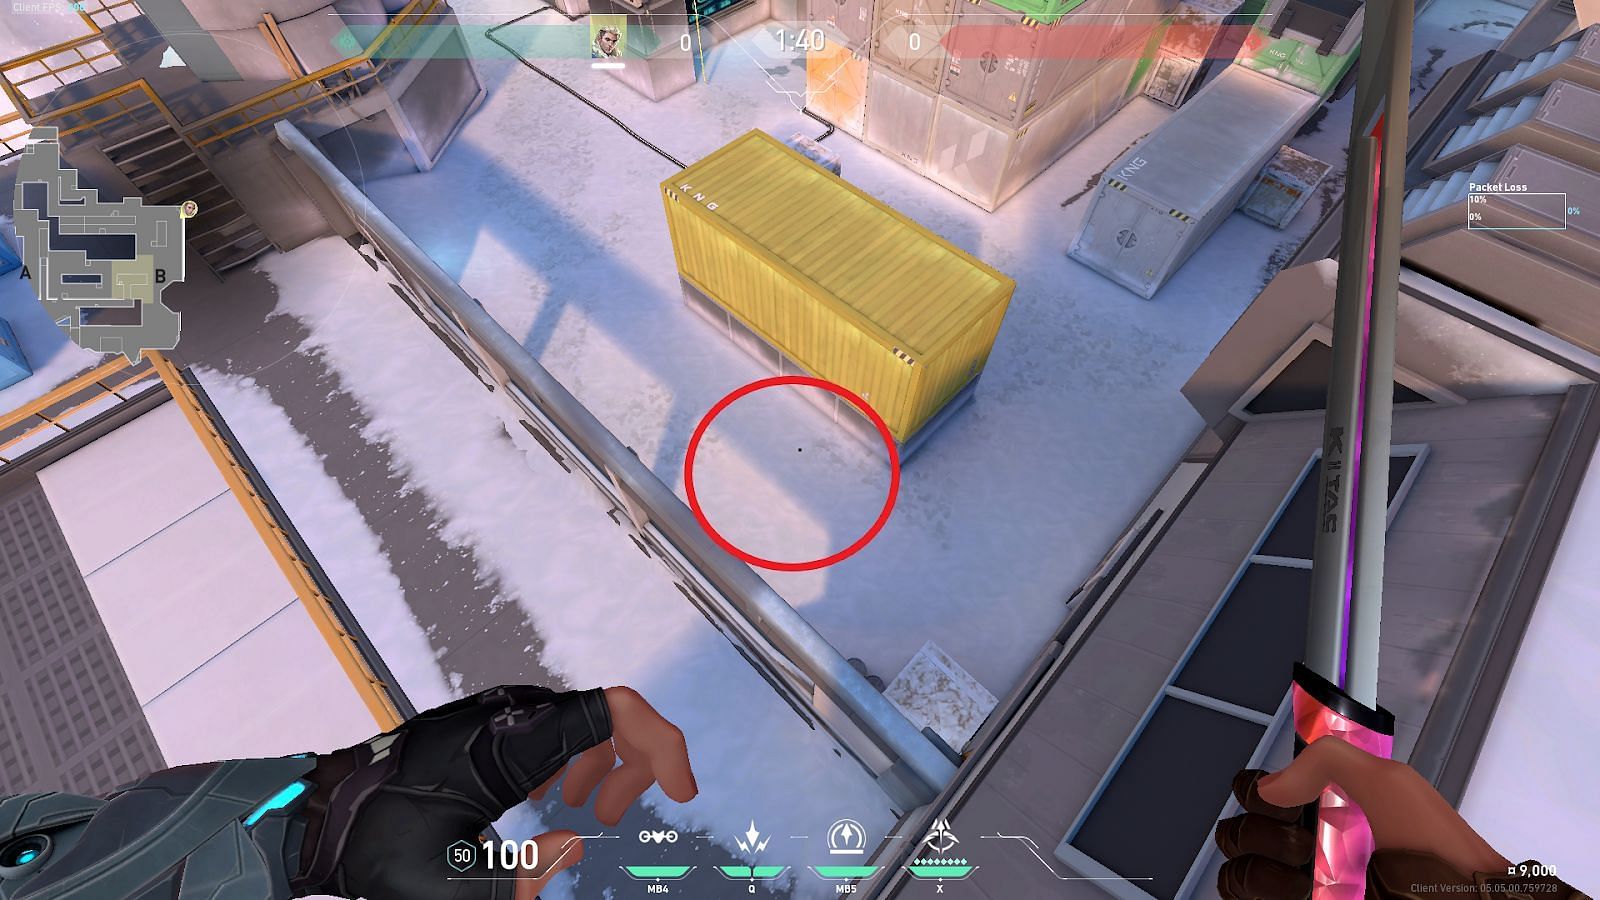
Consecutively launch both Shock Darts and they will land together behind B-Yellow.
These were some of the most effective double Shock Dart lineups for Sova in Valorant`s Icebox. Be it an aggressive approach from defenders or a post-plant scenario for the attackers, these lineups will grant the players an upper hand and accompany them to flawless victories in Valorant.
