
'%20x='0'%20y='0'%20height='100%25'%20width='100%25'%20%0A%20%20%20%20%20%20%20%20%20%20xlink%3Ahref='data:image/jpg;base64,/9j/2wBDAAYEBQYFBAYGBQYHBwYIChAKCgkJChQODwwQFxQYGBcUFhYaHSUfGhsjHBYWICwgIyYnKSopGR8tMC0oMCUoKSj/2wBDAQcHBwoIChMKChMoGhYaKCgoKCgoKCgoKCgoKCgoKCgoKCgoKCgoKCgoKCgoKCgoKCgoKCgoKCgoKCgoKCgoKCj/wgARCAAHAAoDASIAAhEBAxEB/8QAFQABAQAAAAAAAAAAAAAAAAAABAX/2gAIAQEAAAAApG//xAAUAQEAAAAAAAAAAAAAAAAAAAAE/9oACAECEAAAACf/xAAUAQEAAAAAAAAAAAAAAAAAAAAE/9oACAEDEAAAAF//xAAjEAABAwMCBwAAAAAAAAAAAAACAwQGAQURACMSFiEyQWHi/9oACAEBAAE/ALxf5JJF463Y3lwYOKqVXBYuHbAa5IcecZ99dPJlJkHa6PM1z2zIO/51/8QAFxEBAQEBAAAAAAAAAAAAAAAAAgEAEv/aAAgBAgEBPwAtK83f/8QAFxEAAwEAAAAAAAAAAAAAAAAAAAECEv/aAAgBAwEBPwBypnR//9k='%3E%3C/image%3E%3C/svg%3E)
Valorant is a game where utilizing one`s abilities correctly can turn the entire match around. An in-depth understanding of the maps and the Agents being played is crucial.
Sova is one of the Agents in Valorant who can remotely contribute to and impact the team`s overall performance. Being an Initiator, knowing lineups can prove to be a key factor between winning or losing.

Utilizing the map structure to Sova`s advantage, players can use multiple lineups to inflict damage on enemies from a safe distance. Bind is the perfect map for the Agent since it has fewer high-rise buildings, a lot of corners, and tight alleys.
It is important to note that the following lineups were performed on low graphics settings.

This article discusses a few double Shock Dart lineups that can fatally affect the enemy team from a distance in Valorant's Bind.
Note: This article is subjective and reflects the author’s opinion.
Valorant Sova's simple and best double Shock Dart lineups on Bind
1) B-Site to B-Short Outside Hookah
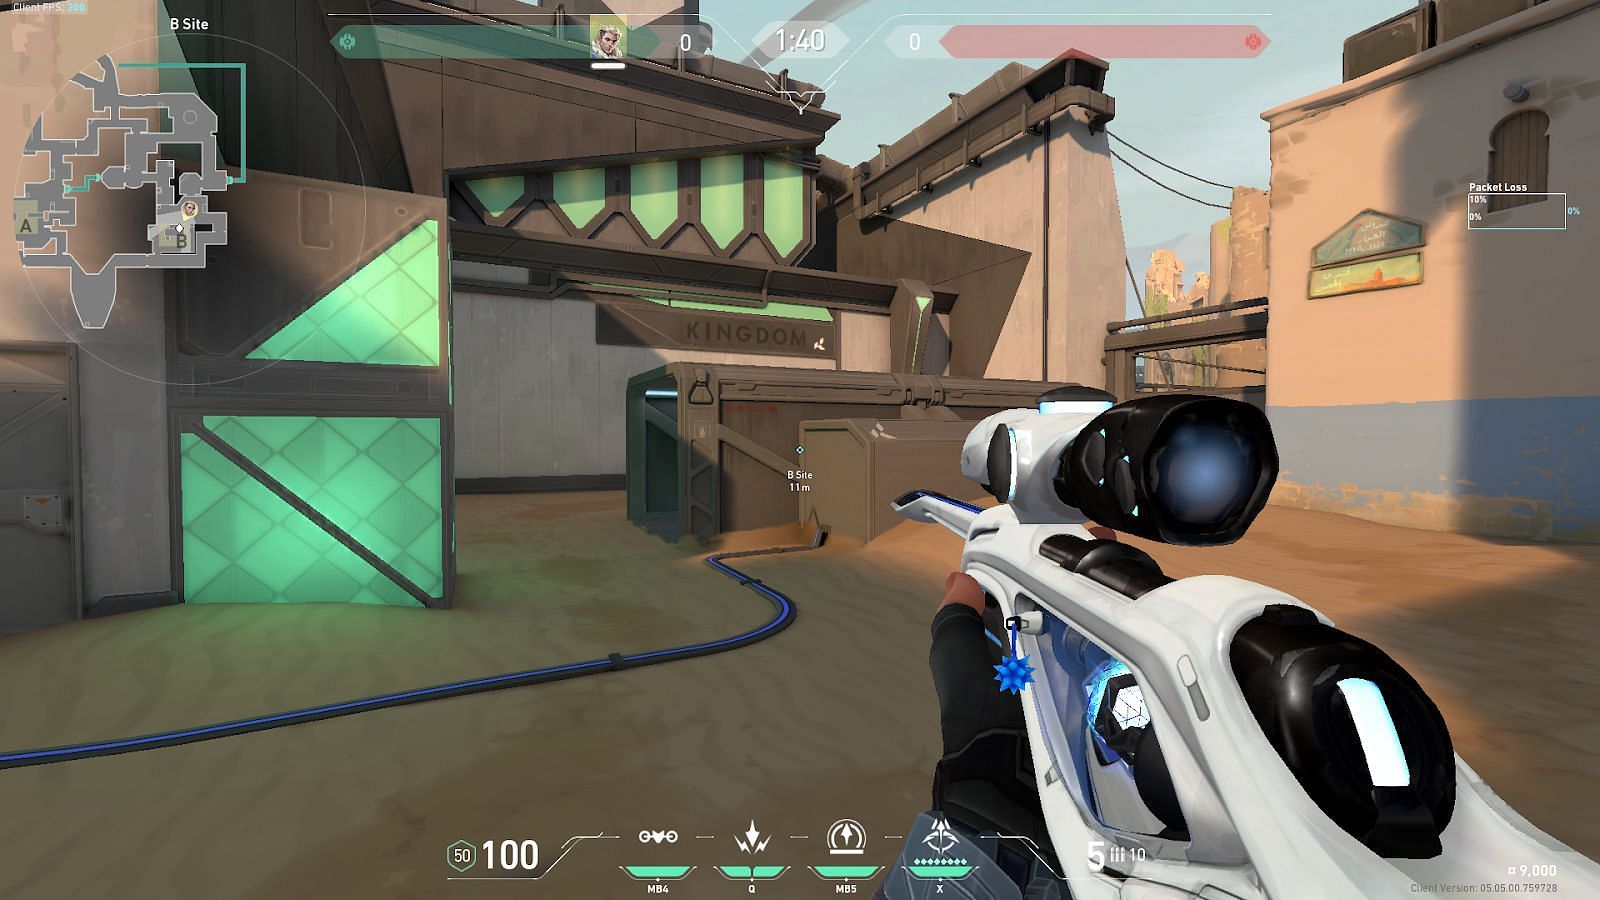
For this lineup, players need to position themselves in B-Site and tuck themselves into the shown corner.
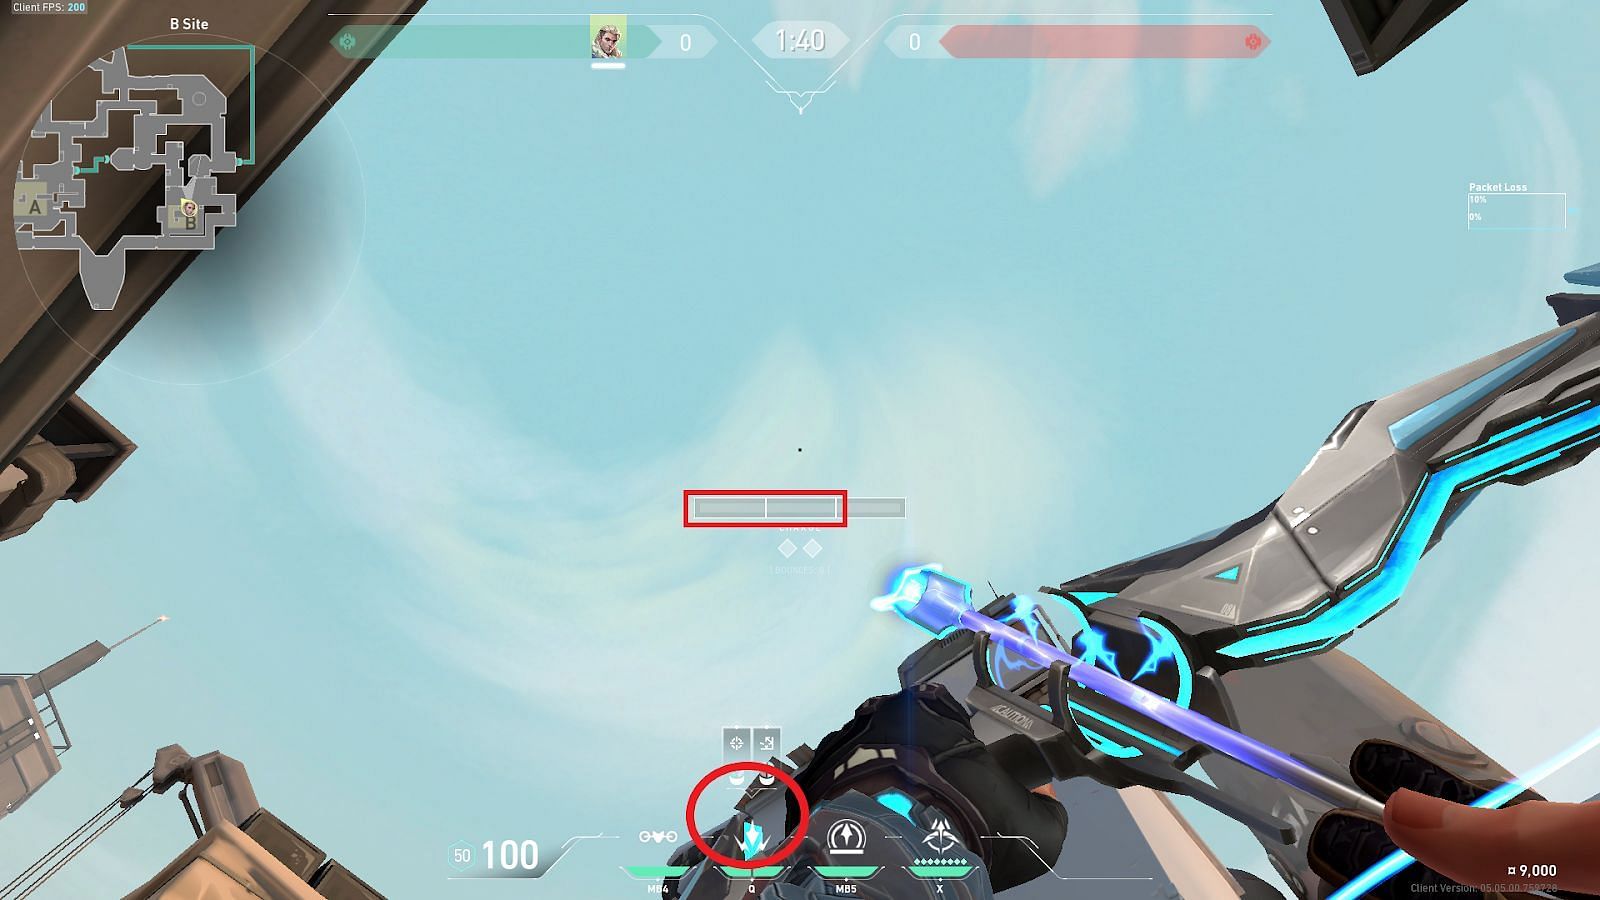
For the first Shock Dart, players will need to align the top of the Shock Dart icon (shown in a cricle) on the corner of the roof ledge. Then the ability needs to be deployed with a two bar-charge (shown in a rectangle).
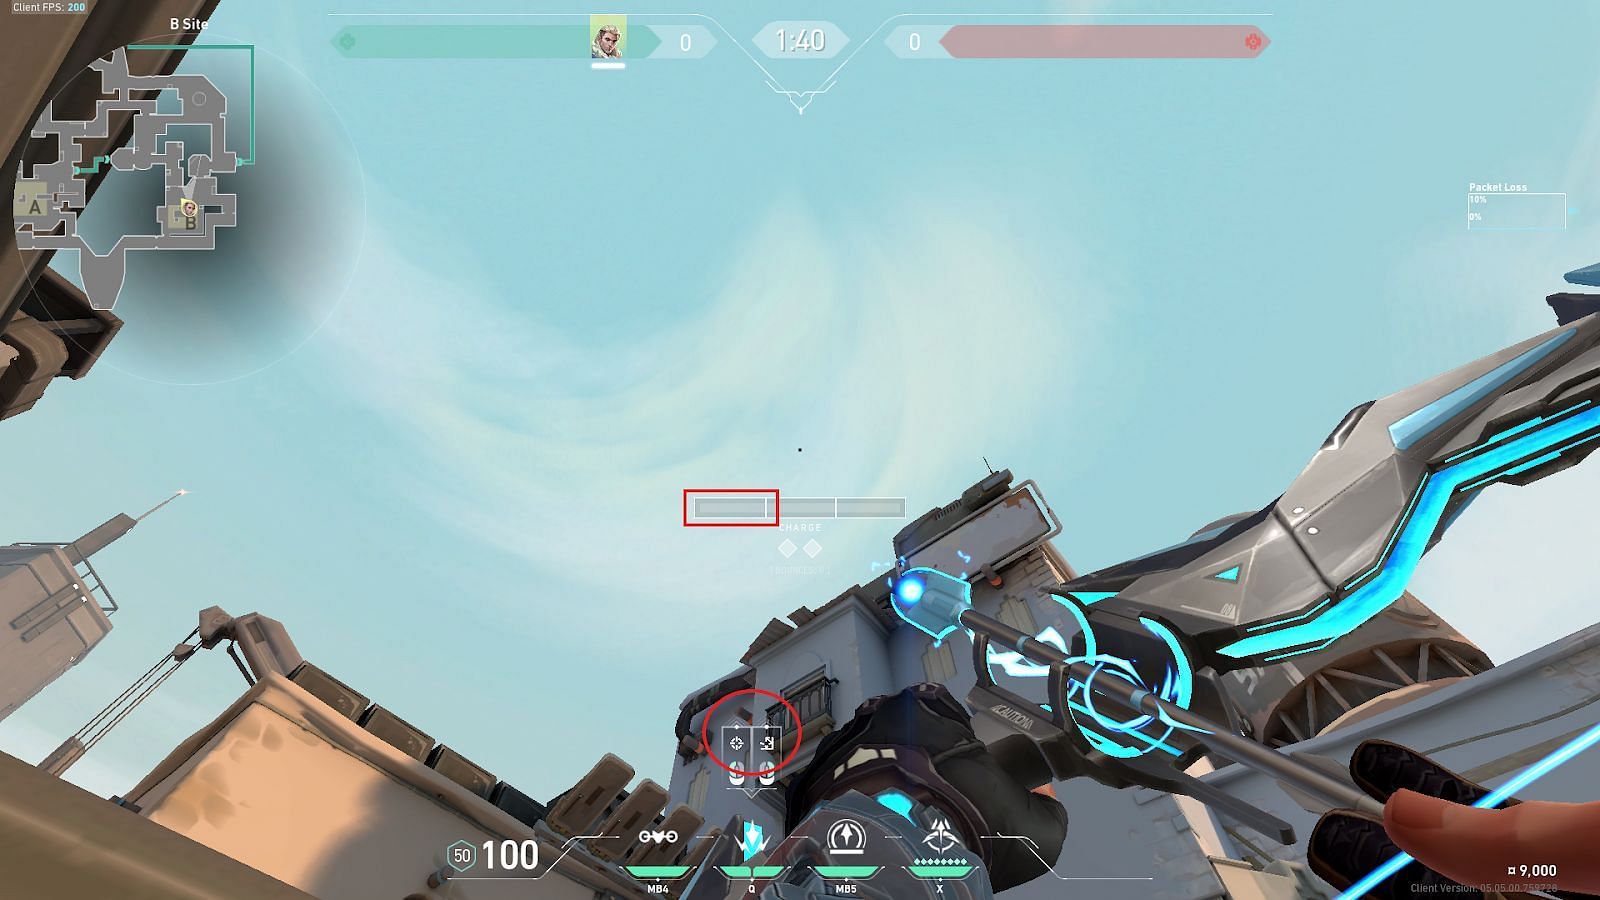
Players need to align the tip of the mouse indicators (shown in a circle) below a wooden pole as shown. The second Shock Dart needs to be deployed with a one bar-charge (shown in a rectangle).
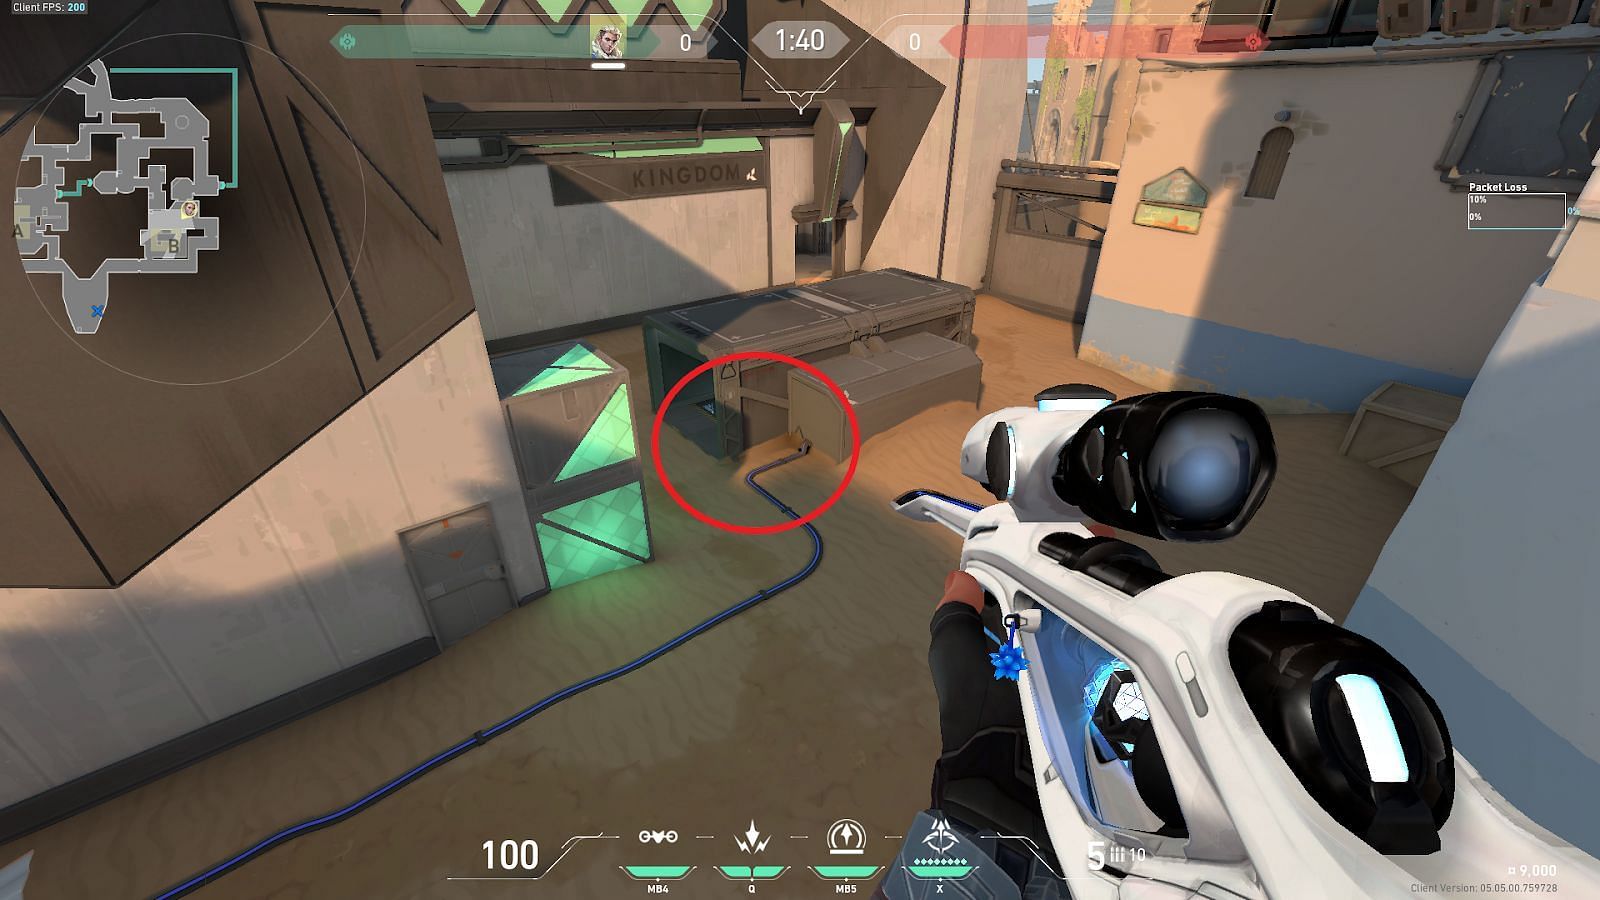
Deploying both darts simultaneously will result in them landing outside Hookah/B-Short (shown in a circle) together.
2) Defender Spawn to A-Site Default Plant
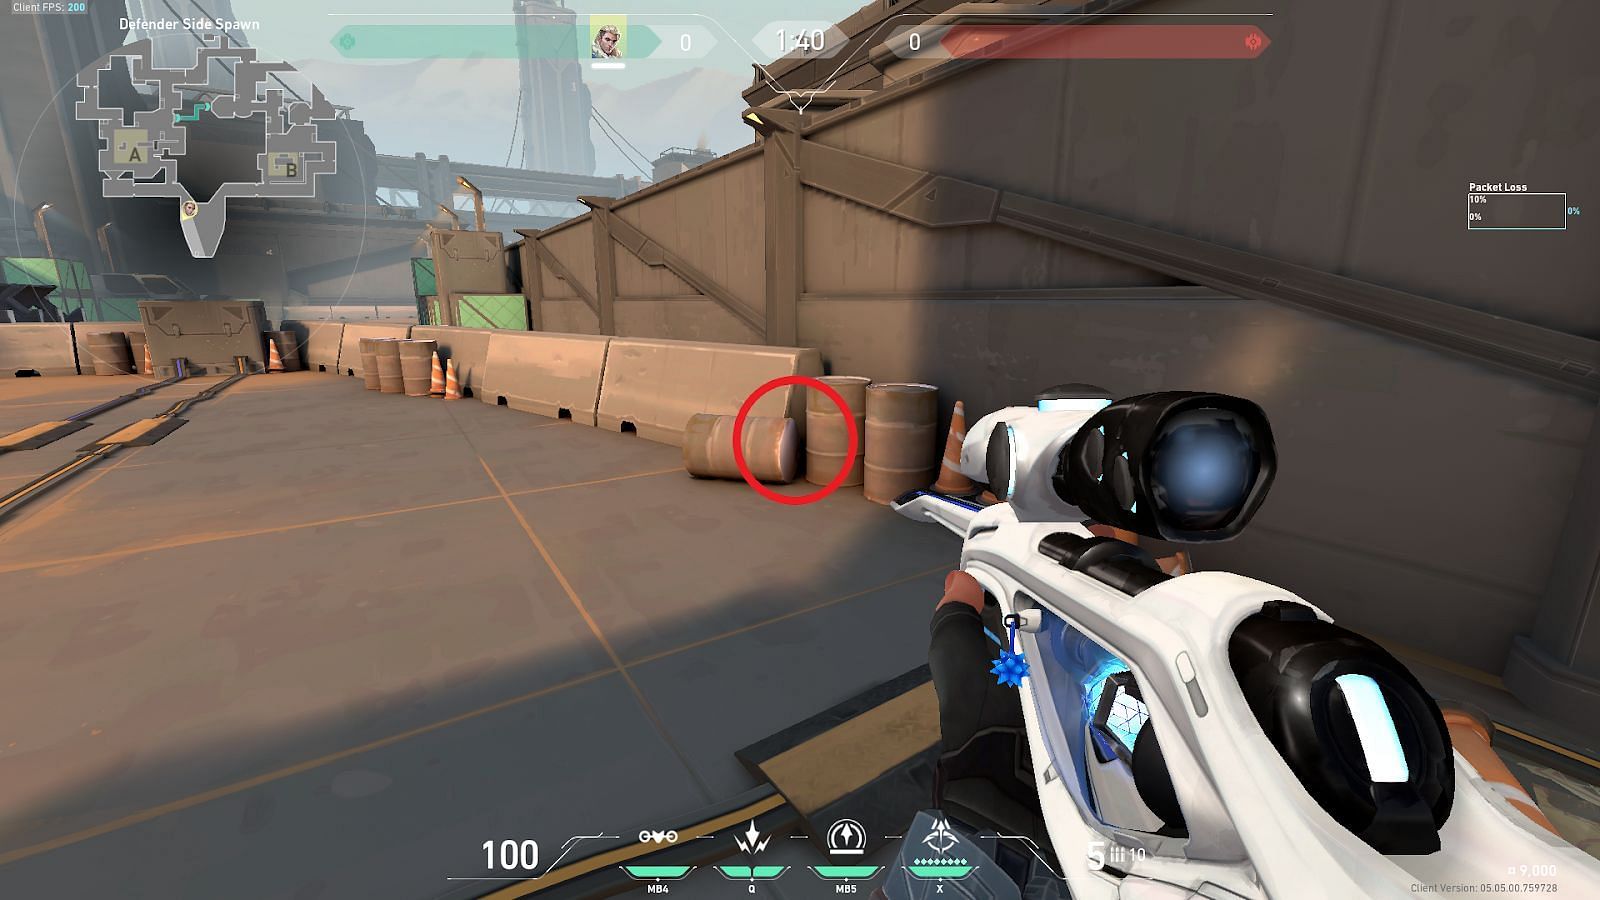
For this lineup, players need to position themselves in Defender Spawn and tuck themselves into the shown corner (shown in a circle).
For the first Shock Dart, players need to align the right end (shown in a circle) of the Heads-Up Display (HUD) Line on the right end of the brick as shown. Then, the ability needs to be deployed with a two bar-charge (shown in a rectangle).
Players need to align the left end of the HUD (shown in a circle) exactly at the border as shown. With a single bar-charge, they need to deploy the second Shock Dart.
Deploying both the darts consecutively will result in them landing in the A-Site Default Plant (shown in a circle).
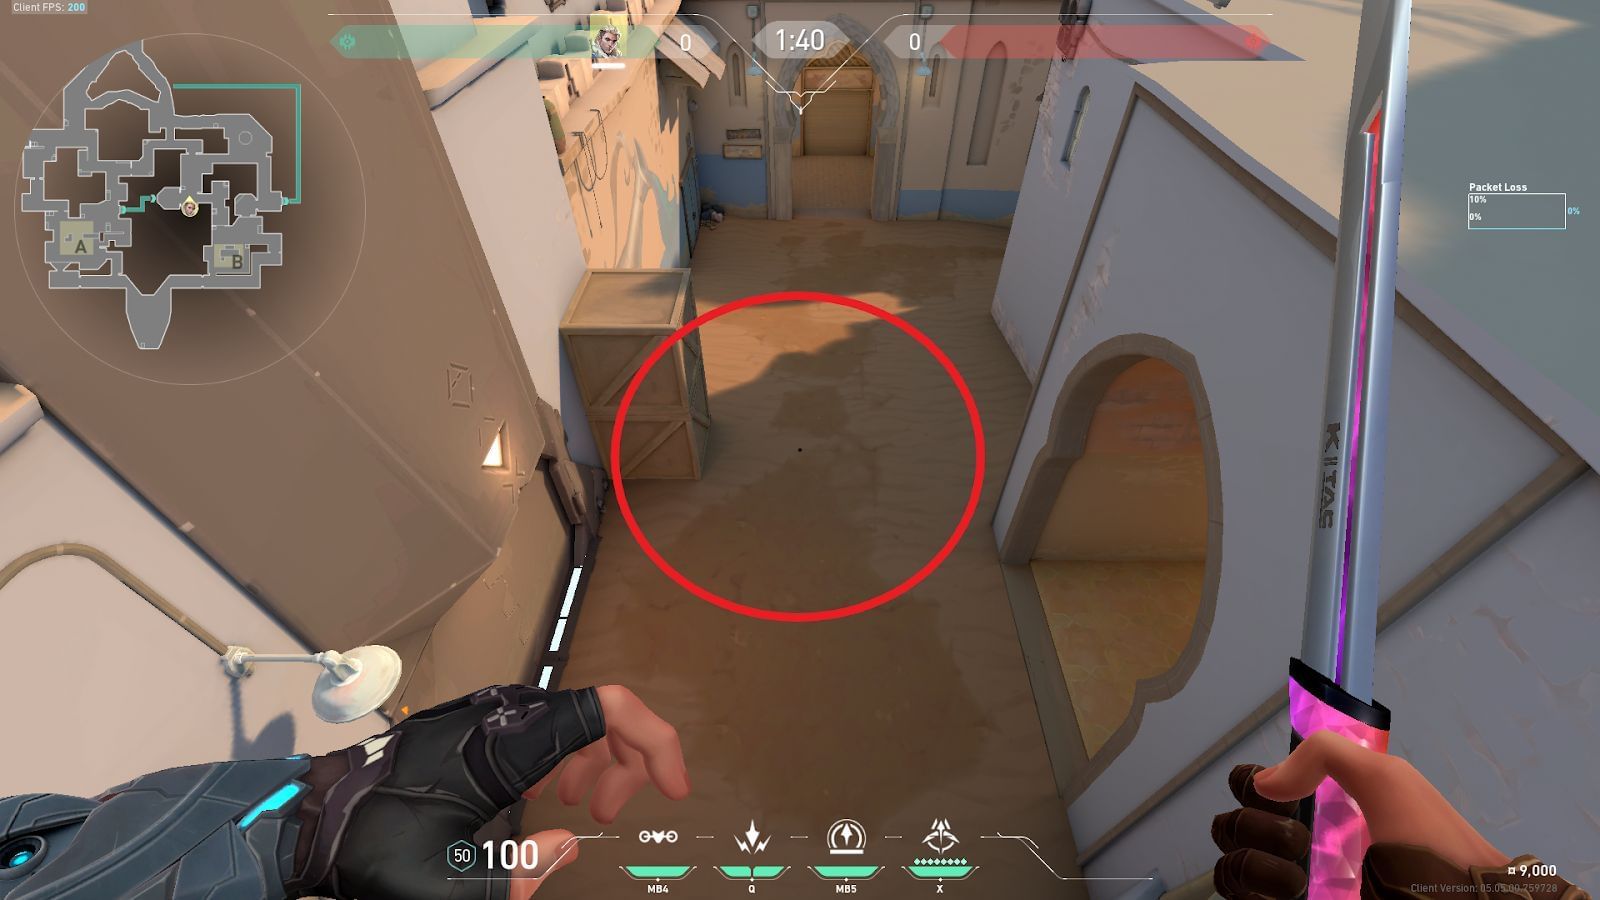
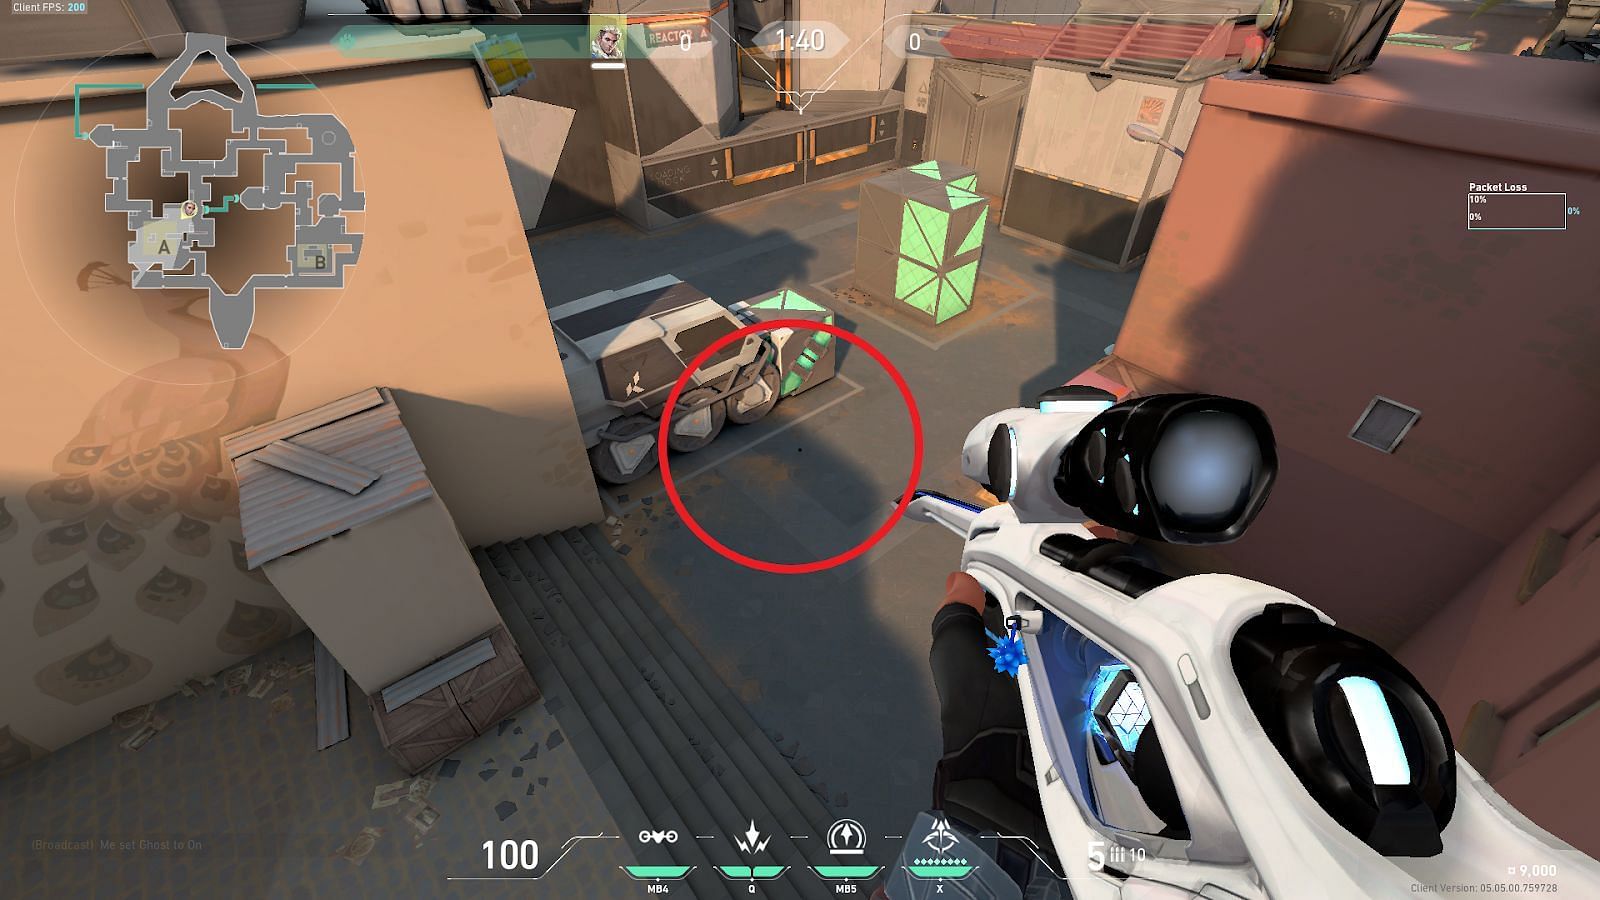
3) Defender Spawn to B-Site Default Plant
For this lineup, players will need to find the middle boundary line (shown in a circle) and stand directly in front of it by tucking into the wall.
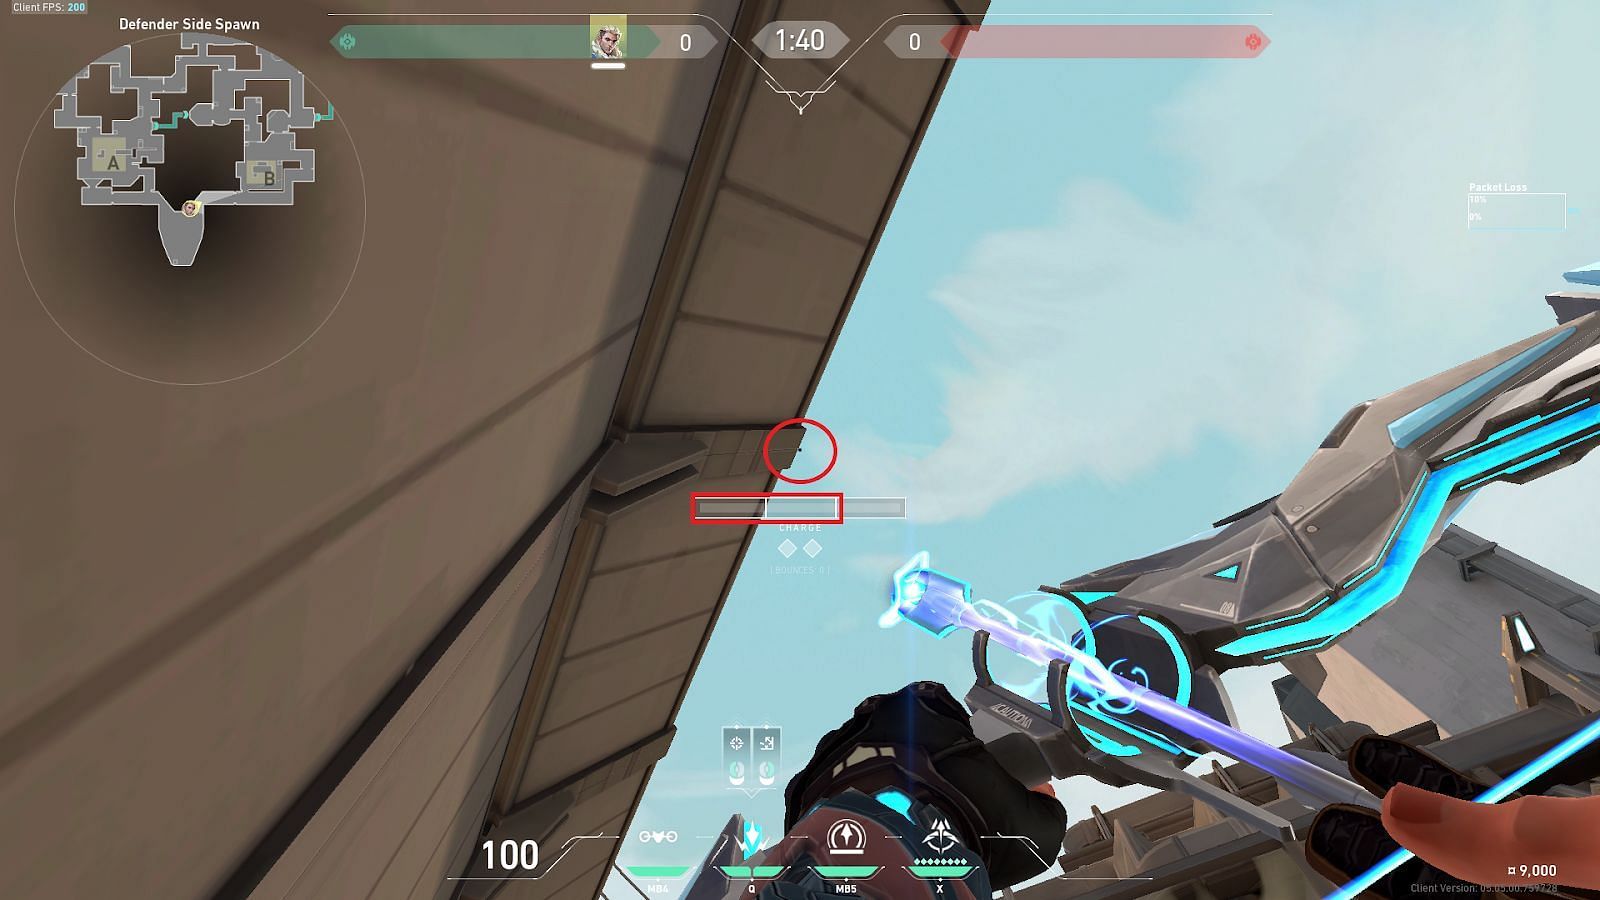
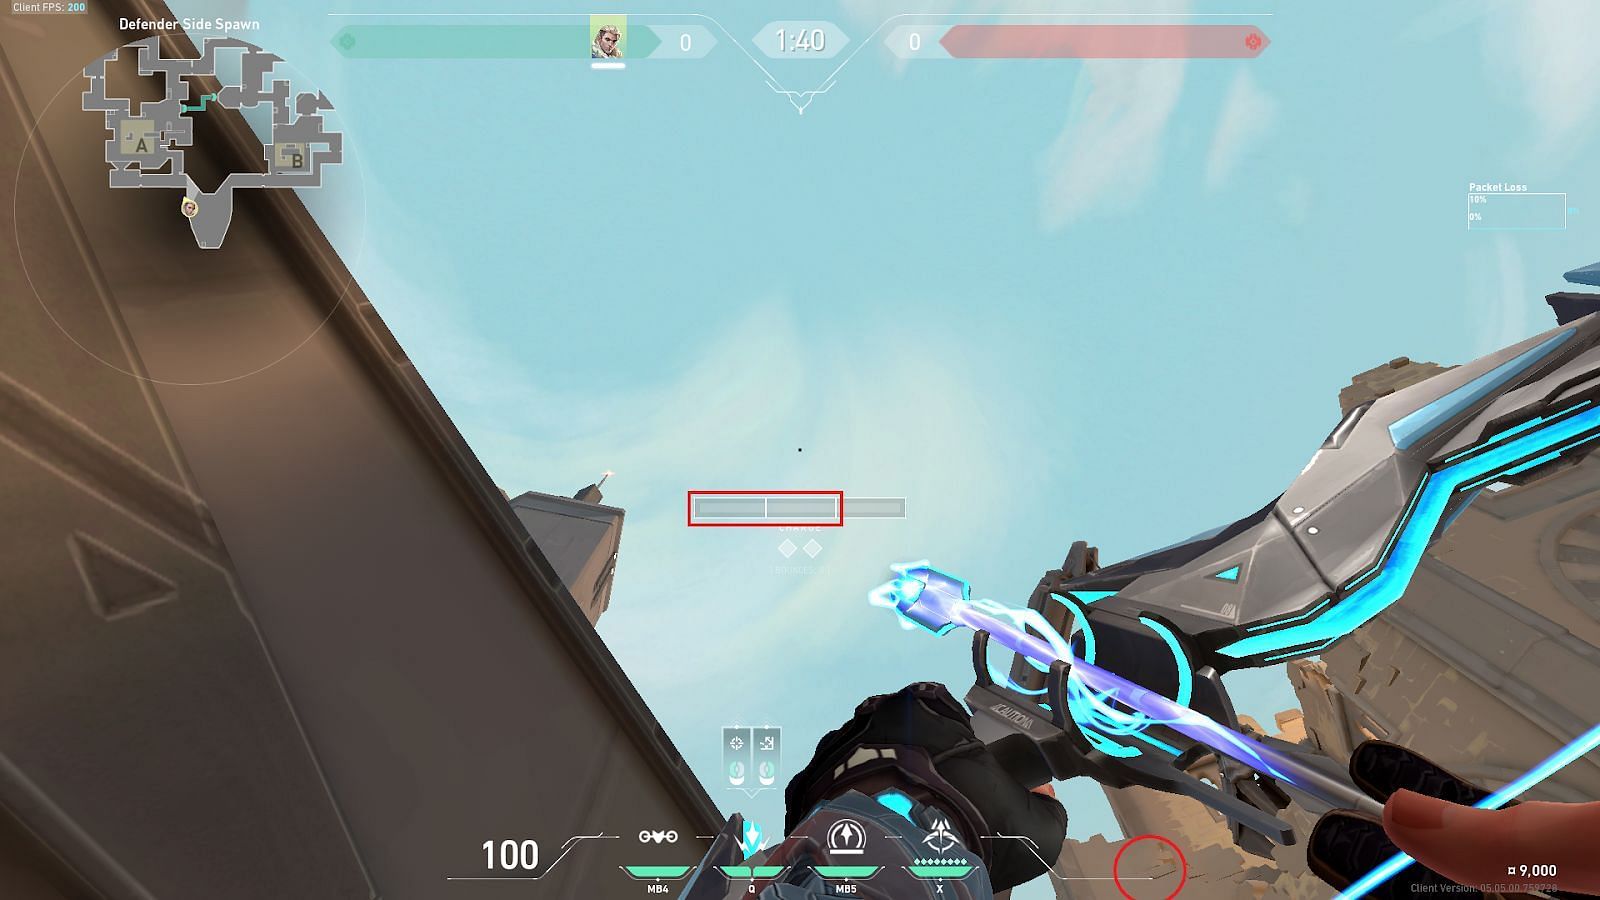
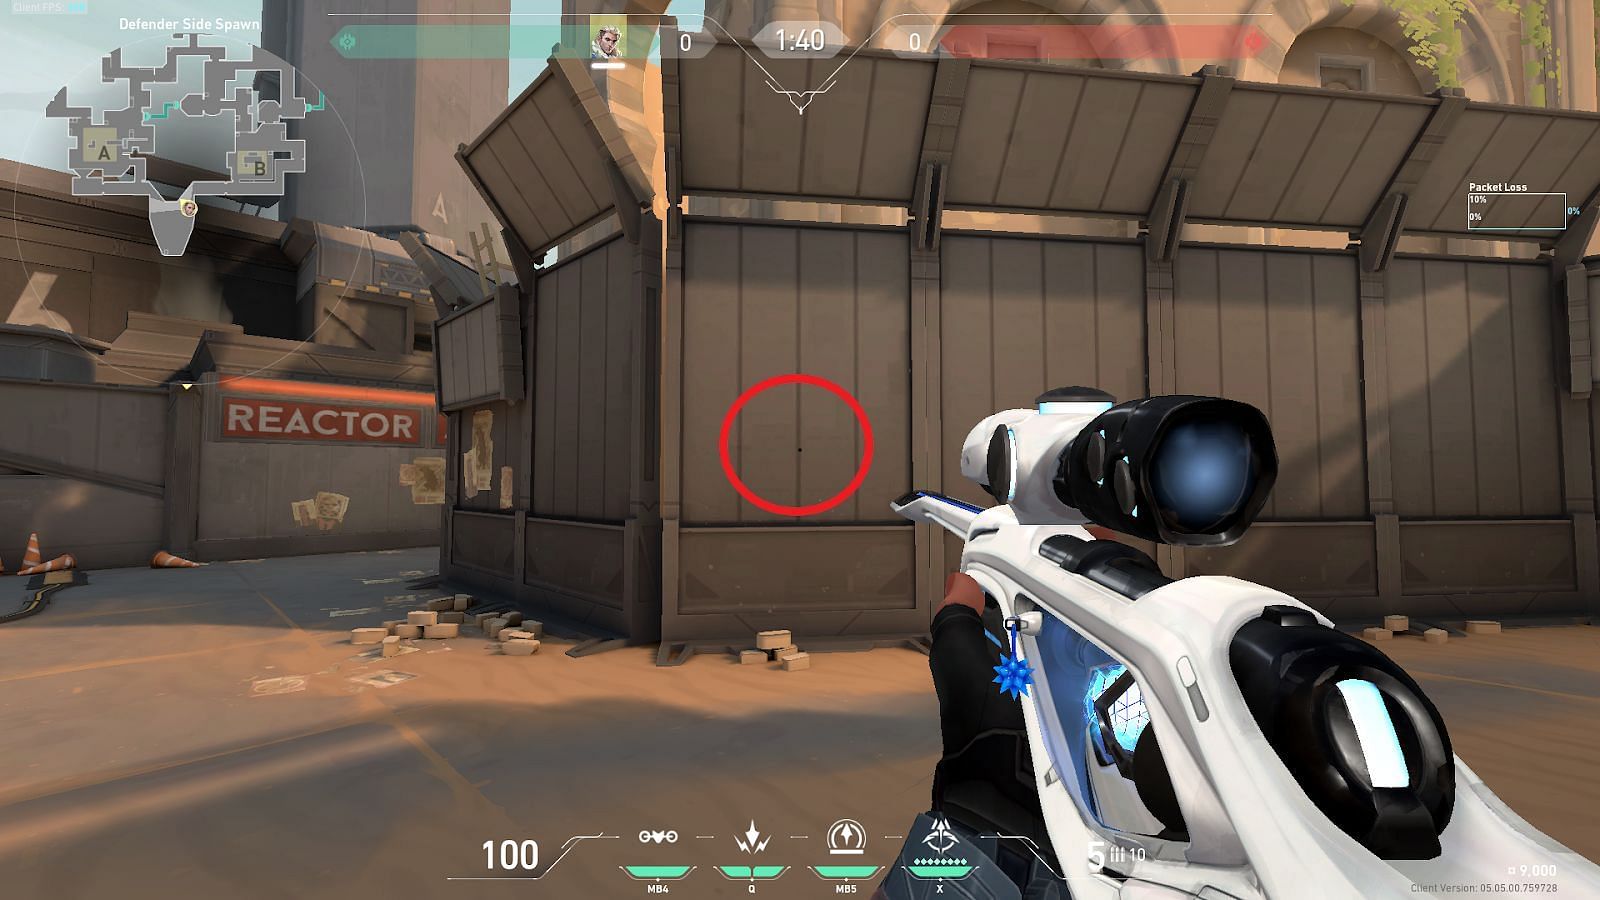
For the first Shock Dart, players need to position their crosshair at the center of a ledge above (shown in a circle) and deploy the ability with a two bar-charge (shown in a rectangle).
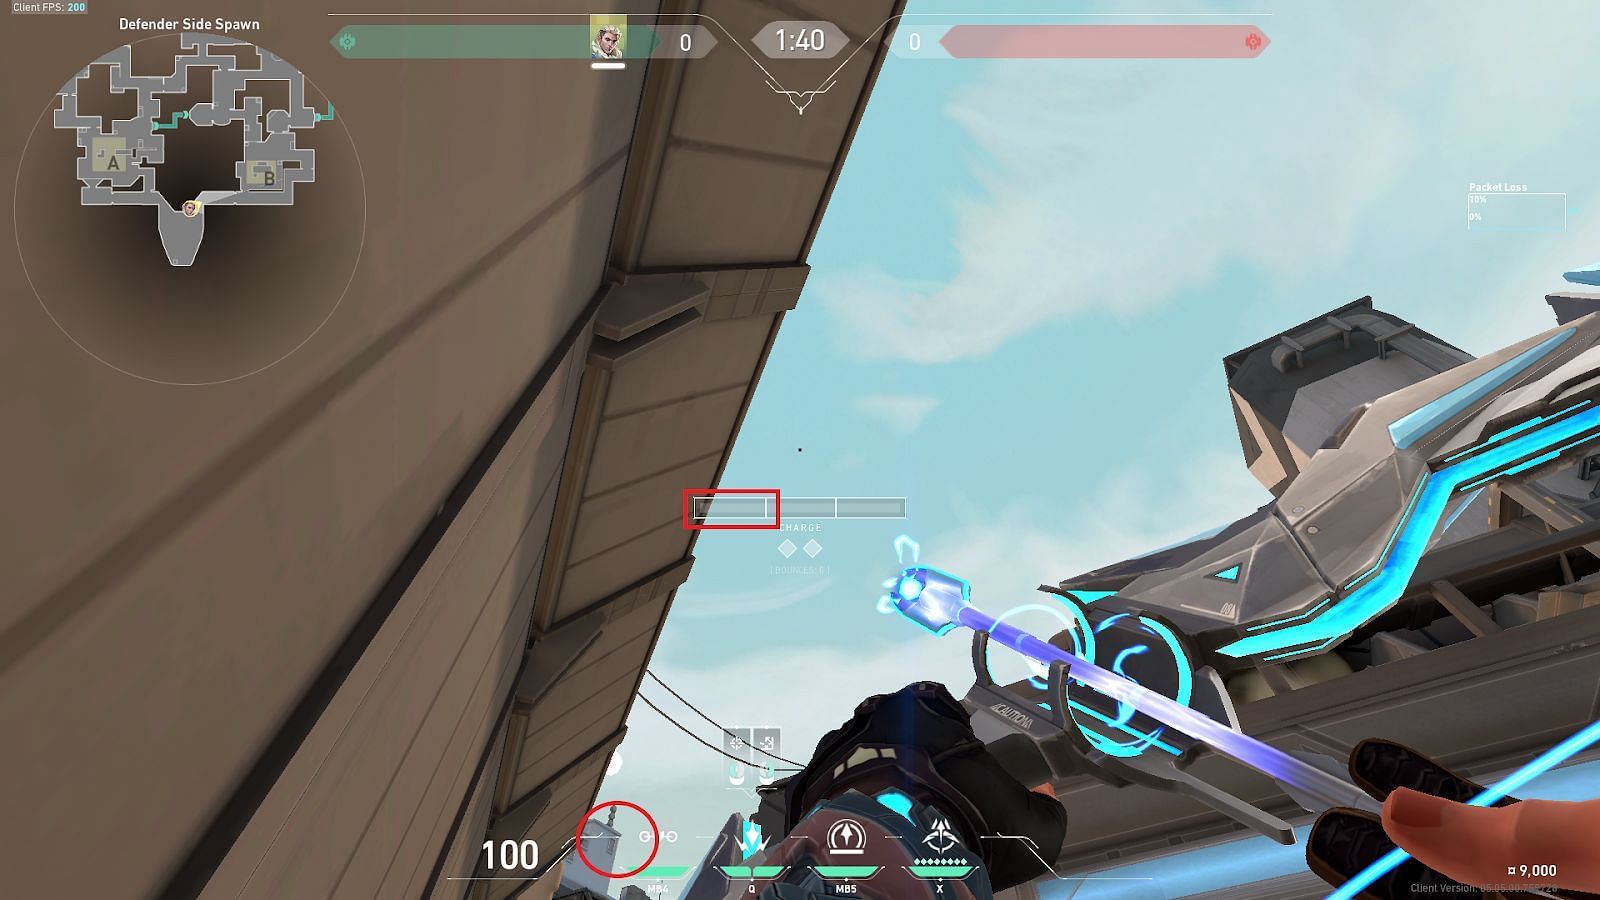
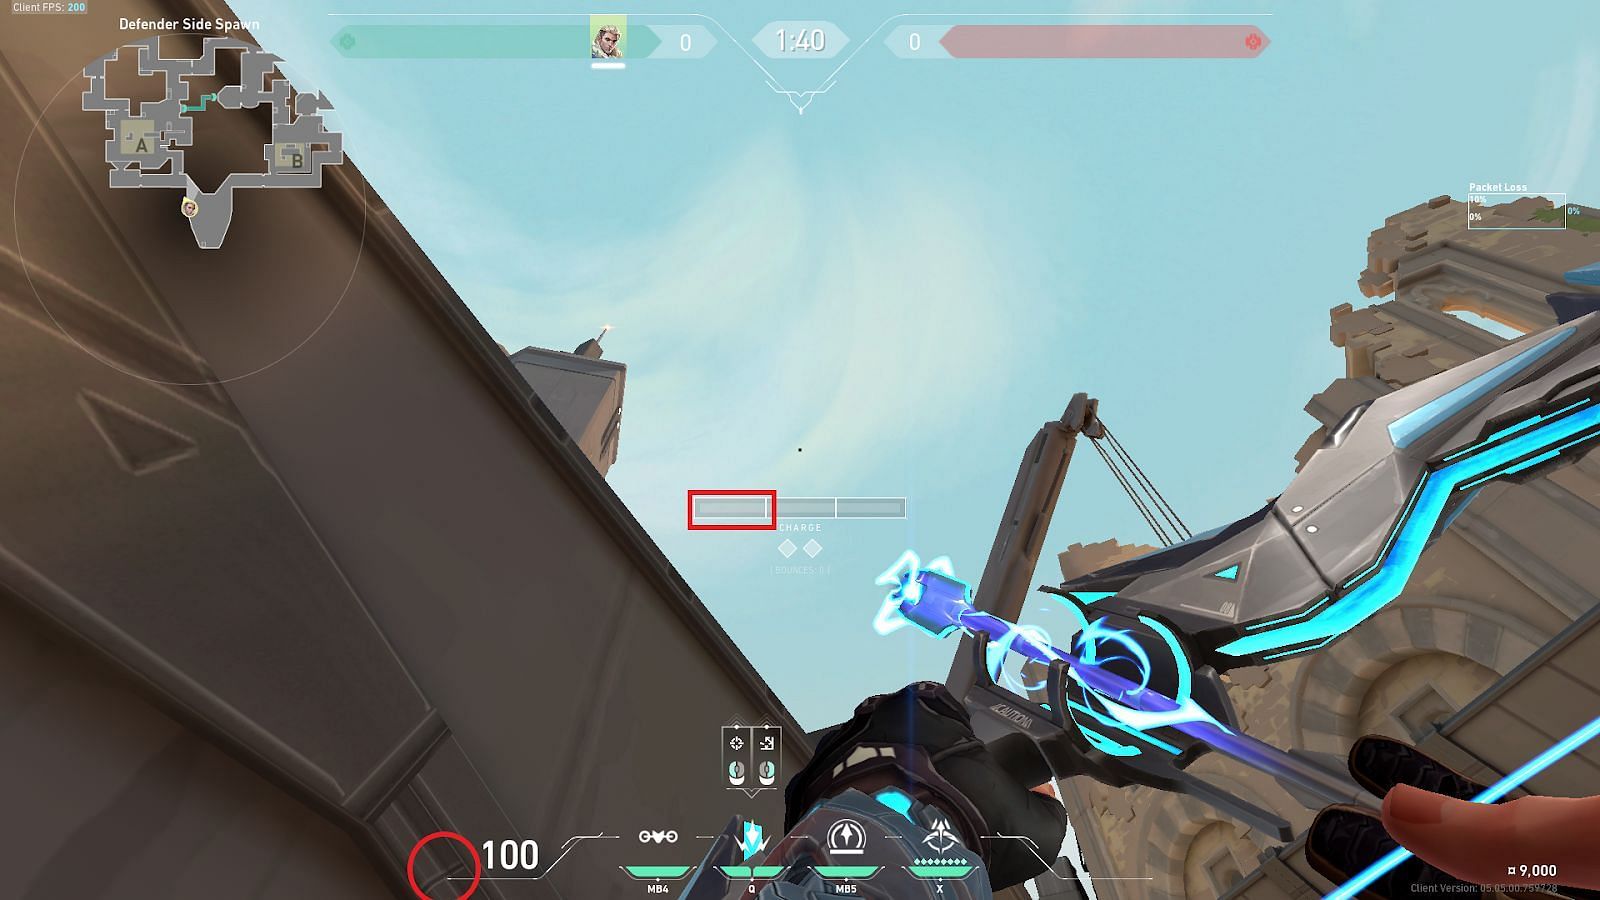
They will then need to align the HP HUD Line (shown in a circle) on the corner of the distant building and deploy the second Shock Dart with a single bar-charge (shown in a rectangle).
Consecutively deploying both the darts will result in them landing simultaneously on B-Site Default Plant position (shown in a circle).
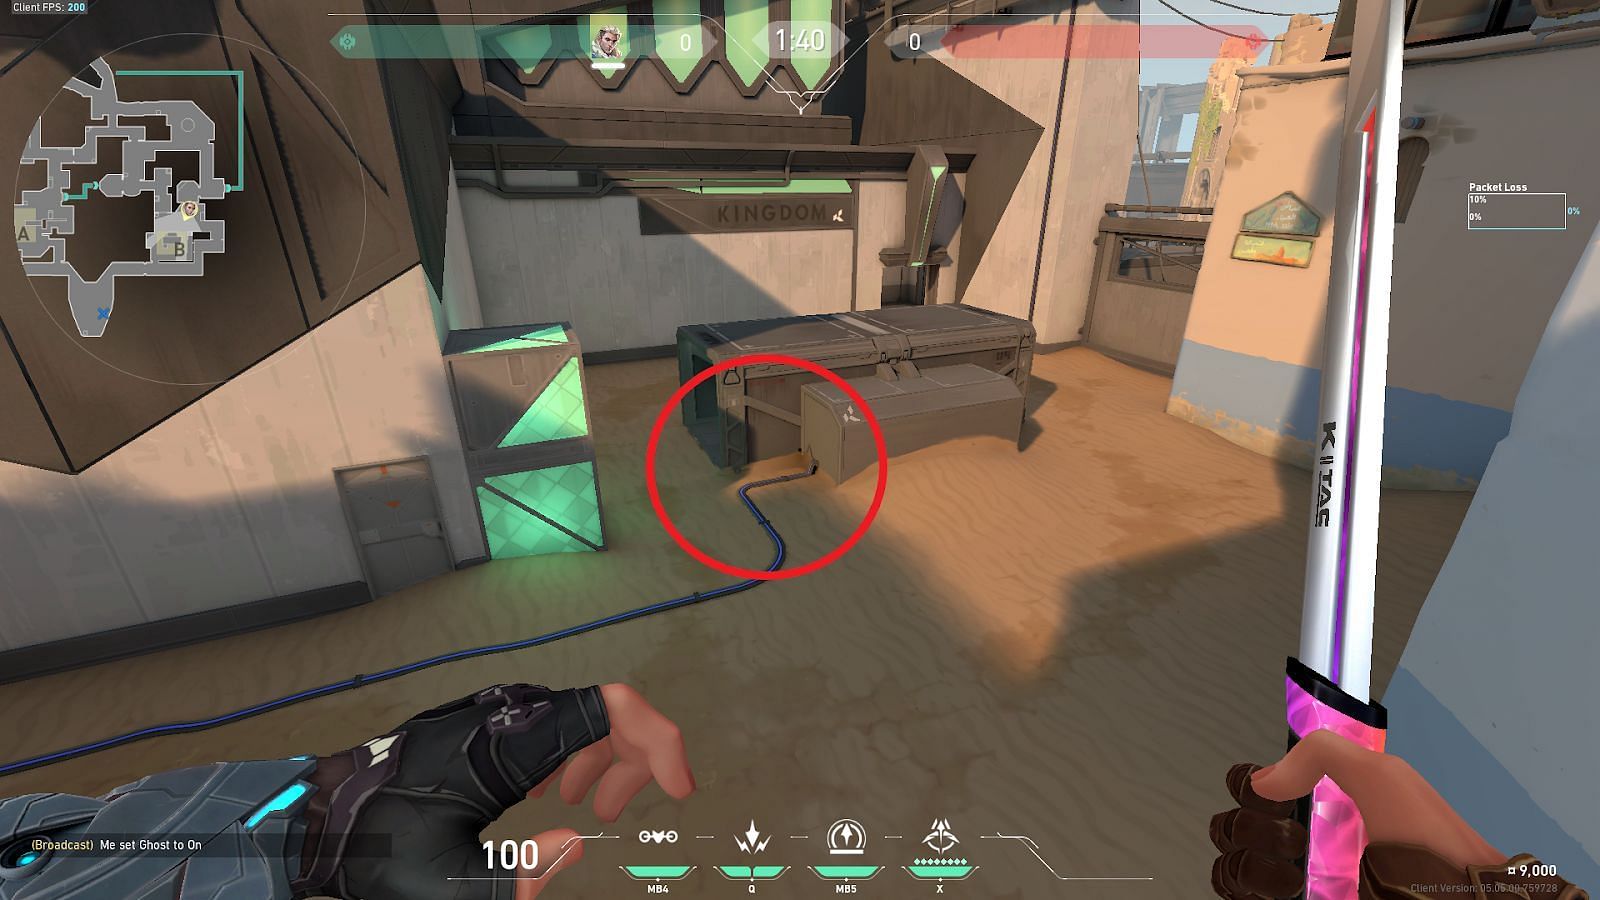
4) B-Teleporter to B-Site Default Plant
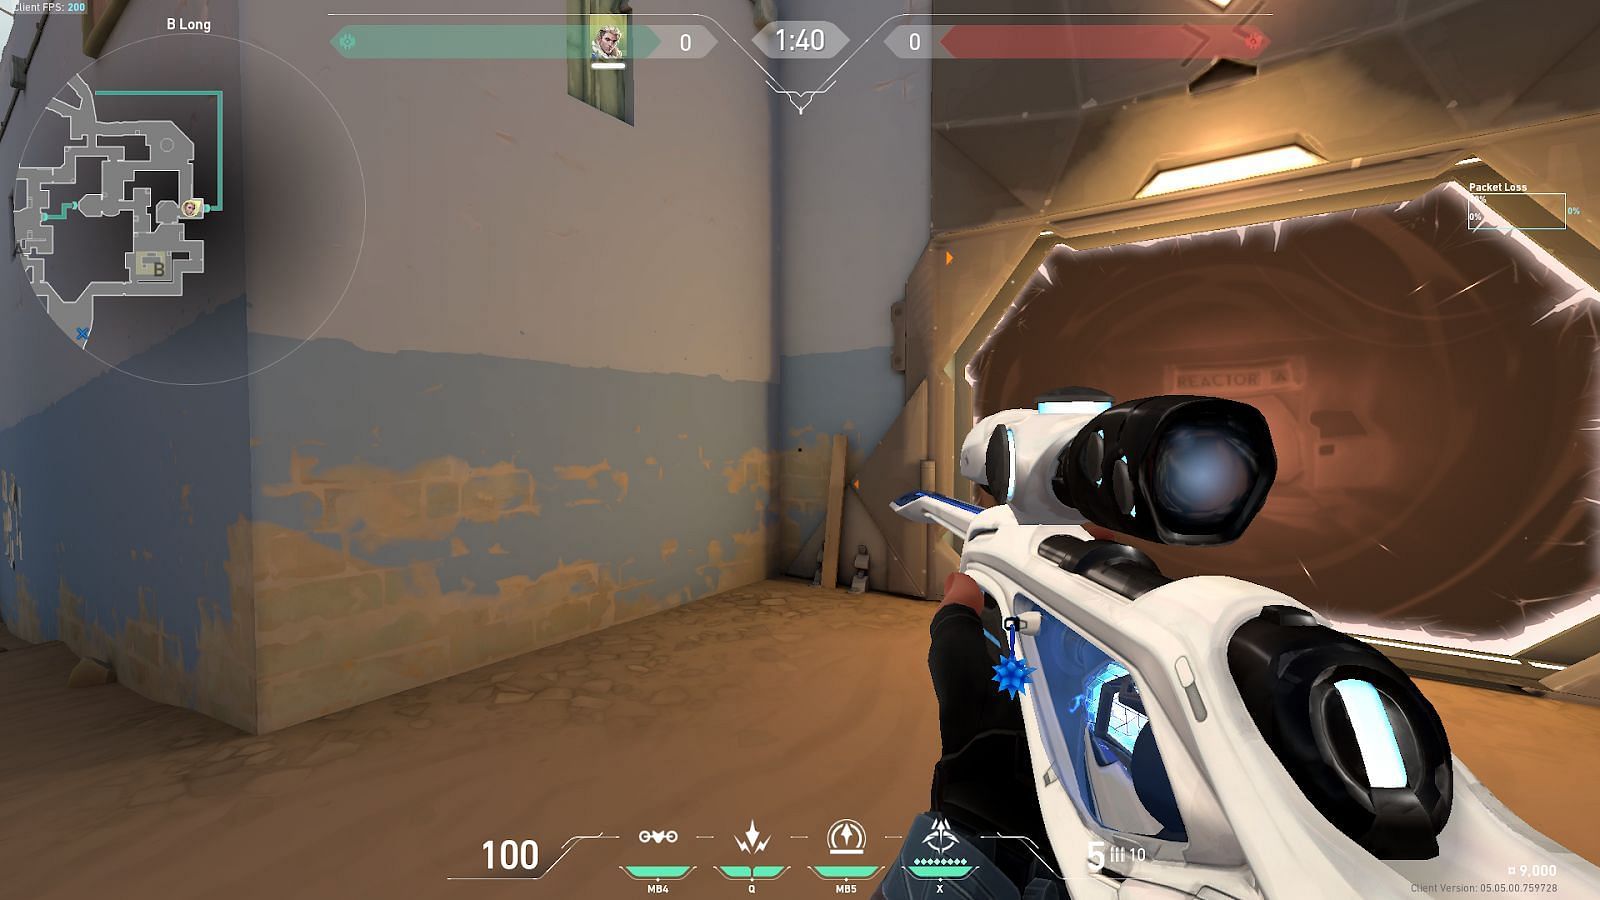
As the name suggests, players will need to tuck themselves into the shown corner at B-Teleporter.
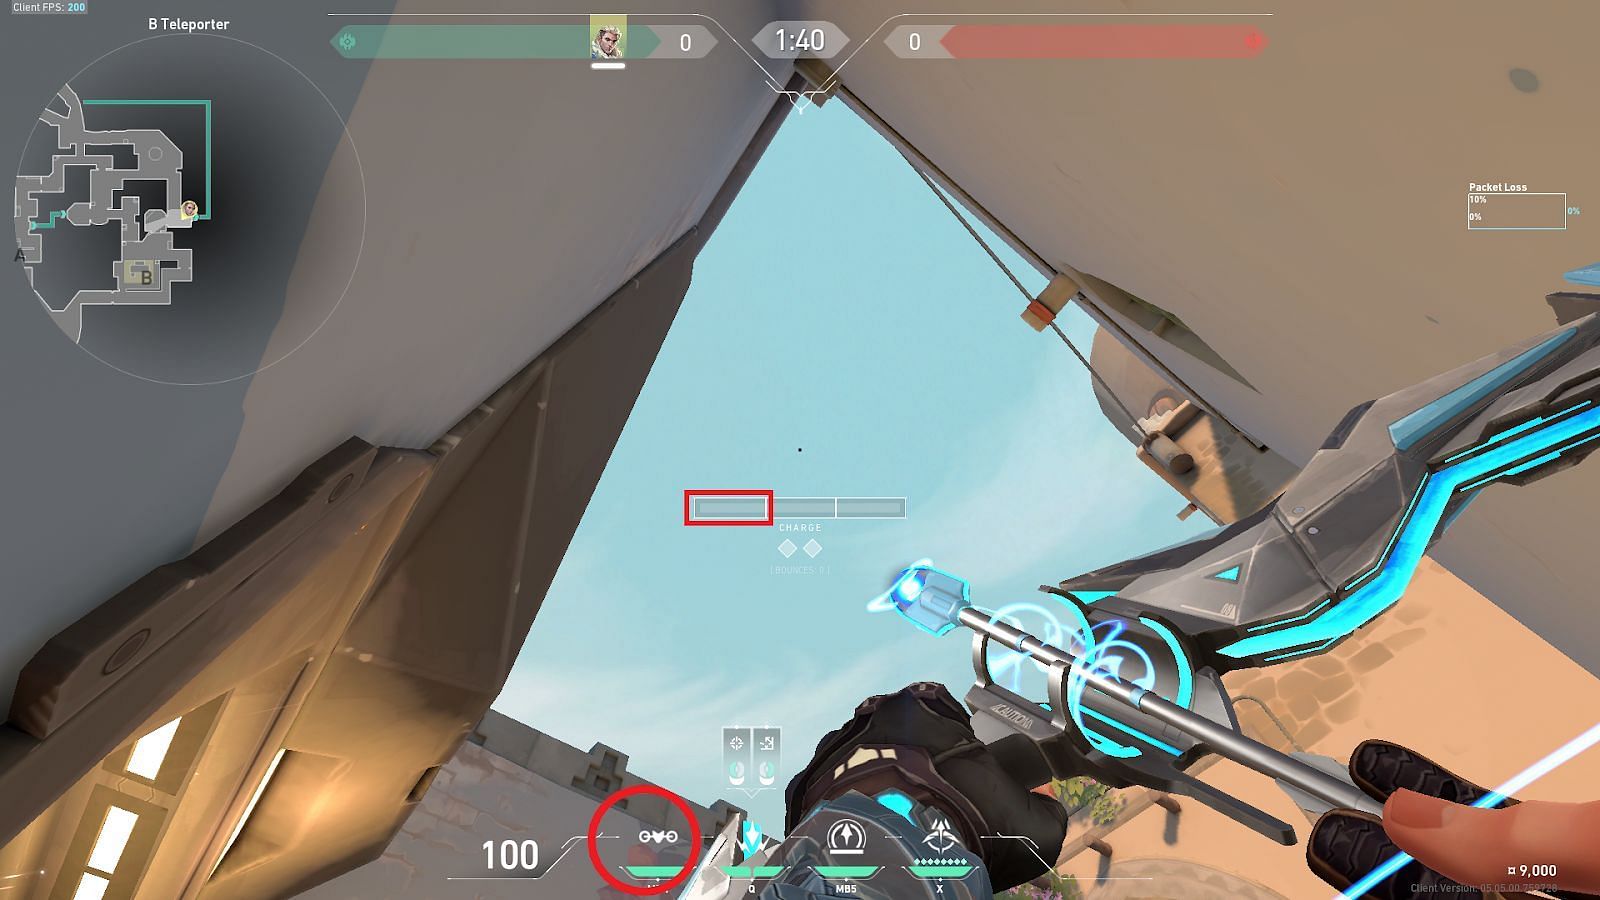
For the first Shock Dart, they will need to align the left circle of the Owl Drone icon (shown in a circle) and deploy the ability with a single bar-charge (shown in a rectangle).
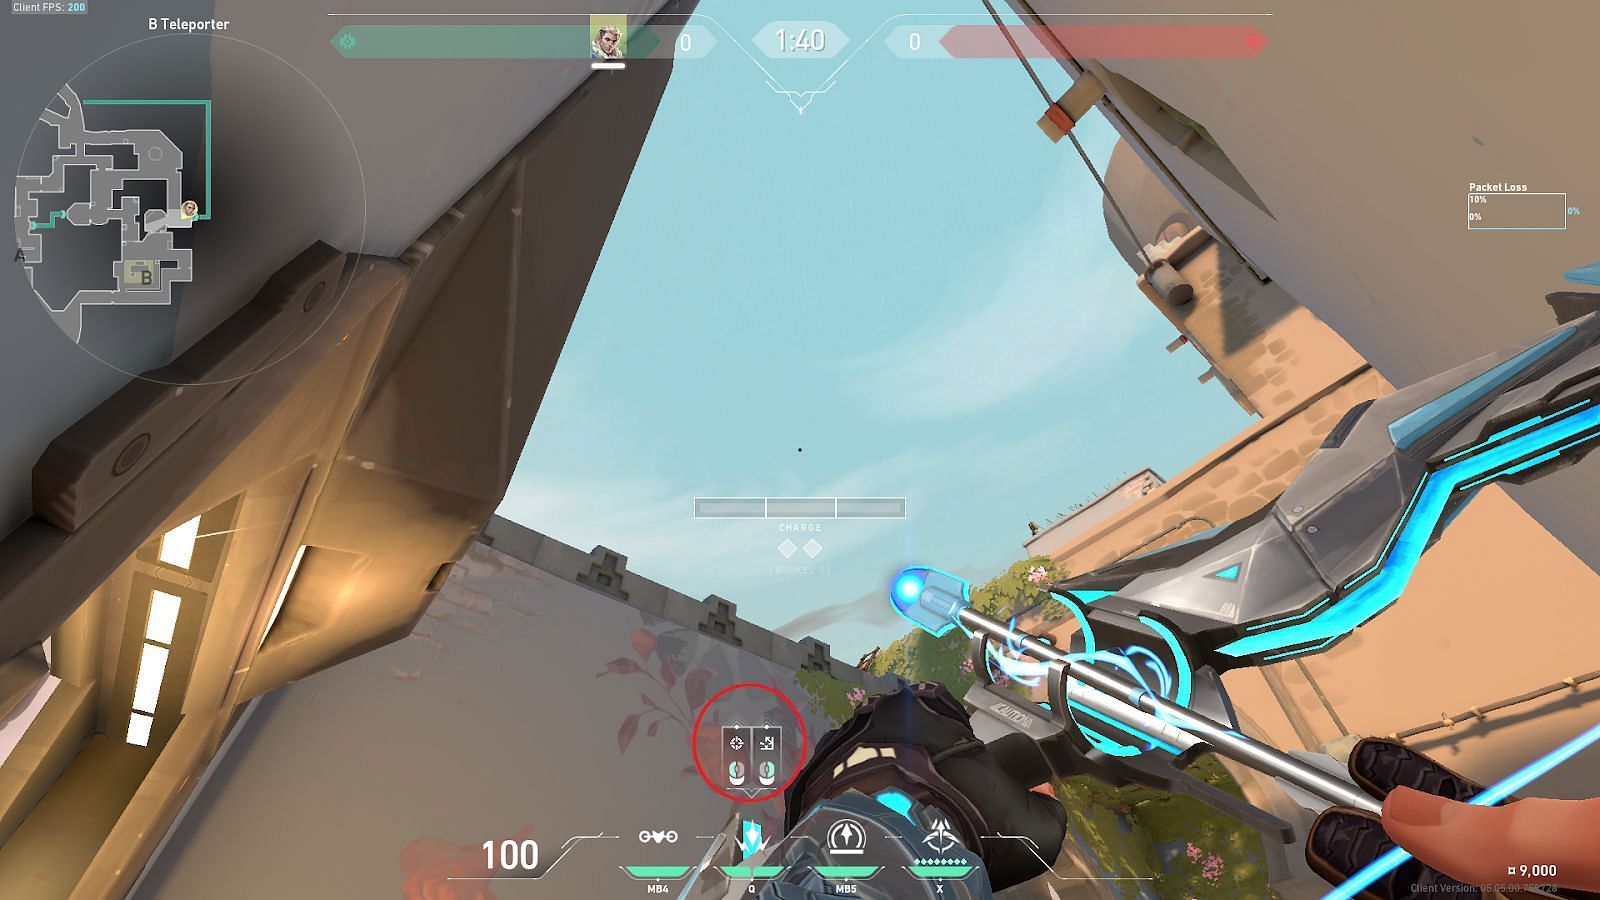
They will need to align the mouse indicator's middle line (shown in a circle) over the flower petal design and deploy the second Shock Dart with a simple left click.
Consecutively deploying both the darts will result in them landing simultaneously in the B-Site Default Plant position (shown in a circle).
