
'%20x='0'%20y='0'%20height='100%25'%20width='100%25'%20%0A%20%20%20%20%20%20%20%20%20%20xlink%3Ahref='data:image/jpg;base64,/9j/2wBDAAYEBQYFBAYGBQYHBwYIChAKCgkJChQODwwQFxQYGBcUFhYaHSUfGhsjHBYWICwgIyYnKSopGR8tMC0oMCUoKSj/2wBDAQcHBwoIChMKChMoGhYaKCgoKCgoKCgoKCgoKCgoKCgoKCgoKCgoKCgoKCgoKCgoKCgoKCgoKCgoKCgoKCgoKCj/wgARCAAHAAoDASIAAhEBAxEB/8QAFQABAQAAAAAAAAAAAAAAAAAAAQb/2gAIAQEAAAAAu3//xAAUAQEAAAAAAAAAAAAAAAAAAAAF/9oACAECEAAAAEP/xAAUAQEAAAAAAAAAAAAAAAAAAAAF/9oACAEDEAAAABP/xAAgEAABBAIBBQAAAAAAAAAAAAABAgQFEgAGAxFBUaHi/9oACAEBAAE/AHe0zjaY1lo4mOFAeFyh2tDbrSqLAj1XwcVKbFY12AhPYFPzn//EABgRAAIDAAAAAAAAAAAAAAAAAAECABQx/9oACAECAQE/AKqNpM//xAAZEQEAAgMAAAAAAAAAAAAAAAABAAIDBBH/2gAIAQMBAT8Aybt6hwJ//9k='%3E%3C/image%3E%3C/svg%3E)
Fade is the latest Agent that was introduced to Valorant. She is an Initiator with a variety of abilities. Her abilities support the team as they can give information on the positioning of the enemy teams.
Fade`s abilities are Haunt, Prowler, Seize, and Nightfall (ultimate ability). The Haunt ability can detect enemies in a specific range and tags them with a debuff “Marked.” The Marked debuff affects the players for 12 seconds, and a Trail follows them, revealing their whereabouts.
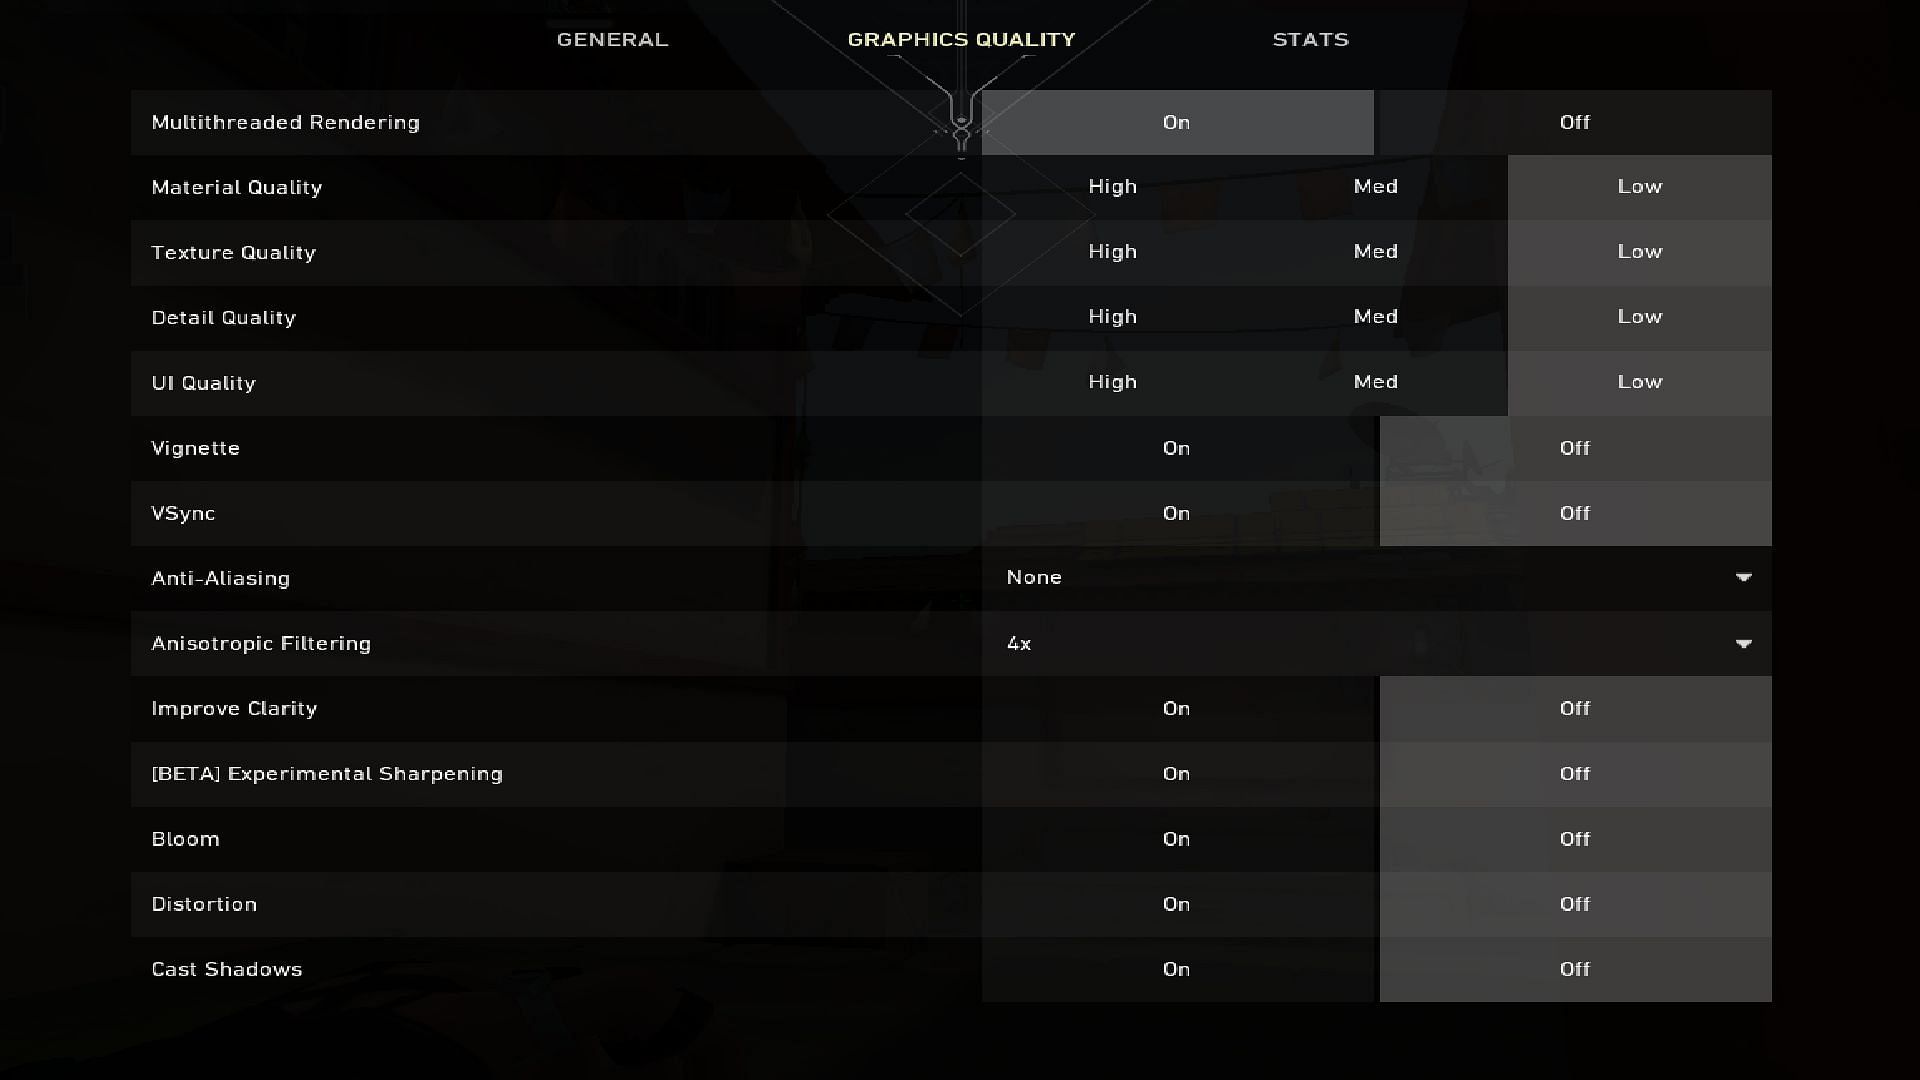
Please note that the following lineups were performed in the LOW Graphics Settings.
Valorant Fade`s best new situational and unique lineups
1) A-Hall to A-Site Yellow box
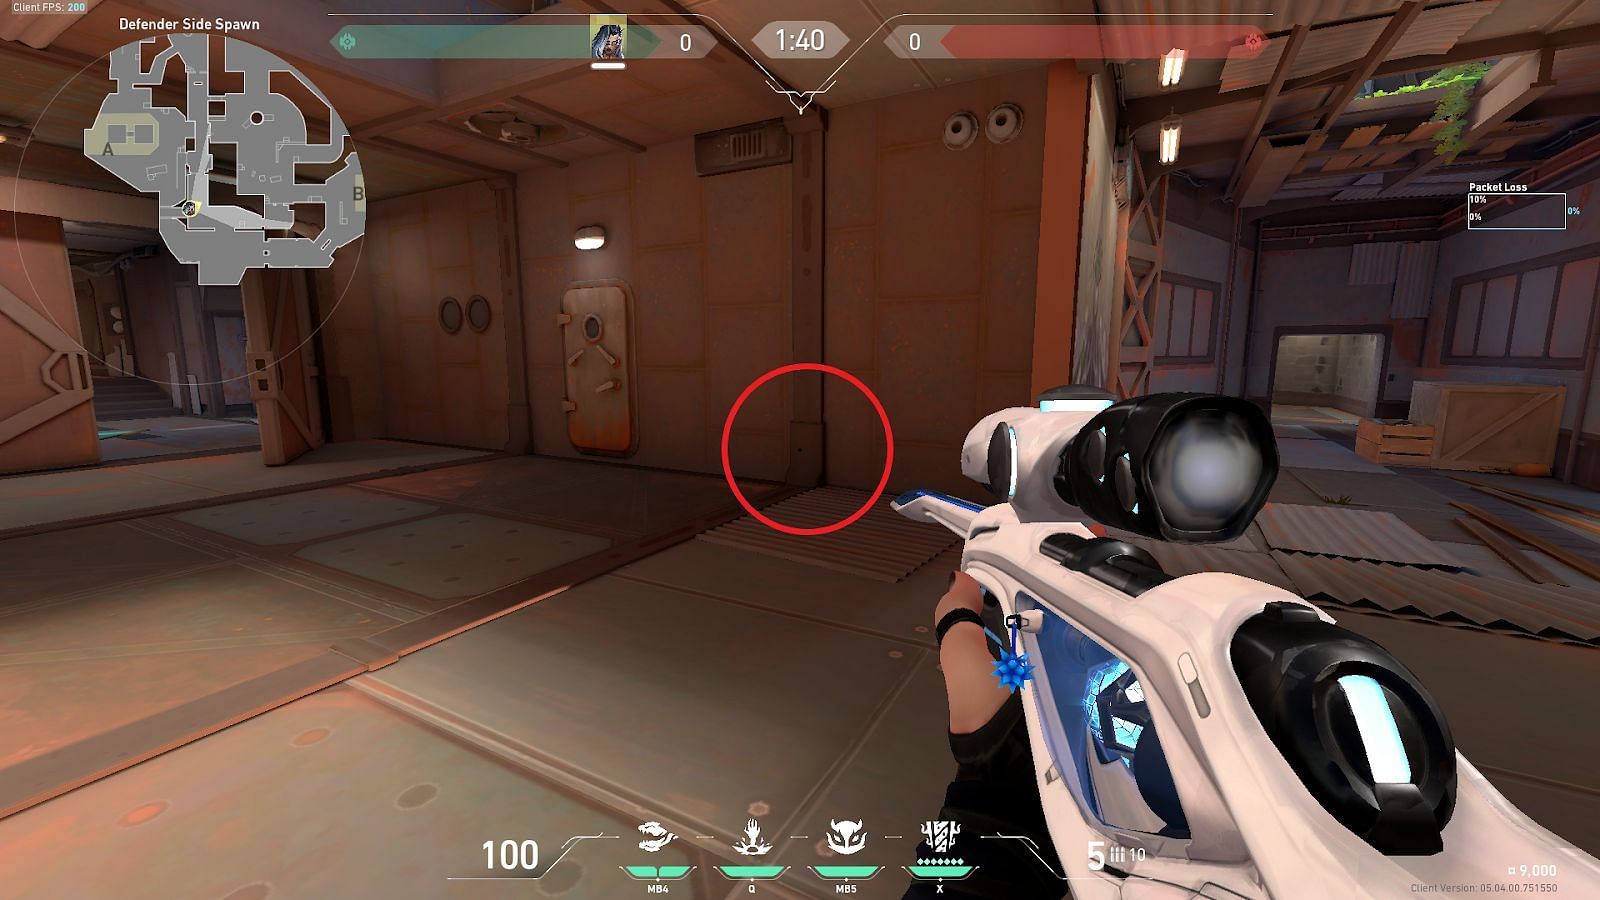
This lineup requires the player to position themself inside A-Hall. Then they need to find the shown beam inside A-Hall.
Then the player has to position themself exactly above the border of the beam, as shown. The floor line continues with the wall, making it easier to line up with the floor directly.
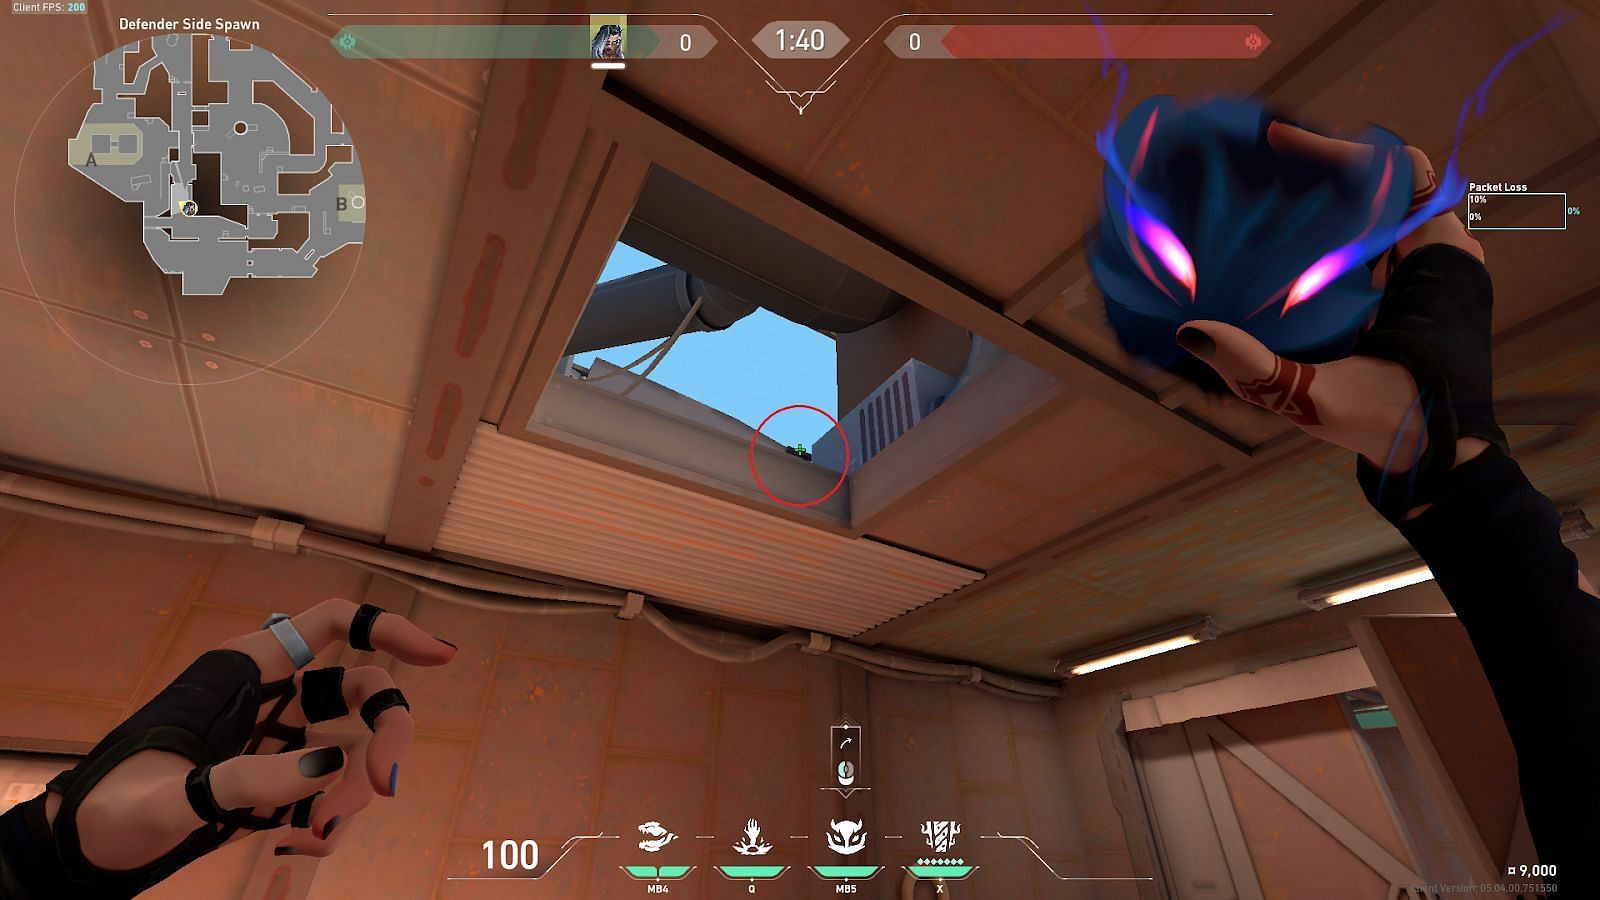
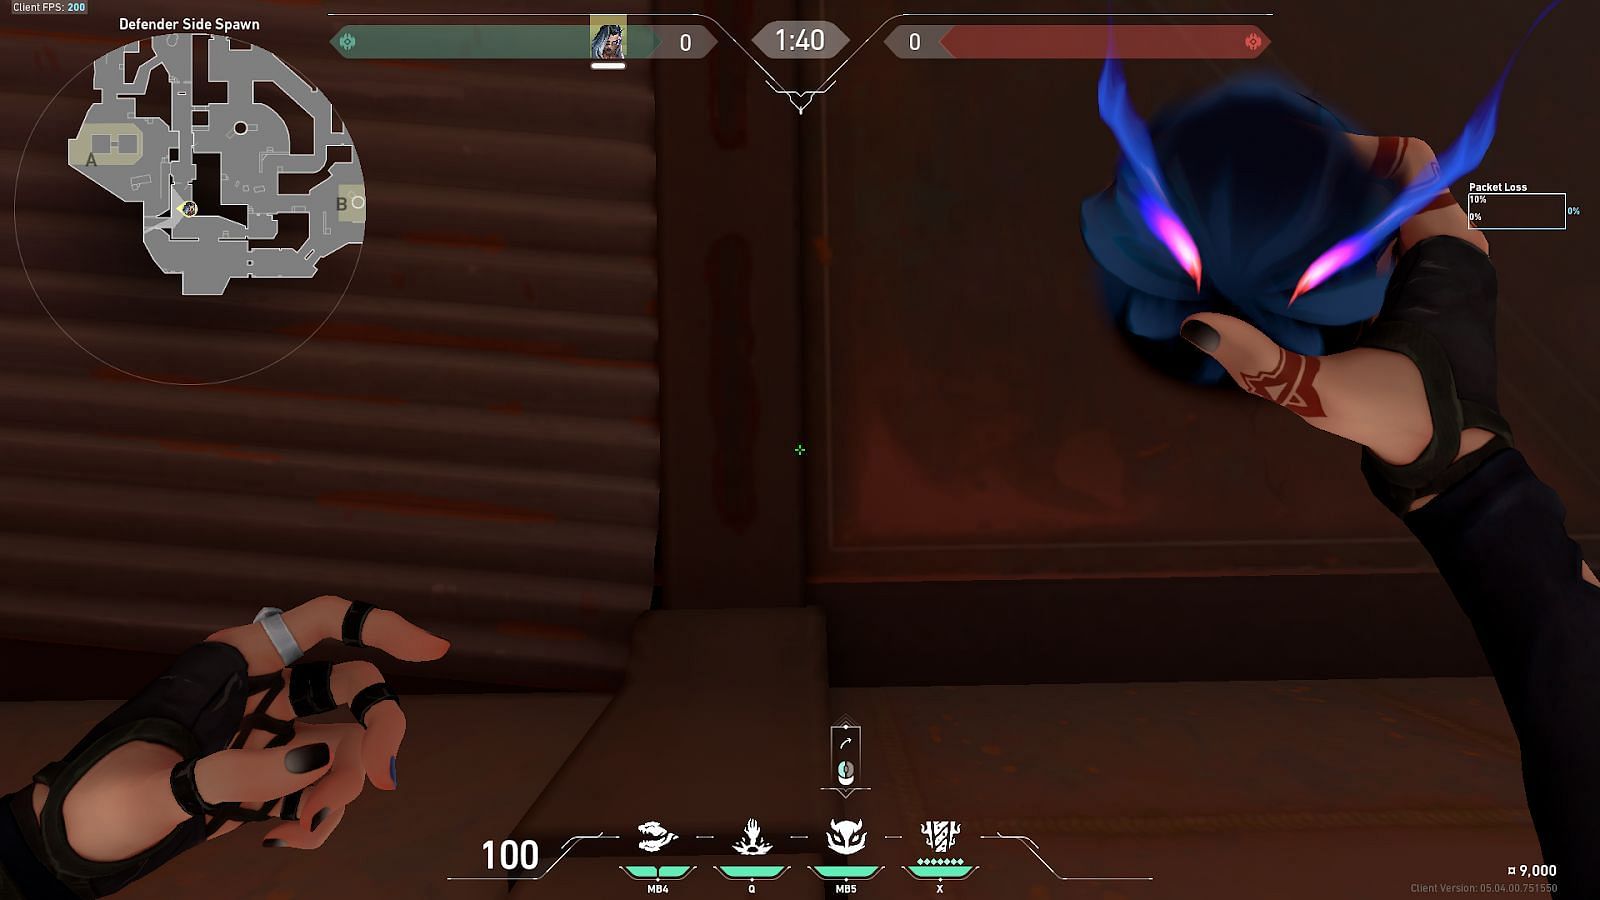
The player then needs to find the gap on the roof and place their crosshair slightly to the left of the vent-like structure. A simple left-click throw to deploy the Haunt ability will be directly placed on top of the A-site Yellow boxes.
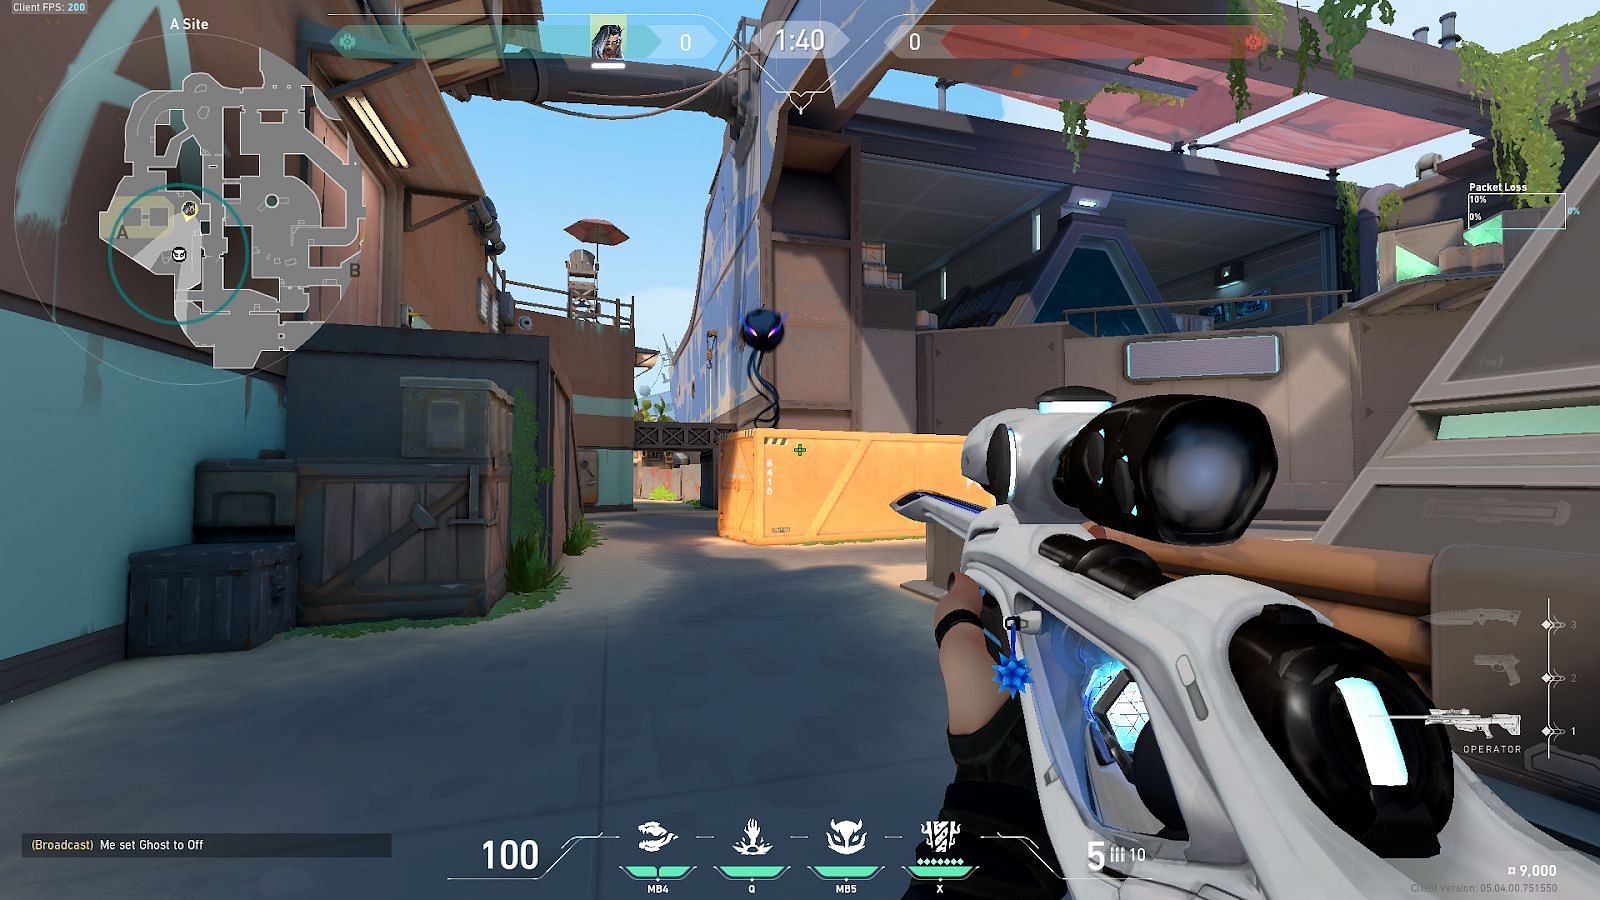
This lineup can be instrumental in retaking the A-site by clearing the close angles with Fade`s Haunt.
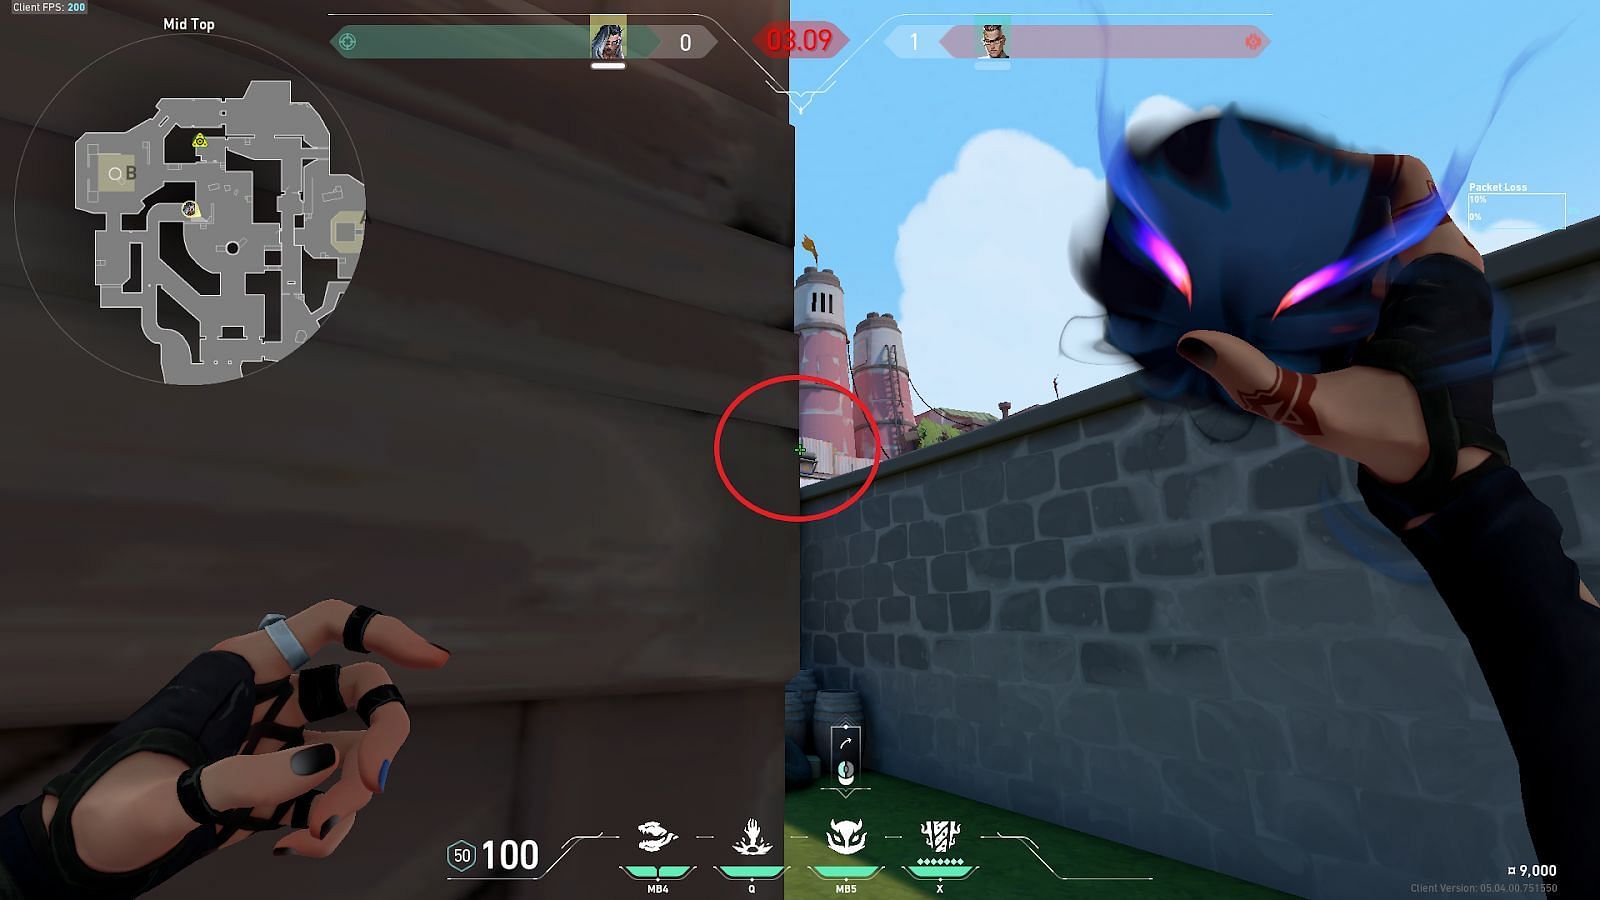
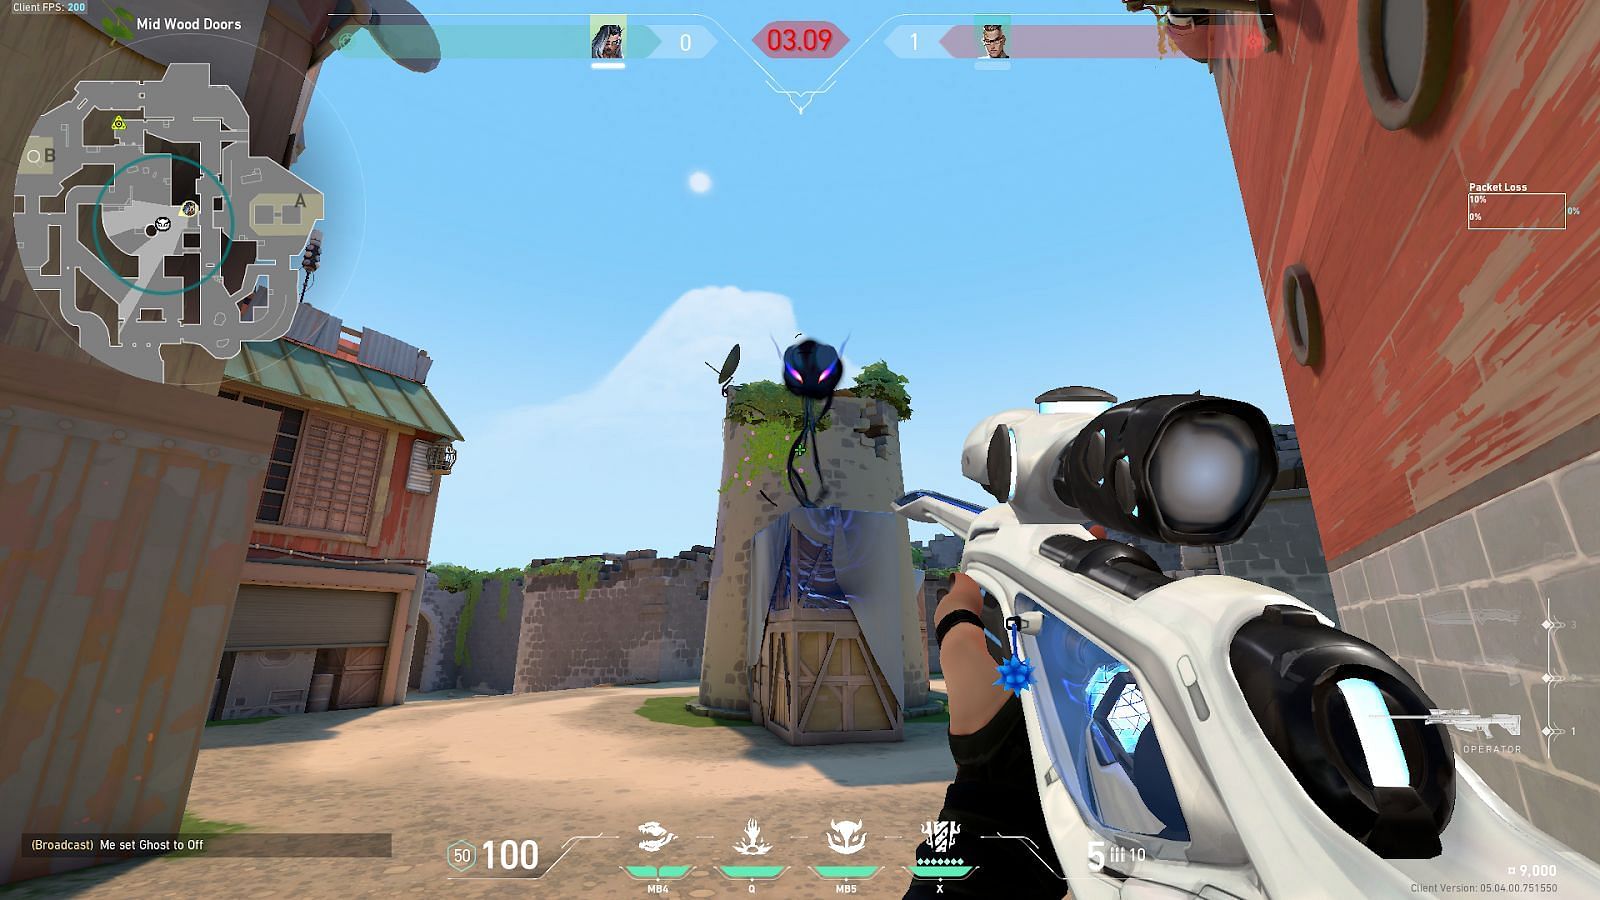
2) Mid Nest to Top Mid
This lineup is a bit tricky. It needs to be practiced to perfectly place it on top of the thin walls in Top Mid. Players must first fight this line in Mid Nest and place their crosshairs below the upper boundary.
The player must move right until their crosshair is directly above the corner of the thin wall in the Top Mid. The player will need to do a short run left-click to deploy the Haunt ability.
The Haunt ability is then placed directly above the thin wall in Top Mid and reveals the Mid area. It is important to note that the area directly behind Mid Pillar will not be revealed.
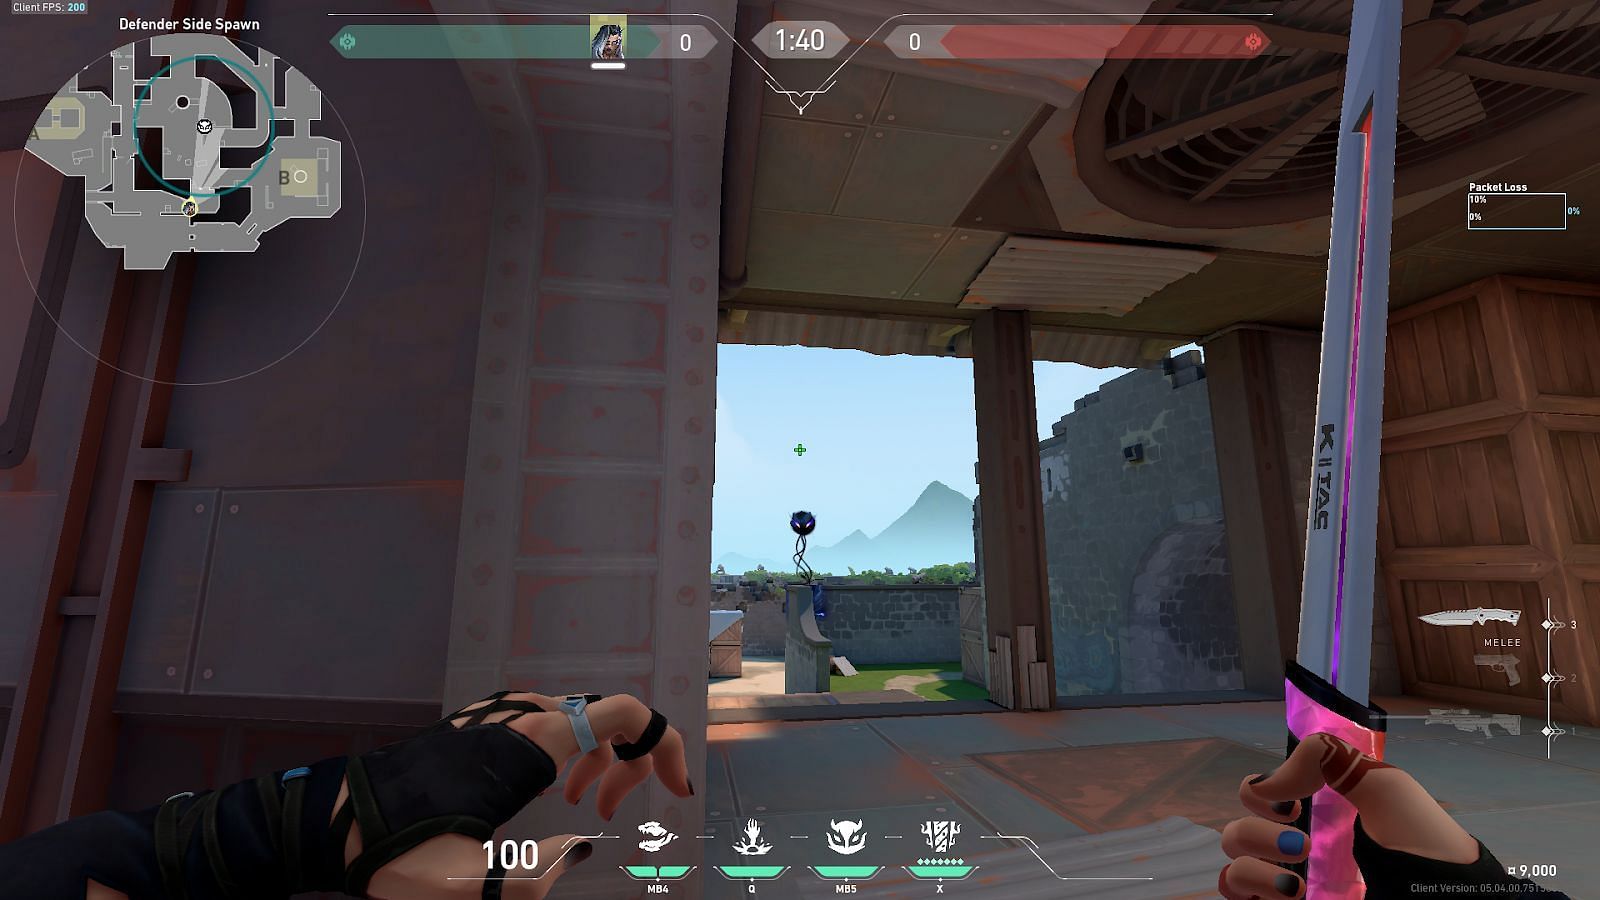
3) A-Cave to A-Site Pyramids
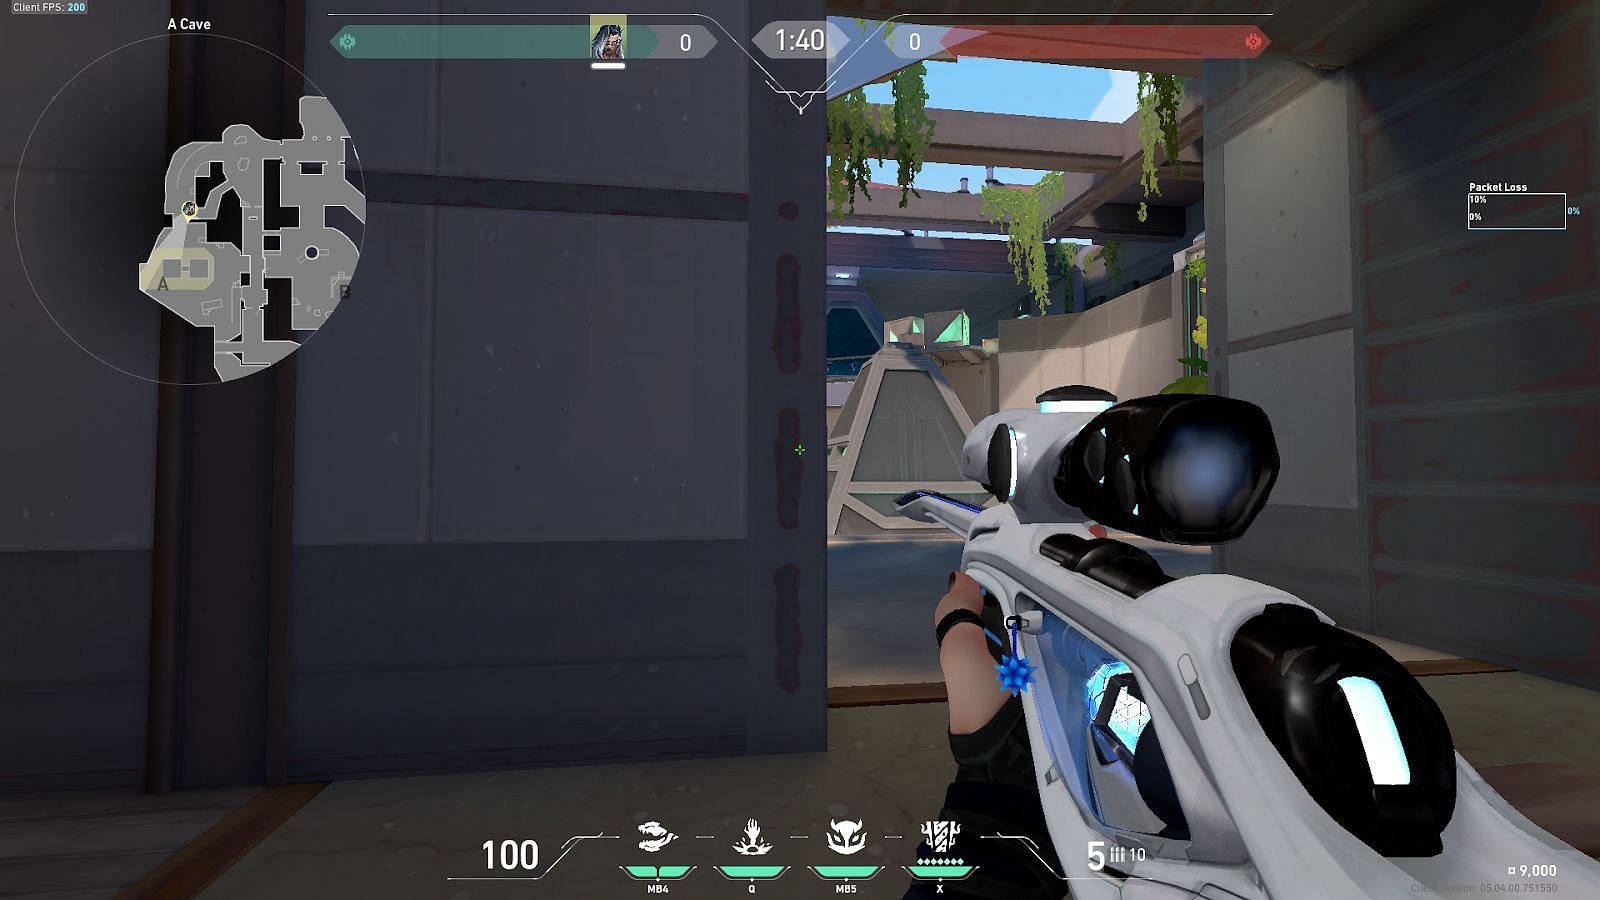
The player will need to position themself directly in front of the A-Cave entry as shown. They must go close and stick to the wall where the crosshair is positioned.
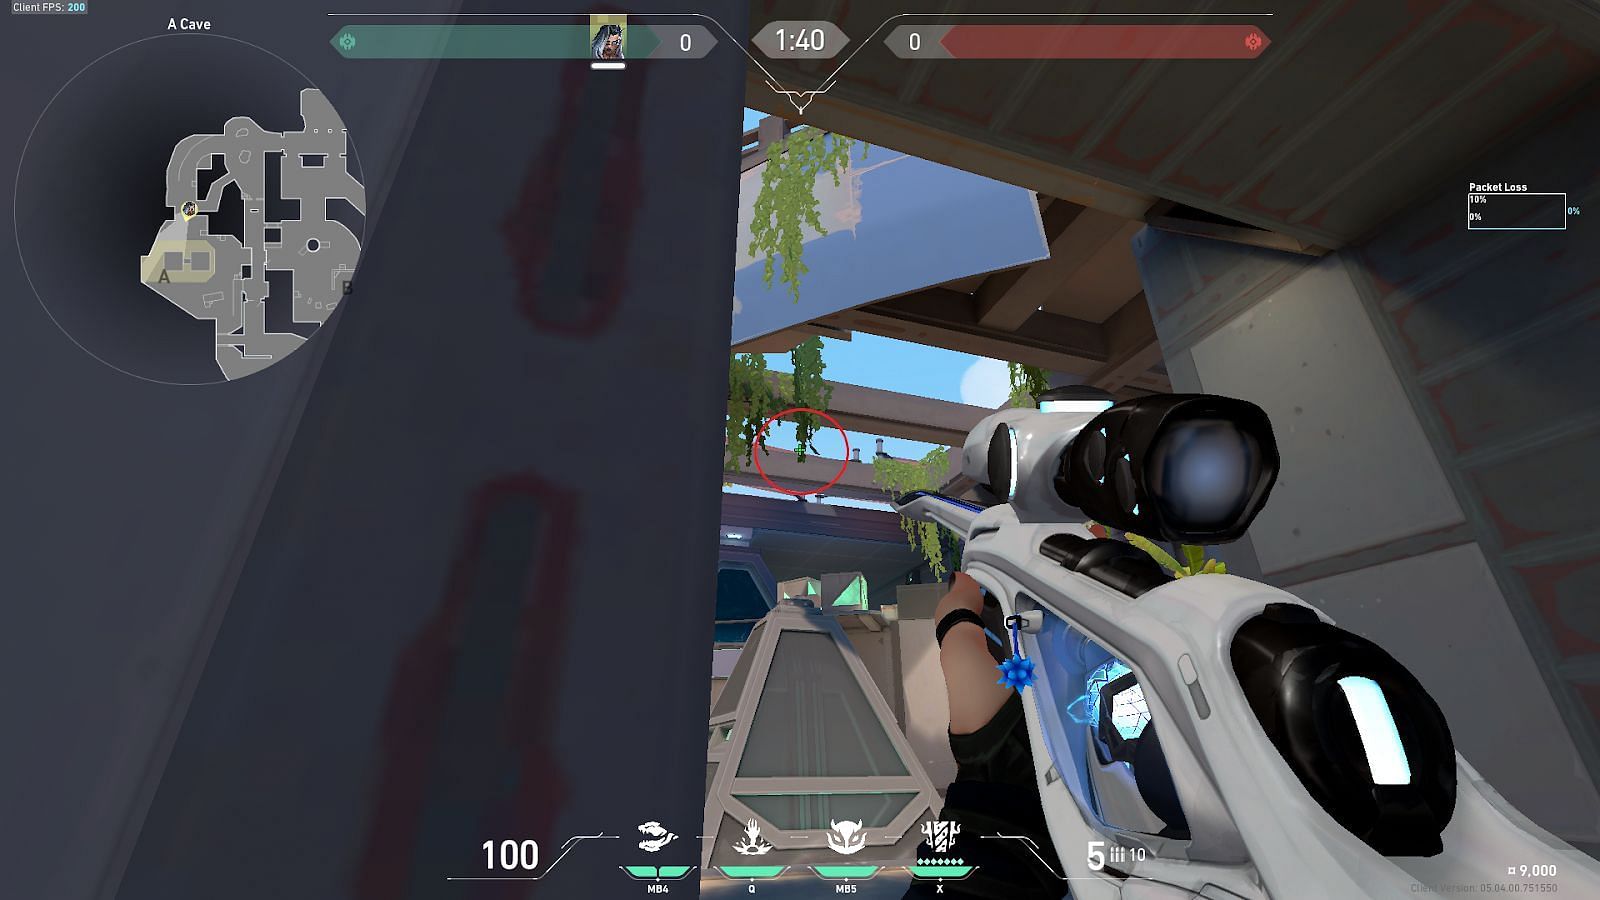
The player must then place their crosshair directly above the Pyramid on the vines above. The crosshair must be placed slightly above the ledge border above the Pyramid. The player then needs to perform a simple jump left-click to deploy the Haunt ability.
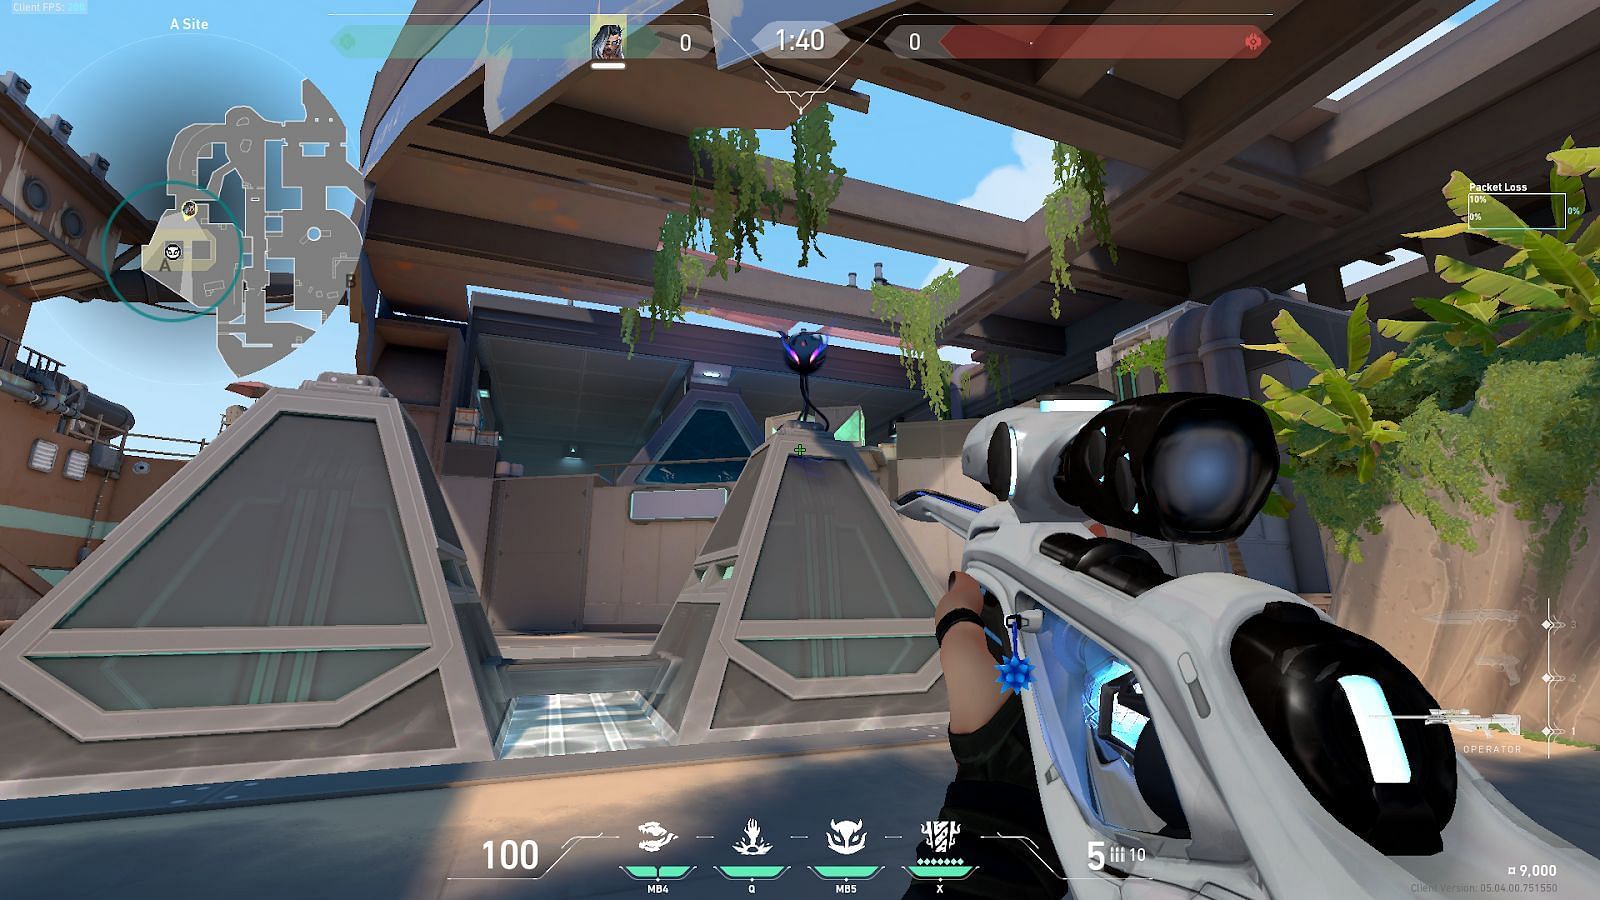
The Haunt ability is placed on top of the Pyramid in A-Site, revealing most of the corners that enemies could use to hide in A-Site as well as back site and close corners near A-Cave entry.
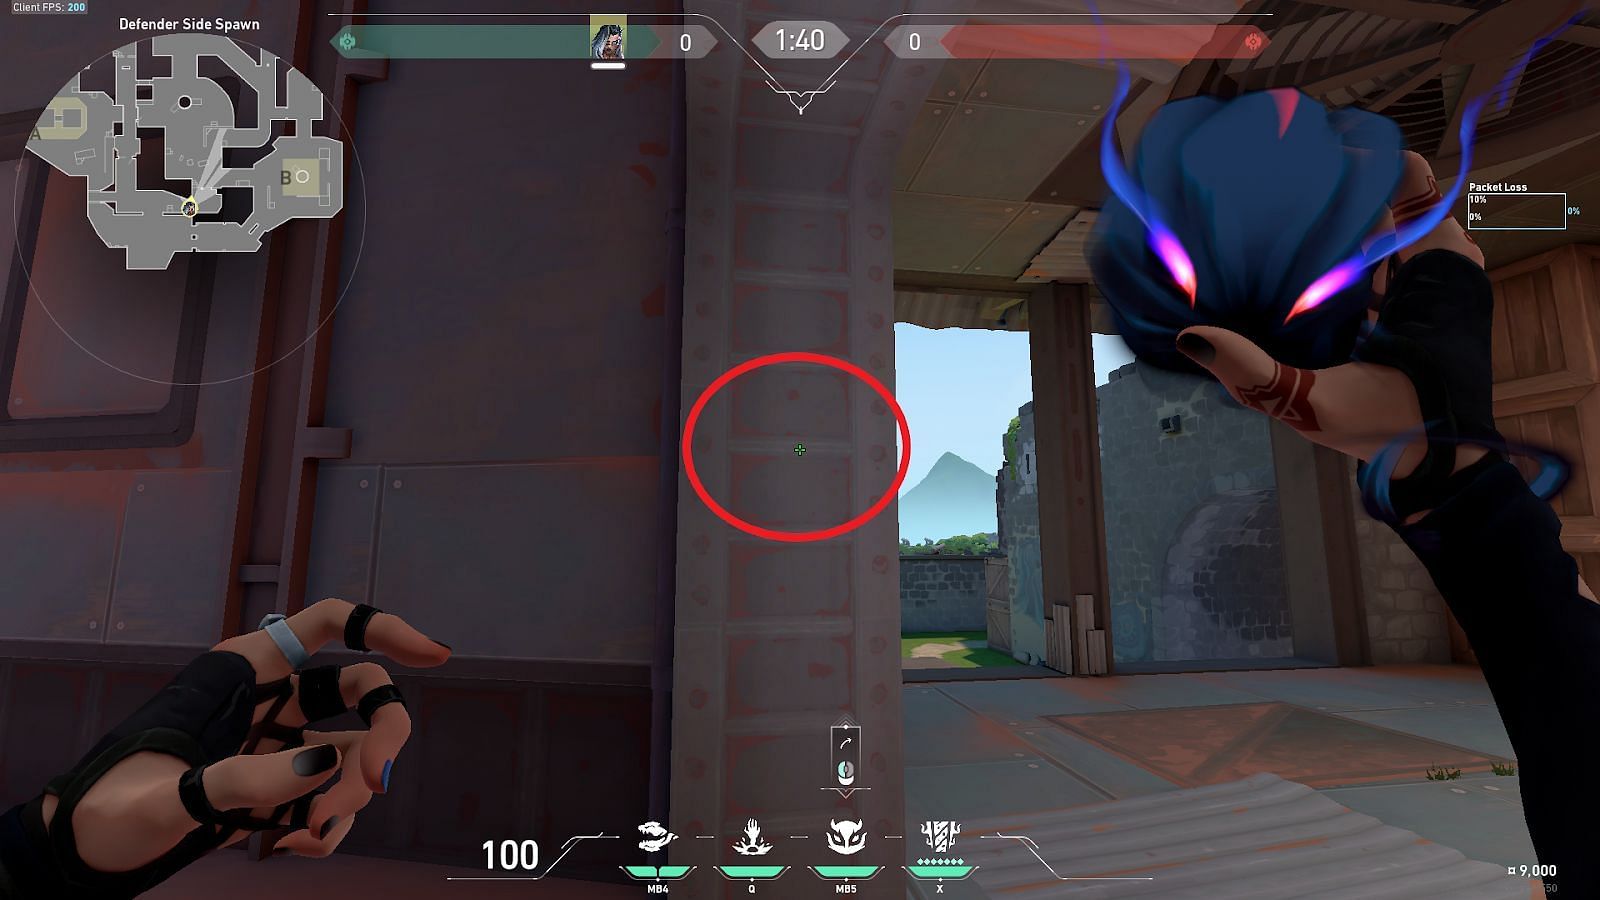
4) B-Back to B-Main
This lineup can be used while defending the B-Site from behind. The player needs to position themselves near the B Back Site stairs. The player will need to stand above the bottom stair border.
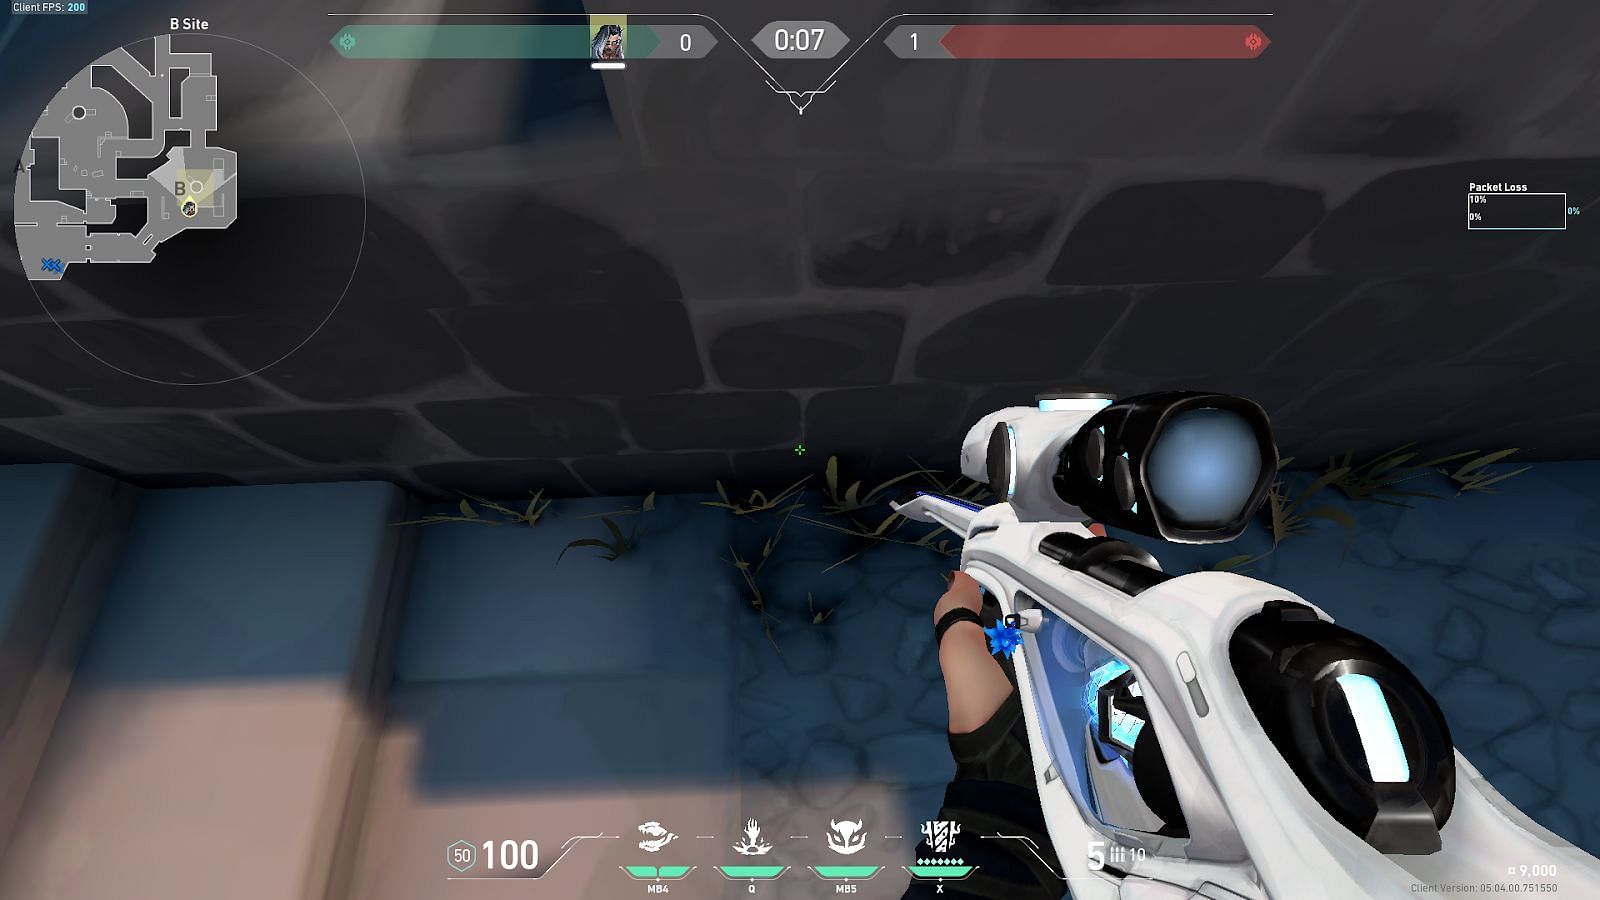
The player needs to position themself behind the broken wall in B Back Site, as shown.
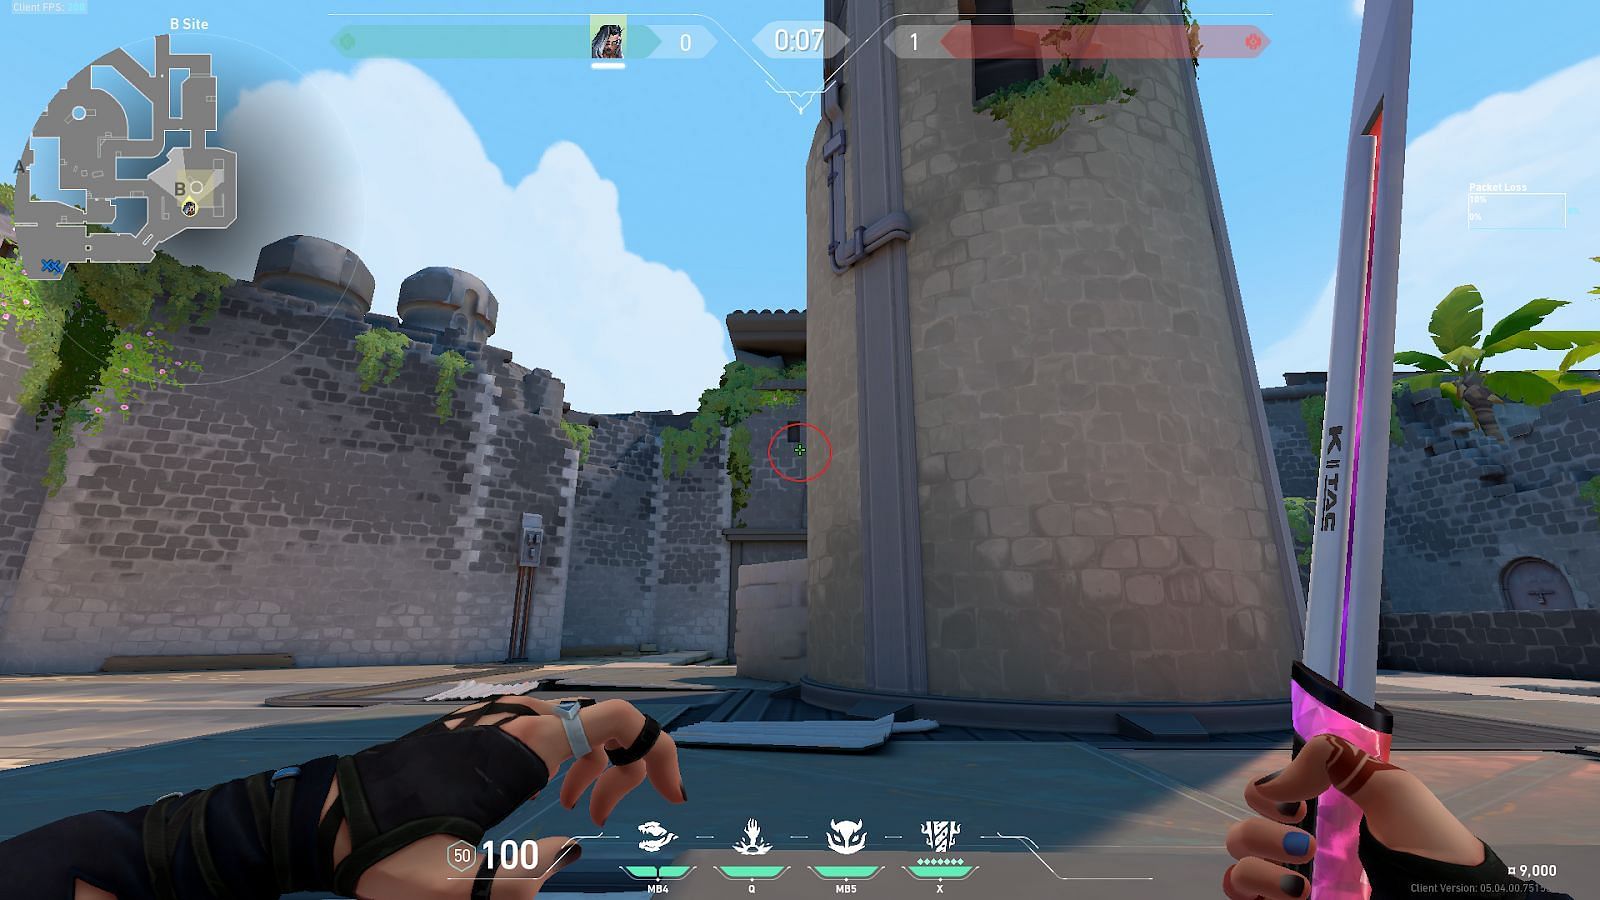
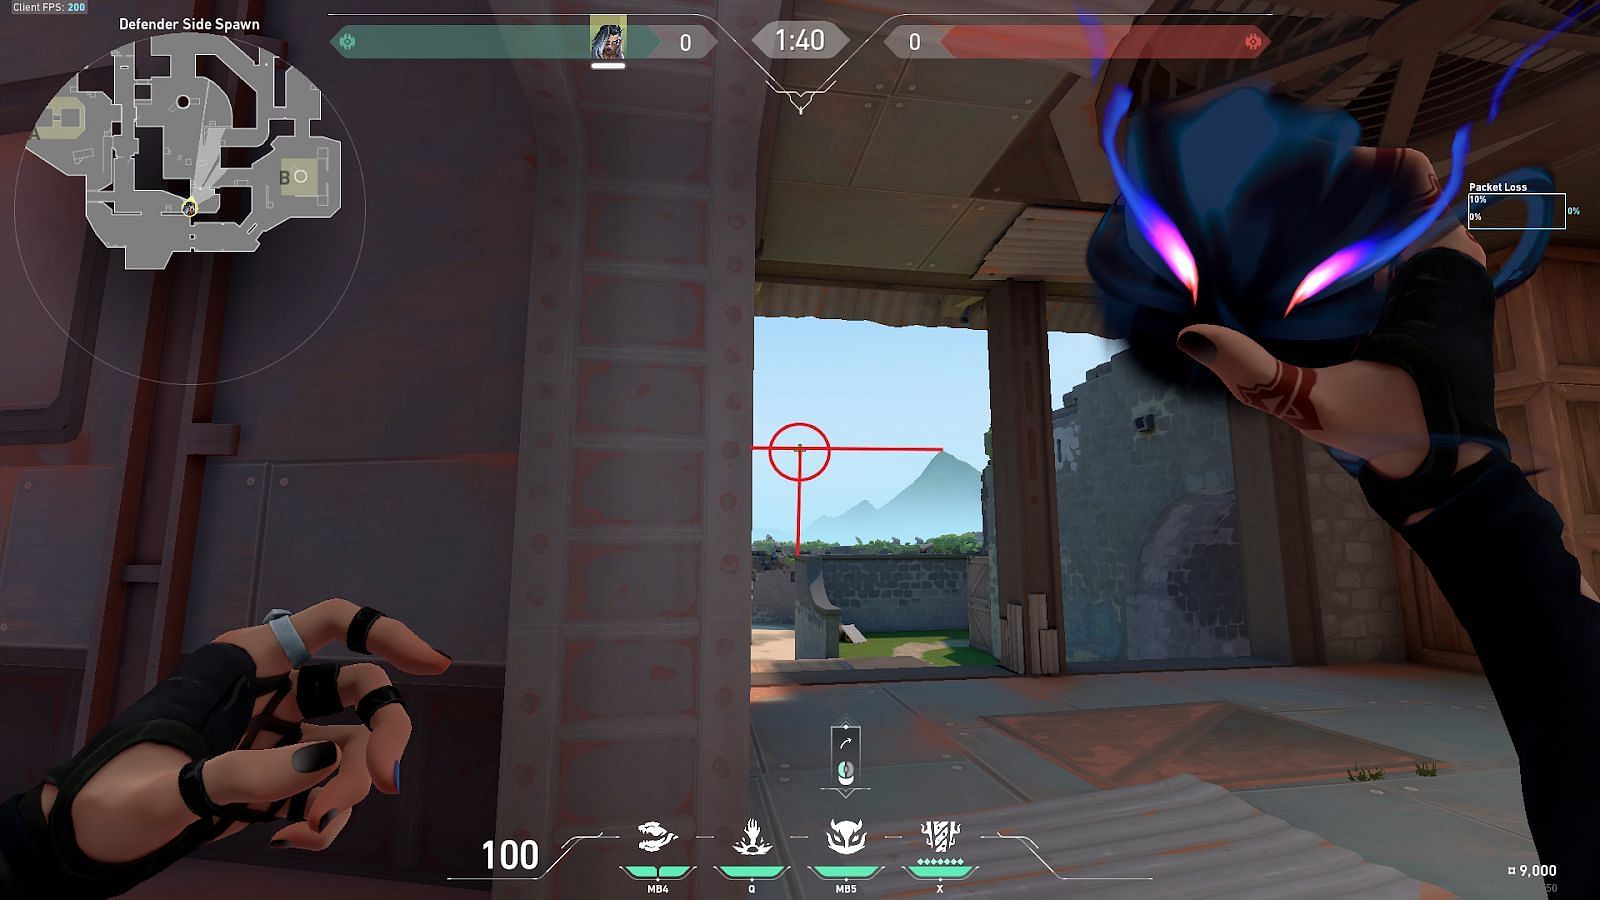
Then, the player must position their crosshair slightly below the right corner of the gap on the B-Main wall and to the left of the B-Pillar. After that, the player must perform a jump left-click to deploy the Haunt ability.
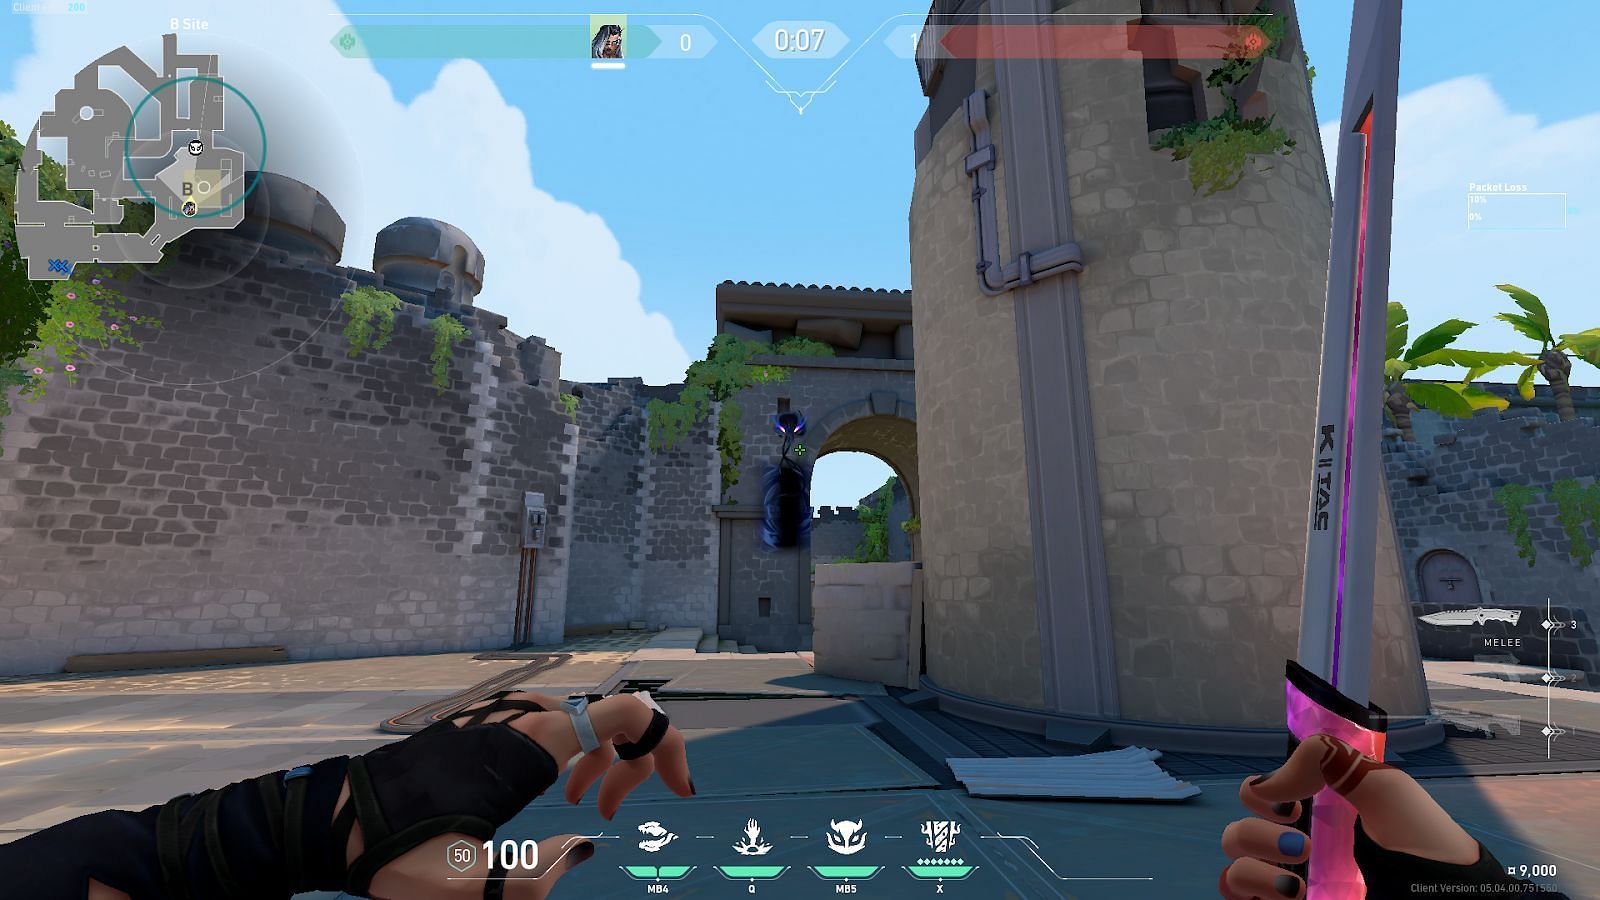
The Haunt ability perfectly sits on top of the ledge on the B-Main wall. This is an extremely good lineup, as it takes longer for the enemies to locate and break.
5) B-Elbow Top Mid to Mid Pillar wooden crates
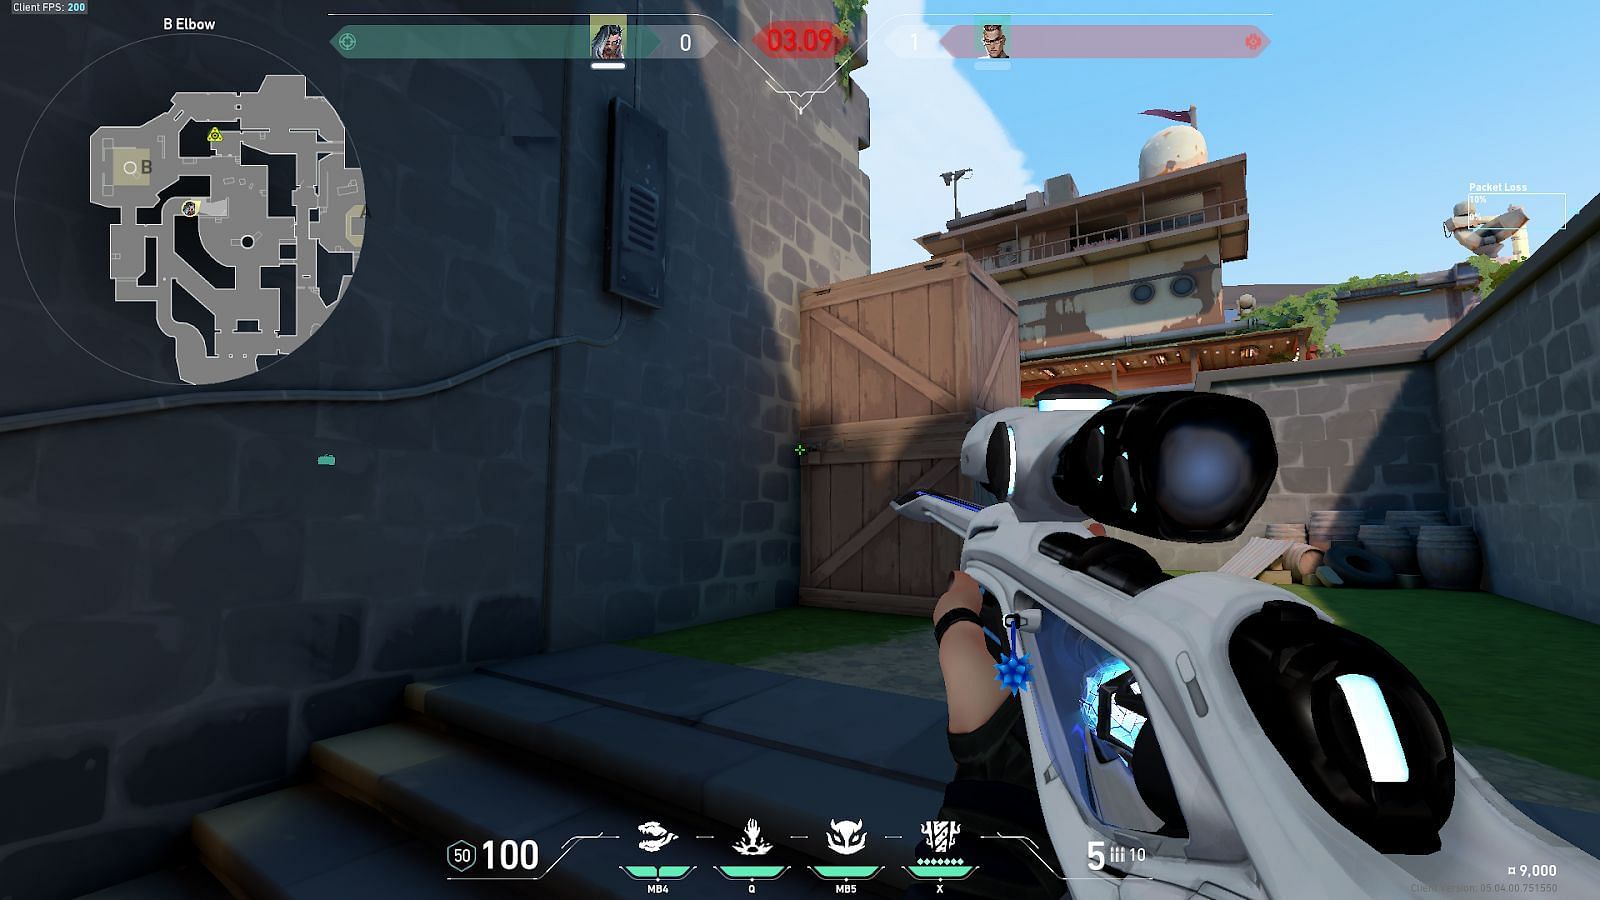
The player must position themselves near the double wooden crates in B-Elbow Top Mid.
The player then needs to align themself with the edge of the wooden crates such that it overlaps the edge of the thin wall in front of them, as shown. Then they need to place their crosshair on the roof's ledge above Mid Doors, as shown.
The player must perform a simple left-click jump to deploy the Haunt ability.
The Haunt ability is placed directly on top of the wooden crates near Mid Pillar. This lineup reveals any enemy trying to push through the Mid Doors or take Mid map control.
Valorant can be a highly tactical game, even though there are a lot of fun elements too. For players who want to gain the upper hand on Breeze, these are some crucial and unique lineups that will startle the enemies. These Fade lineups will undoubtedly increase the win rate of the players who use them.
