
'%20x='0'%20y='0'%20height='100%25'%20width='100%25'%20%0A%20%20%20%20%20%20%20%20%20%20xlink%3Ahref='data:image/jpg;base64,/9j/2wBDAAYEBQYFBAYGBQYHBwYIChAKCgkJChQODwwQFxQYGBcUFhYaHSUfGhsjHBYWICwgIyYnKSopGR8tMC0oMCUoKSj/2wBDAQcHBwoIChMKChMoGhYaKCgoKCgoKCgoKCgoKCgoKCgoKCgoKCgoKCgoKCgoKCgoKCgoKCgoKCgoKCgoKCgoKCj/wgARCAAHAAoDASIAAhEBAxEB/8QAFQABAQAAAAAAAAAAAAAAAAAABAf/2gAIAQEAAAAAnwP/xAAUAQEAAAAAAAAAAAAAAAAAAAAC/9oACAECEAAAAF//xAAUAQEAAAAAAAAAAAAAAAAAAAAC/9oACAEDEAAAAD//xAAeEAACAgICAwAAAAAAAAAAAAABAwIEABESUgYHIv/aAAgBAQABPwCHsK/CqsocpFbn9xXXjy11BION89qlkyaw3vrn/8QAFhEAAwAAAAAAAAAAAAAAAAAAAAES/9oACAECAQE/AKZ//8QAFhEBAQEAAAAAAAAAAAAAAAAAAQAS/9oACAEDAQE/AMhf/9k='%3E%3C/image%3E%3C/svg%3E)
Valorant is a game of skills that requires a deep understanding of the fundamental mechanics of how an Agent`s utilities impact the game. Players must understand their roles and the impact an Agent holds by correctly utilizing their abilities.
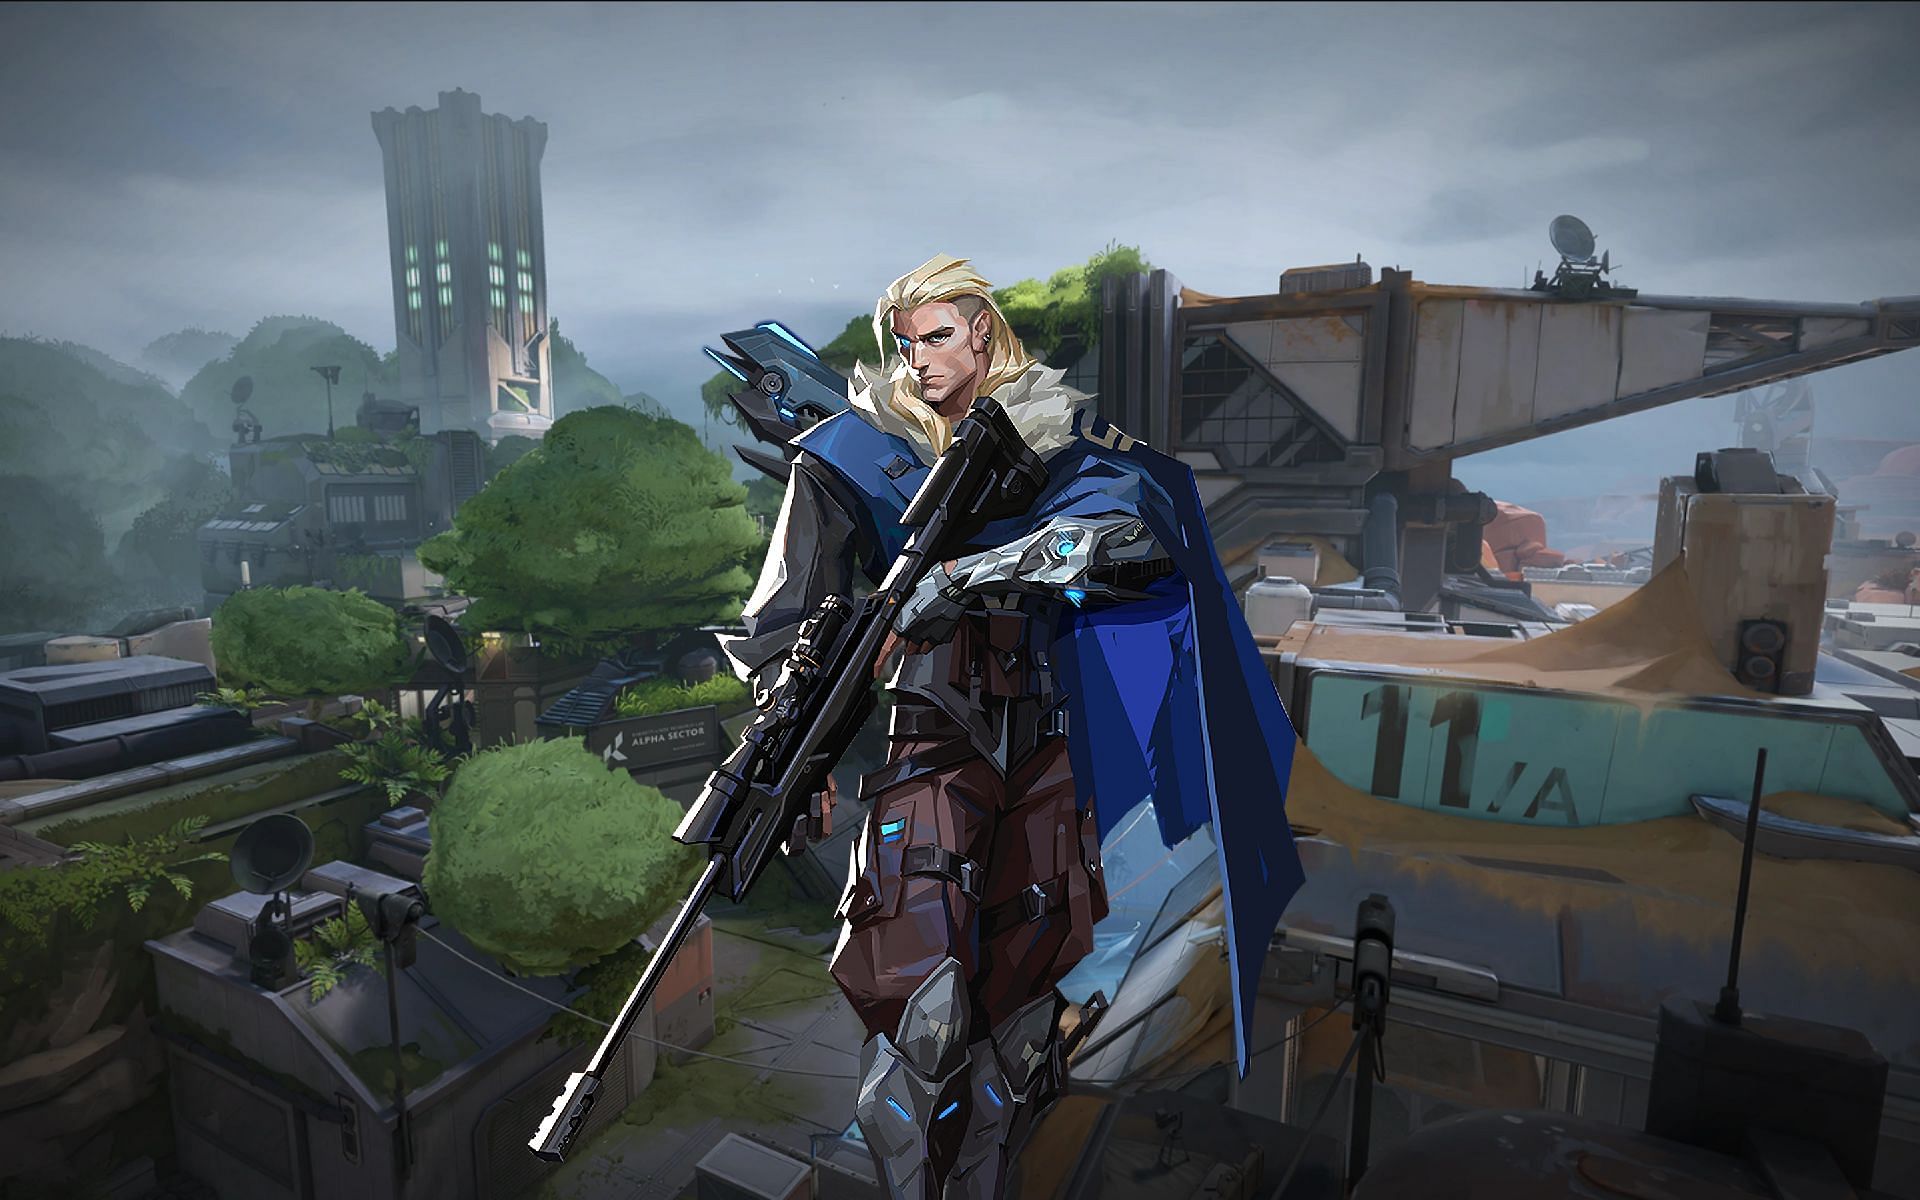
Sova is an Initiator Agent with his abilities tweaked to gain information on enemy positioning. His abilities are great for clearing corners quickly and forcing enemy players out of their positions.
Fracture is a compact map that limits player movement to a certain degree. It is a great map for Sova players to make different combinations of Shock Darts and damage enemy players hiding in corners.
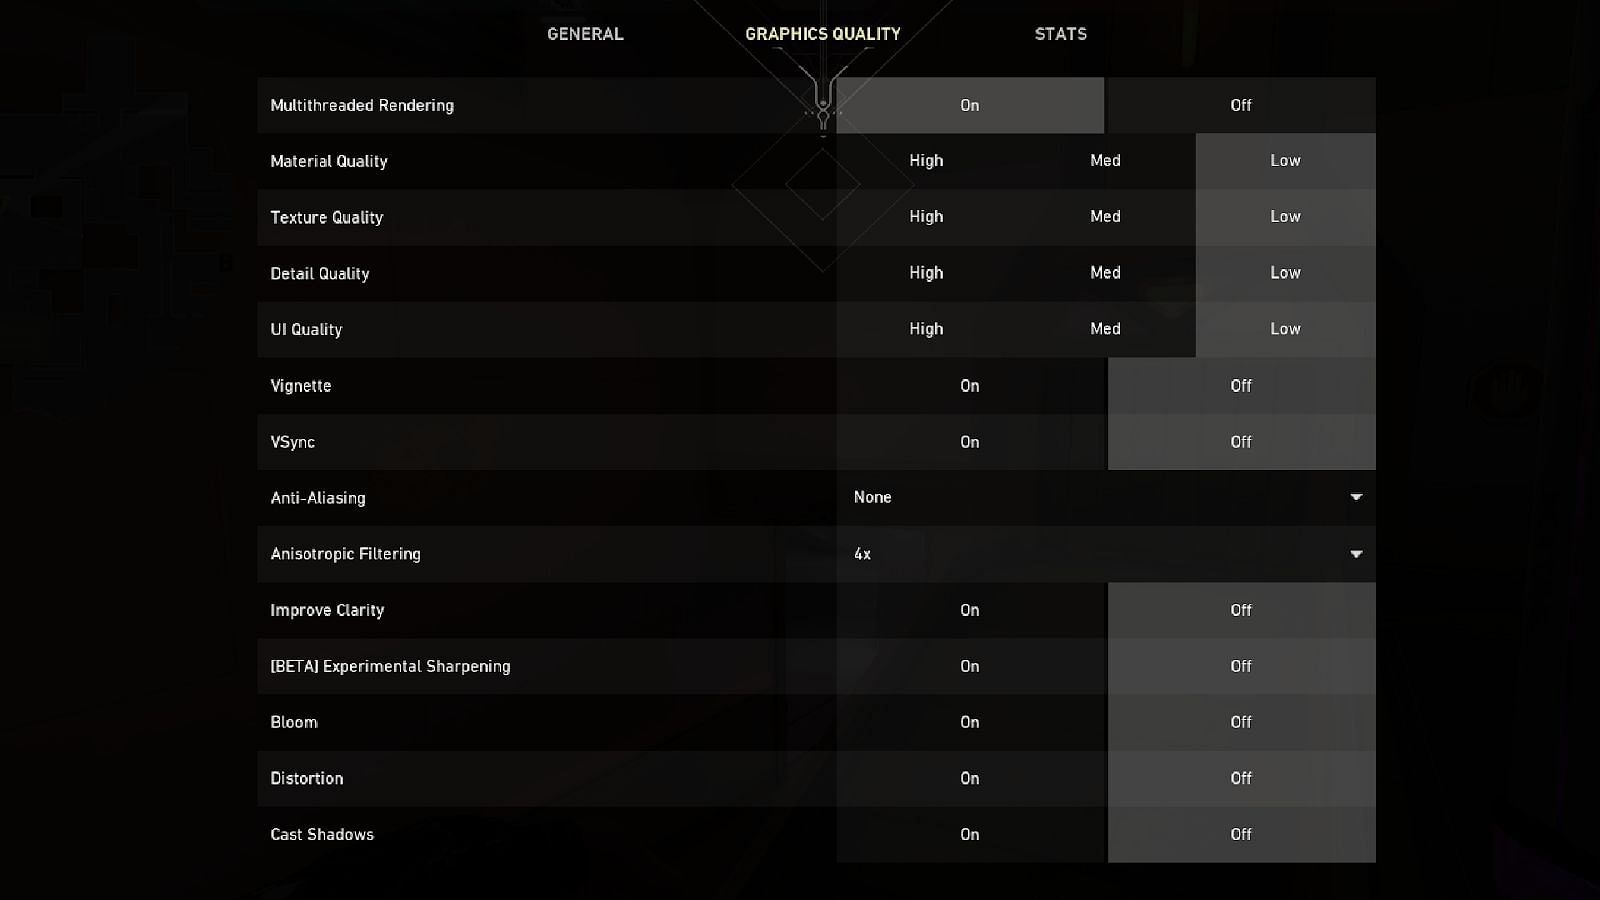
It is important to note that these lineups were performed with LOW Graphics Settings.
This article will take a look at the most effective Sova double shock dart lineups for Valorant`s Icebox.
Note: This article is subjective and reflects the author’s opinion.
Valorant Sova`s best and most effective double Shock Dart lineups for Fracture
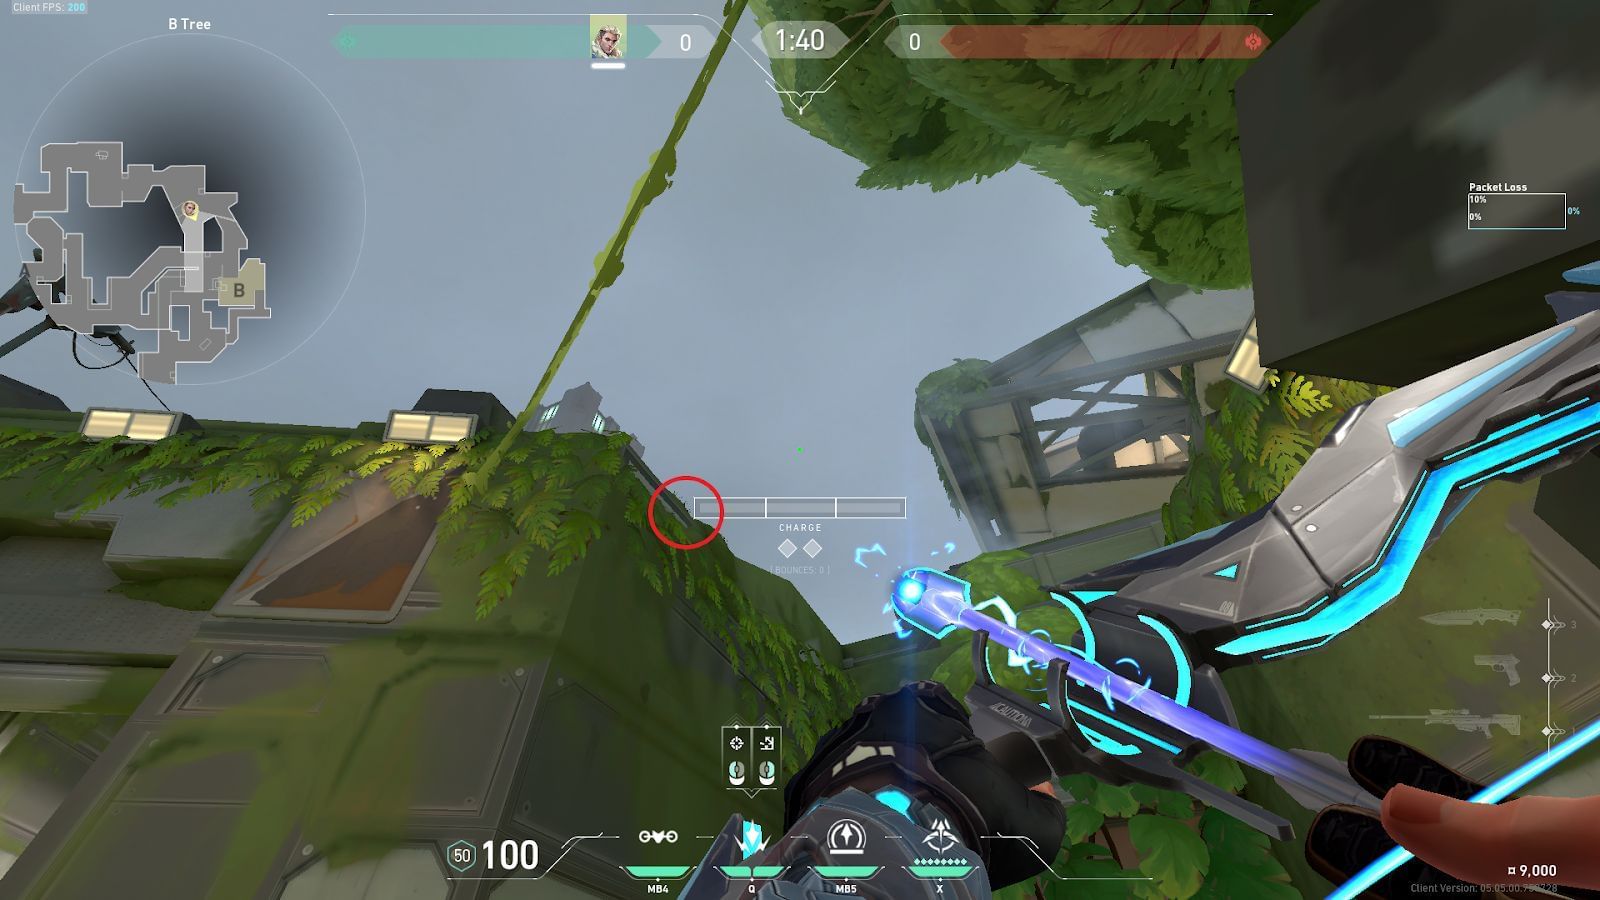
1) B-Tree to B-Site Radianite Boxes Plant position
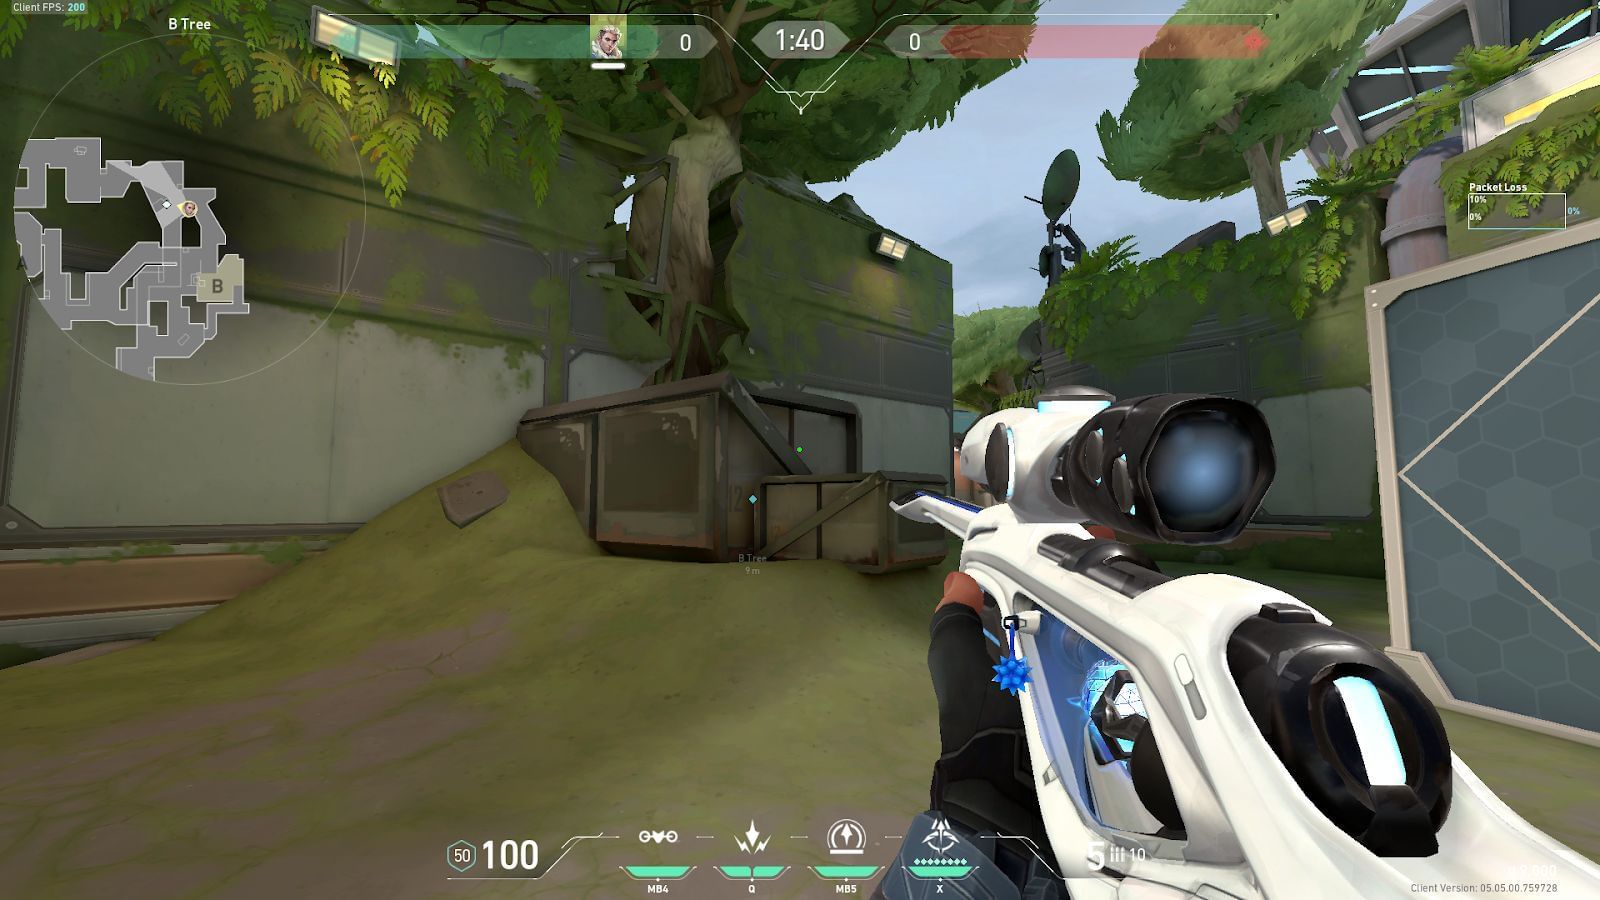
Position yourself in the corner shown and tuck inside the corner between the two boxes.
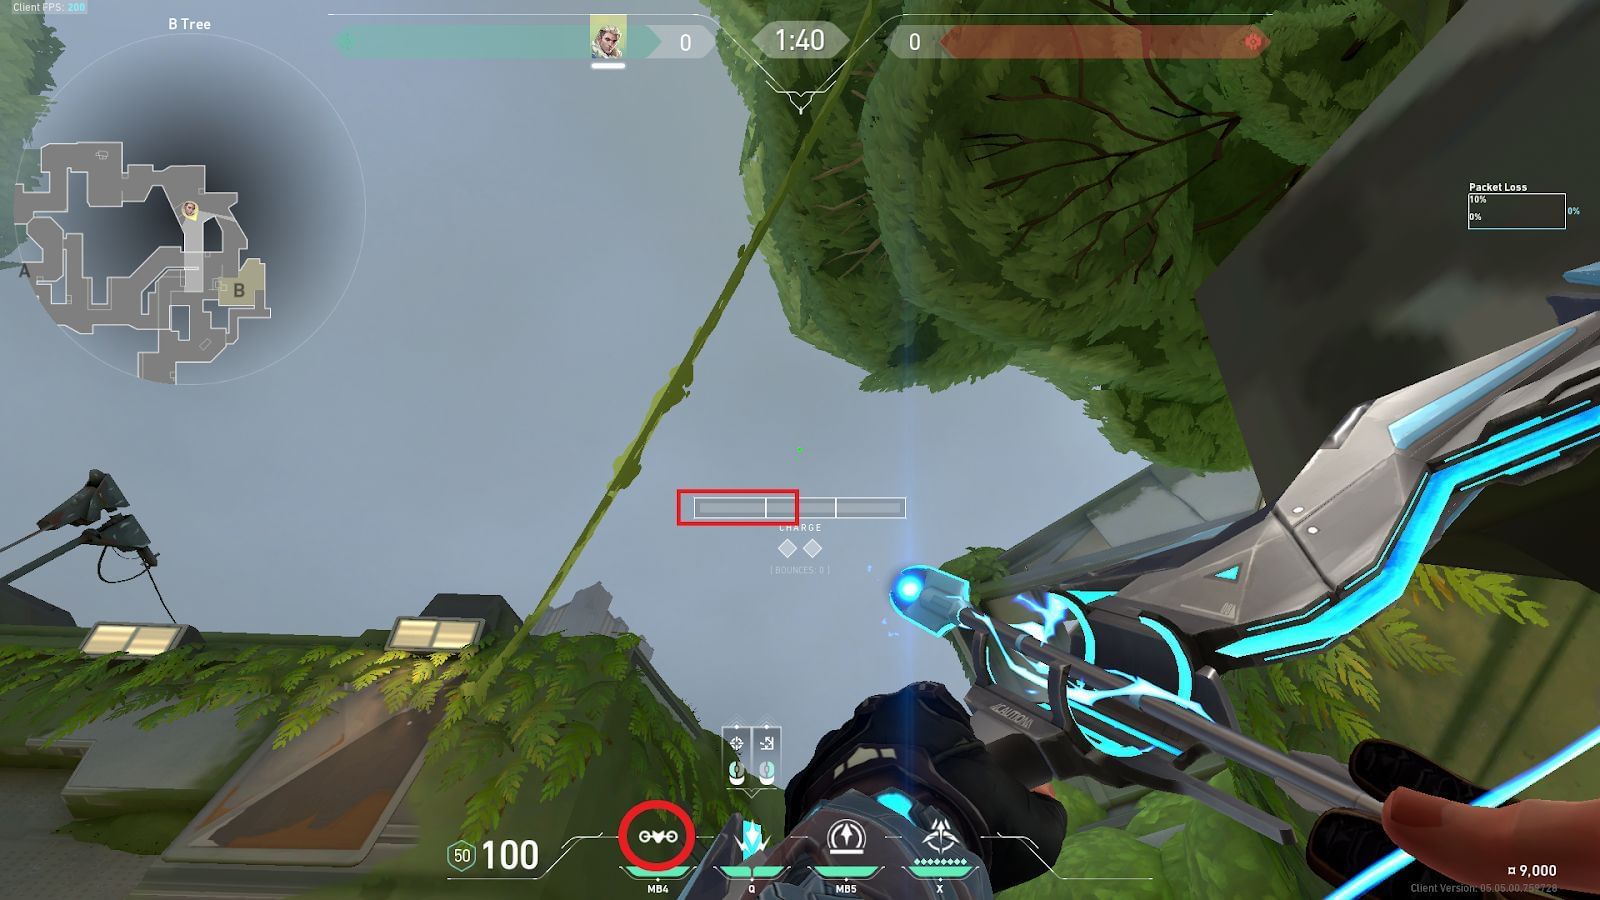
Place the Owl Drone icon`s right circle (shown in the circle) on the wall border below the leaves and deploy the first Shock Dart with one and a half bar change (shown in the rectangle).
Place the bottom left corner of the charge bar on the roof (shown in the circle) and launch the second Shock Dart with a left-click.
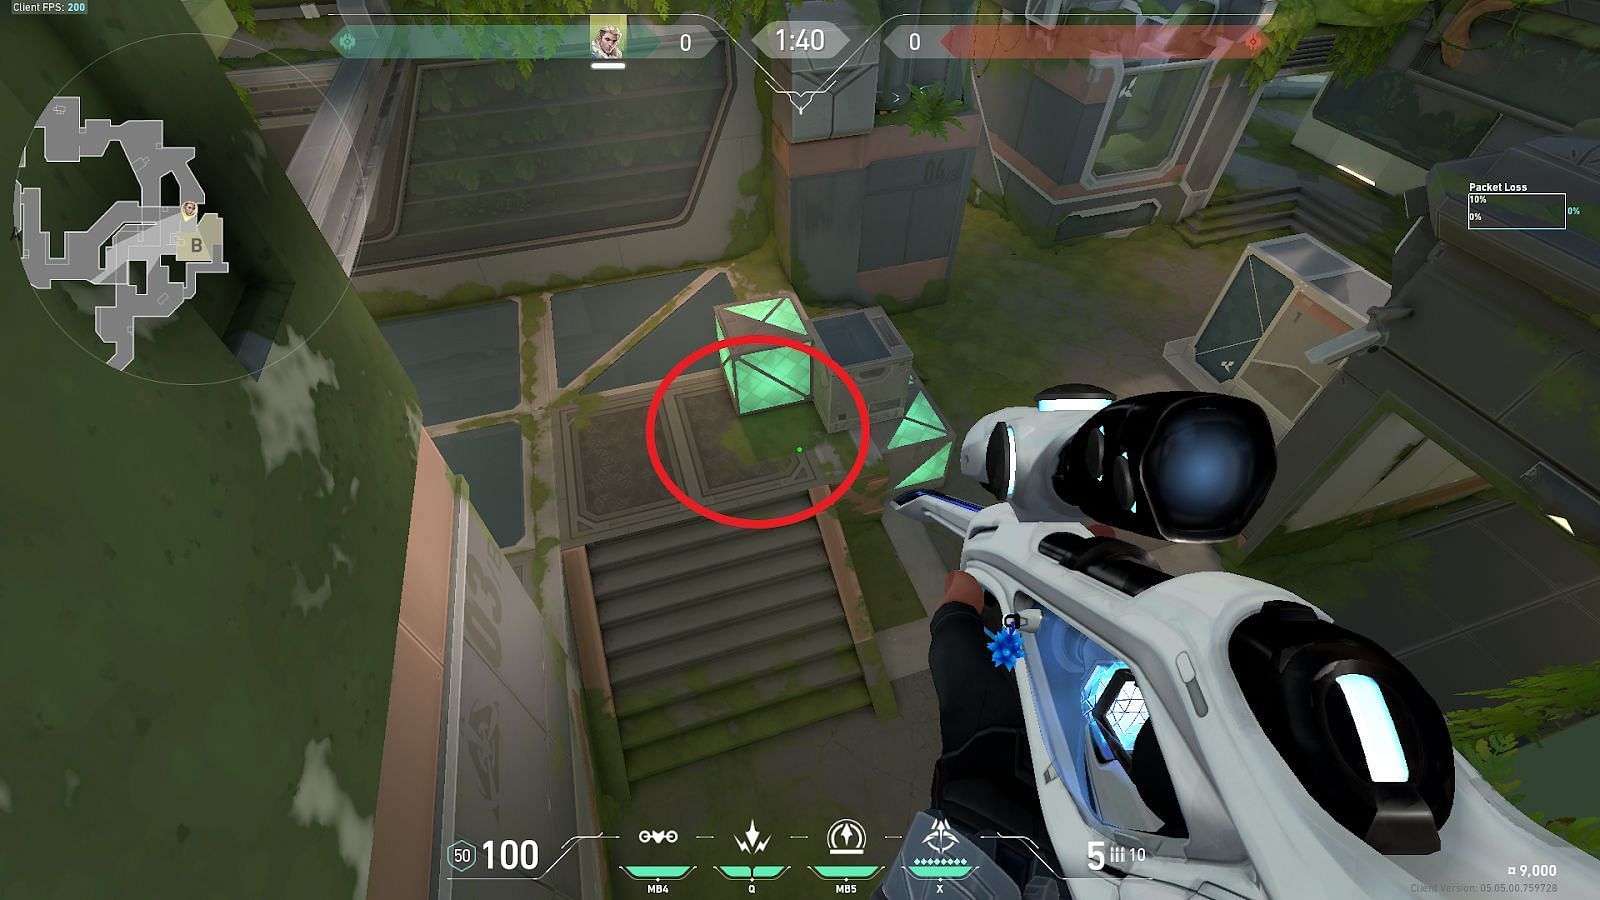
Consecutively launch both Shock Darts, and they will land on A-Site Radianite Boxes Default Plant position.
2) B-Arcade to B-Site Default Plant position
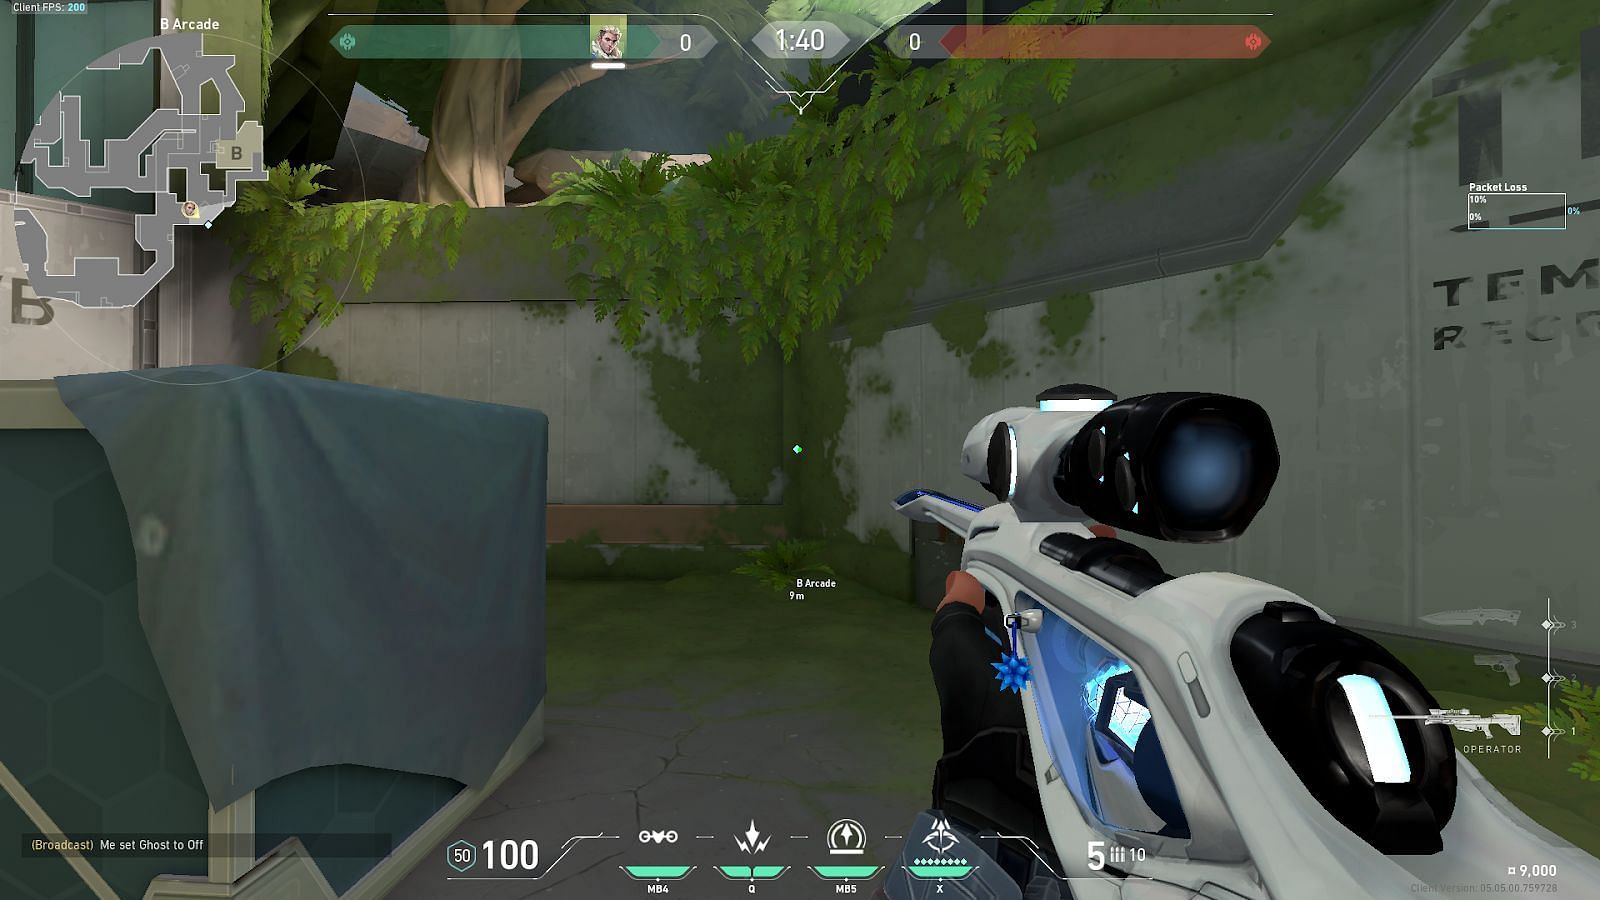
Position yourself in front of the shown corner and tuck inside the corner, and look above towards B-Site.
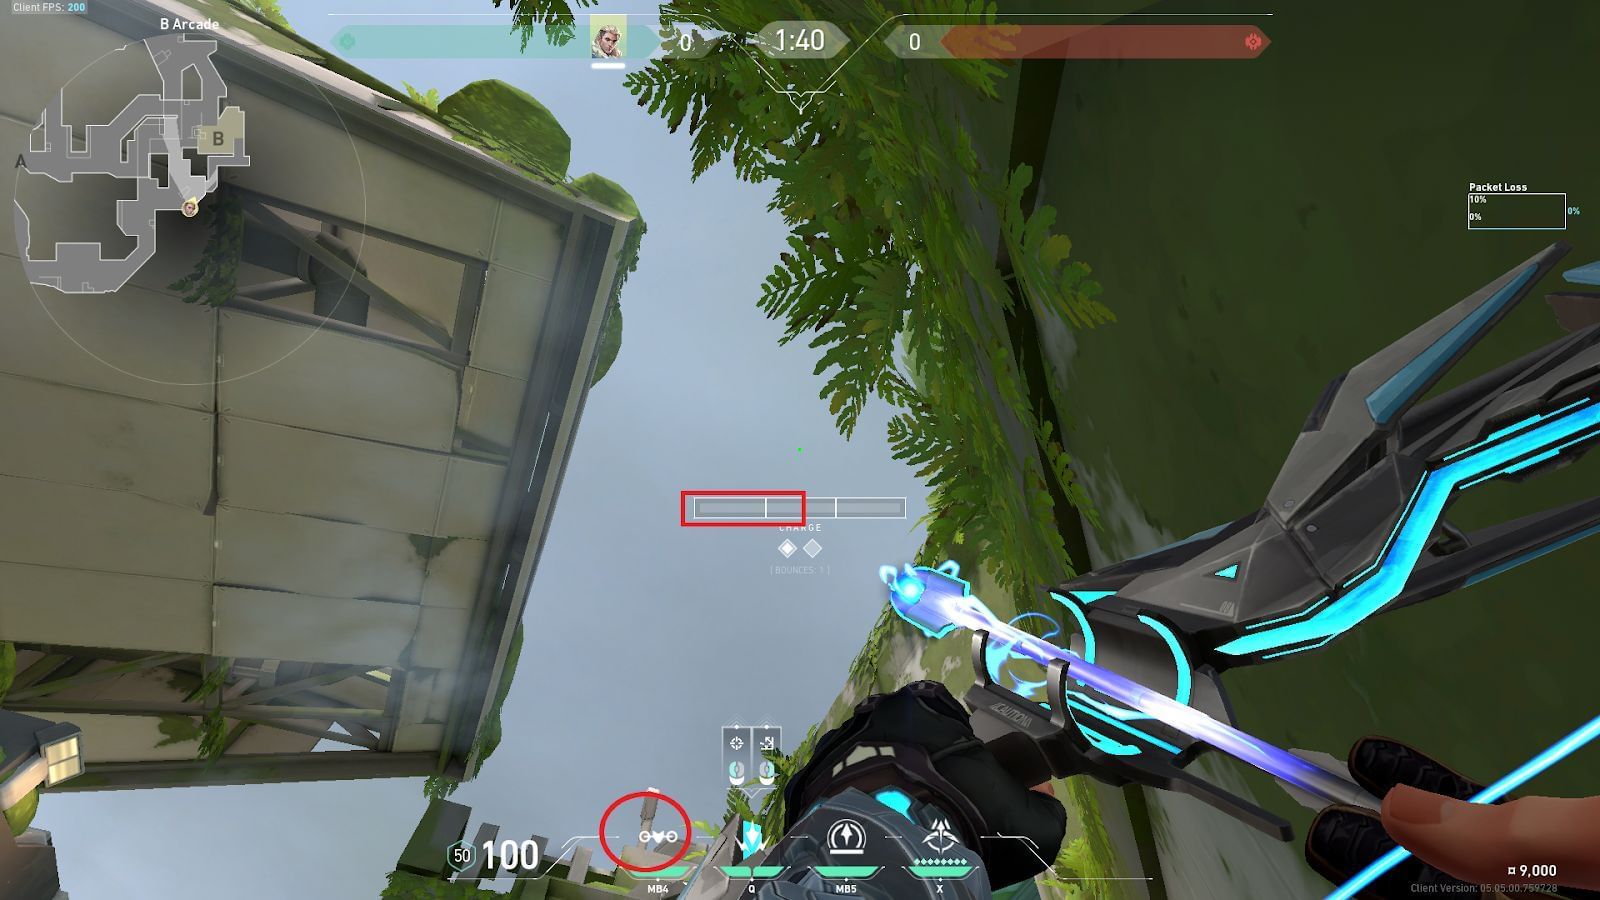
Place the Owl Drone icon`s left circle on the roof pole (shown in the circle) and deploy the first Shock Dart with one bounce (right click once) and one and a half charge bar (shown in the rectangle).
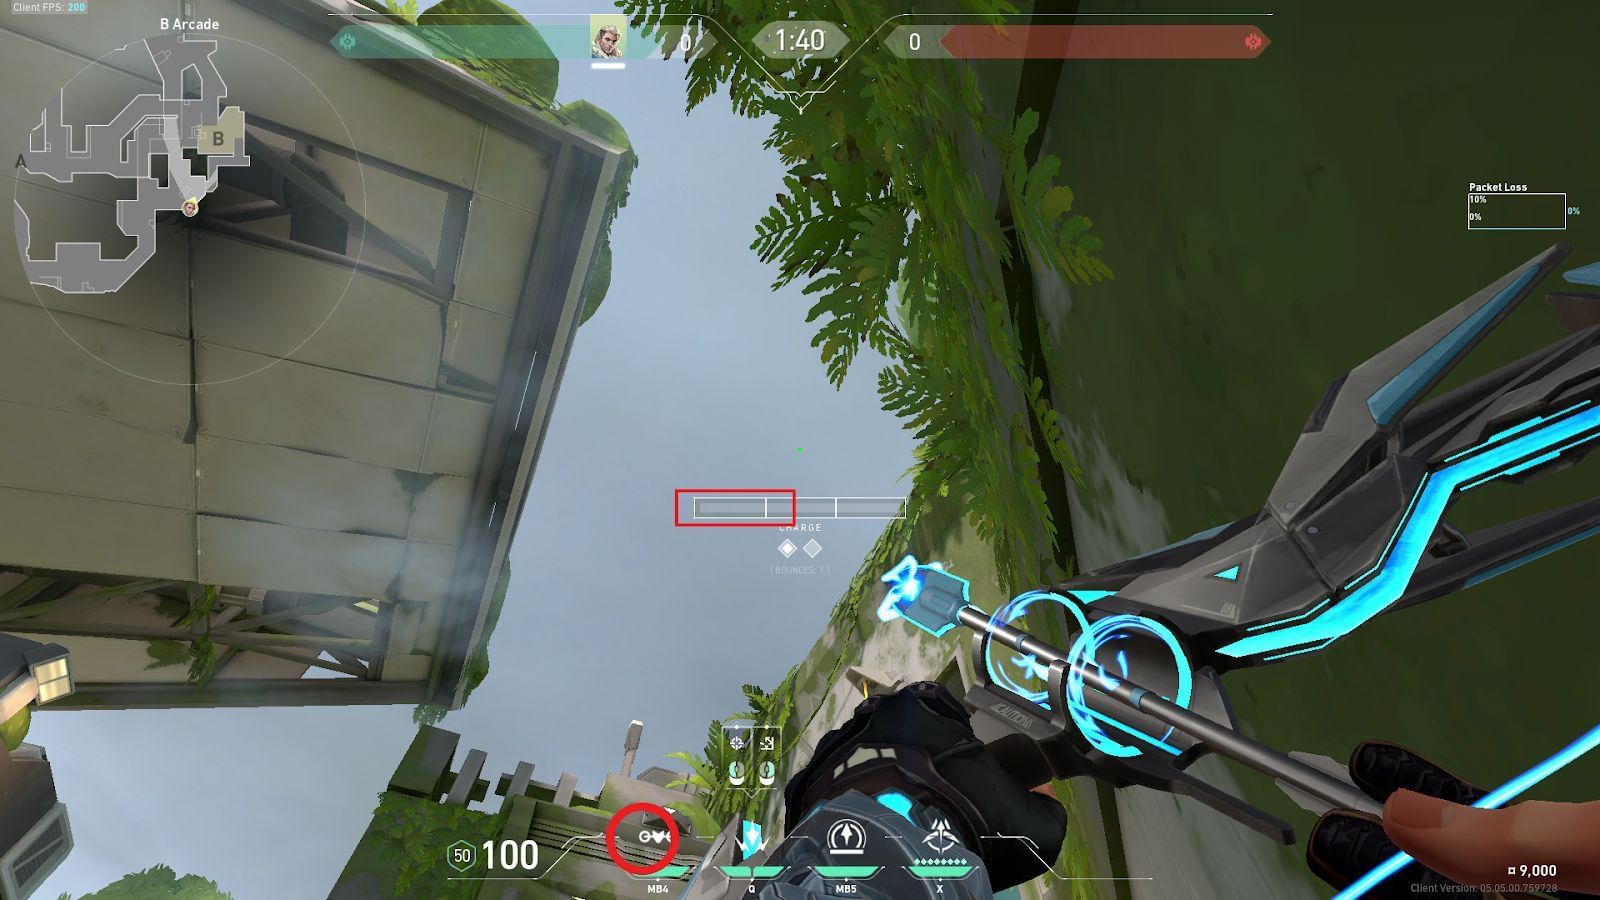
Place the same Owl Drone icon`s left circle above the horizontal vents (shown in the circle) and launch the second Shock Dart with no bounce and one and a half charge bar (shown in the rectangle).
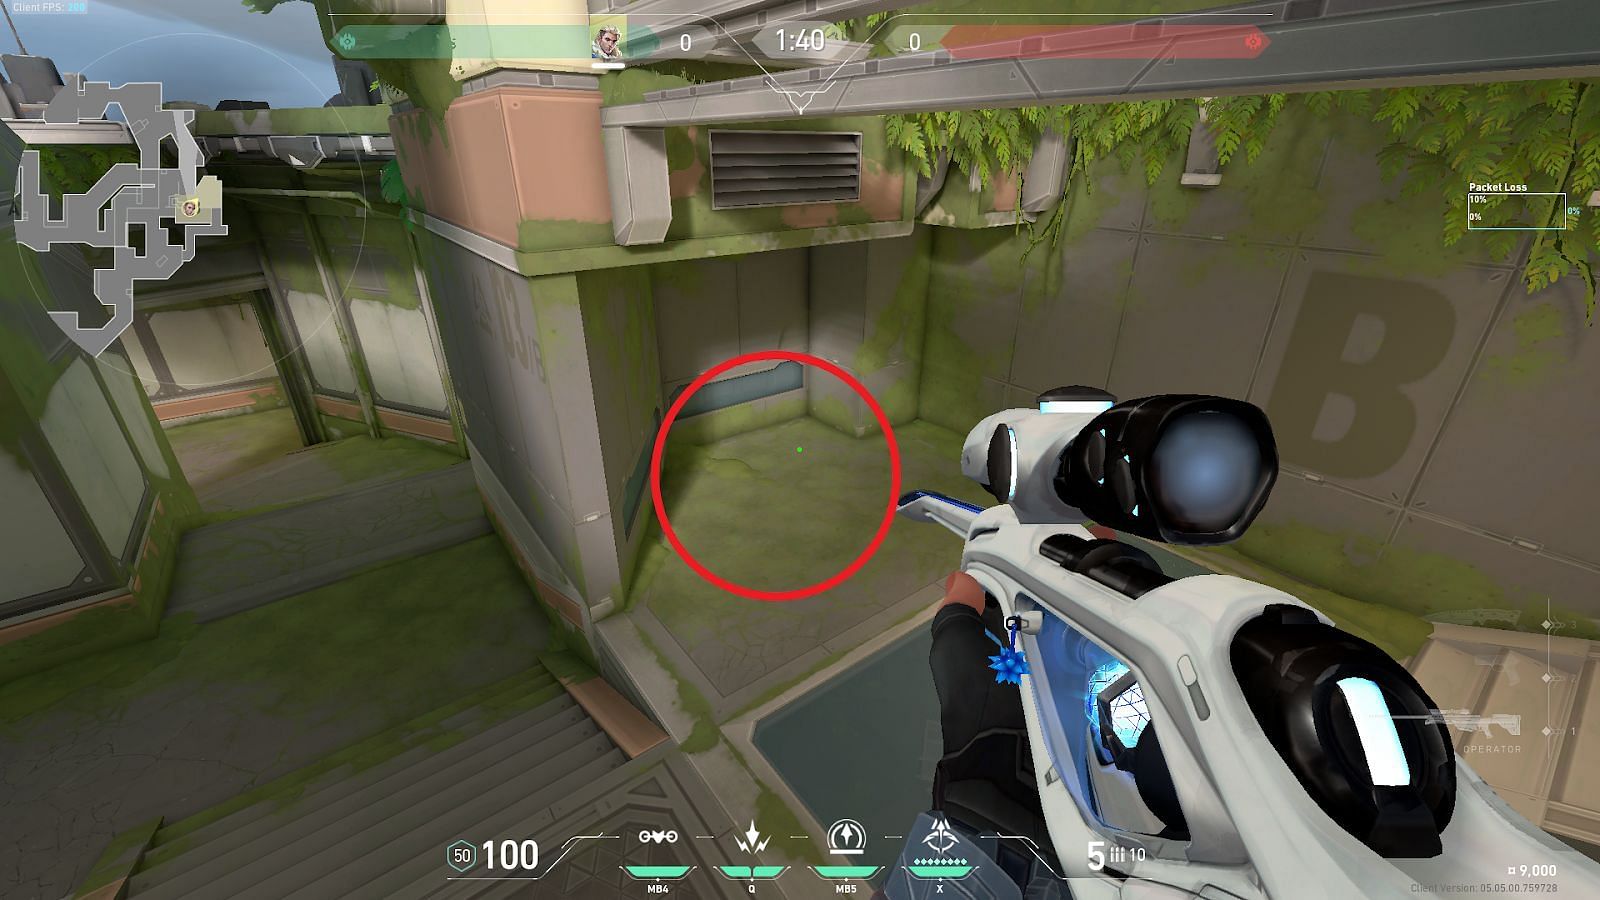
Consecutively launch both Shock Darts, and they will land on B-Site Default Plant position.
3) A-Drop Ramp to A-Site Top
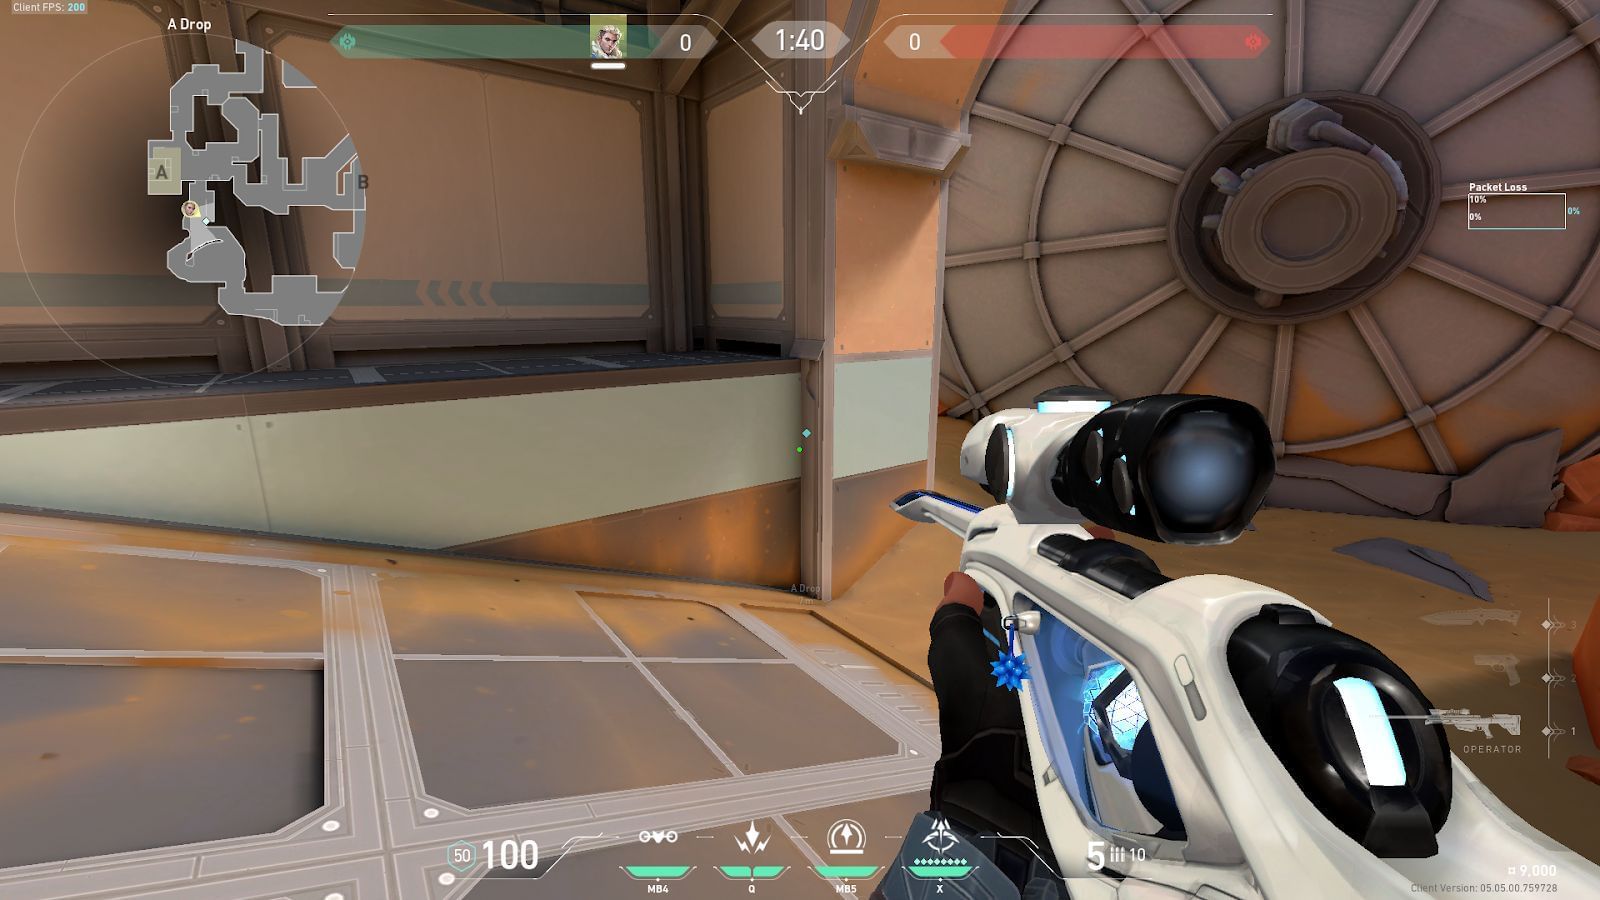
Position yourself in front of the shown corner and tuck between the wall and the beam.

Place the first bar of the charge bar on the roof ledge (shown with the arrow) and deploy the first Shock Dart with one bar charge (shown in the rectangle).
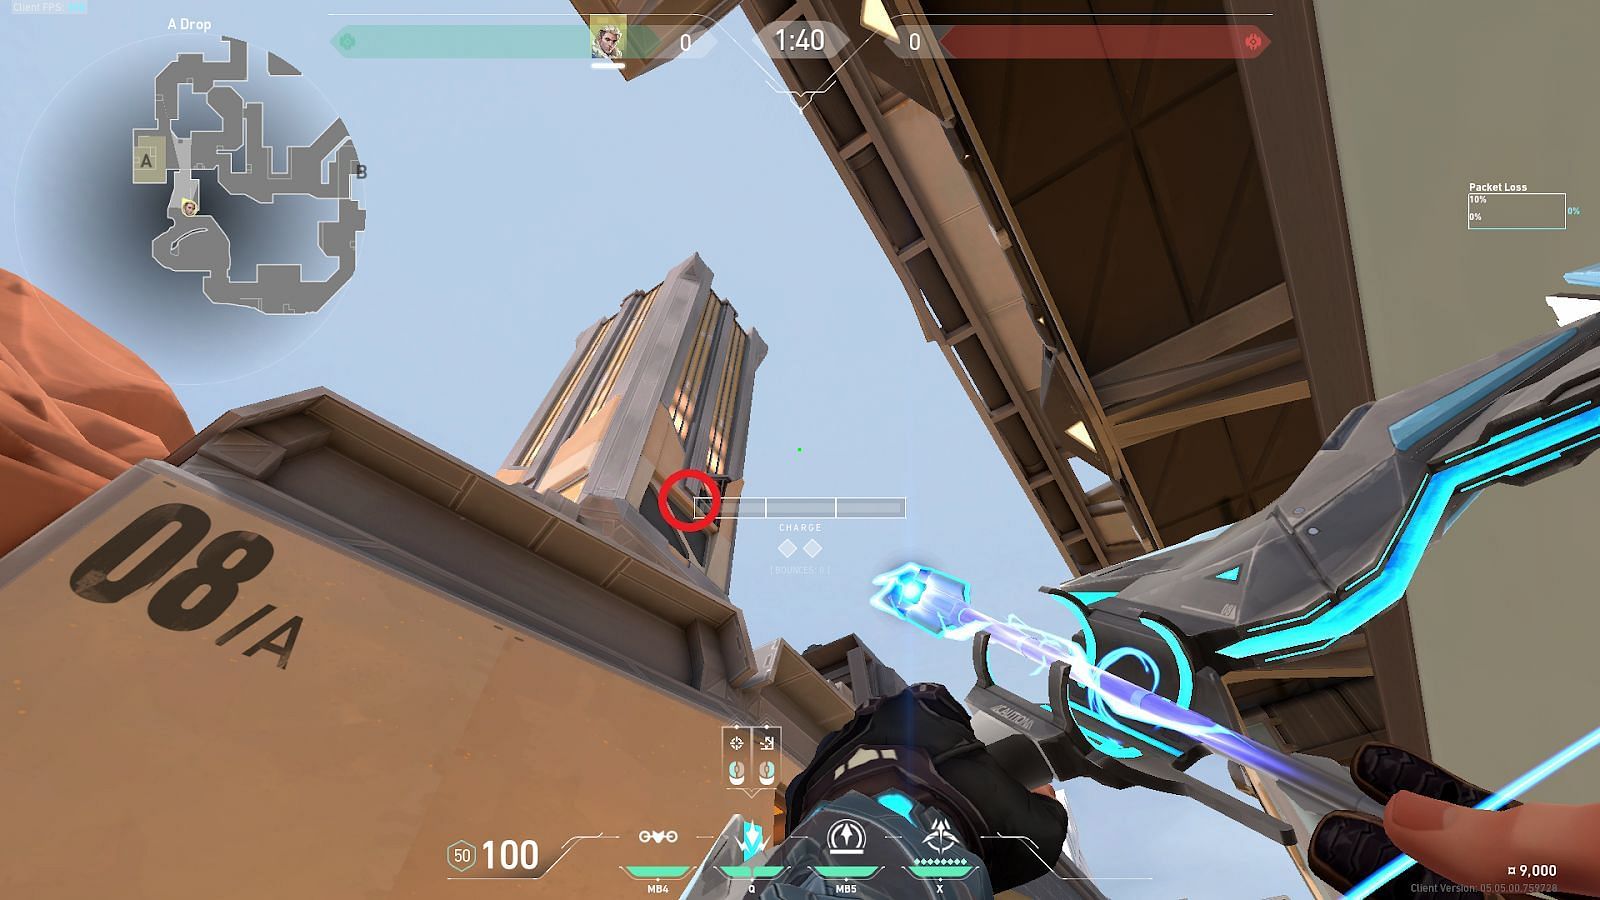
Position the top left corner of the charge bar (shown in the circle) below the metal ledge of the A-Site tower and launch the second Shock Dart with a simple left-click.
Launch both Shock Darts, and they will land on the A-Site Top position.
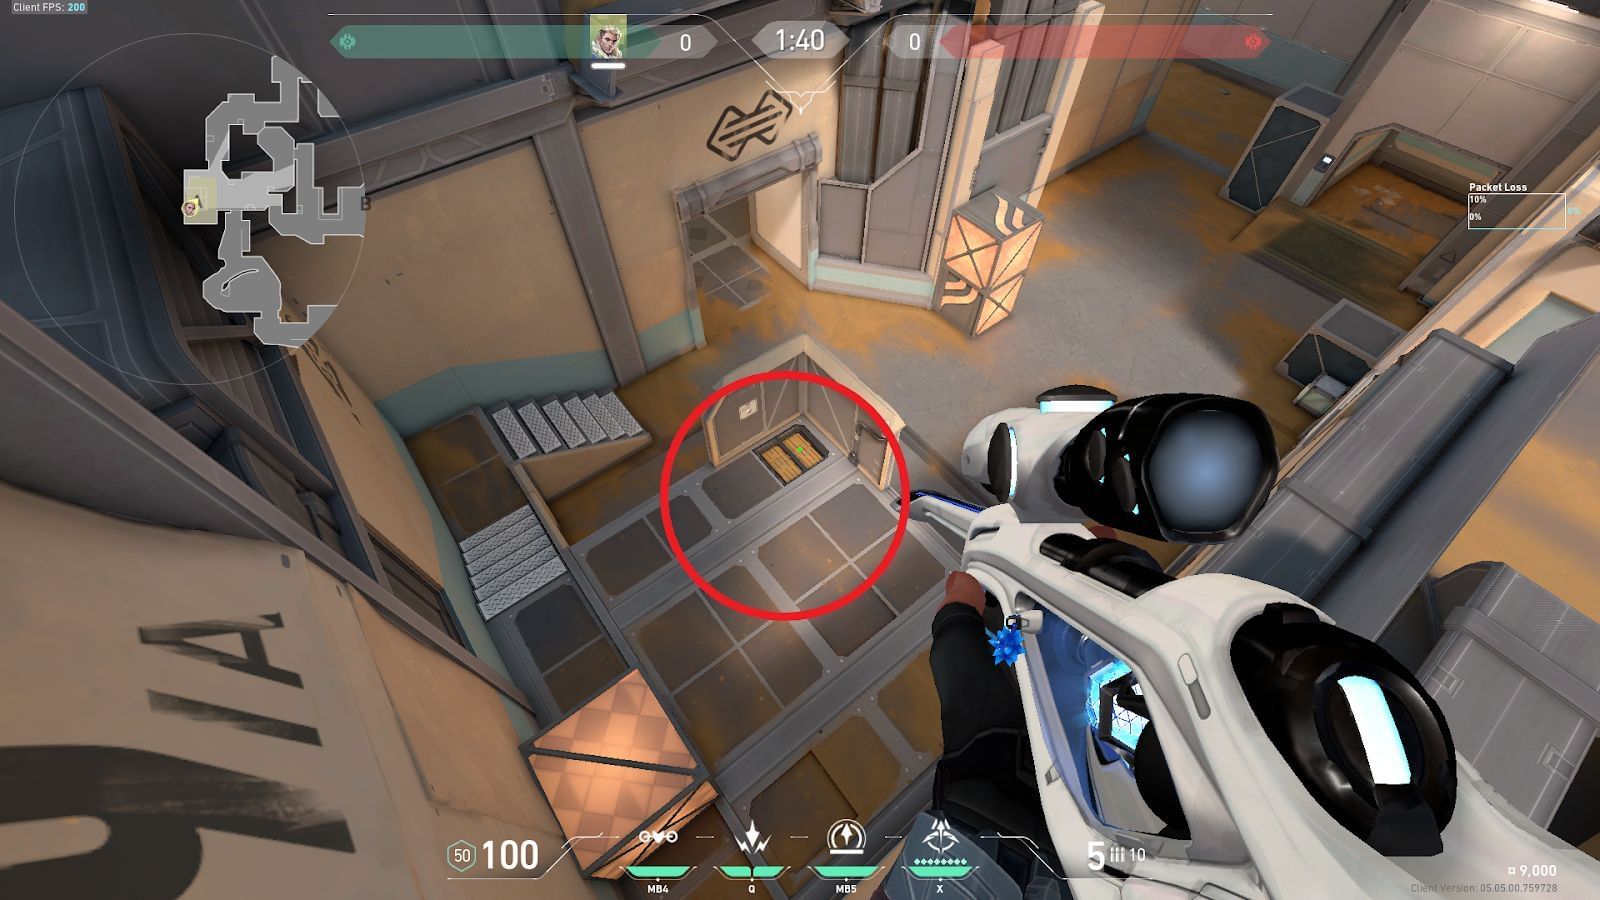
4) B-Canteen to B-Site Radianite Boxes

Position yourself in B-Canteen directly above the marked spot. There is a tolerance for error, so standing in the vicinity will not impact the result.
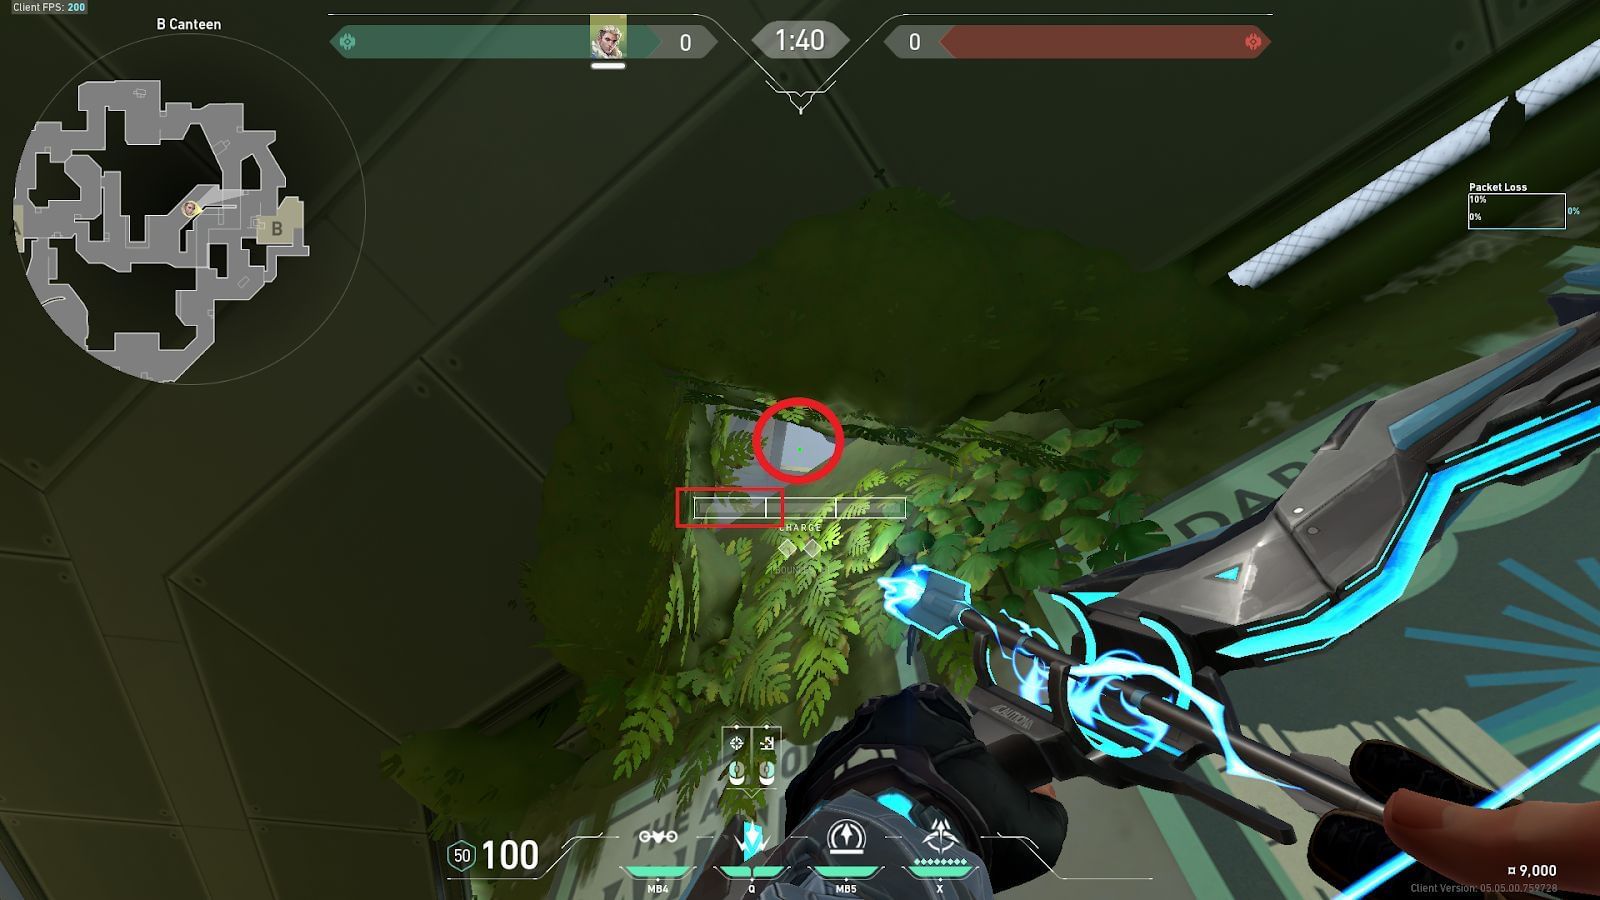
Place the crosshair above through the roof opening (shown in the circle) and deploy the first Shock Dart with a one-bar charge (shown in the rectangle).
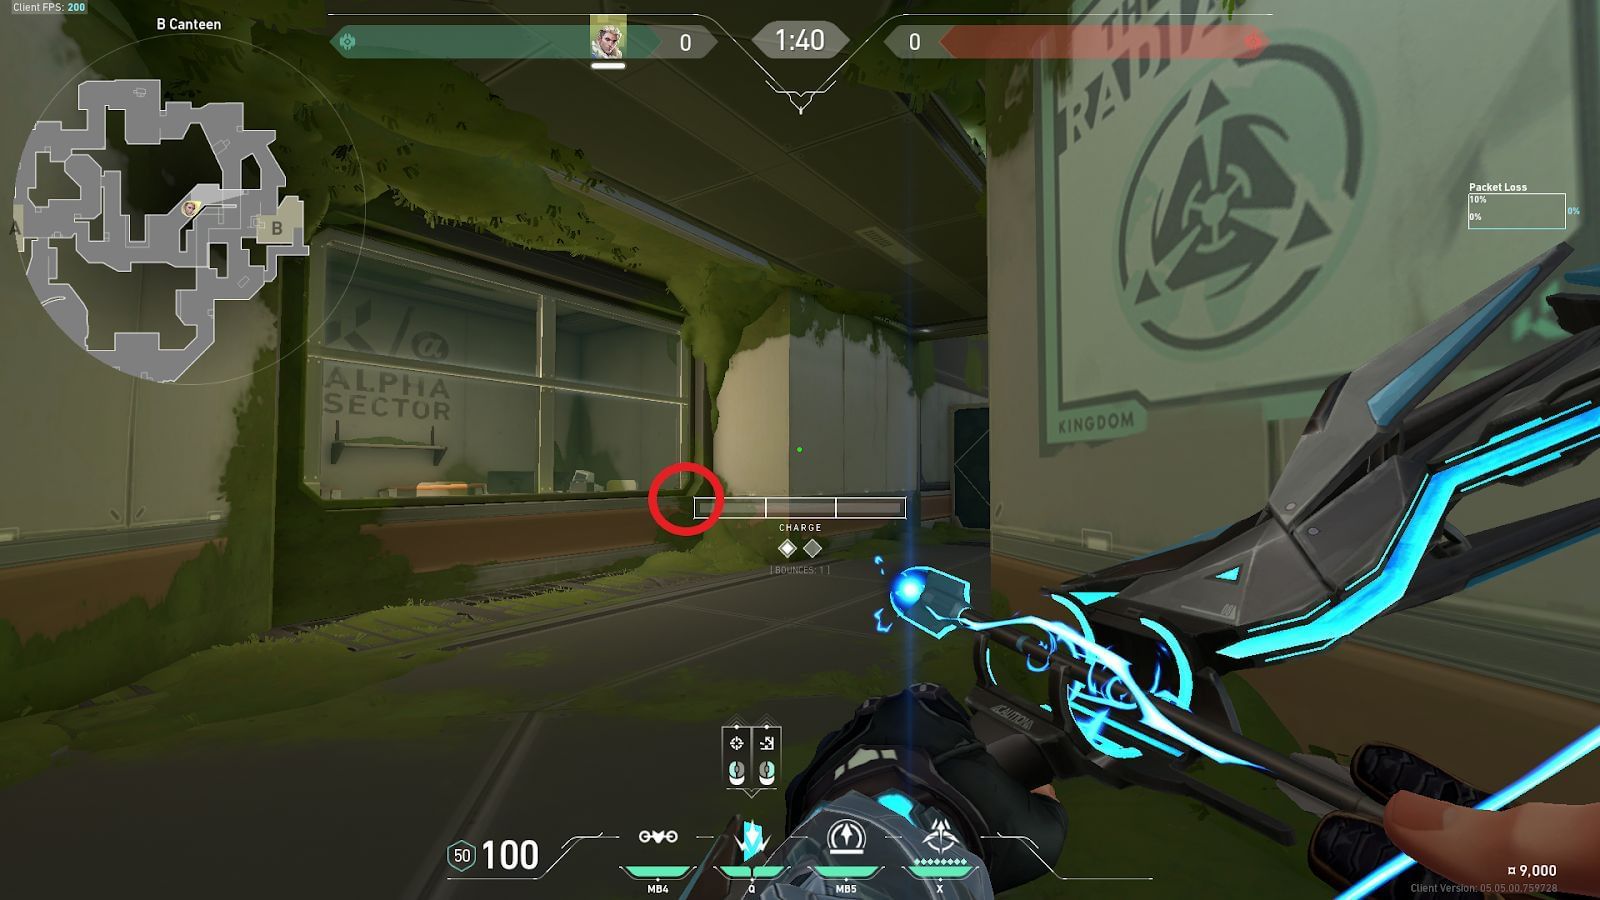
Position the top left corner of the charge bar (in the corner) with the bottom right corner of the window in B-Canteen. Launch the second Shock Dart with one bounce (right click once) and a full bar charge.
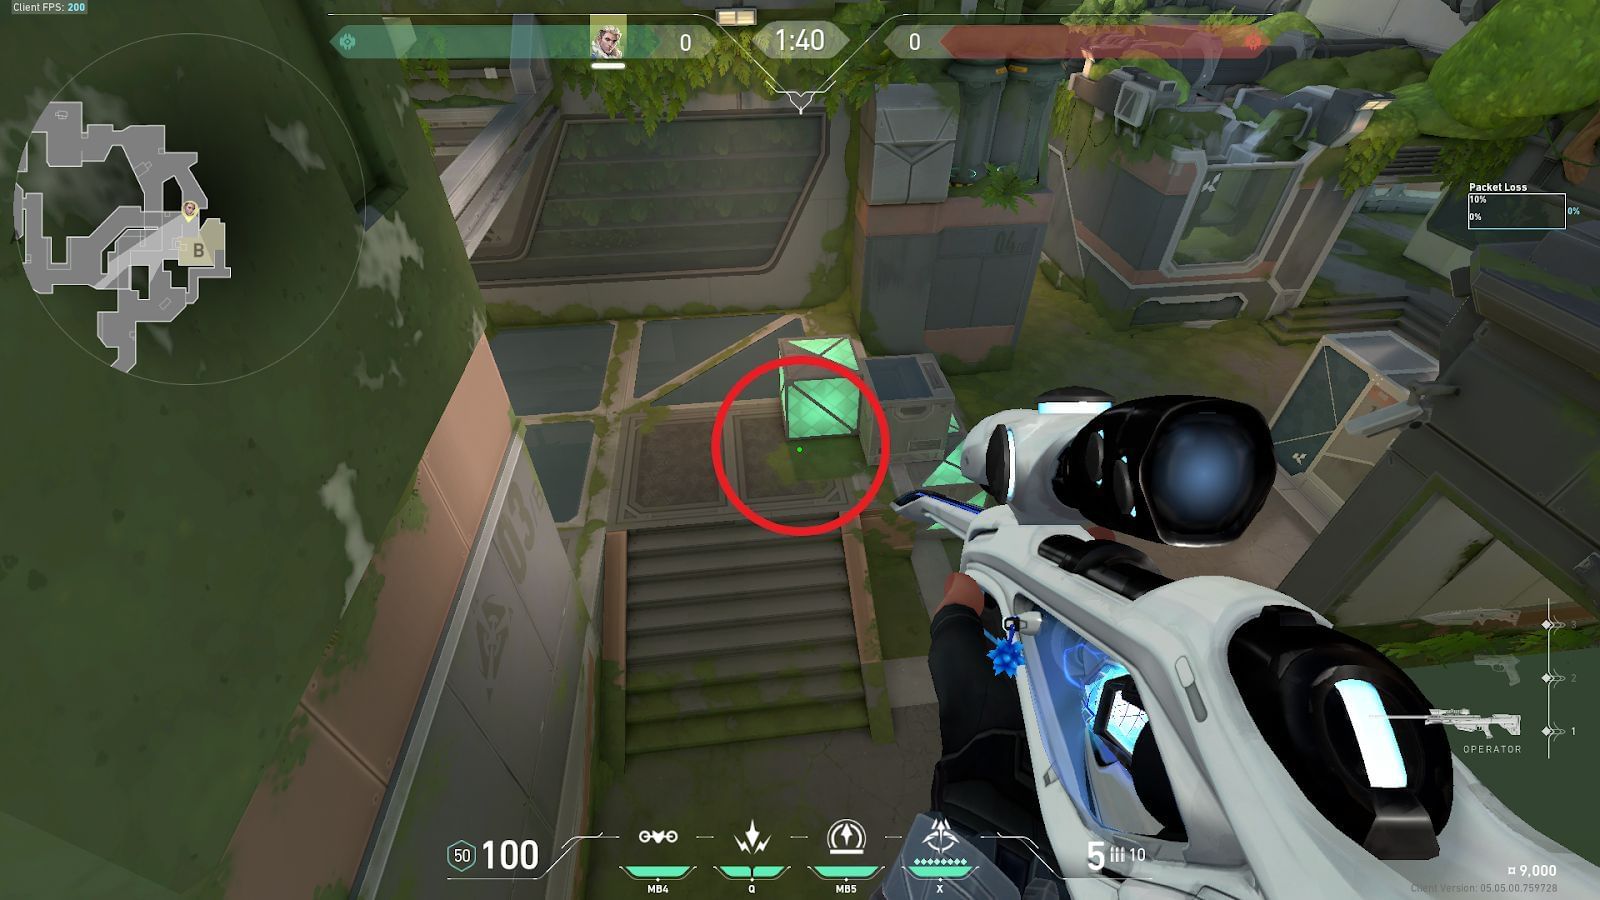
Consecutively launch both Shock Darts, and they will land together on B-Site Radianite Boxes (shown in the circle).
