
'%20x='0'%20y='0'%20height='100%25'%20width='100%25'%20%0A%20%20%20%20%20%20%20%20%20%20xlink%3Ahref='data:image/jpg;base64,/9j/4AAQSkZJRgABAQAAAQABAAD/2wCEAAMDAwMDAwQEBAQFBQUFBQcHBgYHBwsICQgJCAsRCwwLCwwLEQ8SDw4PEg8bFRMTFRsfGhkaHyYiIiYwLTA+PlQBAwMDAwMDBAQEBAUFBQUFBwcGBgcHCwgJCAkICxELDAsLDAsRDxIPDg8SDxsVExMVGx8aGRofJiIiJjAtMD4+VP/AABEIAAUACgMBIgACEQEDEQH/xABdAAEBAQAAAAAAAAAAAAAAAAAABAgQAAEEAgIDAAAAAAAAAAAAAAIBAwQFAAYHCBEhMwEBAAAAAAAAAAAAAAAAAAAAAxEAAgMBAQAAAAAAAAAAAAAAAQIDBBEAIf/aAAwDAQACEQMRAD8As4v6vUttrMSZZbFOeB9sJCNtsNAoIg/NCND9ZgK93sK27soTdRHII019kSJwvKo2aiirjGNHI4rIwPpJ57mLfljAxVUYO//Z'%3E%3C/image%3E%3C/svg%3E)
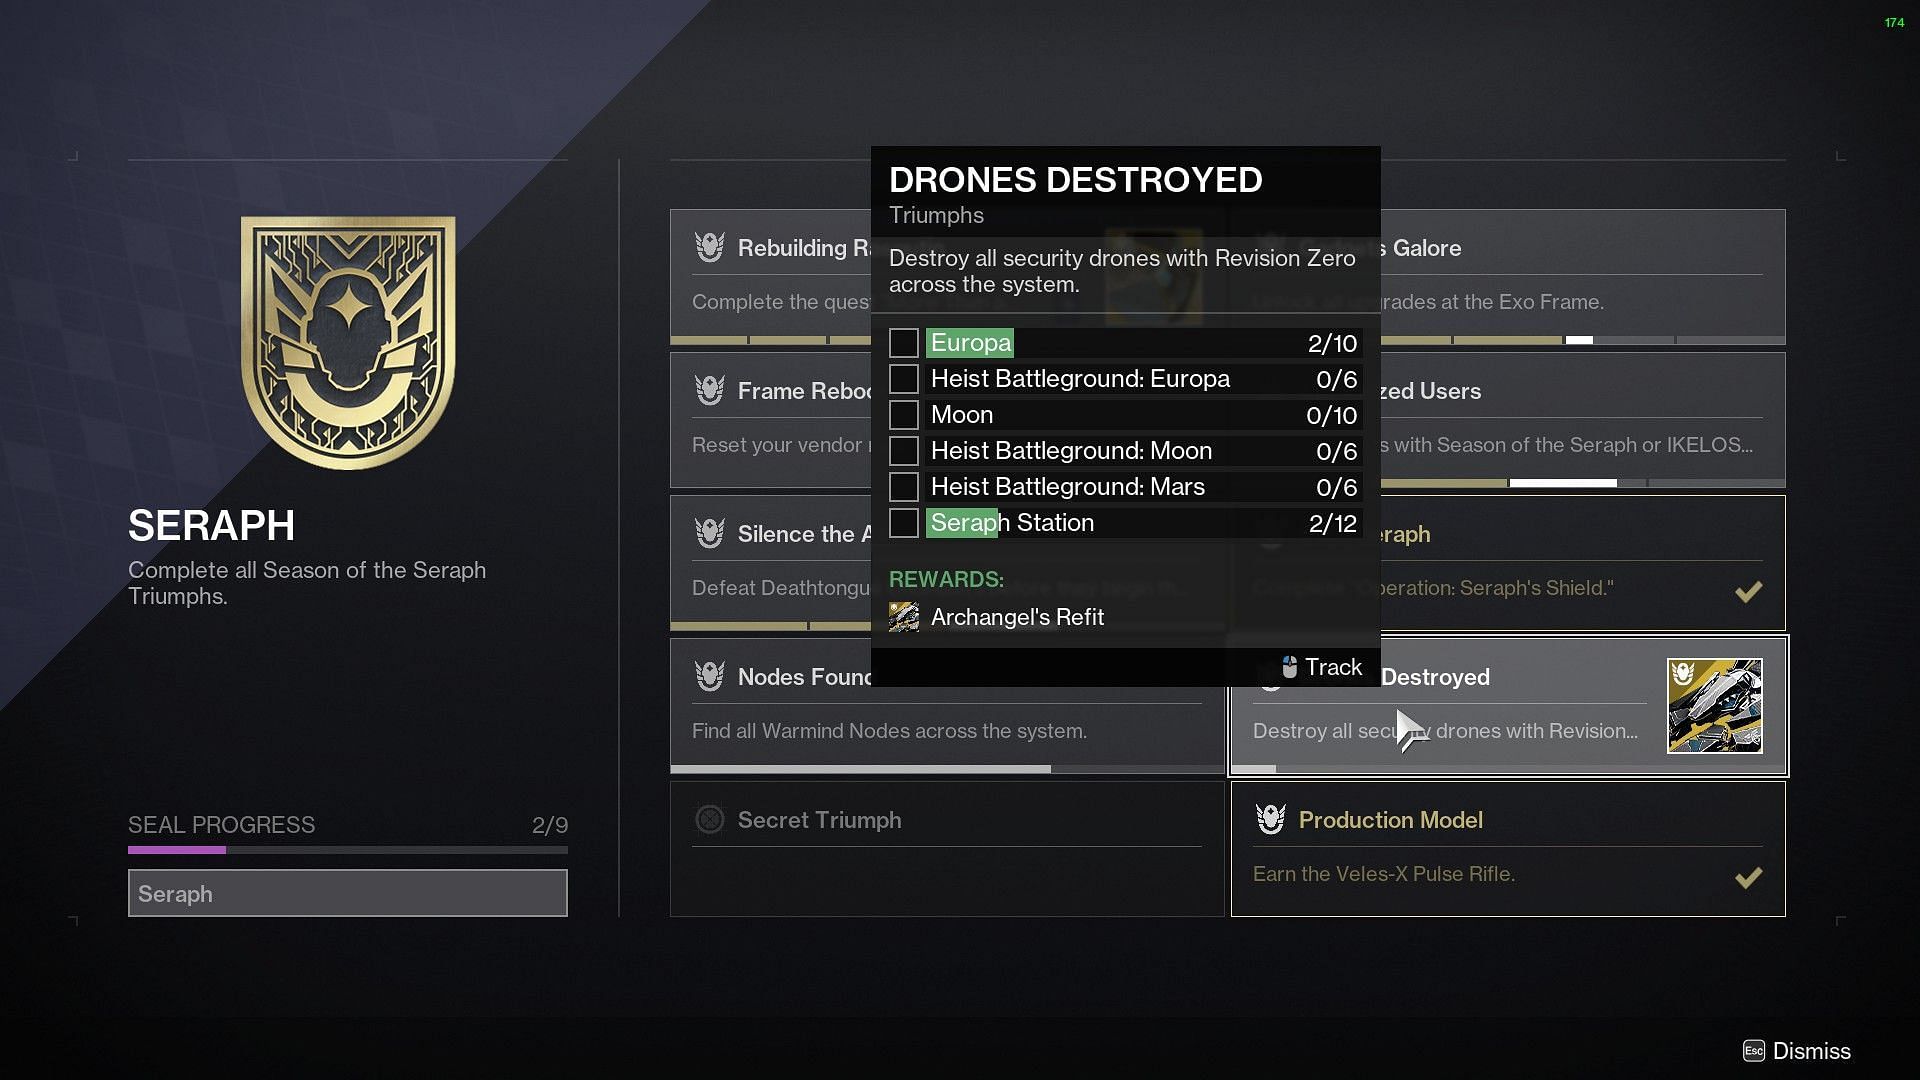
Destiny 2 Operation Seraph's Shield is not just about acquiring the newest Exotic, as Bungie has hidden a lot of stuff behind puzzles. One of the primary puzzles comes in the form of Security Drones that can be found scattered across multiple locations. Typically, 12 of them are located within the mission tileset.
Players should note that the 12 Drones mentioned in this article are time-gated but are accessible via specific exploits. For this, a Sword with Eager Edge or a Fallen Guillotine needs to be equipped.
Looking for Crossword hints & solutions? Check out latest NYT Mini Crossword Answers, LA Times Crossword Answers, and Atlantic Crossword Answers
Most of these Drones are locked behind lasers, and players will need to bypass them by performing a heavy Sword attack right in front of them.
Titan's different bashes with three elemental subclasses can also work here. The video given above might provide a clearer idea of the entire exploit.
Destiny 2 Operation Seraph Shield Security Drone location guide
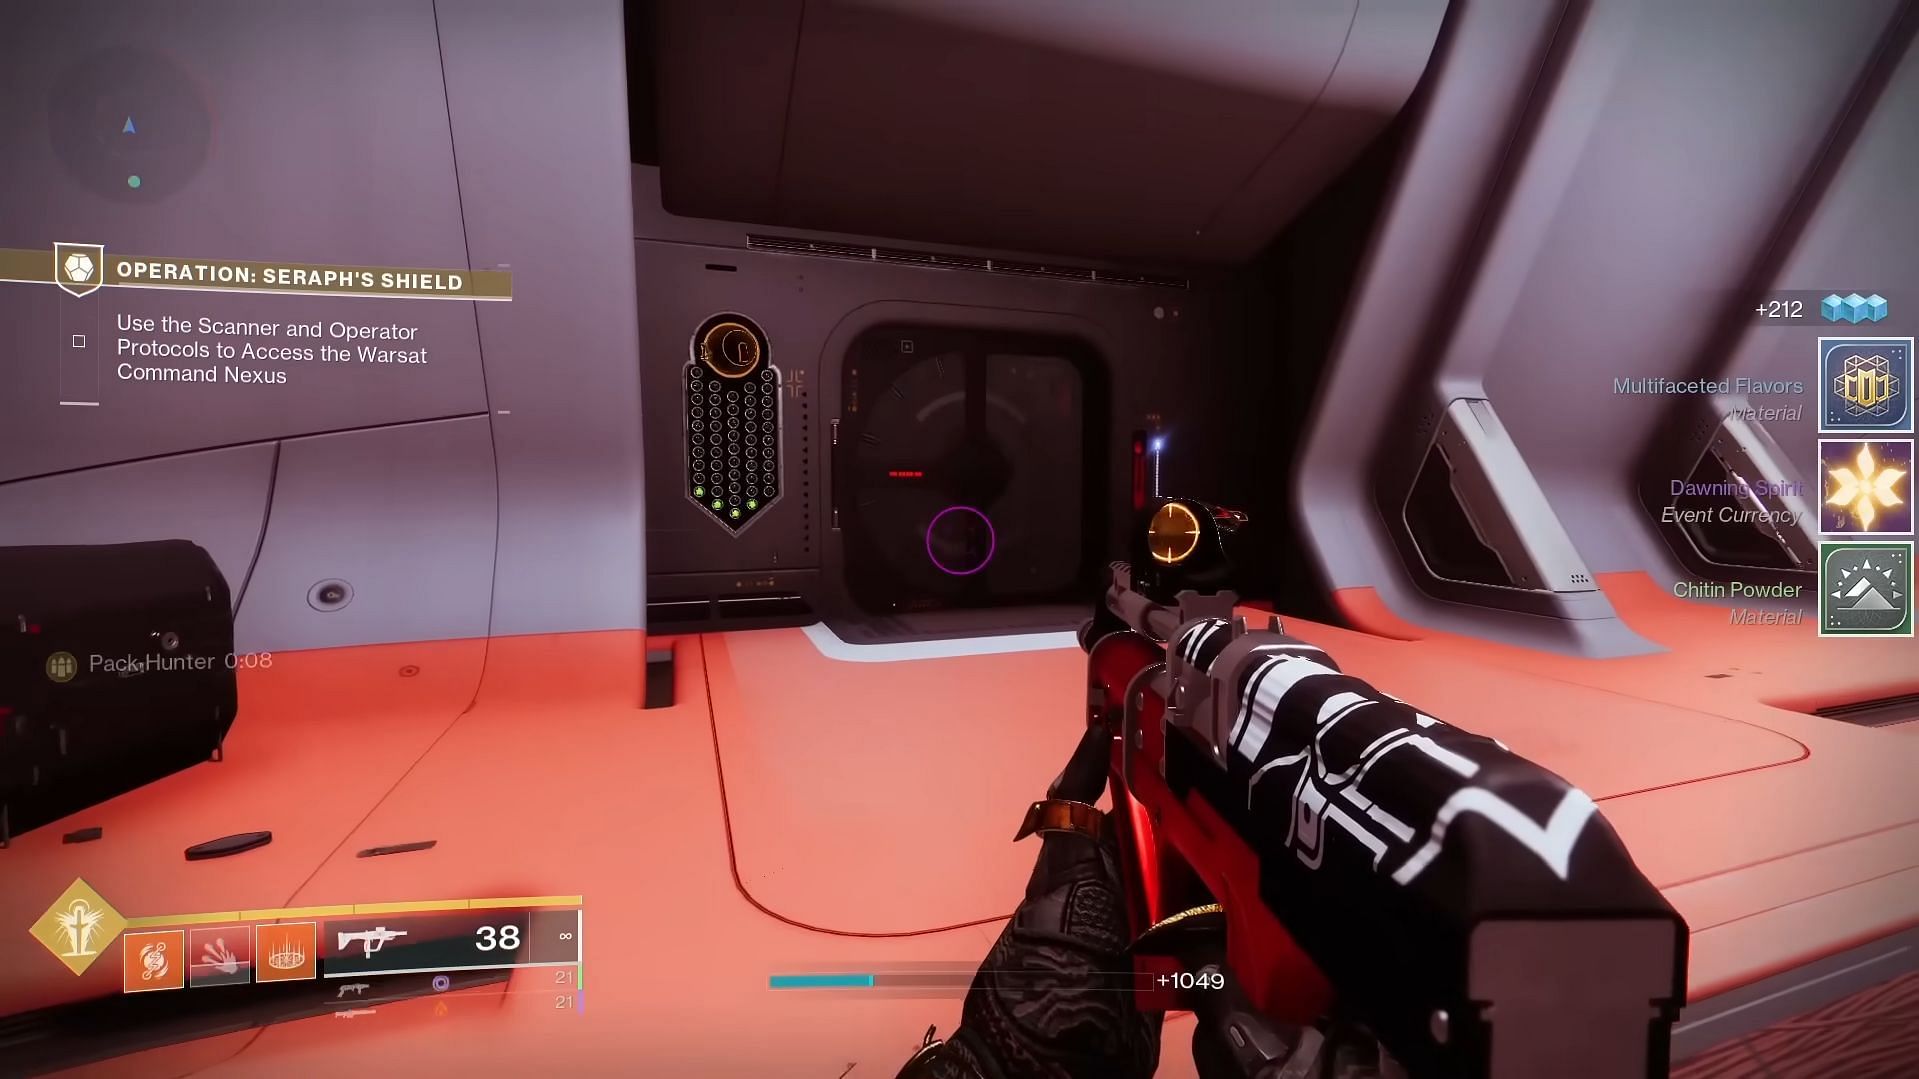
Before heading inside the mission, make sure to pick up the "Security Clearance" perk from the Exo vendor in HELM. This will allow you to open locked doors inside the mission, which will eventually lead to rooms with Security Drones.
The locations of the Destiny 2 Security Drones in all 12 separate Operation Seraph Shield locations are as follows:
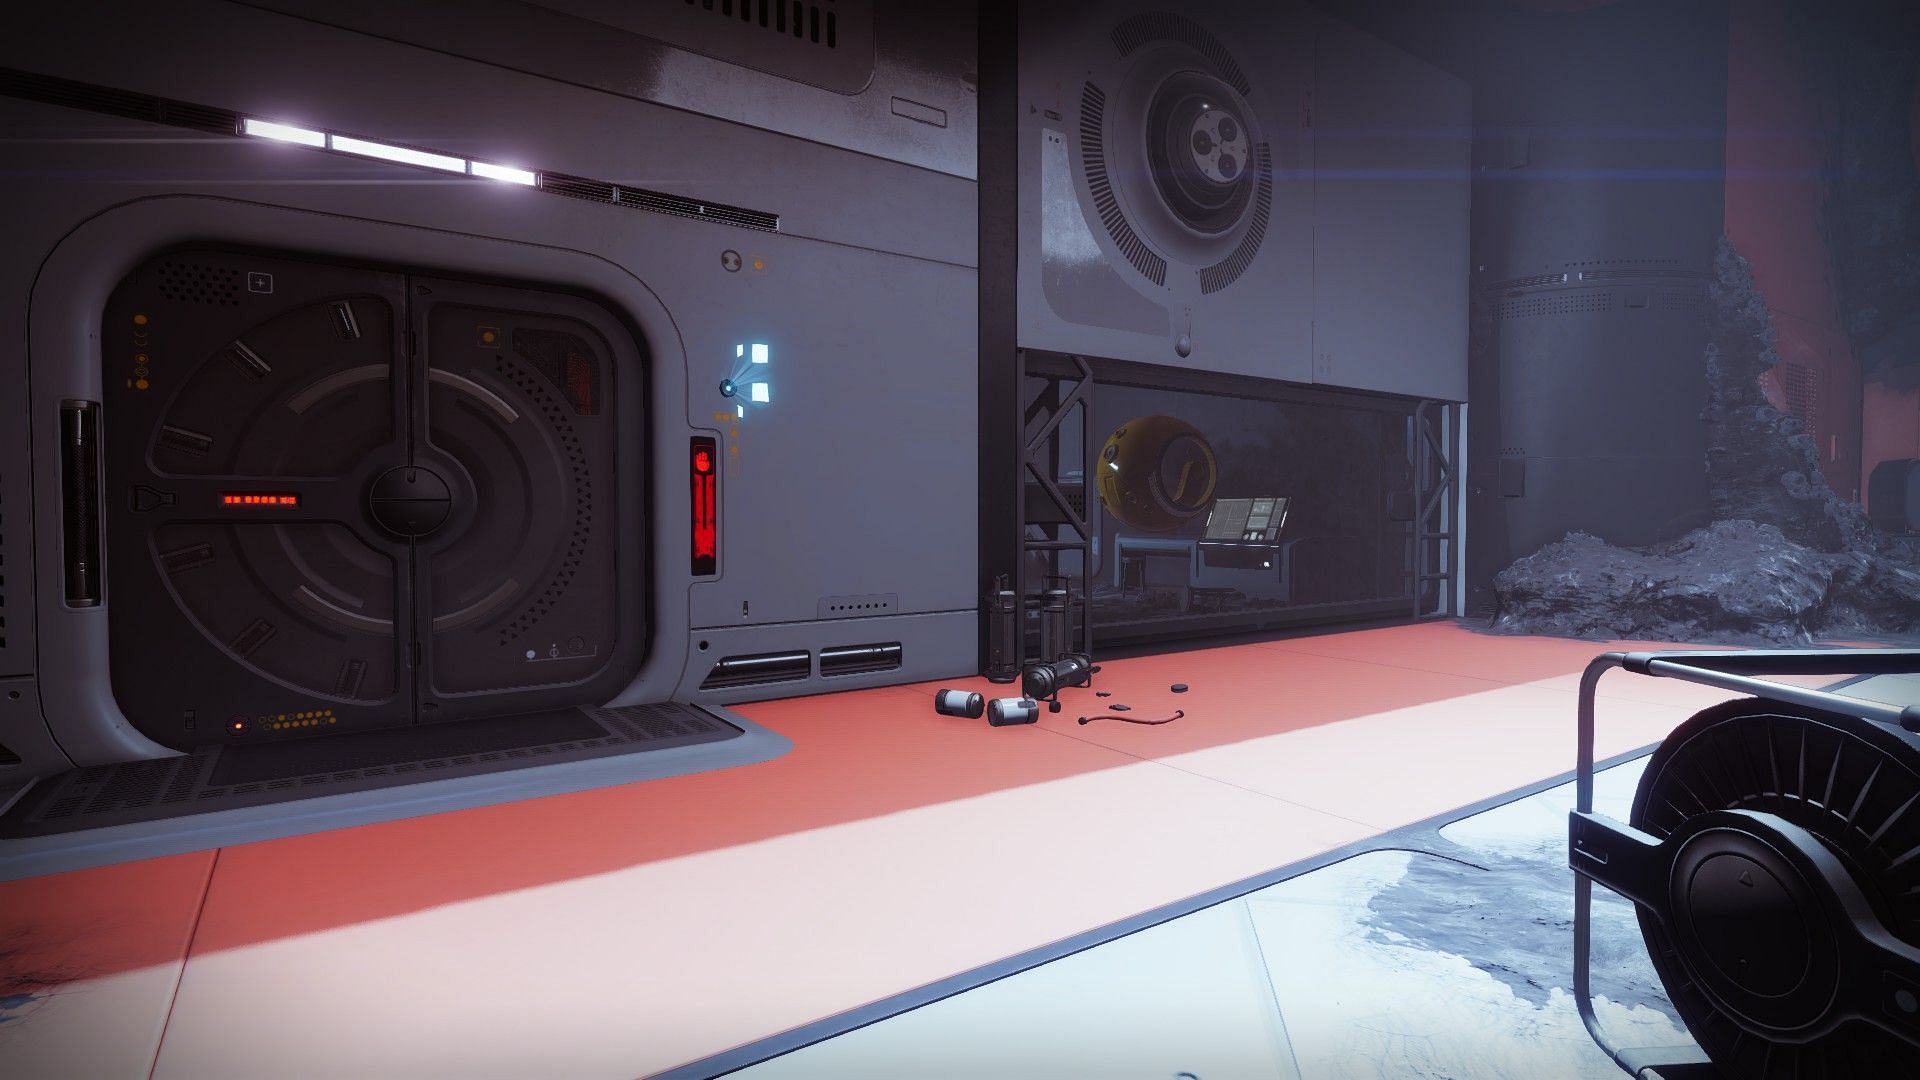
- Before heading inside the facility, go to the extreme right of the map and look for an entrance under the platform. Inside, activate the console and shoot the three marks on the wall to reveal the Drone.
- Inside the facility, go through the left vent after getting the second Scanner buff and look for a room protected with lasers. Use the Sword trick to bypass.
- After getting the third Scanner buff in the yellow room, access the locked room, shoot the three markers, and shoot the Drone that is revealed after the door is opened.
- Just outside the "microwave" room, look for the Drone within the glass panel below the stair platform.
- In the room with the first Operator buff, access the locked door, shoot the three markers, and then shoot the Drone.
- Within the same room as the two Shriekers, look for a room at the end of the hallway. Use the Sword trick here to get inside.
- Just before the first boss room, look for a locked door and shoot three markers. Upon opening the door, shoot the Drone inside.
- Within the first boss room, look for another locked door and three markers. Shoot the markers and then the Drone.
- After the space-jumping puzzle, look for a laser-protected room on your left. Use the Sword trick to get inside and look for the Drone at the back of the room.
- Before the final boss room, look for a locked door. Similarly, interact with it, shoot three markers, and find the Drone inside.
- After the final boss, look for a locked room inside the upload room. The mechanics of shooting markers and revealing the Drone is the same.
- Just opposite the previous door, there is a laser-protected room. Use the Destiny 2 Sword trick to head inside and shoot the Drone.
Shooting all 12 of the aforementioned Drones will complete the Drone Destruction VI triumph. For the previous 38 Drones, you can follow this article.
Upon completing all fifty Drones, the door located within the second phase of the Hive Boss room will become accessible.

Are you stuck on today's Wordle? Our Wordle Solver will help you find the answer.