
'%20x='0'%20y='0'%20height='100%25'%20width='100%25'%20%0A%20%20%20%20%20%20%20%20%20%20xlink%3Ahref='data:image/jpg;base64,/9j/2wBDAAYEBQYFBAYGBQYHBwYIChAKCgkJChQODwwQFxQYGBcUFhYaHSUfGhsjHBYWICwgIyYnKSopGR8tMC0oMCUoKSj/2wBDAQcHBwoIChMKChMoGhYaKCgoKCgoKCgoKCgoKCgoKCgoKCgoKCgoKCgoKCgoKCgoKCgoKCgoKCgoKCgoKCgoKCj/wgARCAAGAAoDASIAAhEBAxEB/8QAFgABAQEAAAAAAAAAAAAAAAAAAAQF/8QAFAEBAAAAAAAAAAAAAAAAAAAABf/aAAwDAQACEAMQAAAAhwAB7//EAB8QAAICAgEFAAAAAAAAAAAAAAIDAQQABRIGERMhof/aAAgBAQABPwBfS2ls1VvrA8F+OC4F2yzptCuy0CS8pE5iZ4x7+5//xAAXEQEAAwAAAAAAAAAAAAAAAAACAANR/9oACAECAQE/ABa9n//EABcRAQADAAAAAAAAAAAAAAAAAAIAA1H/2gAIAQMBAT8AsJyf/9k='%3E%3C/image%3E%3C/svg%3E)
With the arrival of a new Dungeon in Destiny 2, Bungie has scattered a few collectibles across different encounters. These are Eramis' voice recordings, as players get to hear her backstory through six other tapes. Gathering them and redeeming the in-game Triumph increases the Exotic Bow's drop rate upon the Dungeon's completion.
The following article will break down the location of these recordings throughout the Dungeon. Players should note that all the tapes are available before the first boss, Akelous. Therefore, not getting the "Devil in the Details" triumph before the first boss encounter means that players might have missed one.
Looking for Crossword hints & solutions? Check out latest NYT Mini Crossword Answers, LA Times Crossword Answers, and Atlantic Crossword Answers
Each collectible looks like a blue House Salvation logo located inside monitors. Additionally, completing the Devil in the Details triumph adds towards the Wanted Seal progress for Spire of the Watcher.
Devil in the Details recording in Destiny 2 Spire of the Watcher Dungeon
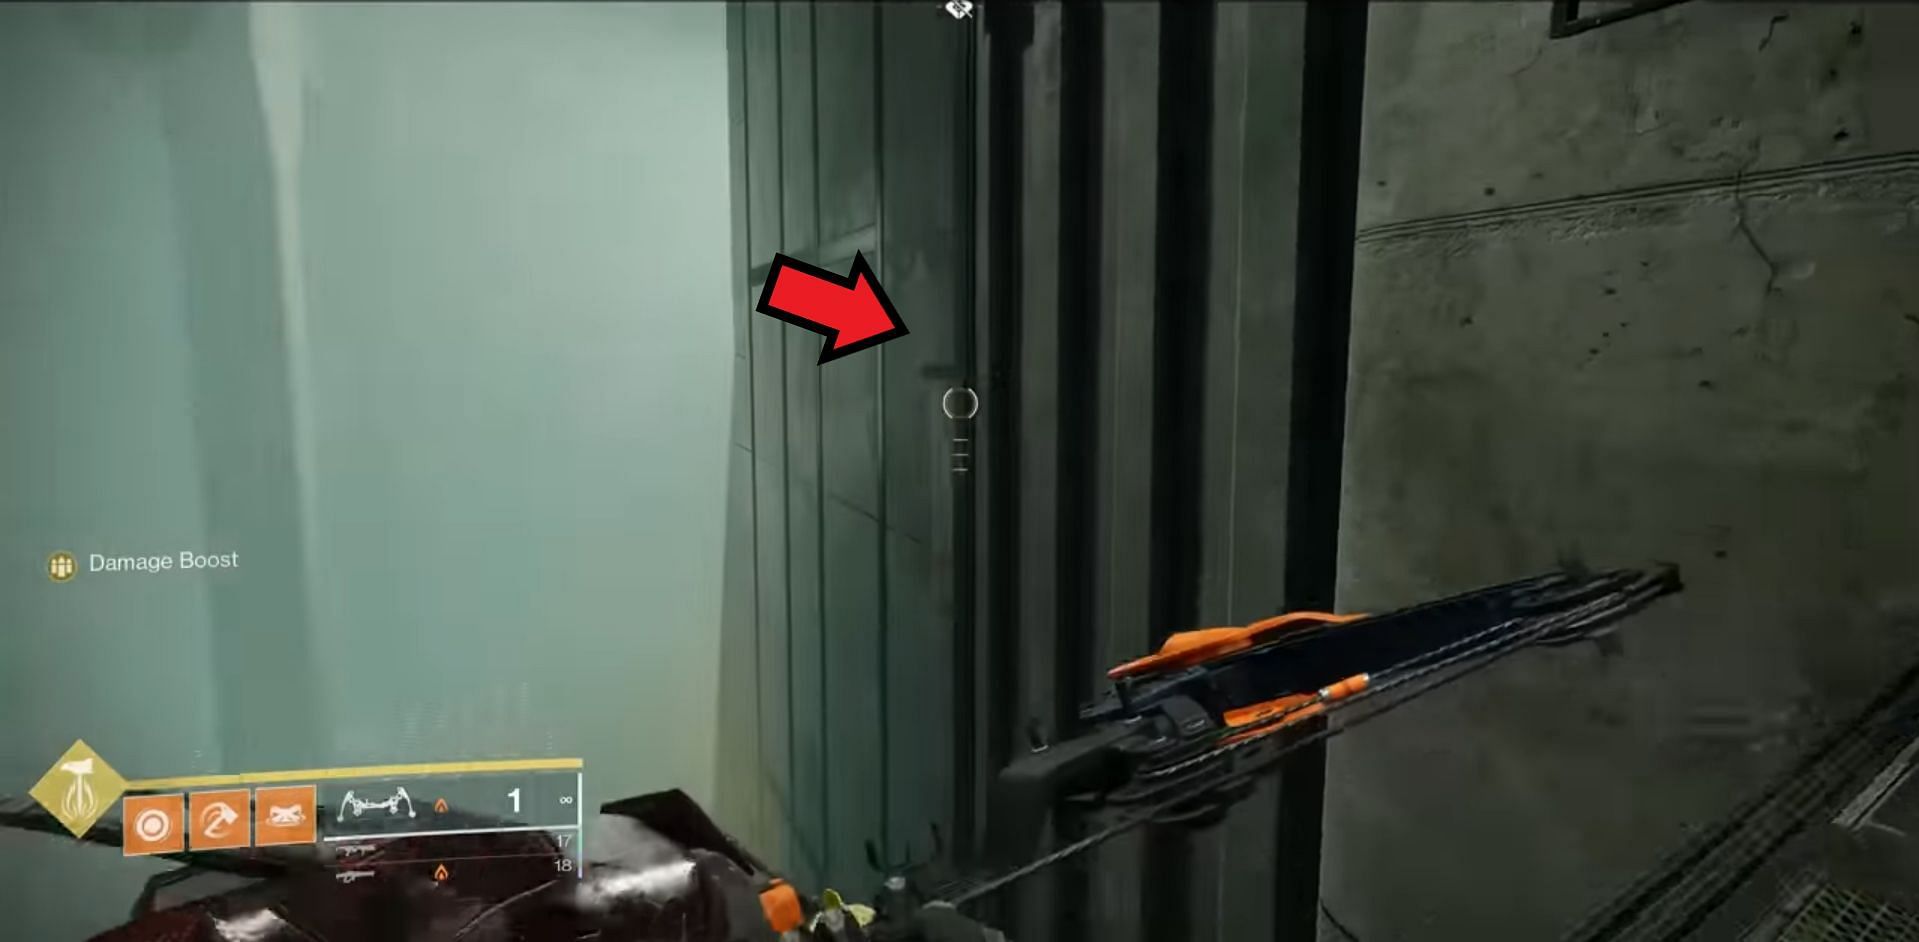
Recording #1
The first recording can be found after the opening encounter. Once you connect all the nodes and yellow wires to the surface, take the newly formed underground path, look to your right, and then at a wall with two platforms attached.
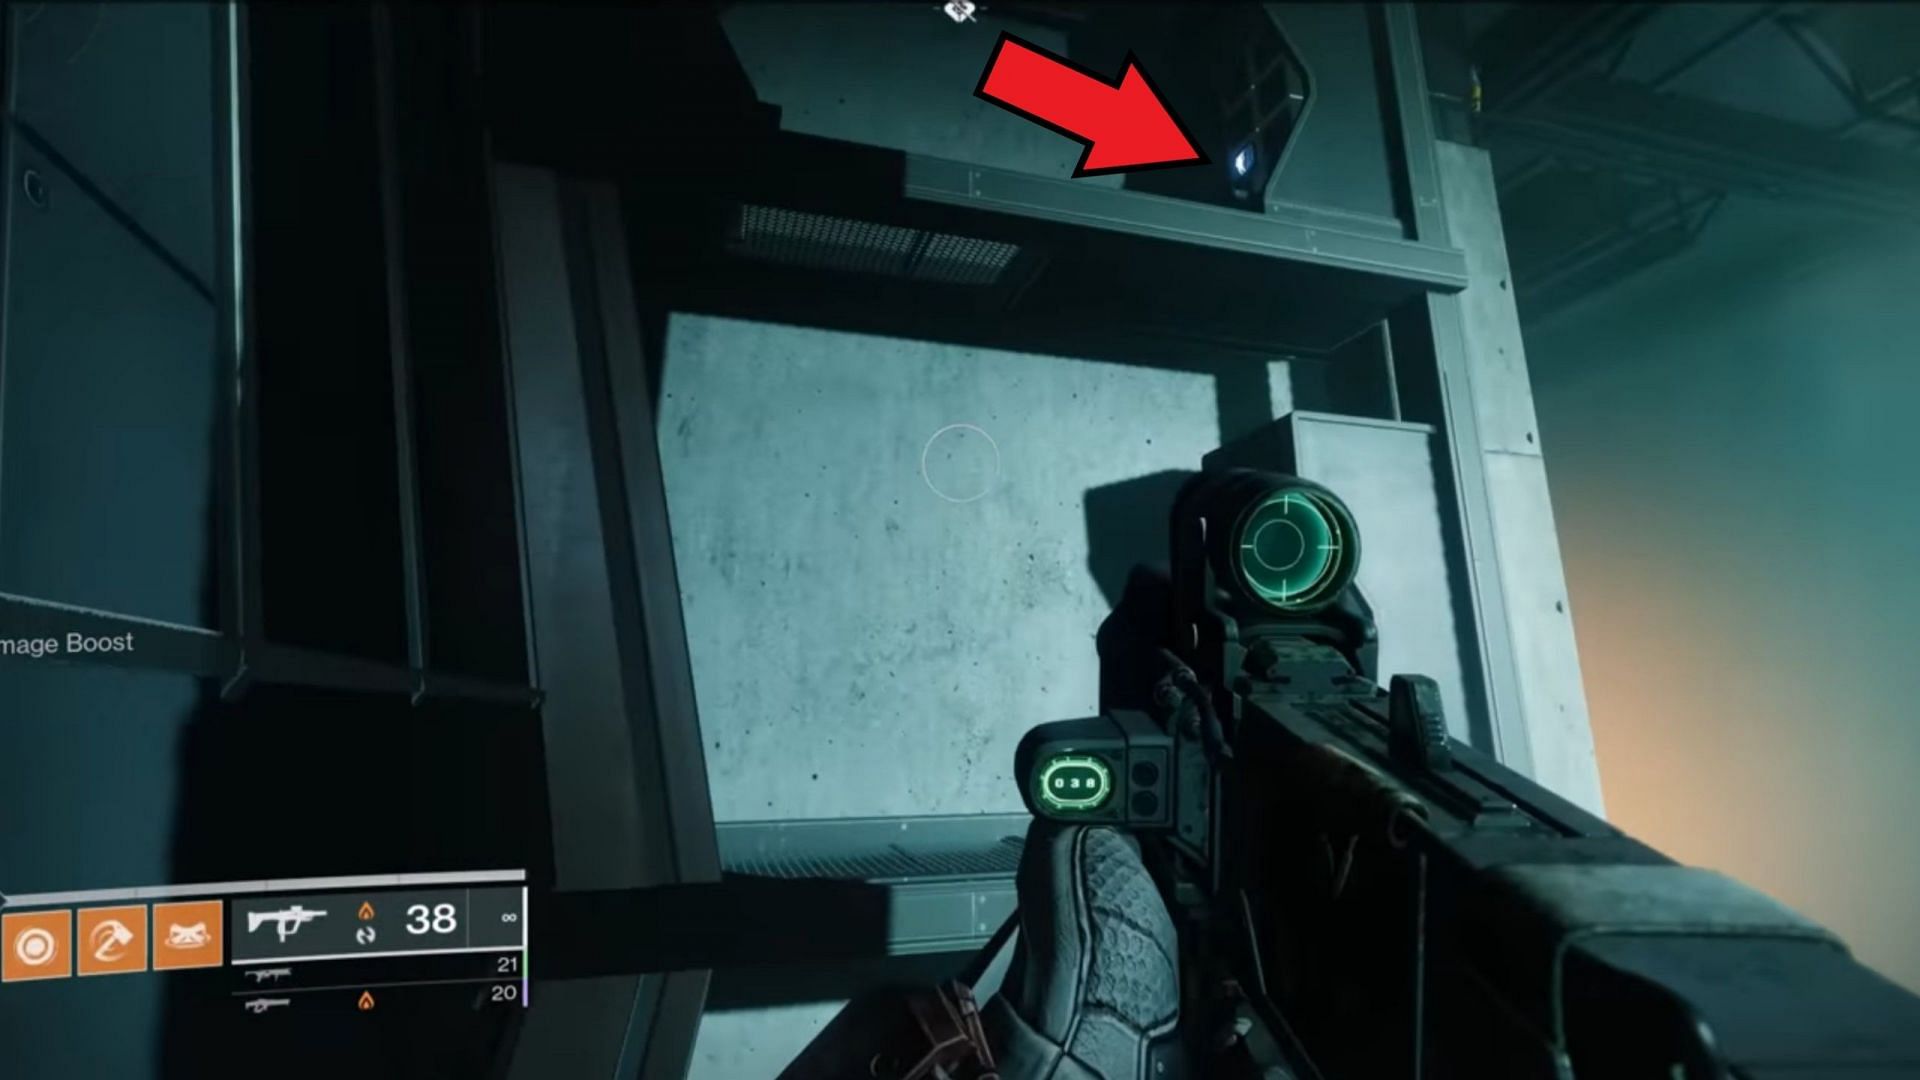
Hop onto the second platform and collect the first recording, as shown in the image above. For the second recording, follow the regular path until you come across the "Reactor Firewall zone."
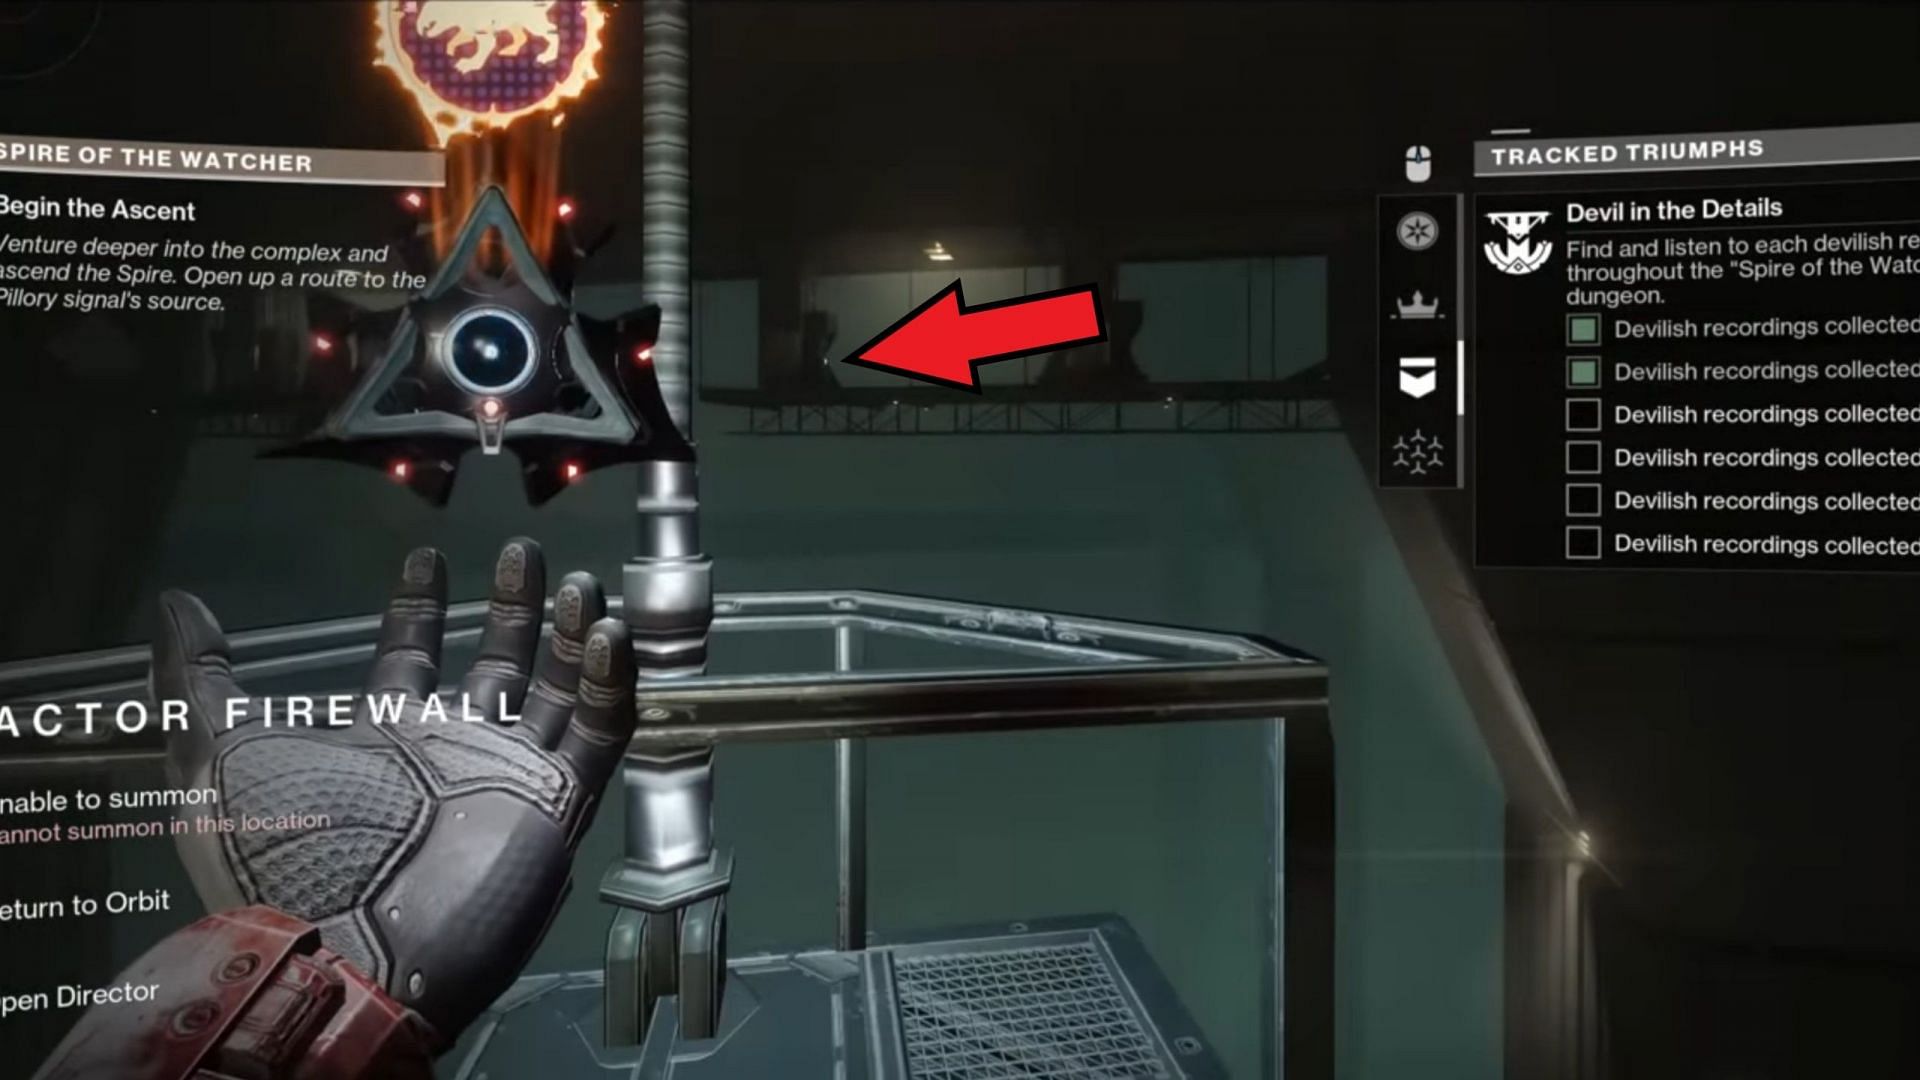
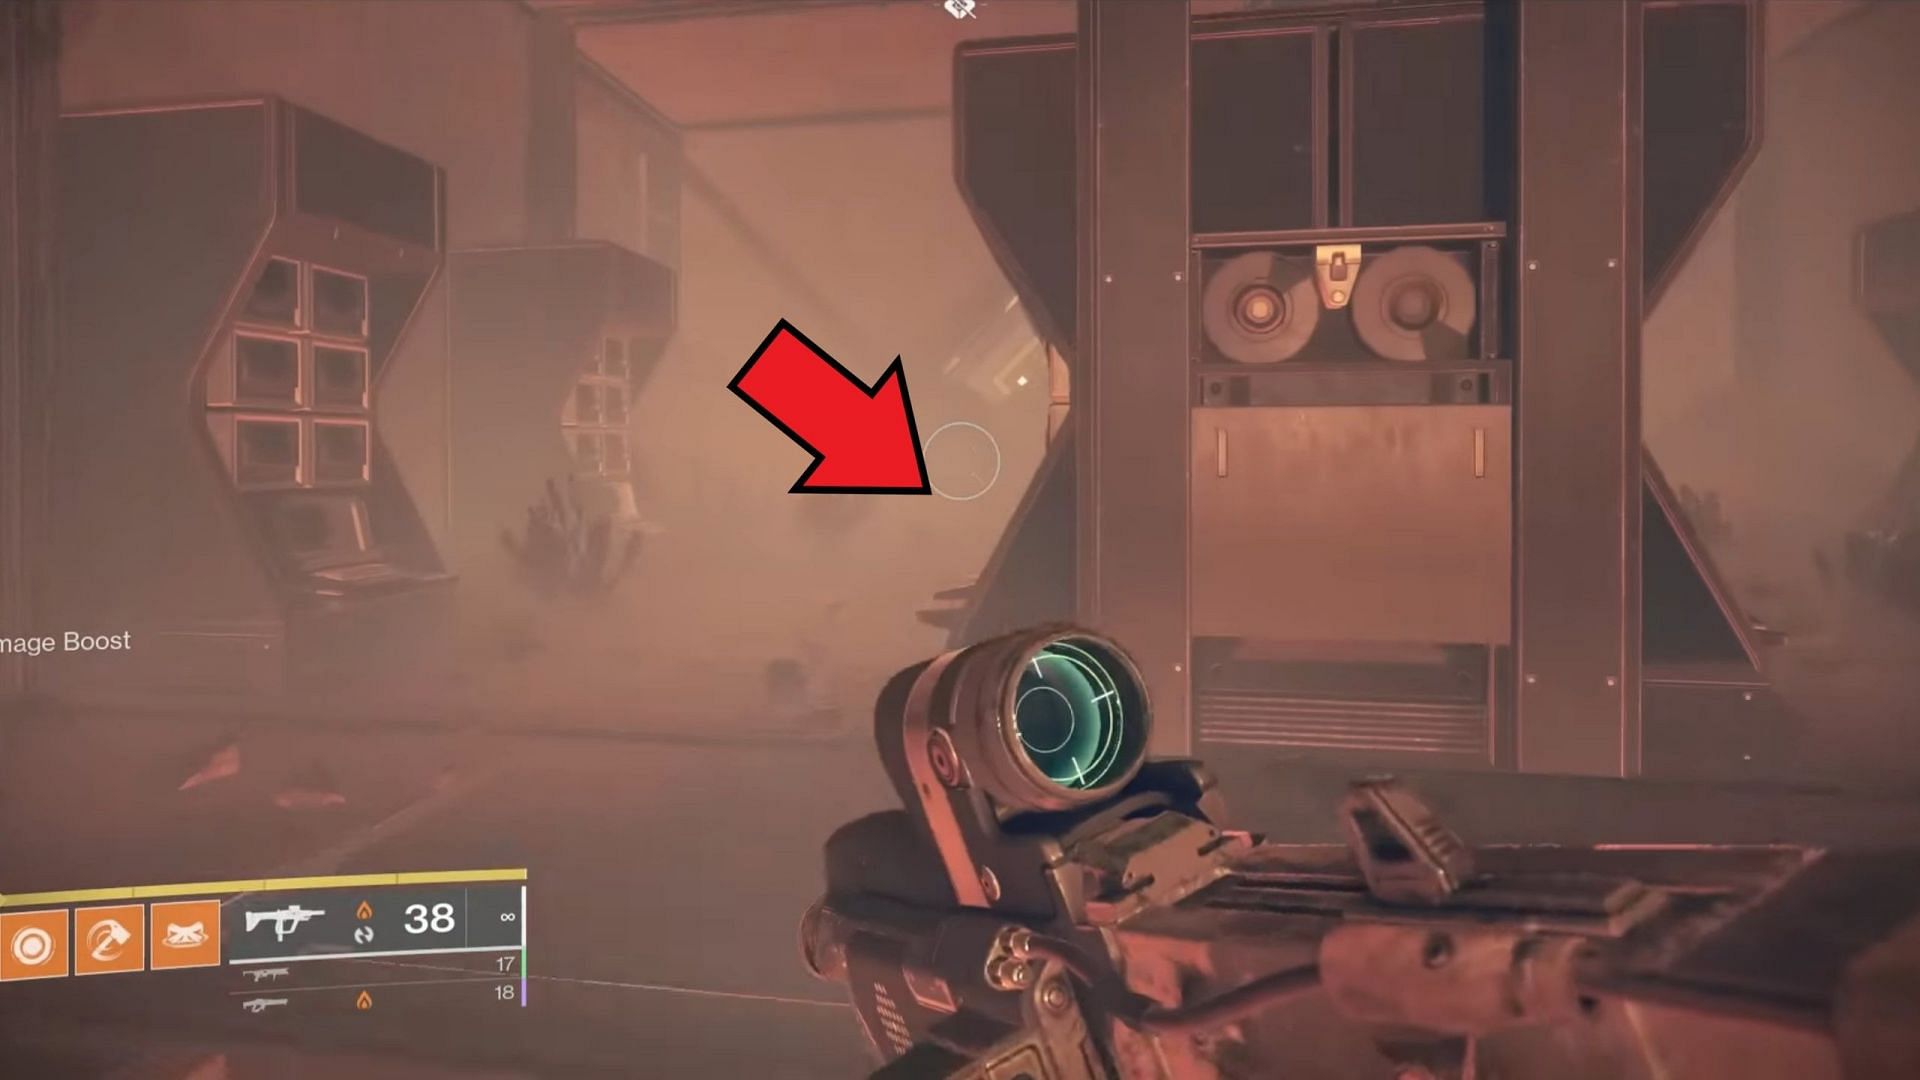
Recording #2
Once in the "Ishtar Chronoscopic Analysis," you will see multiple platforms with a few red and white lights. Make your way to the second red platform, jump down, and look for the collectible under the massive platform in the middle.
Jumping into this location will trigger a new objective called "Begin the Ascent."
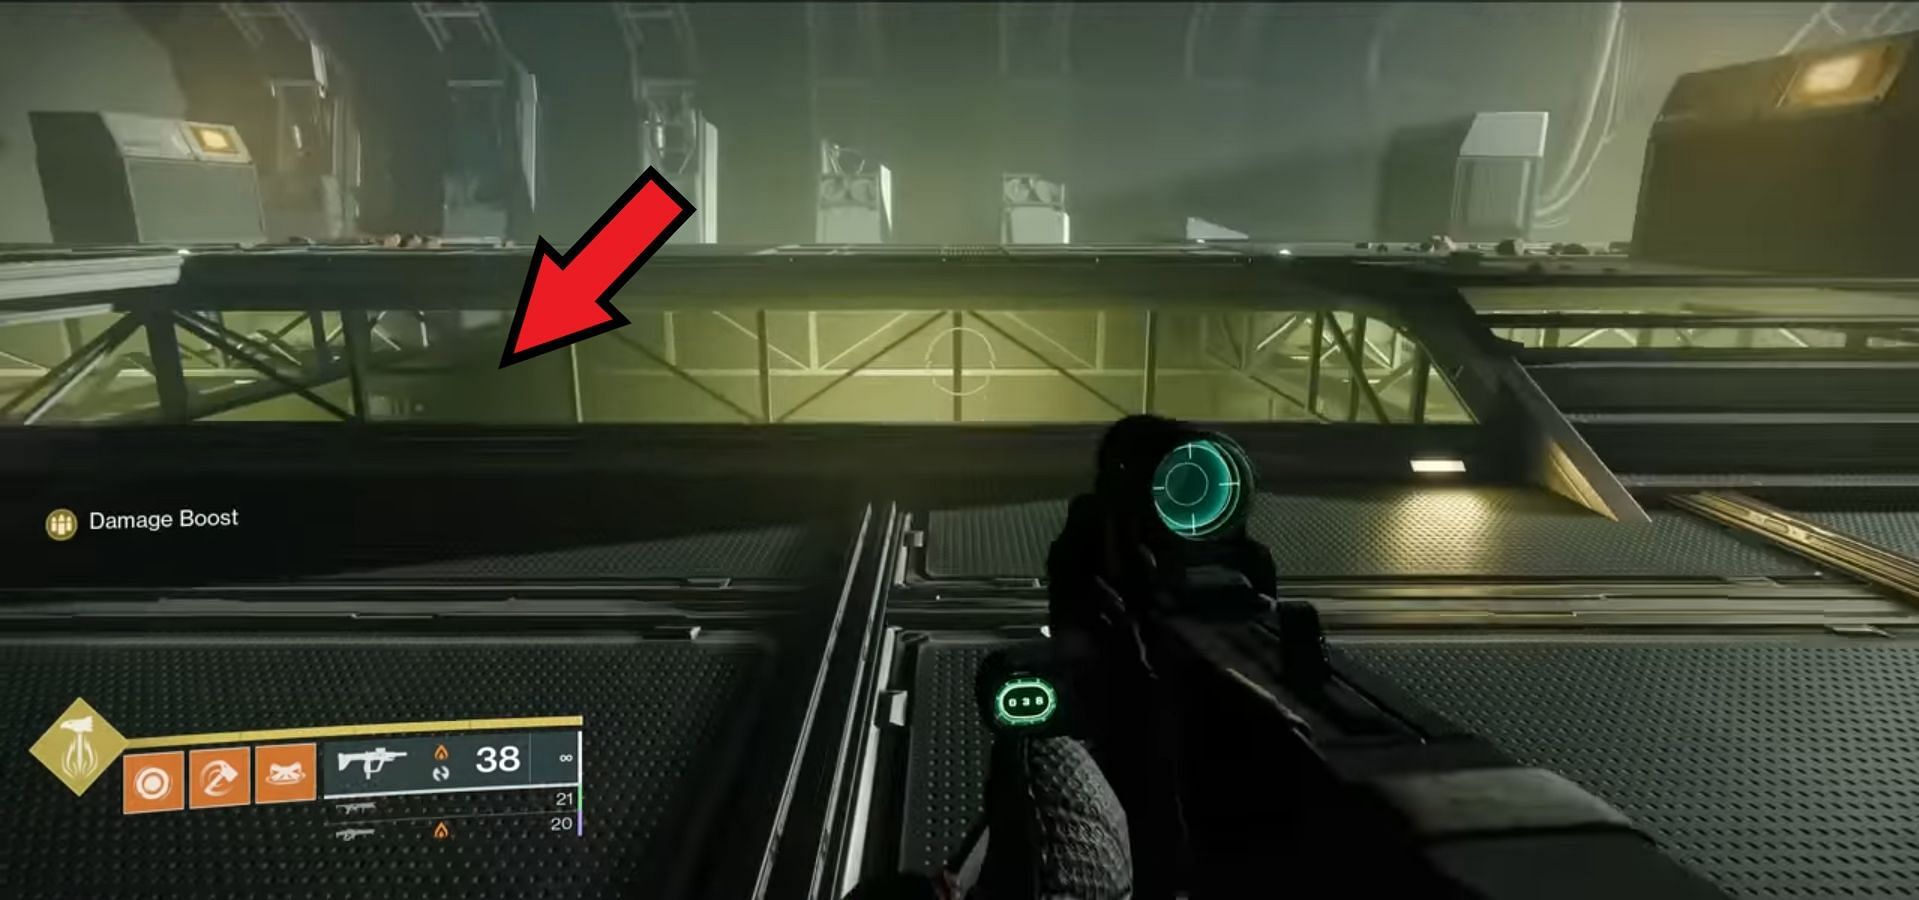
Recording #3
Obtaining the third tape is tricky, as players must make their way through the first jumping puzzle. Once in the open area, as shown in the image below, make your way to the giant platforms on the opposite side.
It's easier to navigate if you know the location of the first secret loot chest within this area and this article will help you find the site easily.
Recording #4
The fourth recording can be found towards the end of the same jumping puzzle. When you come across the first gravity elevator, look to your left for a platform attached to the wall.
Jump on the platform and pick up the recording from the console.
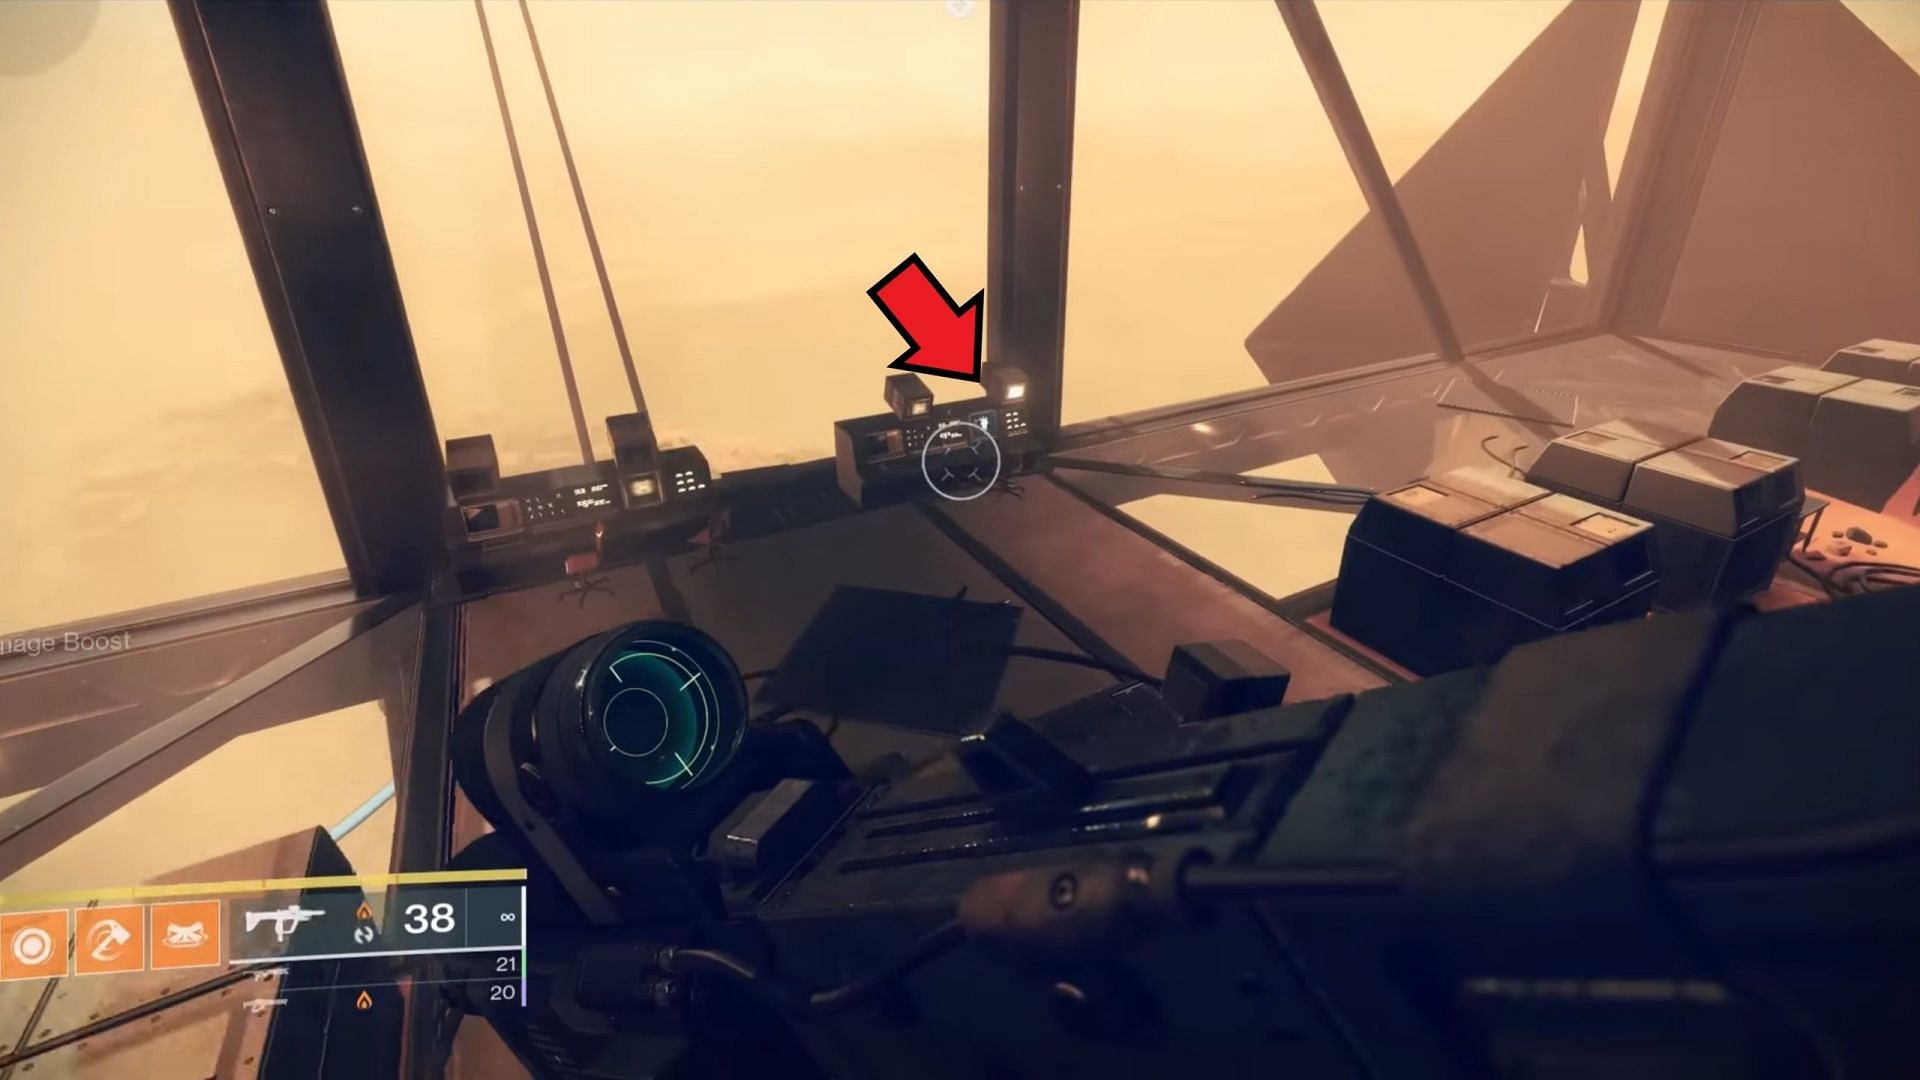
Recording #5
The fifth recording is located behind the rally section for the Ascend encounter. Once you're in a console room with a massive open window, you will see a rally section.
Look behind, walk up the stairs, and pick up the recording from the console, as shown in the image above.
Recording #6
The final recording can be found on the path to the Akelous boss. After you loot the chest, go straight ahead and up through the vents into a new area.
The image above shows that the last recording can be found within the new area before the boss fight.

Are you stuck on today's Wordle? Our Wordle Solver will help you find the answer.