
'%20x='0'%20y='0'%20height='100%25'%20width='100%25'%20%0A%20%20%20%20%20%20%20%20%20%20xlink%3Ahref='data:image/jpg;base64,/9j/2wBDAAYEBQYFBAYGBQYHBwYIChAKCgkJChQODwwQFxQYGBcUFhYaHSUfGhsjHBYWICwgIyYnKSopGR8tMC0oMCUoKSj/2wBDAQcHBwoIChMKChMoGhYaKCgoKCgoKCgoKCgoKCgoKCgoKCgoKCgoKCgoKCgoKCgoKCgoKCgoKCgoKCgoKCgoKCj/wgARCAAGAAoDASIAAhEBAxEB/8QAFgABAQEAAAAAAAAAAAAAAAAAAAUH/8QAFQEBAQAAAAAAAAAAAAAAAAAAAwT/2gAMAwEAAhADEAAAAMGijy//xAAeEAABAwQDAAAAAAAAAAAAAAACAQMEABESIQUjkv/aAAgBAQABPwCVK4d5oQgMz8hVC7zGy+Uo5h5liIol9ar/xAAXEQADAQAAAAAAAAAAAAAAAAAAAQIh/9oACAECAQE/AKWn/8QAFxEAAwEAAAAAAAAAAAAAAAAAAAEDIf/aAAgBAwEBPwCeo//Z'%3E%3C/image%3E%3C/svg%3E)
Episode 12 in Death Stranding 2 is called Fragile and throws you right back into the chaos after the emotional weight of Episode 11. This time, Fragile leads the mission, and Sam is once again called to carry out a dangerous delivery that pushes the Ghost Mechs closer to collapse. This chapter is combat-heavy, featuring layered enemy waves and packed with cinematic reveals.
On that note, here is a guide on how to complete Episode 12 in Death Stranding 2.
A guide to complete Episode 12 in Death Stranding 2
At this stage of the game, Sam is fully battle-tested, and he’ll need to be. Episode 12 in Death Stranding 2 takes you across a hostile zone where swarms of ghost mechs, flaming terrain, and one of the toughest mid-game sequences await. Thankfully, the DHV Magellan will offer support during this mission.
Looking for Crossword hints & solutions? Check out latest NYT Mini Crossword Answers, LA Times Crossword Answers, and Atlantic Crossword Answers
You’ll be able to call in artillery fire from the ship, but remember it uses resources from Magellan’s stockpile. You can’t just spam it.
Prepare for combat and upgrade gear
Before you head out, take a moment to upgrade your loadout. Go to the APAS menu and unlock combat passives like:
- Optimized Transfusions – speeds up healing with blood bags
- Cargo Grenades
- Battery Efficient Boost
- Increased MP Firing Rate
- Improved MP Bullets
- Aim Assistance
Afterwards, you can also customize the backpack to suit your needs, such as adding Spare Ammo Containers and a cryptobiote as accessories. Blood bags are also necessary in this chapter, so make sure you have plenty of them. Once that’s done, start moving towards the mission marker.
Also read: How to unlock Solar Generator in Death Stranding 2
Episode 12 in Death Stranding 2: Connect the Waystation to the Chiral Network

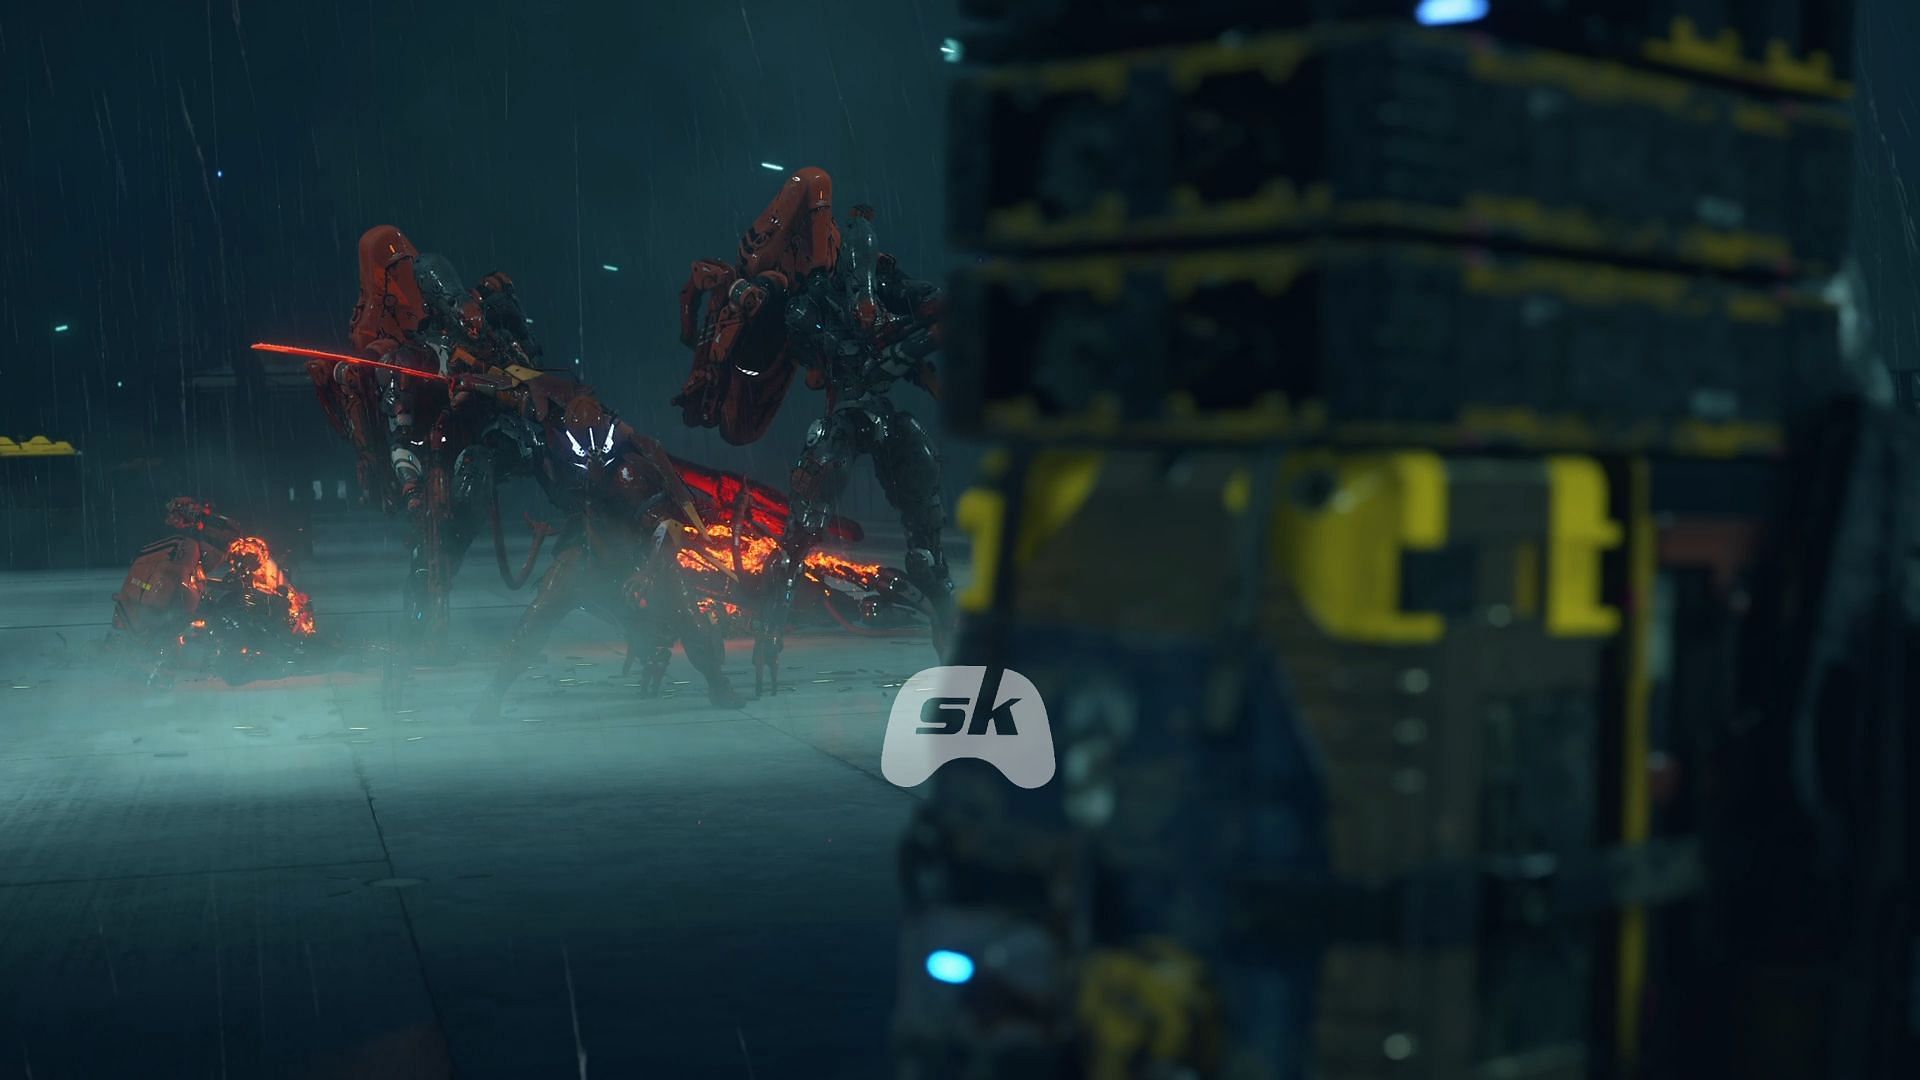
The first target is Waystation 1 in Episode 12 in Death Stranding 2, located towards the southwest of the DHV Magellan. The location isn’t far, but Ghost Mechs completely overrun it. You won’t be able to link the terminal to the Chiral Network until the area is fully cleared.
You can use weapons like the Quadruple Rocket Launcher (which you unlocked during Episode 10), and Machine Gun, and switch between different weapons during the fight. Also, make sure you keep moving, use cover, and rely on DHV Magellan’s artillery when things get crowded.

To call for assistance, hold the right directional button (D-pad) of your controller to open the Weapons/Tools menu and move to the "Drawbridge Support" section to request covering fire from the Magellan. Once you’ve dealt with the hostiles, interact with the terminal to sync Waystation 1 with the network and move on.
From Waystation 1, head another 600 approx meters southwest to reach Waystation 2. Like the first, this area is also filled with Ghost Mechs. The mechanics are the same — clear the fire-ravaged terrain area, survive the waves, and then connect the terminal.

After some time, a cutscene will play where Rainy arrives, extinguishing the fire and enabling the Magellan to land.
Crossing the bridge to F8

Next, it’s time to deliver the Drawbridge Terminal Unit to the massive F8 Fort Knot. But the route won’t be easy. As you approach the bridge before the entrance, a large Ghost Mech blocks the path, along with fast-moving variants that can knock the cargo right off your back. You can use the Pickup off-roader to reach, and if you've already added Sticky Cannon and Heavy Machine Gun, it will be less trouble.
Try this approach:
- Take down the smaller Ghost Mechs first to clear space.
- Use dodge and sprint techniques to avoid bumping into them.
- Save the big Mech for last.

Just when things begin to feel overwhelming, Deadman appears in a new form. After helping you fend off the final wave, he cuts the bridge to stop more enemies from following you.
Fight the Tentacle Ghost Mech

Not long after, you'll face the Tentacle Ghost Mech you fought back in Episode 9. However, it has been severely weakened this time. Use ranged attacks to target its weak spots (tentacle joints and central eye) and slow its movement.
I recommend focusing on the eye (the highest damage point) whenever you get a clean shot. Use rocket launchers to burst it down, and avoid spending too much time on the minions.
Just keep moving, shooting, and healing as needed with your Blood Bags. Once it’s defeated, proceed inside Fort Knot to complete the delivery and connect the final part of the chiral network across Australia.
Final confrontation and Episode 12 in Death Stranding 2 ending
Just as you're about to celebrate, Higgs interrupts the moment, but this time, things turn out differently. DHV Magellan appears through a tar portal and slams Higgs against the wall, splitting him in two. Then, Fragile steps in for her revenge, using Higgs’s own battle guitar to dismantle him. That guitar will belong to you once the episode ends.
Sam and Fragile return to the ship. A cutscene begins, revealing more lore-heavy twists post Episode 12 in Death Stranding 2.
This concludes our guide on Episode 12 in Death Stranding 2.

Are you stuck on today's Wordle? Our Wordle Solver will help you find the answer.