
'%20x='0'%20y='0'%20height='100%25'%20width='100%25'%20%0A%20%20%20%20%20%20%20%20%20%20xlink%3Ahref='data:image/jpg;base64,/9j/4AAQSkZJRgABAQEAYABgAAD//gA7Q1JFQVRPUjogZ2QtanBlZyB2MS4wICh1c2luZyBJSkcgSlBFRyB2ODApLCBxdWFsaXR5ID0gODAK/9sAQwAGBAUGBQQGBgUGBwcGCAoQCgoJCQoUDg8MEBcUGBgXFBYWGh0lHxobIxwWFiAsICMmJykqKRkfLTAtKDAlKCko/9sAQwEHBwcKCAoTCgoTKBoWGigoKCgoKCgoKCgoKCgoKCgoKCgoKCgoKCgoKCgoKCgoKCgoKCgoKCgoKCgoKCgoKCgo/8AAEQgEOAeAAwEiAAIRAQMRAf/EAB8AAAEFAQEBAQEBAAAAAAAAAAABAgMEBQYHCAkKC//EALUQAAIBAwMCBAMFBQQEAAABfQECAwAEEQUSITFBBhNRYQcicRQygZGhCCNCscEVUtHwJDNicoIJChYXGBkaJSYnKCkqNDU2Nzg5OkNERUZHSElKU1RVVldYWVpjZGVmZ2hpanN0dXZ3eHl6g4SFhoeIiYqSk5SVlpeYmZqio6Slpqeoqaqys7S1tre4ubrCw8TFxsfIycrS09TV1tfY2drh4uPk5ebn6Onq8fLz9PX29/j5+v/EAB8BAAMBAQEBAQEBAQEAAAAAAAABAgMEBQYHCAkKC//EALURAAIBAgQEAwQHBQQEAAECdwABAgMRBAUhMQYSQVEHYXETIjKBCBRCkaGxwQkjM1LwFWJy0QoWJDThJfEXGBkaJicoKSo1Njc4OTpDREVGR0hJSlNUVVZXWFlaY2RlZmdoaWpzdHV2d3h5eoKDhIWGh4iJipKTlJWWl5iZmqKjpKWmp6ipqrKztLW2t7i5usLDxMXGx8jJytLT1NXW19jZ2uLj5OXm5+jp6vLz9PX29/j5+v/aAAwDAQACEQMRAD8A8JPhs2+jtqF1bXFvFIgeCSRTtYfUjBJ7e3NVoLSRoBIGHIBwPQjp9cfn+ddD4t8W6p4mSKG+m22aEEQxoqg446isqW7cR+XGFBIAGQDz/h0riU293qdLSWhBbJ5MMkrIztISnyDJCqeWI64zjntinyI0qBSTgdGHUf8A1qc9zJGUFkzL5A2pMOD6Hbjpk5OT3q2NREUnmzqk0rnGZFzn+ueKid7q24bKxiPFNG+W+cdz/noelLLiOMMqNsPCjHX2FbN3f2MsTBdNihmfC7o5Hx27E496ow3MM0rfaAfJjysOzBGc8kiqu92ZJXdrkY811XzmLIDkxoxHH+91/lXQa7KIodPu4naSNocMp/hBX7ufTP8AnNZkUSu6rbyqiMTuI7+x9BRfqp8izkc+WF3ykHog9Pc8Cpg+ZmnLy6Gh4dto3iluJYZWu7jaI0Vcgxng5x09fpSrataTCXzB9nDdxyAf7w//AF07StbvNEv47u2MqwId6qwVto7cf3fy4q9rHioak6n7HGihMFcgbiSc47kZPHtUSjLm5l1LUY9Tj9etf7PvVvbEjyZsh07ZPUY9DVu0vIJYI/LQeVjay8fLnsfUeh79+aq3376Ri6qiH7sanOPbnpVBIbi1nPlKd+0sUP8AGv0/Dp+NdCSnGz3Rm42N65s2iiE9nKRGpwyPyBn9cfjgGqDXbRkloDuA5CnOf8O1Wf7RhFpHLGCbYJtkU4yGJwF/IZ9xWdDKlwcIx3DgEjt7/wCNZ8j3kjOSa1NDiYjkOwAyd2AOCP8APU1bWylgVbhpIvIf91JGrKWC8HcE9AQD3PaqFrPHA6GWMSx9DGSeev685rTl1STzN1uqNEBgK6Z3ZGOQelKVSSa5UXGpFFOS1jVibRjbSDh0U5QkdwD2PGOaFYrE63MMr4I2vb8j8VPI/WlkEbQNPasyzDpGW9Aflx+HB9ePSo7K8kLh2jLAYJx1x61MuZ+9a5oowkSpdlolZJFZVAAJPIx245BpFvG3HLp+RrTvYbC8gjeNT9okO1Sgw49cnPQde4rFu9Png3vGS8akKxcY2kg456dj6VnBRqK9repi4NMuLPHMRvYccfTJ7Z9+a1Y9DluLdbqKZHBHypHG5bI5wdox0yeM1iWN5bOojmgiV1+82OT9O2fapNOe9txNlJogG2sCSMg8jPvgg1ap8u+gRVviIL+2jE2GaORFXc4Qcgfz70XNvaxGI2Vw5jfDMokOQT6Dv+WfrVi8kZ8B3LqPu5J79/aq8MMk7iO0lNxPyTGrYZAPVW4IxzkE/hWkb9GNa6IsWd5ewQv5d7+6kUxlXRWDAdueas2l1MwW2SaODeQDJtIJP1B4H4VlweXP5qSXEYkTp/Cx59Dxnp/9elizN8qId2OMZYmsqkb7r8CeaSehseET9k1i/tJMxPHN5qnnHQ5Hr6D8a3rmSe9sxsiP7s5JXnAIx0+tcjoiyN4jQhzslhKu7NjHocnqeBXo2kYggEK43qd2OCHB7j1GOK58U+VqfXQp+8cXPblJI5VU/uyWK4PdSP5msW7hkZyGQlw2CNp6nt+terSQRtzsDL1GRnGOx968/wBfH2HVbi2bd5THzBj0bn8808PV5naxPL0MVbd153KGPvnH5VteHr62t7u3j1dfMtFYKG5Gxe446r3/APrdMyCaHDrcSOjgfIYxweep9sZ9629JkikgfzSJlb5SEIDADvgV0zqciuxwWu5o+K/DEcniS8s9GhMtsFWSLBGAGQHIPp3ri7+xSzEsEskTTAcbWDYweACO/FdHqelzw28Uhima0YAQtMjAAehzwR6H8PSuWvoW80tGoT1A4wRTpTTZpKm49CzFZXV0kaXHlo7DKzNKgGPRuc/1q9babdWdtKZGVVJ52yI6kgnkYPI9/TisZYp7qIQxhWMeM9B17/rWlZWt3a2ZZ1LxI2TGOqj+8D/MdK1k0t2JNPcqMYftSPFJ+6l5kTuhzjOO4759OPWtizkkszJbXQZ7VjuZV7kHqB68flWNqSQ77W4gkZxJlZXIx8xPf0OKtadcTK/2ecttJ2qG5x2/Koqw5o3Lhb4WWNekRr5p442I2IE2/MFJUcZ9ulZmlwtLrunw7huaQDrjknpk9vetMzLFcMisFkU4x7/Q1at0t5biO4KKk6HIZRjPB/Tml7XlVmtCvZ32N1Z7SZHh1ORFWMlZWA8wIR1xg8j3B6c1l/2dpNh9pFpI15IwJ850KeXnsFPPpz1J9OlUtShhtdTH2WSWS2ZUMm6Lb5jjgcZPHfrkgdqm8tjOJIw+BnHPUH1/KuWMPZfA9GYSvF2ZStcx790MbZXarPnK89sfkcgimfPBcC4WNSSSfu7lzj0P6Vdld/MRZXVg3GSMkkewyaVoJVjaUxOsYwN6qSuTzjPTOO2c1alJatEK+5gRxG9vYoWJCRgl8jsCevv2rauI4p4TC9tbyuOAVXDKB/L8eMVWSA2pkmDlvOIw+PT+HHTqe/p9aegaS2aSAjaW25LA8+4PNazfM1bY1U2tind2r6VDHLbzsGkJVkxlRx09T3rStBFcW8c5iEgxuEecAHuPp7Vm30MsxH32EagMCeAfXHYVPoE/7u4SQhfLBf2wAc/yoq3cL7tDhaTsyWaGWRioKRrJwixjbuGc4ZuuP6Vt3U1rFp1tZW9rAiwMSbiNNkrg44Zu4yTjvioNFgha/hF7cG1hU75MruOwciMD1PGfTp25frSp50ksGBCxJAJx09aznNtKIm7RMyS03DeHJY99uP8AP5VABKpZSxwBn8KTTluZdSDO5jibIAZwoIPoenbg9M1djxKt1EIvnLkLuJLKBk4Pb6njpTceUmSVrpFKBN5Clto4y2M4x3HvUt1PJD5VwpXyyoAyOAwzwe+Op/Gq87GBGTIEh4+lXrW5h+wW8fDzo2zZtzkZzk9sYPXtVpaXauOCutSa41P7VZRLAQSPmkB6jOBxngrwKv2Vpo2Lu31yyur67J8qGW2uAiJgH5wcEtz24GOTmqd1eW8iItvb2yGNTveIKvmE8bd3Qj1688VraRZZTMiKygAKOcoDyfwrOrNUIcyVjSEOaSRi6JZSWjyR3cMVyo+4Q5GMH9R7ZqW6vrpp3KooC7ldcDoOnvVrWYpLOzubmxlV9g4/iIbIyOOc4554rI0y4M0P2qQLKS2JFbgFuvPtznHc8dODEOasvaSHUik7IiWSeZFWaQMqtvQYALE8cj0/zzWjb37KkYcB4R8uR9T0P4/1pnyNbuIIP3gbLTFjk9eAOmPwrqrLwfHqegrqGnsIpfLy37/f5rjgjH3f1ODx71q1fQmEZN6FX4fRRLNq0xiuXjiJbzIz91CuTkd+Me9cl4gXy72SCMkp5hK5HOD0/QirVjNc2lxei3jCzRSMWcKd8eMZxngc4zmsqS4kmv2uZGZ3QlyWOdzduvU981slrcb0R0NldaZYrBbXqzSJExMnkj7+O3J654zjpXNW6m5usAhBJLgFzgKCccn05Ga14rdb10lQyNbtwwYZkV+mwHuc+2MEfSoLxGjvo1jhkXyTkBQcqQcj3xkdf6VMYpb7sza7nf8AiPUdCtfDUul21z9ongjWNAEIG8EDOemc5z1rzsMjwhoCvnI2GVh97J7HoR7cH61qvcNqEqgrvlUFmA5z65/n9ab9hjQrIqlbcHEuR8q5z+R/OrUVazNW+YfYaXLqkEZt7XYy8XE7E/Ip/vDpjGMDHX9GnTUXTrW4gmhZnJ3xlgrLg449sg/hW7ZtJBpjzadOEd0b5A+zcg557H8QD7im+HoYrrTobGe3Bltm2iNvvEMeeD2yTz274rB1NG1qHKmJ4Ve4vke1AjktBMJpAxPIXAO0joT0zU2ri3/t6aHSLcQWKBNsC5+UYweT34/OprO6/skOyQoyLI8WI2GCDyATnr9OP51m6382oNJuAaRVI2Dqc9P161hOScrdGaK3Je+qK5urJ5GjlWXKru5GF5I5YevFT3VvHd4eFznyzIu0YGR7/QkVVuLNtRcrHGXeNRloxjP58Hv6VEkc0FmN1wMx7owvpk55B7/rSi19l6mEpN6FSyvle4WWTAdVfc4PJ4yPxzxVnTr3zGWea4KCM/cH8Q/l61JLBby6fdyRoFKIJMKAAG6E9Kdp2lRxiO7kIaESCNGdcI5HJB74ycEenpVtxmmloHK2rkd3qb6hqcy3DSQRuYzIBHy6g9QeoPX8avSCC0l1C4sYZorNcCHz+WTPADevOKsatDcSPPJ9pgbULlWJZhwm7sPT0z2FZUs2qWr/AGHV9sl3HJHcD5ldZFAyoYjgjp79qzjaorR26ob5nrI7z4brrX2QaNoFukl/cgiSaQHZbcgmUkdDz75PqapDwtcSeJ/GVnFcK6aMvmTzs2wPhQCAO3Q459utUvCev3UGvQ/2mk1zZyyYliinaBvmP3gVIBOSeDx24qPRtbi03+0WiZpLW5uS9wrncJowxIyeuckHrgn1qppRi7q7ZpCKnvsZklqlvbI4jWciRQY2YgMrEDHHPU1mXKvBrt1DFbgGCXAC5IQDt7YJ9aZqXiWSS/lLabaiBsbEUsCAOnzdc+/Wp7i2xBGI4pxbzMsjy7/+Wj/w/wC1gYP/ANeqipQVp9TO0diUWa+TPcNdI86sSkQfO1CcnPbdnHAzx+uTeS3EU7iLHlMFy3TGDng+vFad7bPbRR4Pm275AkXkBh2Pocc/TkVVg2s7LMCwHUsM447CnBr42S977F+0ka4tXdUZklBbCjklRjoOeuR71I1vOCrSJJGxAYMwIOPx71WjlQqkIXaBkhl6E/TsakmMZEEkpLqv3wWyGXpj26D0rJxTehapqUbp6l9dLkuXF4IFTcyJ5cfOcg5Iz24J9s+lQS+dcWsdosOyJ5NyvITlv9kevfn0pulXm2KSK3vhBaq2dpQyOwJztz0HbPIHr3FW5tYubZ1VYhJFn/l4AZyvpx0Hp1oqU5aW1YNRtct2tolnEiyK23HDK3Qn6dPSrMGn6Y7S4C4mAR3J3AAHrg//AK6x9DmRRcurvHFtAdV5I5+99MZpdSuLeGaWCW4kKRyEKyKUJU9HPqCORXPKnJytFtGlKpCK95Kx0nw4ht4PibOlhI1zbqr26S9NwVQWfHpu6V7PcovQ4HGc9O/rXinw309tE8R6TfRvNJb3TPA0jAbCHHGD/e3cEZzXrGraVFrEYTVF3IjsY1QlcKccH1PFejzJrQ0g7q424hHJHfpUMUG5sDrnFZt1baX4cSIR3N1brK2FjExdcZHO1uMc8mtpnFvG8h5CKWPbOAf8KZqmcv4aiFxFq10N2JdRnxnjhMR/l8teefEDQUt9dVoYlzd7pDuOBwB0x75r0jwAf+KK0x3zvnVp2z/tuz/+zVD4tikm02drUZuAjKo6ZDDbj27GrTszOUeaJw3grw/YwRvqktwk7oMYYYEJHJJ9D6HsOao+MtAnv7ee70KMhXl3Tpuw0xHcZ428k469zzwI5Zv7D1O1WUecsjIbgq+UfAxgDoQDnnkZ4HrXT3l5a/2LciPUjDP5ShVG3EhLkOAeoOOd3rxz1q9tTJcrjY871DUXfSbfSpYpZBGo81A/y7ueeOc/p3qKJ7CDSvJvor5LFpPmMUoPzAem3Gcc9a2v7NWW7g/si8F3dOV2xwxt5ucdSRwPzHrXQaIuo3sE9ncabYXKI68XEqhQAMZ2qCc5yc8VRCTb1OZtbm11BLC10+xn3LIsdvcznc5AwDwPlOOvsOKyvHceo2+pGDUNbTUgpO3y2+6B6gcKfzrV8d2l7bw2oF5B5Shilvax+Wkak4JA68n16jn2rm7y6aSNI73ypvJUYYKASDjqV5z09TTInpoXtJ0eK78JXF/NcJbslwY4vlLNOcAlRjgevfn0FdxZeLIPD1lHZy21sYmUbbeMNvHfDN0z14/PmvOtOvHujHZ2MYiRAXBZ2O0KCzH0GcDnHbFW7BFm0W9t9UtpS858yyugMYkHVRk/MpB5HPrQEXbY7q71rS9T1rTr3SLe4bWZZlLj5fKbIC7COp6kZ9P09b0+yl8sSXKRC4Iw3lDhRnoCeSPyr5ijtdQ04xSabeOs5yC0JIKduvp2zXXeFvGfi/TTMt7OLuyWPlL87iM8Ar3J9iSMdRUSjbVGtOql8R7rcywWcEk08iRwxgs8jsFRQO5Y8cfjUGk6lbaxpsd9YyeZbyFgjgEBgGIyAeccHB4z1r50mfVfG/iWz06S+klluJPLVriQ+XEue/bA5PTrX0lpOhQ6BpVhpNpvaKCMoGbqcdWPuSc47VNktzWE+fZaDcZNMnVvLdY2CORhW25wfXH9KvLCRnNNmjyOKpMsxEtLojEmoTE552Qov9K5HVdNebxKsDPP/pDBUlkTk/w56YIyD26V34QhsGpJLOC4mt5ZV/ewPvjb0OMY+ntWdel7RJLoEXZnGnwHc6TqlreW0sc1tn5ygMZQjoSCTnPr2/GvOvGVw8uuzGTOd7HH04wPbAxX0JdiW5spYIJBHMwzGx5AYHjPtnj6V5/4z8G3fiTxHFNpdiYYpVWO5diqiKXqzHuB39Celc9WDumNbHIeFNRuoY9JZPDi6jFa3T7LhVZAxIBKu/QkEBh3GMHirPibUJdc8US3FjZWUd47rCI0HySMOhYtxnnGRimeMfEy3d5bWOjZTRNJH2a1VQF8zAw0pA6liPy981QhjGo3ltfWOlypaphrho4y5mA4aSFG6sBknqMjj0pWTskYupzOyDUoo7CwFnb3d7DeSti40l0Mcan+8x3Elc9COvbHbk5gIbKWwuozbXdvcCUbkxkN8pB+nBHUEfTNei+OfBtrHp9nq/h++W/0y8cbftHzYJH3hIPm7HOec8cdK5LWfBmpabcoupzxSw8BVjlZsg9huGcdK6FVhG/Mwm9TL055rOOSF0wUZg4BIAB/yaeZl2sXCJCflKdc545zWlq7RvMY44kL/N8yA5AJB2n174qpJYmaMxhHWQDPOP5VxSnBy5l1MpOEbtasieFUt2e0uZraELt2H5xk9lJ5I7+3t1rNuJC21B90DA46DrVq+H2e02B2uJUG1QvOOM4+nf8AOp7S0i+wtdLukfIVMDHv/hW0ppRUjCb5kijEIoihckuOWwh4z257fpWhZtcTrI8aKyE/KspAwR7A5z29OacdOjuI1+1TLbvGRuYgkjjtjvx06ZphvTaOIVSK/togMXMQKYBycMOQOvOAa0j7yuka01ZGgdNuJNJmv7j7FCn3mDJnHXvnAPHoa5291aaWdBHJFIgJ2M8IGSe6j+taGrNNfmFRNHJGx3rbxgqgJ7gHkj3Jz9KbrOnrpkFldShPOuTsGMHgYHHoMVa03Vymk2Vkii8xt6hmYYODg49CR3/yajjeBlZQpjjXKDHt0+tLLMlo5SVUOQc7mHQ5rOhuYXcwxOCwY9eMk1KUprmM52tZallreSBV+y7nhON/bax449jj8KnxMrCRYQ8eAXUetRQ27pIGuJgXxlY1OQnbJz39KuTTqls6rkuR0XG7HcgetW4p26k9SS7lEqteWsS+aqgbVO3BHG4+tZml2N/diXVCYWUbsmfAUjB4IPQntT7K5J3IrglRkMBjI9SPXtVlYIGulkKhmXODg/oPTv7UKXsk4lRetmV9agt7/TVYW32a+B3AE/eAHSuaM7LKJoyAzqNwHqOtdjfyCAgHmQAFcHoeua5bVIT886DAY5OOx/wrWhV54+8OpZSsie1vVl4yFc9uxqTUrcyWLyqmDCwJ56ZOOlUltkvI99sQkyjJUnAb3HvUUN7LAstvcBjG/DjuKv2et4maSudHHdwT6RE24CcKFbJ5444/CqjKpUoMHcMA/UVl6Ztm3QN3GVPv7VeY3FmiO4DRMSFfHcevpWfslFtJlct9R+hOY2KseFOCOvSi7tXadpYACxJOB37/AJ1CLhY9QjnUjZMBuA7MOP8AA1twwKshJkJbG4LRUk4PmQS0E8OatHa3ayyx7zja4yRkD/8AXVCFp73X7+7slWP5sAY3BQePr+NS31n5g8+2UCUcsP7457etZ2lXbW91dFSV3EH8jn+YqoNTTlHcpO9jbuIpEgcNIJXAG1iMbmPbHX8aSwaOSyWSMbRzvGOjU+R5JrvzIGVyRwGOOD79qoX4nsL+RmtpYT1miOMHH8QPSseXnVluF7e8jXttQ+xwSeYpdcfKB6+lLY3LXW8SIPtDncXz1UYwuPQVRtWS8Q+Tt2Nnv0P41YiU28rYYKQMfex1GKwceRNW1DnSkpFjUFW+057SUKQkhIbHIyMZB+oNcZHvt7sxPxIhxn/P512cUMiLJs2ujDAbPGeDz71jeLdNS3jhuYpkduAwVsnBGQf8+1bYadnyMm7epq3OrSJpsYLjyyAyqTxk8ZP9K5MzNLqsbt82WBPfIxmpbRLjVJrextgzPIegGcDuT7VNokgsvES4RJAhdCsgyGGCOa6VGNNMbZv29wjweSwRASWEnPzZ45/L86yHYI8vlAqm7pmtJ5oV2r5RQxltjr0Oedp/X+VZUzYO4jhv/r1zaPVLcibTSJPMaZArZ+Ukj6VcWymiQOYgARuGBnHv7VnJw4QtwTjP1ragF5CsPyi4jUYba2WGO+Px96Ti9kTFXEsdKmvru3jXgzMUL+w5J/AGusiv4bGyutC8SOUVF2xTBSRNEejDHcYFZGo37iXT5tNt5EW2B3bFJG/IJz17Y/lWrefZ/FKLPEJrO/tY90YlA8skEHBJ7dv51pBWOmEVFaFDRtOvrKO4lsY2urab5fniwrjPB2nn8elWdRkmhsP9KQpKwYeW685A+9k8Ee4we1aej+KoJrbztSntYACY5E3bWRx7dxXKeJNet7/U5JY5hJCg8uJUzyM9z2oknayD4V7pjS2QvYlAhRJ1PzHcQZATxkHjtjsfWoGgmsZUaKdItpycsCFI/r7VJDI/msVJ3Nxx7modS+zRak/kSmUKERpOoLkc49s8A/j3qoXMV3Kmp3bXl2pumEjqmwPENuRk9QfqaSHy4EJAkUA5+ZcYHpRucX8zsFdiF/gB/LsK0ba0a6kRriURL/CqLkd+T6n3rSUklZlcvMZaxLcMSZBnnGGBx7+tKljLJKSrHyiMM39456CrzWsauDKombH3CoH4njimSwSzqvlyhNmQqgYFLn6ITtsSxWxjDBQQv93OccU+DzoJVki6qc56/mKyDdTQXLJOQSDtY49e/pW1bOrP+7LMw4G0fNg1lUhLfcqHY1C8c0ayxtlyMMuM7Dz37n3rCvbgS6rNGqM6hDGiL3OMZI/WtiHfM8lsX8l8kO6DB4PoOM/y681V8NukWqX8rAMQwQFuO5HJPFTBtJt/cU1qUtMLY2csw+UfUmuuPgw3U0kFpJKblFJYyPiNTk4GQM9vesywsPsfi23tZzEY/tCNlCGUgkHr37V0yeIbjw7a3FrJEtzq1zMTb24OdoP8T47egznHoK1lJtqxSS6nGa3p76ETFqCXMN0QfLUOkscnuDwR+VZVjZS3FxGAu6edtqr9TjH516joekWd/b6g97dx3utXMZE0hBHlDsqA9Fz3rltB0iDUtYuba4laKC0iy8qNtw+cdfz+uKcpXaSDl6lLVvDzaTdFLi5hmBQNtjPKkdj/ADrDupPMGyFQBnJbGMVvain2S4e0sr221QyEgB4/3o91bpn8a5l5iZFUHYcncGwMn+VUotmU1qIgCZAznvT0O5w6uRJEwYH0IP6VJYfK7Pd27yK3pz+PofpU80EcaC4jJO8lWUDHA6cetJxtqRyaXHNbTG2N2eU8wKTnueee/vTLecQkkk4II/Q1paTqdnceFLvTrhdt6s3nI4Gd49CexH+FY0yqqtkjKjI6HmiMWnZlKNrNAGM0ZYjkHGemfwqREyQgGSePwqtZO7Q4ijeRgSxxgfjV2JZU5O1W78E5/OlJXdiXG+pry2lpHZKsVxD9rAzvV+QT16dB2rAgubmG8aGeQkngE88/jV+CPedkZCy9enB9setTiy8zAuQuVPykdRj39PalB8rs9i7p7GW93JHc+XLt5BwcflTr2crZcgAseccVDrMfyK4xuUkH86piZpkWNj8i8n8K05LtMlrUWNibmIn+D5j/AIVfR/Ovyz58vcW+X0rID/OWP8RzV22BC7+QT0qpRuNbmw9wgJMeE/DJ/PtWfcTJtIUFjmq8jOp5JyRTIH/fHOMY71lGilqW5XKzEw3GeCCa7PwwFuL20dpCEJ2ue5U8fyNclqGx5CYxgLwffitXwxfhUa1bAfOUY/yp10+TmW6M9mReKY44fEF6IF2wmVio9B7fiDXR215b3qaT5jNGnljzTjOGXP59AcVj+JYRJHDMozk7CPT2p2gRyLbSQsSHzuC9NoPXms3NTpqT3NNn5EHim3CBWQhl3sdwGCc9j/nvSanqVzqJtLNgA0agFR3IHJPvVzXYGfTcDBKNnjnisDSp/LvGJyS/yDnpnvWlH3oJ9jNM1hdCCGcRAmdm/DAH+fpUekxlRLNIQzsCP8/jRaWbXVzmckQEk7FbBfHv9R6GtjUVh5a0t1totoAjVt23Hv79ef1pSnFPlW42LHFFpcS+QoaUSJMJUzkgc9+emfau20Ipd3N/reqHZAsflxIATtTrjI6HnJPrxWDot8ZdMhFybZkgLqpuGwF4zg+o6Dv6VV0bVIWgk064vRDbsCobYxBBOcf5xxWLm9bI3jojIe1+035kVCIXYtz2Gen1q9d2cSW5bGCgwuDnp/8AX/QZq7d31itxZrHK8iQtsz5W1G+nfJPXrRsVkZjNCYVYvIfMC5z0yD2x/PioaejMvZ213OdEDSJvQFlB2/QmmJGzSbSCSDg+2K1rvXY0hFraxx/Z0BAAGdxP8X14461RGpRzXzXFwPmeII2BjcwPU/hTXNa9jOKT6jpPMXyvI2swByMke3X86rlWVNrRnKjA2HcB7nFW7po42bY26McjnqPc1UExl4jkRFbgjOCaqLb2QXbJJdkjwxwuGiSAFj/tE8n3POPpV62SFLeR5QRheXB7en17fXistYUF06pMsbDBHIHIA/nzVu6kh8jfMMRAnBU4Eje3fGfwqmruyKV7lSGSTTkldJmEZJMaHGemMntn+tVNLKyTu7SKhP3d31quTJqE7YwsS9T/AEq2lg9whZYxHGgxuDdfr2xWzslZ7g3fQ2JYpHMSbh5oU42jcD/nNULu9S3HGGm/ujnB/wAarS3bW9mtvFJ85yhIOflPOSf88VJBGq2vCpEMZNwxyT9O/wClQqa3ZVrlZbe6vGzI2xWb6nPXNPuFgsI2SNg0p+82c/hUd3qAUeVbFiOmSMFj6+1RWdqs86fa5FUMfuk/oT2rXbVk3LOnQsQZ5PvMOPpWikTHoCT1qpc3GxjAjLntjj6VPpVxKizw3IMsMq4HOdrcfN654rCUXJ8zNFK2iLum2hurkfMuUGTk+/r656cVQ14RxyARsCf4gDkDHv0zUqmW3Li2Em0qVDL6e/4Vm3p/dpnPAwfbtRFWmiJNXNPSNVWw0BhAAJ5JG3t3KjoPpXO3kz3DHOSzndj69qRCzKYwSF+8x9qtaTAbjUFIAwg3HjOPTP41vZRvITbasdbp9nb6ZYwE7JLkp/eyEyP580qyCC1jSKRkBk5ZeDgA/j/FUKmNXAn/ANXkB3XGfy6Z9qzbq8eZisAIjzwe5/L6VwpSbu2Lm5R+rq10wZclidqIP7o9D68VX0u5W3hlSSJml3AKd2NvHTFRSKy480tknjOefp3qzuFgg8yEfaSMhXA+XPf3OOn51strELuVnulE2JMowYEDGMD2pzY2lUwyFuD16e9V55HuJGknJdz6/wCePpSwxndsRmQnAwD/AJFVyrcFYFJOOD1IqeK2kLYC4/w9T3qSKEWGoRpevGR95ZAdysfQ471rHEYeQqXBOC+7ILHnHHHccdBUzbWxXIypa2pEipA6+awJJ64x3x6+gptxHcDCMVwPlC7SOn1/Wp1AUAyH965yp3Yyf8KsySJIxlld5pAvLn+Ef5/E1i5talRimYzWhgQTRvsDkhlIyD9B61A7YBCZz0+tWNRm3uqr90c+nXuf0qmSQP8AaI/If41rG7V5EydtEQSgJNG2ckNg+5P9KiyySsD1zg1JdKPKJH3gcinxKZIkZgMnPPrzW19LkvoBAIBB60oznn6VLbxiS/ijU8DJ/IGunnkhky80CB/4SoA2/wCNY1anI0rGuyuzAkxDZKsnWRgdvqo9fapLYyzfKzFEbkKvf/CqTyG81RGJyxYn1yB/+qrszGLYsYKnqhPpnofaqStZPchO7uyx9jdFBgLbsnJz/kY70jyHI8p1K4+8o6eyn+v5VEtx5sCpll3NyOmR6H/OKkBjLhGLbe2B1/Gpaa0KlpoiWNYo4M4KnqBtHUd/XHNVZIvMmLRLsI6kf5xU7RRpEV3nb9fT6fyrGv79gTDESdxAOB1qqcW3ZAnoJdsmdqkHGefU5qu38JPp/kURqygiQ/OCcikP3SPx/wA/pWtrMylqzpjYqNKS5kLpNI+Iht+8B3Pr9azlYrLmUZ2g7cHv0B+lXZbtZIYRGoRETYBuJzzyeT1/IZqtJAEt42J2+YDKBjJweB/jWMdrms421RClw6MxDt83XkgflSSStJPCvLBPm/8Ar/hioXKg/LvIHA4FJHKVOQzc8HHFWl1M4zfUtv8AMD5e5if4sdPcmp47OKVUS0YllUBonIDZA5K9mHfHX+dJbrDLG0pUthgCHfJOe+KS5MMEjOzgHOdp/wA5z+VRza2Ro0hFiEDb5JSuDg54/D3rdkt7TUdKXUrSCRbjGyeNSSDt4OAenY4rnpNba6j+yzB5YyCV43ENjgjv7HnpVSyF9MGSKby+eYwxBz67e/FXyO19ik+i2O0S7TUbKOJrUoo+VQYzwB+oHt0rJuo5LfTDE00K25JPllgSBnop6+hI/wD1VnrqGrQRi3N/I8C9UPzY9ueR+dM+xx3Vw09xI7k8sn3f/r1CpxhrfQTn95QmuIVO2PLEHAwDyPxo2zzjdI4iVOm7r+HetGWGO1TCxhFYZDDkg/XriqTd2PXv/jWsZJq8SOYQQ/ZIEurZxNE/EkbjrjsR+VWnukmRCqK8eMlo12snsR0OMZB4z+lQWtyttJLHKpa3kwWHoR3Hvn9OKa0cqz3N1aMiIrgAKPlYH2Para5tx6NErHI34IPfIxVuxbcShUsRyoX/AD0qGO4guoSApiulHzR9mHtVzQLiOzvxLLaG9QAgxLJ5bEHuD69+hFc84u1jNxsx7qWA/dqmfufLjkHqO+aqNH9ncTQXE6A/MuxgduT0HrzxW3qV9pF1cefHcXdsUIIjuIQwTHYshz04ztAqlZNFJJJGRE9rkeWYTuYN/e55+vHNKPNGOqNYxe1yeyjvtrTreQmQqUZWjAdQR3xwT+tVrzTJfsHn393PJhguxmxjP+z/APqqRy+ns2SzxHAO0ZB9/UVJqF19sjSMbfKBDBwOWyD/AJxUKUtJReg5NrRmHbmNFc+V8q8NxhXJHAOeBzzW7b6ZJDfRW9vPLFC0YdsfOpIPJUHqOQBz05p2iRQJPGJo1IQlkPbcQRyDwepqa5iWxnkT7OyqpzGgbGNwx8pPGPbpVzq62sJNJakN9bSRIC6KVP3XjOQefTqP1pbiwguLSNGjWVlUkOD357j3NQtggmInDcleh9uPWqsplgkMke4MDzg4J/LvWUJWdiL2ehTv7a5gwlxGzjPBZMNj+RGOfWpNNyjxz2cxWRTzsAPIPcHj/PerkGpzMm0sTjrxg496tWxt2nW6CKbhB1OcjPGT/StJVJJaoG+pJrMMsdnDeoFF3auJZfLUKGH06Z/+ua2dN1BZiJLKXDcOFP8AEDznH6eoPFZYuGZyuNyMTuU98+1YdmGiuZreCYxi3bzIj3ZSf59Kx5PawcZboSdz1Cyv0lbbIuyTjK47+orI8U2sM18jtGHkVAMEkZGSfz5rBstdmVwt9AJTnG5AFP8Ah/KtY6pZ3DkyXLCRQFxKOcAYA9PpXKqcqUroakcjd229pAqlRnI3gjafT6VHp4ZS24lWU4Bz+n0roNUubaRSIyyuQV3lOGBH86zkiWS2aa3JZ1JVlA7Y/l3rtjUc46iauXI9W1F1aOXULx4GAR42lZ1wf9k8dO1Rahbjz2QyJM6KGDL/ABqRkfj6jr/XNtJnW6aKQY/vKRjIH8vY+tW7qaWwykUaSo5DBsckdjkd/wCRocXcuM3azIbeNUu45kOMAq6juCMfnW1pU3mxKwGxuhzxgjt9KxsG8eJYrSZZWGG56NjPAxwMc960GWW1jQlhI+3DHHXGevrjpWWIV0oy3FLQbrtoIx9ptYc7iRNFt4PH3sevH9ayZPLls1a1UtMXBfcc5AB6d/61ryajLLG0c4+8oAYDBXGeaW3Phqx2q8GqXEoBbMlwsK5x1AVCf/Hsn2rbDuXLyy3RcJX0MIwz6hcIbeOS4upWIRY13F2IPYe45rQ0601GEKskLyzGUIYv41B6H0wTkHsPatzWswJbJBpei2r3u1IUil+0S7XXqxLtsPOegOTWJa20MwdSoSeImKTaSAQD146/XmtpNcuuxo3Z3NW7tbq1kMM8TJLg4V15B55x198elZkQltI8yld7soYyN8zAnHQdFyDycn2q3rWoXVsf3SYtYYlRFHOAp2nPfJPJNZVsxuTOYMq7ld6k/XBDHgDn3rGnDR9hTmp9C/d2jNuLAIhXaCDjPXPPpntU0OoXK6Umiybhao5mi44LHGc+vpVdwLSCP7TDvVD80mfMQeny9qegUkOuwq3KlRjINQ5aWeqMb2LMVjNHG8rGIQ527N4JJ9dvp71jzwLZM4DPskYOoHRfXPqf6Vfb/QA7NMXmkGUWRsfKapWt0tzKPPULIuQo3Zzz6fWnTTT5lqi7rlsSxHyXikt33O2RtJzkfSpl8qa7tw1ukKoAZ/LOfMy3A59T1HoDToxHaLKDGu6YYUk9B2A9s1WuY3hsjsJOwBpJOm5z39gBwPbmmpqUtNCYyszZZIRJJ5nmrOWOWYAgn19aqTxbkcE5wCc46YqG4JLhCTkDK5Oc9+f6VPbSpIzeeei9PXoMevrXMqcou5L1ZnwWrMGFqxVsF2+UlRggc+3P1qSPWLmxiurWBY4pJBsknjXOU6YBPKqe/AyMZ9KivrgwyPb2pO5zjjuPf26Gmu2UZsjzRw5AxnjOfpXXG8bOWpd7JFlbe3WAs0kVy78sdxbP5ZOKPKt28mKVHjjz83lLwMnPOf8AIqhNDDGVaACPCjnrk+v0/wD1+tTpNLtBR+g+ZAeh+h+mfSre10x3W5s3ljGURgDLDxjMo6euAuAM89c5q7Aj+WpDski/dwefx9qqac5kUkRp5kZDKJIyVb8AQM5Hv6e1R+TJPJKTcgMfTgHPb6/mO3Xr59ROT5ZPYl7li6CXEly7okgnI807ARwexxkHr0rkrYNZ6nLbFcLIfkBz9R/hXWvcW9rbPuiIZCAsYcsu3+9/Ljg1ia80kS7pbaN0U9cEGM+x65rqoSt7r6j1Kl9ckQyQq7qTgkDjnnj8s10/g/xJbQeDtZ0u/nImkH+jx7Pv5GM7h39jjjkd65i1iWS3efBcuM5PO3rwPU1Jo+n2t3JIvms03GIyu0Hn+96/lW/u8rXYcW09BJ7yVZL2XzWDzZ3kN98MAcH2yKl0OSK2aOS8tFnSUqxjfOHUcfX8ap3yK10LaJQnzBSAc8g9f61tLDt8q5cFbeJgbdc5LdDgD0zyT+H0JaxS7lauxt3sEcZ2aDZ3ML2iG4kiZt5SXPP4DAHrxzmn6j8Qb640s2a2iQalKCjz442kY3DPIP6Vz669JBcXByfMk3LKSeWzkckHkeo9c1nycGTzCTPMeWwOFHYAHj/Ckk1uW5W+ELCyuJFxYtIizOI92cZI7Z/MntitXWLC5tj9hupCWBxtBJ5z196g0nUp9PKMPMCRIQgZVIIb73H+TVx71mRJZ0maTnbuAO4+i+2D9KTcr3JVrGbY2t1bx+U7v5MrAD3B7j2rVtL5IbbzEUB1cujRtk7SSMY+nGKpz37mfeyK0jAfu487V4657nv6D261J9gECbmUBJVO0sMHI549B/Ssqjs9SdtiSWaaW2uLaHCAuZF8wfO2T0HYDvjini4uEtYxPlpVTapZjlfx9KltA/2o7kOSihgeMj2qvq9wsZkQwncrK8TE+pIK+4wKxjLnfKku5o4rl5iPw/by/wBpqk8jsPmZ+fvYB4FbeopZXMc0QIhdVB55OckZP4H8KraZqVvbTQXQsYpN6AtuyhQnuCOM9eua6HUfD9vd2w8RQIDp4ZY3wf8AWSHOEC9z1z2A/AHNtufM0/wFTirXv8ji4LybS5H8pluGmJVWPIycEH+dazyzCxtYmJeKMFkVhjcSeSR6k561z2r4s73dsjKggvGF4GSenp35raTUbdrZ3tZY5nijJKnJyOvfn/DpW043hzRW4X93l6B/wkMpaGOeKGNFGC6KFPHfireoJZ3zQXcRmMq5jAHRlwfzIPauTgvxJqiyJErphiEYcEZ6fpV6DUXukV2IhYlikcfr7d6yeG5PeirMTrS5eVu5p6NpF5qMepLb3DlIIJJ5Vj5IjVM7c9juwMdST6ZNO8NRaV/ZskesXn2SURIYV8svvYHkHHQ47+vX1qjoC3Go3F3bq7wCYr5soOCVXjaP0OO5xnitKW1gs5PtU9q9xbQHbLDv8twpzhg/TIJ5zxW05J2h1KjOyVkVb2x0wXJlspVmib5lkYECMc8HPVsDqMj0zWfayXt843iRNOEjFZNp2ZPGQw43Y98Z4NRXEccsvlXF1lC2JFiBIA9A3f64APb1PVanqQi/0RFhS3uIlSzS2QxxhM44Vs55B75znvTcXHXd/kEVFu70Ir+3tryztLLwx/aJviDHPb3CBvMCjIdSv8XBGME459q5qx3zEsk+5zlWRCeTnof85r0CfwZrOm6C3iKEI9lEisJYZ1DwuSBtI6hgSOBU9zBeS2lpa6hAkMixrJGPKUEDoM98+3XHPvWTqKELtFwoupvozmdLUWQtgoikvpSZdkkBwqA4zk8EHn6Y4qrbQ2934hSPUb9bO2uCd03llkjxyAVGcjoPXmrEd9aw2lzaBZX1ESETz/3h9ew7Acce1YZhjjv1mm80puywV+Pr9PpilC6m29P1MZ/u5JJmn9oja0kDZSZW/dL5akbMfxdweBx6VOdfuNQQafq7qQIljtpo4UXaVPCscZxjofwOR0LAW0oZ7eEyEcGPqc+nuP1qvq9qHhWdliXdxsjJBUjNONaMZcrQnU7HY/D2zsoNYuGN1atIkDb0uImEbA44z2Occ4wKf8WYUXTdAt10uOzumUrFIjiQSIBnCleepzgj6e/OaXPp2nwWsiXTnUZfk+zlHZgO7MT8u306mun8P+RL4i057xpSiq8EGXP7lnGNy596l4hU52ktHsy1NNcrW5n2Jn0/wzbaXcSRIomF0xcjJc9Dz0Ax6VoaFHrv9oQX9rcXr2u4CR8NICnU8fxDA61g3t0guZDdRi4tS7KZdgEisCV3Z6kZ5IP09K6Twb4w0vS7ltFuZpY4CQbeeZdoJI+ZTn7q5wR7HHFFKlOUuaUvkOCTer2GfESS41LxJpn9mxvOphKEBSCpLEndnoOhzW1448S2WkeHbuGS7ie+e2aNIkYMxYqRkgcgflWn4s8SaRoVur6ptuJnGYLRV3STN2x6DOOfyz0rx7xVoOqDTP7Z1C1hsY5pf+POFMFFPIZz1znjH/6h3LW1zaT5btGzoPjea202006A2s92sKRRxvMIooEUAbpGP3mOOg7fjW1DY3WqKTrPiNZQ4ybewkEUY/H7zD8RWJ4K1L7fp08S6Xp8z2W07BCAzIeOMjrn65rpNOstB1OAzRaVaK2cOrQKGU/h/OrXkKDuc54g0XTbbTRDDaJ9qlYRx9c7kPJ3cnBBAxmuhsNGshZx3l7BAkvlrI5ESoEwM9BwB6+tUtR8OWT6rElpaxpuhdxtyAjA4B9gc4/D61U8SaYx0CW60w3KCSLZJamR2GScFhz1GCO4x6HmnuO1tbFv+3orHwsw0O3Bur6B3ilxtKIGKMQOqg4OO5GegJrz46hJ9sWWeAJKpHJB2tnse+K6TwFZQ6rI1tcSSsLeLdHLG5Xy8EDGfTljj/69YOt3lnY6rc21u7XTRkBZ94ZdwPzfh2zmmrIwldpSM3Uphd6n5kuIkkZVCdQMcfXH64rX8d2gi12PTglqjeRGqPGMIQwzknrnOcnp9Ki0KRdS1dDJBbTbmBZWbyyfZe2cCr3xFsPOnXULKxuEiRRHcFnMgVv4eR2xxjgUrk20bOLmsr3SrzeA0c8LZPfHbGO47emPauo1rWG8SaTpzXFki3EY2JIhK4UdQOwGe3bt3z166pptn8N7AWIiuPEl2PLjiRdzwggqWP8AdYgYA645PrW74D0LRJNHSz+xw3FxabftFx1HnkZYAjqRwD2+pqr3KjDomeeXfg7XbHSpL6zinmtlj8x49ucL9Op/njmufvNYM0UaLB5cka7GLSZViOM885/HHpXuvisS+HdE1TV9MubkTRW5AjdjIoYkDdg9AMk+lcf8EJra48V30k+nxTW62vm73iDeU5YcjPQZzUvu0Dhqoo8t3vb3aGXKSOVBTpjOOQPxFfTPgFNT8QeHrbVTrdyl0U8lo3jSSMFTjhSMg4CknOTXKfGDwhD4pNl4i8MlHvBMltdIvBOCACQeQyngjrj6VjeO9c8VG9e3043dvpZciL7EpxIQMEkpznjO3jHp3rOfvWaLinTvc9k03+0Fea21aKMyRjclzDwkyn27MO4/EVJKoB4ryX4Z2fjmC7Q3Es1tpDNukW9O4sM/wqfmBPrwO5zXqssgJpI1jK6uMmUdRUYfnFI75pqVqiWyxFIQ1Xr9THZSanBdR2k1tE26SU/unTGdrj0z0PUe44NCJcn8aZ4p8RW3h7SYRcWiXklw+2KOQjYrLgh2B/hB59j+dTUslcadj500pvLule5jDQpMrujdDzkg57dc19G+JYW03UdP1vTzC8ESJG1mvXyjyWjxwMDBxjoK4Pxv8NdQWQano2y/huwskyW4+5I3JKjuh6g5yB69aqQ2F413JZS3cEN9Dxm4kZGYAc9ehHcfQjg5rzqnOtVG/wChnS5oN6GTq3ie0s9Wv/7Kt3j8OXk2+5tZPm8t93M0YH3TnqvPr7UvjS8itZ5rzSbme/gumV3huY3ymed8Mh5wccryPSrHiqM6VYWtxeWsBuSDCkkWDHMAc5OOpA4/ya44alNFbQWzRiS1iLGNG6R57A9QOTgdKfO3e61/M0bW70RDazQy/vACwb5sMduQTjGPUHI9ans4J7i+luQVhjhjwYQSyyKTjp2bJU9Omaz1jiPzSJvkc/LGvfJz+XP1/nWhfG0spLWGG68ycxkyNGp+RjjA56kDP40SjFXUd2jk01a2MwRqjkSybSDjaoyc/wAv61ozafcx6cLiCOVbbzBGz5yFcgkAkcA8dO9YhL2cpN3lrJnx5wHMTepxzj1HPtXU6DdGTR9TsYWFwGC3Tu54fbkZAHH8XTrTlTaV76DpwT0ZzM8VwqtDIXKg5Khj371qR/Z4NGiuLOfZcFvKkgkjBXB/jQjv6gj3rPvLmWeXyYLgNk43v0UZP45qmkollePcX8pTtmIwzDPJHtxWsFLRsmKcWSXdxbQ3RTT0+VJAGEnzKTjng9Bnvim2+m3F9fw+XIpM0hUxw4UZAJwue2AajvbdbdI4o51lUYdwpPyuRyDnqQMAn145610fgGSws7m4vdWlKQxL5adeC3XA9eAMelXWqOnByhq197Kbd7GW2lkxzSLAd1uwD+ZIHwT7YwayrmwXUpv3ZWK45yyJgYA7n/JrutQe21m8vxYFoIZIFlRCuGnMfGOuVGOcck4+uczR7a2toLiQyHa0uI19QM5yPTkCs6eJly32f5DabdkcP9qu7AtDcAY3Y8wLnke/0qRp5biMFVjk9CANw5/MV1LxWs99cK0amD5fM3DIBOf1/WsHUNAVXaTS5XHG7Y3btgGuyFWMrdGJpopec1uyylMfj97HatKC8huAnlO6SjqMYwPXPQ1lC5vrVSlxCJYyM8gMPzHGaji1CERNGsIjJYNkZPT9auUHIm5sXbFpCzHeQMZwKZEEd8SbSR/A/wAu8H0PSs+G+lSQv5kMi/3Txir0eoN5DI6RyQ5z8zcD254NZOnJEqN3dle+0eOOIzWUrhg3zRsuCv8An8qzLkSABbyI8dHFai3ibytuGEZBBVmBUe4zyP0qK6vEVVQyq6FTkAcfT61spSTS3G9NjLiRoyJInBKnI7EVuNqRnURW+nJIxwSZG3An1A6CsOR7fnYrKe23+op9veS2/wB1jxitJRvrbUcZWLFyblpd0qRIV6BQF6fTirtrqzLhZ85HHPp6fSq0l1Fdgs5EbE5xjinLFFIcMyuv1wcfWptde8iuuhtRahCwVkUEkEEE9PpXO/Mt5dEdjk/if/r1qXejmC0S4sbxJwzH9zyHUD9D+hqhBI1lqc4uMbwSrD3zzUQjGN+QnY1/D93E06x3BK9gwHTn/DNX7l1mkkk42KNqD+p/r6muXXMNzuXPl5+U+3pW5pkRvZjGhKLHmR/foAPp1NZVadnzIbu1YynT7LfPGjsqyDKlTjnH8s5qUm9VQVmzk8D2p+tQH76/ei5/Xp/Kp9PlRljupQHTOCvqR6+1N1JcqkRdjW/tNeFukGCcbSeM06w0O91S6EKSh2bk/KenqSeMe9dDaLZTWlzckxkohIB4yQRx+tdN4K8RaZpVjINTZI3kk+8EHAA6Y6461lGvJ76fI0guZpNnn3hnUJ9D1jzrdVMmDEwOBxnPU9BxUFlFZy6tAYndriWVxID2yD0HcZ/On+J7i3bxJe3enMDbvcGWLjsTnGD79qSO2Sxnjmu0dJJyZFAGGCk9fYdga6Xqn5il2Nq1a2tLmdNQt3uYwpDpFk4x33dAawZ4VlUqrbBvwu7rz0/Gpv7TlTzVtSYYGJBU/MWyO/vVOSTzV2SKhAHPGKwhDlM3Yc0LxDDclOc+uP6/0rqtGltb61nUXsdnLKnyPKpO1vQ+9YC3BYBZEXZ25BPTGD6GrEVuzK2AXB54GcD/ACKfqXBpbk2kXt/4T19obnEg6MoJKSoejKfT0OPb1rt9QsNAvNKbVlhR5JW3KZCzZb+4RnGPbjHWuE+3i6042MllNM0Db4ZQQDDnqCT1U4zjsea0PDsetao8um2AtoIyPNY3B3YwcZAA689O9aybtpozVOysh+sPaIwv9MtYLJ0UxyQ8FJAfr0bng1j6jLd6hbG6W3VLOLbCSpBO4Dqw6j9OfWtrxP4VudItIbrUb1b2QvhI0jKohHPI6np6CuehnntWkkVS8MpxNEeBIOuD796zV17sndk3s7SGtG62iSBghkO0E/wju3/1uv5VXjgBUiJSsRcEyN14zgfXnrW7DZpf6TNdWksBu5ZNqW6tzFCvPH9e/FZ62s6JIk2FYj5c9OntQ58vuoVrPRaGYziHUwFAKlAoGf51r29y0iskYQs3O4/KFx2Gen656VjzwCK+t4i25w5DtnqSP8iq95vtbohSSp+YH1FapJtegoya1OqstKlu51QABmGeMnnHrjrWdPbSQt5TAoQ3J9MZGM0zRPEFzZ3CNHIeCOM4z/hV7WLlr27lkOOnAA4GO1YzvCWom0lfqZaW8clyJXwxA9OvvVXT1juDIWZ1l+8Cp/p3q/GpWN2GNq4yc1maYwjkLHOEfB+h/wAmt1dphrc1IJJLaaOROZEGe/OPXv0FO8K6gI9SuIZFV47sHIJ/iHPbr3rXit5ImtrhYtsLxsVlbHzjkcd/x4rnNXeOaR5rGE7Y/laUdM+3v71gkpXg1v1G+xY1W8SDUnFjjK8KByE4610XhbUbfQr2a6uxLf3EyA7hHuZie4J6L/OsyK30q78PA2UUiXikZJYHJA5LH0/x+tQ6JLu/cuShJypHYg9KvRR9Clfod9qusa19imvH0aHT7YLzJK4MrZ44A5B6Vyng/TLHUFlbU5p9hfJjR9ob0yevsOnrTNe1C9nsxDdXMszOQFy3HHoOlTaRHDFeLFIS0SEBxnqqj/D0qZVeWHMinLqzo7/U7Pw9OlpoemWoYqC8jEqMH3+8w96801tBFrFxFJDE0gckiJiyjPOB3xXeeMrq1mvZbm3IKRRqm4dGx3+nIrgdMRpJ5ZiwDSkrnOMLnn/CqpVOa76IiUm3boWtP8P61qaLJp2lyGF+km0IvB65NVDDdRy3FtOW3xgjapzhh9PpXrXgjUr+5iNuI4GtbcBd33NvsOx4+lcZqbLY+N7iZj8sd1vf/dLA/wAjWkZ8yK5U0mjh3UxvvG49nBzUr3aNGYorcAHk84zW7qktvdXeo3EcileWGB6sTgE9+lUNFt4pVnnuEDKcLHn2PatL6EctnZFGN7naVj2wr0+UYP59amW1kYEpdEv3461aaHrnp6io9rRkEd6w9o3sZqWupDFBfgkwsr4HZsGlXU760kVLjODzhh1FWTN5A81WGfTPXPbFWwltqtkVk/dzLnB6/THqKfO95LQtrXQqwzwTTjzcNC5+bt1/kaNf0+20yGCK2Z3mmGXLY6ZOMVk4ksrho51wR1z71btJGu9XtBKS6oR19BWtrK62C+litdWc9uFkkjIhckK/Y4/r+tTRMyxnHQjiuplvD5NzbQwrJDMxJjblUJ7jPesDUIPLuA8abImHTOQCOOv61EarloxrTYpOSYuc5JJqsjHeNvWrMvIYDtS6ba+dK0jj5E/U1peyEx9nasyyG4XO5cLzyOc5/SlFnDCwYuVP+8BU91PvHl2pPuR29s9c0z+zFS3Sa4EiK/IY9wfbrUt92TZlx9VjeExSOryD7pHc/wCPvVaS+eFw9vEfNZcHPIA/lVT7C9pcuJAfl5U+oNQT3BY4yRgYHtUxpwv7o+Z7M0rmea6jxJK+Aexx/wDWqPTLVUuVY/Ntyc9O3pTIxJHFGZARvUMPcetXdPQSyAHOCQGbGdue9F+VWEnrqbdriDSY3IRyqZ5U8bj/AD5qwsRtLeD7QqvFON2OhOe9Z0RbyJLct8ydVz9/B6fpmmSSM4cl3fYpVC/J+g9OtcsqerLTcXch1WeAzyRWKlLYHgE53EDqTVSIANkjJz0z/OkjQs4A9a2NPs4f3scwmFzgCHaoKb8jhs9R2xWmxaVxJbmaS0tfMC4hfK5GOBn/ABrOnZ5ThnAXPAB6flXTXkJuL24EZEcLqN0eMbZAMdOgrJtYIZwXk2wRgckk8n2xmojUikTUT2Mcx9fmH681GVYE8itErExYR7nPtgd/XoP1qCaKQxMY1XcONo+bGT3/AENbKSZlYggYlirZKd/T/AVZV4wGKgN7gcZqW3tIymWUscfeLYAP8qjupEtlABViOQAOM1PxOyEo3HxxW0Ua3WoncufktwxDMfc9l/U/rWdLLcazf7RhUGBwOEUfoKozyvcSks5wTlj1q5Ffx20Jit41Azkk8lq35XFabml9LI1rVBbRGG2lII6jPUn+dVrogR7ZGG7qSWzj8O1ZEt9JJIzDG9uu0AZ9sU1o7l13MpRf9rjipVPrJi5tLFqO6jtHkeLDyMMZI4H4f1qFnur5i5LEZ5Y1Z06xjASS4RpSekY4/OrUq8gMWRemAelDqJPQly00I9JgSFy5AZzlQWHQ+36VZt4XuQ7bP3aAln4G3/69RyL5JUKQQACD61CzshLRn5c7sHpWSvKV2KL11HXFuN5JH7zAxnnI9PY02dIUhk2lkkjHO08Z9MUq3KzyEyn5mySSc8/WmXMhuZkiYNjI3Hrux0xjt71ceZOzLVy9pN07xbpcKcDaAOwqlfByXZnyjHIGMbT6VYj2RSE4784qtfBlkc/wPzj36VUHfUpO6KCErFIQBycZ9hW54f0S+urcXEMce1+Q7y7ent1rFVGmkjtogS8jhFHqScf1r0R9GFvCipbrDNEo2zQvtJx3Pr0xRVnyoIo5rULC9s5miuRF5ox8gb155P8ATiks7pFkKCIJIowSxxuJ/kP0pkl07TmZjvYSB/m5zz71Z1Wyjvg91aqIYC+2ME5Iz3I7D86xi+b4iU76lmzQPKWnIgGdytIOPr6Y9xWfqlqwnadp/O8wk79pUH3yeo6e1URFqER+UqxGDw3p6U99Wvg4N6Gm28ASrn8OKtQSvyg0rWAQyeU0gU7B1fH6A1Cm5m4yO3HWrcupS36OGjIAAIVV681XgtruW48sDymAzwckc4/Okr297QjlLbWqpb/6QFUkjgnke/rVJbia3YbZYpkU8K5P/wCqnCzDyBUnc7iQXY4Bx1I7kf14qaz0T7U+F8xVXksSAAPr6+lWuWO5drDP7VRiPtdsxbJLOj84P6AVofbYxFi3mZo2xgHgEn1J/WoL3Rbe0AaSWU8fMpPP0rNLQIQs6krxsjVsbee5/n3pJQl8I1oXpFz8wO4nnP8AX6VVV1aXYpDE9TngUolttpWZpHXskfyr+vNI9uiyKUjPzdAZNx/IcUlFLciw2ZC8jRqQewwOtWbVDDaAOBv2kevX/wCtUpjEJxseIkc4NRvjy3ZsttGB9T3pKXM7F8jKkMiw3QdgDgcfX/IrQ/tWW4OTEikH7+3Bx6ZFULOQea58tZCxCgN/SnXUkNvIYwrIduWVTlQf/wBVW4pvYT8iHy5BdRtGT5hYhQvX9O1aR02dY91zOu8jtzjPqfWsyK4lSdZrfeXAKgj3/UdTUkLXTMSUKDuz8U2paCj2LFzAzKI7ZwQoxubufb1NVha3Ua73eNI8kb92c/1qeW+iiTaFDsB16D8KpM9xqD4VcJ64wKcebrsNsWS4Z28q33yO3GepP09qsJpFzEqyEqJycBc8j3rQ0uyhiRQsgR8gmbHIFOu7pmZ2X90h4XccYUdB/XjvUuo72iHS5Rl0q6iSNmKu8hxs7kY96rOhjyJkdD0OQavx61FZv+7G9gu0E9s9TUT6+zxNEsCkN1YdSPSmlN7oTSJY3uL61nmju90aYHlbcMc8YwO1al7byRGZJGLInyqpI+UKMfXHH/1qwVSSS6Ql1hm3A/aMY49wO/0qxHem4Z0nmaOcknafmR89wDnBoa7F3utRGypyOhprJG/JARv7w7/XtVu5sp7dF89AC6hh8ynj1wDx9OKpkgoQfSp32MmrDkY27A71wx4cfdb+tRwWE11MZbrOz72AeWx/n8qfDK4V13qY8Z2MoOT0yAeM471Yt7h4Z2UhflOOmB6du1Lma23GmiYp5aExwqIV+95Y+79fX86pNJGzjdGWAPHOD+fWtCSRHRvLmud5UB1Ykhse4z6flWbJHIDz8361Md9RttFn7SzZJAmjwPln5Yc44cHd29SKs2xtZEJYzW0qnq674tuO7Dkdu2KzICGjkHAOAenoatWUsiS7Rkg9PYn/ADzTlsHN3Jri3lkB3PuQ8hwwYZ+vQjHQ/wD1xVUxRiEYDCQZVhnjj0qxNC0Mm+AtDKeWCng/h3HtzSOTtZZoeXHMkIA/8dPH5YpRaezFozOlUI+MZRhkH0+tOtY5t8sUQJQpvYemOeKuLbmU/uisuADtX7wx/snk/qKdp4aea5UFvM2FRgYPOcj9avm0K5bCQWsNzp6CVG3CUqJEHK8A/l/nrU2nXEGm6oq30gCIShkCkhhjOeOcYx0zSyebZWVqYS0NwJWL71yrrgYGemOv50QGG5vJpZ7dNqW/zJnIyzAcfgTUt332Hpaz3RoX0OnXUe+yv7IyHkAzbDjuSXA9+PaqF7ZWMJkKSQzggeXNG2wg/wC0AeP1FRQs2mXHzQpeWinJjddzKDzlSeR6/wCc1Yaxsprb7TbrFPbOQplxho3POGUcg8HB5FSoqKTi3YFZrQl0tpJI2tpBuKnAB54PUVcn0e7tpXiktpYyuSSykAD1z0I98msqCOJXZITEpUD5VUA98cjr/OtvSdc1DT1MUN3PHGykEBz3GPp1xWMo6txY3NSSjIyriZI2dI1kO37zbcZ9vpQ+oTSW0cDqTEjbkzjIyPXr74ojbzn/AHxZs8k9T+vWmNFHHkZA74K/59aei0Mi3bva3DRsFlHlpumOe4zwPQdPU5qE7JEZgzZ5yv19KfFDExG9cxnCvjIxzwauajZWdiyGOUrIw3bEbdgH1/wrK8ea2pUYcyuc3IxEm8cEHvV7eyQLPA+A3B74I7eh7Ee1LdwxywvNCcOv30PHB4BHt2PvVWxmETSRyk+RIpDDGcdcED1zXTHVEbOx0mjXUUTrNF5pUACQSc56ZwelYOrJ5NwLmIbmickj1TOMfrWhYK8UEEckqlSSVVOjZ7578c+350sECrqMs9zFvQlgolPHX1HHTtWSfLJtGlmwkZIIoZg8ckTjcT12ZGeR6e/Y/nTJo4ZolkjcFs4ypBHtzTpopBdMkds4TPAIJPJ/Wq1vCbSWW3wV3fMqkdMdRzyD/MUuXS63JcbE8QZkZZRntz39KSCNrKUSQAmMnDD361NMJI7eGQISJGIUYJJxjoPTJGaSWUxW0EyyhFaQqw254xnOB2zilC6fkJItXGnJHHDqVpuEit5jbecD2HQfr1p769cPmVr66MowI8Pt8tTy2NuMZ4471W07V/Ls7vT41W7SdSFAB3Rse4/qP5VkP+7cowZWB5BI4Na8zK5mtjetLefUtRuGZ5pWRRcPIXJYYU859eAPr7VBPqtzbqqS7pYh0m3csD0BB4B/SoLbUbixtLryiA8sIjOTyBuX/wCuKYGDRYOCCAfXg/8A16ynF6OauipS0Ror++yRGrkqHPGDg98im/ZoJW8m4jPlv8vIwV9x7/0rGS7l0+6jVmL27cJnkr/s+49q7C3hW4tSy5GBnJGNvGeaxqL2VpLYdKm5y0OPsrZEuNSt2AaW22ukvIYjcB9P4hVywHlLKuDufByR1IzxUVreRXWq6xdeZFbo8IjXzGAGSy/0UnFIdQ02JSst1LIT/Dbxk/q2AO/OD/Wu2cZStoKUTYSOD+w9SE8mXuMqq8ZXAH9QKzdGto0jZjI4naMboSmBsDY3A9+fYYNaFxYLcRIYy6sVDIXOWUjnnHGffFVLx1v0/cKtrMIwm8Mecc8k+4rGE+dcqYk7aMdGuPMhlw6g7SPUHv8ASqot7lLoMsb4Z8H5uNvsD7dutLZTPEfLlEkqg4Mr4U+nQ8n+dWJ5oSrrKwETEjDdwO/tSu4yatdMcEm7MoxWc+s6iEuA0YT5ACMNjOen4+wqa40q3kle2a4jjkRN6yk5GRzhj69ulGhaxLY6tDDc3TT6cXUNkhtoOcEdwR6V0vjjTLaz/fgL5S+WWhHWcknIB64wRz07da3u01FbGiinE5C2vUsI4Xu1aaQxkQgHGwHI3njqeQP9nnuK1NPV7kuLgRRxZw652ggfX8qzr/7PqbmRneMg4ZvK3bevBAIOO3Q1SntZZWVY7mKZccfvCM/g2D+lVKmpLsyGrGxeXC3V+wsUaULgEgBUAHHLHgCob6ZY0TyWbOOcdz9R1qkdMuIbVLh5UiRpPKwx5B9SOmPepSrNLGhALAFm2gc4BPAojGN7roEfQktvMt5kcRCXdw7bvu/5HJ96i1BQkjuqgA84GSKtfZBb2zTiSMoZNjRswDHPQhfzzio/sc2o2zNHjZHkBQfmU+mPTHb2qXJPV7CknYoWDm81eBWAEbNgjOMA55zXcXFnpmn2UEkCLMQORv8Am2ljyD+I9QPauV03TntyLmUheoBI/UZ/L+VbNuHKP5cRDFcbm6n39cfkK58R78lZ6IS0LEzIhD27SAHkB+340wRrOGDJIGclixHByevtVa3+R0EzMzq3zE8ZGfT866GW5t7Z4J7WFJmCYaPZuGO/B4zjke9ckmoyUV16isnsznGhkS42E5cdD/e9s+v86JyJVa3mJCyDHPfOf6ioIb6C01Nv7QZpbMlvnT7wzg71x34HHTqKZPrTmcS2sG4IOPMO3d17f/XrrVOSlpt3KiuV7mTpu6G6lspwQ2cL/vD+laQxYLKxG1jz9TVPXLedre21Kdgsr4HljIIX+E88kYx+lRX+qS3lnCkiou35mKjBJPeulw57NbdSkuV3Haagka4mlJwFKjnu3/1s1po8s6RorHLfu48nsPT09Kr2OnlooRMSiE8YGWkZuwHU8YGauRNPHLc2SRNJehsL5fSJR1/oAP64qp66IroVL2KKbUHa2jWOKI7NxGcsD19//wBVKmj3YuJJYZIriJBucg9VJC9DyTkgd/WpJLfUdkSLYzlcHGIWBJz3Pem31zNbstpA5M23Y/8Asg9Vz269fwqY3VkiSxc3lqii3CrKwO0SMn3fy5PA/GqT+btkRXaNyRlnwS6j2/hHsOKbLbbbUGMo4wS7g4JPXv1HpTLF5bSWXzEIkKgDzE6enXtij4VoK9izYmHBQMyszAbjyGPpntz2rdEjyx+WQ8iEYZ+Cd2DwOwH+frgXSPcSWSpgyTKOF4yxYj+WK3LdWtY5Le637kIAIOTn6jg+9c1ZXSZcNdDQvyZtLRIJllmUjyyoKsoA5HHJ+nSse9t7jURa7AVyzbmJyACMZ9SOtSXrW0Op+TBcZiVPNXzFI+fqU559x0yOKjsrqeWUSxs8UGduzOVJ9TnkD+tZwpumrr+rjm77mhFb7YUW7mWCEYQnBIxnHPv3Pt79dXVPEw07QLbRGkje0tp3lRoFz5hPG7J6jHSqt28y2628+myXKTt+7eF/lyuCRnr37gjPrWf4h0IrCsxAtlUABGZWA/Ec479KiLjK0ajs3+JNnYz9ShOq6TdaqGiRIpVhWMsN7cZ4X8icVlx6fHbabDfLMQZXKCLuRgZPrjp9fzr0L4eaD4YuNJun1jU7Eas0mIo5JCnlpjHy9mYk5A6cYrjV0+P7FeLNcRb7eUxRoOXlOeuByqY5JPfgV3Q91cq6fkU4e6nYxURly4B2ENyB2JxxW7Z2cls7yQTRuzRhUyuAhI6g+oPHSsq/v5IrqNlO8RR+QwbG3POAq9ABkevPNaeh6hp5069k1mS6MwCrFFDLtLnvtPQHgdQRj3qqsZSjoEeXZklm15o45xLAx3OVPc4HQ8D8qt2k1/qNxNbaYJpTIrboUXO5QMnI+gOaz9MW73yXLX9o0EcZkaC5k3hx2jOOSSeOw716TouqWfh+I+KbfwnfWEd1bG3tyHNxZb2O1zvHzKcBgFOTn2rmdL7TSbD2ak9HoefNpOqfIkFjJIitgQd8j0HXPbH4V6T8ObDwR/Z17/wl2kalLrbbzKsjeWkMYH3lyVC4PryD07VX8W+I9FvtQsbjw9vutWu4hLc2ifKsM2OWLnHBI3Yx/PA7DR/hbBqNnpur+MdZW6k1KdWWC2wsaKwLNy3JPqT/APXpQdS9pKw1Cx5brElybW4Gj3F1Jp8TK1xdzllFz87eVIIzyQQo+bBG7p2qppl9qN3JJfRy3U0sSGRmkDSBUBwSSOAvPJ4Getet/HaHQbWz0/SPDFtbjUbZA3nxTKQIyeUlzknoCM9PYUaL4f1rwZay3elpok9hPZzTxGaZ5XuIioZk27QpUYJ29fr0onJax0Zopc+q0PGdQ+yzJBeRlReRl4psEfOpIKtxyeuD3BqpGjTFkjQsxHTHb/CvZ9d8EajqbaRdXV9o5t9Qt2itl0+x+7Gibl5kb723IzjPQV43dRzeHfEJtpizwzKJLWSQ7WRWOVLdicdu4OarkUlaPQirSTal0LGkiSxuI1ilAmbDRspwwIORgnnORVi41e+bUpW1OSSS4kJOTyCc+nY+3ao00w3d492Zle6DCSIBsE98qOh5HIyDV20khSa4/tCxjmnVCp3ZVh6nHUH8Bx+dYTgviev5kKnrZ6I7TwtJLYwzXV9ZFbNUWZpSi+ZGF+bg/eCsAR6EVw+gazdXniiFW+y2qzOZofMBKJ825UYDnHbpnHNa0GtJD4Zu9Ct5I0N3IJJ5tm6QrjG0n+IYOMZziuE1PTbqH5rVwYgcZVNjL+PWqounP3ZfK6KnKMbRTvY734rX9taeLHaKWyW08sLLFG4YhzksOOpyeOBz1xWNpcmoeM1ax06Gxhj0+IOJZk3zMq9CoI+gx0zRoVro2iXGjz31odQuJYpGu7f7xjJJVQxPGNvIHWu30HwSvh7xjZ6nos0g064ifzLeb78YK9Ae4zt68j3611qMU79SlFuV18yv4K0PSnuriVp7u71XykmW/lYFmRs4KddvIwR1z3rqprOURmNrppoyMMlwituB4we/865jXLqHwFqgu1tp7jT7lGVEV8eU5csVyf4T2qvb/FDRZo0N3Dd2zt94bA4U+xHJH4U9WaqUY6PQ0dE8M22h6ne3Fi5WC5QAQkZ8sg9j1x0x6VbWwWLUGu7clDIMSp2b/aHvn86m0nVrHWbdrjTpjNEp2lthXBxnv9abrVi99pVzbxTNbylCY5VYqUYcg+uMj8qaKsraFaKdBqF0zE5XbCiqNxbA3HAHPVvpxVeB3OlXUi7Y4R5xyeWPzNx6Yzx3rhdD8S6lo169vrMRngmPnMdv73JwQ2R1BIwPrxWvL4xsdP0iKykV2uHUeYdvyruYlvfPoOhP45szU0zT1fQ1k02+s9AUJdtFi44wpGOB6bz2wOleT3ekXenO0V8FU43pg5Dj2/qOCOhr0K08fWonitbeKaztN2WdUDyMTzkk8ZPfgmuN17UP7Z1Q3YDxANtVdxfkdyfU9+1CuZVHF6ohsZA1kZUgZDAwxJG2CpPIJHXqOOnvXpg1x5rfSLSDTrHUFv7VpTCCUll28MAem7IY45B5rN8B+F9TvrIS6fqFvZPJJsm5Vm2DnAHUH2I6c1T1tSfirpdrIv2ZrOYQsQ6xeZjnIIAGWzx0/rQtwinFXKBs9Z1W/n03w7oLafDGSjM3DRg5+9I3Q/Tt616ZY6hoXgPR7TSri4JnVN0giQszORyzemT09h7VR+ImqX3h2W11fSbpWh5gmt7hcuTncPQ9M+uO3Fcal2/ii9uLmzkMN3qH7raNvHGMc8gY60x/A9NzQvfHF74qe90WCwhjtLmCYA5YyEKrEc9AcgZ4PpXS/AqzfTtMumvUEdzME2xng+WM/wBTyPzpfAXg+Dw1K93es81+ylAwTMcansuO/ufoO9at0YNH1e41Z5z5MwUeXjIGeCVxznPJ9qnpqVFPSUjN8bWdx4f1WLWtIlfyLiVYrqE/dyfusR7evXisTw7r0mpX/wDYeiRhLczGa4m3H5yCCW4H3cADHfpR4i+IEWs38Gi+HopZmlmVGuWGAOedqnk8c84FdjBZab4WsLi5hiJd23SScGSVmbuemOenAFErJXY0+Z+6zppLjOcHrWFrHiCHT7iOBo3kkYAttx8oJ9T1NYD+MnRd0tlhSdq4bP8A9as7WL631XUke3b96IsOhB4IBPcc1x18QlT5qbNopc3KztbrWrS1voLaZiDMm8P2AJ4z6fWtVBzXmfiO7t7+e1MDgvFDsfjHoR+HUV6B4bd5tFsnkJZjEOT1445/CroV3Obgznv7zRrQ8HNYeuxrL408MmWLdERMMkcbgobaffjPvitxcKCSQAO5PQepNc7qmo2mraTIkN3bW+qWsvm26tKDiWMkjBzgq3Qn0bFdFSzVmUk2dHZpdeHp72WKdDopXzRGw5gIB+UDj5eeO46VwnieK48Wabd6xLbrDJalViuIlIOAeQwBORgn8OK3v+EjtPEca6SoaBr63WSGR+QXHLRkddwwfqAcVzl82t+HpPJvWkgt2OFljYtbyE8Y5+6efukA+ma86tOpGXNBXit7HRTUWrPcyvEEl14o1DTdJW1MdzptuEKo4dZcY+dT02ngjuB1rEvNIjibyZGRgo529j6Z7n3qxrU1rDfC70t2g1S1YLKlu5CqB7dj6gHFZkV3byP9pv51jyThCeX+g6muareT5oX9OpDp8/us566zDqskaMd0Z54x1Gf8mmpsOWbJOPlx0z6H2rV8Rwme5XU4rWSGJAq+dIRH5oB9G5J681RtIBIkmcsCpaNEUsWP939fpxXZFNwUvvMeS14dB9swdJo22E5+bcR09SPSueQyW1w8umsY0lBXyWOFkTocdx/k10GmWcN3ffZdZM9mfKxbuE3GMj/noMZJ/IYNUZ5JbXcfKLOjFcuByfr6+lbxkoe7HX8ieXRX0sVredZpgsUYgkC4aFiBt56j1FdZa+FdQ1C0NxaWr7lhMqs6kAqOMjufyPGTXH6jcQXMIRrU/IBiTd8ycdiPzrbt/F2s2Onn7dcPfW80Xkpdbz5saAY2nnpjPXv+NVNScU4rXsTFQ5rsoT+YJlsrjyc2sXDpyW3HIB9R1Przj0xNpkKG1a6t5EMiZWRepVfUeo9cVas7ezv2a7RwSwALqeV44P14/Kq/9kJJ9rQTPbajFmR3JBjkUjrj3PH41mpxmnF6PqJwTk0CNJFIssH7uRDuH1HP+RWtEEv7y3K7LeNkAbP8JJyze4yay9VnW2tbC1ECi9eNZJpRKTuDZwoGMKAPqST+FVrWaeS5dJI5A6/IpZdoVfTJ4zUOhfUiEXCWhqX0YaM+UpKxn5TtJ3jnLc1Dot35b3MT2sVy04CK0i5MfXlewHPPHSpHfSYYQ010PtQ6lZcqB7qOp7Vh3viCOG622caSQlCpOCGORjirpxlL3Ypm0r6S2L0RjmuCsSrGF6gdD9PeodQsLIRNJdrGSODkbSOv61hDUL1gXtInUd3X/HpU8djcyO6310h3AHYCXYkjPUfX1rf2bjq5WMrprXcWaCz06IyqhJboXOTz/nrWHK4uJCQrMx6Yyf0rr7vT47hgskTMYxwM4HI/n2qnbwpgqqKuGC4xjr/WnTrK192Ke9lsZFrot7MpYBY1/wBpqjm02aKUpICWAzhcE49/b3rqFcW0KtKT8r4xu5wefxrH1rVBLIwjURqeoA5Pb5se3atIVJye2glHS7MRY1TeZVJABxg9/X6Uhb5w5X5T1A74q3FYyzL58wKxHkA9WHtRcW32KYJMC9u/Qj/PWt+dXt1JI4baFkDNMFyf09/elngijUmG53njjbjP41HLC1tMVYh42AII6EUsKxs4BXIo8xot6XeTpdwpEcuzqoVuQcnvTJVFxfXbTtljIxLKO5J5+lagskRdOvFjKIHyzr32/N+fFYMRmO6SNGYZ+bAPepg09UPZaj0leBiCQ6+uOtbGmalDHtWeIvHuGdhIb8D3FY4uZtpwrYHXg04TTspYRsR/uk05RTVmCdjtI4LfU3eS3cMnA8vGDz0B7/0rCgQ6VrMtlckpGxBBPbuD/T8ayIr6eGQNHI8ci91JUin3t7Lf7GnLPcpgb/Uf41lGi4t66MLo6JlEdy6xIXQ9VHODQYBKjPOzoxOC204X2H+P+SsNyzIZJII1kK7Q0abcjgEnHU8VC0CyAvM7RqpzuBOT7ADv15zWCSulcIpPYh1W1itpbdImONuTznnrmq88bLcyyO5d2xlic9h3/wA9qW5DRyNtll2KMjecnkZpNNeC48z7bI8SAEqUQNuPv+NbK9txPUSL5gcfwjI/z61a0u0lvJwIbd5yD9xf4j6E9vrUtstrtl3XUoKr+7XywAx98Vf0rTLG4TcZ5fMAO9VkZef/ANVZSmo7/kJR2IdTsbi38yS4toLZ9wzHE+4jOep6Z/GoEvZY7WcRMnI2YZwMAjtnknH863tA0Kw1LWI1aJhZKx3SsxxIR2BPbrk9zwPWtbxdB4eSAWmkWdr56SAyyRp0H93J5Jp+0jbmZrGHN7xxeiatD5D2105ALc4OM/8A1/euv8IapY6adRuTNEZggSBC3L5JP+FZGvw201nbxyWsIkMgxIiBSVx0OOTzVRPCTXMdxJpN4A8WGEMoyWU+h9j2xk5ohKFVc60BXdmi1r9/JqCtLeXYMnUBmPHsB2H5VzU0qRSgSglRjcBxkdcf4+1N2zae2+6tfMcjMcgbco98d8c+ldF4Y1XQzHc2uoy/ZYplUMxi3MSAf4uSOeT06YGKuFNRV1qSkmYsjvDO1zbfLkhmjH07e9Pt7qW7nUlwS5CjAPGT+efzrpbzRbC+RJdG1ewmmCnzImk2bsdwD7ZyPxrk7ffZ3kd3bxOxicMymNtpx74xRbmVmhWezJNTtls9QtliYuplZi5HJI9R2+lW2SCRHSdEdnBVSSflz3AH4VW12+sbySxls2mDqSZhImMHPQY606K/SMsyhz2H7sk5/GjklZX3KjorMp3em29tIU851k7cEirsLnzV+0KUB+UnHB4PIqG8vjdXULFNoTAJxyQPai5udkLk52/XGef50pJyspE2UguXEEUYGTuyW49//rZqppux7y7t5MDzBvU9MEc/1NOS6lulSGNY/l4UyHPX6UkmlzlZLiR1O3AcDIwD/PtWqWlmU9dia0nmvCliszLa7iGcc9ew9K6GKGGzQwhExsKCMjPBGOff+tYVuVktEVYUikh+VgD99fX61o+a90yb2LSouM56jPWuesr6rS39XFotTLuYH0q4PlsTDIMHnr7H39//AK9aaNbs8E0TKF+UnPbHHP5U7UgotpVB3qQqnIH3uSf0xWPGpJ4Bx0ojLmWu4nOz0RrGVLjWIY4wzwRnc20Z4Hf6ZIrQ0pSb3U7qZk+zW42bccsxGAAfXv34zWfZRCC2NwhJckd+Co7e/OantbZl8PXeq3M5hhWcrFGVP79yOSPQAd+e9Ukp/kXGTkQ66lxPdwaRa7TcSuBtU9O4yf1+mPpXR/Dy1tFvr64uhD9ms4RAGkHykk9ee/B/Oq3hHTGtfD2p+JtQBNxPGyW27sCcF+e5JwPxp3hPwnc6vbJc3tw1vpjsWWGNvnlxwSfQcdeT/OtIwUI8qKjHqbGq+NoopWs/Dlks8veTAVAT3I//AFVxOs2t8bzzdUlSWS5BkPlj5fTH14r0ZvCNtCdtlIIIAchNucH1z1/GqniXw55+mhrVy80AyoK/fHUgY6Gsozlz2toUlJ7nmOtNFDZ7IkCFyOnHTt+tQwS7bSKJT90Y/E81DqrtcXyxAH5eB+FbUekW0Xhv7UJhJelwzqM/IP8AD+tdGyRnu9ChY/vZCrk7SPyNWXtmjHJUhhnBzzz/AJ5qKHEJ3HBJIwPWrZu45JDHgGQDt0wKwmrz0J9mnqyibVPP3qpLDp3wamjiZJd6gBj1461Olm13DIzztFEnJK8f5H61iQbYRLISSE/izyfbPYVaV1uN2j0NW6MUioJFSSb128LnPGaoLpN3dAyQyQSSYyUDYYfyFQ2N47rJE54c7xx3FXIJ2hmEsec9euMj0+lD5oaIhyu9TNb7faD5lmQevb/CmtqU7xlGbcp6/L1rtoGS6jBVQwcYUHjr/hUK2www2jKDAH+ffmsfrUftR1BxatbU4r7QckkHnrxTTOcbRnHUj1rotShFss5DLmTAUfqf1rnMb5gOxIFddOSmrock1uTpdAYAGADxVyXVfNthBIi7FGFxxjJzn3Pb6VOLKyfGZAjHHO04/wARSHRo5ZdlvJyemSCD+PWk3Hdj5ZEM159ohXn50TH1A7/WshzyTViW3ktrh0kGCpK9e9QDh8tjH86uKS2IZ0OmRPqeneWhJmt/ugKTkHsTjjvz7Vv2trZ6dA6IJ5pnX5pWiKgH0APOAK5rwrrTaFqbXCKJInTa8bHAbuM1ry+KIXZmMIyTnqPyHtXJXhUbtFXQ7K1+pFMGS6fbkE4I7UyMDdiRlEbexxn3x0qW41aG8eGQxAOi4ct3BJ7Dn096datbuGWdx5J5BJ4yD6Dqfb2q9eW8lqaWuLJIy+VEsSLIRjckec49cYwcYqxbzmdzm6iCqADsiAIA7/MeD796zpWUO6xK6RZHEgG4++eoFAIWJsgcg5Pt6VDS6bjNa91eORGVpXuJwu0zBMbuuC3bPQfhWfbpFKN1zKEtww3jcFwCevPJ9hVMOsM2xclRjOf89Ku2uxI1bKFnOACM7SD1qVFR1XUz5rslkgR4ybKCeXnHmEeWhz04PJ9uBVTcWuPLmCrMi4Jj42/U9c961bfXGhtriwuIoPKlP+s2AkHrjPYZGf8A61Y+itAVvDckBy5Jz/L35qo3s9Byil8JJ8z797F4ogCWxgk+nHBrCvpWlkIB45/Kti5JjttjEliMntk//qqlp8AKSTOOp2j2xz/hW0fcV2JqyM6C0mlIGNiZxls8Vfh0dpZfLQSuw5Yhev0Hf9K0bW3Rd8huDbKOpyCD+B4/KpLS7ZkcnLhDt8yNNuR6HuRx6UOo3sEUrajZ7OKztwkcQQg4Zifmye36VVGG+bggdB1/Gtk6TJqarLbMsluOoi5YdeCOoP8ASmazZiG2JhUbFIByMEe2On5Vi30YTi7bGdDqEUDyW88IORlXORyamu4QbbzUO4Dk8/dB/mKlbTbaa1QKWmlkGdo42E+56VSa31DS0kgkbFtL8rLuBzg8dOn8qrlT1W4uR2IN5Khev+FPARY2aU4XGMY5Of61Yto7aKMTTuGbHyxg4Gefvd/wqtF5fmmSZ1c84AHA+mf50+V7i5HuRx6a84LQlI2Y5EZboPr61XjuXhfDDaw4NaP2iOIZidixxnI7Cr2lyaUbKePUY/3mcxg5AYkHv2P4iqUpL4loNX6mbbywT7llcR7iME84NVryY7CkhG5OOO59QfSprvTAimWylWReT5eeR/n86zwNxKyKQR146fhVU+V6xYLyLXh1DJq8Uu1ysPznZjPH14znFehxXxuEYxXkjsmco9uN3PbI4/lXG+FpYLKW683PzKMHHA5rbvtWFqyvpMMjy+Xue48sjAPGeeCPz5rObcpuNtDSGi1MK5RWu5kiB2qRu7AE9vzq3bWkgLNJjy4ztbnkH0/X6VWs7kQ+WS4YCUO4Ixk5/wA81Zu7yNrtpkcMkwxIAc4I6E46cVnK+yIilc0LQ2RREuI284tkMrhd3J4weKz/ABHFCl5/o6MkYkXCN/CT1HuKZLD5yhlBZgei89f6VDcw3BvxBOjI8ZDMp6+1KLT17DqadCe3jzGzZCknjjtSeXIz3BjI3zAAlRjCgc49+2all8uMlp5QijopP+e9UBqixTSC2TzZJGJAAzjt9aIRlLWJKi0XktlWNWXCMDj5WPAH9P51HNqS225FkM0rcYUc5HfI7+9R/ZL24bdqLtbwgbjGBg4OfXj+dOgjWPJsYRGgOPMbLE/41bXL8Wo9UUtQXUnQvcxPGv3uep9z3qhGFLHaiZ6knNdDOzpFLJIzF1T8yf6VhtZyJbfaSwCtwMHrzVU53XYl3QsbxlSpWLjtg/41ZtdTnsZjJbxxZC7QSoPX68g+9V7eyubyC4lgUCG0XLseM89Ae5qFTuUMOQRj61o7C5mi5GzXk7SyNJH0yyRlto/CpdRaBUCW7l1I+9gjP59O1R6JdPbXLJvZI5htJBxj3PtUes5imZCTnAzn3qUryLi7q4ywZFT5yN3UD1qYRjczyKpPUlqRrgQ20YZAuwcY6saz5bmW6fC4A6egFHK5O+yDRastS3cUPESAsOQen8qrNJPcNln/ADPQe1Sp9gt4zvDXEx464UVSMgaQrGhGTwoJNaxS6IVzRtbCEgPJIJMckZ6VYluLeFsLJ8gOQFGcf0qpDY3+wMkEhHPy/wAWMHt16A1WaRWciaMZHUHI/PvU8qk97hZFz+0WJ8u0jYse/U/lSpYTzENdyEZ52g8/j2pIZbfZtQCM9cjsasLcOYgFBLFuSMYP0qJNr4VYOhbtLNBb7YoB5ueeAe/T2p+SAEdMbcgCMA9T6jkj26U6Z2a2KHKDPynGAcVVim8r5TJv9FUZ59B3qLOWo7DDMFUgDJP+etVvs24b0jRvbOGB68VsG3jgs3CAznAaQqORgnOPUVQRlR2EZ3ISCpx+h9DTjO+qJasV7a88l2FyHlXG3P8AHGAc4Ht61fWwV7Rp7eZJiPmManov09fX0qe90uJbeyuVkaR5QTNE+AFIPAB9ccn04qrLEkIWXS3kaMHe9uRhh75puSnsxtdGUwCGGOnY1OrtHn97LvPJ6c/pSRlJD5qnEWfvHpj0PofarZhFxgrJEmcY4yD+I7VLfLuQk0Q+fM8JV5piAcjLHB/D1qO1laGUkYLHj5iSMGpCFgYxyupAP8PNNc27oQsmGHIJBHP1pNg2yGZWguN2CoYZx7H+lW4XKo0ioWj4BPT8fpUE5SSCNVX94Mkkc8dOT9RxV+JYEsJDOMFACOT82T0x3NO11qOK7jGuVkYBlPAxuB/nWhYotwVgijlldsfKsZbP0A5rGtpV3fcGR61v6XcObuKGK9h0yGbCPPyAM/3iuWx+n5VnKHQErjNQ8P3MNwVlhMeMErICMY5+ucc46ipLmwex06G5jvVv5mYIg+/jI7H72P8A63StHxj4M1fSYLe9kvrK6tXwFube63g5PB55x09azL547e3W208ttAw8p+9IfXPp/Tipu0lqaJ8l7or7Z7hALoRxxEtnB3Z2nH1B9uDSX5tbW2/0RGUzFDIFYnhdwH+fWq0z/Z9PRRgSytk89h2/rUCOszBZM7Dwfp/nmmlb0LSUlqTMPkypB2dD6g/5/Wq7wmPzLi0OxyMPH/C49D/nrWneRwGQ/ZS/lEYG8kkD6mqsC4bB+lTGdtUc2z0M6J1lZmt1KSgfNCT+oPUj26j361v6Araiwt8AS9I2PRj2Unpk4wD68Gsp7KGV32sy3I+6Pu7cfrWxocr3FoHjJSeNgkw29WGcN9eufcVdWUXC/YuKRU1aGayvdjRvE8LAujjB57/TmnarYzNicSK6HgYXbkj+fUVqa9cG9vDczkmQxqjcdSAB+vWoNPsDK6yzOzLJgIgyT0ArD2ijHm7Ct0M2zciUKclSuG/Pqa6ODS2vtMe5tmEs9uN0iHAJQHAYdz71QNibeSRcg4JUN79qs+ELtV1NbS5ZoHY4U5+6TwQfVSOPriofve8hwVnqM1M6fe20PlfaobxBhvMKGI+3ABAyPfFYElskfkzQyhkbqD1Rh1Uj175GQa1Z1cXEhYHaHZc464PftnHNQw25jnV7iJ4VIGG2kBxnGRnvjNaQfKrFTfNpLckjjMcAlggYzyqUQKPl3n+PHrj9etULWc3DvDvaO52/Jk4Un0IPB+v/ANcVtX0iteCSFWWFMCMYwQB3+v8ASql/CXYyeQWtmBYycDYRk4/T61VORTV1dEmn/aJLVjLInnRH541wpX6evTnikt5LVb+3e6VcLIrM2M8Z/wAKr+cY901uPNhYA8kM4OOSDjn1x1xUUcLXpka2zMw5IAGeT6daU1Z32RrF8yNbWpkvZrVIwUt4i+wRtnqeM45zgDn/AOvWQ4M6yDLEKx9z9fccGmxrNbXC+arpkjOR6HqPetHU4DaSteRjlB+9jHGR6/Wld6WZhOLT1M4RYBWQLJGeQRwwPt3B6expiQkSuDiUSA5Z8k49QeoPFXx9nlZBnyzKRsY8cmhbWSF5I5AAduQM98jkevShTa1M9SCS3jktZMqPNChEY9OfUfhVe33W0cccxBYDtngHt9fzFXSwVAvXJLH8KqX5XKAnkjIqlJy91g3dWB0jk2CX7qOG9c47frWgzSStNvkVhISdqoFHU8EDg+tZ2lpvvY0mB8rI3nnj3/kakv51tVuBHIH2HI5xuweuKpJ25Sot8osej6c7TSzPIuDu2k/KAM5J7k57VnSX1nAwNlAwwCDuIG73GOR+tbMGJoklXBWVc8d80zS9Is49JvZLhRJeMpWNCCQmO4P97+VVCpupsuMuhrxzp9nilVso6bg2eoI6fr0rndQn230sduUABAUAZ6AE/jzVrT7jdIthKrKw5jyO3p/n6VYeyiLMGXAVt+V4O7PXPXv+Vc0EqM2pEtWZQ+1SrkTQA4XJcLjj1/zzVlWgaJSQY2YbhvHUevripJp3+3Ik+ZVdPnJU/eIIzmqF7NJayk+SZFOMPnoAOlbJRnZbMVkammwpHK88MMM0vlsFVhlCTnG4emcfyqlf68t/cSfboXVpQqSMrdFUfLhR0HPTgUlvraRWZEFojXgdijyEnbuGAQBw2MHGeMnNVdUs5GiEhAMscjROVX7x65x261qo8rtIq9la5bexjk23EMjI2Btkj744yR3qtIskdtILiAKC/EsYBBIHUqe3I9KXTHFtNBF5qmOc4bP8DZxk+g6VrvHEsitclRAoIwy53nPZf68AUJyi7bocb3MaObfbRJFGqbWJd0J+bI6EdMcHHGealhkkyXWKN3b93u27SAfpxnpVSZI1l2xKyk8Ahuf07VZC7WTy7vZtyf3hzk+o44H41o9iiaKK3hucSIzyEfMSdxx6joQK0nn8x1SOZAJDzK465P8AD3Y/pWLHvjJaeVHVz9/aH2keo6fzq8WnaMbmjfd0Jj559+np6+1YTh1Jt3JZ5IrUlZRLLID8r4Ld+2OMYx6fjUV3PNFbK6Kzyk5IPYD+v61ftmeWwYPtLQrtwp7ckY/lVCVpGQsdyFezAdOvaudavVEb6sS1uhdoTGDleoI5H+NaNjO8EgPOCMMMVTsZA5cP5KbV4YEAsCT1x9avpGjHzAFYgAbsg4HX+v1rOtFR0toVGk5PQ57VVEdwI9gDqSd2eoPT29eaqxchxk5xxW3qUNttkllYGQ843Z/IelZTSwpCQY224w23jcecY9AOv1rspS54obi4uzJ7CBnmlkvYhLAVwhZuh9QBxj/IrN06zkvNSjtIlaUu/QdwM/ritGyjYadNdiRghQqUwcE9AaraRNLA9y9sWVxCUyvU7iAcfUZFaQbuwS11LVxeTHUJGgkaMFPKJQ9B6A+lTWc32S3dVnlghP3wjkbiPXHWs5p1jj3CMg5wqn+tSWNhNeuJrt9kHcdyP85pS2u3ZAm7lw65M5aOwibO0AMTls9NxPpVGeOeC4EMwYSuMl8Y3cdj6f1raSOCwjkgiRdrMpV+/r+PvUV4DLciUusQUBUU8447jrnrURqpuy2ByvoyrayXEPlbosW0RBKPjcTnsfXuD07VNfMvnM0uWhdSI35PA7HPOO1bC+R/YtuoSJ7iR2DuQRhVwB7epz+FVbW4jsfs8rwW07bWUxOhcMSMbsHj6dqbldlW6EFnHNJfxMLVnBJKMqEgZHbt9KC0U32tZHZ5oyHXdlSMZBA/wrU0jVrrRYLj7D8lvcfLHuG4AnggDoMdRWPc3CtOHZVaX/Zzjj2P0rPlvK47Jal26t7eexs7qPclzkiZXIIIA4I7/hzT7JHjMZljZbeZiFbbwx44B6elbWjafD4fW11bxNp8t1NOnmafpWMefj/lpJ6Rgg8dT9M1h+LdV1vXbpbvVJEcnHl28OFSJDyAoHAAHT0689aTp30bJavqye6vJdLtd5nJR22qB/M47c+3NR6dNY6jPPba/wDaZHlQ/Zp0YHyXHOCp4K/rTtPs5dStJrlTG1tHkOjt8y8enXGP89axViltbp4Rh4+WXPt29MdOn0qI04JvuDXLqa9peWGhNdvqDJcXPkvFbxIcxuzDCs464GScdeMGp0j023s4D/aNsLm0SPzWg+cTxygE89CY24Pscjoa565jF5ZtNdQBXc5hZFwSBx16EcGq9vKdPurVgjk7du1hxhunHcdfauhJONupUZ2VnsJqlpDb3kkUkjvGXDB1YHKEZzx3yar21jLNJ5TFUbOMucDPpn1x+NdZ4p+wPY2ktvZKkFugh3MQHVgMkHHUZ3YOAccdq1dT8HX+k+CLC6EiC5vZA88ZO4wqVBQY7Ng89cA4NCrJRV+ug3Tuc/q2n2+lWy6dKyxTYEk7cOzZXIxjp16ZH510HhbVdW1Pw0PDqX8ttoschne1i4efP3iz9QBgcDA7nnmuKitr2GZ1FuZpWOGSSIluPUdcV0moapqQmsbiWGzQpCFSK3iMAjRexUcZ9etRO6jyp6satE73XR4duNAjtdO0SC1EPllj5e4DAYO3mfeGfkOD1wT655a8t/LjjWOSR7VjiL94WRcjnAPHb8c06z8UXJ0+5tzalILwIk5iAlJCtu27c5Xk+hJ+lZN8bS3uglndGWwwJRjOVcjBDLjKnse31xXHGFVPmk+nqacvPaVy3DpsllDDPqEl3afbG/0eJQP3sWT87dsAgDHeuvtPEt1o8uk297c/aNOs5d6QKpVdjja469CC3GcZPQVh6LeeHp7B5/E+oXSraov2aKFSZZAWOVXPAHvkAE81a1LX7LxVALDSdKeAJl0lK5cKq45IPTAGccZ5qajk/ecX57W/zFO0fhO2+Omj3uh22i6loF5LHoKxJBbpFKwEB2nGOcEMvfqTnPUVwGuyTeLfDd8+orHBqEb25jIXAZY4iu4dhnIyOP6VDrWsa5PoGnafqN/cPp0Cbba3wAqMpOCT1bA6ZzgcCu/+H+gxeLdJ1uaG3ezWHZb26M5wH8tS27jkbmJH1xWsLq0ofMVO7b1+88a8L3jWt4LPUow7wHO091z2P8vavQ9Ujgv9Csndbaa4guWghmaT940ewFVYjnAzgHmovFPg6RDcQ3pjtNTsE3pPsyJsDPykcEEEccetcLp3iEWN5cWGs20bJnaJI2OYwe6kcEdDVyoupJ1IOzsaKXKkpGzZaQ9/4gawE0mnxmJ5Y3ZMksOinsT/AJ74qNfEWm6N5JbTkub2BiGLsRHM2ThmBPBHGBgZz+NaF/qt1H4aM9pcKJy2wkAHzFHUEfgD655rnvDXiC10yy1MX1il7JeJsRZMHYcklix6c4IHJ+ncw3vw5pR1WgqkIQklH1uaHgsan4w8c2wSQwxI5nmeFQuxAxJBI5yScDvzXv15bMt5bnB2hJDj8q5z4R+JtK1mwmt9O0yGwntVBe3hIGR/ezjkfiTn868/+Jfi3xG+smaSDUdHsFQpDGyGMkZHzE9ycD6dK6G+wRlyK+4z4t6w0uqtp7jNpAACh5DswB3frx6VwTw6SuliWMzG45zG5yq4PTPX9aueK/EVtrGk2buZH1OPPnSFAobJJ7cH8hWx4L8Cp4m0z7c101uquUI8vduOOo/MVa0Wpi05y93U6n4ZatHfaN9jjhSFrY/cjUgBSe5PU5z6+tbvimPzdBuoRnzJgsUfJB3MwA9+CfyzWT4dsbTStevtL0y4ZZoFRpI5cETAjOR3BB+vWrvieW5N3p1npyLLeb/tG1jhY1AIV3I/hycgdSRgUk9dDpV+WzOA8QXl40J0q+xLc2CkIygZOD1LDkgL0+vPc1zmm2E+pvIioBPGv3jk7jkn8fSvXX0eO3t9PikjF7qBd2kuXGCxYEOTjkjkAD6AYrF0vS9V8M3dzLbaXJfxBQsEhwNq57gc57VaZjODvqc74f0SG10LUNQ1qIB2jKW0D8OznowHUDP9arfDXRpNS8ViCaMvbQozzFlOASMAH3yema1fHms/bpbGa2gnW6UMtzBOMbAOQB2xncfX17V23wphtn0Br238wSTuVlDcDcuRn3470XJSTkl2NW68OW9lBdX+n+d9tS12KqEDzGTJU49e1eCa9rV5r2qPe6g4e8ZFUOqhfujj6H39a+nlz1B6V4f8R/CMmk65HfWEReyvbhdoXnypGOSpHYE9PxFNaFVU7aHbeLLqx1L4aJrF7axXM/2RGjZ15DsAvfnGc1T+Emn2lp4fF4VhbznMkU5AyoIAZCexBB+o/Gtzx3pq/wDCB6naWUAQLGHSKNOp3g4AHfr+NXfBGjvpfhHT7G6jCzLFmVDg/MxJIPY9aY7XkZ/iTxdBpmmPeaYkOqLGwWXyJ1PlZzgtjJAyK881Xx1J4msxp0+nC3leRTFPDKzeW3qV6ke2a9XuPCOmTy+fbwLZ3oBAuLcBW57MOjr6g5BFLo3hfTrMrcNpdnDfxsQZYUwGPI3KD90EduxyPelfUTjJ9TlvBXgxfD2qJdXV0l3eyo+GVNqoMryM8k4PPT0Fdbq1u1zbeWIY548gtGzFCcH+Fu38jTbIkanLA4O+2jKhv9lmBU/lx+FaYWiyasy0uXYx7S801FWEiO2kiPEUyhGUnjI7Ee4yDXLQyPD4hWDWvMRFbanlnaigk4I9V5/ziuo8UW1nc2iQXFyILk8wFVLsDz/DyceteaeJNSvtKGlw6q5mR2YJCyjesY43BuuM9BzXFWg5y5ElZf1ZhJtLmTPUNS8O2l3bIsMSQzxcxOBjn0Pt6/nWzpkSQ2MEUSlUjQIAe2PX3yK8xs/Hl7a2LxNbmTjbBPLuJODjLHoxwenB9a7XwFrF5renSy31usbxtgSINokz3weh/HFbwlTU9FqyOZN2OlEaupVlDKeoIzxWF4w07TbfRZNQnjtYWtSGAdQqzAn/AFZxzkjgdwRnpmuL+Jvi+90/XorTSLiWE2a7ptuMOzDOOeCMY9sk1l+J/Er+KfBECxyu09jKHuo2YBiDkB8D7y5PXjHf1oqVIu6sT7W17dC1arbXUclxaStBb7pJYJt2DA6YcZzzuGQfQ9K6nS9bPizRJpby9aK4WJll0+3nCcqM7mBGSrHpzgD3rzmz0/VovCnnqofSXlaXep3FHxt+YDlQQAOmO/FdZpGnabq/hfSkeBUMFw8U94MgxKTnBdeVPYDgc+lcdOPs7pPfUuk22eemaXS9WudNvZhG0bhWeRs4fHPI688dxUj7nEJhnieMglmR1eVQDjAUcD8zx6Vk+M7aLSfGF9DY3Ru4EkV4ZyQxYYByT0J7E9zWtLBBdaT/AGyqwOjSLC1uSpk3EdcdccdeK2qQjpJK77jpVLNxfQ6LTTcRaBqUdnpD3l15ZzfPEX/cnOS27lSOeOB/OuM+0XCzFIwwUcs4/of84FTXk6W/mLYyTwo+1XhDllJPJ46enNY39pXSscMMZ6bf5UUo6X/MirW6IsLcTOXMpfzFOFdz82PrU9rJEYJba73xh23F1XcR06jNQ/aImmhiuHihlZcyFiAF/Dv9O1at1HaiFYoEE9yU+eUA7Vbpj37YxUTbg1ZbnNzSvdk8EUUdti3VWt3Uqw4YEnqWz/h9Kq3+gW09q11orGzuIhiaANuVs9wp7Hnuf6Vnzfb7AMIHMUvQHqp9j2qmG8QGbMbxq5G0spHTOecdqqjzK7clbzLhO3xGf9m1PS5/tFunHUmIZRh7r6fhWkvib7fNDLdKsVyi+W7clWTH8/aqtxPqkUciS6lbKqDJWNgSPbKjr+tZdtE1/MZryYJCoy0jnJbHYAck13Kmp6zSv3Ke+ht6pqlzq1/NeW6PNckAS3DYARQoAAA4UYA96rTabdSShZr5WLEqTkgA9RkntjPPtV2x1hLSyktbCymlikcuS6gDkdsDOMD1IFV7W41OTZFbxInlncnmHPHpzwR+HShPl8kilZvUmg8N25QyTyzMucZ3YGTUuo6dZWOnI9tAUlEwzISCcd8fp6VUuZ9bdCkoWRQxJ2kDnrniqNxe3jxNBLbPtHzMBnr6/wAvas6cZyd3O424dEb+t+HrzT9RtXst0Ed9FvUAfJyPukdMEY9qo2DmS7uEVibhDkgfUdPaof8AhIJJlSO5jmJiTYnzZ24GOh6U7XtQ05pbSfRGmju4lxJI3y7889vy+lChNpRl9/8AmZtJq6ext3kqpbQsCVnBO5emB/h6f/WrGuryK0IYsckFsddxJ6/X3qKXVYmtDuYea+CSSTjv09ffNZ8tyk8oMduZ3UDBbJAH0HH86KVFr4hXYk15c3bs8KsFPBkY/wBTVdTBDky/vpT09B/jW1a6TfX7j7Q3lRqpZlTBIUdfap9I0hZppWtxmNZAiswGWAPJ/TFbzqRhG4WbVzFkv7uaNhGjiIY+6uBwetPi0vUbh2wE3KoY7pAeD+NdJrEZeMxRK5hxy/boevtTtP1SSS3vJpmE00kSRMCdo2rjgDqTxn2rKFbmjzJWHGN9zipIZBcGGQhHzj5j/X096jXdHI0bjBBwfrXU6vo7XSNIuFulztBP+tA549//ANVcnJkYDA7v8O1dEWpEyXKzSOoSf2W1qxJVW3JyflJ6/TNP0CREZ1fO1+uKoyj/AEcvjq23696ksG8sq2SOf60mvdaDc37HY13eSKT+7jCIPUjmlu/Ngs1uGh4z83OcZ+nvS6ZbGNbSSThpH8w/99Hr+Wa6C6s/t0AhidURyd7EcNknsen61yTqqL1ehUYqSdzlLOGLVpvIYIkjA7GPqO2ev86j0/TVjkmndhhGZEHuDjJqJJZYZzbqEjKMQSqgHjPfrWnp8VxfXRjglYJjL8D5sjPJ7jIHr6+tbybSdthWViuss8VzMAA9u+ABn0/UVqyzQ3dskUVukewgllzxgYwT0qhcWwKmOQ4b6/UcVUis9WjgkaGKRrYHHmdFJ9ie/tWcVGVr7oIu2havbd7l3ZdqIFBZj04HYDr0/Co9CXfdKp2ssgwMgDB9/TvSpMy2PlXCtHKoO4HuDnB9xzWfAHiYK3A9ev8AkVTi3FxQbao6HVJI/OwrozdCsYzgdMccdqit7OdmUtGyxt12n7wPOCM8Cj+zr+OFySvlrhjz0z3wea6nTEsv7Ht8JcS6i/zCKJeMDucngY71yybhG0SYxu+xS1W7nj0ySOBcsi4BA5VfT0/+tXPWkhjRS2WO4MR6nk11NujtfXSuu1o8MwBBwME4/KuV/jIx1fP86mmvdsb8rTuztdc02zk0y0ube5JZwZkTGSOOhPpn8qxLG+e3V2imaOORCrsD0HXr+FSmQRpsUvtVSRhvujPT6VjyLEzyIJl8qQ5I5GD6emK0pNRTT0RCd9Ce6mkiiN7JGGNzlVLDJjXB29ehOSc9elXNDEF5aXk13YG7kUjJEIlUAADDgfMAf7w5z1o1a+F9pipK++VMIoCgcD1IpvgLV/7G1sSTMVtp18qTjpzwfz/StKUn1/pCTtKxJqOieHdQ04XGlwTWc+QCBOH+Y5PAPb3yKW28OeLdM0mS50q/Z7NlLNE7hSV9drcY/GrninVdOa+e5hgij38Axrh5Md29OfxxXP6r4i1LWrcW1zdC10+JNohjPLgfTqf09K0hUlKT7FvlXqcwRJI5cR7Sr52joSPStN7qMrI9zGxLY+ZSMrgYA57VJp9spDAEDcMc/wAIz0z6nvVjT9OnvpLmOyhLmHJduoQDPJ7Z4/zg1bmvuMlfoZ1pLGlyGlIXI43ds/8A661LrT7F9KlklvUW4/5ZxKCd3TrVu98PJkQ3Eextu5XV8sOvXtnj+WK5690280/JUi4t/Ve31HUVEKkJO19Rw0WxmMHgkGe3PXrWpb6s5gaKTDArtBPUf/WrNEgl4BH0P9KDbnPyn657Vu0nuJNrY29MvDsikVVb+BwT/L8qnulMFyktv90/Mo/Hlfp1rKsgkiS2/RpF4PuP/r1atXl8tEncs/T3HtWUkk+YblpqdPItrNYTqU3uy5Eh4249B39PfNc8I83CwEjO3c2McKP61egeMWV3M8qqYkGEPJI9q52yadiZY1Z2b5eOc/8A1sYrOlTshJLS53EMgbRPIZV2xSmVZMAbhjlfYjris3TIbjxbq2n6THmOwtFzIV7LnLH/AHjkD8qpz3E8mn/ZygR2PzyDqwA79s9iepA5rp/htrGlaLby2t0rxXEz72uGAIYDovqB/WrglEuLTdi18QLiS2jtNBtJS0TFSiYwUHRVJ7gdfpXaQwQWOn2NjFMqSJGBDk/eKjrj055HvXnlnqllP48l1LUpVjtYQzJuycnG0DA68Z4pmta7p7aj5mnXErwIAYxtP7sg5wvtnn9KU3JL3Vc1crao9Lhn86POCrKdrL12kf54Pcc1heKtdi0iKILMjXTnCwDkuPU+g/yK5nUvGOox27XsGnG1SRRGJZefMPOCAe/6YrmTbyxw3N5eTObtlJcntntzRZW1B1LbGRbuZtUnmbHf8MntVhb3y5WSIGTdwUXnP1qvp8ZazndoyUeTBbtge/40oZFk2qAoPTA6VtozBMm3MzcjB6fQ1oiNEsdy7ATgu5OPWorW0BdmkkULsLDnqw7fn7U6CNVkVJ8sq5KA8AE96wW+pe2jJoIpr6JIQpis05ZsYaTJ/Tj/AOtWR4jjS3m8iIBVXHA+n/166aK4xHwSSa5jxDg3ZOO3NaJaoU1oY8LlJlI6g/nWxIDGxU9VJBrJt1H2iPPTcPyzXUajbo8xlUna3IXHJA7+1FV2aMbXVxbZnS2DAAlR0zj8verV4P3QS3uG8xh5mRzjHYn8TUIVo4ldoyMgHGOQPemC5KIxVFVvXpxXLypu44tJ2Zj61cPJOynovHTFULLicyN91Bmi8kMkrMTyTU1qhNo4AX5jkknsK7kuWNkVe8gmu2kZiyAJ2A4xUum3Dw3AMZHOD+XOKotuwM9O3NLCrg7hnGcfWm4pqwXdzqYWibUPOljDrKfnHQHPHPt+v0pmuaDbF9+nHymOD5LtkfUHriqdrKzK6kA4xznrnNW4zI+3yx84GMknj8q5JOUJXTIbexkvoVyhILxZBx1/SoZNKuUbaCjvnG1TzXQmNiALiZndnGQvAx/nPpV0gNxDGEQcDaMf5PvT+sTXmXCCkcpa2txC0yTROnyH7wqaxZmsdpyrKcqce/8A+utrVCIVMecl8ZJ9Pp/KsdZAJAFPyj2rWFRzjzMpx5SfcScsSR9ep96s2kyxsXkXf1GD3J45rPdsMQPqaNMv0+1skrEIxAUjoD/hUSi7OwpOy0BlKTbTnAOP8/hirMm8EgkAZ6ZrTvLRY7iQz4BDAK2OGPXP9KqTRqqMyoWIIB56DHX/AD0rPm5rGVrlRkd42cKxVeScZwPf0qazDMGlBJ2EDrjGeOneqsksmTtyBjHB6jP60q3DwDC45GDx2q7dDSLSRNqDER5J7Z61PZrKdOgCoiKxY7yck8k9OntWXezb1GM5PvWvbxlo4reV2CptwcdMentyaubshtjAiAuFQvKMguxzz7elEbKtqI2+QliWzx8vpTEmCXbhvQ546nNS5ZXeSXAJ6j0HpWdm3qFrsbtZiJIn2sDwynaR9DSvbr8rS3Mrd23McD+maFdpXGFkWMj5cYBPX8MfrTzagv8AMrPLkEsx3Ef5FHNy6MW25nvbec3mDekZbueufQelQXCqJjFZhskYdyegPatS/uE2La24BuHOZH/uAdqqbEhXyY+SOST6/wCNVGbtdoWtyppsULSSLdMRtYLzkY688c1euLO3bBt0k+bhfm+8c9AOpOapBSL/AB1LjOT/AJ9q1dNuBZ3DXAAMmCIs9EyOT7n/AOvTnNp3QaJ6lC6sDbkI8jbwoLdxn2qCOK5ZwI8OemM4/nWjdyec5JD5blmY5JP+Fa2jW8KzwhmPlyMAWHGB659ah1mkCd5abHNzpLAc3Fuy4PXHH59KRpVlKgkn05z/ADrtvFtvFZSRpbw4BXc+fyA/ma5JgjESLEo+baGAxuPr9P51pCbe6NHGxPoq27ah/pas8Sru8scbyCOD7ZrsZ2W40m4MeWuZVDPhcbADwo9uw9+a4fTmZr4hTghTnn3rbgvTEjRNjaxwW5/pWFaclKyJ57aMjjO6VSqIPLHPGc54wQeverelrIsgaKISBOCoUdPQj9M1VtZEafCsCWbJOMDjPH5D8KludbtdO3fYtxdx827t7e/9azipuXKgptpmlY6dYmO7lnle2eOThg+3aMA4x071y+o6gsV/cvBNJcyysFUsBk44H1NVrzUL3VC8hOIupboox2HYn9a7Xwr4et4NNW4Ub7uVAzSN1TI6DP8A+uup2gryLvzfCcbJp072n2m8kJklbYkSnJJ963IIbLTLWC4JAEZAKoPmc9+Tz1z+FQarCttrSRRMu5CNxXnDHnkdM+o61W16R2SBCqcDLbff1HY9ahtytcyldalzWdYXUvJwD5CfMVXuSelQWureXNloDsAxiM8qD+maxY/vAgspAxx/Kp2ikR/MYgA9qHFN6k8zbua0t9EsJEAaa4lzhQMYXpz6e9ZVzbTIFEgG4gnaucDmrFpKElRQWVWGG2nBI61oWBS4uzGtuZJGGE46jPeov7PVDb5iK2m3adb2cELRQp8zKx/1sh/iPrx09qzTYNDMQTiN84X09/p3zWxNbGzcxSBkZCSFbqAeOtQXc6LaOAmZSf8AWE/dH9DShUu2l1FuEOk2lu9rJPKSS6mQHgKD/Oo9Z+yw3E19elZriZiYbcHiNc8Fvfpx+J9KxbrUJPLMfmM68dfX2pLaweULJcZAYEoOecevpXTGLSvJmilZWSKdzcSXUhY5OemBTVhlI5UKPetIYAIAA6dsVZiiRogdjGTPJ7H/AOv+FP2ltjK92ZsVkqjM7sfTb0/OtzT4bZY1ESKrqCT3yM/5FMs7WScvJHtAVsB26ZxU0lrZNGzGWVrlQeSu0Z9sdqznLm0ZaWhZUSLHPOGO0/uk+rZzj22gj8aqTRRz585VYHjLDHP8xUAibYnmzSuCD8pc8HOO30pFtbdpNzZ9ME5qLJdR25loVZtLQSYjlRPTLZH+NV5LW4gchWVyB/yzbPA74HNbNxDaLAdyIik4BAyx+nvVdAqbVeMQQYxkj5mz/e7n6VtCba1BIzYtQlQ4lw49GHvU8d5CzBizo4OV6da0ZI7f+FfOVcDptU5+vJH4VDPpEbyEBVjyP+WecD2pOcN3oLzNi4eKx2tJidnJCJGR834dhnqarpZtJMW2oHmO4ovIXH61LbSxMrxX0bWs5Bw9xxGD2+YcjnjkY9adYK9vcFpymMEKwYMD7hhwRXNJOEW0aQS5rWMx5GMjNNnCuVAznGDj/A1G8hdkViCsYPI4OOcj8qk1KRIri68tleN8SKQeATwf5A1TjYP91WIHVtuAa2itFIiTs9DTusxLFc6Z+7hlPlyxkAqWHQEHp39KhkjAjEqqIkbhvKbgH0IPKn9KiVHeF0jwSwBGOoI7+1S3GZIlnxtZxh19SP65ovoRcrNAM4ywH0pptzyVzj6VNDM0QXILoTnH905rRE25FcFSOqnAHandoFG+qMQLIjBkByCMEHPIq/a+VJaziWA7gMlw5DZ/HjH5fUVegezncLdOkbgcMQRn8RV69jTTrRLm0MTozBD5h3deDgdT+Pak5FRi9znYYGm5VcKOC5ztH40kyxk+XA5mYcZVeB+dJNcvduwYsYlY454+ijoBUkkirATgKqg7RkflinsCiixoVxLOrQSSS/ZoslIw3yZ75H5f4VplQcls47n/AD3rP8NwsLaJcLmdm5JA6cDJ7dKuSyhX+YjA4HOcmuavrPQUjK1GXzLkhR8qDaPan2kLMofHyjrUzW8Tq0mWyefx9qFmECwjavlNDGWOM4YqDn/61XdtaGnOktCQsDEygkNkEe+Mj+tWraEy20sn/LVB8qAE7yfT+ZpIbfzQCwXawyDjGR9RUyRlXQRSgEcDn9awckjFeZmWjC686Kcb5kXepYZJA6j69D64zRbSNp2oRzENFb3Q8t/MU4VvcfX9KsSy+XdF4lAYdR78559KZf2jXVixSTbEfmw56MO3oBW6qRdk1ZMpM29Qs5odU+yXcZVFxJJ5BDYTGSeeQcc9Dmnx3qLbo8TwxgOVUNKu5ccjcOuffA5rGGsC60m3uL15pp4v3G0uTtKjg89sdvUVGtwk9qjvHl26rjv+P51nOhok0W7LY19b1N7Kwa3s2heZ/wB2SArgLg5IPTPTB6jNZ+lNBPCFvnZZYsFJ0+8mP1/z6VlvDNM6pb5k5yq5Bzz2z0NSwlrN4pJFV45c7eQu7HUex7c4rSNJRhyxFr8jf1yzmglhuLp1JchBOON2P7yjjOO/SsvWY2tNSPmzTSRYAUEnCjHbNbuv3llPYW0VoQ8LMZhHggwscgo2Tn09vTisO/ju5IzLAsk1o4HmJnKqwGOfQ4GQePxoppv4ipJK6Lzbba3ZmkLow+Ugc8j/AArHecMUiXd5RPzDHrxn685zziolnZrZBIzvGuQBxx7ZH+cUojUrneVJ/vYHH41MKbhe5knJbDrjzLSQKG+Tggj+L/69SRTtDIJ4DtJ6kcEf/W//AFUxMGFklAljUErhgNv9cVDasXhPGPX8+n6VVtPeLhd6GwNSkmn3XZEiFPLK47ev171f1aeNlaVRvgaIK2O524/L+tc4m4MAe3T6VYso5biDUfmbbHsAGTjkn/AVHso7x0Ju23cpiEI8cqb3jLZQPxtII4PoPfiuv1K3NxYpdJhZCuTggYwP8n6Vztq22FCFUuXfOSORnvn61p2V9ax6XqMAdYhnMUZOckryB7ZFaz97QrTYo4eRJmXD+V9/B6A8Z+lRSIk0eSpJAG4Z6dsj2rLsI5ppCoDA8HOcY9sn/wDVVu1uQ+SpG5Dhlzn2/KpdPl2ZDVtTUn1CEWakWoEy4VnDfwj2/L1rEvpdPmtZXjNz9pK5PCiPOR+OPyq7wc4OVP8AL0NZV5bD7TFa2qkGTBOT1yT+QxV0bbFRlfRmvYXTQ6dpFvEqbpwxZz1GJCP6VLqDyM0kACfZnYssgPOTnt1qS/jtYbW2t7RCZIl27s5yPX1ByTWXdsdqwxqTMx5I7Y54oXK5XSKv0HWOoSxyp5km4K2A7DJUZ/Mit6efymYTLlsZBTo/HauZRB5OCB16+narcbTSQIAzMIx8u5ugHOPTrUVqKk7olxZow36XRi82Ikqdo2n7pJ796nnh3xCQxkoxKgjj5gM4/I1kRNH9qD+YAo/1nGcj6etXbi//ANGCqpAZso+ejf8A6hUyi204rYe+po21gtvZJcywxJcIpZAerH1P55xUbrDbaKiXb7riZ2uG78Hj6Z4zTJr9fscDyB2lII5GPwqnc200yC4nZWAUDarA7cccgfhV8r3kU1bUqQpbzakqRgmIhs8dOO1X2t2uQ83mE3JXlWPdeMA/gPwNV9NiKXDSkDao2jjqT/8AWqzc4hk3nO05IBz94DuPp+tS5+/ZEqWuhVsovK3xXCljJ7/dwTwPWqkkCpIykb+cqM9O/X/JrYjlgntt8YJGc+6/T/P51RhSNNwSRQWbIVgeT9acJtt33C9xuGKncocYwdvBUew9P1ptnfPav5cuJITg8c4PqPf2qwZ3KgAQZ6ZUBhUZgiZlkuJFUElcKu3HXn6VoOz3RrK0X2KT7OpLPIp3Z5Ax93H61K65tkEqfw4GeMc9D7dawofOFuTGykp1PTgZ49zitC01OO5SRXgdBEu5nQZAGcZI6gciuWpSd7ocXYu2mmRJayTqfMjT/ln1IGfXrj9aVUsbiMj7OIyOMKMEcdaiikX70EoII6g9R9elZ89vPazm7tyzxj74J+6v+GenpUJOTs3qJy7aFq4s41maIMVYKGy4yrA8ceh9qp3Gm5VTJGrBPlIVipA9f8ik1GU3YtpLYldoYfMMY/z+VXdKuCzpDcE+ZjIbNW5ThFSv6oltmTcTFbNoY1YRAhd30z+frVezdYIZsAb22n8B/wDrrZ8QlEhRgo5Y5XpjHp2xzWbpKQ7opZBu3uY08wHAIA5x+Nb0pKUOaxemliVLORws8qBppG/dpgnHU5I7n0H41caJjZ5kIDBgThvvE9vrwRn3xVyVXkKMshfk5YAYwOpx0o1GzLO4jysI9MemMVm6qurlW7ED3Md3E4bbE6MSOM9B60kCW8jRwmUrKBnJ5xk+31+tZ1xEyBo2h2yAYZ+g/wD1YpY7xV8tioZg25Vxgcc5PtSdP+Uzi0ndo37hJ/3NoybfsyuH3gr1Oep56Y45qj5MMQkeaMuVXMaMeCfQgck45xkZqlqN3cahM9zJcF7hmLPyep+lXoPEASUmWwWX5AIw/G18D5vfkc+o44qmpNJIttNlHy55yEZ2iQkkDtz7dhXSeErS0sJxq13ai5hs3BEAbHmyHO1T6LwWPsMVhhrq4mV0eIs7Z65JJ5+mMdqeJpbcPGWk2OfmGcZ9/Ss5yk9LkKXK9Ttdb1uDXjNea0phvnAYTQsDtxkBQP7uDjHPHPWs4aVNG1ndTXlo0BAXIlBMv0A6Y9ODXO2s/PJV1z/Geg9B3zW5pcVrcpIkjtbTMcxRohKsRjlucA9+h9PphKTgnc0c+ZXf+RPq9ounsbi0iWJCuZvLA3bT3x6DuODisbxQs+mXActATNArx+ScqynHzeoBGDj1/Xbubxoo0VpYZ44+AwzuHqhHTHf6Vha3ZW9vpSajHBsiW4CRkycMxHZT26H07UsJJvSevn3DnuuVliHULVfBhmmsgb9Z3trWRSANpTJLA85yRj0HvzXG6he3F3PCrESTKwG/1wNqgDsODirEMrw2e9gfs7uRknILcAkehAI5qvcW08N1HLbxuJNwKrjccg5x7jpg969KEFFilK6R63pkNhpK3N3dWKahM0W2CBmJ3TEYVlXoQpyenauctvE2qXCyxXpeVmLMHuV3Ase+3+8eOeeapR32p3lvBcWIMa28u0uWAYSY6YPOAO/T1rVsLFtT0y0u5J4d6uluY1iY/Mdxy8g+VQefU4FcUabSfPZ/ob1Ly0hojnEu7lr8sFIuIW8wtxyuenuP1rQuNWtrvTWguIpUmEhdJWQgAHjbxnI/GutXR9Fi8gW+qWF1cXdqBLD5qlo5M5wp7EDB59xVPQtKWa2nSaQPbyk7GT+Ej+Ie+e1TWrQhZyWw6dF1Hy9TnmewgjsJtMvsXRykiDO7cB976dAB/wDXrttMtPC9t4RtlbxFD/aAk/fwEgMzE5JPc/y4rznXpXl1e6lt2WH7DgKDgFmBxj3/AC716B8L/H+nWt0jalp63DIhjmtQilGXORIoP8QPNaTpc6TvoZ6RdmSvonhLVNclSbUbu200oPs8/wBmZgGIAJOOAm4E5x+XWtDWNEvPDn7v4eQzatZ2zKL7ULdfNdpCNwUKv8GMZAyMnB5rqItU8Eq+r63b239n6orPcwJJErIGVRtIC8DJbGOffHJq1+z94qiht7rTtTScahe3RnR1QCMhsDgdgDntihL7PQtu2q3Od8FfD/V/FN9aNrq/YbSGJZrhTlZZAxbBCdiRwT2A7mu5+Ct/bXlx4vhsI/KtU1R5IB2aMjywR3IzHW98VNXl8Lwx6xaqrTTW8toyE46jcj/8BOc+zGvIvgvqseh3llBeZmsru3MEsoOwoS28Mc9FHz85zg5pOUIe71EmrX7nXfGm3WMq5uGt0uNvnGNN8juit5agdArZIJ6fLk5r518X2yT3IH7sHyVkBXGV47kcE8fjXqnxF8Ytrmvw6Fpl5Hf6dEShvyAmQ2MB2PBAI68Z6+9eW32k+Zepawx7L2aYW/l5x8xOP6VpTlyzsOceaOhkWs88UFvF5jsu7cqe54NdBBY/2F4ogTWtJFzbXEe9ra4BQlGXIYEcg98556etWdasp/DerxW80ET3aYKQ7w5AHZ8dO+RwcVteJdd/4SJrSfUN76qo2N2SNSfuIvRVHbOSTkmqlV5U7IxtZPujCt9YuNBvbS5smZY1kEhijJUfKQQvf8z2rtPHfjvw5420iIXFhqNtfQAtDE2Nockcll+8uAeODmuQuLR5dMkurVnd0JMyLH/qkJ4bJ7Zx2P17VSs4P7TjUR738s5lES/eX046cZyamjblV9whzJWO4bwLp118OYdUjtZXvZoFnEgb7uDypUdsd+tJ4c1k6B4ZtLWwS3kluDJO0kjYVSCVKj1I2jniu40nWtN1Tw3dStLb2kdlbMiWLMESHCkBueWHYH1964Hwdo89zpMOnT7IrF7g3EN9NCd2SoykQIwM4OScg9getWm3udFrW5TPtNRS08Y6t4h1MoiRgpFCzENOxAAC99v+10Art9MurKO2in+2R3l1euC8sZz5rkYwPRR0A4AA+tcZ4v07RrbVGgjupp4JkINwT5kiOMYz/eHUEcY7VlQaBqvh+SOe4jRYp13RskgJ49uo68+h71XQlScXsewW6MmEllDy8k846k9B2H/6+taECHHIrhY/FumJrenW08n2SzKF2uGQqs0gGAMnnaM5z0z7CvRrSPzink4ffgrtP3ge4I6jpVxLck9jH8Q6Da67pk9pdDaXXCyqo3IfUE9uOR3HFO8J6Kug6DbaerB2jyXcfxMSSTj07Ul54n0PS5fs+o6rDBOCflm+Vjg4yQOg4/Lmti3liuYI5reRJYZBuR0IIYH0PcVa11M7q4wjBoMCyrtkRXXIOGAIyDnv3yBUjLUsfA56ihloidMduaki24wetMkbJNeUeLvHmqaLrVzpl7p1pNFHIHR+f3kR7EHgHHfjmpbByUdWeqTXVvbRTTTzRxRRDMjyMAF4zznjpXJXXxN8Ni4WC1upruVmCAQRNgknH3jgY59a8w8WCfxNBLqOk3Uz6RDtMltcTHdDIw6YPUdupI7YrCOhSafHDLJc25uZGGy3jfe6jghiRwOT0znNL1M5VJX91aH0RCA2sXcnG4RRoeOnLnn86tTyeTbTTAA+WjNj1wCaz9Fy73LEHeGjRj/eIjX/ABqr4n8Vad4dto3vllkSbci+Wm5SR1XPQnHbOKV2auxw/hG7bUvEFxNeXM2HRmcpksxbjaMc4Gc49KwfiJpurav4uuriOwu/sVtHGgkZDhUA6n0JJPv613fgm98L2mm3N7pt3Lcy3DhRaBMTknOIwmct356Y59TXY22gNqmybxCiOgO6LT15hiz/AHsfffHUn5Qeg71nTi4Iy5eaFmzwR7qdgftEjNGvCAsTsz39BkjJ45OM11Xh24RdOuxJqM9jdKuYERmQzPjoOx/X+tb3xQ8CrbaXfaxpLBeU8y2WMBUj6EjH4GubtPFWoX/hddJuFWaONdjzToDhQQVKnrux8uevQ+tQ4Ne9Lp2Kc1FWKFraza7rK27XCtqFySA102PMbH3SQOD6ce1Z19o954b1ia0uU8q4XkHcDuQjoccEdeKhsJi15iOQmRWAJH3o2B4P0z3qTV7qe51Wa41GWSa4ZgHLtyxHH5VjGSjo1qcrs9epZn1bULdormylaG4hztaEAiSMn5kkU8Ec5wcgj3osr66tZjJGYVBYM0ZjJRiPVQ2CPw6fhWdJe3JmWCKOFEJ2uoYhhgngj9PenyfadtwlvIqy8hwCdwB9+2eePT2q78qs0jeL5U5MueKra71SG1Bh0pHZm8qO0XbKB1OVBwB6dT34zWRYyQ6bJFFqse62EoMhiGJQO6gnkdAcfjTLUqrWxZ9hbKu68uvvjrn/ABpJ4II7/ZGNznLOrrubgZyc9elVGSSsZOXM+c1PEvijTrieG20/T2Rtqx2+B5aIh+8WHJZjzk8evNYsKJ5hkdogUOQNw5x3zWfpEUD6ys16WMUY3N3PPRfT+nStiWO2lchdu3g/NGM8k9PUe1VNRhaKJnJTd2RXDl5ALgK/XCjBAz/n61Ytb3gQkr8qg4x7+npVa0toZDsCqjqGyxwAAMkHPbiqdvchLmd40MgKFWz0xnrnueKTpKSt2FY0heRmeNEuIyxYBoyCRgnnPGPfrVmW8s3tby5CXUUEDBTGI2kUbvuhmwAM4OOpOPxrGtprnzCxUM2zGMZFXprubUha28xiSxtv3kdnbxFVZz1kcD7z9sn6dOKFTgpe8ioSS6HP6xdy3RikNuUg6QrtwD/Unmuj0rw35dr599EJHYBl3jARSPT1/Pp2p9oy6t4701GjZ7W1ljjZFwSxyNwGe+ePy9M12PxJ1qymvbvTrSJE+ySFLa3tE8ySAFjujkdcLxg4A3YzjNdEpNRUYqxooNpybOH8kAlQ/CHbn6U62t5Jbm3SKJmuS4CbTw2eMfT3qolvqDThY0W2LHgSNySAe3rULm7hlQNevsPLJGNmPUeuK5/ZvuY25XzG+bZoTctelYVjfnzCAAQdpGTweQemelZKRPqmqK2mx7pFXdLKx2RIijG9ieQo7nj064qa10m0nEU9yks0zncFZyePT6VevdsMb2yyIlvMVZ7eM/eKnjd6jPOMkZ5pU6kIOy1Zsp30ZmanZ/brZBHKWYjd5u3AI6Zx2HcDrXMX9kLa8+yxSC4lB2ttXjPoK6yS7jiv/LS4SfaOQgwAO4z6+9V51VJHKBTKB8r468ZB+lb06rg7PYio1exFpOgwrBHd3BjmQSeVJk5CnHHHoOKdqAtYp2jtyqStnKIcggd/QdqLEGPQblGEYZF3uTgNknjBPJ57cevNQTWTJpthcwI2CmWYjjdn+XbNXytyu5DcdNDU1G4+z6bG1oW3PAImUdS2c49cZwfetnwXe2MOhiy1HEF/C+YZx1CtyQe2QeeeoJArm3uVa2Ro8eY67sM2NgHGOe/X8Kos4mhaOa5CkDbHFANxfPdm6AVDg6sOV6IpTlfTY2NZ1Dzp1tZJIVgjdmO0/eJIyAOpGecfgKzLhoUuCbZm5xxtwSRnt16fSpbOC2CIskirtwdsaA85/jPUnHYfhV+YxocCNQq8fIuOPal7sfdRE2hkEjzsWkiCIB8ql8Nn69B+Vc/4jtQrrPGu0H5WHB5HfPpitIF1ZmUsMcjPce4NLfqLrTnLAKy9fwyc/SqpztJER97Q5QysYBGT8oO4D3qWLjYD61HJCVY4pYpSrAOM4Oa635CXmd7O7mZXbGBxtAx0qea6VbHZAxEjkMTyMY//AFCqtvd2t7EwtyN77TtPBBzjH9c1QupPsrskpIbJzn6V5fsG7XNlZpJlTXcNq73BRk85N3pliDz9MjNbGgXVnaRTJqLuqOy48sZPCgYxjPesK9BmVJ5FdVyAu7vj0qxpskVxLdLIg3EhlbOCo5HH5iuyUeanZgmkzY1qzikBu0326lgBHJjeVIzux0HP41fsNXmvrMae5REiX5JCPwwAOPf/AOvWTf8AmXGmtktnG2NiP7vIH1/xrl7DU5rOVhywJ5ycEVlGm5xai9UTJ8svdN/xJo91FaJchDOhJIkTnb9R1xXMRXTKfm5ArsdN1VLx0hid2DE/uicZP8qivdCgvTOIgI5YQHkK9VUnuP4v51dGpKPuVEK17cpe0fxsv2WO0v4I3RUMe8KMsMcA+pz36810drPDp2nRtplwJob23G6THKyIQGU9x8pHHtmvKNQ0u605UkcBoJPuTIcqfx7H261Nomry6ddRyYEkYbJRuQ2Rjn8DWlSgpJ8o1NrRns+uQpOtmtosbTXsCtKxXJVU756gkkL9K4m80+Gx1GKW9kZLZ3JIQfOCD0x9e9b3hazbxIstzHfCBY0WJBkHAH8OM57mtnXfD+nTyW322ae6vIk2eTahU39Tkjop/HntmuPlne5o1KWqOJ8RNZiYRaTM8tkVVt7ElmbvuHrntWI0YY/KwGPrXZpa6NBLLBdFUxEcYJYhznGT1yMeg9K5Z1jJQqMjBD4PQhsZ9ulNxd9DGcXe5XiglJ/djdg/wnP/ANepbm4ZYFjitlM+epzx7n2H51ANlzORASIkOGb1+ntVpZEeJmlOF3AAYz9KtKUdxKLSM+SA7ZJLqUFh6AkuT2Aptnbybw06gAfMUHBAGeprViKrOJpYx93EaYzt68k+vr+VVrt82ExRgA3y478n064qvaNqwculxum30dpeQ3N3ZxzRbdyRt93/AGTjoeea6fR9WuNPsJLOOOB45stOQn+sLe/Xv+VcxqVsDZQ3UAd4YwsMkh6GTG7j2x+tdvp8mjzeGLK0kjVNX8tU3ONpHoSe45xnnHSicuWN0UuYzv8AXTqqh1yBHnGdoJ7+/J/GptPsFCrBMxCu+3zCMY+pqrfR3OlzSW0rwMSBnymJPHY57/pUUE/mzG1naTzpMbNzcHPp7/8A664XCUpfmaQjb3mctr2izQ3zmONtr/MjKPX19DWQXlt5DHcBgRxn/PWvVNahjtIVWXJudoBaQYVAMkAccn39a5PU7aISZlQSRseQcZz6/Wu6hiHL3ZESS5tDm4iFlWRT0PUVouQJC3Zs1VutPVd72MwdQeUbrj+tOW4AtTvyGTAZT2PsK6Jq5EuzKk9wxM5UnY3yn8D/APWrUsYo00ZXkBQtkl89eeB+lYUihTmM5Q9f/r1YM0kyQ26k7QAo9ie9W46WQJl6BpkvEkY7oV6c9a6S8/suPQhJLG5vy5AIfA28f41SihtTaRxRqQyjbvPHPuKlsYoU1S2fUyHsLc72wc7scgY64/8A1Vne71NIxtudv4N8N20OjpLqdrFNc3BEuJYwfLB6L7HufesrxKYotQuAyxQxKdoVVCjFM1HxzdXkrW+gWbO//PQruI98dAPc1htptxeXJm1y6d5Gx8mf0J/w4rKrDmWrsXOzVokGp6guozWFnaySTLAf3avgDcT3PccfXFJ4gspLWwknu7gzXMpx8v3BnnjuTxS+HLaO612+eOIeVECqKOAMnGfyFaHimErY3FtOhRkAeM5zux+vQmiUmpRivmCXutsx7VEh8LhuN75b6ZNY1v8Avb+GP+8wU8VoWl0reG5bYgebFMDn/YPP8/51nWhEd/HIeisG/KtYRcVLvdmbeiOj1IRxxWdiS7EnLk8HAHA9qSVIxJEYyEyTnuPSqdo93cyTXUVpLMFVh5m07UAHcnjp+NT2Uc1xGZJdowRnHQZ/zmspRcUKV3qh8kogmKzEEY49MVj62Q8iOGByNp/CtybTkml2q8u0uI/OlPRj0GPT16Vh31jPbOUuEIXOA4yQfcGrpSi9L6lN3VjKjYq4YHleR7EVv6ZqxRnEiozPg7iOp+tYlzbtCwzyvYjvRAsjthFJI/lW04qS1M9tzsnlDgb0ZCy54HBBrP1VGtbBcMpE4zx6A9PaqmlahJHIsM2dnOMj7p9PpUWs3Rd8KTsAwM/WuaFNxnqNJLUx5D8x9KueXtiVGbaep/HmorKH7TeRxjO0nJ+nWrl7EHuGxxk10uWtgiupTjAZs4O0HFPadmdmQAKPapHiKQ4HrUJVivOAgz+JqgNTSZAXC+WGdiMLnGfr6f4V0sdoiQ4GDMRkbT1J7AemM4rmNELPewpEoLkEDJ4HB5rqlEsFtIJEDEDO7GPmGf6ZxXDiNHoIqGALtlncJFuJz1wF/wAioJrwNxa5aMAEv7Ht9auWUizzPCo3SvGY8/ewG5IHv71g6g62Mf2aOQts4JPrz09uaVKF9GUkrEGoXDSyELkscDHU1LHabdPYhgXLbiPXH/1s1d0bTJPLN3IqtMQNkTcEgnr9eD9BXYeH9HhWRxGbVrnZuMcgLBck/dOcH3461vJ9ENRbZ59NaTC1DupVG+XP19awyGRyp7cGvT9V0+dUhtBbq7OrKoQdSDn88Ac159qtq0MzqwIeMlWGOmKulO+jJkjoLLUTd2UfmJGZFXYZJDxx3A7nFV9xW4nTlgx+X/aH+ODVLw9dRRCaGcDbJgqxGcEf05q/cRBzuiWQYOd3X8x2Hp1rOUVB2RL2VhxhXIDqFJHcY4qjfbI5ApPAAHToasGaRwxkdnI+XJPTHYZ5x1rEu5S08mTyWNOnG71EizGnnXMSxYds5wPbn8K2FuXilKyY+UA9M59vrWPoZ/03qASpA/z9K0mjLmUyx5PSPccYX145zVTSvZjWgxmlTUC8kOzvg9iR096maUzySzSqMLwE7AnPP170kEcYOWJ3ADG5z9OKtLAECGZSEfld38WO/wClZuor7Fc/Yybh5s8s+0dME4FPtpbqSMpEzeWThnPb/E1buYWe9eORBsyMRxkneT7+lSXJZI9pATbkYXoCPSm3ZaAo63H6YttGHIUZzjLDJPvn1/SkEEcVss7MN7DOSeATnt69sUaaIIbKW4uWwqggAdyf84qtZ3fl3C3DxBpM5jDH5UPqQOpqLO9x3tuRX+9p4bhY2EKjy0L9SRzk++SePTAq1JCsNuvnq258beDgE85P9Kr3ztcNlz83Qc8AegHQCtOK+ZYgvlBAyhGbf94D8wOce9VJ3sydG7sh06NJYZ1IXzYyBlu4Jxmr1pcC1VxIFcn7uDjH4Csw4S6lkUqxbA28nPHXt0qR/wByAWUu7fwL2B75rGSV/UFZLQmvbmW+YmVicjB3Z/THSqeoSbREcDIzgYwFAHaprbzp7jy4yEb0K4qO9i2xxo3JQEseuSc9z9KqnK8kmNXbuytpGX1ByAMhCfryKs3EsabgSPesrzxb+YQ2CwxU9pp9xfYeYmGA4wT1P09vetZwSfPJ6A7dRjXckriCzRnduAFGatw6MyMJNQcO3XyweB9f8BWlZiHTTi2iV4yPvZwSffvj2p8cojG1k3NjndUSq6WjoK66j7u2SfR7oKyxhVDRpt4OM9MdO9WP+EhMmk2iW4jhuDEI3lU42Y4zz1fjj0+tU7m8aGxeZiZJ5DtTcBx249ql06OOzhhjjRPtBIzIw6k9/Xrx7dalNcupUZWM6WJl2yRqwVSNpPGSOcknkn3q+saPamTChJOfKUcsc9MnnP5Vo+ItsdoiBo2YZJdP4j6+1ZFuZDpZeM/MqsRxnGKJNyimjRWj8RWvJbe3umhgKkj/AFjgYBb0HoB+tVZnLjA5PJ/KqK/Mec9fzrV8P232m+bcpZEQscf5+tXblRzfEyHT4ZricLAjOwGcKM8CtCC6khO+Btm0jJU4/wA9K2rW2s7OwublHKvImNinHBOPr+Fchf3CqSMKqjpGP5n3rNfvXZD5bF+/v1llkuJXMkpAwc4AHpj+tYN5ftMCoJ9qjJnvJCEHyjqegUetS2cSpcDaQeeG9fpXVGEYa9Rtklha+Uyz3A3NnhPT61vpHEzuZZ95xuEZJwSfUjislyQWVuvWtGwBeLAQbyOHbngcYrKcnuKLtoVpbQmZnAC5OSOmM+lPCMY2UfJ259PWrXkjB2ucDkip725imt7eGCBYxFnL5yXyc89scVjzMSRDbsY7dYlY7B2xwKSQIEG4kknjH86roZTJujbIGMr9D69DVq5iXaHUKg6fX/8AVT5bNF8vW5UGZN21SV6f5/KhI2k/1QPGSd2CP/r0kyNCrKVJjHfsfrQLkLGcEdPp+FVa2wRsRQqEnMkrGSYDjj37elWZMSO2WHyfTnPYf41Tjc+eZB2B/CpFjjaMM6nPrz/Kqt9p7gpaD/MHnhsrj7pVfbsO+PerJueSUjK9OXOMn6daZBuC7Ik2K3VjxwP89aHC8EZwpOPf86l2vqPmaGazrN7qEnlvE5IPVj/LtiorSwlnXc0kUBBO4J/Fn1HQfWoNptiYpy/k5wHX7yf/AFqeIkVji+O488IenrWytb3Subm1ZJLZW67gAwfoc/0//VVdYWjjcGV8ew3D6HvVzAWE7plkfOBxj/IqINzx07VLbHypjLC98ly8f+sAIDqemfallEiIgdsg/Pg9s56/zqBo0dwgRcE45HvT3A3sIiwTkBTzwP1pO3Qwb6FrTgjStDIcbvu/Udia0vs6KSpTYjH5gex5rMtYWNos7RnBcqCrd1APTr3FdBpEsWoL5EzL9qUfITxvA7HPfGalys7FQdjJvtMW3tmlWVTExx5bc8n264wKpOZZ4XhgIUSMB5bn7uf7rnp6c9adc7pJn27nUEhTyflBxx7VACy5yOT0GRxTUmJz10RqtYm0sS15byQx4/dkr1+hHB/P61zk1yxjZNwIIx0FXlMilgJZdh6x7uM+vpUtp5Jcq0YRhgmRB1z/ACNOLULvcpJS2EaZrdIYhH8vlocH3Hr+uKsRMklurglWOQak+wrlmaQlepJPI+vqKitJYdzbSJFHUAYP/wCqofLJXiE4NPUswOypvESSbBgI7HGMe3NOvpntI7K1FuHjlhRmJySSVA4A47Y6E8VXEhmlKrhB0HOAOtavhu+W7SW3vELwKN4kUYaA8DcPb1HQ9aWiV7DjbYslPN020hVR+7jcuDkDAJA5+nP4VjGFpIhNA5dRzxzx61o+Ibz+ypZbfYT5xAVx08tjyffj/GqNnKbOd0t5GDROTA0YB4BP3uxB79aUKb5bhKKexpWun2l9pRlsrsJq6Elra4xsmQA5KMOQ3+yc5/SsA3E0q7ogfJztOQcHjuP8mhwJbxppmWIB8goNuDnOAP8AIrRsb5Lu8ubCdYthIMBBOMj+pB/OtYwUVe1ylFWMYullqMyMN0cg2yEjhG9ff0/E1pQALIRMyoUI9+B6Y4xWe6eVq0kcy+XHLlCHHQHIzz0OQDSQLOkn2KYMZk4j4zvUdvrxx+VVUhzomSN6Oa0dnjQIHZid5XgZ6dfxyay5xALVlzK0pdjIuOB0wy/kQR6UkUcjlwUI2jJXoQOnfoactm5Y7CfLGM+ZwQD7VEUoaIFfoO0+NriLy4NyuWUEIN2/JIBAHJ7dOavxWGpWzOgSe3wSr7iUHBwRk9azo5VsZd0DM8ZILsBjBzn5T3+ldQ9/NeaTFO0smSGBbcTnBPBP5VnXlKOsS+W68zDuraL5GtGWNljVWydwcgck57Z5xUEUcqElUG5R90NncPb/ADn61PJPtILHjpkqCBU8MKSxNJ50S4/2gPxrJ1JJe8Y8ze5HZsXDyW4O+NS4TGSSO2PX+lSZjvG3tsQgYO3gZ96r3FyE8z7M0byKuZH5BIJ6D9OagZZ/Ke5iQmNePMXkZ689xx7VXsrq+zL1sWWtSI8DG8E59x7Ve0yJ10u6kUH55FXsOn/66qWtysiKGdGbaD8rBuv+frWhezmGwtoEI6s7fiTjP51mnKLsw5nrc5+djbhnII5JHbnmmxFbqPc2A34/zp1/uuGIyu1QSVJxk+3viqGlyNJeMNwWMgk5P+ea64puF+pLWhcktJIyNudpGRz161Dp0NvHebpdyqyleDwM9z/hWpZxzS3KxrIAhOZI2yRwDyO4PHWnzaatwcRgxyEYBxwT6Z6Z6f4UlPQSTtdFNQ8UrRyL0/zn6VLJbI1rJOHIuijRxj24yfrjIqheWV4b+3in3xcHDHI27Tyf5VtXk1tJBCbeJo5gdvlg7i+O/wD9fpnNKXutNdSopXuVrS9tH0SRp9/2tDjg43D1/wAmqWm20s6T3bZGTtUkZHrxVCc7LmQKcRydvT/JrZWaKOCMxQu8kY9flHX8+uetacvLt1KSuZbSSO7M6gMT8w56g1Kn2qdWgj3GNckJkDv1+nAovJTNdlzjovA7dOKuQzPb3XmWxXJRl6ZHfIOfqapgR2dhcsS3CkMF2nuD39KsPbvZsSwAiIBCk56HGR7cZFWYbrZa+YpBDYwD6/5zWXeXBml/eMXycHHepSdxpJF2zYzO0kj7BglcjIB+lWZTCsPmx7AX++UOQO+B371lpHE6M8jsIQBtUH73v6VHPcGZ9kKKqjsAAAB/L60+W4zXspmuImRFYqrYHvx61beP5CSCQowoxnJ5PHvWfpU5trZ18lsMQyu3G4n0B7elXXuLiTJijh+XoduSCfTPQ1ySpSlUvsjO2o3S4meR59sboyMjoTzn1AHbOD9Km/s2GS2muI5Y42iAYo5xuwe3vg1RVb6ORpWjO3IYnZjPbrUpuPPt3KHByNxJ6DJ6nv2pzU1K/Qe7KV0sSbWKD58nccjBB/nUdo6TSyCVWeCP7nOTnHY9/wDCp42dwYjnBOUwO/t7dqhEs1mjeVlJ2yCQOFz2HbPFbK60K2YjSfu3igX5W5bIIKj/ACa1fDkpia434IICHcOMH/OawIELIHZznlSTn/J+lXrW9FpcJ5ijy2+Rsjntz7VnWg5wcUKErSubMNokQuBExjZhmPH8PPQ+o9vSqvnT2M+VuULyAGRcZTntg8A1anLJMSOVcdQeo9f5VVuo0kTJZQ5GSG44H9a56Mm3aQm7SaM9J/NMjrk7G4Cnpnjoece/vUwcbPMjVtynKh+MjoenOPeq1vaPEXaJh5bjjPapLVW+9GGcrkFsZx7e4rqlGL2GtSvq000rRpIWO1ccnrn/APVWhp6BNLtQ6DYzyNn3yBn9KgaRtjwk9sn/AGhnr9e1W/tzWtrpyiCKaGOMuQ69d0j4GeuOKJK8eWI+W2pq6fGrWaSFwsRLKXPA6npn8KJpYNxit1JzxnPXHHANZIlu7mZpbiUEADJc4UD0XHA+gqWzQTB23vBECVL/AMRHPT0GO57Vxzp2lzNmqqcqtYo6rJLcSmKQnzEwGJGO3AxWt4VtLf7QH1G2SeMKxaOUccDIbHU9emcd+lVRCZLOMqpJDYJI5OTkc960PCWqtZarkIJUkzGUK5G05H8q0c3y8sTOL9+7Ev8ASWL3lyuPOJ3BI0Coq56jtj0FY3OVWVVZ1PHfn39a9N0CxbxDbXEWmSeZqcbbRpzqcsufvI/THTryOma82vkli1R5ZEaFix3xgZKkHnj1+vFRRnNtqQ5KKs0a1rBoiWkssupXMNynym3NuHGenDZxj8M021jfUbNoYUgdkQsVPUD29+h/nWMVN7PKy2rAoG2AZbIAJwexbjOehrNguri2z5TsjsOGBPIPH+INbui5K63CVmagAUjJIJwVyOnuPb3q9YXJWbFxEJMD72TkAVLplwGgVdSjaVSB5ZXHy46AHsMf/XrQi+ypcrPJC+zGdpO04ye/pXNOaT5WjLlV9CheTxtb/uMhd24EKMHPuP0zTbmdb3w/NaXu5hG3mwkH7rdO3tReIY0ZYYzGjDIVh29OevemTf6HZM0RLRXAK7AQSMe3UD34qoWVmu5pTjdmd4aNq9w1nervjkjMSchcE/1PHpnpUV/Le6fPFZXxlU2oJg3DDbTyCD+RpLa0juoUijAEjgv5pHII+n/6zV+4dJUWZITc3KsIP9JU7gFB5A6bffNdj0nfe4a9DR8JX2m28UMmurJdIxlk+zq/l+YzL8pZjxgnGec4556VasnsYfDSwwXdy1zMQ7JH8ir1G0jJDDpzgdaytL1CCyuEubWNTchWSZFjDoqnjOTlfx9OmKu+EfsLPayXkyJAHJcbDIcA8DaOv8j0rCu5JaaFynJJJFvS/CVxrULOt5DblsCNXj3GU5/h2jNVLDVbnTYJTabpmjnZwkg+V0GM5I5zkflXpLf2NNeyaz4Z1+zj1O1iJeyW2aycqOGKqx2s+CeBz+Nectq9rY2txd/ZEl80PDCucbdwxuI7nqRWEeaTcZ6rtZDj7uqexoFodbvL7UpUitpbsBkh3fIGbA2g+nA61zM+nTaJ4kjlktR9nhkyxQ5V1549j1+lSw34WBogiNE0RQnd0OOv1461BcPcah5cYJuTAm1miyUGe7MOv0H4VdGM4SevulznCcVbdHungTwV4N8SSa3NNqMsumQ+TPbStN5LwBgdysDxgEfSs7xNpDeFNee10u6e8syqyx3IIYjPG0MvAI74xnrivGYNKnuYwpmWG2J5ZwyxEgZ5AySe3fmvXtB8GeErjwjbJp2rr/wkKTBTI9q6JIx52EYJAx0bPOPTpVeMZR5b6omMrvQpatNHN4XaWTX2muZZMPDP5k0oUkhwGPCgDB469Otc94q8b2mpeH9B0qw0QWtlpw3mWWRS056EkAdMjuTmvRYPElhoEdxoQsrC+xG1veKDnzAP4xJj5jz0PK9PevIdX0cJeTSWRBh3lV6H3GB64/WsqEoKTvuaSTjG6NjXtM1h/DGn6x/YkUOnPEsAuoZg7NtZuZFHIbJ69O3pXKW7PqGr2gE5iliG8FWKEkHseoNdZa+L9XbwdcaJeNHJpMC7AWQLLGd27aGHfK98nH0rhUL3Fzc3joRu3Sb1XAQZ7Y4xk11xaabMpVLo2NYgurPWnhuYPsEjRLJsyeQRndk8knrnqT+VJYqrR5ildVXk9uD6E9fyrMju1lMbSyrKi5BJ5Y8cDHXFO0q/MwaEDDQ52N3K5P8A9aonGXLdIzUo7s1ZrvzIrgqjttT5i+fmGemPSt/4T+JtO8OX97Lfowt7xVVhAv3QpJxyehPU9qxL+0abw3dXq3a+akiR+Rkq0uc56dQB+efauVS9ls5wJbb92eik8qPY9P0opxlOOg5ycJJpnq3jb4h2mvLbQ3GjCztI5i74YM8o2kL0AGMnJ5PIpmhahL4l0C4P9pXEd9p7IkFupURtEcZbb1JA3EmueN3omo+Cr/ULiZ5tc85YbaNsqYY1UgYA4Ixn6H9df4WjTLa3u49cs4HjkG5PNiLSuNvRCOgzn0JNa2sjWM3zJPY1dT8MJN4WuIDKiavZzvLO8Ue7gdScchduCB0zx1p2l32keMLdpLzUH0+6skWLMpCo6k/eGT1J5Izx0561wU+s6po82r2kV7PFFesQ4ZsyMg6Asec44p3g5bCbxHpSatFHLC0qgRs21SScKGPpnHbnpVWJc1eyNbxh4U1x1hlgJ1WyRSsNxC2dqE55B6DJ9679vFGm6RaWXh/UJbyKaGCKKd44yrMCmOD1A9+Tjp6126G484Nc2Eqqh/dpGyuq47nnJPp6D35rhviRo2l6tIt20l1p2qiPYsj27skqDscd+eDngdcjpQ+W2qF/4Vj4V1WAXlpLeMtwN6SpPu4/4EPwx17VueCfCp8LR3FpFqU13ZyHfHFMoBjYHBIPTGDyOOea5XwP4vTSbiDQdQERsEiZ4L6IMoIGSQQ3JOcjsc8e9Ub/AOKUVk2q3Udqz38zCKzjfhI4l6Fx1zkk49eOBTTQvdWrPXE2u0igjchAIzyMj/CmOduRXA/BebUrvT9Q1PWJJpJNSmMkbyfx7MDIHTHOPTAwK76YZJxSbNIu6uQ7gTkniub8aeCrTxQkcjTNbXkQ2rMBuBXOcFe/1yD+FTeP5JrfwXrMtu2yRbc4b0BPr69a5HwR8S5DFYweKIljjuPkhvk4BKnbiQdjnGT+J45qWEpK/Kzi9V8Kaxpd5qGi20BvLVmRmuQNowBnODxgZ5POAM8Vx+yezkBfc0G7G4dxnsa9i8YXFzq+pXWn6S9y93NctCixsFgCL1aRu/IJwMjA59+d8X+DI9Nm0l7ZzeWrKsFw65AluMk/L/vdOM4xzTjLuZTp9jsvh3c2wtbW0utUlma7JaCBhj5RgfM3XkDgZrW8XDRvEVlNoqo17qAfbbRW5wyuB9/d0VBnBJ4PIFeN63Y614XubeS/hEUinMZSTcg45RipyG9RkGvWfgx4g8NR+H7ua5uYbHUQ+67ku5FXcD93Yf7n+yOQeT60rdS1O/usyvB3gDX/AAh4ts9QY211p+1o7mSFsFVK9SrckZHbPFevT3VrZwpNdXMMMLYCySOFVsjoD9ORWOPiH4NZmUa/Z/LwchgD+mD+FcXZ+MtEt31OyvPEZGnQz5tBbBHaVGBbGSpIAJ9vSnZjjZaI7LxpeQy+DdWlsb63JWBmDI6uGA4wQOorwKwvLWK0wQ4wwUqDnIOef0rU1vXdK1HVFttInigsGH7y5vijE5/u4XcD07kfhWJb3Fjpuo6iPOivoFikigkjXKuxxtb24JNZVIc+5E0m0X7+Gy/s2G5K7bxXIaRDhlyOB755zwR2rMuRNHLDMXPmSLuWTPJwSMjHTkEfSqaSmdGmzk9HbduAOT/n8a6PXrzRL/RtBg0d5xf20TRXizDAGTngnjru49KiMGnr0CUVy6bnK3Lv9qKRsQ5YBsHkg+/r71qRQt5ttbIGMG9naONTvwBk7gOvHOe45q2h0rzmjuwJgBz5QBIJ4zk8cYzjNb+heHvEmkWy+JINWtbC2iiKwy3LrJO6sMbFjXJ3HIHt16U43mrtWFGDsYV1d3WoTpKEgLpGLdUgt1Qsin7xA6se/fHFKttaDVLue2Z5xGmA8q4IOADkduSce1Ms1vrO8muYGV5LdlldQ/ILZbg9c4xn0zWE2pXJnvJS+GuX3ucdyc/4isZQk7pMzquz1Ip4RaS3McX+sZ2Y+3JP51dsZUS1SXZJcSNwA3yRrj6fMx6ccCpo9PS5hjluAyNIARJnG73PYDrzUs+lXNvYbhZ3u0MQJhEWAIOCMj3/AE5pqopabsiKbd0ijaw7vPV0BkVxgEZ5H9agWAxSYdSoc/Lxjdgnp61c0a5uYnmYCKaMsu6KRfv4zjnqB68irFzKbyGN9TkMtxCypDIGGAi9sDgD2q1LV6lQipLTcqqBHCW2/KHycenofxNbOuW1z4Z06W1vrSGHUL1Iri1iKjzVLkgFj1A2gnb7jPOBTdBurCy1ywudQjM9pDMskkI6uFOSPf3HpXSfEjWdK8R/EaTX7fM1pLBEsO71UYIYZyDx+Rzmog0m3IqnHS5zXhWx/sxhIhikliZWkLH5iepx3HuauwXM8Muux29w6xag+ZQeQ5PJJ98k81veLdCbw7qunx/abaZ9QtlnAVQiKefkTk7gAOvJP41zul2d1LHcDyHcMxf5OefWuWrUqazvoKSmnyozGbELLkNnqCPSsXUVf7c6kHdgDBHtXcaDYWlxqxhvnEQ2FRtXOWPAOByT7evFZ/xEOn6GIDFK9zqM0OC8o2si5xkqOAfzPrXTRbclFLdB7F8t3sYH9sTafDJbRhEIwHlI3MM/wg/06/0bKb3UzHFaxCGJo97Tt8zFCSPwB9OMiqI8P3q2a3l2UiUBZfJY5YqTwSOx74ODjn0FaOm30iNKI5WjtpisQbgkbc+vQZz711uMYfDuVHRpMiFrb280dpZpulb77H7xPv2A9PzqQRl0iQYEikqR7cmtSSF3khuQERg3l+Z69+fWmXUO29aGfHm7d5ZMfnXJUq3ZM43lZHO3zeWtztxy5TGeTkADj0q9pn7iwZ7t5ltkwq7ScHJ9O4pLq2W61MwQHdIsPn4Azkgfdx64Gaxr6R5pY7XezfxNzwP8/wBa7opTikXdxN2O109XYtGsjnJ3sNwOe+KZcQwsnEStHH8yjGMnH+eKispU8oIjKJl7Nxj8+vSpLc7pGEhO3PTPXmsOSUXq2zF3TIrdY3idySnZQvUe/wDKrPnqwEbkkHqxySfc+9RyQyR4ZgDGSdpH+HrUe0M+x8ZIz+H4dqhq5GqNC5tmhhiUIrs+WHIHBz1z055qrLbOLVxhcbAzc98fr6VLAqxQH7VgZ7k5IHTOTVLV9agERhtACMj5iOh6cflV04ttKKNo2tqYc4U2kXmf6xSV/AdPwqhJjHrV+x0691a+jgt42eWQgAdPxz2Fa03hW6WK5EAhkkthlvKbcGA6kHuckD0rt54xfK3qLlb1sc3bmZTmIMSOuKsjUJlbEwO8f3hzUEMrW84Zcgg9/X8a6Vb6K+hIeKF27qyDsP8APNE5W6XJRmNqK3FuIpMAL900aTNHFPKZXABXA75NRapb28e0wo0THkru4H0qtbWVzPE8luAyqcHBx/Oi0XHsh3OwtWSS1QKwMgY5Ukd8YNY+q6V9ofzoXUTP8xXt19aw5PtMYzIjqccEj096fDqE0WDHM6sOmD0rONFxfNFhdETrLbTFZAySL19j6itvSr+KW8iW9IUEbC+SMnqCfTnj+dZV3fSXQBuGDsOhxz+dU/dTxW3LzLUSfKeq/wBmqlkl3Yot3lWa6tf76ew7njJ9veuD8RafbW9yZ9MLtYyDK7uTGf7p+nTP9aZpPiDUNMKm1nxjoGG4fTntVufXft89wbuKKEXQxIYVwpbOd2OxJ649KzhGcL31KclJalPRNUksZ12sfLY4Zc4yK7qPXCIFjsnIjYZk553Dv6g8da80uI2gnaNsZU/5/Cuj0iRHtknMoR0IR1PPmDsBjnd2GBU1qadpIlNmvcXkTXe0oWLAuzbv8+tY0shupJobd8RM+Wbpz6D2963r+yuNTsG1OZIobe3kEctuoJdQuATIOoOOcelUrCPT45dTeQtcPHEBA8TjYHPGeOoxjHSoiuVPuacvRFeP9zaKFAHy8dup9Kv29m11axrAoLk7sk84HYe3rWQsm5NhPIGP1q7beZDbRXgyITKYC6n7jY6H0BFZuLe243sS3EczRk4zgknaMkA5/IcVQMLeUXKN5ZH3yOOnbtWzfrIthGYYxtljILLIGBwME46qfxxTrnxEZ/CNtpptYi7KsSShhlRkAjHY/lx61UKb7kOCfU3NMmOm+H7dbuOG4tJ28xbWYZD8/fXHIIOM9QfrWQ8L+XJIsQPl5kMKAs0an+LByccj3xT9SuEkv7VrVTCkEapHG3OwDnnPuT2x0rPmkuE1D7XbzS+YPmMgbk+/06e1Q46+89DTn5dDRgulSdbq8jFziIiLBGGbnBY+nPNQrFaCZ1kZp0+XJ+7k+oz054HtVF5JzKGdwsZBO1UCgkn07Go2uEWQJknGM4qJO+kERKq/slu5vrqaOaGeVpIFZR9oc7iMnhGY8Zx0/OoJLJxBLGsQChcklwSScn+mc1YN9LLELY4FsDuYBN3X68Z49607fRLZ9JutQtbswCBM7IyGBb+7tPK9qacm0tmOK5ndnDeSrgFMpISQxJ7+47VY8qK4/d3CHcoAOOv4GruqWn2e4IIODwfr60wpuiWYcbflYAdR612xlzK4+UxrvSZYzI1qTNGnXjnGOfrVSyIVy56rXTGaOIgNjd1Bx0/EVzCr+9lC9BmqTb0Zm1Z6GlHeFTwTyfTrVtZxKQ25iTWGu7BIzgfp71LHMU6MfehxGpHTT6zJa6K1jarFFGziRmiXazYGMHHbNVNJ8S3Ntc78mRSNro3IYY9PXpWZ5oljO4jdiqD4RzszSUFsNyfQ7Twbamey1i4fAUbQcrnrknHofepYreS8kc4KxDhifx49zWH4f1q601ZI4pFMUoG9HGQcf19xWpPqwkiAIcMoOwKRgE9x7/iaxqxk3oN6pHKxny5pUBPIOecZINSafELi8jjfoxIPPoKjUbrp/cEmremKF1CHpndjkcZxW8tiDsjqwg0Y2ESb2bKurDbtyMZBHOP09awLCdoUkCk7SwOc/cYdz7e/arbSlkTeu4ouwH1x2z61S1K3jkaOVWkQOo3iM/xY54x6jNcsGvhNOZ7PoXZbyOSGOFHM4BZmYqRlm9+pP+NT3M7JCIZ4HVQv8Y7e+fxNYKW9yvEdxKFDBQxxxzWhdR6oSzG+SfZhcSLirUNdGTFtlZbNJj5bco2Rn096prD5C+UecHGfXnrUyXUqPtnhZJCc7lOR/nihwJVBkfZjocZz9RVy2syZ2aM6Rtk5bkErkVWuZjJ16ipLt8y7gCAQO3eqqq0sgRRlmIAHqa1gtNSdlY3/AAlZs5nuChKhSgPYZ70uqIiX8hRlZOcEc1f2Cz0826MAu0KScg59R79ayrhcqQc8DAP+NZRfNJyNIqyM8OWZixOMZ/KmE5UDnpz+VSybVDAY74+hFQZPGDx9OtbIk1/DsixatbuRnBIA9cj/AOvXT3UolnXDAQADHT94y9T/ALuSRXFWshhlzlRx344IrV/ttUIcqpmVQq7Vwoxn16n9KwnTbldFK1i/eXU2lSukZhiaUE8DLKDxyex/lWZZ6Z9tLyNOoJUtHu7nn16iqMTm8u/MuhJJEW3Nt5Lc102o3M0sca21k3l5JEajhe23jpxilJOCtHcTd9itby72tbN5AbhlwAOAMnue561s2mkra6zbrLcBmV18zy+gB9T9OfauWvGmm8nba7JI+QyH5iQe49cit/RdcgmlSW4IMo5Zf7xAxUVOZWcRdUzrNRuha37xWsZZIjhjN8wyewzzj8a878VRSS3E90o++xMgHYn8OldNHd3lzatLeyNIqEbOgABPJIHU8j8OKhjt2wZwwQYbrg8DrwayjU5J3bHOd2ecjcvPOKu2+qXMMbJHKQhGCOtbGoaRFNG8qhbeQcYTlWP06g1kx6NdSuFgVZGIzgGu3nhJakNNDPt8mTnb1z09aqSsXZmOMnOQKvS6RewzmKSILJkA5YcZz36VWe0niDGSNlUdTjirjy9BWGWzmOVWH8P8q6nRIY2vJXncfZmQtjPT6D1rkeh61v6JvuICAu4xdecYHX/Gs6y924Jk2qJ5V9GiZC9RnqOvWretSSxyW9tJKj/ZoggKnjB5P45NQa1sR7Qh3eUg7i3THp65zUU6LIrMMnrjNRHVI1W1h4k3xJIAQUIUsBwe/B9aluiskStISAoPft/nNRT3CtAyj7qgf99cD8uKhEgmEcZA2Jy2T94+n09aVrpC3Wg+FmmbYqEhQfLQjgn1PvjpSi3HmbS6ooI3bj+oAoWNlcyMQ6k5OQcGtMwDO1UG3jGwcEVnOdhRSqbk1ybIxLFaJLIfMznyzkqM9Khe3aWQgosSD1ALn8uKd5DpIpjfaeScNg4/pSfaFWQogd3GDnHHPesW3tE0tHd6CLYQBiZDKF7cDGff2p00SrlQFKg4Aonnl2MGBIYd+2PpSStH5YMkiDcAeT3H+TU+/pcl+6/d2Ioj5cjDse/vVW/kMlxITjHf8O9Ot7yG3ndZJQ6DofvY56e4qJirM5A5Y5PHrXRThaXMwVm7on0C1tUkN/ewLOqNhI3+6SD39f5Vp6VHBql28+oXH2bS0kLABgGkJOcD/ZHTNYluVa2KSSMIiT8ijG4+59KVEO392oKjjBH6Vcndu5DlZmteNpYt5vsyjzxO207z9wH5cevH61X8zzJNxA245IHbNUY7eVgzADavLHHqSMfXg8Vo26R26AygnHz89xjoPasZibcnqN3G71U+VGPJt0yoc9D0yffvVuKWOJmMp85iCD14z6HtWRZTq73EzkAyPz14A/ya07aKG4BEMoDDrvz096VR8rsaxSZU1a7zEiZ4TjJx+p7/AFqayui9gkKxoECbSyjrnJyffmsnW2AkIUjbtHToT61p6cqfZISowSq7jn261dXSmiJybKL6bIjgKNyHkEd60NOiEDFUY7m6lcjI5/SlZoVd1iYliB8uenv6Y/Wql7dLaRNtcNKwwMdh61F5TskRbsP1vUkSEW9vGqOAd8m7JP58VzMUUl07EE7ByW9KcgkvbnYpJJ5Lf1NbbRQxW4gX7uMEev411K1Jcq3G2VbaASyRQRrmEDPGfnIpDE1vfgMuNrA/nWxaN5TjGGGD9Bxj8KivVVEMrKC2fToTWPtbysSUokWeQk5CDkk8/rV6F/LRliYH8P0qqsnl2wjKj5zkY56nvVxpFtkAABYjk56U576mmm7I/Ow3z5XPt/WhH82ZUZOCcHHpj0qNZJJCNyr16EZ3UqTyJKikBCgK8Y7+9Ta2xGnQuTHygEVS79AoPT8ahcusyiRQwAz14z7/AEqAE+cxQnjqSc49qlckqHkb92ACOcEj3/SmlYauh9zeSTWxhbbtIxwoGKp29u0iOowX4446CpXXc5VCVPVHznPsRULsoKl12TM2CVzyPftn2qoxYKDe454hBlSVY/xbTn8Dio8y/fwEAP4/hngUu8+YoYhuPujjGO3pUsg+YPKRsGML0/P2p3aEnbYmLxsN0SlQ3By2Sf6mm/MVxHtJOByffuKrSSll/dsAenHb/wCvTN4DBifmI/L2qOV9RPR6l3WLV7UtG5LFl4OBz7j8Ky9RthBcBZQ4Qqu1/qPT+nWtO7eSSznVnLJE6mCT2J6A9x39jWxd6XJ5ZkdC6uAGUnPQDmrjLkRoonJwWd0w3WTC4UDoOv5GlWV0bZJG6SA8hhjFWprZ7KeN7KQozZwhPXHp/gatWlzDeRyQXrtFIOSXPercrq+42mtjOVh5insCM/nS5OScd/61GQBIArBlDYDDjv1qSP5nYEgAk9unvUM5xyXIhC72baudqjnGep/lTd09y4dcQpnh+RyO/qafDDEpO5sP0DOpI/Tkfkae8Emd+PMGR86Nu/lyP0p6Lbc1WiLZtppCys7OzAHJ4AyOwFaHhvR7TUJLu2uGLzpHvidCRkg4IPY9R0qvardLCWuF2NjCqcZGBwfp7+1Jps39jXFrcGUyyq+SEPAQjBBz3xmslzO6C19WR31nFbyHZkRnoCckfWqS3AIZYVHPTf3z+hPtXReNIlhuRJFhknUSA+x/pnNcxc8KRIoycAMp7ehHX+dXTGla9i5ZXDx5D5CDlSR0/wDrVK6jf8gRI364Hr3/AK1m290Y5IzJlkVhn3Hcfz5/nVqKdMsGJUAnYeoIz3pSpa3RSndcsizPZSW5VnUlCMh1ORir9lDsQzW7R7iVEhPBwO/Pbr60mk3C3KNYSlgXGYm9COcD+YrOMs9t9otZQGlVyqEjpnI/rx/+qpcHJWQuVXLuoOt/YWyOgeW3YiJ/9g9voO31xTNPBtxJkRuzevQDng+2eT69KfBai2gSIfMwJDNnKsTzx6Dt15NMcNtlMSl1iXc23ngEZOPTJqHKUXyIV5Rdipe2sjzSzStEys2ducHPop7Z9OlRNbwSW/yK6Tpzu+635dT25q3FHdK4lIiuU27lAYL75Xsf0NKDFeTCRklYFdoG0gxEc5HrWyk0tS/Ug3/2nBtvEIuYGC+YOCR6EfrnrU09qL+S3gkxnZLtJ7bY2x79cVdsba4nslaVoyFdh99cgA56Dknr60xSi6hExYIqRSEnGdoIA/Pn86zVVupZdCLtuxk2kt0IJE875k+VreY5wfYnnBxxgjnvSJNG0ipcxypJ/sNuA/A8/qan1SwC3rt9pbzGUFX25Dqe2KRNNvfsU1xJZQTwR/e2uquAO+3r+VdF09+pWuwyBGuCyL+8KdF6Nj6dT+RrUsdTktrI2ISLZlj8+QwJx2zjtmsWzv3tXjlgmTzI3yEmXBP58H8c11lzqzahEqXVraPJwwkWEDd3zwcA4/A1jVVtBLTW5gSxvIE8sqVPBGQfxxTJYfKQmRXUD/ZPNXb1YZEeXPkLgDCJvC9u5yB36mqUNrvVliaK5jJziJsN/wB8nDY/SnTfuiViTyWt7PbOhSaWEuu5cZQ/MDz24BHtzVWPMbrhsZTP1z/OtG5kvL7Uzc3EMokfCKNrAIgG0AZ6KBwOenr1rOfepYTOXfoWznbjtn+nSh67hO3Qfa2rXEjumUjj5JHPPXr+ZrQuZ1lgk+Zlm428ZBHpnOQff8Km0eOSbTjHEAzF2PHcevtxVOaMq7BQXI/ixx+HrXO5803foZ3s7lCSQxqWwcr/AA4qou5LaRiMSyfN0x16f1q9crHtLXDldv8AdPLe1Ury6N5cAwQLEMjbHH3Pr712Qd1sa3uaouSlp9riJWTb2/ven1rOkg1Ce3Ms0kixKeAzHlj2AHQ/lVzTPtFpqDtcRNt5Z0KAjkEZ9K0bO9CzQxeYxG3LBztIPsfWoS9new4xSHTXV79ihtL65+1Og++yjdED/AWHJ5xx147VPYwwR2CkFhMdzSvnBHoAeuMCtDxHcafPHZJpdhHYFYirJEzNvOf4ied3r1PeuVu2+yxOCxM7cHGeBWcb1GDjaVijdK08kpiX5IxkgD361d0qUNbhQfmHB/8ArVJpC+Wk6z27yPLjgcHAzUFtamK5m3bYoiTt+cMRzx061tNcycSo3TuSyW6idJAo+8NwHQ89ato6sHKKqtyAcdM1EbiCMDe+8D271Ct3aqDjzS3XORWSjNxsElroMuHaQrHGoBPy4Ud/pSKI449syKXBOOTnn17fhSXN5Cd3kAxsRgnJNUY5BuJlJb0A/r7V0RTtqJeZPLIZASCEiXjP+AqW0khbeJFJjxwmcbj/AHmPcegqk7LI4LZIHAXoB9AKcp/uFVx7U7AdCbw3U6yXWzYoUERjHygYwOw4xUl3eW7p5doRbIAc4O4ufUk1gwx7/wDW3QTjsuc05rWLqJ2dvpj/ACKhwRXMdAr3CPBaBg0ZISPYM7846dz1/Okie0innhnfyZUYq0bphhICQQR0Bz+VU7S/nk1LRoYZlBtZo/J352h94OW7kcD1pNa8ybW9SudSnSZ2nd5HH/LRySSR7dTU8vRk3fU2dQtYE0hLiSUC4NwIyjAkLCUJz65OOMelYsswuoClopYsCqhgOce/qRyKju9XutVmAYDy0jWNQq/dVV2gD0GKp2wlg3MflHO0EjIP07U4xstQG2m4XZWQp8pwRkEAj36dvpWnNZLPIskkgMQGWEQz+Z7H86yjLMjq9zASA33sFf16Zq4ksM2TGwViMBWOOT3yOKJ36C3NTzVhCRQbnhwCqv1Ue3tRKVkkQKCu0c5BOc+39ataRbTXlrKJ4XZYCoEgGcBuB+GcD68GqcjKLlvK3GH+8ep/D/8AXXK4JO4Wu7lN2Mc8hV+vJHbJFTabeyJKIWDOrNlQGK4Izzn0796bq0dtDEs0Eru79towo6fgfarXhu1vEuYrm1hDTBW8sSLkDIxuwfY/StHpG4LR6mbrK3CXskkjFpWJJxzxnHbjtmtDTyrxs1/h5FjRI4lOFAUYBbPsTxxz9aSaGS3lmiJiaZ1KH+F85OT7nrRb2ZQqLgMsR+VHIxjjj3OT09B+NJyvGyLi9bons5oJb+f7WqtHHGhiB4C7mPzY9eRzzVqzija4uLVzkA4UhscEdyccdqwJQbW5nj3pICuw8Ywc9OnsKvgt5QF0CoJwX3EbgMc/rUVKd7aj5lfVHVxabK0HmwWzwhECSEN2PGcHoCCB0BPbuTnapo6LbSSWBCPniNCCGAOeCe+Qe+P51nLfTh5Wt5Zp1IJlL5bqRySecZ+lT6dNbs2FlkRME+WVJyecAe+TXOoTg+ZPYUpReyK2malc6RqcV9p95c210inLqdrJkYIyOa0bXUEdp55LdHuZThZZ/mOMckg9ycH1wB71mXyzT6gqyookYgrGMfL/AL3bPt0rqrO703+yp47rToVu0AAIVvMYnk8ngcc8HHaqqyVtV9wo31RyzWN5slvbSCU2cLeUWBztJ9uuP0qppojGpCS6gV1JACkEA89eOa6t2isXzArLLcW6lAJMGJjyd2OoxnC/j255l4ZmvSzON7NyWbOBit6c+aNhtWPQLOHSW0XzRD5yFSEZ2KnIPOAvXH/18evOajZjCvHPEFYH93v5UDPUdQOtZUvkxTQg3DzWkbFkznG4jpjp6VqX90urawNRuiEuGXy3ZIwMgKACVGAeB7fnXHGg4VObm0E7XM60a8vrZotQZgm7bF8pDsSem7v19M4rY8L2cUi3lhqEeyymjZ3ZVJMZUcMe+3PXvUHiFtTX+zZI4JniiUBXjTCk56enfk81UhuLK4uxAbgm4wWx0WRs/cz64yfQ4xWtSMmrrb8jeMrMdcaeINLkurc4hVhCs8YLAOegPcZ/CsqWSa4KwzM8hIxJlTtB7A9hxXb2BN7o+pIiC1t5nVioYsCUztPPcZPPFVdP057jS54RIwBlVpVBGCyghT9fmI/GsFioRvzLVFywnMk463RiWen32iXpdrYpIg2lHXKc889iKZa2Z+zrJaBfLk3hV3A9Dk474re0vUfIU2jkhkkDIhG7e2eh/I9wSap3+yx1WW9+yeXHI3mSQx52qT/Gn1HJ64/Oj205aNenmc023BJIwriaZtsauUDKfMB5zg45PUdvamXTtdNCzKqLH93Yh6++Tg+lacbCeKUQFlWRgWjQZPGcZb0OT611ng7wP/wlEclp9s+xayAZba3uEIS4Tvhv73X8PxrdVbWVtTNXtZHH6P4a/t0LBp91E98zbEtJpBFuJycqTwRx0ODmrfgXS554tfnvTNYQ6VaPcTJ5ZBlZWC+Xg4wckc844r1HwD8NNDPiDTbPxNfrc3F8k5hsbbK4MXDF24YEHI7cqR9ZLC5074a/ETxXp2refefbbcR20jRLJ1G5d6DGc5AJHccjFbqTlD3tmabaS3PFdKkmvLyRZS8sG0tEM9AGAwB0B56VoXUht5Ev4xMfJ+VWhYqzkc9fUZB9aXS7aCwtjLLOx1JudiLiOMnqM/xE46cAep6U6O3jgbeI5flY7nDbiCeuBjHvnOa5ZzSqXQlB/EdoPBGqw+B7LxbLNEj3amZracN5qhjhW3dSWHzdvxrjdQ1BBCLaPcWlkHJT7m0YAyOM5/Gu60GOXV7G9sLTxsq6XDEsjQzs8eSwwV2k8YPB7dDXF/EjQrzwZcw2GotayXUyechhl34Xcdp7YJwfypwpqpPRWNopRg+l/uMfxFeW89na2VnEvmW6k3MikgyMTkZ7YXgeuc+1YIu5JblDPkoWG5FJAwONo/AAYq4Ld4rEoxH2id1MvToTkAf1q7D4d/4kN/q89/bxLayJGkHUzOeqKf7wHP054790bJcvYymm2cuFZZG2AkAnHGcCrcYubJobsQuASSrFflcDqAe/XpXWNFol74YmN0WtdXtRuhmiQ4nB6xuPXuGHuOaq2trcQ6H5vlSvZoxaWRkO2In5cbumDwQO5+lNzVtjPksMci60pGFyISJMmN+hYjGfp0/lWfbRrJnzNryA9+cZ7UrI84jFqUhklb/lpjGfc9qfH5sFy/mbFYKFkGcjjris1a3LFj+JXR6LJY+HzceHovtqRXN1GkksRGFjyP73RWYj6c54p+seHZLvwNp2o6LqH2aSIOLq3dxGWKk7mB65HIx0x0weDyuj+EbrXtNudSt7+xS3ik8tg8h37j2xjgYHXp/KvT7fT9I8RPa6KqWUmoCJFkuvtSysYlU5ZQP4s4zwDjg4pq5tF3vdWPL/ABEtto/jy1jgghu4I7aONllG8SB4slm9T82fqO1c68kdrdSRyxkSxPwec5ByPpXR6t4YuvCfjG2tNdVfszSgQ3aHKsM8H1X39OevezZ+HU1nxzqGlKRdzB3lWRHBBVRuxkdzwM8jP51rsZtOR2+nfFqNYYZtR06UwyYjJt3DMpHBY56g8cZyPevT4jDqFjHIY38qVQ4WRCrDI646qfyIrxjwn4Skk1XTJ9PRptLW4kkm3fM8BTHyMP4jkA5xjFe1olw07eYU8pRlSpzvJGcn0A9PWg1jfqeffE7TZ7Dw7Lf6ckP2mCZJPtBQbguejDo3Uc9cdfWvO/Huu2l7HpUWnaTbQ37QCa7n8lQSWH3R3xwTmvftf03+09EvrI4zPCyDPZscfrivKviZpFrpfhfT7Y6W6XpjjRr+ILtDAYKk9STg+gPWi1hS1RD4A8ST20KXfiXVh85EVvDKfuoqsGIC8KM4Gcc4xWrB8Qb/AFi+a18P6IXBJCy3DnoP4iAOB+PFeYxWlpdzqrXc1rAluECCPcZGUdDz1PODj2r2Xwxod3o/ghbiFzZ3c9qDKHQF05OMZ6NggEcjJz60gi3oijo3iW08Z+GtT02dDFfG3ZHBGFkJOAVA5+8Rx1+tcX4x+G97ofhlLiC8W4tbaIyXMcjBfLc4yU9QeOOtV0Gq+BpJL2LT4bmRH8trpgXihkZQSvHVhnHYfjVp/Ht/rFnbw+LLSP8AsUzrLO8CGMzqpJCAE4YZxkCjYG09HuY8HgTxle2Npqlmo8t4w0SJKI3VexK9sgA989a0vEfjLVotGstK17TxBrdncxyCTIwyqDzgcbucemOam8W/Fy51KB7LQ7YafauCjTSfNJjGMADhR27n6VieHvBF1qWl3fiXWJ4m0+KOR9nnEyuwGAcAdM4OMg/hVadSf8Jf8NWuo+JTNC00FpZkeVLGssaMwGDyXOQCcE4BJP4Vq+GfDGjab4qlttVntU+zpvjnMiTpIx42fN8ue+cZzXBeE9BtNd1uCyurhbfzNxaeQ5VFAJ9h09xXsmn+HPDdsINA0WC21CS5Db7yQhthA5fgdl6DIBPHqREmlsXBuWp21npnhmG3sZNR+yySytsi+1yApvA3FVB+QH0GK53403mi2vhe+0yO2tUvZoleNokQFcPyDjleASPWsv4reGdO0r4X3ltFPP5cEsc8Mc0m7D7trFc84wxyOmecV4x4c0m/1hJ4luIhp8bJ51xczLGsYz1yxz68cn2ojrEJSd7WPpLwx4L8OXXhnSbyfSrWOeS0ikklQbcnaDk9s9yceteUfFFdKbV7a48PyReRbqY5miwwJByCccd/Tjv7SW/xWivPCdx4dvo1spobX7NBLGvmxXG1doDd1BA7AjPPTisbwzZ2EOoW2kX2pRxjUrfy3kRS6W5b7qP257nsce9F2twumjb8Iat4p+yS/wBnWttrmkyDy5LeS2VhjH+z8y/iMGuy+GnhbTPEVpPp3inT2W+gj/cQlRGPIJxuGPmZgeCWJI46Uvwj8D6rpmjeOdJnliLXKi2tbmJzsdvLPzKeuMuuT615PoGveItE15p9QlkM9uzQP9sZmbI4K569QM9jTlJRV2Q520ZlRpPouoy3dnLD5lpeSxIs6g/cJ5YHgjHBFbmo6tc6hoaarcrYjy1ZWNvAsW456Hb1P9Kzdds7e91QT+e0013KZWg9CeSWb1zzjH1qeHTryWODTdPs1lnmmH2e1Vt2+Qc557ADce2BXLUkqiVn1/AqlNRbR1fw80nS9aB0u81OPTLf7J5+oyySBftVySWSIMeiKNpYewFebXNqYzJhlbacZU5yMkZHtxXongPULXwudR/tG4L2bw5uYlQMbmVSxWL2DE5PbjHArgVt5p1V7tltmlZ3iAB6E/dx6Z/GqVRPXoRXs7Gql5JLbpDOFVERUWNVwFBAUnnnJ6n35ret9cu5Yo9CuJ55LUSb1t4zgzGMHahPZe5Y9FHrgVX1jw5d6F4Zs7rVYVjuJyrKobc8iMAVJHY8Yxzz1xWVpDyRXn2yba1yPlZTyFXsuPTHH1rnajFuVtCbuEtTPvlm2z+UIhKXOWj4VMk52j0wemTTIwsdh5DbvMixtz3X/HNaNxFs+YAdcAe/r9KsxWqpMm+Ni4T5zt+UZz1P5VXtbrRGsZJTt0MdvNum3yfJ5aja2Ou0d+/cUlnb3UKxmRSC4G4Ljn656fzFMvWkhYJESQhZM5/Hqfwq22pJsUokrg4UkDj8z34+lV79vdWhnCSu+bYv3FzDdRWtvfqTJaqfs0pLN5WTnaV/u5GfUe/SotG1ieGUyizn8+PBB87904HPPr7HIwfUcVhytMbxpk8xgp6sAePcdKe2+V8szOQe5zj8OgrSEE42kKNVpHajxTosOrW9+z3AWJQ06LGDvYEnCsPl9h1/Gs6HV4dV1QeKNZgtrqXD/ZNMTlbaNOm4dxyeT3yeprn7mEPGu8gooOOM9B712+ieKLPwp4Fl0/SIGXV7+bz7m6CgbEXhYx6jjPYZOKHGEI+6tXp8ux0Qquo9dji7zV31iC6lnkcXDNvSCNMRImeufXOPwpmisGtrlWjSZYmG1XP3cnPPQkZFX5PEl0dPmN9p5+xzEqJIlChMsCQQvb245qhpAgM881pOWRTsMTDBeM559iML/SrcXyvSxEklK6dy5ZzJdCZbm2O2FCSISE4Gefc1kW19LLqM1yqnDv8AcJzhew9+9XtbZf3ckWVZRscAdV9c/wBK52CSWOXyo85bjgdfpRSpKScrb9BSm9y9N56w/wBrRlkDTsmVJ4AGME9R/UVStrO7ihh1SWI/ZZpTGH9WHY9/Wq8l3MNOW1WZjAzmQx5OAwyM+/FdF4fhgvNEubHUL2W043wKYiyM4Bxnrg9u1dTagtSFqys4juWYNGFZtzLsH3MHsf0qNpWgAkUFlHD4/nirwZLOCNAoknVR5m09z79AO1VHeQ3jCMoIhkMGydwP6VhNtvyCovtXLMc0clnJJFKwTH+sByR/h9KtrJE8AvnjRNrYkj3c5xnIXsOvrWe2lwSRZgLQtsyzL0JJPbpxj2rQ0O3WzYS38wu4H6BgOB0zUckUr3CPvy1KBtX1WR5JPMRB0UHBI/Lpmq15Ba6dAzJEvnv8qBjluh5H+etbGo3EcV2TZFhF12kY/KsfS9t/rAuLyRVB4TfwMj1q4Serey6DlGzNLQWlsrfMMkkdwqkhwBxngqc/X6irWqay1rZaULOF43tS4Mp6PuAyhHcUyUeVFK4+YoScHI+Xtn863tB8Q6K+hy6TfWDhLhNkspIPOPveuQcYpKK5udjTto2cZ4htLHUXW90jeJ5MGe3bHDn0/n9TXLq0kL8blZfwxXUQK1usgWTOw7dw43EcZzWNdws8jlmyx5Oe/rXRCom+UiSvqV7udp9rvjcV5rZ0hQlhGSRgksc845xn9KwZuwA7YrUtN7W0KjPQ4A/GisrxSM2aImBYqhyo9uoHPT8Kvxw2N7AN0MDTnH3mVQefXqf5VHYWj27Eup81gPTCg8dfx60y806LzpBbOEZSB0yDjv61zpqL1KilHVkdxoUbI8iQwKxY/KpOB7c9qS+0o2Vu4u7eOSNkGJ4lH7vvyB1+vNDX91p8vlSxjzF5O9iR9QBwRits6ymoJCiRpE2FVlH8XTn1olKpDXdFcl3oczpnhl9TM32SYDyk3kv0PQAZ9TmsK4tpba6kglUiaNtpXrgjg16pqmm/2RcSXWj3AQpGjSwyHMUzFiAv+9xn/Oa4jxE4vZ5rmNWhuCx86E9Rz69x2zW1Gs5vyB00op9TDbGP3pJYDGB6Cun+G+oQWfieB7mGJlI2qWGfL9x74rkRkEg5qS2kaKZJFJDKcg56HNbtXViE7M9o8VytA0ms6RCPKnItboEAi5RhgNtP8Q6A8E9OleZafMkMs9tG7G2MhLYHJVfugg9MnFWovEkzWs9u7YWUAMRzjBBzj14GDUcd/uvLuS4iikNyoLFBtGQeoA6HI9uaySaTuaSlfUaylcP/AA5yKsaYHezkjkkkWCdtzRjjOOhqFAJEaMsdrHj24/8ArVotsWFFQAAAAfQd/wAa55TcVbqQ5MILOOS4EJedyMMiBwBIuecDrntj8aWDSofIgS4kEfls28p8xYAnHB46fnXU2mh2lz4VN4kzfaFXzklXIMbLnI+nYj8a5a3aa6voLa0QSTyvhQTgZPr6D+lOcpqyibxikveN250BrPTLS9lEhaTOVZidgI+VT745PvWNJcxgSRxZdsY+QjA4/vHjPHTmugmgsbK42a9eS6lcAjda27EQxn0buT+P4VkeJJLSZrddLs544xkFWxgt7e3Wi15Eu263EGnStFatcTkxSxCTCjoOw+vfPAqkkP2ecqqRHBKgEEk+4NbsGizJYW6WrS3d/KxM5QHYgGMKG6YHPfr7UHRNRtXkvLm2RxAQ7RuQdyn0HQj1pNNya6A4aIybi0uIUEkYdhty2ARjPqPTkc8VBa2l3qKTi348pfMZQ20Ec9x34q7d3jXquY1t7Vc7P3UZX+XU0yykutPE0SSMIZYxuyo/ecn9OOetCSjszPbZ6GhcNbXWmpHeAwxR2+Fk3ZJkHTgcnn6cVzIuY1DRsSEZeT7+9bXhmxm1y+CXSs1rbfvJOwHBIT6nv7Cs+fQ7wWP223haaISNHMqjO0qevritKS5VZmibtcoIRJFuLYC8E461lFSL5/LySS345zWiky7lUghc8+2O1UnTdfbVOMsQD07Gt0RItaTEVgmaRcbjtwfarul+G01u8kt7e5S2lCbk8zkMfQc5Hf1rOi3wEquWGQTz3rf0Wwa70vUbuKVI5LUqfnO3IOeh7HI49amTa1Q0r6WMG90HU7AXLSw5igfZI6sMA+3f9Kyx85wOuOfeun1nWL7VxBZtKHKgLwAoLf3j71d034f32pWU9xDLHG6cRqx4kI6jPY+/TNNTSspPUORv4Tk44t2NhO70PepRI6qVYbfxqK5jurC4ktbuKSG4Q4ZHGD/n9Kc0u6HB61ViRLDbvmdh7D3/AM8VatG2X8TA4w3PfiodPUG3JH3snNWdDQjV4yVGBn7w9qibsmwWxqwyrvlib7wcsMjqCc1DdMq7jyFXrgZJJ7Z71Ezyx3xdw24t83uO/wCHWptUVVMaw4wrDO09fbFctvfXmJq6I1SdL1POjZIgQQ36/nWtdiJk3hjntnjiqcLZkjEoIbIDZ6g0mprKtwImjl2YzuCnB+h6VpCVyoOybK88XO0kb3OQMdfpVe4tFmgJbPyZPBqUKIC4lgRD1yeSfrSpMCpHPIz+dVT3FFJnPuWjJCuSPcZqawncTpIkMZZDkNimTrl9o6k4/WrsEaoAi4AHU4/zmtZysiG7F/7ZNMHTYuGwT1wMf0rLuLqIEoSxAJ5H+elaMMZlJC/LGvXnqf6mqt5GiyMpXkNk8VlSauOLbZQaWJ+jEfhTBGCOJEwPqKkniVSDgcg1HFCvzOxPlrx/vH0FdIEsMYUFpGXA985P4VNp1oL65LSkpbIeTnGT6fWqe7zG4ACbsYFdHbwGEiB4yhVsFCOh/wA45qJPlQ1qEt2YoxbwAIicHA6/4Cuy+HdpaanY6lHd7t0LCUMpwcEH9OK5DW9PksblN7xuZEV/kbOCateFtWk0uW72BcTxeW2c9Mjp71zStYcWlP3ibxDaJb2txKGZZ47nCAdhgc/rVKzs4b5oisXlOU+aROp4PTtn3q8LO613VTGzIgbdKwckKoJ7n+lXrTS73+0misEMm0EKdmAwx6HtUc9tE9QableK0OV/07S8SwSNLb5wQeePcfSts65aX9jGpjdJYgAgj5bJ7emK6HRLS1stNn1fUWEot2MUdsowWcHAXB6nOMfma465hl0jVpBJCscqvvaNfujd2+nPWqaU1eS1CUXFXZqxWMjxTXFyyKEUFVDbsbuMD1OOp7fzoeYEtWUbYo9wYsB8xI7D+dPn1G6vI5WnfCn7iKMKvvig27CGOSQBEOCCw/x4H5ZpWWgpNO1iOadU3RlmMpG7L9VJHf8ASqOoN9qsfMjPRAXHQE56e9bcekwTL5qlSGXcGZiM4569z7VkqqLPLbmUxZYMvUqc9j36960hJPYpRfU5Vhyav6Lctb3QwzBX+Rse/wD9eodQt2trqWFhgo2P8/hVZCVPHY11Nc0bGWzOj1lQslu4JI5BU9Rjt78Us9yXwEG1ANoqnNcT3iK7DIXGT6nH/wBapsEoTkLgA88Vgo2Suah8oi+ZQ248Enp1qWzVeJCo2L0GM5NNtITcBmYAxwrub3Jzj/GremRMyyHG4HgenHr+dTJ2RKVoiQRXd5L5NrKcEHjPWnwJKQVJVmUYIZiCMdj/AEPSrlvayJ+8hDqyngqM/h/9ao42Bc7168Ht+Z+tZOo0tBKTSKU7MHWBcLx84Bzznpmp7iaSIJEjfNjg8dO9VnURXgZkLq5+VF/iI7D9Mn0pksZaR2kb5ujDPT/61PlTtcnzLkFul5FsDMJcgZyT+PpSnR1N2yKW3ISpU45x/T+VUURom3xyMp7EHH8quPeSSQurH5zgl+mcDHP5dKPeWzHfTUZdLEke6KM+a5CknnAHsOPSqW4hmBByMirKxrKSCTvPGVP+c1RZgJSuTg9/0rWm76FRlcvaaizwyxgnzAwwOuQe2KtLZz2s8iSAfIcNgjAP1rLspfJuxnBDrj6H/P8AOt5pv9HWN2XA+coq9QBjr/n1rOorSE0mytJhD5ZVgxHmE4xz2z+FRXkh+xo+PmGF575PYfnVm4mN3cmUjEjElsjpn09u1U1UTaikZB2RckdeetTGzfM+g3a9x0Fk3l4GDtHY45p3FrnLMCeMD69au3MqWcRZlx0wO5P/AOusC6mMe95WHmMc4HIUelKmnUd1sTYq6rLulYA963YX22EKREmTYAR6GuXRw8xkk6LyB61PLqUmwomEB4JHU/WumdLmSj2Ho9zRubtbONo0IaQ/ebrj/wCvWSgnvpiqZJJyWJ6fjU1pp8tyBJKSkR9erfSt20jWGJlgQAKN2M9vX1qXKNPSOrJb6IzxCtjbFI/vv95j39h7U61Ik3bs4U4/A/0p86ecDtznPAP+NSafbvHK24FQV5yPSovdXe4lqWYGjR2YEcDH+R9aLqFpCpd+Ryy+v/16ivIgkDsoPy4PXpz1psMvmSLG0hRs7gTzn2qFH7SKSJ3hO0RoAWbp/PP5VE0BXOSMjjGcmrxcEA7QXHyqfYc/n71XPmSMWICMTnAPA6//AFqUWDS2IdwjP7vO7HzE8YqJxhsj7/8AX/GrzQrGoEu3jnngk/zrOuWPmseMMcjHarhuJOxcRY41QyOqHB4zkk+tNmnxEyxorc4JcZx15HrTLfay7yenr2pJN7t+7IQL6jtS6he7FbckauzAYXjAxuJ5/KoCx5ROWY5Y4pRcM1wHKeYq9Bx0H1q2i74XvHUpGSdu7jf9Pb3rSSZpJN7Geo2S5Y8D261KZDIccnuB6moTMrNubjPt0NPgkVHxkYI6+lHKzJRZPLAufLkjdJ8D5sY6+3pVd7SaOXIKtnsR1xV0Od8ixMA7YLFjyc88enH/ANahNsc8gLBivBxz7/nk0k2i7WKiRTIUskRpRLIPKIHJ6cfXjNd1ZpLDJdafdYN1F8/3s7lI/mM/lUHgmO3GtR3LOdkBzgr93Ix/j2FZ/jW8u7HxWL213MpYMq4+8ANpH06jFTd1HYq2lznPEjJHqcyqxyjH5Qchc+lR2+m3d4iXN0zxwSN5aueSzYz37d6u60IbrW7i5tysnmFWVT0QBe/qeD7euelZcqyK8isHyg3n5jyD39DW8dlYPU2ZNKht7NkKyRTqofEhGTn26Ee9VYYNrb3IOO3v/hVC3eQSoSTtBGcj1+lWri83IVtUYsOC2DwOelZTjK9kRJXd0STuS+ARkcnjpV7R7pYrhpJAXZUKxjHAJP8Ah+Nc6vnSnasT59cHr7mr1u8sMBRrd8sSQeRn/CnKnZabha2pq3EskrStvKtjClTnoc8VDKyvKyDHODtOO9VIbp0fbNEQAM8dV+tNv45LqVPsiF8Lg9u/+fzqIxd7MpJNeZfv9Slm0+1trqylElsDGjg9U5PPuMce3650l1GfmKTJj2ziqQuLiPIy4x168VIt+/IZVb1yvP8AjW3s0IuWscc7I7KWjzySCCfYUXaxwyFoGPlnnYxyf8Px4NV/t0ku1FPXgAfyxWyuix3GmwyNKYbgczMQXGM56dQcVDXK9WUoprQp2lxcMGa2IVYgGbkDocjjqTn/AOvWuWS8ubm6QjfMARgZMZxg/Q8dfSsq5htLZTHalpZDyZZBjcPYdQO/amW1vcMQ6uyHquwnPH8qU/J2C/KzZWSVlZpUUWkCDJQfdGcc557/AP6qq2If/hIY5rVv3E0P7z/ZUjuPXgGq8E92Glj3vIij94WiLBRx94jtz7im3wS5cKs6CELyQcEEdvrxj0qFFp37ib6o07sJbtJHGxEbHf5QGcN6gdhVKVxMv7yJ1VcD5sjP059qktnVLWJ4I1bsVkyTkeuOo/Spr4RPZwPGWErIDKuAAGyenfHtWdrMh3MyS/nAEMDOkfQ8nLZPc9TVq2l+R4GAYyI0bMe24g5HvwPrVOSPafMGMjgZ7+9XNNhZrhSAMIN7c9hj+pFXJpK6Ju7jMvJp7xuf39mxDZ7r0/p/OoYrgqDgsM56NjHv6EUnlXAubt0dslievDAnv7VXfPmMNgQrjeUU9M9wK2STRq9dTQ03TZL5s71S3XmQyLkcenvWoo01ZobO1Vo5HPyy9I2b09j09v51Sv7gw2sFpazgpFjzCF++55PPbHQVkTb5GG6RtmOuAMflWTg5vV6FNpRsdHdwm1jlWXbE/wB0B+mfTBrABV3Ani2Ln7oPyk57nqB7frXSaxcJq3hO3uJsGdJBC7dC3ynn64/WuaRmEcokOZY13E/31zjI9/8A9dFKDSfczt2NbT1aSK5W2tpHkSIvhGYeWox8xx1H6VfttLTd5k8jiRzuyQQqj2Hbjvz61z1ldfKwZn+6cY46/wBPatGS7kuIVhlmHlgjLYz0GMGlLmW5UZqK1Rf0F7kJPBKP9HlbJaNgGJHf/aX249adqNksi5LuUHAdW7+4Pf8AyKSxaOEN++JOOPkx07VoWscd3MUWdIpjwrHofYjHT/8AXXNKLcueOjJtc499FkknyblfLOckjB6E49Parlha/ZkkeCJnbbxIBkoO5PoMZ56D9au3tvLbXDo6lSpx/n2qJGjMEqSsEVlwDyOetbRqua5ZBGXRj75Y4pIYLS7M1wwG6RAdkR/3jw3fpx9eaS908R2yI7KTtAA2EEgjqeuTz/hVS0s0j2SzMRBtBxvK5J5/LPerMmrW8ce2SaSUpgKoGePdj/ga25Xoom1k1qFnqN0qFJWBMcflo+BwvPXuWweD1xx0xVJ5IYZDIcySY6sMAfQVBqWppNhreLyWb74ByCR3z6+vvzWYqzTEsBwOpJx+tXGFtWTzWVi1cXbySE8kk9vWmXUc8SBpFCqTgH3q7o0cLBnZh5ik5JOcD/ZHXPNW7+CaeFo/JO04C+mevXv9al1Gp8qRLbZlW9mHUM05GeRhc8VOlhCwLIzuvXJOMVVRntZJLaU4PT/64P4Vo2TPPbIHbKgnIA6n0P8An+tOo5JXTB7aDIbWLaf3IPHDcmrdla2aySNPGjJs+VSo61Le232eXAUiIorIc+o9P88VSM5DMI2PHpWSc5bCSdxk0dqHZVhTk8Z7ewxzVV4I/NEcW7JwODnHPoadLKQTliSOKbZZacEMSQM/0roV0iwS1DTmNZsntxj86lmsmgQCSTaWP4fiaVJhay4jw0hILcfp64rVlRZoiwwy4z/9f61lUqODXYTdjHto0t7hJFmZmQ5BRcHPsSasNps0mHMTkvyu9wM+4Hr+Oa1VsIo1gni2glcHJ9OM8856047QMFhtB+gBrOeIs9BcyRkCM2d4YboFhGAdijAORxjtR9r8yfEUcMIbgAAnB9ya1r+BzLbysEeKWMkOGDfKCcg9wc4FNt2ku0lWKxivLu2O7fgZKDuf7w5+uOvrV87aTY2ZV1HcvGRdSMAcHp1/+vTmsonVPLDBSPvZyc+v09q6Gys9Q1ezvXtI7cLYor3Ec4AKIx27gRyRnAxzjI7Vnb3gRzdWwhKkDbzu+p9Bjn/GnqFn0Oh8Ai00vQ/EWpauIp1gWOK3gcHc8pyw2kHA+6pyQQBXMQ6lGzbb2EwserKCM/geP5VoTOJdMFmyfu/NMrHpuJAA/QfrVCZQjKpUEY5Vhkfr9Ky54zdmrgqlnYW4aRom8pVYK2RIhyCvoR1z07Vt6BDFfaTPIt0Pt0TDMLPh2U/xDPUDuM571ztxarDGJ7SQQg9VYnaT6e38qrWrM23a/llj97H3e1Xyxa90puzVzXuYmub9IHfBZnZ5CeVQMc/yOPUmreneeLO6tS6ypCy7GA3FT16j/wDVmsu0sZJJsGSV5FUO+wY2g5OSTXRaTbi2trc2koub2V3UW0SEkkE4yemD19h+VZVdFZDOait3m12CCUELM6p0H8R5IHf/AD6VC0EhvZIwxcRMUB5IIBI6dq0tMmePXH1HUVYG2Yyuu3GXH3UA7HI6enNW7Cznt4ra7uo5Fku5C+7HUHuPbNVKpyRIST0ZJplrMmpI9hfGwuF2mNjkK+exPQHIGB0PtU0+n6jPdHVruW18iWV4hNvRRIynllUdV6jIGM1Sjcy3TQlZpLONtsu1go/D39hzTtUkutRuoyxDxwRiONYlwsa+iqOB/PPJ55rO+mpaaS2NExRNMlxZzhJiwSRpVwFPsOuPwBq+8eoQWMp8mGUMuA2DuXn7wHc+3NZHh64tI9TiXU0doFUg/vRHJnHQEgjGf8K6x7qGPT2nUM6jhVUZZ3PRQO5JOAOua4K8nCcVFXudNGlTqpt6WORsNWv7Mt5creWWxIoPzcnvnv8AnUt8mny6fb3L3sslxIWMihMbMHjnoTj8qqa1cTTXbyGAW80KkyQ91wcYyep9sVf0+3tJNCnjij3yT7HSR2P7vGcgAdM5wevTiulvltKWjOVtJuN7mBPtlZI/n3RnlCoQk/yx0OfyrVnlaCKItAy7+AqKevv39PX9aoLamB22jeM4Kk4I9/rT7mWSIgRSskY6BDt598d60bTsZ7bkx1q7jhkjK3DQR5aWJWIKL03AdBzj6d+K56GynutlxEJZXJyNvJXGevfOO9dXo+nz6lbTXcs5DpIUUuA+RjuetU9V8My2Gn2t/NAgs7hnMfOVYqfmAK8g+3HBzWlOrC7jHfqaXuhdP1a503TpiwDlv3RV2wWz39c9ea3YfEUNzYpCkPlDaN7RyfMrAY5x1Ht3FcJfxwiMS26FFZsbSxbH0zUdlFL53DtGMYZt2MCsp4alP3uo1iZxXJF6HWXUcqoQWKrLgxyAZyR05/p15p11qU95A9lcgJcyPiTI5jVeo/Pj8ayrK2N8hig1S4W4JGxXYlT+HX6VZ0m41Lw9qYkvvPtSQU3lFJDY6YbkD8j6Vboxav1WxUU7eRb061l067eNV/0NwGPzHKsO474NdgLj+w9OsNbtrmJ7uG6AgVbjcSQCclD8yjjn1PHesG70qbULO41GPWLG5mDDzrdJR53zAHcoIww55IOQetUZodQt7OOC7luWiALRwuqAKM9flJ9Rwe9Y1IRlq3qVGES7YXOo6t4pjvZ7u6FzcO8huYTtZTySMjp1Ptik8RRSWGszeZdHechpJZA0kgI5UD73POWxg/TJNHRbPSb6YG+vYrKTos0oLKp5wGXuvGM8461TvLeybfJaRRedEx84J91gD95Qefw9KdOKctb/AHEqy17+Z0Nla281jJcTgrCqbi8kmJJOfuKACEz3Jzx71iyzSS3EklhI8MRIjG3+AjqD378VFBPPGFjGx4DwcMSQD6Drj860/DsgtUv2jYFpI8E/ewfUA96iSUNew0nU0TKzaatnC817eRszqZF3x53KB2Prnj24PTmuYBm1K7luSWkS3QkeYxOAoPr2A4H5V03ia/utW0+GzgjjSOEcZ4LHGOvYc49+p9sBE+wW+JV2SKoVhjqD2Pvz1rpoy9273ZN4qyR1/wAOPBcviz+0L+a9gtrfTgCwkYfMTzk54VMDrnrwM1zuq29hZeItSstLuY7+whk2xXGc5PUkYOCM5wemKwr5rkOIAwgg8oRlYyQJFBzlvU55PbPSuutfh/rVvaQ3tvALmGVY2dbYiRo1cEoSBySecjkgde1dElpuK7krRRm3VnI+lzX0biMxOoPH3gc8D15A/nWVNe3Vxbi0NxM9sjeaY2YhQx4J29M1v6lqtlp628MkLSSId72+eV4Iwx7H26/SrfgnwEniuBp4dUh0zZJ5U3nqWHzAkYx04HOSBmsqTdvfVuw5U9lF3OTtroz3aQbMJuAJznpx9Kv+JbNtNu0t4iytsBZGHK5zjnoa7FfDlnpPgTUFRo55bi4VnuyVyqRlsJGv3iScbsfKBjk9K4LVbC4gNvOwZ45FGOOwPQe1WoLmTRm6bitQtNOv9SUR2Ks7bSfJRuWx1wO59up7V6j4BgtdC0Z5Y0urOO9idZdVWFWniZBlkQfwHqMnkcHHccFFaXKxWV5p0UyszlI5N+3c68/KR0YZ9ehr2TwdqUWuaZ9m1J7G61a9hlS4mMmC7rjaJUUDcQDgEjOfUVTdjSnA8EbVrj7TILp5bmEyFzHK5ySe+eoPvnrzzWnoGo/2bfRXtuWhKrtDByGQ/UdfcdK1Nd8D6hpOolbu0ljyGeMyYVWRT1BPb9aqP4L12dE8uyuI4XcBZJlMaHd0wzYH9KrQhKR678HvGdlqF/e6RKy/a7h/tCNHFsRzt+YHsG4z6HtzXq5j9BxXCfB/wTp3hvS5Fu5LGfW5sC4EcwkMYByFB9emSOM/mdL4o+Ml8FWOmTiFZ2uboI8eefKUEuR78j8aq2ly79zprh0t7aWaXIjjQuxx0Ayfx4FcN8SpHm8G3UlqFns7qISwuVz5UqncM+gbBAPZuOh46vWVfWdDWDSXVvtyIwkJwEibncce3AHUn2GapXPh29FgbKM209nHayRQ2xygMrgjzJG5Jxk4HAyc+4l36IaPAPCd/wCFdS8qHXb2+0u9L8TrGrQ89CSOV+uMV2Hjzx+z2c1jpEtrdzJbtY37HJBJJG+PBweAeeQC2K84+JGlWWkX1mkWEv7iHzbm3VSFgJOB17nBJHQcEelbnwx8M2y6Tea/4guBBolu6q0EfM11J1WIdwCcZHU9PU00tCU2nYg074oarYeHZdFXT7CS3Mflhni3EZ6swJwx78jAPrXMa1qC6lJA0aylhGFkkkYu8znqfQDoAAMAe9eoa/4J0HTNMN/rt8NK1a8Zpk0mECUx7jlIwOucY74zkVXfwPdSWazJZx6DC0B+ypevie4kUZyR/CW/u4zx25NJoOWT0ueYTWMkdkbuWPCKVDrn7qHjP8vf1rrfCuj2mpaLIH1g2V9HIbeWIvgFMcOcdQemPXmug0a/8F6j4Uex1K51OwuCyxmzS43RTue6lgQoyBknGOp4rznxBbSaBrVzYxRTw3Vq3kyrIykq46jKnBx659+KF2CyjruegfDLTraLxBqOl29lDqerfZXR/ObEURyBgA9ecE9OBjrSWWk6/ouky63B5q3NtcmIGMHKBeCX28FdwI/XpzXMfBs3cvxBs1tbloCySedJgnKbeRgcnJwMcV9DzXmv6VEjXkVh/Z2CjvbwYaMHOG8styMfeHJA56ZqJe6zSmueNzg9O1KP4o+F9W0m8gMfiK3i8+3RGJWTafvLnp3BHQA5Ht5YPC+vWt81tdWqwyBwmJD0znkY4PQj9K9n1GLUfDIuNV8O3VlCFJkuYYo/IMwPAUoed2cABeCa564vfEd9qy/2npstteshm3ShVXKg52+rc/dwSTzUJtfCVKnd+8cRq3w81620abU7mGNYEfc0YX9+FyRnaO3yk9cgfWsG0gOpXltaafHLNc3DeWgXLGRj0AGPX9K9F8J/GHUrfxHbpqENudOj3CQeUfNIOATknlsDA/Wueh8WJb+JPEXiCxtotNZreVLOG3RVWJn+VeB3xknGMnrxkHSzejMZKL+E9Tk1jwx8JPB8mgxTRaprt0mLwRuSN5HIJHKgAnA4PfOa8me6trzU1mu55Akr53yEsUUk8nuTz7n61ylvGkbi5u3Z5ZTu3ODliSecn+ddZd6Pdp4ag1KfTprZJrjyopJMfvAFzle5HPXoelZ14KSV2Q9UJdWCafcreLc2tzEkh2ywMR8uP7pGT1+tQ3d48l0WDCMrwGBxx7dz1qrf+cvkR3aefGowArYyD2yPwrsLGw8LX3h2K+M97HqyDF3BMyqmR/cAGSvvn9TXLVlHlUkr9NBtc3wjPh54d/4S7xHDpizPGvlvJJJjoqj+71PJArI1a3+UoE2SRHbz2I7V0Gi+LX0rVLHU9Btk+3Wls9nOkcfyyx5+V/8AextBPPI5zmuev5rxop7mW1kVJZC5Lpj7x9frWM4NNClBKJq6h43m1bwZp2l6s5kudMuAIHx/rIWBU7vdeOfT3681qM8Uc4+zuu9l+ZuP0qo9nc3AaVIndev+R1rX8P6Jc3unXN/ZwLcNatia3jH73YedyjqRxyMZxz610OMZWYknUsrFSK9SQBCbl5FXb+6gzwO4JxWhDf6jLp1zFpkL20Tp5U7yXAG5Rzgrzxkf5xUrWdotwqQTK0jIsqmNwygNzgH1HTHaqV7KbaQqULTP1YcDHPbofrUybT5YotSdPRoTR9AudRsmlCuZ4stPJIfkVRzxnndjnjtVVLd7yRbazKzZJCbepI9B+PT1qSRWmSSS4lYjHzZOcj3J7fnT9A1248Maymp6IifaETZslQOG9wOzD161q/eeu4nKMt1Yo3E76cklsYR5pIEiPnK47nvmqDSSuSUYjjhUHTn862Neliu44p44IoHY4YKSxdjk5JPJPPPNVzYiJFKkMJEVgxPT1WiE4qO2onD3bxKUME/kPbiNFU9GkwNuT1Hf1rpdMvJUgK24hdVUKu8A8jODn8TXPXNvGtiJUY7nAKgDggnGfpwRWhp17b2qEMfmlAx36VFVSnHuaYeXLJXKd7eXkl1IWijXb8kuw4BBPQg9R+frVfRwFu7iXO1htUYPsTjHftU3mm41GWQg7d+1gO/AqKLT5POuN4yNwbOcfQ+xxW8GlHlemgOfva6mrc2sk9jJJBEzSKcAFsF+Dwo7n0HWuRhuIRdLIAcISQnQg+n0zXXJb+bMsZlXzB/tYx34Prx/hUFxogEr3ciPJK+Q21c7hnr67v6GqpTUPiI5ru9jltEt/OvVEpCpGjSZbvgcCur0W9trbVIDqMG6wYESJHkEg56nqRnHGcc1iLpZuZ3XTyyNtJKOduwD1z1PoK17v7FYiITufugKSmeBx16ZzV1XeSaBXi1INVWxWWe406OWKFidsbHdtz7/ANPwrGtSdrYycnH4D/69av7u4tnWDG1mDlzwMgEYqtp6xtGVVWMisdx9B/jWMXa99SJayJbSURhklJKuMDnp/nNF4k6xKsjMAgI4Pb1wKsPp0wWSSSJkSLaz9Bwf61NqO2Kd44ixSQZ+YZ2nJ4z3B4od9GVyySuznpjLHE/lkllH1yPxrUtbaCa3W2DCNRHv8zByXxnI9v6VUlQB3C5IUlfwqxYW27T42diGGSjg4IHp79OlU3ePYUU3oV3nuJrd4CpaVSA+BksAeD646UqKsapyysTghlxikv8AzkKTkASgbRKnAYejeh/Sm6dDJNE08hZo1xnnnOf0Ga05b7ha7JLdQsUhZlKpk5B9/X8qznKPdoOGXeBx6EdB/PNXbwhVZYGAR33EN26/pWPyu4qMBWByPr1+nFVTp2bZbeliOfashGMqen05rR0i8WMKhRWA6Z7c/wAjiluLOK6WRoCVccgHj/IrGcS20pVwVYHoa1i1JWe5CdnqeiwXg1TU7XyEWKQKFILcMQSQf/rfhVe5t5Wu3W3QvKVyyjOc+p9veuRt7xmUMv30PrjI/wAa6DTNWLySM0pEkxUuxPoMD3xXNWpPePQ05lJWZYazh+z7boh2A+dm4Ax79R+lZV3prw263Nq5xIxMcZPz7f72PTritiWd74m3RY/s8LAskYA85/cnkgflmoZWjSWU3cMocD5UJ4J9D3x9KzpylDfciziZcGrT4MU7E7eBvPKnBHHv157Zp1pJFNawgojSxEsMg565wMV0mo2ukPo81w9rEJEhZk2MQdxHBJ6nvkdB0rknVIEtB/AR849SRnJ963hKM1orMqa5bXC+0+1kcybxCCR8w6ZNVbrQpoYjIsiuARkYPGe/0rQt7hpY3iKgo/VcZzginiJ5SEjywHXHpQqrhoZK21jmpYpIHw6kc8e/0NWNPmPnhD0biruoKAdgbcF/z/Ssu2cR3CsR35Fbp80Qasb0DR+Ym4NgHnb3q+ZEl06a6U7ZI7gRlM/wlcg/mKyi+F2+oHT0NWtPMkoubSCLzHnAI54XB6n/AD1rn5UveHE3dH165s9KvrKDyuVMnmP0jGOcDuT6fjVjQLWGxEV9qU7WkezOcfvZMjPyjt2GfSuRBDbLcZ2sf3re1d/f6XHrJEumLK0uBudk2x498/0yKVW6asbptrQzRf6B9qkc2t7JCT8ibguPcnOSffiut8Hw6ZPA+oRLFJcucMu3AgA/hA+nJbqT6dK4u58L6tE2DaiT3jKn+XIrp/Bek3WmpPJdAR+aABH1xg9fb6URbvYmk5c1mjsWmz/Sud8S+IIba3ltYVE0jgpJ3C54x9cHp271bvPtEpEMJMaMMvL3A9F9/fp+Ncp4nmhtbyKK0VWeKPBRf4Mnqx7H9Tz9ac7paG827aHPsRCEM6lSeUX1/wDrepp7zzbDJJIHyCqL6AZ4H61DdESL5jDMmeWzk49PYdauQaTLJpg1A72iD+WMLnBB6dc+nbrXOtNTlaaehueFNYFlZXduFUlwXiXHJkJxg+oOR+Vb+hKumane2Mr4aXbcISRhiR8wHvkZx6VwVtKLO6R2jdjnaUOVJyCOvUHnIrW8QRxtLCbS7mkUx4PnMX8snnG7r26ZOK1jNKJvF3WhY+IPh1JIn1XT41EyczouBvH9/jv6+o+leZW/7+96n5Rmuo1bV7mPTpLVZ3ECDGAcbmPf1xjt0rmdHx5rMTjc2Py5relJyjdmTkpNGxBaeZgyZ+Y4HHT6mobxZLcta27O6ysuE9W/yeKf9pIidROBGp/I89KlN7GghcSEzg5XA5Ugdc+tPVFaWLOs6bpWm2UNrHcyya2jbriSPmJSf4PcjgZHfOfQXdN8Xa5oVnCssSz2XOx3Q7foGFZGj6Vd6xfC3sYt0rZYsTwgz1J7frzXs2j6fbaNpNtpshDrjazOvyuxyT14/wDrVm5W+IqmpSba0PPr7WdG8Xw+VqUEdndBT5dxnPODwSOcfpXG674fvdEcfaVWS3cZinjOUcfX19v516P4w8J6OLG51GOVdMlRiCUU+W5yQBtHQ/T6153Jqd1/ZUumTtuhDCRVPOCO6+gIP+ea0g+wVFr725R0zb5TKSNwORWnGgBDx53A8j2/pWNYkBm3KDgjFbMDqyjpn69PpVSM47BLu3b+x6D3+tRW5LSmQg7hwOasxs24q5G08Yx1H+NCWkhmBhy6Hv0x/hWMlbYiUX0NbSLa3dnlmBcDBPufT+pp2pX7biqnCkcrnt71LDPBaQFAAzcn15J5xWFq91GZ0eNcseoB4oijX4YlWOQltzEY/hAxwPen3DDaH43dMe1V4x/HITljz7D2q5cSQthIk+XuGHI/H+tSlaVzCGjuZE4BuFP+0KmkcRRkt3P5n0qtc7kmVuOu79ar3Nw00u4gADgAdq3ceawS1dzbspUmKQzTtArEAvngA+tR3arFKFJLEDr1zxVO3/fRkdxVtEKxLuPT19KFBRehcfIrSKGbdJwqj86pTymVgigBB0HoKffTmRyATsB/M0yJdiksDk4H0NaLQTdx23aoPGB/Q11V7I0kqyDO5hkMec4wRn36VzTrmPI9TW3p2otJYi3nAL7lKORggDII+nSsppuzKitbEkEIlZVkOWcZ3Zz155qyYY7KXNyjB1baExz0zuNRXHlqkbRSI0ytgqMgr3yexFWpr23aVNwLGRdshlGcN6j+Vc7uKMbamzbXMdqsklpGGEqIu49MjOSfUcisR7yZL03UVy0c6tkOpxn8v8mpb258rT0tjhWZvlZehUe3brWdAY1tpWGPtEbBxnuB2FZU48uoX0SH32pXMl888c7iXzd4XaOHAHOOmfeq2om5kWSe7uRLcZyynBJz61JN9nECT7jvlZpCF52ISevv09eKz5g75diRn9a6E9SW3fVli0uxJEIZVB8xlwenGeRntWpdPPct5lxJGQoCqq/NsAPRf6+tY9hEWt5YyNuSCrHHbt/WpIZm+0BbiTy/9ogkHtninNXeg7m/LqkbQbAhEqgjb07dM+n4Vz86DyVkCncG3OcHkHA2j2Ax+NXbyeNYSYmSQKcgDnr/AE4qtLfQyWojETn5SCeBjOe/SppJxWiKlK71KWuWjII5CdwOVJ+nQ/lWPt5rq7GzutbX7LAI3lELFU/iYIC3HYnHP6VzLqVLAjmumnLSzJaurljTrgRlo5MeXIMZIzg+tX5V2p+8LPgfKBgjjP8AnFYoNaOnMbl0gZ1B7Fu4pTVtRXLUDvHavA+djEOcHGT6fStmyaJbdIZHCPjnPQ555rKyGaKFAMoTvbP3jn+WMVoyqiIZZSUQckHvk9B6msKmuncpptaF1L/yN8MS75QflGeF9z61QlkaMSSSHqRgDueeB79aiG+Nd8ksNtn5ju+Zuf8A63HeneYxzJErykZCzT8BSe6J61CgkwUe5np5ktyzSuFOcFs8KPT6fzqSBYPP2PICDk59T6Vow6XbR2EslxIxuQmRngZPbFZLoCeQA3c9Pyq+ZMiStuaD20efkdpAODgd/b2q3ZWeZAWQLEp6MCd31rOtRKVIY74yQSe459fpW4kzfZ0iTbFETnAXG7Hf3PNZVHbRDST1KWoxpCJGt0CuCCfTgnkZ/wDrVgXUgYKQoUgnOM4Oe/PvXTtAWUk4x3z3+tc/qFq8buRjymyVx35Na0ZK1i1e2pUVsHdkcc10FrKZbZCgBVh83rkds/jXNs+0bTjIq7olwqztDKodJMfKehI7GtZxuriRsyIltESZA8gG4YPC1UsMxo1xIxVnfjPQ47VHqiiN9saJGz9l4/yKZIi2sQlnG0gfJH6k9z7VjGOnqSkSavfRqpQDJB6n2rnJpWmcliaLmZpZGJJ55+tWbPT3mG+U7E647nmuiMY0ohKVytDHLO/lwKWJ9K1rDTkSQGTEkg56ZAq/YpHBDiJXQE/MMfex9eRVggRpuCoq9Du4z+NZTqt6IORvUiZkPCg8ccdjzT0ZyGClBkbRt/xoQgc7CqnB4qvcSLv2RO6MTzxgEfQ1kld2QRavqAaIBsjlegPGT9fSpIr9Cn70hcHHWqC7STGjM4HfHUU+2QicgbdrjGSPUfzq+VdSFvZmrNMZLVjGVdGG3J5zkdvSscBiiSFx8jbSO/Pf6VdWGU8Qo5Az83bIrPuCVkkEhBJHbtj6d6dONtjVLyNV2MSgkAsCOp6kmpbyJ4Y1YMFdjk/j2FZkebiJmdiSBtG3sPpUkH7lGMkjuo6Kemanlt6k+6hYwZLgI7EZBZsjt2qSSOJQ6gB/9o9uO1Vcyf6wOULdQB3HvSo9xt/1wz3GOnvnvVW8wstiaQ7YRGwPz/d9gO9WJItkUaM43SHLYPI7YqAvdRhds6ynGcbOn0pttmScGWQKwOctU9NA22JLaGCSaMzAJEDyMnt296k1d/OdlLDy1+6vt04qLfD5rFpRtB4wM5+gqdvLvJcFSFjAUduaV2tWN6Rt1IIfLjtgiqjEk/PwahjtoZZVWTESk4Z8Zx74p91CYcGAjYSAQ3amorSuAmCw689vWqT6ohJ9CZ4Y7eQFZC45IJxyPp2PtVdQ7IXXGWJzzyM/096sGHKFXY56Hj+tL5QTOFOOhGKaknuW/wC8ieTUmgJFmXiRMhMn5ix6sxHVsD6AcfVtzqk2oxMLtVZkGUkUFTnpn0PBII6Yp93Astil0uDIRhwvqD/PvWapXYwAOT156AUvMzbY3yEWRZLWDLqOIx82f88/1zU1rcPPcMyJECRkSMu70GPQfkKjDtEwdVLEYwM4yfY+tQwCWO6Elnh1Y7tp7+36f0rSPvLU0hK50EFwkckEVxaC2kRiCGBCv7juDnqK29d8O6nDosl2ILaOBlEiyRTb/cDp15+n41W8P69ZyXVxJrlp9ut51KTQk7fmJ6nuCOcEYOarW0mrWCzQWU73FnC/mCBmzgHgMO2cH8/Wsbq+2qNo8rWpTtJBcR2+ScSKBwAOAeRx9DT9ftxDPGyyLhFVlXP3gScn6dKyUu/s+pFoFaOMtvVGGCpPUfTrV3T3e78PTrOyERH90znnjnaD/IVbi4tSJXYz5QWnf64+tallbi0uLGfUEeOymbDSY6qTg9fxIPSqLqWtmljI81SAU7sOc49+BXeeIdc0rU/CEFtapFFC0Z3B1YvDMoHyDtk4HOMfqambcWuwqcNXK5wOu20EeuXcFjJ50KysI34+ZR3HaqlmwMqo8SyluNpHXPrT7eKWWQbMllHU/wAPPc1alsO5kGR0wMVUpKPu3JcG3zInjhRZRs+yxyN8uI25+np/jUwGI1Edy5bdywbk+3HI/nWS9jIn3SGGMHHertorTbhcZBUBjJ6gevv+vY+tZySte4Lm2ZoPsf5wxZ8fd9OPU9uvrVi1dY4JJJGkRDgMVxggEHB7jn3qLRrR7iUrIpEAUbmx14yMH1xz9KbeRPGXg8w+VMwjKg54I3Dj14rFJp6l3d7Db26jnsjaxzhQr71XfgEj17EH8cVStrg28vmSSeZE7bWjOGH5enIPWrNvvjgKnGG4bjr+felt0QEfKAq44x1P1rRVUtDNysybSodN+3HEi/Y2f5iFJ2HBAwTyBk/So54dpcKwcKSM4PbPepBJHJqsInYhBGUfauMKT2A9Dg02aRpJ1s3kSKWNcJIBjdgnhv5Z/wDr0WdTUXLzFa4tZlkEcqlCAAAfQ8/5NW9LFs19LFJny/szI204OS68/XjOPwqTVZry5a1a5lkmV4UEBfPCYACj6dKq2+nSwT3CaiDBmD5OhDEuuPw568dRSSbTEo66Bq1pc6XKs0ZEtnjHmL0wf7w9O3/16is4FuInu/mVnfzGjjPzCMZwOe/U1qaFqTRyNaXYD27ZBdv4fZvUUuraKul3KXlnKwhlJAQg4Qjt9MdM9uOa0jO0bMpNWKl2sAsJmsxkMpI4Gee5I79655JiGIKrz+tdJBqEyWX2ECIQmQyA7BkMe+Rzj2rPks4vMIg2tL1CtzjnqR0z6ClR91O7Eo82wW277GA3zRb9/lg43Y449OCf/r1SuC0jtHHtyrkxHbjaPTB7evJqxNp86BpA7S55O3qMfzqBXQ5BYZ6df0I61pBp6x1G046DXdGtmeNdjZ2upP3Tzx7j3pEDxv5ikMhI6e4/TrSSFFdjGD56DLBujD0x/I9abZzqySNhlHG7PIHcZPWqkrrQlq5o3SXEMbyQyMCnVRzkD0z3/pUVtqFxCS9yTn+FcBfm9PXFdV4fMU6FnRJFIAPAP45rK8aaHFbmK+gykMp2bAOFYc/gD1+tZU2r8sioqyIb7xL9sSJZLaBCnG5SSzD0JPUenvUjIs+i3N7CAVjXPIBwc9/fmuTddpI5PPrWjpL3QjuIrckQzJslB+7/APr9O9XOjHSS0sD1d2VZ7qa4Ybizenf8qVbSVuZTs9j1P4VeFo1sw8pS8n8v/re/arl3axRRwrC8k0zDdJKRtU+yg84HPJ79sdbc0loN6K5lJbRqMnJ9STVlnPksoUbj/FjoPQU+KLzHCpkjv7mt6WDT9O0xZZPKur6ZfkTqsAyRls9XOMgcgDnngCOZtkwTZjw28C2yPID8qdV4JOTzx+VJNBcizF4qOLZ2KBwRx6bvT26ComvJAhUW67D1G2luNZu5IBbmMiJRtCiPGFx/Km4t2LsmUbxlkjRsHzE+U+4q9o7eWYNwZo8guoP3gWPHFZjtIY/mj2L16D/9dWopHjjjMZwwRSMHHc//AK6vl0sJFzX5p5JQ5jdFbkfKQAPTJ7YwKzI5Xy2G68nFWJNSuWyklxIwHGCxI/I1Eb6RgcMM+uBTS0He7GJbTSHdtKIf4n4/IdasRtHCrJAu5uhkJ/l6Cq8ZklY5BbHXOakZgpALoB0/CgEKAd2I8tKxA9eT2rpNKtvOtZpUVwtuu6dRhvbj1rm1eCORSsjZGeVB+nX6ZrorbV1jsWttDs50kZdjXBbkA8HHGBxx644+uNaLkrDik9ys1zCCu1WlhOWUMcYB/wD1VNJt+UwqFjK8DOfwzVQ3ct2iPGIlMa7MMAcY7Y9e9NAuto3XDeXn7sahfxrPl0J5S1P8qMuCpYd/fn8uRVbT7i6tb12s5GjlcbSynqvofbigPsGJRI5xwxO7NIupINhUrC65yWQsR1OeO3T3HXmrik1bcnqd94PhcNqkU81rBa3Fg8UhnYxqgZl2/N1AyowOfXpmuV1aKNl8mYxSrGWxJA+QT/eVupzgVFa6u1rav9r062meco3nzoztgc4XPAB74wSOM4zVq8kEl6G8lgpwxEQ4BPOACc/Tkms5twtY0bsrIihh/cQqyny9ozIGyOO2fXr25p9xbwTR4Ry7KML0X8/84rRtU024iDQSiOd2KunlFSuAMEnp68e1ZKPHKzeUQHBwR9D6dq525JtpEySh5oxNXjlWSGBwVO3JyeMkkZ9K29R0yV9HbU7WAskMStNhcjB43N6c4Han36wz2Li4VA3AWRjjac5+tQeZdzwRWtlFI1uQFlG7Hmru7j06c9cc1vGTnGL2sXyp7FuO1a3VYiQwkjxDORjLABiue/OPwxmnLq11BezrugidBtXZHgMRnv1xn6VTkuHke2sNRY2VtYzTPFCYyWIcjjI7fLjPb3ro4J9GTSjeajFHcSpIi/c3KMgkbj6/L0z3zSqJNpWuD952IrCOyvUU3rR/apX82ctkqpIH3R3wOPXPI9K3R4W8rT01AsbbTpmW2sY5T+9nJB3OPRR6+px6muMh8SS3OrTXd89pG0zfM4jwUPcgEdf1rofEOvXHieexhk1S1ZbOMQW/kAxgrjIGOx4Jz3P6ZVKTTv8A8MDjd6GZp+nebaX9xJai5s7YKC+/aqs7EKTjrkg+hqzp1wuhXc40yW6glKxvlW+Q7lBKN049KTVrqYWk1tb2TJHJIs8whyyvKAeeeccnPueDWVJqFxFGYQFcNxJ5i5PT16j2pJNr1H8Jb1TUZ9RnYXMkrsB8u5s/h7VP4d1TV/D+qR3tuoaS1zIjTJuC5XAOOm7ng8GuelkPyDcQcg574Hr7V13hfxXBpu+1lVn+1QmBpRGDwSflIPb8c/pSmnGF0rkxld6s5Ke5N7fSyzQiN5JC7sWLbieuc89c13Oi3XhmPwu1vqkMiXVuxjils5Ns0vU5KnKke+M/yrmta0xLTLQyOUZfMMbnO3uMHrn264rnhJI7K0LZKnnbxgev4VUeWtFW2Epcj1VzqLyPR7iEy2txPbxyElIgxbYB6s3JPfgDn06Vk3Utq2EMw80KARN8pJHcHp0o8LhZ/NEmxjlgqyA8Anr9c07V7WO4KLPuDDOGAHOB0/PFU1yy5WwlqReTOsDrDKcFA7ohI+XOMnt/+uka4/0NIG3YA3HOeDzyPbFVprePSvKmjuhJERloG5IPTAPrU0tvINOjuZPlUkAk9yeSMevtVygtGhOFti3YaYt6FgjQsWYMMDJ69BjmrV7or2srJdFYiPvBfm2Mc/KccBsDOOo9qseGtQaC1maKSFN0bb33YyoH3CRyAT9B68VBqGsoYjJaCOQSfLkZ8tSMjAzye2e2fWsXGo3ZFQgtGzPELW77raREdTkbCVYY75PepbW4Ekj2163lrOpjeT1ycjP0ODnqPpSEN5IdlLl1yQ44XPYY6Uy3jhvJRAsgt5DwCzYQ0JtGWqejLdhEyXUZwqSZZJEjGORzn6Hr/jU2ui6ggjuIA0iK24Ec8AH/APXWdJJLZSSR8O4Pl4znP4j3FbGk3UN7MILiX/VQ7VXHyg4A/pyfU1Mrr31qjohUSTRR0gWuqXkG9QyE8qe/sfx/GtXxF4as7DQrG/0+/jnW9doxabv3qlRktgc7Qexx265rn1tJ7TxBcJaxnyCpcHAKpnuR6Z/GtM2s8hF1dzKgAHleUv8AGT6dvXPT+VU2oTVnp2COkfhMjTmPkROTyG259xxj64xXcay7rGL+3RUmKgzBB98rwefXHP41wNgJYxePJcJFEgZpN4J3uG4AA/i5PpxXfwz6JF4Mubm/1gnUChFpawoHEvy43M3Reeo64qcTSlOpGUSYpp3RxOoatPJdyzWgLWqgZyoOM45Oenek8RXVpfRQPb3EjjaoZCmzDY5+vOe/vT9I1IaZps0c9pvimJJm47gjGD37/wCFGlvBNHcNPb26CZg5lOW8pP7qr0B49c11xioapbFOz1Q3w1pS6/cRabGwW8ndY4mdsKGORyewxz/kV9I+HdST4caXp+m6ppF2EYBJL0MjCR++CDgjjgcHHHNfOGnXdxZxz/2ZFtuH58zByg54+vvW5b+P9YubG20jVYDcW0LEiEZG8/3geoIHTtzRPnlrEIyjaxqfEjSvCdl481O8htmfSLyxeWCK0YgrOQBuHZVyc4PHUelc3o9zc6Hqt1Yx6gFt58QTSRMdsqMBwQOT16dzx0qHU54pFnhjgkR1gKxvkkuWkDEPnjpxxj1NZtrqNz9phjUJGsW4M7qOhzy2OcZPHX09qpNySuS2rqx62fHdrp99pvh/w7Bax6LZXEEclzLErS3ADfM7HoATk49Pyrf+NemyatpFpqukaeU0zT9wkkMYj8wOQAVXrtGOSQBznkZNeZW3h6DT/Cl1q1xcQSyyTrHb/vVOR/GxXrwOnXmn6z4m8VN4Qg04XcsWjRYj2kjzHBOfnPUjsB2HXmhO5ettTnL27uLjT4bBJlit0lMgAbYFJAGSc47dev6V1Gg+AtetnGteF7uR7e1ZZIdRdDbiZ84Cxq2WcZOOgBzjmuZ8OWmk3Dm58TXNzDbAMkRhQnfIMYVj2HOe+a9p8H3VlqMkccvjia2j04RiCKSSPDSbcGQLKmdmDhcjOcn0NUtNBRjzK7PMdd1zxLpXjYSeOrT7ZqMWHSG6zsCHODGU+VfUMATn8a7zwn8T9Q16wkt/FGlWy+HwzRXepzF8bTyEGBhnx3GPXrXpOq+En8R2XlXmt2eqQL0e40+KRh3wHjKkD16VzHjK1ez8LXuhOdGv7DSLX7Q9mgltnjQAlTkMcnkn0z71dxKLfU8ksvEmn6R4tkvNAnnuLe0mLRNN8jyxdw38j7c1vfGW9sfE+j6Bq8TJpk+ZIhp0rhpWQkHzMLwBkEc4JrmPDvhnStY0z7bKuo2/Ow3EAWUI4A5ZeMDkYGSSeM9AcfxPYy2OriSS5S7jnjEizJC8Qkx8vRsc8c9Rn8qm4mmldnr/AMN/itoel6Zp+gavbXVtPEgiW4jXzkcdif4gccdCPTFejQ+ONEbw5Prs8zW+nrK0MXmAeZcMOMInUknoOvfpXypceXFdWtzZhvOKASlmBBPI+XHbHXmtu1uZdGtnngtBHq0yNPHczgloYsEF4lPyp0wHOTngc81Sm0CV9xPiXr9trOtX16dKW2d5QqoVG9W24O9xzuwB8vQE4PTFYVte6naCBraQwqh8yOYAttkx97HQN2zgkdRUfh5he3TxthFwWRSw57EkHqcV6J8LbSy1Px9p9hq0MH2XZIBCyDZO23IUjoTxn04x1qW7Owr31K3wT0zXNb8dx3rSSPBav5l1esFcn0UO3OWPHHOMnivdviRFbSaDI1wI/Mtf9LUt1QIDyO/+Ncz49vrTwrqmmX/hSJLZ42ezvBBEBbshGdrYwvmKcEdcDg9gc6C/l8X6de6dpzvdXDxPL5krbCGJH3QcFv7o7A8nHApSlbRGtOHVngGpxpB5joQElYmNOvyH+tTalei5vkeJbM4RIyd5zI2BliT3z+FbHiLwf9j0681OfVUa4ilNuNOkiKXCMScZHTGATkEjsKytH0fcjtfKqx7crvbGD7+360OcErtmL0djudR8CjXfBmnah4Iikjv7MuLq2dgk5zg/eGA+Dna3ccdQRXO6R4l1nTvEHh+PWr+6mh0ufJjlcuEBPzA+vBIyc4HA4qHTvF114cvVFnLM0aNkwpMyIwJ6Y6YPpiqHh2TQ74agNbubm3uzF/oYjTcjSZ6N39vTnPpSjKUlqtDSTV1yvU961vVrvRLD+0td0RbnRc/6E0UwnWBGHVgOQcE4OcAcDnk8RpHiXxJrV/aWenSy3gmLeTbugLBQDtbJ5yOoORjrWr4C+IFtpHgG50W9hVrtJWS1WZsoiEAlmPXAbOF79Kz/ABrqnh/QbCW70y/abWb218pGs5cbnZ9zScfcUAbAvHUjsTS0vZGjm2rnAjwteWDXNzqE1rD5MhWcSEs0RBx8wA5PXjn8Kfb65Yto11bSWsP2nG6KT7pyCOMDjPB/lXZ+Bn0O48Ka9eeLLq6udWnidYI1LMWZgNpJPGQQBkkjFeaanpV1pJiXUrd4WmQTRHHEiEnDL7HB+lVdN2vqYN21RPeX0+oQQLfPE0dpGVjkCBWCn+HPcZ6dTV/Q2m1aCFLu6mjWEsIGBLYIGeFPBHGCPSs/R9Fu/EU5s9OUPJFDvdYUJO0N945wM8j+VJBI+i3l5ZpHczXduGjxMcJE4OM4HPrjkDPrQ1dNLcEnuz0/w5p+ja40kGssllqbL5sflnbDEo+bDA8lsdumMD1rkLpvmIiuJYoZkdcxgAsx5APoMYziq1/qMF/cyyWtu1qCiBo2Yt8wUKzAnkgkMfxqzYWkt1HJIuHZZNqAnHOOuemMY7+navO5HGVyua8kkS6L5dtqEaTGb7KwG9YwC7fnxn/PtS+N9aml1C502Flh062bZHBEflJ7ljn5mz3/AKVpa/4f1Pwnf2EOoGFmvU3x+XJuxnI2E9Oex/Cua8Y2rWXifU4WmWbZMSJFfeHU4I+bvxj3q6ULy5pal13ZNIraRcXAlt7aGWTY8gXap5OD0+nP0rrpPDmr/wBpXRcQPJuX54nZGVmwAUKjIJ446VQ8F+GNS1Swu9S0xEA09/MkkaQLjAJ4z3wPzxW2dU1Sy1v+19N1BNTubECUyRQ/uUypHyqepxznsR17VbbT0JpJpXkctr2nat4a8U3em3hhmuIG+dchxudQeCRg8EduvvzTLU+fGsaSGR2OFDLgoT9Oo/SmeJ9Xm1XWJ7qVjJPKwZ52Ta7MfXHFJrFkJrW1uo9iSlcNGhJJwfv+pJz+dU5uS1Ic738husWt9Y5tX+fA3bBLtCk9ju6ngfhish5BEVMreU+CxXGScHoMcfh0qw0yqR5hZiT1649/rx+VETCdRANv3Sxz7Z4H5U4Nvchy5nc0JYLhoI7owExqoEaoflCnglT0JyOT68cAAVny3C/ZJmilDHOEVTnBP6g1djjgtTbRQSTQzKp84RyExnIH8Pbp0qC50sQSx3wtpQJGJWQqMNjqf1oXKt/katO2h0+gaLBJ4Cub63Rbm6iupLe5OfmiiKKIj/uls8+tcDdLsmCk8DgexH9a6zw5r9vp13e29zG72F7DsfY3zI5GNw7Eeo6fjzXNasxlv5WLxSFSFLRjG7jqQeh9feqhe7bIm1KKaNXSnkS08t9gQ5kB25bJ9/Tj+tQ+ZK8oiO35j0YAg4z+FOt9Rs1eJbiQQIpHDow7Yznp3PekvDbFt0EyPGzYVgcjPpn1qXGV72LhbZmp4et9Hl1OSLxBqCaQVQFZJIWlUt7beQe46Cq+sXcVndz2OmXi6mOkdyEaNWHZip5HJIwetVnmknjVZ2TdGNoZ1yR15+tR3sdtAf8AiWPnKqX8zks2ME57ZPbp2oi07X3/AAHJxTsMs7fakuSwON0kpbkn1z0xUFvcSmcxNIs0WQM9QVPcDoeKnl1ojQrm0OVd2zIOOcDAx+JyfyrFU32nTKhLodwGz6gHH15FdEYys77id1sbtwwjti6gBSSAAOmPasvSZniklbdGoLnHmNtz6f55rWuoLi40lb7ym+zpMEdwMqCccE+v68Vz17bESTSNN8kc5iLqMjA7gelZ0IrVMyimmdnaXiy2Lx3WMzbiSpzknHX9aQSm7hjDR52ADgjLHkd+h4zXLS3AjgEFiG3qQXaTg/gPwFPtNYubVSsgKnqOcYPfH4d615L6s3576SRvXVioZ2CESPjKD5uRxn+VQu8NnYBGlLRRklAxxgnr05xkdOtZd14llmjCyRgbFCKU+TCj2H86y21HjZHGoXOeef51SpX3E5RTvE1o9SyjMY9sbkjaR1Unqc81Xdkj3NEQEJ+ZR0PPUZ7+1U4bhrguGAyOeg6VBDG01xsAdyThVAzk+gppWbRmpa2NJmMwyrK4bjk4J9qg1OC3tS0NvcCZth8zABCsD0BHBHv68VTBkLSrGpyv3h7Dj8/eovMY/e7Aj6ZzVpDbNTTpAp3KckkfKSeeOlW9WthqEDyxQhXiAOVHHPb8SOPesO1mCAdDgAYPNbWmapJDvTzWVHBVgDwR6EemamcNeZboVlJGDaAq3JwD+tNlYw3B2k7TyPoas3UYhuGUFWXOQR6Gpo4VuYjGULSEgLj1/wAMVd+orFjSNTZJUJZht9CM4/HvXVWl7DfWc2nzxhy7+bDMx+YAD7pHc88GvPpY5LWd42yGUlT+FXbO+KEbsgjBDDsfUe9ZzpKWqGn0Z1Gs2dzbafL5ysYcFSc55Bx+fI5rnpInmhTyhkbh/I961V1KeXTJ4GcTRNEyLnJKg4P55ANVt8dukaEjn5V49B1/z3rCLa0W5M1ZqxXgjEDgMwLHIwoz1q5bzLHLcIcooUYBB549PXIxVUWjqRIMsrck+nP+eamkj8vLEbQe7dSKOdepKbiypKqeQ4I+Zuc+mKw5lKSEc4zWzO4CnaOPX/PSs+5TdGGHUdeO1b0W1uF77k+nSCT92xAI6e9adjdSaXdm4jVXBBUgj1Hf9K5yCQxSBhng10NpNbzIpkOGyCc55INFWFul0yohFHLC5EqZknAkPHYn9O9dv4a1+O2SG3uH8pThW3D5eOM57VzNzcF5WaADylQhFznGf19eKveFHtLzVobW8QSrLlR2w3Xt+I/GspJzSb6GkZNOyPQLzUlglSONTKzAfdIwB/8AXq6OQKwktltJpCF2Qx4I+YDAzjv7Z+lc1rvi+WWM2+nARQDI8xuWf3HYDp71zUq1SU2mtDVT5U5SNfX9eYXElnYnbt+WSdcEj1Ve2f8APWuZtraZ7hQqPyxYKBncP7zn/wDXWdbXDABpXLkjheyj6DvW7puozQvN9lt1lKRhyu5gc5PHB9K2bd/IyjPmldkdvZw3N3suJgkajcUiXczEHG365x6itiHR7nS1t5dRmjSGSXzFtSxZwQDzgcE8dcEVy6apdjUkvBIRMvBK8H/PPNWNQvr59T+3XzlnZCqOuMcDGB2Az1+tU2rWQ+ZR1aKWsahPeX0nmuW2uQAOAuD7dTTIJblpBuumC57nj8j1rPlXaSxPzdTnv9atae0t1coIkLhcckZC89T6fSk1pfoYpuUtTP1qTEkihsruP861NVsY7DRtCXBFxLCZpMDnDHK/p/Ks/wAW6fNp+oIsyEJIgdD0DA+lWL64k1FoH3MyRxqgPX5ff044rdO0VbYpe67Mq+UJMGNR5fGPfmo5wjyYVQMcEjNSXsjRIEThj+gqkhJAGcAnmqg3LUb0Ok0m5nimjntQ0LxkYkVsEf0I9exrtZviHDHp5ju7Ey3ZGGVGwjDHX1HP1wa8uiuAcI0rbAeBV2K+to3DthnHHrUyhc0U3ayZoeINav8AVEt4bvCxRfOqITgluctzye1Vbq3iXSw07BLyKQxLHjnHXn05zThqFvKwMZEZUg8Acd84rOut7F3LFwzEl+u7qc885oUdUZyWt73K1miyPPyFcDK/hVu2Y7Sznavfvz7VQskMjyFVJOR74HrV66ZEiKKOmM81b3sESYXS7cDPpnPWprW+IkAH3Tx+PpWOCjHgEAdqtW65YYHuDQ0NMt6ncM0oWPJLVXSCSWM4YAjrn+lXRaxXKEyf61cAAdwT6VLBoOorE1xawysoyPlTcDj2HP8AOspSS0Jkm2VhH0JwSoAH+NPC9MKKi81FnVLuNoWU/MOn/wCqnv5ayNIrMvbrx+VQ1pZkp8u5T1OIeUrAe1YzDmt+9V2s95zsOCOMZ7VjpbtIxJ4QHk1vSdo6g3dXLWmwyBTIVPlsCASep+npUt/PuJSM9ufYCh7l3g3geXFgLGg6nHFQyx5YQodzn5pX7Aen+e9X6lLYrwxh2LkHYOB7+9XLOFXVgwJypx7Ef/qoWMAYGMKPXvU8J2srDqDn9aipLTQl6EKwBSRuOCOMmi1l8slGU7WIOeuDVxfkchT0PH0qpcDbKSuPm/TNTCXMOLuWfLMkheMhT3O7G72FSOdyBXADHt1rOtHby3iaNWO4EMVyc/4VoHasaABsgYyD6e1TNJMad9EXtNihltbsTzojiMlfMOCccgD3rPimCsSxGGUqMnpnP/66YW56n+dIyhxhgD+FZrdtjcb2ZPshgT5ZUmAwu0N1H+cU3zN8ithRnpx07VAGaQ43EgcLx24/zmtCCzgKYcBiD645pySWrMmkR2skkkwiJU5B64HOasXcaq5aPYyJ97ngn/8AXUstpHEq+SoLdSuep69v5Vnw3X7zayAKwIznofcUK0th6bEDqyF5EAjPtVHzJXYAyMUIyOe9XUkVrxkuJWWJ+pVQdp+n+TSxwxQ3bvGxeBeATxye1bRdgV7Eum3V1p9zDcQborhDx9Tx2rOuLeciSVkYDJJ47eta0hSRZQLhVlY5Qt8vTPUiq9veThxFIVkDHAY/Lz7npilGWt0N6aGE3U0iPtbIPOas3kIErlBjrx+P8qpnrW6d0Jmzp94ihwygs2MNnFaQtp7lUuZXKKpwiKefTPPf+lcsjY6Vr6PqjQPslO5CPlJ/hJ/pWNSDteO5SlfRm7FYKkqSgDeB828l2/PtThBK16A33BzketQG8DZwx4OBz1/CrUUojSQnrtADbgMHJ6VyJVL+8arl7F25QfY3DMFYjA4z/k1kRorcSqCemOnJ7mrtjeJktOGKFSqKCTnnrz1NVLmNxP8AuYiYzjPqP8804q3usmpKMth0amJ2REPlsOcHOT6c/hSXUzJJCru27GQo/h5x+fFWJo0dUSASCQkADOc/THP4c1TlhEN1vuN6kD7vcH69cd6OXqyOWyujRiljnSEGQ/MeWA7+mPWsm8hkjkbzIyiJkhsZ46cHoamSNp5A8DqpAycEDGPb1/Kktx5qFpGUKgyEZuv+1j/9fr6U4xd7iactWYd1CVO8g4zgfSqnmMjhlJBXkexFdFqSGSPACsuMAj1rnX79Oa6qU+ZAjVS+jixcEB5mGRu5CfQVm3d1NeSksSzE+tRQxNPMsYIGf0HWt2x0/ZFvVMgngnngdz+tOTUNRttoo2FqqAMwJc+oxWlZzr5hRsYAzjbknr0/xpJN2AOWOcqQD0B6/SnTSKYzEcxkgEMp6c9x/jWLbk9SFox8lycnYAp+uT+fSlh+clpssRyq+/496zUL5KSHkHr03D1q95xtdiKMuw5PXH0rOUWtEDbvqTmRQ/71WGR9zvmq5VZn3FB6Dnp/n1p0cIYlrhWBPP3u9SOnygqMBjjrUfDoiuW/kOXYoXAGF74xVS4VlfOPmJzgjpUswborAKPzNV3Zt/IUnuSc1VO6HJpaIfPNcXCJ5rkRqAOBwAO1UVGTyPlHNTyO7jDYxntxSsqLCF2hi2ckHoT71snYi99WMWVbacmEtjgcjHP+FSHexLlhgEEL/wDWqusbeZuJJCjk4PT/AAq0iuX2nAAGSenFVoVoKFdskkhs/SpUEcQy6tLjPtj/AD9KVAVLgA4YZ5+vX6e1FupeVkYk7s59+e1Z31Fpe4kNz9oZozCEjOOmePxp8hEBKBBu6evQ1NNDuGAFB4HUdhTZnMByVR2IwS3bHHFTvqhNa3Kdy+XRmTnGMbcdKWyugt0UbABOM/Q1PLOjwSbwFJHHP8qzrePGWAYjpnFUtVqLc1prf7QTuxsDEjnGT7e1VJoNh2oCO9PjkkCFVAOD1yfypjNIzgEEE9eTSWmiBsjPmqATv298Hnqe1QqRuBBcr7E1oWpbz1C427geTmq90QblggzKc5UDqPftWilrY0Uky9oh37ogQ6SZOBzjGM/zFUbiIwXEkTfeU4/CrGl3IgmkmlCqF2Kg2kAZJPb2HWtLxVDC4sr+1YNFOpQ+zL2Pvg8e1S9GQ17tzGkhkmj3BhweevJ/CqipJFIyv9xj94dAT/Tt+tXpoGjgWaNwsij5sEgkH096qee7p+9wxwc9Bn64q4vQrRI2dQumlt7C+h2RXqoI5SM/vQowCynIz78VRl1C5k3ZcoGHIjAUfpU1vCot0juFXDIHRh1IP9f/ANdJ/ZZkZ1tG3yKu/aT16cA9jzUKSvYd5PYgaaGS3dHgcy4+WQyscH6HjHrWh4aubmxtppp9KXULFNyZfdiBmGN3HT0BP4c1mSxIthFcpMGLuUMWfnUgc5HpyP8AOa17m2fS9ORFmu47i7jxcREgIygjjjk8joRxirbWxUHK92Z2m7DcxiWTZGpBZ/QDHPv9KvX1rc6l5+qLEIUcnloyFuGGcnP3d3sO9VLTTzcRSnzRGwGUypIY56H0GO/NbGieJp9HVLHUYWNk2A6oc707jn5T9eCM5qJyd/c1ZcWtmYMU81rGSgXa5zuIyCR7/wBKQahcyMAuM+irQ14n9kyWqqBm43qe4XBGCemOh+tJpyeesiI6Iw5A2FmYHOef196fIt2iHfoy0l3m2MhuYc5+4ELNjnnHT261I+oSy2hWNQsb8NwBuGf0q3qWiw6fo9vPY3N3JPcPtCPBtVgByynuOMHmq0628KRiMyTTCMeaZDlVbHIHt+tRLkaugm2lZsfps0gVltFO4gKVznGPTtS6o1x58DxELMjElWH3eO/r1NWNLdIrkpIm1yPu5xjjkVWkDLcN5gbO4k5/P/CsU9bmV2tSaKVyFglWIlvmLAcg46Z7Dv8AWmynylOCC2OAfWq5bDcA5wCPc1LCyPKxkfr0f0NRytu42m9WNSRTH0IfJDA9Rnt/nrTbpPPRSc71GC3dSOMj2qaaQzlQQGIzlgPvc+lRujLuIDYDf0qk2noS99CKPUZbZofte540YMssYyUI6Ejoeg9K1U8QXMk7XEgi1CNLaRWXZnchZc7l69s+g7VQjtpJQwRA/GML3BHp/Spzp8OlM0k0i2yzQMrEMWJBKnOFOfbsM+2a3jNN2a1NoSbMqLzGtFuwoWN5GVQCTjB/lziu307GqeEZEJ/eRKTuPZk5/lXGx6iRootVgJtIZWWOcAbsE5w469ORjH41veGLwQ+G9ejTmVoxs56ZBBI/D9KKkbO5FrMzGgnkG6GI+UAC0snGfYeg/X6dKlit1gXac5PJzwTnvx2rHEt0GjZbg7k5TKg47/L279q04FS5tsSTTSSDrub1/rWdWPnoawav5iveRRhlSQg4xkDdg+vvVO2ijYlJGSVSchn+RgT6Hp+uKdNYAKfJY7h1DAc/Q9KW08nYkTHbKSchh+A68U6fLFe6TNyfxEbWccUpUuWcHHlx4Zgc+vQfrVvw9py3kl/ZEeVeIjS2znGQRztPYqee3GM1KlmpfJUFh1wPvAe/Y+9LbSDTdWtdRjYnbIFbJzkHjHr2/KrjVTWhF0Z2muWmZoUdLhRkpG5R8eoPcexB9/Wt9tR1DUtKbT5oGnVyCpeLy5AQeufun9Kx9SgRNQme3yAspaJgxGATng9RVldbmZ1MhPmMCFIGCD7Y4zQ7T1Q42fUxbi28l5EGwyLkFCOVx7f4ZrVuY2soFjMTKQoO3cueRndwcZ/UdKryW1rNIpkknC5+YBVOfoT3qW+t7eNIv7Ka7YYPmLclW/7529vUU5STSVwla2jILe+EbkvESx6Fj2rSjvdPnDeYtwjlNqlCrDPHrz6j2FYTFeQylfUHt+NWbSxe5yYJoY1HGZZVX/Ip2i1ZhFp6WNe31K2srGWG1t45Z51w80yBio9EHRT6nk+9YzSiaYLK4Uenp+PrV59NeP5Rd2btx8sUofI9RgUiWFsuN25275OM/gKmVSNPQcpcuhueE9DudXeVrQw7lXCRyNjcB1IPT0pmvxyaTLPaT4FxGmGAYMFyM9R14PTg1Xt55YLfy7SeSHbnBQ8j2z1A/Guf1TzowfOdmLnJc8g/1J+v61lTaqSuyueElpuU5JBK5zkRpyff/wCvU1uQZCT3Xn6f/qFVQy+UUGck7if8/wCeaejSZCojA4Pbtj/Cu2xIzY0jEgY7kmpI41BAVTI+fwFLArTZ5OB1OOM1PFbSyzCKA5Y9cdvrj+dJuwDI4ZZS2M4UFm2jp7mtg6Zp8ehy3ZuG+1+YqRQryXX+Jz3A5GPU8VJZ2Gt2dtcR2XkPFMpSVTgkg+55/XrV7R9a1bS9G1PSU0pZvNG+WQJvaJDjPHTGB1zweazcr/Cy4rTUyLLR4LqO9SSeSO4ijEkQX5lkJGdp7g47888HFR6P5iPJHI77goKK2emTyM0/SdQSzmmlSVopCoCYyM56g/hV2fVJ7y0ht5nWaOBswPgFoRnkA8EqR1Ht2rOTk7xewlJLcZc6aLKdDJcxyu43B4m3Bs/wsOob2P4ZqcxOh2yYGBjbwG7jr+dMujN9pBuJBJv2lZOm9c8HHboOOo6VNcMJ5AHzuCttYdj1yfUdaxqSd0mRJ6gyFoDEpQAknOASCRWW9nHaXBkkVZApB6ZH5H361cilkhYeaA4B49x/hUjzJJceZJAfIZ+UQ9FJ7H/6xxRTlKPUSbZEtxG7GF4A1xJIsiT5wEAzlAvTByPTGOKtOxWT5hgn5hz2PanzXFvsRY/LRy33fvsPTnpnB60SGM2SySMFZG5JHRcfryKVXVq45oQIznEb7XXlT7Ak8/zFPg06GOdZWTfIH8wHPQ/hwRx071UjkEjmF8qSMl+SMdfr7fj+NSmC4+y/uLmKNQw+V3C5z/M81HJLbmtcuk1HSSuaH2WFrkSz+XsC4VHUHac9Qf6e9XNN1rS7DUYJtQhluLEP5cwVMYU9WHcEZzwOvFc5Lpl8ZNklzGzkD5A2Tz79PxrU8KeHUvze3mozzxafYKGn8tQzOxJAiX1djnHtk1SoxavKVypJOV1oeg+OvDmmWc1hcQS28wkRrmCQy7fPjYfIAewIOSewHHWvN7i7udc0+5tWgCNA4MdvEuEjIzwAOnfnJJ689a7F7m3dLWy1G3jZlTEKvFtMSZJVPqMnjr3rKt9Ng0fxAJhk2l6Nkbux/cSA9GPcY/HHrWNOso3jbVbG7g5K9yrp2m6JDbefqVi1/bX0Ya1eG5McluwyCsi9CMgjdjqPwN3w/o95bWa6jplsViSVl8wJ5gR1C/eJHT5h+NbGr6DLcyyWllcWk1wOYZIwdhJbHHcgnuBnPPNXfCt/feH/AIeeJoJHf+2NTJjht8YEWxvLd8dQfmbnoNo7mqVR1Y3v95EoWacTDt0vItKhubhoF2YEpJDqzA4xn1xg9uaxLvVYvMulFtBNKmQFkQjdgZ4xzkVu+BdKY6ZLHq+kPbJMBc2k7xMFkQcHbng9j3PJ7dKEOm2Ml7/aeluCUPz25YNgE8tzzn2rnjVVOpKEru33a7C9jKMFK97nGR3kV3dRRtF5CFuTHzjP1roNItRZXF9cWIUpAQFup2xtB7qOm73xkdueav6zo1oI5gYVj8070IGGUnuB6etU7WO9gVLGaNJwxDgq7KC3TcR3PX0rojiIVI+7oZU2h62C65JDFayNdSYwsaNtC9ST83fJ9yTzWdf6Kmn6u0NxPbWpCkOtzMYuV56DLE9BjqTUmq2byamVBjSdcIRCm1FxnjrnPvnINQ3d08cTiK6n3g+XKk+JVGeRjcCR9fyNaUbPZ3LSgQzyIJDJp5MiRDeZYICqL3wC+Dj8Kke4MyRs32uaYDbHF9nwMt754PHHBzV3T7H7dp93LeSC3S0iVkkhULvkYHYmB8pBAZjwCAD7Cq3h631C7ne5tLvyb+3x5MpmKFGB4PHOPc5HatJ8kVd9Asov1NDVPB14givrnS9UitFj3n7RAIUUnoWOTxnHofp1qzaoixu0uHZAIgpjAwP7gA5C/rnr3J1brxH4112S30LU7q+vpDwEgwfNGCecDJAAJOegrH1P7FptyixXO5ynzfMGznkY7kc1yVKkpWitb7WKvF9LIwNW057C+hntJVEc+54zsDB2Qg8g8Y5+vHSjTbqHUdSEl1byJPgttiX90Se+B09e/NQXkgubuINkoGx3yM+uf8moZLm4tZ8ROoywBbjDemf1rrveKj1sZuoovTY0tUdBG6yPgABmxxu9hWVC8c15DcsSqxYO1QTyO2KZqTmW8bacqg68gY9R70/TLlbW6C3VsFjIK8rnGRwcHjPce9EIcsNNzKXxaFoyySxuzRyIXO4uRyc9s+lRW32d5hE0xjJYYfsPrjvVkSyXTutoxUD/AJZ5bp79eO/6U1dHnvoHlgMTsgBf5lGOSOfx+mO9Tbl30DkktTubq2s9N8OPdiFbmWaMsIRIDIHHHXrt/wBnHeuba4t9S0y3mhLW9wuBJFyQxHf1H0qx4enBtmtr9S88X3WT5tw9c+v/AOurU32OORJWmgySSFMoDDB9BzXDTUqc2mm3ffy7HUq/OlFqytY46dtr3kakYduOeoDdPpVN1WNhFkBEG5yDnPt/IVo3kf2WEziRJMu5Vk5Byf5+2KzLWSDfuuVLljwO1etHuZPTUkTN86iSZP3a7Y4QGJb/AOv3P5VrQ6ZdrbObe2uWt1A8z5QNh69M5qhds9uizg+Xd7/kYDkAf/rFM07W9Rtpn23Essc7KJI2P+sA4x6+ood2vdEpRXxF6z1S6WXyIgIlyXYKgy31Y8ke3Suo0rw2n2Nb0X4a6lwcFCxHt6498j+lc/r+pRu6xq0VqsTbkhtlzjJ6AnkD259KjGoaxq0MNoblrTTgTjJIUn3PTP5CsJxbjde6upekXqO1c3H9t3P2ULlAqsyuWAIHJz65zxU3h3SbnWLme3soxK8aNOYwceaAM9cZx1PNEkNraRGGO5jSNvlO9wSrfh1+vapPAWu3Wm39zLaW8F1IYWhEcqlhh8DcvTniqu+S8GSmubXYv+EbGS71waZPoNy91eMEMj8iMZzuTPT3OelbvxV8Nz+Erby3vIJo5gY8JIGeNh/CQOQMHrgHt9dHVbyT+yHuvMLTPKqRhiTIHPHB6+4HNeW+IfD9xYRpf314lzPdOxbrv3nnJJ5P19anD1fbJSlp5FNWWhv+GNIm8ean/ZlqEga001fLdsKp2EZ3n3LEg9uK6LwDeJa3N54b8T2c1wLWN5re5tmAuLYL99UP8aY+bbyDjGD0qp4P8LaQw0h9R16Wwt9SJgnEedxIIxCT/D7kjBPr1r6F03wf4W8OxRLbabYwsnSWdQ0hOP7zck4z04rVy6Fxi002fN03ifU9D8QwW89+q2Ucokh1G0jETzwHIViUwGGMcEZBGDzxS+JfiJdSS6rG722pjULUWhutpVjECWxg4IYE98/jUXxe0H+zLu6eyeGTTLW/dIRG2diTKsgX2UHeP888/oOnW01jdHUbaT94h+zSKcbH45JPG3n659eavSykS3Pm5S34Q8Q69ZWV3pehXZt7K5w163kgts4BJJBGMeh5+tTeJbq2W5vrTRZp7nS0bzIHvAfMj3Bd5I7ZYDtk/nmkJktLJ7JbyNlVt2wDAdwOCSOW46ds1p3Oo2MngttL0zTrmOZ7lJby/K5aUqvCkdQoJz1x3NDfkJL3Tf8AhLNoVnDfT61psepXpdEs1LEYJznnoBkDBxnJ4r0u5+HOoeJraWXxNNcxwlVSOCCVTP5YO7DOwO4cn5SQe9eIaDG9tdRNAROI8sVUcPxyvPHIzntXpuhfGzT9Nhigh029a0VCTFJMr7GAxtRjztz2/L0rO95FRa5bNnO+MfAfh7w34k0C0tdUuYLaffNPLdJuaHawwpUYIGe+OPeu60z4dDXLuPUkt30qy85nt57eRo7iaNjlWKtwijoP4iMZxXC3fxMtdY8XT6xqOkWzyKqxWS3EoCQKuTluCGOSeowP1r0TWvixregW1imreHLKG7vlV7Ui+DI6EgB8AZxkg9emad7vUpWSvE0fFPg8tptjZaPaXH2k+YpmupvN2IF56fKBjJ4A5xXgfhGS40zV7e2t5ZILx5kVbjzfLQRbhuz3PA9cCvXPG+pxeF9fjk8d6rd3Jv7YzT2Gi3DRKhBwqkE5KN65UkjmvGJZYdZ1Sa7sbY2WlLKfKhkfzWAHIUnjjoO3HGT1qE3Zt7Ck7tW3O7+LtmbrXbXWLRPOsL35YmkfLuI/l8znop7D0574rhdTkSeQWgI3Ku58H+VMkvlmm8qCUOife2rtCknp/tY49scDjmrC6XfPf6Pe20DnzrkW8D54kkUg7ee/I9qylHmmrkTgp3kitf6bAIo1lEbPJHkyRPvI9M+jeorJ07RXe9xJIFEatIGGP4Rn+le9fE/wc2rX+m2nh3R7oX2JJLm6wqCQgKSAOAwBPLAAZOOTnHmd/ot34T1eSy8TWsttFNEypPGFkRweMgjoeme+Dz61pHnjomKUJc/kRR3ltezyhYYvIAALPgtuHVsj1645qjPPZ2yyXgskW6diYzypQdm9j0I6evSuq0rwrZi1lujrmirFJuC27zkTY6ZVe59M8Ec+1cldW1tHO1zfC5lshKY1WLKhyBwpkboMegJx0q16lSjLdmXqHiC42RqqmK6BB8yMBQQMc46E+/Q1BNfT6pufVJZZJY0Kw4PQ5ztx2GTnsBXd6l4Z1q5sF8TaxpOzS2SOO3NtHELdIT8qhcNuHJAzgnPU5ri90dve4glbyIpDtJxk5zn/AOvyRWitbbUzcXfUpQT3tkDJaTywncpLxuV6HI6deee/NaNn4jurm91ma7WCS71T5Z7lk+4pYFigHGTiukvdW0xvhtfRDQbf+1J51iS+yAYo1weB13YHXuG/CqXw68JjXLgQx31l9vmXzIbN5wrOgJzn06fdzkjnGOaaateSGotNJHPrfBNS83Mssa4UmTALDPp06V6P4P8A7P1PSLgR5EsDkgSMMYbowB79u/btmjxnL4etZYLa60iGw1iBSl0CFaNjxgqEJOOvbP8AOjTbXw94Yt5p9WW/k+0ThrcBCoa2HOQc4LfmAK46q9omrNM3p03Tle6ZueO9c0vUtBtLcWs095Yq8LysR5ZVuAoPfnBH0NeZQWJdthJIfgKEznPt61v3Eui3+ItOiv1DZP74EZ9sDgDuKxYNLv1eSaKO632rB0kiXLDHTHvWEYckVG9iZSd02r+hu6bqGoQeB9a0yyWFtK3hri4fKSGQYPlqO/C/QD8AebsNQacoltKVdvlUKdp9MH27da7Ow1bQpY4JPFOnsiSZMz28m1ZGx1ZR2PGea5bXrOx803enxRwwtORCkb5XbgHORzwTwa1jrpNNMUr3vF7E2n6XLdm8kKAi2tzLnIBXBxu9CMjmotJ1PypWFva+dNnmVkDBR04B4H1xVC0Nzeq0URY7EClUONy5zg9s56Z7gVJeX0FrdmCyINkEDI2CPMYDndnnOT06VqoLZIzeq5hb+BvsySbY1UDBYsBuHXGB3/I1l2KiW5UMQBu53dMDtkc4/pUvnNchjcSEqBvY+gHbHbrTbKB2KuuELqHTeM5zjGe2KcdNzP4pKyNjVptPht2i07d50j+Y+FwIh2QZ5I9+K34tJ1Kfw0l2UtntLVGQZkAaQMMEqv8AEAeM45PTPNc06reG3SKBoZUBEokIA3E9B7f/AKqs6pfgRBVVpr1SFEu7MW0DjaOpPtwOO9ZSi3ZRNeZptmY8SMsZiT59+AuCe47Ve1uFbeCOINGNx3CJSCwA7sBwp6ADOfpVURS3emzgy4lHzgjAwf6/0qnpEMupySuGzcYIZcEbSOPpyccVryK3M3sZKJsKVWzEU5jWLqd2Mt+HUVm6tFGmnw3dohWCK6QMdu1SSD/hXSWVpbsJftiRpKu2RFbOZc9VXHBP61L4/aCz8F/YUlXc0qSeWse0Dk57deTzXPDEJVIwS3ZS1d2JdNaa6wmjtTbTRqEkljI2S4xggDp2zxVvQrrStL0vV7C/sDLJexrEJmUEx4bOeRkfQde+a0tE1/7Rpy2p0a1nPlqPPwPMB6Z6c/zrO8VW1vdwrcaZaN9otlJuVGeAR/F2DdcjOQOaypVHKpyONl63O10op80dTz3VFV9WaKxRVCD+9kcd8/0/Cq91cXEVxsmldpVIcknox4znrnoO1X5DOuos0cUZmBHJ98Ef/rpGubWOW7n1DT2vGcBVX7Q0exhnlsDLd+MivWUtbHK3q1cLHVc6dBYX0jiwiMjJtb7kjj75AwT06+/4U/RLiCTR57SeHdKJTKZOuQQBj6d6sWWlRXvhi7v7eW1iS3PmSRSoTICTgKjc5BB6H0zWNbebbSL5bfK43evA7EfhUvlkmkKWi1Olext9Qsg7hRJax7cg4dl45z0PYdq5rWNPeOHzYyzxqdpz1X2NXrXUZVuTDAAsmcje2A/t/hWrcXkc8kq6hYvazyRhGVicE+uDyDjvzUqcqfmVG01ZnL2VvHc25kOcoAHGeh+nXH9alJtlQLDGpwQCxHA+p61VZZLG7cRsCOgPXcCa247SGFEZXZsjkno+eefxrWUkrN9TO3cLHT1mjzErNNjACgYxj+dQX6vZzDAKXEEgYZGMEHvViC6vLaYGylijYt1Y/dz+mOatRacb24eXUb03WXy/ltgt/wACPP41gm1K8noTZaNbmzc3trqOgm6toVgmicySKGz8xHzD6EZI/WuW1HToZ0MlsojbaSuOjY7fzqXVdOfSHMunXDyQODujf7wB7HseKNFZZ1ZWyYsH2xkf/XrSnHlV4vQvfQ5pQY2YEc5I+lWEmCtuAHTnmrWuWghuiIh+7YDB6/jn/PNZzROiFsAjHNbppk7Fm7YSRhweRwfeore7MLcE57H0otCZJSoHykc0ydIxM6rxj+dGl7BfqaDyQ3agy8SYxux/OqF3bmEqVyVPGc1FuKnjqKlW4VhtlJ2Eg/596aVgvc0LCFkt97McOASM4HP171o2NoNS1aCGTakccTkbeST2H1NYsu66JeFuAcCHPQDoM/lVrR51h1DzZ1LGPBCk4wRWTg9ZX1BJ9TaVf3wUsFLjHpznH+NU/EW+NoZIypLlgcDuBn8+tWLpwJR5hGSSVI5yzEHHuck+tUNUiuLlYYvMGGYgIF6Y6k9yawUbVE3sOUUZ5D3Ad0XMaABjRtB3KoJbt6Y9a6hNOe10Cd/9VbgAcgkyNkfLn9e9Yce6YyJGFAXB9j/9etVO+qJlBrUxLiBo2OR+XNWLSBmTduZCD6da0mt22KhIDg55HUc1FcqFdkU4Gevt6VfO2iNSo80lvIVaQORzxV6w1HZOkw+WVSGVx1GDn8elVJdNcwtLCd+Blgf8+9UMtH0q1aSsWm0emaxqH27Qbm9tSkcWUgIZsuztktjvtwPxzXJRQtIWI+6ilm+g/wAis/T7newiYgIeTntj/OK6OFEmspYrJ08vdteV2ALDPHHUD+tczpqlotEDXM7ozkU4BJ+9W5ocpieWVWGd4xz2UYA+nWstoQG2oykKMZyalsYSblfIzu/PI9/as201uKLcWXdSiga01C6iDect6VyDwEYZHFZriXyEkLLtxtUZyQB39ue9XTeos1wuxXhLfN6ORxk+o/pVrSNOjvLiRIkMh27o0GeMnGfU0SlZXaHL3mY62HmoHkygP3SR1+o9Knh1J9JedVijVJVCuMbgPR1PZh+v1rWvLV43aBip+YK6knj2+v8AWm3Wnx2tvdjU4po9khjjkVgyhsZ2Mp6DvnoaKVRT+IqCMXXZrrUtIhUqXjtSzq+eQDjOTWNpdysYMbg8sCDnqPQ1oaiGsIjAjq0VwoYrjlQD0HoKxriHCl0Kgd1rqpK8bPYUtGajyJJ5hAxJnJyPT3qtcRtIIcRRp8oHyDG7Hc5PX+dQ2crSP5Rc73+UZ9D/AFrUKbGRZCoAOM4yeO/HSk7wdkLpczni8psMpUjrkY/SoFVXk4Q4GcVr3SyOC0oOBzuzncPXPf0rNeSMkhVIAPU+tXF3QNaCRrFFLtcEhgCBV6cSeSx3jy8dMfpVMPGmJmw7Dp6flSG4eXdlcJ2xxTsxrRWGWMxieXBwSoH15q5sgNuWmyXb361nWy5nx2x161ZnjJyhP3OlN7hHYVfKjO0lsZB9cVaxGo+V+RjNZcZZJcgBiKtwspYMRtOecd6TQJmjaSzCQN9Rkdu1ddZ+Lv7Kso4YVilfYQ/mcYbPGPUdzXCtIAwVlJUnOOasRSKpV44wXBCrGq5LE9+KylBNpsq9tUaT3tvJFKXLXN5OSzMy4AY9/c9eOABVF12j51Jz04zmuq0Tw3czwX11qQa1WKEMC2Pmzk49hx+FY1xBHHYvceWypgCNm4xnuR39u1ZuSTJlFvVma26RWUh9mMHIxx+PSqyRLsKkEptx17fWp3m8q3G/OH5A6lv896r20+7cuAB93Gf1q9WrkW0K9yrSyEBgApwqjsP6Vdt0hj02RF3iVgd2R1qvPtRWlRcEkBquxwqqgHnj8/anObK5ralO3ddgVgPlXH1570+FlccdcmoHQqzDkdqrxM4l46D8Oarl5kJq+hr7TtHtx0plzGkkXysu8Y/EURvK6FXYgEcHaDmoVt2jwRjBwevWppxcXqEFYmtQNhVcI+Mtxywz0HtTwyuyoMb2OMenNQx7zdER8kcgf561LPIksgDoFdTksp6etE1qU0tyvIzKSCoBBIIPHI4ojMkhO0EgAkgYH86fcSA7mIHJye9WdNtGln2sM5GeDnP09fp1pWsrgr3IUieO3EyrhQwHXp6U7HkiZwTllLDnP+T1rUuIsWLRNwSSeOjDjH0Oc1Wt1jZkZiFCZB3HGQe1JSfK2xcrSILa+8pkaZWYYPzA85I70tzGpukaIAJIA3Bzyas39tHdIq2YhafnIVgM/h0+lY9vcMhKMzJj2+7+FKCUveQkrrUvpaJLI3lYeQ5JwB/nFV3+UbAwYZz06HpSbpI3DgkbQCrg9QadeFPtGY2BVgO/U+v171WpLRHGisokYfOOD2z9fekbEYJOKmtyrQOzA8e3X8ahZAbiE5GRztPIIPHI9ae7G43HogwGjbcT2xxWfeWu3LoBz1Arbhh2MAkkau2cD1/CqF6gt5ZUBDEjdx2Jog9bAkYxUjNICc1LJ3JqEAk4A5zxXSDOj0xIXgikn3PIR0wenTP6U5pPLu2hjRmjB/75z6VYsYvsjRhiSyKPoDUkgDrIBuEhPTb698/rXEpXm+xonokRWUyebhhyqkAdRnPU4rVghlvAEt0VuxPTB+nWucjQWaNJLIdxPUHr+Hf61Z0vUjHNvDMM8EZ+8P8AGhx5ruIotN7GxH5ttI2JNjR5DbR8wx1IrJlDmZixZwSeSc/5Na+rSWLmL7JI5m27pZHXOSecfX1rHY4Uefu5ztPTp/n2qeV6CmnsWEt4IpVBLS7sAgd/oBzilnspGvQkedijlS27aD/D6frTLR2ldViUxhQSXXnAHc9un1pZY7y8jnlglWOKI/M0jEZPoPU8U4prdlKNh99dxJEYQsTzsAuYwRj69ifeuWuVwxxjrV+RrhZNscxd/VMjH41BqCkSHcOSOT6nHrXRBJBLUrWe77QgU4JP5V0dveGCJVI+VPXnjpg1ztplbgENt7A4zV2QShCRIxYVU1dii7I19zmEyqAZpCcjpgegHpVZYGbl84z6EZqKJjJGrLPLk9eehp8cHnttlklY4J3bjgAfWsGlfclx5mTyRKyhFCggcY6k/jzini6XGfKYNxznOOMVHB5aR7YyGUdG6n/64qOZd7YOfmz+NZta2ByaYTXHJbIGeOTz9fai1mATLFM/wlj90UkdnvBKABMfkcU+W2+zpGxdGyRwBj/IrT3WrD5r6kU0yySD5z15/hFDxjJ2g/Q80rxmRy6jjpjH8qj3FTgjocEUtNkQ9xvlhzwefSoxICu0ADHU+tTnuVxk9OaQmOMOsygNjOQMe9NAkmRq7RANGTvPAB/i+tSxttJDAk4AXkc47GiOMlhI7KWIGEz0B5/OpA0a/LIGwDztFO99EN32FMjuQXAGARx3z/8Aqp0MUmd7goTwOeg/xqnJdNu/dKoRTgHB4/Huas2yscySSeazdRu4pSjZXGrLcJmO8BCXI6BRnHuT61Lp6hlZ2BAT+92J7/r0pZlYhvLUFiQTtHT/AAqmsm2eJpGZgrjcM8elCV4jspF+5hjnPJ5PTnGfw9ahMLRKCvzAjGckYq1cFGYZVcg/KR/L6VTlVg2R0P8AL0qE+gSi46jULK2A59+P61PAFkyWdvpkc49ahjBZtvC5xk5xx/jRcLF5cgDFWK/Lhu4+lVuKL7lxki8xSpIXrjjn2NVyCN24BSefT8arpdSCJUALyEenSoiS43zuSM/5/CmoPqx2Jr1FhTy95cMwOenAA4x+JqXT7lliSKcb7dX3eWe/B59uM0Tr5rxyELtO4j26cfXim+S215AVCoAWycbsnoPf+lNu6Ib7E0s0537ZR8+QeecHtWVn735dP8+lXpUeIhiPlfkN/So5rfeyeVku/Ue9EZXFdyN2RLfU9LiNiGS7tYsuvrgYP4Y59Kj0pZ5Z2+zvGswAUB+PMJ/hB6A8ZwcVm+HrpIrx5Gd4ZVRghUfeJ/hIrS0m6WMXunylTFeLj5sYWRTlDk/Ug+zGp5HFNG0VdalLUkkh1YzG2XzI2HnQ5zuKnr6H9afrOpLf3RnBZAQFw4Jxj+tR+YI1k3KZFkXahZj+7bI59+h49DnrS2VpcX+ofZdOR5ZpG2xoB98nOBj1qlbfsJTb0R3WheGbXU/DMU2najayaxuJks/OUNsHAxnndxn0Oe1ehL4K099L0p9UhhVrWDF2sgGyRSCTk9iCcg5z715lp/jXZLHp/i3QrC/toB5Lf6Msc8QUY6juMdOD9Kw/EviI31zLbaR9rtdJY4jsnuHlBwepDHAPfHT+dYexlKV9jpjUglexleKodLh166i0B5X09WxE0p5Prjvt9D1I61Z8CwpL4gtllilkBYhUjIDFu2CeM5P0qjbQ/wDEx8mZAzspUgPgcg8c/wA60PDV1Dp+q2s8lw0aI2WkA5UYPPHXnB966W7xsjGLTlc3viPrMv22DTUkdrWzQ+WjRCNgWwTuHTIxjtXO2FrdXH2dDA/nXDARJtPz5PGPUZ71B4ivbnWdYutQmAMs7mRtvbPQD8hXt+jyabb+H9Kn1WzhltEtUhS+jBJiwBlWH3lOe4rColCKSWpbgqsm27HmOqaK+k+Ii+vwG4MLiR7dGwsiEk5BHbP054rI1G5tjdzPYxypbFyUjdtzKD2yOv8AhXofxauNKWw0u70maCa6dmG5DvaRQOrHqcY7815MpIzgguc9PenC00rmdaKi+VHQ39osW4BsEIsiHP31YZ6+vX8KqxwqT5gGGbg9+a2PDVi2vQWOnmSNbrzfIjaQ8bTlgT3xwR64rE1pzb3sojxiORwrhdoOCeQP/wBdSoty5QWsdSK0kkup5GZiqKucBeDj3FX7C3kuZWEkkiQKCSqE5Ygdh3PUnvj0p6Wz2UUNtdI8crRq4QjB2nBzz2/nSq2ZUiQh42AURbP4s4475/M9KTmr2tYUopNXNGU3mhtmBZYLZo/MQzjEjk8ZAPRc9D3FYfiWOW+uTeFwZXQBwBgMB34798U3xXPdwXq2135ySxYWSOXIZduMDB5xj9KsCZZYrcjOVUKffAx/QU0nC0xrVtMxdHcK89uXDCaPKY7uvI/HGR+NWRa3hi81UaGB0zvJ+8Pp6ZqraWH2i+ljRmRlZtpXtjoQa3ZNQuL+CKyuI0inthskZB1UZ+Yjp6ZPqK2qPW8SGipa6UWtY9yDdKcx7SQuAcZA9c/TBrS1DQ5rPTre9jJQhtkmTkZ9c+nUYOa0I7V0VYI1LNLIRAc8fMB0/wCBZP0rR1LUhcW9xotuAwmINtKTkPtIBDY5B4/I/Wufnk3foNR6nM2RW6yGYI6nBwcj6/SrV5Zx28K3CTLdTKcCNCFx2B55I+nHvWK7zWz7ZMxyrwMnIx7HoR/9etK12y2LGO2mkdSA7lh1OeR7fnUzXL7yQ+Zy0J9StbmUoYnVbZ0Dkg9TgdV9fzqtPYo9nlGZ2Awwbv78dsgfSr6hrV/IMySIecqc7G6fT8eRU9zqljZaPPaJHv1G5lG6RhhIYgM7R3JJPPoKypTm2ooORNXRzd5BLBskkUhZFDg9cAgHH60y2dS5WRiqnnjnB9QP5+1bt/MrWFpuK7zACR6Y44rCaBvILqPkHP8Au/8A1q6jKSsxW+XJIA7ZJz/9ammcKhCPlz09venadAl5K8byKjhSU3H7xH8OfX+Z4rR07RZLm7MEMYMy8lG9vUdaWi0Y4wctijp+nS3yy+QRujXd8xxu+nvVJUO/CkK/sAcn+Vdcz/YI/tFwIFeM7EiRdu4jOQSO3FcvNtuJZHjAAUZYjoOe3v7VcW2i3BLbcuWF5Lu8meJJTjhgSuPbA4/WrkSzXFs9xHEnkh9gZeMkDsDz+tYgkZSrEnK8g/Q/zzXdWWmnT9Mtp775LRxhLqNOFkI3bZFPbk4PINZ1YLe2pSpqS8zBiby3kScGNo1JKumGyO2OuffgVVkvbeRWV4mKEcjaMden1rpPGVzJ50VtcTQTsoV1kjbfgMMhQTyBzyMkCuTnVWRpIlbIO1lx39R6ilCmt2iXT5XZmbexoC5iUqgPAbAP0qKDzd6rGSWPTnv6VLNuMTMcnbwc+tRWrgXEbEk7SD+Ga7FsBatnDoYlxG+cYPH/AOqvRNN8Ow2uiJPYXAuJmGZtqhuP9kjnGfz61z+jaHZSWrDUchpEZlkA+6eqj1A96rKbrw9dRTJJI9mx27s7WX8R0PcEfQ1zVJe192Lt+padnqdZfhLO5lt7aW6CRMFfzEVSGx6EdM+uQa4++ee1mljiLIs4wzKx/eLnjPryOe2a7UapLeyYvb6G5twDta6YLlcdQwIyfz5rlrzUdLi1CAupubWJm3hWPzDH8J9KypJp23KlqtHoS6KunLYXlvfxHzWlhIkIHyIMM5yfYj603xDoa51q5tYljFrKrokYwGRmxwPTGKh1rxLp9zZ6jBZacyPdSbhLM4YxJtA2rjjsOc+1Y8Gu6la2Utg7nymi8opIg3BSQ2MnkDIGPTtXSoS3JbitBtlIrOuQdwIIXccn6Dv6/wAvStqRRIkcsRDBueK560Nx58UixNtDA+mQMHGa3YvK/tGZQy8nkqegPPP5/nWVeNtTJjXZQ7bsnGBn061HLYzTSL5EyIrcHeT1+o7fyqwtm/2jyiy/MSu4ninDDr9huIlH7zzI5duJAQMYB67eOnTPPWsYys1ZhFNPUzv7PkhYEAuRzz6jn3GPxrZ0+8msQZocIzqUDsm4LnIJ54z71Uj80zlRMTtGCdoPAq1a2k2oJepb3MULQAMkZO1pfUKScA8eh5/OtZpSau9jTkuzQtxp0MjMt0l2z5Du4w7gkdjwPpz+NO0ic6XdR3c1sJ4TG26MhSGU5UjkEDqOxrOs/tt5NLmS1dH+eQzyJG3B+6T2J+lakl+7xSWtxYiNbhoyZo18wKob+Ar36Z79sd6xlD3krlqHM77Gt4m0crHaXAsX0y4ZXZbeWXLHkYyu0fL16HjrUmnamun+FbG2t2MN5LqjyPtBOD5WxdxHUfO2B/TNUfG0ulKEvrKynlLlisE93JJMQpA3znPyD0Qc+9cg+r3dzKZrq3QW0jkhIhs2/wC6T3wAOSc1oqTash1G7neJPBayrBqFnctIoyRJmMlscNyCSOmB071HrVy720cpjKWT3KwowbftfB2gnoxwCc4HPpWPL4j1CbQZ9KgubfVYt4aLzQfPgJwuAeu3GM8kcfhWhqc0dv4X8P2MUhltbCZrq5kiGfNujj5M9AFQL6nLGueWGW7+QnN8tlsas6ro4t7mWWRLlmNtCFOFTdgbm74BAPsee1Hi658ybRdWlMdteyoYYgm4LhXO9iSck7iwPqT7Yqtriw6/qC7p2ttOVFJJHzKx5OfcZPfJ6Vs+PlsdZ/suDQr1JLWwiES74ifMbnzCQepLE5OetcdKUYwXO9evz6EQlyxJLJ7e6lndrortgJifk5yMBeeg6g9OBWbJb29u8kpjUuwKsygHg4/Cm+HbDypGSWUCAAbi24hR6DuDnoOcH1rW8SWi6JYaTJeytLPeQtO8RwBsLlU24GegyeTgnnpXIov2jVN3RpXUrqS6nL6ib0KEt3lmiA5RlLFPcHqRz74rmZr7U7e7RUuD5qHhSPUHnngjp713uj3CyYmZGMSnYzAlCpHPLDocfpWtp48P3CylbKKW4EBC3jpuYnthTwW9+wGeuK7KFXlvzx2Jp05TR5Mksy3Dq4UTE/PtBAz1yM9vb8aZqivcQhkBO1drEHOeSRx+grtLPSNJuNUk/tjUW06KVSsdwqB1Rl9VJywxngHOfbNS6Laalrmm6pFBq1qlrYxtJKJZhD5gB4KxfewemTgZ4PNd8KiaU4ocabv6mLbiW2tbRWkYqSZpoiAMZTaCO3T+prkbaWJdXEbODbzOU3LkbM8ZDHnGfwroJWcr85yfukE9ck1e1XQPC0mjx6ppmqX0GqLgNp8sYkUN3w4A49OpqoVLXU+pdbdJdCLT/EuuaPZ32l2t0qwyq1vMDCvmFTglPM/1m3jpnFY9zZuwDWsaKhGdm85U/l149TxVS2vpy007SDzmIRv73y8Z+vT/APXT4r5vPBEp8tjkljk5/n+FNxa2MYtN+9sGbpn8tUQZIHQ5UDvk/wCHSprif7dMZLjYrw5HChVGO+0cA4A564q3p8MVxe7ri5W2hkOPNKlgB26DkVn6r9olnldlcKHB+bkvyOT7fzojrvoCi2iC9s7i4skmiPyFjhMYOPU/09qtz+feWdtDe4Z40EaNgbgB0GepH58cVHbXAcmNhtYAE+nU9O9XGmt2jKltjryPkIxj+VTOUkhcrkrlvRNLuZreSW2kcbFxNtAOMH16+/fnin6dYJpaNNBKJ45z85D/AKex/WmabfzG2leGU4mwjGPgHB/Kn6Hf2cd2AyLNGu4NH180HsPcHnPXFctR1JKXbsCs1vsE0MlpI9wkJaKb5thA+ZP6Hrz3rntaC+Y1/BH5bA5wq/eXp0rs4rq1t02uPNkuIwtqiPjy3Ldh1PXGKzPG8cOlwCyAEt2QVuTH8yQueibuhcAHd2zx61rh+ZyTt/wwuRrVHFPI06xQRgnso9STXSXmhm1tYIbSdheNF5kiNgqzc9D24/CsTQbcSNK5J3rhUAGc544HXPI4710Eeox2dnKbpWNxJGEJkHzADsPbp/KuurOSklAtS0d0YNlo13cS4uFbcxIxuywIB5PoOtWcDS2ktrZ4Zrh1MZkC5CEnkg9j2z+VMgvLueNorHekeWJkJx97sT6dePetttLsoLe0EBaSaUDc745c9uOgqpTtuNJJXW5zl5a41FLeItvO1D5g53EAEkA4xyfwruLTT9Vg0RrFFie3hYom1VcE5yWDDp9K2/h/4R0++8VafBevBKmoxPHG0isTHOoOUZAQRkcgg+nuKZ4j0W68F+IbvTb+7txbhQW8qUlWB6ADqG754+tc9Sq6itFXQ1G3zGeC/B8DXNnrRttIvlSb7PcafPN5ZUtwrc+5GDz9KwNRtNS07xrq4v7E2Nw0xd1XG2IE7lwRwRgjnJqZvEEkknlaJZtcXKk77gjccZ7k8DGBz1712Gg/Cy913wxf+Idf1pkjhLbbW3G4uQB1kPuccD8aG1FNTfT5lckZJQW5z9prenWL4u7xZ93L/KTvJ9Qehz7muc8R6tpuoajZTwRmK3gK70GfnIOSw7DjHHTvXd6F8PDPL5um2cPlPbmcNfA+Wozwd/UZIx/9asDxY/l6LDDZxj7S8jQTqqbRCVGSnPBPHUHp9axozipJwTd+7tb5Gs6bhBp9P63Oa1TxFayTySoruzvncflJ68nqN3/666C98beJ/GSRafothMdowyWCuHlGAMyODkjj2Fct4Z0i51zWILKxjaW5dwAqoWwMgFj7YOe9ek6ldal4E1hW0FYrrTxGsRnZGWN5D1CkEbgCDnsDx6V2TkotJLUyp8zV9kY1x4R8WXlumhX0Wn6ZHPtufs7OoYn7oZsc54IGeevSucutDvrZ5LW4uLWSaBjHJCRh0I4wQe3p1r6m+GcNpq2k22v3VlbprFwpEsok8xjg4yD/AA9OnbpWP47+Etr4i8Y2er29yLfzGU38RXPmKvRkI6MeAex6+uZVQucV03PJPh94X128tZ7jwy+iG5hAMsM0WyZTnIGSp444OQM+lReJn1+a5mk1rw9E1848uaaFSrOAMcgccDv0Irs/FXhtPC73Or+FNZnEQlaymiUB8FuGXd3IOOMZB6V0HjLVdQ8O/CawCSOutzQpZx92BYfMcdCQvH196nn5pWRaTUbSPBNSsbvT9KtvMtpIbO4maFJlmVgxAzt45HXJ6Cq1hoguFu8XNtDPbgN9nmbY0q4Odp6Z4+7wfr0rZ8U21x/wi+m2QkaW484SmHaQ6PtI59yMHPpXV6V4T0XWfA0dxrGqWmi6zDkWlxJIF+0KBkh1Jyy7sjcOeO/SteZJJGHIm9DN8J+C5rTw+PG0tra6pZWTlvse4rgg43SZHKjrgZ9TXHeJvEN94z8eQahfsqiaeOJEz+7hjDAAA/3ep9+TXWaR4Pk1fRtSi03xLZJNaybNQsZp3RMg8OpTiVCehwD261xv9iaheTXFtpkkM8luvzJbnG4ZxgZ5Y5471UdG7sJJ2SSPR/jdD4U1PUmufD+orf6u+2FoLRWlGxf4mbpwOOMmvHor24WN7SJikb4BAXB47E9etem+D/C/ijwKE8Wajo8pshGfnUCTyhkfM6g7lGcHPWvNb2UPq9xLEzlJJTIkkiEFgTnOP/10QVlyrUVTVJvRnUaZ/Ylp4cijJuRqzOXlDKGicEkAAj5g2Mc9Pp1qxHoGtXN/5MEM9pcW7LMvmrs8sjBUkHnsO1Z8KLBN5puId2VdWKheeo+vT3Fd3oXiy/mvbmPWbmedksWW3WRs+Xlh84I5J5Pt+lcUpuLcuo/cbUexheMPiJ4xuJnN3qLWtzEogmihQIQASc5HUE9/wNM0u48OeKdElTWdV1HS/EcETGOWeUz214wBIU55jYkeuPr0rqbfRbXxn4j07SbxPsonHlRTQqN0PyHGc/eHHIPX64wzxTo/hzwjomtaF4g8Ox2uvGIJa6tYTO9tMw+YZDE+W+Oq9wfSujD1o1YXSsJtt6M8nlmlstSKi5Vbq2kws1u4IDKeqMO3cGuqtjcan4dluNUupru7u7gzQiRi+/blWyDwG+6c9ccVxNlHC9zEjAupYDbnv+HJrqvFXh/UdAnje7tHto5beO4Rc4+VwcHaOR0I7HI5rWUUTCTV2aU9y1v8MdU06O7fabuNzaseCCfm2jqCGCkjj1NcRYMY5kUcMTg5xx69eM4BHQ4Ndd4W1fw9b6TcWepQXU097cQNJcr0gVHBbCnq2MjOenHHeTxLaeDYfEF/caJc37aQcCGDaN+5s7sM38AxwTzzjnrSi+W6aKl71nc5qG9tZXmikS48khhCkTA4J6Z9u/bOBWdBdS2c0U1pM8M0DZSWM4Kk8ZBHI9K9B8NaVoHivyNKspW0u5AIWWQLjeFJ3EkglcDn+fauX0lotD1W+hujb3AKSW7R79ylhnDow4IyAfcHHvV3XQTi3ZmfdpLfTC4nlmuHkGWlkcuzH6nmtI6dqdxPD5xupBBEscCy5+SMZ7HnHXtimjU5VuYYhLOkLg58s42Y7gD9RV4ahfw2smnRXUoilcuY97ASMeMt68DPNYzm7WIdrXCJJ7ZGKAMRyffH9KnW51LUpHtLdVCyAM0MYwGAOMnPLHHHOcDpipdMt7YrLbEl5QBIJM459PpjtzUjyiG4DWIFte7t0cqtjnng/wCyckfQ1xuprZI0pxTi1cxJkutLu7iy1BVfyW2b88EEZHuMjp+VWbvSrdNDh1SBjbyzShY0jP3wc5P046c1d13UotU1N7qG1m8y4thFcLIuQkiDGMng8Z+g5rP1OxbT4LGWzuHeFlB8p+GgkxngdNp6g9a3ttK9n18yHHlTkieeDUvDsf2i2kt7lbpDFLGU2tnr06cYByCP1rmpJo5VWIM4lP3lkABDf3hnj9a1LaVLm4Z52kZtpDSu/wAq4PLMx6ZOe2eOM1S1OOO4k2wAPbjP77bjf7gHnHHU4P0raldP3/v2Bt6LoVissYKOvmoceeI+w/u5Pfjp6Vr22o2lw5QxsSQO5Upjtjpis22s5BxazvG2CXSRQRn1HtUk1leTKhZ7SRk6EZRh7E05uEvdbsVyaaIvT8EmNQVHcOTxTobiBNjXZZYC4BZQTt/pnvWesk8CMj2jPg4fypMnn/PSoftlmWKtLNEp4dXTPQ9Djg/pUKh8zJQs7nTafaG81mKwinhbeRiYH935WCS/qFCglh1GMVkafdDS/EQubcsbC4cKSwxgFjsYjscDOPciqhuo7WaSbS5AsDoYzDJJlmDDDDI7HJGPTimPcRSw3KSbQ8qrt3HlCuf/ANVa+xXK10Zrpe53eo6pYvNfyxxgTW7KluqDhpC3zufTjP41zfi2QT2d8JHLyR7STnocjI9zzWfpc0kmnyBV+ZSB19+P8al1OIrpl1uO52UdR05Bz9a5IUIU5xXVAnKV2kaXh3XogkSIWsrxIfLE27hh3I9Ca63Q9VkgtjFFe2q2qbnW34OWIHK98nGM+v41ytlbWV94etbu8iikkigWJEzgnbxuOOf8irz+E7K4sGu7WG5t1FvvUiYn5hnPB7elTOdFy9661t8xxnZnPeJUex1XOE8z5JSAQRyAcenpx+HrVfUI0ubiaSIAxz4de2Nwzz+tWdatYo9D02UTNJJmRG3jBBBJBHqOuPcYqjIp/s0xoQGwoDdMZI5/Wu1JWTRFRWZZsndNPa3iYN5RLSxbsCVRgnHuAPrjkdxVrW7Gyi0aS/0jf5bTKsXmH5iu3LAj2OMGsmCH7Io2kkg43EdSOfyroJLKNbixnViti7b5Lcn7rEc8dwePpSur3T/4I4NSTujObR4NR0+2ubZlWR4Dlgf+WikDBHYnI/nVjTPEwi8P6jp2pxQySDayeZEGkdgcfe6g4689OKybaebQNSltZxIIXO5Tx3xhh9eBVLU5JWvjfgJjeGxjvnuO9UoNvllt0BySWgl5ayfZ/tEuRIeSmMbR2H8qks5mmtjuZSY8Y4GcVvf6NfadJL5YZ5YjgmUAq3+6efyz/hythIVeRf7y8/hVRfPF36ENaamlsY7NpHzdB05rR0gQ29zuvklZCpHyMVx16989/Sshspxk53Yq0kxE6mddwK4OT7dR71LjpdExSXvGktndXh+eSWOAlvLLj7+Mf4iqC2FzBdyC0Al29QOM4571vQ3iXAhUyEsuEX5+Rx+n6VmaneNDMkds5VE5GOMGsoTnc3cUtblKa5DkCVmGezDO38fSqs8e5H2AFhU13OJpQ+FUvw3bJqKRnjgkcD7vT65FbXZg5EMCpbYTnJyT7e1R3NkZLqR42+ViD045FW4o1U5mAD8AjH+eamYAYAIL46A0ObTuhxTasZv2NFUgk5PfrVKaIo5XIOK2EDXIPkMMA7Sx6VWlsJIxuDCQNnPrke1aQnr7zDTYzkkZMFSdwwPwqeG4KM24biST+NPks5Y4xM8ZEfOG9aosDnJzzzWqakLY6vRJYg/nzHzZQMAZ6Z7D/Gr1gYLrxE0kzLDb7SqiTtnrnt2PvXJWF35SMhzuJ+U/0q9YT+Y0pdjjOF/z6VhOldtjvc3tQuReyOI1YabZAtjH6ntnpn8BWTZxyiFpomCZILt9ewz3/Wrs7ymzhsLdttvO483HTA55P171omWK00a5toDHsuGGFYbmJGOR3wB396zb5dC7cz1MRm24YD61UcbpJCRgcfrVgyAyNECCxGfp/wDX4zTDtRQz4JYdMeh70ldGUt7A3KBQw2cY96pXKR7WyRmrUkp6KQB0H0rPunLZ5JzzzW1PUbiRWIzcqOoySa34405KOHPHSsXSFDXeDnhSa2FQq3y49iKVZ+9Yk19Mt7ea1uEuZfs9yyhod3RgBzz/AJP1o0b7RbSPefZpXtQHgZ0Bxyo79jyD+lZ8d3MrGK4VZoCfmjY4/FSOQf0+tek/Daw+0aLqUtvdXS4ZkRMDBOAQ3pnsR0rC1tTeklJ6HBadYf8AEwW0vVZCsSyYzjhufy71LFL9hvXa1mbqVBQ4+oz2p76m97r7zztG0kkCx4jAG4K388A/jShmuru4kgt4ooyGVVjjzwPrz06nqTSfxak2Wljc1+4tn1kojosHlIYXBAULgHt3z+Na2oeLrG5tLW1tdNTVNYlUHy2QbA4GCxJ5Ixn0GK80uZo5roQ2boHQZM0rgKuB1qGxu5LN38px5rgh5AxJYHqD6CrhRUW5vqVGdm33H3aMbiWa52vcM2W2jCr7KBxisaVSztxjnn/GujtxFdKVJPntjGTx9Kanl2V2Hkt0l25yjg4OQev866Iy7BKN9Tm54gEEkIO3A3c5w1adrM2oBmAAmRQXAHUDA3fXpn35q94c0qXVNTXTIIwxmO7pwF7k+w61l3ttPoOu3NrJnzLaRom4+8ucZ+hFV8V0ZWH3sbOFSFyxzyg7ZNVo7Z1Rw+CCTyD3rvtP8D6jeaF/a1vEkUBi8752+YjJGM+vGcelY0jww2E9ncafbtOVJS6TKyKc5+YdGH4ZrNVEvdRfLbfQ5FkZcBgSCcAevvUoXaMF+fT0rp9G0oa1p9yIjCbqxRpjFI2wtFjJKnpkHqPQ/WubktypEmeCm7p65/WtFK7sJqyuQ2/ErMDjA57cVL5/mFlVDt7c81BBktJj04qSKRYc7k3MapiTLRtV2Bgw5FRLFIrj58emKiacq+RjjiiOYlgzDH0pWYOxcMchbapJBH1x+NXbVprQmSN2Rh/GBnFVbe4VMk8+ntWr4eRNR1NLe7fZbuGBxx1HGT25rObtFtlaGpa6il2JW1DU7meAR4FtyNzDp04IzzjPvWHqs/2u4hitomDYA2liSzZI/wDrVFfWAsL57eObfMpIKEjCc9SR1H0pBY6jbJFdSQSAuSyk4yc98dR7cVCgviTCTclY1rnTYrHQ7iW6KyX7AKH3fdGeijpjHeuVt3xMckAVpXOo3dwDb3O5TnChwRtz3wfWsm7Ty2KY4HX35q6UZJWk7sJtPYuyDeQpHAO4/wCFSKpJycD61mQXMifxenUelaNndIsqtMhdc8j1H0olBoyQ+RWYDO0kA9DmrEFm0SeZKmJGHft+HrT45YYVWbcATyMjoc5x/wDXqGS7aRiwbI6+n86hXeiL12Hsp55FQltrc4z1+tV5ndg2HbJAx7mq4Uh8MAxIyOtWodRcrTLQlyQ6j5gcc+lCZwR3NR2+HmwVwOcVetoo28zeWJAx8v480p7g05MbBCZ5o4yrEk9BjkVqxWEEl1P5DFBC4CNHx8w5OPxrAedreb91I2FJCk9Rir+l62Lfho1POc9znvUzjO14mitszstSuv7SULexRJcRoqtJHx5vuQON2K5IIjO0cmSiSYPPYHGat/2tBswqtz1bjH0rLvn2XBmjYESHJGe9KmnazLnK5NHYWk7t+8MeBlSpJBNVTptzKSIysuPfkfnVq3YSyb0GWP4dPf0q3G7xoWTqSecf59KlylF6MxMRjNat5VyhVfQjr7g9KbdrEqAwuzA8ncBWzLJ50beeFdOgBGck/wAqo6vaxQRgQyFlG08jGSR/LNaQm3a+4K71H6dMo0+SMOfNc4IPRU7n65x+FPa2AhMqFHA98FfzrNgLIm4dM81MJDtZc8cE0SWpLktmWEyqZaQj0I6/n6VV1CQlQrsGdevGMex9fWrCo8gAUDapG78Kp6gyNO4UnDcn61ULXHF6Ge5yOTSW3+vQnpuGfzpJBgnnpxVvR4zJfRsQdkZ3tx0ANbdBbs6ET28srLGw44GWHPvT5J4FO24mXKjaFUjjnpTL2CNHaRkR4pTkMw6E9qZAqKreWEUKecCuPk5Xpsaty2SGX80M0ASLed3pF0P1PWstleI4kRg3B5HX3rqII1dEZSGBA49/8adqOjxXEa4YxSgcEd/w79quD5dAVN7nPwTJuJZ8emeKsSIjIszyqylQ2ARlR6Y9aqXNlPaN+9IZAcBgPr696u6fHFPNCs0YMSuHk4HIAzj+QpuK3Eo3epLDL5diQmN83UZ6DPQ+/rVCW3uX2rM+Is8KGyAT6DpmrmoLDLLJNFDGis2AAAAPyqs0CH/VsyMACArZ/nwaV0tgfYmit0jZlUjIHc8mql4P3rRsF2g1IhuGG0BZCfbB/wAKbOv7vMqsrduRjntRFNPUV7PQpyKoGVAApYbgBQrKp7ZINQTSAcA0tgolkdXxtI7/AF9e1bNaXYr2LSttl3IQFYgN6fX2rURkVdhBdlBLbTjj1BP1rLFvGpwd69vvZq3brsjImKlV6NnkfWsZpPUEyeS5HklIowo7ArSrsKiXa2V4K5659KgQpLkxkccd6UHawwNwPTms12sXaxDds8jAF8IWzgGpmlExRQGG3pk5pGhZhvABBPqP8ipEKhCqxgOeDu9PrVXMdWRl9j7SDgimuoYnaPmHX/GklJdnJIBX9AKbCxKg4b5+hA/nTUSop3JBGdj5GB1PGMYqomJp2dzlB7frRNIzu0Mb7snLHPFWZDHHa+VGQzsMZ7//AFhVpWRT8iosrrKfIQqp4AJ5/DPSrUUwXAlzuAPWoLd1jDNtLE+3f0qzGVk3MRznuKUkRawrmMkEfd9MAUimNdzbGUE9Sev9KljtH2+YV+TPC9SR6/SmNz8jbsA5PbOfSob6CfoI0jIrqJTtOMnpwO3vUaxhcYJbPPI+tNjtZrmcIAdu7H0A5qxqqeWEWPOT8ox7VdtLFW925VLqzhCSSOBzwKlupSwXbnI6+x9KksRH5O1okPqeuTUNwVjcsmFAPCjnFC1YRvazK5EhyWfp+n40qgAYXO7pk96niUAl7gEtjhfSkONv7sDOcDPem5W0E3YSzJEu2IDfyCWOKWTzFOBtJc8Dr+PtSooWZgABnrnsetCZWVsqcik73uNt7CxSFsoen8PsanWQlSpJ2nse34VRQ8j61bVgxL9if1/zzUSVtUZBe3U7DY7gRgD5VTj/AB7cmqybyu4E+vpirNxEHjBB/wAnvUMALFkkBLDpk9B/nFVG1tClqTWfmKGYIskefm+YA/4/jViKKK4BfzCrH514zggcfUHpSXVmtmgM4kUFA4O3qOn4/rTLe4ERcROj8fLnjB9Rnj8Kad1c01joyO2YkFHIJYcg/jj+grV8La3N4e1u31KCCKeSHOI5QcZxjPqDz1rGMxmnDuRvJIOFA/OpZD84buw5qJrUzbcZXibsja74+8UO9vAtzqM2CwRVjRVHGSegA455NZlxBcafqE9neQPb3sDFZYpByvr+Hv0xzXs37P8ApGnPpl5qptgdSjnMHnMSSEIB4HQHtnqRx0rqfiR4Fh8V2PnWoWDW7dc2twPl3YydjY6qemexORxkHP2yUuVrQ7FQc4c99TwPx3La3GoaXqWnRwwC7swJY4RgJKpZHGBwCQAfoQa5xVbzAGB27Ac46jP+NaWoWqyiWPcYbq3ZiYX7FThl+oI6enNbPgXw7deLNet7RFYQLta5m7RIO+emfQev41unyx9CLOUvM5a7eOO6ChgRsGcc7jyf64/Ctaz1WSOwa3RISGIZZMFWBHbK9R7EGoPET2uoeOb7+z4lSxNyUhSMYGxeB09h19ea0L1ZNPtZIoJ0EMg/1UgDYxzkZ5HTr68UpySsurIs7uxiyrdSu0lwysmRyOcgn2/WtXw/psWrFLK1jb+0FDueC3mgH7oA6Ec+vFYsgMlskrTFpGY/u/7qgDB/nVjR57uz1G1vrNjFPC4kR+nIP6j+dEvIhNX1N2AyaLqUNxbMweCTzVVsh1ZTgqR1B/p0rG1u5W+1KZ48FHcuBjHJ5P611HjbVLTWbxL6xVoZpmbzgy8BmJPX07ZrlrbTpJHx824ttCoNxPtUppe+zWTWy2J1kvNQu7jUpA7JGQs0zHIBboM+vt6D0r2j4VeFZ1s76fWrBfs1yiJHHOgJYAk5weQOeDwe49a878N2zWes6fp+q20wsVuUlltp90YJ/vHPA49eMcV9JavqmnaPaJdandxW0DuEV26FiDxx7A89AK56k1J6G9CKb5j53+POl3GmajpXmzCeAxOkEr5MoRWB2Of4sZwD1xwema86sNQe3iZJF3qB8n+yc/yr6A/aS05JvCGm36gFre8CA+qyIen4qK+dUByB7/WumladNJmVZctTQ2NCmliklkVd5YHzBwcg/XrWtZhWvYb21crPC4fcQCT/ALJB4I9vStL4UeHNO8Q6vJa6rd3FrAIS/wDo6ku7BgNvAPHU9PxrrPHvh3w14Tmt7LRrqa51DazXYkk3FVONgIHCnrx1x1rOtUUb23EoNxujlIN87tknChnABxgDJOB2qfSlN1q9jCTiNJ0kXaMY2nOfyzWdZ6hNZ3l24jEkc0DRpu6RsfX2x096taPqcdq9w8gJmaLbEoBO3PXPYDP6Vycm0rip2i7PcXXreK61G7jiQDEh2HIHJ5wB+JrM0m0d1aOETJIW2kJzn0+XoefxqeWZoYpJmJyg38cfP1/PPFT+FfELPr9vdzbkVFae5jj4DOpAyuPzI+orX3pQbXQppKVzOdZIpnWQnIw2cY5qO4083eoBg7JBJy7AAnjtjpnH+Nad4gu7hhE4lJY7HTneCfz79OuaWK2dHaEkB1yGQnk/5PWoVVw16kqm+bTYydTgZNxXPkQ/Kg3ZIUnvj3xk461IGzFZNAPnZ1AXrkHsfWtO+sri3AUtbIm0SwyrIrZYHP8AMDOa2fCcOlw61o2pag5FuHaRmK/uVdhlST2wSP5+1aKXNFNkqjJuxyOoWqx6izW8TQgNloyfuH0GecZ7dqufbJjcRyGZkmTBSVTtYH6jn+tehfFDw/B5p1uwkhJfH2iJZFywPAdR1PbPX19a81u1EQaQ/cVeT7c1Em5NXM6kJU5cpW1JZ52LlizfdIP16/X+dUzEwwUjcIoG1cZ3H+8ff+Q4qbT7zz5XVscklP8ACkvHljn2rhUIB4HY/wCTXTBzi+Rji3sXPDFvazapEdVaRLfdjgDk56ZbAB+pwPyrvdS1e5sYLhYr12ssYjDMr7RgrtBHsf64riNPBbT9nG0OWPGcDjr7fjVWefjbFnaDxkn/AOv+VRKPtJ+hqpW0RM0gO5mIUMcj1PP8u1UieWcsAOm5SRx/nvTHm25L4Zumc5/P1/lVSeYysQGxnj/61dKQnILiQNlIwcZwB/WnWcCyThJGwCQSc9hz+dOt7UySpEvMrnA5xz9fStjxDpI0bToSkhmmkb55E4VMc8Z5/H+XFKU0mo9WTexLf6hbQS7YLyd0Xhdjdugzjjp6d6o32uz3Nm0DeX5RUK2FGWx3Pv78VlRBpGCqV54BPHU9TXZ6L4XtIts+qlpgU3qp4UAdSQOSP0rObhTV2O7Zx6yme2WInBQ4jds4IPVSf5VpJ4buH1W209JkuLq427UtiH+8AeWBx659AM10WqyWTwPOIktonfb5HlER/wDAfwxnpyfSuXgu5tLuo5UAwRuVVYgoD6Ecqfb+dVGbltoP1PVtI8A+EY4bgs8+ovauI5Xkcqu8nGAF684HU1g/F3w6mnpaXFvd/wCjM3lJaOATHgHlW+9t7c55P4VSsPEsiWdjaaVGsccdz9snlmOdzL0VgBwOBwOv51Q1/WT4g1Yy3t6hEY8uJsYU5PJ54x78HvULmUrtm0nBwtYxljkYDDGSQgAg5yTjHA6ninyBLSZGcyq/RldMc+nr1ru9AY+H/Dsl9p81jNd3Unledu3tDj+6uMH1z9OvSsGVUkuJZ5lEtw/Lyy5Zic9ye/8A+qs5Vo35WQ6V1ctaJpz3N7FCBnzQSh6glcnr9Ks619l7KzOhBJdgxJ9c9c9qoXup3GpW1lbzSmCGxt/IiS37gEt0Pckknvml0AQX5dbqR4raI5JVd7M3Yc+/Xmp5FHVvYI2SsWNJljtrS4hlx5U2DL8o5IPGCeQcj9T70/TLGwW+84RSOsMo8xA24vkA5A6ZBPK55/SreuQaPJptqmnfaLe6jkJmMrbvNHY8cDB5x+prO0NJWnkSIErNIPKXPOeB/QVzzbs5JlQlF2jIg8UQ2Ud3ey3ACl5C0LLH948ZyDzz6YwD+VZmlkWN+stslzHdxfPBJbvsw5Hytk8Y46enH0ueMJY7yfc0v78tllXnnkbfTP5ir09itrcaDp2lytcXkohJOQcSsc7R7AnHPSuqD91XIt7x0Mmi+OfFmotbeIZj5skRMUMromMDIKBOM8fiDXD3Hk2cwjntpJduIpElfaVYHnYR3/Kvr20022X7FLNbQfarVAiSRrjYe4X2znjpXknxL8B2NhcnW4rmJ7ZrhpZIZG/ebmycKR94Z59QOOalTcU2/wAByTPNJxplxAp0h5UiKguhGCCexA4P61tXun3Nj8L9HeO5Vbi9vrif7GRl2hASPeBjoDHntwciuZ1GwbSdXhkMUkNndjz4Wb+JCcHHTIz09a6OTXoriW2TWYLr7NZw7NLgkOwShpBkbgOV2hs8kA4A9KdtOZA49R8RSys1e6kYIkYZ3J69/wCfaiw1yCC1v7Ga2E8MsqXSMTgoDkMyAcE42MRnpu+lcx4g0u7sL5Pt04ktp8OnlS+aqqQSACeM469Ocg1Nb31ja2FzaRB7qRZY3guSCnlgZDoV7hgeenTiudYZddb9kRBWep2t/qtrp9siWxF5JIhaB0H7skjqW7kZAIGSDwcc1k6nPe6v4e00tLLJLbvJEqbfuk43AH04+ma5I38rbI2d5FyQm7nC9AM+vFb+n61qegXMN1ok4hlDEnIDYOMEkHjBxzx7VjHDKi047mlSo6jV+hBd2U9pa2yKGF1cqFe1iQlTg/Kc5wW5yRzitxl0ix8NLLHezR63Fw9tLnbJnumBjPPr04xWVpE2pR6hcaj50r3MrlmLnIJbOSPQ89fTioNWtptQ1O3gjKh5XCBXbpk8k57Vu2py5ehScbXW5Y0DVhZATXaK+9XjhV1DKgIILBex7V2Hgf4pwaLo13Y6pBblY49qCO3UGQAHknGTk4znnNcRfwR2lpE5KOZE+UZJ2ZJHPvx0rFuo4r35RG6Sq+0kcBxx+v8ASiCUnaxPPJPQrDUrm+keW4mzOH8zc38YyM5Pr/P61psqxwXCyAZxlD7gjt61XXw1duhkiCJGV+XLE7gPTGR+tSQC6uZBbybVuIWC4IxuAxyPXtmtKrjf3XtuZyjP4mYEdhItyqXWfnG888/X86mt45bOVTEVLg4BYcH6+n+etW7kytdyMSHk6Y6AAH/Cn280ThskiRcAqQcc/pV88rXZnFWYqSR3E8cc5KQqcvG/Jds9OOg9Bz+VacsyI8iCGK4jYdEkAdfcA8j0AIrKfymd/wB4qSYGAx6g9x7/AP6qp3800qCDUAzhPuSLwR+Pce1CipNG9k1odJLpIFi10rruXO+OQYLDOOM9D+lVoYmclbjKqB8pJJ3D0PfPr+dZmnXkqQeUCGfnD7zHx6EdM/nVg6lfbwrxRTR56jHBz1OMGplSk9E7E8q6aD7mQWdq8dpGNknTnGxjn9MfrWdYiG2jIlDMCdwdeMMOc561fuUmdSXtzHtG7luvuQeagtzAAftAZ07OvO0+npjFNRcVbuZuDTLSXEdxOl3MwilgYmN2OCSe+Ovpz61S8SXiS20Rt2beD8+0nb9RV+a5ihwsCxS4UEEsDgH0Xv16daw53kE7glA+eQg4IP8ASnTWztsU7pbDbKZ7O0WYyiOUuHTaSGUj+LjofxBrW8Dz6SPE9vd+LrWTUNPBJkh5Yn3PzLn6Z+uelUILHZmScb1YEKP7vvV3Tra3dhG5IX7ztwMfj6YyPr+VaSqJp8u5aUrHqPxB8O6BbaHZeI/DGoRz6DeyGNIGG17dgCSmD2HI55HHXOazbS1g0XU9PPijSprrTYrUTSIhC53oWi+YkDPIOM5rg49ZFnpsthLI0ludypGGyqhjzz+AzWbruvanrhgN5cu0MKCGJAAAiDgAAcf1PvWcaF5N7JmjqWj7252Gv/EDUtVurJbCFVvrN5JIZbRNsihvUjsFGOg45NVJ/BuvX2jR6/qsxNpPMIw7MzZc5yGPb0+uR1BrL8E+IbzwhqsVy1ustq0ivJ8gyyjtnHAweh4P616n4D1+613w74j0SCXT3jvS0ivc3Yi8sY+QgEZJAVVI/wBkEnvTmpUk1BWXccf3u71K+galp+mG1gg0wSRW4InhLbOcAZB6E4wc889a6HRvGOov4a1uyMUMdm77QpB2xZziNO5ZuOSeME49PPtE1Ke2voMvIw81WIUbySOnB4J/Q/Su6vDHJJ9o1RkjttxkhgtCJHlk6O7kYTfjC4B4HGOpPjypuF2tb/eOMHfe1jpfCXjnS9Fs0j1/dHYrtQ6jKhEaSY4XYBjHBAxnpWL8VNb8Ja3pkuqeHdbtL+6SSMy2qPjA7OFwDnsTg8HB7VmQ3Ma+HtVTXbwS6JJGFSwuJiVBaUYbA54xn5cHPNc7L8O9GPhXVvEukXE5+xRtvsXYEQ9Mln4LKQcqcDjHU5rtw04VIpvcHKUlzJnLazqsmmzWGs+HrlLa7aVsvCQHUhcEEemGI962PgR4ku7bxC2iTol3pl8jGSKeMSBGUFt2T0Hr2/nXD4imt5p4FVVj5H4+lLZTvbiVI7h7aYrgtF8uQRggnrtOffNd6glDlMIycZKR6Rq/xB1vwt4jvoNF02ws7MSFRC9uzI5HBYZI6+2Aa17P42a5d/aJG07TYVSLM7RySI2AOCuWwecfLjr+deeaZBNNpl5d6qV4KJYxMpJdics698Ad84J455xt6po/h2Twg8sFzND4ndVY2+SVkwcnIIwGI5HPXAA5rNRjtY1UpS965Z+H/ibWbCG5t7RfM+1kzy/aBuRFHzGXnjp37njrivdvCthPpnh6W51W/jnuLhlukaZlWKLp93sPU9s9OK8J8M+JbW68DX4mtIl1a4mWzlbJVZUxneQOmACNowM89eneeLPifoF1pFzoc0UV5aC0RIzJGWDTrjGFJzt49jmolH3tjaErRWpt+MftdxrkTWmk6bfbP3CSQTLI0yEZ3sQMqw56gjBNeY3VjoqQas3ii/ljv7ad4HhYF2Yj7gQjgnpwRgD0rBt11awvL7X/AAbot1Y6cF2TR7lmjRWGCGU84zyM5wfpWVpl7cJqF5PM73Esw8uWWJUEgB67d6kA/iD26VcINO6ZDnfRoTTdNEmq2tvpyOtxd4VYmxyCfuk+vtXQac7aZrcE2kWTHV0DW6w+WHALAqRsIxnk9entWPb3el/8JZp8rPqdlpFs4xPJIhnjI53K0YxnIGDg1HbWVnqfxEvbW08TGLTBJI66xd5RpFPU46sxyRjjPcDtrKLkZbWsamseMvFE8l/p+oajdFs+TNHkLt2k5Ugfj0/HtXMXdxb2lsI3jSbzDlBkAoAfzx6e9dP4W0FdU1uS1tbxXBdtk8isAdpJDFV5AIAz1wMnmoviNaWGmajrFnfWgfX5pLcoyuGihh8rLFcdS5KdQcD9VGKT0FJP4mznbTytQspIpkOyMFoieqgZyB7Vu6Re3Gi2EN5fCTUbFVA8rIVUjySAH65yenbp3qhZSR6dojyyyeRJJFhEC53ZbBXdnjgZ7+hqpq2tSXvhbTtIt2ljtYZWeRJGG1pOApHpxnPbNDXPo0TF8uvU2/h547k0bxV/a2owS3UMMxuQkbAbCQRgE8befbpXYeI/iymt2epaZaaWq6Vdq++J4vMldmH33bBy2cYxgDgDpWF8NPAviKTVSdKWyM5jzNJLNgQRH+LHV19Rz2+tJfpoWpeQPBYu7PXA7B5Xuli80AEfIBhTkjPODzjng1m6dPm009DSC91X3G/AzUPDvhTxpZ6x4ovYDbm3k+zuqNKYJQQPnUDKttzg4I56+nqfxwu9N1SaZJ3itdTFtFNY+bESJIWJYlm42HJ5BzyBjJzjwPTdAt7pJJtQ1C1hMbMPKLESzMCcgMPlHTqeueM9K62O91GV5dQ8c6Nq+p6UFXbLaTg/ZhjC5OCeAMckc98k5urJNqN9f62KhDrY4WSUuzR3EYRwPu4GQR6/hWhpEEVy7R3D7IiS8szHO1c9h3bsKgaa11HXllaWZNPMgjEk3MgjHG5scZxjjODWjc2mnxyq8UsosyQGwwOD6j2xz6/Wk27mPI73KNxbWy3xY2721o5AjRmyzDHUn09TgCkuLC0nQfZVaOeL5sIM5H88fhVqws0v7uNWG8d9zZCqK2ru10q5J/sRXjmt8Brnf8jNzxt9O3+Nc88QozS1/RGjg1Dm0LGh69FpPhuTTxBb+e0ju0wUmXaRjGc4z26GsK2ZJGLLGo2Zbhs9QeueT161A65ivFkkWKRCFkB7E5PHtx/jVWzlitZo53Y7M/LgBtw/3e9TyN3erMFOWzLukSbdZ8ySRjGSQe/U+/0q/wCIrW40+CO/eN2tWGxWTDA56HI6e35VnoIrm9ZtGZvszJlzIpXYx6qD1Pt3/nV61F5a6K1hNqB+yluVOSzg8hQv1BPYUpKKkn17Dpp3sZS6pc3w/wBG84yTEZj27suAVyB05U4P4VLNfNKgS/k/dwrsEaqCQBx2/wAams7K6vWMdkskMbfIfn6g/wB5un4ccfnWTNGrbUtmQzg7X2g8AZ6Z7en1ro92o7GtROyuyWJobiHYSCI2+WMr/wCPdh3PvnimySKyNHEwI+7kH0pr2syBBcBwzAgZXBI9/UdKXS7OKy1GG5JDIrbhGOQSO5H07U7JttM57XdjSh0rUoNKhvLiMi3kB8hm7rzk+uOtUI7eR3OwYf8An9a0U8RanfaYIILsC3jYn7M6rhMknjPI5J46Vix6id+6SRQVPO08/wDfOM1Mac5X7ltXtYns9piaOUE7m3Y/vY7Z61e0zTIrjTZLkSQJ5b7HjcgY5B6dxjP48VkafeIysLolEWTcXIxkHPTvnGOKz769ku5sNJ5MKE7E29R2J9619lJu2w1JpJG7rtvbvdCS3XTrJCvzPFkkkdwPWudYWpyoDysRwQfmyfWrl0ukeRE8dzNNOxAcSbuMDqeMdfrx71Zs76wjnijEiQwkLukWM/LjnkDqM/j6VsrxVlcL3ZQii1GwhFykFzHAePMZflNdFZ3en6roOoQvILbUUgLordJtoyQD69/wrUttcg8lvsl2LaJnw22XzIPTIjb5h69SKxNW0C2Nq17Y31m+8krEkgBIHX5M5HXp+H1x5lNrnVmaJcquiTwnKv8AZ0JmiMkKE+Z8+MYPt7V7B4Rv3sPDuo20dsjWl9F+7eZstGjDt3I569M81494P1o6TZX1k8BmM8bx4VQSoYYJGe/HXsK7rTPFegDwHFp+q/a/t0CeQkgiO1kO7jOfcduMfjXLjqUp/CupdJRjqcH4gtp41h093VoYXfDqc4ye2Tg8DNR3NtCi/Z43MiSQgBueCMcZPBORz29K0IrHT11EgtHIoj3KVbPz56Z9eKlupIP7AtZUyZFd3ZcdVOACPXpj8a3VTVRX9XMZJyZz0Md2UeCOFrl0IVmU9jnA+vGfpT7jUdRvRFGxhh2KsYZsE4HHUewFW/CE+bjVZ5YcvJCTHIc4Rj8ucdzzUsVujWE0vkCWeFVVT1A5xkitpOMHZoLJL1M6bRWVJJrq4lleMbhgfLxjgk8is9wGjZTkgj/H/CtW0llctFeyny2VlJxjtjp3Oao28LyyxxxpukY4C47ikpSXxMzqNXXKWtDvptOVlkHmwSKTsJwVYjGc49KoW2nAPuEy55HzcVNqu+yuI7eSFBKVB2qchSeMfXpWas8wuvLlHzBsFOnIOK0SlLVPc0k1azL62z3F42SqxE9cjr6fWlks3hLBnAAGQQdw+hqZ3EkpaJCuVCkE5zx/PNXtOmELI0kUckaZDRyKCDnjAH6+1JS6Cik9DKgkMcjJPgKRw65IyPf1p1wmdwGMjHIOQe/BFW7pIPMkaAeUWfCxrxgep7Csy9lEJ2bizEDc3HA+nrRo3puSopaiQszyB5MbU4HbmtKNIlUmUk5/h/X8egrHWaNtiAsFBx93pVmXzGTYCSAR045Hr6GiS1J9Rl/OVnJYH5lyD9KlJSDSI54nzc3O6JsPyuD37jII/X0pb66Nxp8VtcQrvhfcshOGIxjaT0xwD61nwYa8Ujaqg5ABJq4rQa0Ou0i1s3EVvCsg8qEyOzyBQzDrgY+vrUbxrAJGjeMLuJRsHJBzx+tZX2owk4YByOme1SWNwJY5Z2ZiE+VjjPHXAzWMYvdml43KmptlorfccZ3sPT8Ks6NpEWrGeNnSEoBiRm2gZJ6+1VbQNM0902CBwPp6/rVZmb7UyJKY0PVvb/GtrfZRGhWvbY2V1NC0iOyEruQ8H6VBHIyHgmrsFobu6lSIkpGMkn8s1WuITFKVbAxwec1opL4epPoX7PUmQjJrQa9BjZEcxvMQHbbuIHrxyB3wOprnQ2wEx9+9KkzL0PPXNJwTKUrHXahawQLFcadBOLNdsbyTbdxkxknGc4Pbp6VRkHnoTHjaBwPf0qvY3bzQMjklNwLDPXHr69akmlZQAm1VBOAB+NYSi09BNxuQvGZI8oCGHBU/0rPmU7SCDnJFawdWXB+VqzrqT5sMua0gStGR6a4jukJ6dPzrbguIFuovtW77PvAkMZ+YL3xnjOPz6VzkZxIMZ6j+dXXYqTnv196c4KTuxpdT3HR/C/h6DxjaRIsWoWl1ZGa3d3DjzFYE8Dg/KynHaug8Df8AICvbq2iEhe9uZIkBC5AkIC56D7uB2rwfwvrM+haxY34DeQk4c474BDY7Zw2CP/rV1w1B/CumaJqej6gqX9/E0l1ZuSyuGJIcr0HU46GspU7HVGpFK6RzQu7XTvF2pzalZTpbGWQeRkCSIlwwGOmR+VZ2pahLdTSNp6NFaSFgqK3IUnoT3H6Vtz2dx4kuptSaeKXUzKGaCVQFkGCcjsegGMelVte1IXjRRiwSxng+WSJOAz+wAwowOnr61Wm+5g9rnPpE0O1GABPOev61YhtvNmjjiK5kOAScAGmkyrMY2wWzkkc/h/KpiShBb755yOOc1o3dAthyy7VVSrCZW59RUk908hxP2HU/zpkInttRkS4UJNIc5OOnsRxXT69Y6K3huP7JfLLrVtlpflIWZTyVUng47Hvz7VlFqLsUndHL2l5d6ddR3mnTPHPEcq6dgRyMemO1Q+J9Rl1e+F7dKv2lkCyMoxvIGNxHrjFVEkOGIJyo47dafcASRF+6kZrXVMht7HV6NqGoW2hxvZ65GkUilHtSzlhg4xjG3B654qlPaXd7BLdq26K3G5324/Lt+FY2lyBUdCPmyCM9AD6/lXSaXrtvp8DRz25v0Yn9zIQkQPTce5PTHTHoayldSuXF82j2OYuriSSWSUkq8h528bgev/6qfEo+wXQaRgQAVTsT6/XFP1q4juZ3lit0t0P/ACzU5A6/57CmXKlLZ8njA9wf65q29jNu0jPtU3GUE4OOOaTY0e4sBx3zV3R7V5orqVVysY5yPTJrYgtrUwtE0YkL8Yzz+B6ZpyqcrBJtHLKzbcgDmnozY2k8d6tTwrEQ0QZomztLDuOv17c1AAFTJB5YY9qtO4WJYVHOeOM1oWHnyXccFkT58x2D2Hqf1qijBASV7kL/ALX/ANarNjHKb1Nmc4yccH8x0/pUy2uNOx1Eds2lW0QglHmTjMhIBYkHuT0OfpV6KKFJxJeh2JOWwM7setZDztaGHzXBLJuXzOq84/E8ZHY9a0o4phafap508uRd5Yseg9+mf1rzqsZNp7mkZW0ItatW1rWI57SIlNqq4wAVC/xEdhiuS1Swl864KqWWKTyiB2Jz+nHWvRfBtxHMtzdJnEK/NBwd2Blc98E9R9a465kCafqN0Zt9xPdMgOOin7zD0zjHsK6aEnFWZMopK5zkcSpz95v5VYgTdIE9T83vUa5znvUkJKXiK3GMg/iK3epjFXZLqEgV40Bxhen1zVdGB4HBHap7mNZJ8n+6BVdo/KK8gjOB60la1gluPDH7vpTwVDpkZY1ECd3BNTxRbmyWA9PpVRZUHfQUvDGDkAE8D5up9aGHlx+YjnaBj+vP602ayLAsGHpSRwmNCGBbPUZ69aZepWmfcSxJLN19/epreSJo/LuEXI6SZx+ft+tRXCNEclTg4w2c8+maLfCuHZcgdjxQ9USWXwlu3lA4POB6evPP4UsWnzzQmQhwmM8jr/8AWqzGySKSrAEdau6Zcu0n2aZiynmJj/CR/MVk5NLQE7uzMcebatlWOAcHIwR9a1rG9ZmRcBtxx/8AWxSX0DGGVZUXzSxYYP8AL2xWdpkixzoX6Z57Yo+NXZS0Ni4UQ3YAQGL+IZ7H/IrP1OGTyY2kHOwNjP8ACehq7cy7huumCKT8qjsB6d6p6nOs0kbJnLA84689PpU073uHe5Vh/wBWBg57Y5zmrFvas1wEcEAnB9qlslVV3s4Vc4J7j3FMubxFkb7OCq9jnJOavWTsieVX1LEzR2ls0YfMmemP1rAnYljzyTmnTzsc88/nVRn5zmtYwURNroJISSc9a6bw5ZhbN5mZCznBXPIH09KwtNtDdT8j5F5P+FbUamNw24IR/L6VNSVvdQRdnc02RLfSZIrpg5IO3nP0PsaybKZXAVyHB4x3NSahslMeJRt6EK3UelaGoaHaeSj6Y7hx94uflbvnPr7c1nzJaPqaN66CxFRGURwIT/DyCD/U1etnhI2rvIHAz1471zKTS27tDcqysvBDelaNteiGPcuWGCRj+RocS4yNHULy3RVgmgMiyrk8EHj39azgI7eMmAOAf7x5pgkmu3M07EW4+6Mcn2+lU7i9HmgYwoI/OhLohNmzdWV3FbR7VR1U7iAO59cVizMdzbl2NyfTvWrpmr7JT5hG1uBxwD7YqXUFjnjeYhCnrjH4fWp5bPUTgnqjESUKpZic5GOSc1Su7kuMZ45wPSlvrjc5CjA/Ss92zn1reMOpm3YHYkk+ta+l2p+xs5yGY5HHbmodLsBIRNcZCdVBB+Y/4VrpnaxGOBx9emKmpNfCiDPjfOWyCB0qUESNKDgKep9Bmool/cgAY5Iz6nniiRWWMnnJwP8A9dZ6XEtGOiZgFULwfutzzU4zk4wDUcmySBBHu80YJPPGKEd2iO8Ag4APqaJK7ujW/Ql8xt5yBnocelOTbyTyvYgVSSd4XJIJUdQe3sauqyTIxjzyOmf85o5LCUSSVoha+S0G4H+L1Prkc0yDd9mLbRtBwFPcdKjjOSIzkt024xzUqRyYIjO9c/NnjHNTbowi3fUhAWSBhFGqNycd81TTcqnaSB7881OyOk5bcC2c8c96ahBkUEDcDznuKtXJb1sR7TjaSME+nWnCMKOGIkyR1/nVma2ZnIUZXGf8+9R20UjuyRv93Oc8YH1NO42mnqLb3c0YOZN6+jD+XpVl51lhDbcE44/wqFoJRzIQTxjac8Z9KjnhkjcYyQfu8Y/Ck4plapWNHTGEcLuBz0Gew5qu+ZZ/MLEYGNv1/wD109GxbhRyMDPbv0pGRfKBzuYtgjH3R0qXoht2SRCzLCx8tVxkZxn9PeiO18wBsr+Jz/k1Glw0TuYSOBjOOvNJLKR8zEbzz8o6/WhJvQhWe5PLhX2uC/YYHb+lQBSrb/ToP0qYsUtg7Lknkn0+o/rUW15MMoLR9yKEugrBKhW3BUjzFO7jJyafu3wl413BsADr14xQ0YX/AFjY46ZpvmrGg8tNqk46U4ptajUX1K7FVIB6/wAqkiOMjPynmq8CGWVY88scVuapZW9nYowyW2gA/wB5jzz6jg0SsrLuRy6XKRJ8px3x/Wtvw5p1zdXNpd29rJOEQiYAcbRxuJIwPqcCueil+Q8c/wBKsR3+oNBKsM03kx4DopOAvbj0yPpmp5XaxcFZXO91d7SPw/daPqKEajEwnsJLdg8MikfMM9M9sDv1zXnUtum0vECO+0Dt7D9atS6rd3EcazSBwjZX5ACPoRz+tU4ZJIbuOUE7Q3QEj8Py706cXFWNKj59SDPzZHof5da1ZIlUKAQwwpyPUqCc++TVK+sriyvPs91A8LuquiuMZVwCrD2IINWpCRcypEC28kgAdMZ5/IH8BVSV0Q4XVjqvC3xC1fwzp82naYLVYXkMvmNDucMR+RHA7Gpda8a+LL+ze5u59QSxc7N4QxRE+nAAzjt1x7V03hH4X2vi3R9K1jRb0W0kU6xX9tLk5ZGBLow5BK4OMYz0PaoPjBrz+MPiLB4dguFt9L0+cwGSSQKgYf62UnoAACPw45OKzjy81kjoipxjZv0OA0fS/twudQ1J2i0+IebIQdryKGCs0WeGKkrkelP0LxZqnh7RNU0/T50hS/2pK+3LgAEfKeww319K9S8S3Frq02l3OhafHL4E8KTQxsZF4uXZ1DAZGWGMZ9ep5IFeTapZwx6veCJhLDHO4jYYPyB2AI7YxgirUlJakz9xXR3PwM8AW3iKbUL3WAPs8aeTbx+YUZ3PJYY5wBj8TXC+JbCbTNf1Gwl3eZbzvCdxJ+62PrjvWno3ifVNDs7+3sbryob1QsqkZwR0ZfRuwI7Vm6rqt7q91Jd6hK1xO+S0hUBjn3FZ+85cz2Ik4ygktzK6HAxzg1ai3sSVDMRz+X0rY0Lwnrer6fd6jYaXcSWFrG00lw42RgDOdpP3jweBk1PDaXMXhafUxaRmzM3kGYDOH6gZ6g45HY/nROVtEQqb6mNau0kBjkHzKAR+Zrp/Dmiyatpup3FkzNeWAS5MSnmSEZDbe+5flP0P0rAtbIQM08rHaei9ODXZ+EdH1y21DR7+KC+stO1KQWy3UDbdyMdp+bt0zz1A49aUmopm1ONj0j4U3C6pPrvjLXJoLeO5dbWHz5AFSNFBPJOD/D9cVnfG3WtO1Ox0ez0m7huh5zu3kjIHyYA3fdOdx4/lXJeC9N1rRtHk8VaRa2ur2lndTQXNhPEHaNVwfMQnkHHXAyMZ6dN34peKtP8AE3h3QLyyD2l5bzljbS8EI68OhHDLlRyOh4PpU8vvXRvze7Zm78cG1Kb4Y3X2rTYbO1jlgA8y4DzZDY4VRtHU/wARr5mQfKcE5r3v4x+PNJ134cWVha3e/VZ5IZp4FBPl7VO7cemdx+teCopZ+ScdfrW9FWiYV3eR1PhHxHqXhye6uNJnMM00DQb14IBOeCe/AINWfDWg65rRvb60s7i6tV/4+LjlvnJzyTyTnPNZ3hmzgvNRggu5RFbPNGryEH5VLANwOTxn1NfVeh3nhLTLqWfwrpesXfmR+UUsrKZomXP+0AuM+/rWdW+yW5VNXWp836npd1ZwIbmCaFZiSnmRsobHXGevOM1iyt5EsTgE5ByPavU/j3quoT+JNOe+s7rT7U25EFpdTxsVIJy+xCdmRtAyecV4/JOrXJBPyMcdeme/0rKFBozqpuXMhmtXzzBIx8i53YBz07k/Wn+F2dNVVyPvJID/AN8k/wCFUNQKtd4HQAAe/vWpoAVZPPkyI4I2Zjj1P88Ct5RUaTSXQUG3JNl9t9tdyS2rlRuwVwMBs+nTvV6ytb6+vEh0+0luroJuEMUZLAHucdBn8OaqWDedZ3EuDl5CckHqT+XevoP4S/2VJ4RibSLfyZQxS63MGkaUY5LdSOhA6Y4GK5l2fQqnHnlZs8cjs9Sg0iHUpLeVLWRivmgfdYHBB7ggggjjJ4q7ocmm3ug3WmSwxpqcEpmt2P3Z1I3eUSe5BYD3969Ye1t7PW54mjSbRdbcqyMPliuxwQfQOBn/AHl9TXlvjRPDdncyTaCs6z285guI2JMZAzgrnnO7j6ZNTGPK9NmbSTg73MjSbzTLCG4e8iuluETfavbzMhcsRgMegA6k46cdcVyuqahNcpciQ+czKWkY/hzke+Pxo1G+a4nkKqqbidsa9Fyegz25NR2NlcXs0FlaQvPLI3yxRrlnY9z7foBz6muuEEl7xlJ82hHodhJc3MSLuyfmOOyj09/T3rU1a1IuxGCpCqQWB4HP/wCquo1HQ7bwlaQC6vY5tVkGbiJOkQ7Lkfr3J56Vyd9eCR3dj985IHBJ+napTc536IJQUUr7jFf9x5EBfC8uSeMD+ntVGWSOFm2nLHjNR3F2rKY1QgfX9TVVQzkls9OB71skQ2BcuTzxn8zTViLfMcgkc81d0+wmvruK2t42lnlcIka9SxP5YrT1bQbvTLlLS7j8ud1y0ZPK4OME9OmD1Ip8yWglFvUrnSb6CATROrkYOzkNg85B6fyqaHW1+yXNpqNrvd4mjRz8jRse5HcdeOK7KHTbmUIqwlyH2Dg5U4HLeg6Va1Tw9am5uRfXUVwllZrMVVGZGeR9qqCOM4B5JHP6csarl8SuXGD5eY4rW9M0ibVF/wCETu3lgeGNhFOpQ+aeGTk4HqD0IOOvWbSvGmp6foN5oioMysFE3KTxAHlN3UqemO1F/wCHrVlWW086CJjjf95CeuPrise/0LUYZc+V5w2gq6H76/Trnj61pGcJqz/Ejm6rQfcas1xHFHIGAQ52yZCk98/1qbdpws3lja6+3KB5YDAKGz1BWjRry3MgF8jyGM52Z4OO5Hrx0/yemvrbw9e6busreKW+lIRQg2bM85bHb8KU5crUbM0jDmW5ytkyOgijjEd2X3SXBkJBjOBtK9OuSTnOP1RrdJG8qSILNwAuNp644I6+nSpdf0v+yLyKJXlCyRbxvOcnOD+FX4w0tlb3jlXZmI91Ix/geacp2XMjOWmjHWcAsrQC3TbMwy5c5wPp+Nay6hFJo32B0giO4O0oQ75MZ4Lc4HPTgVmNv2lo1Vmbj8fb14qxaWd7NpUl7LDAltGcbixBOOOPxIHvXJa/vMa52rIj0qyvNR1WCxtFhiMz7Fkf5sZJ646D8DXbeI/CuoeGtHbUbW/icRsoISMJIHZWy4AGNvHPrXE2E3lsk9u7xTxkHIboR6HqK6ey8dPYWlzbazFPqMtzMZopHk5jO3bjBGMDqBkCrjJ83LYdOS26nHy6/datbrBqExmkjwEOMcZ6nHU/XPtinvcXEMSQxMWuZcgbCcnrx+X6VmmzaF3ubeJghG6NTj5VJwOe5/8A11r6NHbwxm+GpbrsExGFY2V1VhgkZGAOozkE9q3aS1Q4pt3ZqafpMWmaIdalnimu/M8uKLZvO05HmbeirngZ5PUdq7j4DaLY6ld3OvSyma7s5DDHFIufKJGQ/wBcZA9PrXA3etLHo0tjFcS+RkyLEPulufmweSe2a6r4ReONG8LaPeRX9tdve3U29vIQN8oAA75znd2qLNpvqX9o97fUYrVZWvsWsaAt5kjDYyjuG6A+3BrxH4oazp/iK8iufDlk7CAmOS6YhI5++0IepyevB7VB8QPHDeMLuHRbGb+zdMZ1MrzjBJwTlwvb0UZ5607w3prW1sUkFrpzW5DQtfklnAXJAhYY3MSSGfC56Z5rKSaRVr7FYeGNHv8Aw9q2razqc8eqbFFtaK+PIc4AyD8xHt02nv1FXW7eaLwT4Wacq1qy3Vhcwyx5MMqTNIrDHJGHGDwSD1r0D4f+A5tfv31u9vLhLD7Q01tcI2J5juOGBIwOgJPTPHrVH9o46lBpei2t+6XM8MjyfbIk270OApkXoHzkehwT7CoNyWom7vQ8WuI4oYI9s7SvK7sVJyUVTgbvc9e/FQaKnmyzRHGZcKpJx82cAA/jSGQTSLvTZMDtzn73t/KumtdP0xPDcDSWyy3k7tuLMcKoHXAODyTx1zV1JKnG7FJdehJ4Z0QS3tvGEhmuWPyCaZYkUjJ5LfL278Z461b1SOP7YwMRQbj88O3gk5IAHGM+nGKSxsZxBI7W2LZBH5fI4Vg2OvXO1/xFRX2qw2LySMAj7DtjQfePpz0riTcp2aJTaXKTwor29yqXDPc+S5hRxh3IGcAduMnvnpUVpoNxDoEGo30HlLuEiucrvjYZzzwcEYOOfm5yKzNYka7u4IAAJgFV2UnlgPm+g5rYnaW+MRld1ESgJFIc7V9M9McegrSVox16mkYJ6FBhApkmlOEXoMZP1A7j9KzJ7MyiGeNZolmc4bacEkcYPcZz+WKNdeJbiRLNnFtGBtUsSCcc/hniti98QXFxosFn5dunkKEH7vPA9ugNOC5bMy5dWilp+uanpMcVtPFBcwOT8skeWXGentz9ax9XvJDctOV+Vm3Bk4KHnn6U3UruaSVJQ5dogee5GP8A69LpF0skcxOSQuJEYeucMPYHg/WtHBJc9iXOTjytjI5BcgXK4Vuhx/Ec44FVoJHluvLtwELthRIcgt1wfQ1etbeCebylPlOP9k7efcdD0qCeI28quhSRi54HPI45xWqso7B9m7Q+4zJAhaPYyErIn91h7frxSWivJbkSEME4AwOP65ov9Vim2/MXbje23GSBj8Rio9MnBklST5oJQM4XOCOhwPbNTbRhGSUtCVMwj5kWSA9QRnB/HoamOmrcti1cpnkKvHr0H+TUusKhjjYzsydlXCqT78VnWd9K2piCFS6ZAGOCgHfjmpjKUlzRNI1IyXLIuDT4Y7eSO/IG8borlHztbB4dfT8PxFZFm8i3Rgk6YIx257j+dbU9/wDY7qa3v4UmTPzOnDAHnHPB4q3YeHLzUNLfUrKIPDEjOULfMig/5x61cpe77xLi5aIwZIQkrIVJyoyPX/6/Q0y1t38yS4REc5wRnBHJ6Vpyxfaf3sYXd/GF9Rx07H1qjcW89tcG5twcqMNHyMj2FJP7JOkdi5G6CJxOHTI4KgMR7cVlXy3UseINoi5+62O+OQec1ed4nijuhKEAAyueTnPHoeRSJPC9u4YHcffGPr7Uov2eqQpVZPcpWVjby7zcK5IXhlboQM9O4q02mre2vmwSRxGJC5dmwMA9AOpJPt9eKazOt0qGYbmXlpADtAHf1q3EsDzR2627tEQMSl8dPQf/AF6cpyXvChfa1ylbPqUcUuyFp0j++YxuwPUj04PNZrxxXUjyW+1STlojwM+3pXXRWotTMbeZw5Uq0av94H19u9Q+HvDD+IdUWzgRBK5GGaVYzj0BPBOPrmrhWTjc05XezJrOa1ubS3SR5vOYBHhUhSWBxn1I6exq/LHfWjPCrzwPaqXETErtUc5UfTNcz4y0Sbwz4gk037UbxIwHV9uxgcZwQeQwqzB4m+2N5uoGU3mfnnLkmTjHzA/l1rmqYdtKUNUy/aNO1i5FfXGsapbvqtx5Nrb4kwQMt6fU5xz0xWz4nXULzTpJLMT2ejXYQTRJLhJgh4JHc5JOOgJ47VlWV1FI7w2tqJfMXAeRgucZOc9j+VVLuZ5JDHeqLZBynlqHBP8AtEnAHbp0ohD300rW6f8AAJi111uJcR2i6RLBZyPHyBCuQQ7Dlsk844x9fbFc00N0srJJHIH4B3j1/pXVeHbULHeXklzBi1wqxogO0En5sYx16Guxv5dJ1fQfs1u13Dqk/wC8uZ7uOMRuVBZUDD5wpPTsOpz22dRwlbdEuDlqYmk6DqupaNGbFjdERZxCjF48HGGHp3GOua5O/S4gVorqURurEEknII9e+fate58Tan4Zu5YtG1I28ksQR/ssgO0MBkbueR7cg+9X9Ii0jR/Cb67OINT1iY7Io7oOUjJYfMoHBIyTknOfStUralWT07GS2iavLaefJa3KWijzPMuBgkH+IJ15A6nnp1rMg2w3WDuE6Yz5nPX6fyq/LqGp3xjlunkaCaZmRRwpYYzj8wO/FdFrPg15bq2bTbiMXjbY5EkkBR5MZwrDtjj0zxxUOdtGLlcvhRr+G9eitPtWn6jFJJDdzxC4kzgBE6KV6Fc4J79ua6T4leCtLmsdN8RaHqZ0e21CN4o3kyY5pVf92HzypZd5z2xzXK3+hN4V1IwavFNE17bLc2bo4kSI5/eITghip6dRjGa6yPxvb/8ACJ+H9D1K1Fx9gvI7rdIoMUkceSikckk9PTgVENHdGu/us8rPgrWG/tB7y0a3ns4hcyeYcLLGW2+ZGejLk9qz7rztMvW07VrZo0BBkUpjYSMhh3IweDnkcjNfaninXvC8vgibUPEM1rPo9xbl0iddrzJ1Cop+YscDGPb618uaZZ6n8VNfhs9ywvFZtFanZxFFEDsVyOT2G71PHpWzl3MdOm5laboesQamLnwyzTGEiQeQpkwMFsFSORhSfcZq7rOqJr1017qOj6fuBDztp8RSR8DHuPQ44GQOnNaT6LrvhjxRougWO9tYgeO6uJ7eIs8MjBdsWRwVAGT2O761W1XSPEHh/WrqC+DaXdTFmSUx43liSTGRwPcZyBSbe7NLdEeca9qH9qahutbZoLaNRHDBksUUcfMe7dz05PpSW2mX2pKkOn20lwwIDJHyQTxyOua9p+OHhn/hH5NH1i1eF47+xiEyRgDMiIoLADsc5z659q840bRru6tNX1DT5LqKdFypg/uYy59SAPp+PSnGrra1rGHK3KxR0bxV4h8M6hALO5lhuLFyq55x2KnsR2/T0wmhT6OGlXWmugGYFjCqs3IPAB75wO9ZVmqztDbsFidT88pz84OPvE/z4rQuo9IsPO8iY3l1khWVcRLzjOTyfYYxVtK/mNX3O50CwFnZ2t/JBBNDKplgEpw8Q3YDHHcgNg9hz6GtHVPEmu39pe3Vu39l6NfloXS3t1j+1gfeCn+Ic/MRgc4HXFcJp9y8oQRK4tQNshY5L4HAHooH5njpXvPgHwRP4ufTdU8RXIt9HtlEdrbkhWlUfwIBwE65I5J/OuOUU5LS7/I2VX3dNj581MwHU7iO3REtyQqBeOw5x6k546Z6VZuvDdtFZ209lfLMJYFlkUEbo2JIKEdzx65xg4r1j4meCPDHhbVtXufEs12k2rSPLpdtpduClsinALM2Ac55UdPxrzvSrjTzpiWeLh5ZZmedCgVGCgBcEZOcdRxg9M1unyjTi07mGzXAjVVR/J7jBG4j1xzV3SJow/2eW5NtG5G/HBJ+vUDr71ag0iae7PkTtbRKBsKPlyD3Pb14qO50+4ivjbS3iDONjXADIQe7Z5H5H+tZKVKUuS+u4/Yuym9jC1dVF/JE0jqEGFYdJVycE9844rSGmpd6AtzDIsU8ZUxIWx5wzg7fcHv07Umo20kd+kc1pZXSR/8ALWCYFcH3B5HsQCKvyW0jWs1zI9qQOBF9qUMoHTAI5FbTbsuQlU/ebZ0fw20u88TSm1gtGa8ikUF5CfKlyfmEgPIOO64OKzPEGswjVL2zjtrWGKOYxDyWaRQASMqzc4z61d0Dxmmh+EtStLI+TeXyeQ10vJhVvvEY56ADj3Ppjl9OtEEcgtbW5uY5AA0jnygcHsTk449MmuSVOMm5zVuxdRxSSN7Rk8oeYXBYhmIBOBgYAA9cfrVLU7RNJ04XqRqgumbys9eOpPp1qCCcyIJbeZLd/ushO5AR9eTx34NaOviK70mxy4eFSwXacDJC/j2rn5XGpeT0Yq1pQiuxltMZrS132VwpMJYTyjYJsnqoPOMDr3/SsJ55vt2HcYB4CdF7fU11XirWl1G60+y0zTktLe0hS32p8xdwACefpx+fWsLUtPh0/P2m7U3IPzxIQdp9OOc13w1d7bnNLV6FTTrMSbpFTMoYYfqcjv6fh+Fdd8QdU8N7beXRbVoXktlW6tmjXasv8RUnnHT05+tc9Yvez2jx6eqQIqFpGLAucDJKjqB37fWsQqHuAGLSiNhuP99uygenqPWtIxvK8mWnyKy6nQpo1pHFpDtL532xCZgBhYmP3V9T7n1qLU1/fvDc26xSDj5V/XmkiSeO1lEud8xLnqNjA5GD+XSuks9S/ti1Zb6e0t2VQMbD5kmTghSeA3r0/GsqkpX5ou5Uqbe2hxjWttcSpbwANKi7SwUYHzE7j6nHFSTWVtbpHC8INz94nHDDnH4+op1pKNJ1i6KW4mtJJWhy7dgezdM/pWpOv297eCOFo7iMECJkxt4J69wR9fWt02rdgjD7zrvCXh7wzrtqZdTt7aARpliMxsVHBYle/PTkk9K868V2NhpervBbW979nbLwvJJt8yMk4Yccfrz+Vdn4J1ePQtQu7i4MfzW7LH5h2qjHjOemcE47mtLXtMi1WDTbmO707VF8kDyonDG3A4CkZ5GO/QnjFc8qrozcpNtF1GuXTc80tLOC+tmk0uO6juYRkmSQMp74HA59q7j4f+Llt9GudOa3sWuC2X+0xAllJHA7dRnkHnp6UXWoaPoulahb3m9tQW5BtbS2ACgMAWZjjAXsBySfbmuP1XT5ZbOHW4IRslLeeiL8q4J+bPpyM1bvXjZ6J7MyUmtmaXjGO1025t7ixliaS5RmnijTasLE9OeM9Dxx2pbW4sV8ASO0Ia9R2iEjHdjLDG0dB1Y5x16Vzd1M08KoXZ4gTs3HJXPb/CqMd5cQW01sJHEEhy8eeCR/Xit40fdSb1RTkk7mpYOYFR4yRleeeDn271uaFfeU08dxYi9tpUy8cUpjYgHt2J9BVK10m4/4R2C/VSyqcSAD7oJOD9O1Q2l3LZiR7fbkjBDDOK55NSbS1HGzVyW9t4F1KcWccscZclElO5kU84J6Zq5pjR2V9DMGVZcnClTtbPGMdsjjPrWE2qy+Y8pRC7H5uwz9KmW+WSATO8IZTnBJypHoK0cG1ZmK1dxmqLNP4kaeaJvLFyEPHAwcYrP1iMw65cKQQRIGH1ODV25aSG5iuZJGfDBgpU/Mc549vWqV9qTXN5NctEqzORk+gHGBW9NbW2tYbs9TXv7myawRrVjBcquHTb/EOPpis20vpS7KSS7DAz/MD1pgt7mQ4iVCwXftGeR7E1TK75VUgrzj0xzRGCSsF7am1aRySSM80oOF+VTnLVDaWy3F5dQzxlpmKhAc8E9/p/hRDMyIYmHnYOVboR71dsjGb+SYEtOVyfmwP/rHFRezY+ZS2K8saI58tAoHC8enf9Kr3Ia3jjlZHwSSfRuen/160nljM21gnHH3hzShVkhZLmZCrKQOfug9MVEbp6jauikYrYRmSMbt56nnjr9OtU9QsysS3URRQWxsXqMd/pzRaB03JI6qoJxk8GrPnQICJZVPHAB3f5Fae9F6amVmipHcGdBmIMVGc9CD6n2psNwI9LdFzudzn6Usl2qQNHCv7s5OQOtV4FEz7MnCjPHWtbKxWxpacwSBUZSCOOpGSeevrVa7UfaC6ghVXv6ikRrpY9u5jH1Ctxz6imXs7GEBsB2+8P8AP50luCasQxXDwxsEIBc8nHNSJGnkbpjh3+714xXQeDPCv9uQzTSztCFYLHtGSe/5Va8U+FG0y6063WeWR7gugaVQApABAGPrTcopj5HbmOOaMqOM4bkVG8eMkGt3UtC1bTkWTULORLcj5ZuqHPo3T1461kqrPxGCck9x0FNSvqiWibSpMK6HsQelXZiGjOByCD+FZ8SPDIG8tgDkHI6+2alF1tkwEJQ8E/jUSjd6E8pO2wLwT5nUj1FULzG7PIHHGaW4m3zOV6ZwD9Ka/wC8TBI3DmqirIq+hWQ4YH3rVuoiI1mjB8h+Pofesk8E+1a2lXBXEcmDC5AKnpVSXUI9jW0zUUtPDV9YXtpHcxXpD2pLYaKUcbxjkccf481veGdF05vD1xq2ryTTXG9rRSWwlsyp8u/69B6dK5tbSGG4eUgnkAZPTPp6fzqeDVJrVtRsw6/ZNQUCVCO69D7H3rFy3RfNbc1PDkazX8NvI4jGGYSd1ZQWB5+g/CszVZIpYJJpSvmSMWVsdSTk4/GoWkf7oYjjAPrUV3HuCnaxYAIg/wA9vU1zwjqmQnzCrHHauvkzpOSoYsmcKSM4ye/YnpUF60jSAKgRBzu9T6mrc9gbM7ZCu7Zk4OeSAcZ6Z5/pVSSeSZNpAAxjavOfrWybuHw3GLHMJ45ZgSCcFutWZ+UOeR0NUxJIsbR5OMgj256fSp1nElq5PEgI4+vcfpSmndMhmcAVVQQRuq2seI2B7irMscd0qZYL5YBPvntj+tQSFieTwOnbFapuRaKlo+y4UHHzHbz7/wD16uzZWRkOeMdsZz6e3Ss67Tad4B2Hv71a883VrPPPJvuC6p7njGcfhTcb6hfoRakFDARnKY6+9NuZy9rECxPGSM5welSXcJjTYy4IOD+VJpFjJq2rWthBtDTOq89Bzzk01Zq/YW50mlXsOn+Go7SCMG7uG3zSsMBVPQAdzjH61FaRxmUG4keOEKxcoOSo6genp9K6HxtpNrodvYwqFN2xKpGSDuAGPMYemc/h+VY6KpBt4VeaQcB14LHnIGBjGa5Jau66m1+X3WYN5cQ3EjyRRiKPOFXrgenp0AqooVgXdT5eeF/vEf55NaF5CkJHnKQRn91jBP1x29/w+mfNvLFsjIHQYwBXVHbQzZExMrsWYZ6Dt09KvaNKFueSVcKcOKzgCh5B4GeavaZgOXkBUYxjHU0VPhYk9S3fhri4BDM4VerHpzTPMeKFoASEYglR0OO/PerQQeamSMSAgZ45HPeqErZcpnO0kA46gVzx10JlZPQu6XdyQTSLFIU8yLBwSM4xx9abcI8mgq3O1Lhz0HU479+1U4G2yoT0HB/H/wDXUry+UWjAyqkjGc55qtnoNNctmGm2hY+bIpCDBGR1ro7/AElNQjtWijRJlURrIn8eOefXgYz1rL/tHNgkMMUSnfvLkZP09MdT+NT2185g8sqOCH+90IPYelZVHO907F05RWjMHUfNt5SjKyODggjB55rPZjnLEk/Wuo1WIXp3gfPg53NkkE9CfWucv7SW1m8uVSMjIz3FdFGopLzJlGzI4pCvuKtLcF4tmQCDkH0qhyDzT1JU5FbNEp2J/tEnnjzCRt9D/KrsUybNykMwPGc1QOJPQEdP8KlgkVWAKnPQ/WkykzVK25tSzuxJbBG3O1f73vUN7ZmIbo1LxYyW+v8ASpdMuIjOY5gxRhgBACRn2788VZDKls6xFhE3ADjoM9PpWLbiynZGIH29ByetaNteDzYmbAKH0HIqnLATvCrjHI5681FDDuRmJwFzj8Kt2auyb21Ovs9YV1lSK2h3Y4Zk3MST056D8Otc1qdpJaXBZkKpISRx39KgtZDGxcuydvlPNatobCazljuFk+0MTtkL5AHoB6/nUqPK7ou/OVbKSJ5QZRuZRgZPX/CjUnDXSgHO1R+HtVOUGCRkPJHANMuJBgFfvHg4quXW5I+WY42jGBVV5TzzUTN1BPNR8k8etapEtis2c1LBAGYGUlVPtWtp2mxxnNyA8mPu54Gf51raZYwy3ksbRKvy5R8AjrnnPesp1VFXQcul2ZwYFI47S3I24w/T/wDXVeUszsCpznnnOe3HtW9qUCWhOGJbHHsMVhsSy+bHgsnzf/WNZxldIGtLMYYZAhdoyqDHJOK3tEgNqUYksrkZHOAD6e9ZJu0uItrggZ3cH9KkXUmihMMSnGMepA9PalKMpKwRjbU0Nd8m4kTzSqBAQuzliPcms+O6gt8iCMbzwCeSa0rPR4ptKu76+ucGOIukf94noM9zmuZXI6dR19qqCVrJl7F27ublndZWXPQgH/DiqyIGYgkZ9DUcuQwB74zUtuoLA56c/QVotEJO7NLTrWCMNcXBAhUZOD1PoPf3qnq+pm4YKg2xrnCg8KP896h1C7Zh5a5EY6Dp+fqazGbryc04xu7scpWVkDt781Yt7f5DLIuQo3bemRT9Ptlc+ZIwA7DPX860XQhlCOrryDyOh/nRKdnZEJX3EgvlAAbIXGKspKpjyFH05qhLa45i69h1zUUEchkBdSAPfFZyjGSB3ehftkLGRTIFQMTwKUwjkBjg8/jnrTVkFvE+3GXGPpVaS72DhQT1yeOPpUe9J6Cadwy8fmIercH/AOtVyznaSGEBFJjbJz3I9aoLdBn/AHigj+VXLVljY+WCFcc59fUVpJMtbjrh1k2qAqMCc9vwzVMIVbdEwU+metTXswaXBjCgcDPeoACwGM7e59PxpJslybZetrsOAJkG7plh/XvV1lBg/wBHCqccjcOax5LiFAAPnIx/+qk86eTOxdq9u1PluWpaami0EhTaY8/iOKIrSVTuVELDnczDj8KzN9znAwc+hqWKO8c4BUZ688ip5UuotG7mxksi+YQGB6jB/LFVLifyx8mAvftn6UtwUjgGDyOOvWsxpSWbdyR29P8A61OMVuVKQ6S6ctkH/wCv/wDXpxu23AlgQP73OSDTDaOuGdxuI4XGcZqrcxeU23cG4q1ZkXNe2vFYuhVQTwBnilAkyQyrtyCfmA/PvWNAzB/l65qdxMMln+n+e9DgO90X7hhGCITECevIzUVnB5khkndQAeBkc/WqRjk253A8A8A8fWoy0i9WP60JaWQrmz5xkk2xqzADBPr/AEAqGW5cKyqNqjGcVQjvZYwcE4qeO7Ridy9RzScWtkDb6FpfL8sMRuLdCT/KoJ96kgAhMce5zRCx2rtYHHH0qyQI5A0xD4xtQd/c1KumJJ3JPDlqbm9JVWdo1LlVXPAFdD4t01DpdlNbics6lwsoAOxWK9uAchjjris7wxHNZxSXkBdWY7d4XIAB/KuiuddlbTJI8q/BjSMgDOW3cAd85PGO4NYTn7+hrGCcThYLWZ3EYjIckDBwPzJ4rrrPTY47NLYYDyrtd04JJzwfaprDRI72SWOe8shfcO5mnCKN3oTxjoD6flW1rGgS6Dp8BW+06/lf5xPaXJcKwx8igj5jz1H/ANalKfNsEY33POdX0m40118xS0L/AHZACM/XPf8A/WM1RXGTkn34z/Wur8UTy3EVtbbm3kbmyeMk4HPpWBrEC21vatApAGUeQj75HOf5joOK1ptySvuZShZ6Fq51CTUxpsdyqH7CggjdUCsyb8gN6kZOD1xxzxUKXMsLeZE7o2GTzEJBwQQQSO2M5HpVS1l/0ZecvuH6Gpyr2zyJKgkhI646HH86px6FWutXqdH4V8e694Xsb210W5jhS6Kl3aPcVIBGVzwDg9cZ/KpvB+gRXFpNr2oPa6gIbgLLZPMd7A9ZHA+baTwD69ffldEgj1C+WCW5htFY486UNtU++OQPfBxXps3wz1DRNCm8RDX9De1tQjF7W4aUtuIAUDbg59D1rGreKaWjZUOd7m/rHiSa4+Fer6bMkEMcd5AYYYUCLHCDk4A7Agc9ea8Pmmc7JA5BcMTz/tHt+Va/ivXzrF67wwJawHbi3hLeWpAGSAe56+g6dKxZCrWsOM742ZW98nIP8xV0IOMfe3Kk76DrRJ7m4jhhV55pGCJGoLmQk4AC8knnHrX0Z8MPAnhPTPtWneP7RYPEW0SiDUJQsIhPAMbK21jz82fmB7DGT4N4Y0XWNUvQNBs7y6uVOR9ljZmT3yOn1yK9W0T4E+NdUXz9RktNM/iBu5i75+i5/U1U9dEOKSWp6hDpPh7w64Hhvx9Dp1lyGsLm5iu7fBzkBWbK/ga8N+KsWl6LdtY+HdYt72yupRdzQWnMMTjIGDk9dzYXtx7Vi+MPD50LUprK31Ky1N4xmWWwy0anJBGSOvA6ZHOOvFcm6tk7lYHODnisoxV7inUsrI6PRtS07+09POs+abJJ0eZYl3MUByQB9BXsfiv4n+DZ/Dyadp5v/wBzJHNCEtwgQq27B3H3Ir56gby5A5xwew61p2g0iaZ5NQS53s2flPy4+g5/WnVjFq8lf0FCu4nReGPibq/hiLUE0t4T9tuPtL+bHvwxzkKOmDx+Vc/c6tqc6xWl8ZorOItNFbshVULEnKg9BnOD0xxXoOgReELLxt4JbRHiu0aR0v8AzozGu5hhch+MDPXJ9faqPx+uLVviBdpZJbpDBbxRDyAMMdu4k44zlsfSqg0+lrlu9rtnCa3YG1uInW6guWniWV/KztiZudhbuwGM44zWfECpOEGO3Wo55wQo5OOnbHtSxyeY2BxjJA9K2SdjJtNnSeDLz+ztUhvXhiuPs0gkETsyqxAbGSCDjJz1HpXrHhz4hxX2sQrr1xdaZbKhVP7MupIYmbt5gyTjpyOnXmvHtJVVhEm4+ZKdiKx2jnjOT29zxil1RY49RktdOuVvVBC+dEpVWOBnGecZ6HA454rCcbu5ak4pNFjxzcwv4n1MQXDXUKzMwnebziQM4y/Rj2z3rmoAbiVUAOCcn6Dk1JqJSNEijABGS5z1Yk/lxTbGVII5JiT5gwqL6/X2raCtHQi92V5jm5cjscflVxXcxrApO1iMKO5OPzNUV+ZyT1Jya1NJha4ugEcRlfmDntg9fX06U5OyuxI+g/BHgey1H4Y+VC7Pe3CNhpVCm3mVjlPpuBB74rkvAniC98Fa5cafqFoVtpZVF1E/DxEcbl9eDn0I6dq0rvxVrPg+6u9P02bTNtyIrsvaqzxKzIo+Td0yACfU9K47xPrNzq9+uo6pLAbqaMAmIKMhcjLKvQ/qRzXBvLQ3nNKyjujtfi14mRtTksNFvC1u8cZujHjazqdykHscbckY7DqK8x1UsultGMliu9vUs3Qfkc/jSTv6HtkfjUOpXJS3Dk9No/IVEU5TRzSm5yuzoZvBGk6PYi48Ta8yX7AZsbFVeQE9iScDsegH1rPsfEEuiwXFtoW2wSZjmZgGuGGPu7+w9hiuVa6Yv5m4qpOdx5LH1phuN4O3BGOT6138jfxG3Ol8Ohdub6R3d2dpZGJJkc5JJ756/jWbPMZeTjdTiGk2lT04+Udff0p6woMkEsOn41drEN3IVj46nPqef8mphuHOBkjH0pvIJCkAcd66zw94Tutbs1uYyxhLsoSFRJK4X7xC5HAyByRye9Ju24Ri3sbPwZs4rjV7+dwomt7fMPDNhmbHQc5/OtX4kzpqXi/S/Mia0nhREnWTAyWbOSRxjGDk9q5CGaXwxrkM+j3F0ojkZCZ02sTjkMvQemOavaTqD6t4je/1MrNLKWdldchzjAHsMfkOawau+ZG8Ze7ynpmpeIvDS3s7xoty8kil5EiDKpUYyueCeBz071z1pf2t94qu7bTIppYpr6OZ41yCyxxZ/iOMl2JI/GrttpmiaNokl/q9us13uYwQsWw7DooxwRnv6dav+ENItLiOx1okwXpV2nzgeYzZ5C+gB49vzrCLa3NVzN2djjy0sfgzV7A2N3se4ZZDgbLeUDKgg/Nu46jHFRWsFpN4VtdVbUoBMpWKS3wQ0ZJxk5PsDnAFdhe61Dd34X7K1vGrlkvVb5ztyAxBHI9uv0rz/UrNNP8A7c0K7ILR3Mc0MgH8LHcffpj6H8c1HlqRsjKSTWmpyM9qt1LeT27kTI5cY6Muf59xRpoMrGW2nEN7H82xuFceo7A+o6fTmt630/Tra4QztMloMNIPMHzAeh7euPWszV18y4XU9MieJIwN0mcb2BPzqvUcDn39q6U+hny2LVzcprUdsJbZIbi2UxyGNQvmA8jgdDnIJ7ilmiit4k2sUCZAAUkNnqT6dBVvQrd9VgZ7OAZRd0qxj7vbcfQe5+npTb8SWrrJFJFNHtBKIxVk56HIxn8TXLdyqcvRFuKcbvqRAlY1KupO8EFSDgjvUmtXN/Y6jfWqxG0iuCsxgYMFZTgjG7oeDhhjPTkVX1O6jiuz5G1hIqsMDGQy5B+ozgj1qtdXU9/K8t3PJPK4GZJW3E46cnPH8qqEOR67GK90rpLNNqqLFIYiTtUnnjr06EH0rXvbdHtYry7cusPDog27s9h9SBk5zisKVTHIIxjPU+1d7ozWVzoF1ZSWkMt01sPLlSXDowOcMpO1vqMEDsa0la6lYqEU2cil2L5kggs/K2ngxZZgT6HqR0H0rSj0S6uIJ5BKJLqMAgAEEjPX3GO3NJAzWU08cLRSlSULRkEEcjIJ4x710q7hDDFPPDO8sWA0YxhNvKkjqAcDJ5J/GoqVLLQu2l2Zun+HdRvrF77TLV7mew/1xSLdHwcjnoWx1HJHU4rJ1a3nnVb2AN9oCkXEUakeUF6Nx/D0GTjnj0J77RPF9t4fspLaB5N8k24Q25+VVOAQoBwDx6k1jeJtSi1DxS32WKe3gudgVItsjOh/vgEAseSQcjtz3xjWk5WsXKMeW6Zk/DKZU8caM0rxRL9sRy0jBFABB5J4wOetfVMnhHQdWvX1K7t2vJJju8w3DlcdMDacY/SvnKw1bTLDxFNPqfh+xubG6bbJAkQBUdMpuyqnvxjJ44r3nw9P4M0LQ7a90tTa6ddkmIMZChfkkbSSqv8AKRjjPT0pzkm7slLzGR2ur+BLS4+zXFlc6TPK3liRWT7K7Z2k9tpICnpkkH1NcB8X71fEVnc6gsF7FbFUgy64jDIScE9M7i31BzzXtFnqOl+K9IubaLdLDcI0MkciHqRnae2cc9f1r5w8VyajbaMmiG1umnuZIy8KRlgZEJwARxu5wQOeme1YtuUo8r0KXvboveDI9F1b4NeI9HiWMa9C51FRKBlxHtOYzjOdisMe5rM+H9lpWoXCf247Jpdk7S3UkTYPlsMqBjn7/XHIAPpWxpvhy68L+BtH8VOghvVvJba5jJyQrNtTIP8AEGVlI64Y155a3yaVcXkU8bFHQxeWrFduG3L9QPT0rpm3NaK9htKzNlruw0+BvJlufLySqTEFmUMSoz0JAY9+9YUU8d5Jc6jdsNsIxBGMfPKeFxnqq9T9AOpqKygl1mYzXkwt7JOCcHn/AGVHc9ie1WdfDLFZxxwNDaqjGH5CocZA3A9CeOTzz3qaceV2er6kxT3ZLoO2OaSaUkMV+QkZ4Jxn68fkKtzX+y6lSNS4ZAmB1X8u2M8VFEg8jfG4L7tuMfdVRjPpgnPvmiWaIwyJJJFblQMEMTvznJ9zjHcc1nJc0tUXGT2MhkdI9jHmWTJJ9D39xVu+mhltFieBVeMkx+WuC5J53dz2pYrzy7i2aAfaGtSWhEoGyMnnJHQ88gEkZ/KtDS4pbnUImljS81O5mCIxc/ePqO4OfWqkrO5m1fQ5qdGED+a5MrE72x19Px9frUNnZ3qRNc21vcmE/Iz+WSvr17eufzrovEsM2iW19pep22zUJpEZwFH7sDJx9ehx6Vzul3T5FtHLIjMcffIDE/p7elaQd1dmOidmTRpq94s0azsghIBQnBH4dDxz157dqaI7rTbpF3YlkjJV2HysMkZ9CMileN53C/aHjK/eB+bOO4/zioZrV4iXRpJFCnc7nPfP5d/TNXKSasU5XWgpuYZFEV1aRq5bqigA/iOfwoa0jjffb742z93PBGelMi2yyLnb8xBy3AHP6fWtya1t7ZnRrq2ukbKZicMVYHqPyH8+1ZN2tYzSvqZskSKrIXYtncyEfdyTyO+PzrpPD2mpLAZrcW0zNj5l3K6cd/f8xXHyh1kaOVgJYzhWz99fc/hW5oyTOkiwaibGWMGSNj92Q4HykjufXOKVWLls7Fx+Kx1zabaak8CXUNsZkG5iAo5HY8ZI68V0V3Np9poV9BOljax3MDeXKEAlVsYXbjnGf0/OvJLfxDe28SxyMzwbmcPuzwT0Yf8A6jVjUddhuEZp4PtMG3COrYlQnOQWA+YZ5GRnHGe9ZywtSU1LnduxspW1RmWSSRw3HmynzZOQQeVpI55I4vmkbzefmUcevIPB9ex4qrZXAij+bOyRuGx6cfj70+UhZOQNpII9/aunVSdzKTtFFuIpF5huYUD3CqUYcZUn7yg8Y69xVS1tJILndext5T/KgyMMeuD26c1Zl1f7dp0dlNBzasTC4Y/Ih+8oHTB656imSyLD5cHkgoXEoeZyehyCB07H61afQTaa0I5rtjcmGOzWBFBCghsn8T/9atOwBtZJHKwFHX92xIDD1Bz/ADo1rxBqd1G1uFRNNU5KxqC2Pdjz+WBXPyTPHJiOQy7lwobquSOPpmk4OSsJ6dTpbiMeaJrWGFCFAKI2/OO57g+3Sq0V751/FBPHt80hThAWVs4B/l+FV3jRbWXzWMcgX5gT3x1BqhpMUmqahDYWsbzTSNtjbftUdSSx5OO/biphBWbl0KjN7M6vx3pdzFO0erXv2nUgiOkiusikY4BPXOMDHPvXK2+nvqCB4EBmJ27eOT0xg9fwrpjoUdvpl081zA7ws+Hi3noMjAPG09Cetcw0MloctEWjkxk4+6+Py9eKdOaeiexU1712XYdPMUwguHn064PTfyjfnyK1bzStbs4i8sUF5EFHzQyKxII9Ovrxzzx61o+GoNPltbh9aSWfTpEaINH96GYjKNjsOMH0zmssGazuYjeyO0RwHlGSyjgYPr04PpWfPJt3+4rRIj8Nas2g6u87LNbNKhjlhdcBo27c8EcZ7881X8RXj3E5TQ43iscZCmQFu/fvx2q14mvV1HSId8UYaGYslyCd5QjG0joB0Pbk1lW32F7JlYstwCD5yHAA9CK1gov3+pHOrcpnrYTeXIwjZyi734IwB/Su48AWlmtp5GtWty8F4+I1i2kuDj5QTwDkD0rnk+1IkSxSiQyqNgfPzZ4+vatGe61zR9Otb+80Z0sXbEdz5ZEbkHpuHGeD7mlVU5xtHcIxSfMSfEKwGmeL20mN7mO2tiqos4AaMOASMDjvweMjmu3kQ6L4fk1TWWhuGsN0VtcRklbo4wg28YHIYnrx9K848W+MJfFfiBtW1KGGCdo1iIhX7wUEAnPJOP0pZNfS6NmkysbO1ZXW3KbkYj+8pOCD39abpSaV0aRqJNvuep+HLXWPFUVkt5Et3qenRK6R3TAjY4yvDcEew9ga5PXbie2uopdaieC6urh2jkYAIFyykY7Df07AdOlaGqeOPDuralb6lFbT6ZqkcW1miAETP2OM5HH6kfjzHxE8RxardNNEkxVo44YFnfzBGiL2Pck57dOazhGXNZoqpKKVzM8XaheHV7dNQInWyhW2iAkJAjGSFz24Neu/CL4kaLbxTaJofg29h1e9gMf2izl+0uxAOCd2Cqjqe36V4VZRTRRJem1W4jQ52yglT9f84r6b/Z38ReHJrg2VhZfYry5TByAELJk7QR/FznnqOnTB0m7NJL59jFe9eV/kZr/GPXrPxCsd3pqI0DeUyspUngAuwPJIAOBwBnmpvjt4s0TW/wDhHb/RdRikkgkk35jJ2naCjYI5GeP+BfWvVPif4E07xJYSXgRIdTgX5ZzwCM5Ib2xmvm34h+FpdDxHcy280Su8Zkt5hIoZVJ2nHQ9CAQDisJylBqL2FzX95GL4r1yy1GUTWfnAGMecZ5WfDAckbuQOpHXj0qlZ61G8EVozDbGCjGKQRl89snj8axbCVN0qgLwMEfXPX2ptrZtwN0aIxwoTBYn+XpVckUtWELzdzU1sWL6ZCiRrZz26JCOMtOBnJ9zn3xiq+i2tlZT2t/qtvFd2sb5+xO+0SnB4Y/Xt+HeqN99ktbWSVvtE0mfLQ5wquOuT6+3FbDaJDaLDdXscF1BLAkoMcpZsPx0P8QPUcHvyOul0o7s0srmPaSSh5JICdjFh6DB7D256VqaFaLrOtWVhd3VvpcJYh766kYRQgc+wB44GRz1I61kG3aNlNruWPdgYP3Qc8H398V0+nadbTeF7y8a8D3NrcIj25Ay0LgjzPfDcY56g8dyU4R1M42T1LHiqK1n8RJpXhrUtR8SxW6JFblFaRpGIy21RwqgkDj8z1rf06CX4d+IrCTxX4atrpp4RLFbzzANEN2MlAME/73v36GkeI/EXhW1h0rQtRghguAtxG9pHGS4foCxGc54IPTpXLa3rd/rPiSe91yd7i9iby2eTGTtJGOOMdeOlYuopXUTWUGmn3PTNa0vwtrGr2t/4ejXRTdSD7dLPIUghXB+VUAwWJOfQY965bxO+l2Go3NhJfx3vlbWjlhQETjaTkHsR0PvzzWt4a1AnRp9ZkNtOdPbCWcioVZeNwlUjcQ+cBhkqQOMGuRsLS81S7aFU8281Gc+RDGmQm4nIA7KB9OBXMqak05vXp3NqsnBckepXNlbXu+6vTHb207rGlvGwaVlHcDrn0yMfWqmteFNQ0ZYYY9Pmk+2E+V52wlFAJJwvT5cknOAK6OTStSWO7v4tOilgtHNvdwtCZIgyDB3Y6cc5yCOvHFcze61dyaRLYqHS2OTIPNZjsJ/1YLEkJkZxkZPXNdVJzurPTqYXUVaSszLsJLUXQiJBRF2rzlXfPX3FdBeao+l2axQRqJ5eGJHKJ2Fc1HI6b4rZUhlQ5VkHLZPXcee/tXVDwfrklvb3EVgXWeMSgbhyvHJ9uf6+9GIhByXMZSvJe6jmY1DAnB2A/h+J61fa9MNopa5V4Sw3w4A2D+8O+R9TxSapp5tbdMFo5/MKtA4wR7jsR+tZqoxjFpA6vKWG5sY3sTgjPYAcD65q6ShNNsmnpfmNmSCxj05ZVO+9DNukGSGJI2gc4z1wAAe1c7PAVkbtk8/59atwzX3nPHbhoo7Uneyk8kEjn8P8a0ba7czBZdrNIuMnHPHrQ3KD01FJ3MKKL94NhcOfTjr71sWVgkUsHmM0LbCYuM7SP8+9V7m2kjt47mSAxxySNFGxP3iuM/gMj8acbzzyGdz5mccn9c0puTatsVSS15jTiurW30xYZbaSW73EtM0nr2Ax+vrVS2vPJ+0XcCh0+4YzwQSDhsnvkVW1K/8A30Y+zqAxAYnJwwH6E88dq0737Lb3NtYLEB5Tia6XIG9hjCDueufpVRp8uppzSb1ehglnike0kAZg2JDkFc56k/U+9KqapHctJbwXDlZBGm0ksp7Ad/6dhUuoKhklk8obmwuc4z7Y+nGat6Rr91p+o290I4pZLdcRhj8oYDCuR3IOCBwM1qpuyaIclezdjO1B7q+ijWWN43Ryjbxjnng+/XjrXf8Aw78O6VH4jtLWW7imv5IjM7F9kKKMZX1DbcnPpkcda48SE3UFzLMrLCxYRoerHPzEdSf59OlUrrUtt+9zboVBcOAARtPsfTg1NSPtFyp2KjOKd3qzRbR9R1fXL/8AdKjh3mdmO1FTdjIzyV7DrXpng3QxNpElxB5cljZgJIdwyGdhklfptHP61zR1GTVb+KVfJgkaAI77yCR154znPB/rWhY+Lrnw3os9nFLbiO7cs8eFbkEHJH3s8DB6elclVSqx5Hp6FxUYsxPiZ4SstF1O3u/DErTWtzHvmtsZMD55AHUr3xya85aBpm8wIQg+9u+X+deiw6hPq94qIhhjbJ8z/lo6jngnIU/mf51y15p1nJdXE6s/kRqWAds5Izyc8nntXXQqyS5Z7mUjuLXU0s9Iis7TTrh0LBlklYRpIGA2jnkj0wDkGuK125jW9mWKC1tpE4kSBmcdeevGfYYAqjJqF7c2lrBczFooE8uMHA2j8Mc9s88YFd18M/CWgXviiwttUuHv4Jm2soBjj3clQOckHHtzxUwowpycurKjNy91HnIuGaYyxRkMORuGR+VLLZ3EBD3KMpJ+UMMA5AOfp0OfevQ/HWnafa+JtTsNBt8RxSNH9mjO7AHUk9lz0754FcLqXmC7aKeQvIEUDByAMcAeg5HFbRqX0RElZWLKyLNaoG+ZSuOfT/HINYV2gQlcg44+vvW9Z2qrbxKZF3AEMPU88VjX8eJZMEY3EAelVSVmxKLRehmKwiQE5UbF7de1UJGZp1+Ulm5PHf2qSNZiAkas+0g4UZ5q5eW89vII1hZLnHzhuqE5OD747VWzAZHBKxYHMewg8jqPr61ZuAi7lYBR04OKgtiYIz5rEluSSe9PmaOZYSr84+YZ9PX04rHVz02JS1IUs4ZJkUbyGON+88cf41Yl0m3jYAXEhwRnJ4GfcdO1SK8ES5twWZcbgvPPPFQtNcBHVrOQrg5ZOciqble1y7WJPEOkx6NMLa6jTze/lSbsfUjg1FY6HNczJFBAszv05PfofpVC5nWe1IDHcp5B6nqP8KsNfypBHFHuEpTYcdSDxj6VTU7aE9SrdxhLhreMqdrbSV6E+oPcZ706OxJ3q5McsZwD+v5VetbJLaESzunmOAQB/D7fWnySq7SOWDO3XaDgVUm7aFJdyGJpksxLOBtBKZyOSPbr6Vnzb7uYuEOAOeP0qaaYK52IXkJ6sOB749auSK62BlZiZFIzjpg/0pK0XdLcSiug22kmtWilgkmt5QMB0YqR9D1q9deIdQvrnTYtQuZLmKzkMqeZgsMkZGep6etdx4BtvD/ibw6mlXlvEmsR7sSHKtIAeoYdevTkjrXmeorDDd6gY3JCTmKJXOWwCeT27fnTspXTKexveKvEU3iSfT9LtZDHZQnCeYcDcx5Y+wHHsK3/ABlD4Th0HTo9CuYmvbTETuiH96pySScYzu5H1x0rzOA4JZs8jj8TU7TEgKp29gBz37e9CgopRjsgUu5dur51tmt0LCItuIB+8emcfSrfg7RP7e1SO3nvIbOAnLSSsATjsoPU/pVy78Da1Y6NFql1auYHbDxqNzxg4wzAducf4VhyXAXpjA7elNWtoDutybxPpltpeqyW9lqEV9bD7s0Y9+h7ZH5VmRY8xQOB0596tXLRzIMggY4P9KqsPL54wQRTi7rUhO5DOpV8EdKW3lKMMgEdx60PIH6jtx7VCB1Iq+hPU3hIZIzsbcOpB7c/qKqyyH7R8xAwv8wKhspCWAGSSM5zjpVuceYdzBckcYGCRnvWTVmU+5ZjZUhG/OwY5/z+FTZcPuZgQQAuPQVnLMShjl+42M+9W7mZTHtC9AFVunHtisXEWlroJ3MyllJ2qemevuTUMNzJCpETbATk4HXHvRAcNsB5b+Rq5prxR3IkkjLRZ5CgZ4/zih6aWFrJlCYSsyhwQx6buDzR5ZA5weee9aGpzfbZWcQrCvGFTtjvn+ZqvIoZIoYUL3DsSx9v5Y9T2qk3ZFqNim68HaSHJJJ/Lj9KlcBhyKicNDIyMd+DgkdPTinIwPGenT8a1QE8MZuLOW3Cgn+Fj/CRn9Ky7GYWV/HLJEsgicFkJ4OD0zWlbyiGYtzyMdcZH9KX+xHl8Ny6ussfyTmIxlvmI45A7801pe+zFZ7oNZuI7hkeIAIRkYPbpz79aTw9Olo73B3eargrg9Mc59fSstCRDjJ6062Y+WynGN2evWlyWjyib6nR6nqE+r6rPfXEjPPJhVz2A/T3wOOainttRtpcTC4icYI5xwfb6VStWdTkZGOnGP0q1cXMkjNNcuZWx/Ec4/z6VhZ81hX5nruVbwlX3SbjK3Uk5J+vtVEfKhAPzHnJ9c1oJHJO0jyKQegP9B7mqktq24jIBAAGT1NdCa2NGQwgtIqsSe/1xWlAVyc5J6Zx39KoW8JWQ5IGBjntmrCQFUV42L4I/H3qJ2Zmy/K2UUA/d4Ht3zVO2hJErMeQOnqatNho96ng81WMhSN0U4aT5RxWaT2RcknqLbQmSIOcYpZbZvL80AFQcdf1+lFikkse4YKquOuMe3P0pJgyzgEthvfpSv71rmYkMZ2Ek7V469/8atW0f8RyEyMt261Xlw+1MlVH948nJ6VfQptSIyIqIwI7Z78/yFDTLUNS0u+Bg5UblfHzdPXJ/Sm39rHeBnkK7cZ5yPyzx/nFWZZ1W1ZIZ45M4wTjAx2qpB+9kbz8O6NgEnI5/QVgk4+92Kcu5zF3b+RIVDb1PIb1qtjb3rZ1sKLjkjpgY54+tZbplQRXfCV0myGr6jUIJ4ODT9zAFge+DUIyM4p8b+oqwTJbWSSKZZUYqynII4ro7XRrm5tRPAo8rr+8kAyP8K52MlTwM88H1rZs9QuWhS3MjJHjCgHGep5xzWNW9rofTUSSzYBfMOIlG5sHr9KZYWomVS0hi3yYww4AAzn1z0pWYswDZ28jnmo1HmNmQssanAAHOayTdtRRRBPZTjfIih4x1weQOfxqqC23nit1CGicKpRugyc5+tU3gVgwkBVhypHP4EVUKrejBMoCTIIkzx3pk6bEXg57/wCFWRCUZHlACnkHPWobpgVyDzW6Y+hQbqc1JaLvmQD1z+FRNyauWBjjYmQE7hxjjHvVPYi12aRmdeVQv35JGB7Vfsrza8bjIZD06+ox9OarRxrIu6Bw+OqE8/8A16rWykXuwfKGPKntXMorZlR00ZqXhmmHJDs7Y6Z68VlMixXJjdSBj+neulgWC2vbeWQt5an5toyVGOuKz/FMEMup+bYOGtynLYPJ+h5ziiM0nymskrXM+CCON3WVARgOvXp6D6GkC5Ykp+7/ANnAOKnaRPK5yXxgHHT6+lVgsjKQhG3OOvWmzKS6Fx7ppYlhDNsQABM46evvWZcRtBL8235ueCDj2qeBTgoqk7jngdfx64qxLCqwriNC7HGBzx70K0XoNFFWVlIZQxAIGOv41HLuiPPAx0q5FbCOYoMKW981DdqC5yfpgdK0TvsVayuZs0gZjxzUunWj3UudrFF5P0qN0G/Aq1DdCJBHsHH4Vb20IWr1NyW1gEC4UO3T7vQemTVcx26nDQIT069Km0aZJIZUmJyGDLk0sFsHZ3cgKThSPr1/LtXI04scl1RUubSJMtA3QchSf0psMaKpKBtx65OadM2JW2tx0yO4ogUktsPA698f/W4qrtqzJUncR7dZ5ljdtnykg1XvLGSEK2VwRgA9cCtN40aFVyAQDg8d/WoxGCOFG4dO/PrzTU7bDbW5ipGwkwoBf05NaEsbugCkhwc1ZgXyZS3ykn0I6etDSSO6pAo24LMfbPr603Lmd+wb6me1zNHGUmAIz/EB1/pUXmSSKVLAL9KmMTMSAS4PQntTBbFc5Yf0rRNBzXJYEhiQkIrt6n/PFWGmD5ztBODzxiqkS/M2SMAetRyuuRn52P6f40WuUW1eNHLEqQPbOetXVkJjJGVDdeecVlRwOxEk64TqF9fw7VqqC6KSSB15FQ4q9xxXUoXEmW9/r9aktjbRQOsxDlx+I/GkmjO47hncO1RR28e0nYME9+TgGndWJvZ6iXNyrKFhZmYDkn2ptrbCSVBMfv8ATJwPz61egjCKwwoB7ZAxUgVMBy6nsPepc7KyJ5itHYqq5BCNnpkn9akWFCyqADz+n9KmRDIGO5VTjnPP0x6VWlh8uTcJWz646/Wpu3uw16iwyKpeIKxbcffNJPGFd3hIPTJ7ZHaoAm0NkgjJH+f8KfBJiPtjJOPeq5balN3EEUMikyRkMDkgDBP0qB7KPI2yHnrx+me5rRZ48LgsHYY5x/nFQ+WyOc446fWhSZDfYoRW0p3eU2SOMZ60guZkOOQV6j0q3DmONTyDx+FHkfaWfdktjOc1al3KTNLxB+4W3ggZhCEJ2Z/iyevYmotH1FoZIreSNJI/N3LuX5gemM9dvqOlSRQSXzNMQrCF9xTuVJz+lUZ8Jfs6AAAhlHpioaVrA7p8yNi41FU177XFEURCmYjITuAABGeuD/n1r3XxPqr33g+yk07SdK0TT7ERX0aR3SvcKHDbWJ4weM9Sema+dJ5PMneU4+Y9OmKsJNLdRrAGA5ABbt7/AJdqxlS5kjSnO17mwuoHUvEwu7nZOkb+dJuGQwBJwc8EZxkYrF1zVX1KSTCqkZYuFHateF4LHSruOOJDJJGVMjgkkkYyB0z78+3PNcoUKkhvQ1rSSbvbbYTk7DoWbBx25x9K3ZAZAH7OAQR3zWVoY338ShA+c5U/57YrpfEWrpLFa2dpBGkVtuAuAG82UE52n5ioUZO3AHHPWqne9kJK6DQYtPhkc6jafabdjuaNX2k4z0Ycg/hWRqt6jyTQ2Pm21kXLLA8xcJ6AnueT2zUc19NBauqscSYwCclQM9DWUCXclifUmiMLO7HdpWHhjk4JP9a2NKsXe3e5ljMluCMx5wWwevH5fjVbSNNfUZckMlshAkkAJ25z2654r0e41W4lgPhO2v7D+z7qWCM3jRbjFEgHRh0UfKDwSSCOOcxUnZ8sSoRvqesfCH4mJFpkemWnhy+ltYYwETTrVCwA4LMA3JPU/KKx/j/8UHvLODQ9FS/s4pE827+0QvBIw7JtYA44JJ79PWvMfB3jHU/BOp3J06ZWhm+SULx5qg/eVuqnGcHt6VveNtQ8MeNrZZtJt73TNVt4ySbq4a5a6JP3SWJIxyd3vjHplz2VnsU11RwHhu/uItesRbzLC7ypEHcZVdxwSw7rzyOQRxS69aPZ6vfWUphklt53hfYSQGViOMcEZHBxnFT2fh26ty13dwv5Ufz48ttrEDOM9O3rnFZS7vNLn72CfqapOMtjLpZm5beAfFN7Yw3tloV/cWcyh45reLzFZfXK/iPWsK6064sbxra9iltrhfvRzIUYfUHkV778Dre7uvA+sXOka3d6Xf6e+90Z99tKu3ILIeQeCMgjoM56V578VNauta03SrrWrSZNaLs/2mSN1EkAAACknDLuycgAZ/KnF62L9nFq5U8L+FNQu9On8RyW0f8AYmnHJeSUDzZOm0Ac9SCRxxx1rjdWlM13NISDubI/LHFXI9WubPTLiKJiY5x9wscK3TdjpnHFYEspfk8N061UIPm5mErLYa+c4wPpVvTrMSbndiqYwfrz0/D+dQ2VvJcz7EAJxkD19vrWnqNjd6bI9rfRNbSxsVkgkUq6Ec/MOo4IP0xWrlbQlLqX9Dayl1W2bVYJ7jTIjiSGCQI8gA4Abtz1749OtdZ4i8QWOs3VrDpWiQaFp9rE0flWjAvJnuzEDJz3OTya5ptMvdH1UWUixLeCVFVzIBGGZVIBY8Y+YZ5wP1roNWmstFvJLLRdVttSNzarHeyLGGjjlJyyxyHgjPO4djj3rkqNv0NLW3PN9RXyL6dGQja2Apz9f5VVDFgfXoK1PEis+rSGRzJIQAzFt2SOOD6YH0rOiQbs+ldcHeKZkx8MfOBnNdBp8BtbdZ3ATcMhj6fyrU+GPge48aeIfsvnLaWMCGe6uG42opGQueMnI9h1PTFZ/izWF1iXT7G1hgjtrCMwLJCmwz/MSXbqM+/pz7DOfvPlXzK5Xa5WTUnWE21pkruJV/TOePp7+lRq7xnLkMehP+etRjYgJiUBeh5Of8ahllOMZP5dKailsPY2IJluFyBhlwDnv7/SqurZ+zqAOrj+RrOiuHikEgIXH45/Crmo3sVxbx+WCjk5YEZxj39Oaw9k41E1sY8vvXRlkfMc43Dr/hSoEIwyke+aUuMnAA9fegtk4CkV1ljgqo25G3AHB68j2qeLnIJDDB98D0zUFvC1w5WPOQAQMdefT0q29heW8ZYwkqSc46j8OuOuKlyS0bArqAWOOvXBHatrQPEmq+H5TJpFwIt4KsrKrqQT0w3Hp6VhmTcTuByDj0pVVmcFWxg4z0zk0NJ7jTa2Ne/1d72N/OhRJGkEoMYAAbJz06DGfatXw5q1rDcCV5hatIpRmMPm9R6DkZrmRgP0LA/3aSNkbcMkHIH/ANc+lJxQ1Jo6yDV7KG8la5Mt7Bjy1MilWQDnOFOM5+vHFdJH4utI9NS2tri6jgV9+zBGMDpnOdvOe/tivNd/lkqWG9uDgc8f/XoEm5NoDMq5749BWUqKk73LU7HpFn4uto7CW0ltlvULlohIxRkJ4OCBjsD+lZF1qC3V49zKzlyqxLk/dReAuepPJrlI51YhWC7gMgbiMnp19elTJOxI5xtOCN4Of/rd6FSjF3QKRuTuXILRRPGnzDI3FiOx68fnVW1huNReSTyylkjfvMDaWGegHYe+MCqcNwR1ZlYdNxB4z1z0/l/Opxqk8Q3RTFGxtJU4yPX8R1ocXbQd7kEty+ga/dDTiywY2kA5wrAHB/P+VWdM0mfV7mSITrFAieYZm+73wPXJI+n9cxXN1fkSoEDjblM9u/vWrZwifVWihddKtI1w8jM0mFwAQB1Yt128DPp1ptNLTcUWlvsZkYLXKOqtsVeAuTtH49ua3vDvl3OoQ2trcpvdzsguo90ZY5GPUH3BHOPxorIsV4W0qIhIZNyicgsQCMZ7H3H/AOuotQvLi+1OS6mgiW6nf7yjaM+yjA/GpkrqxKVinf2clvfyo2x2DYzG+8HnsfpWlFJtgMc8Nq23GGZRk9sDHOR+tbGn6DKlyian5qSLtLwq2d2T147AdfcVS1qS2sdTIsYkEIADRMCyMec8HnHQEcevrSUk9EWoWVzJDyebvCkoCcZ54GOCe45qyHe6hkdGZNgw209B6Y7irOlyjy1X0LBkwABk5GPUc1DaqsOozNETtU/IgH3s9R9Oufak2CRSQOH+Y5Ze/wDhXSaXEsIhuZ7ZbmCZGUo/yhmwcjI75AI6VLe28N9aRToYY7tt0ckSxheoHPHboQcZzxWv4NmtLWW5s/EUTy6T5R8uRWAMLg5DKO5PIxkZrGUuYqMdTa0bS9J11Y9Pt7WK2vI48R/Z45C2COrZyCM98g+h7VPo876BBcadrlxIdHkcuY1jzh8dVVhnPA4yOfzrbi8d+G49ZEmnCGKFUSLEkLx+YF4GT0HsO351lXlhb+MvHlh9r1LdpNzKEVEfG0dNigcBicfz9K5Y3lJxd0vP9De0dzntQ8eTxpJZ6JcSafHJ9+4ztkl9AQOAB6Dn3NWtB1aOz0+zOnX93LdW7ky/OdhBJxtH8BGMZyc/pXrGpWmkq83h2106GdNPj8uSS2gADxtjdA5xgTYG5TnllHTJFcJ4qk0+wji0HTbizS1jvJJIwhG5kKqELEd+X685xnHFaVEuWyiHPpzGB4l1eOTR0aZ7y4ilkkkWK4c/KSSd5PQls9R0welch4e0yz1J7uTU2yxUiDLdW43NjvgdverviNv7S1p0tY1QyMF4zjCjGSTzjA5rpdT8Pi10IR243rCpZJGQD5sZOGHsTxyMU+aNKCV7OQezc78pF4VtdLF1p1zdvDFY2Mf2q/ku2+Rwr/IiIOpK7fkAySeahlXX/i14wvb+G2Lx20JaOEHZHDGuSkeTwMnr+PtWDFaXXijWYbDSYX8iNSyLj7iKPmkc+v6cgDFekaCIPD3gTWTYsA97NHYWpWcrJ5rA5dgOow35jFaqXIrdWRa7POdN8I6ndwRXc8wgtZS7LMUOxiuc4boTwTisqKxiMjqpknmXd8vsP4vQAcfh78V6d4p1WGHw3caFYafJJZ6OxD35kcg5bCDbnarEnB74yO9c94L+HN7r9k2qXgaGxZhgkFmmJP3UA6t154Hfgc01N7yYSjZ2MfTXgtIHMkUV3MNwChsRkkY7dgee2fatvRbe1E1jZsLVp5XUm7AyYBkE4xwG9+ac2iaNY+KtSsWM7QQpGoEEqhwz/MAoPDkL1Ixk+tc40q2TB4HkjcOSA64KndjDdsgdxxmsnFu9mJ+6kXdbs5b+bW5ru+eS7jvGMRKF2fOBkkAnpgdetc5oWhzXkkk8M0FtdWxLG3mfYzFT91c8bvbIJ7elSXWs30aTxWs8J81yZXMal2OSeW645PtWNHevl1uAVSRgGYA8jr/hW8YSSdjnk4cxq3VuVkgYgxzD5pF27ec44Hpmk4Ly+YTtZNoHJz0/+vTp79mji2x+aIxtQyTZODkgAdh7cioN8gtWMqDcrZBz29Oec+lQ07EyjbVFXT7CZtctrSOMSRTyqieYcLyehb0rpPF3hh/Dup2VrJAbZ3Yhlba5j74O3luhOfTmucj1O5t5TJDIQpIzGTkHB4z29efert/rMl4jXEskrzFPL2A4CY6AEc4x0HpWvLJtMcHBRae5IlrHdQyfaEbCpncDgoOmf/relDWMAVYBcowwOTkfzqbSvMW2t7i8ZEi3lVZh3I7+vU8dRUWqWm15HgbzoVJHmKDgj1x1x+FZXnF26C5Wo3LVr4b0j7EiRXF1JrUrMFQgCEDBxg9STjB6cZzXI3cZtb2SCAuUfgIRyCR93/PUc1s2lyY5Y45JG8mU7FlUAsjHtz09M0vjGDTobmCHSSD5EayTSnI8xyRwo6g9c8nJ59K3pOXNaTvc0upR00KXhzS7rUJ7i1twhljG7ynQsWPtjn0rXk0uOPZBdQy20x+VhuyobP3s+nvxzVfSpwhXULWSeG7B+SSNDyRzjjv+uOa19c8QyXthBaiyVL/GwysxVgCTgbTwOp9Px61jW53NcuxKgrbmDd6XHpN7MJLlJjHkHZznjP49vxrMuN0ls8iNI0ytkjjCp6+30ror+C1+xFpWvZNWYqHlcgx4A/PpwO3eqRtBEgluIm8lB5hw3+sGcbcdOuMn0rWm3o5CcLOxhtNK9qsPOC2QT3A9fxqzDZu0e5toGOCc5GOwqC3bFzDPKCg37lHGMA1rX8qNPDFDcRSltrHZ/AT/AAnPGf0rVu2iJtfUxtRSUBYyWfB5zyQf6jvWx4Wmk0yeHULVxFc27Blc9B9exGOoIwRxWtcabZW8pSQm8kUdUBxu5+Udz+fWsq5mtbNDAsyFXBLRr82wnjBPQn8T/OspSc48iRVnD3mat1Nd3Ud5IJi0UmF8xnySM4BCntx07D2rc8C2UWp6RrVjrN1GqSABJpBjBXn5cfxZAx0HauViV5rCKSymDxxx5dAMlCDjkdhyPbqa6H4bt/a08mmgFLyNtzNgkbeBuOOQM8cdCc+tYTTjBuK2Kim5Ky3ObunkutSggj3wyY+zXEaHGSMnP07/AEp9zoV80KiPUUlVeFjwwA69c8enrXU+N9KGn69HqcSNCoRYZXc5/ehcZI6gMB9c1zOp6lqRlBgkItmUBOOOBnA7Hr1604VZ1EuTt17imnG6ZjoXIeKXAcH94M8EA9/89K65dA1DxNNHa2lukL21v59xGsRXZGf+Wp7FcEYIyMfjjn9Gs3vp703NvJ5swCi4DYjjYnq49Dj2x1r1PSfDUmqeDLVf7XOl6naW91Z3Qkfayosit5Tr1MZUlupxz15FbSlG6vui6UXJNHC6ju8K+I9Ku1utK1RbZllC20+9JFVvuuOq5HY9ueea9i+IvxEsfGvwg1VYtHtVto/KG1b5TJbsHG1vLwDx27YPpXgWlWB1W/tNOs2i8+6lWCPe+E3McDn0zTr/AE+Xw7r17pl5Oknl/uZxaT7lbjOAw4ODjIPQ8da1TcVZEtp6tGJqumRRSK2n3HnxsgblCmM9ufeqW14XAkDxHHp+v/162obGa7gme3dmkt/ndWOPk9cdznPapJb6S40WK2vWUWiStJHlRncQAQG67eASOmfetFN7GY2ztryPTftdnPDLDnEq+XkxkHgt6A9vyq/Bo2rtB562kd1YsVEkqHMSFuRkn7vfnjnio9J8PamNA1DX9JuVis7bbHKsj7DIHOAig8P0zj0q94V8Yvpvl6fqMlxHp4kEkluFG2QjoG749skd6zm5auOppG2nMPUXdii6eqxQxSZwJzuU9vlI4I611nwj8cR/D7xDNHqWnx3GmyHFw8K7pYyOkignnGSPXHrgVPeS6LqtuwsmjuGlb5VyAIhyeB1H68muH1K1udJmbfte1cFVaQcp7E/Tv09a4qVfnk42s/uuXKNldbH1L8SPGGg+IPAV3PpfiKzay8vfIsbkSseqgDr1HIIHTHFfLcWtXcmn32mWgC6bdyxmeV1yAUPBA/vc+xwcUafpl34il+y6ekULKA0GmqdpugByzOcAtge/PAAp2iK881/Y+Q0caY8yN8r5WGA+b0wepxjvW8oauW7JUbNWNPWvDX9j+G4tQNu0Rnna13OeZHUZYkdRjjn3rk0hC3LRP82wfNkdDnp7V1vjOW40sWeiyW0yWVqxdJJW3NPKQN7+y4ACj+6PUk1h6Np93qutx29sFkubhiwDEDJALdentSStEVTWVkSnTpL7TIbYIFRZBIuckn+taGo3N/baYYZ9NtJkdlzegEzKq8BAM4VfwJNNu49Rt2ktr2Ceyk6FXXawHrz24PtXS3FtNY+F7XUba5t7rTzEYZ5lUNJbycna4+8M44Pvj65Qk9jaUdDiUjwszDHyqGGD2JHP611Xh3wfqup6Jca5aWK3OmpHMss0c6p5RQbiHU8g9COMEHtXKwXk80c2+3LRyLjft6duO1aum6zf2XhTUNEgZ47K8uI5JSHIyUB+XA7Hgn12j0qrWTuZXU2rB4Q1uXw/qVnqUVjDftbyh/KuM7cc/rk5HocGljis9Q13VL/WJRptnI0lyUhQvlmO5Y09ep5PYZ9q6rwR8N9Q16Ga6uHgtbC2USytO2TsPOQo6jAPJIFdp4i8DLqsr6bq8kOi3VgD5F5HCv2O4tjja2BjZjoTyMnk8rmI3abjEpxcUtbtbHiOnapHFp2o6etvC4uZklSaTl0Kgj5W4IznkYPavRfA1zpGjzaT4si1F28ovY6lYFwk0JIJEkR/iU4GQOeevXGRL8Kdfmhurzw5FHrVlbgsLmJDEsxHaLdgyY9R8pxgZPFc1oMiwa1bf2zDLDFbks8EqlSu0E7Sp9SBnjJ75rVxu+ZoiEpc15HSatqT61NeWnh8yxxXt09y9szjM7Es2HbOGIGMKMD6muQ1AtaSHfEBKp2FGX+YP5UzTEZVW7luvs2XJQIvzEn0A7+lS+MwlvfQ22nrIRDArsZAd5ZuTvJHJ/DAzgd6iEXz7jneS55FO1sPNsxPEqhoZxDljnbkE8gjkEVvajqOpWdyUu7uWWQqMZkPAI9uh7YrAtlMdqs8jmNnk2sOzAAEHHqDnn0NE9x9qnMq8EEKT7j0qqicmwj8Rt30kt5FZ3MiM0MBZWcnoNpzz9SM96r+G9Kknkc2yEJCPNkkI4AXrluwx1PatK/0u4bwPY3UEymKWcK8TdUYsQGX1B6Hrz064rZW2Fv4WnSORYo/3Sv5bg4AYEhvX1I6ZGD0rm51CCXS9vxLnTcpXfQyNU1PS7SOWbTM3NreqGYbATGfQ985GfQj1rmbuErdxLGyuBg715BUev4U3y2hiEij9xJuUd+VP8+c1PpEM9959paTQx3GPMQSfL5mP4Q3TPfsK6UktUZSlztRewt27X1nBA9wWit2dkXjaCxGfcdB/nrSu7O1hsYjG7i5LlXU4IYf3gfy/nWjoum28Nxf/wBvsbGARuY23KzGUfdGzOSp7kZx196wJCBLuXG3PAGa0jFp6bESTjqy00jCLybja6MATkc8cimWML3V4VJyXzk/XgCtGKVW0oxTxI6mQFcrhgOmd3UD+dVlht4WbcC5Rvccj0qpPSw+VytY0tcigtbW0UFt3lEMOrcHjJ7HORWBG6sxZztQDJ+mev1qxdyRzzbot+NoyHYk859Tmr2madA9m8105AYcp3x7ev8ASpppxXKxyi20iAxJHcwvGiyRuQ5TqAp9Sep9q1NRmsRPbpbkSRCNQX2FSpyflGe3P0qGK2N1bhLCOSFlO1cjfuA9T0P9KhmNqEKzTBZlBU5HBIzx7VM4uWgpXV/Ma8rQSkROcdVzxj6Y96zYopb2/wDMnDrEGy57n6f49KnmAi2JJIgVzxIWyoH17fSp7WQPbJJaSlgjbWcDBRjkYPtnoenrWlOHItWOMO7Nqa0eJo4lTDusqhC3I+UY+n54NcrcPm2ZTngg/l611OnzG6vbWC+jZGjDl3ycNlcK3sMjJ7EU7WNIsvLmlhAjE2MgsMbs9FPYdT354qYtJpM0lT5rWOHQnBwRhh371Lbz3VnJ51jK8Myn5SrbeR6H19KqbhbkA5cbvn/Pp7Gtm/sZLKGG4tz5ttKoYSA5GT2PGAemRWzvFnNyuOqI7LUb7T3luYXMEkq7JJCN5Oe+euffrUCSyXF1vYQE44dF25xzz6VbWYNbbSBtPJH1GKz7RBArkZBz+npU3WrtqNzdixO5gtEkW5iMpYr9n2EuMc7s9CPxzVGW8uip3SMiZyRxyalvy8bxTBwAy9F69Twfr6VV3SNL88JZT09MexraHwq5V3Yt6Yst1fxx/aXicgsJWY8bQWySOe1TRYUsSSSecnnOe5z1NV7a+jsrtH8sP5YZdrE4+ZSp/nUkexj82WUjjmpmJ7ECFEZ2jQYY8HH1oETXTBYmVELfxDPPvV1l8qMeaQi9ieMj2pttcRJKGUg8jv79felFvdIUSa7ZIY1isnKoqDOUB3P3P0qxB/aVoFeILO7qHXAwCufwwazmYB2BPGa63Srm2k0hWZ9phXlG6ntwf6VhWlKKWlyo+87M43VW3c3Vk9vc5yZOgbPt0z70yxvWtI8tbQu7tlZZMnAHt/jxWrNOdY1dSyk2lueF67j2z9ePw4rN1OKO0vEiukYxB8sq9dpJPH4YrphJNcrWo2uxHBDdapqCW9srXFzKflVR+P0HAP0p8cDWxMcjqzg/MF529aalwunT+ZZttZSSrjk9+/eug8IeF7rWWS8l+aGRnSOFHHmSMFzn2GcdaqTsvIOVy0W5hPAZEaVRwnB46fX2qCWeSONolY+XIMMv05r2CbwgfDGm3qyhbgyWjysXXsE+Zc+zY/A14zOwPyLyQ3X2rKlPnbVthODhubfhqzuLiTzoWeGO2HnPcDjy1BxkH1zgDvk4qLw1o0niTxC8bEi3DmW4k9Ezk/ic1cn1lpNDsPD2kRvjf5krHrNM3f2Vew7cn6eheG9Gi8N2axfK8zKPMbIBZ8fy/wA+tY4vE/V4N/ae3+Y+VG/d2/hyTT4ba70uGWKMBYY9gLhQMDB6j86r6RpGh22E0vS4MufNVZQGfcoJ5LdPXrVOW6Tz1ubfcrxnEi4xj6H6/wCPFV7K5ueJi5RlYsuQV+bk/l71xQxVTl99mibOt1TWru0QQWUIY4+Z2BOTzwB0rkrXwfp1/qEj63YQWyygtkS+SxJPUKD+fFaNrNdXWrx3rO8wQ4EYGMtjGPTHPNL4v1COVEtbixtZrhAN7OgfyyegGeh79auhVu+aUmVJW1bKl54P8Mx6JcQQCG1ndmME7ylmO3jP+7x06Y5rx/UbFIp5IVkimVT8rRtx36HvWxrmp2V8tvFptgLWdRscx/x44yPUnuMVXisHt8JOrJdE8oedo9Metd6k782xi2pPRHPy20qRhvKbYDycdMetVW4Jx0Na11eyS70jfA6FMcNgnke/tWe8e2JWBGGJ49MV0Rfcl26DEYgcE1fhuV8o5+Y8YyelZxXnjvUgBzjjAptXBGgBuGQuCckimXEnlgKpJY+vbHatnwdHp17rFnb6zLLDZu+x3jO08+p7DPfriuh+KPgy38O3Vu1iZHsplIHmNuKMCe/cYxisW1F6jcdOZHAwSshdj1YcHOcZo8ySMfeYL14P+HelFpMEMgVni6ZHb605U2oPMYAH8au63FsNEz/eE0mBz161Pa6hJCWMefMYEbwxBUEY4qpcSAnCZwvGDiq+TnINPlTWqC5ed1IdsnntTbXPmNGeSD/OoUZlAO7PpmrVqV8xSRg/0oeiAstbrtJ3nf8Aofaobq8eSzt7ZY4o0hGCwHzOSSeT1IqxIcYAPGPy5pbG2S8k8pVLJGC2SM+nOPw/CsoTdryFFtmW8LLbmTjaT9PXt1xVvw3am81AwK6xtsLqW4+7z+eK0dVC/Z7mCNj5aANj1YcZz6Y/Suf02XyL+F8kLuwcdweK0i3KDY3ozoYrRpizyMQCfnkxjJPYVDcpDiVU6R8If7zd/wAhVm9v5G+S3UKmdsQx3Pf68VVeB4YlOCUzjOe/+NcsW07sLOIgu2eCONz0yWz+XH6VDfFUjBbODjafz/wqpcq3ICnk5XjrTGE88MaScLGSRkevat+VXUhS3uSlvMRSrfKMjPqfetSC5d9M+zMExG2/IUZIxnGfwrIhg2Agncp/CpwGjVmiIAZdv4mnJKSshp3WhNG4kR2A5bBwPx5+vSnQIZIHkA4XI3Y6YrU123tbWK0WJP8AS5MbiG4PHJPbrWIlxLbC7hjcgMOmM8EY/Os4e+roH7ujJreAGGN03bSoG7pn2HtRGshb94c7eRkVev7pIljgQABEUHjvj9KjsTLeM6wxgIgyWxk1PM3q0S1rYrBV+bdtLdckH1/lUBcbsHPJx0q75nzuFw+wHLHpn/OagICjJOPXjr+FMfM1oOhkiVJI5TgMQQ/pj1qSxmKM4DHy35Ldxjiq4U7lZxwRnGKk5ieMqo6kd+M47d6NNhReuo3WIVbDpndj5+evPB+tZMZyCp49K3rry42bOcLnOT1NYtyhRgV6YyK0oyurFXuVnXk01c7uKmcZXPQmo/LPBrdEtE0BBPU5HT2qwGkj/eLhiOfp71TJ8sLnqec09Z1HTdz1P/1qVrlJmok3zxsgBbg4Pr71OFLbUByxx+ZqrpsyyrIpwSoyOO1TFizNgnIPfiuaXuuwtUh7Quq7gwzzx6VI0iNFh8hj685I71A0cShGkkmcnkpjAHXv3qCeVPMwgKIAMA//AFqIxuxpJkN3OWIUkHb05zis+VucDpVuZ/vHI56cVROWbABJ7V0xQpaCxqXcKo5zVpo9pIH/ANar9vps0cHmKmXxlvUfn1qJVzkN171POm9BqOhBFK8b8EgitGC4RnSSTBbruA5FUJYgicHPPTPSq+Sp4osmO9js5ZopYfMjLHAA6Z49v1rIupZIJW+zSEQv8wPX9KoWN40R2MTsb9D61qCNZ4GJlVHboS3B9wOlZ8lnqVfm1RUDmZQTuLHkhR1/D1p6EgHIA9B1x/8AXpLVgjNGZPmJ/uketTtbhTkNw3IJ71M30IdxlspDsyrkhOOvr0zUhVmO8gqcbQuMUiFYySrMfXHOfwqMMd5kbgEYA9/Wps3oUmx1zGxkiIbOAcnpis+74Zucmpbm6LZBNZk8hYmt6cWlZib0EDfP75qV1LEep7YqK1XfOuegIzmtqPykI3IM9B71TdhRVxNIjYMwkwqkVdlhZFYEkLnjA7f1qW3YNwAPXHpV2PaQVYDbj/PFYT1NORNGE8aLIRnOP5+lRFyshMZIyMHBxke9a9xp9v8AMUnZCe20mq8mmSqBsKFTz1I3UloZ8jRRkdtquSMDt/n+dIzSzRBSSwzztBXHP5GrfliGUCWI4ByOOvsKkLJKjMGzzg4PQ+lNOwRiZsfyBh/FkZGegqW2m80suNrj7rCorZQ0jbtyoeC3ANWFtlhl3hmIORz/ADpuyKSCIPvljCBdvzFh/Fn/AD0qo80SMUYO7jqSMYrSB+U+vesu+XEpYjg8/wBKINN2YpRVhk8w2MFAz9Kkso24xw7DOe9VFPOT1PWr9owyrY+6efpWrVthIsv/AKv5s717D/PpWpAqNAo4BI7nOMcfnWddKzR5Uqrbue24f/qxV+yCKi+ZtHHT/PesmaR3Kt2qpuwQg67s5/TrVZMHYpOV9V4zV7U44p7VxnBDA49R7VQhjRFAGcZOOaV1Yzno7E6wxnoMN9Sc0kfl7trRKGH+fxpgXf6D15ptzDIqqxYYXBIqbX0uQXI7dQjmJgg+9z0qrICEWQkFDxj0NSLIDY7pEj3nhSG5PPU+lVPOMh24OFPNEbrcE7AhDQPEQ2Q27Oen/wBfpUSLtJJwB9fel+dMhQdmcnnqc0q4aQO6KSBg9ea0uO6YjHLZb6fh7VbWMtEDxkdxzmooxG8pUopz1Pp9KsyIIkxCwAwCeM5zUuwJIqqhaNefmPB/OrFr9nikmWZXfcmI9oxluvPoPWo4AXjO08gEdehpttIoPliRiQfvHnJ9PamNLUbBLNDcRuXdFDDd1AwOo46ii5ZZZpJExs6DAxnJPSrhtZZUh85ZipwWUYHXvj8e9Vry3EMsiKzPChKqxJ5GeuO3FNg42RXB2tg53H2qWJJGdVCnLHAGDzSxTkfLk+g71Ytr6W3LbAOeCccikODsafiL9za2cYUKxA3c53Y71zgxJcMCP4T2qa6uGnbdISWyep6fWlWbBdyqhiuwnH4/nTguVWKdnsUrOT7NOJBuzggYOOSCKsJMTGF3/MPXuarMpRiQQcknjmiKN5ASFZgoyfbnv6Vo1cgX55JAAGY5x9T6ACu9034dSy+H4NTu9QtYTMzKlq2Q2QQOWHGefyGa5DRJDb6vbsACyP07emK719WWTSIrcII5453kZgxwysoAXH/Aa5685rSJcWupNpa23hvUlh160R7VInjaCNfmw4I3DdwT7nNYNjZyQokwjALsckHB9cED6D2HP409au5VnKhd5IBYvyBjoBms1dQvFOWuHUH8f07VgoVHHfcOeNrF/VHjS5jdchQpV0Pb5j3H14rpvh9D4WudSgbxLJcm1ZMPHbyhXV/Xkcj2z+eOeagtZNTiG1lS4O4qW4B/2Seg/lmsh0aN2WRSrjqPQ1SjzR5U7NC52tj6fv4fCmn+BfFJ8MarqaF9OkDQXEw8uTIx0IznnGRgnOB3r5ugY+dsH3D19hViHXtQTR5NKeUyWL87GGSnI5B6jp6kVW07bLeQwkZV3Ck+gJ7/AJ1dOHKrM05oyske7eFp4vBvwdm1EhE1HV5kkCSEMHhViIxtz3IY+4FcF4z8VLrI0N7ovqVxb20wlS54XfI7cZHJAG0g5GCAOOlQ/FO8nF1Z2s1/9pkjjEnlxgCOFCqhEHckAHJ989zXn73TNFhmwVBHU80U4c3vFyly+6hk7MzBAMgDFV249Mdf/wBVKjE8ggEcHvxT12nO3H6107GG51fgW302OK/v9akKW9vGfJiQ/PcTMpCID2UE7ifTjvT/AA1pF74w8WWlhA8Bu7tyDNeOxToep6ngYAHJOKPBugXOratbItobpEYEwZwJMN3PQJnGW4HbivSvCPhLTtG1y5TxXf2NmZuIWsr6N5bSTdkZVSfl7Edvbk1zVJ8rubxjojg/EGmahaX82g6lFdXmt2t0YeZS0QGABsTHcBTuJPGK0NY8F3WhyarBftmbSjG1ykUecRvxvUngjJAxx1z0r1vxLaa34Q8eWnjK9tY7y2nRbaa5hXZubGAxTPBIUe2cdOK82+Lnjb7d4k1C4toIUmniRIriOZmzEVHbgE49uv4Go+PQJRT1Z5TrDM19IC4YL8qleMgd+eagtwolUseBz9cUhy7YUEsx/Wl8ncMpMufda64pJWMDfk8U6nb6Guk2l48Vu0ckUixgLujdtzKSOSCQOM9OOmayYF8uME4yevsKSKNYgGLF29/Wnq688jvx64qUktitXuNL4bcpIyMdepqFzuPU/wD16SRiwySOv50wO2TjH5fpVJEsUJySc0u0+nsO9SRMS6hguM/yBOKu2MqQ3KGSNHkYghHO1evQnt9cjHWhsaR0Hw98C3firUTGJo7SzhG+4uZOEjGccn1z0H9Oa6TTrTQfDHxAkjvZYJdHtFfbLd2xfzTtHGzHPOecYPUU34tLrelXNpZvA9jo6RKq28L7oRKAC7K3RzznPBxj61zcNmDZWdzYW97Nftn58MMMThSPU++Mc/jXPKXNq3obJKLskeqtPqnil54vCOhx2Fk8OXuNQtYbdQg4+TC7mH4kDvxg1w76bbTQQW2nGa4mhQPqF7OwWONmwNigcBQenJLHkYArnp9X8RTaiLTVNQv7uR2CFPtGd7DICk9Mjp3rSB1jQri60G/jNoA4aaKUh03kZTLDuQcbsnj2pcltBuSlujK8UaZm3ivlRV/dos+HHJbO1gOueCMdsZPGKwFtZQFaL94p98H6c12MGm3dnHHfa1o9zdac5LttYqsmQCBnsOh6g46GuZhY2s7RSK3kuTt3DBA9x61rDRWRk4q5QiIWUIWdGBwFYbcf5xT4g0k3lrGzO2Vyv0NXNSssI9wpGAfmzz3xkd8+oqG0LPIm1ghVg2cY9uMVd7om1i3Y6Y8kn+kocAfKFPJwe/tU11BaxuSRtxxjJGT+dSpNiLEYMeO2c/jmn6RpsGp3Uj6hM8dtGM4j6yMf4R2A7kk9KzcrayL0SMeSW3+ZYowT1x1//UK0LPRL65hgmXy4oZn8tX9COe3HX9adqar9ph0/T4UBGFUIOWZjxk9SeQK7kaTdxaf9iskZ0sh/pcTXAQFiOpycbc5JIOf51Mpuyt1KjFSuzmn8PRWDEXmprL+683/Rjv5P8B7A88+nanSeEL42BvY4pntwUHzKEYF2wox1OTjpmui0hLa6wskcMV1CVaSIYcFgeqEZBU9O+DwQeK3/AIjeJVsf7MtLURQ3MEq3U8DNuVHAyoJ69wcdqyVSfNYpQTTbPI7qxlhlDPDKvB7Yz24PrxirVpY+XDcS3DyodqrGAwJJPpjqcD681va9cWk2n201tc2guIpEY2653Ekks5OMcnqOw/OrUtjFeaBPfWsJukiRJpp92PswZivI6Yz+Iq3UeiJ5N9ThgXjkcMGBYDG8YyPf86tu0U0D4BQou5Oc4II4PcjnI/Krky2LWcYadW3ZyAp3IwOOfbv7iqNnGTOVXbJgEn0cD0/Cq5riXY6LS9Smg09Jk3ExlipmBMbYHKg/lx+dYbSC8vfNnA/eSBpCAeMnsOmMV0Gm6VfapAbeOWb+yUXzy0cbSrFnjcyj5gM8HAIHXB61mx2s0aKJYwIpASrZGDjg/Q9PSoVldmqi+o9mlhJaNIniyPmX5uvIBxxnA/Cu00fw9HeaL/acd9p6wK6i4HIlt1Y7fMdf7ucZIyQOfUVyCQhmGCc49O1dDYfZP7FMcVzJDqgkYleQr8Y5P3fujb2yfWsnK+xaRQvNNn0+ZriQu8Acxlx8ygj0I7dOOKryz+dIIeShYDr1PpxW/bavPc+GrjR52iEJeNw/ljcdp745zgAZ56e9ZUUa2l7BcwxrLLE+8xyplMg8EjPzDIHHTtzU26sfKT6jYW9sqYDb2U5SSPYyMDypHPfv61f8IyQ2+t2Ed3NNBHJKoWSDiRT22noGz+tVYln1C93XJO+RiWIAGMkk4HQdTxwK2tZvNLGlz6Tb2d1GtrMJ7W7lRGYSY53Mv8JwCMZH0qd3Zg4pu5u+BdP1rxxa32j2d6mnaHbMzOm/bLI7EnMoX5nb1JOOOM4ro9G8JaZ4T0fxdealaW9xcaUSYtyh926JWQFiMkZI4GPfPbBTSdX8L2Gn+O7S+tmuLq4/0iOOQEPvPt8rZOcjgjr2ONj4ia953hvxDcR/u/7Z/s2RYi3IUxkt9R+7xXRFKyuRdt+7t/wTzv4f+E9W8Rx6ve6bGsslpGqfO4XJcksQT3wPbrVHXbvUrHTDot4Z0BcuY3bhBwSQM4GcDnuK9i+EN1aeFvhHqut6gAY555GCE480gBFQe5II/GvIPE7DXtV8/TbFrKzkCQxx5LYJGTlvU8+pwKidNXTf9dioNuT8ivodzcadCzQI4+1Rq8oTIaSNn2hVxyRxnHQk89BV621u4/4SWxmtYTIbJtlvGqAM7E8btvVucdSewrKuLy5a+gnt2KSW6AR+Xj93tPy4J6kbevH862PDDLZ2F3ftd2EU/kGO2iZTJK7sfvdDtwoY54IrOVO/vPcbV2Y2tzXFxq0tlukgiup/Omt0c7Fbceo6Hbk88nFehxzx2b2+26mudNshhIEuDJHAjAqAf4d3GfevOIAz3jT3LRneAquWwOD3PXOBmrsdvd3cRntmEVoCQXaTapYc8AYOenOCc9ccATKDaSvZIIxsr9TKv7m7a6urohRJM2EEhBZEUYXPvgD8qrOt3fPNcXkr3E78MznLNjvjrj9PpWxNHoenwQSwvLf37gl0dcRrjnIJ5zxjpke9aGsl5LV7TSEI3YVrhsYdx95VY44GcdST14rR/d5mUouVzzy+gEM0aQMXyuW+XGDz2/LmnrDHcB1O0NjJXp7fXPeretW1xp1ysFwdwdA4dRtznjj1GfTis1Jf3uBGQxxiQt2z19K1jeUbpmHLrqSfYyUMUjbol/izkjnt61qWtw9oVa1kV8YOSM5xVK3bMT4ySDyWPOKW+QlVeEANgZ7fqP5VlK8na5HoSeIIxdK1+yiO4bHmLwFf/aAHQ9AR+NZelsguh5mPLI571OYYvKRr6a4KysANi8YB5xnqf61Yu7Ozto4vIllaVhuKyRlSozjHox6HP4Vr8MbXKlC2pHPcNKvlM5MS/dXsPw7VZsLcXCbEkJkAGQxPAz29qrspNoZCFSOME72yATz8ufXirukzW0Ei3FxlVRSRtPU46c8YrKd+XQUG4tPuWb3wo0K28l8RbRTjKSKCwbJ7fj9KyLjR5Le/C+eJduTvAwQR254rotK8Qma7FtHg2scb+dJ1DOeigenH4nn681NcyXV6u92QtJ2PHPtSpe1TtM0k09iS3hkt5ZDHcMuXEhVSPvDndj1xW9r/AIbvpLGHVrq73xmKOXhd37onkgjg4ySRx0xxV3UI7GFUzax29xDIpFwW+ZsgfKSOBjrnkjp60862Y7CWyuCJraMSKgBzgNnIGOMZJrOdabalA3hGPLaR0ej+GfCEGkSQ+II1sdatVMsUxlc22oRD5vMjYHAbHBXqD+nnvie80ua/urvSra4GnLIfJiY/MFP5+hPfjGa6WPxxcXXw2i8LS2trcxo2FuJUBljCtxt564wM+nFcj5EzXEcSPGsQO7MnyfmegFdELq7k9TOT00RCLCxu1d9/lSYG1WfqOuADWYLC1bUWtftpiYAjLxk4I7DH6Vraxai7uPJWQuqH5Gwqk+/HB9O+e1Zq2UwvUuGz+6wFfONxHc9/wrSE1bVmMo8vxGjbwW66e0ZmdQy4DP65xnjoKkv/AATf6bLEbt4lhkgS5Ds23MbkhSAeSTg8DOauwWiXyQiO3dnjX50jIAfB6jv/AFzXdSeG77UtNXWrq8la8tzFGkE9xsLRglQgUc7R2IweT1rD2yhvK1zanTVRN22MnQJv+Ef0+1tvsUdub9y326Yb2UKcA+WOQOQOTyOcHNUPEjeA7HUYrnTL/VbfV4kPm+UmYzKD97oMKecgcenFPnQXl3JFbfapJ45d0cXnEtEB1UZ+/wBueMflW7pzDVL9dL1HTrWWVxtJkwzjHP3u546+v41z+0Sk3rrvb+mac3MuTttocpfeIrS8tFadswkPlduVYlSM4PQ85/yKxLKGBtJmZr2IyghkjjJYD3OeQf8A9Rr0fxz8NLaxtoL7w5E13YyhPtVrktJA+RnJGMrzjp1rgbrw7Z+bDc6TPPHHIcIki7zkdVzW0ZU4xUU2rmFSMk7NGVPr91Z3n/EskaGYAKZFwSfbGMfzzXofww8YRWupyah4kso55xA6pcTuQjSjJTeoGQMZXOD2qvJbSabbW+r6TbRSyGzZriRVAMOJNjMAenUA455/CuE8VuUdjFIo3qN6q3UkZ49q3jGM0opfMq0qW5r6zf6drUzX1hZwWN0ZAkyQsdrvzhwOgOB14Hf1rmGjaPmMsoR8j2Ydx27D8qseGY1CPIZ4oTkgmQdFOOnfPUVvNAYbSSSNYnR+JGyDsHJzg9T6dq1vyaIltzV2SWUkWoC7v7hobS8X5ysEfloR3IQdAR1A49qymsLO7vHmmuI/IQ7njj4AXPp6fTkVHYwRTXhVp1dUACsdw3n0HcfXpUFgpaQ24Kq7ExfNgAZ46+g9aNiW7nQWQh0aKU3qteQuubOTrHDkH5ig/jyAM8jGak1C+tYNFtjdadE9hd8+Z5atJG6kZI5zt/EHFVJEaFxpcjQvGXCiUDIJzjejdSvHNbB+H/iWR0isbeS9s4rc3MsyDMMSZOcE8McDOBzx04NR1uy7tbGb4otvB8t0k3gq+voVEIaRLhCB5gPOB1C/icetZo1LVIbVpb+B7mzYeSZtpK45+Un1+vNaEfhoRzRXenS7LuJxIkBQ/vADkkHsPbBGP16yXWnsbi2uoPISBdzPJtyjMAfkPGCD37H2pSkm77lRi+uh5rDeokaKIFuIkl3opldSi8/KOw6g59RUkOpSwzpLMzYaQeZlj+9AI+Vm6kcD1FamtJpM12uozxRW1pd3RZYbZwXVDkNgDOADj8OK6ub4S/2n8K08WeHdTW+mh817i0x1RHKllOMhgBkg9j+e0WnuiZJrZnH6ox1l5L9gHdmP+hwgnyVHTnqRgdc5z1r2Dwva2Z8G6f4h8P2KrriQtBc2S6bJLaX6K2B90Hy5Oh3qRyORXnPg3wHB4l0+1a01w22rFmE1pPDjYgON6seCB1IyCBk9BRoXjXxF4TjvdF0bVjd6b5joywjhycgtG33h65B68/XNtO8YvVFrS0pdTuNR1zQNblW28Tve6S0UTujSo0ksUnaJGGdyjnrgnjODzXK+MfCckVpBe+H0e50wxgz3bgosrFsjKngDGOmec1qaX4z8GHwqlpqNld3UlpC5itZ0BMs7MDnzB0XIJ5wcdjWNrup+Hp7tW8L2V9p8EsatNbTy7ow/cpyeOe/PcelYqDj7yVmaynGWjZHe63rDWVtBqD2M8JAjCpFsaNRjGCABjj0PFU9L12LRdVka6t4720uIXt7mzkPysp6HPVWB5DDkVlancuzDB+7k9e5/+tVTCyW7sFORwdyEYPr9aqkm9bHO5Pn0PWvCHiy10jR9fsGEkr6hp7wWchPMu7hAR03AsQSODn3r1DUdO1zxdpi6TZXemfbNB8kn7TAzb5Qn3SScFTgggrg18r205SACbckUbB1KuDsPqB1H+TXZ6V4w8XLLdx6RqqWovAonuN6hnC8A5bnOCeRzVSTi1bY0ck/U6/xF8W/GPh/xP9htdPt9GhhUebYPieNn7sh/hU8YAOO/eodXvrP4k68fEGpJb6LbQQmGaI3Kl5lCthlGAQASB05HFcZdab505ur7WRcXLcNJKHfcwHqQOPp0FczfySHf5kUcUowCI2JU89cfke1ZObqe7HQyvytyaui8YbXfDIruZI3yrZwAAeMDt6+uarareyTxyFmfzGbdvDYOc559f8ajikY7DGwPIOevUd6ddzrBJGSOMYfZzjnv+FJRfMupMZ6NFZ2OxfMO4dFLDqfpSxRtamOW6BjgvOYZc/JuU4IPp/Okuf30H2pUkFsnyGQR5557duD9Kl027iSOR9QQ3GmnzCI5FyDKV745BwMjpzz61vCLs2wgmndmne+JdVstDm8PXpH2XcrwholJQZ3ZRxz94Z7g0l5qss+n2plhmWzk+eZ1GRI+5vmGOFPqOPXiuf1C1mtZbW1kuTNGIw0eTwm7qB+Of51vaH4judC0vxHpFxbwBrqNVUOgYx5bdlO2Dxz75HaqdONtEXzuTalsZlneFrfyWYNEGZhkevX+QNaPhmwgutaC3DhIdrEA5+c+nv61gQAwyLukTDfNnePlz25/WtvTHEunxzCF3uQ+fMUbY9oz+JOe3T+VRUptJ26kRg2zsfE50QadHbyW5FysWyMBMYbnGMdQOefwrgRpcu3O4JgH5nBHPSu20O4V4oZ4Ina6yxkmLZIA4wPQd6i1mXz9zSyEuq5Xzl3ZGM8HuMVxxr+ylyNalVFfVnFafFcvHcWxAeWD7xRgRg/1qxqzG2eFboIt0UB2xnJA4wTnvio7cy2okNjKUZyWOcMD/UU0WFupWe7D+c3zGMt94k9z6V3xcZttmSfYoLdO7YKFecEt0OO1XraaNZNxIJbpySM+3pVnQpNOvNVFpqq7YH+RJEfAQ57+3PWs25gWDUdRgt9zwW8xRWbnIyQOe3Q01a7SVjR8zjdMv/a50ljaKR90RymGIxj09PpUV7cyXolaWNDIQCzc5wMnoePxrNS4laTbHE7OBnA54HfA61K165t23kAN1HY4/UGqjF9UKLbVmUbqRTbRxL98sT6/hXYHSHttBtLy2iZMQAXKD/lohy2/3/wrjGKYBUEHqOc4969G+GOsW87vpOqAmN4z5L7sFR1K88EdcZ/kaVdyjDmj0HT31H6dd/bdPtLlgC9tKI5Ze+1gVGT6dvwqXXHU6PexyFs71aLHTJzkg+nH61NrGjR2d/qL6Esj6ZdLta0bKsnOQVz3yCRWTtvZrCRV2XkQ+VkGBNGQepXvzXJHkk+dGiV2cfq9mVSG6Q7o5s59nB5H5c1qeE7zzHSwOGZ3/drJJtjz/tZzx6DAJ6VqvpsL6YsMzBHk5Lf3XPf+mK4i+gls7p4pFZHU8j09D9O+a66VRVk12Mr2d0dvceHDGl1588Md24M1skfEU6gkFUPcjB461zQiZYFMhwe4P1rrNA8Uvqlhp2m3YslNsGiWSePIIY5yxPAPHB65/OuZ8SObW/mjAzu+YH2JPIqeVqXKOcIuPMirpGnXPiHX7TSbT/W3EuwHsi9Sx9gASa9H+NOjWWif8I7aWETIsVq0QYj76qwxk92yWJ+tc38FdQt9L8cW1zeTJFFIrQs7nAAYHnPTqBXo/wAcUi1Cwswqsl3bsXj5Db0bHfqDx7g9Qa0qTUbRBQvBs8VeNZolLAblyp/xqxYRC6uoreMDzZZEiQDgZY4/Drmqk0zD5XBx0bj0rT8FXNrbeJ9Nur1gltFKC7Efd4OCfbNX0JVnY6iTwtbS2N3p1/NHBq+nyhcScedGTncD9Mn0ritb05La5kS1BVkJG32H9a6Txlr661qcVyquzx/K8pAG/DEjA7D61S8U6pbaxqCXdrE0LtEizIQBlwMbhjtjFZRbWpT5XojmLOd2lCFQxPUHtWpbRvqDC3WcW9tzyf4jnp/9c1SmjEMLBWXLcsc8keg/rU1hJ5agHBTOK2dmSux0FrBFpMUmRsWMZBxnfk44NYl3/p07SyqAxOR8wGPz9qvm4V7cxyp5mPuNk5X/AOtWZdK6SyRIxypyOMZHpWEYOLbYmmhLKG3R3WbBnUnqeMH07Zq8k0kDrJDK6OOVZWIx9CKyrWI+dvlySwIA6nBHX6U28kZDGu/bu4zngDP51TjzStcanbQ7C98c67caTJp1xP8AaI5FMe6SPe4U8EA9e3vXGyI8dwY7iJ4iBkqwweRn8OOa9k0DRLfR7Ix2cyGZ0BmuZiFyvfDHoPxHHp1Pn3jKPTZ9bkubWZ5oQihsjG5wMHB7rxxwKmjNNtJaGklJq7MbSJJ7O/S7sceYvQuu4emK6aTxbcC28swxK4zzknr6D8u5xXIT6gfupgL0AHFVvNklPyBmz6c1pOhCo7zRnzdDau/EF7KTm6mUE8hG2j8u9RR+I9SQnfePMmCPLn+cfhnnPvwais9Dv7yGWaNFVI8Z3HkknAHHfP09ai1TRNR03Bu7Z0Rujj5lOD6j/wCtTUaa9zQLStc6/QfiFcWMRiKBGcbS/wB7HuB1z781Y1XXo5lWWG6R7zPmZxv8zIxjC857E15qGK1NDMVzg9evv9fWplhoO3kLnbVmbugLGNWEk93FZqp++y78E+nbPueB1rvLXwyVnmu5rz7T5rZjfereYpHqBgnPtjHFeWLIOeK09L1zUNLjkSynKIxB2lQ2D6j0PvxUVqMqkWouzCNloyx410NtLvmmRWWGVjkEY2nrjHp6Vzo3SYB+7jHP161qajrN7fKRd3BkDEE5x19z1rMaQdAQa2pRlGKUndhJpu60FReChA+XJB9qiB+fB7U8P1GaMAgZ6ZrURNDJsTAyeOeOleqL4htfE3giHSdQmA1G3KKjMPvgDrnucc++K8phxkAkc8VoWjmGVXjkO9cfMvGDmspx5kXB2NOLSLpo5gu1TFnKsdpc/wB0Z/8ArVXv3geARLbFb88fLxtA4OR68VqvbyaxDLdCeLz0ALRO+1iOeV7Y744xWVaQzPK80CO77c88Er7A9+nHpWVNyv7xXKlsYjxbC5GWVep+vNRLg9Bx61pI/nRyr5ZMruzs3QAHscfSq6wkwBgRnkY9CO1b3MtiurFHAI3DHSpoi0hHlg5HXAqSG28y1Z2Vi5cJGB/EfQDHXkU+6jm0yZ7Z9qyIfnX0J7Zob7DEmZnK+ZjOO3tx+dSW4KkyozI6EEEE8f59KglkaQ5CjAPanK+/acc9/fHcioSsKKsy803m2cudhYKc8HP+BGfyrnSdsgPoQa2H27WYgg4Pfjmsdhl8DqTgVdMJnT2itKwuXAMQO1MA84xk/wAhT3uliaILnCbiTjPJHb14q7od15mmiOVVC2q7ARhRgtnJ/WqN2IZpGNsDsGCeMZx6D0rl3k1bQe63I5nVgCAATzwOv+FU5Rlu+auxoVUMoLfKTg9f/rVnSyHzGwe5q6auyUrjtwVcnJyeMCm7mLgADaACRjP4ipYlMpzuwB3xUzNABsBLEnmtbJFcpFcSLcyNKpIkLHC/3VHQ59arSRtlmOcuu05PvU8asXdowCRyu49vX3pksbDMjOGbqeO3tUJ2diLN6oSXcXIbr1+tXrNJSkkcTssSjErqcdew96rBDMuQBgHG7PX6GtKCRYrF4VjKu3Q9Qc8ce+M0mOGjLWmMbS1nkMOUkUqmVUjjjqefy5NU5FjWNj5bMc5Bxnt/+qprtGtpkMJJA+UoTnkDnj0rPmuYhJIZDhs+/Hb86zScndFya6DJJNxII4zn8aSSUJFEVcswbIGP8ipUXzQODhhkbv50x0VVOTnaQcZFWtHqZLQZc2/mRxybv3r/AHlJ9j+X0qERGSFgwYOg4YDgg+vvVqKWPuNowe2cnNPu7xZY1ghDbFOc/dyTx+X+e9Um0XtqzEuPlPljkqeTSKGPJPAocqIyxOTnn60DLL0PIz+VbgMf+LJBx0pnUckYHT3pxjYkccU1hzgdMdaZLJbOXy5QwJ4P51rwhnbcMHceMd6wQMEZJq9aXPl4DE7Twef1qKkb6gtdGbKq8iEnBUcD/wCse9Yt4371iT1Oa2ppxFafuyDuGFwThcjnA9f881hXDBic4xj1qKaKaSIHkJ4Pen2i5lBAPHNQHrWno/7vfITjPyg/4VrJ2jcjcvW184+SWRivZuv4EdxTpoWmO6HaG/iz3PrS/Z0kdjHtJPIA4496cqyLE3lqd2cfQ1zcyTuik2tDMwxfayNu54xmmFUK4PBrYjJiJywJIACgZ5J7GpoY4bkNHJEBKfulhxx2qvaNPYrc59YsHJYY7VetpzgoFGwdeM5/A1NPYERmSIFT/cOeR7GqkYBBwCDVqSkhosXSkhZLf5XXqoGAfce/86lSbzIwXyD6en+eaqtKUBAJ5qu9wRxxRyX3E9zQeSJeoHHT/GqVzdg5Vc4qlLMWPU1CWPrVqCQnIleUnP8AKnWttJdSlYx05J7L7mm2kD3EmxcAdWY9h71vxeTZwBY8bOpPr/j/ACpTlyrTcmzZSu7U2ZURAumOSOTmmxzDHAHPJzS3F4zP+64X+/j1quzepIQ/qc9TUq9tS1oadqWL5yB3zWpFPEgyxDcZPJOK5wXJCbRjaff+dSRysBgNhfQcE0nG5akdObtEj2psDMc8jn8qEuZWjd5EGwDPTB/Ks+zhiz5k6Db9f61bMiSMylAIgPlfOMVFi0yI3BkRt8YT0xnvVFlZHKIFVM5BA61fm+zorCNxzgYB657/AEqkjCZZNylQDj0/ChrQiSK9wqgBByBzz6+tEUpPDj5QMA+n1p8zK2CzEDHHHAx2qruT5gCc9etG6MXLW6HTyfcCMc8kYpjo0yncTkcYpoz8zkEZOBViEsyccEHGRxQ/dQN3eplYOSD1BqxZthyueSOPei4jCXDAZwTke+aAnOV+n0ra90Uu5qwgTMi5A5Ayfr1q7dBVlIXDYAyfXFY0RIZQScE1fiDMSckgY+v1rNrU0ixJ5WYFARj3Hcd/pVVh5bkEH5ucdefWnTN85I61XfcZPvnJxRbUzm9dS2mAoZsM3XA/rTTcOSdu3OMfSlQKqqq/d78d/wCtSmSGONjwGx/d71FiLXKZJEgaeUM2eAOw9aYJU3sxzzgAD+tEiiblVOc43dM0jxqJsbSY14f37/nVpLqC8yRBNJuEcJKDqScD86g/eb23OEUZ7ZqdstJi3Rgh7biQKsWpjhnEku1tozgjOaLpbDVinEVilyNzE+o9atzM+0bBuOcD/CooiJzNJIQpY8c479v0p26RQrcbhwelKWrB2GuHU5bAkwBgc/hTFVVffzvJJ6Y5qWRfm5YHPzEioZPmk3DOM/qPT1oWugJ30NWS/s5LiII5SMH5mKZ4x+dXo4oJ1jmE5BwS7n5gxJ+6P6+mKyL3T7eByFldh6gA5qtbRzF2W1DuOrccD3PanbqbX7k2qLbQzA25OCTuAHA6dO+KhmVggABwQMnHars2nx/ZQfPH2rOTknbj0/z1pysWtykZU4ADMD1H+FJ90Q12MgHnk+9WIF3A5XcvemyQGPLEA44AzjNIszoP9WBg+tMhNpWZMVteQ0bu+P4G/n2qO2JEvlxbtr8Eevfn1pyXJJIKjHUY4q9ZrkiVQMZ+8MZznpUylZah5lGCZ7bWUlIAKvvHHqc13S38UkCPbqEuACsmEyWB/iB9e1cfr1u6mK42bR9z65711HhbU7eTSQtxKEmjPlkDHzA9Pqe1Y1py5FOKuaQu9DKvHu9UumknjEPIjCkcjA9+p7/WiHS0tr1DfgCM/MFyCzH6dcdB6VrXcyG4ysWZGAxGcHI9fQD9T2plxZEFvJdXlLB1mYcvgYx649u1Cm7e9oK3VhKvk3JmXbtYBjjnbn1HbkH2rK1y4SaJUMBSWNuWwBwfbrzkc1rXUkAuY3CTYaFfM5H3tzA49sjioLtYV004CyNKiuu4/OAWxx+RP8u4qYpKzC3QzIbWzfSbiYO4u4k3qMgq3zdMdQcdqraTKY9QgkBICMGJHYjv+eKlvyEt3IGN459Ac9/0rLjcIARk49DW0E5J3BWNTWJXm1CaeVt4fHzddwA9+ayroRLDGyZMpZi/svGMfrUhmZgCST3weeKrXlwZZVZVVVRQgC98evvnqa1jG1kNkI+Ybcjb1FT2abpQACfWoF55I5HT3ra0W3yXkwMY2/iaqTshRV2dr4E8Y634ZvpZdJuI4llGJIpFBjYAHGe/GexFbXjaHT7yddQsbaXTriaJHu7KaJkVZWGS0fGAh64Jzz+XK2emPcaVJexOjrC6pKu9VKD12nBbjnjOPaus1n4s3rabeWogtpry4Co1wygRqqjGPK+6zf7TbsVxSTnKxstrSDxX8RNR/wCERtdDvC0jLEymRpg/mqSNuQOQVKjGeen4+QXEvmFnZuTSXMxd2ZmOWOT6mqpyzYB4rpp01BESk3oWkkeAMsYHnSqVJx9wHsPf39OOtOjQIQpAPbGaIoxGA/JJGM5prkkEZHrVkiu4yxGCTx6VAW55pGyD1696ZknjHt9aaQmyUHcTjGB+tKiFssPw7Uka7mCgjk89ulWY0ycH16UNgh9lAZJVQY+bpuI4Hrk11WleHzf6pDb2tuZrotuRCfvEdiDwR7d+g5qjpViYZQ08bGUdIzkY/wA+nTmrWlX3l6zFco0zFFVwmdhLKeDk9+K55y5m7PYatc9Ni8ULqfhMm7toJpRlFuJU3kIMcfN0Ixx3HTjivO9buL/UnESmdGdsRW4X5ZF9Sw53Zx7fjUsuoq9/FDDZ3P2WV2k8hJFSMMTyxBHLfj7CtKLVbjTLgiKOLhw2WiDFTjpk8D6c+tc/LyT5tzZ1Hy8pnXtvHZaPFp194cXTr+KTzPtqs2+QEHvyD2+hre8K6zpsU8mpa293qzQqUe1ly2ML8rAn7x6/Tr9M3WZbnULdZ7iZ5ZV3BXxwUJz8x/vZJ9ugrnlEpheJpEhG0uzL1JB9u3Tnj+lUpObdiFJp3R0/grxK+lXGoxSxyRG8tmhSdmZ9rcfeXoQFBA4yD7dOZvbaCSGVXlBmDDDk4+bpwB3x17D60osLtIopmmCRzJ8p80biBxnbyVGe5AJpdsEZ8sxO2BtDHofYHpit0knoVdvRhbWytbyRSOGB4PHrnt9a50Bop2ReGB6Y7jnH04rYmeGFyFEgYdMtxWfeOJZlcdRglsdulXG5Mia8WZokljRjC2Sfbn/Iq7o1yI7efzWPkw4OcnjI6AfUCqAwLCYjqHCj1wff06VDbQXV9L9jsY3mcBpGCjOAOrewGPwpOKkrMnc1/CX2qXXYtQjikcQSKzyKOEZiQOeg79a6GGW81TxOosY5sXLGz8qPH7zA5UA8EdP/AKxwaztJubnw9eRR2F8pgfbI+BhZGA6MM54OR2/rUg1J/wC045IFEBhm85Et2IRGJB+XJOP++h6ZrKUeaV0WrI29Kha5SFfMj027tSyh50K5yeVfuT6cZ4Ap3inT7Y6nLMfJvUEAaa48wQGWUsQx2ng4x90YOMHg1HrVtb+I7hETULo6/cNI/wBnkXy+ANyqpJyzH17nj3ONoeoadZz+Rrh+02oYoW2Myrldu4kEElSQcDkdfm6GEnuac6+FmBesglcQg4LZHsM8VveGHVdP/s+4ujb2+pXKec+cBQmdufUb3z+Gau61pWiWpVLWSaaSK3IuD5ylfObJRoyAcx4x6E5xxyBmXTWsenW9r9hYzyIJPtDN6+g6YzVp3VjNRa3KWp2MtlqElvcxtDPGSGjkXBHoeeo9DV7wrdLpusx3BSF1OUIlAK4YYJ54H9O1VrwS3giklLPIqiMN1yB0z71q2+lw6de+XqUclxvgWSAW7Da7nHDZ545BXrnjp1TfQqMXfQ7fw1JqXh+fVb/SIlfQpXEM97bQmX7KDglkQnLD35HSovCHhD+3/EMlnFOtzo9tN5st0nHmxZ+QdM7jjGO3NdBYal/wimiS2VvqkL65qxCywxr8mngZBc+4XtjOfauf0q8XwrcapJo+pTLfRzhIVHzW93Hlgd49cYIIOQTx3NRc6raaE/xG0jQbDxHJZ2Q+zCKNQxQnhzztI6Hgj0PauMTzGXJPyhgvu3U/WvWPAXgvR/Flnc3+o3876iJ28+BHG+M5/iJycnk56duuam/4VjbSeMLyFbqFdPt2jZLeSQGabIBwQOQueCevYetFnbQnmS0POYI4RazYjXzSQQX+8g68fX6Hita306CytUu9QWFpnVZ4IpXwJEK5wQOcH6ggin+JNOkt9a1BZYHhbz2Ijddu1cnafpjGD+tZa2MsuSU3nGAQcY/Co0ehe6N7xfrllqg0/wDsnSl0lYYyjpGwIc/gM+vJOTmmaBbXV9eIbOILcRsH3ZwpIPUg8AcVkxRNJCqkDI9R0x9a2dH12/0MStptwsckkZiYqACASCSD2PA56ihxUnqS4WVkdb8RPDNwdPS8XTLfSYp7hTIsFwWikkIIDGMABW5PI9fxrj/iVc2uqa1pdppS7nt7G3siQuN0gzwBjtuA+tX7zxlqN1oZ0a4kMll8p6l3JDbhlm5PP+cVzW24k1CS/gjla4RtxKj7rHgfj6d/StL66bEQi1ub3jK9hmtrHw9p8zyWekAW0Sx/dklwfNlP975iQo9mPcVfl01bXw9DDADdeIbuYBbaNSfssarjJUcg7APUn3AIqpbeHb3RLfTtU12FrWK4m8sRv8jgZyWx2AUEnvzj3o1PXJf+Eh1HUJEkgkjZk+zuMMiFdqgjr9049cVFS6exSdrWMW58OS2EmsTWN8l5pljElxNcrFhlDnaFXsHJY8E4wK5+DUgJX8uIyyCMBNuNoIYMPcr2OfpzXYaz4rsk+HU2hR25GoXtyLi5mByZMMCMj+EDCgDPQe+a1PgZ4Lj1DWbuXWYCYIrZXjjcYEjM3BI7gAcjpyKpK6SW7E20m30MDwR4En8V6hBLeAQ2JYl3DhW2g4Plq3HU5yRj0zXoA0Dwr4WuoFkurjWZvMKfZ4o9zkbt64A44zj6Vt+CNE0TU/EOuXUcFr59tqksbQrGpiaEIBwuMfeJPqK5TVdD17QNdv8AVdIinMFhfMiJkkLGQHQ4B5Tkg+nFTNSUbmcp62KtzHFpMWq6fLovkSah+8tTPbAT+VltwJ6gbQfy9685uNZSLUIkgSe8uFO6NQSfvcckc+ld3rfiY+L/ABJLcaxKmnQ2ljKbRI5VUh2ABBY8nJzwOcenU83oOtWGhNdQGwhvDOgYb3wYzjgepGOfr+uLUU+rRWsrS2OK8TavdTXctvf28LhUVFUgloMdlPrzzwRWEwuppVWULbo3O3H3h9K7B7SzuBcz3tzKkp5jSNAzSOSeCDwF45Oc/Ws5LJo5HIUlkUIoxjy1Hrn8q6FUjCOiMZX1bK+mQlVuIyAsnlny/M5BI5/lXY/CbwW/i/xJA82F0yydWuehLEg/Lj0ODz07elcNJa3VxqASwVndeucKv1JbjHvxXdfDbWbjwlfS6gby1hkK+RNB5gbKkkhuODyOMEkfSoiteZ9SKcOdnQfGXTtA8M2tnJpmnkJLeTIkfm8SJHGFc854LnHodvpXja+bcQBbdWV2Jbh2wBxxs6AZxg8V6HrK3/jYXWtzQt/YOngW8EYkBMMYP3m7/MerY5P0FcjarFNrc72iKlvErEAfLwFyTjr7Vo5x1SRc1fRnd+C/hZF4o02/L6mbbWLeHzI7QoDFKhBG7J5HzDB9OD3rzDTdpn+yaorNASUwjYIIOM+hGeleya94oW5+H+nzWmm3Nheabui+025xFcwuMSqx6qTwTnqRwe1ebxeGn1TTZ7vSo5HlhDSxxg58yNSeBnndjkD24qfbRUUpP5+Y1Sc37qHwWqaY8Utq0bwKSUR8qEfnBYDvnBByQentWDazvdXHmT7fOtiSYY0xu56j3zVrTp1nYTySOWChNpJKjPGfXHr71Fc232HXopoHZg7B0I5Iwegx15BFUnraS1Ibeh0Wn3Hh19DlTXJbu5uxE32eG1YIUkLk5YsMEY5J59PeuXvJfs0UEcCsiu7lQ5ycHp+HU0/UbiW6uWuItKfZG2S5QgnnvjimTagbmdXFuExEFUN2Jzkj2qYwe6RDb6EGmwC6klUqyqCOehByegrZa0muIt9gjSG2UB8csQSefp+nrWcwntbV5BA5RiPm9Mn9B71SS8cSqbWR43HAdGIOT/npTacncSdnqbDykRBrW1JCZ8x1UnGT/F2ByKzmKyTRBVETAgjIyAT0OPTpWzp+qXunWd7Hb3Lf6evk3IbDeaGPfPfJznqD071pad4fiutUu7HxBc3FpexssYkEe4RsOquvUDB+9zzzU8yWxs6cpu0SxpqX1vfPrF5E0GqxOyyxzqcNIOMlfXB4xwO3rXQC41TXBbyqZ45mzlPuIgHGSehHf9OTiqfjDWY/D0U+j3Etnq9mQXtLu2kkLo2SNrOTggYxjGcc8Vg+FdW17XbvZNqU/wBltoSMc7QvXZxzjt9OfesqlLnXPK2hrGdnyFXUNfvvD+q6ppF7HGytKd1wqDzGB5yr9Sp69en5V63pt14e8W3emW/hyC4lubDT5LuW+mYwxxtjlGIGcAnjtwRms+28Mab4mv7PS9Q0xJLpEdIXedkRlAJOJBz2PBz/ADrf0zwv4a8Ey6jpeqyqlheIhaF7xv8AWKSxQuMHb8q5GM/MBgmlGpCpG3LqOKcZNxldFH4beNtJPh7WtN8YX7wRuD5V06GSJkB5RVwSSSeRzkVxN1438OWXhvVdE8O+G7+Rr1vN+23Myr5MiklWjQAkLg8DI44Oa0/Dmj6vc+KZdJ1CzuRpRYXB8i3O37OzgeZHv5Kfd+bGce+RXpupeDtL0/X4tHfRRDYTpkagrKB5YwXDrjPHTdkevStVZK7jcTSelz54s9Wu7awL3bSnSLw/Zt6YKI5cSEH+6dyqSDg45965rVTZLBcxTA/bY58R8ZEifNnJ6ZGBg+hr6g+MPhDSofh7BYaetolhFq1vKjQhS6o+VccYye/J579M18uahYXN1qVxdx6fJZ2MkjPGrA7UQEnaCeTge+fzrpgkn2Mpu601NTTAraVLZm1ilvZwEiIHzLznP0A49Mcmqn2NdPutl7MVAJCEDdsJzkYHf8cd6fa29wt+xi3vBGoQyqThQw6bhx0J/UV0tt4I1C4s2vL5HYTMI4EUl2lJ4BB5AHPJJ6nFJyUXqxRg5bIyLnw1BZ2ks8k9xK8YU7opFVFDKcNkdcnGBwe3WqdrCunCS7JDKw2bWAbeTg5I9OD0Pt356a2toLDTrWS5WK8FzC6oiE/Kc4+b1YYPrRJ4LuNMi+06moS2uFSawSXd+/3ZJXA4BHGeR1GM5FZupbRspw/lRx90LmeGK63AushK8Y6c8AcYz2r2TwP8Z7/RtMbTItEjRrmXNvm4JCcDdtUjHJ6c4yT16VxLy+elxCtrGjRcP5Y2nIPTB4Azj0NcbrMrw6zKgkOIGCp7Ac9u9VBuXk0Q/dRe1671Y31zf+ZMsAnORuyq5OQuOmPwxT7ODVPGuo29jB5VvAqs5Mz7EJGSzH+8cjgc46V28cOg/wBk6esVjdapdzWjyXUe8gxyhmCnGOR0OOmMd65u48Q/2RpD6bpumjT7lpkl+0SYaSLGeEJ5QHgn6fhVRlf4VqO2t5PQ5jybeHU3lkikW0iG2NJFw7AdyD3PX2rc8Of2srs2iXdzbyiBrhvs05U7CcEHB54GcdcVH4ktWvNdt1vdctr2e7VGe+yfLQkYwxxkAY646c1r3vhXXPh+YNWh1DSb+3d/Jd7OYzRjcp+VxgdQT7+4q3LmViUrPyKnh3xZrOgXcMoEFxDvWVWuIg/K/wAQJxk9uvSsWPZC5uLOdyVO5jszsbPB+mf8K2dd8W2kuix6RdeHdMyjs8V1GXSSMMSdoBPQFvXGAAfWudke2luoU00OVdPmaUEfNjoPyqYx1vaw5T2V72NC1sY5Fe4uYbm4mfLjdJs3nqeAMk/iKbeLbxaaNQtERJFuBB5MjMWQFSe59iOn+FbHhmEazcwWd3JJGyEqoQjczDtnpg8/pUHiXwy9tLqs1rLPJDBdyQhZlG8heMlhxnOR+HHel7Rc3K2Uk+VtGTEEuMlp/sxKhkZu5z0z1NXNA0NbrUbd9SvHis5B8spGAzEcIWPCn64yOBVXVdZRPDyaRaqDCrK/mbcZbrkHrnt6dqv6S2spoIm0k3rW86OlwI/mQruA5X6459aaTUexMVFPudL4t8PWUOk2L2hSTWbeKRtQht1yscQI2SORwGwcc8kY+p4e1UOgaIt5bfMEOQQeeVYHgdKSVp7DS5oY4pYvtP33DkK4B+6R0J47/wD16WwmVo1CnYwAU5yD6fl2pPmjHQu6k7GhHNc7maXzZvKw6JIwO4Z6A/p61Tl1eHUtSllvz5CsDtCrnGOg9c+/8q6rw1oB1NTLdzNa2YBw/wDHKQPuxjuefp61ymjaGt1EZTCxk37Ajty3X/DHfms4KGspCmpWStoVfMCbirLtBxu9Rn0rZ8NOYNStppgPse8LKfLB2K38QB4P86sTaPpr27wGCa2uoTtMoZScjOQwzjPv6Y61DtmgjMQvGmtm4RZIwrqPXg4Bz+FU1GS0JhBRkmbmqWunWttdf2ZcxT2lwy+bBu2491zz9RXFzWcljNNaoSbS52EsRxsJBz7EdK2zsKpucBl4yRjcc459KqxWUl3qDi0T7TKu4xRs3yjr0z+lRRk4XT2LcW3boW47Gzk097qW9eXyGK2weJhwR03YwRnP86xbq1McMLSpuikXKkEMDj6dDW14Y8Q/2XdzWGs2hkt2bbLDJ1jY9Tjvx/jxUHiu1tbHUSmlTM+nTnzUXnjJOMd+2PWrTkptS+TInG65jKtvLWXesartB6DjGO4+mak0CMeVi28x85UR5xuA+nfmqcYPmhizLg9j1A/yaW2uEiDi3DROhwefXPT0q7OzMoyaNi0vnsrmdI3dEkGGRiQeOqnpziq9/rM9/qAXfi0gTygOnUnk98cn8Kr2hNwzeYobnOfU+tJdQqI5Xi+VgSWHrnvWahByu1qU58xvaJpBuJJJrglbdAf9WCxxjgnHT9awZrW5uNQmfVldkVwm0HafbA7DFXdN1GUmK1iuAkRwjZGMgHv7Vu6wFzZ3UAIaPiRu56np06/p9KKbcJWfUIpNHJNBCsyLE42A85+U9enpWnp5tRb3WnswQ3HzCUnq45AJ7c/59ZdY0p5IvtsYVQHVH3cAs3Q56D0z0/U1kX1o1rcMkiNFIByjA5GRn6fj0xW6lGatcpJxd0QJM9pdrPESssLhh+B//WK67UvDa67bpeWjCGZ4zK2VAV89Dx06jmuNmQKg2k8jrXZ+G5p5PD9u8Uql48wKp/hGSSfftWeIvFKcXZopa3RwU9vJazNDMrRyRnaynqpHXIqW2uHtZo5I3KSxkMrDrweortvG+lR3Voby3KPd26qJymcSLgDdn1B6+1efklQeB6VrRqKrG5DXKeuaF4hn8RW9u8jKZoJMyR525OPvAD26D1qn4mdUVriwlcTCTMseMZU9yevpzXn3h7VX0nU0uowGGCrqe4Pp7+lelw/ZtUFtc2xWWHPznGMjPIOe3rXnVqboVOe3u/1oaqo+U5nWJbh9PS8tFxEDh2UZwT/I5GKwNdle/t4LqTLMo8pmz9cCuy1zTTp0cr6eTJpN3kPGTnyW9fpnGPy9DXKaXE9wl5aAZV1yR1xg4yPxrsw1SMo88dv63IeqMTS2IuxETt8z5cn19/ar2vtOzxpdbvNiBjw2OMH27e9Y8yskjA5DKSD9RXRa5qMWoaPZzgAXKnZJgYOQCM11Ne8mQnpYy9Bnig1FDcKHgJAkUjPy/T1r0HWIb+ws5I471brTIlBg8x92xGxjy27g56dq8ztMGcZPUECun0/UGfQ7mxkyWjIdPm6jcOMdOp/Ksa8G2pL5lU2uplNvuruVVwX5fH07D1+lRmThVOeOB2xir2k28N1q0sM/AaI7W5+VsjkY7/nTLyzNtdyweYJBGSpcDlh1zjtx2rTmV+UkSC5bcI7gNLb5JaMNtz2ByKtwwi7YRWUSRh3woY5b3JPYc+9VIl2qSVOTzzWx4elt7S6FzdxxzREEeRuK7+vf1BAOOKzk23oEd7M5y/VsJIF6DB+nrS2oPkqRnDc9cetb+t2McWnaNeWuXjubfbJxwsinBH8j7Vz8VxJE/wBnaNTs+XGOmKvVqxLTTJ0mlSRY8jDHANOSYzyHeoLqxG78/wBKcJYUKGZcnHOD7/yq27IsyRBSpcBk7ZB/rUuTtsXutyPYUPmYAYc461RvbUXDZMqoB/DgknPPFX76GeFtkoKHGQDxwe9Ylw9ypJJ4HUj/ADminq7ohqzszevdavrizgt5ZGaG3jEaLnHA6ZA6n3rnrmd2c785omgliO2Vxu6kA56/1rS8N6TJq98EJIt4zmRj35+6P8+9aPlpxcnsNtvc2vCvhNr4xTXQLZKs0ZH3UP8AF6mtHxL4VltIp7qyaN1t8+Yq4G5B0cdiMYr0jTfLvL6ylEcEDLEN2wEcA9M9M9PpVfxPaQm4uEtJQFKbtvVU3A5XHYHHTt27VwvEtxcuzN6dNPQ8i0jVJLC9imUh1QgspH3gf5H3r07SHtrm2gEoDxD5gW6OCOnoea8o1qyfT7tlUHyWyYz7d1z65P5Vs+FPEn2GMW10C9ru3AjllPp7j2oxdF1qd6e5HM7WKPjbSorPUy8O1Y5SxKL/AAkf07/pWLqOmS2MiKzI6yIJFZMkEHj8+DXocljF4ge5a+kZIMfuZFIJL8YA9Rjr1GfTFc/PDA+nS6feziG906RlidgSJoiSdvHfOTnng1vSnKMI8xDicgFboM56d6NsvPyv/wB8mt2GHU9JmS7jtip25DtGHAB9+gPP1r1f4X6zb6vvDW6pceX5cyryjYOQR6ccVq6tmrLQmKu7M8Ps7K7vpvJtLea4lPISNCxx64HNLeafd2Ny1veQSQTLjKOuCMj0+ldN4h0i58N+K54tOeVSjmW2khzuC8njHccg/wCFVPEesy+IL2O/uFUXPlKkpTADFRgMPf2/Kr5wsloznQrDORVuGzuWs3ulhb7OjhDJjIDEcDPrgGojjdznrXo3w601dV8K+JLHyhJNsSSJc8lhkj9QP5U2xxV2ecSqSCQeRzUykhVKyHJ5J/pTZSUdgykNuwQeKYG5wR37H9KA2NOCYKoIf5vbp+XarDS5yVlLMc/dJH/16xD5fJIPr61J5qIMA/MOvt+NKw+Y2d0ZhRDDtKKFVlOO+Tn1PJqm8BXcoDDJyBVE3kxwNxwMYqwLxgAw2nH8J5/I9aXKF0xQskbq6swZTle2D6/XimuEmALI3nbizvnO4deff/GnrdiTnGDjGDz+FTxFME7DyMHB5qbNE8vYq2kPnFjkqBxkevPUVKFVFxkZ9qeI8oEtpCgBJP8AtelRNC/lsg5YdWzj8xRa7uXYq3c4I2r0z1qGxKCcFuvQe1MmjZVDHODUKkgggnNapXVjOT11N1E2gl92w+nf/wCv7VpG/tlt/Jt7cgSKUdnPJz6CsaGd2twGZsHkjP8ASlilEM0bgDAOTx2rncLuzKS5S88rbeTu25AHr7D/AAqjNbS+WJSqqpO3AYE59eKtR3KfajK2AGywHXbn2qTxFcW5+yxWTK4xveQDqx4wfyz+NOGjsh20vcpwtsULuGTx/k02STaSOue45/Cq4++CT04+pNSxuisSw5PFaMnqSxbjIM5XOSc9qju7gZMY9ec/nUhdlA5BX6fzqKUIwIJHTn1GalWbuLm6I0o1mFtA2Pl8tOQP8PY1ZvZYo7ZSWHqxJ9fp0+nanXN7FfPb2ukPMRGmGuLtlAwowFAHRQOB1JNVreMJflGImVT94/xH154qJJp3ZbuMaWeSMSLmJGOPMYcn/AelRLaIsgdiXOclieT/AJ5rQ1BWMUm8gKuc9Rk84qtZ3MRtJckNIFCqO/PX2AqY8zDrZE0iNIRG4KnHAJA4P9OlUp4xG+PlyTgY4pqzSSzFbUb5iMFv7oHp6DH41bttMH2ry7h2aRCfMIYdcfdH9T+FVZQV2Jx5iksLF+p2jr3xTdwSTYfxq9cWUPzbQVZCAWHfPP5/1qo0B3ZDg85+f+uKSaZMlbQzrpRHKRj5c5H41NYBPs85kx1+UY79fy4ov1b75UjACnvyKrW8uxSo5Genrmt1rEadmOupgwAA6gZIHf0+lVTkcHoR1p0rFiCFwBx+ppnHvVpWJbFAOODThtONuc+9MHHIp8PLg/jTYi2XZIlTOQo4B7ZOar3DbnPTHSnTcMcHNQMTzUpFNgqs7hVBJJwB61trayW0MYlUhRwR/X+lVdGQozTgAshGMjj610P2vzICLgBhjGFIG6oqN7IqMLoqWzRwIcAOzDg4Jq0Qx2716/3+CfoKhikRt62xVAeMYqjdC7UsZkn9c9R9eO1Y+zux2sjQu44QgImVdpB69TzUBvIFXLSl2zxtHf3rFfAbLZz39vwqMuzEhQMfnVKkrWYnZm9PqLTqC0mSMADHQVQeRQ7EcZqtGdnXG6oppc9DWkYJA5DriYHoaqs3c0hO41ct7dMASA+aTwCKvREasrxQSz5Ma8DueKlW18s5nz+RrR+aEBcE47Y/zxSSMGGVcoT1VhxU8zZXKiA3C+WEhAUdenf6U0Hedz5dh1J7U/7OjNkgqSOSDwaZIhHBPA6Y/nRp0KI5ZPmJ7dM46/T0ph5BIzge9W47MttMhAQ9PX/61JeoI18tQAFPb8e9F+hLKiDJwc4rRjgSNv3bMw4POODWcOCua0VQsiHquQOn86JAty9ESWQOxEY7euKsOqFZJHfA6Kuc5z7VBEqzgqx2xg7fTPv+lXrCCJp0iQBQeWL9gAeayZslcprHtBY5YDpxTJF8uFiCeeTnsatNLJKyxRxsxJx8ikk1FdxlGkidCHVuVbjp/Wi5LWhRbKoGPRuOvWqzcvhMAdTT5Hd/4c46e34UyBwsjKxHOMEjihKyuYJdx/lyNF3IzjFRglBgZZM5x0x71YYMmQrADuTxVdgWIyeT1P40RdwXYSfnYxbI6U2Jjgg4IOaFi35GQoJ64zz/AFp0ds28DzBsJ64/pWiskWl2JrKMtISegOBxVuRljUgscd6j8xIotqHt1z1qpIxJKlvwpbl3sSqwzuIyO1SeWuGfBLNznP8ASo1UbBgDgDOeM00NhyuTtGP696zeuxi3dk6qRtDMADz9KbKN+EiC7RySe59aiXmXgc59elSFiJAEGAOSfWhOwJ2BgY9qk5IH/wBen2/7xjwMdT/k0yYs7hguFx6Y/GomZlGCCB6D+po3EW2ZyjAgL2GOhHrUQkZAQoUZ4+tMiuCnTPYc80rMS5LsGJ5+UE4/pRYe+wkMYwQAOeR35pBGSDkg9/akbdGQSrAE9T/hTW3EEsc/0p/MT0LCsoGyRV3ddwOf8+tRXMgedAMBRgDtTFQ43BgOfzolXdCWB+ZeRz2ojZMaepaLLOjmOFUcDd8nHT0/wqql3OnCSyBTwV3nBH0qeKKc3ZfaoQklgDtUZqC+VQ2QwLdyB196pIp3eo2eYSBSUPA+Yk5yc+5qO3nMco28AnB9/rSDvnA/z3pURdrkkYHbrn3+lV0sxJl1wX5JJUfpVbpnGf5VYgnAZc/cIwfx7/XpROFEhB+8D+dZrQUl3IQh65G6tzw/qlraExX9mZVJ4kVjuUH0B4x37GsMzENtKgHqCO/0706KWPeDKWA7kDNTKHMrMSOu1ART+HriOJo5Nzb9xHzKFzjHtg8+9cVgrgqxyOf8+9bM+pWsVqY7fModChySpU88kdD19apaXEk90oYoxBz5btt3+2f/AK+adNckdS73N+zeR2EsygyFAxZR7fxD+tXN0l1bzJAu6VQGCrnJxz069sYwazdQvL3e5WJLdeh2D+dVIdTvrfJ+Rx2yuce47g1m4OXvdSut2Wp3murxzk7iNp+v07f41cj06WXKxFV2gDazcgY9ao22oxvI0qqEl/iQ9yffuP1qtd6jMwZWYqDwQCBTlCUtFoD1F1tl4to33LHkM3ZmJzx7VkIOoPerKebOW8uJn9cDp9ewqx9ikhhSZiOXxgc47/nWsbRSiBPpFlDLK5vNxAGQgOBgevfpWDNIryyMBtUnIA963pZhb21yyjl49v58f1Nc4Mc9eKcE+ZsUtCWLBI68Vu2khhsMn+I7h7isKLAIyTnNbcr7LNCAMAY5pyKiMkvGSN4lc4Y7m56ms6SVmbjPtTmbPAxyaI+ZABjPemkkDZEF6l/pViO1J2kDjr/+upfJjBDElgDkDpz/AIUhfnJJ4P8AnilcLDn4znPP+elV2znkH86e7EkkcADOKhDfMdwzx9MGhITGkH6D0pAPWnhQynJ+tHlnHAPP3aYCQ8ZJ7Yx+ddP4b0t77UPlieaQgmONVyX2jkn2HrWXo+nz6leQQQR7nY844AHQt9Bnn8q7WLSzos0Uv2O5dlBEUtwgigJIPY5LHnPbNZ1HpYqKe5UtfNluTHb2rTSQMQUiTOF6du1W49J1Frp78WrMNm3buDNgnrgc4656YrHtruW6vJVCnY/Di3TZG7DoMDg9e/em397fSvuKSwhOG2TYAx6nqDnnGAPTiub2etiVFdS5LNG8gVrNZWgYmNG3YQnjJx+HrVo3Au7fyiRbscFuOMgHB9PUZqjY3xe3le6ZUeEj5CCcg/7XXPfHpzzVrVr63vNP+zlYkyQQ4bJAz2//AF4qHCV0rFK+yKUGrmGfyggkibKsQeCBnp/Wmz3ine0MG8E5I4UdenqfpWVJGlqCRu55HTNUJ7h5CdzsVHQdK6Y0o3ugXum6t9HIrsiGJsYb6+nPA+vBql9tkiYpFnYxGdwB/L3qrYwXV6xECnaBy2eAf8avw6KWt0mM5O8M5CjO0L13dxx06giqvFaMfNchsYhfajDA8wRZGCtI3OBnrWjq+mRWt5NaWpZ7dTmOeRQrSA5+YjsParGmOQxgtbt08xdm1YRvYEjgE8ke3f6Zrp9J1JbS2aw1G0tLuZIxFA88YYhQSAOOc8njrj0qZz5VexSimjzm4Vo4CpPIbB9+9auhKkOlTlJvLlnfZIVcq20YIHHGN2D9R7VU1xGWRfMRInJ2hEOflHHJ9ecfzq9oTxLbeVLb72k+7Jv24PvnjFOTvDtcgF0y5nJby32tyPU49M9elENtOr/u1kDD0FawhFqk8d9C6XD4MM7uGjQc5DAZJOcdOh6+tV7fVNUlB33NrMBKP4FEgIHZsZx7Z61klLpYOWw/WNLeO3hvxGwt5uFcPvCyBRlcjkHnpwcfnVKFhLoFzp8gUbJTdw8ch9u1h9CoX8Vq/p+pXenWWpwC7YQzBS8YAfzMtgcN0PPUc/hU9xZKmmFysa3AO0sGzjOMHrjHUHvnr0FUk0U1fVGVpsGuXOjPDaWk0ljAn2h9sIYKhyd+eoGc+3rRJcXOs3tjY2sTkKiW8MQbdknHT0ySTjtVzw1rF94fjuo4Gdba8ga3k4BOD3XsD/OtmXV4B4ym1fR7dI1eZblI48KwHdVOMA9e3B5pXHB30ZvWHgnVVmbShbMZifJdkj3wu6j+8OAccknHPpWRrmm6poiS2+oWU0UKS+Vl+gkHIKkcEYHHUYx9K9TTxHZ6Z4HtNV8DyiLTH1HZexXWWmVn6qMnIxx3zjnPeua1i0j8WyeItWuNSuV8P6bGwszM5b982NqoOu0kZx1xj3NYW1uzoUVuefGSPzT5zSmWX5iXU/Nk+/Xmr1tpMF0sridY5ETKRYYmVs/dXtnnnkce9VtOs5tQv7e3t4RJPIQkaA9Ce3P057Zq7Jay287w3ETxyxttaN1KkEHGDnkUpO2xcUdV4V0HVpLyFvC9peW11CQs0k2UBzjlieMcdOTj1rpNc0fX5L2a71JhJqUWC0ca4fy16Spjhl45I5B61ufDG61LUdNGnXdncy6ZH80dy0xj2Dsmc7jjnkEjH51p+I0055pbHStIudT1KAfM3myOtsW9SWxu9v8A9VacilG7M3L3rHn2u6hdaxp1nDcSGWZJi73Ej5JBCgDJ5C9T1xnmul8H+FzBcfadYsXkijUOsDPGu4EHBbcw49Pf9akOlX134hjtNZQ+fIVaffhcR4BJOOANo7Yq7rWnWZYxNrSXkECqli6sJCqBvmR8ckgHg+gxx0qI6LmfQ0aVlFHPeNNP0618i3srWa3dXdmdpFk8xCRtOVJGRyMe2a5q4094lVgyuhH3hkce4PIrsNOsI9Q1j7OwHkyqY0J7YBwfUdKfq+nvp9y8H2hb4xqiCUdAABwP1FJzvqapcvu9TilESnaQykLkFVzu6fl1PPSuq8S6vplr4d8N/wBl6bawaghF3PJ5fzb0O3BPU5Izz2rMcGzuRIw8tJAyPt7A9/Xoc1kavbGO+eF5jIqtnfnO5T0YE9sf561cJdiJQV7l/wAR+Ntd1e+sb+8W2Elp88AWP92pPcqcg9utc7KlxfXcs9xczPKw3zHYUwx5/wAT24rfsLvTrTSruS61C8a9KmKC2twqqVOQd7bSMYAOM5z+dY9jdmSfN5qt1DFI4WWTDSELwM46nAHA/Crld6k2stCXwv4ck1TWbqTTp7TGl2pv5HvlLRttPRh34554rZXxLr+jsus6pNPDqt/HvhaaLCGFxjICnp0wOMHHWsj/AISGGK5uraCe9i0qZ/KfyhGZZ7cZAD7uCT6cAZIq7DqiRahHd2RhaSCPyIWuoVdthGOjZGccemMjvWc2klcTdrs2dBltvCGhtHrs/i3ShI7SrNaRxmB5CPvLIASflwOuDTNA17Sp5pL3WYdV16wMhDSPctjdjjzIi2Gyo74A6c1zkvjC/wBM1gyaBNbWj7R51vbKYbd37gwsSncjIwD1GKwJ7u6vrm4kuHSzF237yO0QRAkkkEgdepqmr2aZKW9zqdZ8Zx2mt3y+E7aGws7lPKktfKTAjAPfoCSzcemBXFXYEcgddpV+hxyMc/ga3PEc0TpY6d/ocK2aqrCzU8Nj70h5w3ryeffIFfT4LW4tPJMR80y7iz4G8YwAo64HOTx+PWspu2tjOau7Iw7piq5CtI/YnmptIul1S8jtLhorUFCqs6MwyM8Ejkd+cEfhUrabeo0zQ71KMQPLIIZc4/Hofr/N6ztNAQxCTMfnUJnocZz1BJ7cfjTk042Fey1MPV38tQ8eHVW5V+/sSOo/L8K2/At3oohuY7/QodTuJpkeJJHIEYU8oOCSD0/+vVeXS5Li3c7GdD/FycH0qhpuj3EVylzLBM9kkg8za2zdt5wG7Hjjrz0zRTkuXluZx5k7rY774iatHA2qxRWF1oTXsKI1gybDjIztAGNnyj071w/g+O6/tWCSzJnuYshFVN5bI6EdCPXg0/4iXmtavqsGpanb3NuFQQxRyBv3UYPAyeoPJ5Oc1HYMY0iNmkpmb70iHAx9a0jBRhZdS9eayPa/hBbk6L4jl8QwiNII3hWG4TAfcCWUr/EBwMe/0rm9Ol0jS/Beq2mtarDHrNlcLFbQWZJyEx3HysrA9exB75rl0i1O1jub661KLTYfs7EiFxJI6MSrLnsTzkHnvz1qPwJqctjc3GrW2np9jVDa5kIYh3U7GOehz1xgc1g6cOVtr/hzWL5NL7nM6lbvb3rz2kbRnId4vrzkenXOKrSXwvtTtZyq/JtDDbgcN3HTvzXq974alt7ddQ1O9in1a4ck29uBI0YwDuYjgcEDHTtnqBwHiOwgVkngVUYlo3wABnGVPHfg9qdGtzNRkjJJ6tm9/aEIhnsGLhJiVBx2HP5+/viseHS7YWN3NeGQNkFRgHgDHXsfboaueFdDk8TzvFFItvIkIZHccO3A2r3J5zjGcc1i6hcPp0N14dO24uo7xoVmB6BSRtHqMnr7CqpwcfdTHGKWslocytxcPdGJJnYSdB6ckD8a7XxZ8ONW8JaXo1/rr29pLqIZiuSxiZSMKwHGSpJ79CM54rnPDWns+tPNcxTfZozwyxbssPunB6rkc98dPSvZfFukar4g8L219cTWJtY5Y4p2jnfcJBwheNvlXgnlTjByRXROoouyJjDmjzHkdxIkMggWZpI5E3MNoTBGeTxnHcdKsafql6bzz7XcWlcec0uHWUAY+YEEdCeOlJrlpEmoyrHd/bEUqpmjUgHAGQAeSPy9a9Q8KeFPD3ibwTf3NndTabq1mWkMbZYNGAOo64z36+uazk1GKuhxUr2vqeO69eSxW8NlZySiFXMrxHgA4xlRnA4616B8LdWsbC4s7yZTOlzmKazWMHg8cdic844NFtoHha3sp7vWotUu92Ut/KxFEZQASpbrxn1zjnHaqvh3SNP8M3Wnapr5F/o03yvFbzKZowwOCQD1/ix+eDUznGUOVDjGUZXZ2/jjRtUhE2o6DLBcHSys8kcLFvLSRdw3jnAxjPJA7HrXAael2oHiO6u45mMoDxSxF0BByFbPUdq9A+Av2461q2oWUbRR3X7qJJkyrqSeWx2AI6VwHiK8Q6tfwWNnJb2Ylx5oUrGxyRuK9NvJx1x/LClyxk4JbD21tY7ey8YX2vfELw5qcSS2lzBcCNp2kJiFsQMoygdM7uf9rtXpXxOTTP8AhMI1OqJaapPp7QI89yyxwEnKZQfLtbDKwPYg4rw/wZd6zDqFlFLCo02OOSby7mbyEeElRIUfqTwvQnkV9LeL9Rsm8LNrWkWdhql/5CfZ2kRHby5GCbs/3cMfY811RXNGUb+YptKSkj4t1KK50HVHtxI0E6t9yN85/EcMP0Ir1/RvGPhWf4ZanfXtrp8PiiMGI2mNyTscYnWLouFJ6cA59QK0PiV8LPDd94k8L2Gn30GiarqMbyPZSMzq3Q7UxkrzuA7HnHIxXk3jjQxousnSpQbR4ZPKlVgMuc92HUYxjtitHFNK61ITa1TIoLxLTRI3s5JjHOCZoJMGMkjhlI5V85GOw578a9n4supdOtbOGeZZLWRJUi3kZUE/d7Dk9O+a5d5JLe6BtFVl+60fUOB2x+dNtdVtI9Qjl+wMBGf3ixthnBGNvp+ntScLruNVGbFhfXdlPeLZy/ZrUOzAgAOocAEBu4xkf4ZNdEfiNqetfY7XVBaT6Vp5i8mF4cE7O+8cjOMHkDnjFZXiJdHuzaXdvLNpa3bGMQTQsEUqi8knOAXJGemTngcVEfEupNa6dY2v2aG401HjjkQeWwUnoxHBAyTnHOazceZXSLbcXZvQ3r4NqF3f62Alu16zPIkEo2MSehHpjGfc5rzrVoraTxFsaQqpwHfHVh7Z6dKmu9ahj3RQ2yTFWz5+Sm7HsOap/wBnXV0ySgxLJOPMRGc7jknnJ9/pWkIOOpnUkpaI9C0aC5mu2i0+WW3kJKBmfaZAeAo98npn2qQeDX1i/aLU3g0xkm8mfKkbXPJwvryMjOM+lYEOralZJDd2xttRiVcz28oJYgHb9VOB2+vNeq+ELnwne+GrvXJLuaOxtYS0sM8OZYXZumcbWXsMfN1PGcVn70dUbR5ZaM858Q/Da80Pxjf2CTW/9naeyN9pnlCeaCob5VPJYZPA/wAK+gPhn4Q8Oa78NpbeWM31reyus0sq7XJTKgr3UjqO/Jz1xXmN1rMHjC61HSPDGmz63Y6dbs63ExYysGPCAA/dDnJJ52rjjqbXw7+Jev6Lbz6ILaKd8JHa74tq27A4IKLgnjPHBz1q4yXNeaM3BJWgdbN4c8F/DOS00/xHpaapa6pLI4v7u3SUwEbQEwRnGDk478818+6RDps3jXUdKkmWLS3lmFtOwA2bdxjPPb24PPrivoPWPEtrZzxL8Rm+3weQtxaoLIq8Uzb1ZQmMHCkHnj+Z8L07TLS71XVL/wAyNfM4tY5WCuAMDdtHBJCn2HTrgUSqJRk0Cpu6TK/h/wAPfbPFo0wXn2aS4i8yG48zaBg8nj25788U+TXJdKsX0a7mF9A9zMyeTIVJfcV3uCMsDjI/lV68gFpLDqloJd+nstyfmxlVbDrn1w2a5vxdDpU9hpcunW90NbuC8l0SRsZSxIb689enFTRarRUn1HKDpprqZ6Tq9hewSCOWCch/k/5ZEEncPbHHpzWtp2qy6daR20DLLAwDbVBULjPr948n6dq564s4LUnzJd2BkpFliM9ien86ab4LsSKIBBwu5ix6+/APPpXQ4JrQxu15GpcXQuWht9SlZbfeAGQAbQT2/AmmFYIpAqyB1HfYQOvJAPT+VQRTIyFZJTt5+9GGCkfripIzlSSRuIA6cGs9VoyLtGpBdS+UsPnE24cMhBztIz+X5/0qZbm1kgMBSV7oNtBL7O/Y9emeOSTzXPSIsUDeUFy3O8A4Iz2z1PvwKLJvsk/mlAX28HHAz3+tDpxWppe2rLM1xHHIY0kz5fB2jofr09s1Np9wrNN5UVurKu9pJ5DkDp8q9N3bPJqmsbFriWZCVl4UA8nnPHbFSaTNFHdxy3ECyqhOEYZ/H0JHvTslHQUXZo1Bpt3cWT3hUJaxYZ2c43cgAD1Pf6UyLTNQexe9tblbdAjMA6Ehwp5IPYjHStmTXI7vSLyJ0KSOuxOQQ3f6joPWr0+p6TH4GeG3AFwrbg5b5+vCY7ck885HNczlONrrr6nQ0rM871CPVBdmfU1ld+nmgZDY/wBocEdPwostkvmqZwrqNwBydxHYf5610eha/wDZvM0/UUWa2YiNWIG5CcYORyV4wR1rL1u1t2v2lgAjBPKIOrZ7dh9K61JyfLJWMJRi9Uyk7FpX4Azz9BUUuyzmKSxsjnBbd375/WtlNH1CLRU1zyd1iZfIEyjcqOOdrdgfT/8AVVa5vUuNPFtLBC207hJySOfX0xSUtTKyW5XEk0lxAsQKRE5chRgZz/8AWqcFZEuYnIEyqSpBOGwRwPXimW8hjZUJIycA+n+eKs30hZYpGjVSqDy2VQCV9yO+ePWlo+hSatdjNItJZLn5LWScjoBwPxPpXRfYtTWBvMtm8k5IVJAdufQHqM8Vk6ZftBdpOsa9PnQ527h347f19q63Tr2+Dy3N1tWEjrkYbPPHbFcuInOGsbNGlNRSvcyLi6u30h7KeKSSIxGOM4OUA5Ax6d++BWekMmr6BbkTL9stV27ZOsiZOAD9MCtq+1RBPHLApABywA45GDTrDTLa4tbpziJok3RtGfmfOcA9iPXvitIzcY8zVinueezBkJhZSjg4YHtjpXSeDZUFrcxOxDJIHH+6e4H1ApupWovreeR3P9oQZyuPvKAc89zWLo8+28QkHB4YZx74/lXTOKqwaItZnqVsq38UVtDGogQFmnwMsTnI9+1eZ+LdFl064Mqx7bZyMZI+UnPynv8A4iu6tJz9jEdozblI2FSQSGrT1azhvdM8q6AuhInyswGSexPv6V5VKvOhU1+E2cFKNkeHj6+9aWk6rc6dLvtpCCRtYY4IPYj8OtLrmkTaXetbzDBAypz1B7j3rMGV459K9r3Zx7pnNqmdzpvi2NS8d7HsD/KWT5lIPqOuKy7K6Sy1eSQEPF8wyO4Pp+Vc8rgLtUYPTOasadfyWN1DPEFdomDhZBkHHbHpWX1eMbuK36AmXPEsMTTrd2zK0c4JYDjawPf9KyYWO14/4W+b6Ef/AK62b++sr+E+Vbm1uOSyIcoxz1GelYi5WUY9xW0E1GzB76ElsubqNB3bb+J4rXS2kS6KyoUdVO4EdumfpWMkhjnVx1VgR9Qc101/f2k+mJLDu+0vw/8AsgdvrzmlIcbEGjRiXVCsbFGZWy+7HHHf07etXtZtUtHeWAHawCvjpkHg+uPerfgO1iSy1PUr0DyCht1OMspPJZfU8Cs/WLxbjTbSIAeajsHx/EBjBPbJrCTvU06aFNWjzGcJHYP833RuIzjrRv3RlcjaSCP5VWcKA/mZyw/zzRBJlSOhHT/CtLaGTd0beoazCRbx2cBTbGPtG45UybcFlHYEEfj6VlSMXdpGHMh35I65P/1qZbW8t3K4iGSFLt24Fa9y9udAtkMbecQHSQdiMqyn27/X60m7D1ktTDmYrc55+6KvjNy8bk7AiE5+nb9cVQk2szliQVTjjritbSrcS2WW3YZTnH8hRLRDgm9CCa6kuZPMlkaQ425b0HQflUBjEjZGQwGDipbWINIAc7GYoCfXmqF3PNazFAAMDBGOpBoir6IlXTuyT+zpbm7SGAr85xk9vw617Houh6ZY+D0MFwEuosk7V3FyTjn3PAA5x0rzPwkg1C4eSVceSQQRwBnPpXoCXaqLW3TgxOSX469ce3QDoe9cmJk5SVJ7GkbXJJJTIgcSEEnaqA4z36fWrehxXsSeTBbicSFvMEy8MW4zkc9AKz50+VSzIeh4GOSf0Hatnw3cXd9eSRwXiQyRptwe4PGeeSf5VxYd3lZMvnbdmzivEVjtluLG+jZupRwclSB6nqePxFcM1u1tNhslWG5TjG4Z6j8q9Z8c6M1jDFELl7m8vHIUMANiqCWOfpxmuGvbKVrVyYdggTzR/ubtufpzXp0W4aSCaXQn8F6w0E72jYIkACE4yACDjJ7d6y7+SXWvEEzAr5k8pVc4AABPX0FU4HFvOkwx8j5xXR6PYJDqF3OuZWAH2fA6s/QfXB59vxxpO0XcS10NvT7uSSVTfoFk2LGFXG1vcnsPXvWtp1nBp9/I8ipBHcAMxQmNXHPUD5iOvoKifw9fM0dtaacYmQDzJGkyCx64J/Hjn8q1r5oriygs7tCl9bxjzJpQRkDPTswzjviuL2bi3KG4kmjobSz0+yhiuZbiIIvKyFwiYPYAHGPbn8a8h+Ks+nTeIEXSYoFSKPEskKgB2Jznjg8Y5q74hsjdrFHDepc3SA+XaQguVBPU9k+pxXMahp0lrdta3gQTKAW2OHUZ9SO9dcZNJXQSb2sYCYyxcccVsaFq1zpF9FdWcrJtIyc4z7Edxjis24keGR4wQpB42qBn+tO0YGTU4jKGdVOcDknFbtXRKdmWfEzi61e7vEt3t4LmQyIjjGM8n8M5rJ27VJBz2Ndj4mtopdK8xQ+5WHLJsxkE4HrwM9u9ccA0m1IwWdiAABnJPoKKcnKN2rCloRtuWPBBweh6flRxxgE/pXaeG9QbS720+127XGnwK4ceWCVV8A/UbsYrI8Tzi81cPGisCMEJzkkngY79P0p8+thNGFu5wc4pCBnrWx4g0KfRZobe6ePznhEjIrBthPY46GsgZUHIx/WquDRPCgxk4q0bgKQMDpjIzVBZWJwDSmQkjJO3gH3oaGmXluEYhUwCD1z1NTrMFLeYRjqDn+nQ1nQFnkDIh2jj0qw7I8nylc8ZqbDTEu2R0OOR0HGPWs5VBfngd6vzqp+VO3v3qi+QaqJMtS4rAoAo6DFWLWASy4Z8DtuHU1Qgk2OCDWgJY2UFiBn2x/8AWrOSa2Fqw1C1a1mWLKEuu7CsrYz64/Omw+RsdZ8u3RWAzzTxCshXAJ3HAIwf/wBdWE02RraSdpIkVckhm5GD6VPMktWF2Z9vgt8+cgccd/WnP5cb7yvqMDvSBwVGTuXGcGoy2+RQB8oNV1uHMThmYg7AEP51A8JJLnt2qwrfKMdjUhIeLnIb1HfFC3uCsytb2Syxs5cgdOO1WLTThNtxOygD5mPAH09TUCEwv1IU+1aCw6hcBordRdCNd5ESFgg9z0AptvuUkV54dPt3PmXM1yR91Y8D9f8ACoFilckxW7pEeqpyce560/7NdD94IlLDso5/Cn6e1xcSeXBKEk/u4pc2l0wZNazrCvlgbBjDDbg4PUf/AF6s29xGgLRyqG+Y+vXP4mq1/b3NvDvnlUk542jJ7c0+wsBdA5nKsuCRtHT/AArNuLje4XWxbsSGVlJDOzAAk4qvOGjd1cYwdvXkke1VYzKjOnmNvDFQoB5qxD5shKgIW7bxj8zSsospq5XkYYwwGTx65qpd2pt9rsu1jy0f90e/pWiGFq5K+WWXgSA7sHruU9M+9aMOiytbNPcMF80BgMevPJPU9KrnUDNI40Z5x0Jpp/Srd9bG3d0JJZSATg/59KqgZGO9dC11E0J/KpYF+VyD2H86iIp8TbWHoeKbEtxTnB7VH361I/X60wYzz60IGa+nwO0KlcY+8e3Gat3kkUt9sso2WJUHDtuPA7ntz2qtDMyWybMbcbT7nNVY5XE4kUgODwax1bZsnZWOoh0rUIIZLmK1lSKNBI8jAAAHv9T271SF7cOcs5Pbnmn6r4ju7zSksiyRxh90gjUgyMMck556cDjmsiS7QQKkEZXGC0jHLdOnpjrSjFvcqUkvhZqPHbTyEY3vjADAHHvmpL+zhg01ZojBu/jRMkrwfzrFSTcepJ9vStK23tb5lU+U/Hzfxdvx60OJOjMOQ4HuagbrxUswKuVPQcfWovqK2Rmx0C/MTxkcj8+tWXDN8247utVopCj7hirzIDEkkJJDZyPQ56VLBDTPK0YBJwoxz1qNmODkDJ74qYjH+sBHA/Ggo55KjB6d6V0URo2OucDnr1qwhBHycnOf/wBdQFQVyRz6elPikCnAB6c0AaeQAMkA49elVrpPNX92MlQRwO1Pt2WVhnjHT3qZIzcKQuEToec596hu2opGHxgg/UVesrgfZ2jI+Yfd9qTVbE2bIyNuiccH0+vpVFWIZSpAI4qtJq6EbVo2cM+doz+Ax1q5ZXNuQ5Zzvxt9+n8qxxMVjZAD83P41WEjK4IC5Xp7UuW5qpWOqstTmtbmOaArEyDHHfPrnrVS9kku7t542dy5y+T1/D0rIjvJyw3D5T+OfpWlF5ojGYgM9cHqD/Sp5baj5uZWKrx7CxAxzx9aoN/rRzjnFbOyNQwctjGRxnFRNZhhujIb145H4UJ2MpRZXYkYUrnntQYvmAOeeT7VPGvcqwOcD6DvSlhvBwCAMf8A66mO5KjdlltPiisRJdPIs7cpGvA2nuffNZM0204jyBVi9unl+ZmbcAMZPas5Pmc55P8AOtIruaSa2RPu3gFS2TweO9PiiwCTkyHoOtTW0fljee/IHpQGKHaACASOPqaUn2Ja0GKDgjacZ9cc00xsGLKRgjjJqY43Hfkjt71FIxVhhRtPQ9eP8ahX6EJLqNeMLtYMd35ZqeJNybs45yPWoArSMwBHAyecVLGDGjF8FzwME8U2tASC7bc4JJK9Bmmk7m2gHPGP/rUBGfJLEAdOKbkqcthvwosIUIuAQBk05Ectxg+nOKY8hJOxQuev09qAducZJ6nmlqBLOpUqZAc4OMEH8PaoRtUEMpZvT+vtUiyN0Gfx7VFKu1sLk9/THtTXmF7jieMsMg/pUbEhWXgZ4AqaFE8vLE7j+NRjarNhckE856fQULcEtQk3bsEnHUc/pUat5rncRwO9SXH3lHOMVDGxJ9s4B9DVrYdwZBg4xx0qPkZPr1qbIyQTyKlRhHDMu0EyALk8456j3p3BEduTt2t1HT/Cpc569OPyqFeoH+frUisGUqAMA5LZqWik9LMJF4HscU+3iBDuUaRB97YcFQO5x/PpSHLQkjJ29SBUcchTcVJGRtOD2NCJSsEiqXYx5CZ4DNkj8cdfypqRhm6itOa1jTR/OMJ84lSHyflByMenpWcoIyV9KIu6GkWWup2RVkmZgBtG4ngDt9KiCPMxCZPuWA/nVnTLJ7xncrlIgGcAgE+wHrW8bLbbqq26h45Oh4zkfdCnjPftSc1HQszrfRmMas92gBPPkrnHtu6E1estIijVZp7cyR79oeRwSSO2wcY//VWqsbtcRphQQNgGAOefw79abco6LLHtbcrDeufQ9/1Ga55VZbBexQyiXE0ED/Z4pHyNoIHXjI6dDiq+oBlj8ljC+SG3IOeM9fT+VWp4IjLFIG4ZQ21hz1OR9Rxg1kakPIuXxjkBuxxnjB/wq4ayQ0yjqc5MQjGevP4Vmgc/pUtwWJDMeuTUY9q6lsS3dk0CknIAPatuXdHEGKh1AGfb8aw4CQQR6960DcOyKvJK8egqJIqLI3YysBEpyewFPSGWFnSRBuYcgnGBU0Nx5MZWNFMu7c0h9vT26VWkmLO25ySTknvn69qSuxD5FONvKgdjUDcHg1LvwuCDn+lMlweUB49BnFMBhBAwW/HrxTVjPYH1P0oJB9eelPX059ePSmAqKT67ey1IibioH8WAfc56D2p6JuJIbGOOOPy/T861FtYLaSZ5y7mPaICvCserHJ5wOnuefak2NIt2UWjwPCNeW4SNBnFswZ5RnpzwO5zzQutLBC0em2kk0IcpE9wqsQp6DgYLc5zzVYSIzRySFGJBbaVzgDpyePwqy1tdTRwmKOLyJi20EjJxjJPcD36Z96zb7lc3Yd9qvmLPeyHzXwMAbMbegwOPxxkU+Lda3SSB1VCM7xyxz6Z7880y6eGGcxo26LJPzNuwPTPc/wA6rysAASwCgevas0m/QNb36DXN00jvI6lRwAQDgDjpUMkqxkbQGbjb1AB/GmTSsQNr8DopHf3qtLcPk7yGH8I9MdvpWqQNj5JSdxZmLEcg+ntWnoOjpdAy3ZVS3Masfl6d8e9Loum28yfa9Ulkjh6R4XIJz/F3A6f567UNtGJ9sasVJy3loQSB39BWNWr9mJcI395jdN+wpp3kQCdL+MlGjlbaGfn7u1W7+uOKqyu08yzC2ZpkUKGFwAoxxyNuc/iM1K0qW941xHa7UIxJ5xDsMH/WYHAHrx71LHaJIrPHKgcYZckDnnpnnGfwrN1Ipbbk77GHqE8ofbcIFcHjD8gj1IAP41s2T3UthPcNJDsgU4V1Zt5zxznPqf0qlqAa2YPEI3lmGGXhsE859QM06K5H9mTKzMrMuwhRnnPoKqUm4JwCFjG1S4kvNQJkwGGE2hcBcdgBwBk4rRsxHuRDtRlwMt1GO+O4rElSW2vv3iMrZDruGMg8556109rNZXKlpEEdyB8mT98+xPBPt1Fbyjol0J3JA27cJEIwOH6bvw61VnjHm7YAqoDgyMMdfYcmpfLzb+YUBjDYDEjP4j09+laVneKsBDOERRyoGM47Z6/0rBJU5WWzHGN2ZdvZxzM4QEsg6oD/AD6gVan/AH9tBAsSuJCAjksSvXpzjGTntxzVGWVd8ggnEJc8gEjg9iavXNn+781byAMFDYEh3HP8PofX0xWo15Fy3hg+2yIU+0+WuMucqAMDcOxP5jvUdlILG8S+tz5TwODG4HAOcjg8HtxiqUDSNJvZ2XjH3jzwRW9BqqW+kyadJpinzj807ANkH04+U++Qe1ZNalpiiOdVe8YGNHcSFlIXLHuAOM4JwcD0rW8PLqmtaUvh7SbVpPtF2LiWRdq4UDGCx4Hfj1rDtL77NZTadebpLZ42+zu/JUkHgkdOfz610Hw5vi1w8cbqrBRIPM4U7Tzn04PrUctlc3gjqPglcabaeJ9Xtr2SP/UNFHLL8pOHG4AHv0PrxWl48+H+s3mqTaxpcx1ZLg5YAgSRgcAAdCMYA7j9a828wxeOmNk6fPdAAxfdJJw2PbJNejW3if7LNJbiadGUhGkjOFXOetNpWL5WndHT6Hq2vaP4GaHVoJo9VeZbWxM5Bdg3AyOvy89favQPDek2+i6YlnC25k+eaQnLSSHlmb1JP6V5T4d1OTxV4sjuJJrhtM0aEyq4BbMo6NxyT3HfjnrWnrHjQRXMNlpytvuXVHkmI5Rvcd+T1GQKuM+VXZjOm5PlRu69Z3fim4ZLeJ4LOPgEx7WmwTyf9n0HTv8ATn7Hw9JFcTlHVPIGdzHqeePrWuviddFtHtWlV5MbAiPuxz97PQD0rFttQe9vC5JAY569K4KknJ83U2pKfLZaI2tD8NC6DOvyke+MduKr65o8Vi7I0f7sLgBWzk+mfrz+ld/4WjjNmCAM4FYfjZVQ7sD1GPXmqlR5aSqdzGNeUqnKzynUdMubizknhhkeCBsOwAO0n9f6Vyt81wyxQk7hFkJ8oyM84z1P0/KvQpLh7GKYqRl1OQwGMEYz655z7Vymrm4vwskTDc4AYKvLfiOaum9Fc6mzJS0ht4mF8A/LFo1k2YwM5BAPfj61k6heRLOfssIiixgLv3kD/e9ePpXY6r8PtcstGGpXds6QKf3ig7pI1/vFfT8cj261Q0fw3pz3sMer6k1na3R/0W9SISQSEdmJIKN04Iz68YJ6lF9TLmW6ZycBjvRBaSyRw7dzLKwAxuxndxyPQ8AD0rov+EM0pLKCafXpLGTA8wMgkD9eY9vIP3eD65BxVJvDED6rdwDVYYkhnES3BiZ4SDkbtw5A4985+prM1bSdW8NX1xaXkavHGMMhO+Mqfut9O4I/xFJ67MTdw1ObUY7G50yOSC7tdyAvLaKs3X5QG5Yfn3PvTr7wzrejWUUviHSr6zsmPErHcoYjgEDnt0yP0xUy6nZ3sNitvahb9CRcLM5eOVFA2sPQ8HpgV1XxLudeh8KwQtqFnf6DcTlhJAyuzv8AfGT1GMkYGMYA6YqeZ7NE+ZzvhzW7N9U0+y1azhk0QNtkgs7cxlsr94kfMWyeSWNal5b+G7eW1SyuJJYJVYlri38luvA3ZweOMg9ueTiuW8MC/uNQtdMtIp5H2m4EaLuIcDqAOchcc9auXNzPJqB069Dv8u6PcC5GOTgHoMYNY1Y86sOE0tWWb/FremONt0ed0Y7hT2J6+2eTxUFvZhh9tgUzQTMYXRZQCCOdxU847emarXbJb2EzmEb4wADzlMHt2x7YP4Vv+B5LW40nUL++SL+zbGNyUt12yMwCkbs9FOcZ/vfjWUacnH3dRLl5nF7FWMW6zLZXE7pCuZG2gttB4zjueBnkY96zIrE31pqLWt4ba5t0WaO3myBcqMl8E8AqADg9ag0O+vdU1oQC5Fv9pbyFkkOFRWcbVYjjbuC596ueJL6O3uZ7XUQ0N+pZCfvK+MqcEHg7hx7c5q403CytciXkdp4dh06bS59a8X6hNf3UdrhUuJyFiQgjK5++/p1APqa84ktvsE7y6SWEMjEbk5ilX1IP3T/X1rKjt2ms/PvLoMsAwsZbJIHQKO36cVqaJNdajaEtAxtLWPMpVvlQn7pA659Rz6mtnAly5mUvGkC300TRTws6Rj5YyDknkgsOM4/wqLQWFvpbwz2sshmbiRGVht6YI4OeP88VSupgb1po0DJna5QZ3DOeR09M+tWNPhnsblrhY5bi2k5cRgkbM47cg+/HpRy3hykNqUjptLneCzmtzJL55QmORSQZFOT16+oP51Y8Q22njwFMElkS6jmSckqCsmQANrDkHg8dAOPpq3V1baj4buNWd2/tOyaMQI3BktgdhiAxglQynuTXCeNNVl1K7i0uzkUW+8N5SZ2pIeCPm5OO5wOc+xrONNuSa26mrXKtDO0q91e8tk0nREnkUzeZtQfdcgfNnop+UehwPTNZM1wsWpJOJmeZWDySEfx55/p+NdL4l1GPSdPsNN05pBLAN8NxE23LE/M54yx7Dpg5+lN8H6JFJZ3k0zI16jov2SQHzJQzY+Tjls9sfrwepSSi5NEbtIQeJf3kjaZZzzSsAWeU7iTjHOAABnoOMdOvJn1Q6n5ll/b98qR3CFzaWr/vI0ViNrDopzzjnjniuu8Y6Hp1vryeF9O83T4nT7XcXmpAxsoCFvJCjGSSPfJx6c8ssrHSYodQUCHczROVyy57A+me3r6VjK0fhX+ZSfQzjJZNN5VnIYGtyQhbP7znr9f89K6u51OOHR4bK1sns2LCV7kzuZGwAOVBxtJyenH8+c0a002a9WVpRG0bYaSdiFBOeSqgkjA960oo38+7vcQtY2rqktxD8yJuOFO70JGM468Gk3YVOMkroZFOttFHb3JaWGRict9wMffoD+A9Oav2Xh77Re3N5KhtdLg58x1D7SSAA4HIBJIzjH4VR1K8vnSXZKzRk5Mexdjnk88Yqrp8smmTxTFJnnzhoXcpleobngj8/Ss+XmTcdxO19Ub+q63q2o6LDpMF0lta6fMXLW8flmfauAfl4JI6/nzWs/iGHXfDGsR2NzYxWmn2MKLBKFE1wxbLAcA7sjqOmcH1rlfGgu4ZNNuBCZDcQLdEwEMAzHhDt+6eOnXGKqwafZQa3bXMsyi4a3+0lSMKsuegI5I4BzxzwatQUoqUiruR2wk8N3fh/wAL3/i7WbyS1igeKDT7CEeaArnIkJ7ZyO3GMetec6/rOoeG9VuT4e1fUJtCvYWt4ftQO4QkcwsG7jOARx3Fem+H9EXV1m/tO4tEjmeSKAqg3CQtneVH3ewz2U1U8YaPqXh4T+GP7LtLy9uYjOdhMv7pEdty7gMN8jZODxjHWqpT1aSuhzj5njGseItQ1e8srq7vrmSeziSGGRnJaNUJIAPUc8jvmtWxj1nWZ4pDJLq1y6NIRI26TbyzZJ5Ld+5PTnpWLDqEU1wZ7qEO6x4gEe1FUjuRjkdffpWla31zClvcu8ttAAAptz5fOT1PXt19a7HorJHNFj7YLHcPBfIFtAwJlwQ4XPQD19uuRj1FSeIdGudPv3gilhuYyqulzC2BIp6Me6n1Bwc8VPqM9vfRutlbw3M+N3mbiSCcZPPVvXjqc1W0vRtTjuUsVDh7navkS/KWJGVwG78Z9xU36lWurWNuzu3tUudJ8RZcTjypHLLJ5akA5ABwGBAOODmqmq+TaXs1vI26SCNYxIMMJozkq6fhxjnA4PSmf2HOsxh3I8j7ju3DBC4yQTx6Dr1rI1RidUSf5ArIobyySqnHTPrjk9s1EFdluTS2L0Whpe2U13pNys1zb7nksnGJQgBIZM8OMDkcEH161mDWrhp4vtkisIgQrogGQfpx29M1oW12kU1usaGK980PDdRSbWXGBj05659faukuptJvdRkuvE+hiW5uI1/e27GESsBguAPlyx5JwRnp3qm+XdXDlUlo7BoF1pNxaRGSVZVmdkdMlZLU4X94G7A5IxkjI59K6e9+F2r/ANjTyxrePpEuJwDJ5UW/H+tYdNu3nOCBz0ryrxHerdTlNOs4bLTITtW3hJyMd3JyxPHXJrp/A3xW1vwxZ6dpVq7yaTHcmS5ieTe00bcGMbuEXHOBjJ5NL2btdMXtVs0erfs42ejWmj391HeTPJeN9kmeOQI1uw4AKg7vmzw3ToPWuM8QyaZoXjW8ihuWvYrG6XEMiHfPg55zgE4yCO/UVwvha109LnUjq8VzseB1tTbuVdZdwKexHGCDxjnrirOna1DZJGt9pjXyK+55DMVkwP4QTkYzzyD7YqJQbfcpSVl0PUvFniDW/iZ4mSLQLCZNIt9r7JU2x7V5BmJ+XHBwOn865nx9PLJpOh6rJaW9kbaWaACE7FlBOSsaj+AZ65/iwM1lxeJpdStLu20iRtMtJZRI9gjEoTk4yT+GexPJqlqV/qGv6vv1iR9Rb7gwB8ijsoHAXvUcrvdlXSVkNtvHKxi5toJWS2uo/Km3RqwII6kHkj16etcjd2strJvBOOqnJIYA9vb2rt9C8IyS+IIbVFh8uQNNI8kYkSKIdyf09SeBmuUls9Ra5uYIonlto5mT7uACfY9D3x2rWnyrSBnPnkryINTW4+yJqFxPHJ9tzGNrDI29QV7ducY9KpweQY8kH5eenUjuKknSFbwxqZPkODg889h26fnUr27nZJahSo4KsD27/T862WiMupC08mVjjQMHxgFRuH+fWtC3tJTsQgnHUf0qtJGwkhZVRELANnjkc49vpXSadbQ63ZtHZXMiXKt88fALk9AO/Y5PNZVH1LjFN6jbO6a28uISkr0CCPzF4PTHT8KteJNKWCOO8vYIrWWYHy4oHDbzj7zDOFGDnHrxnjFU1uY1hkiimtoBBlVUycuR2A6nnP1rOvrh5drs7PsGE3HOFz0rJLVDnNWs0dD4b0+0uoY55YnktCCskeD8rg/eB6YI/WtLUfDVtKIWW2QBCQVjZhvJGMnv6Y6ZPQVW8KXs9n4cDRRW4jVmkaWWQjqcdB1PH5U+9129k+ztL5IEpwjAFtgPQ5Pbp6/0rP3uay2NoKHIrmP/AMI6bdNzsmCCSVTJBHGCOuOP8axWZbgiFWLc/Kp9faus1bT9TnmkL3skcOws0isBuB9NuAOcDk5/Q1wtpiOf50DY4IYZ59CDW9O7Wruc9SPKW4oCskhkYI+M/wC99O3ep47iGOMRlwzAEqDn5Cc/rwDnnjioo1jYqjg+WCpAHbnJP5CotSS3+04snmaPGCXwcfTviqSV9SdFrcH1K7tbG5sYLlntLj940Yb5Q3TJHrxioNNXzgPNBQk/IT0bmpo9MuTbreeYjQK4Vjvw6k9ip57e9JdFVQtnkdMd+T+daOzVkEulyxdRvaWRuDHk5+ZT/COnWp9MEV8kfmFhE31Oz345/DvVYai01rLBcKkgkUqWbgqen9KbokyWivCLgsCwBKHoD7H3APpUcqcbdQVm9CzqkSabcrHZzC4yu4tjAX2+tVrbUL9SkJmHkuTgMBgfSuptrSCSGeR1gleNuY3+Uv8AQ9R9enasvUI9JuLCaSJ5YQnzeW6ZKEHkZzkH06isqU4t8tm33L5Le8tCWCX5gjkYI5BHeuv0nR7xtOmkWNUidcs7HqBxwOp6EZxjt1rzXSNTkgl+ZDPFGwYhgcgA5yT6cV3afECaDSI9NEI+yLI8kJGAQrOWwe5+9W8qfNpYuLTVxPEelxPp8MlvhbhVOWxguDj5T7jpXmqExTnB2lG/kfSvQ4tS/tJiZLcIx+Zd5xuB4yCeOtcXr0WNYuCpUqX3ZUggZ9+nXIp0+Ve4uhM2nsb+j38cCCQhi0fzKuOAG4JyO3tXTprLRW8VqLWDauSsqA7ip5xz0rg9F1uPTWdpwXjkVomjUj5lb09CGAIqwniCVojDplm86t0DqZCgHYY7c+tc1bD8zva/zHzW2Zv6otvqam2ulO15GdMffDkHByeSOBxnFcHdaWsFzPHNcQqqKWD5zkjoMdj27YrUkfWdQuI45HEJIwF+6eeOg5H0zWknhS2gVWvJ2uJmICxp8vJ7+pGPetYXor3noTq9zg8DOTjHvQMbsDHFd14o8J28UkjaYwWQc/Z346AZOfXOeD2rjvssgYIIyr9MetdEailsS4tOxDHhGDEn5sjHtUMvyybh2ORUjqy8YPH6GmSgt2J4q0Sya7tzDJg8D61HExwUBOD/ADrSluI7rTIonjVLmFQu4fxjsfrWSTtbIzwaSu9xvyO38MXjDQb+xAYlcsAO4IPAH4ZrJuGSeJQgO4HAwOuaj8MaktjqtvPIoaPIWRSeqn/PWui8WW1npOuR3ekndZzBbmKNsN5Tg5MZ7HBH45rnUOWb8zT4omX4fsTqX2/Tordp77y/OtlX7xZT8wH/AAEk/UVgNlGfcrAg8jocjjp2NbOn6s2j+LbTVrUYSGcTBQc/ITyuf90kVHr7Lf6lfX8DKIZ7l2ChduMnIP0OfzrVabkNaWM22uDFJuBYP0GD0BrodGFtqU1zYuzo8yGS19POH8J9iAR9a5WQFGJBP/16lsrp4rmGXLAxsGBU4Ixzx6GnKF0JOxbvYGjMiSKUljbBU8EEHGDU1ldNDHGUP3Vxit3xdIt+H1AssjSMqedGABJxxuHZiByc9RXMvhYwqHnFZxXNEtuz0JBcslsqjOQ5f8T3+vFRzwzalqTRWkTSzSMcInU8fy9aqzS4HPYV1/haF9NiS6UKbmQ7iWGdoI6Y78frTnNU1zMhvubnw/0IRWc0ZbNw5w6gdwRgnvt681ct45mkMsTjyoyVGRj5upwPToM1VN9NvtFeYLIFKRmLIcZYnB7EE445qaT7ZaedamNgy5d92Op5z9OtcleLkuZbmzjaOhZGzYbmTGARkkdCexx0B/I1NauLHUVeKIidMHyWBBkB/h5745H0rN8/zLSSAyCMyoC2044ByM56j2z0q9qviphp5ttHsYYpLoeV5i5Z2yDk5HPT61hRpw5k7sFJWXUsRzXmr6xP4iQfuEc20MZAYiMDlhnjr+ualtvD8Gq2GsAELdlwySMcbUIPykf3TzkevNdR4WSDT/CVjFdMEiVCD5i4Ayeh7fj0qzFa2tvqkYgUKLiF84YlX5Xpnjpzj0rtUPf5ky001Y+dtRsri0u5badSJY22sPXv+WK6fwLqkNjbTG4hluZ4CTBEilghbGXOO/Hp04pnxSgEXjG62OCGRCcdsKOOO/SqngS+Fpqk9s06W8d9A0Pmt0Vux+nBH41vJXiZLRnXweLNX1ZltbeJZN3DmTC7uD2ByR7cZrM1hdSdhbX0sqjORBCiRJ16nBzn6mug0zTIjbWraZYg3Upw1w5IRiM8ouckdyeB9elTzWtyjPGLENdBsSy43k/iOFHtjpXHVnKFvP1LjByR59f67PBanRrTZFaq26RkUbnPHGeuPXuT1rIEuRvOcNn8umar3aPDdXCyDbIjkMPQg9KiEoCfMeFH6Vuo6XM720Ib87rkkdMAVr+D9IvNZ1GWK0VSYoi5y2OMj9awvMLO2funpXpvwlsHjU6grKhefYNx6oo+Y/TnH1xWk3yxJSuzm/FsV5p97badqDZZAZdgYHaH6c+uFz7VgaLcXGm6hHdwKhliyB5ihhyCOh78mvQ/jZFbS3FhewY88AxPjHzKOQfzJHvXn0jqW3AEErluO/tTUrq6CpdM1L/W547GKCYLE67gfKQIWViDyR1HHtVe7sZ7S0trm6ieBLkbot/DMB3A646VnDYSzsV3cdckk5/Kpbu/nvH8y6uHlkwFDMSxwPc9BRyitfchuMtLlnLOeuTnPuTVq2tRLHIskywqACqgcMefWqSTRIW4yTwSw60G8CjCg49KfK3ohFq6htTbW/kxlJ1T96ck5bJ59MdKpyGMEFiWxyBjFRPdMxOO9QklicAk1aTBsmkmJyFJA9KZkj5mJzUe1s5IOKTlup+lMm48HOTk57U8kOucc96iA571Ivy5OOOhoGhBVqEkrgN8w7f0NVXGDmnROVOBStcC3DK6yBdoBPr2NPMitIVucuAQTs70xGWUbZMYPcmmS20kbbo/nX17j61NkO5ZlZJZGeJAq8KBwP09aojd5gI7Uo3uxyDgdTnpUyyDaWKg54znrRawbieZxkZ9DRFMy5PAH160rgKox0z+tR4B69qEgtYslxMhwCprW03VpLbTLi0iG15vkdh3Ukf4VmQxr5Qbg4Hf0zTHZQxaM4K9j29qlxT0K21Ow3abDaH7BdRSucA+YjLIORnrxj9cVzOr+XLdNPADGxPBU4zjuff3pltOpkcEBMqQDnOP/re1QzOS2AQwAxwazUeV6BOd1oS3GpST23k3IDkHO/ufXPvViwumtGaTaA7rjnpyc/iPb1rNg2G4JljZ0AwAvqanLGJMZde3zev41VklZIlS6lxJvshaVnLSMSSx5z/k0unwz6jcFYox5WD1OFwOSSepAHOKoSW8spRDuLtjaM9c1ZglvbcJFHOVEWdoQAFQevPUCko6ablQfctalpE1rD59zgKzYTP8XX+HOQKz7m6upNpaeVj0Az+HSiSXzpCzmR2zgu53kfTtTvLR8BJFyOx4/wAmkk1uRLcqyrLPGy7WaThiWPQAE9+3esxeT9a2yAwIYk7uv/6qy5oDHNtzwSMfQ1tTl0J3I+dhPvimD196e4AdgDkA4z0zTR39q0QMdnIpB1/Gmg0o9qALUcgXKsTt+lW9OWBZw06+ZHg8ev1qpGFCruPB4PtSkoCNhOCcZ9Khq5aZr6fshEu5S7NnoBjBHQ/jVOeyZm3QAspPC4x+Aqa0lwJFDtlgB1xnFTpeTwbUKgqv8LLWXM4l7oygrxybXDIy9QRg/lXWaTFDqK6Z9rkHl242FBnkdcEjpSy3tvdaTFGYRuEhebeg9egY8jjiszTTMhkhiaKFbkgB5shU59ex9/1pNuS7FwtHfUzNbeOe+mlgQJFu2qB6A9azTWlqFpPDcyRzgbhzx0I7Y9R6VnYGa2jsYy3G81d02YRTHzFDowxgk/nVQjqKE/kab1RK0NmZIJDmMhT6BicUotmAzvG0DiqUTFemM+vtVyG5ZB0BA+vFZtNGuj3I7iHyyA3Bxnp1pkkeFDAHg9RVu5uvtEADoMjv/n2qEfKm05xjjnp/nihMbSEt3+c7gNv86tQu0LExkYbg8dKzwDuyenOfrU6SfLw3U+vehq5JJdhXTbI7O7Hg9AvuB3NZLxtGxDAg9u1aiTI3DDkcZolKtlWjDp/Cec/hSi+XQjYorMzDsGA60xFGSz5J/mKke1ZW+Q59BTQGWQBlPvn0q1Z7DuaFnHlC2CFIyc+lSee0Y2xyBkHUY9frVRJDIMFiq+nTikDbchMehJqbF3NHzR5e7cQcdMUD5hlSR364z/8AXqtAzeXgg5I46VLllRuRu9/T1pWHcnj2oXLtww4+uaoyYDHBI/XIpEkl3lZHBQ9On86ZdDaOcc+nf3ppWJb0IJWGSBnPXmlslzJk/wAs4qJVMhyOSKsplFKgDHGaryEty6pyuO+Oar9HY5zyT+NEZO7DEA55705ipAZl5Hv15rOSBsa8nykFQSffGKrhZWU4HGeKlYBtxUc/TmlGSu0HgEf5/WhaIz2LFvalLdZyqOZDt37/ALp9CB0NJMChKtwM/rUSTbQ0MROx8F+O49vxpGUc7dxxzzUu99QbuPLLgYIxTGhZ8EEY780xcenX/PFTE4BUdMflRtsLQYkZJwGUDtz1PsKCkUTAnqP05qN1wxx35+lEZDMcKd49fSmFyVpT5q7FOO+e9Nl+9lc0BctljgevSmTNhM9ecD8aSFckwW4jzkDkf/rpPs7qpYqcHuOcfWoI1BRmkHQ8UokeL7rkZOMVokWrbjwVmGAdrAd/5VCgMYIyCpoUEk7fun36inEORnacewoXYLdho5Jz1zQDn5SeAP60qgY6nJPHHbmnDAHvTBIYW4IXoPUUNwQDj1pSrYyQcen+NNYAxjCnIPJoBkoJjkUSKCMBsE8EH6UjlRMxjOYyePYHtj9KkuZkljiijB2RLgEjBJP9P/11Xb5WIPp6U0NGhNfM+mR2wzgOS304P481VXJUkZwOvtUQJVcj15/lU0S/ODnt+Y96VkhnR6EkaaXunU4ckhh+X9K3LzVHuI5beO5ffMVDyzfKWAPXPYYwep965fTVlmVkg8yTb1RATgZ6n2ratJ7OzupDey7JUGAnl7iST3Hb69q5Zw9661Y0XU0648l3cwi3Q7g7uORnqCcE57cGoJ4RsmdGfauFaVTkA+mfTtS6rrEc1vDJEiyycNJJJMCSD2C9uQRnk1ztzq7mGRBMI4248mIkA4OQCBwacaTe5TijYuZIGiImkESjGCxGP/rVy9/Os0uYnZhgLkjqOaktLO41Fg4UJETjf2OPQdzTJ7EpfTQo3yRMFLn8OPrWtOMYaJk+hBLCzWxdQzBMFmHIGeOtVgpxkcitgy/6FNbRM4jcc88Ej2+v0rFjbB5zWibEyxApKkDHr+FSyu4XZgAY696ZERkMMdeae/zKcHuDQMWI8mkLYbB6nmkB25AwfxpMbueM0AP5xkigE7dowQBUWWAIOaNw25HysCPegRKBuOeM9h1q1ZQiQjLLjOMEevf9aoRuwPy549q1LK3fbvkARMcBjye2cdcUnoNHUapoNvbpbQWF1ZywqA1ze+cMbjztVPvYHT7pBPPSq+rizu7kR6ZI8kEUacOmOQACMem4nn05rFtyIVeN5Cdxzkn61Ks62/CBcsecHJNRY1ui2J5wUDKFjUEMQoO4HtzwB+f4U5p3MPlFiIxgBe2AOmB75Puaqx3J2sY/mBOPTFQPcSchido7AdKVhKyLDSI3En3hzx/9eqk0ozkAjvhhnH4dzUH2tQzADPbrUTSNK4AUsx9ByapITkSyz7xyWJPYnPP+fSm2du1zKoIIjzgt+PT+lXdNsbQhpdRZgqtt2A7eo6k+ldNYWkcljPNI8X2ZRsChcEMMEYPYfzFZzqKAKLkyPT03wbGU7T8pHYj3/OqqA2UshgKYDEHZ97A7HvUhmmnvNsAKGQKo8sEqmTjj0HvTtQtUglP2mPc0YBLg43duT3z+dYWcZW7kr3dCKW6nMQZZJvKlBxvcsDg9x0xmooZJIj5IbgDgN29qL2QIiRiEwgDeyk9QeeR0/HGfWoJHlubNZo3VDGSXwPvZpKHMtRNXehO93bm5YNGIJFQqG3ZDcdP/AK3PPSq8LW8rq+8xHoQDjH1Pp29aqvGVkPmshkbj7ueT6ds02OErMuctt5O0A5x9eDXTCHKrIFcm1XT1SLzYpjIzZcZB3Y5znv0FVbdw8QDHBX7vGcE+1aMeoqyyBhNK5UqXcg7Se/8AngVlW2BF9054x+tWUi9AjKXAmJPYjPT6d/8ACtS0tjHbyvcMGjU4YBgA4HcHrWZEp8vdzuQbhg9P8RVol7mGO1lkIgicu+VBKk+nt6D8anQa0JILdLi92vJCiE4Dgkgd+e5/nUsBa4uilxtt1jUgkEnJHcZ6Z/KmrEkcYdVIBXgquN5z19jVlo41tkcEvJg7iRyp7DJ6ioBFhPsrREmQIqgguwyC3t+HbOai0m5WR4klyqlgGZccD+nWmWlvdtBJC0h+xkl3J+4p45x68delRRQ7R/o7LJGzEZHPIA6j05otoWjenWwuHMNm4WFTiUu33sc9+CfQcZ7VmAw28rC1DkOcKrYYjsOnU1UubpjJ5ZYEIoU/LjOe38hViGM2Uu6bO4EEZ9Dj/HrU2sbwOs8H6LqUdzJqqiJfsqhmVpxEybgRkE5GcAn2+uK1NYu9BmK23hxbia9uFCSyTuBEhB+8C2OMZGTgAc9a5W4uXvY47SOQrGSC+D94nv8A571oHRLe2tmnkmlZNgYRkgE+pJHOP5Vi2lrLc0TStc6i18RR6FpH9n6FdPLPsBluIlKrk43DnnHOPT0rJ0aLzYZ53mEMcClicElm7Aeh/Sqmtarp8tpFY6JG8durB3ONu84x9W696Zb6h5OmPaqo3SPuZuOmBxVNOxqtNjtfDmnNeabqGpzyBbazUcMD+8c9F46e/wCFWtMvj5rO23A54456cCuYtJru00wRNMFgvAHMO8HIGMMR2P4A1a02UGL95IkaA7i7n04GMck/hWcoXKT3PVNB8UtaLsJJH8qqa/4iN23y5LE8f59a4QapFEhS3DNk8yPwSPYDgD8zU9pHdXcTXIRjbIRvcH17Dufc1l7N2tfQj2cE+axozQF2mNwfNJX5lU8KPr61PZade6VfabcwQ7JJnC2gkA+dwMZx26g59axW1OOKzECwxyA/MWfnBI54HJP+FQT3U6myll37FYMMOc59Aex4H0rWMDOd5Hvy6xBFpqyanJBHcABZYY3Eh3/3QBySfTn+teT+N/Dc2mvJqNrBDYaLqMiw3VlO26NCeRIwHCc4GRkqTnPOBa0K7njg8zS7KNNXfLvPMmIIIQPvJj243cscn6VnWvjlbi01DS/FDtc6dcxsjSLgvESeGAPJGcY6kHmul1FKyZyQi4PQ5HV7C8s7B7fw/d3N3psq+beRLGHktShAIbbwU5BVh1A9jnGv9Tm+1R3klyVmtyiwPjccLyCOwxjpjFdPp32XTtEvb3S9UisvEFo+6O1DhVYLgMwY5BDDJK525/CuL8Q2strcwJcGPzZFExCupwG78dOuQPT2rGSu0bPXQNJ8NnW5bmQTwIE+cEzKhcHuN3HByazLmxvdBkincpeaeHUs8eWjDZP7tx0VjtPTPHI7Vq2uoTpDttp1jkRdh4A2qewI9vrR5RksnQvG3zAPGWGGB7nPf9aj2jT1KauuZG/ofjTQdC0i71HSrd18Q3bMgiKHEEeOzDhhyAOhzycdDV8J3E1vc2viyeZ1kG+2s9g3t5irj5x02bTgnrzkVw97prxlvIjLKnDKDyp9vbHf8K27DU9Tm0R4oiDYWhVpQzhU8xsqMJ/ewMZ9e44q+VW9wzTPSfFV74f8TeH7nUjA2n+IFQB7dAAk7ZAyOOeMnPHoa80jvYNMgkm0+3jkV9sMwGY1mUnOGH93KjPTnp6izc6F4kXTIda/s/zbNwf9IhbzdqDruAyVHbsc596x7vKiF2u02P0SOLBQc9enPI45/wATkW7BO2qJdN0db2wk1Nbu0tI4ZCPs01x5UpfqBGoBLLg47HPHam6nYWzeH1upJZprjcWYKmBDuY4Dt3JIbA4PHHrWhFY6VHYyXc8s13LEp3xu+0FjwMYGQOc/p9effUWa2ltEUeQJkcRkk4ClvlHqOST/AJza1enQWiVmOt7KCC5tBPLMscih5WWHc8Z5BG09eRxyMjmobeCabUTJBK28MCWYnBH+1jnHr7V0uneKvtF5dNr9pDdTzoEgmkjBERGBll/i+UYBJOKj1KK6ubW7vrZY/IGYwwjCAnOSAFGB1/AcegpXJSvqiP4d2On3/iTWE1q4s7O3WxndXmlCRJJuXbgkjI+9jqcU5dY0+9t4rfRtOS3mYfPMJi+SDy208jpwMnn8K5u7nTyY1vI0k8tdi78cAHOM11vw3j8GWtpqOteIFea804rNbWe7ZHc56LnqW3EAjOMc8jNJxUtyU+hoTrar4bnutSuL6C0jtpJ7WHy+Jpc7AN3VRvK547VyngjTtOuIdb1nWrry7WwgykSuBLPI2QqrnnGRyQDwKsfEDxtd+MJ5ri8tbexjwBHb2wIUgEkFj/EeeuB7YrmbwtHbrp6xpujZWaQAFjleVz1xznHrirhC0eUrmUkT+G7HUPEviOD7NbTXd03zCGFc4C8gAegFbuo2d1ousmM280Nxa3KLMeD5cpG5QWHG7gkda5nS7y40e5S7tppIbnnDxTNG2D7jkDtWtp/iFRMWuYHlh80ziIOxDS4OGZjz0JyTk/zpVINu8Qja1up0+l30lhrS33iq2udV02ZcztDJ++QHoNx5C/7OVHr6UvibV/D8N0dT0O2v7WCQ7Y7K6AZXP8QUgkYGRkHPt6Vzt94tnktT9lZIZ5QVZgM7QDnjPBPHTkYrC+z3N3B5sdtcuWbZ9ocbYwQAcZPBI/QdqmEJNXnoO5Zjt/lkuJAWhz8yRsBnJ7HqB74we1W4bQR20sFxcrGZUBUA71BHI3Y4x29Qeaox6bcxhBdu0YPQDjj6+lallZhb2K3Up+8I2zSbSBkD72eMZPXtVN36kppm34Wu49PnBuLhbUmIAuDvjJ6c9RjBPtVS/u2MlvHALS6tY5S5jlRk3q3YdwOOQCPyqY2a3epCx0yKCUx7UlCK3zSjPTP6YJGKNUW20y806S+adYZQVMpjH7vHGQAcsvJ9DjpWNknoaXsrGXLdyWeqNa3R+z27OXWPJxEMdBjt3z05zUFh5c2rXEluTkg+RJnG1s9/QYJz70uo6lanU3YwNdiNiPtHmMPNTGFwp6fzxVe9vbhbiAxWkUSRgfNGMeZ35YcE9s1rFaEXtqdHofit/tn2d4YkeRwYw+Si8AEADJ9+341e1O7uNS1CW91WeZ7qJgiXQbbuBB+bPXocemOKyL2Sy1BVuJLWLzggGYCQMgY59OfoafouuSWcqR3cVvc20wMQ+1jMfIIw+O4JDA5BOK599Yq3cXO3oeda1pUul33kyj5JRvhccB0Jxn+Y+td3pujWFjqUmmas8F7BaLukSO4HltkDKrJyB1Azjr0pLm/t7+BLe4Uk2NxuhI5+6B82fTjPp/OrOotayWJtTpq/aZNrxTOPn5xnOeoOc+uTnpwOh1XJJPcmnFJtlWLw9Y6N4k0+zurpk0+98qSaTYWZbd8PuXHIYL8uMZznqDS+OdTt/Ems3M1sssSmRPJQkDZGg2pwOh2hRj61TuTJqOqxGVp2W2jjinYuZDlflJBPbAAx2HFbCxtqGqBbl4IDEju9yAEOF5+f1OMe/amm002a9HFHOXup3GoyWunXk8VnEgMStFGIw2TnLkfhz09e5p2q+B7vSmZLhWhukO4qzKflJA4PQnkE9wDU2qaTbXK28sdwPKlYj5cOcHnJ9uvHWug13xVd3GhWFrepDJNZERG+iT5p0jBA6/xduwOAearmatyEKN9ZnAavpItLwlZcSEjanbP+FdBBd6jNa22nLm5AIRV25OSMcZ574qbVNM2wPqsswkjmdXWNlwyK3RsdMdPWsu+F5ptjBqFtdQsJJsK8bfPE68gkdQOhB5H41TfOkSk4vyMqexuYdba2uYWjlLED5SC3OOnQ1ZttMtorlZBKTubjjAHtnpVvVPGN7qM0FxrUUM0ynPnoiqS3XJA4z1+ta2nvb6tbq1wyss8gjPkcgbz78Kc54455ptySuwUIy0RUOtWtsswinhE23YWZAzA852nt049qvWt7p0Edu1wba6syu6QKRvJA4BI5B68Z/OuD1Gym0+9ms72J4biFtrxuuGB+h/D6irzRR2FmrWpLzy4DSOBjGM4H689eKbgtNRKbNX/hJpV229rbQ+QzNwq/OxbjJPToeOMfzrs10TRF8GXGpz+IIdJvQgEESjeZSM5VgPmBOccZHc159BcQCcfZ7VFl8vP4+o98e2K7jSNHF7ps7X0ctzbrE0jGO3aTDEYH0Azy3Qe/SomkjSF5XRzej+MrrTLdraW9uZrGQgvEc9QDjaTyOMjHTv15qmNQWdLmaAlYpgx2L/CQTxz3569cU6+0yzs4Zkl86GVWOxHXIbA6eo/n/SpKqQ6got4/3ZC70xxkrzjHbn65q4qPQi8loyqsUU1wVhiLzhQxO49TzyPyqxbXbQMzzIw2sVb3BHb371JcZ03Ume3ZJDKSAEbJAIHH156UWQmubp5LiFRbq2PLOc5IPQde3JqnaxK00KE8/m3krRENC6gMOnIHXB/HmobaWWK6eG3keNpRt3LwcE9P8/St+HTo3m3pCBGWwQCQeuM4NYul2Ml1qciyIxjjciVum1QfXsfShNWuS4s6DSPCb3sSagsqTRKxPlAkcjnk9hx9aux6c1rrIeeAra4Zgkh7EH5c+vJx+dV9B1GXStQeHzS9lLkGQAjkHqQe/TPtzXWuryQyIoVlcAnJ5YdeprlqOV7M3jTi0Y891bRR2ltayRkZ8wRryAAcbTnqT/OtDUbSK9NvLaJAogB3KCVLMTnDY6HmsSaGFNTFlpcbea4ZXuJCD5St2HYHtmmW2n6lpOotdyv9ojk+Scg5IGQN319+aGlbzHd9javra81m9toBm30uMq0gdwWkYdenf07Y5rmvFulGw8QzRRJ+7mIePBzknt6da9EvpEubyGSGQQltqhFAwABjt/nNYGv207Txi6MjqxDx5AHlnpn1K9D6VjCTVRdrBUiuu5hLo6JKbQ/6xozhif4j0J/I1mjSp4m2fLnbnOeo9q6Y27XV3DJPKzyzbQML2HQEfrUHinTbjRLKC8iuUjivMxLCkeDx1OfTGO4PNdCqe8omUoq17bGIUtoogjSOoOTnHRjgYIHb35rJvDFG+C4KjkED3rdtrK3ubRoWkKvGu7O4deR+VYsMcO4i5iUxhtjN6E55+vBraFupL6FcRpIjSxtk5weO9VSGgn81QGX+IHv9a6TS7K0ml+zxrKoILZ78e3/16h1PSSkE0kE6SRhCQe7DHT2NNVVzcouV7oVvENoIvKitJ3Y4BZ3H04x757/rWbPcmZLgCymzKVyQxA49RjuMVnWkzx/6ttpHHSr0GpSxeYxYMzjA9FB9unT8utacii7ofNfcdYNf2F15lhE8EzIyFmOMowwRzxjqKRHulUKZkjC/3AOKhkvXkxuckqOO/H41PZ6deX6iSMKkRfaCzYycH05ptpK7C/Yq3EksmPOuHkY8ZZicD6GogvO1mO3gVuL4ZumU4liaQruCLz+B7A9/esx7SSOWRJFKOg5UjBpxlF6Jiaa1K6qsfzEK315rvNL8SxtpMduI/KcDEpTA3AEEH1xxyP51wfKEjsTjp0qxazNE4YEZ7qe4+tKpTjNWYRlY7hyBcT35ulSVDmBtuckc4IPb9aYLye/uQ7R/vimfZh3I9v5VQ05jqi7nclQMfMQAuO2B3rajthJAkORtTGJE4K4zyPz/ACrGdoQNEy4yre2slwOXYsSec8nP5VzPiXSYIbeG/sQVZgFkTHBbHVT2PqK6CxjmtzNburTmVcxvGcAjuT6ckZ61n69o9zd6bKyXADxkFIgMB+OQv+ea4qU2ql3LT9DRpOLdjhpYfMjJBJc87fb6VTIKg4HP8xWjbedHIGLbXjYH0wR2p2rNBLcGe1t3jhcZOV2qG749s16d7Oxha5lNnBIJAHP09qYwDrkH6/41JJu+b+FTUYwHweMjB+tWiRsbENj8K6SbXHvdFtbK4CCS0clWCAGVSAOSOcjH5e9c0Rhs+hq2ieZAJBztOD7H/ClJJjTaFm6gYHGce1WLRmkBQMPu57dqrodzfMByMH8OhrX0vS5NTsWS0jBuUZscgbx/d+v/AOqpk7IEYdxwxBbPcd6bDGW78VMLORvOKISIhufPG0Zx3564FQjdtAGeD2rREmydWU6VBp6QqscRLEg5LsT1JPtj9apXEysJMIoYn+EdBzxVUYzgdMVIY8AZ6nilypFczZDA6rdRySLuRHDEeoFemwXVpJbrNCyyIygKmOCeeo7nnv3rzB1K59RXZeAWtWZ01Ld9kLqGZTgqTnn6dKwxNPmV10HTfQ7G203z9MjvbOEtIsvkMoBZhwTx7fyqvqVw9xLI8sbJMPl2EjkAcj1z3xjpxXb+DVisri900SJKpxPbzKf9bGex/wBoHrVrxNo6zaURYWcT3Ctlfm27cnBbPc455rl9g7czd9DSz6nBWfhjVNUtHuBPax2iAlMMGfA689FP68VB4ejupNUn1XRoIrmGyDJHbyNzIhGGZT0z6etUbvUbwJd6Npt0xsWbE8idDjggH0Pp6VX8L6hLY3M1sJHW3XejBP4hjIHriqbUEuXoEmo6I9H0zxfYNFaW12r2jnMM0dwvCkcdehGf0qfXL6COyktNNheWeEIYHjPyoznCjPpj9K4GzmWOxuRcwwXCzYIMqE4I7j3qCzuTbOI7YnaWyI8ZXjP5dfwqVXur9QhLq2WPHOg7NDspY5Fnu4ld7h0OSxY/MT3zjBrzkMVIKkgqeD+Nev3Esdwsl3AvlIzqsi9cEg559Mg8V5t4o0+GyvC9owNtJyoHWM5Pyk/54rppTb0aCa6nrnw68UWeq6XIbhgmp20Y85TgbkXoy+g9R2P5062161ljvbVmk824LFZVHy8/r074+leFW11LZ3KT27FXXkc9fr7Y616PoY/tK3s7m0mMpkJVkLAGJh/C2Pr19P0yxMWrS6f5gpu1jkvGTx/27NHblWxjc443MO9YMjEkAfT61s+JtPl0/VrlJzl5GMh9gSeM1z87Or5Xp/KuilFKKSMpMeqMzYAGfU/1NdReeIksNOtrLRZnQrCFll24LHqQM5wN2eeO1cnEk1wxWJHlYckICcCrttoepXH3bdkHTMh2/wD16uShpzMSk1sQ3eqXV3811cSzMT/GxOf/AK9VTMx5Y89K3de8NzaRZ2M11NmS5LARhCNqrjnP4+grFigaSURxozuxAVVGSxPYDqSfQU4uLV4idyESHtQpd2AXLMTgAc16xoHw7+xaK95rVqkt5JgR2xJJQngAgcFsn1wB79L1x4aTw3pctxDBZyR5EU7GPcU9xnqM/SlKoolKm+p5AtncNgmMjOevHQ037LIJFRiMkZHP+fSvTr3wZftBBeKzLZEMP3g+aFOoJUdBz05IHWuR1nTWtddms4pEnNtCN0kZypyBz79cUlNscqdjsfDXw+06fQLLVJZJb6a45ERIiiTtlj1wMH61o+IPDujJpZS0jbyoVxLcRr+7LeiepzxnkVqeFLAjQrH7RDC+mogZnfIMgPYDqee3AJ9ao6lf6jeanGt6j28cci+RagALGT90t/tY/wAiuadW65mmWrJbHmup+Hri1j8xEcoAGZHGCuTjkfh9azGgVgwJKY6Adj6fSvUfFVtLHfrDfShnJEjlQcFj/gMV5kAzTFVyWLYHHXNawnK2pE1y2KMsDKSPvcA8U0ZA2DvzWtNFLp95F9ohZSNrbWBGVz29uOtbN54U8q1fUWlU2Mh3wlG52npuPQHGRj1rTnS3EotnHsW3HI4x3pAvGQa19Z02KGQtp063NtgENuG7kdx161k7ShB5BFXGSauhNWFHbDGp4rplwGOcdKgLA8EYamEYJyKYjSQxud2wZPcHHNMeOJjyGUg54boaoBiO5zTxM2ME0rBculQyYWQ4/wBoZ/lUMvmIM7VIHGR3pi3HQEfiKVJgeOKVguh585xhCo5xjNTCF2jYSY6Z6VEjKG3ISDj8DUyzOyAFlXGeM0mUrdSSwtUmS484keVGXGDjkZ6+1Tx2qXQsoLOAC6mwC2M4Pdj7YqvktE6xk4Zfm4HIyDxWhoup3ekztPDHC0kqBCHUHap5wPQ8D3qW2tQVk9SS60+bTlkdomVMhFfGc/5I/OqXnx+RPHPEH3j5Wzyh9R+PWtzVdZa/tUgNs8MR5kb73I7Aenf1rmLkhnYxhtvQcVnGLerKkkvhGrNIoOHbpgn29M1d083d1E1pbsqREF3bHTHOc9fwrPEcmR8oA9cg49+KfE0kTMI3ZSeMrxn61o0ZrfUvWNmywG4ESSR8gFpADkHqBVYTPHu2hSrAggjPX/P501owW2NIrNgfcOQP/r05gXAAUKAAPrSfcqXkKkpZcEAYAAx/nrUUiGfKrgkd+wppG0Nzg9OO3ualWTYgCrnFLbVGd+5lyqVfBBDDg/Wm47+tW7sB2D9ycH6+tVT6H1NbJ3RQ0U4fUU0Dg+tIM4PtVWJLUZBjKseP5UJhGOCCp7VAp+bnPpTwp6qfbFIouxvuHz/L16c5xVqCQN8rZfI+U9wfQ1R0+aSC7hkjIO1gcY9O1WZ0Zi8qoUUDJx0rN2vYadjWaINaMCMEDJ98V1+qCzn0O1a1RHlihEaAAfNgDIx1PeuM029Eto0Up+dckHrkEdK6DS5iq7YVAZxhZP7gx/P1PasZJm8JL7zM1u10+S1tZdN81VkBLRschSBzjuOR0zg1yDLhmx2yK7MfZbO7vJzMVhjiLKoH3nOFwvp359K41jnJPc5NbUzOoR96QE5zSn1pByeK0My4tvNsEiqSp9KkSYrhZVOMgnjFW0wFRF3EADPatHRYop9SgS7Rvsu4eZg4wueST6dT+lZt6FpdjBaXkFfu54+tTQsZM56clj6Y5rrLxrG/u51t9P320ZIiGNoVB39SehzmsK8tlhSRYwqFuAoJ6VCnfSxSWplu4Vjgjg9fWo95YknGev0q7c2TbVYEEtwFzk8AVSEZDdCMH0rRWZLTRIrENn0PPf6VPuJG8A7gO341VQ4PPfirEDDd8x4pNCFyQoOccfSiTdIgOBwPfmrBjURTTbCyrgAk9M//AKjxVcu3OTuBP61Gpm00yrHGZGOGxg1OsXlgnJYenvTGOJMKMHqfrUsQZs56HrxV3NETlsr8oww/Gl3Lg7s57HGaYkeVODxx+fpT5GG9+uM4H+FIoftUpgbdpI46Ef59aq3ERWMKMbTz/wDqqwJP3g2qCQpHPNQzSZhHH3T069fShCY2FEWE5OGx+f8AjUfmBdwPfrTUnDfKw49v8KY4KktnI7GmlrqStB4kbbgHGMVMGyvGCM5H45qCMpznPNSqMqUGMj+WaGD1Qhc5xnFOU/wgcZ5+lNII3DjJHTFIPlXcDjPFQZomG88KUXp2zUcrk5RQXIODtBwTQGBwTgsOhx1qd9Una3MBWHYfRMYPr9aaVylZ7lSJiCN4xnPGetTPJl1AbnqBjr/9eq7liV3j2GO9MXCyE45zn6f/AF6bjcGi2drPyeemKRm2EcgKfT+VRqzctt+cDjHT8aaqeYQc8A46YqeW25NrDvMJbq23qcD+dISCeBTpNq46AfXOaG2g8Htn6UwtdivgADPTljnvUDEMxC8jHanSoTGuOhPNLGNsbKTyRx7e1UU+yHgHcQOT/nrUqxEKdwPPHSo4ZSARnaT3H+NKVyw3E8HnqeKnqHNckWJTwN2T/npST20kSbyu9D/EB0Pp7VF5ZB5wcc/hUgKqfNZHKZwOwzQIsQylbZ0BUFs4VlJ698jmq7QSyL13sOOD1/ClM+SQIgB7nNOW6RImG0+dnIYYwv4UajuVk/dyHevQjg/1rU1G5TUdsnlINoAyFIPHY81m3FxJOAZip4GDtwT+IpIWKq2COTnrTtd3YJ6iyYBwCMd+KVWyuRgimXOwMoSTcMDPGMN6e496YBgZqrFM19L1C+0m4W706d4ZFwSV5B7gEdCOBwRiq8k01xJJO2HkJZm4A5OTmobZmwBkcjucYHpVyzhSd2Vp4oCOm/jd1/Aip21GuxnwpJLIEGcuQAcE9T6Dmt+x0OFZWE0OoXDL1C2+0A592zzVuO2YNza6Yy/7UbIM/g1WYfIjxLFZKhUgsbS4YdD/AHT/AENZyqX2KUdbMj1G9axgMSWUtvIpX/j42gY9NnTH4/41im4jlJLspd+WB7k1peMtTiuWijtJb0rjc6XEhO1h+JHQnmufi3YyPn/z60U4pIWzsi3LMqrykYP8GD1H41iEEM2McGr07liMqBxgd/1qm/3jwRW0UTJjo2YDIPHQ8VYQuwJAXaaqgkEkdMcj+tSwMQQOcYPT1oaEiQDHcZHtS7jz0/KmEbeQRg0oc9yOKRQi4JJAFSwxbicYwcjPoMdaaOTnHGPrU6bggJHzdvcUMCzA6Wyjao6feYc/gKcHblmOAe2Rz9fSqcjlR8uAetMMmMbsse9Ta47lw3C9UCenzDP5Uze20ZBIz6Yz+NVPO+YMAo+g61Kiytnbu2sfzotYLilijHJOzk+nNW9O029vw5t0LJjGWIGfpnGT9Mmm29uILpBOVJJGAykgEnv69a6e8kv4IoYZnglGBtWGILwexIxz2x+FS5W2BW6mA9lZW5aOeWU3asB8hXyxzyOOc++cU24QwTSLbqAnBVwCM/TNWWEDPLuURsinrGThvQ98fninQRyb45bu1mwCHbIyHjyBke386dxEVxcbV2uhjfCkowOef6ehrQhadLYQxK6ecoOxxn6EDpms2dTO6mRndV+VGIx8oPv047VoWskt9cu880rFIgqs5J2kHA47cZ9RUPbUabRc+2PC0MkOYrnaQNpxhhj06DmrGpalaS2FmlwRLdGPeWXPyEE8H3z2/Gs67O9kbZGwX6/Mw74/nzmpWht7/J2hHZMmPd6Dk56571i4xaTZUX0XUz1uW1C6KyuWjICtuH8IPY9utXbi1jt7BozcqqvgcLkn2A7dOazIZPJ3RwQktj7x+p5/Kpocxukikzkg7lIwU+vqMVq4vpsQr9CC2VZN8bSKEUnlhg4HpU17GNg8tAAqknjIxjqO+KuLtn2kQqskQ2ggEbc+p9qgnsQFknMoUgYyTkH2HenzpOwbaEejgrBK7rkY4HqM4z796oJiKaSMg7Q2Vz3UmrKxtL9zCbVGNrdB68VBePcXVuHkUFbcHD7eSPQn8KpbjTNHyIGXzVkKqcYVV6cdB6nr+FNjmiklDbnij6ZA647HPaqmj3LC6ReME8ex5rVCxTb49rFt+4ccZ9D9f51LdnYZetDJ5RKYlRvmw4K4OMdPX8qo3F3iPyziSQ8Ek9gfbrVuzjuLe1eX59oJBiD847H2qtJDFCS8oRHk5K7QTj1XtmpW+o0yaCXYmxiSSfl4xjPr6j2zUiS4dYgY9oJwvTcSTz6jGazo7mQENJGWUHGScfn/AJxUkar57GdgrgghgMg49COOlPUpC7iLt9ysVPAZhjP/ANers8st3iNt0sr4Rc5YnHA+vbFZU0ytdsysXBwB74HWtGK9eMxSR5VwSoY9iRzj0OO9DRrFmro1tJ9qjiuUHmb9jLnqBnJPt1rRvLtNPhDfJPIpIiLcgA/zH86ztLlG6dmcJsTIx6AZJ9BwKxJrkzSDYCEGQi9eCf51i4OUtdjS92aJu5JmJbAJJJwAOT1q7aOo5fBPbn/OaygrRN5bAblHzd+vNXtPWN2MtwSsII4HV+xA/DqatmykbMd18252Djryep96mW6Z2yzHjgdvwA7Cs1Z4dlw4RFBbKKeuCe3v6mmwzZfn2z9KVh3Ot8P2ovry3M/7uyL4kldgo4BPJ9OPyrovEt7HbRpDAkSRsN6IuQQOeoPQdeODjniuUj1y1toYYbeNnjiGcScAuerEDrz0yaonV3luGfassrnPKb859u/5UuUhtt3Z1MGi340m31d1VbeV8RJglmxk7sdhwcd+9aOiXml295dXfigebCylUyxLNk9AvXGO+AK5Ay6/qkBcvL5EYIUPJsVcdgoPH0AqCy0kGI3eqXaw2nQBMl5GB+6PT9aLakNX3Nvxb4oXVbiO20O1azsYkEMcaE7nUtn5z6ZPAyR9awk0kyqftFwyEEZCEcZ7YP8APpW3BapNCsX2X7PYghhEeHkYdC5HIHtnJPp0qvfazZwK9vFbhwMBiDtHH61M2+grcpy+pqNPvJI7e4lddoDFsAkEdDjjt0rpF8I2ieELTXbjVVZpyge2hABUEkZ3Hv68YFcxFKL7WkllC7WkDFQPvYHcHnHGTW+zXEcd2LS387S2cSNGMb0JBBwO69eKUp8is9xN6lC70+BohAEKHH7vjkY5yT3NZN/cyRXAgvYB5ycGTYF/EjsfXtXQ/wBoWcsRZrh5ZQFVJGkwU9c556cAcVX8ReImvoUtp03zRzmUXLt821lwUx6YANZQ13Jk7ozoZYDaSpMpWaIgowAwVJwQw7HvxnPQ8c1FdRwppNrNGgtriN2WV2AZJQMEZHUtk46YxxUY8tQF+ZGHBOCPp6cVDFPMLgARCSPJYNgZ4/8AritIOxCb5dTQ0KS6mhZNPubvT1n35ijbfC5UjPyE5A9ufx6CWG+mkHmG6h8x5N0jSW+4BsEZA6DOB6YNa3g2SzgHli2K3vzMrJG0zMWOcKOgHGSevXqKdPays08h3OFJJ2HJJz0/nn0olN30Vyo62sY3iN/Ja0kCRRzzKUupEUqjg9CVHAwSPeuTkdF1Blhyqqduec9evr+FdprlxfeUdN1SBVW4QLG/lANsJB4PY459c1x5VW0cSSTKLm3uvLMZHzEHPzE/UdK0opqPvbhVs5aGteWNrbaSZ7i4nfU2YbdwAjCkdTnnd6Dke1OmuJLXT2iaWJY3AZfk3A+xzyp9+R9OtUZNVm8i1tbiYrDGoyfLWQn357cevNV7vUW8oxxfMHHz4+6qngcHoe9PlZOiWhV1f99booIOxuo4GTzj6981DJNc3MEEU5ULbptTagB25PXuTz161Pqd7bvDbLHHKzRxIrnHDMB149u/XtVSYtNErxbivUjPenYxluSQNA95C92XW2hILkKTkZzjHYnp6VvaRbx6rrrTXnyQTyGVyu0cEkhRngdAOvArCtt8JZRLHGZgEfLdVBHGOnUfnXV2ckGn6ZKIxBcRzfJsQgmJgc5x6cHHI568UTbS902p+exJqHhOAX/2RZb2O9mKmOFolIZSODkHOMnAIyCPXtm6n4ck064u7C5MMM9s+ybzJAQSRnt1HHA5xS6lLbrLb3YllkvAoBUs2Ysfw+hH9Kq6pOJ7lZi81xcDLTyRnPTuuOR+NRDmtZsc+XZFnS47XKtJbRR4U5fqOmePy9Pzrp4r251KyNtBhrSwgZyrgfKh4L7D0zwOMn8a5OwW4m+2GBOPLaRE3bgqryST1J9fyqN49rpFcFreaQErycdeue1YyjeW5HO0rWL8LwPK8ckBECqWUu3Qk4wB6YHSpbBdLj0lLhVXzoLkOrlGJnQnDRN2xjkE4OelbT2d9Y6XbrdxKkkyFy5T5ZQehU9P8KwrAPqFzNY2qTPdTfuxbp8oZucMR1x79j7UoSbbTBxcXY62x1zTtIv7O+smFpKHLx28wACsMr970IJ75yeprO+LviLQNZntF0GK3K4Mlzsj2NHIeNoPRh1zxjNcVp+rS6bqQDxRXaQyYMVyu6NyDghh3HUfrWnq8GgXlrczaRZT2zSuHTMxdYB3THcZ6Hg4/GtUlG1wcuZaAnh6C2trSa6uJHjnC+VsXoG55HWs/Tk1J7+SJbe6mgt8s6IuSsYP3gPTvnGPWtjwv4k1K312wRtR3JFdrJ5jxhw2eOd3GPT06iuy+KGs2s9n4aubS8glZUuGvJbd8SgyEEIVHRe3XGeOlVayaY9LXRzOlWVrq0t9vW3W7tyu2KeXyvOVjgYzwTnGQenWtnS9E0qTRF03VtNv3Fzc3AguNPvAwEkfOzByCeMj17ZrjYtStn1MyWO5ZnjCl2ww4A55GMYJ/GtjSNf1LTNRuLuOWKZrv5Ik8ncC+0jKjgBvTnjrWcdPItSUtX1MFL+W03WMgN0ZkDI6LtJbbgY9xz06jn6dA/7hG1S80r7ZYR7dyTHBJBztZuo56gAHHB4yDV8VWECQafNalor5z5pIONkhO449M88dKs69rttd+DWaAnzGQJLl+r5xjaeQRgnv+HSlFqdpRQQdk0zmbW7TfPdRFYHmd2WPdgbTxt9Me1OkkCwsXiZ7gsoDDGB1JJHXOP8AGs6OKWG2XzdPY+egEMjDqDzkE9OvX8KgSCRRLGC24qWcZxge/vXTZMz5rmxeahZWMBSC6G+Q7nVIw2VIIxk9Dyak0/U7a9hS2tMwxR5wJFGWLYBwemcfTAqlpXh3T7+yNw08qPGpeWFecqM8g9f51Hq8lro8sEdpbqxC4Y7jweePc9KlNN8q3JUpLXoaWp29ysdjDNczGzi2okBy3BbGQfT07ZrT1/QtPs7C3DX9pGcsxMkuSRhcKFA3A9eec5x6mqGnzRaramQ3AKxLzbR/IUAPQ9yPxqjeaa9qRfOiIGfyw7szGMnOM556Cknd2LurXWpd0zwyb+xaOTS5dk2ZLWeaQwRtGvDEcZY5PHQUlnYQaSqJA1p5yn946OxdcHqc/KG9xmku9RvJI4ybpmgSNYl3Ss/yjHbpycHHTt70mnxlrSV+LhnwmwkIeOTjPXjA9Tmm29mPRbFbxRbXOta6Hvt0VzMPLjkYAfKowu7t93AzUV1pcK20a3F0jlGx+7OeTnn3GB+H8tq/vY2vt17CZMKuVbhnwPug+nT0rOjmsgy+XEIcN5gEjHaMHOM9fQU1eyJcVd3OR1MfZ9RPlyElMYZeOQOtdvpvjyaW1FtdJJsAQv5bkb9h4DDpt45HTPNYwhW4uftLsIpfvCTghjz26HsMcVz8wk+2nLL5rHdnoATn8q0spqzM7uGx1GpQ+bB/aFzcRBrh2lxngKcHHscnH0FY13iGRNrp5GcloyTnPue/anNNJbWbJKpnaUYBI4B46enT2/nRZ6fDNYyyAlHjQSMjNgFSdvAPO7PPfA/HDSUVqD12GXk0Ues2Uiw77eNkdYz/ABjdkj1xwRWhqNzDb6reyhpYmE25F3ZOCeOe/pn0rDtbkRXCStkmBsfNz9DV+YQatcrslbzierjAP/1utNruJO50FhqkEsVzIzpI6jzECLtwcgYPfPU1f0/Tg1rKVuI4ZJm8wtGoJ5zxz0P61yMfh+/t590fluFPG1yCQfY/yrsfDV1Cts0d9AHjYgttbaeO3HIH5VjNae6zWDb0kc9qNnbxW7w216zSpNl42UnGOMg9M+vrTNSu9ct9PtbZGk+zOpCOi/Mw5+XPUcduDj14NdPHp9rLes8aRoHJdo5D93n19/51ZuYEmgkjluFdACTsf7voQT34qVK1r6j5H6HDeFNP1C41EGCVrVFbEkjnHPXBB7nj2r0kl0jlIOQpO7AznJx+X51w+iWNxY6xKpvAGZiW3jIkBOee2c857fnWrrl5czWGbBirQvu2qB8/UfiP8+lFVOUlYKfuROjsbKKW3nuZJljK4MMe3/W5YAjjoO+fwFLrjmTUWkmcyS4C7y54HoPbnGO9cvbajcSxW7NAY4TgzYGSP93v6c44FPGoS6hMyyxSRRICF45Zemfrjtj9ay9k+ZS6F80WiO4fVI9RFxaxIYU+4dwHQEH3zx+NZms200dmfPmaRi5kQbicD0/I+1bV8oSy8yNN0i4Iy+QeR1759KbBdPPmxuYNpwJVJTGVz2H/AOuuhNWuZSV9C5or6fb6dFKBHLPKjNIZBxFnABGeM9R/9euOv7Ro7qWUMpiY71285zzW5f2PmBUiO2Huo5wM9Prn8qkisp7wwwRxiZV427enTue2AO/HWppwak5X3J5W9zkpLiWJ1MMrxvzypx7VJDdalKDHE3nKTg5X279gK39c0KEWqNBKj3IGfLjGRj03dM/gRz1NGlxb7GE7E3bQCx7474//AFV1RWhNnzHHmGTT7gLfW7+W/OCcH6g9P6VJ5dhIT5d3JFwMCSMnn0yP8K6vXNN+2WuySRRIpJQ4+6fT6VzNnLHZ3H2fVrYMi8Z2jIHr6kfjkVT2JasQm3jVGKXMcoHI4Kk8+/NT6PO1reqRMIoXIWTPTH09fStaTw/aTWpmspyGcExENuRz/d9Qf61i2UazP5MsghkzgGQEjP8AdPcHP/16SlGSaKtax1V3rWnL5TQ3Fw8ka7RtiAUgdM5OTWHqGqPfPmSGEEcAhiGxz3/LjFWbTwxcXSh47mHaTt6HjgnkfgauP4Kv0tBcrPbvGcbQTtyfSoi6VN2uNuT0scu0g6SoR7gZqNh8x2ke4xV/UbK6sJfLvYXhbGcNyD247EVRcqcHgYFbXT1RG25e0TUhp9yHaMvGfvKcckenvXfBpL2BJ0RURm+RlbOM9TjOQPbpXmHKkEH5e5Faukazc6epEZDRMT+7Y8Z9R6GsqidrxKjKx3A1Bbe7h2RBYUBDjcRncOeRyBxVlLkXKTQXUrR3LHCbB1BPGO3t+vvWFbXttqPllpBET8jo+OM9we9bWlxKugy53eYpZHYY3EjjA9B29cHNedUiklKS12/E6ad57mLrtrpsOjJJE7vqDTAzSE5VgQ3Hpngd+n44xby4WXQ44eDIvPuAPfsPbvSalJlBGMfKx4PYnv7+lXLQrJZPbSIoUpmMgAHnivQUNrmMndnKrGXt2kHIUgMPQev0quIt5I5GMYrRRPs1zLDMSFb5Wx/OoLq3a3YnIIbkMO4rRMzaKR+YEjrnmprGbyZsPzE42sPY/wBe4pkSncR2xTWHJqyS1NEYnIBzzlSPT1rb8J3vkXDw+YIxIQwz6gY/AnisiOZZLby5ByvRs96YEbOTxjkGptcpOzujrtX0U308k9rIgumXc0eQPMz39j9eK5C6hkjbYyFGBwwIxgj2rsPCdri0m1GeYD5vKDM3QDn6+34Vp6pb2Or2bZcI6n5Zdvf0PqKlSs7FuPMrnnW1VXJPOCTx6VsXenDTNOgN0R9uuE8wRf8APKMjgt/tHrjsPfo7TdP+zasGvVUxWoM7qeQ4XkAeoJwPpWbqd5NeXMk9w5aSRi7H69vpV7uyI+FXZVnIbpjJrtPh/ZxyWk806llzsxnHQE8+1cOGIOT3rrvB9xIIZo1wIg4IbPcjpj0rDFRk6bURQep2UGqT6MY1MZeFTutpdvzQMTyp9VPT0qn4j8eTao6WM5ax09yFnlhVmL46ge3t296jvGl8u7BcTr5YCseNuT1wPxFc/qvn2dhHEpDwxyLOisM7WH+OPxrKhJyj7xtd2N7QIbS5hnFndwm2gdkjjdgHkU5+bHUEDHB756dKovaGK6ecMIkkUc47DOD7nj+tRX8VlcCyMFoBcBle5ubf5fv87MDjHv6Vo6dpM1xJexG+YpbS7I1mG/K4yBnqBiomoJtrRjsdLE+p32nQ2Vpp1t9n2jBWEbSD/FzwPr1rQ1ewsNL0u2jlsI1kIy8sZ28gYJ9T19/wrCtvFGp6NamzXTIo4EPy3EO51BPqDyKzb3Wp7yVpb6VjLjA3jCr7Y6/XrWb0V46t/cDmtLIf9paW2uY8jY5UJtGMqM88d8VVudG82wEbHCK4SWFlJkCtgiRAOWH60W5VrJ49rNcM2AcfKR6Z6Dmqt19stb4yOzC4hYEkPkqeo5HbpRFzi7yFKdopHGatYSafePA5Dr1SReVkU5wQfT+R4p2j6lNplyXjZ/JkG2aNWI3r/j3Fdjq1sviFWe2gZLzGWXACtJnkr7Edffn3PCuhUlWBDKcEEdMcV2wmqkbGb7o0tcuUuLvdExMYRQpznOe/5mseQErtBGSefp61YkICjHpgVB19c1cI8qsiWdn4B0zzLaWZWQbnIJZgPlAz3+o4rtoL6y0m3cxJFeyTjaYymAmP9rqf5Vg+ENIuf+Eah1AzQi0O87XfHzAkYHHXj2qvqt2bS1mmERR14TJ6Mf8AOa4KkZurexsuVRXc5rxjqUupawDJIziIbF9Bzk4HTGela3wg0w33jOOZgTHZRtOfTP3VH65/CuPLn53YnPPPua9s+Cmj/YvDkuoygedfvleP4F4H67q74rlikRHWR3lyWjt3dYzI6KWCA/eIHTJ4/GvOrdPEGr6s0MzRW1ktwJ5Y5FDJvPRfUnjkZwOpr0a9jaS3ZFZkyRyhwcegNc3YWk1/PpM0DqtpE7TybePmBKhAB2HPPUnJ61jPdGtrlfwdrU7Xuo6dqbjdbFpd5AX5Qx3fh0P0NeceGtEuvFGo69qFgiJC0hCFuBySwUfkPzrsPi3JbaPpzTWcZXU9TBtS6nH7vgsfrgBfxrrfA+hjQPDNnYkDztvmTH1duT+XA+gq4xajZkq97MyPhVqiXvhwWUjD7VZOUaMn5gpOQfpyR9RW54i0WPV7Ew7zDKH8xJFXJDAd64/xnpd34b1oeJ9CiBjJ/wBLiBOMngtj+6e/oea7Tw9rVpr2mJeWTHHSSM/eRv7p/oemOaGk1ZleTMTXdBS8gEJkfzLZY2EhGSzMx3sffgH2rzmDQjbaxetHEHliJ4bgA4PT8jXuEkYkjkQ5+YYNeR+INWvLrxDc/wBk2i3F1KBG0cYLZxxuGcYP6DNZzg5LlQ2otanMePLw3OoWkJcOttAsKkL94DJ/LJOPaotK8U6hpulvZQNF5LDDCRdwIPqDx61T8VQS2OrS210ym5QAS7edrEZKj1wT1rHH+rYsDtyDz3P09K1VNWS7GMpPmuieSZJGYrjfn+AH/wDViqsshbAcAgcVai06+uUjkjtpTG52o+3CE+zHjPPrXdaV8JNUnjD6hfWtqMZ2IDKwH4YA/M1eiJSb2PNPlJx7cd6cMDORkVra/plvpmr3Vra3fniCQxiTaMNjvxx61mEBidq8gc4qkxWsQFRk4IpMdcHpVgIGJBOT+XNQkbH5Bwf0ppksYBkZHQdaWnEYPykZ/nU72+Uz/FjJouFrleNyp5zU4YOAp6dqrMCvX6UqdD7UWFc14DtT5RyOnPSpikcwJwwc8nYcZ/Csm1m8tyGztb1rWU5UfdwePT8qhqxoncimtwYQkUZaTPLbjk/hUZjjWIbo3DE8ErgHHvVtWzjqSOlWPlkADfMD0OM/5NSxuNzIZeuOG/nSKWI29cnHPvWjJagjCgk56jt9aiFmXQ8/pUqVtGRaSK6ROoLCI8cENxj8qVpMrl02sO68/wAqsvfv9mXaF3YwTjvzVOHJYAnrzmi7e4OS2Q7dG2Sz5k64PFI2VYBo8dCPfPepHEb4XAPGM4pIpJoWwrnaRjB5BFCdydGJPFutpGUcx8kdfxrNcZGR1P8APtW7/aEgt2iZEVHByQBlvx6gVl3VnNAiysh8mT7rdj/9erpt9SrK2hSHc/jSZA57U5hzx2FNrUkB+nanqcZHU/zptAoAs27bZA2DjIrR8xtjK2cEc/59KyUYnIP0rXhjSW1jkVsSHggdiODWckXFlaImJsqflPQ1taVqgSSNZCFGT831GMmse4t5ImG4Yz154qFiyjbnr/nrSsmUm0T6tdJNPsiP7tOMjPzHJ5+lZ7H9ae3GRxUTH1q0rEN3Gk1Pp8YknG4gKvJqvjkAdTWlDCVgVExuzksf5D1pt2EtWX0lhQckgZ7D+VTNeLIBFEDHHwDzy59W/wAOlUHs5+CzKD04yarsZI5Ckg6deOtZ2NL2OqnulWZYrJilsgVQvrjqT75zWVfzCRiFBzuz0qK1vFjRgw+boPxp04DLlWGMc/8A66hRSY09AsH3zxwnaN5K7jxjPv8A5NSapawQuBHKJjjhl4zzjkdj7daogFOQRwciot7Kc4B7/rTtrcpS0I5I283IJxk44/lT0yoIGfbvU0k2NrhQwCkAnn17djVRmYH5iQetVuQ9C7EcxkDkDJAz3psCM2SVO0DJ4qvHIynBPNX45s27qpIBwTxnJHrUyXYlq+pA0AEgeQ4jZguR2roRonl6X9sALggMOfuA/wBa51yxkBbGwMCVzwSK6CLxAbiFIbh1RACG2rxjHQdh0696mXNZWNaXL1MMB9xfaxLMBkjHrT3wBIdpPQ8CpWuEdSqIVUOSCxJPNRSyZOFx02jb6euf51QmhqM7EuAAR098dqimQ7G6jsPr/kU8MMcEA45H6UqgSyeWCFJGBk9OP5UyTM4zwOaespXAYZHSp7mDaTggsO471W3AcNn0q07kFgIrKGXOKkQN1x0H61UR2j+6QRmrcMyvwG2t6etJjRIifxDOfb0pSETJwenFKvOTgZ6H/PrUTnbnJ6Vm9CXpsRgsxx79BTmjXtnce+amhClHcH5gM/WmR/vGwoO48AAZz7U2xN2I7i3ENuknmBmJxgdvr71EApYkZzjn6/4VfktHa0mJZcqM7cgYxVO3TAzJk8Y49KcZaalbLUdF7A88VIcjqRTY1CkAdep9qHbkhQOKlrUm3cZEqoHbJJI9ajJ4IBP59ak+QcEkccVCc7sgVSBOw+ZPMVWXAI4PPSoQWHLHHb/IqxG2GPowwaS22wSh3w2Mgcfy96q5ewm1wcFTkdeOlPUsAQQ2Pp0qzaxztamVVDRocYPXHtUkTow+U7T1weKhsi3Up5wcHp/Knh2Kldx7Ed//AK1WpbcvEzhDlQTgdx3qlGUP3iV/DNINiwW3J2XHfH9KqMEGArHnOcr/AC/yKfJc7GZV5XP3hwTTQYpB1Cnr+NUkNiIQGAPzL1570p2liAxUehGajCkNjrUmwHGAfemHQj/iwans7V7q5WFGAzklj0AHOaYEwOhz06VsaRJbQW8jAhrhlbeGH3R2A9aU5OK0GjKT5WZRzjjP411Glm0nUWcyIyrHlhnrnvnrnJz6iuaRSW+cjg89v1qNpmFwZV+9uyPrmplHmVh3sdCsj6ZJLBIWe0c4EndR7j9M1Z1O3ubK2jultmjjlTMcjHO5T344xnj61Xh1OO5zLOAGyRsUdh9frioLiaKOF9kEaCbrsH3R/dA9KhJvdDjZ7mUTuJeYFmYknJoST5mWM7V5ySev0pbjYjAKCe/NV2UZ+Yjpx/8AWrZAIzfM3Tk5PtULnnPv+lOORwDx3+tI3QmqJBfUflTifm4HWkX7oA6Y/Gl68D0zQA5HBHPApQSRwQaYmVxjGTTz947lAJ4Hb8qQ0OjONysp5xnk1KWxGFyeBx7CmQtyc9hxntUiRFnUINxJAFJjHoXZgY1LMMcYzx71cs9N8yXFzKFJw2xMFmBPb/8AUavraRQWe8TR+Zuw0YHI46+mKLZlWFnQhWjb5cDJUjkYJ7/Q1i5t7CbH2um2dqboXIaO5hOFhnhLEn0OeFP4UoEBthHcKyzKxfgZAB6DHr75qM+ZOWnDOXZiWJJbknuTyT9abN9oNuzhG2IwXnvnkj1PbjOcUJth8hVtfMLzFiCcBBx19frxS2u5rgrKSZQCQwPAXB4PfPcUsd0Y7ZcRoz52uGHQn+R4q1aEm8ijijeR34wcAkn07fhQvMcURXluyKiSTnbIrPG8jZJAJGCOvb29asahdy3kySMYzOqKD8/UAYyfU5P17VpeJPD+pWMatf2MkMcQLLM6FAwPHfk9+5rmHtpVyFQSqwwfmAI79fzxVR13G9GWXuWEe0wR7GHzMEx0Pr0zx9aYsyrKYlVsNyZGBXHPX3GOtT7gkRkG0yKMLwO2O+PTvUUlpJcxicySuhBwmCuD6elPYC6qhZYhIyiAqSdgH4Yx9KzVkeRiY2CeWed3GcHr+XWoItsbhCoDheSOeafeKHv2RS6pLwT69+Ae3WpUbMFsSXEm+6aVow5GA69CDk9x/OtmGzeLTGuybdEMixABwXyRnp1PTnt2rCjjWIgLksHwxJI46f0rbZ4Gs9iRMbnOS/XA74AH+etTN6JFRSejZHYWxM5lkY/OTxnGfeoLy1kltFeKMKrPt+9uIx3x1A/Onm4WKaN43wANpJUrx6D1NRtJsvFcSfJJlWAPTAzn60lfcGktBbSE2aSxMAXCr6HGc8fXkVFszayCJuZQwYSMFwefw+gqxBdIsznDcxlW+UtkZz07H/OajW4huIyvkt97JC8sc9D6Z7/1px0d2idDBsiFmUtwAcHr0rorW5M10tvBEzsOOOgHqc9BWbqcChVuYipcDbMFUjB/vEAYHbI9am06XzlCGSRCeMxnGfY9yKqcVLVjtc1UkMZaOUrGHPAz90ew71rxWtnd6e0ShWlLZjmK5xjsB/8ArrAt4vLZlYnIxzjO4/0rX8+5SzcLIY2JwrqMH8v07VhUW3KNcvUzYtPktriQ3BVlZcAge/of5VK+n+RNGzAvEfTuD39qgvvtDxl5XEkpP3+Qcev6Vf0++C2jCSVZDGu7k4z7Z/8A1mrV2txqzfumXqEQs9QuISpRo9uVYEFcgcEfQ1antgunJhGWVV3gg5DflwKoXrpcX88yxCJZW3qgYsFz2yeT/U1eguYBbyBQWuU+SHB+VOnLZ7/pVWskaX1EF20mlSQBVLMQQ3fjsPbjpVbTbhYbgO34HH3T6gVeFvb2ECTS3UFw0i5WGLJwCed5OMfTGeayb2XN47CMR7jygBGD6etNIs0EkLFzySeeasRyttHqBjPWqVlHNcZEMTSbQM47VblXyY9uB5hPzd9vt7Gpe9i1IlE3IzmtLTXtVEr3cJmAjwsYcp8x7kjsBk+/61hhscnOa19HtTctgE+Up+ds9fb/AD2pNFp3NXRrBLljNMrpZx4Z5D3GegJ6ntXV6WkD3H2wRR26dIIgANq/3j7/AK96xVvEhsW0y3jfbcTq5+csECg8KPzJpb+/dWFnbkNdSAh+p8sen19T2HH0gCe41aC302+geQieSZgqjuC3r0xjNQ6RfaeqLNd3am5UHarDAiHJ49T79TVOS6s9JRmmYS3B692P0HYf55rn9Q1CbUpQAgABOyNBnn+ZP6VVhNm/f+LUMTi0jdJMkB2xjb6+oPtWD5st8reUyxx4y7uwHIGcD1NaWlactjLbyXCJLNIcYcZVBjsO5/MV0F0yRacZre1jaVnwgjQHr6/lWcpRRL13MbQX06HMbrsm4LSOc7/YEdPp/OtWe5LRn7II0CjPyA59M8+xx0NZw00yBIb6J4pkQFXQ9VyeD7jpVmONIXUMSxAwDjHU4OaynHmfMxJPqjJW7ih8QWd1PBG4jmRm3c5JP/1847GodUSMapOW3GPcxG7rjPH6Vdt7e2m1m8aRQzRkNHyeGA6j8Tmq+pTebqZeUo6Q7duO468475z+P41o42sKztYp30zNtnkAYKFx2xjAz6ntmrXlqUQygKVJxsOcfj/TFLHMk0LXkeI0VyU4wAR9foD0x2qGO4e9VrgqQHblicknPJ+vfFQ4SewRcdiWwm1RDHcaTeNZJGzMJ9+CGXOd2OexwOnt0q7Z3VxLFCLSN5Cz7WlRidmf4iCMnnn9azbeaaO+GklXxK6yx+UuTI3oO+Dnp+NZd1JN59zdWV0YGySscEhXjPXOfrW3KyL8ux2Wp2lzdRtm4RrmN/k2kIzOQQV2jkcY59Tg1xPiK1khmjuJiv8ApKEOAwLB0OPnAwVPH1PXnuaQfJvoxcRSyxsfmEZyRnvxzWh40Szht1W2laWSXa4Yt0UZHI7t27cetEW4zUSXLm1MPTU/tLVf38xhXmV3Cglceg6ZwOO1aBtjbIqwBntyAzM+Op/U/wAqqaHgwNFHkzSyhSM4yvpntzmui1SS0sdfFlr8DxwxSpHcxwS7iiZBO0jgkA8ds1U7t2WxL2OfvLSa8uo00+AuThdijG5jk8D9P0rJdbq2eVDG6PvZGXaQVIJBB9CMVs+fA0VzaxXeI2OEkdOSAeCV6jjnuRWbu+z35MTsXZBnLk5cHqD3GKcdtSHZq46yhm86FrclZ2YKjOdo3ehPQV1FvBr66bJFcaTDPHLIWFxGU81ucHnjIz2qOKSa9tI5J1V5FJV9xCg85HC85/M96rwa6+mWCwGS43LkFDyAc5yD6YIqH72li4qKXqV7yc2NyHn0tyA2GFwpUBgfbg9Md8irVi0N3NIdXvxZWYQsbXToyzSHOdpIwqjv1OBwKpazqH9sLsguHf5g7qwA5/vY659+ali1K5mtbtmd0eMZg3AfcXHHqT/OnbRJIFJLQlsoYEvlNlcxoD/qo3yep6H1P581s3UkbNDHqdspVWU7FAHnAHn5uoOPwFYqeff276hb2kbwRwhrpcfdyQMr6N7Vfha6kWOCK4Ks7KokkPzID/ED24zn2JFc84vmT2NI8trlqXX7iWCG1uLsSW8IZIYnGdiFicZ9ecZ61nLZWt5eW8t5eJY28Z3STtydgHKqO5OMD1NOv5oNDmltJ7YG+jOyRsjaR2ww6j/JrKvdeE8LQS2o8xW4KHIZD2we/oacYS5uZIidlu7leyjttQV1X9zMASjbeJGJ4Bz04q/HdwadZy2tzGxE4VRKvGCG53DqB7+tUdE1C1sJpYruyE9rMhjEhJLRE9wBwTx+HWruq2NhJewvaebJFISiyOMb/wDaOOAQevJ9fatpRWzJjK2q3I5p43kitYTnypGddoJ2nAyDjqeB34pviW8mnQW7TxtGfmPlEP19xx1qzo15Hp+sxi0upkjhZlLKM7DggsuO2aqiO0lu5pLQMqNI4QSDjGTjPp0NCjZpju7blayhuSzrYxRpHs4ZyPmXjnJ9xwKtNHdwyRzznayfMhj5CnOeO1T6dYXczw28axEzEE75QFjPYsexxzVmSCKM7GnV2LbVAOc49B3Hoe4om7Cd1qZt7rd1qFxBBIQu18syL83ccD6fmazdXXyrsBBN5cp3So4+UyKSCR7c5/GtY2NnM1xCZJd4kCq8a52k84J9e3oKhd7aWdLdLZnZRsXewypxzz0PTr3ojaPwrQcnKXvN3G395ealcRAMolCg/LjbEvYfUDgDqBx61YWaS10iS1jCuC29mbB3nn5s9hg1BaR21sJjdqXRQSNp+6wI5A9f6VRmN1eISEcoW+6gPf2HaqVrabDUjVguL66tZLLSB9ns5pQxJP3mAxjcecdT6fpWp/wjN7caYV1CCCa3g48yFdsiHJ6t3Gc9jWFZXstpB5UcjGIYGyRSORzgMPumuj0/xRdO0pujCbNyA6ByJF4+9g8H39+eO+NX2i/hpGlPllpNnJDw/eWt4fst0iTR5IGSGAGOvtz9K0fnuLW5S+EYnjC7wScHnggnn0/zxW/Lp+5baa1uV82SPDtIckJuOB9cZHr+NUAkKB7WQRP8pV3kTAyOevUnn249+aqFTn3M1TaKlnNJNayWsV6sNiQkkkQ6Fl6fj2HUVFeXSzLA1lbSJeRthpIzw/sfU/0p0doqGeOymEMJUefK2BtB52Dvnjp1A61LpE7rZzW+nvKtwoJWNsH6sD0HHb1q0luCutGOtGkguPNvRDcMU2kEck4IwO+RwfSmaxYwRxBXleDPzqzkMoB6DPUHrnr2NQW5Z1YyIZWaTb15Zhzx7ev5Vd8U3s1+iTaq0ryK5VMkcHAHK+mP8OlON7j3icyZLq0UMyjY5wAGyHHXr/k1kRhrjUw6JgNIAAOwzjH5V0P9nvdCOWeRTCmd+3qCPbqfXPpWSTPI4MUeAmTnGOB3z24rWMkc76F5w/liH+FJCcMf5e2BT1ktdnmSBuD8qDA/DPpx2FV0uopZkHlEuzAO5bA5pzWMkkp+z7pVyT0yMD9KPUq/YFiW/mFpp9tuyxaRkQszZ9O+PyFI2mXek3asse4gbkJGQw9QPUVuabbzWun3WyGUiWIhWjwGU9dp9R0weo6VN4bkuL5IBO0hYLkBhnbjjjvWU6jirrYqMNk9zMsbrULy4VgVRARnCnH5V0NnbRjIYHzgxx9Pb2rb1PSU09BP50OGAzH0JznoP/1VlfaI1y2CoPHTJNTCoqq5olxVjFu7a4lkkWWQYDYAUZ2gdvcd6ZFbvDkRAgt79fp7Vry3C9Y41x6mqszGQkHOPbvWiQWK8tnNLGZCxE0fTnqPSktEJQNvPXHIwfTBP86sCTadhA24JzjJ/wDr1FIBG7FHUgj5wATkeuPWmBIcyTbBkvkAA559vepLNI/7Rdb2VoNnymMLyTnpz05781W0/UlFyjrCPOUhk8zocf5zUGprLc3shnmaWfduEgAwp7cj9e9LlezFzGxes+QkikRgbVG3bwOQc/rn86w/t17Jtur2UfZ4vkjQEMzY7Z647npVppJGjRZMuBgbsnPT19KbpNsLaKUTAMN+cegz9OtVZJCbbY/RBcSae7yyyPvcsVbtkjn24rq/DiKthqUJUKVRGLg5O3PQe2TnNYcM6bXMWC/QLjA/Orng5yYtZVzucRoSf+BYx9PSpSu7lx0Em2qW2gAf571nOoQkIABnoOMGr1znPUY61Sm2hciRdxz8oz0zXQiGQO7MTnHXPpRFpdvqokS7VfKjXJkyQVJ44I7+2CKTgN8wyB2zipUuSkTRxgJk5OO/H5+tTO9vd3EvM5WXT9T0W4mGnyPJEwPMYzuXrnb37c9vaqd/fw3wEzxGK8HDsp+WXHGT6N7812aOWdTgllYHv61N4l0jTLpPNFq6XOAzmNs/mcYP6kGp9pyyXMieVvYyPBuqvIYrCW4MeJldJM/MB3weufTnNdVbQm+uZSZAwRiGdurckfUnA6153qelGxYS2zu8Iw24jDJn/PUV0HhDWGubiO1ncLKDhX6bgT1OO44/ClVo8yc4biTs7SR0uuwGCOIEh4lbC+YoJweCOe3TjFcvquiWElzbG3iMKTBlJU8Bhkg/l2rs/F0brpzCTG+Nsk+4Nclezq9hbmN+VuQdvpkdc1Ti7qRe8jmLvThEmYyWYcMhHPHpWejFZMkAjOPrXZ3tibj50cLL6+v1FYd7pN5E4Wa1cORlcAnI9cdemDTU0xOPYoLIOFbBHP6Vo22qXUMPkxzDyCcmM5xnjn68Cs1omjJ3REbR7j/9VRGQq/GCuOvrVWTFexNcszSfMwbknA4H1rotMZX0tGYZdGwjehB79+9cu8uScMeR1zVvSdQe1lKthoXPzqec89R6GnYE9Tf8Q6dBNCk1v5n2hR83HDY/rWPpDJcZs7gE5yE4HBP9fT3roBK08LCMOYyOu/hh17f45rnL3dZ6iJ4xjDCQcUtWhspX9pJZ3MsRRgFORnGcHofyqow3ciu08ZQwM1rc2hyJYV38Ec5zjnnvjNc5pdtHeX62sjFDMCqN6P1GfbjpRTneHMyZR1sVIQMgYHB5qVW2sc/dPGKlv7KbTbyW2nAEqcZ7EetVEJ3ZPFaq0ldEPTRm5o8+5JLGRwscpDqScAMM8f5710GnRefJDahogqkIPlJJY/XoK4uI7iAOvUVvWd4YoPPabZJEBuDDl8HjHv8A0rKcWtUaQl3NTxdGNOsJIS6+e+IXAHOAd2PUcgVwMrEmr+pX0t05aZyxOSc+pJrPQZ3EngcVpCPKtSakuZ6DOc+1ei+D7Gzn0BHuEjLDdycg5B7ep/GvPK9T8CWiyeEspkuHLEH0z1/U1jiZcsLlUtytObiwsrpQwktZFCIzY3KSfunvWNe3Eci7VlOxY9zsxx83oBXQeJGilNpaQqqsTvfA6kjAz68AfnWEFS3D2r2yu80iEnrlRzj6YGK5ovRNrU0k7aCeFxdvBJFFGropJKKQrjPORngj2rbgvXjvG2yjzJIgmCpUgr6g98H6GubkllsdScwkwGUYUgcAE9Ppz1rUQNJslnQh1XaDnI9MjvU1Y3vOw4WehtW+oNboJlkkkkAJ2SD5c+2B61VsoV1u6YC4C3sjZKMNuR659famsy7P9YvKjGfUDvjk+taOj3KQbbiKFPPjwQxXnknjjkjFZQi27S2CSTshup2Vpps6obn94igEqAQ3+zIM9ffkfSsUwzSSE7o8OwC8hc57nHbipdYnS5EskSOMvuyy4znr+FR2sbsqRlVJfAAYkfr16e1N802Zt8zsblho+o2soijCiZ2cIyuB9wfMM/iPesTxroVrLY2V7pGZ70Q771IwWwvB3HsDz+XNdELy40ix0+HUF8yVJZJEnByGVlZSpPUHPfvV3w1eWaJFpcFysMUwUz3G0BpmI/1Y7KuO/U9u9dMIwpO99y+VJWPFHAMYI9Kjxjn0rqfiHpNvpPia6htEKWrEPGueF9QPbOa5l2HIIFdSMWrM9e+E9rBqXhwofKMltcMJFkQNwRuUqeoNc18VdlrrAsopvNcKJZePus3Y+/Gfxqn8N/EE2h6lc+UoeKaI71boCvIP9PfpXL6teyX2o3VzPIZJJWZ2Y85J/wA9Kz5E5ehbl7pBDE11cxW8XJdwo9ya+mPC/wBmsNM07TRIPOaLcicn5QT36CvnnwtaPJdG4IPlxEDPoTnn645r0yyubd79HurqeJQP9cpywxwAMflWVes4SUUrlUY3PVyuQAe1QW1vHArCJVUMxbgdySaZo91FeafHLbvLJF0DyAgtg4zz/Ore3itFrqaHknxIH9qfEvw5pR5jjKMw9dzEn/x1RXrPfPrXk83+l/HmIA5W3X1z92I/1NesEiqfQmO7GuqyIySKGRgVKkZBBz27jFeXWhg8FePZYfmi0u7XK5yQqk5z7gMCPUCvUjWJ4q0G31/TWt58JKhLQy45jb19x2x/XFIZB421V9N8NzXFqQXl2xpIOcBs/MPw6Vg/CrS0SyuNVkYPNcN5S8fcVT/Mnk+wrm5Zr61s7nwxqvQkeQxOfLcHK4PdG7e5+orS+FGteVfXGjXGQJczQ8dHH3h+Qz9RQF9Ti/iLaE+OtQjlcKkkyHcBnAZR+vNd/L8P9P0q0hm03TRrEy5Esd5Nt3oR/COFDdMfj3rkvjFAbfxd5qjCzwI4PuMjP14r2Dw/eC/0LT7pTkSwIx5yc4GfxyDTvoiEk2zzy4FpcaFeQafPKkFgRNJpt8Cs1ngdFJ5KYOMZOD37Hi9f8batqdoLP7S0VoqbCsfBcD++Rz/IV6p8RvDsGqaVc38UotL+3gb9/nAkjAJKPjqMdD2NeBIwZG3cenH6U0upM24qxHI+R6ZrVsrDy9DF9JgGefyox7KCWP5lapLaOSDIDuPRByST2/8ArV0uuxCx03TdMkkV7iDc8gXom7nH+f8ACnKVrJEJM2PBnge08RaVdT3E0tvLvAiaMDGB3IPUZz6VjeMPBGp6BGJ5/JuLQkATRnGD/tA85/MVuaT47Tw/4ehs7KBJ7oplmckKjc9e56jvx61XsdL8Q+OtQSTVrl4bUDeDINo2/wCwnf6/mTUxuty7Jqy3PPFQo6kjIyM1pIV+YHGe1euweDPDz6RFb39hPbtgbb3fyxPuOB9CMV5p4v0G58P6k8EwLwHmCcDiRD3z0z2+vtinzcwcrgjn7xVU4XHqajhVcEHPP6U1ss3NOU4zjpWi2Mb3Y1oyvJxtqws7YAD8YH+TRGQwx+FROoVsgjGaW4bGks3GSRz1+vepkkBXfI+BnvyayY2BOS3ToKmhUvLuY4HBz6//AF6VilIvw3ifMHXgdCD3qZLhZEZVJC8E8e3r17VlRRvhiSpbuM9qnSZRyVKkcdM/5FS4pjvfclljHlzRhf496nHrVeBQZQrEgE4OOwq7HPHJ8pBDYzyMZ+h70SRgxAwkGXPHHb39ah3QnG7uhEaW4KWo8pRklpAAM024VI5QsbllHGcdcU5pYIDHsLMV4LYPOfWoi8cjttcr/dDd6nVicrkT9CD9RVyz0ue70y7uoz+6tyNy9yTnHH4HmkWwnkgeZQp2EArkZ556fSrtq8dnpbp57+bM4LxLwFxnBJPfk8Y6U72CCs9TlpB34xjHWoxz7HPNXryI5eRQCmcHnpzVA8Nx0roi7oTHHk4wKQDnBxxS8HkdRSgjP0pgGMHrya19Du0hkaOXb5b9yM7SKyRggkduaejfMMH71S1dDi7HV6htmgDSOAiKSp46Dt7+1cvu3MzgcE8e1WJbqSSxSDk84YnsAarHIXGOAKmMbFylcaxGDnNRE0rnjGaI42kdVUfMeBWhmye0VQ4Z+3A4q9Du3ZBJYHJ/OprrTvskMO6RMugPqR/9eooVydgJwP1rJvqXbl3LxuV2jaoPuc8GqVywlPJ5PHpippGXYVVeQOBRFD+6BKgk8j/PrSvcTbehTFu65fIYVPauMFHwysMUrwjICjvzxULRqZfvBe5/wo9QWmot0oSQBSMY556U1trLgHp0p8qj7x78/jSADPHp3xSFezH2kYnK2kmNztmN+6k9vf8Axou9MmtJWWRTnPPHSkQtHNDKmN8bBx36HpXSeLb0XgW5t1ZInIdeOOh7fiKTk00dEUpRucq8aqFYuDuzjHt60kbliFB4J/yKr4+QtjnPXPtSoxHQVrYxuW/MwhAyWFMZ/nwMAcc+9MLbwXDAEcEevvTEGMjrj3pWHcsCTGBk+5z2qQN8gAHAznn1qsDjv9fwqQyAjvjNKwXHNj5tvTHPPemRPtnU44B9c96Cx7Ag/wCeadEoDqW6EZoEyy0aTFxGQh65OTWdLHknA5H61bWTD4jxg8euKhYH94D8zZx0pK5OpUB2E4xT02t04NPaJmAyuDUTKV6jjpVp3GizGzZwTwetPbDn5uvQGqiMM4wOtW15+VsexpNBuCR4JycdvqKA5VsrkDpxQMqcE/Ke/akcNuzx68DtUtEuIryO3AI9M0o+7wR7mmquQxyceuOtBAzwev4UtA2Bo2zgYxQIzGSGxwOmakztQBj1PGP61WYnJOeaFqLzFfbnjOOv1FGFIIycU1unIIz0pp4GSev61QXJQuMDnj+VE6ttHTA/nTYj1xkjFOkcEYGdwplrVG4i+VpluinOV8xvxrHuXXzDtIweSMdPpT0ldchXIBAXGe1RSRhicZ3Y9aiOjKexZs79oQQ2SpBx3/CpY9P82IyK6rnPyjnH41Ts1jjmVpyTHkdDjnP8q61LSCRJGBSIhN4kVcgjPcdSeePy+ilo9BRV9zmZtLugjMsLSIvVkGcDPXHXHvVERMhIYEHPftXUXOoTRA29oVwoG6dVGQpGM5HQ9evNYctyk+wLGFVM9zk+/Pf1qot9ROKRWQBTkEcH1p24lMAVJtRiSflqDJDlRj0pi1J7RTJMiAE7iAcelXL+OO3ICoVkPqRx/wDX9qk0WNoJPOKOW5A+TOeKXUpY5ARMw81TkADGPw+n4Ur3ZdtDGDMuSMj1p0SqxO5iMYxx1ofDElQcHnrTcsuMduBVWMy3F8oIXJXHJP8AnrTpJgkYRcg4zVaKTHB7HP1oJMk2Wzjt9KVik9Brnv3/AM/rTS3ybSOhp8gwpAYeuP0pSwK7RjAGPqaYEXzZzjjoacvTGTj3p8ciHAK4Y/oKVkG3gDuAfpRcYwLwRnFOKYyT0xjiliQHIPp3p7kqvJHyj160ARAbQDgZ9OvHrShdx5PNMyd5YnmpUXG33wPpQwJIVzjp61sWdusUIeRsv1+U549D6VllDtYr2OOnWrmm2VxcS7Ykc8ZwoJLYrOWwPsjSuo0k24kCPsC4RfkLY5Bz35+lRJltqyF3OMNgZwR/kUtwsW8pIXDqSuARkn6de3PNOvF3BknR4bj+MEYwQevH09ay7XE09yOBzHtKSmNUyzN69senvVmOcecjKS46n5cg1HYXs2nP5llNJDIYyjMDywPBH0qa1UbA79CCQQAo/Sqb6ouNmxt9bx3E6eVAoc5JwNoAHc+1FxCGk8mKUFsYBAJzg9ADzjkVMjFpjIhkdkyqhcgDI/8Ar06KaSOSOVFRJ48kOOoUds9/50kx6X0Kwtnmt3/tC5nhnjGIlcl+PT2Ge3GKzwsgmMLZZwNoOQM5/rzWta2k9wHY3g+yp8wZnPfngev/AOqqyCVJmCKscoXqQGyvtnvxwe1VdLcTVirKrqqpuIU5yeRgj/PNWrC4nlcPOjzLGVbaecgeoGCR69KWSRprEFQEBwBkdCPX1PJ5pljeSW8ckULB1Yje+CTxxge1Nt20Fc2X1WZYZbCACGynm8xovQ/U8kD0yfxrE1lJI5Q5leRQd2Tzgjv9KseWZLfzlAb/AHs/y9etRTAsRFubGzKnOCM+nt7VEd7jd92Z8aysDJ8xyQB9SRn8eK0oI0lukklLCLJyGP3seh9apvLvSCKMlCjYbcNuDg89+/NaG1hbGFigRRxJtOAeuR36+1ObEyWZkilhYwoEGW2sDnHJAyf0/Copohd3XnQOuAgKjuGOeo60ybzVJkuNr7cHBbOM98nr6VNZIvkCV+Q3LAjAx6Y/H0qX7qui72ViGSPypJI8B3cYAVwdh/3umfbmlWJoLKRiVBU7TGDgk9s9z6+lSzeUpDtBlFXKjdjnrkD8MYpsCNeMJWlActtCZIz369+cVSd1dk3uTW37qJVmxhgV+6AOeMc8GsC4hk067aIuDg5V1PDD1B9e31rau5FFytvMeYR8mD1J6k4/HFM1KKK7RUQlQvCcZyfX9OfzoUuV+TDYns9Vne2KQvErEfNlAcYHUZ5/WppZrm4tdkqjCsGHGCw+nrnmuVzLaTlJFKSDnr+oPpXS6VeHUrdrbciTLycj7w9frRKCWo/iGw+bdySRG4SF1O9Ufjd2OD0zgCleykt7uQKPtMcGG3REhOeck44Hp6n2qS6sru2DXf2ZjAiECYrhCM/3j1/nnjmsW51GeW28hpG8gMXCAkAsfUdM8U4q+w1puXLm7jn1Bpo4Y4I3P3IgMLjA4A4xx7VVldkmYjkk56+tU4yw+YZwpA9eSe9TGRjtBcMhHHsauw+YuWV3dWMsV5AoVlb5HaMMobB6BuM9+h55qGa4Mrs8jFpWYsWJ6k/15zSTTySMqFiyx8KOmPoKrMSHYH6/nSSKTN7wzPAuoIt3PJBbsDvkjTzCMc8L3P4gd60tcvI5blEgRUgjULEig8Kectnq3JOfX06VzML7Igyn5ifp0q0JXmHy7VGO+M857/1qXHW5aka+j2TahcMpJWFPvsP5fWu4s7RI4BtAitU4LnhQOvfvjsOa47QbiS3H2NF/0mRuBweTjqc4/Wm6hfPG7QXDvI8TH5d2RuPv0/nUNNmilY0dRuniupWgcJGjHbKSR1J4Hck+n51mnVnhV0tCUZhhpTy7ew7KPbrVAyTXlxtVS0h6AHhR+PQVu6bocAw96xkcD7v8I/qf5VNktxXuZmn2dzqEu2BSQTy7cge+fWuz0Owg0qTJhS4lQEuso+97EDoPb881LYTxW1rJEtvDgkAMGIKDp9M0xm2gsBxnn1qHO930KiDOJZA8h/j3DaMAHkY47c9KlSVlQpkhD1+tVo51W3fy9paQlScA4wacGBjVlJK1MYq4lo7DhxKz85IxyffNMnYMADngjHNNd84AINOgKtyev8qtrQow7m5ltWu1CGP7xQFvuhgv+Bptu4uI7aeYh2YYdMY4UkZJ9T/9c07U4Wd5pJ3yETA6DcFJ6n1wTWbPdSQrbzR7EmT5Qi8bkHY/496aSkjHm6lvVkdJohKhdGARAnAxn7px36c96pGaezv7e22OhTBEbdW3H+fp+dWjdSXD7I1aGDd80hBYKRz36H8qz7iR21BFucOAwV5WJbv3J/yOlWl3Jdr3RqaxcW1wu5ZHtr63OUb7pBHbisuNYrhY3kYABgHJB4zkn3Hsa0dWu7GGxBghikZnUKxj4UA8hecZzjnB4OB70p5Z9Nu1ktzFGrqS0bDfkEk4I647fWhBLfU2tHvxJPLJIqxqsahAq4JHr+g4/rknlPEdw8+qTB23BG2jrzgVdjvJVVo2CrIzBsDGccngent0rEuZjLeSyc5Ziw6Dr6470QglJsi5saO62OtzCJY5QhOxX5VgOcH2xxmtGxhs77Vpby+meOMs0pAG4lvQdv6AVg3bS/2iC5Z5JFUkkYJyuO35e9WColmihiJjjVTvJOcsACT/AEA7fmafL1KT0szRbwyt0ZBHKYnBPlnGVbrz7fgapX9tJY2pt7hULplg74O0jHCnvnIH05rU/su8tipstRdf4trj7p69j+PSm3ej3N1Ksl9dGeQDIOCQfbr06VHMorVicbRdkYc8F6sUZErJBIo+YMcZx39D+hpYNLjSQLcyF5HI28nB+n9a2RNBBAyzhPNjUgIec5yO3GKXUo47YWrq0DuYlkCh843emO/t1+lTzS2M1G1jIvdACkSW04D7c7emDnoD2qta3k8RjS+LSwxseRjOPTPeuhuLvzFjMk0DugwFC4OOep9f6VAtlbMtw5y0mwEJE+A3Xgk8ZqoSbVpGnL2HQXrzWrRw6gIouN0WAGkj64b1557+vFWLm+8xZfs4JwNo3DBJHcfhms2/8OwfYklspwt4WI+zkhgAO+7pmq9lqJt4pbe6gMUxJQy7SSpznkevv1xQ6cZbdAu1oyRrmabUEtr+8lERURebJk/KvIBx1wcYNVtPMDXDCRjFKBhPlyr567v0x70t9dedbMrl2KsCnGRj0/yKWzsQ5hkkYMx+ZoypGAP7x9c1pbQnVs6r4eW1nZ69DdaxNNb2fzBZI5NmOMEk9QOmT6c1iXFxJHCkg85bP7SZIzjOVLEZB6Hj1FTyNNMZSIw9sudqkE7cA8Z9Pw5q8zveaSIZQqK2BtUdAOc+3p2rOV9NCnfZGKrRpLLLAh85udmzIwSOT2zionmjlbbIp8sDGyMkbm9T+ZHb+lbdva2Vt5kXm7c4yuMyHH8s55od4Vt/KjtPKc9XONxHp6f1FXsgMqwtpp7xRbsY9xw7N8qkY6c9T05qaTTb0XRjZlLRuV25wBz0+nPrWlaCMWrFof8AVnOd/LE4/wAOOgHWq627TXO9mIJBA5zj696zUm9hJXRBaRG1YJEEYDIKpkkFvr16DNQw2LqbdwhYlsIRyCfQntyDXWwWdvDAss86i4mXMcjEHAGRkg9sgjsayVu1W3AUss8Hzsynl5Nxxgewx6HrUKbk3YbWhl3VhIwMs5RELleDgBverVrZyxiNEcncfXg+mB9eaG8u9cSTzSMBucbjnDH29Pb1qnf+bG0Zt1fy4+srSBst1wPQZ6U2uZWE/IsMGSPLw7Y3cq5du4zzjrnn06VUvrGKSASwbFKAng/f9hjv+VQaleyNExnX96xG3B6f5/PNTwxTmCIRvvk2k4jABBI5Bz7YqkrWYJjrW1uYYUuY7pnh2ll2su4Y4yVP8utNiN5KjOVEkgBI3KOB/Q1fvLR7FUEgWHcQXQgNtOMBjjt6/nUEEHmwE3V3awqxON2dxKj16gEng9CaUddWNSexQt40+wiVvKH7zYUyRgnPzdfrnvmppdQvNGlmhtbe1fzgAWjQuR9O/aqU0Y3yxghypDll9D356066WeARs8mxcKynPOO2O9aJK4Xe5DaXhBGABtB4BUHn6960bWzN9GhMEm4EkMW4wB047570y3t1nieedTMoHAK8t6YPU9T7irUFvNZrBsE9s84JCE5B56AHvxRLVabi3HyzW1oEE0xFwyksAO57f0rOstPDo4kjl2FT/q89Pr061T2f6Rlskls/N3ro7PUGtIo0MIRHzg5wvp+NTKLgrx1ZPL1Mm40i2s/LkQF3dSxVnzs7YwOQe9VbjzbdUOxvJbgYOMH0xU+v2/2W9byr2O5SX5xInXB7Edj2xyPrVKW4ZVWEyZQ89a2SdtQujp1u/OhjMWUVQG65x15+lWprlofLkXiVWyWH88dMVzGlagbYzxkBjJGYxntn0/Kr0TZzvY56c9vasI0uW6Zpzcxta5qAv7hbhUEbtGqyemRxn6Y7Vls/ygcHikYFSAxBP1zSOq7uM4PtWkYqKUUMRQznirS2xVsEg9xj061GrbMFQSMZFTh08tSxBYjA5yePb0psQrBSiBWCseTx1qJLfDMWI9DilL4XJAx9f6fSmmV8FVALfTNFgK00Z3SKVBx90+/t6VSM00e4CRge4Hf8Kuyysow0ZyevvVeRhvYkHr8vtVIlj/NZow0q8/z/AAqaEtGjSKcnuvofUe3tVHLONvOBz9DU0crLlQ22TBHJ/TrxQ1dAT24aOOVi291cEL13fr61u+Ep45U1iQAI0kCHGPRh3/GubWPCPEoJ3gEMDwD6/Wt/wnzZ3pI24hwq5/2h/wDWqWralR3IrnqSaqyr8oqzP94mq0h4rZEMrNk5qLBzmpmGehqM470CJbGf7PdRzbQ2w5wfXt+uKuedLdKfMO4c4+n/AOqs76VdtCQvBqXTjJ3aC7Qy9hSbYpxjaEORkYA9PSuIu4Z9M1BWjJSSM743Hse38q7qY/MfpVG9sU1DZAxG91O1j/CxPH4ZH5VpD3NCZe9qXl8RrruiXYnwl8kZMi9A3+0Pb+RrnrECWTy3JKkZGOxH/wCqsN/OsrqSNgySxkoy9Oh5B/KtjTLoeYssalsdQDyv4USViovXUurcXKAR5JBJG4AEj3+ta1nKFuGvJ5Z7q4Kg7iOoGO55J4+gqtZStExeJEbZJkZ7cdP1psGoIl4iyMEQkk454P6GuecVJNF7GtcSLdbBcWkW6UMDv5OOvPcnr+Ncprfh9RHJJaSJuTLNFnnHt79K7OzjguNQjUXAEYX7wwcZz29f/wBdVtXura2sLzbbIZZEMasR0B7j3wMfnXLQk4tKKf8AXqVJqW55aFZRtYDHr6Uo5BznNa+pxLcbniiCmJF83HckdT+lZe3gnB49Oa9JO5ztWLFlfT2p+V2CsMEA8MPcVd1m+j1BYWhh8sqpUoOgyc8e361lAMRxyeuaQFtxwT61XLcOZpWO21e3kuNGiUKC1vCr8HqABkfXHNca25WDoxDKchgemK1tO16eCLybgCeIDaMnDAegPcexzVC6A35yrbsMCpz15xWdGEoXi9gbTSsdD4qeO80fTdQiUF5FHnNnncc8H261yigngCuw0O3N74XkiCb2R3VRjoeowfXNcpIrIWVwVkHGCMYOe9Og94dmTJ31ZLaLtQsPvHk0krk5BPHeq4mdRg5qzbQBrYXEg3I0hj/3SPX8K1em4J30RVMZlyQCEHU0xwFUKBx/SrcrgDao9ABjGQKqzMWcsSM/T+QoEyEDLgH1rsLLUni0iKzsmIk53MT0B9+tcxp/l/bI2m/1YYbq617G0MZBiCgfdlQnjPPOODWVSzsmaU0R28TrKJJXaRyMZJ6Z9vrRJLJLeRrGCPJXC4HJY9c/kajkhmtzgXDbSOD94H3qz5cgs5BbMGnkA3P0z7D+VYVNLW1Zry3Kuqyy3ZjjlVsIp8tgBjJ//VTtLvGx5MxO4dM+lNhl8mTMpKsUBwexHr6U+6Mc0jPbhlwAdpHT6e1CaSUWQpJepdkYMADxjIzjqK2NLeNbNleN2kP3SD26cjua5+xunU4lUqQMEn3rUsJHy5iIYDkAnIPPSp9kr3RaSvzErpiZVRS4yME4Aar1/CIrqKZAN6/Pt9aoTlWAaRhwAflU5BPbj2onuEuGtdsnBbYcg8f/AFuahOz5Uthxtqi74h1B9aggR18vyyVVS3XpyT35rJ0zUbe2vVmubdbxChVoWJyMdCGPXHPuBxUM1xGt1LbFgdj7iVwckDGOf5UjQSSRMyAwQM2Rx8546ZHQd/XFapX36g1ch8eypeW+nXiEEy+cxUHO35s4P4VxTDnAznjFdVqVqf7Of5SDG24Z689/yrmiP3hJ7D9a6IGU1qKkzwRPGjEb8bvfHaqwyzEAZJB/z+lLK3Xrg1peGo0a+2uoJZSF4zj6/hVS91XIWrsbngyRZ7FrYyRxFH+Zm7A8545PTGK77wxJp2oX8Wnz2Mr4UhZAcDgk5IHI+vPpXmXhe5l0rxJItvjd86AbQ2QPrx0Feh+C/EllpV/qUNxbTmTCPuUKflOSePqa4qlNe0v3Lhd2R03hfVlt9f1bTWZI7GDc8XPyptwDz/nmtqy8R2d3a39yodIbNTIzOQNygHkYOR0PWvPdTSS2tpRapGttcSkm5PBbJB2DPJHGfTuOKx/FGprZeHZIbWc77pBHMq5xx29+lTGUlJRNlpG7NX4Oxyap4i13xBcDLtlAcfxOSxx9AAK9ZzXG/CXTzYeCrQspEl0zXDZH944H/joFdbFNHLv8p1YoxVsfwkdj6GuqW5MNEZPiHxFbaG8IuYpX81WZdmOoI65/yK5nRfEsv9pzXd9df6I6MTGBu6fdVcd+oP61qeM73SJQ2n6i7LOsfnRsoxt64IJ4zxz7V5pbRPDYwsA3+kDKjrjJxj6965qvPe6exMm09DofHN9Z65CLu0SeOWAeW7FQOpyue/XPNc94KuJF8d6ZJI43vKVY9ASyn+pq9aCOOzuoJJmUTphvk3ZIPA9vrXORTNa6nBcp9+CRHOPVWH9BWtGfOtR62TZ3PxysyYNLvQOFZ4W9sgMP5Gtj4QX/ANr8ILATlrSVoj7KfmH88Vf+ItiuteC7prfDlFW6ixzuC88fUE1578GdU+y6/PYM37q8iyoz/GvP8t1apXQPSRv/ABm15rawh0e3bD3K+bOQeiA4C+2Tk/QV49bRNJJlAWbPAA649a6/4uSO3jO835wkcSr9Nvb8SawdK1JtPsLuGFE8y6QIZDyyrzlV+vGfarSstDKbvKwul3USa1Zyak5SJZVdmC9QOccfQCi/u5NQ1Ge5bBeeQ8AYyScAew7VnuRjL/drT8M6bdalrFtaadKkN0xLxvISApUFvrnjjijlW4k+h6toPw7s9Oe2klJnuvvyyvjCdPlRenXvyfp0ro9RtrJNsNvCjXbkpEAxG046kjpx1HXtXJLY/Ei1YCO+tblcdWdD/MZpYtG8eTlVn1Gxt1BBGAGwevUL1zWEoO90zoUraWOyttLlS1jQXt1GQoUoXDrx/vA8d65Dxbo91/Zl/wDanW6s4WVl3LtZN3G5ccbRxngf4w63eeK/Cdol7fataX0DOEMbREHJ9OPQE9RXMax42u9WsJLecjB5AUYPXOD6j054ocXoDmtmcTc24DOYwdqnAJHX/wCvVRht4INdd4etorqKRZlSVdu8wkck8jd9MH8KxNVsza3TxFlYjBwpztz2PvWsZ3djncdLmYH2ggZzQG3ZBoaM9RTelaEXDBVsD61IrEfNz0qMnI5oU8kiiwiwsuXBAJAFTxuBjBwODyfXp9KpKwB3DhqkSUEcgDGBzSaKTLuCckrtHTg9alWTHQYOOfeqcUiqMoytjkg+lTKdyn8D06VNikyxIFf7+QcdfT/61V5YCOmMe1PDjBV247Hr+BpquFyp/Op5ewNJj7aSWHnkDtWtYXMF3dYuhGjbMKSuVJHZu+Md+oNWpJrLUraNYrRImQAPjhiQOOfTvWZe6VdWbowgdo5RlWxwe2PTNTdPRmiVttS9Y2kX9m3TXJtlLFkId8uPZVHfGCD0rjZ027gOxxn8a2biE267nzvK529+p796xpHLMc9DV0yJ+Y1SBgnp0p5XBPv+tRJ1ORwamQ5XnqDWjIQ1eGOe/wClOwORn/6xpgHzEEcdqcBhufpQBKGwc56j8jTHfJNC46H8aY3GaSRQ3Fa+g2pkLzFQQvAHrWQoJIwOtdnpVpsskktnik8tRvBJ4Y+uaU3ZDpq7G6/axqLaaOZZnlUMwUHK9sHPfPp2rMCiJg2flPB561p+a+9vOCoencYNZ06b3cMSQGzkelYeo6is7lQuRIzH7vHGas29xwQcgduKrzHah3DrgY9qZBneCG4/pVra5CkW5nccrjBGP/11V6NvI59PepTJt+XGfT3qNyWXG7IznpjH9akTdxwO8ndnkimsgVscn6jv9aWMsASASM0oZMFmG7j0pphcb8vODhsfnWnLc+boMULMN0bMq/Q88j86yWZSh+UBs8Y4xQjjHOeeCf60WLpy5dLleRdgwc9c0wckc/p0qe8ZWb5VY9AM9qrBiK1QMtRFAMknpzS4QFiuTngjrj6VWzuI9+1SwgK+ckkevalYLjw4JU7eQMH/ABqT5c7QME0sigkOCPm/SmELucsw3Z5xSGKvIIJ6Ugc7gM/L7ikZhxkc+386WIA5JIB/l7/nRYTJXyhAAG7OfXmmLIVfJPUkHvmklm8yQkgBv50x24GRyelTYhk4O5QQfao3QEHJ5oQjGFH1Pr7U7jDE/wA8VK0EmV0CqTkDnpx/OnAnAIPII/D/AOtUrLu6VA4Kk9OOTVp3LTuS79xJGOfvLjpUpCsny5wRx9KokkE5PBqSCYxsAwyh64/mKdh3HSfIMgHFJE+4EgDOcVMwyhYYZT1+hqOKMKp3EBc8Ad6VlYlpD9/BGevBpnuKiY/MQD1qSI/KfmAP06ilawrDJlLfeySKbsb06nFWmkBQ8r6dOtRNJ6g5poaj3GqAnBzmonfnC4x/Oh33Eg9Qen+NRs/UDt/OrSGXog2Mtxjj0pfm3NhQf8PWq+98cM2BzjPep4Lp4TuUDJBB4FRYL9B8YeRtvyZPHIq3cm5tbPcJVMTtyqjjn+ntVT7QuOEGPxOKYsyNMHmdnOeQec+3tRqO9hqzEjj0x1x/+ukWQKTiMe+f/r014+SV5Xsf8fehGHQgEds80ybk++RgNnU9Nqgc/hVm1QqczyNnsoJ49yfWqZY44GMelMillU/KxyaBpmo6oGyUf5h1Mh5z796pyhIxtVgTnHTkflUYaTaVLnB5OefyHaoj8zYU5/TmgbY9RuJ3Hnr9acFDusa4Lkn8/rSqipgSZwAcYI6+mfTvUSjc4CLkk4Hb/wDVSEyQxgEgg59KYHZSVAXj1pxJBwCAR1wP85qNyCckDHT1phYVn37dygdOn+FRg4GMDrSqfyPHWgjIGBz3560wFXaSc9e1TRKcEE5HaoFA7gcn+tW0UNHnoeR9cHpSYIVFx0znOTUc8eJARypGfpU2cZP44xVcsW7nr+VJFCEc5PfrU0SnoRnOCKjYfOABwBVy2gMh2AE8E8f0obsJC292iDDJuUE4IPv3zWqt6935UW7KphY1bkYPOP61kjTZWYCINvPTcMZ/Hsat2NuFtyJV53HtWTs9RLU0Wd7q73HdmJWJbrgY9T14qBJmuzGgcBV+VWbjHP8AKrCRwxWjeVIXdzhwR26dvwqaGP7PYKD5BD7mUyEbvz61Csx7jY7Pzg/kgNIv3wDnt29R1waupbn7AIVw/GI36FffHcZ7daxRdO0SupkbHAwcHn+f0qxHeXUSKY0L4+8rKQyg9wByRVJFwaQ2KR5rXl/3zMyFAcbl9Rj8ulOMd06bEgdYxwRjJzjG4jr3qrY/JIs0axySlsKsh+Vcn7x/zx1ro57yyMEa3zkOxOTCCwQHpkDn+Yok3FqwJGBEs6kLMzNngptxjuCD3FaEbSuRIsabEGHdj93jv3wfWn3sKwq7297BcWzDgeYfNUnuBgfXuP51lma6UOhkPlMuxxjHHv60Nc24mrOzLMsk0yggBRkHHHPX+lPaCCKAyKrBiAy45zn0osYo/s4SWNSCcBjzzz/SoDIZX8qBH8uPO1weFP8Ah7UKPYaatsNs7mJJWaTIB/h5447juelElwrSvHFjEnI4xwO3t19aqXSPI5V85QcE8E5z09RUsMRklUISpUevBHqfSrshX0sNvIWKyOGwcY6/ewen9fwqxDI0qs7Hl1GTngf59alYoYs28Zkkzh94xkdPlHaqNjthdUlIEchKNn+Bh6+1Z20sEV0HSKzXccUpZYjycknP59varLIix5QM3QfNjC84zz7VVuZWivhkB2UKBn6+n1q9O0YhYDOCwyoA6j+mabvZA3qOMkTRiOVwxXhT/wDX9KqrcviOKPb5q8An09z/AJ9KdOyz3RjttqxgfMwA7dgO5/ShIIkk/dqz5z1/mfenFJIOa5JY+YJn8ojznIO7OOB7dh+tWHkkWV/tU0szqOAT2PpnjHSks7WRp0WFQznjk7Sc+/8A+r0pzmRJdrqSy5I4zipbuK5TureG4gl2qvmKpI55BHPNY9pK0bhoyVYHtW9O2Z3uZFCKCcgAYGc8/XrWAwCA+WTycZ9auHYaNK+1m6uLOK0kwYI2LKvX5iOvX26VXtLGa7DSBCIk5ZugGOapFQ3Csd2ec1ZS9uI7drYSMIW6rn+dXay0He+48XJVPJAXZkf8Cx3PvTS3zDK5A56cc1CzcBV6dT9aeBnbtJAPSiwEyluigZx6VCXBYnn1FTMqRx7iSzYIHbB9qqr24oQ7k6ngYxgVatd00qoGYZ6kDOB1z/k1VjG5tqg5zgAdSa37XTY4Yw7yea56xoQP1PvxSbsUtSq1vM8gjQCUkYGPp6Vbh0u6YosgSJSfmJbO0DuQK1/ss0CqAUTIBxHxjPfnqfxqWzk+zzCdsTyRjGJFwM89R1z3zWLqKxV0RoLfTx5UTHzAcMSCS319qvac4uZlWRljyPleQ5HH6iluIo3i89p7ebzQfd0Yn+Ient6c1XWNoflYj0Pp+HcCufmC9jStsM86tII/LXeMjIcg4wO4PNPkm2wEjB7AHuTWfC8m84Xd6/Nzn29asSXLNdo9tbrCiDbhyXycctzxnt7Z4q4rTQuL0HWEiJJIh55yuO4I5rWgjExUI6oCdu5jgA9ayIZA80xkUbgQBg49+K0o7t1gRQItmCPu5wc9yeT+lTJuK9QT5ULd2jW07RSBd4Gcq2Qc98iqxKRgsANo5Jx29TRLG9whEW4O2QcN1685rPme44hnYsFOJDzzg9OP/wBXaqi29GO9tyvqgjlu1aQsqKBuQHgkjqR1B4HHp71gbUUpM6gRs3Y4JAPLVs6gi6ldoCJd6rlmGAAT1z71HJYSMwgKr5SqdkgBJAH8PPvj2q46IzabEg/0i8ubcTKxiLEJJLlWH95T06D3PeoVVNREsiWwgaNlBVCcHPQ/X9KSO3S1sXeTZIVIZeD8uTjDdscdKtaa1vawq1xOiSzHcqE8Y7celVe4LXczNZikh0uIkKI9wPHB3En8v1/lVmxtpbqC4Dz71MW7J6kg8Z7kZp+rHztHljjiOA2S4bgEHkY+oAxUOnys+lr5UvlPtKvlsBiDnOR908DB6djVaWJe5Uby0jS68zY+MHGCdwJ49hisNs7z0GTWrOsrW0tyCXjJKlvUn/8AUCfTNZdsu6Qu0ZeNMM46cZ/xqkSy/NukdbmeQmRhhE55UcZPoP8A9fpUguBJJbJbxMZEXHHViSO1QtcQSLcu7ETOMJx0yeee3HT2psEjWrl7eRXAO0MMBvTOByKAudlGjG1z5yPLtwcsMLgdvWpop4Z9OQPtSSEBWw2Dkk/j+Nc5ZTMY1UkbV68ZAz6/5+lTu4jnmZZFKkbCyD7yjjiuWVPq2U3ZXGarbNJeOI8l1PzZHoBn9ePrTby7s5rdHeFEdTtURuQzc9Tn34qzZyPah5RAqxso+UYJ5yeM89xTFtXlkS4tXCSnLMp4H5+v4Gtk+jEyhLa3BVrhI2MQwrS44BPIB/AGtaxnnAV51AYkZ5++vpii1WW9zaWyPvkbc6cY4569McdeKngsZ4uXJ2xkk8gfqe2TUVGnoS4vSxfhktMhpPnTunQgH69cVzOuiFtQcDzfLbhcjBGO3pitySKV45AsQkZTyjNjOOePXioYPs88IZlYOG4UEZX8/epptLVFu7MaCHbFtZSxB4ckkAf3R2BySauQxLEq7l+ZiN+4E47/AF7/AI1oStO0RgjCAS4zEpxkjvz1PJ75qijkko5PzsM89f8ACtU+ZaFcti7c6jIICLeOaEPlWIkB3H2A6cfSq2nrKWZBIV2DIUdSKuxxxx2jR3KgMX3AgHp047DnJqpKpinH2cgkchhzkEdKSad1EE7vUgkCQsytEFkz1Hp/Wp4uYAqnYynOR3zmmoHmuiZ1CN+hP0qSRF3AKSjkZP09qqK0DfYk3EBUDAMCWOPXp/Ko8+VKGLEqB06/mai+WIq3DkkjPJz+FNmuEaMLwFz09aajYa0CWY3ExAzjtV6wsXzDNOhjs1kUySnHC7hlsdTx274rOs2UThwuQuTyOD+HpWlLqb3BjW4C+QjbiicbhkHH9KifPdKK0EymIY1mkaIF1JbYGU8ZJx+OP1qrJBNuAk3Pk+ayk9BkjJ9T1rtL7TtKkVZdOvIFTPHzZBHXJB5Bx1HX+dY2o+UssRYrLvQFiARsIyMemOM1EKinstRWujDIhWKdi6I2RsXGSee3YfoafaywxncqTyuy5kJONpHpjr6mhYIZriRZCEGdysRwPbH9aITPDeo24bTnAVcYBBGPf0q2mRqFtdzPM6TPiB2/1jHJAJxtJPYVWvpIVJj5Z85BIGSOeKuXNmtu6faYpNzgMqk9M98Uagsd4sC/Z1MqII18tMZA4GQO+P1pra7GlpqYizy/a1jMYCAcfKeR/npV+W0+0wpMzbYYVyxyOPb1z7VcguBCIoTbwMIFcuzJ80gbBwxPYYyPQ1IITBZ2dzKFSK4MrIUPLOuPlYdQMEYPT9aOa70EncRL2SWzjh84bYFzCANpI+nr+XStOe6vP7Ija4RVifhXk+fdkcEf3T15rJMUEC281shRmBZ03Bl+oxz9Qeas6tIbjS7GYDE3mtF5adMAcH06npmpdr3K82ZrH7MUdVWZuQrYyOfY9etU5PNjUyTglQp2jP8ASuquNNYwEXQEcxfC4YMuOmQF78VgX0TCe4SctKrt95uNwH8unSri7sHFo50y7izE9TUBnDqUKZ78dq1IY45rvzAmLaLKqAPvMe/0qRrdg4aNFBwcDAGep/Pitr2MuVlKyt5Jgmw7ien1+tb8YhVAGz5mcEen41nOkEcaYwD7DvUlrJJLMGnbdjge+P6VD1KXu6G3NGJMsuQ3HfP6UscRZ9rHJGM+mfSljG5AARkAe1TRoZFDfdVTyfYe35VMS0VZYntpCsq8Z49x161IpjYEqo4GcVpXNus0MUTN86bufUE+1YhVxIY+Q2cdcVVguTfaFIYBRjoTz+GajTMu5EILEcds0nklWKlhnvUQhk3Egcjr7UrBcXlk2k5A5+mKglBCboiCzD1/z6Uk7kFk29OvvjPaqz7l4GcdhnrTSBkghdhy5Zu+Owp5VYCGLF8dSRntVUoxIKSDcPcg4PFNkuZMBGwdpyMjrj1ppC2NO3UOTtU9MqOcY9c9q6DwuFeC++bA8nGPoRz61zNo0lyHQuELjjttHqMdq3fDJ8qe5iPH+jtnvnpz9KiRUdxtw8YYjk1Wdl8vhTuzyc/0p8q7pG5OBUL9CK2RDGMepqBmqVu9QsKYhQelXbTdtIDAeuRn8veqKjmtCzAKHOaEIJmBY8iqx8xLiGaBPMaM5Mf9/vge/FWJlG44NP05d+o2i/3pkH5mmCM3xDYwa/HLqWnER3YyZoG4zj+vv3781xBea1uDndHMh57EGvTtf0yJWe+tWEE+8hucKwPcjsffvXHazamZFM8RilQYEi8qw9D/AEoT6A11Qyz1ZpEdTKIS/wB4HgE/X0qzBCsis+VIGMAHPGegrm/s8yk7U3Y/u81EJmQ8ZDD3NHL2Dn7npNrNBZ6U8txKqTTyMcHhkRQNvHocnisOfWIxDLCQ0gkG1iT29vf8K5RJJJGJAZz7c1a+xXrIXaF0j7l+Ov15rONFRk5N7hz9UaUms+SrJawxQ7z8zDLMfxPNUzqEjDDNuXrhhkUR6aEw1wWx6DjP41cTTLWRMRebu7ZYGtUoheTKL3RZSvlx474Uf0qAEHr07VuXGhQRQHF0PtBAIQnj6H396xZIXhkZJFKsvBBHNXGz2IldbiLj39PrTu2CPpTVIxyKdu4461Zmb3he4PlXNrHIVldg6AMecDB+p6f5FUPEC7Z1YqQzrk+5BPJqhBK8EyyxMUkQhlI7Gug1S7iv/D8UioqyxyAMO6k5z+HSsGuWd0tzSOqaOVc8nHSp7OSTZJCrny2+crnuPb1qGRcGpLAFrpEBwWBUfXBwPzrV7ErckBHOevUVBMRk56g1I5IBzkHmqzknnvSQM04rDzNL+0QHeyZaRe6j1Ht61f0LVPLjazuiNjD5HPO04xg+1UdKnntXjubVgrjI5GQw981WuSjTyOkYjBY/IDkA+g9qylBT0ZppZNHYWyT+XskkG0k4KIODj37UXDPAqLalcAfvWcD5m+nYViaVNJJbHZLMChAIQ56+1aSXpJ2mJ3Q4z8uD9eKxlFqV0aJ3K99DPKRKY1VweWRs8Y75qC3juWLiDywcc544Jq/50eHWNiyFSArcEH69Dz+lIo8sO00obeu05PUfQVWttEDj2IU0yWQfv74ljxhB/iaR9PvrY77eQlPc7T/gajZhuAt4pWPA+XJ9qlW41fYI40cJ90b8cZ7c9DT1XUHYcut3dpA0U6qcnqe34inf2lJIu64tyB13bev07UyHSr2MpdzCFip3BG+fPuR0P8qszyahc20kUksXls+7bt2/N9fT9KS5W7xsEe5JZNbyM9w8AYbMAk45/n04HT8aksNUtI7OaEq29f8AVqMnr3/Ws+/dLW1EQIJUAHHrWXF9oFvJNBKm1vldQcN16c1XInuHNZmvCWljKGNkikGWZiSWHsDXN3cZhmkQ9jj8RW5pupxSqkM4Ebj5VYd/r7/pVLX4ljvXMZyWAJ4xj6/lmrjo7Ey1VzCcHJzWr4auEt9Ys5J1DRLIA4JOMHjkj61mvjuMd6WJsMAOORmtGrqxitHc2bAJceKJJIgRGruw+nT+tbzSPpWvafeTwoY5B5EqyZ2nnjPoORz25qp8NWhPiOUXFxHbgxkh5FBBII454xya0/HVxC9vd2Vu8M0SFZfOQZ+b0+mDWE42mmbK3KeoX2n2Ftoci3EUJhSP5RKQ2WI4wepPOBXjviiL7Teabpluo3SORtUY5ZsZ/QnNdC2rjUdO0641K8ZhHAoSBMjBAwTxwDx9T7Vznhq8huPEdxqV7GTHGjLCidmIIUD2A/Ws0vf5n0HKV1Y9B03XE03STFa3TSXqFYxFIp2xIueB2PoTVebxVN/al/PZR7FuYxEvOMED7/ucZxXNK4M0rOwOF+bjP0zTJZYooW5Dyg/KvvXPzSbFzNWLpgl1yO2soyWuUkMUbbSdyHLEsx6YOcdzn8aS40y50e4W2uoyu8fLzkHHuOM+1O0HUtR064tpYgjqrMm18Y+bG4+o6AZ7DitzxPLFqF1DJaNA8zAu6xksMDPPPGevOOlaSjeNkykm9VuVfD2mwT3kVzLIksaH95AwAwMdWzxtzV7x9pNpeacmo6b9lFzESHSFhmRen4kYB+lc4PtMTrG0pSNsbRIg5+h9P0rqdJuYtD1K0t9Qt4UmmC7pI5BI4J4BZegByOAfzqaUraC5lfYT4d+IRJYppmoHCD5IJT02kfcPoeeD3HFeU2N0/h/xStxGu9rO5YBc43BWIx+Vej+Pb2PwnqM8emQSI2oRFnVlVoAf7yA8hgeT25ryZ9zzbiSSx5OffvXbDrcVRqytuXfEerT63qU19eFfNkOAq9EUdFH+cmqNnFNNNHBbxNLPIwSONRksScAAUsgzGfLUbF4Lev07/wBKWwmntJ0uoJWjnRtyOpwQeeR6HmtNkYt63Z3934Pi8MeFLrU9aKTarIBFBEOY4WbjPuwGTnp9etUPCmmzaP4x8LSzkob1PNwewYMAv8vzpYdWuvFyeHNBuGZmjmKTSE8uAep99oIz611/xatvscGi6vbrt/s+5VTjjCk5H4fLiou9mapJq6PRc1S1eWKHTbiSeURRqpJYttwasiVGiEoYCNl3g56AjP5Yry3xHrDeLdaTSrKZINMhJeW4Y4AUdWP9PWs3G+htexl+INek1yyk0m1gnuyXBVzk7SD1H+elcM6MjshIypI45HB9RXdeIddsLPSotB8LK8ilsSXAX5pSeML3OfXHt70j+CX07T4Jb9GkurhR+7U8RknG045Jx+GeKUUoIwmnN3Me61aC6gs0sLWSK9twAZlIAVQOmP1Of8a1bbw3bwaa0mp+bJcXBO+RQT3zgH19TT76xSx16K3VFWBUXaq45Hcn3yCTXSag0lykPlzH7K2CX3AKp3dwO/Ss5O1rbGsYXb5jzvWvDc9uj3VpDMbMFVO9fmUkdvUYGc1zLALkLgg969tk1No4UtLqRGaNyryBdx2kdsdfrXmutWkVxqjx28e0Mw24Ayc+oHGea0hUf2ialNL4Tl8YoGeQRWzrGhz6fCksjLtckBM4YEe3p7isbp2rdNPVHO01uAHY9u9GOecbqQcnrzS/5FMQKQD+lWFuCMqo+Y8HnOarY5NWIl2jLDnFJjRIN2MsTzQCNpwAfX2oPoc7Rz+f9aY+ByDxnikWT2l1JbzLJGeQeQe4rrX1BdUhtY7YsHAIKN2P171xIYbhgnHerVhdS20yyROVcHII9fasqtPnQ4z5Te8QwxQzrApV3RdrP6t/KubezO0lSSFPTFawzOY2Zhgt1+vWpyI4mmiWPfIyArk9PU+/0px91WRTtJ3ZyrAK3HrShtp4Hsa27yxjktJZAr/aFIIwvBHfOKxGUjg9a0jJSMmrDmHPHamhiTzUrAmNSeuKjxg800NjlznI6GkcHHTpScdATwcinLksPpigRc0KKKTUovPIEKks+fQc4rSilm0+YNLE6wy/MOo3qD2PpWdpxMSs4AOflIPORWhqF0+oESScCMBFXOdqgdvas27suLVrdTqNc08HT4biG3lkMu0x8EbgRnOB1Fc1CGZH2gkKPmJHQe/+Fdj4X1i2fQoYdQnk3QDykUc5XPqegwawfEF5HPOtvaWyWlsgHypzvz3JrC7vZmlWKspXMKVd3J2mkCpGASQGx+tXFtUmnSJZAA5wrHjn0qpJxKwPBU4P1HH9KrmujBp7sSRcKAMFup+lIifJk456Dr/+qiRlCnAOccnOKiBJHU4ppaCsPJYNwBgjj1NN3FVO3HHFOJyoBGScHNN8vLYyMEc0eoiN/u4JB5/OmJkMcYFSbFDNtztB4psY2sc4xVjBxg49KgkU4/z0qxgA5JGDnPNOEYkXABPpQnYaZTAI6ZyKEOTyTUrRlTk/d7eppoAxuOMDpV3uUSFgFGCcijaWG5T3xUWTkc8dKkUDPU0rDFde4HIx+NN2tkMOuKkXGck8D9aYuVOVxtPJoAkdcpuxg96iIz1BzUm4svBOc9MdRUYY4OBmkLQXzCFIX5ec0iOw4BXB68ZpRjAyCPqKaV7iiyFZdCRHKDAOfT2/CkJOGJ61GRSh/wC8OKLBYCp5bHBHNIMYOO3apQwI+U5puMg4Iz3oTGtR8JIB25x3Bpu5cHINR7jk47UpbPJ9KdhjgoyCCG9PalkIDZVRjrTAB1BOaV2AK9cHGfpQAhZcc5A/lUPmMxOCfTOKdKxYbiMA9PpUJ/TtTRLYhJ5NS28ElwzCNSdoyT6D1psKGRwgIGe9dDZmG3tGhh3ZcHecE5/+tSlKw4pN6mNGMnpx9alO44HAB+lQ9s9qMlBkE/4igSZOybGBOSDgHnp71Ja+XHOWlUlQDwOf58VCxZlG8ZGO3FEhzyM84yMYpA+6Jpo4yjTQEqCQAuOM/X1qmeck96erFXyB3zUwRFQs3fPahBuQrjZnJ796kCowDZ9M8Hr70xw6jgEIeRQgZhtwST046/lQC0JMbl2q6+/vTfJGOpzTOh+n6GrdjcLC+Z4Vni6lCcYHqKTutgTT3N3w6sU2mzwXc9rsVhiOTAcg55B7jgcZFV7qBbaKWa1IjiIJMbfN06dee9PsrexkYzQTB8YIi8sjH13dR71W1nyzZq9vGEjkkMeRjBK+nfv+NZWfMaNWVzHjYAjA+vvS3B3AH+nFMA7jOcUpHHsAMVuQMHU56nikHWpCmclQcAcf4UzHfjg0CaHBdy555zU9uGHO48YxTEYMOep4pyAkkc4P8qTKRZkx5TjcCSMDH1qDaFOF6D+tOGWJx908fWpTsHJIz05OMn2qdh7iKi9gfxrU0KZEkl2yRLMMbUkUkOM9AexqW10WW4sbiYFiFQHcoyEycAk+mTWTbxzWN/GZEBeNgR3B9s1F1JNCubn2+cfd2Lu6YHQZ7VDDGVG7c2T2xjj1q0hkmt3laNGOC5woGSc9h+eOKhllNwo3RhTGOOTkdutRstA6EbW3l7Zbe5divLq6gEdOMDqP6VFcQSzTbizYI4J6VLcWe5MMYnlOGDEdM9qrqZFlBViUAI288EH/ABq09AY63jgt3PngToBu2EsoB9cjtntxVkNcXFyx80Rh8ANngKOPqKsWaiaMwzoQpHJH9faql/aqJitozGPaAeME/l70011HsNgks4oSShknVud5GMDsP/rZqzFieAxXCKqk5YqOgP65z+FVLSxLMGcJu7Z46d/rWlJbOkRYOpj5A46H69+PrSbQ02U723t0EK2UTLJkh/mJz6EDt+uasXUJhaGSaaWdXAD8kH6c8jke/FNkmYI0mxckZGRkDHb9MVVsI5L3z5I9gfOREMgEei+hpRHe70LCSorFVJfBGD1G7279P1pbm5uYCGY28cLE4VV5J+nXNS2CQS2ksJRVuiACH3Nkg/eGOP8ACo4zJE5M8ZkKfL0O5c9x6/oaNGDWhRKO7I0hLuw3Lx0HNX7TzFhMcchjL8kqeoB7iq0t1LNL+8kHyqQmBjGTj65otjyENwFkI2qy9vrmm02tATsi4+5xKCgDKc9STgf55qgnlPJdxSHCkgkcZxjqCfzqwvDnzZCCp/u/eGOvWqF3MbW6M0By4yrb0Byfx4oSES27fab9WOdsChWbb1wTyR9TV2G4meGe0smiED4Z2OMyAHOFPb8wTWVp8n7o2+4okrZlkwckDsMc/WtJXjLAKxMS/Kvy9h2z2GaGtSokTSSx5ePftzjGelSea5UFjhu/epxdrH8hICsfmOwMTxng9aaG8+P5QzbeMoQAAP1/SgTS6EsD5CNI6qpOMgYxj3/H0q6kySfvQwDAYG8jkZxn3/8Ar1mhs74EQN0bOepPvUst+scSJLZQIyDBJVgxGfXOO3XFQogkUdTmdTIyzKFGFXI+9jOSOxHasV5mkOXO4/0qS4kaR2LYHOcAdOfT0qAAE8/zxW0UkrCbHhzu3Zye1SKcrngn+VVu5A/CpUjZY0dj8rMQPfH/AOumK5IThRgcnp71Kq7VAyCD71CeXUDjH6U/dlSDjA54NAx0rFkwOuef8abECWzye3SkycADGD71t6JbRCPz58FycIh5/Tuf6Um7Ia1LOlaeYwJGQPKw+Uf3f/r1ovKXiHy4XuScbTzwc96ntbmO05KHcGyuCDkD2P41T1N/OmgdT+7mky8QHXAzn26fjxXLK7lqVe3umlBFcR2qSyK4ifO1th2tjuM8E+tIG3SbX25I55689Kcss0yxp5qrGoJCu/A4z0zgH8eaS3mt5pQrIVmB+VlUjPsc8de9SndD02LNtAhIjljmjycBwAVP6560rzPpepqIlhklhUFuQ6lj0HpnH681Yv7uKwsSzagWl27fs6xBgAexPQEkDjk1iWa3DM8xIV3O7BH3B/LOPwppNq7KNVPKUSzsreZ95uchjnoueQfzpqzhlEmN0hGACxH544HHfmqMkjzrHErFkOQBjGcnPT1qS0lRy/l5XYdhOOpH+cU4x6jj3NEsucxxrH13HcWyfc9uKbb3UJvEWQSBQrZwflOMfjmmOTJEIywKA56Y/Dis+6uVtF8tY2e4bG1PUHoT6Clq9wbfU07rV7eHT8yqo5LKoOSwHYd8579hWZpVndagjXN3OsMKv5ixsxBkJOePb61Vg0wzyyz3so8wNgqhAAyOgI6enatZbWD92LYSQyjADKxKt7EHileNNb7iT6slFpAqswmlVmyCI5CP5cfhVSfzoSq287u7H5VkUEDHf1x+PWppbiKBZftLeVPGTuQnOR2KnuPy96gt5UwZZJojIw+b5hhR1x9P5mqj3LVhqu0SCKaHcgIZj1yc9T6nNV547KS6eWbzN4wQGRueOFHbHFXEuoZHCK+/PB2gsPxxxTLOCQzRdHaRtiKW6A9PoOOafw7k26FR3SabyhA4aQZWN1IViAB+PQZrFiuVtoGgeEOUbcqs3yq2epUfeHQYyBWv4s1mFoF0+GJPMQnzJBjI+Y4UEcFdoXI557k1ya75X2rlmI6D0FaxjfVkyaTsiWe6lmDBmO3cTgDgZ7Aeh44rTiRbTRpXWQGS5UK3A+UA9Pr0NZ9vNc28ckcEqoj/AHhgHP8APn09O1RhGkIDOWPQc4xVEJg0p2iPflF+6Pr6VMFDyorILeMf3Uyx+mec/kK2dHjhsNPe5mVRI3GSOR7D9aTT4F2efICZ5HAXI6Dnp7//AFqXMVylS20ecwtMH2BhxHuyWH8gfzqexIimGA+zaUwBkg/4/hXQw3caM8fkruYYy654H93sP51kX8BW+ikt32BiRjHGR2/zzUuXcbilqhbtcttgJBI6HPHXPHp/KpRayRKPKkLFsZDDoPb1+lUpLstIplRenCMxHPTOevXnHrSW90QsrFnMkY3J3GCRz6n+h9amz6Eqy3NHTbuW3vTIAVMXCg9OfUd+Dmrup3izwKw3AHHyHoQeKwba8ijSUSkgsd4Y5JbPbH5nOav+bAbaKIOdkbbyT1OePpispwblcqMmk0a1p5bER+a4kRRhuuB6c5/PHtVXUMLcCbzFcgAPtXp7/kcVlTXzC2kkiYMSQoK8Mpz3B9uamsXiFuRJIXkPJGRnn9TRGLWouZvSxOrZRnbrgbTjOPx+lJarDLu80EgnAKnoetIjKzAHaIwNqAcfnUlg8SiYjBB4z0x1/WjmsmkOm7uxPdtH9lwWJbcNv4Z6+/Ws9UZoyWBUjpx2qWKIERlyXd26Drnpk1cvNqSLGkewoMZJOWPPJP8AT0rWEeRWKduhWcFbUSqzEKPmB5xWe9yc5xuI4B54q9KT5DLnAP61RMabyVHFVBNbkLQi815OOcE5P/66eIeOScmpETBHpUkf3gcZzVDFwYoQA23Ixn2pI9pxlgzH36UXb7ztUDCKBk9sc07T7dru5WGIIOCSzttVQASST6cUthokF0FG3CjtweDSPLJJKkZLs/QDr+ApbuSG1maG2mjmBULJKqYznspPIGOOxrq7Txrb6Tpxt9I0xPOHCzyHeVGexPOPwHNS79ENHKNGIwwZGLsAO4osSkd7GXJ2KSPp15PqKsa9rd5rV55t4QFUYWNT0Hpnr/T0xVWy3yXGEUDA+Y56c/pRZtaiLWs2zW88eXJDg45zkf5NWY4VtYV80lQTkMuRyR0q7pemtf3dvG6y3Gw7VVRlV5zz2Az71Qu9TaWe5DQxIFygQDdgngnJ9ulYWkko/eLlstS79sdvD8mmxW8SW0sv2hZJY8NnG0gHrtwPz/GsJY42keS5C7iNu054A7j9KuC6kaIAj5VwOuCeOw6VTlEolJwCWHKnt/geKIKSWpCukV7xopCnyNaxkfu8IdhwcZz169fepb2eA2q29vGYolCn53LMX6FvTJ7jsOBUl9qDX1rZ208p8q2XbFHjGzJJPPpknv1pILKS7nW2gRnB6oBkkBScj24JrTyBkM93efaBcIwVcbB5ZO3OOhB78c889agMrzOfPcGQ/dGAOuOvrx27VaubWIwfuv3UicbGPBOccH1qAxABVIPmA4P/ANb1rSLTC7IlRTuCKpI7d8+1JCkrMpHGDjBFTtCfL3cEVPErYwpwB3xmqTLMm7jLPIZYi2wHO04/zxT4ocWwcHOcMBkZGD6+ntV+6BUIpdXB5HGM8+3WmNDuUuAAASevSgiwkNyygKFBAHB6YrSsZ5IQzBQy4IYfX2Pas5PnOwIMnkVNE7Rbs9D60WGavlSQlZYPm2ZyCc4zxjPeqc0TT3KFpAPM43EE4I4x61JYzBmZNwXPOQB0HvVmVWkjjmjXc8fPTqvuB0NGxRR+xzIokUIyMSAck8jt6+tReRlNyyqrd0Gcj61oXBdI9xcEnDHIyOP5HrWTcHcjyL8rA8g/40yTPvrp0yFYseR+tUnuCwGfvYxU7FArbtxbP5iozChTcVIb1HI+h96dhaigoxjkRiXPUHt/jU7PEmVGdzdX/un+tQmGEoxt5gHzn5uP/wBdNaNlXdK27PQjmmkO5cs5Uj3KjdR95RW/4ckDXMkaK/zxPnPGOM4/lXMxQHcvlyNu6/Sun8PRoNVUxyAllZSxz8uVwT6++KmSW4R3EZQpYnrnNUpSMnFaV2kILBZZH29Ds259+eRWbIzrxFhQeueSatCZEaY+OcCn885NMbryabJGj3FX7dWVclSB156YqjWjps0luxaIgOT95lDY+meB9cZoAilPOdwOfcGpdHG7VrJR185O/wDtU24km3FjIr8kkOgPJ9+tQQ3GJkEliz45PkHJI9geQaYJI3/EEEp0GeYxt5ZzhscEg9M/jmuQt5I5AgldkiQZbjPQ10cPiCzk0+7s5Zi29doikJDZ6cZ4zg4PYj0PNYG22t3yJYXt5ACVJ+ZeM8j26HrUp9GW11QXotAHkigGwn90+Oce/vnms+OSCVilzEjEjhtue/Wrk+yYH7OSsOflXPQ/0qn5Qki+XBIORxTsImhdVc7TsRR1Cj9Kuu0t5oz+WoeOGVA7k9iDj8M5rJRwisHTJOQd3+eK19A3LZajEuNkkW4g9ipyKTXUcd7FDyQspE5JZTjb2PtmrNnFFbrI6srb8KF29M800YkBwvzZz0z/AJFXfMtxADgCMLlu/Pr65zVkktlZwXTxqUTzIssWZsDB7k9BWd4yTSpPIGnTPcXicSzKm2JgB0GeT9cAYqm9/cBpLay3qJTtaMDkjP8An6Vah0xoQjzKrO3UMeB7U0mncTaascnIjIeQR9RUZYA8iu7treCSYpLDG0fQqeRnPv0rP1DRbGSd/sqlVyQMNir5zPkfQ5MsPWmbiBgE7T19Pyq7f2AtrlogxJXnPsapY4yenTmhO4mmhwbcvP0psTNG4dfvIdw+oOaVRwSO1Iq5OOmRzQBbuJhcO0uAN5LY9M9qpsB0pysFJA+7SMPToaWwPUt2LRm2lV3Kuh3L33Z/r3pHUHODg1BFhG5PNWoYpZnASNnz3/zxUPQtaoXSrg2lyWcfu2GG/DmuoVfNG+FUYkZDL6H2rlXjPKsCMcY9Dmr2nXksA8tWO1uAM9BUyV9Sou2hrC1WMs0vzynqzd/w6AURW0ZkD7ASOnU/5NFt5rK8zDgHHcjvTre5Zxh1AK9CB2qTUnRdr7lU7lxjmp4DunywGMluR3GTUcRy245LHvnrSjOMDt+ualxuBammkkUDAIUknjHUdPp7VRuJ1jgLANksBjrj3qbzGVuQAB0z3qO88tbKTIOOpPv/AIUqcOVWElZGRg3F7Fu+6GyffHrUup2q2s6X9tGPLVsyIP547VJbEKEmGCyH6Z/GtWKPzYfNViYXTIPqM9KtytuJLuZF1Z2uowiW3Kh8cFf6j8frWDexzwEpcAh19+o/w9K6KbTlD77T93cA7lwThsZODWLrLPMftEud7YUg8YIz+lXFkyRmyDcgIxUA+Vue1TNwgx0z/OoXByc9q1RkzY8NXMdrqrSTLlPLYH5c88HNbOr3rXdjPcuF8p12hu7npwB0H61gaDN5WswHIww2c+4NXPFEMFtJFDbrsLjc/Jx1x0/Os5QvJFLY2vPt9P8AAGSE+2XSrGu7qFJJ3L6DBwafo2n2cPhGzuftKpeyznfGSPu9ie4GB9Oa5kLLq19HboSYLdAo9lHf6k10Flp008U08UfNqN7E9lBHboRwPYComlbl7jTuzb0BtJjjuLi9imn3LsiiwVDk8ElunHpnNYqqkt5IHKgZCR7V6e/HfGQTzXWaRqMWraTHZXMZbaWl8uLmWZySdvHCDnrySPSq15ol6jvObeHTlRdyxvcDOPUd+31rBrlZo7WsZ+h3mnWk1zHqEMs0cybooMEZYHAJPp19cc5rQ0aW4GjXy6baNcy3ExhZPJ3bQAf4gc55HYc80zwwLK/1+G11SVnuJ18qJ2HMMicryeCDllI6HjNdtp3hSzEU9nFOC7O7tLbsQEYYAOOcHPG3kccYpuL3QKNzjIre5SCW21/T55PLKos53AxDAGPQjocV1Gj6RDpto+s2MaajJGpK7mIIA67Rj73644FCeMv7IUWF6o1CaBiklxE4wQOg56nt6fWuxsroXVlBOsbRCVA+xxgjPb61MYpsFGNzyD4ka42vaFZyramNYrggnORkqT1rgdFtBqOq2tlJKkAncJ5jjIUn2r174pWFpZ+GpDb26xCW4EjlOgYAgHHTHNeMbgGLLkEe9dNJPlsyJrVXO08fLo+k6da6DpwSa7gbfc3IUA5wflOO/OevH1riYEaV0jjGWZgqj1JP+NRSybick5PUn19a6TRPDN7d/ZY7ct/aczLLHCRxDEOfMkPYdMDuPqM6WsjOXvPQ1P8AhFbqx8UaZo9lqCQ6k0BllnQn9253Hbxz047Z69K6zXLXWofBt/p/iQreweXmG8twXZGU5HmDrjI+8Bx39aw9S8LXNt4wgtdPvZZNVWzN8tw55knVuvsDjA9B+NegWXimxn8LyavdERCFSlxAeWSQcGPB757elQ+hrGKR5vqvjG4vvCOnaZZEo4gWO7l/3eAoPuACfyrkLK1E92kM92lsjsMyyElV9z61padb3OqfbYLdWTToXN5NHEFLIpOOAeSQM4GcVY1fQ2n18WmgwNJDPF5tt84YTKFzuUnjPXjqDx6UXsQ9dz1HwL4Z0jTLdbq1mg1C773a4bA9F5IH14Jrc1q0M0IljA3xAtg98Z/KvCdOsPEWnX4aws9Rt7tf+ecTDqcDPYjP4V71oZv5dHtzrMUaXxTEqoeM/wAgfUdAaiSubU35HBa5pqXLRXtw5CoMM+P9aSeg/ujnrzVay8+aURptt4pVIWTIVW2jGWz9D9at609msstnYXLtlmWV5HyrknO0e/61UgnM0LWsiS7WbL4U8ZGBknn0xwa53c06jtMtZbx2IMUe9dkTEDk9+ByenWs2a0t/7UR1BWSE+XjHVueD+vNaUscGmwyhJHQJDtUK+TvJ9e1cjeXc1ncSSyyb3kOVw2cn3q4rmJk1Hc1PF1lA+s6faJMZmZfnJPse/wCVUdQ8PW8kTT3TMkhPHl4+bHGcdz6etVba51DULxrssJJ4V8zJAAHOAD+Nb0Gt291psrzWzJdoRGQgJCjtg54Gc/y5quZqyRHuyepxV5odxDKY443ZgoYjqcEZ7d8c+tZLROoJwcYzmvXdBsJZLa4mihieFzjfIcs3qQfWuJ8V6clndgKykuN0ir/AST6cY74q4VbuzInSsrnKqxHrVgBsFjk9jTfK2g46Grg2qgQgYPJPTNatmaRX2sQck8c9KTHZj0/WpLltoO0nnGPeqhLAZ70LUHoPzyQcdOaQMRkdhTctxk9eenSnc8HjjkUxFmGd4sgEEZq5cOrGN1ySUBbknkZHH6VkhuuOOeeKu2cpVMqAWGBzzj3rOUVuO6sdz4Vu7e4sZba6QsY1L7cE+aADwe4xkfXiuB1CLyr6ZAoXaxAB7c9K6vQ7mWGCa4kn/esmCeMhc9ADxk49OAPU1y96TJcO7H5mJJJOc8k1nS0bNW7xRVds/jxUJJwM085KFhjAOP1601s5yO/I4roRkxKejDjg1GT+dKp57etMSNKxI2spx8pzycVZZXiR24AOAPx9qo2bD5geRV2Rixxk59x0rnloxqy1Fjc4wCVOB7URylsmTdwOM55+lRwEmYkkYAyc9xT3m3+n9Prip2dinqrsl+1KYXQogyfvY5H41XkA3Ajg4pgGGIJBApArM2Ryc4/+vVJInfQcxAUKxyaj35O0DNWPKVSAx3Y4OOw9ar4CMemaE10CSsPyVBxg4NNYnqScH2zTQemen86fHt3HJwB/OmSNRc8EnnknpimgYyy7tucbqmJ/dNjGTwaiDlVK54PbHWhANGC3J9vrUjkgEjoD27dulMQZYY70/nzMHHXmgExBh0+Y/wD66ikX5Pb/AAq5wVGQO9RtCWGRyu7iiLLhqVTH8pOetR4PAxyatP8ANuAwMfrUTDA56cGrTGyRcCNdwJbvUZweenpSoyhjuOBQGXbgf4UAKJNo2kEZHHtUjksg6ZA56c9ahfpg/ez6dakBG3Occ0mBEuWYrsJNKMgHaDkH8qcJShbbnJ9uopisQxx3oI2FIyMZHXFMKnof5VISeoA45/GlBDKMnnoeKL2KuRlcc5NEeMnPP9KkUKRjn09MU0rtyQSR70XBO4pAJyp6jBpmMHGAfemKSGOOvf3oyc55xTsMkUcZ4PPPtSMwbAJyOfwFIw7ZPPWmOOM845oDYRzkDJOOg78Ux8YwMEDrQTg8HPNNXp06mqRNyzBFmM4+8f5VLFJtIEuSvSolbacjrUo2uDz/AFqXruOwwcluOP5GjIwc/lUquUBUnIPPvUUoGAVHFICWMhiQOtEsqNbxrg+YhYE9ip5x+eahXO4Y60jHIP1+lAXAdPxq0HX+IsvQDJyPwNVBjJznBq3b7GMcaksSe49fagUSWPazcMw9CoBGPfNaJiSQBQR5oGVkTjGOx7flVWS1SJlCsuGJw46gCprdZkwY5jhSG5TOPfjmspvsynoW30+ea3U3SK2MkOqckH1qh/ZbswFq5dipLZGfb+VX4tRlt5lRlMkh7I5YfgvUfrVG+vEOJbSZ/Of755H+TSg53tLYd0ZkcjrmNdw5zgc4PtTSOuSetLGqkkyE9DjHPNNGNxLMB+f51sSmOPQA8cfoaT+IkdjTiBhck8gdjTQBgYPJ56UAxdx5A6d6cYxhsA7BSFSpIPBxjmpUnzIcgDjHNIS8yFVAwARkkDmrATjg8YGTjsKRVVmODjnjvV1bRDZqxcZlyOD93Hr78UpSS3K2KaOu7bztx2q5AnzcRhicH7u7H51UWyn8zbEN3PBB/XmtxS6oEkk3SLz071Mmhbliylks0keElopBhk28Yz3A/Sq5kWbkxLvkII2t0B7c9/yxT7eYW8rkO+xuowDTbW4jQlVQqd5IbA78/wBay5ew7LuSXtpPbbVlQA8ZA43A8/XpTrQW/lq7KAU3Z3NjOM9x0PSrKTBpPnfOOufQVmPmZ2YEIp4yTxijldga5dUX4k+1xswkPB+U4x9OaglikjAeJxg/MxA3YPQ/TpThb3UMPyOyxnrgDj37nH60TnyrZFAGCMhs5zntnqapJrVsuzWrI0nYrhmbgDvg59cVYt5k80ebIN4xsYY/8e9DiqbbzGHIGG4GKktlj/eNK+Mr0z1P+eKW25CeupM+/wA47dxAbIB5x27U2RHZEiQnzSQqj0BPb39qY1xaoAskAZivIyQc+3p+VQpeSDcoikeErtO5sMPo369KqMepaSetx99I9mrxBjuJBQ7R93nJPucYxjpzV3Q4vJtRMrETMGPQcLjHfpVDTbONrqHzPNZXcABVDH8iQO3ritnV1mtZEXy3t0cDy5J1VdwPPQE4HuaJq65UDXUoztIBE/liFs7omHHHb3x/n0qzHMTZfbVBREcRSmNsvG3OMg8BTyAfXj0rNvbhmkRWBbkAnHTPcU7U4USISRuf3gwYwOwP3ienakl0Y0Vbl3F+WJ2uVDHAByScgnPXqKeSJ5ApULOpz26Y6/SqiuzTlydzbQfXJHatLbHJAIpAFn27htG3B9Qf85rSwIkKeZG6usbDOBjBIBHt61marb+TGu0EAOV4PtUkN28G5ZVYqSP3gAHI/nS6nMs8KbSDubOfpS1TRLRchjCxoyTSrDjds2dffNRaeSZn2jeMluQAMf1qDezIMKxCjGe3TpU1qY9oVFzIc5Xdgj3Hr9KUk7aA0SyIDPGHBQZJ+ox/LmhowjkoRgKAO4P1PY+9OslE2WCjcpKN6g1K8WWIA24OD16471ndrQLaaENvM6zYLtjPKfj1/wDr1Y1BlktSxcbcYBYZxk9s81BtVGVS4+9kMVA59s+9JcgmPaSm3Iy3PI/ln344qr3Y4voYzqMkDkZwKruMZI6dq076GKOf/R3Z4Xy0bMMEjJHPbPHNV7aAzXO0A/KMt+Fa36iasT22l5CyTMc4BKAdvrTdZaJZYkjIyqkugTaEJ7e/Y1cebyrYzMwLgY685BrEbc7M8hPzHJPqamN27sQoYEbieP60BsNtGMn1oXAOWHHYVNY2sl7cbEwTglieMAfz+lW9ACBGmkRIxudiFHbP5106WtxbK52xnCgPnBC5/rwORUFrZw28eYw2TzvbGfw9quC4iFuyHbtPI4JAOMZrGT5vQv1IZZnkIyVxjHApNRkUNbmNypVxyR7EdR2qMRmML5hKqo/A+n4U+4UzW8iEHJHB29SDkVCsnqSn3LysxRtrkqMZLDH4YNbBu9J/sqItHNHeKfnn8zIPuABxxwByfU1iaKwu4413KGc+W+/op9c9hjmqt+32q6FnauGjRsvIOeh6j1AA9qSj71mVHTVjjM93fA20E00MZO3K4y3qccCrgi1N1ACxxxuSM8Egd+eTjj86t2kKxQpHEy7AdpweoPfH+eaS+lhhtzLBuL8nqR+fvmlz8zsilK5lypIs4iWUMx+RpMYC5PYetXYBFp8IaRgeMDn9MVQikRrQQqjTXEzbtq8kf/X4q7FZtjzrol58B1XjC5GRgfSrlG+hVrse011JGJVZbaFjkYG58euOwqIp9miL8Mzjmbk5zz3+lSXIMkIwRtcgE5wSD/8AWFRXVw8iruRBCAWRMHAx0ye5zn9Ki8gTutSYWxW2hkAO2RQxKcYbnIx3PvmrtsAMO29EC4GVyB/XtUWjvb/2fK8oYXDdXPQfT0HT61KkhhhG4+Yzk8AEbRz+nfFRzPVBFosiGdpvMnCzRkYV0wR16jNAWFXVrW2EmQcpIAR36DqD+lZ6yK05c5ZMjKg4zjjAq3CrXLsIVCqqk7nbaFwO7HjFS0+YEk3ZEDyhmdgqIB/CCeO3fms/xBfTLbRRiU/KwwvdSOQR6Cn620FiivHcCe4diSY1IRR25PJ5B7Ad/Q1zE8zStl2JPIHtzXRCN9xNtKzIyrSyMSe+WJ/nUu4zMkcCn7oQnoWxz+Ap9tDdXURt7aJnTduYqnccDLeg57j8a07m1GmadIDhriZghfptB64/AVo5pNLqQl1MmytZLqXy4gCB1PoM9c/5zXTX2lf2cqQT2y7QoZmYcnOOT/hxUGi2qxWm87SXOSP7tWL2aBYJI3G53XCAdiT1Ptipk+bRFqK5TDmWBJvLDv5THK5PT861rcT7ULPE7KMqh+U/n0pun2ZvraSIBRg8sw5xkDg+ufwqvaubW8ktbnaXX5Vf19xScuiewluaP2hsDzIJVBPUYbn8Dn9KhvJ90IkjVSqfNz8pz3OCOtSicKpU52rlycdMe/8ASs9JWmtriYDCtlV5+6On589am77A5O1hpa18tHl3oGc7uQ2c98j65qpE6szqWZ41JC7xj/PrUgt3FukRdNxPAPPX+Q/GnQ23lQqbgoufnC9cjpnI/PHXjmrbsTZsjeIzzIi4UnC8juf/AK3NToRDLcQH5wnIbGcf/Wzikj3u+I8hAxIR26+/9PSrFxHHawedHIyPN1XaOnoQe1TcdrIiijVYDcEhpZCdmOxHqPWrsGDAN6Bm5baeTk+uPfvUUSJJaxQSlER2L88dPTvnPH0qtd4MhjtDth4BCcDOe56mknrqCdjQAjWQQAkAksz4zz/Sr0kZWIv944yOgrPhVWYD96VH8Tp19yanUySMTLIzkDg/3QPQDpUThd3QNa3RYsQ7FwWVMYbkZLY7Dt7026l8yZ2JJYnv1qazkMV7Dkl1yGHOOhPBqCSLzrgqVBaRzhucEn09RWkZX1ZcdUVJX3ZABX8O9NVNowQc/SrE0YgZkdW391IIx6Hnt6VEofPUcDOP6VYgIEZ45Pc01CzN0GAetTffGCjhfXHAPv8AlQ0DrbI7A7GJAOCM44zjuPei6Ap3b7lbPBLZPPt/+ul/fLaqwUhJRgN6gdR/KrVpcQQu4kgWWQkFXd8AYx7cdP6VoTzQR2clvFEJd7sQ2Nv3u/PP4cVEptO1gOdwQB61PE4VNuTzVpNJvX3qIirJkEOQueM/maqCArGu5WB69D0HFWpJ7MB6AseCSMV0nhWOZLa8vYWtlhgZVkWVQzMD3UHuO/pXMgcHAPoavWU6xR7Qgd+eCM8D2oauNPU665vpV0JXjgW1sLqRtgRz5jAceYR6cYx05H1rmYIPMnUKhCN95uDj3+nSrD3LXFvHF5zTYQGQNkHJJxGvYLjB7ZNMuJ3iuY0iKgxAKNowMjn8efqajbQpvuJLb5zkHPJDDvVCSCZ32xqWfnoetTyzfvXjMzCRTt6Z5HFEUxjOXj3OORtNCTRNkLcRQIFWJ4y6r/CCwBPbnv8A1qy+qJDY28dkZIJVhMFxtYguCcnB7A9xx075NZQ3GaRyQjSHJxz1NKUHluFQtzkvjp2xj05+tLlWzIaRDK5lClgS4bgn+Ie/qfepo4yFGVOcdTzUQxjjkA/lUiyOeGPBGeh/zmtFGw7D3jC4JbIGD09aiaNsEqT2B9vrS4VWw5JXP4/UjsKsWskYD4dWC8Bsck/Q0xlRAwJCqN2MEmntDNtZ2wM9v61JKfnLcq59WznntU0d1AyhSny98np780tQK0A2yKTjKnnHerMihxkDJPX/AD3qIyJ1XIOMY65pxdAEbDlh1zTAr4MMmB94dPerVvqrQqVkAK+mP5+9MkeOcEMWVuoxWeU4cZOR1pgaJvkY79oHqOOeetQmGOWTMZ+8MspPbnpWXPvjBwB1HfpVu3vY0VBKxwDubAotYm4lvBC0JEyDCuQcZDEf48VGY7ezm8xV86IEjDdD6H69K1/Jt5AbiB1kLLyMgHPrjrWVfxY/eRg7m4IQ9eO9UmITU2t3SIwRhGYbjgfpnvVItt+UjchAI7f571PECgGQTg557UsqHnONpOCO4/D0qkAsVwCQ0YCuCOfat3w6qrqsbhzsLFSpGeSD0PpzXP7AhwACnTIrT0KRV1S23MV/eKBn+VDjoC3L8/8ArHqm6kHJq9cn9649GP8AWqkvQmlHYTK7d6jYHJ4NTqeSTTXOaqxJGOOMVagwV9xVbjNWIOMHBpoB0x4p2l/8hGEj3P6ZqGY5qXSSftyZ9G/kaGCNyLTLe/0nVpZoVd4LdWTK5OSw6Hr61xd7pscTMFUjnI5PSvQrSUW3hjXpf4jHHGnuSx4FcSVDrgA5JyDn17UJDZktp7xhmSVhg49fftToLW4UMWmMYxg8EZNbVq8YgCEBShyw67vc56DFF5E4myFIRsHBOc0ra2AwpRLDIPP2uG/iHRv/AK9blkYvsFwYCdzwPuz6jFQ3SQzWvlSkLJ0AHQc9fY5NV9P3WbEyAtGwKkgEjBGM+ucU+XQadmOt1YRI7MVVhjOOtUb+481o4LfcSvGPUk9av6tLHYwx2tpdpeRlNxmEZTGedoB6HsT+XrSaRZwxv5l1OIZiPlJH3Cex/rVeZL7DtMjTTvnlQGZ8Zc/wj29qu36mSZQ2Cu3KnOKf5lpK6+ZJ58UZwRgAkd8e/pUd60TTBogRCF+UZ6j0qWykihGroXwVCk8Nn+lTQgu6oWBJPXHX6+tTrDF5ZlZcnrj19uKrsyqS0YKFugB6ZpXAqeIIUmKMmGdE5PtmuRmX5sj34ru4gjjC/f6E9f8A9dcfrEJiv7lGx13jjHB//WacHrYmauVYejc+9Mb+fFBypyM/WlCF13KeRwRVmYxcd+lAbGaQ8ZoVh0Pp+dADjypO7nPTHau+0yOGbTraVSciNQwjHzOcY+g+vJrz0Megra0TXHsUaGYM8B4GMZX/AOt7VjWhKSXKaU5KL1Ne+sXvHkuItu2MHKgk8L3z3PX0rBlfYw25yDx/jXV6XeW62k06yq8CplucHucY7GsG7tSYUv4ImWzlbgt/Acngn8OtY0qj5mpFNN62NCxvHMAZQC44Of4ffmpPOjiB80O79cjAwD/SsLz23ko23BPT0/qKt2d4JMxTuEDYwdoPQ1tYal0Nm1mE6Fgu0AkAZ/WpZAFBKqWbpkVWs2WN9hOQ3K+x9KuL82eSvbnv+NSUiLczqFccjpntUgYBCrgMrcEEZzTvLBGS2McHnrUZi5OSeDTGVE2xb8KMBiAPatLT5F+xkKo8tRyo461m3ikPkH5fp1xTtLJLSRscKcZ/GoqR5okl9vMdv3WWOTtA68Dv7VmalDCLVJbpCwJ3OQOpPfHpV/hLg5c7BiMAeh/XPNLrCxy6ROqg5VcDnoR/+qs1VSaQua2hw0zR48uMEgk/N0yM9MdqhkX5m9v1p04xtPbHH+FJIcjPrXcYsdDIIrq3kPKqVYj6Grmrs19qpWJi5OFUn0FZhztXHbitbQLZ7i8kdHKeWvD+hP8A9apm1Fcz6BfSx12kaZFp1kIHU+a3zOxGCfp7Vo+HbBtQ1yKyO7yF/eXBQnG0DIUkdiccelc6Lu/guDAximITcGzjgn+danh271qzaZdLMH2m4zkMNxY9Rg9Af0rGKla8mb3XRHSeNNLf+1rRbK3ZpJFzvAC5bPqO/HOTStZyz2cr6zJbS28B2yz8b2BP3VYjOQAeeTjpXI3Hi7VzHNHqWZJEbZ+9jUmNufxB4I9Khi1K7e1jWa4m8hSWVWGEyec46fzqOXlu2DmmjoNct9OtZt9oF814zBLbxvv2EYxIjkdOBz1/HpPaeNNQtdOewTYsQiEcbhRkDBB5GMnPTv8AU81jaLqlvbTFLsrNayIU/eDdsPYj39vesvVtQtbaWWK0uDcRAgg7NuePT17VPvN2iTey0L0V69rNHPAFTaQ2XUMDj1B4ro4PiilnppF3G99flyRt2xxgduRye9eT3V9NPkO525yFB4qrkk10U6HLqzNTcdjqPFnjPU/Em2O7KRWqHcsEXTPPJzyT6dq5oM3OAeav6Joeo61N5enWzyheWkxhEx6seBUcsH2WUxBleQcEjkLW2i0QtXqzsPDnhqEGzEJi1LW7lBLHB1gs1z/rJT/ER2Xpnse/pNnNoXhG2eK71GNryQ+ZcSud0sz+pA5A9B/k+R6Zr11ZaMNL0hJI7q4lLSyxD95LnhVBHPTtW5o/gdptTgtfEV8ba8uUMqWsXzSMozksx4X9TWb13NI6bCeJPGRl8XpqWhhgUtjbI0ifeJPUL+PFY2paJ4huLO61e8srhIWYSTFl2ZPTcU6498V6V4e0HTdF8Z3ENrGBDb6espeX5iGMh+bJ6HA9uK4Dxb421LW9VkisLmaDTi5iiijO3zAeMt3JOenTHHrQn2FLRe8X9LuU0DQNI8SWVvvDpPY3cZ6O5ztY+3GMVH4D11bW4tEuUjxDdgo5HEccvyuB7Z2mpvEFy3huxvvCmpWizadMnnWk6na6MTkEnoQGBBPXHrVq0trHwR4fNzqAg1LUtUjCRwqQ0SxjnJPccj8ePU1L2DW/oep6pqlhpMQk1K9gtkPTzGA3fQdT+VYeoeMdHl0y4GlalbTXhQhE3EHPTPPX+tcRpngmz8S6faXVrqM1tdTQmRYZ18xcKdpCN1wDjjnAIqhrnw01XS7Sa6NzaTwRDcxDFT+AIqdC3OfREFlKz3EELIGQPuy4Jxzkk/jXUCSC8eea3WZbxXKq235RngcjnOB16Vy3hgzxgm4jYgrhJCM8D19veujt5byz0K9hhQeU8m/zByVBIHJ9ce9Y1LX0NKb0ucxdyT28d3BO4aQSgbepJx19Mfj1qtBaiWJEcb5Zf4c/dGfbvWnqWnsfMumliBZtyrjDcH06L6jmqltDm6DxFkcBnDOQOAOv1rRNNEtalm3MVtIyWXlQuYlSTceuG688E+v6VUuV33pkyNspVmjjz+9IPT/P1plksvkzb4ywkO4Fjxxnnmktx5Nys24nDbj249BTsI3dT1rULdBvSGJwpH7oZwcfdP071m+HbJNT1ASah/qGUKVP8eBjA+gHWkikt7mVBcQueNoVPlBOe59K1FvkZJEt1YQI3lKiDaD6kt19fepeiskXu9TiNQto4LyaOJi8KsfLfHYE/rVR++c81s6wRPeGG3h2BOuT1J757DpWQkTKzeYTgcn6+laRd0Yta6FUIGwDnPOcdsU1owpwcEetXQqq7MwO0HFVbjMkp6bQcAegq07kNEIIxgDrwfpTG4Y9eMUjnBO09KZnnvVEXHc+tSwSbHBzwePpUQyOT+NIT69epoGdHC6NBIBKwUbQFx1BBz/+qsi8yHYD1NMt7ySEcYYdPp9KR38wZJPqCe5JrOMWncu90RAcc5wcU1mG44znpSl8qfyNMOTknoa0JYg70uetHPf1pOP6UyS7p/LOGPbj61YDMpYE/Ln/AD+FVLLPmKo7+9W2O6X5yBg44/nWM9yug6MZJO0bT/Kkk+XkA9amAVUwpdlz1waZsaRv3XJ64NZp3YcrYwPuHOB3P0pATtB7LkE0sqmN8MR1zxQqc8n5D/Sq6BbQcjBs7cnA5prxqQMk4PTmg5CkAgZ9O1MVjg5+mc9aEhb6A6L0Dcjj/wCtTB1ORUi5RRIuQ3Smj5iCQBTBpDt5Vhjp0PbFR7gwOCSQcH0qViqqdvDd+/FRIFyRzk+goDyHrtB5PakbooJHXntSMuOTnNKF4GenWjYL2FZwV2kgZOCfYGrMc4cCMYWNRk/hVMggnCg9evGKkiU4YAcnj6UehUXZ6EjrGyMwBBJH/wCr3qqVPqRwB07irb4TK5BPt/Kqkj5A4xzj604lyImGe3Tr70oAyARweDRn0yfwpAQF+prQgkkChAy9e/uaaudvyjJzQ3EZIyRjP0qxARG/7wHOBketSBCEbBLDb2HNKF+TPr+lSzMjIQGGc9KhR8cN0NRqQxMA8DP+fegLhdxFO7nnKn2oOdm09BxQFhqMQxwccdqc2cKCDtwOabGvPfH0p/OShPfg0Mew0jGQSM03OB1NTll54H/16gdsk4//AFULUErjDjcQOtNdgOn05p4xnGfx9KgkPJrRFXGk8cdqliT93vAzUS559DWgsarbqB1xz70N2FErY7g8U5W29elDDBJFMz8hA70iiaT7/fioxnp60Z9T+dKmAfeggeFxyM8VGRhic8fzqRiMEDPPBqMk9ulCGx6KhA5w3U/SrtkkSYaQ7WJAXjqP8aqpbPJMI48bjyM9vxoljljUCTG3JwQQcH2pMa0NxDC0m8OmAMAsw6mqLTNG+y2+Zu3PH61l4JPOM0Dcp4yD7VPJrdibuaB+02lwk8jDzCOCDn8K1LzTZpbUTQo5jl+blcAn2J4z689+awbaYRzq8qCRc/MpPX8uQa3LXWzDm3WSeWxySI5OSpPcHvSldbDTRleSUtWkdvm3hQp+hqBguBkHBGeO34Us0pkkdmJOWJ5/z1oUErkDoMn2qiREjDNlSCB6nGPw7j6UMefYfrSLtZ8DNTMqcE59+aGUMxu6n2zTWRiAcD+VPBU8YP505VwevWgW5d0YIbtRKgYLlmQnqADzn61u29raLC7urF5OVTOdgJ7e9YlvaD7WCjDdt+7nofb2rfsQBCY25YDBz1B65rCo1e5Sa6lOIL9vRUXCxplh7n1/Wp7gRuArKM9uKjVFTVOGDKYwDj1yafd3DhysYV4wfSm5bJFt9EU5iI2YsRtzgcE457kfSmqXhVm4MmRjn09u/wDWlIkkVljjOM7mRVJzj096rTb/ALRHnOSMj/63t/WhamZejkVmZyQz88Y6A98dsflUCEtJgqSQcDrjn9KjikLtKozuIKttGeOmamt435ZllCDGMDv9KEg3EuJ5FV4o2ON3OGz0Pp/hV55EEPlBRJEcMvUEd8A/nVC+kUyoUU7sDdxjOD6dM0IHiR2fkN90hs7Se3HtV9Ck2tC3NOjhdoZUQbVBxwPf3qrLdwKrNCGfaOA5xk9P881HLLE0EkLYLdDz+lV9KsvtUzlj8idTj9KSiuol7zL8DbpEdAEZlViR7j86uXNorxu0e92CZJXHb2+majaERvmcbR91XT7vHGT3H8q09LmSBNjHdz1X8/yqdUy4x1szMtJhG0dxACZ4SJVJxjAHTHetIyRO6s4iy4/iXgg+o6YqnpyhbqeLoFYqox264/WrbRqu/co65Ax7Dim0+hcUV9RiSGExW90iITuMLfMM+2eQMfhWXFc25imEyvHNgjoSpPQdORWo1nEhM2GJYYyTwDWRf3G9yERRJyCR7HuacNVqSyrCwRmcH5f65q5EssyPMZd7yN8z7s5z69wOnNQ2LQwzlZ4hcROpR4ycEkj7w9DmrGkWTSu6F/LaI5JzjGOMD3qpNJXYkQyRul2I2iOdhfaT97Pf6Uy/jSJonSMoxAZ1yCBn0HX8KtXasuqR5YHzF2F/XPGT79Kbq8JihAU5HC7vUg5698UJ3E1YgZnc7Y9zKqg5J4ANSw2yyxsvlnzzlg+/v7/l196niYpp0RVSWYkHAzkDsT2HWiCS3YnzWaMoeAp4J6Y9frSv2DYrWlu8m51kZWUjOT0x396utut2y6oGzgSYPzZ9+v6U9ZEZ2CjMThiWHHIPcdvWplnLxiMq3C/K3XBx+YqXJ2Kj6kQZRjG1kPp35z+Iqre+UzqkrSFMgFY8Z69ee/oKWSVrKULGqyyFc7mB4OT0x/n1rPa6uCCocqecsGOTzTUXe4rW3I3C+a4i3KmTjd1/HHerulRyNG7qASGIz34/Q9elZrTEZJAz65q/YyTQae8isFDuNgwCSemcnoKqSdiSC9md3YEgKp4AGMZJqsSWJGfansNxy2P8etIq8/jzVIZNaWs11LsgRnYDJwM4H0FdRp9hFbwssKzl8bm+UZOO59PpWbpcYET7TsPQcgZq7DMQxVcn5gcenvzWE5XdgvbQuwRwszNNGxTORlePyz1/Gs27u1MzGKCRUzjk/wCFWJ5JhKzGdiPQt0/GqFwzENnGSckevuBUwV9wbT2LdjfeXMpltorpTwsbOQM+pxzjv2q5DIZINgVAS27IGDz2FYyWu0q8bc4z3GD+Nalms086xQ7GlAJy3QAA5P6fnxTklfQFvZFK7jltJGkiYhJiVbp1/l6/5NTaVEI4vMIILZzz2qG5lWeRYYY8HJJOe5/kParj/Z7WFAs4kbbyoXAH175/Kqd7WZaVy3EyRt50m3Yhyd3Q98HH06VSuJ59ScRWSExR5LOR79T6e1V47drkgyBkhB6ZwT7AenvWnAqIFSMBEz0/z1/nU2UegJEmjwpY3CSOzblIZpBkHjsMdKv2MivHm52GOM7c9HIB6DHU4waqxOhl/eIWVeSMHnHY45x/KoZWKu0ihQrHJUdAOen8qVrvU0UtLDdUI37YAwh5YAnJx0x2psfkxwo04HIAC4Jxn9O/vSMpkmA7YK598ZqO8bESqVGcjA9qbjfQXmWFlVbtBG4kjkXkY6Y+tWGlDHgKqpxnHp/M+9Zdu0yYcYAkGzP1/wD1U+TUJbGX/RdvmBeSyhvQ9Dx+lT7MXmaLXUNjaS3Ek0qXQyIvLCnDZ6HPt2wcCsQaxdJPDNayPFLFyrh8sD7en6VSdpr25ZiS8rksx4A/Htir0OnRJ5AkZnLklsZXIx29u9aJKO4OXYqx2V1ekyucKeryN1/qaurpUEETyMxmZRkA8A/X2/GrdtY3IOyxJnXcB5J+8M98jjrTbm4SF2troNBKDtYSAfLg8j0I4+lHNfRAkjS0Zo4o4pJ5Y7VrgF0VAUDDB6AcAcAehP4msvxJdJJdoMKZFwTwCBx1I9cZP6nmqN3NNeXLSbW5OVAGOO3P+PSrdnpn71XvgTGOSqHO4+5Pb9anlSfODk7WRBplhdXcbSW5UKpxlieT7VrW2jymJpjJ57rkqowoB6fUj24q3aPBDCWDsrRA4GMBlJ4yOgP9aZYSvI07KSqsAoyfuY/i9yeePTk++U5zabQ1y9S2jQWzJbJI4iTlsDrnPXPfoa57xBE9zqczRsHlGH3IoHGOgHatMyLuWNJHk8zLNvGDnJHJ/AH9Kr2gik1jUGXf5SIQCeTwR19+M0QTTbJ12Ki3DLIXKxRlkCbd/p3Pc1RvoZIpJJomLKr5GBwB6EdB7CuivdPtjc27xqEKRO4kdMb9pAx7nn8KzFvLUR3i26hdxIAUYyCMYP4ZPXrwKuLvsg5e4+FUuLfzMqyDlpOmDj26foKoalLK53jGVcRlxgbsfTv1JNaMAtbFJUt4y7yIozcA5U5HK44H45GKypjK0gmbBjUkIccNj0Hpmqile4tUgt5jFcRmV8kDu+Mg54z6VdgWORFeeUFkwI0Rs4IH+fSo7mEmYS6hEqM43Dbjcc9yOw9u1S2URa6YKxiReCkmASAOvoO2OSacrWEtCvd+UZA7SOXB+fI+6D6Y49M/pUgjjWOJiTsY4U5OCR+lXomVJR9nURz5GZQ+Oeeh+lOaJb6CAXDxh4QWaMvtL44AA6A+/eo5tBWuVdLD7XBVsKR85bIJPoK2Y8q80MUkKDO0tnORz0J7deaxo5T5iLCm+V3KiNBnb6Ae/T3rWiiijuIhPsMynDK2VGQcbT2z+NRNa3Grp3NC1tbe2v4ZY2MkIUh0dfmDe3b0x3FPgnSPdEIogkSl1eRs5x2UDvz/AFqKRDd3YIuEjeFcKHbbuAOcA9M8n60+0hkZMMDsJJYbR8+OMfT86zl7yvIu5W1OJ7gfaQUckAYUHJA9c88cYqSCwRUXLLIXxtDfKRjOe/8A+vtV2LMYd4mjMjEk9tvbHPQ47/lVO4uFE6K3385DAHGOR0OP6UueduRA27lqCHKzsFGR8u4gkEdelNhCtC4Fwm4DARRuz64PQdc0i3kpK2+C6kcAZHGckkj1PSgSoGZQWRsYBUgbCD0Pr+dQk+pSs0MutGsmgSWR0WX7oiTgge46HtUlhCluix8SOx+VyOhz/n2zVSKMxlUMjmMA7zIQRyOin0x3z1/CtjTVih06SVZrZ3wAkRBdiMn8B29KqXMlq7oWu6J5VhZnnuAjuCflkcsZG5GcjoPxx/XOnzdXQVwFjC7UUZPBPIGeB/iatxOtxN57FpPMf5434Xgf3h264A6CnpKYiskESOUIAdkLKvHv/L8aybsN7XWxzGsaW1mfliYJgbjuDAZ9SP19KzIj8x25+UEfWuv1KN59MWGSUpJMMxxsNp27vvYHBXOcdeK5tbebTbgmSMSO3Cntknr9fT3rto1Lq0tyToJok/4R9VitStyifvCqHnJ7nOAe/rziuV8ww3BZcna3G7np6/lW/qGoTJpkVtcSkPG/TOcNgdO3TA71heWLh225ywJz9Oea1RUmOWcNveQfO5JLYx1J6UhuG24BG36DNTTQB4Y1XAwv1qOKzUfMxdvoO9OxIxXBZSWGfpjFWRdNHC0aDeud2MfdOMcfyqLyVWRvTjHtVpId3yxr1ODSdmgKaLubdIoXPXjFOkkQLgIX9Of1qWSPdkKDgH8+vX2pghZGViAG/wBkdPpTVgEMW2JXeMMG7Dg/TFRSq0hwsYRV6nOcVZM53h5Afl6e/wCFEkyfIYsKT97PfNOwFVFycBN3fccj/IpXYfMGXHP1x9K0442eEMNhbOMjnBHrVO4gZFjbgM2ePTB7+1ADYdqA7YxIpXBXPP19qYJYsrhW3Z5zzUsMuxxvUYHVf89qW4MMkYIJ3sT7gDg/1o2EyF0VgRgZPAbH9KrKCGxk5JxwPTvSyK4+VSGB96FjYqrq4J6EZxiqjqK40RiQSeYCp9/549apzQyLMTIhAbADbfQdatqhO59xB3UtzJII1ilycAEEeh/rVWEyojSE4Dn5emD0FTM77iGbBByMev0qJcqwK59elTSRkE5wQQP1osIkErSjawAwcdM/pTjAhJY5zUMXyMQpPIx9auW0RkQ7mI4JB/xppAQeShwAck9R1x75p0Fu8N3BISGQSKSw7DIPI7VPHCeXC5xgEA9fb3qzAyMzBcoSMDPPPoarXoSWL3IuZgB0Yj9apSHrU1h5t3ZvdTsN/nMhwO4A5/WklhCoTnJqI9jRxb1KtNbNSAc80rj5TitLGZWHWrMe4A4OKiC+lWYAufm6UWFuVZN+eW/SpNNkVL1NzqCcjkgZqWQRHOMVPqFtbyrYSRwrHMrIGdf4unX3qbl8jRcvpX8gJuPlFwSM9SAevtzWGynJUgABj07H0roLiCRoxDHE8kpcgKoySTjGB36Go1W20vd9oVLy/wBwX7CrfKCP+ejjoenyjv17iqTSQWbZWtrXKCN1BY4OI+W59QPrUt7DGIpBLCyKMlCMgIc4APftz71S1C/v55T5ki23zZEVquxFPt3J980luYpYZBcMRN1BA++fQ/nmhRk9RXiZ7g4PBzn8+auzoLeLzp5QhbiOIcuxI7KOg9zgfWluiFg22lzMm9fnVWwD7etZkahHDKSGYYbcev41WpI7TrRbi5864ZUOThR/Cff1OKk1WGBJnCuS/QgDI/E+tMErWsrEKM9sjp71GziQZCkMT834+lJjQwI0agKyOzc+4HoatfalDhOADjk9vw9Kgt4fOm2xKTg849M065jBdyMIBgfN1wOKRSNCTE0gCSBIQACc5yfX2qrq5IAQFGIJAZOhAqqUXaI9zAjkkjv/AIVIV80xKCF2HH1z/SpAZHG3lLKmcjtjvUOqgXNoZhCPOTk5HUA9P/rVceYsQkMYQRnk+vtTgRKhDL9RWbdhnFXaGOTtscF09wT19qhifawYHr1rU1y0FtcqDgRSHIb0P+FZLLtLc5FbJ3Rk9GX5Yo3Xcw5IyPeqc8PlSlMkqvQ+x56emMVuaQ8F7a/Z7jBljGBnqR9f6VQ1Qxm7KxxGLy1CEE9SB1zST1sU0rXMsjv/AJNIo9TUhXqFHXrQEbaTz2qyRAxXIBIB689q6DQdTVrQ6fcn5DymTwSTnBHTrXPHqc9uKUdiP8KmUVJagpWNfULNrSVmjyYm6H09vrVIswznNXrXUxLbfZrzB/uuTj8/f3/Oop4PLIIJKnocfpSWmjKeuqJtPnJIDk/Lgrj6963bK6aZWRgA69TjGQc9K5aFvKfcOv0rVtJZoyJthAPHzLwfYUpIqLOgjwwUHv7fzqRkIlGP4lx1qCCQSxbowRnGR6c+nrVm5bywTIGwAPX/ACKzZoU7y3lZPM2N5SkqTjjPpmqumOPtE+ckKAB9aoXdzMskkrSEKxOEzV/SIj9lLMRvkO7GeQKq2hN7s1LQgR7wfnZi30J4/rUd5lbS4K45RgefbFZsurW9u+FLttOPlGRxmiPWLOaIoZiu4YIYYxWSoq9wk07XOXnXcMenPTuc/wD16rk8AZq7OvmTBISME8sSBUMsUds2C6yOP7vIH0NdaZjJakSqVjYkD/69aXh2+NvcLBIAYpmAbnGD0z/Q1lsxYnJ4qzpYB1CAlSQGyQOcgZNEkmtSU9TrIGglnuHBy4/doPQDPP4n9K0dLumsriO5Cs3kncAvfg9M8Vl2toUZWBCTYy3cHPOCPxq+xcKqqAHYfMvUdfX04rnk+U6LtIh1S3k1CO1kkjKxTsx80p8xYdcnuOR6jmrFhpd9No7m33zLA2yeHoQByHUd1xnHXniquo60/nM9/Iz5jZViU/d54AHQL+X4msD+2r1WYWk01uhXbhJCMj0z6deKmMZT32I5kb2u3lgmhWq2kccd2T+8IbknHUL2GMfjXHyt8uAAAOabMzM5ZiWPr1qIEscV0U4cqIlK5JZ2017dRW1tG0k0jBVUdyT/APX617N4W+F2n2eZdb/02ZW+VN2I/wAQOTz74q38I9EsrXw1b6ikQa7u9xkkYZIAYgBfQcZ+v4U3xv45WxafT9JwbkAh5z0TPYD1/SlKbbsi4wSV2ReOPFlrpFq+i6GI0lC7JHiUBbcEchQON/8ALqea8ebapbGcZ6k5/En1qaUkg5ycnPrkk9frmvQ/CXw1a8hS61xpbeNsFLdMB2B5ySfuj8M/Sj4RNubsjS+Ff/CNW0Sm3vUl1mUYczKUZf8AZQHjHv1P0wKn0Oxt9U+JWu3d08jy6e8awqzkbTjHbt1wOn1q/wCK/DNjZeCdRg0azSFkjEvyjLMFOTlupOB61wXwv14WPillvpWZL5FgMjnJDA/Lknkjt+NTvqVtZM67x+tzFcaylkkjTXemIoEakkgTYIAHPRvyrxxra5tbwQyRvDcoR8pGGVu3HUHp719IXNrKfFGn3UaExrbzRSN6Z2EZ/I1wPjfwvLD41sdVSNpNPu7mITkDPlsGA59Aex6ZyPShS6CqQvqYHxOj1SC7s7XUwGs4oh9llCDJBUAgt1LZH9cVyd1fS3UFnFKxYWsPkR5/u7ien44r6bvbOC9tpLe7iSaGTIKOARzxnB7+npXKa38O9I1DTYLW0jWylgK4njQFmUdQ3qcd/X8aFIbpu90Z2hxSW/w40C/t8rc2cyzIf7yNKVdT7FWP5Zrt/EFidS0q6s1cxmRdufoc/wBKdFpdtDpMGnov+iwoqKp5yFOefyGfrSSanAokL7wFJBO3jjv7Cs20axiedapZQ2kKRvPGkkSrCI48/KQBwfU4Jyc81Xe7jaNEjiOUKsrA7gME5yO54BByaZqtxFeKJYIpV3SEcjduYHrzzjHtUEcpjVljCxyIQUYccg4/w9eaxaLuV7m1muo52DsRkElmxwe3PJ7DPOKhl09o7NFklxOQTsKkBQe2e46e3NTIHlQeYxmRpNuM4OSOcD+tWLv96sdvPB/pBlAUxseFHGMnnOTz71Sb2JsivJYC20a38yZS0isduc/y57/mc1i6paT2bhcGRSoZWHTmuqubueVJRHFEEiZ4UaQYPHVs+uOKytcmX+z44bfcyR4Te2MueORjkD/PtVQk7hJKxq2dolxbWMUdsGwoJIGNvA5LfWoprVPte23kQPnLR7cAHr247U3T47nUIVVTHBFtIVU6kHueckf1qe5s4LaAQWzt9of70jc71AJJ/wBmlfWxW6OZv1RowsIzICRJz97nr/8AWrDu42jlG4ckcD8/161t3CJb3IVQWOcrznOfX3qv4ktpoZLeW5YeZL8xHQ44/Lqa12sjE52Ric5OQMHrVa4+ZcYIPQ+9WZDhFU9wRn8ajlQdRyeK0RkyiAfcUoHHFSkYz3z/ACppxVmdhnQ+1Az94il9RSfSgBBg8AVYAJK/TmoI+WGPWpy33sDnFJlRI9vzYOOTk/Smsw8w4/lSN1GOg4P19aGGMkfT60DGjnNKvTBoHc9ulDEdMDFMkntRlhzznFaVjMLW5SV4hKqnkHuMds96zrXhgffjmtUTHyvKU7oic4x0OMcg1jO9xo0/t81wrSwQqIQceu3/AD9KpXFwIwxO5XY/dAGMep9afaNbLYyeaT8x6ZPb/wCtWfKnmP8AuumDn2/+vUcthtsmWRZIWZmAPYbev0x0qtu4J4I6dad5nlgqM5Ix/nNRptOeMH+lUkhbigk4JHJ6Ug9SR1/KnR/f6c/lxSBNzNhgO/15pvQdrbDSTzjGTTkyuCaXywWABOaa/BIOeOOtSQHlgg5P5ClHBAzzx7ZqNZMuoGfzqWUfKuemeuf0o8mCEdmUbcjDcdqjQkjIJ4OBQyIAxGcDp9aWENj5s496qySHayHMTuwuOTn6VLFnDkdeDj8ah8wFwoUZH+cYqWFeoI68H2pWLjuhsikHjPB4NV5QVdf7pGQatStlBkHJOD9KrE5GMZAHHsM1SKkRnHbmmkHnj/PtTwAPw60A9j/KmQLEcpjg4pWdm5bP59PpTkGw52gg9KfFJGp3NEDk9+cUgZDHhmA6H1PNWpYkUA7wXPTA6UyfZMxeKNgfYVCZHThunTpRuLQZIWwxycdqVZGYYP8ACfzpM7gS4ODSj5V+VTnOASelMdh6Nycggj2p3ocgY9ah3Yb1JGOKbkFjuz+FFgdh5c84Jx7d/wAaQEAHCj8TTWYKMDFR7++BmnYVxxPU7hz71EcUhbOaQe/SmK5Nbp5kg6cVeP3Rz3yKpWuDLz0wcVdZOBgj061EtxohkyFJx2xUSnnntVpSu0gcgccioHUqSDQuxVxSFxjA/ChAAGyBkVGpJ6mnr2zTEKFbp/EaekYjO6QEn27USMUwAMA8+5oLGReMAAjtmkBdskSZJpfMVSvG09cH0HpxVS8K+bhc4X196QAgrIgx9D1HoafdRBpt8ZJV8Ee1FgKp6mtHS4o5oJEkjBYsNr+lRtZeXLGsjjZL9xhnn6jrTorlrfbiNcKe3Gfx71MtVZCsXb+zt45lUIARksB/EB24qMWsLoWiDRqoySecAcng1NZl71HECgtnMsjEcZPA+lQanK9vJLbIVBXh9rZzn3HGKhX2HYyyDk46dqbuIGMng+vSngnp6UjdcH1zWyFYWNRuU5AyeeKkkyFJGCOn4VFnv7U6YgH5e+M4qRCx84H0z7VY3JGQWB+UdPeqYVsZAOM49at6bbm8uVicTEf9M0LEH3H6UMa7FiwvQzurRr5nDKwPTHp+BNakUxnCxSbwu759v3nGf0FY8yRRXRiG/K4U8gEH/H2q/puoXFhMJiFni5XJUZA9x9KzlG+qHY244wuwCIJEGBx6+2Oo+tTxi3vb+4uLeJbe2j48snzNzAHJBPOOOKpJfxec4hcNHImG2nG7P8PqB6+vTpmla81C2l8q1LWiv8oCrtLLnp9KwcZLRF/CiG4a68wktHbxbvlYAJn245qibZ5XZjL1bIyCffpU95N596BJI4RVJJd8ZJ7/AM+OtEeJVAjyAp7gj+dbpNK4rPcatuFB+faMZGM/0otRLPEwdt6qSAWHXHv1FSW+fm7FTjHt7VYjxhlA25PbsaEVGPUzkRJHw2Uk56nPHp65qeK4WKIhfK2jIbIzu7VXvEkR2E0mWIO09dw/nUV5NuLKiAEqFwgyBx6jvQkQroqzKhkxES4OMZHX2rpLKJbO1SNjz1J65JrF02PDGZ1BKEbQe5+netHdJ5OG++W3demfWqk+hSdizJdD5lIAz/LFVUeSOQOhIH8qkQpErFsb274ycn6/5FKYRLOlvbB5GfaAEzkkjp7msr6BZy6jobkHUnl3Z+QbuMZOCOM/hVlbiOS4Ee50TqSqb2/IcZ/GqN8i2k5iclGX5Xwc4IqHL+ZHDGHjt3bDZOCQTjnuB+taKzLT6Fq4mkuZpIrJmEUeQZZOcD044z7c1hA7Sc885yf5mtXU7+2CJb2XyxqCHIxg+w9R1571kNsckqpHbqaqKJe49V+V3ySex5GPf9K349ZtbrZLLB5F4UEcpQfu5sDG/H8L9M9c9etc8z4icKCrcDB/pVyzW0e2ZL2UoAMjauT+XbmiUU1qCfQs3LRz6yDGwMa9D68Z4/WodXZfJiCsTls49AKpxHDEhjgdD3pI0aaZEZuF4z6DrS5bWEa+mSH7OkbKWUj8smpJ4o3XahjwpyMdvw7/AEqSJXcxxwhMt64GAD6noP1NV5oSztGWG/cQQnAUc/mPapTuy7CwI0gcKkcSAYUsQOR60Wc0mZUVAz59RgcevcZ570qQBMBc/XFLct5cTSKBuAIJ9eDTEl1Mm4uGnuCzkYHA64wP1plzcmYlisaHsI1wPwqERjZk545ocARAke/XrVWRJoaVaiWKSVlBPITd0+v196huZJHcIWZljyq5bO0fy61LKRHZW6K5+ZQwAH6/nVTdheO/X2pW1uAxySxABwD+dSxR/n2piA8DNXrK289zuJCqOo9f88027AbNtE01mibiERfk6Z3dc/nn/OKbatGWMcoMchH1yfY+nqO1QaeMLJHvUXCnhSep9R/+uprlHkshIF+aJt/HYdDWPLrqOw98yTKi8q/deeB/nND2eYTluVyTx1pQVZQSC0ZGAcnp+HenvtkkIj3GML13GpUktxXS1M2JmBXcTlenuM962LW+t9PEzqjs86GNiDgopPIGeAT06dPen28FqoV71gIEGRsb5mOOg9uetZUqm7u2EYGCc8DAFVdPctaaj7q/M5EOn2aQR5ztjGTnGMsx5PH4emKmsrbYpaUjzCfY4FWIlMMHlhFUDqFHX+poTkn6Zppp6Ia1JmKlMqOR29aWC3aZSY3QOOilsFvYe/oKgByc/nSggnkAjp0o1Wwy/v8AKhCiJgTwWxwP/r1GQeROuD6EYx+dQQzCORWUZ4w2fQ1NdzCXYSzMFHAPYZ6fSoS5XYEraCWihmdWbYy4dSO3PX8xUN9HDLqM7wEPaoxWLrzz7imuSzrtBOTjAGTk5x79a1tN0uSOGa61K6gs0j3MVlwXJUZC7euTwAOuOaLtajSZiajI8ajKDgd+w9CPWsaZizEsOvWrN1cNJcSSs7SF2J3MBz7kVXTIYMCPUe1aomTNfSIIEtyz5abPKtxgDP4HtUt3dW7XEe9woRWOd2eSenH41i+ZK+ELu2T0B7k9Ktx6TeO5WSPyRxkuDxz0x1z7dalpdQW2iLf9teSsiWysVb1OO2MH1HtVK5vbq/LRxxHYcExxrkZHf19a0h4faExpMwkuWPzRZACcd/f8q3bCBkxbWUUTytgfKpI+o7Hv7d6zc4rWI1exz9jpJNugMzLNIcFVOdo9CPX3/CrZs9UUYiEVyuQO6Mc+x4z2rVMlnhonkWOfnJyCARnjP9azW15C/k6fZSXG0jJLEDkEEDHYnnNTzTb0QloZlxdvEHtrqB4TkEN94ooz0xx+tTm+g8pPs90plTBwybf64JyT+NPsL24FzcTmxik83KhZZQAuD05+n9afNp93cBpJobRM5baWJIB+nb36VV0naQW7DrOd5GEzLFLtySiFQRgfqKybLdIZZjctDHI2GVB8zknOAO/61YmtrW2jk+1xMk8ZIT7OWXdg+p4A69vzq54ciAhkuL14o42X5WdQSQD1B6/1/CjSKbQJdCCHTo1BluZJIlAzGkhLtJ06449gPXrirEF5JGkMbxq0UQYJGFC7M5+b0Lc49hxU/m/aVt3YusKMRGByWJz8+Ow6cdc81C1xEtyYYbcS3LHAWRsLHgkkkjjHqMcfWjfcexmarMZrqOKJXLFRuCjk/QeuKR55Q58i2Xy4U/1c+CM4OTt7+3p1rTj0i5e6d0ILSjkwIW9uC3QdO3FTSabp1uQlyGu5SfnEUoJUjuZOgPtz701NbLUWphJcWiQ71MvmAALv+YkZ6ZHA9ulETFWaWNThhkgj1P5f0ovIRAzNuA38r/s8/wAWOPxxz7Vb0yNriORVlA2gFkP3Rzjg9fciqaSVxJXZDLJeyQ8OgjHYY4xxzjjNXdPsyEJnRmulIf5udoz0K9Mevcd6qNG8dwylgpb5cNgKSO4P/wCqp0aYTZbeHUc4PP4nqamV0tANSG9sMKZYkgbkMjEAjGeVxzVUSSC5Ftay/uJDubdjnB6+5osbeO6BkkjiklZuEyGOAPatq6t3uBDNP1jQrtXAx9B2/wAmseZR0Ks2QwEwrsKrI3XdgDp3APerMUwZgjDadpzljxyegHH9KZHboqRk3CeeTtaIKw2kjjJPB469ajHlGMsWZmXjGMYGP51Fu47LoSXKzRvbMytGpbcrNGSG56+4qK5RHla4aMIxGRGucDOeR3A7etTNNL90BgY+QHPAz6dh64qKSUtAyF2Q9yCBx75+nFLsJtDI7kW+5hK0jgLhgMBSCeMdTwetOCC4neRyVQnezsT8uf8AD/8AVWcGEYd9oKLz05bk9f1NXbeXzQVEXI77uCMHHHr+da2sCa6k0NxIrIAxMan7o6HA/T/69KjBLl5JApEh+baTlcA8fTpnjNQu6fKyShGHX05z6UnmB/8AWBc7MEJ/EOmSf51nZhctLMCmzYHA/i6ev5mrt9brDZgW944kcK7RbMcEdeeM4xyO/FUIlg8gJGvAHyswI3H8OMc/WrEcnLidpEYDCqeQwHY9x+tTbsNJpGQNXlW4uYiJFEg2g5+6RwMe3qM96tx38aSQi7jE0cbZK45c9cE9RjnNQ3KLcTqpAZojyqY4J9+v+e1TwR/vQkgIYJtMhXop7jv3P862fLZOwia9ax1O88yS1eMYwvl/cY57g85z07Y/CqNtbpa3LIDLEWBCnHOOuOeMYrTht5/J/cMjxQn7x747knn0pi3EkkUcjIryjcWKkE8ZPXt+tEJNOy2H1M++to4xFJFhk2DeoB+Vh2B7jjPt0qCCQMCgznrnd6HpWjdwxeQJQZC+45yMAjHYdT16+tZGSJv3S8kHPXmuiLTQmLKoDqpIAPJAHcU5JV+0FcgY4DZ68Hiq7K+8uFGT05/SokTDsWyDjpjuKpAXLpNsjlZAIegYd+OmKrq7q4IcuB178/SlWT5huIZNuByOv406GFdzhZCGAzjbkn8R2oAcXWU4lBRlXt3P9KZKY44xhSHbn5vb9c0pARSgjLPkHP14zSpCFZtw+bsSTwBmgCeNwpkIR8ELnLY59fz5qysm5lSNVkyuMkZz9PX69aq27pnaZG8snPJBx7U52w6quNuOnp34xzQAk8Qc5YFWUZ4NU5YmToc85GP89auMz7gpwCw9c8Gl3E43YPOCPp3FOxLM4hvM/eZB+mOamW1SaNiCQwP41baOKQszMSc8/X2PrVco6dz256cfT0prQDOIILKCcZ/zmlO8qELEqDkVZUjeQM4J5xTnXsvA7cdfrVkkDR4AIIwAMduKfsYqDgbRxkfy+lTLFxnIIx6ZoWNQ3U89aYFYQBslWGM9PQ1agjO0Ke/606OPypWxgenf8auwRBVw5GQc5PYVaRLGrbsAcD5QQfrTT5atwDu6ZHcVa81dhwAQee4/Kliie4dI4UZ5WIVVUZJz6VSYjN0syyWtxBErM5ucKqAksSPbvWnc6He2kUst20CLFksDOpPHbA754q2ltLp880GjSh7zHmXEseDsJ42r7AHr3Pt15ZDNMx3u2GPIz7+lY9blvawjTSPIxVVwx4Cr056U4ySxsGkU7c85XqK3/D8q6TczGbLq67WCAZyDnjPatmbxMiMkqQzF0jZYvNVWUE5HKkYI56daaYuU5W0t4LqZ0F5FCANylx1H+NWLjTykDyWlxDdKgy/lkgr+B5IrHez8raQSQwyO2Ks6ZaSXV9Fbxts8w4JJIB781aRI8abeSKrRQ+YGAwEZSRntjqDyPetA6bqEktrElnc71ZSw8sjAB6/T3qpM62F/dWN6ZEkjlKedEcYIOM47j8jUkgvDG6/apLmBl2IUlYcn+8OoHqOhqGpFrlNWe5uJ72Ww08BJig866jcHYnOVH+12B/8A11nfZYrMvbxAbRkByOc+v1roPDtrDYwJHBjd1Z+7E+tZepRj7bLKxBPmthfbJrSlCwqkrlWK3t1RmuM78cc4x9fU1XuraJVDIzAEZ9f/ANQq6+55Rl1AYZxgE8D361QmhnJyzseM8DjBPSq1M0VbgRKMr3xxn/CoPIU4CsCwJx2xmrMiwiIqARKDxx1HpUc4ihIY5Zu+D0pMohuIC4K8SSEYBJ6YqKGIKQpQ9cnvVwMrIGBOSwyc8r1/zmlmyo3RcZGADyQfrUsZGJPspCRRBsnczdCPofSocC6kiUL8x4PP6k/1qK1DyGZjk7T371bs42kkKBlUqTjHX6fqKgpDpLdFDuXREQeueR2xUKrblchW88Hk8YI/xrNuw0TttJ6449cmrNsXxGxB3MSMe2Oual7DRPuVtwTPIOe1NhwvXAx05pk0kcUZck5HYck+1Zbaynmq0W8NngFR6/lWfK3sI0dXtheWE0ZHzoNyH3H+NcSWZQBjkZrpLjWjvmZSHlTgl+56cY61z00jynJAwecADpnp9K2graEzt0IwxDAqxVgcj2q7e3D3knnhDtVVVzt6Y9apRoZHCpjJ9Tj9TxWrZW8UFlcXEl+scyrhIQufMB9e2MfrVNpExTZnjpx+NPkXCAsCMjIHt6/pUBkznGAP5Um5nPdj09adhXFJAzxSEn1oKHnOOPemEHHWmhDwT1q5b3kiwtCx3xnGAedp9fyqlg45oX2oauNOxeI+QEYODXTadq9o+jmK+DPdQ5WHrtwR3x3zXIxyMvAOQeoqxFIEYMhGQQR9R61Eo3LjKxt2moG0mFyApkj6ehz69quDxddyMzSGNnY5OUBB78jpWZHb3OpWl5cEFkQF2PAAP0H5VzzMynhj1qVBS3L53FaGxqN21xOZQI1Ldl5ANUQpLAk4b1GRWhoOnrfRtJMWKBto2t1I55/DFbH9j2bIQI2B6jDHI/Oquo6Cs5anKyyqHIwc9KtPpl6P+XZsn/aH+NbdloUEFx5sjNIy8qG6fl3NaxYNwc5FHN2BQb3OCuElgkKSoUcY4Pao0XcCSc9DWt4khb7aSRjcvHuB/wDrrJiU4cD2/rVp3Rk1Z2E4B461oaApfVYAACDkNn0x/PpWcfvVPY3H2e5WYAlk5Xtz/hRJXixRep2jXO1yXZERTgkkE/X3/pVHUNbSNv8ARPncdHbgDI64/wAj61zk9xJcMZZ2Lt057ew7CmBxuyenesY0dnLVmnOSTuXYvIxd3OSc9/WoA+Dx1pNxZj6UDC9BW6RncU5b2Bq1pthPqF7DZ2UZkuJm2Kvr7k9h39hTLO0ur6YRWVvNcSHosSFvzr1/4b+F38O2V3rOsxhLry22x5BMcYGTkjgMcdM9OKUpcqKjHmZNreoJ4K8I2Wi283mX7REb142A/eYfiSB+deTTO0khblnduAASWJPT3Oav65q02s6lcXt0fmkPA/uKOgHtXafB/QYLue41i7QObdxHbqw4D4BL/XoPbk9cVC01Zb952RtfD/wImmeXqWsqJL8gNHCQCsGe59W9+g7etegH60ClA68Vm3c1SsrIaQGBDAFTwQRnj0rwbxh4Tu9H8TRwWMMr291KDaMi9CWztyOhB/TmvfQtOCg4yBxyO/40XsDjzCIhC/N97v70u0YwRT/pRipuUNC1HM7xEsEymMkgdPwqwcKuWIAHJJOKpT6paRRkrMkjdAFbqcUmx2Fkuh5DH5omPA3r3+nrXJ+JhcMyQljKJVy5J2hOMdqhv9QubqKQqREof5dpO49se4/SsjVdUliiUXG35WBPVd5xjBPpjnBrPmbZWxT0lA0kqTTyeZgsn8WTngHHbjPtQlu0cSZU3LShyXQY+bb931A7/So7EXFzp+9RNkyMxHOMnsMc49sdKequl9HIsogkjG3jAZT6Y659+wqXvoJbFCCyljjhecOEkXjyyMhhx07c9PyptsFF26s4YA4eQjJUD0PbnP4VeiZrf7Um8PkFOSf3mTnAHrTbmyNg8Dx20yIyFj545LH6ce2aaYWKmu6hHdRLBbrJ5sbEK7HquenPeoINHkS2826lERxvKP8AxKcHI7Hmtp40ithJPCx81DF5e0eYpPf0z6d6xLx2lkS3kt5EKgbAePlB4DD+tXGXREve7LqarNY6fJJIR5km1Y1RvuoBjGPX8qqwyLdxSSsCsmP3rjhUjH8Kgd6q3SKliYJLeUXDElMHg/NjPqR2xUa2s9ugS63xxOcHGRu5HrVpKxLbGErIRMF+6NsSg/MSD1x3PNU9dumupVkZQEiCoPqOvJ561pakyxKklo4CL+7j2DoAO56k8mo7ewiudJuo5AFlBTZIWxjORgjvVebJ8jkJWHB564qCVjnB44qe8ikt55InxuUkcHg9f0qq33sn861RixuflIpuTwfw+tSc7jjkZ5pCrfgeR7UySPnBFJjntxT8e4yaTHUnpTFYSPh84qQZJ5zyP61HjryeKlTryO3FJlRGFT8y+nJpp5xjrjFPGclSeTTB2H4UDEzwQM8Uc4JA46Up6kDoBQCcAeppkk8HDrjsDn8quzScRqBgKOw6+9UYyVII7nH58VdKAKzHJJOFrOQ+lhrO6IAAdhOfrT1cFflBBBycdqHGUCnoMfnmhV8sHdzmobEw2uxwMs5x+NN+VHGWOR/OpYx5kuFHbP1A7VDcoCm4YBJJx7UIBQ6kkBiAeuKkYYQAggkZGfSqsYJ4HQc/lU0lx5iBCQQDke30oauUnckLDAPAPHPTimSncNq429Scd6hXkksDtz6cVOSrAgZ2nGaVrAQIoUkkjNSsGMWCVI4PB6VHg9OPSlBC5DA5/LmmQRn5cqSc96cN55zikCkEls5JzzUig7cE8E5xVMfkIrd2Uex6VOjNjBPH061E+AvAOR+tTwW7+S0glRsAMQOSPqKiw43uQy7duDnpkVCRu455qafhsjB5B/Co5cYDDuPWrRoxJAgJA69+ajK8mmljuyetLkjufzpkMFdkypztpd3HGMdaTORg4yen+FAyAcUWBk0EhjUk9j09aR/3zZOAB1zULv2UjHWmhix4Jxiko9RLQkdlVuOf1z702STI4A7ZqM8Egfz6fWmFuw5x3qkh3F3dc00twQD/APXpvJPep4bVpDl2CL6nnNPYncr5pRk8Dr6VpT2UULYRvN4BznPUZpbm43QRQxxoioOSoxuyaXN2HymcsZJ54qzFaocbmOfriiFCxJP3R1qfIJIOB2z6UnINCZLRYIDIpUlwONwJFSNCi2u8E7mPAPpVZWZVxjJ/zzRkMcg81LT3KJfIjaAt5i7umM8mq0kJRs53KR6YpXVtxK/Tr0qVJCU5APGDkZ4NLVCvqVWQoxGeB0pwHygDr1qwQGUggZOT0/WqhZgeQMfSqWoPQkCbvXj9asJbSm2kkUKEQZJYgZ/CmWbRyOVlyDjC89TW5pMO6RoygbLKyhlJBIPf2qZSsBgR7x0VuBk4z0qRWkwW2vtBxnGefr2q+C0OtTLt5DtkEjpn1+lab6lJa2c1rHIXty3mBAQRuIxkH6e+KTk1sh7GEJmkmjkkIaOHkbj75/pVuLM4Dz+X9n35KZwHP4c/1qpt898Hqx7ccVfSJVXEikR8Y6cj29KOZCTK0aR2155trKrLg7l5G3r36ke/WsssWJY5yTkn3NdRBHCYWWFV2ng8YOPqea5u72C5l8oARgkKPpRCSbYEfcZ70vy9qQMMHHNCgnAFaAKOv4U9AS3PBFIgGefYH2/zinIC2eO4/WgEiWHYvLEIoxk46CmR3D28zvbysBk4YcZFaukWK3TurEAYIUk9W449zz0qK701Wk2xIUc5OAD29u1Z8yvZjaZmRMXmBYklmznrnmt2KBJkaW3KNIMH5TnP4H8uxrnSpVirDkHBq7psvl3SAk7GODg4x7g+tOSvsJGrHjyz5iiNedvJAJB6A+tOnuJJ4kilJZUPyhzuC/hTdSe+Fo8Zxs3bSSPmPfp/WsaK2llO3cofPAZsH+VSo31Y3fY1IzEsjIrLCTyecD6554qZMcFLoHJ/iRj+vTFUYbS8gJOUdO6k5zWhBHE2cjY/UFTj+VUy0x7Mwz/pEGfof51Komzg+Uvbd1z9BTCJFDK6mZCODwD+XQ0tqWVQo3PGnGQMsvsR/h1pFFS5Zmv9rKJWA4z8vr/+unTOIyLZWCEHOAOPwPcfr61BesRftJCS7YyUxg/570mn7ri9MkwJPXp1x6Zos2Q7t2LBWSFAwYlTyF6ZNWWnLIFVQw4w2Bgcd+2adfLuKhVbGM5x3oEHlAIH3bQMH/HP1qG+garQYkLb97r8vsK0rW5lgu/MtSIZSpyyKBwPfqD64NZkj7HVwxCYyfQ1HK7SxvhzHAccMfmcn+mevtSauwSad0WIVE0puZMkE5TcSf8AgR9/6VSvpsYGA5kYfiBnippblhFhgEQ4BPtWe0c0lyFGXG7Kkc9fpVRWtw9CzCYGiM1xbqqoflA/jPpj09afIYrhZryWURhCAkS/eY/jxirmpPFaBFnghndGyCJgQOODgcdTk5PsayY1fULwtO5Znbcx7nrzVRKemgy1gku5T2Xgk+grYFnbryI1Jx1Iyf1qaOFI4wkShQOMetR3ExjQhQGfsM9KL3GlYxN26RzjqSen1p8RUZwwGOTnjNOjs585Kj3IPrmrsFhEq5kId/0/LvTJsxsNw8qErhe3ToPXNWoxJ5rZxsx97OSTTDEgjKpgd+gqWPIUAnkCotZ6FK/UeEd2HzEAelVNVfy7fAAJbgH8O9Xt21SSQBj17Vz97K8k7l1IPAAPYCmldikrEJZuVA681Gc85J9PpUqnpnkikzubpwP/AK9WQSIW2qSTkDA5/wA/5NI4yAo+ppRk47dz+FIhyCT1PWkMkjXHAwTjmt20heJVRVGAMknnk1iRY3cnODmt6RtiYYscjjnse9RPzHZW1IJohMxaYL2wV4xjP+NLby3cZaOG6BTHSRd34ZNOVlGXfaR0OeP8moJbiAO3lrnJyMCoV+glfoSQzSxN5L/KDyAvIx7enQ1YMzRqQpHPXv8A/qrNW6IPAGD6AD86txoZFBckA8/X/wCtVNJasq45fNuicZOMZbtgfzq7EEg+VM4AGTxyT/n8KWFswhIwntyOB6etSSJE0bqHy5xkbenvn0zWc9bIHqJFmQ4BIYKTnPX2pONwGTk8Gnjy9yrypAyT7+o9KiLBdzHGR049/wBKa00Y46aEjD5sgAelNH3uPpTkIYZY4btRcywwEKwLOPvAHGPxq7l3FOMe9N82NH2sxB7hRn8KksNektFdEjQxschSSecHnjn9ay55w8jMuB+PJ/wpahdG/Z61a6XIk0FnbXU6kFVkBcKQerHgE+wGBWBqt9JqF/NdSpEjSNnZGMKo9AD2+pJpkbeY+Bjb3I5wPb3p11HH5yC18wqwAw/JJJ9uMUJJMTbZXijkkb5ELH2/z7VLHZyyDjZknABbBraNq1jCLeRClwsgMmT39PUfSmlZYXaNWR5GJVQOhJ75HHBz36UufsLlMq2trmSR44Yy2w84PC4z1PQfWtG3sb9t8YnVNvJ+csDzjgjv61chsFig2qsZfAVuOrZ6565z1OQAOKlujHFbpeSEI2CQASd+Dg9ff396h1OxS2K1zot3kyNfRtg4LLnkj1J/nVC5NxZZBvIXLDaURuTn1xwR+NJEb7V5pArhUU7juJ2rnsB61cXQVt2UzyRyt6ZyOp7U02viZN+pz80jOTtO7OAew/KpbS9u7NWS1upoVbnEbFc/l9K6JtLtZxJILTlTj5ARn6c8mtKLw7YlkQ2gMrnBXczbc/TgEY6cn1xxSdaKBJ7o4WS4mfcXmdtx556/XPemo7Z5Zs4xwa7f+wtNMk9pJAschOA6kkgewPX17Cq1naadHcSWepWqSyIT5Mm3yzMmCAeOhHHHOaarRa0DlfU5YTzoSvmMQRyC3Wra3sjJHAwWSKMlljUdfdsdv0rdfSrOPYptVUyYGCMke4PpUF7CNNnSeJFWBlCSqvA9Mnv/AC5o9opaIFcoCfUbgu1vbshAyTjoCcd6sWd1/ZZ23Vi29hudjITvxxnjtzzyP61oF4/JhlOG25I6fJnnGPT3qxfw21xbKCJDIyKwZcfI2PU98VDqJ6NaB0M0aoboN5gZ4WbAhhQIh+oUkn6kmpdT1K3OmxRW2xWcjzdqnKAdumB6/lWfc2yswa7UW07H5ZguEk+oHQ+4qq6zx7TcLmM8LIckHHoavlUrMZpWqAxyPkiF04wVk3Eex4BOcdD6Zqvp9vZwGZLp5PNDAAxn1GeAeCcdc4p0FvFJbeZEs4Kt87xSBkH1HUGlt1hkluJJWXdEE2LwFfBOUPfdxkH86E03YEhs1wzCK3u2U4XcH+92xg5yc4yMdKuW0Fvtt3tZhnncjYHPsepH/wCrmq9zFb3CPJbBkIkATgtlQBz65zn27UKq/aCyRLGBgFH+6T3Iz0Hepk01YV0mX7JRbTNhGWdm3Abscc9j36VsreSSRN5zQo+PuKNxOO5x0/nWN9mkk+WKISOpz5T4Lc8/LnqMZ9af5ccjopVo34yG/PH04rJpPccZatotmYudzKSCdxPJJI756/WklYNAQoOAc7NvHQ556+lRW4BGZHjVVyT0HOTzVq6tYyY5LeYIXAG0rkKMDn1xUaXsEI6OVyrJO6xFUI4Ib9PX8ae+ZY90gAUAEkDOAR1qMxLFG/mK+5zlTjBIzjj0oMLQ2yxiQESfM23jBHTr17f55q0k/kJa6EsdqJJAjqxBH3wucsOduemcY47CmLBI0yCLqDuYdMADufTrVcXMgt2UFjHGCQPQnqfTt1p80jI0Tqx3sNwUHI54wfbn8abTbGvIhC5tySW3scdAfyPTOKfbgxyHzCChXGB359KbDD5kUh3EopwncE8ZI98CpypVZcE5YANjvjpx+FU7dRaE0ZWNm3LgjqrjOAO3ufypbiQeWgJYYHGM898Zx0quzyeUiqSGXgp1qWUJNlGBDdDzn2+mKhrUEx1ukkhVlUkkgYBwfz7/AOferQsyI2Zid/IVQcdB1z9ahQrGhU5XHXjIx7nsealdw8kSxOCvLFfpjH9aJtrYpiliEkjIClgOgxyPb8aZEpjuIzFErHIJk5GT646k/h2q5I32l5mJQtGgIwoUEjHYc9PzPNVRcOgZxjOMA4/i61MHbVbjW45m+0amojRoiU+YAbSOvPPOOlUb23kS7Cw7kG4L8wx17/THP0q/bymaSOeJx5/O1s4znr157VUV3EkhMgWPJzER198+netYzd7iZWWOR5fJMY3diT147H8KqXFsxJJRkB4G4Yyf610F0xVWURxrIDyuOhHrjjPtVO6Z5lwEJCAfe5PHb6VpGTYrGIE2fKDgZAJxUgAVdySksD6f5xU0i5j8zYOwPP61GqrnPbvntz1rVaiuL5rHa2CHHfp7UEl/lwRjvk8mkZGyduCOgpyI3TOT71SQrjlWQJ91cDrTt3B3EFiKXDxjLAYPJowgkyMEnke1FgGwoxdWY9R93sBipPLDRAnClf1yelEn7xjgntTlKxtyre/1osAyMqoYYHB4yM4IpzuGAC54BGfWlChMMpySeR6n/OKcEwhyOd+CPanYLlRViVjlB6EZ6VMhjOcKFPrwabNGVmb+fqDQF45/XtQkSL+8jGeCp4HGc04W4I3ZOTj349qdEMhgScjp6fWrCRKUJBPHB5rRIRAItuSeeOPpSBm3ZYHGMVbRPlwcH60/ygRyhGOnWrTJKygEgrjHGQf51O+ox2MKwW+6OebKy3Hov91PQep6nOOnUCd+1PECyD95F5oPRemSRgfrVct0CdjQ8JpHHqNyR8qtDjJ6ckd/wqppGli4WzMaqXebYeO3vS3cZsLRLJcCUHM2DnDen4D9a6T4ezxQ6larcxb4lff14z0/HiueWzaNFueq6B8KLCeET35Zd/IVQM/j/wDqqv4v+Eli1k8mlsySIOM8j6GvXYZFmghkhIMbAMuPQiluMC3l3/d2nOaFTSWhl7R3PjDXdIlsHjSdSjAbencE/wBaraSyW9zHLMxCJKD+BBr0D4i3UV5dzW9ugZBMX345BGRx7c/yrgWiaPeMLtbqG6HHSt6UJON2VKyehV8bsLjX7iWMloZSZIz6gk81l2Us1u/7pjge5GK2U8u5T7LcFRzmOTH+rY/+y+o/GqE8DWbSJMhDqcEevv8AT0NaKFiG+puabqCMqOzEMxCt04/+tTL/AGmaUnnLEnjPNZ2m2bTWUlyJGDIQFUDhiTirqtubDYWQLwff+WaEgeyKEe3PKh1PHXBH0NSmKXJWOdsL0UnHrxUU8sgZkCgZOOB1+oqB51f7+VYHGVFDQkwmG4MsyYkUkq/qfTjiodyKrtGwBHJVqs/aItu1mBx0OP8AGqV3cfPtVA2edxrK72sUmV3k/etlWRGPIT+lTu0mS0QIUgd/6+tRrHN5bOQABnj61ahA27iNoHQAdaTKRX2zIm5c5zzn6dKbCrOeIyCevOMj2960/Mie3K8K+fTqB2z61Q2GIq7k+XuwO+OPSs7plFV4w0oDD5cjtTYS2514wGIBx2xUs0oRnMrAhm2KAKVQpTIPHH/6jUy7DRmanObaMyABuwOT1Pt2rnS8kshlYjI5z6D2H1rq5YlcvHLGHjPPTODVZII3nEUaIFLAcAc+9NOwmrnMrFLLkqkjk9SAT+PFPa0uI03tE6LwMkGu5+z+REA6gM3I56AGmfdDgAZPGfb0p84ezODYfuBkDB56daYF46ius1PT0uYjsVUlHIbHX6/41zU0LxSMkilXHXPeqUrkSjYg2+uQasDCLgY3e1M5YbQAw79v8mo2z3ziq3EOd8gn1puA3SkOGxyB608Lt5H0pgNHQjsKb3qVcFNvHHQ1Gy7SQQaCQB9qejYwT071GO+aUe1BR0vhS+ktbi4ijDP58LIEUbsk+g/+tXPXcZimeMjlWwfbGamsJzE6vGxV1OVIOKfqWJnMqhtzctnvz1FQlaVym7xsXfCuoR2s0kE7bUlI2segYcYPpxXXNtQlwMjp9K80Heuo8PasZoxaXLfvBgI57j0J9f50Tj1HTl0Z0AcMCQKY2DyAc9vWmsDHyOhNEZ3A46VmbGH4pQ/6M4z0YfrXNvlX4zxXVeJnKwwqASpBJ46Y9/xrlJMh2BraD0OepuB9uh5p8OPmJ64xTf4B9TQnTiqMxQW+6Mn0HrUskJjYrJneOo9D71veGtNG0Xk6gkn92CO396s3WVCX84AP3z+vNTzXdi+XS7KUaM8ixxoWdjtVV5LEnHTuc17l4X8CaTY6ZaNqFjFcahsDStJ8wDkZwAeMDP8AWvGvDtwLTXNPuCBiO4RjnsN1fSc8gijZyCVHNTUbRdKKY62ght02W8SRIONqKFH+eTWZ4zk8vwlqxH/PuR+f/wCutSJg6gjPPrXI/FSa4Tw4I4GAiklCzDqSvJGPQZFZI2PGR04r3D4VQCHwXaMAMyvJIePViP5CvET8u70r2zwLfW2n/D6wur2ZIbeNGLOx/wBs9Pf9a0lsZQ3OyXvUq1jWHiHSLyAy22o2zoOvzgEfUHkVzXjXx3HptusWjSxyXbjIYrkDn0/r/wDrrPyNulzv1HFPUDFee+A/iAus3BsNWiSC9wSjxg7ZMDJGOx9umPpXcy3cKxbw6kEgLz1P86T03CLvsW6CyggEjnj61iPcXMksiwSCLGHZsE5HtmsubVJFneaQySCMdV4x746VDlYpK5qazdFZ0EMZdsEKxbC+mK5aOENLGkzksx+aRBtwD/k1ZutRu7l32syxD7vr06k/0qgkm/LkFwCRw2OfTNZSd2UiTVpLW1B8jayx5HznqfT6ViXc0V+JY7h3SJtrbxgncf0x2HoKm1OBjHEZSyW+d0mM8g/rmqzHy9RZkT/RmcKiEjkY6flVpJK4myzFMkelXE7SypfjCFwcKpH8XHJ474FZqWy2szTMqXKvtKyMxxJknkZ7cVZ1gW8l8ygCPKI0ucnZzkAAc5x1qvr8X+jwSRSrLDJlVCqVwQejL681K0diWTWdzFFLJcrGQ0Skb5Afpwf5cVqTtdzRC6uJFe3ZFABPKgHI5PfJzVHTNNN2uJlG51G6NOM4HT9BWlrLRyWEduIR5sODwDjOMZx3+lDtfQtbFG0tpbydpIgWVW5kJ4Udevc1mXlxBbzTiJlklKeV8/Uk5G7d2I4qzql3NY2sen2gKPKDJM+MFh04x27VW8OaaLy+85yrJCQxDfxH0/TNNRsrsze9ka+iaYY7RLu7YPOFwi8/IO9ZuqLHeXzSK3mNt/dRqcrkdz/WuhlkluLPUpIYnjYLmNWQDPYk/rXJ6EzGN8AmYsUQ5+7nt7dKI31Y5aWRqyWUFzbbChaRPvhOFLf44/SucFt55kBUALkbs4x1P58V0M1w9un2QTHGw8Ieuc8/X344rGitXSNUklVEJyxUFif6VpGViJJFe50i2jss3BV/NKqhkIyD1yO4HQe9YGtaGtqU8i4VyQCV64Ppn9OlbHiyBJBA8DOTt3MGPXJ7ds8VlWu3YHfJYZBzzgCri3uZyte1jGmXyowNuHxgj/GqwJYkHIAB/H2rf1JrORm+zbyvB+cc59R/hWLIUBJAOOnStIyuQ0V1DN0HbP1FPCnkAinjGMgdKMDHGc9vequTYjHy45pQchifwpcZB46dvWmgfNwOBTGKR8pPOQc0xgNgwOp4p7nAOe4H51CDwQeooQmKP4j6cUdsimjNOA65piLVmu4jOPlyT9f8mrbEbcEggfpVSwVml2L1b8OOv9KvIVXzUKjOMA/n0rGe5SdiFAWlAycdakzEuRIC2PQ8VF8zHIzkjGB3qWERoQXU7lHQ+v8Ah0oSXUSt1GiQA9Nv9KTcZH3EfKMf5NSXNm8KtIFKhSAwIxgnn/IqJ2jEOQ3zE4Aosug7WGvhctjg9PpTFTDbuRjsKeGcHzAmWA4z2FRlixyxJz1z3oJYhbHHcU9Uk4OCAe5q/FbFosrHt46scfkBzVeSPy93JOKTYWsRS/KcMenTHH/16cq7wCMcdfwoePcpY5PTv0qMRPnKmhbCLEu3auB9KbAA24t6cUMSyruGD0OP8+1MUs+UXGO5/pR0K8x9uqyzfMwROmcZrZLWdtbsITu6gnH3j9awjhRzgDHHvSqWdcEkJnOM9T60/MpOxI7AhtpJXr0qDkqyenI+lapEn2AIEhETENnPzH8OuKzZxtcMP4Rk8Uou5ZXdSM8deBTMjGeKsyxlkLgHaQCD61XGNxB+tWiGrCHoQCM9qYzsDjPNSMAOhPPemlFK9fm7VQiMseR+fvTlYhSFA96YQASD60HOOBwRimAm7qB+NEaFmwKfHEXIA6etTBCn3c8UriSJILUsdqZ38n345oKyqMAgj1xQkhAx0+vFKJM9MEdetQ7j9ARmwc/TIFQkclSe9SFhng85qN9xbJGfp6U0BMmeFBGB+hNSICuQ5G0H7tVB6qQMetOyRkk/SiwFt9xwQDtxxxUXlu7BIgS/bHX8qijlfoH/ADyK19J1GOBtlyrDuHUZ68c1LTWwIyGkkjYrIhDA4ORTophklm47fnWjrEsN7KfKBwufn6VlGFlJHUCmrNA1rdFxfnYMMEgfSpfJRoXfYWdv4QOnvVK0Y78DORz+FXrd3jLY6Y+mc9j/ACpPQa1KtzbG3lUK+8YDZxjHtitm3vlUmWDzUbODuPB479B+lV5Zo5LNkIwCQR3x+PWqbyO8ZAIAHQZ4ApW5twStsSBBJcybvnflvkGQv19qmitpFDrI4Z5B0HbHOfYU2zUKiPGXCHgsP4iD05960rKVbNmJRHeTjOfXPH0qZOyD1K9ssUEDK6/vychzyMegA70yWYr85nZucEE+n1rRHnRqI5IINrfMCTjAJI6nqKwb7a18WUrtJGcdP0qY+8xK5JPeSbn8rK4HOM1mtliTnrWrfotrYhIyrGVhlgc5A/p0rLRc5+ma1i1bQBBjBI7daEJ3cfSmjv78Uoznj1qgJc8BiOevTrzU8S8gjHHFQKCwyOmcdfWrKHAIGMHOPyxSYza0eS0S0ka9naIo+QNv3hx0PY/gahvdYtFkla3jeRpBjOSMDPTPU9Pb8qwrgnzW5zjimKBk571Hs09WJvoXohBdzzSNHsUnIRf4ahaM2tynmZ2ghgT3H0709MxWoli67sOG5BHT+dXLXfqSL5gaQRfw/wB3Pp7UbegCT6x57BHi/cgALz8wx344P+FaEptltw4lIlyAq7eMY7k8Z9qw9QsZLOYKfmR+Ucd89vr61c1xFt7uMRkbfKXeqt3AwenFFlpYabRpwsrL8p5P86jwF3Nkbfc4IqnFE8IH2UF93RXI6n06c+1V5be9l+aZH25wS3QGi6K5jZSQeWHVhj6g04FHYMDyP4gen41SQIixJhguwAZbqfXjp9KRN8kh2yEDPpj8KVw5gWza81GXYpduPlTqT0BA/L8a24NEnij3S3cUQB5jD+Y4B7YQHBzzzg1jTlSyIFG8tkkqOcDH5U9HXaCjMkhYAKGIH4+v5YqG2xJ6ly9Z5jEsa+Wp6u4C5wevHGPwqk0h2vy2SdoHoP8AGn3F4zyM7Fg5wC2P5ioISZpMkFi33v8APrTQOTJI5U3oxBwOOf54ouZfOl8xyCQcKP7oH9ah/hOM9do/HPWrEFu5gO5BkjI7dKG7asSbDzVQKSockgYxnrVhbiAHyfMWOXJXkdD15zwPbrz1qG302dALtkzg4WMNk7uxb0Xv79Kq3WnzG5VDIsjy/PI2PunJHPtxkUKMXoVY6WQ6fZacfs0a3d3Jn/j7XAi99o4b65wK53TEYXbkgAhTu9uelJcPJDKtursYlHBPJ6f54pLafymuJc5ZsKM9zzVRi0C31LN/dsh8uMgN/EcZqst4ViWJRjPLHuxPfPpjHFQxxvNMAPmLc/XNLfW/2W6CZJ+UHOMcn0qirvc1LINNEH3fKPTvj+VWCMdSBVHRnIjkjLDruUf4VeYEnJPNJ7jWwgAAxxSEDORQRingdM9fpSKM/UbvytsQGc8tz19qyWYkkmpr1w19KT0Bx+VQnDHI61SMmxPYHp708ABQO55+lMVfm4zQTxwSSKYiRevTgdffrSR8AnnHT1pqq56f4VKi84OB2o2GiaGMyOiKQGc4+Y4/MnoKv3F+pURwJuC8B29uKz1Ibgg8c+mPejOW2oCT0AxnP4VLV9xkksjSMXlc9qktbSa4I8pcKf4jx+XrVuz04Lh7jDOcfL1x9fetSKMr049KTfYaiYgtZYpTt2l/f/OKtK91grJbFwv9wf1FXJTH5pO7LEdvUdqlhO9eo3ZqOa+4JO9ivb3kEasskEqZ/T8Kla+ti42yMvuQKsptUYIO3oaidVZypHGOOAfwpNIq1ggZZ3IjdXPA9P51ZW2kKkGNsdD/APrFVBp0MxJ2lfoev9KrrbwwbxM80cqHH7s9R7f4U7ofqaVyDYMFnQg5HykcgHnpwen+RWNI5kkdgT1zyf5Uks8kp+Z3YAYG5s1DDFNMxWNSxAye3H400u4mySJJZG2l1Qf3if8AOa1Lez06MBp7jzdpAb3/AA71mx2ty7FVjO8c4zg/XHerEel3rcmIKuByzAdaUvUF6E102nvPvjWWOM5+WMDgegB47epqiZgrblzkdM/561dj0p/M2yyDqB8nPJGcc9/wrSbSLWGCRJY288cDPf6+hxjjFTzRWg7N9DDjv3xgkEH72e/1PWtJNRM0ivPIS6p5cZ2j5Rnp/nmmrChuliRRsVCfnwO360kunbyixxhW7lD1/A8U7pgTy6tGcgjzDt2nC4FZFxPJduERSVHRVBwO2a0bTRYmf/SJX5zjb8ufz7+1X3gFmrLCiSq3TZ8hT3GOD0qFKEXZbi5Xa5Z8NPa2kUdtNLHCzSZmnWQgkcfljt61pXlrCXl8mdRFuyjPgnB7kDkn0A4HfFVrCe08v94sxuXGCJEG0k54Bzg+56/rUAit1mZIjJE5ORlgq4wOi9Bz09vfNZySvcu2hYtbiSznVY/kUKykkBt+c8+gH4mplmYKTEgTb6MR7dP8KpnzoIg7MLm3Y7QUGCpHuOPbtS2k5eR0hSVWLYbbHux2xjr/AFqHG+oKTWg97lc71R0wCGZnzz6/T+XSob2OK6Gy8kkEoOVkjxmPA4P5nn24qe/ubeQQSRTNcXDfKwkjKhQMAex6Ul8Y3vBOqqm5QDHIpxkDrjpzgnvTty6oTTK8FzI8jW2oKouQmI35IcD+Ids8c0lu3mWSLIqu0ZYMMj72ep9Qeo68VBqFz5yMszBkJyCoPB68dwf89KqWcxa62ySZZT5bNgfN/db644pxTtoJ+Q+xVINQ8iUP9nwWVM4bbnkD+lbGnXYQsrTDy921TtBIHsOoPt+FZ9/A8t0XIZZAg2MffIOR6UywuGglkQqVmBDb0bt0wO4+nX1qpLmjYEaBMM00gvQ0sZDDZtPJyMZ/Wql1bRQ3Jlt4Qli2A8BbcFzxlc9/8iprfY0j5UgA44ByxJP50t6Q8JRFAIcH6AHpz1GBgVHNZ2Qkr6IyooYLe4d4JmhVvlzjOQeCCOh74PXNOWBo3DOiMpGRzwevr9MVKto/lSEqrmQ4aArjjOcg9jxnHT6UxBNFbTKVaWGJvmRuJYx9OpHv/Oreoct0PWxNttL45G4gHjnn86LVIrhbgO7GVWXqCMAnuT/hVoSm4mh8uVHhkUFmHzEntjPT0qW+0+NVILNFewg4BwVIAyFPqSTUJtvUbjr5DF063XcGmY3CcqTkYHtVC5E9vOQZGIxhZMhs5AODjj/PrVkOs6gxRAyNw0ezG0+nsPSlnW3jsRE8AW4U8nI6ZzwB35qlLoOyCGNFiJLOZhgjYQaltZSGl8wlyy7cH37/AFrO/d27KVJIAGTyDg/yqVyFiUoN+TtJzzj6dxRyu9rkXtLQ1pozIqxR3BkReEyCAoHbOMZqJ5hLayDcwSP5mHo2D2+hqKGeGS2cShvPBGG7FenbnI+vSoriIrlkYOgHOzjdzwPr1pcqTLvd6DmhKSFdhkbb5hyex9R6cU+BXYOgHzcEknPXv6fT8qEbyQSHUhVzk5J45x7H8qrwyyxKQGJeQjzBk7gP5Dj8fpTinLViS7krDy1KKRlc4yfT/wCtTPNkRlYRKDIOc5Gcemfb/ClkwQFPOAc8frj9KYs6SnMbPsQZyQMjJ6Y+v5U7AOd13GRVJJwMMeD+HY0/zdxYDCliPl6ep/pTUlwHEfys3XIA6+xpUUou8Ip56pjI57+hwKTRI4yIpwuW2np7HvU+n3Me5zghsk7ezd8cc/hTIbdbm6d4G2Rs+5fNI+Udhn69elPjREYBmAkOQcNkZodkiti1HdCZmiYqqYJHVcck4H51TSUSyZRlVslTnoPYep/GmbeXJyMqflHPQenrgUgmjtlypG3qRtznPapUewEwRY7vAZlYjDEjAyQeAe1K5DzIi/KwPVl9P69aEQzRK0hG0tn6Y9qZbwyJdIYmAUjvg4xxz6VcbP1AlMUgckuZlBxnpyO1XbbIjZYQN7DhvY8Y5pYnVsrIN4OS3Yknv70iBYEYKACvUk9eenpVpN6CvYozwoCkbR7sZ3bRjn1+narS2MMpw27dz2xj3+nFWJ/LaISSEq6427QOfqf60xrgrEB5R2Kc5zjk9vX0+lbxg2Tcqu1ubYsyhX3Y345bHHP+c1RcKQME4zkVrWjRTSt5iEgKcEmqVxDEsxUEIPrnArWMLOxPMU0X5uhPp70vHQKc/SrIhXjLcnkfyqR40GNpBJ4OTVcoXKi7lXOznrnFNkkLEke1Wyq8gSDavoOpqCOM7jyOeaOULhbryxkBIxxwRz74/nTxDIOFYkYycnvUkS7QSnfj61eYItt5ZKiTbnjn3/A0rCuZJQE8E5PvSpFuHuP85qcBSp4GfypUKr2wDTjELkKxAtknBNWEiG0FT06jpQiqTj1qxFH82A1aKBPMNRQufl3Dv7fWpjtdMqp3eg5qZIcDGMN0PPr2qdbdQc7gCRyBxiqUBcxUktz5RY4UdAB3NXNHgaR/NWJnZCFjUDO9z0H07/SkeNWKgsMfyrc8HajZadq8LamH+zqrIskZH7tm43sD1GD6g9/aq5WwUktWc5cWRdCxJaVmJJPcnmnaaWjlG3croePau98V2kOp+Lr1bd0it1hR4jGMjasXGPrjrVfS/DbajAkkYAm42sO/19a0jSVtRe16o6Pwh4/u9PtUtniMsY4Ctk4+hH/162tY8WahqtoYoYGhicY+UHkfU1meGtCaOUCeIgg84buO/wBfeu+tNDhMRDq248ntn3wKn2UIMh1G9keOXWgzzEkRklj27muf1LwxfCeOJbVw0jBVLfKCT2yeAa+jk0SDjKE47VS1DQrd451MQZXGNvv/AI+9bKrHYz94+UbuykhneJ42SRWKlSCCGB6H0Oe1WbuxS8s1t5XK3Cr+6kJAGf7jf7PoexOPr7T4p8LPKu9YI3nUY8wj5iBwMnuf1xXl+p6dNa3BWQKGH3lPce4HaqcVJXQ1NkEmjXOg6HZw6hD5U88kbgE5+VgWB49qy0jQS7mOTkg5PU9K6bWtTi1a1nsxDIh06GN4mdgeA3GPbBx9K5aZSHdhnBJJ/E1zyhbqaqXMkVbyID5lJ2ng9+hrPmgO4lAWH0rVAaWRQOgPT1qK5tnUHBUnnPPpUoDG2Y6giosEIrLjjpkd/StZ7VnIfIO0Z544qvLGREFIG1Scfj60mhogjuEkdRJuXPLfUUXW2RgGYIVYkbO/ufwqMbd5xgZ4+lCsFwzAnJx16e1ZyiWmK0KyRYAAz3ApsUXylJMyenbJHp6U/wAxI42AGecc/wCNHmoxGTg44rBxKuUdRjZxuXqvOAOxqOLItwT+P41pTspUMFO7p06ZqpLCPJZVJ5IPp7UFJlOWQleMAn3/AFra8M2Vrte5v8vt4WMZ5PqfaqGnWsc1wFkcKi5JJ9u1a8d4sUU4VjhhsVVwcD6/55pSXRFx7sg1HZJcs8fCsPu5zj8aqsvy4PUfrU7MhhiVQO5J65JP/wBao3wWJP1oUWDZBkFSAPaoLm2huF2Sjk9D0Iq5hc9aCiseop8rFc5C8sZ7SQkrviPG8dx71VcA7iDnPIyK7ryYyMdv51j6noqkGS0wD3TOMn29PpVJ9zOUexyrR88dMZpw5BGR2qzPbtbuVlQoffP6UxEXH1A/D3rUyI1XjjrTgobAPTpTiM5I/Go/XBpWAR0K7h+GRURBHParbtvhB9BtPuarFgR0wQOaENjVbaQQff8ACtKGQNBk57Dp1H1rK9farVnJwQe3T2pSCLEuIgCWTp1qEEggqcHOetaLxkBgwHHX/P4iqxtWdJJIyMJjIzjOe49aSY2i/Z61cxsFnczwnAOcZH0P+c109tIkkSyxsDGwyD61wKttPOc10nhq6DwyQNwVyy++e1TJdS4Sd7Mv66A+mOWH3SMH8cVx8n8R711XiCUCxWPnLOO3pzXKv8ynPTn+tOGwqm5H/CPfNT2arJcxJJnYWAb8eKgY8AenFLGe4OCOn1qyD0OMBIwgGFXjHoBXJ+I1xqUuM8gHn6V0tjMs9tHIuTuXOW4ORxn865zxMc3/AE52DP15rOO5tP4TIGefpX0T4X1EX+habLPvZpLdNzP91iByc+uRXzqOv41674DnaTwraQyB2jXftGTjIY9aVZ2VxUd7HfX4ljiSSE8JwRnjH9a4bxjfINDuYbhx52QEAPOee3pgmtDUtXkgs5TJKVWJd2D6j2615Nq2pSXc7u7kgnPTGfesYR5nc3nLkRBIcJtXlzwK6LxDrMcmm2miWufstkRl88O4HOMds7vrXJhyxGOlaOj6ZNqd2IYCAoG53Y4Cj+p9q6HbdnMm9kV0m8mYPE2JAflPv7e9XrDSdU1SUGC3lcueZZBtHfnJ/wDr13Wl2dhpqJtt1bZgksBlvfPX1Naya3IofyII1yMdz/8Aq7Vk6vZGipd2Ynh7wqukyx3txcCW5U7QEB2pke/JNdXcajJhWZwGXG0kjPHt9azrLZgtI5yRkYBIUk96rXbmWdjI4kIOPlXGcdKxk3J3ZvFKKsjSkvJhG0zzt+84Zs8f/XPSolZ1O4yttIG3PHHWoXJfYHDE7RwAfep8STFPkbdt2qdpPHqahlIYsxMTB9qYOQScVagCyxLuLLEDkknHPsOpqouj3EjrJMQBu4U+g7/WpHeONBsJZlBOeOo/z1pXQy9c6eJLWWNGxuUgN6ZHv/kVzdjDJHq1rbzs26JhuZ/T+v8A9arr6g0FmTOSd/Ixz17E/Wq2mFZGYjKrkyMwOMYyM5P5VUU1uS9zU1ZSHuJIlUbyGYngqAOGB9c/pWLDYyMgaSYYMu3CZLyAjll9eaS8mu5Zrq3WNpFhBaQE7MpgfeB5LelXLPTpjp9pJMrLzuURk5jz2J9P5Uthbspa9r8mk32lW0AUW25RMXUcgYGCfXHNXvEiy7zNGyxw5CDyySefTHGT/Kuc+JFs8FtbPwyO7DLDpwOnrU/hTVDd+G5kvSZWtpVVI1IBcBeM/lWkY6KSI5vecWWNZa10oy26SCedlAbndgjsT6c/SrPhuGW2uws06ogAIG7vjOfbv+FYscMmp6pa7odhmkK9OMDtnrWtqb+Xql7DCrpFHGVLSEZBII7Z49B1qpLoCetzc1XadKlmt7uNpWVxIUYYXqdoPbI6nr6Vw0V0I4IoUMu8gcKOrHPA9+gqsJkCJFHMNycjr8w54Pqea1/CGlyTakLi4RlSIgoGGNzHkfhjmhRUIu4N8zVjX0qyESM8kbbIh8wYcs3v/IVjXlys1xNPO5KluFXjGe3oK6u9LCG7fIWMruBZcKSCenfqfzrhfNNpLGw+aSM7ssBjIPX6dKmEebVhNW0Kev7lliBAUlT8gPKj39+azJphFFtUjkZJz29v8a07mQ3UgZ33Oed1OsrO2kvUknYlMfdHQkevt61rayuYON3oZCqscXmSBi5YcDjj/Gq13Ekjbo/lyMnPf6+lb2tae0C200rjZO5bYOoGf88VT0wPDfB2QkIpznpzn1qU7bEtWdjBaNUcjk+1SrGBGWboelW9RzJOJQFwxwcY9elVZ5cTFAM4NbajskBTjgA4/UVXJGPqc/8A66leUJtV+p4+lQz5yWHQHH1NNCYOQwyTxg8e9QAZPPSpWXaQW784ppxnvxVIljcdhSH+tOOeTik4xihDLVmwSZCRkDr+PFW3ki35YFRjovr61moflP0P5VYjid1XJPI+96VElcW6LUcsbSoN5CDP3hinBQzElgEzz71HEm6FI1UbnbIOOgFSSKltGY2YPKe3Tb9feocewOJdu7kfZ184hyTkIDnJ9TWW0DqN+B64HamRMN+6RjwavxXWdyRBV3A5dgeB7VWxV0yvGwZcZyT2x/WnhUjGFZXYEE9fy+tRyuPNLKxOO+AM/lSrdDjMYwOP8+9TLbQnQt+a+3l1DdcZHFNKuzElgSw9OgqNSoAYHg9O1PtijSEFmxjgY71EddwvfciuYxHGNvRv1qud8LFlOV75HSrt5BIIVmCExq2D2/yKh2mQgRAHdkVoxtETyAhSpGOp9aYjsBiMY55JprKrSkJnHH+fpVgLGoZSMtjHI6H1o0SsGhEAqkktuPfNOg+eUAqzZ4VV4JJ9Pxp20c5HQgUyUGNwVbp056UJpiTNc2N35cSyQCFj0ck7jk+3aqz2rEOpU5GM/jXQxO95p9vMmdjDJGejAc8n3BNUrhB9oByQpBBz6jms1M2hvYyFRhbohwCoJI9c+o/Cs2Rdjc44zmtbZK107vtWMAgHHHPYZrOnG51PHORx3rSLCS0Kx5HXH400ZwQfWlk4pg4JrQyJXXcrEdR+oqFFZ2AXrUsfBBOcGrMEaqzMOCR+VK9gtcZH8mFHb17mnpgluoODTXH7wgY9RQTnk5z37c0hkwJGCcEfzqS8mhk2iO3VMDGQf8OtVwdwyD0FOIXj0GKh7ku4+CylnQmNGfH+eKqgMnAPGfTpWusqxW7CKeQvtwVRcKufU9aoIuASaFJhcrhgchlBz3pfLVunp61M6BjnAx+VRvG69Bkd8VSkmNNMiMLBScAj2NIowwPOKlXlTuJyePSmlfX8KodiVWDjAyccinKrMD8p+UZJ68ZquFKkHNSLIRwRwRg9uKmwEcRG8EE8ntV9FPlsqEEg5+o9KzEYq2eeORj1q1G23bhiQcg02hJk43ZYEDg5+uKZNh5FUKB64pQxyDn5vc5pUKsdxAVu9JFGrHbucOWAVRxjnj0z69qhuFb7UCwO0gEfQVLHK7WT4zlQc474Hr6YotJA8DRtIGYLypz37Csncliy3Lx2p3lnB4G49FHODnnHTFY8amWcBVJyc1bv5hIqqhGF4OP8+1WNPiEURLgZYZPbAqk+WIyjqZb92GGMA1SVsHpUtzL50hbvnj6VAeBk96uOwhB2Bpy8k+opAOOKUcYNWA8Zxgg89Pw71aiJZiDj1/M1XDEgZ6gGrNou4qo6tgA/U/8A16hjRCFR7grISqs4DN6c4pl3Aba4eEur7TkMp65qze6dc2qs8i5UMQxHOD71UB3ZBxu/nSTETW63DoRCHYAYIAznPtTbeaW1kLRM0b42nrz7EVd0ZGkaVVYjAU/THetuMw/vjLGglA+fevt/L3qXK2grXMmxvRK5S4Rpd38Oep9R71JeW9xqEtuoA2xqQCcKFAOcZqYtCt5DJbxhVALOOF4GTxj2H1qC4upbyVVgjWHccLHGOhz781KWt0NIknt54o1J27B3VhxnsecirEt5LPDCrKropBZO5x3J7Dk8Z5ptxFaW0TRJKZ7g8O4Pysf50qgMmWjI/iEmTkk9sdx/kVDsx6Fu/tIZraN457dM8kb8Fcdz6e1UIYiVZo3DOp4ABy+eeB0AodBcS7pAEUYAwT2pwUA7V79DjPehOyDzLBMFwymcNa7EIMioH5HPTucisqPbuDghgT97kYIOea2FjnlRTHFkj5cgZyfT/Edqox2pW6MM8ixxNwxCZKDPUD1/GiMraCGhpnlkYlNgznceMHuf8fWozI6PmFgGU+uc+30q/FYolysEEgnYHPzLgEAdPT/CkmjjjlkMVwqBz88brx1z9Bz27VSkthkUBS4kbfEI3J5A6Ej69P1qxcSzWNwq3ETxqOQSQQR6jHGKillEdlM5PzFdo6dWyP5ZrNScyxCOVyxXgZ54pyhfcctCa6luJ7x5muS4JwHyRx7DsPbpWogcQxS26qj5ycgMD25zwfWqltphaJXmZlDDKrtI4HHWtKCFI02qMAU30sWk9zC1R2+2tnsMdAM/hVdTkc9Se9WtRUG6eQ4weOvJx149M/rVdF3SBRnJOOlWtiXuammR5kLc5RQA3bJ7flT9WtXuEEikGRBwPUelWoFEMKqO3J980/dng4qb6mltLHO2c22QZJBU/ka2YroNjcAc9D6mq2o2asGmhQeaOTz1H+NZyTEjnuP8mnuTsdAcgZJGenJ6VA8kuSI8HHBbsDRYP9ptWaTqnBPrTLiQWtqMgbv4R/eJyeazfYGYsvMjk88nn15NM/i4ApynrnrnNNXqTWpA4bh3578UqvkEYHsab14HTvSqp53HjtzQA8biMnPpU8MqqCXAbI4z0z/P2qFVAPBPvViK1aYMYznpj3pPzGiQSRFVJgw2QSVbg/h/9erUOo/ZxutIljOed6o4I/Lg/jSJo8mADLg9/kzjPv6VNBo4yA8xP0AFToy1cgudRnnkMhKIT/zzGPxp9pqDhGE5Z1b6Cr5022UjMf8A49n86Z/ZUUjNglG7bQMH8P8A69LQLMR5oFCqkysSMllBIH9f0q3bhOWj9PXrWPLYzwgsFLhRngYwKS1uZIm3KRjOWU9PyqeVboStc3wOpIOOtN8yPDEkMVA6c1mXV40wwRtj/uqev1qSGCJrZ5HnC4/5Zxrlv1wP5mmzS9zThu4I1AQNLcMQqIg+8TwAAOSc+1UdUhkiunF7EY5lIBiJIKnrg989M/5FOsb2a1lA09NkpxkqMu31bqB9MfnzU500zO0lzIqMxzsiXAFTtqJsyUJYhY49xboMZ59sVpQ2Mnl7pJBGzcFQv8z0q4tukBje1/dTRnIkBJyff2qxBdZLblCSDkg8/l6ik5dgRBDpELqpW4eOXIAB9PXNSW813Dbl5I0uYz3yQygZ59O3vxVlVZkZwGbj0yc4zgDqfrVeeQRafFGVf94oAyMcAfMw9qzTb3BFeynXY5fcXJ3Mdp4z3PoK1TIrIN7lg/SSRjxj19eOKz4XJiSVpGMjjAQLztogupNyx26LJOrfLuHyRk9z/ePt0oceZ7FRlZh8n23LMQHTqRjgdxntVuZE8tCd7ktyFOOPX35psVkIfN8wyPcHBdnU9ic/SlTcsbAAgHtn/JodmtBXFEbNI5VhhcNg9+eg96ntZYZ0ImwpVSiOF24Gepx97rweoqKK42yo0aqu04+c5BPqavvZyToJERooQBtZRxgk/mM96yk2CetypJNuihtUQSwo+8bSBng5z2J9+oFJaxQsWN3AY9xx0zx6Z65p76e0Y3AbHKFkz0AzjPTrVoQhxsRV2Y3EkgbT6k9Klt2shp+9dlMytCGiTbDKpGJB/Go6ZHT60xL2XzknDJGzddrEMpB/iI/w96szwhQH8s+bJkhwQQD0H4dM9apztyCsIXzG+cYwFJ4/KrTshNu+het5Y4lZTA/zDcMsMY+n9OaLhbeWHCKVkyNp9vcdP0qlBErKhuZSyAYdc4wexPGce/8A+umzzmIoBgqQMY5wck9+vAFJ09bpg0ylLJK0kjSIJQww5K47/wA/5UfZ2gmUDyt7r5i5OcAcYIP4e4qSW5jc7yQCSSNp9fWo0fz7tcwl1TkbcZ7ZyT24rVpka3NHZL9l80kbNhPHIXBx1+nNU7yERpC8cgkJBYFQQc5PbsafPqAjhkhjKAMoDjsMkjjFJGd6tgJtCk/Mcdug75qIqS1Kla3uhDIZN+SQTkbvX/6/NXpbpbf7MURZgGw6yH72Bnt1Gcd6zJWETRCInLMD+A5/PNTIRNLIcEpEuTx0B7f/AF6HHZhzStuaNvcRPvucnzIwD6EnOc/Wm6rNDLH56NsvApczrkbTgnb6EHPPFZshWRhGPlikbk78Zxnufy+tQXZdY43CL5czNGI9+SMcZIHfuOOetKNPW9ynJtFS1ZrWU3JTYC2DGUO3/gJP51oJdQ3IzKxVchlGzGTj9fXtzS2j/aLaVZXXIw+wj8MD3/8A10llbH7HK4HEbDOTjGSefXtWknffciza0FDFJt0akkqFbA7ZPORyDz/nFRXYZMlw3qCR1/xqzc5hWNgCGY4JUZA9s9Koh5LhhEWZ40zs59f8/lRSXUdnHRgWVlyTuGOfenxvIiFQAyjkZyMVVVWCT44VeB+GTxV2KVFhywdm68EYP+TWjikhKI+K4b51WPCvhSxH3cc8HsferQkdF8lHZVkYfKCPmJyAeeOnU5/CqUMr+UysSVyOAByf739KZczLkIFDYIIzxyM4z271HLd7BYtpGkrxxRlnYj95wRyP4ff/ACKbdMI1OOXJCrtHXk9SPp0ogV7bbNGwHl4LHIyxPPA7fyxVW5ulluBIGI8vBGR/Gee3amlroUSsHZiisV4BbjOB6H05zS28gKkAKmCfm9sYwc9v1qJJZHSMyKv71jk5+YYGfywPSpUCyLvyPKz16cj+fenaysTsMeVGbDIo9hzx75p6DLsV2v3HHf3/ACp0vkeXK4+9jAK5P/6j/KlRUWAkBuTndjPX1zzUqwh1vubIDArt5B6Z+pqWFlJAZdx6BgM4/A/Sq8MvlocKSc4J9M+9TGVlMYZig+6BsJ55zn36Cps2yvQlmiWUsFLK4+76kj1Pp70wRyR2ypcNuyOM9gCfyqaMSTyMibVJUttHfA7dhwMk1FcqAiAOpK8AryPqfU0lpoFimWeCQKzsYSeVyflHP69OKltZcu6gEnuSev4fSnfJ5ZTcykYPY5Pt6CpSU2kxEk452joT2rTm0DcuR/u8bWyWAzzn8KcZUZDEQNvG7Jzn/Cs37RtG4KCc42E/5NPSOWMLJCw55PfH4f1px8ydzRuflAZdpjHAQjp9O+KsNOJoyfKEfQcE9D7HqO1ZBuyxO/kHGR7/ANBVuNmeBiWbaCAee/XHP0rW+iuKxeb7NA0spkJVj8rE4z14x2+lV9VFrLGk8TZY4DE98f0qEzq8uXKttGV3dB24/WqN55QdmhIRTyI8k/iPaiD1TB7aFkSxthQwUdQT/SkZogWJ5PQHOKoBh1INOZuOuQB+Vb8xNizI6HhQVH1zUa4DZ3c1W3cHB4oU9PShSQrF5W6gyHmpY0HZqpxsuQGB/Ophj+Fh79qHJdiWi2FVVPOf8aFEXOcf/XqkHIOCxxUg5GVz/OrjLyCxfjWLHTp/L61IY1HzKflqhE/BUtirkZUcbuTWikkTY0oFUxBXPJxyKdKgCgsf904xuqmkpVeSPT606OR5ASW4HA56VSktyWmWBG2QMYY8Dtmo7aMXDXUYI3wxiQp/eXPJH04P0+lRyycFWbJxway/tVzpurx3sBwyHI3DIYEYKn2IJBHpVxmgadj0jw9I95JY3YIPmQvat/vKOAfwP6V1Pwzv45A+nTsBMG3wHp07VzfhS40mXR4RphdZ1uvPljyWIBGMfTBNZNvcXOm6w+0NFJDLuAPBHP68YrdWkjM+horKN2EqqFYn5h6GtaFNoHHUVzHhPXItVtIplI3PjcPRgOa65cEDFcs7rRghFHUVBIm91H41aAxmoejA56VKKMjXoYord5nACIDI/wBFBOPzr5z8W3b3Ml3eOAjHJUenPSvb/idqi2+kPao2JJ8A47AHn/CvA9cHnQyRO5CsRz69666OkbsjqY9nOXngkXJ82N4ZABnnmoJiscrDJ2kAnNLYXR0W8MsWJY24eOTO1uCOccg+/ak1NY3ELxSxGORdwCn7h7qe+fT8xUyavqi0JCNtxkN8p9/rU7xpIrknEYqlaQvvDfKwxxk461K27EmWHoBis3JFNMidWb5WJyvH4dhWdcYKkHt0xVnzXZpQWOfTGfbioAjjdgZ9alySBXKDxBTncDx+VVm4JIwc4yP6/WtCWHd/Ec9MdKiktRtBGB2PzZrJ1IlxK8scrQgiM7Rjoeoz1qtuBY5+tXUuGWPaqkkdOegqFthHMRLE5LGsWzQhExGVLZB4+n09KkMnyfIwJ9+9VGU7mwAMdRToJNrqpB6n8qhpMpFgZwwOMHFPjCkEFiO9RswAIAGSeaRMgnIHSpTGiRGUDhjUiuvrVYd+vpQAQTir5kVYtDYc81f065s4be4iu7NZy64ikztMZ55+lY4ORyeafuI6Hihu4LQsEKOhFBAPfpTPMiKDhlccHoc1IUhwNk53HBxt/Q0rhYjkhiniMVwgdCOh7e/1rnb/AEk25eSJg8K85zyo9x3ropEZSASCSM4DA4/LpUcsSvbMJc7XG0/jQp2JcUziy27pwMVGxAzwO3862bjRACfJnOOwdf6is+5spYDiTGOxHf6e9aqaMnBkdqMiQHoeeagnQo3T34q1ZIDIVOfmGPy70l0A4+U9Sdv0pc2oW0KttGZGPB2j3qwIlDDjbjp2qzBGsNvjjceTUDyKpOMUua5SikhWzjHJH1qFsgjHGKcJt3y4OfWn24aSZYxtyxwCTxQG5Um+8SBWt4XhkN0ZxkRKCM+pNXYdDjJ3XDl/ZeAfx6/yrXhjSJFRVVEXoAMUnLSw4wd7szvEMIe1WYs+1Mggdye/5965UnggV22o7jptwVUMdh4J4x/nmuMuFaN2EilX9Dnv3x+tOAVEQnqfalXqfzpp6e1APNWZnaW88dvpkM8n3VjB+px/Ouc1O9F5IGCYP17elMu75prO2thkJEOfc+v5VT74NSlbUqUrqw5epz2r1XSJI9F8L25uGClEDbc8lmJOB75NcF4Z04Xl8jz4+zxkF8/xEc4+nc1f8Ual9sulityTEmf+BN0z9PSoqLmaiXT91cxS1fU572Ri7EITnbn/ADmswncfmNNkOCeen6UQRvK4SNC7NwAOcmrSSM222XNMspdQv47a1GZHIHso7k+1ek6boyabCsULKAOWkYcsx78foO1Z3hOwGnQt8im5kGZJD2A5wPb+tbSPiMyvIHcHuevHQVhUm27I6KcLasiuWyAJA3mY+ZjgZ6/j0pF2OoVXI3Ak/LycZ6Uk1wpm+YLjHzcZwKWW+VYiIoVQdN7Dn6ewrPU0NC2sWVQI5SGODtVsg+/HfNPitYoC3nOWdjwkZySR2z0HNUbS5vZI2WPbwB1G0Aeuf6Uk96LeIrF/r+8nt/sj3qWmM2YporYPJKI41I2qh+Zs9ef8KryeIYyriMGP5SdxGc9vu+v5VgLqE3lsm0FmyC/fnsPSq1vs80LIG29Dgck+n17U1T7iuaK6rPOzojSSPMpU7jtA+gHT+dEuYraNFj27VwcnHAx/nFLa272spjkBWR/mCgjKj2P9aWXbK5Jclh0z6/yx7Um0noNCLELi3nRkRVQAmVzjavoAec+lQWV06W08yKpijYKsfTLH0Hc85JqO5ieQrDGAXZst/L8OtaNlO5lEFv5NvGF2vcIuNgHXAPG7sD1PtQ3ZCEkAvriFQ8nmTjLkDGMep6nHp3qxd3b6bYB1kBjGQRswWJ4x6YrmZ/EVxYX0U9jAPscIEbxY3Bl9c+vf61pJrGm+Illjy0ToQ6xyHGQCAcY475+tPlad3sLmXzMbxZqv9r6OJJ2SKZZAqxDJIIHfPUY5z3rM8J6k2nw3saRK80wCo552+498GtLxPpsFw4ltAfKtwFJHVwPQeo/XpXMaV+8vfIZsKysAw9QD/n2raOxhLmU7ndaRNOqS3EQDPAgzIoJZST157Y6e9UpIZJbsrdlg0h3OS25sY79gcCubsL+7sJTtZ2TI8yFzw2Oxq9qeuS3lrjyUhZmyWViS3p17elT1Hzrluy3pKpJqkYihDbSThjnJ6ZzXaait/HbGdBH5UcfKA4Oenb/JrjfDTONTiORlvvZ9+30rqta1I20SQMNyyBicYz9Pp/SlU1kjWDSjc5fWL2+mVVnkG4gYjQ9BWSyyAYYNu4Bz6VuLHEVmuZ3+fOcEgMfb/PSswy71ctg8jBPOP8+tax02MnqVo1ZkkJUZClumMAVoeGtt1fiOR8KR/D2+np61EkLvFcsMbVjJPuM1X0O5W0ukldiiDOSB/nND1TBaNG54utyNetrWNg4ESbQAOM9sD+VM8SJ5ElrEmMrF83v15JqzpcTXGrLczxFZJFMozz14AJPtSeNnCXlqu5NqxH7oHXPQn6VnF6pFtaNnITqAuFXLZz06EViyOTK6sMHPHHet8qZAXJAHb3rHvUWKZmwCeCPb6VujBkPlyNIC2PlAH1qWcqqqCemSe+aImJ5bAJ60wwsC7SdACRmmFuxE5LrvIIXoKiHtmpmcCHC4OeScd6rg88c1SIY5SelHvjmgcd+SKD1+tAhyn5gPTnjvW7pwT7ApLrvAIOT069qwR97I7DJq9BE8jrFFkkqCxH9amRUdxYbmWI5iIVgNgbHTJ7e59aHt5I0DyIRvGQT3HrVuCG2AAeMtj3wf/wBVVZIxvO3gZ471CknsXYiaMhScjA4qbdCloACGlJ5PTHtTY1dwQuSAMjPp70NBsAaUrjpsBG764pmdrBGhdQwYKD7f5zSuAsZJIbB60hlYsVVDt7bsDA96GdVbG8OPZTU6hoPtrtkBREDA8HPv/KrIkwmFUhu59KhtTECVXhWHcVOeZApwQox9M81EpWZSjdbhAhuHMbXBQEE896pSqY9wjJKk7c+nt+VaAuGt7eWF1jZGzsZlywz6UptYY9MiczFZJRuZOob046g04uwJWINMtfNXcwfHONuDyPXvj3qNiwcgqfQjHSpdNvpLJpFAyjrtPPXHoe3Tr6U1t0pEn1zxkd/zpy3uxNLcRTvAAxke/wDOmuoB+VQxNR72AKqcZ9qkXOOnXn8aSi9wTsX9Av47W7ZLvPkMDgbsBW9/8a3dSEAiQq48wncEAAGM+p74rjpAQx3dSeat2ty52Ruw2KMAn0HPU9O38qJ07u6NIvU3b0RmziSYAtjcm04xx19+vtXKujL95WGT36da07i/O9Y5ATCgJ2rgHnvmo4WjmicjG9cEbu5z3xRH3TSbUtjGfqc+uP1oXleR068VNKmHlABK7jggYH4A9Kg6Hg/UVuc70FVu2eKtW8g6cbqqrhgctgj1HWnKDnjqOlJgWnGeTjOKjCgkhSQeufenZzjaBg+9G3a4z9etIY1gyH5uD6inIx7/AHc1ZkjUMyPuxzwwxj3qvJE0eccrnANSnfRi8maDwxrDFImSGX5znIBPaqZB5Oflz096ijlZc4bj0qVseXkE5J5qVGwNEtosEjYuJWjJ44UED680kDRvL8wIQHnr0/mKqpg/eYYHP19hThMucAEDocf1oaJv3NeOK1kkxxjgKD/ET7H6Ul1Y26xu6xSx7STx3x+lZ0x27Nr7uAc+57CnNJLJsRRtU8Y3ccUkWmQSRlSeBzz9Khc+nIq00nzeXtAHfvk896plu2AKtMTdkOZV25zyOCKWNhtweMH6Uxi69MEd+P50xT6itALXGzA6Dv7f4UqvtbaSMds9KijlwCDnHUYPT8O4pSwxgEYJ6en0qbBcuRzEI6KxTcMdetQkFWOW7mog4KgDOO3uf8akDFs5B6/XmlYZNaQNcThRjaAWbnsKZf3hkJij4QcH3/8ArU0MyZ2MRkYOD29KhMeckZ9aLa3EIOFGMep70jg59qmBUIMY4/WopM8E4poBoH6cU/Yc8Y4oQcc9OtSohBII7cUXCwxRyex7mtLSlVrpFb7oXd69KoKhGT6cY9c10GiWa/Y3mZTl/kAHJ47/ANKzqSshlfxBdSRR/ZBIzA8nd2H19Dx+FV9K0Y3tuJWdkBbjjOR/jVm4tUa5Z5lbf6MewqygaEYjkCEjcOeCB2/w9Kz57KyErN6jY7NbG5mETbwBg98Y759KS5HmyFi2BjGWIHHv7ZqOW582XzF+QEc85yfUg/yqhd3e4lFUbT39fwoUXe7C2pauZI2CwwBWYHBfOck+h9OnNS2lrC1ysMYd7hjtHYk9sfjms21YGaPAAOf85NXL1cKZEbDZAHbrxVSXQb8ieOISO7NgIoKpjtg8nPfnP4U54pjbqzZESkqOegB4wOuMcU+3toREHlkVwgxtHr9OpqQRl2AjBAZfuk/d+vb3z2rP0CxRilZRIq8843Y55q1CyxcyANtyDn1Ax+hqqkDfamQk5Uc4Pr/Op44Zo5iCmBkgfX6VUrWHzWRNasRu8pmUrwHY45PUAVFNOYUcsqbuvzHk+3vVl4gU2KQq5BYFc8j0PUD26VS1WPZbOjZ+QjHHQk//AF6iLTlYSdmOsr0SXaCLekhBGcj06VNqUJJjkLA+ZuzjGRjHUdQOetYVvI0UscqdVOa7+y0bTJdDn1a68QxQziMlbaOMlpMj7vbH6gDnmtWlFo0iubQ4W6bBKAkhen/6qn0az+1XRJbbHHyTjrVN23SMQOCciuk0+6sbKzij8wPLjcyopYlj9P8A61VJ8q0JVrmiUGV8wuyjgZ4GP6d6jmktY4XlmdkhBCjbjex54A6E+p6Dv6Vja9qExuvJRXhVV5U9cn1x+HpWQ88k23zXZygIG45xn0pKNy+axPcz/aZjJ5SRqOioDwM9/f8AWr+lW3PnSdM/L79qqabbfaHIycZGTjpzXQNEqxD5mGOFGBjGe5ptpaCir6kfH4UKaQdec1YtYRKWZmVY1GW3ED1PHvSLMXVro7vJjJHdvfPaspslsKDkkYxSuzSSO5JyST+Ga09AgSS4aVsN5YG36k//AK6rZGW7NHTrU29sEblydzVka1LuvTGOQgA/E10kjCKNpGGEAJJ/niuQncTTvIM5di2PrmlHXUuWisR5PSnDBHf34oC8kY5oHT+dUZjkAzn8B70/65po4HB5FWbO3MyuzE7F/r6f40noMgyS2BWvpUOUbcWHTH+fxq3bwxrCIvLVXIxkADIz6/lTZDHbnCn5l4H4nv74qG+g7W3NGPtk9OKkLKvJYYHvWLLqTIjJGocnocfd9/es5pnZtzks2c5PNCjcrmR0b3kKAncGwM8c/rVeXUiOI1GSf4v51jCZgrKCQrckf15oLZ5PJp8ocxovfTPGVZ1XjsDz7Z7VQPDcdabk9u9T21vLO22NT7noB9TQK9xEG4HBxipovLMqhwdgxnH8q1LfTIUwHG9z1JJ/lUz6bAwOECN0BBI/+tU3K5WPsTbH93blVPH1z79zVzGCy4HB4PvWBdWrWeGLggnAIOCPwqez1Jo9ob5wMdT/ACqWuqGma643EkEkY5A96geMXTM7ZXnajY+6B/TNIt/E8TMgZXPCr6e9alvax/Z1KyKoOACwOOO+Rx36VLdhmbaPNFLtRkWRc8lcbh6g+nt1qvJGzXq29uwJkAh3MeAT1Iz2xnn8a2xZG6WSJTGrR/OJc4yQD+nX/wDXWXGqxRrNOFSGMsI+zTOeMjvjOOegpLXUdixcxRG7t7GMqhA/fSKd3TPT8KktbdoJ541VQCm5VA3Z6jj0PemWcbMJri53m+kbOTxkEdPrkevTirXmq10m3ChU2DA6fU+uDUvRC8yXdIsYkjiAjxsck7ic5Hftjt+VV5WVncFRGcncf4fwA6DtipZckJtCBPd/vEDOTSyeRMybyQccrGu3np+PqeeaNAtdFeydV3NtV0IIy/QZ749etaAut6GNCixkY4yMY749ab5VoVMC7/tQbJm4Vck9CD2wOvGKmmiCPIrbnYAE85wAPbjv15qJ2H0IkdX3y7WAzgnA59x3PT/PFNDuq7eiPld2McdOf8KSFiGdZEYEA87s7AfboOo5pL77WVG5/k+4FGOgA7ZyB3z60klzWEONwqACQl4xyAozgA9frWUBPIZZo9/l7uR7ZzVsJA1p588xe6BwADjCj1HcY4BznPtzVUyM+4ITsPIXcRx/I96cUlsDXVEcU8sk/wAoBkAxzwB/h2pZIg0jRxxNuHH7vufXA4IprLFLM+AFOBgEgAgDuf19aryFVO0RgYwAVwR+R5rVJLYRI0P2adoplhLAAnBBHI45z/k1atLZ8NcRIdxUhVHr6+hH61mx7SSSw2nsTjOP610EF6sMckkBWEMgDYJGAeqjPOOmeaVRtKyQFa/l8meMSoftBjzIXAwfTHfOD1/Wq9pLG8hFwDJnI+X+EDocelQ390JLmV5JlkUqFLLlvl9CTxnHHWqP20W5URIZEXoXH3u+D/kU1G6C50DLCkckglDyRMpU9Q65x0PP+fxpsMH2ZGkM+8SqVbCjkE9x+ArKiZbiFmWUbwokOwYBPcHPerisqIkgmL7hzxjofTp16VMoNKwEl1IJYo0jADouxRx0z+eap20bwvJKw3lcq+49znp6HNPkkeeIPGoRYzk5I3c8Z9apzyHYwcgDGPxNOMXawD7a4mRpApBU55YZJ5zgfjVxLjJIbo5wowOP/rVnaXG88xIOEUhT9SfT8OtTxttmkUMuAcgsOx9B35pygm7Am0STtstJMIGCShjIM5A5GPTHfpmooU8tw2GIWMMcDt0/Dnv60lzJMsTRNld3X6Z6/wBaltp2WV43CgDaXII+bHTB9M849R3qlogItuLNm4OeBzzk5Of1xTZQEtyQw8zBOwZyMd/pUsxEpDRuvmtKx4+UKBnnH16flR+4jt5g5Uttyxxkk49egPTjpzTuARgLaxurDJAAXu3B6e2evaoR8kuAFJB3tuzzjHTv19xxTkBjiGWEzA8GPksBgY9APbk5qZ4/sdwnlSI95gtMCu5I2PIX/aYZyewPHXNMBs1wqQXJd/3siqEC88d8j6DiqNou8MB85PO3/E+ntVuC3WbzYprgC2UhnmAXO/k7Rnt1J6/0MZjWSUJZNJ5IxulkOAT7AcUrpIGEh/ehJWJYj5sfwj6ev9Kv2qho8AKqqPl3v175wOenSs7iFZI8ZU9TjGc8Z/8Ar1O00B2feKheoOc57fXr/Kk0BYuJYgjqyjLAkjgZ9sD+dVopnksmLMcKcD8v/wBVVpm3SOxI55HanWgPkEYzvcfpQoWQkhy/NwGO4tkc+mTzVnbJKAigsx5yp9eMfQ8VA6yGWNERVYAqOQSRmragxxbi3zlsHaemOmDQ31GOgx5LvcA5+5GFPDEcEeo4705CW8wnCoBzxjAwTge+e9NlVfIRmKq7HDcg4OeMHsKhd8RvHFnD8tx1xnBx+NJa6oYiTF5lAxgcZUk5H41feHKAwsnmFcMCQNuPfoRj6elZxJRAASQeDx0q5bBdvHyxsCep4xx+XOaH3FcljfzokQ7dyn8+1TIUB8v5hjvn/PNV2LqR5GVkPyg5wG/zml3DyzkjgbgTz0OO/IFTfsArAAMpBJX27UxbhcMu4jPOcf0qv5klxlypwvUgHHXpTA5yVZM8DGe1axXcCwA8uTg7T61G4KsVYk7eBTopNowSfTP9KSaQd+R24/rVKWpIzAPIppbGRn8qZvGeO1Gd3HpVJiH5568U9D9MVB+FKsh6dqdwLYxmleQ59hiqiykd+Kf5oIwKdyWixvBqVH2sMZ2jnrVNJF2sGOMdPapBKFU4Kj601ILFxJEwcgAnkfWlSY5AHTpWcZ+TjPX0pwcgHJ4qlIVjV+0F2wSABwO1WoJhggMM96whJjAJPtUqT7QQcGruTY12f95ucH+lMaSNo/mGdvUeo9cVQW4OMMSy+lNGWUuCcA1pHUGX7V5bC6WexlaNl5Ug9RXRpqC6o32ifK3qrgg5IkwOo98dvyrlomCqQxO7jv0HWrdvNtx82OOOa6IGbR638Lr549QMLH5c7hXuFvKCg5r5m+Huotb6/ErZKvlT7H1/Ovf7O+HkgkjFFZXdzJaHQM4Ck57VRkuBgnPTNV5L0eW53ds9a5o6qDHLhsge/wBayjAbZxPxJvzday0ascRoB+fNedXkikkPgn61reKr/wA/VLhmYhdxB5644rmZ5Vcbhgk9K6npGwJEV9beeh2j5gvXrnrxWTArQjDgGPqM84/+tWp9rVYSGHznj0qhLJuTJwTnjmudvuapCso2KQwB6jBxj8KSWYK4jB5I7juPSmC4jkABU7gMAkZ/Gk3xAckFvpzWLYyMBJHDAlWYc84qhPM0M7KGIPbnqK0W8sHkLwMj2/Gqk5ikQ7gMjgf/AFjUuT7DQxbouD5g5657mq80zMSYwdnpikVdqEh1b6+1GWYk9vvemKzb6miQiKy5JByajMgGSSdo78VI0xAO45z71DMAyh2Ygr/n8qhu5RBMolCkZ3HO3A5xSQQsD8+WIP5/WrAV4g7A9QMNx0Oeue1MjO1/nYnb168VOoyVlBU8kHH51EoIJDAjsaUuWB8sDg85oaQDjaN2ACPX3rPVDQ1ec8/Wjdycn9aFUbuAcEfkaOMdQT7dvxp3GIeDjuKAc8HvTmGcjPNNIPXHIFUncLiqPToKU5GfbikBIzjAxSE5ycnnrQFwRsEjJ5p2CevT86jI4ApUJGQQaYXH7STz2wKZcW6zwNG3Q98dDnrT927kjkUwk9BQgOcubd7O4HcDofWo7w7XdAM859j9K6S4tY7qExuPm6g+9c/co8TmGVTlTgH2zTTIaKsk3BBx7VVdwxqW4jKyHI69qr88+lWjNtkinHOealQ8AqcEHr+PWqwIBPXFPVircH/69UI7O1m86CJ1J+YAke9WkPzc/wD6qxPDUu5ZIyf9ofTof6VtsMdxkfrWOx0Rd0NuMPDJG2NpU5rhriV3ZjIxYk855z+NdhqqM2nz4JyBzjjiuNnwHIUgjFXAzqEUfJ29jnFKMZIz3pqZDqQehFSOPnOKsyQfxH6Uq9eOtIf0qa2XBLHtx9KBmot40VnHbwDy0XlmzyxPrVNpyucY9M+lQtJngngCtfRNFe7ZLi5AW1zkKTy//wBao0WrLV5aIq6ZpNxqRZkxHDnG9gefoO9dbpWk2+mqfLJklb70jDHHt6CraKEAVQFUDAA7fhT/AFPWs3Js2jBRJ43G3YoG9uFOPXjrQ/BCsCMd85xz2qBcqcnrmpVlK5JHUEdfX2/KszS42T5pnOVx1GOAQPSrFnGssLSzkNGp4BHXB7e3NVWCkID36c8EVYt4pbryoYx+7AJC7sdzzx9aT2BE0V20ku1nVLY9cADIB6CqF5KZZ5HJzubjjHH/AOqpr62jt5Y4xOGmjA3YGADn/PFU50LXJUDG5scgDrwPanG24NsjUndgGpbbKyiVm27OeB1+nvSiPy1kJ/g4b0FRLIdy5PQ859PpTvcksNI63DSRrwxyMknH1NacMCyIboZUnJKbugAznJ/l1NY07jzHEbFl7ZGM/hW5o7zQRGVXhRChUMyluSOR9fbtWc9EUtx+nxrLAT5ywurcOx7c8n86lubfyHBcCeNULLtY4TPVsf061VvleQExxptjTDE+pB59M5P50J/o0G2JpDA6qWkHCYz1b1rPco4y91i6tbi/swAsTsUJ27Xx659cdulY0sl0JDchhG2AyyJge35/rWtr8cE1xdSI7PIjbhJjG5T2x1wD+lZ0MrRaZcRFEYSsoORnGOe9dUXY5G2nZs1dP17zdKNtOpkuQ6jcCBvQDv7559+tZE+bfVlnCbNr7mXH0OB+ZqgC8Em9SVZeRjtTjcSSAFgfQk85FVZ3uiedtam/rDfaJhctbtD5u1FRj6DrxUMcC79zKWK4A9qzRd3Dx+WxURK29Ux93nt3FaHnjy9yudhYDPSpSUdWyuZS3N7w3bs+oxyADCk44znH/wCv863/ABZbQKkF3IXEr4XY3HAB6+ntVTSp7bT9PJhYSXEapvcj5Uzk4Hv3rN1m/lvEjSZnd0+fc2Opz0/Sp1lK5too2KWo3izTII0CIqgDK4zx1x3PvVETeYHUYUZGffH/ANeiNlbzZGYtsVgvHRgCcEenFRWsaY3zk7Rxz0HHU1adnYyZqpt/sm6KMCxGNoP4ZP51l6ZbtNLCqoXLsAFx1Nb3hy6sZzNaGcRyOCF3DCn/AOv6Cug0axt7WBJLIF9p+eYqefb2HfvxUOpylxjzWY6KJrfUNzSJuwCFxuxjsPfJFch4vmMuoHLgsvB7YJrSv9SlmnklikUMoKZXPrXLXjFs7yDIWOTVU4vdjnK6sNhkEaFWHXpST6etxIrl2AUA4A6/iaVoCFDHBOO3pUqHO0g8EYrUxsVRpiod8bNg/wB6qt2jmTYCc49OgrchQq3zndWdcR/vGZWzjj8Oam+pSWljGltwgwCd1R7dpOQPStGeI7st0BJH0NVhDuUk+5Aq1IhxKzDpmkP5cZqR0wRk8nmmketUQwT+ZrotJVYbVJ8jym4fPUEcZrnO/FX4rrNsqP0Q8L65qZq44l29uFmnd7aILGO/r9feqBdpmKxqWY+lLGsly+1iFAOTnhVHrV6O5trZTHCGccbmx1/H0qUkimyrB5ce4XBmLn+FcAfjjk1POzTQxx21vsjHXCgZPqT1qNIobhyI3ZGPRW5/I1oabYtHL8zhwRt2hRzkY+gPp70N9yVqZDK6ErIBnpgnpVnTNOfUGlEeS6LnCrnj1xWpqejrsaUOsUoOArH72B0Pvx1/CsmzlurKVxHvRmUq2OMj2x9Km91dCas9SGeKSCR4pAA6nBqWGTEBVRiQk5bP6Yq7Y6e96pY5AzjOMk57+4qnJaTRO3yNgHGcEcCp5k9A13COPe6lmBUYLHrgZ7mtm1jhQ+W4OeiMe456dqqabCZbeRcD5s98ZA7mn2k0gtpbdiCUbAPU49j6daG7IuKEvoV+dFQAcsDnk47n371SiuMRHdjcoxn1HNbTxCSxeQkhguPX14rmDxGQDz/OiPvockPjK7g8uGT0FWCstzl1Ty4QOMent6/XpVOBDJIkYwMnGa6poUjtolHLIoVvfj+VaSdggrmHFGDGyEHeOeabDCRufnYB+dat3bbIfMjX5wccfz+nSqU/nKqCQBVOPlHvU3vsU42M2Y/eAGWxkE9sGpLeRVQ7eo4P49SabKMO+CTz+hqGEhXOc4x/KrtdE3sySdt3lYU5xg5PUg1XfJZuMnPQCpyhZiSQAcdecU2Ly9zlshiOOcc00JkC8djg+3WlUFTlc5p2wk7h0x6/hRjB6jnvnp7VRNiZe/oevenKCFY9fxqOHPzAkY6ip/4e4PSpY0buoXC/ZHcRb94Ay3OMj0rGWTK8EcdsYzU8crugDAFRwC5yAPpSXNs2A58tR/sjH/66hJIoryxISGjz2NRBgGKkHj1705W2sRkkdfrTThm+YZP0qrEsmhtvtUixoQGY4qCWFopGjkBDLwe+KcrMpzGxVh09qQM5fcZPmJzkgHP50rMhxLdq4Fv5RhDyEkq2Bx+NMDiOORGQ7icHtgD/AOvzUUcs0Ts0cuCe+2p7eyubxHnMgwOuV7DjPpila25SKQcAnIPXmpF8ghhtIJqzLZzIuDJkdPuA1SmjMf8Ay0BPcbf50bifmKRx16cU0qGPP4U45JPX/Ioxk8D3qxkTxMuSOVHemBhjnpVoNtKkdCOc96S5hA+ePuTkVQWIeO2Bk/nT1Zs88n17/nUI+vFODHv0pWAshizdCPbOf/1U7oSMnHBIPpUC5IyGOcYqRGXbyWzjHPOPxpWAYflY9eOaaxyw44xxT3b58MBnikbGBxQA9MEge/5VLH6jOccjHrmolxhsZyB/Opl5GPbH0pMaLumWhun8skD+I89h7dfStS0laykKMgKtyn+weuP/AK9V7a3a0jXO3f8AxBuo7/h9Kc+XDMcluobIOCfb6Vg227dAu7k92fMZ3YgOAOAc7v8A6/WooBAz7SVLEHJJ4XnvWha2hWya4WN5gPvbOdgP9f8A9VZGps0aKSAuckdO4qYWfujj7rKtzePG8iwEAHjPHIpbG2jlUvO+WHROmPrVSGFp3YKRwMkk1dNu0cQaQg544rZ6KyDdhdRRwFWWMIxB/wAOnamW74lU3LthcEAg+lDsS43nIVfrnk80jFCcjlhjBz0H+OaXkSzWtrqG3E21W3SDBA6YznB7gd60LOeFP3kivtKgjaQcEfXtn6GsJNx+Vk+XIyOn/wBep8RxSp5z3JjKnaqtgg+nPbOM9aycew02w051e/aa43eTLITIVG4gc9M/5xWnLGse5hMCBncWGPlHIwfyGOpNYMchjbaCoBOOvp6+1WTdhioYMTkA85/TvVSTv5BfUvQSpIGYuQQBjjOf8BTL+GW+glWzt5pSBuOwbuB6nqeAanhhgjiLx7nA6mRcYPpt6enfp2p2m6ortc2mp7lSWPERt28kFvRsckc9P8ahb3XQuMY9TkcbWwQQf5VoLMz6cYAQOQBuIAxnJOaalifNfGPLXkc9/SlM6I7RNb7scEA5/Wui99ib2KS479aVXZSSpKkjHHpV7T9KmvnOzEcefvPzgegHrWxBp1jb7W2STygjPmfd/IdD+dJ1I3t1BHMorP8AcVmJ9Aa07DRZ52zMjRr3GOf/ANVdAqh2IjQAADA+npUj7mUsFGMAcH15+ueDScmXylW2hjhxHGgCDk89SPU0xpA3AHr37VbXbtOVBHqe2e+e4qF4lB5AHfg1C31KRBGjSOFUEseOOafLE6xTKPvFWGRz1GKkhAWQFA2QM8HFTRg9gMdS3PP41TYzj4sYI/8ArVt+HCgkmVQN5wR6dTyaybuJY7uVAPl3cDOcc9an064FreJI2SuOcD/PtVvVaGa0ZoeI7rZGlupwz8vxjgHofy/SudwQ2QeKnvbh7q6eaQDc2OPTHao+xJ69qErIT1E5znI96Bnnd2oHWgUxE9pGryqZQ3l5GQDjI9K6FktbbcxdQkg2qg7c9/yrCHllRjPTHtmkBAOQR1z2NS1cehqXGoKoQ24XgEZPJOfboPzqhJI8pJkPuPT8qVpA7M2wZPHAx+JqMMMHPQfhQkNgCeME5H60ZJpGckGlgwXXeG2Z52jtTEPjVmGApP0yat2mnyz5JGxPVs8/hWjZvahSLfCHHOeD+J71ejIx2Oahs0USpb6XBHgyZkPv0/Kr8aKoCqAAOgHGKie+t4wVaRcj05/lUQ1S3GRtdj7CpdytEX1Xnrz/ACpLqeOGLfKTx09z6D1NZ8urIq/uEYv/ALXb/Gs13kuJMyEu5OBx+gFJRb3E2LPK9zMWYEs3AUduelWpdLuIxlVMgABIHUE/zq7peneTmWfPm4+UDHy+5961IyQeeSOScUOdthW7nMxYwcEj61Ytbi4iI8p2DA5G1u/rXQxafaz/ADhEEzfeZwMYOOvbrUVxpdu6n94VkjbG6NeCAff8/WlzpjSKVprE1rcLIVXzU4G5e+COR+NLbLHdSLI1wz3b5OeFCY5HXtwePyq+Y7VYjEsSyEnJd15I9vTtVSbSkixOjr5Y6pk5VvT1x/WldMZaVnKIu9n6lhjjrjOfp3pjxI0RIc+ZnBXHQc9/youJHYIC7AKMLz0HPH40ihmZHIGduOf8ai4Nir80ioWCf7WM8gE8gVMJhsXyxiXjk9c+v+FQG4Cq8PIPHzexPIPtTAjJICSCMD34PX/GqsMus0kkOwIC7emd2AD+nepY7iS3ZSqLtdMKA2Tj35/Tis/zmjLYLZyFPJ6E9h9KfIhhll2ONgwwOR3/AJ0nG+4i39seOb93Cqzq4LZJ5I4AwfftzVhlnkjZ5I1wF3OxPYk4Bz3yfrWY2yO5Ro55AcbmaMgnPTIOeT2NaU9xIwG6TlV/u9cdBWU0lZICi+yaVWZgAoGFH8XbHrn8DUU0fzFIECowC8sD9c56DPPtVlfLlnSNFUszE53dz2J9M1DKhjkURMFKZBJIJPUY9MYqouwIrSJHHKVkYSANtLxgHOPx6VXuG3MoCDIHduBn/Pr3qcbiSVJckEHrUEkymKMeWOVxkDOcHr/j2rVIQ4TSlTIVjY5Ixz377RxVXywB8uCVOc+uf5VZiX5WJOCAW4PbjrjtzzVdtyZYgEZx0xwKoGVmO0FTnBOR7jP/ANY1YMaqyBXTZIu8oD93Bx+ftUU8Yyp5A3evOCKWBds22U4UKOevynn86roBbskghkd2GGAbAz14PYcf5FPkkDom2Mbccc5P4VWeP72V78c/0+tNtpQHlU7uOi+/qajlvqBYceXuRs5zg9On1qtdqvlBdpG0g8nr15/Wp5G2qilQQOQCfzrOuJsMRgsvU/nTihWLOmKZDsiUs7MFU5I/+t361pnTL2RfNaLy0jIAeQhRk8Ywe35+tZm+ZlRY1EanGTjp+Aq8PKEitKryhVwPMc/MD347UNdRpInhtJbh5sNakRrh/wB+oBAx0z1OO1QWsT280QW4hcPG4ypzgbucn8aieODaxjVUPVjjt6Dv+OagudgdVSNlj5OM54wOB+WaS10C6LVvHau0xknZAmAriMtux6fjTpkjDeX5LsTscEsCBnIG5RyTwTjI4xTIXMVqULMNo3PgdO/OfYir2mGG2ia+1Ngd5Ei27qRvA4GBjBGO/A/qtXsNalTVGn015YonDXDnY7gDcpxnavocEZ446A1nq4WMxQwnzCACBngDueev+fatC7vJr2aWWBVhjkzvIOS2Tnk/XHt9KaYFtmhKvHkYLnfuyfoP5VewMpwWQ4a4Y4J+6uCef5/SrzTDasaKRED6fh0HAqWLynkJkBRVwyFV3KDx97uB17HJqAuWkkkiDFQM8gc/UDipeu5NitcKd/ln7y5J/Dt+dR7R5qguMYzwuf09ce9WbghrwyNxuQu/rjg8D1qN0NnK4dQ8uCMEZCMQD/LNX5DsOjt2uWP2eI8YBLkcE+nYH25p0lrMXMUhWPyvlO5xxjsPfmn2195FvEqsysCZPl7t6/Xp+FRLeyIks0hEjyuWLHnOepPp1qbyDQk+zvFEjmUoD8g5AyvqB1Iz3xjNQCViVy5VgMknv70kjyXTebdTEDaF3Mc8D09qjjZPMBXaqqMZJJyR/wDX/CmkDLW92UZZnfOcgdB6DHf/ABps3lwgI7/P1J7fn1zUVwzukUak73OTg9ffA4/wq1CsRJZ0MrAADPAyO5PU/TijbUYkEW1VcjKtgDcCBzzzVjevCquxe6+n+fWoXPmBIiBv+7g8Y9gB0o8xEJyylicdAcj61DVxE+dozyASAee2O4pTJuJwASG5x/nFQq8bKQ0bLgfKTzn69BUkYDg7cAcEc+3YdKTVtwJ0L4lcKGCkHGeoPHHv39APeqtxHtPmxuOTjH93OetWpUQQ7Yn/AHg6c7SR7+o9qp3NwHl2KFO04J9vY0R30AYJMZDZzRJJ+74yfWqksu2UYIx/KlSQsSDjpmtLEgWYMfz9aVJCOfWmt90kdQQT7Co+RyBVXAtM2fu9OpxUPmbWIB//AFUih3yFyCPb1pXt2A+/z34NF7AODKRkMaaJCpODxmmbWT7wBXFOBRkyRxii4EnmblLZ+tKkp5Az2/KoVRiCUwARnB5pQyrjc3saLgWs4AGDz2/z0ppc8DJwOnt7VEsvUjORgU12Kk9fU+/400xFhpiV2hTxTg+VJIPy+9VYycE4OCMj3qZiG25OCw/P2rSMhNFkSrjIJz35zUsMhL5HGBzx0FUVwMqPw5xU8LlVIKAg989vatoshl1SN3dgOmKmL5I8skk8YqkJo1xtyRz+FSK4UZxlWHUHGK6IyJaOm8OXRt9UtHcn74Ga9pGvLBYKS3J4618+W87K8bHGFI79K6q51p2gijO4gDP/AOuuiKUlqZSieqReJlaBtzdVOOevWubbWisVwQx5yev1riE1fy12BicE4Oegqu2ouyyMWGMEcc9KqyRKiR6ncidmZeSTyT9ayXuAu6Ns5ByCDxUUszHdjO3rVJ3BYgjB6+tZSkapFwz7lOODnr/ntUM0oUjc2cdxUGGY5Gdg/WkZC2OhxyR61zTmikizC0aAgkBn56cY9M+tRvNGpBUlWDZ+o/xzVOVnOAw5HSnkOqnO05Gee1RdbsZPLMhjOG+Y9Qe/NUw42NuyeeKYNgcszMcccDjNT7ozG4jXHy9+eKzlMpIgi+dcjOAcninOy+YFUkA9e+KjtZSjKFA5GOeh5NWvI3s0oyCMZH59f1qGy0JNGqkZwcjP1qKVA6/NgjpinnOCDnPIFVI7pvN2T7Rx29ax1YFhQZIkhUKTyBu7ADp70eZAow6gPwCQO4OOaZMp8pih+ZeV/CmRTKxy2CnG4HtmmncaHTRiQYUgE9weQf8ACq3zIxLAE4x9eanlZNwdDhep9zRHIkiYdeV454oa0AWOZHQgnB/iGOCf8aZhd2V6jrketK0KiN9pwcZP+TUSP83XqNv1qbDTJFY4IzweelKAOc96ZnORk5xinrJt4JyP5UDE249cfSmsjZ4qZmUDJzntkdKXnGciqTCxCgDLjuKaOCR6UFhk7aRTyc9aYDgQwIxxTgAqgjqTj6UxFBBYDip8oxxxzjHb86VwI1OMEEDHfNU7+2S5jPTzMfKf89qtsuc46AZpigkHpjvTuFjlrhGXcj5yPlHbpWc4K5B7V1OpWokhMy/eQkN7iuduFLHvWkWZSRXX1PWn0+ONdmT1PA+tMZcDJz2qrkGhoEhXUolBILZH1yD/APWrrT0HPI9a4OGRopEkjOGQ5H4Gu7t5I7izjuIzgOu7p+YqJmtN9CK7Uy2ssZyQ6EY/A1wzqFAyT/hXeFgsLyE4VQSfwFcRdhcgjuM4ogFRFcHB+mKlk++e1RhSSPSnyfe6VoZCqMhQB3qVuFAGcHg+9Mh7/SrdhCLm8iiIO1jz9Byf0pMaLmi6cZXFzcKPKAyqn+L8PT+ddqgGAABjoMDoKzY1XcqjCrnb9BWmDxtHUcfhWMnc6IKwhHJpwUgHHXqKaO5J+lL97qKgsUbsgnHoKTO0sT1xjinDGAQfpTDjawHPPHNACKxLqCeMYzn1oNzIJ38omFWGzCnovpmkkG0DGM5xUZGW5xk8Z9KAHJgSg4DAHPJ64NSy3AmvVmuMYLZbA9P0xmmmDCb1yUzjJ4p15CyQIpjUHqG5yfagZBOwWNkVyVDEnrg+9RRqWBJB574rTl0q6NsrKoKkZ9Tj0qEx4G0AjbxgjFK6E0LFax3HlMDsAHPOMkdhnqe9XbRliKuqM0Ebb9jdNxPQA8detVBHsWORmCjlRx6VaMavbI0rL5SFtq8jcw9PbJ61nPUpGtNcKUDRqBLjfJuOflJz8w6Djp7day7y7aK3ufswZlTKhWPyjPoOmcEfj0qy0KxybreaLzI4/m38g45IA6kcgAdM0682nSrZLqVoWmADPgHA5ONo6n+R9qziNnCXsM1m6XM6qYSSvzHIy3p64zz6VSv9OaK2WeErLAwyGU5wc4wfQ1e1ewgCKscrOF5Qq2Rz2I7H+dZ2heYszW/mEQtJmWPrwp3Z9OvFdSXMrnLJXdmVFgZkcMhzn5ieMVXnjaMZGCtbmpSXM77hGQj9CB94/Ws2TT5rgEKoLYzgHrj9KavchwKULjcT1+Uj8/T3rX0+xhm+xmS5O2Q/vQo5QA1hlGjchgVYHpWt4emj+0CKd1jjZh857D0PtWkloEUtmd7r8i21jFFp9qIwV8xuAcADAJz3rEWK4n0lzPLlZXJds4xj09qr6nO8krRxyFi6jhMnJ9CPwGKt3VrPbWyJO6pDBGrFC3LE9vY/0rJKyOhu7OXRZLe7a3aT/WEYb1BGM/kacEd0xuJQj1Pb2pJw1xqaFvlLjIwO/NTWasUHZQSPyJq+W+5jY1vDCQWt+JJIVkYKTubJ2/l9a6CbWr29tLhVjS3gwAQo+ZhnHX6fpWLoYZrhliUAlcZYZB7c+3t3ropVu7kxWygyzOSp2qMbcfewPbpWckrm0F7uhy9/lQkFuwCDkso/r3+tUBCqtyMgc5J/U1duYzBIytuBBIIbIIwT2qEMNueGJya1RkyFwF3HoOoFTR2kkdk8xVMEhh8w3KOeo9DUIUMBuU8kin3FvLbwIik/vjlsDoB70MaGpPH85JyTkAD+dZ7E+e4IGHOQfSraW52vG5IOcDB7j3rOvpPLXAHzZ+lG7sC01CchmOMYB5qFGXJUKMgc89RUCuCoAOWY5PtTpGXHoMdh0Ip2sTcrTD94w5wOPrTdxK89ulJI5YkdhwKYOnTtWiRk2O9QM/nTgcAY5/Smp97+dL0yCaYjR0y/ELMsuDG5yx2gn/HHtVo3ljvkMkIkJGBtTGDnrWGD70obnI9anlQ7nSWgtJAHihU56PkjYR/WtJZ5DOs0eV2nGF4GPp/OsXRCiW3LqGZyQCe3HUVs2qzSTIIF3OWwF45P0PFZSsmWgkkE0hYqM+wAwfU1olLY2v70j5V+U7Sdw/3Rx1BGaZJNcRKxYou/cjMEGCTjgY4z/KqckYMGQxC989W9vas9ytizDeRr8lurIxGGOcqcjoCPas/Ura6FkryOCjtz9B6dse1OADFQeEUcADgVLJK0zeRG7PGvK7lPA+npRa2wXMmRmtyFGCByOf8APNXrCza6jeeIjCAFu3fr+vPeoVtfOjYM4BU8cZP0Aq3axS20EUYDEOxOF53Yxx600rPQlKzLKxoJZYo2DNjCELwRg5JB56CuPucCaXYQVVjgj0zjNb+ragRam2RAjknnoQvp9M/zrBsrZ7iURr36+iqO59q0grajk7ljTYi7s5UYHA4rq4llaLiI+WuMnpjI9+1V4VsbOzCSMHZMFcKR17n1P6Y6VFJdrMCYbg4PVW4P/wBf86zl7zGvdJ7rAUAEGNgAeeK5++f94UJOO3b2rSe7hWDyX3kqevXArPuEMhZkyVAzn0NOOhcpKS0Kckfy5PGQB+IqtIOhAwSATjsRmr+0tF71WkUDIxzncPoa1TM2rjLYK42vnGefp6U+dQqptXjdjPuPf0qGJipVc9T9OavRxLIjgDJK+uMe5oegR1RRK/wkgFj60LGokBOWXOCM9T0/D61LLC0RQyJ8vBHuCcdf61HMjRSnJXB6c5//AF00yWrEaAo5AweSPXIqwn3Sp6jpUScyksRk8k+lTRkMOe1DEIGaNs7s5qxMdyqQc46sff09BVeVRz7Hj3qZ9qRqAwcEZOD0NJjvYEdI2JZQ/wAoBBH+fzqWP7Oy/vAx9Ch/nUA5XoOMD+dORlUYAC5OD25qH5E83YcIDMSIyM9ceg9yKikjaIkNg+tSRXCr5gQndj0pVLSRsNhOec8002PmKwwQcEnFXbK6kiiaBQXDHhQTwf6/Sq2MDjPWkZuegFPco249oXfNlGJysQ5Y/j0H5ZrPuIY5JWdonJY9z0/KoIbhoyMDcgOQD2qxLcmSMKjbOpzjofQe1TYGr6GenTg0c/lSL7Dr70o75xnitCR4GR/9b2qYrujBA+6Afw6VEnGRnI6Vbt24IPQjb+dIpGbNGVy4Hyk1GPrV+QKsLblBAPH16ZqiAeSD0qkyWKvB4PWpYz0G4DHtUS++eufWnDlTkdKGJDmUgf4Gl7jHSmJ9elPXJ6delIY4AnIJIBrS0qEyzJhSQvzH6Dnp3qmi/KBjkcj9a2NGbyYpG8sFmAAz7c8VnNu2g0adwJr5pZSyyyKC7HABAGOg7dvwrOl8qKQIFJHBfBx/PrxV1XYkPL8uP4wBz+HeqVsbe4vZ3ui5i6/IApYD68D9azimirF+zldLmOFMyQuQU3HGPYkc/wD1qwtYkEkw+XaVGNuScc1YeZ4y3ko0flkHDsSQCcA54rOunMshzz/CMVUIWdwaXQsWnlpYyMdzXBf5R2Awcknrn2qGe4JRcZDA/wAquxW+23UEln9uQB6D3rOm2G5I2/Kp6Z61a1YrkjswJIABJBx61oW+JIY0CFShOQcZJ/8A181ThbdcowUkgjuOv9K6K7tGFnBdx280ds2FMkhHzvznb6jjHU+9RN20FqyoPluInIIPBOMHGKteJ7izmFu1nGVKDazMwy57HHYZ+pqkrGKd8HIBxx39gf071X1WYyOAMsSMYwPy4+lTFXY4u2hSiheRpdqltvBI9qsrKqqBFEwbbku+Tz7AcDr7mkWN4UZJG8sbD8uevXqBRG77FAcBCMcnA/H2rTcaRNFbzra/aEuFiyxBQMd7cdcelU3kZ2EcZJPv/OpbW9jgZ5J4RcYGAuSqg57kc49sjNQSTPdSuyqibvmIQBQB+FNX6jZK0SSK73F0qMBhY9uSSB37D9TS2ymIKV5yR8wNWtLMseJZSwiIABCjqKuxxIzYOxoz82fcn86iUuhL8h9vI5QMrFFBwQvByB0z1HHfjNTQuiKVA4YYGB39qgEYSUpEMAn+GpiAqb1IYHjg+5/Ko0Vr9RrQdwvCFt2OuOn/ANepkY+SPMc468d+SeagWVTuYr8wxipomDthgeuD64qmWCnLEBhg87QaCwcMADkdBimPtV2yDuzjrTVyzgKSMdz2xRFAhyE9ScDv/wDW96fGfb5c/wCc0SYYo4IAIxtx0I/yKTOCQO/AqmUYGsRkajMVHy5BPsSOlVHO0gd/T/GruqyQSTHbv8xSQzE8cHtVOXDjIRVA4G1ienfnmqWxmyDaaeCRwPwpwUYz7U0rx15piEyMUgPOD2/CnIpZgFBJyMY7mtJdDueCXiBI6c8UN2C1zO6H5c4pwbjjHtWvDoMhYB51299oORj68Veg0u1iUsEEhBAy5zj3wOKlyQ1FnPqjsmUjZh6gE8/WkCspO9GH4YrstkKsF2qqgfwnGD/SoJFAxgkgjnP1pcxXIcsCMcLUqRysCUjcr7A10ShQOgA9qcrgHjOfrRcfKc4r4GBnPfNSpKwUqGO0jBGetdIscb5LxoTjnKion0+0Y7vJUY9Dj9KnmDlMKOGWU4iic9+B/Wrcel3LHkKn1Of5VtLgDAHGMCpFxjkGlzD5THi0mYt+8kRQO45/StWzs4rUblG5+7HqfYelTA8ZPen53YAxUtsaVh2flycf4Uo+UYHOSN3NJg9Ccd+nenRqAuS3GCKjcN2KHxuIONxyeCcYqSNgSVUFt3HXGM+n41DhcDPA7AVKucfLgdyfx70WHYVwYyyK3IOGPHbsPX+VVpFaV3zwMY5OamwCDjg9/ekC5HOPy60WC1yMKroeQeOoPSiRXVBtJxjB6dKkSHbtKEqQPXrUmzjJJJPHXNUhpFEHZglQxGOCOcH+n41IzxkEncrggDtgDjHFStCGBHIJ6c/p/hTY0GSshKt65zgc9B3oYiJJiQPMRGQZyRxn6460TTrK/wBxSgAXr1x/nrT3hiClYy27I5YA59qiaNYyEDBwQDwP0o0ExGxLIxVAgBxwMAD09KR2YkBS3TuT0HbFN3DjIIycceuac/8ArGAIBxyfzoFYdE4GAS2R+HrmknQlgwbAbnrnj+hpYo1JAkDAdTyOfzqRYPMjcmMgM/DEHggdv/1ZpeYytLLkABydow+D1H4/likeJJZQFzvAAC54UDsKhmCi5AVflUYDdNx55+lTuq+SJFU5GARzk9cknsKoBm5rbcAqspBUg+hqtkSPukPHBJHuTxUzOCdwXr0/wqI5DMgUHI+YdOfWhCI5kI535GeOh/lSAyGdWIOSNoOfQ/8A66kHzMCxBwTx0xgdqJWBiUDO4tkcdPxqkArPwSAVfOD3zUduyw3+6QnBBzs55x78dqdJIzybsjAHP1H9ar3G44lzlhj8qLAWZWLOxZvmPUt1NUJfvsR68e1XraRZgFLqDgnDj+Rqpdfe+n8hRHRgXE3CPd8zKwB6d+adHKoKowJCNlf14NRxcWYfcCewznv7cinWhdd7x4wQfxH9RUtEjgy4fcBkjj2PX86JoZGQJCAzx/MxDAAAdeeg/wA/SpY42kAnwPs4PzSEfKMc8/4dSapXl39pPkWsQWJSTnHzuPVj/Tp/Omk7j9SWe+3XDfYI3QAADoCMDknHX/CrM+2+tku2AFyD5TqM/MQOH9OxB+n1qraxRxFVMpWVgVbjgn6+n4UjXEsr/M7GPocZ7ccDpmh+Q76E9vhpNu5SIznjI69s/wBKfcR7WbAOWONoOcH+dRuyqsuxGDZA+b2z+tLJI7NDuZUVExu3feIyfz7VNncB6GYrsVVj2rtbbgFgT3/SpI7VYGD3bMtuAWJiwxxwOB054x79e9MSTequWdWTAZs5wM9P8n0qO8QCKRlyI+BknrjJz9faqWugEN7dLNNFLHEUAwFJbOQox/8AX+tRXMglYSsTvY4bB6kf5x+FR3DSNEob5FX7oPBPHYduKsFR5Kwwou7AbzM9Mjp/n+lVogK5WTcu5Qg64z2oaNlJyuDt3bcjgf44oAMTEy58w9CT1/xqaFGClwQQxwB0z9T0H65p3AaFSQJkHfgjGepz/n/PNS2dsZpJFLKiqOTg/Tgdc0+NvLY4UGRTjgg8jrj3461ILiXyAY2X958oIHzDJ/wHToOvWpuwJZVMMkkXkhJEBDkgFlPZR78fmaZaIu0tJKFySCWydgHoP7x7DnjmoGLxLJDHtcAfM393P9f6VDbxu74jyQPvYXoPX/PWla6AtvGqtkfKOoBHJB7n3/E09hsY4I2nOBgcY9hTJZVcMARGFYvsHJIzjGOx9egpLeVDOWUOSQc5AGFAP9M/0osO2pYjTLncNxIGO2frUlqVkKLGgLs2zIYkZJxx04/GqLzC4bEbGKNh3P3sevt6U5lUpyTjt355qXHoLTYsvskU+UzBuep5GM9OwFZ6pPIrvgsQBnHfH9cVdhCRIWKksflAzjj/AD2pqt+8IEigYycdCPoelC929gMt9wzlcUqHnIxUksiLKwG44OM9KjIDfMp5z3rRMknj6ZxkdKZv2bdwOB/nNNjLBguDz/Olm3Ftp7fz+tMBsm4rkEMoHGPSmrM3QsfzpAD0Un+VNZSD8y89BnvQBMJhn5gSuM46ZqFmDMSuQKQ/LgkD3B7fSnnZkbD9eKALEUyrFtJAcd/Wq7S7iRjGDkUrBHYgEcng+1KyoAShBZcZ96SsgHfaeMbR7n2qZNrHAww7d6gADoSVKsOMZzT4SRGdnAHrR6AKJQMgchT6dqlRl2c54zjPpVYvjkEbic/rSpkg78E5yDVIROCXzjHpT43ZUYHJ7VWdmVhjlf61JHKVbLYwePyrWLJaLS8gbUOT69M1YWN3jxuXA6AHv9aqJNuPDELjIqWLgttIwe/v61opslly1kWNvmUg98+o963IboSAZzt5GM4rn937olsce/T3qeOUouCRsPHSt4yuQzU3oyNkA7Tjp71WMhjUOM7uvBp0LKsZIUZz83p6Z+tQ3bAxnaBwcnjpj0rTnYkRurlHIGQvJ9qpylTkjAZRzzmpWuCVcISFYZNULiVCwcMR0B49e9YyZaRMjhZChHy4yCDTgnRiCAOaqJMobcylsHb14qZpCyhQxxWDlYqwssnln5QGPQ+1QM5zy2WHUf4e1RyKdzDLEfpSfKrBJM7xz/8Aq9anmuNIccyo4PBxgVPGqi353bj1HTH/ANaoYO43c46f1qyQOcckjHNZtlIZcxQxxIAWbkHCD3qVS7FiSWBAxnsR/kU6KMv94Age/WrCusa4ZA3+etTd9BlO6aVZFcxkow28HJzjsPwrLu/nXeMo68AetbN1NuhEfyqBk7u49xmsWIj5lWUuc5yM4P4U0+oieGQyW/lsrA4GSewqTaBGSoXAxnvSeUWAIJyeSRxn/OKHyh2rkZ+UZqVrsBEXjOwmMhA2CeeAe9T+QpbJYjJwOhyPUf4VXkKojRjPXcp65/CnRjeNoYhFHyknof8A9WKvlGidoGAYBgQRjkY/M1XfOQHAGOOnXmpXmfy9y9uD/n9aZndEpbO4cE+v1qWhoMLsztHoe1GMZJIpqjaSSQcH86mSRWDbgd2OuepqRjPMDhQRhR15pJGyQIyPQ8YpzbR05H0x+FMbackcAU0MbGvODnH8qlKoQTjpxTFBUbjnPWld9y9unpTACQQQOPTFLt2KpzwTjNRBsdhx1qXIUnJz3FAFmMAxljtIPTmoHUqB19qmUKV3RgZI+bjn8KS4c4VQo24z16fjQIrqFBkDDgj+Yrl7uEK/zZ29PwrqHTzIZFJ27gVyOorGurQxRMjt5mOVNNOwNXMFuMgHjp9KjILd6s7VUtgDrmmjYCc4OTitbmNirjvXReFbseXNauScfOg+vUf1rAkOSSMAdhT9PuDb3ccuThTz7g8H9KGroUXZnWas/l6ZNz8rDaOeeTiuOuD82PQV0Gu3KSWtuqMCrtu69QB1/WudOXl+p5+lESpse/CqB7Uznr7048sfakHOcE/lVEEsXGSe1bXheLfc3Ep/hXaOO5/+sKxF+VCB3966vw8gt7CMsBmQlj9D0/SolsXBamjGoaRV7ZxWoqYAPGRWfaoWnAOMLya0x71jI6EMPHYY/lTCeD+lK3J+lRFucEH0+lIY5h0wRgcUR5GQQc5xTST26U5eyj8aAEkxkjtURGBk9/0qY4IJzUD4JKgnFAFuxT7RcpESR3B+n/1hW5L5cMBE6q7kkgkZ2j+gwK5+ylME6SAg9vz4rUmikeQ/aGKK52DHOe/5e9RJalRehoGa4WJvIV2JAwnZR6/4VGHE8Uz3EC716HI4Y+uP/r03z0QEDGFALP6j+WKyNS1TzMx2xYdNzZ7j09elSlcpsB59xMPLgaQL8pwOgHsenH5CtGSVwB5UbTQtsVGPAQ57+vP+TVDTSpilM900QKEZY5yxOeO+cVZhuZEtHgVFhjGXy+dxYcgD19e1KYkyncSy24K5YSB9+0pkkHPIzwPpU+uXUdtHASHbMXmfvCRuGfb6YFS2aw3t8VuXl+0tGEEWCQxHc+3t3Nchq+rXdzezwagE+0RfuiyDAIXPP1/nTprmZE5WRozyx3EELRwQiR1KKqhskk9FHp+maqW+lvaatfR3+IZFiR2GexPT69PpVazlljkSaKOV1BVNyDGD6cd+KY1xc3VzqM21sSOEcjJ4XtW1mtEZ3vqXL+ZISF3CSQjarBeFX0UevvTLeRrWCaQ2jzW3G+RGGVP09KrW8NxKWURlxGCW57j3ok1prSze1Fs3ml85LAgdsADvSi7qxKl1ZnSiHUbhvLjMTEEqSQc47e9R/wBi3TWMlxHlvKIEkfRlzyCPUVpaW9u163ms2muE6k8k49CO9aUzal/ZZkkMMlu3A8xdj4HTkcfhVqTQcqepy+n6ndWUu6OQ7hgkMM5xzyPwrqo9Yj1jTbkTxbLgkMzF1C7uxGeQMZGOaw76GK6sS62ksF3DyznlZFJxn6/5NYaO6kNGxVwcjBquVSFdx0Ni3zNrCbGUpAhbcDxxU1kha2XGQWBLfiT0/Cs/S0coUjOZLlvL9SEH3j/ntmtpFDCQKx2p8vHb8abBG14fvLTT4pp7osDKNkZHtyf8K2rfW4fspfT3WFFQYUNgk5JJZvx//XXJ6ibaKytFwzOAWYDjqcd/pVq0aGLQHuniUyMWWPIzt5/LPGc1lKK3NYya0KOr3c93fzTSgZdiSfXNNUKgViQeBu5/Ss9JzwScn3NPjnO4kEAH8fxrS1kZXuyaWZGmLEsFB446D6VZFwguA9uAsSMCobnPOckfzFZTE+cAxJBB/OrgkR4dqkAKMj1+lJWkgehavbxpbt5oo13uDuVBgDjr7D6Vzl0We3Gcb2Ppzz710GjNbxXqy3bqkSgkse3B4/OsWRTKzyYCwHcFYfWpjHkdiktDPjQq44xgY+tMmYkdPrVmQBTkdCB+dVzyx4GSOa2TMmraFYYySaD1OKkderL07+1RnFWQ0GOvH1oNA7+lIfTHNAgxSpn1ptT22DNHkAjcOvSgEaNqLbYFnRgehKt/PPatu0VLcbreRmBBC/NnHBHFY97bmJ92RtPNLp02yQoxbYefxFYblrR6m0GnZVDEeWpyF9z/ADpxY7WRsZznkmnR3MUkYEUjx87SzY498dhSwRxFWhWVGJ/izz196XqXYd5SSQlo2Lt3AH3evf8AWoI3dSEVcNj+LjufWtK7WGwESRSb9xG7HJAPf60qyCSRVkdXQ8x7hkJk+vYetRzBYetnb2boRN5rFyGIAK8c5HfPasjVbk+dL9nVYoiPvAksQfc9B6itW71BoWW3EkRjXj5UHJH+c5rm9Tu47iZkiVQndhx/n/GinfdhfsZk7F8nccHp71t6HEgsZnBUTscBi33R6YAwax4V81+nyqOtXoWeEsyY5G0/T1rWWqJuTNbSEsWZXc56H/OKjitJGV5gu2GP7znoD6D1PtViJg0MhCBpBgZ9uf14qO7vGa0gtSCkUblj2yx/z+tTK72Bpbkd5L8scYAZgOc9ge3HemvIsM7iEEpgAg9SafaKZL5GlxtkON2ehPeppLeKO5YSElmHBxwCaTjZWYcrZWIRomYgqT933Pv6CqM65AIHbJ+h7VphXUmNQWQHIOOuO+OtVpUBZtpyuf0ohoVFdDKZecDvyPpVgNtiAbPHXt1/+vTnjCuQc8DjjPTtT4cM0rSD5D0AHWtbiSsRSSecrBiFAHyYHU0wpmEB3Xpnk8//AK8j8qnjRfMZ5CyJnCgYpZGkhLEfMh4J7kentRcdiokR3Dj7xx9c/wAqWL5ScEEdCasvJFNbllJSTIwoB5H1pg2/ZZBIAJFOVPrntii5NkIc4IOfrTRyuCRxmlQhkABwD/nBoPyORjI70EtDgyRnadrgggjNOtoWnk8uPaWxnk+n1qbT7WW5uCtuyK4XdljjgUPbSmQhV8xh12L2HepEk9yILhmVgoIOMjvT45PLG05K/WozllI57fgauRwZjXHC9N2Dyf60vMS12HqglBUKApGT/n1qk9vLz5Y3r7VpxRmJSXC88dev/wBaooyCMNlUPp6007I0M0RzDrG35ZoRJN2DG/P+zWnjA3R8L3NOmyUiZQcDjine4amICc/iDSg0wep6U5e1USPQkHOcVZgJJPXAI5qqvfPWtfTifsToEDeYcH9KGUhPEdqbJbaISRTRTDzo5EPYjBBHJBzWKoye1WtRkLz7C5ZY12DJzjH/ANeqo68ULYUtx/bAI6/pTeM8DvSj3/CgLkZNAgx8g9/0pY+uT9aRj2GOKmRQAGHYjHvSGTAlwpwFPQ4rVE8MMapvU7efXJ+lUbWNWbBdFBPLN2xVmRrW2mDRE3AA5yMYPt7VN0UiK4unuAQu8oOemBjNXrcJDECADnk4/wA+mKjiSScsxPloc9u3oB3pkN0kVjtIG9uF/Pr7UXvsG5VupN07suf7vB9M81HZqDKWZC6rjuevrTJHOWBI25zUtpH+8aN2CgDcSfQjP8jTewGrcRp5JkiLRsMscNn8h2H69awICfMyASx6fjV2RmS1nEZJVsISSef8/wAqq27Mr/uk3uRgZ7UlsDLDp5MsQx1HPfPPWtvUNYnuLGGxmmLRwn92HQE+gw3UD9KwGMjsplcFucYA+Xmnyb3bc0jFvqKlq9riT6FiWVokyu3dnAxmqgaR3DKSXJ646UrcgZLMegye3pTTIFODn3x61SQI0LCJcu5tTeS9t5IRT746n2yB61BFA7xiRcjkgBOCCPan6dOzOUWRlUDdgccdP8KsQhkgklLFFLZC56k9j71m5MdyrZSTwTSNHNJC3Kluuc+o71YuVWOeMx7Vzgk7QuSD6Dj8qltUYsWYLvPzcnHHsPWm3DBnwyHzOcE5pc13YV29C1bRsjrIzI+DuA28dT1HcVO8gLHbGqFgMkDAyfQdhz0qibjdEpYtuUcD/Pb2q1dmKCCNbebz5Gj+dgMKGPOBnk4Hf14qGrgyU5iaTynUtjBHXaP6n2/yYUUk7VXgDIFMg81cDYhDDJ56nHr61cmmgkkKwW7WoIAIDFu3qef5UarUL9SKPhCpxuzx61NAynII+bjoOcZ61CMFFK5468nrz/8AXoR2jIIxz1z3BNa2bWpaJm255HQ5/CkGPKJGOTgc0SpiZlGS3GPf6UMN0gRT8o4/+vTSGLFnypPVSCP5f1FVNSufJiIXHmOMD2FWbeVVZ1k27GUqCT3PfNYWoMxu5BJ1U7euenuKaQPQikVijMcH1Yd/bjjNVuw+bg1bkvJZLKKKR2ZFJCqxJCj2HpnJzVIr1IPFUiGWYmUK2SM0pHXH4e1QRkbdvcdasA4xj6UgRqeH4B5r3BUEocIMZ5rdRS6M4PzZye3HXP51n6cvl2casNpHOM+pzVveHYqucn2/pWbepoloWEDuWwwyckkD1HT8qidedqg4708zjzAVHORk0rbmbIIKgcZOeDU3GVlYKx68e1KSznAHJpxQ7sHHTOcVLGAM4Ge5HWmMjWHPUn8qUKqnBBNSbwAcH1/CmA59c5ouBKi9x0px6c00E7QAc59qVD83J4A5pAIxyQBxipF565z2qGVlZzt9sGkjJBODyOaBl1QMc9KcFCtg8ceo71XR2xzjpUnVfYc1LugZINufvE+3cn+lOVyGO4cAcYFNXaOuMHnmpGk4KDG3OR78VIIjPUnjr0py5xnPGKb15AJNKmR97HtTGOBwSccjmpE5B9/emEhjk4/xp42YHByO3ahAiQKCOelNBAJHGKFO4HnB7U1c42+tMZFOxywUEtnioWZ2UhUG4HGcdfxqwCFVgx75+vtTQud7liBk4X17fzoYrFEySEOAyg54B4PNW3cbIlC42gZLY6/0qnDGGeUPntj9ePyqyPmDAckcdOn4+tJklebgEoFyrZbnqaPNPLgEhjnjsOlMkiIyVYkHr9aiV2jd1Ybht49j6+9OyaEWnLMc4G/AOTjkj/IpgklaQkZ3E5+XjmkRwq4ZcsMce3NMEn3ioDAkn86SQEr75eVCJvGODtXj+vvTPM2vsk/exnJxyATT9qrHglfm5DDn3+tBuCY1jZQAhyBxgE+3foKYFTknkkEds9eeg96sP8sjYA3HGe+OvWmgb2JGMr0z/TFMVGU7FwAPfpQwGzLlDkEbTxx/nFKZMYdQOBwM45NOdpJR95dqjhQO39Rmqo4cgAtKT91egH1q0BIysqrLJsIkG7AIPf07HNMkKyzYUcZ5C8Y9gKikYxuQOG6n3PrVqdsrHBEYXAGSyrtJJ5P1PanYLFSVRHN8mRzx0PP8qgmLmRskcGrU20BURW4xksOQfpVF85O7oOtNAXoyBGMD5MZJ9KttcR6bGd3zzsvyx7vlQHnL+p/2enTPpVNZDFErJtyRx3xx29/61VBCvufJxn86SVxIm1C8vLx0N3KXIGETgBBzxgcD6YFPto3gQsQAzcjkHH19KbaCMGRp1kLn7u3tnuc//WqQO0R3IDu7+3H60Pshj1chBgkSFuwzx6+/PaljlkVxKu4SIcgjnHvUBYKcspJJ6Zx+VKjnGBgZPJ9f8/lSsBZMryRneykMc/TJ7Dt9KZtTOJGC89/4fr/QVCgO8KMc8fr61JO4kIJYswX+6Fxj+f170WsSWHeNIyGDgn5hx27cdu/PX6U3UFbbDByiNhyAM9RnmoQH5DMUUjkn+X+c09jIblxGpeQkhB1Ocf4D86EikS2rR+TdvNuJ2iJfQdyfr2x+Pas9ZSSY4g2TzjH+eKuIoa0C85VsnnrkDmqy/uvlDH5uT7fXFNAx8SrCjyyD5h9zB6Ed/rUu1UjiBAbnL5x1NQoA7IpJxk1YnuEjkXYgLDHA5wRS1AvC1zbrPGE8qNSvmE7RgkjBPfvzyaqq0m4myeXjrIqFVVT6Hrz7gUl5eXV8YjeOrKgwqbQAg+nT+lEt42xo0JETcN6EjHapV9guuhG10I4niIDu7F3fcSxPpk1cs7WS/migj3GKMBpgDtRCeceg4GCeuapfZ4TIpkmCp1LEHn39auSyCSxeCyUuhYGWdvlGRnAHtz1P6d36DXmQXptGv5dh8mIcJtXece4HGcY78dOTmoJTDLtEKyqi/eZ+S59gOAPxNQFjEdgIIBzx3P8AWn72253kADjin6CbuSSxuqK5AVeg5+v/ANekWR2UsinC4HPH5dqarZAV2GM555/Gno5wwI/dkcA9j649f6UtQJzMVTlARgDHvz29ajKqsLq7HznHcDv2/SkF1G2UKn0Bx36depqlMGR9pYMP4ec8f5FCRIhIwMc59qVc54PWog3Qc5FORucEDmtAJC2ARzn60NISD1wBimHAJwR+VIVYjnAzQA8N2GQDSuWK4JHHPJ5pEBGAwJPTpmpZwijAwzcUgIC7AEEhh0oXC8j7v8qNxzkqD+FGwuSOaYDpFVhlT19KdHkBkB45zxUZGwDdnIGOtRtK3OOKAJVkZOHyKVH3K5Lc44qty5y1LFgfez0xTAezAsc9elSmbZ8uDjGP1qJFBfOQVH4ZNPIGCecdeucUAySRhhhuAI6c9RTI2wSSckfrUWCxwCMD+VO5XAyKpCZZJ+Tgkd/x9Kekp+XkZBz/APrqsrnaC2T2PvTkIBJAPpWiZLNiCRJUBY9PvVODGqHa+VPbPI9/esq3baueh69atbgOADjvWkdDNl+CRvs/GQMnLnvjtRJOGtmC565z61DbvDxGQ2/t6Z+lPdhHGMMOeMVVxlJpA3mGMHIOfoDVRiTwwz9BUsiOsrMmNre/9KqvO0bMpwfaspPsUhH+8UIOOg9qIZhEdjA+nOeDSiWKUYZOevWoZmUspQHb055rN6lF37RnkACpiwf5gBnsazoG3EoOvHarETlcqwHHH0qGgLMcfykEdTuz6j0+lSpkZJ4xx160gbdBuPBxge9LAAcgsMkcVIybcqJgHkdB/SpIucjIx/Oqpc5bB/zjFNdfLQPIVXJGN3y/560AWZoQ8cqSKH7cdwfeqXkoiZRQOOMD0qaO63OyFcovUpxz9f8ACn43xNjjA9ufpU6oLFJPk80AnaxJQdMD6+nWq6by4XcGRfmY9Ovp6mrlxF84ABdMZ+RgPUflUJtzG25UHzKRgnGfyqkwJAh8pipXfnK56D2qFV3O6thcnGM47frUMTSwyGOUY3H5een+NWQC3LMMggYB689qcbjQhKAERknbjGemeajhkMzhOMMCeeMGgkZYIfw6g+1JbMUyGA25456fSqexQ888Z6fzpe3v3NOlwX6Dk9fT3+lRsQp7+h56/Ss7AKw+YEmmMB1B6U8MGUjHA/GowTg4DYHU46UwZIzAhdoGOM5NAwfvZxntUSSfOMgEHjketTRqQSzKABg/jQ9AGhWGcE8e1S43MpYEjvz60gJ67sI304571FI27nILDH5ehqVuBbQhFBB+bOPfvQ7AL8q9fvCoFZsc4HuPSl3HAOTnt+dXYLilT5bkAcj16Vk6gT5i8cFSCc9cVtquYtvOSKoX8X+hSEgZA/rQBysw5fn0/Wq7AgnHY/1qW4YBmA6ZqDcBnrk1qjFkZySSe5o6cUue+KKokd5h2bWOdowPbNIgwrHBzTUXJ57VJu/OgBpU9jQvXFJk8kHrT4lLMqrnc2APfNAx0cckh+RHbtwCf5V2VlbNDYwJIMSBADz39Kmgg8mBIlwCoAHvgf41ZmXlQuSe9ZOVzWMbD9Pjk3GQgbcYq8zYHNSC3SKNFEu7AAPbmm7BjpWV7m2xAQSCex4pfKwOQM/WpTgcComYjigBNqryajZgCOOKG3HOTxUfIJ6+tFhCxtySPxpmMZ3ZzSx8ZwKNrZJOOaoAP3RjP4ika4n3AGVzg9CTx/nND/KBk9KjXk5GeakC1qNzkmNQDkZY5/THaqHOMVM0ZJPP5+tBjCEhgNw4I96NhvUvtLJaxQRNEk1x8pTPOzJ9uv0qe1t/9IAaRnnIHmpluWJOeO2OKoLI7Sxu85UxL8rE8jb2HvWibh7m3iZtpUuoBYgbRnjJ65wck/nWUtBo0ImOJ2BQnZy8Y4yT69eMnjOa5DWbCO41lLhpQY3BDkLjDAYxjv0rU8UNJHblbeR3t3fHTOGJxtGOPx7ZxXB3crI7RkuQDyjN0PPb1p012M6s0tGjsL/ULSztbhFCxTIAwiVSOQOPYdQTzmoIJLfT/CEK/K17O/mdejN6/hg1zM4RrQOszSEqC6MOVx6eoq/KRelDaqoEUYQknq5GST+HFaKOhPOT6VJPd3H2ZIXe1jQ9yORk5zVTQ2ml1cMGjRjlmdwPlA9PfjFP0yz1BrgvauxdW25DfKfbPQ+4GagvrC6sZzvXD9flPIz2p2JTaV2b19Ib642NCLpRGSEYAYHqM8E+gyPzrmbl98zxWayiDqsRYnGB156VY0y8dJfJkdlhY/Pgc/TPWtOV4AzSWKlMLmWPgnA5znp7UbaDTUlcxrS5l8yNoyXdMhMuRj29Me2MVSu7eSKY7ojHn5tu4HaD24q7Z2hvJZ3WVIQqmXryfYe+e/FVpopEfE2Sx5POfb8atO2xF20XPC8CSTTxvKsUpjJDN6DnA9/6Vt2sMsOnti3Uxs4zI/GMfT3xXJjdFIJI2ZWU5X/PpXSaN5moW5C3DAL80y4wqDPX60PuVB9C9LF5lotxLFCqR/IvUGTv0Pf16CoPEkggtrO0jIA8sOyjHBI74/GoJpZXURnzAseWUNkjAPp61lu8txOZJdzueTQlqU3oJEo/ipwiHVcbTyB6UR8MCw5PFKSpJGSVHvVMgWdBG8MgAw25fxxmlWXZxIAxHpzmoQWiibIPySK+Prmn+QUJyR0B45684rPmeyE29LEd4ZGt/MEZSNm2jvnHOPTOCKRHMlsEjACrgkV1vi2FNP8ACmlaZHGGuZWM74GWBboPXPQYrk4V8hTG4+c8tn9cU1LmVzXlcXZlbySAA3Gcj8DVMEHcOcA/pWhdNl4lGeSfwxVH7gIGcNnH+FXEzkQMCoLDv1qIA5wKllznaOnJqPHGT3rRGTDHHGKQ9OvWlHzDj8aNucj2zTEMH16Ve02PMjuY2dUXOB/ngVS7VZsJFWcLKzLG3DEen+FKWwLc05ANu9lLFTjbux+GfT0qJLhEclEAHTk5/DNXTZoo5m+T/a/xqtLZr8211cDptPU1gvMuxNHPwSmVRiARj071LDfSwyExjnoTgE+nFUC7BMHcSOuSfyx2psNxsbke30q00O9tzchmRLSc+e3nOFXyyv3h3BP8quxzSDSlCxR+W2Qxxlgc469uBzWBt3rknAxwfT86ge7ZQAhLbeBn0qXG40y1qdyIwUThu5HasuNXkby1B3Nx+HqaU7pWO8lmJ6etX7PFq24qrOeCDyMen0qxDxGsEarHyF/WlecFFUEjI5xjr6GnkoSQcBWzjqcVE0KByuRxzSt3Cxbt5lWNkOBnH6E1DNJsOShI6f8A18VFIwjxgEkcjGRUsVwCgFwgKtwDjOKLDIY5Nr7gBkHtkCtaaFLWSKOf5mlTce+M+/4iqghUjdC69Punv+NafiQxyJFIEO4IMkH8MfpUTV2Pl0bMuMs5dW++nrzkU5gN4wBn3FV7eUxtvAJIOPr7GrInSSUhQFPUAnp7H2o5WkVB6WZRmUZcHhcc8Y3AVTmVkO5chVOfr7/WtOZSPvHjp9aqywhoWJY8Lgc+9OLCSKnmBiCPmOfyp8e4hjkttz3459agEbLKFDDbntVhGCLJGDkNkAY6471bITK8h/esFXy1PQelNLbG5G7B6H1qWXc+MAcKFPHT3/PiiS3fYr4AI+XHuO9MTLFxGEjiAxuI3A46qfX9aiYjO4k5PFVXdt4JY5X36c1Oh5xxjqB/Si1hN3ZNaTPA5K4yeKt2t5NHux0bg44OPTNZ+edwHFS28hWTPG4DipkK7WpoOVi5Cj5iMjPWprnCxJGwZih4ORgdTx6n3qkZnboPmHIJ7e1WH/ebpJCqA4yuevHap32GnfYdbIWDFQdoOTk574pJVjjU4yXzkdgB/U0nnAJtQBV747+5NOmw0IYDoOaY+gzdlAqgHuadkgZB4ANQqcHAOMcnjFWZUEcCEtkuNwx29qEC7mADxxnGfrS88gUg6cdqX3J5rUkXnGcjNamnTLHZyk4xGcj6mssdMelNYnGB0yM/WpHewHknJ5PNC/j60D0JFL65oEOA7Z7flS/xYB9/xpvY8duKBkknJzQAqgknp6fnUoyFAB4zgcdO3+NNTv0yBT2HQAZ4GaQySPdnkjp6f59KVWLHaR8xYL+vWp4XgjjCkEsxyxx09qbPBhTOrLtzkqTjP0/wpWHYVZSBtABbPPJ5xxj3qVo4tpLAK0a84bJbrzjp1qlE3UDrVu5kFzNvjhWKMrsC5JxjjknnOeaQJlQMGwMc5wal3F7tt4A6DGOvFRlQkvBzgjt1xTpnLz+YFIzx+VMB13IWATI4547e1SWcaMq7jwScjPbr+dVHYsxPOTyasRkZx0AGKTVlZDvrqOeP51dQAozxS7htYAUySfdwOFAxj/Peo1Z3JCLgYwe3FFtBPyJ0K8EkjGaGW2Zznfnv9fwxmo1THU8GrM8MKuPsru6hcktxk1Owl5C2YtkkDSzugyAf3XUfgTV+5ghAad5lEbcJ5amQMB0yRwD7dapRR+bsDPt3MABjgUlqkcWYpd8cqsVJRsZyehP0pNplq1rkiTKoyHJzwRtIpZbpBgZxz1xn8venzRzKpQy71U8bh1H1Hf2qaOOO4tSgABBye9Rdbi0ZV+0xl9qK2wDuuOfep4JvM3wshVVw2VAJX9eR7ZqxFaM1sgDq7htm3OCAOcnPBHp3psESQzsrAxsM5+Unk9vpSclsga0uXH+xJCjwST7snBaMLuI985HtVSGcsZHJYrnPQnJP/wCumRxuEkUkZU7sHn14+nNPt4GWUS4AzngdKI6CW42Gd/M5yQOxzxUg+bv1/Sp5nR2PmgKxORgYz7DHFNjX514G3PFXF2RS0LXAJkOSyoR+OcZqKAY3twcKT+J4/rUpjDrMVIBDH5c9vp6VlRapGY7hORtIIOeWxxgCq1ZQzV1UWyAfe3Zx7AHmsrO30J4PP+eamkund3Yn7wxj29Ki4bOQRVIlu4jzFkHzH5TwuOB9Px7UwtuznGTRt6kUm31HT36UyWPA4/rVmzTzpUjHO4gfrUNpbyXMoSMHuSccADua6a202CyiR1kLyuuXY9vYCkykrkhzv+U7v6UK4UMBnJ6n09hQxGNqZA6H3+tNCEnCgk+wzUGhLEyZUMGwT82OtWGHybOFcHj3qqsT8kDgHvVjBwuSD+NSwHozkEYBJzzgcUjIyk45OD04yB/SmpgOSSAOT69zTyqllbhu3XFADDkrnBBPSog+STwDVhyu0BDhhzg1WCMck9uaEMkWRh64pxctwT/9emZ+XAHXk0o6CqGSKMChR6Z4NCDjODT0BxxnFSBNtA68cfWnx8AYJ688dahjY4x2p6HkgfSoaCxMD325Y9f/ANVJjplhnpTQSDgZxSpj0osFiQ4zlSAAOlKTuGefy/WkXlDyPpQpxnkZ6UFAOc9ePwoz60o59Kac59qAHY6YPHvS7htyfvDpzSD0GMkUxOUIOBn1oBiEAsNzEtjg0sB+QjJyCcfXNB27j5eD657UyIhXkYscDge/1oRI1o8XCsuBuXJz+VNRfLRtrHqRjHXrn/8AXUszFkJXgnjP+elRRBxbfMATyOf60mJiOpZASDjGc+9MZS0YOR8vGRx/+unlvl6jJOKj8zEMmWOVbOPXNCuwIXIjYA5CkY5qJ5ODtwCRke30p8oHzBz2yOOmf1qqrbt24nCjBOKtIC9busqxhgcYIGf5imTFVBIwSMgnPb/HNAkDQIwA+UgfT6U2WTZMFXZkHJPByQPypgEaMGAPUjHX681asrJbud4JbqGFyMKJN3ztwNox0OfcD1qs7qWAjYsxHLHPPrj0FRzLGFXy1+cjDMy4A+nPP6UuthaIjlLW900YcbomwecjIPT3oQEyOwZtznJOQopRIwTBYYXOMgUKHBK5+bqRtqrgMdTHKWOCNpBI7n29qkgWQzKoD5RQxBGCAP8A61Ou5o2iRbWGRCrHLO2S3HXjj17VHJIGiQ7myRjkk49/XPFMBZG3uz4qpJjJPAJ9amDHleWzgdTz+FLqNubaTyJEZZUGHB7E84x+NCAgziJFGff61GieYxDDAHfFWrOS2S3uDLFK10QohdWCrHzySOpOOg4HrRGm7CICXPGPejYAjAjUYJAPBpjKUdGOMFgOT1yallCxDygA8+TnDZUD69zn3xTNiqrSy5ZgDg5/kPSgBEYMWORuztHsPrT2QKDgHaPWo7aNvL3gOAP4tuQCfrUplbYrPM4bGQQ34dB0oAjdQcY607BiIJ2nAyOc8H1H61HE7M4WPc79gBknHPb2BNSecrBVKkgD58EL+HoPyNAkSq6lgZGEgTnB5z7Z70/R3kk1HMLmN3YANnG0A55PbpVKWWQxEMxOTxk5wPp2q3p2oNaqwt0RpnRoy7qMIGGCR3JweuQKTRSLl5eK8ExWOItNJlSMDai5AAHbJyT+FZ0ELSMQSFQDczc9OmM+vb60w7SwAUsM4Bz+Q+tW5iIYTbREbs75cHgkZ4z34P50bCeu5X3hpSquYohx6/5NPD7isaKkSjAbrzjjJPJ9Tjp6VBtABDDvjr0p8XG/5TtAySOcDPr+IFDAsywZdFVGIc4V2wm78Tx/hUVwn2beskexmAby8HgHkZz1HNOMyFo2t2ZWjXBZ+dg9j6/04561FNuuJN8szSzP3Yli3br6YqdgdkNXZINqI8kxXuQAOf4QKnEpjVY1YkYAYgAdzxx1P+R759xH5UjKGBwccZz+NSqzzLgjp3x/Kq3QXJ7l/MC7yemQ3q2T+mKggV5HKxxM7cnHNGULqHYkDgZHb0qSJV7H5Qc+mOvFGyAE/eNuwACuR744x7dKlEikneUG0dM5Yk/56VHFb+ZEzBwrITn6eoHpTYtu44JJXkZ5/KldAEq+VtdlYK2dv1H86J/nRWVRhh1Jxgin3IE0a4OTjccnpnv9ahNs/ksxcYHJUD3/AFHrQmBBQhAyQOe3tSYbsKCrEDOK0IFLelOXJHUVEoOTnP0qdIzgfrSYw5KcHn+VRs2Ths59euan2gHAJz9aTauckDNK4EKgHkMACOafHuIxHgc8c80rxsScEY9KjZJFyWxj196e4FiaJ9u7hvfrioBEzA5U5HrSosoQMB19DT1lOCTk460tQIVicEg8d6FikySMY61IJRvPHX/PWlYKwyDkn1FPUCOQkDYwGRSRyFfu/wD66V0Hcnn9DTGRR1B/lTQh+TIM5GBTkbfycZz1qLIC4XIb65pFYDO4e9NAWCgDMSBt+vanHaRmMd/1qFHBJB+6entUkHzM2OhHGPb1q0Sy1Gw2nOQSB2zUpcghSBjPNRxDPBI4FAZd7IScD9a1RBcU7ZA2DgYPWlnd2kbcchl6++KqqwZioB4qYHMi5B24we3QU2BFDucrtPOMHj61Uv1z84wcDnnGcVq/KIyFO0Hn/JrKuVZpOCdvI5461k3qWiCIlgc5xmifcI3KqAM5HOKdEm1CDg56Y6099hizyeASKhsZViaXIKkkg8VI80yPvOBv4PGQakhjHlDB5Py5/rTLpHjUKATg+/TFFxklrdOVbcpYA5GDj/IqR76YAOoQLyMdc1UQhIipyGY9fYe9ORcN+8IIHIGe3pmiwyyl5JhmCLyAMNjAOT07n2FVZLl5rpGmYuw4O/sPbtiprlsRoIm/cu3APG08Uhjk8tWZUMi5XGByM9/ekIti7gQgjPHYLQ+oYlCRxNg/eJxx7gVWYBk4QA7cgDkHH9aY4cMrRxsAqg7gMlT6H2qbIDUjcSJ8rgAkHIJB+nFMQkrliTIM9Dn8M1RtrqUM0chV8AgHGMEirSvvwWjIRgCMHPP06jvSaAe7rwHCsB681XleV/lZBnOA/II/Konwk20IXTGNuDwcU/aky7WLIB0z2ppWBEoGxQkw2HHH1+tU5SVBxgLnBYe1XRKBGofaSn8fv6Ypl4oZmfCqCADj+dUMSFy8IJ5bv7/SgKCzZ6delNjIEaAE46nPr7Ugb7w5w3FSUhXIC8fU4p8UiMoVvlI43etRFR0AJH1qXy12Y28kAgj+tADZQjMFU9Rn6GnW7EM20HBUAjr+NN2MxPUEHnj+lPQ7VwHOepx3/CkwJZHUldxPI9O4Ht/OoQFI4UYyDxzwOPzzVgKuEXJJwTzxj8/xqOMMoIU8dBz29M1K0ACyqC6jA7L0wajQnIyT69OacPmY4JIJzjHTtSkEEpnJHAIqwJophv3MPpmlIWQOrEEMDxjqDUaKDtGCTnv0FSAMGySNwOAfTHakByOsaTLbEyJl4T3/ALv1H9ayNpPQE4r0RgzqfMU5PBz/AIVxV75YnkaAhEYnC+gzWkZdDOUShtPfFJjjinY69DQFxjrWhmNHB/CnYGOetJ09aOOcZ9RQMB0JHTtWr4dtxPf72HyxDd+PQf41lc7uM+tdN4ThKQyznozbQPUDn+dTLYcVdnQLgISVz/nrU1uqlgW7nK/5/GoVO5Tk9eKs2RG8A/h7VkzoW5a2jkN1zj6GnoTtYAjJP/1qYeDyPegNwR0BOemc1BY1xsZs1A5z1xxUjnqc8nk1C/J+tAhvc+lHAboOmRSk8c/hTdu8kkH/AOtQAoIZvQd6CyjJAyAO/HNKFA4BHHXimn7xGevWgCF8v1wMDJ96YMBhjGfrU+wYOelRyKNnAyQaoQNk9+MZ5pXm3qqjbuJ5b0PSgH5cn6VGgG37oPc/n61IBu2oyDDEkHNO1HUYbC1tVuNjlslTGuTjI5bP/wBfNINnm75BlcglR/KszXLKWayMscRIiO84HIU8fzpNJ7kybSujU1q/ZLb5Yt9pOm5JM5KnH5AZA7Z7VyenSQR3IluEaQq245GQR7+pzj2FS6VqDWcvlXETzWrcSQbiMgdPyPP+c0lw3nXLy2tr5cTNkBV4GP6cU1Hl0MnLmsx12gup5CltFZkDcEBIJBGeh46fSmWdxmLbOSYU4CA4B/AdT+dST3MuoahLOIVRkQFghJBA46VW04CS1YMqjY/J7nPaq1sJtvVGxpeqXsc6i0hTaOi9h/QfWrWrIiMlxLIHd/vKx5PbjHaqlhcqoEAiXGS2QcZ9j+HSq1woViCTnHGeoHWkk0y1dINvzMqlcnncDng1b0a2t0nnF3vfYPlAIUMCO56461Dpd1b2zkXMKurEfN3BH9KZqtwFi860zFICUIBzlT/XIqmlLQEluRvDBLC85ZYg8pZeDt2dOMfTOK0brw7LDoH9oOJWkYhlj4wsZ7n378HjpWetqkenxPLPbMgTc8ayfMDzxj19alu76WKJLNbiV7FctGjNnr6+wPY8ZpPXYNOpjDltoBLHgD1P0q5a3U2kXh8wvFvULIo/jU4JB7dvzqkZNtyso6KwP61oXcIvwfLZd0a7gWOMjrj/AD3q+UzS10NjV7uIraxWUheMJuMmACQeQPyrMeeWVi21ApI7Y6VlWbyxRMGyI+nPb/61Wt3G1T1oUUi73HA7pGJOAAc4Pv6VJAAVOD14+tESGFwzBW7YNWo2SU5KDcDxgUxIqXSMltM3mbwygAY4GDUto08UZuGh82ULlFHzBf8Aabt7+tGtyGC5FlahQ5UeYfUnnaD2HT6mo3kk063cX7u9xgJFbtkKgP8AER6+g/GptfUtWT16G9b69aeVFJqwZrxVVMx5BWMDoCehPJJ649K5bU7iC5vzJpqSxxlsrG53YHpnrVW2gmupTIwDgHJ3HGatzTPG+3y1QgYwDmhQUXoEqjktQuF6eoIb8fSqVxnylI/hOfzq988hRuAD1A9+9QXAABU98A+3WmmKSKsyfN9RkVAQMj0qwVLAKx6E8+ue1QMOcZ6DJrRGTGMCH7Udec8jg05EDMBnjvTT8uQMelMQylU+nekIyAcHFOC8c4ximSa1gsd3FiffmPA4boPYH8qlNkm0mN2CZyMnnP4Vk28zxMWU4OOfcVpW1xvKyKOc4I/z9Kzloy1Zoc8WyMtJJ34J6/Q1WYeZgxjOe+OtTyZuZC7EBR2yPWmSyiNcRc4OCcUrA7bEZjcccscfd6//AFqfDaTyBmYhVHBxyaFuGx9wBe9Tx3YOAWI/r7UwSJHgW2EbR/e6nuT70Jgoc4yKGkMjA4yQMY9RSJ84bIOM0xinc2QO3NTW80aAR3Sb4s8soG5R/s+v8jUAJJxyBikI2jBwTS3C5ZvNPaJTcQyC4gPR4+doz/EOqn9KpO7dCeP881IWZfmjLK44BBx/KhLhG4uYw5/vqcN/gfyoQ9GMR2xnJx25rRtLmNsR3ALoRggcYz3H+FMtrfT5CCb54Sf+ekJ4/FTUz6cyOJbKaG9QAFvLHP0KnnFLmQ0mVbqIwEhWDxHkN6/4H2qLaFUngjirxlS4hMaQsuCdy5zg56jPNVnhCD5+g6E+lUtRNWJUVGs9wclxwykjp6iq8f3Cx2nAwFxnoaQyIpzH8pHApE6SYyOM+meelQ42NIyvoQXsIRTkHORgHjBPf6VREhWU8YJ4/KtIqHjY4HJHf0rOuI8OSRng57dP85pxIkraosxlRycbQuMYxnNPnZBalXB80YH4e/v+tU2YpJFk/KePp9KmnbcAoB4569aLBfQrocMpIDEc/WpMr5hC/KO2e3tUJBYlh1P4Yp6qS2DjnuO31qjMsHA6g4PFNZd2eajJbgE9ucdzTlDHIJ2j2FAyzbTkLsYjI6E9/wAamO5iMA4B6k9qpNGcdB7+9OSZ4+GJI7c0vQC8CB9TVizmBPlOPlaqSsHTIPB6UIWQqcnAOaSGtC0YczFQTtA5pl+3mbRHkKvFT+bhRJGwCsMGqcgbPByO9MexmLnP+eaU0wdDincEfSrIH5wOnamUE8YFISM+1SAox3x/9elzwCRyOtBGBQvJFABngD/OKeMYP4CmspVgSOKBznHU+9AE8eOh6f1PFPWPc5wOnWmL90gYyf6VctYt3DK4z3AqX5FEMcUsxPlxl8d6WWCYYVom46d/5VcUPa5MZG3OcHimzTPKu5lUZ4JHYfWi4aFAbonBK4H8OeeakkmZ40QYCIB0GMnnqabMAyKCRkng5+tNJGWRcAr60AEIUv8ANnb3x1+lSXU+9gifLGmdo44z/M8U2RRCnJUsRngf1qsmTnFNK+oiwInChirBc8Eg0ojk8osI22Dgk8D9evWnvd3k6LHNd3EsYIAR5Cy8e3SmvGob5tzHHrSvYbGDBUD73OOvSp4gI0yXJdzyNv8AnihJETOY3B47Yz+VEkysRthYDpjOaQWHYOMhj1z0zmrUR2xFifmBwevHeqMUm1yp3ZznGKsjZIrNIH3Hphhgn6DpUtdwWhNBINxeUMc/d4/WibEg/dgbuoY54xnj6UkCvJEAJYw2OhbnP09KNyQlg4OSOPY0h9CZGLRRsWG0AgZx37H1p3m7ZC8QUbl2sOfzqJNpKhNqxtyTkYHXsauS2n2eVH3KTt+YZPr+oxWeg0roILr597MWYjBy2ePxqS4vEaUMqGRh0YHGD/jiqTRtuJUABupXtUyoxQAE4PTGTk5/z70rWdwu7WRdWRZIhMy7WHytk4zg+3X60/aHjbyfn5B+Xv1z+PSqYhhO03BlEQPzAckDPoe9PurYwLvsJS8RO6FhwxXJ6gdDjGRk4qlJDQ/HmdTgjvUiyIk0ayEgnkDHpVdX2IBISJuQw3D5QO5zzmqTPJPcyOzl1jBHT8fy96tWC1izq+pCGGWG3/1k+QSedq57H9KwFG0YBHI5q2qpIk1xMW2gbYVHc+/tjn61XbkHGMY61oiXqG3HIbgDsD/OkycHJyKYenXgU5F45JoEKSc4rW0jTHkkhkuCPLLAhfUZ7+3t3rKjGGBJHHWuktbjO1A20bQQNuenpSbsVFFzaPt0ixfKgfjAxgZ9PpUl2ymcquQEwOD3/pUdpDOssjMxDDnJ568jkcUmWGf3oYnk5Pf6VFzQYcA7sE/iKdvYKQGOO49aXccDcFP4daQlc8qQPY5oAaTnp0FSo5x1+nHSmhI+0o9eVNPWPJODkD2oaAcjfKSwGcYFOBx90nIPFJsGflZT24I5qWONSGByOcgnmosBEWyMHvTQSAQe5p5UgkEc9Ov+FMbg+v500MI+CTTgO+aRfUkVIMdgPemxixnnk9BzTlIzznH8qanB65B9qdgZ4HHrSAcp9OlPQnJ5pick+nSpAp74pDGSkriRWOEPzL6jNTpliAuT3GBnNNwCMHnPB460yzd2jKA4VTtbj72D39sY9s0gJhT+oP0pf4sYH5UoA9DQMb3IGSaazYRs1PhNvC/N9c1DKhMb+/SgBpzkkEikY4zk5UdPzpGPHU/4UinaSMEjoM1NiRWACFgeh4OetNjO2Ndwzklj9aY7OIckDBH51LE24buQCMDPpTQIAysTgHBHOfWok+86tgMTkfr0qwdoJxz2qteDMe5fvKfy96dgsBAAOPvfXrVaYNgEcjIANTW53xqwzzx9T6VGytKJV4AVtv145zQkKxDdtiEEkbmYngdhUFnH5izEnjHTPXrS3MjFFjbHycD6daiQOw2R5we/TNaCJ7djuMeF3/d5OASP06ZpLmNoGXzAoOMjBBzz7cUn2ciLkkv1qsUypzk7eaALNurM3mSZJPv61I/J2kDnnFNidXGTnGB09cf5FTMxUEqSCRjr1FICushTaW4YsP071K0zM7Sl3Zz1fJJJz19agUglnGeu08elSAiMNlslwemRjnpzx/n1qWgI2ztLBzuJ556g1HFnzNrdOcVNwGOM5GCMDGajb93Pk4OO3Pcf/Xz+FUuwFyymitblJWAcA91ztOOue5749azrhg0zlc4JJGfSp55VMWxYyeR8xOd34dAP1/lUDDa+B04oiHkSWsUQTzLicIpONqrluO4HT9an84Ojx2Vq2SuPNkbc2PUDoPfg8cfWKBbcYkuC5BYjEZXIAxzz0PPB6U2e8ZoWt4AUiLbtue47sepP6UwEAEY5YZ5zz396a0pkGFXcOvr+ZqNYxgGQnnnGakX7vHFBI5ZJcEFyqnqB3/DpUaquGDA+2ORn+lO4yRzmlLbVbAIPb396LgSWd09jOZoAu8xumGAPDKVP44PWnTWqR+SYGJjlj3Z/unuD6/Wq0al3Veef61ZupjBa/ZMKQr53Y5yeoz6e1BS21ILjY7COMHHXrngevvSr8oGOARnjnGOw/GktwsXzzBmLDkA4/X0qJ5i7HgcDA9sUwJkJU78jI+7jtTo7eaYokSM8jNgBeSc+lVt4Oc59uOKfHM6n5Tt4OdvoRjr9KALS2UnkO8ksKquchnBJI7Y65/SqysMBRkLnP1pnLYHPH8qXhWGQOOx70rADMRnpg4yOmcUB26gkY444pZO5GKRV9MUEgSecgE9c1NHceUoCqN5zz7HsKjI7kcYpm3rnAFJpNAS8yk7u2D9KVmWMEIxzgHnn9RUG3jCk4OM0BPQ/WiwEsc5XcDgkjjP4j8afZMA5ycDg9e4qqUOc5HFIQcZ5p8qYF2SVGw4H7xTg5GMj19PamySFo1UMcAelVRIBxg5p3ncdDS5QJAARkDrQxHA9KYsynPBFNaQEHGfxppAG/ngDAoExHQYz1qNHxkE+xpAR2z6dKdgJ/MGDu6diKQOqgEEn+lRBSRkdOtP8vI4IyKBFgMMcnFNWbIK4HAqEKScswA/nURB5wfeiwx4m6g7sdSM09GVgSV65AzzUcKBzlgen0zU3lghcZGKAQiMNxIAwOcY6UrN83A7UAbM7mJJ6U0A45/Ci4CPnnnigZA7YPFNYnjrmlK5JUEjvTAF6MKYysNxOcEc1KFGDkClJ3Z65+lFxEVtxIBxk1ZVfLlAB+9nNVASkgbODmriAyAgEb1OevX6VoiWTQ4LEcgjiojIRISRyCefUU5Sy43ZwDjrTrjYyHbnIPB68VpcgmWdTghT+FLHKGbA6g5HPWoLWT5ChOB1qRAqycFcjBB9fpQMc/mGNiXJ9OMY9qqMj7snH1PFW3YlsliSegprKHXL9M5+lZSZSIwuzJXacj72P0p6KGGQAD19KQPEu1TlieRzx9artK5kIjy2OPlxWTRRIUO10xjJBX2/CjcW+9wc4PuM/oamZSIiSeRznpj6e1RFo3K46tjHpnkfnSTuAskaOmCOvy9e/qKSOFVhKScqeM9MUsqj5lPDFSevQjvkd+Krtcu8EYZAoYjByOcf0qlcBk6nyGCFTs4z3P+eauWhRrZ0iG5+Du7sP8f6VELdfMZ2UsgGWw3+NSWm9yyZ2upyML2H9aYw3IOQRsX73J4PuKrTzRrKRKp8wNkMDj5cf/qNaUMOxSAqsCSTkeorPurdnnUucHJGM0IBbeU3G1QcyIMksMbse/c1at7gfMjAYBxgj7tUWjVYkWIDerBsk9R7UQzNaSuCgcE9WGOOaHFMVjSdRJ8qkgrye2RTp9jQEOAG/IH/A1RF4BIDJ9xsgjJ4PvTb9m8wqGj2lRjaeKSQySL92nzFSP7vWq73Jkyehxxx/SoIXZZlJJYf0pzbA567f1qkrAWImLLu9cZx2qYLxn0qvGhRABkg4PrUgZujDGT+VSykSD72MD/H2qRm9Qeg6DPtTGjKAMMkgY/8Ar08yNt3KpznJ9KQArYzsBPH580wEhsoxQdM465pFZmkDBAD2I7U5soCCSAcZyaAJSwLqf4ejH9KUKZGAzxz+GKgtiolyw4JwO/44q58zYZgQo/CgCBE/vv8AL649T3pGZS2FyOMH65qZQdrYAx34HvUIUKThtqn+f1oWoEjYRgQScA9/r1prXR2EFAuTkn/69L/D8pLE8Z29KhaMFWyxJBpgTSTu8agHIBwPb6VzGoW8LaqUmkMYfH+rjz1B7DqTXQxrtyDjrxUZs2k1W2vIJjBIjAGQHkAA9Pf0ovYLXOPeNfMYRbio45HP4/lTShGASORXpslvYw6JNK9hZWtlErbfPIe5vJAD83PCjk4HP515s5JPmEoN3IVecDnirhLmInT5CArjvTWz2pxbcucHpTec81oZiA+vSu001Fh022VQR8oJ/Hnn8TXIW0fm3EcY53MB+tdy6kEAj2FRI0p9ySBiFwM7R+uas27DftUdT/jUEWQmOM8f/qp6jHI7HFZmppE52+vAoPCkA55x+PNNXIHuKUseM449KgshbPOfSoT3/wAKmPOc5zUeNxwO1UIFT1+uKcBgnHrTQCpOM8UoIJOe9SANnnPTpTFBGT708Nyc9KRice1ADVz68fWkZeSD7/lQo+Y8/SndevbmgRBnAKnB7HikjIzgZBJyPekddysQRjqadbrgHOc/yoAlCxIDJLlQoyT1x74rkri/dbtp7f8AcE8BUzyO+Qf/ANVdbLGJUMbfdbgj2rD1KytrZ1EbOlvu2u2Ax+uetL1JkrlLUZ3urWK8aFA8fyuQeoPGSKl0xrhlVLciJnbhsnGP5E+neqBjZy6xSMqEEZbjI962dC1KCyUWOpwrJGSDFKPu9f556flVW00IW5kz3Fxp+q3AWQM7AxuduNw+n4VDprqIpgxABYHp7Vo+I7gagHnWBEkjcsxUYyp45PfpWJCSqDLDk8H0Pv7VpHWOonozas7yxjlVbhGIBOX/APrDvmtFrqydZM2ryAnO7AXOP1rB0q1Sa9C3DqgByS3Q5Pf2rYlhhgMzufNQA7ZIcFQfdTg4rOVkEW7amdqbRnY0UJjAOCCc4z71RuJS8SxYA+bLH1P+FTJvui4CEAr0Ht7fWq8r73gIADEZI/HFVEnfUXZvkVQeSQOv17mrU1m0SKSygnIKhhnp1I7f1qCNJEZZdo2gli5Hf8eKvW1vIIjK0LFR/FIMD646n9KTutgUUY0hy+B2HNWY3mjVXOSmMde3v+Qp0sKtllkDt/WiG4SOFkcEt2FXzJ7E31FupdwAUhg3T3osAJJhuds5wBnGD/hRCwFsJAM8kEegps0e1llQja3JxxihD8zYurcrFuYgkNjsf8irOhQRi6SW6wltCDJIzHjAGfx9h61im+maJCzJgDH3Tz7n3qjc3ryDDMSPQf4U7XVi1JLU2pNcgtbaaW0j3ancuzSTyKCY1zwqZ6euevas2zsbjUXa5uGbyyclz1b6VRiiLnfJ90Hke3qa7qG4ieyhIbapUAqkZ9xzj6f4Upe4tA1nuZLRJHGFRQABisi4jZpiBkk/McVs6q0cKK4Jbc2OmMYHQg8g1jqwdy7MdwPGOMAdwf6URu9QltYeSwjVQCdnU/rSXYA2YBOf0rZ8Kwx3H2+K4ICbBzjnqenv3qC/s/LUoGJ2s2CeOPWpvZ2LiuaJz8+7jbwnJ/pVbB3+p4q1cMB8v3sAj6Cq6LypGSM4NbLYxe4Lx9Dxioj1/lViaPbg5BA4HtULAKeoPFNEsTHy55IPX60wnqcGlzz1FGAM80yRMd889qlt5WikyMYz0qPHPHX1oHfOKNwNB5QVXbxRDFNPxEpKjqen61Tgk8twWUMAfunuK17W+jlYJzGemP8ACoasUtSP7C4B3yfMOcIM/rTlslQbzuyOTk1YLOFYYODznNSg5gAIIYe3WlcqxXQAk5IUce9ScBNquAepojAUjLD6f404LhuVH0x0ouBGy/OenSkZe4xinsoHygkMMU51JjxkgdetK4ER27N3PXBqrJ8zZGasOMZHfFQMpA4596aAFY56HmpIpXjcMhZZF/iBxUAOO5p4IPIJyKYG1a6vC0u69gHm8jzYyRuHv70kl1bSDjO3j72OvtWKWyBjpRuOOOeKSiVzs0prWNh5kOM9cDvVYnlgSBnnI96ms2ZYFJZcZwcEHGc8VHPH+9JxlTyaNwWjuRRqCpBXkHOfb/Cq13vOQvp/nmrTdhk5K8fhSGEOR3wcfSpTsU1dGfIC8QcEYHB470+M7jkE578U/wApkZ4x0bofT/61Iy/NtJIcjOR3qrkEU6rwynI/l7UbwCu08gY6daSQBegHP86hOcHGapEtkwlLA5A4/Q1IjsFBHI9zVPkdMg1PbnAJPU/zoaEmWE3McMcLnt3pkqkH1HapFzjLdaaW656d6kYyM9/b16U8O3OM/wA6RGBYhBx1zUgxwB/KmIehZBk5UHt/jStIpO5SVb65GKjLHsxwOvPSmlQWAzzSHcrAGnCjtmg9ParEGOKTHuaM05RkgE8HigAOeuOCeD6UL3xn+VOfHUcHOKWJeOTx/wDXqQDdlQAxI78d6ReDk445+tORACSeKQZyc9KALkC7goUfKTitAtGwEgIUEfTpWZA2PnUng5/Lt/OpiUkJBQKexGPzNQy1sSTyq8mQ/Tgd6SKETf6oqP72T/QVC21htOOOnH6mmRkrLkcEcZ/rQhWJrm2MefMkUnoNvPrVdtikMSeB+dPlkHA5JByT6e1RFx5pGBg4IyO/rTQiQ/NgOFIPQd/rUkKQKHErNnsqKOv1Paq0bYkyecdeKkLAsCQeMZoBGhbkSbiYWab02gBQB6dB/WnXLxM6iUYwMF1HP1PPPbPSqbuVUAHg8+vT1oaUSEbhuJHXGai3UpPQtKsZjyykkMfu55HrU8EMDEKSqu2eGB4J9/WqQmVI0VCTg56kYpys06N5mNyksH/oT/k1LTKuTNZpESJoWMnPyr8ucZP4/WooY4fvK7r0OG9Pb1qa3Z5po1aQqoI4die/UUhvIoSVMYeRWIbcuB+Q5zmjXYTSGzRhuSA2TgH3qGCYpIcMeDjpnj054zU0spdRLEuCOSSc8U9Z2UFZIOSeij71NbCa1GO6tw6c9A2OAfWnQSuzRgkKAoVdi55H16VJGYyCZE3xE/cU4PPofX2ogOx9se7AYY45/Wk9EDQeeAxJVjg4Ix0qx9qEPyyRHDYZWUg88f5IqCQkllkUE7uOowPw61XZ1KGMKeOWO4+vYfSkirWLVxJ5pUxKS5HA6ZFRu1xCDuQOoxgZ7emKiEhjUAHPGME9vftT0ElzINwKo3HHPI74qtBEkkeLXz5YkYuuxNj4+Y8cgfgcVDer9nWO1QnzWA3H0z/n8qmHkfaFR5HMES5PX759AenNVkQtLNJLnfzyx6D0PvTTCwl9JH9ltoYxzFnJHQ+471Wj6kZ61HM2XbGcD3p8LhvkIGTV20F1B4yeV6j2p0Ub9SAVxUiBgQDgg/dPrU0EfmPw/BPNFx2G2kLbgzAEDtjrW2k+6MZBLDjcwwTVCWJoGJG4Kw4x0+nPepY5tqFmRh259ah6sa0NqV/3TYJwflH0qILkcED68ZpgkKwph1fPOR+tBfeMnr0Ht+FIskYZAzt49DTGBwWPelYbCQM5zSHODk89/akhIQfdAqSMjnJOKj54FSlQvfP+etDYxR3wT1walicbjxwPXPFMBzwABj9aUYAJ5z0+lIETHaU5bJzVY5JxzUmQQMDFIO/+eaEMSMAcnr1p4OOmMUhAJ568UoAzwSRVDJIue/NIsm8OCQGRtvTGf8inJ94YAyOtM2gTPkj5lB/EZqQHq1SoSQcU1F45A96lWM9xgUhkUjCOMsfwHqfSpbWMxxKpPzdSfUmopo1a4gXnIy2PoOtWtpBpAKQ3fOaOR05pRubmlOOmOR+FAxFyPxpxIxwDSD2xigY9SaBFcD5mTjg5H0ofIwBj0FLx9qIHZeffmhfm+dvpj0oAjkwyhRj/AD3ojT5Ayk49c9fw7U2YqkDPtwcU6Mjy1Ugl8dBj0/yaBA7hsYJAB6g/pUU75VlXJzx+XNTFQGO7Kj6/1qCV1Qbo9rdQMnkk8cevvTC5Y0a/bTY3e3VJL1gyIGG4RKwILnPAbBOO+eao3Ei267VOR9eSfc96Zbs0c4U8h+v161XvmBcjA4z/ADppCbJWiO1JXAJ6n6GpJQPNRlPXJHHbHapEJ8hFPZRmoJMRvkEn8elUBITgbjn29zVRlKvkg4btj1qyjCQhlz8vGPepfJFxIsZ+8TgGgCDS4SYp3YhY1OAx/l/LNJPIFQMWyc8cY4puqTbJkjUfLGuAueBn+tQZ86YhicKO57mktdRPTQkj+RNmcknJ4FOYgKpA6HJHUDnFEu0RrtyT3qLzMjAU8jqTSsBYU7EbcBhec56j0+ucfhVOXdM+8ELxjr6VKG3oFOCqjp0+Yim4K4XaCRxkc5PpRcVyKNjnnqMge9PuGB2MSMhQOmM04orOASec8D1qCbl+M4HA49KpO4xF5yS3fp/npSxYjOQOvt/jTRjtnPfqc/SngY+8DnsM80yRck52g5PXim88jB4py52kAdvSgE5PXH17UgEU47mlJGCcnd1FCjkY6Hp3/Sl4Zgq+1AEsO0RuSPn6L6fWovKkZPPYHyQSoPYkDOPr0qSReGAz1xx2FMEgEYhbO1T8oJPBPoPXpQUQzSNI2T9B7D0poA7mn7ASxOeOn0oAHYDbwPXNMAQZ5KlvTn/PFIykHJwCTnjj8qfG2GfOPb29qQjcBg5/CgksaTYz6pfJaW4+dySWIJCqMkse+BzzTZ1ijLRxsZGBP7zpxV67E2jQz2KsFmkISYqTngcrkdsnBHTPrxWUcDvzSWo3oSSEYyT7ULtUdeO9Rlx6Z5qORgeh/Siwi0zDoMVEOvJ59Kay/KODQy5xzz3osA4Zz1A45pTnHyjmo0Yhtpx9fapGbjA/CgBvPfrSfiaNwzjIpMjB/WmIcACDkjimFAc7QaBIOiipM4B6e/FGwEaxHBBxR5eFIyM9h61IXRR97k+nNAOTnP8A9elcCttPfNJ9O1WCCWzio3bb0FO4CqG2DPenM5Veg9PSolduSTxTHfLEkcdu1FgFLE5zSZPJFHBxgnrR1OO3SqGSBiR6HHXpRllHDk0qbQCDu496Rm7YGD0zSAQu/YnFKJDkYycDmo88nGfwoXPPJ56cdfagCTzl5GCKUSDk5JOKj6ZyTj6U08/dzRYRLuJBII+maApxuBKnvzURUMRgMO2MVZSNvLJH4UxETKcA4PPaprfAweQOmaiLcAHKt+X6VO0geIcDIP5j1rSKEx64fduJ9qfHhgScAAY6deKbbrhTnliMClZSpCr16iquQRK22pQMA4HBx0qUQh0JbbvxUaq5OEBIHHIx/OjmAdGTg4Y5zk0rMZGZWI4561GGaNuRjHt1pCQwLHGRz+FZyZaEIjY8n86kA8v7q96gOAMnpTopmUkDBB5rJpsond3PTuabNbmRUMbBXTP41A0zrIQoVkzjntUgmKnkEn+nqKmzWwiwE3Q4mK7h1weo/CqrwjG2Pv8Ad56GrEMqyNtZduSAc9/ehEYb9hByfUcc/wA6fvdRkTNIoyquRjBBA5J4/KkMqr5asShHQn064Pvj8asSN9/JAI6cVCrs7iNivzHGTyKtAJ9pKs5zu2nHAx/kVDeXYmt1wCDuBzjGMVbMKspUgKRnt+v1qlcW7QoNzAxNwx29D64FF0wLkcaviUKOV7/19+9N2NGrlMOjHofyqK0lEaMC/wAo7Z6U7ziSwikXaRyR1HX1qdUwB4tyArGhHQgHpjn86jmt1ZT5a4UDOaXKsuFdd5ycjgmqxjkV8PI2Pr2qgEWIpgggL6+1NbOd3mDaOPWr2FZAFU4xkH6f/qqnNEmQVJ5H507jL8A/dJk8/lSyqQhI6VFBgIqk8jjr0qWeXPygdeDU21KJYipjySNuMf8A1qjdfLfgjaentUUayH5R39sc09Zh3BBHGBQBM8xc7goUdsE8/nUWd5YkAnAPTvmnLJuB3KOKjQ7ZhtORyv4UAWInRpAF+XkEZ47VZLNIyLwp5759aqsjb8ZPA4HB/wAjinh0BUtkPjOSOD7fWkloBNJhcocLx+fX86gICj5gCucZB60BnuJsANsU/MT6DsDRKUjYhSrcHjrg5xmmkA9cZzHu+Y8Zx09veopANvAOAeecZNLGxUMXdwnYKOv/ANah1JGOAzUAKm0qQOCenH9aY7+WC442jHr/AJPvSoRCNzKSQDims3nrtIyp4H+RQ9RpmBrdzDIiqCsj7eXCkBDnoPX/ACayTHD5SbZHZj1+XAHt710Oq6KsAidQwSUBxyT/APqqk1hFH529x8q5Qe/+FVGSSsiJRk3dmQW2qUA5NMYNtDEcHpUkh3ZKpgEc1DkluTWhky5pJC6jbMc4Eg/wrsgTu57DIrktCUPqkGRkKS35D/8AVXXjkk8c9OOlRLc0p7E0e3rk05cB8nnmolHueetSBueCfyrM1NJWDKQOo79Kjc4wBUdqpMR7gdKk7c9qkpDG6YpFwqnB5JpxFNI68UARn3B96YM7uO1PJ5xzSAc+9ADWJAyQMGmqxAzxmnMeCOeOvtTEUsCc9PbpQA8HnAPFBz6nGOawdU1SWC6eC2wCp+ZsZ59qm03Ubp32X0YRW+67Dbn09v5VRnzq9i4txA9ybZZR5o52evf8TVxOnQ5zz71y12PsWu+fIGMZbeNvU5rqElBjV0IKsoYH2NSxxle6Y52EYOSuR61kXF9Y3EM0MsoRz8uSD1HOTj+daLAydQPQnPasHXZIbiSJYRCm0HLY5b6n+lCXQJtpaDf7PZUgdJFeORgHfPyruOBk/wA61pNIjez8iSOORd2I3Uk5Y+474/Cuet7s2ssJdFlRedj8r68eh4ruJZZb/T0vUkyxj/dqcDapPP6jrS1WpMLSOCuLe60/PlMZIWByp649x6e9ZsbndwMg8Y/pXbaf9kvL+WW4uAqscDccDPHAPSoNT8PW8wa8RTZWy5y/Xdz1x61oqiTsyXC+xzsU23AcMvHXnge9aX2m3hUPZSOkm3DxzKCCfbvj86ytRtRbzMsExljPTIwfyqBHwMMDwfXpiq5E9Sb2ZsLfmGQyJCMlQu2M4AxnjFRWtndXc8l3a26usZJ8vqVHqR6UWqrOjlCAUUs2TjIHek0I3Ju5preYxeSN5YHGOf50krItPuS2jO+pwG5cy4BbDcAYPQAdK6C81A3UlrbwxOpUbRvAGTzz0zjvnk1m6l5clzb3DELMxA3hcAk55YDjPenTQ+TI3mSSpcjIfaBx7g+mKnmTsPYpa2Ht7ohyuWPULjIHt2rNUIVJH0HPQ+tWtRVkYbnZ9wz83pTdOtRcLLk4Ven6/wCFFrK7M3uQwGYMUP8Aq3O5mwPpUzACPaJMEfjn61YlhDxbSCR/CM4/+uPrVJ7RxEHgk3KeMNxg+lXqw2KtwdqhQfrUmm2b3VwI0VtoGZGA+6B3NQSMUO1wMgfXNehaTpqWGijKOGmQF2K537sdD0wPzpylyocY8zOKuYyjFDgAEnGeg/xrW0S9EZKyj92/AO7Gxv8AD+tN8Q2cMMy+QWO5fmz6j+VY8ZGGjJAU8/iO9LSSG/dZra40csqiPPm9ye/19+KzLdPmckZVRzjsahllLZDMS2c7vpT4ZDHkseH+99aaVlYlu5u+ELkW11cMxG14+p7YPvU3iNWmuJXjkLRMF6Z+VsdM1l6S+2QuwGCvQjI69/yrcvrjyrKSOQEtLtkJPG0DPX3rOUfe5i4bWOOkhJlZsFR0/D1oij8tnWQEBeRWnuw42BSMc7hnI/wqhOv7whCW54Pp7VopN6CcUtShuIxnJx0prckkfWp2jwMnHOfzqM9BgDFaJmTQirweR7cUw+w6U/IXjPFN+lMBVUc5NDcAZwR2pozknHFL15OSKCQPXB/ClQkNnt/I0hxzQuTnrn+dAGnaXzNKqSgHccAgVpSscAjkVzisUcEHpyK1ra+WUBXAD5wPQ/4VDRcWXE3fMSBSo4JPI4/GoZDlj8xAFJb4G7HTv71Nhk8pBIOfrxS7l8v2602X5FUnq3oelNONp9OtFgG3GAFYHj/GoxgjrxTps+X8p756darhiBkfjTsAOmDkDiheATjrSl2wSB+uaOSPrTAiZeeo/OljwOMGlKHBx0HWmDGME0ATp8pyoBPTFWI5DtyQQR7GqkYyf0q/FG4KGV9iHp0z+VDGiKQbT0wWAI46jn/ClDLGAzfKDxx3p99dKwVQDtj+VQfSsyaYy5JJHP5VCVy27FqS8BeQEFuMKeO3tVWQEwea55OAfUd81VGclTkH8qcZyqbQSRkE89cVSjbYzcr7kksinhD8gxxjnNQMSDkY69KQNvJYjntS/MRk9M1WxL1AjjJHFKsgU8L9aOckZOKQq3Oe/TimBYjeNj1Oe4z/ACpZAmOCfoaqLnr6VMr9MgfWlYBUK4J5zmnb/wAB1pQIX67g3c0qwxNnLtgHjpSGM3kn7wwOlOVhjBxzSNBj7rg/XioTuUnPWnYQ8dMUuKVOQfTPHvTjj06UgIz+lOj4GSOP60HHUUEnGCT0oAVui4HXrTyNsYzjOfXtSqNzc5oOGcnPApAKpBxn86FXLZwPehcdvoPanjhcnoKCh0TFTx7ikDDKkk5x2HYURsA/Q+uP/r0xvvMAQOcCgB+5WJIPGKcCABgfNUKqwG5s4xTTN1CjmhIRIwA5c/QCo87iAAP8KI1LnJBx34p6gKOM470NgWbO5e3XDQQXER/glTPXvnqDx61Mz6fLuISa0fHAB81M/wDoQH4mqRJYgMTtpQOCRnt+NIaYr8E7SrKD94c5/rSpx8x6AVGepKj5vXpT0bLfMCffNAIm5PXp1HfNS/MoJYjBGeDUCsQCC3A9s4oDJn5iMd+KkLk0ewN82446AHofrTAqrJuUb17g96nhijuCsLNhjypGeR/kUTLGv7okAqMc87vy4xSv0KsNikjjlVlVwR/DnvUslxtLSRlm3H5kfvn9KoOm1g24fhj+VSmRiBkgn+f4UWFcHdSOMBc4wP50yOSTO0SEbjg//Xpp6n5QParFrA0jiT5kUEjcFzyBmm7W1Frc1lvLaCJyVZyTgqwPzA5yFbsay7pUW4b7LIzxE5BbIIyM4Pr/ACq68USwo08c0h3Bt2dob3+n61AX80uot4gSeM9sfyrONlsaPXcrxuikjqx+U8YH51I0zCNmAyV4Bz0NMlhkC7yMqTt6YFRtnI6ccmrVmTqhSrSRsq4PdizAdc9aduaMSA4BJH6e44xwKqsTjc2fmPH4U943EasVO1uh9asQzOcg0bAe+CBkcUKOSM0pGOnTigRYtxJtLEhlHNWbZjHiVcZzuA/rj0yKq2bATFedpFXbOJVkZ3b92vp7+vtSZSNOV/NiGEUhlyQTnJ5/X/OKq26s+7cO2TxtpY7g7FRiCoychTxzxVpZLZImaU5kjOTxz/ntUWK3IyskbkKpZT2Gcj86mi3bgGUc+nT8/wAKEnjkcg5LHkD39j6U5LhJMxKy5XkoFpWKLR2+V82Seg2j/GoABggE49/Wo/tKoNrBtx4Cj/PFSxM7Rl2xgnA28kAepoQCLxkGpFPQmmBwZCuTux1x/WpFVvNCnAU9CeMfWncBwI7dKAM9+KCNp2sP65HsacgB4HNIYAAg45PWkUkdamtbd5mIjxnsM4J+lNkjKOVYYIPSi6AaD79fWpU5BA/wqJQOfapBkjt60MZJ8q/d54qIbUdQcgOdox2J/pxUn8PQU2SIyRsoOD1B9x/9ekBMrbZFXgqRke2O35VYjbJHzdOOlZzTJdLGnKSFgGAzlSMk4P4Ve8wpARGpc44Xd1x70mFxqfNqMhJyEQKPxq2VB6VQsD5jzyjA3EfLjOOPWtC2jeXO0H8ATj69hSGhoUe31p2FHBB9akEEmAfKl5/2D70+IJGd0wL4JzGQV/EHtSGQYznHFKieopTtzlM4/kKeoGD1piKdzEVYSKfmH60QRrtVznoePUmrbxlkYDHSqluxRmhkwGH3f/rUAV72FjFMWPyKMjH+etEZAlUryrgEVNqQzp9xn+4fxqtbrulUqBhFz/TFUInmXeu05HIP15qiCslw20ArGNg44yevH5VoydCT2qlajFsh4yRk/ic0WAbIihQ7YyvT396zXJmnAXHJxWhc/Kh69f8AGstXMcwYY+U/XP096aEzWCg8dx1FV50Lyog7HJ+lWIVIQs33m+ZuMfh+XFMtx5kjyEf7I/ChAyF42gfzE6Hgjp+vrVuwdWMkikhoxnkdCf8A62aSZwqkAZY8Aeppvltb2EsoxywDduB2FDBGddq7yh1BJJzj15ohVssByQRxn2qcx7EaSUnqSQCCcemPT3qKFmZn6Ak56dBihdhCqwwCeG5zTGb5TjJb+fvUc7hRwfmNQxtmTc2ccgfl/wDqp2Ae5JU4UjJ496nixkA7uQencjvVeNWJy2dmQPx55q3bpzzkqeCB8vH1qXoSKkJ8syJu44xt9v557VQZjuwc5HUVelzGZQW3KCSMe1QOTcEOFjU4x8vf/wCvTRRJCf3S8ZOPy5NM2HOQAO44qSNQBg4GB34p6xbkZhIuV5K5xn8+CP1p3AjPyhiOO31qLjJPPWpXxyARgdTURxjjrQJgDk8E+tWLdRNOiowWTOT7+9UTnpmpIcqwYk8UWBFieMA7N4dgcnBqs2S2CDnrU07YQMgGCcdOn1qFc4PIpgxXwDjv0oXocY7U1gDwc5z3FOAIUg5AFAhrnAyeh/WprDb9utcAN+9Qkf8AAhxVd8MR04FT2Ehhvbd0UF0cOAR1I559RnFD2Gty/wCKpfO12+kYHLSsfpyT3981j8+tXdWeSTUJ5JW3Ox3MfUnv+tUSTjA9eKEtAe49MjJYD2oTGen0oT5utBJAyM5/pQIB8pJZutOPIJBqMtyc4J+vFNJOCABx6UAKW2jK45pCem5gPWkZuMDHFMBJ44x70xCsV7A/iaFJ9/ekIPpQuTnaCeOaAHbhk4zQp3ZGfoMZrS0zR5bzaWlgt42/imfGfw6k1v6fpL2CtcW+kSXTKQRLI4YADklVxnPvg4qXJItQbOO2spJx19qcj/LzniuruJNPu7hjewi2duWxExOTz34rJmjtiwEMBYjgkLgY/CmncHEzM8ZDH19aZIXbqoOOMitpPLUIIrWEgf3kDfhk84qUNA+HltYmVTk4G08ds+n50C5TnDuHXPNJyQcV1P2TTroboo2TtsRyT065P4fhVdtGtWmXy5yiMOpBOD6Y9aXOluPkZz4XnPP0p8eA2SDXR3vh1rfmOVJkI3K8ZIyMkZwcH1rKFnsLKQCee/8ASmpJicWtyqWULkgYBz/9ao8M/ABHpwTgfhVl4BnlsKOoxSiEZG1jx79aLiGRW77WwpBxk5pGiZcfMMg/nVlSxYIOg+lNEZJILnBI/GlcCkY2JJJ4HFNWMbjjOP61fMYUEkjGeOKa2fvAcGmpCKbYGCAc4pUdo3B59DVkxt1xxn8qaYzwQPm/zzTTQh8+3auOSRwfSnQR4HPc1G+5SCQWHv2pYpvM+UjauOferWpLLcYwDtGccZpyFWOMjPrTI3WMYCjaelIZFOQqjPBz05qrE2J9hIODtH0p42BgGIHoT3qpJM+CGAHcAUAo4AOM0uUC5OFK44x+dZ7ooIyOe3ParBBAyCMYwf8AGqkq7nA3hC3Tg/pUNFoHPzsvO7FQyv5aoQFBwTuzn/8AVTHJDEOCHXjOcfnQUEkZVQV9O+KVigaQOrnjkZx/WiNiyLuLbcdT2Iz/APXqBFIYKwIbPyt7fyqeOdUJV2LL2BGMe1HoMto0UUZcjdjnv155HfpU4JBDI4wwJ6ZqpE+4FiSQRk98dqsQnbGEZiWVegwO/X3qdxEm5ZRtIG5OjEdP8aqSxs8mUBGM5wfT1qTeZJVDZXjn3qOU7X3MW2k8Y4JOKa00AmjZ1YAqTk+uc1IWDIQwHJwR1/SoYLkA7ZUZO+Tk5zT1liG4BQD14B7UrAQFEkkxyoUH7vtzz680yW1RhuiYq55ANMkldJSYx97nn09BSxbmyzHkjqOOh6f/AFqdnuBIFKx/Kxcjk7QOB6VWdZBIW2liT059elWC7JEVTGOMn1OelR3M0jEFSoGOcDp7e1UMkiuJdm2SA9OCB/SnQnKsyYBU4Knnj2qtbPOu4AnbnqecfSrJkDW7MSAcnG0fXtU2AkHzA/L83T0zio2BZiD1pYclRxgk5PPr/k0gU7/l65IplEsJyOpUqOfeiTZsBGQf51DlkY9cjr70HD8gH1wKAJSvTcCCfb9aait52049fy4oWQkMrE9D3pImxcIGJ4oAsxKVOC2M9Pr9an8pniG7Cp/Ce/8A9bnmo2BYDarNkZwq4xz6evvUkco8pgx2t6Ej+v8AKkA1Vk+YM42gYO1sA/41H5ag7iu1R09SfU+lSyOxf5WRgBg/LgD8aUIfIyxBPOPYUARxlmJwxPAFTCPBPGPVcdKq7WQKgJ2jsD3+tSxzyxryodR0Geh9zRYB05HzZCr/AIen1qvv6iMKD3NNdvNOTjJ64NTRbUjICkselMC1cRy3FmY1DTwwxoxkVceWzE/Ke59frXMahCnnSJ5gLYz07Yrs7HW306yeB0QwPuMpK7jgjpjr1+lYOsWluj75LguohDiMDbjjgMfxA9TWUW1KzNZJSjdHLzR7V4JGCfy6VU8snjnjp71saw8cbR2y7GKAFivqf88elZqEE5J2rg45zkgcVvF6HLJa2JNKla31CIjHLBDn0PFdkOMgEcfp71wYPzZGc9u3NbWm6vM97DFMwKMdh4xz0/nRKNxwlbQ6Mk5yCalTHOTz16VGvGRj6c0qjLAgnPU1mbGpBxHzgU3IOcn6UlrgwDGMDrTdpDEEd/0qSkKB+VNJ+an8YNR/xdzQNjWGQf0po9AKcxPTFMXOec0CCQcHBGSR2prOsMLFiNuPUDn6mpNuc0yY4OBg/rQBi3Gqojfu4UD885Gf0ovrG4uFBikaRSMsGbAJ9qXV9pIjEas7c5Izj6D1q5e6C2nWLG+cJLtO1ExyTU8yWjZDi2mYP2W5TzIWQZIzsY/e57HpnvXTaFLFJaqYmDqkflsHIG04A57g5rj54WQZcHDcLyfpmtyHRLRoY333AZlDH951yM81ejRnTdnojT1CaOGGcRPEJdpCnOOfxrk1twqu8kkbPzxuzWrc6Vp1tGXlD5I4Bc8n8Kopb6cTgJO7YPAbGT/hTSWw56sz/MTawPc8Z7Vf0jWVsnUXSNNCikIucYznv6ZrPkjtwhjiG+Qn5pMnavsB3+tWrOC1a7Ty42aONA7Bhnc2On06n6VVlaxEU09Bmo6jHd3TSCMpEOFjXoo/xp8mtymyW0j3RwA5wGJP5noPata/0SCNEkjlWLzBn5cgDPb2rHuIntyhby507EZB+nrQuV7FNNMqxXaxElVOT3J5qKeaKQlgpVyeTuHP1rTtr+K3dmeBgWGCGGcYPNX01qylciWBUXsFiBH496q9ugreZzcE2xyQ3UEfXIrc8IFWe/hOwmSPABOOhycepq9J/ZN9CY0SBHPR1Gwgj+vtXP3dtJpt4ACezxydNw9aL8ysL4dTU1mxubO3/fYMTfMjg/z96juTLc2yzl1ztDDnkEcH6+tXrrUE1LQYwQPMiwjrjGM55+neo9D0uS9tyQ+xVOOhOe/as17q1Lsr2Rm3mPLLSMXJwNxGMUaRKxeWNATuUHGMng//AF6m120FpO0YYkFQVHr71U0y7FnqEMoI2H5W7cH/AD+lV8USX8Wpv2tlM6tIECLz8zDGe+Ko6jbrZRFvND78lcdie2K6hZ5VkkHO0jsOMAH8OmO9cDq1611cu+4lASF+maim5SepUkokVhbtfalBAAT5jAHvx/8AqzXdeK7i48m1tjICkS4wDjBz0A+gxWJ4Zt5bIC8K/PIMLxkhSe3ocfpW5qtvPqSRsIzEqZByDnJ9PbFOclzLyHBe6znbsYt9zZ9xn1z3qgUiCsSR7c11UmipLFIPMG3Hy9dxwPy64rkjHtby+ThsHmqhJS2JkmtyqSNxyOKki5kwoBUj64FWrlMRMIgoUfMeOeKqxqWkAQZZgAPcnjj35rQzNnRFkjiZooy7SZVcdRitG4mX7MI2jWRiu13ck4Gc8Dsen0oiS8ttOht4jgJkNt9T7jrVKQqrjcDvJw2T/jWStJmvwopSHPCkHHTtkVVDRwqGLBmzn1walunVcpFkkck/4Vm7VUcZPp35q0hOQkkh79zkVGxG4cHmlk+eRQAfpj9KcxXcdo7YrQy3I/Q+tB5HHT+VSBGA3Y+XFNXBJxnGOaAsNI4x/SkHAODz/OnFucg9aOAM9/rQA0rnOKbz+NPPTJ+lM9cd6aJFzjj8/elJzkjrTR15FHOccUAWYrqRAQGyPQ85q1FfKARICpPpzWcCc4PWjsQcUrDuboKuiuWyCOP/AK1PDKF5IGayYLqTITls8elXpCvUyJ6dcVDRSdyV2UxsOKg6Z/zmkI2MemetAYkcck0WGSBecrQ3XgcUseQuSPaprO2mupNkKEt169PfJ7UN2C1yBUycAnP0q1dafLbW4knt3BYbgOcj6+ldbplvZaXaSnas96ACzlflTIOFGep4GenoM9K5zW7tr9Tcbi7HJkOwqqgYHBPU89KzU7uyNvZqKu9zEFxKoPloEXHemGaQk8nPTr2puWbnLbc4HvSSfKuCCMkitTEdncDzxg4/DvULMDHg9/eg8qSeARgVESF60JCbAHJxk56UroNpwpJFQ5+bI5OauQLuUg/xU3oJalXGW+UcVKjYQgE5PTP+fpT2ARCuPm6DApqxtlVYcnn0ouFrCAuOGxjr9aXdySBxnGM03Oc8HGcHmjaMHk+tMAPIJFNLY6GlKbRkHr60w/eOCCM0IBysQcg81IrE/ex/KoV9aUEYOM4NAkTZyDyaTA6Go1PenhuOeRQMePQU7jpzTQR1HU9aUZOTipAcuDnPNMAyT7GpFXqB2pcckn6mgBQwXIIGaB1B5wBSDDEse9PUZ+nb3pDHAADkcdqFOVOSMmnxyphxIgcHGDkgqR6UjLtJweDyOMUDI14zzUkGQwLcR5AY4z/+umIowWfIA6e9PmnMiImQFUYUYx/k0AFzP5vyouI1+6P5k+9QIo7UKuT14q3GFwApGBRsG5CeEAwcjk89aT2Y4B5qc7R1xTQFznH40gsRjbkEg4A571NC8ak7lByMg+9QswLEAYBpZAUXKgFCMZxn8/emBIY2Ks4xtX3789v606IZUkYwf5VFFMRFIpBIZMH370yNmC7cMBnNKwFhV4yQcdMintGiQbtylsgFM+ueQKdZT+RbkzKrhsjaeM49SO3NQws5djF8gPbPWpsxJFy3jjjQ+bCGY8/eKlfp29ex/wAXXEdu7ZgSSMNt2rJg5OMZyOP0FQmZtwBbZ26f5zUk0cmcbyw/vdBU69TTQjvLYQXDwyAq68MCuCD6e9NISJtqgHgHOD+v4090MjZMgaQ8ct7+tTwDToLvZf3TtGrbW8iPccD8cevGaExWKKRvIXKoxGC3A6e9W4bhIlQBmfjB4xzjoP8AGrX9oWayTqkM1xac+XiMIeM8nt6dzVy/uLZrDT4000L+53GQqRvbJOSOvcgH0XNJ3e6Gl5mbPMzufMI8sNngY3N6AdMfpVRwzMRsOwYPH9auWfKuSSPmwxz1GT271Jd4b5lVtrYB4wOOvT8aLpOwblFCWDoFO0Y4zxUMm5UJAPzdD69quNA0lytrEyneQzMBnapxz6jt/Kk1PbFIkXGIxuIH+HvVJq9hW0KM+fkU4+QY/Pv+dNRhhgep79KWSTczNtHJqMYIyK0JuSZCEk4OevFIc4IxnuPpSIQQQxNSxqmM5OelIB1qyNkMDkZxWjbsVXauNo5+p96qwoAy5A2kZzU+2XBMcRBXg89c/wBfaoky0WJ33nDEArwMY704wxiPezDccApyPz7VAksQb96GAI+6RkE9iO4NJcnEheQlvMGMA/e4/n0qbATI62siFgdhyFK8kH0P9KhZvPuGMnyPKwH0X3x/Kn29/exRSwxzCKNvvKqLk8d25P681Xs95kRlI3IMDPT8fxNNAasuIg0cEhcMMO/BbHT8D/KpA5EaiFAiL0X72PxH61XjjwqqCuCcn0OT1Pp3qeN4oHcXasqHBjlj5B7YP+RUljhIJAAVwSPTr65/xqQMZCxfdx1P0oAinQCCTd6cAZ+vvT47cqcuxGBwPQH1pK7ARIWGPKcjJyQSP5VNbkAjzlLjucYqEboUCnYyZznAGCOOvWp2kxHlY15OdxJOOOvtSGPyA5aMFRnI56H6093Zz87lj789TVYMcdB06g08HParAeuN3tUw24OAOfeoVyR0H+NSKp6mhjHDA/8A10+F1lQmMggEjr1xVaeNpIiqsUJ7jv7GnWk8b2m791EkX7s/N1wOtICKBSNUlUAYwWzjpn39auyXMEH+tYsw5KLjOPX2HvWQL4rczPCQVbgMw4474qW133L5MP7oHLk/xsc8sf5D/wDXSYkzUspLmGzubuK2QwyMP3kkYJUZ45PABPtnv0zV6zvma1he6nuXndm3qXYIi/Reo/Hr1rG1WY+SfOcuzALGuMKvuoHA4+pqZbltsYYLET8pAJbGR1+vSlYdzVM0ZWViSpABTaTn/wCvx70OUTODO4dQ2QQMZ7H1NVbbAwJCruq8Kp6D1x3NSTeYMFI2Vsehwamw7kN9MGuokgIO2IhWK45LYz9e/wBa2ZbQwKAJAVAAXJ5Yf3gT1Gc+471zbSO2rReZtzGnOD3J/nW1HI0jCMsAoz8zthV79emKdrAiUDA5xVLUIvk85B86EH9akOoRfaPKjuIXZcgquWAx6npnt3/xJGMwJcKqtyDnOad7gUL6ZXsWYdCDu9uOlM0cL9jAbJfv9MVR1L5GNtGQ28gEdcD3H0xUwnFhcBbgPl0BCoMnnkZ9D7daokuXrhbZyOrDaPcnjimqm2IAj7oxUYtzO6T3QIdfux5wF5747981Oc849aoZn6kdsYBOB1/Csy3kEc6SNzg8/SrF/I1xOQgLRqdoIGct/nPFIthMoV7jy7WNxkNcOEHPfB+Yj8DQSzUnIWEkHk4A96rJIBDHHD80jDn2qSX7K1sv/E0sCVX5grSHJ9ANvP16U22ls4oUaBb2d2xvIgC4+nzZ4+gz7UATw24j+Yks56kn+XtWlYpCxg+2RF7RZB5nBOBk5OB/ntWTLe4UmO2l2kfK0xCc+4GT/KtfwpdSvaanPDEDtj2uBztJBwRk5x6nnHeplsXC1zmzuZbk8OrNgPjG7B61UV8HHIByDWxJDNcXM9vCoUKu4uVPIH09+/FUmSJW8kwyzOMfcUD9eoNUiWjPT97Ng5OegHOTVnylyFKrhR91W3E4+nar1vam2jLrboWYfdzuI4754/lSCSBbZTPGqybuEROWOe3c/XincViskT53ZCjJKoQf61IGZBvKrlenvV2fzBJtXONvCkc5Az7VVjEE7ZZ2ix9993APrj/9dIGrEM+17VpVZy7HBGOAT6Hv+VQuxZ1CQokQ/hU57Hk1LJDsSR4yJVzjOf5Z6+lVomHmgg7cDtxzQBaQ7ScoG4x19aPlwoAO7J/AelNPLNgjOMkjn8KdITswEwCOOOnPr3pMBXjiwoM20sMgFenJGM/hSm1BKhplJYHGAevof8aYwkERMzHAYYBGSevT296a7jzFwACvZTkfXHb6UMCNowiBzggnAprY5wQQRz7VZtkFw3ky5SLcGLkH5B/9fpiqlzIvnM69CTgeg/8A1U0Kw5GwcPhlJwfp/jVqys0meYyTFEjXcNqZ3DIGPY96oLk4Y4q3aStFBIVZ0DDa2DjOe1DBbi3twtxcMwzgAAZ6nHH49hVYNkHPPPeiVTGSDnB6H1qMdT1xmmgYZHcACpbQ/wCmRHsGyfw5qInd6VY06F5HaVQPLiIyT6nOP60MFuPvQZdReNMZJA54wBjkk9B71SkY7jgggVdvrlD5iwKVLnMj55b/AGR6L+pP6Z2R+BoQMeuSRg8d6cCMHJyc1GpxkD8KQH369aYrgeoJoB4PtzS5H4fWm96AEbHYU4I2zftOwHr2qxYLbea5vSwjVcjbnr6EVpWsLXAHlxSmFshfl+97Adz7Um7DSuZAhmWEThG8sttDep74/Ouh0rTUGlC/v51iUsY0gwQ747jtjnn8qcJJbi0S1husQxHaE2gEY5xxz6jPPNWf7Wuo4o4oXiSRYvKJ287cnhc9Dzz3J5qHJstRSIYoY3edirvFt+WQqflx79MVr6VbTQ3UJikmkThg6jIU+hJ+Uep5PFY9nBLNaSJG6Yzym/DHv9McVLpdxPZlxC7eUuSyM2Oee3TPQVDdyo6Gtq+nGRGVruOaSM/NIxGDk9sdF/L2rAuLTy5RsPGCQTwGx+h/xpzSfbJ96o0IHJK/MCR6+tXYZZJnUTK12iDBCrjYSR19B05qouwOzMkghAxzj6YP1ApUvmVCiyMuex7j0PYituSximuZhLdtM33IkRc7RnvjHaqOo6dNaxFlhldQcKWTBxzzjOf0FWpJkuLWqK8bLkMqqjr2A689QfWpRyyyNuKbgd49R2NUm3JFukU5YZHGO/8AKiO6ZeCMLjBwev1odmTzWNuG6LRS7Qrheu/BwD35/nVOaGOYo65y2QGHQY9u9VtzxmJyzGFiQADjOPbOR1q5E3nQyyM6eap4AGAB9TxnPHrWfLbYvmuZ9zanzNmDvPTA6iq0kLKABkZx2raF2scand8/bjpn/wDVVIsGYh8Beox/Efb0ppvqS0jOWMjIGSf5UOCpUKRk888VrJGdiSBSS/Tpx1Hao7+1SAGOVF8xiD94Ej8qfMuonEy2YsuBjA5HNIegAxke9MZVVsbSAen+NIzbeACM9/aqsQTRkdGzkdPc0KOpHXpUS/LkbyABx708HI+9xxihCFi3HgLznHTGakEGHLBRnHPb9KbGx6knGeMc/jU4bnqM5xWiuSxnlZ68/hSCHaWbPXGPf2qc5HynG3HFIc4zkH8+Kd2gK7I2clc59ORUQDB8jqetXlHPapUCnIO3cBximpCM+Njv64U9eM4q00cTLtJHqvH9atZOcFQckD6YpZIYwAeQB6HFTLUpGTqEIaMMDljkZx1A/pWZgg9wRXR6sIQI1jGNxA657dKxJogG3BwCPakmUVHd2BVmJHXrT4GGcMygnBBPf2pqn5ySMkj9R/KmNwxGTgHIyaYFhZJAjbSwIOenY5qWOWQMVCqzdSeuKrROE3I3TqPf86YZDgHgED8cUWAuTTHHzMAQRkAZ/GjrIWLEuRx749PeiKRHj27VZSOuMYp6bT8oHC59jU3AjDTrnDZI7f57U17h9zZJ3EDPH8venJIZWaOVdrAdevHv/jUkCwh8LKMjscHP40XsBCI1cfvHPmYz17UiMw+Vs4AyP/rVoGBFPzKvPQ4xzROse0F8YGPwOaFICpcXDKgACDuCOf8A9RqvCwY5Y7j7nrVidoiwiLAqOFYDrn3qsYdpOxlcA+vamhlhShQqCRg8Drn8amgX90+OSOnbioLY9g3zY9OlWVbaDnrg/wD6qTAbGwyVGTjufapQp6ggc8VWVSrnYTnkc0+GRmO0j5+OMUFD2Xcc857mkRRngbgP5VaETJ8xX7vPHOf89abKiHlCM9x179aVwIXwx+Xgj2qMqQAQR1xirBhHU5yfaopE6qo6/hgUXAUySbMEkAdev86nYowBkYFh/CAcn6n/ACKrBGIILdODTdjocjOPXpTAtfaSi8BdwGBxjioBcH0wM5AH/wBeoyr/AMef8BTkUk8jI6UASo7OeCc/0qyQUgLMQoPAUE5Y+/tUCtt/1GMsMdPenXEilUUqd3c5649KACOLLNu4wO1S7D0UnI5P0pkOcg7TgD61Y5++p+bHPFS2A6xWFLgS3Zc28Z3uF5LY7c/SsvW7qN9UeW4j2Q+WXWNCGySeBn/PTHpWg9rLJY3Fw0YFuPldzxjJ7Duf5daxbiaxlhWeWE5QhUjViAcnue/Qk1O7uXtGxgX8gnvJZUUqjNwPbpUDsRwM1NMwZmbaFySQB2HpUJxg5roWxysYvXrVjT2QXsTSE+Wrgn86g79elS26bxIABkDIpsS3O5RueepHpUnOAcf59KztJuBPZIWP7xPlP4d60RMQOAMdwec1i1Y6VqWLV3BIHQirW7jJ69KgjaN0MkWMjGV/wqVWDKCMflUspATxx0NMY4A5pWwB3x0pjdKQxjc5p+CSAAaaqkk8Hjk8VIuckgDGePehsA6Kc/X0qsSGc4Hv9KllcZwRmhdu3IxQBRlt990kufuEH8QaS/vGjmjlkJkeRxuaT5s855/wq0wKtk9TzVTU7U3VqypjzB8ye5FTyol3toNktYr3Y0pJJct6ZySfyq7INrEDBAOPyqtpRkaxT7QCsgO059Ae4qVgQ2AT7U0gjtcz9St/OkLszHsERapRaXJPBcN5gjVVK9epAOFz+XStq6JSDtk+nfFTeHV+WeORkUY53pnOT27g/rT21J5U2cZLsDNsXaueB1xx0/nVuKBV007jsuA3mYPBKkD9e+K0otEZ9SXapeLLSMCuMAHoT0B6VZ1PSt5lle5SOVVzICCRj2x3+nFDfQzUHYzoLia9hWBsyTKVQNnkjpzSTWpjvJYpCD5TFTjpxU2m4sEN3G6vI+Y0BH3cdyKhkcF2YyEs3LE4GSaqNyleyvuR3TMCCwDKO2M/p3q1b6Na3Vm1wUKqSVzHx2Bzjv1qG2Fi28z3QBXohz83HT0qyDDd2y2VnM6QGTfIWyvHHSiUuwrop/8ACP8AnEiyuGZuPlYZ5+oqnqOlapbwn7Vbu0Kc+YvzBc/ToK6K41O30WLbp6KHzhAOCcdyfX9azbqPW9SiWW+kkhtmOFVyUU/RRyfrRGUt3sFkc9DI8ZI5AI5HqK77waPO0ebEkEZjcsSzYcjHQY+tcrqeiPb2gmglM2M7124K+9N0LVvseYp132zsGIABII7+49RVTXPHQIPlep1PjDTbaTT/ADo23zxZYMO4PJH8zXnoznBPSvRtPuIXtnMf+kxyAqxPPB7eua4C4h8m4njA5RyPyzSovRxCqr2aNaLXZY9EnsmwXwFR++09s1i20XnTxox4JGfpS7dygA84re8H2SPPNPcFQqAKm7oSeT+GP51ekE2iFeVkdFZP5KYYBcDHA/p2qee8keHjeEByflq0bVjKkSWrPLjI2DORn9eKtro8t/DujBiY8FWGNoHPAFcmjdzdJ9DFln8uIzygcIdoxjnHpXGyvulVgSMk5z/npXYeLNNfTbDzJZd7SOUGQeSBnP0xXEPJslQjDLtAI+tb0kTO60ZNuBRyeh6Z9Kfp8Rkud8akeWMge5/zmqsvDlTymfWrlrqstnZ+TbRIrliWlPJ/LoP1rV36GSOht75rSAGdQdvAaQ8Y6Y9fpWRquuJOcW0KR4yDJt6/TuTWNLNJPIXldnbuSc/hUTFckkYqI01e43ItDayMxJCkcZwcn/Pf8KNPtZLy6EMCjcQTz0AHrUVpBNeSbIELf5657CuhsIzZ27pEVDt99iOv0PYU27bbiWrMCaPypNkikSAlWB7c1AECtkjPYCtK8VWVix+bOV7559aqSMcMc8nB/GqTGVXYgBQCAOR9KiyTnAxmppC4OTj1qIq2M5PPfNUiWIuM5OeKR2yScDnoKXaDwASaFj4Jpk6jOT2pQvSplU856daGjIGSaLhYhOAcDNJ24pzAZI70BC3SmIaCSMYyaQE9yc0tIPfmhAPUcdsfWpbd1SZCwBVTUBJA4NHP0otcDXd1cBo2B/pTlXoR1PNZceRyrc12vg+50y3he8uFae+iOUt+AMDHzc/X3I/Ws5PlVzWC5nYWw8N3TwxzX2LaCRsKrD94+fRevvmrOt3MOnyJY6VbSIGGDLKwUMfXn8s55qzqviS8CyNBHHFGzYWXcd3OeR6H8+nSuO1C/uLvcZ2UsBhnJJY89Dnn/wCtWUVKbvI3k4wVoivqM+50kcum7OBwDjjioJJ5LncJWZYwCVX7wz/T69hUSvGAgUNK+c4IwB/U/pUwV3B3t8o5wOAPpWtkjC7YiO23hAqA8euT71EV3soc8Y9OlJLOGwq/Qdsf/XoDgDGTuAwW64+n5UDIJ8ZwOQOntUDYB4BFOlkJ4Oc1FgnPqatGTFB7jOfSrluwDjJ9M+9UgPmAHrVqAcqT64OaJDgXJE3AFVO/np3+lV3JjMbHDEDnirrKzBSuM4LL26f/AF6pyOySfJErH77ZHByM9+1ZxNJFYHksR8vpTlJYHA7c063UzSkbQi9SR0x7+1PbIDASqVH91a0M0uowg44/+tTSgIweGHt0q2YsW6Oc7m6Y9qgZedoHzdTxmpTG0VDlSc8Uox361ZMe4YYHjv6VAyFDz0/nVXuQA+lOx2OB3/zikVDjJJzSnAyAOfrQBNwcilUDHBpO2R3pR6DrUlD1IIPYdaJDlsDoKa2UO3NKgyefXmgByqx4HfrSyPtUAf8A6qcSB0HJH6UzAYnPSgZGjZPGRzU6fMCCR7VXddrcdPrT0Jx1oBCuzZ2n/wDVSKMnqM1MBuAIAyBj60qe45NFwsR844AwaYQeMZGKXLMFBIAzxinDJyeeaACN8AllJI9+tAZmOSx5/T6Cm5I65/OkNFgJRGe2fxpfm2lVPB5xTUk4wf59Kf15460gEWNhgjp3JPb6VKIGYk/LjPHJpNwGQB1p8aiTrIFwOwz+lIYxkTBJIAHvn9KejiMcfiVOPzzUaYYOTkEGlKqoOXAPcUgLeYZCk5KnB+6OCSO57fjRLeSzuCcAYA2jtUUSAKVIzyCCoyP89K0rSwnktXuogGgjJLnAUD2OTz0PHWpdluUk2ZsjMoJj2s2OBg9/r3pdJnhtJJJ5ImkmCnycojoD0+ZXBBGM46HPPtVjz4M7ThWX5SRnrj9D78U6S0d4mbYjAYLY4OCcdP8A61Cl0YW6olj1B7rUHnlhRDIS6pGMKpJz8voPbnitHUpUmjtyJNrxRJGY+u3Gff3FZcUSqsZdlREJI4xkfXsK1763t7nSkubWWCGdSEcSOqtMMdQDwT/+rrUNK5ortFK0bCHbAroSeQfT0JNP1EpbwB8FXcHYFb9Md/U/lVCL7PCtxIZWUKPk5xvOcY+vPuBVEySs4mkdt6/d5zgZzQoXdyXKyLkdyLOEGAl7hzvkfkY/2ff3/rWdJIzu7MSWY5P1p88jsC7HO7v61XJ4NbRjbUzbuSBd3GcUY29T9aYrdRk+9OPPJ70xDgM9OvSpUXnkDHv2NQjHPQDOasw7djMSc/TrSY0Wo4tts5By3B6ngVYgnXZliVIGBsA/Wo7NmCsrAlG6n37cVXBIkyhIckBQox+lQ1cstyTssawxKrKQcKw6Z7n2zUAR95flzjnp09fpUMryQSA7iZM5LcHGOwPc/wAqjjeTLSDJ45P+NCQNlu4imRgVQjPJPTNWLJVjhKuwVic54PFUYpZmDsHO1fb+hqS2kYS/vjuUcjHy5I9e/rxRYSepfjcnai9O+R/niqupXhZfs0RGP4iCTk56D9Kfqd9b5MenxtGehbJ5GPQ9/fNVLeNYWSUglTzk8bcen9DSUeo2+iNexhlgiVDGwb+p7VcGTFlmk6jPqPxFULS7J3KsgXHI3Ec/SpjOzROrH5sdd2f5cGps+pSL6GNQELZY8E8c/wCFKSqAAkYAIGTWfbtJvBLemSSOfb61ekdW3EqTgAjjrx0pJ9BhweVI4pwI9OtQRzRkERnn0A/yKkluE+zmRyu4EKMZ6fhxn8frVIZOjEDj6ZpwJ7n2qlbiUlmkAXefyHYUye8ER8uJN8x4P+e5pCuX5dQW1ikAUzSY2hM8KPUgc9az5lee33yRRW4OWBUFS/4dMe/FLDAtuhluSGmfgAHp+P8AOk2rcb/OkKKEJ3N3xxx2OTigNyPT4j+7kKgoxIIY8HH+HX1rUmv2sovs8iIqPh9sb5I9/UH8axohLNHHFGpIjy/pgnjJ9OgrSsrKF5w5cuWxnIxsYn3/AJ0PzBeQqW7SG2uprhHEpdREOGQL3IPGORg8571PJJH5hWSLbyCOp/lUwiT7bDAbi0QKjMHM6lCSQOSMgHAzjitCbTrMMr32r6ZCDwSkjSkAd8KCD+dTcdiKC6MKgRCFZD0/dE4z3GT0qG/1VlNubueWQDoiALtz7H+dDTaVbPKyajJdLFF8u2DYJDnGN2SV4OeRXPyTfar5Jo4Qw4WONvmz7Y6n+R/ShRuO7Rr2dwsaXc85RXkXzBvbGQDwFHc/05qnHdQalfRLqs7Wlkn3jDGXY4OcAf3j25AH6UPpuoz3ST3drK/m5P8ArFUkDI6dhx7ce1asGm2dk/8AxMS1uoAdY9qmWQkdFYnaB+dPRCsx1obOeY/2Zol4DIw8pfMXp05cj0HXGKj1PVTYOY301UK5+V7sOwx6hRwPw5p2raxfGJbCy8qysox8kMUwaRwTnLN1Jz16DsOMVz9vZNJI32lCqg/cLYyfU+n170JdWDdhDcTXdwZ4o1ilwAzIxJx68nP8hVu5u5du37ReT4Aw00rnBHoM4H60MLd4wBEqMOMjoQM/jn8aQfMrbnOO3vTuJEkGqk4Wclj3OcnP9aLjV3ikEdsivOB35C/X3/l3qjPOGZYLdUZ8cy4ztHPT3qfTdMW4uCouPKiRfMlkK5wM+nc54xxkmq0C76Esus67dxvbm/dYG+YxwgRryO+3A9veqsenpGhe6njLdeBknA7np+NT3NwscRhiyiA/ePJP5d/8is15d2T6cetCQepoG5tUlBALIM8Ebf0HSkF80UeIIRgnO4gnr+lZsczQsGjwD24z/OrUd8k0jG4wp24TGQAadhXFub43EYBABAwff3rX8L6xLphWO3SLzXJO5wDnII288AYPofWuQ1a7W2dxAQzf+g5qCz1q5WNeMTIfkmC9ef4hjB/nT5Lon2nKz1rURcv4ahttQF7anzS6GFVCSJ6MTzkEAAY6e2K4mfVYbRvKTbJI/wDDEdxJ/kD+ZqjrvjHU9WtFt7h1jGNriNQqtxjp24xnFYNpLCJE+0WaXMag/KXZd2RgcjnGef0pRhZajnVvsdfb3qXN7cwLKrpGNscsYO12J4XBwyk88nuMcDmoXvwksShQ8hbAXHIwffjP06muds5RaTeZYNdQ3AGB5b8k9OmOn58V1Hw5bQNRvLjQ/FloY5btcWOoAYe2l5wGGcMh96qxPMzqPDunx64ro2p2UV3tG3cx2NnnaSBlT0PcHpWD4k06Tw/HHPOFm8/OzyBuCkdiegPfoeORmqHl3ei3c8csEZELbTdQgtE+CT1HzY4HuPTFaOkaq9xrUa6gtt592n+ifbwXt3J4C7gduDk84IB4461CTRV77mTpM2pXgKxW1q4ncwxQTM25Tj7wx1/lmup1bwutr4ctNXgZpIS32eaSNSuWGQGAPQ5BUjkZHuKTUYrSS6tNVurhdQQbbZhFAq+RsGBG4HytnnDA8j3rrvDen2mkyLPq0U954OvwyxiQGARTE5CHk8ZHykkAnrz1TfYS0PMHiEbgHLqwBBz94ev1p8PmM3yuMqchXPXHt0Ndm+h6Zf6iunIs9pM0zfZQcHzkODt5xlxnnHBIx1qivg3UoNRkSNo7qzDFRIiMy4yeGA+dG4xjBqboq3Y5y43ec2Qrsc5AbOPp/k02GNWY/aGMSrznv0Pb04rtvFXgf+zNLj13S5JbrR5VyRjMlu2cFXOOQOgbAyOtcJKZ53hWU70PCEkDjOep4Ap7jNO7uxcadBaFUigiyyGOMB3/AN4g/Mcf/WrBkZckRsWXPHGD+NX76xngQBmHzhWByCAOnBHaqT20kaljEwU4+bHB+lNaCd+og4A+bv09KsW7xIVDMcNy2R0Pt6/XiqqqARknP1pRsYd89OvWm9QRcMfmRkowYLkdaokFSQQc5q7pmDdxIzDDnYeM4zxn361o+LtIm0XVntbldsq8EEDkdiR27cUlLoO11cxQDtyBgGtua0bT/DlnKZjuvt8vl4+6FYqp/wDQqyLeFrmaOBGw0jBEGe5OMVreLG2XotASRagQjB6BeP6E/WhvWwLa5gsBk4PT2qPinsM9KdHbyu2FRjx6dqokiz7U5IpJDiNGb6DNWhbpEcOjO/pnAH17mr9neXEalLd3TPG2EHJzx27/AP6qG+wFKLS7hgdwC4IHc4z64q7B4euJpAkCSTuSARGhGCexPToD/WtKOyuYSh1BGaJ3wU8zG5ep3N/+s54rdk8UiHTotPitfIcRNE5L4OxmyGyOd3r0Of0zc30NFBdTkLi2S1keE2sbSKeRkuW5xnOcYz9KutqF+5SNY/IeQeXENmCM5Hy98Y9hzUupbhcuLSU3rlRiGPJMY65dz+nftWZcO7XBkvnVJRj+LIweAB79T2/xe4bbF2W4mtIFty0IZScqqgn8W7/ToOtVZZp5EKxRCbcM8nOPy5B/nQFik3mEsxUfNx/k496lttQsoIiEDvORg/wqOf8AAe9AtSAW91CmWjKDndnK8+mT1NNj3pICxDgjaRy2OvH1xV0aha3Uai4jyFOFIJ4z39x+Iz9KoNMFL+UiuckjI6kd6e4m0jRtpE24EgiV2G87csR7Z6c9fbrird5fRRSSixiuIV2gA5xvIIOT2B6msUXd0wGBGncgfL+OaQzHftO0ufXj8RU8gc5uWN7fkC4hBkkY4DNNsx17nqev0oRZ/MaWdo9h+YIr+YxPux4z+lZQ+YBgCrAjp2579qN8gjZVBKt19/60h8xeuLq3nkc3DEM/GBzjHv07VlTxKoJUnOcAjofrTeVzuAI/l71YVgtscIGDHAOcEEfyqkrEPUqxs65AzuIx6Zqa12s2xmC465x3+tSTQwFI3Vir4+bn37d8/pVV1XeWCll69APxp7i2LFwGVCN4yPu+/wBKYLhpEBbLFVwM9h7enepIADCxYMwPTjp/jT2hQKkqyBc5LBuAoHqelMeokF1JFjaSFHJHTn39asX99bSiOXaN5XEg67epzWPcy24Z/Lcyk9Ag/WltAWWRnUJtAwvXJ9M9KTj1GpPYtGNHVXUlgccj+GopbfyvvFi3bIHU9vatCxulWF45YyBjgZwE56+uaoTXSyyMsS/KT69B7Uo3bsDsQPH8vYjGODTV3bQF2gY5PXAqwFG7A5Xvg1A/yDAJBHerIJFwFIAOamQKu7AXPbvzVVGLAckgHnirNtEshZSzGTGUXb1P86pC9Brkqxwck1Ih8wleAQMnnFMVlU7TtLEEEc/KexqFo1dfUnrV2uKxbKqFPzc9T/8AW9aWIq2GRjnvkd6ovIfM3Mx54HfgcVZhlCRZGeuDzj86dgsaVokZOAuGHU+9MvCqSHpx2xjr9e9VhPt2so6jjvSg7wxfqcDFSxopyHeCrdM9MVVkt/MAKgkknAxWg0a4Yru64/ziq8uVjyozz64/Gs9hmOyleucYwfb3pZcnIIyVIPHepbrKyMQvy5zyOhPaoA2NwBHI45zVjFLq4+YEY5HtQse9flI5POe1MZgU5A6cUzPTBNAEilom5yQD0/OrHzuAwcA5z9e1VdxBIPpipoG+XJJ4z2pANRmSfIJBxg/yp6xBnJzgDHb9akEXm5eNPc85zU0US5yWOSBjPai4DY1LDDSNx/n8qtI2I9sgUx9Dk/h/Oq3mxoQGByo2njvTJ35wnKAA8d+9K1wB4x5rxqOpwOf8ajEO3kSBfwP9KsCQqA4UZYDPHeopm8wlgpBH60wESRlBV8nIHPTmpEbEgBJ2+/Xj0pIGBOWGeP0FWNgyWHQjgelA0QlicnJyST+FSWLOlz82SCCB7VDECrDIHvz71PbR5mypIULnOemO36mgC47DyhhuBnFMi4wWAOcjrTlAC85yfxzmmrtSPJAzk9uancoWQtk4IwOvNMwcYJO7gfjT412gE5cZ/OmE72JIA54yelABggkMQM880q8ZBBGB9eM05QG3bsZBwM/SpPJOF5BI4H+FICMZxx1NIfvAqD6dKmVFV/myR0xg8U3KEkEdD65IouAwK2G3AYAzkcY96ZEit8xOT0FWBGHycHgfh9KYsD7Qq4x35ovcB0ahQ2CM4/lVuIhgGBOehHrVK3U+YTkdeR7f5FTPjhl4GcH2oAW81OGGzltJHk3Z37MYHPoenrXMzTQzgiNVUg/dUZx/9atq9t0uZVIBLZ4B5B4xyPxrNubW2s7UICRISzN3zxwB7c0lZFO7RkXLYY+WBt25/PjFVDgD6DFWGYttPBA4+uDULjO48Z3HP61sjnZEOlSQNjcDnnmoz6g806EgSpu+6TzVMlbmlpV19lutz/6tuG78ev511EDKwBXDIeRzXHy4yxVcBTgc9a0vD95sn8hz8rcpnsfT/PeoavqawdtDpI32tuUHI/D8Knt5t0hA2gEZxnoaqxOcsSxz2pDICxOOQe3FZ2NTSJ7Gk2560ikFAw6HmnqeMLyakoQ8KT26UAfLlcYpSCQQaa+VXHb60DIgOCTz6570o2iM5I45+tCEEY4xxSMu75QDmgRCPnck545+lShemSOackZQ9qd65BzQBGoyOOTSBA2ODnoKeqnJIq4lq6xGUH5jwq4znPcetDdg3KtzZj+zzPI68OFCA5J9fpVbSVDTSMSMKhYKDjP1/wA5rQ1CJ10t45yFP8Cd8g8k/nWZaW7S+axk8lFAXjktnnp36ZP4Ur6Ce5euzJ5gQtNFG53ERHO7tx3/AF4qpdQls2yRt838DMflHqT0HaprewY4uLyQtHkFVP8AH2zxwfpUWp30enwvHbrHukBJwMFc5GBUrfQfS7KBVUX/AEby4kQ7S5bdz/e4/lis7b5twZJGaSMuAXPG76VvSWq3NvC8UhjB+98oGMD+ftVjTbeytrtZryMySI+9R0UAegHU1fPYlroZuuW9pZxKlxp8EEjnK4kJcKO5A4Az+Nc9dWk1uInhnV/Nx5ewnkHPHP8AhWj4iuvt+tXVwPlBwFXP3QBjH59qj0xlt4pbll850wignhAev40QlbcwbTkVbSCdr1PN27oiBiXOAc8Z9R/OuguLXVLobrnVgNpwExgDr/COB9ay9LkSW4nEihvOzwe+Tn+ValtHcTQtDISzRMY92M5AP+eaGxx2NCNp0szBJNFcS5yXVNowevPf9K57UfDJmLS6cQZTyYwPlOeyn1/SuotLN5IghU4UD55cfN7eh/PA/Sugt3+yWzxwkQlfUcsB7/8A6qz5+TVG/s1JanjLPfaVclGFxZzjqOVPFRXN091M0spBkbGSBjPHX617JfWsGpR7NWjglRmxGsrgE57qx5/CuP1jwJCJiNJ1CJ3zgwM27bz0yOlbwqqW6sZSpSWxxAbsMZFdh8OLyBdVltb2NZYpFLoGwcMvU4+mfyrk7m3ktbiWCdCksbFWX0I4qTS7x7G+juYCPMQ5Geh46fTBq5LmViIvldz3221Gzji3RqQVJ4Azjr16Z6fSoJ7tbm4Rg4QAKfKJ2IfbI57dOBXCR+JLG4sDLK720w+UwqpboOx6Yzn0xWbeeIJ7m3MMUYTPG9mO4D8OM1yqEzq50XfiVrS6pqUNvFsC2y4bYOA55I/ICuIRgsjfLnjAPXBq0UTewBbj26n1pJmSM4Cggjv2NdEfdVjCXvO7KsrbjkZ556YpMFgeBz70PKMYB68H3p+RGgJOT7HNWZ2QyRfLUYOSeD2Aqxp1xBbKXaASXI+6zHKqexAPBP51VlcMg4FQo4wM9Qc07XQbM1YdQkinMiucO25xgfN9ffmrN5q0TW4WGI+b3djnA+nrWEZBjjNNZznjpS5Ew5icNvJcls5yc01wegIxj8ajD9DxSbx0NOwrjnUkYB6DNNHyqeh5z1/pR5nU9/eo9+e/bn3qguOwTyDzT1XapJbHH41LbwlhueN1UfxbTimXDRFyUUgZ6Ur9B20uJ5iCMqOff0qFpcjAHPT60qgsSFB570BMH7pz3/xpol3YxVOMmk3E5GelSvwwxnn2pjLtNAmiPrzRSkGkGMnOaZI7AHXHP6U4YwNoz60IAexJ9acF4yeBilcpIRc9Gxj2FOywyVH456UiseigE5xSlZHOScA+goGAdgDmQ/TJ4o3ORwSR1NN2CPqMk/hTlxjJPA6UAWbe58tChiQjOScc0+7uGbG3aFPPyiqZIzyx/Kn5ABDE9fWpt1GpEavg5PT6ZNSM6iMlQSzHg+n4Uw7W6E8c9M00fMME8fSqFcjOD1pSMcd+tA7+vrUkJAf5hn0/+vmmBNBYu8LSEgEchc8mhCRGV645NWFuOc+3Y4/Kq5BJZhjr0qL9yrJbFpdzAAEYIxnnIGf51HeBkKAMV2jCqWBwP/r1fsYfMtzKBwi5z/n6VRlVGLzOQ+Dwnt9ahPUqS0I7YgmUsM7VIweM04bfsMvloFOQWLHt6AVXR1ySAFA6n61eUxraGAYeR8cjB/M9qt6ExILF0+UOzHJzj0Fanlx88Dnv6j29KxzEVcRtIoZe2RgCrlvcSFNqqpXJG3OOPapkupUfMZcQlCCCSpNV5MrkDofUVpSMGQnAxVGVQ3QnNNMmSKu3C5PI6/SkXGSRnp6Z/GpRGwzgmo2TnggH61ZJKvP41IP4mHb2po4yO+KASG4HIBz/ACqQG/eY8mpk+XJ7Y5pqL7c9qbIeSOo6UAOU7snmmsSDkdqQdeKUZBoGJu3c96Vcc/lTHXnIGKVW7HvRYRYiYBxkAqeD/jUhXYxAJ2jof8arxkr9Ksw4YYOeDx3/AP10ikQseeMHsaaOn3qeTuYgADA5/wDr03GMnHX9KEIDtxkkZ7f57Ujx84A/IE5p2BtOB9aZyBjJyORQAzkEjB/KpYgWY9eB2qPJOc5JNKMg55pgT8tnB70u0g8HmowwHU8U7JGcGkA7eVYkden0puDIxJI3E8e+TUo8vqd+B9Ksx3FlHEF+yGR88u0jDP5cUhpFaWcoEhQDcBgnnPXue9WDqk8MKQIwZEySpJKknjp0xxVq1nt4N88ltIiupQ/vgC4PYZBJqW51DQYLO3TTtHZrtQwmmu5zKrEjAKqMAAe+eevpU2T6F7a3Mmyiku77fFC7xhg7gZbAB6k9MVdvLtLe7eSAbHwVZQ+5fwI//V6VVvdVv77aLq4dwqhAOgwBwOOMcYp8MNrHAZZy7SZ7r8p+mO/Wm/MlPoiu5nuV8xsiIHG48Dmp4wYCqzw8DJXPOfz4x6HFEtzFIQsSsIxgYY54+n61XlkZ3LOSSevOaNWGxYu75pgUVVSEkZTb1Iz1/M+1VGlYkk5z1PvTWPXHT6Uw56ZqkrEttkhlYjDZIHT2qPucdKbz6U4dMgnOaYhwwR0FOXgcnpUa8Z6U5RnJ5wKBkmARjnpUkbbVPcN05qeytVmKCSQRqTy20sVH+6OT+dTXtvaRJi0lnkcE7zIqouOnyjJJOcH/ADmpuikuo+OVEtpQxIBUgY7mqXmzqSI1YFxjIXqD6Gm7wzAMTtA4rVfxBf3Y8i8vZmtyixbVAbCL91VHTHA4/GkO9zHjQnKkc988+tWxFJIqLGAEUbWIHTP97Hfipri/1C806K2dVFrBnGyMKc9ck9c9+vNVoLq4tCRHLPErfeEb4yDRqGhpWlncJDJ5cbSJkHIU4446/wD16huYZlbYyqjFgcMyjGe5zVeS8kvCRPd3Dn+HzZC2Prn8BVaPczYJC85yaSTBtF6cBnRGWEOBgsrZHHfPqfSpxarPCFSVFlH95sAg9Rgn171VhhjIBeUquck8cDHX1p62/mpuijcKAWJzksB3HoPc0AKtlLs4dFbnKlh1+vSprN/ssn74L2DDOcj04qPTraK4Ri07KwBO3A57dT9aS9iWFV23CSupOQF4I9eaPIfmaaz2m5tzoyno2D0569xQokkQkuojY4+9nP19PzFYtvskcq2V44K/1FaFrZyvvJBEUY5cAcY756VNrDTuXZHtlwrSrhQBheg/AdabEBkTXDfKmTGgHRc9aqQ26zB5SD5AO1cnlj6AetWXjjhiLCcJIMEKXD9O2Oo9KViixcXDRYy23PQHAIOO/oKdpsMMMLzzSxxsBks5z17Adc59vrVC/mtXKyRrJuKcBsYJ+g7d6qqWuGBkkLbRgBmPAHp6CnYVzq/Dt14elea78QTXSeUQIreGHf5gxnknhRntgn6VR1HUXuDM9gjW0T5QrkKNpI4/IDnvVa207EJkd/JB6ZYDj/CmRY80LE8UjrJgHbnOOOo4xU2Vx3drDrRBJmFZjGGUA4ydxHsO3vU8NgouDF5jtgAqUOM9sfpUT3htc+bFGMn+E8kf1H1qBb9pplc/utoO3bzn29+nsKdmLQuxxQRXzqLOS7VVA8ssw+Y9Dxz07cVrebHaxl59P0y1VRna4EkrEjsmTz7nH+PNosu1mYMzyNg4bAB9yeP6VI9jc28kH2yNdkzeWpEgIBPfK/nilYaY3Ub6fUGjWQIIoxhFVVX88dTUcTIZkbeARzyOp9Bjn+VRXCtaXOyVHGORu4yOeQOwqGd4mbdDlU9HbJ+nFUkTc37B7e6vna6nuPLUEhYiA0j5zgHqBjOTgnsPWnyamEnkmt7lRNkAPJGGKY4GCRkHjGcCsK3uiIVMZKywkOjKSCACOfY5roNUmuNQn8++uZ5JWAI8xjkdTk9u+f8AJpNWKTujPe2t2GHvIHlkOZGfPy5OSMngnPf8KvCFSVDXVuYgQP8AWqMfn1qt9lcTqQgK7CPujknjJxxnApjaa6RmURKImb5QwBbjvz2z2pWuBOhsDLmS9VAewUtj8uKrTyCQhLXJjz/rduHYHttPT+dSRGK3mDxhdy5PGF5qC2S9u5pTaQvLGxLnavAP16CmkBYtrFpZlhtuC7bVDsASx7H/ABrS1F4tPs/7Ht5FedpPMupVPDlRwoPHygZP157VFo9l9m1m0nvr2zjSGQM4M6ngc4wM/SqN1A91qFxeNdWAaSRmAFyoxkk/lzimUtEVY5LNfmnE0zkdMhQDjjJ6nn6VXMkIz8p/M1ais2VzlUfsNjBwc/jSz6RNFgzmCIEnGZkJwOeFBz9OnPFNNEalF7kGIxhVK7s5K1Su5dsBkt1DsDg8jA+vcH2qnq12p+W3c7QThsbdw9x2rLiLZbBIVuvvWij1MpT6E6GJmdpmfJB+6ucf/Wqxbi12srXAXPcqw2+/GRUEchRGCk8jBwaXzFBbgkkYwccf5/CqsQmTbbfcdsrMq9dqnJ/OiN1z+7Rl5wCzAcD3PQ1XWeUAqrlVPGAelV5nMjEkk44osFzbdbjRtWgGqW81u67JeMBgp6Eds0anLHeTmZLr7VkFv9XsdMdiBwex44+lZ0l5PcO8l1M88jgAtI24nHTk/lWj4el01DfvqYljkW3Z7WSB9rLMDwPTHWi3UdzY8H61EdZg/tO4eGxiPnuI03btgztAPQkDG73rS8RalZN47/tS60BP+EeuRHMbKEAKYDxlCMbSdvXjmsfwxnT5k1aQySWnmIk11bZLWgfIbcvuMjByCMioJNVn0Ka9sbW6t7yFiYDLuEsckI5ULnoOc8EHqOtTa70KvpqdDFNdeENQu7vwzqbNod/mFluBlJEIysU6g4BwThgfcYrv/BV9eQeDlaee31fw5qIa0uLaWbJsWcnCFuoG4YUnPJUjGcnyXw1r9zaAGC2tWkWUyF5YFlDIBypVshgM7sY966q007QXSO71gzaXpeqh4ZLnTcmGKVGB3bepiORwQcEVEk9mNNdD0Cw0K/tdSttK8Ya3ssb0Le6Xe3JVvLePGMMfuyDADDPzL78jp7aOO8k1id5ZrzXYZEa5h0xl3HP3JlAYb42GBnOR35BrhL/Q9JXQxanX4LOUFbjTtTt3Y2M8icDKjJifBwwOOeRnpV3wtrOj33h21nt7uz0b4g6czeS837uC8TPKBx8hVhnByMH2qLXKudVp3iKLUJRpv2u80fVmlZRb6pGE+0AHlQxBUt6Z6+/WuD17wlaz6te/2fOllLC2ZLSWM+VuP8SFclQT/CeB2JHRus+JpfHlw8LWkCT5Blt7qTy2LqcfKw4DZzg/KfqOK6Pwbda+niKJpNNt9dSBSkcxZUvNgyCsi/dkx0PHJGanYZ5nf6Le2yyJcW0ttKDlCVIDp0IBxg/nWdJ5kSvbiRtvXHTP4f0r6Hit3i0y60w2so0h7n7RZSOmfs7Fv3kDseFwSSobHB2+grD8efDTT7mMz6dKtnsbdKpyI0J7jOcDkew/QFx6Hhcgi2F1BU5wFPI/PselViDzx19qveJNOudB1C4tNQs7yKWIBwWQFWQnhgw4K+/546VreC/DL+M9Puzod7C+rWxy2mzERySJ/ejYna304Iq0na5N0YenITdxEFhtcMSOwB/nxWv4w1Q6nqs07qELNwuMYHAA+vHNbl94N1bw/BH5ul3r3LrucfZ2+RueAe/H4ZrmG0rUJZmElpMGHLb02kfgeam6buXsrE/g5GOvQzx7M2qm4y44Ur3PqemB61Qv2e6vp5iSQWJLHuc/r61bjjudHt5Jri1mWOQBTKyMFxnpkDGPfIq/ojWksitFcWNhcKA4kuSUGw9GUnIPOAMDPf1o8w0tYZouh6hHLBeXFpstTyXum8pHU5zjdyeD2zSzWNtEzZ1KPGePLQnj3J5NP1myuxOBq66mlzIBIGLpKJFPRg3dfQ81ntZ2a2wVBO87AA+ch456jacdsUbj0NK2/wCEdiB+0C6uJPXeAo/Acn6ZqzPb6V5KvY6hdRIwyI5LMBSQccFWz+OPSszTbGB18nyxuYjL+WBj6Hr0/lWnpenOsRZnLx8lA3QL049jxUOVupS16FKeNFtQJb+LIPCN5hYAHPGRgfnWbdalbtJK0UbtM55kDYHPbPXt6k1taupeXZLBHC42j92hUOMkhue+MD3qrbaSb9z5YSNFALM3y5z6Z4xwPb09aakrXYnfoZkH2tYWCSxWlvIQGCNuY+575HXr9KYfMjjRojuIYlWcZz2B9q0rqzijjON3QgcDG4dvrz0/GqkkexSUQluAO3PrVRlcl3Ibq5nnyXKncd7P0/Lv6+1Q7fPxgKFUZywOWPvjnHp+Z9KmRXYFVUHawLNj0HT6VMY1di4IRs557gf0p3S2FchifauVB3gEcA8j6GoppBvBUMf+AYzn0P8AWrf7zLfvB7EZ5P8Ak08WEzoN4PmMCQzZOAOlF0gvcpxzqwOFVeOd3H/6qsRgMu8sSRyDx19B/jTRZ4XbIxCv2PGcdz7VItisSnAYErkbG45Pftj/ABougSLEaR9Y18yTjKDt/wDXzRNIfP8A3uLfHWPkcH1rU0lRHaATqiFMk4JDnOPTqO3U1DdJZ3ZMcmw7eDhgSOOc498UrDsZ0c1tPuWNh8pwOclu2Oe9RoqnPAXPOc4x9atQ6XZW6SM/mSI3KqpwQT2z0zyO9NtbLE0RILJ3B5HHr2p27CswLeXGSkZDA8SZPf8ASoXmiwN7kyA5ORwPetK5EewqSc46bsg5+vesmeMRxlmkTJbaFOc/X6UJA00NabLtgE4GMDvUw/eIokVRxlQ5Bx36f0xVWFeSFx8pwcVO0UUbgHkYBJ56/Q07WFYhknCSNtijiIPBVeT+NEk7XLosoyqdACR+nrT5cBXJdQAOA3cHtVVBszt28c8HsfrTSDU0LuWF4o0hj2AYJXOSx7n3/pWNLM3mERxkHkdOnvV3zF6OBuGD1qGd2d8RtksPm5x+FOKsJk8TGOMLIDk9+vr+lLMmQAQMgdM/yqKJHVM78Mem4Eg/1q3ZzrYs0vk/aJODh8AZBzkdyKG+wim8jwFdylA33SR155p6XAQeYGOQM5B6nOcH24qTUJjegy3AOW6BQPl9hWbJG6HYAfUVa8wJGnYsXyQxOfzqe3uNwIYkc5x6e+KziJNxGCcVNAsnOARTuIvKHdslkwfUYxUnlgAPGdxPB74x3zUEcRY5JOcY9KTLREqThMc89RRcC0peQKUI46bgefwFAlKKQWAboR7ioY5RtBGePQE0gZSVZgeOTx2zSuBLucswVymc9ulRDzMbZWDAHr0/OnmZY8HDbicjI7fTvSEruyCSpHp1qGUUb1JF2nYQvTdzz/8AWqlwcgHpz2rUcbQ+3PTOM5//AFVTmC8MwGcimmAC3wnzDrg5FNaIphtqlehP9famwzFCUP3Dz1zipvtBAO0fTP8AOlqBVO3zDj19alA2glfT+VNmZTIpCgeuDShyAOvpVATJOYQWQAMP89KVs+WZF6YwQO2KgfJAzgY96kjkIHBHFFhj5JFdQJADxyf896kUBFKsw6HacZzUMkYZAckZGPWnQ/MSGBz1479s0hBIRIx52jjtVqFlCgAgf1NRqI8kupwOh9Pen7Rk5PUZGDUvsBNKoEYKnn1x/nNMEqFSGXg8D34pGyEIWRlyMEUoUyMwC4ZRjB75BoQ0NWPcpK56cg8/lSWjAE8gAnBoDtGCBwQOOf1p8KoQw2jB9PWmUWUc9sYxk89qTcqSEhgfw7UwAqw3ZDD9aZIhJJGBjg4pATSYz1AJ6AGmqvzY4Ixg5qBQeQcDtUi5IC857cdaYCs0Z7YIPTPSlDcsFJzTmQKuCPmHf/CnKF3ng4x+tSBLBIHZdxIJHrmplG6bB2nPpxVVYztwTxyeO1SIkjABHUYwM5zUtAXBGTLxgelQ3UYTOM54HJ6n1ocMA3zMCvzcHrjjio1SRk8zI2jjJPc0JDsMiURuc9CcH+dWisatnBMZHHbP+eaz5WcyZDc9fx9KTzXkh2qWCj72T09qqwhznfI3lk45APrWPqU2IFVoyWQ4zg9v5VsRIwAIzuHQetZ9yMlnY4ViV2/SjqNaqxhyDbEGG1ePXvVZsAdSTx+lb7wWosgZJDu3Z9c46/SsW7aIZSIkgHhieoOPT6VpF3M5RsVl5OccZpOpOO1SKh2HkD+tRn5SeRnvzWhkWreVWVo2U7uAuO/1NID5cwdDypyMc8ioIHaGVXXGV9R19vpUyt5rgKoUt0AP6DNTYdzqNNv47scELIPvL6H29RV5umRjP8xXGlJLaUMNySKfpg1s6fqyOQlywjfON46H6+/6Vm49jWM+50+nukkezGWXnr+tWSuGwOlUNJZfOfBBLL1HOcVrxKGJyKho1WxA6/J04NVn+6QOmavSqApHPX1qpgdh1pDIQBu4xU0SZB6elWIIOAQfrQ8O05B4PX60AQFFByAc/XNO2A9enWrEMLsxwCQOc46VIIwo3NgYbafUe1AFTywPTJ49Kv2bR/aQRM3yDAGMfiP1pBaljgMN5wfTOfT3q5b2EaRzSM65QDA7knOQR6VEmktQiUdWtjsZ2csrseuAcn6fhXLtetYwsJBIXctgYHA+v/1q6i+j8tgRnk8Z71nzQWtxZb44UllZ9h4JyRznHT0ojJWB7nLzapcTHERZIxxhec0qxurlrlCWJBJcdB/ntW99mgtLdZYYCLg9FkI+TsT6fjSwaQZw5fb03klwSQPYdM1amiOVkFvch4izN+A9uh9hT7hXlgBDlgcA99uKvWGmWRXdulKn+6McfU8Y7dq0Eis4baeW4hjhtBgjzD8xA5wue/UVDkkylTkzjo9EzH57Tbk3YwOM/jVaeGQLNsibyVkKjHbGOCB9av8AirxFFM0aWSIqRnCqB90DoSP8mubn1OWYMSzKzYJwevvx3q1CTRlNQjojX0OJRqBeVhFtU/M3bPsevWuqtL7TrZBGVMp2kB8g7uc9Omc49a8/t9SeMAYG4ggnIHB/DOaY+pTkYJXpjIAyfbPX+VDouW44TjBHb634q2WiR2kavKDjMhG0Aew5z168Vc0/x3pk3kR6ppYi8v5i8ZEgLeuD29ua82lupHznbg8gAYx+PX+dQ7mOSMYJ9c1SoxSB1ne6PW9S8aaHPflWtI7i2JXEpX0B5C+oOMdPWrj+LfDsFoY7GQQMR92GIjGR15GM+/NeNbyWAwOMAYGKnjRjkuxwOtP2UUNVpHT+L20rUyt3aXCi+2gSDDESY9/73Tnoa5iNBG20YHGT3zTzKEGF4z+lUpJtrHknt9auMdLGcpXdy4JRkg445x6UpucqcLz1PJFZylmPzEhR0xVhNqk4w2QAc8kCm4iUhvnMSxLbVHTr+lNBeR/3aMw7k9/xq46RfZHKxqZCQAcYx14qNpArDBOe4HTp2oTE00QpC7Z3YUAgHnOPwrYl8L6k0SPbiK44yBE+Tg/pWdBLIhfy5Cu7BOP61btdWvLcERTlBnoD3/rSd+g1bqMPhzWABmxkAJxksBj6805fDd6H2u8Cf8CzWmfFmo8iQQOh4I2Y59fXNadnc2+prv8AMKzKMsD6DsP8alymUoxexgL4aYvh7sAk44jP5AmpT4YiztM7545ADZz9P5VuNuAUnIUDI5Bz14xVi0khGZAAsmdoLdsjuDx/Ok5ySDkRm2vhGzVSLp7lyvOUwMn2HaqlxommW9uXZZckkDc/p9Bn0rdeZVIdt4Zvuuqr09fpWTqM6spEi7j1BIx/KlGTfUWnYSw0awk8p44YmdgT5bOT0z+NXpltbKMSGKGIEYG1QSfb8xWBb3k0cpZdgIGMEZAyP1NV7qZ5LhXdmkcgjkeuenb/AAocW3qyla2xavrl7tsA+WgJ2rnOT71iyxOSwYAk9CCOtSNcMxbYPnGAD9OtIGVhuBYsT24zjuK0SsJtMe8axQplWywznn+VU3bLgLxng1p3N1HJCgVxuIx6njtiqqlACAASDyeOKIvuEl0RBIgVSOOBg81A/C7Rg49KlzvOONx7nuKikwG4z0x+NWjNjdhxuI69KVgqrz1pCwwN2SR79KjJJzVEXJoCCCCelOB3sAFqFOmQOnWrMfTI/wD10mUh20ZwAQB7dKcMqBjp6+vvSrjHJ5zgikJ3dOnTtz+NSUMf5RuOMH8ajzkHbkgfrUhQE5bnPrxTgu5mEf4VQrEBPABxz75oVecEc1YeMY3A8jqvTn+oppAbBIJx0pXCxDlecDAHWk474/wp7De2V5IpoHoOTTFYYy5PGCO2O1N2t1INSO4DDPUfh+lOkOAvuOKLisQirSqQQVI2tgfQVWIB6kCrCqfKwSSe2D1oY4mvpgyjQg8NyfwpDCqiVIwpRsDJHTJ6/Wq9ixXaSSAeD7j2qyZg0jKuFGPQnGPSsXua7oyJNyM4RQq5wQaltmCE5GcnnnGc+1NupPnKnGMdAOlQgAqOTmtN0ZrRlqVlkkJICyAdRnnHtVcTNHKHCjjjr0pC2AVLEU18YIUk8ZP/ANahIGzSSYSIcZwOelNK8sT1/lWfBKY2GDxnn3rUhYMByDmk1YadyCUHBIzj8arPkMQOlaZZURsqWzwB6j6VWSOS5kO1ev3R04Hf+lCYSRByu4tnPShRkHnp+opztlQT1J9KSPjPHJpkjzhUP5VCvuOKkc5GB0HFNwSMDvVAHUcYyKUEjPPXpTemR6UYJqQuB5z+tNI71KI/lJJ+YdKCfQD3qgsMVj3qSN9hyOlRlSBntSDI6GgC+sodNpJAJyfr9KaIVkyN2D0HGRVVTkZFTo5UA+/NRsO5c/s8/ZndblWkB/1e3BI9c9PwqubfcpYMck9COlPjnKnGTg0NMF56+wP86B6EYtJWOF29+px0+tRujJkOMEfrVqOYFRuIBxUhIcFWAZT+H+TQBmleSfWnpjv61YlhVSAp49yOtVSjjopxRcLEpxk09JEhAYAM/uOB9PeoeVGc8/nSbf3ZYnk/pSsBJNK8zFpHJJ9fShYY24DFfcioVfaB7e9PQs7BVySegp2sA9wi5CksOmelESseiGRAeeD1wT17HgmmyQyL99GwehxXWeGY9Rl0+4e10gX9vHE0exWz5bNxv2g53e+CMcVLdkOMbs5TBVAQ4K5546Go854HrUs8bJK8boUkU7WU8YI4xz39aaiBR71SJYBe5oK9Se9PVTznvUm3g5IphYrbOTihVPY9O1T4HOMUzjJzux9O1ILDNpzzV63025k2rCgd3OFXPJz6CrUdhLBZRXzTQwxOxVQzAyNgdQvXHUZ4GaqGSRi81us2xRtLDPcY5P8ATipvfYq1ty1cwxadJtacTXIGCqAbEb3PfHTFZzys+9upzz71AWLHk49qlgwAwJwT0yOvtTt3Bu+xbsrYPbzSMu5guRjnHPWry2aGMPCzRug6kYwT6+9N8PeUbyBbjebd3AkEf3ip64xznFddqOsaLa201jo0LhWBjacjcxB4IweO2M56Gok3eyLjFNXZx2pRXMEJiulUs48wPG24MM9cjt2+tZ0MfmyAEnHc+grXu2g8x2aPCsBgMc4x+uM9qSwt5tQuPs+mwGSTGQFB+XnqR+Iqk9BNXZFHCEGzClCQQMf5yaWa3ZgQBFtPG7bzx6V0FloVm3nWVxc3smsnbHa2sMQCvKWYHczchQApzjPJGK6K/wDh3punWTXN/wCJYQVTPlAfNkAZwehPt6epqeZFcjPNvs2CcOMjj5uf69Kv2OoXFnJ8jjLDHQYx6c1Lr9voapAugSanPMVHmvdKoUnn7oHOOnOazPs0r48yRQx5Heq3J2LN9N51y0yKkLkYKooVSee3rSXE9o2nxJFGY5EyZQ753tnqABkde5I9KqPCyglphnp0P86rhlLAEnHrRYVyRBtCvuGWOCMdP/rGtA3E9xbrAGPlJn5c4zznmqf7schiQB3AqS1lw2TgUbgjQ07VEsA2bCzuWLZBuVZtvHQAED3PBzUd7qK3Tuy2VpAW6iKPaBz1APQ/pTDdLMUVQI/m5lwAQvp/k1E1lPuG1QUOdrAg/wD6jU2K16ESnJzgkkgDvWrY6dcXG5YIw0nU7VJwPUnpjn3qjbLJbyhyMMvTPHPrmrF5qlzNH5RkwncINoP17n68mh+QlbqLdiKBikshnmU4bDAqMds9+3sKqxMwcsgbaDuOO3v7UltEHcGUlUzzW7b6pDp0M0NvCg39iu7nGOScn364o2HuY0lsyhWZlYMfkAOSefSrNpFIxQQgIznYGbjJPueAB+FGnRxSmcyMVdBuAHp0wPfn8qsmZYZ1EKD7uwIVJ3Z7549u1IEiuHlhEvlStEyZSVkPDfWoXuVkUvMC8oPDAADp+eaLtZ3vZo7hRHJ1ZenbgenSo4nlI48pQOOVz0/nTsFxwvcQ42qZVbIZlVsj0yeR0qX+0J5lwbhlJGMFAwwPwyPpUa3DsFUyjPQ4QcAd6kS5mjJ2Xbo6jjYMZ/LvRYLiE3c4VQ+8KCPkA78dua0tEZwRE8MgZflY7T3PPH1H9aqHUiULG8u/MbgjaFBz6+vvVcK9wodriRiBsLbz2zwM9vrQNO2x1MVusy48mIMrE+Y2FHPrngce5qpduFkWO2srmV43AEiAGJj6Zbgj3xWAbdPuCWUnOMbh0x/9ar0CyGzaH7RLNbqciFm+62fXsaVir3NRp7qMPaTWNha2ocOFdGmw2Mcydce2QPSruoy6jfIqKulTLHEEVIInwqjODgMec+1Y51C7s7YQQXUqKHO6JplkViexB78etPN4JUk8rT9MSUgb5Y0lRlHqFDBc/hQFzQt47yGdbmOd9Pk27cWyCH5en1YH3J4qlq25VeTKXLuSJH2Atj1OOp/DNZF3E0gIa7lfuNxLcVAreVCVhJL45cHbz6dc5ppEuXQ1I101IPNmt4scffOB/n86yPEWoWG1YLC3iRjkvIgxkf3fQCsS9vJLu4Lz7iqfKqZz0qrM+4BnwWAxgAcVooGbnpYjncvIckYHHH9KRT2AJ9gKUOxJ9OvFKGIBz26c1ZkNBJPA78Cl3egwaczMzEuSzt1J9aZznAPTr7UwELYBzxn8KlaKEW8cizhpmY7othG0DvnvVuy1OS0triGKONvNABLjPH0PHp75qmGUtlo1x6LkZpagNKkKGPQ8detWbGa5tbktbOElKkYYAjBHfPHQ0ajZtazqFJkjeJZlb/ZYA8+/OD70l7ey3Yg8/azQxiJWxyVBOAT3I6D2AoGTWTTQytFGgzJ8hjY4BPbuMHoc+td1qNvo7/2NZw6bdyXUkHnNcuVJmcgfwAHaAcjJzu4OOprzdd4UybG2cqTg4Bx0zW5o2vXFnew3qzzJqFuQLeVGwME4IY/Tp+uamUW9Rxa2ND/hE77+1pLfT54RfoVItQ+JMMM7lxkOuDk4ycZ4p+ga+PDd7eQT2kdzLE3l5SYtC4VvmV06PG3oMYPI9K2tJ1CwNjNaam8Uj2t3JPDfwzYuom7MDjaUz7jrkYIrm/FXh2703WGV9phuiJLaV2+WUMc8N0OM4PT1pJ30kVa2qO603UdMsNU/4Sjw9b/adHdN2p6XMBILbOF453bMkAHGRx1B4juYWhspPEei2bS+HpJV2mYh1tpCQWic9dmSACexwfWuG0G5bwv4rgk1ez82CCYx3dspBWaPJDoCOGBHuRxXU6lBFpusT+FNC1V5/DutNDLA7dCHwU3DPUH5c+x+lS42BSOg8USRDxFY+JNDtm0wXUcYURoJrYOi4lRgvzAjGfXbziumv7KW513z1Gm6BrdnHHcPqNvdFrW7jkXcjKmMsrAHpyDXH2nhz/hEfiPaeGPEuoXVlpV3sdrhZ8QvKBmOVG7ANxuI4OQeK0tQfSdNu7Gx8SWU97JYX0un30sEwUuhy8LxgcKDu3duc+1Q0WmennVdMttTYzahdaJq09vGZWjDPaXWRmOWNzwRxghudpIxxVnSdbW4upTqzo+nyuwiuEf5rWYfK0Tqcrjk46KeAeTXnljqlppMS6bZXl1N4b1VbjT0jvAHeyuFYtGAfQ52+oDe1WG0aJrdNW0G9Nzpt1APtNnM26dcrscEfx4wMHggoMZODWbKSN+513SL+J/C/wASdPjtZo1dLPU1H7uePJ2srdVOBjGcdM15f4dsrv4ceJrLUTNDLY3EksDTrAJ12AbldRuG5WXkcg8EckV6P4Y1Cz1K1ltJsXhjdDPHMQJLWRMKk4J4aKRSoJ4AJwfWuB+K3hPU9Hk8w28kmn2sxNpAnCi2cs2w4/jRmceuD3Aq4voyWup634u+KOpaLp+lX4srK/sp2Ci4guNqOhBwcN80Zznrn2ParukeNND8XAyBHSYRKxtknhmdWBIYgKdxHvg5rw34V+MtMXR7zw74kh86xlU43JuV4zgFTjlWBAdWGeQR6GsDX9EvtD1GCTQJfteng+ZayZXzVyxDRk8EkHg47EHjNNxvoxJ9UfWWkJ4aljEiz7yjDfFMp+UjqNp6H2OK83+OHgTQL/wVean4Vtkhu9Oka7lWMBQ0bDEi7egPRuMDr3rzlfiDqMdtFaa/plyl2pKxsyESMpP8D/eBAI7lfbtWt4Z1DUL7xVYR6vfPpqxNH+5umB/tBWY/JwNnTI/HGfRK8eg3r1OI0q6j1PTjPFBBay26xxtHDnY5AxvAPCluCegJGRgmlW3klDkEkquOhOPfiu68caVpumzXw0BdPW0a+MyRQzBpdjoDhoz8ygEYHVc9MHNcgm6PBKO3H3Uwfz9qm7buikJFcmG3ljADuIySzc9Aefr+da+iXkMNnFHK7ZkK5yODj0Ppg/0rnry4mk/d/Zwrvwucg4pRNOkSwyhFA6BeMAZ/Hr/Ok4XQ1Kx09w09xcvaO8UtvEysucfvM8gccD1x6cU1byBLJom3vNvIfAyGU4x9COcdjn6Vz1pNNMwghQvc8tlMjGeck9MCrE8jmeO2gVpJGwjgnCrn1P6k8VPJYrmuOuma5mkuUieK1ikyi9QWHoehPr78VTllJ+eR+QhGTk4Jz+vpVua+uNOJgi+yiIDaqRliFxxkk9T1J6Dmsm4niBDSyNMyncAgCoT9Ouc96tRJkPtgwiIYMfm+ZsDqff0qYw7UBd1PB+4cnmqn+k3Ct5RjBPRFHT/P1qJ5mtoxHLcCRsglVOcfQ+v8versSjQUEMQGDFep6Bc9vr7VLAy+YSEMkuB839B7VmtqUe0LGFUjoFTPH1POfU1DJeTSyfLLIV6lTIRz6/y45o5bjN2aWOWAkxSHLYwAW59vaomdYXTIKAjgF8bT6gf0xWFHHKyMd7YHIXJGf6VNGAEYSFtx6AcD8RRyWFzGtci6nfzY5BjIxk8Ej37fpUVw6AISmG4LjfvAz146E/iPxrLjnEe9FyHbA9AOfT1qxFIqMvEbYON2AD/+qmrhctyXKmMrE5EfTZIuRnjjA/nzUtpdJApiAZ4/7qttx9D9O1UGCId4YFTx7jtjFRvudWy2ATt4OKNw5maiSBmYMzeQQAQSQQRVO5gWZcFm/d5CEADC5zg9z+tVERowoldmJOVb2q/DMpRhjduHHGOlCQXKORb7iSzfpUyXWRmJCD1PzZxSvGZA6EEA/qPbFVRZ7SNrsAeSKfqK5cjT7TuQgopOR9emR3qOW1EOQdzDFPtd0fG4j+tSSqzBjnqOTmlqBUBXadq49eelPt8s2DtQk9h1/wAKrSFUYjnIp8XPZh7+lMRbmjCj5gXHfmq3lxKGKs6k5xk5xTi5TlsgdD3yfWo3w/3CASMn3FCuMSPLEgtwCCOvB+lIZZVcpJED757f1qSOBlGSoBPvUqAEGORSeMg5FO4iDcOkZAb6dqlRO+GJPr/SiOyXzBIjkqMds1ehjQZBZjik32AqiTB+VCB0zjP4UhVmIOQR3J71cdY2bCsMjBwefxqORSpPP1yeo/rRcbKyhskDkjg496UPkhVHIPce36UkqyKxaJtpwDjOMimMuw+ZjH5n8KBEc0csuQMYHPXp9KZExVwhdgfQt1H4VJn584I78Dn6mkkj8wnyzzgdB0ouMkmAIB52tVdrYlWCE568+1SpHLHEFbayDPfHX+dSxxsWwueORmlewGQADwcg9/anxxt82Tz6dM1YuotpZx1B5FQRYYnJZSOmBnH0qkwCVNrDpyCKmRFYfvAc8DGaciqWIY79uDk8c+mKc4QtnzSPUbecUARyqu4eWjFunPPFR7ZF4K8ZAOcc1ZRbZSBuYSHn5j/WmzMpbMWH7H3pXAcIwYixUA8cU+NSo+Y/LjioVGGUlAARg8095A6YHzKue9FmBPhWG0jg8daiZTHgjG2oUuIwQCDgcjnpUgBkXIkOM5AJ/lStYAd+6kEnkfX39qWIszHyyBg8857Y/KlMJ2sBwxGOlTwxELkHORzgAZpt2AjMfLNj5T1xx/nmn2nyyYJ4Pf0NNuA0X72PJAPzfh3o8wiJZGK4OcjOcc//AF6W47l6RRgHdnPFNl8vGWAHGPQGoY3OzaATjkZ9PakATccAHHPrz6YpWKuNC5bB4zyOO1KudwIzweBipZASu447Y4poX5skHjrRcCwIy0RJIAPGc+npTgihhl1zjn5v51BlZOgI9agnGMhTyDkcnkUtwNJYVYg5HJ5GaekaxttAAVSTnpz/AFrItzI5wGA9ecfpRIXXIZmyPSlyvuBr3EiOuMHPbvn3qsoZoHUyHPJGTVNJ8BcZP6ULPnOB8vQ/400rASoSG57cEeuaZGP3mRjmoxIxLDPI6ccnFIZcdPWqAvp1DE9BVK+t1nnT94E3jDE+gzzj17YpUm2/Kfuk0XEfmIVDcgZXB6e9KwGVqkEcfyRyh+ct26jP/wBbFZEka7Mk57fSrrxMXICkttAY56YzzVVgCxV2AAGetXEiepXkYnAXGB+tRgcnd1/rUsjLnC/dNRfj9a0RkwQ4JJBq1ZSRK0nnhsEZG31GO/p1qrgc0o65Hah6jWhdlVvLVgxKsSOeOR6+/NV8OGOR1p6Ss0ew4wGyeOvapjAzRrvGM8/T+tTsPcn0zVZ7GVGjYMg/gYZBrr9O8R2tyFWXMMp4wTkH8a4BlZOvTPBoDHqKTimOM2j09p1dCQQVJ4Oc5oiwQDn6VwFnfzW+DG2CPb+hrYtPEk0SqJQDjptAH6dMVm4NGynFncQqVC/LkEDB46nt9aGj3ZJG3jndxj656Vzlr4jkmUlfIBz8yuo+YemDwx59M+lNt9bRZFhMcqfNgnduGP549qy9/sW3HodG9qwB3OE+U7VJxnI7H8fyqiupJZ3Yt5Y1mK8cgYZQMc+vOCKfeavFuWG0kZ2VdzSbSRjH3cdAe1X7LToprXMtsPM279pXpkHgkd+vfis+Z/aBrsQjUDPZLKxUhpCG4/1Q/wAjNRpcL5o813kiQkeYh4A6jOe35ZrJeEiWUxI6hzghRgEj271JFcO6TQQQyeZIwHlmMcheevrx/wDrocU9RKRb1WbPlyu7Opyp3cHI6D6Y79qy7W+kVWDWgQqSQORnjrzWgI2eJDwJGyeW+ZcY65/+tUN9KtvatJOWmbO3ZuO0df14JojbYJa6lK0vN0M76jIrOrkpCMqrEjqT1xnr1qPTPtTWU17MI47eaUpD5Zx8wHPJ52gH61E2muLZ577FrEWKp8/MpPYDpj3zVLUNXazhWztMJBGOGIDZJB554B5P58etb2T0iStNZC3OtXdtIIYj8yYzJxj6Y+vSse+1O5u5GMszMgOVGTgZ7+3SqckzScsSSSfxJqzbWkIIOoXAgBI+RRucj+Q/nWyikZubloV4IpbmYRQRvLK3RUGST9BWqnhjVGkVXiSMEZyXBx9cc59q6bw1BHCXSyikET5y7JhgBxjJ5xnv0rTe4tIf9Gi86SWQknaBgDOMk/zrOVR3sio01a7OJk8OPEWMl9aLgZJyeB/WnQeGy5VmvE8sjO4L/jW9b2FsLh/Mw+ScRkgrgknnuTTNV1Wzs4Xgt9s044AUfIn9Pwpc8nog5I7sx7zRbCANIL2QxgYwcZJxWO8Kl/3Yk2/7dPmnaZjJKxZu5J/QVDJcbchRzjr1rVJkNocQsZPI9OtK83y9cAVUXzZnO1HcjnAXOKt2Gmz3kh3IyRL1JGOvYZqrdybvoUHcscDuat2en3FwW8qFnIGTyB+PNatvawadMrEyiQjHC56+/wD+qtCD5y6rEjA85x82Pfv17UpTstBqN9zm7mzuLeMPNGVBOAfvD6HFRREEjcRxxwK7CHYbWWB4tiZw+5ev4eucVzd/ZGGZ1iwU7E8dfalGV9xuHYj+RonXzApyMAg8/jUG3JJZj1xwP1p4Qxvh8d+9BAUfMMr0qkSwXyiBveRcdduORUSYyQGOM8ZHakZ+uM+9GfbIoEOkUD7ku7r2IqS2uCrhtxVhzkHGKihfb0VWB6g1ZWOGXarMI8AfMRnjnpjrQxo2tN1x8mO7KtEwwHAAKn39q1oZYngWQywMCxHJORj2rj2igh4eUliexq1DLGqnynOzG45bPP8AjUOK6Gib2Z09xdwW6klEkJyB8o9O+e2Kwby8a4YuoKr/AHR2+uapG4bKkkliMdcY/D1qJLhkyzYK5woJzn6+tJRsNtFltyRlxt2uchsg8VC0y42/MzdgBnPXkmoGmMkgeQxrkfcH+FRvdASkxqU4xgYGfqauxPMNlb5/Rf1FMM6qrBVzkcH2pHkDHIUKB2xUcjBzwoH0qkjNs07a3/0QGN1DE7i3p+NRfZHcucjqPxOak0xm8nGBgMM8Zq2bhBKHZ2IUFmB75P6VDbTNUk0iibUKpaRhnGAFFVnjQAFdzHGeR096lnuhM7mUNgjAQHAH1qvO6D5YweBg85zVK5nJoh6E5780nqBSE0tWZAhww569asjHJyeOn/6qqgdMU9WIznrSaKiywrcEZPXPFK8gP3uAO3rUQb0PSjPQHt7UrFXJPv8AUnHpUq52rtwMjk+oqIAZ5PPepN3y4JGPpikNAzKdoAJbOM+30pWkA5YZOcY4phIY8EAjp70ikEngD1oGQhjkkLye3pTT5nPJqfhgQOT296Ch28YxkDrVXIsRQxhiRyWx9KHX5iQBUvl8nAHBGaYqtlsA4HJHp70XC3QiIyScDPfinxO3lEEcDpSY6YJIp4GMgZGMUCSLlpu2MW7DjmkcnDGPG48VCtwqp5Zx3yakWaJ4tgIDe/X8KixpdWsQurCQhgNx5PvQVz+dSbcS4zkgYzSOu0nGfencViFlznPUUDI6YpMkEkHnvTkfrnFUSRsBz0xVmGRUh+U5bJxzioSoOeg9OKfHGzRnsOlJgrlqK58xcMyqR0JPWrEFztJLmE78AnGRiso7VO3BPpSodrBhhcDn8aTQ1NomcDK46AUgO0Fs89B9aAM9R/8AqppbJI7dBQIXPyj6UHPHpQY22b8cHv8A1oHTPYVQCk5znnFC4x1IpOOxPNNPXrQBYAyDgg1GykZBzTUYr0NSrJk9eakCMH8qcyDqOtDY5Ix7+9BHy5GcdRQAzOOvBqRXyPmwR2ppC9CKYylenSgCdDuyp5H601xsyRnHb2qND09qsRuGQiTBzxn0o2HuQxybWzxVhZOg9+OaiMBA3LyM4PtScoAexP5GgC7AY51ZJMcfd4/izwPp71VJTPBOPrRbgh8kiieL5t6g4Y89+aQxY8Nx6D64qFmHIGcZp33FPPJqMZJPpTSETRLE2dxYHtUyK0ZYRoHXtzg1XQ4BAB7ZOBzUmMHAJ9s8UmCZYZyV2s7Adg5I/wDrVY07ULvS7pbmzkaKZfuvG+MH2IqkfNj4bpjI5zkUAZBIHOfTrStcq4ssjyyvLI7PLIxZ2JyST1JJ6nnOaRFGeSc0ICckEegocqoJz83fIpiJsADg8Ux3AHDAt3FVhIwGCxP9KVV3AAZ68f8A16Yrkik4wc9cVMNoX5+gNRKjDBOOP5VPJInlMqAYZSCP896Q0RvMZG3MxP1Ofw+lSpeTJF5SuVQHOBnk1QXGecj3pxU+x9KLILsvQzRtkSYPPAI6n61I0nmAK7jywQdpXrWenTtTvMPcmiw7mnBDJH+9jBMW7AxyRn261XeZ4ZcMw4OSMYqK3upYZA8bMrDpitqPxNOYRDNb208SndiaMOfzIzipdxqz6mSJts4lWRzz7H8Dngj8KtT6oCzvb28VszriQW4KBiM847e+MCrEWoaZNd+beaciqeqxswBPTJ54/D9anuF0u+gk+zkW8ynKoIQAV4GCRyfb9aV9dUUl2ZmW+tXsFxBNHcSrJCT5ZDZ2k9cf19ale9udvmHce7BxnaSc557Hrmq11p09uzAgPEwysqnII9c/SnmGXadk5J2424xkf5FOyexN2tyQ38rEljxweg/lS/bElGJo0ZRz0xVEwyMRjIJHOTR9nlGc8e/aiwrs05hpsyLtWeLCnhXzz+PQVWkt7dY4xBIzys2NvAwPc9MVURTtbHOOuKRt8bDcME4I56j1oSG3fobF7o93ZW1vPeWlxHDMu6OUp8kg9Q3II981SMGZcQkuCB26Z9avxeJdSTRhpgupTaI25EYkhT3AB6CqNrfvbxlYguSckkZJpK4/dLFsolRoJMIynHT7p9/ap2hls5GiKTSXG7gYwuPX1J6Y6Ae9UzqNyXZlYKWOSQACT6nvTVNzdyYDs7H1br9KLMLosyQXRAFxIqKP77/d6+lRkQRuMyGYAfwjAz+PaqpRskOTkHFOj2ZwxbA6YosK5pw30SsMRKM9WwOOMdhU1qLdFd45Hd2+9xyM/wBKzjcwr5QjhjYRg7tw5fP945/Lp3quGLt+6Vt5/u5P8qVh3Lc8fllpVnUdwACD9PrSldQVY5mjuEVhvSRlZQyj+IHoR71raNZTq8ct1lkIJKPjBA5wSefetXWL03VqWuyx+URhSQQFHQADoB2A4p2Y7HGwPJJdghzuJ5bvj3q5IrwncyK0Z/uHacetFtFHv3QKQefXgVM+FlZQGbPQkdevGKYkiJGimXasiq5PST5Sfoeh+tV7mGSPh1YEdyD+nakkKhgjKuwg/gfaoRK8JxA7YxyDyKQEysGi2sGYAEjB5yAen41JDONu7IyQB0x0/SmW00EiutwGjcn5ZIzgD2IPUfiDUMu5MiReG6MOh+nY5oC5aE6SJINxcrgknAI/GmvOuwrszk4GMf8A68fWqQO2PAC4zn3pAxByPXA9qLBzGlGGCiRlII4XkAD6AfzqTzgV3MS5Q9cdPr2I9vyrMDkA5J5OOvehZWXaRjjgZx/LvRYLmiXeSRdoSRSRtKA/KOtJfZtS/mEowGWycnnsMVnm6kEm8OUYDjb8v/1qpXt89zdO0zFyOTu/iY+1NJichsioIw0YYyMTliegJ/SqU3QIACe/HrUxLoSzylQcngdTUReVs7WDDOR2/Q1ojNkYUgZA5zRgk9On6mnFpepUc8Zx/KkXzEPUJ35pgCq2cAHJ4GBQV2oQR9aVSxPzSEqBzjsKWYrvxEz4/wBog/ligCNYzjv/AIUbuw5/CjGWAL8HqeuBnvUt9bm0upYGkSUxnAeNsq3uD3FBI0TyKW2swyNp57eh9vanq4VGZ03qccDOAc/4ZqsDz34pXJ5+YYPJGf0osBZvViSQG1ZvJkUPsJPyn0z3wc80+2nUWrpLK6mNhLEuwMjN6H04/wAKry7tqFlIBX5CRjIBIz79PzphjZYlkYMFYnaccHHpTAspfSq8j7yWkbc+f4+c4Pt7V1qa/N4jjttL1TyvsVsXuCI2CFUCAusWflBIGQuPvdK4ghNq7Sd38QPb8au6fJBbapCb9Elt1bbIqngqQRnI69c1LimNM39Kv/L8OazY3NlJeaNIS1rcvFzaz5+V8j7u4Agr0P4ZqpawNceGnvbNphd6ZOHciQ/LG/3WUdQQy4JB7g+tZVteXVks8NtcOsMpAkRW+WUA8BgOo6/rWu0sUGn3VxpMzrBcwhLm1kOWTLY4I4ZQcY6EZA7ZI9Bo0vFPjDVfGOkW416WSY2O7ZMkQ2hn2gbiOmQrfj25ra0zSbVG02TVr8arHfWaz2q2xbYzwMSYJM4OdmRkc5I9c1xejpDcabqlpJAjXAh8+CXJDAoQWX3yueCO2a0fD+sNF4faziDtd2l4l/a4H90fvB9MDJ+lTJaWQ0+56Nr8GgW2syztPdyaPdXFrex2MII2wuuCyuTksCBVRNL8Qaet3FpVtNf6bPBduskL/OsYI3E98o4Ru+A2a1/CXhH+2jb22r6lCtvdWMj6fPbsHK7XBCMDyChYZHoPSrcE2qeBLiMNetdAhdStpFjIjklXKXFv6ASIOB03KO+Kw6mxnaN4/wDDOsXtj/wlML2z3NqLU6jbuUntWAKuGK8NEytnBB5z26dj4YmC6fbabNcLrfh77VPZJfzDd5jfwxSDko24fJJyDuA4ryTxprlvDrFzb29jpl7YCQX+mvJAN0cbHeYiRjcnJBU5wehFbn9pRaPHqmo6Glt/wj+srG8tkjHbbF487GHVSHHysPTHBq2lYlPU6Gf4RaVDqtpLp13d20F3h7O6aMSoshGfLcZGFIwQT1GRXP8AjX4fa74M0+e8uJpbzQbpz5q2tqJoofRvmJCnsG4Pb2Oh4f8AiRPa6XDpNzI1rpsyGe3+QyuQx+4C3B2uTyT93jr1yPBfxK1/StX+zGdrixkQpJC/zRk5POD0PYjpmknLqFkbXhefw1F4da58NXMt94jjYXYSSB9wC4LRhRwuQSMjgjHTivKLqW/v/EEVnYzzXUu7bCkakknJIAA64B4rs9XsrHVdXnvtCB0HWkkUqbeQpBIzAkFcfNG3GO6k4+6aYvxJ8Qxy/Zbm3ig16Jki+2CILOWVhkNjrn171SdtUJruXLPSrK60WezmtrqHxDandJcGQMssY/hHp1z65FRWvhUxS3X26TYLYbpf9IX92vqW6ZJ6KoY9avSeGtcRLvW2s7ma3vpnk8+Jd6g7jkEDlT164zXMXzSBmQhyeS56HPtUpX6mi06FO+RVlM0CkROQiKWy4x9e3f8ASjT2gCkzzCOUNjmIucEdQeg/KpZo0W2KtHs3dHcgkHkcHtWZG11FGN8X7snGWUAZ6/WqavsTsbkv2lyU0yW3mj4AQfLIc+zYJP5+vvVS5S5gJjuTLuIyIydnB7nHXj86g85TM2VDJnOQ3WpEIK7RCDuIJckn8h0pJA2VmknlKoISFHZTxwKtQpCSZJclgcmNRnge9OjxvYDduxx0Gf8A61TExqvzcuOgB7UxETvvGGARBxsB4qKSEPGVCqRnp0/H2qZikgIUDpgq3vVYrKSWiUYX5TGW/kaEFxRarGwIQMB9TUoESkALgnnuMn60izlk2HKv3ycY/GiHfIdsrowyO2f19adhDmjQPnnIGPzp/l87iAe4qxEiKGRQwxyCece+Kk2Oo3SuoJ/w6fyqQMe4tS6honO4k7hn16Vm7pFfaSd3TB7VuO8e/JymQD/k1RvVy3mW4+YnB56gelUgHBv3ZLry3UmnNcbVHmIwccfX6diKpr5pkVnJJ4PT+Qq8I2uUjHmAMuc9+/b/AAoAq+a8k+G5OMD/AAq5DHLHHyu/HJ2noDzxinDTgQSMqeOfb8en604tLGBCCNxyCcYJ96BkCXO6RiZCq/gAPwqeKTe2S4I6DAxUbxKz7ZUDleM49uvFQRs28gAgD05oEXCm48NjJx0z71VnLrKPMU4xjIOR+lCySPMTkrgYHOP8mrUZzsK4YgY+tGwystr5mDtY85POKnCTW6lWRSMHJHJxUi5VjtIXHQZofdtIB+XNICukTTbi2Qo5NTLZgx7gyrgYzzwPWlty0eTuIU9cjNSD7qlR0BB6Dr2piDyZVXEjh+y845x/kUyO4R5QCoV142Oc/UZ6g0si8FSx/wAKqzw+eRjIYDBk9aBmhLDCpL7zF/vEkD/P40wSsqMhIJxkZGfyP61Xt7eSJCpkLL2GeOlPVVChcnC/r9PakA6N0VtyKS498fh9KnmYPChDFNw5OelUyq91OD+FSMAkKgYIIzzzQBU86XmORzkfdOP6+lVWEu7ILHPvVofMSWAwOBxjFN3twBjApgQqpVW3E5P41LDMU2BD36kcH2pdzEEFRj2FKuDtxnk9xQBJLJvm5GVz1A704T7XBLYj/wDr96YcLKFz8vpTtgaQLkbc8cUhkTuHZyoChiSB6Dmo0lRCdxPA6AVPgKWXIwDxnvUflq7YHp6UCaI3mjcZYk56dsVWzjON3XjP/wBarTJtBA6D2FQjGDjpmmAxfnIyMcYz1xVpRHt2KwJBGff8ah+6Rj61KGBUNzmhgOhG0MrBtv8AWo0gaV8hQg6HrUkeACST04pA5Q/LyPrjmgAntdhUw5JB5z2qxDiNuVBwPTofWq8kxkxxj8TThIccE88UgLMTszFJhyfukdgeee1TqyKgCsRtOMdfx+lUY2YHNTo6hsgjOPrSaAsTh3jkRUGejfiapiD5stGVUZ3fN9Onep0kyvLe5560lxMREQMZPtQuwwjjG75c4zgds9qVNi5wOQccd6qhmyp3H86st97jqaGO5KWUxgc8HsaQlTkDP+NQ9Dk5pnmHJpWGTptKFQSM9eaY0YViefu469KRGzxQ/ORz+VAESRgscE/nUsijdksTx60iRj1xn2p5hGThj+VFwIU2HJwfzp6FASNvQ08R7f73r92mrgkkkjFO4DRt80nB/Oo2UE5IOM0oPXkj8c0bvmIJ9uvvTQrihF2HHYZqUKinIzkDilDfu8ZPftUZ6r70hmNqIZZn2k/M2f8AOKy5EIJPHrmukNubmeKBMlpWCjA7k4qhrujz6XeSwT4KowCsD1B6fQ4GParTS0IcW1cxz94naCewpNuAc4GDjHrTnwCeDnJ/Co25yR+daGY4t0HelOBnI6VHznjrTlUnrnNAAre/tVqGfZjIU49hzVYqfpQvynpg9cUC2NWCNZxtO0Hp9TUFxa7NzRkkDBIxjANR2twwdiwXDAdf6eldBZWYvEdoF5Ucrnd2/nWbfKaJc2xzSyHkZx2xThJgVr3WjSSy5C+VwD6k+5H0qtPod6hfyE89FIGUByfwPNPmQnFopK56jPHvVm3vZICc/dbgnAJH596hFleZKmzuMr1/dNx+lQFjkqRyDzkYxihq4k2jSuJIXSOQvlmBJUN79+wNbOkeMLyyHkXCG5g4AViVZR7Hrn865JixXjpTRuJJYn3qXTTVmPna1R6noF/HfRX1yY1VGf5VDcqMDpjnPrU9lFNewGW32jcCuST15GD6V5hp99PZSb4HZfbPBz2+ldZpXiaJWgOTAyn5kz8o47f1rCdFrY0jNPcv3tjfC6ZGmgifhUXYWZyffoB71Yu5f7JsIptRVp71cERAAKCCeTnkDH4+tX7u7tvsdpqN8pQSriJCQQcZ+bjJIyOB/TmuF8S6g0+oGOKRpm+6W3btxP8AP2HSlGPM7GllFcxH4k199YuGknQAouIlQkKPz5P6c1R+yXd3BHKylYQCqsRgcdhjknJ61v3OhxaDpMV3eqJ7yV9mO0PGenc1k+fI0/nGRyhI3Ju6gY/LjtW8Wre6Yybb9429D0WC2so5bpEkupQJMg5MaHp7A+/NaBsNN85GFuHuAwC55yB1J7dKqRyFGSXzjEsX7sJtyxx7Y5GOapwTSSSXOZDGrAFDj5u4GPSs7Sk7mislY3Hv7q9SeNwsMUbBT5bfeAzwPT3rFmt3m1AziWKG0UklQCpXHG31P+TVObVPIg8lGDkHG4cAgHPI7n3qnLqjMXyBkgFj7egqlBrYTmupJrF/5shMClI8AA9M9qyXk2g8j2plxMZWOCceman0uxa7kdnyIF+8R1Oew/n9K1SSWpi25PQjW3uJYRKQEjJ+UngHHp7URQHeEGXlY9snFa+qA28ccG4Hy1C8DHSobK3nCicQOUbjzAcEKPQetHNoNxs7Gvo6CCzlit1maQH52bgN9AeT/WrWp+VZ2Edw5kYjHHTaT3Iplm0T2skTOUKgM3mMOcn26n2pupNa+T5DujxkA5HJ47ZrLrc1W1ijHqOd0i7iG5AdQOnP41nvqN4V8xZHjK4yfU88DHar76si2ptVt1WNeFODuPfJz3rn5GK7iGbDnBHr+HerivIiTsb02oxiFZ1KtMQCRz19SOhNVXvGuJRJJCR6896z1O1l5GAOe+anSb5wu3IPFHKkCkyB/mZjxj/PFRKTnABwPerfAdwOg/WmwxjLE4zVXJaHJbQTxqUdkkH3geM/jUX2By+IpFZB/Ecj/JpJMKSRnjnrVpLpZIF2qBKowTnGfelqtgsnuQRWLbh5rAH0HOfxq8IbWHHmbTgZx61SnMpbAcHHUj+lT2VmZXEkxLgEDb6/lQ/MqK6JFuSOC4tPMePgnIQDqOmR+NUBCi8hygTsQOTzVq4aPy5h5pZl4RV7Edvp61mSMqv8x+YjrSjcqVhjKWlDZGD8xPpUTMcAADAyKniQrCxDFyeCB2qGTf5O5hgdB7kVojJkYyxCk8ihwB1YH6Uwnr60g68ZqrEXDPpUiq2OMAd+1LHCSM8D6/4VetobbIEpZz3wcAUm7DSuQWzeWrKXJB5P4UyWZ3zjIx79vStIW0ZYCAjbjLZGPwqq9uudgJ3NyTjp7fWoTRdnaxUVJJQSFJPsM0jW0qxB2UhSdozxk/SrG42y/JlQ3G7PUZ9qfcZeFSxHHQ7s8f571VyeVGeylSQRyOtGCOo6jirMNrJcGUrjanJOf5etQMCDggjt/SncloZ2IzSDOOtSmMqMtnr2prFQBtH507isRjg8Gn5yaaDySAOKMjPGaYtiRX6k1IWxy2eg4qKIgSAseauTTMwKSYYZ6kd/rUspMrE8Z7e9ORupwen51bFhM9tBLGrMJnZIwB95hjp78/rVe4t5rWVo543jcEghh6GldMqzWpIhAHOMHqOuKeASMY46niq6PtIx1/nVhGRiu4nHb/GpZSEIA3Ag+v8An1FDcOGj6EYJ96sjryQR/SoWj2k4zgHnvwfalcqxA0YDEg7cjp71HjPGPz71c2qyjOCMnH+FRmNSoIzwcc00yeUrpAW+YJx6mk2oWGdoGcVO6Pxk9egJqPyz5hCgEjFVclxAOq8AMdvGTxmnGVXQg4B+tRbHOSeAKaqfLu3CiyC7RIWQn5Tzj0pHGec9Kh3nPB4Bp4YkciixNwYnaOuRU0GSu7PAqMAEEfjTowTGy5G3rj1/yaY0LuDZ4GR+lN+9nPYgU2NWy3yhR05pJMADGOR+fNBNy5CF2/McZ/X60xotrHuO3pimnOKe7fIhB9qksePvAtzjpUhhDqWHGRziq244yWHpUqT7U2nsaAEkgZPcflUPXIPUe1PaTcSSST9aYc9QDj1poTEAHU5xT1XoQevIz3poPJ6Yo47HpTAUNzn1pysenam4HYdqMYGfWgB2OMnI5xmlTg8455FDkhMjHHaow2M4HP8AKpAkdfnOCM0iuR0JH+e9H3l3dz174pB6Hr2oAlikMbZGCpGCOufapW2BkZ1Lw5zjJBHNVlzkZNTqygMp+YdOnGPX2/z0pFIke6jBmEEKRq/Cg/MVA9CarxO4BKk89vWl27cgdDTlweQOnUZxQkK7ITljz1706NlVsnGB60sy7ZOOh5BqML3xmmIlEgwQBVi3mCo+7O3jA9T9KrRqM8kgfSnDDNkLgA8f4UrDTsSOxcktj2x2HpTckAfWgY55PvT0QNIBnn86BkkS4yW+tVpWMkhIwB24qe5zGeD1OAPXFVwc9MA96BMaVI/LNORs9sHNAyeD2/WlQA9hnpTAlMh8tiRyTgcfrSIpaNgMZGG6dQKWZg0QReADkcdR0ohO0k+mDSGRdQcjrz0pU4HHSnysFdWUDaeR7e1I7Bsvk7vSgAHJGAelL5YxuYjAIBGeSOe3eo0J5wTzUjRO+CoLEDJ7YGRzQIfGLZlCMZUcsMvnIC85+Xrnpjnt+WpbaFHcWdxcR6zp0Zi58q4Z43ceijBBPtmsdUVTmRgQOoB/rSiYnpxjsBS16DTXUstpl2sBmCK8YJ5RgeB3x1xx1xUXkzpGJTDKqHPzlCAcd89KZ50pYHe24AgHPT2z6VcstZ1Gymhmt7udXhI8v5iQADnGDwR7EYNGo9Cp5hJ3Z5PBxxxUq3DnGWOOhyc//qqKWR7iZ325kkYs2FAySSeg4H0xio2G3hsg988UxGoYUNqnkMZXxuK4PyY//V71TeRnJXzCwx0yTmiCZonVgOgI44/WrrxWdwqyBvKdv9Zk459R29eOKQ9yltYDAKgMOecY+tRkDpkE98HOPxrotM03S3ijeSdpbpHz9nQY3rx3J6degJ9fWp7qHTbq/QtaPat/GEI25HGPb9KSY+XQxW0m6+yRTABkcbgqgk89O3H51Xe0nhjDzQyohOMsu38K7IxSKqJBORb8Abc5x9R2/wA9ahkgmniEY2PtPzAqT37fhj8aLj5Tk1b90UKnYefyojyhyoJwMmt1Q9sksNxHFNAcFo2XGCO4PUGsO5Xy5W2qdpPyjrjrxTE1YutIhQPYySJI67ZYnwQfp6jvjHFVCjqcshQdeRjNQB+mN2anjuCGHmZdRxgt2/pRawr3EV13EnGOT0zn8a2dD1CxhkP2uJiMYyvp0/GshlRjuVgoJ6EdOtMxsflT16dKQ07HbS6xbMhaGJ/LH3SUBBP1Hb2xWBfTeZKpkZmBXGSOmT0A9KrNfQqkYtYXjbGJNz7wT6iovO8xst99evP8vSi5V7kiSm3f5QQCeOw+v6Un2jewHC456dfxqvPIHxz1xUZb0JzmlYVyR5B1bPT9KhZx/Dn8TTiGYfh9aFjJP3aokjBz3NSRyyIu1WI5zj3+lPjt3JyvBBGOe9OS1fLBweD1HT8aAJIQGXBjiZs5yHIOPT0qw9vF5R2Wkpc42lZ1IHPcYz/KoILUZ++AfQ/56VoW9mFUdM9/m/UUrDQ2HRTPazsk6i6Rdy28h2s2CM7T0YY7A5zWQYX3FZGCtnBGDn8a7K2tUkjaKdVkiPZxkfX2P5Uk0NiuUYRMBxwo+mPaktCrJnG+WRtCSBnJ5XaRj3OeKoyxxmd5VbcCcDI6kf0rrriKxeKRVATgkHt3/KuMdvlLZGEGBz+v51cSJaEFy++T/ZAAH0FNTHPFIB1YkelKc4BweeB71ZA7I6ZP/wBemlgTgUA4HFIOvOOKCRHPAUdB+tA6Z7008k4NOHXkjGKYiWBcsP8APA5NIJA05ldA2WyV5559qfazeS0j4BOxlGRnqCM/Xmqw9jS6jJbnyTPIbcOIc5UPjcB74qLHFWbaN2c+WyiRRuCnuAOR+Xaq579PWmAD3J9vapmkP2YxFiV37gvYHGP8KgqeBzCxICsGQghhkcjHT17g9uDQAyKMyMqRnLnjHT8PekEjb1Yk7lxg+mKuCNW00XEb7biCQKQBjKno2frx+VSJZxXNi89vOWuk3NLAy4O3j51boRycjjpSuFi3qjWms3VlJpdslrdzoEuIMhIvNBxuQk4Abg7exz2xTdJuZ/DuvH7ZaJJ5TNDdWswBDoeGU9uR0PrgiqVpp9xe2tzPbBXFuu+SMH5wndgO6jjJ7dT606LT7m6sLm6gheRbTBnZTny1JwCR164GaPIZPqDW1jq7TaNO8lnu3Qs6lWAI+43v1B5wetXPDN1/Z2t6TfbEjhkdoJMNkENlXBHUfK9VtKgiv7C+ttv+mInnw8fe2/eXPXJGeOcn0qpZSxkrDcHy1eVGEpzhADgkjqRg/Xih66DWmp3HhnUL9LiPw5ZtLLqVtfA2AjkCbs5SRCx6ZB49xXp/hXVvEh0GOeLSV1eCSWWeaNwvzqvyzQFDj5xw+R1OTXk+t2llo/jCz1LSLotYXDiWJi+5opARvjYj06hu6sD1zXS6PN4qsp7yTwzFdSRrqBu7M4OJpVA81FHR+CQR3XP0rCSTszVMXxdf2Y8Pwte+GnudIRR/ZV4zkPHDI2TG7Ieo+baWB6cg8gYWm3EOkTvJptybzw/dQrDIkygSrE74KSDoSC3UcE4I9u/sLbQLrTru+ge+sdH1QsJYpoC0MQ2/6QgPVWRyrA88E8Ht49rKw2NsqWTTBZAYXy4ZfMRgG2nuDhTn3px10E9NTpJfDtnqkcX9kXk5iCvts3w80TKRlRjG4EA44BBwDXLa5puoaJqBS8BxKplikxlJkY/eB7/TseODXeeE/EWk6mhtPFYfOEK3kOEnhkGVDIw5Hbjp35rf8SaXNeaHFba8RqGiSt5ljr0SASW8jfwy46dBuByD1yD0Sk4uzBq60PFIr+6iuPPWVvM+Uk564ORkeldpb+LIdXuLJr3S4H1CDaBdL1bHA3eo6Dufw4rjtTsZtNv57O6UpPC21h0/yO/0pllczWknnQcOpB69Mfzq3FSRKk0fTngDxld2V1sgtGWAhDNEHG1gRjcvQcd+enNei3uq6ZeKovtP0y7Wb7n7oScnseOuMn1Az+PyJD4sUF5JYm3ylyzRSlCoAG3AHHXORjoTV628eX0elm1a5clIN0bhijRPu6A/x/Lwc9vpWHJNaI0covU+gtX8KfD+/wBRSwvLAWdzJ917O62jJ9FJ59OAeeDjpXOyfB/wlql29tofiqeCbOPKu0DZP+znGf515hB8TNWurN7W9gtZljhLSSeVhlYfdfjo2TgnuDg9jWrqPi2z8QW8UN0L22uDaeYrKVk8wrk7t2cqRjI4ORweear3kGj6nU33wG1uGRUsdS0663D5cyFCfYde3SsW/wDhN4xsn2NpTzEHG6GZXyD365xWfonxBtXRrW6EzWn2cEwB2zLIuCQknVeQSDg8n8a7bQPjRZ3M9vBJqV3aQvlWF2hljXOQoYj5s9DvB5GeM80XfVC07nB3PgXxNGpMuhaiEC7yREWwoOO3vWNLot7bfLLa3UZxkB42XP0zXv2h/GCG6a9t7u5hs5rJ8meQGWCRG7q45z14IHHXkGunh8aQXd0SslpdbI1nxYyLOyIRw+OpUnhsEkHHBo5gPk24tSiM0iSZHYAkn/69MmuFs40mu9Lv8BgJWwVU5z0JXANfUV540W21K1gu7e0gkm5tpI4g8N0eD/rBgqMEZBXI68isnxf4iuptKvpfDsUGm3Uqs81pfaeXExQZIXGVdtoOOMsBkdCKfMFmfO2ha34bk1VP+Ei0+/XT8jeLSVS6+pII5HHTg+/roarb2Npqco0ecXOmSESW0pOCYzyAwPRh0Occ1vyePNG1y1+weLtB0fyGjLw3umgpNHKOwJ5APcHIxyc9K6/QfA/hLxh4WsrvQbw6LrN3udILpwYZGU7SABwvIzx+WOAxJnle8k844GKQgMmCuM9eateIdH1DQdVmsNTt2guIz/eyrjnlT0ZeOD/XIrPVi2c5oGMeMHIbGD+vvVe5OzAUDjgEc4FTsRzjIqBgN3Xj1JpoREsj7h85/LFWxO8aJjByfSocKQOe+OnSlJyBkZxQBIbyVuBn65/pUgDGI7skgHnp+NVOA2ehqdHyuCaBojbccBW2ADtzn60sSgn3pQcMSOTQJOeAcmgQl0uMMvDetMhmKDBI6elTqwYENx+lRSRpk4PP1ouMek5U5Xb6dTTlmLjnA6iqJjwT8w/OpEIAwVzxTC5Z4GWB/XtUgnKgZC44NVVIUcKfrzSvJn/lkT9aQXLHmb+SRz70u4D06VWR8D/Vn16U4yZH3GH4UrAS+ZuPLD86fvGwgEZ/CqYIycg1JlD0Bz9KBEyv1zimu2SQMYNRAL79aTgNwT+VNDHOSRgduKRi2OcY6/WmlsdM/WkBPPQGmAmeckClR1OMMwP5U3ce5H50mQSCy/8A16QEzYxw5NCyYP3jx7ZpjN8oAGBUbPGAcnj8aQCSy7nbDnB6jFRqxGcP2qNmBY4x+HNKpGTxVBcl34PLDnjnvSlgckAc4qBiMjJGfpT8jHUUAS714BRfr1pJGUjC4/A1CSOMkdfSgtzxj8qBEobp6AU9tvUAZNRA4HtinKwxxjNACgDjr+VOHy9PX0pu4Y6j8qQn0NICQvnI4pFcgck/gaYTwcEUZIFMZNG/ucjHeleQEEAnPvUSOR0P6CguzZBINKwEinIzxx71MJPQk1DFgxkkHIPUDI/GnbutDGhfM5wc0zPXrSZ55x+VBI7Y/KmgHK2CM5xUgkGeGNRK2CcgcUofngD/AApATK/oR+dSLI245xu9zUKk5yBwaeJArYKZ/GpaAsM529Bn65quh2q+Tz71I0ikcAjvUW4Krgklu1CKIs4YYFN535YHOaRjuYAfTpT13gMADj6iqJHqx7kcVNsb7/lv78Him2unXU0bSLC3lDrIwwoH9fwq87tY4tJWck9WTG38M/zpMdmaXgKwa71Z7gQmQWyMyhhgBiDyT9MmsXW2udcmzHGoDFtmB1UEgEn6DOe+as/arCJokV7goBllVyA5Prj8j/hU13e6etqyWhYl0+dUBPmDsMjnrkYwPfjrnre5qkuWxxOo6XLaNhSsidMqc549uMdazNpGQAfyrqL2cRwedEyRIPla3lHzkkddo7fr6cVgys000jxpgFh0H9PrW8ZPqc80lsVdpHJzjr0pRIApwDn61J5bsNzkhc8ZqNgoJAOa0IAksSTTWJJ5PNOwR1pMbqSEPikK5wp56Ejp71atXmLFo2Cnv/Diqa7VXJOaXkkZJ+gpMaZdS6njkPl3EnmA87c9Px7Vt6ddi6kUT3IguS4KycgE/XoD09q5xF42rmnq+35Se3ak43KUmj0Nb7VLbWF1C5u5JvLVolhVsLnGMccAZ59614/D9j4kX7ZfxxC7kTawjAXa3XLHqTx7+9ecaNqbWN4juBPApy8DNgMPr2NbF14h/tHUnkMRtbd33COPomO2Ovf86xlCSehtGcXuN1fwj5V3Pb6RdrcSxkhrd+GGOevQ9fQVyN1BNaTNDdRPFInBRxjFd6tzYugWW8miRsvLsHLeg+nHr+dYUl1NqDqrJ5kAwsfmuCQeuRn/AOvirhJ9SJwXQ5oYznPFPVtp610ttY2N3DKZHhRk5zuABGR0Hdvb0/S9PoGkmG4W0LzkDMcgBXOB37Y59Sc8fV+0XUlUm9UcmlzJ8i+Y20dFJ3Afn0rs/AGh2V/It7Ld77mCQYtum0f389x/KsDUdD+zybYg+AcHJBxjBIPuKhitZ7aOQ7wrN8oYZUqR2zQ7SWjBJxep6f400lJbCGDzvLjJLDIB3+hHevOr/TJLM5tXFzH/ABhQflNVYtb1O2MYN28qRNuQO24A4I78gYJFMg1S4ilMoY5I5GSM/j1pQi46BKSk7mtZxpd6Lc+esazQuuxpZMYGD/D+fPrWRPqErW/k7yUGBk8k47E9aq3V5JO26Vyx/L9Ks6NpF5rU/l24EcQGWmk4QY689z7DJNXa2rFzN6IoPPkkAZNIkMtxkxqWI6qoJJ/KuoPhi3iuJbeR5B5BUyTucKVIyQB6/nVx7+z02Y2mnQh8HqhzuJ9fX86lzX2SlSe8nYw7HwtezKJLrbbRE4Jc89PQVoWuh2cNyqR6lKZBhgI1HX+lJdyaxezSRGGYbjgZG0Y9var2maM+m3gnvZhLsBMkPK84OAT+XapcpWu2XGMb2SOc1ly17Kp6qcD8PU1cvdShXT4raNyWQKDwMDjsRziszUZVmu32tkZwCOMk0oskkDGJXaNMB5GOFH496uy0uRd3dhFvGUgrjjpUhmnkbI2qT14x+FR3CwhV8iEoB95s53e/NNM3uOOntRYV31L9/Ii2scYXnhmb+8fX61jyfN1PQcU558xsqk5Przx9KijQs3lorO5xgAU4qxMpXEDksME9cfWrBfjIwCD65qdrBbUK1zlmP/LMdvx71WJAHAAzxT0YWa3EkkbggcnrzU9mNyPk857mqhxk+o/Wuk8P6LLeHyCAC435U5PTv7UpaIcdWYtwudpIwOmKjClBkZA7jFbmp6XPZ3aQygOvI3DGBj+tVmjVQ2SN2PTOBSUinDUoJNGB94GQe54/+vU9vfMXIJYKOSABz7fSoLiMAhwo29elQNvd3kU7QpA4NOyYrtGi+2GJ5Aik7cD5hxnsB6ZrOQNNPuLEkjJ460zblyDxnH1qyB5cWBleM5xnj0otYL8wtwxiL7AMEAA9MZ9KpzE7SHJLg+uatrlYnZ2DM3Iz9aoHkk55qokyE7VbtY0VSzZz9elQJHlc5Gc1ZhikcmNSrMeOTj9abJQ9woxgDnkZogkVfvH5unWrkPh7UbgbkWJn6bPNXI5x64x+NKPDmo/aRFhDIxwAjhsnOO3fmo06suz7EaOu0Y6Gobhv3mCPkIwxHqSa0l8M6iUOwJiMnezMQFx9eM8GqGr2txp9yIbgKzMqupQ5VgR29aStcp3S1RQdC+2MHJJ49hVmO3CtueQ+ShByRjd7AelNjQIWLA7ioyemM9qW5k3QLkHA9+maq/REpdWPu9QRonjgj2hjz9KoPKzqAQoAGBioz05qW3QsGwRgVSSRDk5MjyWGCST2qcIgjAA3OePpUq2shTKsMMeQKjdWgOM8jjg9Pale+w+W25GUIBGOM4qMqA3P/wCunlmYk5O0/rQkZZ8MeB/KmIj2+lTRfvF5xkde3FNZSpJAOO1Chs7l6j9aBWNxbyIJaqqmMQrjcpyeDnP1zgZq9p1uZojcXbiZpeWBcEjJBye+evrXMpIc+9SCTDclgx7is3Dsaqfc1Lq3tH1HZ5P2eJmxjdyMn8sfhUR0zzLvytPZ5CWIG4Yzj69arFjI3Dk5OST3PvViySXePKJLNwu00Wa6gmmyOe2mtZJI5AG2dSvzAU2GXbkls+n0/wAK31+y6fC7XISa6lHfny+vA9/WufuTGzM0aLH7Dv8AhST5hu0SZdpBAYYznr/jSgLHk5X+dU42K5c84NVpZnJOc+npVKNxc1tSeSccgDj1qvuJPGQc4zUYJJOSatQKBjcSB61duUi/MOwBEQ5YgCqZycAngdOashjJJhc4HXNRzKA5Ucgdf8aSFJXIT6CnD5T1BNIB1I6A05IyxzkAVRNhUbnnkU7jdhQMe9R4IyeMUof07UrATKSzAH889RT5Io8sSQAf0NQqwzk5B7cdaHbf94nHt3pWGTfO2S/BB54xViGOOSEhpSjr0G3Of8KiDb+3PI4qTaAuCQCO9JlIYYWD4UqR6+n5805bcd8n8KFkRSSylm7c9qdLds4CqirjjIHJ+tGoaCiEEkIFXnksf8aRBFkrJINvIyozzUAMnPPB9aNjtkk59aBXGsAGIUkjt24pARinMpAxkdRTc1QDg2OlAJ55pBnvQCOaAJEAOQe9NVcZBxnNLGx9BgcU9h+Y60AQ5Kk4/lSkk9acfulex5FNHQ560AB+h6UAnHFA5HSg5oAkSTBBJPvUjRqw3Rk/TPSq6nHNSo/zbk+U4qQHyFWUNjkcMP6io9w9qsII5gxyEmAJII4bA/8A11AFGeMj60DY+3EbSYnZlTH8IHP59P1oBHKg7lXIBxj8ajbAPBBpyY20AKvORjtmp7bPmZP+RUHYkg46CprQ7Xwe3I464/yKQIZdOXmbgbQSBUIOTzSyZ5Jzyf50zvxmmJkijjrzirCqqx+Y/Ppx3zVaMZFPlY7VUA8c5oY0WA63JCkKGXIB9vT6VHFG+5kBDAnHT/PpSWuUYSdh1x2qyJWY5j3EgEkpkHb6n2pNjWpX8sbSGYYP61H5fYOPauhs7LUIUdo2uYY24BCh/MBIGAehHfqAf53z4X1FYHSa7sUQp5vlzEZOM8cA4PbGcZ/MTzpF+zZx6LjJB/zmpByrB846/U1ck0/ypMXEkUSHGDySc+gHI6+1V5IQownzY4bpwefz4/nVXuRZohIUuRGMgDHb9PWn+TgkDpnp/wDWpPKCDczLnBwEGcEcdeg7880Qy7AQwDA/5+tAFy0jjYOrRq4A7kqQfqOP0qaOxdIvMGN4PCkAhgPf1qpFdBBgIT0zwOfr61Zi1JQ2Cr4PPTNA1Y1bCePBeOMI4P3W4I9hkYpuoXFxM5f7HH5Uf8JUZbI6+/8AnvUcN3beWJTE8zq3+oOQG9srzn05/wAKz5tSuJJJDHAkKsT8igkLz0yeT/Op6lXsiIxxXBkKOscmchMED6VU+ZHKt8pHH0q2PtDtuMa5PGf/ANVR3CSEEuo3DnjnP41RJJDB9sjd0ZEaMDO7I4+vQUx1lhjBW5RsdFSXJFSWWoPHEsJJ2LuKD0LYBJHfOBxTXt1kcmBjtY8Db3/OgPQtafrMsIKS5dOme4z69jW3Z6kZkYKFfGMEcfn3FcvLaNGcMw3egpiNNFKrISrDpg0rDTaO43QvnzSrexyCM+hrK1C0sgSY2YHtkj9e9VrW7LxEy5Emcc5waq3LPnAdSTzkUim7os3MWmLajy3nS6z2AKt7DHOfes542LHcu3jGO/41Zt40iG/zWEp7gZpXUSHPmL+K4oRLVykY+GO85z6dfxp8e5lxINyjpk/yNPZdp7UsjFmJwRwB60CsIsKZyrnn2qRIR1wDniq5zngE1NbmTIyhC+p70DQrwqCMACk8rjjFWerEt1PtTlVcHk5NK47FbYeaNp75qbGMgelIxOeaAsRpwQQeRVhLmRYyinAJ9agGfUUpHGR3o3AmRlGS2M4/Wp7eRRglgOfU1URj0NKcHOOv1ouBsC9EafJJFux3BrPeTc7N8uck8ZHWmblaMKsAGBgsCTn65pCpwMgj1pXGVdVuPJsyAQSwxgf1P4VzbNlD5asFHJJ7Vt658sEZH94/lisJ242jPvz1rWC0MpvUbyepFOwdoYMD2IpoFA7kVZmHzelABbgAk/SjPBNBY4wCelADmRo8CRWXcMjI9f6U3tjFIWJxuJOBgZPSgfWmAE84oFL1pBSAkileKRXjYq6nqKbJjzX2gqueAew9KTjPPSk9fegCUqnkqwb59xDKR27GmduTUkTosUqvErMwG1icFT61Hz3FAx8UjI2QTtJ5HqBWzqkOn26217ol1KVkUh4JxiSBwOVJAwykHIPHGQRmsMdeBUsbM8TRKCeQwAGenH9c0rDRsafYSR6adUsLu2kkgJWe137JkUjBbacb0IODjOO/HJqRLLpyWd9BPG6ShlZYycjsyOPcH6EVQhQzOI0ALuQFycdaGLojQyblIbJUjoen50Bcs3kYs7vdaSExN88TqcHGeh9COhq7e/Zr3SoJrSJ47m2TZcq0hZXBORIoPI5OCMkZ5HfEMF80mmnTrh0+zKWmjyoyj47Hrg9MHjoe1V5FnsDc2txE8UrBQysMEDr/AC70AW9KvIIbiOLUlefT5GVpo42AYDGMpngMATjtxg16Gus6t4XsJNN0O9Ms9hqJubciMnzYXiLbtvPG3ryfr3rzRLOOTTZLiKZFkhKh4j1YHPzL684BHbI98dbZarAmkK21DcGOIGZSVdNjYKnPBGB19Dg+lRURcC5qHiG91S8uri8lSWW4niuRbxoRCzEYOUzjdjvzn3rir9wtpBDltwbziCfly4B4Fb02kXKaba6vHbGTTdyK7K4z98gDHXPy+mAax/EdrLaXkUUqBV2AxPnO9P4ScflShYJbEO1o4VeJ23uvz8j5uegP5ccHPrXZeB/Eeo6Q8qWUks9hL/rLfPmAt1+Zeew64IPSuHspBHcxSMoZQcFSOucjNbFqH0nWre4jDJbu45U4yO4yO9E1dWCLtqdl4y0Ox8RaMfEeiQNZXMIC3dqy7Y5FH8ceeQw/iX05HQ583e3YTyxJjAXcO+RjNd/bzR2V+k6xNPbS/M5HIIYEHrxnqCeuDg1zmtWB0fUbmC7RoxH/AKrI+/E3KH0wR3qYS6FSitzmmVhGGwdh4H1H/wCunQxtKSqjlVLE+wGa6TTLKF4FBiEhVSMPnv1xjp6VagsFRHRY4o1Mfl8gnjJq+clQZyUSyukzqGIC/MfQE1N51yjhg7Iwi2Jjuh6j9Sa3m09E85c/JLjIGOcf0qKKygBAOwc9WDE+mPpjtRzIORmLb3M9rMkkbFXgPy4JGM/rSJNJ5Ajydm4EnHTHr7ZNW7izJZl48xpGZjjoB2q5aWaR2VwiEtM6EZzwSf6U20JRZni+lhubuUYDy7kI7DP+TUljqc1pPYyW8s1tLbMcTW7lJNpIOAR36099PSGzmknYvMcJGF/ve3rwKWaxFtpW51BnZ1I74JPT8qV0Fmbt943vrjQbjS5NQvplgvRcae7lcRqGYnPGQ2SDwcdR3qr/AMJDLfanPdX2p3ouLi3BM0ZKlbhB8h4PTI68EbiR3rKh0vzLl05EaKGb3bGcD8+vpUVpaM1yRLA7RoAsvH3M8DpyOn5UWiF2I92slqs7yv8Ab0lGPkBBTk5J7kH1Hf2ok1G5Yi4W4Mchl8zEZKbWGPmAHAPPbFSNpgVruE5Mka+ZGc/eX+pqolt5li0yk7kYDGPvA+nvmnoLU7ebxdfa64tdTuZpo4og9uGw21yF3cnkAj8yAcdTUPmcdOv1rnLeGTT71JpQGTlWIz8uR1I7V0IYbWwo7fxdqzaS2NIu+4hEjphVbj3xVfyJ888AnmrUTS7WCrHjjqe1HzrgEKcn16UirEPksoJJH50oRiCQDUru4BAwB9BTAcKTyMdKYrEfltnIz+dPVQqckH06U1Xznk4NJIAV4B4oQDWbqQo/OkUsecDP1puGwQD0pQzDoeaBEiNgEMM8/Wkfy2zhTx7CkjJZjuyalIQZxSGVjtDHGf8ACkBORgkVI2SeP5U0qw69PemIQscY3H3pvnNzktj60gI9DnFNOMD5qYx4nPPXp605ZDjPPP41CVweo/OnKwA+9RYRKJOScD8qcsgweB+XSqwc5PJqZX4PH607AP8AM9RR97OAP8KaCOcj/wCtTtykcYFOwg2kdaAvsadxj73PrQdpGN3NICNx65601W5HXinnvzTW6HkVIxkhPOAarnPv+Qp8pYdG4AqvvbkHkduKpAKOCfXNO3deDTFAxnIpckD74xQAMenXNODLjAz+dROfmyacvY0wHkjHf86cMbeMVGGHOacpAXGB0pAOLYXGT0pUb0JpgztxnFOVeKAHjpxmjOB3pgx60pxjOBQA4MewzTg3HK1CW4ICk05GB4KH25NFgJlbA6D9abuycbR9aRSvIKfrSEpk5BpAWLYkq4HYdj1FLuOMgVDE2CcKD+HSn7+uVJFFhocOlIScHNN3/wCyaTJ9qYDgeen60oYZ4B9KYOex/Ojn1OKQEwkweQePxpTMuckH8qjUHjO78+tKQQScHH1pATi4TP8AF/WlYsy5CSkZwDtrR03RZp1+0XMcq2qPiTGA4BHUBuo+meaqeI9dvI44IbSe0aJ4QseEzNEAxxuz0ftnrjFTdN2RfLZXZb0/Qbm5mjFw6WsTkAs/J6Z6DnOOldQmjaPpF1M5klu57VQdnyuC5AIwBwT+IA68nivKW1m/DqJ52dlznc3Xg4Jx1pJdZungNo0p+yZ+aKP5A5HOTxkmm6cn1GqkI9Du/EeuR3dyFSaVVVchYsKhLY4HYnrzXOyzwyac7GYfaVlZ/wB6xJkX2xxnj2HpmuXhuJIGDxMVYAjPHf0qzqOqXWovG13J5jRqETgAADtgU1TtsRKrzajvtj4ZQ5w3PBxz7VX+1TRqoSZ1A6bWIwfWocs0gK43GrUWn3Ej/MgXJ/i/nitNFuZ3b2IPMLy7iTuPJ5yT7knvWxo1rM6F4mQENjL/AHRx3P8AnFRR6FkgNOAx/ur/AFqxDcXFnMtpBO0QjBIaM4c/5zUOSekS4KzuyhqDyJM6S7NwwDsPAPt6/WqAYc+tXZ1jEbrIwMuTgdNoB7+uagdYkt1YyKZTjCAZ4+v5VSJkV856imljinGTrnGM0w85qyBy+44PSpA3cmm+W4iEhVvLzw2DjP1pgPWgCXdkk5wfrQmM4B+vPWoh3pQe1AE6nGQM+p7UB9rZBPFQ5OeTSgFySSSTweaAuWmumZvmIOcDGcUsDx8ljjAI2kdfofWoFjKA5UYxSJ13bQf94cGk0CkW5NTkIURQxRkHBIUcgHp6YrR03WHVWaUBtrGRlLMEkPUAqOMZzxxnNUrn+zn06EQW8sV6P9YS2UOM9O/pUukaMl/aSTNdrAwbaqshOQO+fxqJcttTRNp6GvJqAa0YySxPO/LlFC4BJ4Lc464x6VSmkafHMarj5QGJCg+559v1rLeIRSurSrMqnAK5wce1RSz/ACH5sjAGPTFJR7Dc+46dgGYcYzg+9VnkJ4GMdBTSxkYAHgVIiDorc/Tr7VpsZXH2Nt9ou445DgMwXGcZJ7e3PFd7N/ollGt0yWyxAbLe34IJ9T6Y6nriuDTdGUfkDPX6H9cVpXP2zVb4JCGkDjI+Y4A759BUSuzSDS9S54i1trxhHAf3IAzz1OMfjV3QtMh09bPUprhFm3jCk8kMuRtBHPGefxFV28OxRRLI8rSOg3uuMK3fbnqfSotWlG8NJIreSQI1wRkEDnHoMYqNLWiXrfmkdaYpry9mlvbnyZpQEhmJOIwowFx17L75rG8Ua6rxS2eD5qsQVDfKvPQdyPTOTWVb3JhtHubt3kuiCtsJDxEh6nGepOcfnXPFnnm7s5PA60RhdjlUsh4UyyDJwWPPsKsPKqxhI+EB4GetRGMwyyIxBKr+pquWwcjpWtjG9iw9wdpU461XLLzuPXn61GzdauWNupDy3B+RFyE/vngY9utO1hXbZJo9h9uuAsh8qAAsXzgnHYevNdPqM9lpNo1ta2pjkLAOWIY8D25FZ0F0FmXUSohC/u0QAMGC+may7+5W4Jck7mYnrnk9/wCX5VGsmaK0V5iXt0ZXy+Dg5GP89KpTN+9JDBgTnNJJnoc9KYgJOACT0FWlYzbuaOi6bNql0UjH7tPmkcsBgfj3Ndlp92mmu9vp6rJKwxI5GcgHOMdlz+ZrB0sNZwC3VSzTnJK5B47/AP1/StiBhDiCDyljIyz7wGbHJyx6DA6cc4rGozoopLUoakzB5SQPOLFmCAgIDzg9hWRdBk5LDYTk4zz/AI1qXMlvPEPsqmJVGXYHIBJ755yT3z/WsK/+W4l8zgjG1c5wf5U4IKjsRTM+4KCSCMD1PNEaxoSxIG3IOT1/Co5JOMk/N6VVLHJz1rVIwcixJOAMRjB7nuajlnZ3BJbj3J5qLljxUqx7Rub/APVTskRdsEDnnJA/z2qURCR1RclmOOB1zUeSBwOtPUjAYHB/lQMnvLSezcCZRsPCspyDjtn1qJW9CKWS5lkTbI5dc9DzzUYKZ5H156Ul5g7X0Om8M6tFFJ5F8QsZxtmC5aPHJx69635dVsnDW9vOlyMHYxPl7gCSCeN2fbp/OvPFO0nGenP0oJIYMpIIIx/9apcLmkajSPUF12yg0dbbVY4fNUExREFggxxkDt6DNc3rusW+pwIhQvJG+4SsMMARgrgdF445Nc6928wzOdxHf1P+NMt5d24nAHap5EtSvaNkk7xqDu5B4x6VTuJ9x2qMKOKRpSQyKMsTkk+tQhQSc1okZSlcaeePSnIP14pwj6ep61OFCt8uOOntTuSkRK7rlUYjI5waR1JxyMnsOfxouHLSEKOQccd6ImdSQMhscn60D8h0eBhTkZ/SrUaCQEg4P3frmo4rfzUPzKG6/MSc/Srlva+ZATES5XqRx+ealsuKZTmiKDBcHAzUSku4zx09q0lh3LJ8yJgkEMeT+H071SulTeSuduOo9jQn0Bq2pAwG8gDn69aEbnDEgeuKkQrnI+92oaNmPAAAGDVEWHoeThgfoKtRybUBjDKy993T8O1Z8ZaJ88N7HpVwPHJGwVSrDoMnpUsaFlui4G5FZxxnvio2Man5lJYjPp2pqoQwK9B/KmbSSwOQO+aEDJGMTD5dwz796rtb9WWQEfjVjaHAC/dHXPFOkVEJCsc+1Gwt9yl5TKeCD9KmXcFwVHUfhSoBkgnBqTjOOuabY4ogaTaGUAc8/SmLls5PWrDqGA3AccVE6MhIRSSevFCBjkhwm7njpQ8OV344PWm/Oq4bOD+tKZGaMrkgdKNR6DERnDEc4pjDnoM1biO2HA2k9TTFi6l8ZouJxIB3Jzj86AQDkA8VL5LZJZhgc/5FNmjAGY+nsad7isxyMVZgOfcd6vgBo2ZSOP5jms1DzgdauWj7W2t0YYx9f6UmgQquuCCFPvQqx7yygfQ/zquxKuwIxjg0BjTC5ZC5XtSY446GoVfjmnK+AcdOtSO45l+VgD2qvxVlW9x71GYt2SoGKEDIh60vtT9gA5pQo9aomwxDhuc4qYHIGcZpipUoTjp2qbjsJHA0rbIxlvrUcqbMYOeOatR5jBIxyCDx2NQsuSeaLjsQjpzSdMjB61Pt4pNvpRcLEJzk57U4cHrTmTnrmgA4IwOo7envQImgkxhHVSpbccryO3BHOP51duQH01Z5opfOLHM7uAHGT91cZP5kD2qnbgDG4HHOSB/nmrlzLLNBDAzkxxAiMFugPoDwOlS9y47GWe/NPT7vSnmPBOaYwwSBzVbkhn5eOcVZtzlXJHQH6c1WOcYAPXNWrTIRgQM9vcdKQFWQfX/61NAORip3UZwQPehcA85phYktY853ITjkj2p828Hb5agHpwTn2FOjkAXac461KssiNlVRlGOCOv1qWWiBraSIIW2gvyBjp71Lbh1nR8kEEYOcYweue1SNOJGzKCMDAAORTQ4wxXuMdM//AKqQ7I3ZfEFzeRsiwRIWKDzD94BcgYJ4Hr9aqG/eaSYzlVl2lctIevPOAOtZhkYjHGPpQBhQcd/XipUUiuZsjlUmViSvBPQ9vxphTnJx/KrKwuRwjev3akhg3PtlyiZyfX8qq5PKUVVckH6UqKo7Ctt9PhC7ot2GGVLH1+nQ1BNp62+1rh2G4ZGwdfxNLnQ+RlDaAmDtB6j5etNRecqBmppNu75Ado/vHP8AKnJgIcx8juG9fY0XJsSwCEA7pVTjB/dk/rUciRKT5chceuMfz6VAwI6NnPPrTTu96YyVWIORSysrA8ncajCt6Hj2pyxnPTn60xCQ2bEh2VgpBIPrj/69Ss20kKgP909B+VS+cRD5ZBJHQn09KrnlsN/+qlcdrCANIxLMeetTSQIgUrIsjHrjjFNeDy8YdWzzxTyoDBQB09c0rhYkaVggBBx/vVEqhu+B9Key/Lyo4GOtRn7pAOM9RQMeqhecDHbmkA+YnAPfFMRT+FSBScZBx9DQA0M4JwcUM5ySwB/rSlDnAB4+tKgPIKtj6UCsQs5XgAA9euaRJZAchwfY1aMTYOcY/GoSjZOAMigLWHRzsc7lNXAF2AjGTzVFEkXLZGKtLL6KOeDzQNCkdQcdaYUY9AOelS8NxwPeo9zKQNxGeKQ2J5ZHUGnKjdMfrU68gZwfxzUqnCZ7ClcLECrwAFH51MISduB79uaesiZ5IqVZE7fT60DsK0f7vDOxI6jPHFUpGAYAkckAZqWScH5VPzdcccDPpVWV9569D9KEhNlHXEDW2e4OR/Kub6sSTmui1CJ5rZljILnoAc5xXPsMHB+8ODW8NjCerCmnpR+VA9D0qiBO1BpcUc5OKAGindaQY70vGKYCCl6Uc/nSH3oAVQScDHA9cUDuQDwKAODnPtT0kMZJTqQV+oOR/KkAwUo9ATjPNIKBnFADmUgDOORn9cc06B5IZkkiJSRDuBHGCO9R55P6U9t7gseQuAT/AJ+lAyxdljdNM8JiSUmRRtwCDn7vt16U+O73x3MdwkchuMEyOMuhB6g9fUY/+tUK3UjW8cEru9uj7gmen0PanX8cMV24tHd7dhujZxhsHsfft9RSsBHbRJIZRI+zbGWXIzkjt+PNPVjdP/pEzbggVWckjgYAPoO1RxIHO0uQ7YA445oSPKyEYKoeeOoz1+nSgCa2BVXjOVL8MDxwCPX3Aq9DNCYHV4WkeRWjiZD9xwRtx/nv7VUlRpUFwWGWGT2x1/oP6VDHFMwBjRyB8wIH6/hxS3K2O7sdQiOnJMoUaLlYLm3VsvbMQTlQ3JG7JVuQDwaw/HFkLG/hjhukvLQqWt7hD9+MnIz3DAdR2rBt5/JkJKLIrY3K2cMPQ96sXpV7OAxFggZiI2OSuTx9RUqPK7jcropK2Bz+PuK6jT4hcaUESRX+bfhgDtIJ9e/b3rlas2dw8Dho2Kkc8VUlfYUXY9O0qeC40yH7W7o4O0NnIB7HHT8OAayNcjOsFbS7cjUAim0ZVVY3b7pR2JAUYXI5wDx3zVTwlrghlkjlITzWBLj1yOvatfxhphlhju7fbJB8xbY2cMFOBj05JFcy92RtfmicvpV8YJFt5DiXzH3kN93HT2q7BdyXFmJVLbGJyoYjIB9e9VZCJLIx3G6eK282OC6iZVVdy7grfLlv4up4P5VDaRy3VrZ6fpu64nmA3qi4K5zxz39+lbOK3ITsWPP5AKkdf4s1A1y4YYLgDjAY9M81AbyRYZ5SCAzbUB9h2/rU0xkjZQ/Vjgcnn3x6UrDuL5gLEgtz/tVZtLlYckqwAxj6fzqBIZ88EDPTBzmla3nYEse3TdQ7DRfSWCY8sqBemc8/1olaHepkZQgO4Aduvr3qhHBIoJYj86dMWYEEL+nFKwXNBZ7cIzBguDwx5JPpSLMpYshXJHJGefrWZFGzELhRnjrVmOxkUh5CcduM0rBqWBsL5DFiMj7p4zTILdI4njCFlDbtpU9yDj9KlW24HzFvbp3796sxwyRozeSjcZG4A5/WlcaRUeVslTA+COuP88UxZM4G0jtVj9654jjWms7A4O334zTFYVACMFR+VKYwOinnHamrgk5BX8MUpVccFvwNAxCo54P+FNwMD5aXb15b86aI+RjeOfWgQ4JxwmMUx84wD+lTmHIyHYfiKj+znjMv60XHYhCsAeCc0vOMbBUzQFUGZ1x9TVchhkBifxp3FawEDnOaeoAXgmmc45/rSD0/xoEPXO7IBIx+dPlGFBx1HFV+fXFJz6n9aBjcnPehgSO/40MW5wP0o3MVxt6UwuMCjPJFS8AdRTB+PrThz1U/XFAhRt9R9MinKoPQj/voVHtHPFOAGOhqhNjwBk4P05pdo7knP40wFR60oZfTke1FhXHjbk8mncDoCRTV78DFBPHWhjQjdDkGosD0IJPrSykAct+tV3YYPJqRj5BjI38VXY9QWFBHJIzTSMn2pgOX8KQketCqc8UoQn0x9aBEbdcg09c44xQI8dTT9vvTAYevbNOGcc4FIVG7JpeR0zQA7jtTlwPWmjkdDzTuAPSkA75SScEmkcgDIJ/PpSdjjAFIc4wCPwoQwDDuRTxIMdR+BqvkHOSc05cevFFhFgMD60m7kgYpi/XilLdQQc07DJ7ZwhbJAY/5xSkjHBGagUhicDB/SnlSOuKVgQ7cAKTdwelNGe1KR60DBT1wcU4E44xmmRo8jYjUsfYZrr9L8O29rYpe6lunmf5o7aMgbQCB8/f+mamUktyoxctjnLO2mumKoFVRyXbgAD1/wrei/srS7QSXKG4v3j3w7shd3GAVHI655IB6cVU1DU9S023+1QR2lqZM+WAVYouTj5fXGT3B7+lcTeyTSKk8s4keUncvPGD37d/ekk5jbUPU1tev5Zr1hPM0gDgFEmLgcAkKfT9M/nWTfvLLIjSNK8kmSu9t5wTwM9c8e1Uy5znJz600cHJ5J5NaqNjGU+YkdWR3R1YSKSCpHTHrUYPXOKsi2zZyXUrFFziMbSRIe+D044q9o+lJdQG4uJQqAkBR1JA5z6DoKbaSEotuyM63t2mYjIReu5s9Pb1NRyYUkKcgcZ9RWprAnW6fcyrz8oj6KPQdwPSs22by545NqvsYHaeQcHp9KE76g1bQ39D0cCNbq6dVJHyoeqg9yDWutqgY7ZAfrgUsOoPNGHVIgzDlHGcf/WqKa4vWYYig2jsP/r1hJcz1LTsRTyMrABCdoxu9vwrEnm/fyNGC7Ebdw6/hW1Obxx8yRgdttc9MTFOQTt2nBzxzk04KwNlJhIGYNkEZz9e9NK8D5gc9fbk8GpZH8zKxrhQSevY9zUK9SB3rczYnFKOcelKTgEZ5pARzxxQBueHW826jt2uI44weDKAUAbgkjuP1ro5rDRL3Sp47eylm1ZSHBhO1QgAyx7YyDXCQttYOpCsvI/8Ar1r2l1HcRrFI7JIBggt8rH1yPbjHNZyi73RrCatysz7u3EYWWPCxSZ2KW3EYz19KgSI8E4Oa2ZmErKJodiBfmx/e/vY6dOO1VkgW4Mnl4WTYWIUDGR2+n9apS7kOOuhQkXuMY6EelOtcF+SPXnineTLkEKGB+gp8VpNOSsETFxk4HoOaq6Jsya5bAO1QQQORVIt1A6dacZjjZIDwMZpijeCRxQA6IAuq4J56Vd8x4I5I1kYRtyVqFIzFGWPLnBP+yPr61BuMsh8xiFHXjt7Cla49hdzyNtjBZunsKe9o0agudwPXb0HtTo7uKKMIiN16kj/JqWO9gEToEfLfxZHFMCsilZFKruA6DGaW3kSOZ2Zd2OinIH4+lT2s8kaMItpzwcjnFMa3E7nyiVkwWZTxjHfPSpv3BeRFvUrgk5Ax+dWNPuzazqwbBU5GeR9CO4qiFIYhhz0NOUAsVBOOvWiwXZ2U2rPNbBomG4ACTIHHbj2pZJYyJ5JYUkbC7S5zjb6/pXKWpBY7iwHqDitKGC6aNUguG8tzjZk+vcVm4pGsZt7mbeyeZK8jMzyPks3Tn2rY0m1a0tWmuEG+RfkGOQO/Pam21rHbziSfa8gyTuPyqf6mk1K9DRylpD5n8PHsOnpTvfRAlb3mZl/IHnLHjrn86pHknBqS56R8HO0H602GJpSwXAGM88fh9a0WiMXqx9tDuyWGeR+JrR06CSVZkJ2xlQXYjIUA5496ZZQnaAcADr/+utDVilvZRRWoIJG53zkEnt9RSbu7FRVtSpf3EZeQRKUQqo24xj6Z98msqQkjGP8A61T7XmO1cknueKjYCFMq+5yAfpn+tCBu5D8zEAZq/aWsbRq7MTKZcbB/dHcfy/CqaOSQjEAE/MSP69a29ORFZZmAbgrGM5J46gf17USdkEI3Zbub1Vu2lVSJW+VU7AH1PoKrXk7rGLeLbIIyW24+VCT3z1P6VXvGkF0kYLKxYbmPGMAc+wqobt4ozHEQAGJZ/Un61Cj1NXK2hJcznYQ0aRRZBZFzk496zpZNzkjIyfXNJK7yOWYk/Wo8noK0SsYylcXdj600ZJ96VVJ+lSrHkgAEZPX1qiNxUUKuRj8aWRgEPTnpTSONpP8A+qp4rZGX52bOelL1GiuG4/SkVvyNWZraIAlGbI7HmoliKj5sCgLMZjJ5PShsDntTymQckevXrS7QVwzADpQMYSVAxTkDOMnpnGaFAXJ39Pan7mC8sAvTFACgKOCW29P/AKwpgIMoC5xnFROwI4JwKdbsok3PwFHr1osFyxJakAZ4ZuPxp1vaLlyx3KtPjk84SynoVPHvipTsihVT0BOfc1F3saJLcg27mbHVegHQe9V3kxGvHzA5PPWp2b5hnO5hg4FVRH/z1JyOg9RTRL8gj+UFzglugpGYrnB5PJ9valk2j5RnPGPpUZBOeKpEXHwy7QSxOeoq3HeuqbIWAbucc/nVJYztJJPFWkgMhXyl2kDrnt60nYcbk0cNwV3SOERjklj9739arzXDJH5cWAvr3NNmcpIBvDkdfr6UW8QkY+YwxR5sq99EOtUYgNznOc47irKrtOCBhu9LAQmQWYqBx2wPY1XuJDyqkMD6dqndjWiJCi+b8wxz+dNlTy3BHRgRT0EhVVwflw3PtSuwOGGfmPfsKB9CvGuZMDKnoKemXLMTkKcEnmnMQeSw69c01VAyoYAHjkYzTuSkRySEEr1HQECkj7Bn2g8g9aDGwJAAI9aQbl+UjKj8ce9MVi7FbI8W8TDGMdv/ANYqMjYcDp2NVvnhywON3p6ULccYk/DHpRYE7EysSeOMcmpMnLVEpzyuCMH3p75bCjrgZPpzSGNdlMxDDKYHGKairhsrgDpzRKDvyPYUFhls9MYpivqOJjRQwbn0z0psb7skqNvr3qsPlYg49DxTg5Tp60WBSL42FNzNtwOM8ZqtGN5bB5z9KdCwkGCM9/pVkYwcAYI5+v8AjU7F7mep2k8D0qZO5BGQM1B0JBHOcH2p2TjrVmZZK+cu5SC+P/rVWJ5OR0604PgkgDOMfhUpjExDIBnHI6ZNAtyEN9aAaV4njPzKR9R/WmZ65oGSq3v+dS+YTyOo6VWB47UAkdKVhXLasuCGXofWpPJyNynPGT9KqI5ByccfrU0chXkdM8g9D/hRYaZKi9RU6xjBOQfSoEkXoBz1FWlIZMDrjpUO5cbED88cinQQyStsiBYntxT1TGd6n2qVJVjPYfQUh2GPp9ymd0D8VXdGTgqQe9b1pqEflBChYgdcEZ+vY1HckOC0kQUt0yOPyqVJ9SuVdDBIyCDToo9zY/pVwWytuYEYHXA/xoWOJBlWOfcEVXMSojFTHbpUgXkZx0zTfpQPfNIoZMvt2qsy81bIqDFUiZIZt4GKmjUBGPftTcdPyqVFwnAyeDQKxC2ScntQF4NSHuMd6VULHgj+VA7DAMdelSA88E+h9qv2tkkqgCQbsZPt9agaNFchGDEd896Vx26kB5JyBn1pwGF4I96dt5J96cRnpjFAJCIu5gGIA6E9cV0unaPpxiiuHnknBY4QER5APXkcjHvmsC3jVmO8kADPA61ehndAY9riIchR0z757dfSs5XexpCy3NbXvKWUwWdyZoMLtkxsx3xg8+tZiabJHiZhvD55LDP1C9ce+ajM8xQeY8Z2LsUuAcDOeP1qvBiRiZlaYngEOVx/T8KSTSKbTZqi1ldAwhQRkbU3kj8cZyf5VZMccUIja4KovHllxx7Anp6n8qpRssYCtdYP91lyV56ZNV7/AGNLvRzJj7pK44/GlYd7IsywxPFnYF+bkIecevTFZUsIVXUI27IIJPQf1/SrjzGSJAI1QA9ickjuM8VW4KMpJ2tyfwz3qokOzKio+7JyPerCWxc5Drjr6fz70nlRgcqachVD8o4P41TZKQ77MEJLFuvFROg3ZGQPer6zQvHtlOHA6lc/rVcxrhiCGH49KSY2uxXYDACgVCAd2O3erBUA8dOvTP6U1o852sCCfSmSPuViEv7l2dQe64pp27+N3tzSSyySMd+0YPYYqPdzkZyOtMLk4BO7ahJ6nvTdrkEnAI7HjPNME8igjJweTx1NG9mx159sUiiVS6r8p5zzgf1pGaX+Iv75JNNV5AOCc9+KliaSVgryIo9Wzx78c0ANVXPOSB604Fl6Fj+FMLljgk5Bx0p0fpgn8aAFLnJByCfQUFFwTuOfypDjfySB3/8A1VZnSBUDRSs7dCChXA9aAKwReh6n1NPPXBI/IfzpVSLO5nOPYZwf5U0A846f0oAfGrYY5HApVIJzweO9IgwemAfUZ4pwUZI3gAenceuaQEsW6TODgDmmSSEnAJIHHXpT0+UcHORj8KjC98EigByE5PJNMlmZQdtKRt9cVE0ZIyc49qaJbGE/xcbh0z600/MPf29al8ng09VK8jH5VRBU8s4JrG1K18tvNUkox546deK7vS1iZcOitng5Gf51p3Nlp8mnSxy2aNuHUKAfrnjmmnZj5Lqx5JjPSk5weOlX9TsH0+5KMDsOSjHuPw71SbrkfjWidzFq2jG0g+tOzQMUwG0Yo6E0+gQ09Peg0uetHJHagBCO9IAaXk9TRzQAnNLSj3pKAHMu0DBByM8fy+tJn368GkooAKczEhVzkL059ab2p6rzsOMsQM+lAycR7CiqwYOuSR2Geh9KnuJfLvHbyl8mSMqBjqCMZHvn9ar4eNGBI67Ov41EXJfgkqucZ9KVijcWG0ht43lZsE7JEzhiCNysB6A/pWdNNtgWKMjkcshIyp/hI+tbmm3l3NDDHIFZLe3a2CyRq2VYk7TkZIGcj0NUf7JYthZwfquKhO247N7GNtPb8afubKkk/KMD/P51tHQLvjbsIPI5xUf9h3J4LR5+tPmQuV9jGxzx0oH6VsHQp9hcyR4+vSli0Yn78i/8B5zRzoOVmUjlfumtCHV7mKMqsjYHY888irMejRsDm4ZfTCA/pUEmjSLkpKjAHAyCM0rxY+WSKtpdGHAJIVdxYA/eyMYxUj3sUtrp0UsCrJasVMiDBdCdwDe4Jbn0x6CkfSL3aWEW9RjJVvXP41Vltpos+ZE6/VTVaMVmizb3rRCIsqXCxylhFMNyNkdx6ce1aRW01i9RbZ002aRhEwupv3CA9xI2WUexz35rn9rcYzUih9jDHDYP5UWC50N7Z3Nnd6htmglSzURqySAeYpxhkB5Zec5xjGDVbUJLzTo7eKdJIWZA43rjIPGefeqRvrgStI4DMbf7Pzz8u0L/ACrRtNelt/KS23QK9uba6H+sEqknkK2QpxtHHp25qbDuQ/2i32VTkGQkL/Lmi7uYkZAmG38kioLnUZLmC0N2qSm3/dJ/CSgJODjqMk89e3YVFHErS3CNBNmP5z5fOxAcnI78c546UcocxprJsUksQoxz171dRzJuBmVthwQMcH/Csd44zfJFbymWLJePeNrSDORkDIz+J54pdNMqXlu8i5W5BOQQc5z+ufxpNFKRvJEzJuEgA6YzVhrWZEDCUnI4wen5Vi29zGIru4lDBfMJUeoxjHP4VdE1tHa+dPnO0Erubgn096izLTQrQ3G47pkGOvzE8+v1qIjHBk3HPpSwmKZBJGAoIyPmNKV9DQIltwCec1OVwOgPc1HaSeUSQobPAz/Opg5bJY8k5POKBkajKnA6UhC4ySeffFSnjO0j396YVO7Iz/n0pAINg6KSffmmbxyNmMH2qTb6Mcioyo5wx/z70AIxGBw2fpSqp28OelPMa7QSxY49DxTAqKGBRifxoAiYHcecmmgMScZp7K38IOPcmmfNznP51SExpznnOaae+DT+fWkI44NIQ3nnOKTHynk59qXnBwRSfNt6igBpByScU4YxwDSc85IpQOP4fzqkDF49PpmlBGMU32yKT1zjrVIkeMA9B61INvYDH0qD6EA0oznrTAsIqd6czKBgH9agAJ6sPzp231YHNJghtxKGTAIOKpMTk81bkHyfNkjpVcqOcBvypFEHc5zRxnvQ2AT1/GkycnB/WgB8fBPBz+NKGwOFf86YrYJ4PPvSh177uvrQIfvPoeKGJPWmB154b86XIPQH86AF3MDwDilO4nkcGmrjdjH60/vwKADp04/GjJx1P5008nmnDHPXNAAcY5ajoDgim4HXjNBzjrTAYM5xzz7Uq5zSc8805M9KAJVJwR2oHc7u/vSKM5zilAIyAxAPtQAp570AH1ApPmB6k0/A7A0hiHGBhuR7Vf0u3YyxzAIQGHDgMCPfPFVI49wOMY71ae4Ea7YAEBHzDGPx9aT8ilpqzW1TVC8qm3QQ7Bt8uFQFPHc+v6VkjUL5Qyi6m24wRux09e+PaqbTHBBJOeuex9aYWPYdaFFIHNtj1YGQmYCQN97cAc/n/jUE+kCaMvAxG0Fih7AY6frxVqOGRwMbRz69K1tMjWMtn5mwRgkAdPU0pStsEVfRnJnT5I5GA27OMMwJ4PtTTYxx9WZvfpj2ro9S8ye4ZoocIADxzwO/6ZrNmQ/MZBsOT1P6UlNsHBIyrtUjDRRuxXPTORn+X40yC7lhXbHIwXH3c4H1p164aRhtXAPr1qC3A3klmGPQVqtjJ76GxY6hH9qUSrG6d/l7euK6iXSrK8gDx26ruXIZQP6cfrXEyGJXUrCygDkqa6LRWt5bfal20TgcI0uP0B/pWcu6LXYWLTnsZN8RkYA4Pbj61fdI3bLOxxzjcDVY212W2x3AdD1zIRUzWLoBiSTHc7jUjGzvAqFQj59wP8muX1dvMnLYzjg8AZ+tbt1GFBUyz8Dv0rnLtsTPkkgnn1qqa1uEtiltI65zSNnt0NPl4Y/pUY75NbIyEHXJoFKcYpB160wHAUoB4A5BoUfSpY9oHI+bPFJgiaOaXozNjryf696mibad0B2t1yRwPb6VVI56nFKDjgED8am1x3sSo5MYXK5VjjoMZ9O2KsW10sMmSpyODsbGfxqoHB+ViQO1Oi8oEhiTjkYBOfak0NPsXbs21xEZFg2Y985PrmqEQSLOQCeucfyoYcEKSTznPp7Cq8hYnBztHFNIGySefduA+6PSqpYmtezlVIgvkIw65Helazt5zlQUbrhTRzW3DlvsYw9+lOG3cBk49SP6VpPpg/gkI+ozUEunzKCQVbHpT50xODRWR2U8MaupdEqFUru4GRxn2PtVJVCt86kAHn3qRdnJwcDpz/Om1cS0LEyiVi/PmdSMZ6n8h+lRKRxk8dMkdBSNK2MDgVJaJFM5WV2XHJ75qdir3FjtJJUBRSQP4iMDFbNrcCGIAH99yNwH6cdqa0qrBsVWZQOPaqhfaDgH86hu+5a90W8uFP3gTg4xjr71QnbziMZ4Xnp/KpZU3nC5Oen1qCS2ljIJU1UUkTJtmjpWl3WvXkNnZBfPELMNzdQueBxwfyqa90ptPtVllXYsbhZMuCTnPQD6HmsxnMcEYKkHHZh378c0gZ5IsLs2g5Ixzn1os7+QXVvMmkZGUBZPkzgfMB37jtUf2ogAMuR1xjOfr7VAxPOduR7GkCnGVYEnjj/69NIm42SVpCc4HYfT0pqpJIcKCcf55NSLCuT5hbr9KlQiP7vA+tO4h1pZGSVVZwPX2H1rUvpwhKqUjRMqpHVsdvpUNnjyxI/zKWP4Ac//AKhWcuJWEsuNpJOAcZ74FTu9TRe6h00/+kbmJdwpyd2cmqTkljnHPJxxinO+SSAFyeAB/Kos9atIzbDqfanIueTxSIN30FSjj04pslBjjofbAqwg/cJhlZieVzVUN9akgfa5OM54pMpMkaF1UOckNwO/SmNIyEYxjGRU7OPI2lRzyOcc1Vb5lIPUUl5g9A8xznnApucHkk0zNGRnNMm4/d6Ggc/X60xBuJA/GntgDHY9femAEgdO3TH+NIzdOdwHSkY8kAfSmjofzoQNin3wDSAdzQO5NFMRfsZCymI45IwfUdP60twg8tcMS3U89ARx+NVbRgsylgSOh59atXSnJbAwQFx781m1ZmsXdDogQrMdudvrmqZPzNI5yc5HuaGfaFCk9OaagBfDHGeTTSE3cduHJUfM3P0pm7aDjrTgVG4jj0FR9VJxz1qhEiE4Gfu4OPekZnfAZjhRTQWGPfjJobOOM0AIxHQUiuUIKk5ptFMi5Ya5Z1APQVJbSKT82AcY6VUHrSAkd6XKhqTN1Nu3IPbGahm8pQSSQSCazluJFQgHg0NKz43MeOKjkZr7RD87ixYZ4457VPEpKYJIPYVVQFiMY45xUwmlVSBkZ9v0ptEplpYiqsScYGahZzwSvzdBimm5cR7SeTx9KcCvlq5yx4x759aVir3IVQSbiMcdv60yWNVClSWHTNW47dd21mxzyV7CkVIufNbJAwOPy5p3Fy3Ky7trKoOPb1qaCUK2xgV4A59qcuC2FYAqdwyOT7Z6VDkfaGLLvb+VG4tiW425OSPl5+uarMdxz3JzT2jcbt/X09j9KYyFThsjtTRLGf3iDQmPXr29aBjOCSKQ/KCOM9KYhynByuQ1XbRtwIyc5yR7VRLNwQTkj86fG5DkjIJpNXHGVmbWrWAZzNaqzDnd349ax8cEYPFaiyEDGVFV50JbcFGev1rOLezNJRT1RUAJIHNPhZlYZBwOlDE54A/nTlB5Jya0IsXIgJUbk7h29aY8C4ByN3cDt70tvJIUMca7s9Rin/vI2yV2HGKz2Za1RVeAKpIdSR1Gf5YqPbWrF5LIwkkO8juoA/xqmU+Y4wRmmmJxIVXrUir0wKkSP3FShBjoPyouCiRome3FSiMAgg4/Glx7U4ehxSuVZD1YgYUnjrzSIFz8wz3+tNBAHUUoYknGKQyaQIq5VyvsP8fWoDK4P32/PmpTGcA4PNAjIJ3KSOvbn8alDGwyAAlhk49KkBDDcVFNQEZAHFP5xzQNIZj1p4Qc5b9KB07UAcdhmgZHIuAcHJ6elQkdxU7ISpwRwaiZCvWmiWMx29anA/d5596iC96mzlMc5piIsVJEF3DzCdtN6AZxQDxwDQBoI9tCrGAyebtyHB6H3zVMbmcsc5PJpisR0z0p6uc/z5pJWHe45UGT8+P608DnGf0qPdnGRU8RIGRuGfbP86GxofGrIwYnbjvjP6VYN5J5ZQPkHqNoH8hTbaQk7G2YP94gcVZkiVSpjCuMZOQOfas2+5aXYz3JYljtHrhaVXB4BGD6DqadKy7jhABn1qRJ1VCscYBPc9f/AK1O4i5aQZTe8COCSMtx+NMupB8yiQjjACRggD0z1qrDdPC5aNRv9TzST3DzZLKc+2aVncq6sHyEqAz4HXK9amuYIVjUxOSpPfGSP8ahgjeRgACGOcbjwaJFaM+Wy5xyR1/+vT6kk8FsGkk+YsmO5xxTpLJAWZGP5im2PlM37xO/IJJGPwrSmt1zGIUJDA8qMY/Opbsy0k0Y0kLqoY42mmBsZAA6djWtMqBQjMCe+eQPqaqyQAoWVBgHjnrTUrkuNtjP25J9O3NCoR2NPYdSBgUKOcj8qskjIOclaarAHJP6VOVJB+b9KiZRjqKAAyrjBU/hSBgemQfpS+WCudygE+tCpxwRx70AORsK2JWXPHHce9GQOhJ/A0bR3K5GOvelK8Doo9cUAIWXP3cZ68H+tKp55Bx7Ck2rn73T2JzUi4HTP16YpAJ95sAnHvkYqRo9qn51Y9sNTYwd4+6D/tE1YaRmdQGjwpzkDH/16AQiWpKBxLDtzjO7uRR9lPJE0PXB+bFTrcyqjMJIA3T7nJ+nGKrSEsckhuhyOP0paj0Fkj8teGU544Oc0saKRyR0zQVJQEA4HU46U8/KqYP4elMQ4xhEJjJzjBxxx+NLt2rwQcdfalHCqxzwfb/JqRIbm5wEidx3wP8AIoHsVShbOO/SpPIOzJIx0q1LbLb/ADXdzFGwx8incwx9OB+dQSX1uMgBiB1yev4CkrkNoakDD7wOD1P/ANc1ILZmB2qWIGeKjOqxpkKqs/8Ac64+ueBTTqGoXKlYoJfL7LGOv4jt9MVVmJyiQyyPbuVIZWHUVG11IzchyR6A1DdG9XKLaJG2cn5NzH8TyaqNFqWDlZAfpirSI5i5eRteQNHKoU9Ru6g/hzXLTRSxytG6NuBweM1ryxaiwwBIf0zUISaPIknIPoOf1q46ENuRjFuCM0bvQ1rPIucHDH02g0+JJWcCO0kYnp8oFVckyUV3+6rN9ATT/s1xjIhkx9DXQx22oEAC1jXPrJ0+oqwul6pjIjtvb95S5h2OVMUq/ejcfVabnnBzXdW+lauqhlitG4zgTYP60+axupV26hoRmUfxRupI+hHP61POFjg8+lL16f4VtarpMETFrZ5oW/54Xcewj6N90/pWO0Eqk7o2AHXjpVJ3EM/HP0pcdzwKVldFDMDtJ4JHcf5/WkB7nJpgA9RSgDBz9c/0pO/A68Umfbn3oAUYCknGTwB/WpI8FWbOGUZ+v/1+aiHelB7dv50AP3fI45JfGCexBpI1LfTpSxAOQrHHB5xnn0q3pseZ1Q/eY4I9gR/X+VJuxS1Ok0YeUsbMCJC2SR/X1ravJLZlBAYy4HO3H40ljDabRvUsFAGNpOfypboQh/MEQVT0Xb/UVzcx0qNkVUB2nG7+dDZZPunr6VNG4OGKHYT2zUh+Zc7OnJ4/xpXHYz4wSx2qufp/jUghyOQufzq4kaYbbGBz1z/KmmF+Tnp70+YOUpiIRZGFznoyjv3wakW0DQmQkgjgDZkHJ6fTFSeR+9GQCe/BNTLE2Gy6gbScEn+VK4JGbIo8wIAWI9eM0siLsKnOPz/SrErJIAC53DHRQc9fX+lNKHGQevT600ybGc9lBITlSCefu9KjOkxNnDMPzrRCtnG05+tKEOOc1V2LlRjPoox8s5HpkZqnNotwuSrI/wCJFdIU9zz701iBnJH501JkuCORksbmPloXx2wM1CRIjHcGDHjn09K7EgYJAB7dcfrVeZUcbZIkcAYGWHFUpk8hzEM0kEqPGdrJ0OM9Dn+dBmzucAiUybwRxj/JxWxLpcUxzB+6Y9twIx/Oon0KdcbmQZ57f0quZC5WKbuxWTUHtpbhIl2vaQ3CLKHO4ZV+3QnnHOB61avGtdRhsBACkpLtKwYYxkDbs/gI59QQR0wazv7HkDAFhj6E8Vr6fZpaK20MWPU4P5CpbXQaT6j1hVEAUnAAA5/pSjj8KkeVQBlHyRnpTEbeDwfyqCxwJA4NSRsSRuyQKjGe2cmlxnrmmMsMwGeRUfmpjkjPbtSKq4PWnpCrYJBxmpAcjLt27kP64/H0qJWUMcumc9cZqy1lE5ykuwEcA8468VVeGNCQ0jZ/3aFZhawpZMffXv0FKsgVTtcg9+etQlYucFz+FMO30NOwE0jZOASRwOpPH41Hx68dKQMoBAX+dJu56cUxMQADmkbPOKUEc/LSE9c44pCAcg4HvS87egx0qMsewGKQt1yBzTAU4xSDGf1pC3HSm5HPB/OmgY/PPIFIW9AM0isuMUAjvVokUN2xSgkZw1AKml47GqFYAzf3v1pRI34fWkG0jnP5VGcZ6mpY0SPKdhBB9OucVXY5HUU80nOMA/pUlXI9oJ6800Rjrk/lUp75K5x6UKOCAR7daVxDEhB9cU4Qr3z+dSKDjk9Pakzk9entTuAwwL2JppjA5HSpgRg4z+VMJ64z+VAxgXkYBx9Kds7c4+lP9MHig4xyCeO1AiIjninDjPoPakzzhQB70vTrQAhI56U3d2GMUo6HikI/zigAByOi/lSgdc00DB/+vSg8c8CmA4fjT1bjnJxwKiHJyD3p4x680ASYLHgf0qeJcKC5B/2aYjeZwAABSEDOAQce1IodNIzAKqlQBioCepOc55p7SlSONuOKgYlievvTQmIRn0zUsYwBkfWo1U5NWFBxk/hSbBE0DjeBgntirqsrYIJ3VRi28kMAx4HtU0BjGN2c/WoZaZamcxrjBbPX29hmqF+YpoFUxIsgbqRgf/rzUstwwV1BHPTjPHNUJCXUq3ykkHcOOPTHSiMQcjNaxkbJUL9c1INLnUjauc+nP54rQW1LLiKV8fhkfU1etrVCBma4Ru44IP8AhVOViVEylsbyJd0dq74/iAAqss13G3zM6EHnGBj8a6OewvWGbW6Yg54Ixj+YrJurW+Ukuyluc7jzj+dEXcGiCGYTsQ9y0RPXcuf1qVgIjlboODx94jmqDW90f4RgH/PvT3tblRxHIQepXvTaRKT3J2ckAGYkdPvZqlOhBBLhueetDQyBCWBBBwVJoRdrKAw3YB4JP+TQgKkhyTgnHvTKt3HLEtnOAFIAGfr/AJzUChNrZchuwA6+1WmS0Rc0UtNPeqIJEHWnBcjqenao0zTxsC5xlv5UihxHqzfnTR9TTTjJJ605VYjoMUAOA55P05pwdk4U8fypmVXg9f0puSfagCZmbHOQKYMk8kn8KFBxyRTDkfSgCRWKn5SRVyzuUDfvicDvgH9etVFYFOcZqIZVu4/Ck1calZm8LhJP9RHkj17VGr5yJGVR+eKoW7BuC2PxqzGu3I2NyO5z/wDqrPlsaczY2R1VioIb04/nUE0OMFQDxk8cD8KVXZM7do+nX86RfvhjuY5z6/zqloTe5AVz0ABFTQxKgBPUUsqsWABHIyeBwafGnGGP/j2KG9BW1J/MAAZXIx6HvUZmfoXbHXt1pCF/x+amM3YEYqR3LDAOoywOTzx0qOUNt2qvHXqTmmqF7kEnipo9hJ2jDHgZNA9ynKM26kn5uePTmoYiM4ONufSrNyrfMpI4P0qj9M4960REi2qI/wBwZGfWnBNp+6QaitWwSDk57VOTz9xh+FJghCTt7HHqKaUJGQoH5/ypxxjJ61NbsVb5eCoLA56EZ/woGSahhNPhXaV2sAcH73Gc/mazJj8iDjgYz61d1R/OulMcjBZEBbP58/kKoTvu2qMDCgf596IjmyEkEdenApvXp1/nR6ihM7xjrnirMixs2LtP+TTJM7enFSOCTyKjYkDAzikgIxxRkg8daT1p6qWIHemBZhcD5wF46ZHX65qJip4wBj9aeFKDkimOAQGGfekUM8sknGKcID60KM5Bz0yMUiM2eDx9aBWHBQgZQwOevb8KicnnNSOcAbTx1NROQSfWhCYnNIMk49elHY4qW3AD7vTpVCFaNlUYyfwpYBtbLoT6cVOs3que3WmSskjZKumeuDkVNyrFhSM4MaY9sfyqa58v7MTjnsfy/KqdsoglEg2yY5AJxVid/tgyIiiqMnAyM/WpZcXoUNpC5yNpOM03r93Oc1bktirIvUE4+hP+RVZgygqvY8NjqOapO5LVhFXcwGOp4qcrtjIYZKHH5mmomDk9QMk1YKjydpJ4UFvfn+lJsaRUk+YrgcAAU3HUDOOlSvIqMwjAK44qvuyOvNNEtgIzgkkAZprD0NKScHJ60ADaemaokaKKU000CFHU0uOuO9IMYNANAEsGd2c8D+tWJWJVVI5JqO2ziTHXH9ae6nIypPvmpe5a2EeICMEH24Peo13IQAc4OcY6GrKHbww4PI9RSSKjAMBtIHJ9TnrSTKt2JI5XjDCRShPP3cVHLcmRgMDb9cUyUsxy7EnoCec/hSLCFTcSQx5FJJD5mSNF5mXVQrdR7U/7MwHmkHaevf8AlzioY5XCleCD+HFWkf5k8x2CdM4zj60ndDVmQ4CuDGp8puznG4iorhRuyuVX0rUuE85mAIG4AqxXr+PpVSS385nU5VlH3c4HFCkNxZRO05IJ/Kozjk561anj8lFyvP6Gqpxnp1rRamTVgz2A4ozyDz6Uu7ge1NOMd6ZJ08slnJ0hZPof6VTdeTtHHbip9qjqo/OlQJ0K1zrQ6XqUSp/yKAhweD+VXjHGc5BH602SNAPlLE+4AxTuTyla3doXBXdx1AOMirjypKvIbP0zj2quPQU9aGNaB5RJyFfH0FO8shOUkz+FKC2OGOPrThu7k0gIQvJzmlHFSbSc4Bo2n0NFxkf0BpRznAFPwAOc/nSrt/umgBuwf3lzTlhHXdTwq/3eKeir7Ci47EtrC7kBT/49g1pxaaTFhpVjBI+8c/jVKzidpMR7s/7PP6Vux2cezdKhUgc7u/4VlJ2NIK5mz6OURjG5cDq2eB/Ws2WFo2wwYA+tdCssWGSNVJHA4K457elZd6hclmc5PA70Rk+oSiuhnY2jgD6Umc8kc1IyMFwQfbjrQqt0PXtmrIEz82QoHbHY0hAbOAufpUphk2k7CRkjjB6fyHTmoWhYAk47Y5H+e1CAbtbkEKO9IVIAzjmpNh/ix+NNxgnA/rTRJGAOwNG09uakI7kUgAPQH86YDdvHNABz3/WpAuf/ANdO2EetAEY+n6VI0ikcRn65zUiJk9vzqQYXI2hsdDg80mxq5XVgWHB/LNWUmK/T0oVV27mI9MCmhTj60hok3I4PygH86QW52nEoA/pTQMdh+VWURXXLYx/nvQMqiBOpdSc80irGucJu57k1ZaJVOVIBwCOelR7Qy7ckHjNAWJI5B5ZVQF77hmq8gYHnPPfFPVAucMSfpUqydAS3PfHagLkMTlGyAD65rVivIRbMsgZW6AISP1qgsZblev0qRYWHVT054qWkxptFyCaIphkYgcjOOPxqCVcnd+7UezDn64p8EM6qSgyp5+7mjbO+APlJP9zHQ0rDuVpEHAyrcfwk1C0LkkojtjsENaax3Pm7VkcsOuME/lV6WHULZd0skuDgDGAQPcdqOawrXOeW3mIwYZf++TxThZS85Rxx/cNb+9SAJpbkHkkjA/8A1VKEtiCQ92w75Y8UcwcpzYseB5juuev7s4/WpEs4BljLJsA5YRk89PyrddbN4mAE747Fjx9OahSK0iBd8bQPuEZPNHMHKZHl2GMfaZDjn/V0jpZg7jLLj2jrVW604AFbUEZ5+UVNJPY+XsMAiLchto//AFijmDlMArAc4lb2+XP54qEkAnbgjoOMZFb9rJaKjIuwnPVlz+mKi/0NN+9QWJyo2t/IcAU+YXKZ1jCJpCvlljjIwf8AGrE9m0Ox5AQhOGGR1q3aPCWYLGE7AqMEg+/WnXzKURELbR135OT9Tz3pX1HbQkhtVeBQiJ+IA9eKa+nqwKqAD3yf8mrFh5KLxu2kcnBPT9KtQusuSocIDySMZ9gO5qb9irLqYzabOq4UMUJycClksGjXLRlQBnk/54rWefBOPkjGRgEEk+5/yKoXDLKclx/n17k/pWkU+pnJ9hLSW2SDdIjpIvTzYi6kc916Umo6zLPDsjCQJ90+WTyPbvj9agcqqnexK9cetZ11dxfwAYx0x/jVpIz6XZRvZwHwMZP86oSu4YZLR5P3sY/L/Gr1qqPP585TYOcMMg/X1FXWlsp1ZJbWQr2eJ/5BucfjWmxne5jwzwW/+riMjDoWOB+nWtiHXbzy1WNxEnoi9fx61GujwzFXtZJDEQP9YhVgfw61fS2s9OQGVgXPTdgkn2HU1LaKjFiRXOozqAJfKU9SVxx/M1DNcRQPsaeS4nI+4vJ+uKiu5LhkzGDbxnPzHG8/h0H6mmW+nu0YMcISM4Jdxktnqc0h7Fv7Nq04DLYSwwtz5jJuIHqAP8agfw9eShpFs7u5b/bCoD9FBzVi3RbPmO4ubdsnmOYjnp06VZk1zZtxPcTMBwHCvz6kkfj3o16EvzM6Ky1GHAg0W53dP9WRz+H4Vei0vW5BhtLWNepywU/TPrUkOs3ro+HtmzyUki8skHsGX6+lQz3Ydcyy3tmQMnnzUJ/3uuKLsWhKIdQjOxrGGPqD+8Axn+lOj85QxlLccDb0H+IrNzM8byKBdxhSd6gn9Oo6YzWdLcSMAGd4+ThVzg445otcVzqlkjiIfzUGeqg85+lXrLVoXYCN23Z43DHrxXDwyM2QqFhwCzH+Xf19auR2yr+8DEyqc7c4B46UOIJnWXGoQTgpcwK3Ykck/l9azpNJt54pEtyERxynQdew7GmwTbyskK+XJgZXGc9RkfpmrsM0hIMggDL/AHmK5/oanYZzuqeGbtNMmVImmCYdGQZxjqCOvT+lcf5Xy5HJNeyWl+luVMkoVjzhXGT7AdT6Ul7o2i64TIbOeKc5BuIE2cn+8D8rH9TVKo1uPlR5AIO+OMGoJlKyMDXdeJPBuoaPEbhMXVoDgyRrhkHYsOePfJFcRc484kd60jK4mrEXPrTsUnA70nPrVEFiBdz7iOB1549c/wAzVq03DfMCUIAAI/hz/LpVaMFlCKR1yffIrd8OTwwyz212imKYBct03DP+c1EnZGkVdjrPWdgEV/Hx/wA9U4z9QOv1rpIWtZo4jFIkkbDnBzjH8vpXP6vowhRpbRxNAeduclf8R/k1iQSzWsm6FyueD6H2x0NZ8qmro05nB2Z3eFGdpGM4GDinxzRGPDfMwGOo4PtWBpuvQyER3aJE+Mb+dp9/Y/pXRR2isokTy2DKDxyCD+lZSTW5rFqWwxc7S3GO5DdKlVgSSSOewx2posXC87UJP3sf5xT4dDuZBvLKityGY4H4VNykiNc+aCoBxz9Kkj8ptxYDO04OD+vp9elSRaGokJe6iIxxg4wfy/wp40qzC/vrh8+kYHPtnsKVxozpggUeVGu4ZLHJGf8AOKZGu5V3AL68dK11gtYfuHeOciTBzn3HNQywxvEEhCKQcltuSeMYz2HtVJksySp3EMQo9cVftNOe4i3q646dyTjuAKheyYH94yhOucdv61b0+6hs7WREj/ek437MEg+5OQPw5ok3bQUbdSMaaVILMW55AGOM+v8A9ami3VVkAjUsRwXGcH6GkWZmLk7sZz8pznnvUgnCqVW3Xngs/JHPb0NK7DQoS2MjKQ5XPU8dfYVWk092H31GPrwPpWpNNIy/u1QMeMnJ6dvaqU6z7sySR5Pb0+tWmyWkRRaWndmOOpGBx9fWmsojBRXmK56bsj8qnjldAR5mV4GAMfzoeKJ2JUso/u5zxTv3C3YgjcjIVnz2+b+nrTzM4JJVzjgc9OPemgqrrtyo9c9D7VaeaHB2tKXA4JcH8fb9aYFVZWBJIyT6mmM5PXA/SrZeFk6N755/yah2Q7WPnMD2Gzr/AIUICv7ZP4Gjn3qYxw44lPbPymkcRKSFcN7+v4HmnckiGe1ByRgE0/HoUP4mgRswJXb6daAInyTyWP40zHpmpxDIVz8uOn3gP0zTCj45A/AigCPv1pDjng04qV69/em5680xC/Ljg0n40mR0oDenT6UAIcdBSNntS5GaQ5zmgQ1ce2RSdaXPPIHPtR0HGPamAw8cc0gHvT8+oH5UlCAQD0xSgDuRSc846UmPWrRI4BcdRUgQY4xTEAycgcc0pkyTVAGwHoRSeX6Y/Ojg88/lSkD15+lQxoaUxzgUwEZ5z+FPKcdRSk7egyagqwwuDkYNAwc5B/KpNznov6GkOW6rx6mkFhiKQeenbnrSHqQB096mCHGRjFIUXGSMU7isRBuuc8+9AJYkL2pxC9ARx0poGCe/pxTAXA6Ypr9DjNSAgnqP8KY43A5IouBEPmHU9adjnkcYpoQA8sadxx14pgOPsP0xTcjGccU/dleAD60xmXYQRxQBGxAJ4P8AKjIwcg/WnAAnOKBsyQc4piJYY/3fmRgvg8g8Um75vugZ/SngxoP3eQTyQ/f6elNeYCNkO5zx1OMY9KQwaYkY4wMdqjMhJ6mo930xSbucEcE+lNIVyT5ieSaBweTTlHHHNIMehouOw5Tx7VPuXjr0Gc1AuCQBnNPHA7/lUMByITyGI+op5HOAcnocA0+BcxsCOMfjUZYjlcEZwPbFAxuNmSGx/WmIxZ8SEYJ7GmH72TjPpilHocn+dUTcuxhUGIwRmnq8kTAoSpB7N396fapauM3Ujp6bBnNX4xpsQVlknbnJDgYP9azuaIS0uppkJOWZT3H8vWqWor8+5gsi56lcfoK13vTcQeXAIEI6bRjNZlz9tVHxJG6jqr4waS0G7GUtwrEq0W3HQo/T86n+yiZSYrhh2OTjIqlIrRKzSGLJ7b6qjH3yYgpPr1q7diU+5YvLKFAyhnMhA5Ldfp3rLfEWSmc9P5/4VYuJ/MchZBzgD5TyKpujEj3PvzVxXciXkPaZmBJUE4284P8A+o1DkjPOAetPeCRE3lTtzjJpmDiqRDuN4/yabjr1p3ejiqJEH6U8Y7Cmr1OaniiDLkuo9v8AGkNEXfnGO9WYwqx4wOeaEhbBKNH+eaBaSvzvU/8AAs0mUiFgN3BzSYXng8dasizcAgBePcVE1vICcge/NFxWI1ZegUe1OOVPIFJtKjGAT/Ko2J54pgTAZAIK5/KnvG7nO0kkY65qBWz94VMmzbySKAQzyZu0be3FL+8Thsq34iklVlJIY4PvTV5+9mgCa3MfJfk/XH61aiWNXyCUx6tn+VUkRCDkgfUUCEHuPzHNQ1caZfkVWyVTke/X86iLlOiLUIiC9Gbj8KcoBPLjPucUrFXHht/Jxz6LSEAdRyaesaAA7hkH+8eaRxk5B4+tAhAiEc7c/TFKkaknLAAUDJAB9KcFbGAOOv0/xoGRy7CcFxgcdOtVTtAyc+1WLmPanOB3qs7Ljkcj3xVIljExv6/0q+pGwYOfxzWeTxxUsXmjnnH1psSLY6cU+FQ25CcEqcenSoQSRkkZ+tTRkgEZGD+dSUtxl+g2RzKCwB5+nHX8qzSSXJPU81fvGbKopKx45/z1qgehI6DIqo7CluMqW2X59x6VFUittTAxjrz61TIRYcZ6VEVwOWHNSRMCoLcU8hGHQmkUVfWlQZbnHHansmMkYpIwAcmgB7gkcMAOlRAlUIOMdKkdcrk5FRBeDQgHwjB3N93pSMrL82046dKRGOQDyK1LZo5oTEF+cDjJ/wA5pN2HFXMwYxx39qidT17VaniKSMAAD+X6Go1wcqw+lUnczasQD5sDFWI06dKQxBMEsB6VIh6FCCR7Y/nQxxZYWFypIxgelRtazH7vzfpThPOueR+VMN5KOoH8qlXL0IWSWPO9CB9K0tJYG2nVydhIzx+X86zGYuxYliSeec1p2KqtgBIWHnSYwvGQO2fTOKHsENyV42lMbqFCgEt7Y6Y9/aqlxHEhVXYAgcY9OefrUsjP5Z+zlcEAnnOMemazZFd+SdxAzkdxURRcmOklAGF6Z5qJpnOR2J/KpBA8pBVcL3yfSnJGoYr2xnmtNEZ6srlCASen86AABzUjndKQcY7ge1QtyTz+NNEvQTjOO1HGOKSjvimIMYHvR3opBQIX9KQ+xpaT0oAsWshVyoGdwx1qaXcrZAIx2xVJeDketXFcsMhjUtFply26AybAW7Yqvd+WuT/Gx4AqPOBjP/1qY7qx5JY/TrSSG2PYqVUkEZ9T6GiQ7lUBhhhj6YqMsXIDDgUSMMnac/56U7CuP3BIzu+Yn8OlFu+WCs2Fb9Kg5PJPSnM2FGKLAmX5TJaSjLZQc4+vp7VetSrw7oyCxBAJPQ56fpWQkzTqkb7cjAGR2+tPid7WVgwJTOGH+e9Q4mqnb0NW5thLbbWxuAz/ADrFuYfKPOMHoQa0rp0kti0bfLwf/rVmlUwAVbAyW55ohoFSzK5/DHtTcenSpSjBCSMY6+4qLBxnNamDOowc5/rS49f50GJl6kZppyD0Fcx1inHfFRsRg5p5/D8qYRx0pgRgdcU5RTgKdt46UEiBfwp6oxHCt+Rp8GFfJB4/Wta2ukxyvPTtUt2KikzI2OOqkU4RNtOR2z3rbFymOEVvqAP5VBLJG2d0ZU9ODU8z7Fcq7mMykcEHP0oCnqBVtoEL/KxbPJ4xikCgDAA4qrk2IBGwHOKesWDkkVNilAPai4WJrW4aD7mPetO0v5X4ZQ4HA3N0Pt2rKCrtBAIYfr7ir1ki9W7dPmA5qJJFxbLN24ZVYykZ6ggflkVnkq5wAPSr8tmJS7Rs5x0OP50yDQ7uZgIkDNk8Z/XFSmkhu7Mub5jwDxx/+qothJ5wfxrYm0m6h5lR1wec8VX+znPAJx+NUpIlplDA6AVGU5IAJ/E1o+Sy8EAdqcFVT1HT0zjPWnzBYzPLPHBAo2FcgdR1zWqIWbOACMj8fepo4cY3KB9RT5ibGHsb0NBVuwNdEIkABVSfXpUMzKpOUVR3ypGadxWMTae4pQMdav3ch427dhHUDqKqxn5umT6+n4UDGqpQjqpHIPPWpx8/PJbqT6mgh3bByfSrMSPtKlSVwOTSbBFbPPzAnjgGnxwlidqnAHPNStGpJ2gn3yP5UgWQuMOcn0phqSxWvXchxx3NWBbxbQuOvRsCmw7vM2Bic8fU1YlGAcqwH0xU3HYrtbqM7Iz046VF5bqxzEpBHPyYq3BlkZhwFOAPWnlXZiFwMY60mxpFJI2kRmETZB6heOvrVqGydkyYJdp7bOtTtPPCCUZ146qBzSpfXbRuJLggHlcYBz9fSi4WJU0+GRNoidJO2VK4PrQNOn3hCplOcccE0kE87SbjdSEqB/FwDVuKcLOrsqEZAJzz+dTcaRdj8PJIozO0fT7y5A9qc/heRc4kSZTzhQM4/wA4rSsLmaUFVghZCeMnH5H1q6vnwR7ojBE+fmDElgPcelYubTN1BHNSaBDHIHEjwsCQQDnn09q2dI01LmAospkfOGVwPmHr65/Or2rP/wAS2OeKzWSMnHnnKhj3x69qxLG7hS5zOowedqAnB9PXNCbkgcVHY6P/AIRm1k3mRQqKM/e/zxWVe6Lp9pIUi3M5ySSegrqbS6hubEvpohnlAwwuMjBHcqOa5PVEvoJy9zHbKJACrR5CN9DSjcHYgmt1RVKovpyvt2pFsYWRgY0I6+vNVpr25QBZimzgrwDn8amE08tszRXEUB6ZZN3H86vYWhmXlskUhWGKAA9eKTyAsRK+TnHTaOT7is+9nmV33alG7DrthP8AhVUXEox5lyT9RgH86pIm6NFYHGJJdgGQAFjxj+lSXOmvNIMXa5A/hXIGfX0NUbo3NzENoZ1AG4qxIH07gVJZxKbclrwqQQCmTn6jtQ31EiRtPms3WWeXCsCBkABu3apZI1vFVAzbUP8ACBjPuKtXdzA9iLO3MbxEhi+CXYgcden4cVDFasI1xlnYjapGOT0JxRFtjatsIgERCAh3I4VR3/zinCOa5PliQBeQSP5Z9KnOn3EcKOsZIlyN5/z0/Tmnqq2MDhXHmkcnghPbHc+1XblIXvGTeRLaBlchmOD64H+eKyr25SIjBUnup7fWptavTGvyqylsMCTzg9ye57Y7Vy08zMfm+v8A+utIpmUmuhauLxmJJY4xgYqi8hZ8MxH94+nt9ajO5mUIrNISNigZz7/StWy0iKGMT6k4CdSpOB+P+FaaRM7OWxVtYJLp9sCHZxyegrXit4LBR5rs8r8BEGS30WpbFZtUjkayZbKxiODMwwzH0A9O/wCnWr9itrZrItoHkdly8xHzOT3LHkD271MpPqVGKRSkW8aDzGUWsGcdQZH/AKD9TUSxqjMY0GSPmkJJJ4znJ5q3cXRcr5illHCqPY+tUZLhi37wBTjO2hJhJokUrGwcsHYYy0g3bf8AHiqs90GYmSSV/wBB+XpTZJOpkwO49/8AOKzbqYFyqYVc/WrSMmy3JdxbiUU/if8A61V5bxyMK2eM/jmqgwcbiOn0prtyMHmqsTcc085JLE8AVPDqd1AwLSMQMfKDj8jVQdCdxz/OgAk/Nkj86LCLiXzSTM6RtE5PDQnaSPfse/atGO9kKr9oWK5AwOnlvgnuenTv6ViJkEbPlOetO3JHg5Lt3yf0pWC5vmC3kwAZbEnp5qEg+hDDinPbLYyM18xkXAIkydpH4celYTatcLwG4IIIIyD9QeKks7meHzZ1ZIo9pG2RS6E9dqg9D/LvS5WO6Nf7esjCOzgMascLhiWJPoBz0qQ3CwPtvblhIvWKLDSHA6E/dXp7msQXFvdXUDSI1mjKVkaI9z3A7DjNR7vsM5il2OcBlkQghh1z+nTr2o5QudFb37yLjTtlmc5yBl2+revFbGl3zOpj1BGkAAVvMJIPPUHuO4HauLhulm3ZKo2Oeox9Py6Vs6Ndukyq5J9SDnP1FTKI0z0a1sUuFEkSjA6ZYjr2yDmsLxN4EtdWBltNtpe9QcDa59Dj+f8AOtDR72FCgVwCRj5Twfr/AI8V0KSrIm2UjnGGH8xWKbi9DSye586ajY3OnXktpewtFcRnayt/npVYe3Wvc/Ffh+38R2j277U1KBT9mnPfHOxj/dPb07d8+IywSwXEkUyGOWNijKeNpHXNdMJ8yM3GzJrVCXyO38//ANdWOFPy8r0p1jGHtw0Zw6NxnvUVz/rASpUjkj6Ubsq1lc2NL1QwAJMDJD0B7r9Pb2q7qOlwXtsbnTmBf+JQAA309D7VzO7uOD/Orem6lNYzbojwcboz0bn/ADzUOLveJSl0lsZjjaxzgYzw2e39a67wNqMLRyafeM/B3xD1Hce1c5qZWaaS4gGI2bdj+7nPH59Kn8LXPk61FvJxKDEfqen9KqS5oig+WWh6WslvGd8CDOMcnPPuOlRPeOBtwABzgYx/n86pJGBHJks0mRs/X/PWoN7qcMoDZ5zXMkjouyy0oLZwc9Ov60PkoHJUDO3rVMu65OADzggdKhmZzGDuLDPTAH/66Yi55iHIVzu7nGMf5+lPjmVcggficfiKoA7Sw2AMPY/WkLydgPzp2Fc0RdYjKqGZsk5BB/MGqzSNIpLqFbPpjNVhNMAcR/rSebMwBaIgduKVhlyK4MbMPJWRWwMnjGD2xx7VJJIrAt82TwAp457VQ+1KqlXib19KaZkJYqCBjPUc0WC5ZYkDI6dOv8/amM6Z+VW68YIqFZC4JDD88ZqB5ip+YLx75ppCuWmAIwQDnn1qNsYyOg/H9KZHMrYBAbjscY9qljG44CnGO1UBEMZFSBIxndIgOOuD+vFK0eeESR2Bx0x+lLJFiPLJt57nH6ZoAjYrxh1J9gaaetORAeC4Uj2/rSBQT8zqo6+ufyoRJGetA7j+lSGNdufNXr0IPP0NNwOhdfamAw9OOtHrnFO47MOOvPSkxnpj0PNAhpH+cUm33GKkZGHQqfoRUeMen4UwDGOw4ppPpjI9qdn0FIOpyKAGkk8flSfiadjntTSo70ANJOeSaT8ePzpeOo+lAPrnFAhnJoxx6DFPDYznFNP1oAZ+NJn0NSbDjPWmY55poBBk5pTwTnGKUY9KXHoBVoQi/UUpHXkE0KuP/wBVLtA6GqEIM9O4pOe/Wl5x1pOc4OPzqGNIATk8U45PQnmmjGeeakH3e1Q2URgNzz+lKenLDNPB55GfSjK8jBH1NIdhoJHAamMMjjP+NPG0A/pQRk8A4oEMRGAPP607nv8AhSr34/Wjv8w4oGAHHakKjpxTvlzj+lLtGOCMeuaCiMDIIwOO9JtHIOM/SngdRlc0h69RQSJtGBwPyqMocnBGBUuPoKQ4x04+tAEIU9MnH50beRnH5U/Axg02U7VOCc1S1AfkkEsy/X2qCU/OcuG9CBUBLMcHr+lSIucZP41VrEXGjOTUsXcnGKeqoAAHBPfmnglRgYwT6UrjSI8kdOlICccYp7PwTgYz+f4U3Axkjk/pSuMdFg/eP5CpFZt2AAR+dMAQD72KlViq54YdsjNIB/m+WhU4Jxx1qDLGPcR7cU/euOcDntj/ADioJWHUEAMMjJz+tNAxRhs4U/nUygbAAnHfkc1WhlXJyVyOeTj8quiNZBjdFx747dfp+lDBK4hZVwQetELGWQbyyqOhx1NXoBb+WULIWB5wCc+1TJg5K24KqRkkZH+NTcsjghwWcyAqMDlcg+2agu5GVfLjVYkJ54yDzVi8mRhsVUQYyAqdKwbuV2dt08mOmACcURVyZPsaTxqLf5o4j6OBnNY9ygJw20E9OO1EUyQ4zNIR0KsD09qldrNkJ80OfTpTV0w0aMyUDd8m38Bjn2pmWIJbt/nrU88S7SQyDBACg8nn07U10YKQAuPXP+FaJmditIWPVieeOelNwdpPbpSnvjtTKpEi5pM+hpcHsKVEBGcmmSOj+uOal8tepbioOefanB2A4HT360FEwVR1Qn8angljjyQjfzzVNXPofyqWN3bI5461LBFs3AI4B546GoZZMg8n8RSeaVGNx/KoXbPTpQkNsY2fUURRiTOZEXHrnmkPcHOP50xUZue1MRKYwvSRWP0oGFzg5/KhYo8fNJz9O9WIbPI3K8EmO245/EUrhYIEllbCJnIHWopQykoylWFXYLVSW8yE+2w1Hd26IhKROrZHWlcdtCqjgDBUMT1pT82NiFe/WmMgAbJIYHpjr/hUQcjoTn61RNy8kZkQ8kcde1Vk5O0E5PvUZlcnliT05OadGwJOeopWHcs4ZVILYFTNs2hmfkj+6B61EXJAxsIIHc9aa25jxipLJN0eOmT+AoV028hc0scOTk4H1pZURRwrNx1APNAWYx9rRkDOfpVeOPJIcfTPepgw7ow96iDZfOST700Sxxtcg7SCfyqMM6cK5AFTCR15Uio2UkknHJ9aEAzzZB0Ofwp8Mm7rgN6YpRDu4z+lL5Ow5LHNPQVmOeQupDEEDp7VVkUr8uOOoqyynJP5Co5jlVA6gHP0oQyqRzilVTjrUoHyjgkinBc5yDTuTYaGBG0j9aljYLwVH1pqx98U/kdQKAQ45bgAflQkfYkM3oKaSOck0sP8TZPGOQOgyOlA9xJlwrAA7s/p61AOQepNWL0bZEKEgFc49/SodpQMgII3YpLYbIx6gH0qxbK28MpIxzSZVRwoPFIJz0GAPYUxE9ywZMMQX7HuRmq5bcoRsDb36f8A66a7ZyT1pDluDngUWsK42Tk5LZ7UiNtYEGlbPQDioyOelMRcB4z1/Gm5GDkHFRxBcEd6mAAHGD+FIoh4ByKuPiSC1U5AVucccHrTUZM4aJSKejAykEHpz7UmNFuaEQLsWM+S2drFuvt+VUyyQQLyCe3uDmppZWneNFY7YxwpHAqteIjLGFKhuSce5qUU2LLOFiAU4zw3OcA+lVZ5jK42jaOlSSwgJlMnPP5U3yxlDzg9fY1SSRLbYxFAkIz0BqEdeO1TfdZsdSOaiqkQxMcUHrR2NIO9MQUhpQPrRj0oEGKKMGlA7mgBKmV/kGMVEAO9KpxQxokGTnJNGcZ5pYsknIzUrxHB6YqSlsVh7UpyDmlZdp+bHSm/jz2pkijoemaTvjFDZxzkCnJHuXPrTAYAavRzJNEySn94B8rZxn6+9U8DnHSkUZ6AZpNXGnYljYj5GyFzmtGKNGYBcFOz+oPrWdHlztIG7Hepba4aIlSBtP6VDRpF23LOoRxhBhgu3gD157gVnNtCjaDnvzVic7yN2eBwagIJBAUY9cdKcdhS1Z0XU9KX6Cr0ek3OSPKI+pIqVNLbcVkJHrgHisHJG/KzMAPtRtz1B/CtldNQfwsf+BYp66bg9So9yP60udD5GYnldwDigLV6+j8o7A4OeoxVQDjjNUnclqw1QPepVQnuf50sUZc8A56fU10ulaEcF72JxnG1c/zFJuw0rnOpEfU4qTysnnJ/GunutGHPlEAemQP0qhJpk0ZPyZ+gNRzF8pkGLAz0x60m4YxgZ6VrG1faQFAPuM/pVSazmXczbSPYdvpQpA4lILnoM+tSJHz04p/ln+/TlRum4n8qdxWFjgyR8yjPvV23sgdyycMORwahicx/dIzn0/X2q7bzmVv35UBe2cfzqG2Uki/ozC0nG2NJMnA3Dr9PX8q6trHXry3DWWlmGNk3Bm+XAz1K5/GqHhnaZf3mqS22RgBI/M/nxXZG4miQrJqtpMCuMXCFTj3UYz+dc05am8Y6HnFxb3Jd0vmEjodrZ7YPp6fzojs1xujcbP4lwf8APrW1fWsl1PO7XMK5OcRQhQB7EdOKqxWcqptWY9iVx198inzAkkYF7aPEzgYUsOBsHQd/asswP5gBYYxx1Ocdq7SS0ymZh8ozyOcY9faud1G0VXyjn5jxyDVwn0JnDqZSucEEtgHJ/WpEmZWADnB6ZGaaykSEY3Gp4FUxsWUcdAP6+lbJmLRehubWO3dJ8STEYGwEY+vvWddu0owg+Ucf5NRyBOSB9eahkyBxnBqk0TZognVyfmI4psIIO1FDN71LtJ6EZpAhzkZB/Wi4i1FG5GSVX0AP9adtfozFvbd/hTY5fkw3X+dWopkZdoRdxwd3eobKSKZwH2g4OamhhLc7jmpmh+fdGQ5PXj09aVX2khgQx7Y7079gsRsgA5I496t2jrsBkBJ6Dnp70wA8lhwf0pRGMhkyP8aQyzHlpQuAFY4O3jI+v4U0xYlZQCqDp369zTlTfGd6lMDqvf8ACp7AglY2xngHcO30/wDr0XGN+zzMm2IBkGMBc/5zVCaynVyVhfB/Uf41de48ud4wzKgIIJ65H07UkUiSZzIN340gdiCyVo58kttHBBGT9K09PU/2gGjSGXbnclwuRyf51DbqsfK9Mjv1PXOfrV21t2fzJY4ZGlBypQhN31PQ1LY0b8LXkziHzLKGMELjzCu36DGc++Kemml4/MEzqSSG2tvyfUhqw3kuG5ubYqw/iLDOPw61raLGJeRJJjHVgQucZx9azasrmqdxZZL1wsM5aWKLhM9s+g6fpWeunybxIDFwc5weP6V0rRQrExnJRmAxuYA/h6H3rIuLq1SYpE6eUo+Ylh19PelF9ga7liG8kdoo45DbKo+YhN+7tmrty8XlhVvHLj70YjG0/wDAT0rIsbhmOY5QVIIIz1B9/SrF5cQTMQDEioMklsk49T/Snaw9CL7JB5h27BnOUZSAfzq59mSKMMkaIRjI3Dn/AOvWe7OwWSO6UKv3cAdD2NXknAhE0jqkZHAZuvWgERXdmtwoZQikHALA4Pf8q53V9KVB5jLGQeuxSTW5JfmNGcBFIHHJPA5yBxmuNvNYuLlmeSU47YUdKuKZMmi9DHDaxswYR8f99fie2aZY6fFdOr7SWbO4htq5z19MVlpdSsctJuA9UB6VowXxaGUM67dvzfJgAf40+Vt6E3S1ZPcBVu/LXaQhC7lGef7oHrWpG4s51LwNLhSXVWG5emG9AM8H8qw7KSVbyF7OJppGbEUbA8k+v6ZGOlXJZSq/ZDMJZTJukcZ2uwJGcdwO3tzxW6goow53PToW73VnuJN02N5GFUHAwBjA9Bx+NY7yG4maRlYIpK4KkbyPQ+nSort1NyYoTuIbG45Bb39hjPvWgfs0UaKCdqghRnP45+v/ANarUVHVkObl7sTmtVWSWMvICWxzkdv6Dpmsu10iS7mJZWjtycjIwTyfyrp7ja7s7bQMc8emf/1/rWXJevcBo7HcYg4iaVRu3OTwqD+Jv0A69snM5aRHyKGsxWhgsMRWkQmvH4Crhn/+svqeMVR/s+S+l8+9nJtI+cJ0c+i+3bPeuh021W3sZrCOIm/uHzdz7i52AD91npjPXt26VevrdUMcAYERgbY1HXP/ANbtVKNtiXK5iRl5EREjEUCj5I1P6+uaZdQyoCqnaRwQD0+vtWjexSiSC0tR5czH5lztJBxgew79O1Le+VZpmNo5GXKnJ5Htj/JFCiS5GG6GJRljzgA+9QTEbXaRgW/nTZ5muOpPQ47cc1QupC2UiJzgjn0zV2M2yG5lLFghLc5qqylfvdOvWpSPLXAGT1J9Oarysc5buMDmmIC+MgfX1zTQ5O7k8dOKY5+n5dqWNTn/ABoAeg59qeo549cA5xTkTAGcZPSnEbRk9MYA9qAI3wvT8aru3Jxjr6VJI5PANJHGGUu7bUxnOM5I7D3oAdGhZGZzsRR1x1/+vTXk8w8qEjAwsYJwP/r+9Nd95AwAg4VQf880gHXr70AT71kj2hEBJA3dTz6+360TEvYQuQuYmMR7Eg8/zzVc88c9KdF5Zd1dmCOPpg+47jNFgBTk5JweD0/pW1pkzI8bANhT2PT/ACP1rDQ8AkVqaZKN+D94Dg9h3/wFJoEdlHqkU4VoyUlBwe3Q4/mP0rpdOvftSBCBvA+X/a/+vXmQm2Sl0Pfjgc46+3b+v16jQb/M6ZfnOQcY/H+X51jKJaZ1FnM73KFmO8MM/nWLrPhu2fxBNqLbS0oz5bDjcvU+/GDiugaEPKk8QXazAvz096d4ggX7GZyhdVw/+fzzWTbtoaq11c828Q2k8M4YhfsjDEe3AwwBzwO9YsqpMoWU89A/p7V1/iJzJYkGFVCsDuU9v8muQul/cv6ryPY4NaU3dFSVjPmieFsMOP5+9IpDcN+Bp5m/ebZMtEwXPtnuKbNCY+VO5D3rb1MfQRztTBBOeCe1VlZopQ68MrBh7Yq1G6R/NI3HYVG00eS0cPTqcmmiWd4NShS3jlknRA6Bxk5PI9B+VQw3kV5u8iUPt68dPfB5x71w8ZuLkhI1ZvQKK6fwlp5WeZZbm3RnA+UvkrjJ5rGUFFXubRm5OxsrHIoyc7SODnrUsFvPdSKlrHLO+OFjjLYz7DnNbunx+HLKFzqM099ckjakfyRrz3zyT+Va+m+M7jTbcQaDHFYq/LuoC8fXrj88nmsHN9EbqK6s5T/hHdZZlKaPfnIz/wAez8479KJvDeuhfO/sm+WI9GaEgfge9bl/421y6y1xq14yZ6tIxA+gFYV3rd9e83V3POB08xyaac2S1Eo/Z54yPNiZQTjn29fSpFjWQguWwMYxjp7VHJdSMpBAI+mf50olaZVUEgKMbeOf8Pwp2YrlprIKoYMMMMjcwH41TaRVGzyo37FuT/8AWqz5N02Wt4mIGOWXPT3qCaKdnAnA3Hk8AcmlG/UuTXQT9wcYiVMjB+Yn8v8A9dRPEmDjB9KmECIwE8+BkZEYyR7emf601p7ZG4EjDdwXYDK57jsfxql5E+oyFmVWwQN3ykY60jAxnIYZB7c/lUtxewu3+jwhUB6H5uSSeSfwFUprsMeNyY6gDNCdxPQlC/MSGOcZ+tSqoXJZ0bjJyx/L2NZxmbqrNjsPQ1NC5b5XBBxxkHkVYifzNuAAGx+P86TzhuyYwehOcf5xTSp/CkIPQCgCWWRJOEg2KD65qEqDwFyScUvz9senQUjbj1J/lQBGFO45BCmlCjPzOQPpQd3fPvSDrzmgkQqMnDHGfTtShPcn8P8A69OOT0pOc9aLgMIwcc/nS9sbTTwBnkmmE8HGfyoCwz8OaCM9/rTucd80YOOAPypgRkHPbFAHrin4PfGaTaPSi4WIz7H9KTbwcmpAF6gmggetMLERHHB4puOeak2imheTTQrCBe9OGB6flRinBR+FUmKwKq85P6U7CYOD+lIqAjNPVR2ai4WGFPXmmbQvQDHep8IOoPNRMOeASKTGkM3e1LuHOc/lSgZOAP1oZcY5FQyw3DOBnH0xQGGSPX2oVWILAfKODS9cggUgEPJ4BpzAeh/OkxjIGfzoAPOBQAhHHAH50mADzT/mxzijaxxyMUwG4XtnHelATPOenpShOOopCvPOaQBhVGAT/KmZznP86CrDsfalC5Xrz3oADsweDzTCPqR9KftHTNNOBmmSNIwOQOPwpjleRx+fNI869Fyfeq7HJJGKpITkSybQAVJOfeow3/1qZuOT1wTU8ChwMgn6DmntuTe4yH7w68H0qy4B5XNShVA+VSvT/JqJmOSBipvctKxGGCk5U8epqQrvTcBgfnSBC3LHj3p6jaMAChgkQ9QeBxxTJZGIUE5I96s7GY8DA7nHamyRjaxIGAcfWhMTRSLMeuKVATkZxzzTn8s9jgCkyMYBOK0RBKnyjJIIHH0q1AryACIFieOB29KpRbmYKuCegyBW1pGFfaU3S4JUIM/kKiWhcdS1ZWO1f9KEqjsCoH61LPZRqhMVy4x0Ab9eKJo73a0jwEJ33cfhzUDwsYy8ieWnQbmBz+VZodrDZIGMZMpQJ2OQM/TNY9zYfMzrdZXBwoPf0z0q1cyW7N+9ZSF4CjnFQXv2eaDdsZCAAdzbc/nVq6FozJksrj5sEbQMgk9fwqpJaSISDnPsM/rUp8tiRGku4H+8DTJvVRMqjjBPStFchpESAq3zDAB5q1vCxklW3g5BL8Y/rVRTuUgseOmePzoZnwAxOMccZ4p2EnYWUHPYnGcDHFNKnAwPr1pyYyMN/SkkbnhgCOOKZLHR524bhfpTHZc/KTSbh03H8jTQPTNMQvGeTwKCTShXxwp/KneXK2T5b4/3aChIn2NkYP4VOZAwyBgfTFQiNlJ+Vj/wE0Ydzgg+2RikA5n3HAx+VJkDqRR5LA/M6r+NDLg5JGe3vQAFsg/KMY9ai3DPK8e1SFQy/e7+lCQbujUAMypHy7gfrQCM55z9KsJYljxIoPvxU8emScHzY+T0yeaLoSTIo5CcAhwPUMR/9anSNK8e2QjGf79aEenzhRtEfOP4v5VFNazSTM+VYt6nPT3qLl2MstJk5OT06elNzkYJH5Yq89tNGMlFGfcGojbyyZYxn3OKq5Niuqp3Y/lSBRu4J/KpJVMTFZFA9OtNV0LZKjpxg470wHCMYyzEH02n+lPi8sEE4496Mrs/d4X1+f8ApTDvzywP40DLqANltoKj3P8ASh9pXCkp9STUEIJzlFqYQykfLEjLnnnIFZlbjMSZIDqw9VqLDc8kn8KkDFTgKuOhpNwDfNgGqQg8sEchvxxSiMAcA04bSDtZD+NR4bBwRSQbDlUEnLEAe1Ml4UjsPeky46UNvMZznb1piuRvIMkDOB70wuDgcdetJwF9utMJHPSqsTcuRxqVyDUqr8p5Ax79az1JPC+vrVmJZeCd+PzpNDuS4yOpz9KjYepNSjpkZFRtu55H5UwIm69afEN0E4GSeDx6DP6Uxgfb8qtqEjKGLguvPf3x6Umxx3I79G5kXOEbt796qFgSNuSMZJ9zVy9kCQBFxlvf0qii4xz1xRHYJbisTikBpZOvFNHSrIEXlhnPNWEPJw3aoAD1BqxFhuozSYIY6g81CevQ1daIdQcVCUGOSaVx2K4YjoBUiOT6UrKuORQoXtigEPWno5ycd+M46VEQuOAM/WkBweMcUDLRY4+XjPvUKYG7OMk9+adu9COe+KhdSD049aVh3LiEYOTnHTFRy4wDniooZFXOPpzUrupUg5/KjZj3RA+NxJxzUZVcnkU9vbpTHxkkGqRDEAHNGAOnek+uKCeKCRT7U3iikGPWmAtN5p2PSkK/WgAFPjGTSKBzT0pMaJYdmW35yRU6kheFBGOKrDvyanjJwdp9qQ0V3w5YgY5xUZUjrV3yf3f0Az9aY6DJIzwDSTHylXBbk9uKkLgLgHBHHSlVA0ZOTnP501k6lSuM5NMmw0qMA9hjH19acuF9M9KQHsegpONwGDxyaYWJMnPykcDPSpJBGyF1BHTj0PrUKum/JIUj680wSYLYJIpWKukTCVApEi89KiYl8AYA+tRMQR0pVBxntTsTe56XFqT7SCxPYjpU0N3GzDf8o7nH9KpJC6clOPzxTgG6hTg+mOK4WkdybNCSaI7nS4Jx0yuB/n8ahac7c7kY98N1/Co4YJZOg+Uc9qmFqrKfMRlAH92p0RauzGvY5XdnZw3HTGMCqyc8EZHU/wD6625bGGSMkB/lGTyP5HmshoWVjj7oPY9q0hJMzlFolSSSIo0ZOTyAQBx6giuh0i/nfG9xtHU7uTWPZxmZDGuIwM7pPQenPNX9HvYoZfswhtpEzxI+VJ/rRLbQUT0vwxrFqXX7TdQRL3Dxg8fQjGaseI7LTJoZGsGgaXJYGPaCc/jgVyVv9gYMZoFB7bSanXToJh+42rnpyecVloaO99znb9dRgkYSwyxoOfujkfWs6a8d/lBKjp0xmuyj0+cq0UglmtwNuBkgH1z1B/SuU1a3gWcpaK4I+9vz19u5qlJN2E4tK5nd+MNinKrZ470CNmBGT0/yantljaRVkcovTd1pt2JQQwM7YLBSen+RWjb2SQyB2n5XBAxjJ/Gte10uERCS0ubYyDBBlkXr9B/hVOXRtS+0NNeRGRWI3eTIoyPQentxWXtEzZU2hovniZzZyNEWJD7ABj6UzT9NvNSusQRSyEZLSOeAPUk8D861obrRbSHyxpN15+MNJcMH59gOPXjn0rRlN5rSJH9pcW/AjSRhGvBxjav4/SocrDSuZMcLRWz2vn2M8rN1Vmdhjtn7o5+prX0+1lmjCzyNBtI5VGbP49MdK3LXQYoSkMUdorR4LMu5ix+h5z+PHWiTUbFFaMRM7rlZCjNjA64wSex+lZud9i1HuZ97BHFAyGaKRieshK8fQVyF9CS5ESq4JOdqnA+ma6bUNUgtlZ4Ldk3DIBy+Bzz83U579qyTrc5PztLjHHPHX0FVBSWopzWxz/2OVGLGF8jr8vFSQ2azRtsDAjkjGP1FdL/bkE2I2hlDdC0Z5bt/kVaihs4F3B3O4gnJz19/6VspMyaW6OImtPLyNoOOMc9arPGVOSh2mu61G3tCpZix6jjjn0rI8mJASBlePlK5zVpszujlXUAE7RweKiHXOR9K7X+yYJ7TzzGYSQcZORx/U+lYc9qkSpJJb7gTzwR+dHNcLGUmwjBJ+tTR+UGHzbv61FcKGlIVAh7KvTH4mnRxFui845IGKbQkzQimg2kL0IxjB/nTwsS/MoKDruHNZ8exQcEk1YEpfYoJUD0ySfxqbFFphuGcqQByc9aiQ7QQSMH9KtxRRiA5JLEfdK9TUUUZDZ4Jx064oTAkhYZVAcM3AJ5q0kRLASBQR33UsDtCuWWMnqPkDY/+vUgk3KdxGM+mP1ouNIetirkb5ICx/wCmmcfiKqzWMcZK+bEx9Rn/AAq0XmWNiFXYQAPb8qSGyuJm3DDAgFRxg+1CG7FRFdUJAwOhOM8+9bGmTW6x7Lkgt32jtxx271RkjdZWSdCjE/N2wo96ltop41lltog8jEbW4baPTH/66l7BEsajd2UUoEdq+1Mg7+S3br6dfX1q9plwbmFAZFSJTuWNCODx+NYz2LyFmvJGa5Y5JY8jjoR/+qrthbmHywSrKxwF29e3TqetS0rFpu4zWIPMLA3I809dw6fiO1ZDQoVEJlLEHb8oJ/8ArV0T29tI+Lm3CKx+8pxuA9jTobK2tJd9puGCSmTng1UZWQpRu9DPXTZbaFXyVA53bOv19+nFNt5bS7mcSXLeYCeRGQDW9v8ANjCz4fBwC2Dj6e9VxaWmWD2cbjGSSuGJ+tJyuwjFpamTZwh2MAkwucIVO38weD9a6S2sXiIiuljulEfWP5lBPTBPf17Vz8tmyP8AJEY9vTnpWgkmdg8s7x1OQdx/r9KTGtBxgm+cGJkJPIKqeP8AIrKv9FluHd1WPc+Mhv6en51qRziJ0J3YX6cgnr61ehia5jLlTEi/N6he+ef/AK1F7BocBf6Hc2kTPOgjjOBnI59qpholVI4zvGck+/tWj4h1N9QuikbboE+WMf3j/eI/l7VnqiWmWlXLjhV67m9fp7dzXZTjZXZyVJXdkWrS8eKRjp/mJNIuwybsnHp7VPtS3Uo5HmEZPHII/wDrkUWkMsRWY587JIXqQTzuPoP8Ktx6aFzNKQZGPzHAH4gVfmR5GesiwiTCgsx4Yj5gM+v51XuruO3h866kCR9Axz+ncn2pNburayLoXElxtJ8pT9zg8uew/Uj864tRc63eMDIwiiG55G+5Eo74/AADqT70uRyepXtFFWiX7nUZtWeREf7NYRDMrZ+ZlJ4GP7x6AfieBmremtKs0EigQxwKUgiXjYDnLH1Y9z+HoKq7IgUjtlYW6H92jYzk8bjjqx49h0HHXprOxtbWNbvU7uEqACIUfLYBA/L86vyiZ76yLtjdJZ2chjVQxGXkIB6fwqPXJ6U2G+igEtzcOi5GIlYZJOOp/nisfUtQF1M0hjWCHBEcScKgHOM+vuRkk1mFpJhncdpOBu6gHsPamlYlyuaZupHu5bkykTuyspJ6Y756j2qrc3E2oXEhlOArZbPBOTn+vPf8aryOsbrGFBG4DdkDkfr3/CpLu5aOGBAAWUEnkDJ5+Y45z/IU7CI9QufLQRrkcY9cgdfxrLL7RuYjpjgZ79D70ksm8k5IOMHrx/n/AOvVWSTdwckYP86YD5pyeh+v+ewqAtuTJH0phOD/ADpUUtnHSgQKNxwB3/lVqCPHzMOMd8802KL5dwx0z9ad5oUjAoAlO1CSeuOPb3FVJZS/tikll3k57VAWHt70hD0XOQT/APqp8kpcLHuIjTO1fTP/AOqowcDAx7n+lJ/LtTGPA7DrzRnHQ9800SEZ56fpSbgehFACnrx/OmnqfY5/CnA8cmmFuTmgCUknDkAA8cHuP/rYqaBzG4ZeMY9+9V1HJUuAO3XrU0ZBQE/r/n2pAW4yTuwueP8A62a0tLldJxtY5yO3Q4Hcf5xWPA4DcgnjBGcf5FXbP5Wl2uPvIxAPbB/DsKlgj03RL/dEIpCPmUEce3Q+tbltJHf6dPCTlkJU5I5UiuD0ubzERFbaw6exx157ZNbnh2+K6qgYDEqlSOvIzxx7GudxNEzntYgEVjMofLKwUrz1B7flXJXyuU7hRycfjXoXjnTJdkskCnyywYsPX0I/I1wrcxFXyGxjmqps2lruYk44QjkAACp45CAQeQf1/wA+tPmiCrtbH+FL5YIycVrcxRFJCSDJEAR3BAOKrNuzyTnrWhFG23I65qtPCcMVyQaaYnHqNtLowTpIEDMhDAnJxj0rSe0+2b7rSWKT8s9upwfqn68daxQcHBq1ayNDIsqsQVORg4psSOy0iJ7rTbUyF/MZcMzeoJ71PNCIQFEhz2G4Ve8JeLoblo7DUxFHvIUTlMhcnq2BnGepxnvWhqlp5Tss0qlc9ECnIPcHuO+a45ScZWaOuMVKN0znl3+WQeQfWhYm28Y4HUd627LR0ugWJnRQOPlGD9KZc6Z9mbDrvQD7y9ue47H9KFUjew3TklcwPIk5IYf99UASoeWYEd/auisYbdg8M1sCoxiQDBP+FLd6XGAXUqgB+XI/mRzR7VXsxezbV0Z1lqE8KYO9x0H/AOupZbie6yCmR9OnbmljtZA4y5wB06Z/MVLbsYI3JRmXIL7e2ff8CKTkug1B9TKucIuJGVSR1wT/ACrLmuEwV5PbnpXRXkSSH5SyhuxAGaovYg5G1Ae3yjmqjNdRSptbGVFc8ENgDrwAP5U/HmAsNoQEAnPT8Oppz6ZN85idSeoHAzSW8EiwuDtGTlffHrV6bojXZki2ZMKMM9SW6dPb1460+eORpQy4G1doAIAAH0609Ycxru2nHo4H5il254yD/Slcdgxzz296X8B+dGMdD9KOc9e9ACcUEcE84PfHWgjdx/WjkDrx+dAxuTmmH2z6VITzzijPGOOaoQ0LnkdO1G0Z6inZ9MflQc9+9SMYwHY0m04608jjjHFIc+oFUIjwfrQEYnPNSKOvJp2PXFK4WIGVufak28c4xUxAz3pnGeB+lMLERxzg0wA9zxUzYxzUeB3PFCExhBwcYpuDnqKkIXqG60sao3Un8qtEsjA681LGhz1/HipEjjA5Jz7CpVjttn3mJ/3atCsNWPvuJIoKoVPD5FKPKUkDd+GeKeemVJHvzTVgKzYHBBqHIGRg1ZC7skkk/X+VRSDGQcmkxojAHPXHXpQFXvSlRjrx9etIVHTBzn16VDGO5C4BIHWgAEDacHrjNKsbMmRk9utI0Mi/MVIqShemMsfbn0pqsD39qAMnkinBFAPzUgG7h3zigMvbd+Ao8s9QT7c0oD9lNACiRcYB5HFMLZB4OKf8yjLAAfQUMy4OMZ/KgCLIHJJoyD3/AKUIOTnGaeACDwM0Ahm0EdRjPrRIrIm4IDnoetLwPT09KQkc80IChIW3cqKYc56VbnH90DHfPaqbAA5JOa1Wpk1YdFzKAfXmr8eApKqOnbj1rMCkngGrlruLFTuJ479PxqZIIssFyn8J9OntUIPzdB+VWQjkYBHvxmoWQ5JBwc59qhWNLCgjHJOPftUfnIrYUlj+Qp5UspBY8jtVRkdTjaQfU1SSE20Stc4B4bPTg9KgaUMSfX2p6DoDtyePXNQugVypzxweapJENsciM7Hy1Jx+FTLBx+8cDsMHP8qrc7cAnFPjhd+QDgdT0piRcgXy2zGpZgPvMcYqzaR3XnrLHLN5gPHlqSPxPp+FVETyl3rl2HXdz/Or1uWkiBIXzifw/SpK2OpdpXjQSlEYAZJ6H8Ky9XjMmd8yuMAfK2cD0xirenwqIC1wykDoMHr+NOeWbfttVSSNuGHX/JrJaMbuzmPspt5jIxJXHVk/UVnTWck85bMkyZzypGfxrrL6CeFm2xIpIyBu+8K5m9+0QuxkhdDJ2DEAZP6VonfVA1bRlNrHYTtIXju3Q+nFQS2MynBKZxn72f8APFWLkzw4Zt64A24IP61WaZnO5pJ2Y9c/SrVyXZFR4mU8jrxSIhOemPr0p7lC3O/j9aQtuJ+VR+H9asgcYxjJI/PFNMeMkYpyITwMDv1pjZ5xigA27elNz1pQfWljCtIFd9gJwW60wGLkn72Md81ZE7KAfMYkdiTU32WNUJ3CQdm3Ypjxxsm1YX3Dv1zU3uPlsCX7g8qPzNW476Fo/uHd3BNZogkB/wBW35VYhZFPzQOMdcChoE2WvtEO45jH4rmnLNBkgiI9Oq+lRD7M/ILA+hyKTy7fGMjB/wBqkMmfyz0jQA+gpu2PGPLTj2pghiz8rkD/AHqT7L8x2yv19RQBYh2Yw0KMP93pVhLQswaONMcEZAGKpLCwziV/0p6xTAcXDAfXpSGjRW2kYbT5ORweKSSzkXjEY78YqokcyjJnJB9alCysCN2fxpDGToFJR3weu1P6n/8AXTY3uIhmKMf99YJFTBSYnEhzgcHP3TTLecw58pAx74btSuFhk1xJMpH2fBGOd2cY+vTpWfc20jyMwRRk5xnn/CtKe5nZ/wDUmMZ6nOc+2MVWmYkfMWyTyzdf/wBVOImkZDAqxU8HoeaVHcHIx+VWJoAxLB1B9yOagVV5JXOOOtaXM7D1ncDBA9eCR/KpY5IycuJTj0aoVQdBnH51IijO3A65yVIpMauSN5bMdm8A/wB4UDGOdppm1t2CUGPQUjFgOMHHtmkMsKoA4Htxk01o1A3YOT6GoVkuOcA4+lSJPKpzyMH0z+lFh3uLtU9Q2Pr/AI0NHiPKxy4Pc9P0o+0MSTxn8qRrgkcgUai0KvPQjn34xTSvfFOZt5J4p4Y45bBHTjNUIjSQqCGQMPep0u1HBQge1QFhz15pPpigC4syP0cAClbB5BP55qkFJHT9KCrY4HH0osK5ZK5IG7HrUoUKDtI9enU1RUuvHOPrUmGZcgn35pNDTHSqzY3dqYvJ69sUq7gSAT+fWkOQDntTQDXI/EVEeOtKc557ik5qiBc4yKlichcYPFQ7j3xSq2M4PFIEyzvBBxkGk5qANk8ZzUgJzmlYsVlBHGM/WkWPkn096kV17r+tLlSCQDx7UANCHJzj6VHJkN7U+SQAYwc1GSW7UAKrHnIFN3Edu9IfajB7fzp2JuSKeOlOU5yBmolDdaeiknAJ3duKQ7iurAcmoyKveWWBEgC8fQ1TIAJ4JGfXrQmNoiIpoxmrEqcDAx0z/jiogvHTmnchoQjik6U4DrTgo75/OgLDQw7g1KoDDAIpojUnhiPqKQxkchh+dA1cULkkClHsBQquMng/jTgQ3UDI9KRQnIPep4sbBwQcEkiogpPTPWpJZPLhZVJzkDNJgl1BGeSEscnDdAeg+n4U5CrAqQwJyT7jPSltGSOJ2UkccP7+n+fSgss33WbjG7J6+9JlIcHEaneAQSQe2P8A61VWl2MSMMDkH0omhEbcvwTxURQncBkhT2qkkS2xWkLZIB2/561GzemealRZGQqq4Hc9KctuEJ83BI7A09ETZsrfSpo4SYjIxwo6e9SIB5uwAAH3p1wSAUJG0fd7flSuNRIZVAZVXvikcbHKnHHWnxYMcrMATjAJ7VX55piZ6hskjOBKuPXcRUoSfAwx/AitFDbNwQn0YU77LbZyV2A+jV5rbPSSM9JpYzz+XI/lU/24SACXcygdM9KvpbxEYTDjGODg1GbSMjO4o3upqeZFJPoUnhtphwWX8M1A+mhmJjZXGOmccfjWiYW5AKYHvjP6URQuW/g/P/69NSsLluY7aU2TkbR/+vvVm00xY8HapPqec1pLC6sdoHp8pzmmv5kXLQtgdwM0c7YctiRYJYzgqueM4b/Cp0DZ+YdDkdf8is03QyAYwMdKnju02BXIQHuMEj8etKzHdGvb3E8TZjnlRvUNWlDqsxG2d45QRyJEVs/j1rFtZUI3KS6jAOOM05rlWlGVJTOPu5x9SOlF2FkaN7Z2V453W8EZPOYxt/lxWbL4ZhLl4yDF3HOf0rWih2YjEYHQ9fx61p2oJRgRx3PX8qi7WxVl1MnStEs7RhOLOWRkI+ZZ+49vStprq1DFJtNcB+eqnOOeT1pG82JD5IBJ7E8Ec9angkWZgtwACRjpj9ehrKWruzWLtoivcQafcqHWF8heAFA24+vU/nUd7Bb29qRBcFSCG2rwc+uRxnHetb7LHGTg7QeOvX8+QaglgyyqJWw3GTgYx6Z71BV0ynHqd3dQJbajCkyj/lozhXHYEse/ocA/WodZRrKzRYruGCWVNxj8t2Lc92PB57dfwrL1K2uNPEk1rc3TYOQD8wJ+vp1rFvL+SaMs7CaRlO5wAMY+n/1q0jG5jJ8ok7xMMSxR7uuEJBJ+nQD8BS6ZpVxeu7Lthg5JdgCcegHXNZtvHIWALMHPTJ6mtBFcAgzgkDkoDkH3/wAmt9tEZLuzZk06OztnEJd5CODt9u+O9UfMkiAQKPlOfu9/el063uWZizSuoxgCQ/y6kVPIzZZBII+oztxgenNSnbQu19TPu5HlGWHJyTVjSLqO0uPNmDSEcLEMAfXPYVUuYMAGMkkEgnP9KqROUfIznPHQ1qmZSjc3dZvb+/wVtFghUAAIMkg+/QflXNXVrcyFnCdO2SSOPet/SrwSI8EkY3/wuDj5vcent+VVr+7gUlo1wxQKyAdSBzjP0qmuXVEK70Zz0Vm7SsWACr15A/D0zVqWFlB8lkiAGSSwJ6etV4WjaclwcnoME4pbqNWQsCu3HAIou7j6FTKK2CQw/vA4q1BcbcAbQOo4rNkUochvwx1qaJiBzjkj8qbQkzaSTcCFB3jk+9OPyqJQQGPVT/8AWqpaS/OSZFH4Z/lV1Sny5ztY/L9PrUjLUBDqAc8n9atQwB96MjPtOMD1+nes6NVWUlMYPA57f1rWtHubZA0YgZWAweOB27VLKXmS26ZJha2fyxwPNXGP8BWu3kRhPs4jYgDOxgMY7VVWV5l3kDdwG2HIJ9qbaowLNEI+vdfmHP5UiiW6tJLpvMa0LoABl5eg65+lRwWpt1crCsSnoELNg5rTkMv2WQSvhu21j+noPaotJSTcs0y4CcHf0P4dazcgsMmBMKb7cucfffAP0P8AnNVhYJMAWmFrsPzbmzj6Ack/kK2priOd2SKNGHupwKuWUn2Fh5kKSqxHy4yBg+nQmp5rItROGkVo7ghZy8fXew68+lLFbzsrTFS0YOCRkZ74FbOuQi81GZ7GxlhyzOcjOR646YqvDdlBHDJEpjQkcZwx6c/p+FaJ6E2GWm3cdyBfrz+lPEiKS8ysV5AXGM/j0qhPKnnK6ARq2dyj1rRsJIncLNkKw446/wCFU+40QSXUUy4bETE5Of4vy7VGIQ0mY5S6HklOAPwPSpJ7WX95KzRSog47bR6+lVVkV2SMuxR+nOP/AK1JeQDt4wSWDHIB7c+oNZ/iPWriO2OmxS8OMzHPRf7p/wA9KsavLFYxs5+YLgJxjcT2x6f0rj2hkuZC7SbQ7AsTzuJ9vwralDmdzCtKysNhmKP5kagkHAJGQPw9eKs2ccktwX2DjgEjjJ9KYxSSREiBEa4UepP+NWkmRQ2046DOeSPXn6Zrq3ObY1Le4EAeUrGVyCS3c9cn2zVKfWpr1vsunHyxnM91sDKinn5c9W59sdaxmml1KeWGA7bUcSyY6Hj5Vzxu68/iah8QagmmaZDpmnyFZZFJkC9MHHU9Qev8zVJENmRrc8d5emy05i8EbEmVxhnY/eZmPOO/NKkojgWytQRDncxxzI/I3H8OAO3PvVOKEW8Ww53N97nGf/rV0Hh2OG1jOpXQ3eWT5EeAd7AZzg9v5GmxF6DT7bSYGm1oZnJAjhB74zhvfGPpWLqN79oucbVVU+VQgAGD6A++fr1qPV9Qa8laWULvZvlXPAGc+nJ7dqp2oiLEOQ2OM45z6D9cH/61AN3LgZnG0DYvU+/HU+n0pzvvdIYmAdeW46YpxDBGjCxpI2B1OP09ufb8qZDEttI2VLMeck5wKBEjthG83OB0J6nHv1qs7lxuYjHTGOuO1F3KsmEU/Lgd+3+NVpX2qMZ6e3r/AJxTGEzqF4IPb/61Un54J5xinSOMnHSowST7/wAqBCbepHSpYyFIBHXn6e9RjOCABS7gOcfMePqKAJpH3DhyV/l7Yqu79cGlBOe/NNYgemaAGM3amrkDPbtRnPy4HqT/AEpSRngYA96BEi4wAfx+tITimK1Jn34oGO5PSgHHXpTM46Uox3zRYB/rim9zige2KB1oAVe2T7VYQr8w9f0qsvXqPTmp05QkZyOmBnj/AAxmgB6nqMkj6Vd06QCdFyQp+U+/cf59aoqRjinr8xwMZYjj/D8aTVxHWaRciO5TcRhjxwOen6/5960ruVrHURPG4A3rOpB656jj/Peuasm33ElvIQWzlShPUe1al/ObrTUJOJ4co244IIz+PXmsmtS09DutZtxq2nlLd9shQPG2cA/X2I/LrXmN/bT21zNBco0ciHkN157+49+ldd4L1tLqwWKVh59uSCD/ABIav+I7ODVtMmeEhrm3TzI36EqMkpnv6/WoXuuzLTujzOSPPPPtTFBUkj+dWSvpnnpQoCNkgNWoh8FoSvykqTyOKZsEUpVj0ODnire+SZleRiFAAXPYfWobpophtZzxxkLSXmN6bFG6slbLxgDPWqgiYEgA8cVqxRiNMRs7Z65x/Kjy85JBzRcLXK1rDgZyQc12Xh7xD9lQQXqLLb9uDuXtwf6dK5hkwmO+aktm+cKV6cA0pRUlqEW4u6PY9JhQ2Ml3Ddi5hC7lGwqUb+6Rnr+npXI32qXqzbjFLyRt3LnP9cc1S8O662mM8ckazW8gxIjHhh6D+nfNdVKltcaa+oaUweEHDCQkSRZ9fVf9r169q5JUfZu+52Rrc65b2MuW8drNHdI7WZchg+MkHufpzx1qhFeSS7gshkEfGVUc/j1xV6Rr26gcP5kwH8BYMMj07iodKEcN4r6hFsts/NHg/NzWaSSZpdtoqzPI0rSSs5GOTnjJqu4j3sI3ZlYcZODmrniu7tZ7vFhHKI1ACMH4x9BwB+OaymIUFiSGAXIOevp+WDWkFdXM5tJ2LjL5IicuQ2Nyhudw9hTJmcy71b5T1FRTSsxjYqTtGB2xgfrxTXlL4LOQM8AcVSiQ5AzkA4yFqMruBxikkfBJyCT06/oaiWXrkY5/SrSIuSrFgDcgO3+HPWmEETMQEVehwc1HO42H523YztDUm1FlXbKHGB68mmkK5bROASwx37UHZnBcfnVNFUMSGBP54p31607BcnwB0xg+9KoTk8ACo0XjO7jvxTuOeSaTKQ1z1xSAZzilyM9B6UfNyDjkflQIDgZzjIpNwGKTHJz+PNKF54J4680AMLDOMH1pS4xwP0p5UHnmkIXB6flQBGG5pSfTNKdvr+lMZuMc8VQC/XBzRjkgUg5Jx/OnAL3x+dAEZBzwBTMnk4HFWdqkcYz9abt9CDjr0ppCuV9w7gf59qkjz/Co59sVL5bZwiqT061YihyATChIwOWI59KtRvoK5WUPjgDn+dSqH6lRjvXong/wXJqTDz9JMkZG4n+0EhwPxBruY/A/gpMLqENjbOMZB15WIPuMCt1Rl1M3USPBACM/Kvp9KbIDyMn8K+i08A/DK5hKx6rBC4/uamjc/jVP/hVvgxpcw6rcyp/0yuEbP6Ueykyfao+eNuCck1E645UmvVvF+h+BdOaWOyudSluEOGh3hdv/AH0uDXnd3FZhnEe9Rnhd+78MjvUSpuO5pGSkZHzDgj3pwBABIqYqqk5Dn8M0xn9mz78VnylXGBivQn86eZmZdpPHXtTPvdBzSLH6GpaQJsVQ2TgHgZ60q+pA6etOVOOO/WlCLjPOPpUlAh2AYXnFAkJ52tj68UhzmlZQcdfzoAXeDwR9aaQoPGeT3pp5GM859KXORggfrzQAMhU89fwpvHsfXml+ucD2pDjB5zQAnPtihjhTx29OtIMdj+lGAeQaAKUzFjksee2OlRdsfzqxMoDH9KiK8HGfStVsYsjUZYZB/CtKBFChlH41TgZQ2GAye9XY8BCS3PUc1E7lQXUk28EqD6D5v5VEeQcjFCEScBxnNDKsTMJHII7YPP49KhGgbuMA/pTSVIILD8TUSP8AaJcAFEAyQOc02REVWKEhh2yMj8KtIm4r4XlWBI6npVdwCSwB55ApGY8FXb6EdKdAyM/74Oyj+7/npV7Eblm0svOy0rERgjPGcVdmjSEsIyWTpyuO31qlFNcKc28L7PpnIqU3N2x2sDk4yCpNZu7ZcbJEMsrTEIBwowPU/h61LBFKBtReTgFvT24qNrWZ23OoQYzkLV2xR1QqLgozHp5ec/WquktBblxEvYwgjm2IPUf0rQ89o4gs1zg44Kp196pi7a1Ch5nk/vYi70r6zBEPMkgkdj1LLx+XT9ajcL2K95qRRSru0wxwxPI/DtWHNq87oY9q7+i/u+v4VoTa1DI7MLcYxjDYPFZj3duGLRwnf2GeBz2q0vIlMz555nDCR29MEVFvYgYIOBT55NzncOc5+ntUbOu3AGSe9aIhjTkscgetN+tGeO2fWlUBsYIzVAIcUp4Hf+VKFAzuz1pQpPC5NILEeR7/AImnxrv+7GT+NSpayMD8oGOuTViPTRnBnAf0Cmi6DlY23tZGBKWsxA64bgVbWN0GGRlPcMa0bRPsykSyI+AdpQE5PvVORbg/6qce2R2rPmuzTlsiIdwaU8AknApvlXeeZIT68U7y7jHzCJh06YqrisMFxCOCwJ/GpY2iJ3NEGX8qiW3H8cafhkU4RKFPX3wxpCsTwypGzMLeGQtxh1+79MEc/nTS2Tu8tR7AcU2KP+6T7ZNIUbPJGaBkiMN27AGPT1qddzoCS2057VU2ENgk5NToibOQx9c0MEWeFCqxDD0YdPy5pkssGOCo9cHn9artGqN8w2j6VC+zqpU+nXNJId2TpdRpMGERYHjJbBqG5kEblwPlbnrjH+NRiRQ2NpOeMA02RxI4Rk6HgYx+dFibl+2nMkZETtn1/wDrdOvNVrpjGwM2DnJXI5A6ZPboM1JFcIqFFBweAMjk880ySHztzghT05HUUluUUppRJIwWFQP9ngfrVaRGYnamfQjn+VaBtJozldrZGN3Sq8kM+7BZdw9DVpkNMo+U45CMPwNPWOcZIV8EZ6VbEM7ZUAsBz9/Gf/r1E8cw4KMMe+adxWGx70+9GxHXkU8zR7fuHPucfyqNlkCnIeozk9QcUWC9iZZl9F49zS8t0I9euarAdiDS7V7Z/lTsguTiFiTgA/pQ6Oucg+g5qMLjkbv++qkXOMEtj3NAEIUgHI5owcHgVKT14/Wo2JwfSgCEg9+D9KlgRXIB3e/SkHPWrVuiKNxbpQ3YSV2XLeONVyoU+hJFMuJFYAKBgD07+xphltxyd2aieeMglQQR0wetRqaaWGkc4Kj8qTaAM0x5S5GAQB0pS52gHoKokljUHk9aqEnoemTUhkI+7nNIfnXj7w5oWgOzIm4Jx2plSsMHBB+tREY61SIYIu48VL5XAGRUKnaeOtWky8eccjv60MSGCA4J4x61IISF7VHsfPBPX86nUOg4UfkefzpXKQ1YyPSn8qnIHT0pwdx1QflSOruN2zihMdirL95c9KlEQwCB15HNRTffPXpip49zRAsTuHTvmhiRE0bDnFEadSSBipHB9GJoSMsMjHTnPai4NDAPSlUgdQc+tKUPOSPzzSZGOaBkiSSEjHI6cjNJcqABg8gcj39aRPUEjmklJJOFJ9aAvoQtITjJBNIcA/Ljmk2gHmg45pkiFj0oV2xgHijGOaFY9RQIeuT0zTsE9aVGI9KXOR0FIsZtI70hX3FSDHtQcYoAIUO7JI+maWY7hsUDPc+lOhXClgR+VNdw0hwMY9O9LqPoPjRAFVmOPT1FOSWNGKrGSAeeewz2pgAQMw6iq8e4uWHWi1wvbYsPGWKuAdoYADPqakONuSAoDDPP+eajCllXa53A/Xv3qK73BtpYkfSha6A3bUsROWBwSzEYOBnHJ/CmtLvnAAChOTnkcf5NQF3WONRkAHNRsSXbk8/zp8oubQmvHRmDR/iahO5lyc8e9IRgc9aVj8gUdqexN76kg5s2HP3s1XqfpaH3b+QqChCZ7kqQEhSWz6gf5FTLawbtgbce/H9OlSSQIpGV8r03Nx+BqB45FwTtdR6c4/KvLTPWsPNhDkqCyEc8YNQSSG3yqO5XpzU2SqhkJLDt1pUuNoy+R65ANMkS2Z5RysDDGecc81P5Mb4U26qT/EOenepbO8t4TkQxNnk5GPxrQgubS5c+ZbxjPBwcYoYJlCKzjkICSKR/sn+VTtp7xYILED6n88VrrpNjNGXjZonPCkknp61EulX0bEpehlXk7STxUOBSqIwLjTVmZiMA+hwT+VZ0+jujAKWJPqhH6+td5BqCACK5VQe3GfzB5qwHtpEZYyjL1IxjHvRqtmO990ebCymAB2jHQ84/yaZAjhyFLru754/Tmu/Gj/a3JhUuDwAuD3qP/hGL1C0kQVWBGA6kc59elHMxWXQ5u2S7jAAnDKT/ABc4+hFb9g5bCSSDI4PBGa0I9G1CHLG0iZu+1h1+hqezcqxjl08Kw4yRj9RxU83cduxUuI3LAwncoP3SSGP0I4x+FXbQFmUsAHXGc8569vWtFLG0mAEkRifpw3T8axNVsJLOYK0rhSflcn69/wDPFTKI4y6M1rqGOeNuDyOMnjPtWbLFO6osiqV7g8YI/iB9ajhk3KglkOV6HP6cdauowkYGOUMg6jI6/Ss9tDUz1C282W/fQjgqcA59M+nesi40yyuHaSBWgk5ztAGfwPFdOYQFG9RjPJI69+o71E9vHesIUPlsAWHGcEe9NCZzFl4dRJvM3RzEYwpBUg56jFbdxo9rcKGljHmDgFTtJz6n0qreRta3DwsxGADxnnNaGjXNmtwLfVpHjjdRskx1P16Yq229WTZLRHPXunpaHcomUA4BwD7dRUQk81CrOHJyAH7YrvbnS7W4t3EF9ESx5LDGf6GuZ1TwvtiM0V3ExBPCqQSf5UKSe5LTWxzMlvMisCRtY8YI61nzWs29pCU5Oa3XsZUOGdUGBnOenriq/wBmVuTJgnlec81opWM2ZKBo2EiSKsmQAvJIPqP/ANdXGJa333cNvcYHGSVcAHnn1/OmXFsc8B26dBj8vWoFt5gpVYpC7cD3/CtVIhxKUltC+XtY5omHXD5GP51GkEigPMxKYwMjr7e1asNrPjAjYAg529QRweO3etLTraC2gkbVMJA64Ak+83uB1ocgUTjZ1HzHbgZqk/yMWXnuOK1rsxCaUwgiInKAnOP/AK9Z0ueeOtaIzZLbzBGBQ8Vp20wkj2hskZNYcWFPzA9eRWrZyRmM7VAzwT3FTLQpO5eR4XCb2CyLwvJAxn1ro4YFlt9ofaeq9BisC2sYWX98QVz0zyD2+tadtDHCT5JlbAAIPHeoeo1cnS1e2YvIzrGfuncCM0/AdRvJ+X0f/Cni6ZMISQmOckYP1B60Ge3DYEcJyckqwXn6UnoMktp7gJiMAj/aYn/69a63CmFYbhYtw+Yvk4+nNYS3bCYCCM7c4JzwR/KujtNOivo2Em1gQAF3gE/hWMtNxq5nXEUCkyR7Tnnbv25q/oetW0Uwhk0+PB53lyRn09M1nXWlzWDnZZTfZxglywIAPHXp/wDXpbG7tGZhKp2sCrIxxn6Y7090XG6Z0Oq3drqg+zxs9sSMbQQAx9vUdO9chd6dcaf/AK1Q8bnaCRnOfT8qtLdRQXrzQCPyk4VXU5Xjp6YpLyeK/l84yyiTaMArkD6e1EU0/IbszIK+YwXZwO4H86lSZV+RSG6AjHTHpQ5LM2WAfpwMZ+tQpGnzB2O8dBgCtiLGg8su2Q5X5x2xx7Y/Cs1/lRlB+Ut6dDV+2sEZBIQQuMjnOar38SCFkXOT19f8+9VGNxSlY47XLq7v71IohuVPlXHt3+v9Kjkt3jYWzMXkAGW3Z2AAnb6Vevna23LbgRuw49cetU0lRX2OzITxuyM5Oe/p/OuuKSVjjm7u7FMKQxES5A6jOOhycj/9dUNz31w9tEXit1wWkVhwDzj/AHjx6Y71VnupLuf7PA6hXYBmxwvvz1745rQSBLOFbaHy1RQfnJzkkAHceh/TmtDO4t9cw6dY8KyRL8oWMjknPfue5/8Ar1krEtvbm8u336hMNx44jHuPX/P0nDpeSmWdkijgJ5B4TBxkf3j2HPTms25uDKAp4iT7gJHPJ5+vXigQtui3FwgmYRoTlmP/ANbvVi/vC0qIFaNFA8tF4Cg54+vfv+NVJWaKExrJsD43rjByO3v+YpsXCBgB5gPr93kDnNAhuyR3IiAyRz6Y+h6H3z/WtBIjGquiZLFfmVQc45yvt/Uc1HaLiIyRhQwPfoTz07f/AFqsQkSFmYFkRvlySMn0HfBzmgCJlP3nz5jdRnke+B7ikm3AkYOT/Fj6/kKeyhGLFSQVHOf0yetVpZcRYOMngjPbn+lAFeVuCQOhqCWRm+8T1/lRISxPpjP0qFjk4zTAYepA6Uq8568U3+IinYHTPH0xQIdu4HfHTnk01sZ4zj1z1pPcD8qTIwffj6UAKD3PpTRyf8/jQBxUowlrMzAkthB7Hr/SgCsTkE0nHPNBx603mmA+lAyDSUqcUgEHB/SncEdeRzTTnPFJ70wH89CKO3SkDkCl39c0hjc8EYqaBjjKllPQkepB71CT1x/+qnRk8jk7unbB/wA5oAsDKkqe3FKcjHv/AJzUasD0GKd2GRQIuWkxEuQfm+v8617iYsonCkvtw/owJ6/49awYgeq8fj+Fa1sDJHngMB/F3xzz+P6VDRSK+g332PVtyYCSZU/Q/wA+9dLo+riTVDE8hTLBeT2z0P8Aj2rkmtz5pKqcA+pOD1xUsKSef5i5Dggg0NJiV0aFxCVuZY1BKI5XI9Af/rVLBHAuPMheQ/7TEfy5/WtC8Mkdwq29tm4mRZBKzYAyMnHYfmTmmvot+i755ERj0+Ytn8elZcyN1F9hJJnWMrbpDCuPlCrkA+vPf65rF+ySNJtJOWPJJrVeykhlHmXEb5Ge/wCmKj2L5/lsVJHP3s/hVRZM0ys+mGOQYfcMZ+6RUkcQiznAzjHfP51ptbcfMEXjjNN8kbgoYBemT2/OhhEoeTuRiM/kKrklTwRkcccVqkqmQWRiRjPPNVZIdxJAoRVimbgqMHBB9a0NE1670y6EltImw/KytyrA9j2I9qz58pwUz+VVml6/uxyKe6J2PTbuYDTrfVNIVUhkJS5MbZ+zuc49wp5xzgGsiW9k2kyTFwxz13D/AOv+Vclp+qXtjI0ljNJADwwUnBHuDwR7Gt/TNctZ5gdZsEaNiMy2o8ts/wC790n8BWEqNndG8a2lmJcTRMQFQrk8k8Z/LiqjMPNXYHJPJJ7EeldBYafBrGpC30+/GZCRD5sRTPoDjgHtnkZrBnZvOcEbWXjp35H9KIqwpSuBleS63Esc8nJJz/jQWfzdowRzTHB4PODg4pZXZWXB+UjB+vrVWFcXnDsSBt7/AIVF5yYBbcceg604SDbskc7vY9ev+cU8gQhd8ZDH5sFc/j+dMRXP7w7gFUdhip3sWjTebq2J25Ijbdj2PYfmaFmWTCMFwvGQMHr0+lNIVs7QcZ5+Umpux2RJAiJGAPm75x1p23gkAU+CNmzhcEfypGZB3Gc9KLlWGjODkDFKc+1PKMVJKgDrkjp+FQqyFsAnI9aAHYz19KQ9MHOaeysBkHPTOP5/SonYd259KEA7oPf86aW9KapHPzHFNVhzjAwadhXH7hkkZzQOMZNABAznv2pgw2cdfzpgKTkkc0mBnkmkIC9CPypVCkbsj8qAHJt6FhzV37KEg8wBSevrVA+XyTnPTinm5IiMceQh4I25p69BK3UcQrbmLDA9KYobf+7AYnn61CY1A+SU4PUFakj2gsuenQ471oSLtkViGXB689jU6PMwUYJVTnH/ANaljCSRssgbAGQQev5//XqxZXEdu+Apdc5wSOg7E9PSmkMktbm4iZWCq2052uNwP4dK9L8GeMJY3C3tt4bSL0mslH6iuDXULBWK/Z7lhxkiRQePw5+tbWjanp8k/lW+hXV47cbHYOT9Aorpp+plNLsenalrPg2+iI1nS9JckZDWjKh/Ag8GvMfET+DR5q6ZYaispJ2v9rUoB9NuTXd2vgiLWVQSaRqNg7L/AA221QT7mrY+BksjEnV1RCMqrQ5I9jVzT6WIi4o8IeZY2/cLJtHU56fnVae4PcH3zivU/F3wp1TTAzW9zZyqgyQ8wjJA9jxn2zXmNxbuszpKE3qcfezkj0xx1rCUZxNVKMtigz8M2TgHnnmmhUIBx+uakljIU/IvPWoFVsHai8fhWTuNWJQuBwBg8d6ay7cnKg/Wk+cDtg88GhMEkmMMRWWpQ0SkZyR6cd6cjAg8t+RpuV8whVAx+P609QwHGP5UMokUoOST+IpBnrx7VHtLEjA/OkOEO0k/nSsK5MFznLA/hTCPm6N09aauegI9qVVI5OfwoGLuOcY/DNNOfT9KU7f4VOaC2RyKAG7SSckYx6UjYQEnPtyaUg54Y0yYNtyCceppokru5Oc8iomPy8Een0pSW5z1pijLAEkfStEZsnhWMJuPzE/SrEaiQBQBjHHbGarqgUgHOT+NWEU9FkYdumaiRaJWhhSPLFUx79fwqBpx5ciIzNkYBx0NSxQxAkyck92wcfhTpYAOG2kH0HWpTRZHFCDF8gxwCcjH61QldvNJB5/KrtzcImEI34Hr+lUfldyw+UEjC9f1q49yJdkKNwYP36896amVkyrEKD2Pv7VJdNEZHEBcRZ+UOckD8OCfeoN/HGP8aog6Bb0Sps3BgBgZP6n3qGWcgDJOFHAyO2fXqc1n21urrukdgCOAO/1qe7ljKmGNVK4A3D1H+cVnyq9kbcztdlq0uTJlS6554Ixj8RSXdrLIxeKRcr1G8DPvWbB8jALkknGcYq95bvtVTGZG/wBof/rzTtZ6EXutSe3s7/CyGJ5Fx3O7A9jVe/juXVgYFCn3PWrYsryAANfGMEc7W4FFxIsJVm1Bmz1+XaM/zpLcTRzMsMiZLIy59v8AGoCrnIGeOtdbHdK6E7xKBwdozk+mTUXlCcqWs3Qk4DEYH4dv1que24KLexy4t5HG8JwB9KhmTaxx0zxW/fRwozhXCsOCuc//AFqz5Ui3YZN6joVPf604zBwM5AWJ64FScZwDx69aeEGcD+VWoI4lKmRS2Tg84z+dU5EqI6xitpWI8uaQgcAYHNWpRbxZLIImUY25I/HPepVQBjHCQFkONo54z3/xqHWBDGrQqVeYHDMGyAB6ds1ne7saWsipJdEncpQggr05+vP86Ym4nrn8aqCPD8Dgjuav2rYbJQMB6k1rZIyvdkkO4ZKjnocCrdudxO4EA+9U2k+fIIBPXtUokbbwRUtXGnYtMgAyGXI9W60pjy4KqNrED72c++ap7jThKeASSB0GaXK0PmNrTNJkv2ZIFRZFI3GWRUXB46se2CT7V06fDe8lgy2teHI2BP8Ay/ryPX0/lXCoWkJWRnZWIyBySfx69etbGnTX0aysFsWjiRW/f2iPtHPOCM54PPX600Fzfg+GspfF34j8OwJ/eF4HI9On09atJ8O7QTQwReLtBknkOEUO2SSCeD0rE0u4urx1it/DehX7vlVItypOSeSEYAfkCBWlrGk+IlsYkj8IixjfDA20bOrY6/eJAGPpT3BEF18O9c82ZNN/s7VI4zmWSzuUby8f3s4K1y9xp16ly1uIrd5FBykdzHJwDjscZ9utWTqGo6efIksoomB3fPbhG69eMHFMutevbi2lgnSHy3ABzHuI+hPIpaDMqZnikaKeLy5F6qw5HfvSJJFyG+Un26VGERmGYlx2OP5VYV5Cf3m9xjjdk0CK0n2eY4JAb1ApyiSMEDY0YHB//X9KuqmMsYQOOBjrVd42Zg23ymB5Jz+YpXAbD8u5g6Buo+TqMetPdpNuVEfbqxHH/wCumQtHFJn5Tzwc/WrEksTEvvHOMknHP0pPcEVHFwF5jUDrxk/jUKvJuJEe3HvVuduuxmcY5/l0qpv2kk5PbkD9KaEyRrjkGTqOmAOf60pmWTBC849h3pgZCh4yTj7wNNO0ZYovoPf6ZpgOuZDt4OP9n2FUz+Pp0p8+3eNufX8ajz833m49qZLEKgcjP5ZprqpBwD+VSghQSDwfalM23gAc8dKaYFRhj/OKFDfwZqUsG64560yRVzlcfhTFYBvxzTgHOcgVH82eCM0ZfvmgY/GOoNODY6Zpg3Z5FSIwAxg5oYCSfN0HNIkZVsyIcZp+7Oc5/Kmlx2z+dADnwWGMAfSo2bOacCevGKa2MZNAEY746CgEg8Zp2OMg0jdOKAHI4YYPWlkUdhyTzUQ9BViGNSMyEkZGKHoC1JbW1WSLzCvPfJxVkIQPlCjFNjkRVO0EAU8yjb8uKm5VhhWTP8NIN2eQfzFSZHoOfwqCfcykRtjvQIWTBU5kK4/CqTSMvQ96jkVwTuzmmjd74+lUkS2PLFuTT4m2Dg8fnUePWnfmKYi5bATyFSz9P4QKsfZkTdt3E+pFZ8R2nI3/APAan37hje9IAdI14Ikz64FRNt7EkfSpQhPG88etKIGPTH50roCFGKnPJHSlf2JqYwOoOcfmKasTngYIHuKV0UVXA5J6+tMJz06Vbe3fBwpqFraYHPlnoPeqTRJCoBPzMQPpUqxqBkMSPrTWhkHWNvyqLDKeRg/lT3EW1ZMcinBo+2Kqhj0JNGfzosO5aLLycComKk1CG6igMecfqKVh3LII5GT9KbCcFh3qEFs5zkU4PhuhA74osFyU8s2c47DPWmDC5OM0mSMH24oPuPfpQMkt5/JDHHBHp0pjlpfmKnr1xTc8cdulSRMJOh2kcnH+FG2ob6AGBgb1HA96R4Xb94Bzj+VOEYEZyRkGpCwKYHelcdr7kEuGCvg4I5+tEhHzPj5T+lE+5iCfujgYpr8JtU8H+dMQzny8EnrxTccYzTmx0Hbv60wd+aohntts0sgzHIcdPmwatx29y3J8pvbp/KstroN/q0XPTPr71C90/GWZCK83lPS5mbZtgSFYBT3+c8VJcxJFGRJJlccAYJ//AFViR3j8B5S69eR/WntdDaSC4H1zkf0qbDuWI5LbOJnkHoFQ/wA+1amn3WjwuGnWaQ9hnj8QeTWEs6upKhe/Pf8AGq8k4wCGIP0poTPRLbXNNZdsUm054U5FOm1mNZRtiJXBPDD+VecR3Hphj35xV+K7lkTAJxjjPNP0Ejsxr9tP8tzAuBkZI6Y/WplOltG5tDKkpwfvE/p6Vw7mRSNzgjqe351WW8VWyQVb8Qf0qbJ7oq7Wx6VbI8TBllV1OCW5Gfw9a6jR7u2B3ea2/I+9wOnavHrLWTEq7pyADgg5Of61v2fiK2Dr8+7jGCDg/hWUoyjrFmikpaM9Ym1WylYIIC0o7Bhn6+lRS2drdkbpbiCXjA2jBP1rktJ12BmBjUP3wRmurs9UV1wsafN684P0NTzu/vIPZr7Jja1o97YF5xMJUYdQd2PrWSt3LIVhnWKUMvIYenb0FdeEdpG8t2iYjJTGVaqUmlQq8khwctk7exPHT9aly7FJdzKubKFINxt1QgcDbn8sVjRQlmJ2lST0IPSutMCshjW5aOQcCNz1qDzDZB/toHlkABtwxUXaLVmc/BGUYlTyRzjvUUitHKs4kPycNGMjOeOat3yW/nebBdAZz8qqeh55qvLfDYy3GGQgFWHB49u4ppsdgcQX4Es4wR93a3r7+nFVtXigs7MTiVtvAIzuHJxxmq1kys8jKS6FvlXuDVDXVuLuaFrhGS2j6AHv0zgZ+laJGUtDRivLOVFS1MkdwVwHVcDPoe3TjpWlcSH7IxUDeuMjA+bv+BrN0m2tba2EqQyK2M/NyfqMcVELhnnJQsq8lt38X/16Egv3KF5Z3d7I8guECE4AYEfh6YqcWgjthDLMzsSP9WgGP6kVFcyBnIMJALcHI/zmoWaZCzHzVUenpWuhlZm1YaNE43SzyqgA5A7/ANDWvBo+lwDzFMjjg4lbrXJLqD/ZmQTTIcHlSOvtnv8AkKTS9SiUhJ5JwzH73cZ7knt1/GnaLE+ZHZ6g2j2lqs1zHHGmOChxk/hXmXibUNLu7pm0y0kEhP8ArXkyT746VueINBWS3muLPUVkbGVWVwfc59a4xbQscNPCG6EKM5xVpRWxF3Yi8wgEDDtj0qHDMDkdfoKkMW5ysbDAGe/ahwEj6ncR3NUFiFocqSQcYpVRo03KQBn16n+dKNrdRx9as2/kRyKzbm74UDJ9smi4ixp98+4RyZ5/iAAxXRKjooKo0yYzkcY9qxv7QRl2rbSMw6fMM1NbXTOdksHIPUvj/wDWalrsUmaNxcRqoDRyNnjk5x9agS4j2sVs5Gcdioz+Rq0wVQHtwyjod3cn61k3sd15mJJFYf3gOT+XU1CV9xky6lIo2R2rhiemCv5nvW1ZXqRRq9zYgyjlRI+OMdSfSufj024ysqXJwe2Ccc+/FbqyqsReYRyEjDNtOce+OKGlshx0L8viae9iMJ/cwYwIohgDH86p2sk1qHljYOzcDKDdyen0qrNNDlZI0bbnbwBgf1p9/P5SqJJQshGVRFIwSO/YcY9TU8q2SL5u50thB5zrd6np6yQlDulhzuQ44yPyzWfJbW7BzZOwkUHgnOTz07YrM0y8utm0TTYHP7onr9BxUyyXUssvyyOZOMvxtx6e/FTyu5XMitNb3DOrybckcOhBz9QKqXTcqCAki9SO9WbiaSNxKQY2bhhjr2+n9aWOSKWQCVPNVh0LY5+v9K1VydCzZXgFsxjB2ouCrep7j1rIvdQuLdJGMS72AKk5PGfSteF1h83agZIwXbuce1cbqV695KJZiQx4UD0GeBjt/OuiCOab1IbuQSSl5SGdhknGCf8A635VjalKceXAxIJ4yCMHnt0q3JKWJ55PPSmwLulZnYDnliP0HrWqZi0VYbdYYty/Nlsudo5OPaotSZGgwrMMN/q8eo5Pp7VsyqCRtkG5cvggkvjnp0rG1WT7RdBY1CBj0AwAPb+daJmdjGihaQ7edo7DjNTKu2QbxwoyN3A3Z6H29uK2obdbeIMEBJGOfU9/51WltSyORGS3bt9PqKLiM1reV58ONucnkY469+nsKtwWZZG2Dlecr1GCOSPSrMVj8ke7IYE5z6j29KtwR/uyEfocDqQRk9c/WncLFBYyjBTk4z/Fjrn/ABFWFkCRGPccgHjrjHv3+tTY2hoxGGw2c4PH4noO2ahkYK4VVjycElTnPXj0zQFihIxfIy2B0+mapTvlj5Z4yM8VqTxhFzyDgnpWcQdpJB5NAFOTbjC5461GFPpVtk5zTfL7HqPei4iqvXODTwCRxmpivJ6UoTsBzRcLFchj2700g56VbK8YHb+dMKHgY+tFwKyqc5A5pZQTGo9yf5CrggYrkAntUbx8A556EelAFERn/IqQRHHBFTFOaUJz0ouBW8o+opVT3qzspfLPtRcCDZkHmozHz3q4EzxilMfH6dOtFwsUhHTxHxxU+wD/APVSqvXpRcCERc9qXyeMc+1TBfypyrxn0ouMYgCrtZVI57dMjH+FPRQQCf8AOKeqjsSO/wBfpUqqvGM80ALCASMgYwR9a0tMu0trhRImYsncMdsYqlGhGcA+3enFSzKg61LGtDp0h0a8SURzvC7kBfMTGD6j24NZl9YiB/LiuYpuAcoetUftCDKDORxmpIWOSVBOcZI4yKhJoo72wWPUdMs1nx9mtgXcRpveJu5AP3kOASOoPI99nTfDsWtQ3HkuZY0xtAyC2fVeoPp1FcLoOsXNhcK9lIkUg6q6bgR754x1z0PvXpfg3xdZRXMUq6LOZtw84W+WVsHtn37VhOBtCo1oec+INHOn3kkJSe2btHMuMj2PH8qms/C13/YL6z8klvGQrKqtwDwCSeCMjHWvY/iulj4ys9Jt7W6W1lhUusciDdk8bWPUHHua8ourjxFp+lDSIL510oyBZAx2RwuSRhzj5c44PQ/nVJ6WTE3d3sYazyRrhQBn1FKHIBaQKMA98f8A1z9KyhJMs7IzjeGIJyCMg9uxHvVsK4bcz7mPOcVdib9hLqaTkxllX0YA/lUMQdtxaQfkRVkRO45I59q674e+GdT1nUE8jTln0+Nx58s6gQoPVieOn40XsBwzQ7s/vEHPrVWeIc4ZSfrXcfEbT9AsPEslv4YvDdWOMswGVVyTlUbqV/zk9a5iYxEYAA29T+lO/UVjEMbDpn1pUWSPHyt83vWo0LYwrnp+lV5In6Fj16VVxWLPh7VbnStTjvI87oz0z97863oY9K1e9nmiuhpk8rGRIbgAw5P8IYcgdexH865NW2OVOCOgJpzsAOQAP61LjcadjpNR0u7sZtl5GIyw3IQwZWB7qwyCKpPCqkmU7egPOKhsmbAKt8hGSN2Afw7n9atTOd2SpIxx9D0/nUO6NFqisFhAJLbv1oYoquQG6cHGfentOcFFRVK/3m6fWopIrmRXIC7VOGKnuePwHb60ahoio+CiqFOcnJ7n/wCvV21hX7OzyXCRkkZUkluM88cAfjSHT5Um2SkhlPpyOKsxQJbFjHPvfr8yDoPbkUNgkLE67GBkfn+6Rz+NLbBY2O4FiPamJtUhiATTpHJyACM8+lSVcS/l3bViBDc5IOc1Uy4IBA3nqOtTrAzZIIxwMk4psbKjEZJbpwM5qlpoJ6u7AtImdzHOBkAdvrUJdCxBBJPWp5ZnADDefUnAquVLEvIApznJ/wAKaEx6bSQB16jJqdYXIztGBznNQxSKGXAQknHPFa81p+532sm8kcgYOM/0qZOxUVdGVuz0/rxSORkkMuTxx2qOfMbFS5JXg96UACL5wM4yOadibgwAGDgEdf8AIpo75PX0FR5JOQDj1oaNiMZ4wO9UFx5mMTlgw9DznP4UHUQvAAbvk8VTkXaRghv0phx02kc1asQ2zQW/TkFOv6UjXKyOSEwM5Az2qnGqnhSc9jnirMMYDkSKfT8armQWZMjGRgBIo446/wCc1YWzkI3b0JzwM1Gq7TgJ78Y4qcLKGDLhl7Ec/wA6FPsh8patYUgKSTeTKAR8jFgDjt9K9R8LfEXRtFs2WLRbWwuSpX7TZOvmY6fxg855615WkEhXkMM+tSJaoJQJ5GRR1IAPFbQqSeyJlBdT2WD4uaUrbriTxHMRnJa+UZPsFAH4dK6ay+OXh1owGstVVtuMlVbOPU5HNeYeHPh/pevWTSweIo7WReAtxGBn8jmr0/wi1oAjT7/SbzuDHcbePoRWj5+xlaHU7DWfjJ4TvYnSXTbySTGB5sSkf+hV5D4y1jQNZlkvNPhntbtvvRxxqsR98A5BxjtitDUvhf4vtdxk0WSYZzugdWH4Vxus6PqWjtjUNOurUnODLGQCR2B6Gk5yStYcYxvozLuChBwzY9CelRRcZIcYpCd7Nx70xIs9SPyrnk7mltSds44I/KgZVDuYqPUVGqEZGRj6U4L8uDyPpWTLQo27MqwJ78VKmCpBPNQIuzOwfXmpYZGGd3UVLGhrRt8xHf3FRrGQ3z7jn1NWHkO7kL+WaiZw3JJwPahAxQqqOAT9DSGTCsMDjrzQr/KRxj6U1mXJDBfamMj3OSCF4p2W5JHFKRznP0okOWBA6YzzmgkQFthY9vTrUDzHJyDU7FkBAwD61EIs5O4YHP0pqwMrsxbt1oGAe+RzUrqgztOQD3qJ1ABzgHFURYljkDgjBBHFWYcjG5sY7VTtHIYgKSPX0q4pzknIxUyRcdULI4UjIBJ5HBP41E7hh87MO/XFOnbapGR7cdapO6k84PNKKBuw4xx4JDAnPrkmojwMBDUzYQZKqR7dqrOQTwSBVohigEk8Gp7e2EqMxdEVTzn0qCKNmbCtj+tXjYgYa4nGwc4ANDaQRVx8bRSRlI974HXp+dQxxjksyFQcfe/pVx0BgxbtwR2GB+ZApIrJCgIUGTvjJz7ipUki2rklnNbw8SQ8ZyMnIFaMc1tLH+5lijIHykKvH4VkTRLCMyY7fe/wqp8jc8Y9qVr6i5mtGdJDAsjFzNkAc88n8KgutJhuJz5twEGBk7cY/DrWKlxPbK3kNIgPqAaqS6hdM3zTEkc0KEr3TDmVrWOoubHTLG3Agu3LpknjnPr9KwZ9TkkxEJGKDpyefrVBjLKd0hY9+eah8wgGKNAxP8Xf/wDVQod9RufbQvG7WNvmjSRu5OT/ACptxeT3IBjhijRevloAOfryfzqs8FyiljFgdAcZz7io0tZj/rGCDGTk8/l1q0luS5Seg6S4ZSSQu7p0B/M96i84s+WY8YI4p4tUGd7n8BTxHCG+VWwOBuOfx4p3SJtJjGuJACEdwfbj9adbwPJC7KqlsjGXwalQQ7SCp+oOKfE1ujDcrgeqkUX7DS7kdlC8itlQuDzv9/rWgTb26KqAtL/Fk4HrjiqssjTSMwZiOMbvb9KakJ3DceKNXuCstiRohNKzRx5B5AGTxWjZ6beSgC1tZmJ/urnNQQSCJfkUZx1qaKZyTiV0HsTUtvsNJGvb+CvEtwu+LQ7+RTj5hHx+Z4qSXwj4lt03z+Hb0oO/kE9unHasxNRu4omjS5uPL/urKy/mOlaek+NNe0m3aHTdUnhiZtxUgPz9W5oT8gsjOl0zUbSN5ZdIuo1Rwd7RMNnXg54xz0PX3rPmueRmBY355xgnPrnqa7fT/HF2Lky6zql/eIRxHHKYVznvx0/Ct6Lxr4UuLcQ6hb3MlvKSssUlosjhSf8AnqpUkceh557VaFY8oiuFUHCFSRzsYg+n5c5x/KtGzvtdNs32a61QwIMNskkKDHYgHGP0r0HWfCvw+1B45ND8Tw6dkfNHcbpACRkc9h69Rn8qrad8NbWaRGsfGOjTKSCAk5Qt9O4Pp/SiwWOC1SeWeeN7i9ubmUqNzTqQRz0Gc+vtVdnbygm9hGOQM8D3x69a7/xF8NLvT2DXWuaaztyA0rlmyfQjp+ma4zWNHbSkQTzIWk6Ku7JH4gDHPvUsZnMymMgEjv6c+tNEy7AFQj8f6mmjbgZJz2G2nDbjO5Rj14o0CzLiaiwhCiONXQAAZILe59T+VUWzMSXJ3E92OanihZslQrcjoaZIr+YSSUwOB61C5VsOze5Xa0C5ZlJH14py21s6jgZOf4sYq1GwDEs2QRwFP404BZVJCvt47dce9PmYcqRnSWkarlHOPrmoirnaobJHQn+WelWJ45I0ZxHheBgt098fhVSKUMSGB29SwGatbEMsRLJwSy+nrROp2/eQ59qjACIJPm2sflbHBx6e9KZlZ+FYcdhQgK0g2P8AMpweTSFywyFFSyvHJ1JVuBnrnHsKiIIIU559j0pkiFgeinPemkZ6ZqaNAykEkEfhmmyRsoPXFFwKxXk4PAoGOhBpzD3phX3qgJP3ffP5UDb1B5pgOD1GKerKeu2gSBu1IOnFPPIGGH503H0oGH1601ivPWnYz6U35e+aAHr8wAyPypSvBOFpi57dKVicHk4oARh8v1pvt60uT0JJxTUxu5zimSSKp7qOafk9s+/FN3Z6HikJ9Cc0ikTQlgxPBz61JuOOAvWq+84PXigOPWlYZMZSAc5xQsgbPNV25ztI496ad46g0WEWj06D86hZc9Tj0qEuw6E09JjnBxTsK4GPrgijbgetKZhnJApBJ1A4oGCq2DtB4pVkdc4Jp0cxU8EYqUuccE4Ptmglka3DjGdvH4VOlye8Z/BqYSjcFh/3zikxGQASBj/Z5pWQiwJCynPmKPXGaYGJPMoz2ylJHMYhiN8fnxU0V0SCrKh98c1NgQKs3B81fyzxRslzkSLx04pGmbn5OenHegSuFyYiR65qbMY2VLgt8syDPbbj+VVZjcAfOVbnHHP41ca+KKd0D46DJqm90GLYjAP1zVRv2EVjnPKjP0puT7YqRpWYDOOPao/TgVqAnPenq4AwaacdDgUi4B5FAbEq5PrUgAxyeB0qMMDwAaXBzyaRSEJG7Iz1o5JoLegpAaBCnGD6mmDKnINK1J9aAJYmOcDP9DUu75+lQwA5yMVKxxnmpe5a2HSYKkYGB0qqOHyegqQsSKaOc5PNNCY1yCxI70zFOJIyRSH1pkM9DEjLggkY6ckVILuYZJbKnsRTWT5yc8e9OQJ/FgkCuHQ7dR8dywb5copHQ4wasByzjawB746fj70ixiRcEc9uOlKymNSBjbUuxSuDSjIO0qQcHr+dTI6kEYBHT6iqnmbySVOe5HGacCwYbSSM9+aVh3JDEqZMbED0zS280uflcjtg9qruxYnBIxUtvdtECrKGQ+oxj8aaEy20m5fvAODgrUaykg7U4pJFWZA6ttHYg00kFAWOG6bl70ikOeRVXcQM5/OlsoXuJf3SMTnAqrMoTq5NS2V1cwuDbTOhHocH8KHtoCeup33hzStQM0ZWJjyD9B713FozWDFJFkk38E7OF/z7V5louq35mQNdzhSOTjd+nrXeWdrczQK63cwIIPIPQ+mOK5Jpp6nVHVaG/c6jE6JHFIyFeu9CM1l6veTwRnyLmNJMbgHyCe+BUkcjKBFJuDDHzMfvfn2qrq1s08jKy+bGRjGM7fYGoGjGttema+jmucbhxyw2/nXSOiarDgBpsgMRHg7ePToRXIXtnbSTiKGEb1yVJJHP1q1aW91aqZDdSoqkBgm5tufXNNpPUFctCxEkxhtpzHJkrtdCufrmrF7od7aw7p2QIe44/wDrVqJr8MShZgkyYwBI2Px57VRv7rUNWQmDy5+5iDfcUHoMcUtQv3OWuYBaSMUmZHz/AAnPFNtbm4e48tpgycHEi7qfeQN9paGZSkjAkK/f6HOKhjt5I3+aMsAeCDgitRGtJLbxyRpMrxMcYZFLhsnuO1Xhp9ysREaCXjcpUg4zn8a5x71AuydZGUHgjn+XNWLD7S0xk0/UnKqCAjrkqDzgE9Rz0qWmtRblWe2u1kO51OD0ZRwM+/NU55powysB9MEZroLnxfJazGK9toblWAHzIuB+GM5rS0W5sNXuvKn0S3iVhlSkrI7duATjPf6VSnbdE8t9jzy4vtihWQg5x1/TPWmrfpM48+NjuOd3BIPTPPWu88UeDrdZJGspJlixwkg34zz169+vNeeXFvc2N26FNwHTP860jJS2M5Jo1buCCWEFXunB5CqoAz71kG2ijZpPJmyRznA//VVhb+bad4Kj64/GmpcRoD5+4g+rkflVK5G5lzR4jDxxOrscnnPFVGaXdhic9hXSTxWhh8ySU7McK3OKoG4tVOI43YdeR/KtExWsUEK7DnduHTjNO8kECRmBHHHQ06aRnO1LcAeuP6dagDguIyzcdcg5/wD1U0rktmrbqPJAUkYPbAPr2+vWrSSopU8ADnk5/A1hIyxuSxXGMgNwPzqQXjYOBBkDIG40WGmdFFeR/cVlyf8AZJqyTGmMiNSfWuettRdUJK7Ux8pRDzVm3vAwDFGPPU4BP51Di2Nam/5FtIoBJkZs5KtkD2HvT5rOMKIYSnlZ3Mu75j+PqOmKyV1A7SqkxjGB8woS4u0g3MWwjbt5Pb69KnlY0bH9mrPayTWV3E/l8CALh1x3I7+55rnJGYSHzFYODyxyf0PNaM+q281m4jJFwpD5CkMuOPxFVY2kngMht3kBOSQDyfpTjpuUWrF7mOF3tJ2hXGTgkA+1LHqMzLsbluhkzhuvaqE5aDaqFgW5xuPFJO88LgOY3JG7njH49zT5Qu0af28ySbHKMqr0YdT+P86rSFYsG3ALOR8ufWorKRp5AsyxzbjhVQEYPoabJAHuHll3RRRc7Tz09DTiruwm7K5b12YWulFQSjzAr8p655xnt3zXFbiM7T/+qtHWdTe/YRhSkKcKp5JP+e1ZZHauhIwBdq/MSqn8TVjT5Emfy4gWJIOdp6AZ5/I1WmU+WQDyRWt4auybKWwS2Xaz+dJPnkKB0Pt04zyTTSIYyTAiYklGxkyeg6ZrFS3aaeWVQSWOEB44Het29QbDGcMCPurnjvVe2h27VYgsOn+zVJktFN4pvLRbkgKn3MVciXdGmAvPt04x+FWZV8yLeG3upC8qOp9vyq19ia3tSZUO3buwTyOf/wBdVcixlyKqgFVG0Ar1x/kVAisSuQ25s+hwM+3Jqe6aNnCqCWxtHp+vWkixGHDKN4GDk9M9R1pgVpdkbsrDKnnnOR2+npULeYI1aTd6jjHFSNiXDOD14we3+RTL0vldxI3AYyc4FAFO9YNGFGcgfNk1nsMj9Ks3CsCuSc4BP61GvTmqJINvGDn60zb6568cVNx3HA9qTHHX6VIEO31pyrwfTrT9tO4wRigRFs4ye/SnJGD1H40YyenepI1z3OfSgB5Hlpx17VUkX5TnGTzVp+flPHaoZIWjcq+M9aBlbaMijb14qQqR0oCt3zQUIF9c0u0elPVSOuacMkjAP5ZouKxGkZJOMZ/lUnlDbxnPrz/OnGN48FgRnkU4sBjg/TqMUXCxVZBk5FJsHatAlZlAKDPb2NVShGQOucdaLhaxGsYx0pQuM471YiChTuH6U+RV25APtTsK5WVQ2aljQhcjGCSOvcY/HvSAbeRzT4h82cc9elJjRJGuQcYApZnaNdijGec+tWIIc9c5ptyp3hCAFUAD8e9JajKiDjJUdPT9at2+MYGeuSMVGwK8EHkcY4zTUcqe3pQBqRXHkF2EKZbAwRkL+Fes+FptFWGBodeiS4I+ZZm8kcewHA9Oa8gjUvCS/fr9Kz5FO9lXJAPBqJQUik7HvGq6vptqzXDa9pCEfeFs2+ZlH93OeeuOlcZ4l1SXX9BKadbva6ULndJht8kzgZ3yHr3OOgH15rz1AFXkjdmu6lSfRPDH2nRroTQXShbxoiW8rIHBBGRnJG7p2+sOPLsUnfc5JrSINyZMAY7Cp0ZOFBZj0GaqGRpXwuc17J8D9OtYtWju9W+xxpkKhlHIYjg+g9PrTk7bgvIpfC7wBf65qNvNd6bIlgXBZpsx+YMds8n+XNeifGy8g8M6Ta6FpMVrDYSIS0KZ6+/v7mu18d+JLDTtGnugGku4/kQxNtbB9fb2x2r5r8VeL5dVkbfEmD/e+Y9al9kNd2cguxmG7AIPC4yPzpsmxd23B+lErNISc4BPaowtugCyK+/qSGB45q7isMeVVyMn8+tQS7jgb8AgEcipUELq2Bjn+PH/AOvNOaVdygBdoxg7QM+5/wDr07iBdOT7OJpWlcliCEwMYA5J645pIlsUlBmheSMN034Y/nxipFmG0H7QFwSMbsH1/Kq0skIBLFMnjuTRqxaGxYiNI1XMa85C7cEZ469asyyLkgsztj6j/PFZ2nAz4CSgdq2l0e/fBGD2AHU49B1/xrKWjNo7FB5jtbg5PXJPP1qAyZJ4H1rSuNOlgB8yRWxwQvUfgcH/AA71mFN7En9eMf8A16FYbHM67cknd25pgkUZO0M3p6/Wlhh3zhJMIOAST+Gab9nVHOXZj6D/AAp6C1FKMzAkBAOo/wAaZM4RAN2fb1p7uVRlQAZ6ZNRqyOMEfMBgdv1oARJMqy7Tg9aRTEOFXGf89aRt4bDkn0XP+c07yw6nJXAGevWqAidN2SCRt+vP0qZbM+WGZRn071EflO1Q2ffI/KnSSOwAyAcevWlr0ErCvGqZB28enb2oinMK4iYj6j+VIjD+JgzD16UwyLghFO/26frR6j80IEVixd8Dvx1NN5QDBHX1zn8qkbCrgj5j6npTZW242MuKYrDDvY8qcHriopVIGBkCniXaCQeowaQksuOMfXpTQisxIBBNNDcEZJqZ1LDgfjToogMnOD0+lUIhUkH7p/xqxbyyBwAhYHtUZGCTvPHvU0PlEqS4BHXryfeqsgVy1EkzDlWHo1Wl3opwCHzkZ9jVRZxkFHA496swyO5XBHyn8aFEfMTxfaJpNwQlv7uM/jUscLEnKZYnvnmt7wrrk+nXSObG0vFX7qToSPyBGT7816lY+I9SuER4Ph/prKBxII+M9e9bQpc3UmU7HkVrZXciiOC2cvnnGcV1OieDvEdzMhht4ok6mQyMpFemXXiC/mgRLrRmsdpyBaStFzz1KnNc1e63plrb3CXFpq2+Rgx/4mEpyRznJyQM9QOK6I07GTk2S3HhLx3EQbXW7WCDAA825ZenueDXD+K/PIe11PxbpV1Kh+eKESS7W9SQuM1na3qmmXlxKXhugzf89mE2PcE4P4ZP1rmJ/s4ciGXPHJkjGc/nWcpu1hqLvcp3iQo7eXMko7FFYA+/IzVQbcnaAavSJGV4mXOORtqIZU4jwV6EnvXNI1RWBGSCpB/lSd8A/lUzqMksw9OKYdq/wmsroqxESewNISeckeg9qezfMMKfzzio3kIHIUEdM0DGqx5AJBHXmkJJbOBnvk4zUfmNliMc0jyOf4F4/GqsRcsLgnGcn2FOmGw/MvI9+1Os5mI+ULkjBPTFNkt3kV9rBgvJPr9PpU9dSltoRGX5hgn8u1AYs3DHHsKakJADZb24qWNd3AH6UOwlcl8pQNxAJPJJxTXmVRyFOf0FOmjOwLsPtx71BLC2wswJ9faktSndbELTJvO0A801uhOMCmBNuSQRzTTux1OK1SMmw+6dysA35Vcgdyikg4PcnFUHBB+lW0i8qHzJmBGMqCc8+mKUhwYy7k3SkDIUdOevWlhiK4OevPT/ABqKKOSeUO/C+/p7VZuGbZ+7TPaltohrXUmSBCu9+V74I5oeCxbcd0wPZePWqv8ApTqCxGBxgnt9BTwUwRI6k47cc0rPuO67E8UcKg7VLAcfdOfyp023aN5GwnBA4P51B9uEajbjdjHC9vrmqxuDJkYOPrmhRdwckjQjmVWBUNtAwFx059aeXmbd+9SMEZPQ5rL3MBww+lT2iGVj1I+vehxsSpX0LJjYn99OCoHBxnrVqGGLAymcfMMrnOP8/SmW1m5Ds2eeBz1q2u9UwwGOnFQ5GkY9WR3dsk8QkQvG5+8AOD/Ss4WcMLHzDyT3q9PMACEO3HrVNmDYJ+ZvUmkmymle5YkjhaARna/OegGPcdzVabaFADlR1AHFSxDe4ADHtRcQKuSCc46E/wAhQVYqPcx+XtYszLwCT0/CqktxknnPH1ouY1jJAJz3qmec4PFaRijGUmSFsnJqN26imnHY80oU8Z6VaRFxvU96miAUjjn60BlUYC7j9acoZs8heewpkh1PBqVc4OScCoTHtOcnP5U8OR97txQM9p8D/CGPWfDdtqd/qcsMl0gkiiEONgPqc5Pr24raPwd+yygwi1v488iWV4SR6cZ/nVn4Z+AbKbwvaXWuQTPdzYkVlvGOEI+XGDgepHPXFddc+AdEuOpvYwB0S5P585p8pRxcnw6g7+DICQP4NWcbvfB71Uk8AxBGx4HukU/3dQBwfx5ra1T4Q28wzpmt39u3fzjvB9gRgj9aq2vw28VWK/6F4rmQgAKFmlUKv+6eP5UtewzJg8AxGMhvBdywyeZNQIIP+FVdS+FV1cRZ0zRWtZCOPO1BWA/DHNdpY6F450qRnGufb85A87LgD6bhj36nFaFzB44jtLeaK9sZZsgzQiEevRc9vfIPemkB4tN8KPF0bgLpiOc4yLiMg8/Wof8AhWPjCCRWGmyK4PDRyKduD1yDxXsB1fx9BebrjRLN7YqTtiO7bjPcHOe2P8nffWdXgsBcTaTHvPzGNbkBgMdweQex60WQrHy9qtnqNrdtBq3npcDnE5O7nvzVcQ7lw2CQOnevWfHHjn7RcG31vwoPPiXMHnTkMA3ckdRxwK8nEyG58w2wUbyWUSN8wJJ/D61nJdikQShFbayMDjrg1YhtVdPnBYHpz+tbtrq3huM7bvw9dTFeRIt82SffjGKxr29D3Uj2EEkFo7cRtJuKqO249859qlpjViAW0MbbixQL15x/KldotvBcoTgnngfjmuw8LX/gswG31+w1CCbGTceb5qt7YAyD+BFdHJYfCqeJTJq80eV4GWUrnJ5ATBP51Sg31FdHjVywVwYcGPPtk0PezTu5RUjDAKVT5QcY/wDrV6xdeEvhytvKYfFLF9p2gyJ1IyByP89K8wf7DaXIH7x0Cg8hDznswOP/AK9O1iNShLLdDBAIXJztp+X2rvRiTwD0GPyqeK9imvSZcJERwAOM++Ofxqbb543zzFcHggg7gaV7DSKUjKv7uVJgCc7d3BP0pjmMudrAN7jGK2Z40W0cxDztygDzG+4QegHfrWckZVWdhhuhXHOPx7UKQOJRZclsbSTx7/8A1qjYnPzM34mrMqy7twQgdveoGLMxJxx7VaZLiM3HB+YflUkLsp5AKkdP/rUxXCtgoD7VafaYGaNVjGOcj+RoYkipMUZiVJ9cYqJeasMg2AqQfpSKqkDGc/1pphYiEeeQRThGR6VOsJPXAx61GVG7aOc+lFwsIc4xximfjVhlGTgmomUqT6dqLhYZjg00KexFPQFicYpShGcimKwKcDjk/SjcckcUqYBJzQy5ORjFAyN2yMegqMH0p5HX/CkCHuaEIegBPQ0rIw55oVRggE07OBQCGJ6kE1KBH1weffpTPMByBx9aXHy8GgaGkKPUfjQzjBAOcHA5o25J+YEdOtMO3IGB9aBCMdw+6fzqNjzyKU7c8ZpM5p2JYmBSYxS5oB96YhQxFSq7Y65/CoeMHmlXOOGpATB2B6CnCQ9NoJ/KogkhBIGRTgkndf0pDJsvjiM03d2ZGoSSReAvP0NKZpB1Xn3BpWAsRRDAIPvjJqR7eU8RSDp03H+tRW8hlBBGDweKc0Lc7XK8fWpvZ6iHeTqEanaQwPPY1VeaVW/fQI2P7yf4VITMhwLg8fWmO8rsd0xJPrVIRVdw3RFXnPGabU3kktywpBaynG1c81V0MhzSquehp7W8i5yhFNIK5yCKAHLweTT+COBmo0z3p3IBPGKGMQDGeO1N9cU7Jweab27UANOe+afGu7r2pCSc0q5B4PFAImUKuOmaa7cYNIWBHvUbZyaSRTdg4zgUfTNIoHNKB1qiRD160nSn470h5BoCx6BHJvztJ47H8aeFGQDgEjjmq0DMFIwqgZ5znNWUV2AwVI6cVxNWOtMsxNtj3FufTrVhHDDBI/LGKq20JaTK5OOvFWpbY53DHPT8KyZaZHMevlqeo/8A1mmIMgbThiM4NOdmERRQBx3GKI9uF6g+/OKdguhhhb7zAt347VE7DcAAMdhn+dXQ8ewKXI9eKalvExyrsOwPoaQroWPc6phCvYAf0FJc7QRwcj04xT2gcEgTE4OP/wBVKsLnguvXPOBmjzGVW+cANkD6VLDGpOS4G3GP/r1YNnIbfzQm4E447H3psNswGZM49ufzpNjRcgvp4mBVgyjj5FxW1aaxelAyT3O0cYMx6/n+lZNkqxHIYEEDINakRiEmImXkAYYDj/634VlK3Y6I69TrfDmtXd5BJbSIJgmG8wtkqDnue49K1ruWQWz/AGV8Njh9/OfcVwUUM0MiyxSSwtnOY3xyPbGD9KtvqOuIplgWC5C8lXUK2PU44/Ss3C7uilK25PqEF5bu1ysbKV67WJB69P1qna63e2TPGuWVjk8Z49uenNXrDXm1APFLbNBIg3NlQVyOwI5/Ss/UNUKltib9vbbjoOhPf24ppN6NA2t0yT+1g24FEfPTCkEfUVteHtSsEUR3UbQ5J/fRkjH19RXETypcKrhimByMbTUmjTKHba5ADYB3dc+3pVumrEKep6JJaaTdgsmoxOwOV3yg4P1HNI2hP9+C9QKefmIb8fWuDgS5t9S+1QBnRjll45A9PQ966BPEwVDHewSvGpyAV2nk9x0rNwa2KUu5fv8ASprVC00tu/GeF6/XHSqItoXjyV2ydsHHP17U4eI7O4OyOKZRj+Hnv0q7JbwygTBmjIXPzLjP1H9KFdaSHo9jn9XtpJIWVRuZBwxYDkfqaydE1KaymEzTnMByPMGRn0B5rpbiJBhQSQeenT6f4Vx2vWflh5Ii0Q6FQT8xJ6CrilLQmTa1PQR42juEK3EShSv3t4Pvk9/w5OKwNTm02V3ntJ2BY5IXI59s9RnnFcPblI223FupYHBJY/8A6s10diFtYhNbGIrnIEh6flz/ACo9mo7EqfMU9Xt5Wt2mjk3pkYEiAH6j/wDVWKRdycttGOm4A49q1dRae4PmxPvVRhx7nJ6fT3rIW6k5xFnsMCuiGxjK1y1bR3THDTAeuB1q/IksaA+YzoRhunB/pWUvnFi5Z1HpkDmj7V/CZWyeDg5FNq4tjVhMZ4ctkc9aLlVYNydzcA9x7VWuIp7eAOsLShxlWjIYfXIqgl+5Ox1Ax6ikl2G2NvkSF9gYu+fyqoJzEGUBlJq7OyyIMSDIPTgY/EfyqPyEkRRI4BPGWU8fQ1omjN7kEExaZd0j8nnax4H0qe5uWDFoC4VeCSev+etW00K4tsyLLC2RhQ2Rn+majvM7WjkjQSr/AHFxkUdQIYr+UJghTjvira6sBC0YjDKRhsk1kxSEORgYA4/wqR3UKduORxS5Q5madm6TMBDsWRiFCN0PsT2q/c6hexQG3YNGFOB5bZXIHvziuXZupOTWlZu0yCME8Hv35qXHqUpdCWC9keHMsoOw56Z/n3robGFL21DszEEckj9c1maTYk3E2DtQqdztgYHsfWtq51axhVUiYyeWu0LkAcdycc/lUyTb900g1H4jOt47y3mc2s3lRE4LthcD2qtrV/uia3gfcrY3t0zjt/OoNQvBeSbpJFwB8qjgD/Gq8SRtzuGO/I4raMbGMpXKKqec05Yi3PJ9qvYhA4Zcg857YPSmvIiklWGPqKqxKKU6FRhcljwPpWvY2v2O3ChGMsgPmbj8uB/hjr69Kh0tfN1SAjLANkY/w9OATWnPNJ5LuxG5vlxn7oGQAPbrQ72EVkhjyzFyz9z9TT0ijcHJXC8Dg5/P0xTIJQwGTgA4Az/WtAKywqZCAmcZ+9n6/rTSsSypbWsbucNtYZCtgYOD3/Ss/Ur2QlhvDFV2A9T0/oK1Lp1W3xECGxz6c/5/CsdtjHMqkseueOfXNUmTYq2pdp1ZtuF5ORkZPt3PNWjGpJXchJ+mKRAu0qowOMnHQZpY4CTuMi4ye2f064p3CxSmgZJQqALu469R68/TiqV0pDJjJGO59PatC8Vgo5GFPH+R2qtJl49u35hknOPWncmxmuC2SSSc/WoCpGcitBosZ6569PrUJB6H0GOOlO4FMfSl28VZZOSR/KmsnX+lAFbAx09KcFz0xT9mOtPQcdKAIdvBzmkQbScVK3JPWoyOaCQftx7UkpZjl8Z7dsVLtGwswOOx9/aoZWMjlmPJ/TFBQzHXBpQB2pyqPxo+lIAHtmn5YnJJyMD0puKegwMnHNACYz16d6RlLJgfUcdqkJJ4GMDqcVcgtV+yvMzgMPujgn/9VAIz4lZewIOP51Zh2qrE4J7nH6GogxX7ynHfmgGMkdh6etIAZC7DaDtBHX3qVbUnOEPHrViIk87VCjrzT9pchtwC9QMencmnzEWZRaJgcMpA+lWYbdWUnpgccdacysXJJJPA6VPGoQYJ5PtRe4IhHmIjFQuBzk8VTdt24sTyecVo3DhEOVDrjPWs2YfNuI+Zug9KEWNaXsB/SnQR73yTgE81GsRZ8AFiOuKvQgRgiQAZ6Drj69qTY0NeVkhYAZ7VXVuOMA47j1q2Y1+Yc4PfOR/9amx28X3nkGT2/wA9qLhYfY4ZXjS3WSWQghjnoOw7D613Op2s8ngcfYYGggRR9raHG2Z9wIBPU4ycjoDXJaeLCOdPtjyrBwHEf3mH8q9Rk8beH9W0kaRFb3MMCxrHHEsIO0rkhyfT1GPespt30Lijx77LKoOFbPWuvsLz7FopQs0ryAMh3Yx9D9a3fs+mx38NqJEeKcfunb5cn0P9P09Ki1jRbWO3MtlIBJjjyz1P8qlzvuUo2OXvtcvL4Si5mkxxuyTyfX0rJE7MxDAsAOPrS3jT72MqhGHUYx+lVIzu3EEZXH5+g/nz6VokiLljzGkLjAx0+ntUcq7ULK2XHSnR5Z9oDbD1O0kmrCWgGTIuCeRvOP0pbF7mW8sgyAxI6/Q0xnl5JU5IrSaxWTdtcRkrkcnn2pjWXlbAbosc8qIzwPXng1SkiGmZ8YuXH7qORkBycKfzNPNrOctJGwUYycjjNdBp+pJZWckccBMrqVEgO3bx69x7cZNZsaFmCqo5wOT70cwWLdpY2IttyzzB9oJThiW/kB+dTbUi2tE88anBJV8HI9P6VFEqxIVIIOeoNDLlQoPy9eazerNVojVXVCY5JGVnlC7FdpDlR0zx36+1VBqMscTKxEgA2gOAeDz06VRZdzkjAx0HpUhQSKWboMZ7ZqbIaZGtyTIcxn/Z5PHv+lK7YBLdD0ye1OY/f+UfgaSKyFzEzi4VSATsJxjHaquhJMrBkQHDMD/nvTHlG7jPHrSCPGflORSKOpVR+VWQAuT8wwOfalE8m0lQQPXbSAurbhgEe1P89yeSB6+9AyMzyydWPH0ph3cksMCnjgkk84/KmtjdjII70xDdjkZzwfekCORyakHfsD/nFPjYKc4BGe/ORRcLEAjPOSB27804Rns304rQMiSttICL3bA4qB4Y1YhXyPoaSkPlIFt2ddwdcflTzAFGdwI6cmp/l2gAjA7UKoPVcntx3ouOyK7wlTz0NMMIOcMSB61eRgqFThueQacY4+SMcmmmKxnC3ye9SpbDk4OPc4q2FDEhT0GcZp9uQSQUPpg/4d6u4rIjhgQE7lAwOMVoadFAJ18+OVoh1Eb7T+BOatWdnc3KqtlYTzzbsbI4S2fxH+Fd94b+G/ivV1EsmkJawD7puMRlvw6/jWsKd9SXJR0ZyAOix4K2d8SPWcD8+KkfUo4lItYb2JQM4Fyx/ICvTYvhBr0BaRotIl9VeR+KoXngrxbY/wDIMWxgIY/PESQMDuSvStlF/wDDIjnR5/LPqk8ClxetuA25ZuAfQmqrwarsbPngdyWP0xiuk1u98aaeoXVtVleM9DHMMD2GK5e61y+3Hz7udvq2c1Eko73Li7mdNDOr5kdmPQ7jVKVRGfmIxn61PeXUlyCZANjHt1PNNt44ZI1R1KKPvSZLYz6j0+lY819irFX77jCk54AxSgcEAhADxUksflkgYYdttU5JGwQQPbmoeo9iSR1QHcQccdKrtMWyRjHpikTbuy5JHYen1qSNV3EsAQD0A61OwXbISGlyqk5qq0cgbBUkjj1rZdlSAsqDjqBjpWYspaTC4AY/TNEXcJKxAoLE4Bp3luRkZJHtVjiOSQORzyOcU/cqtgBfqM9KdxJFYK6qSSoz74qVZDtUNhUB4JP8qcVALmONpD2yOn51AsEsrZYhAD370tGGq2J/t8ca7RHv47nGKlj1ASDbGixN14yf1qGHTw+SCWxycVILWBOzM46c0nyjXMWxJuQMzncB1B6/Wo+vMjH8ec0inpwOMUoXcTkE/rj3qbF3uVLh1JIjHHqR1qoq7s4PIFaVzGfIMgBxnB9hWb8p3euOMcVpHYzkMYgADuOelSPcJIoMi5cDHFRKu9uoFSiBB/ECap2IVx8d5xhI1BHfnpT3uh5YG3B+lSRLaRx7pOG9P71U7lkZ8REFegxUpJ9C22luAmJzyPxpsjDbnjP50wROTgAk/Wpo7Y5O8dfQ1WiIV2MjRnAxg5qdI0UHIwcduKeqmNSFOD6ZpApbqxzSuFhWhRlwHHPHaprdfJABcY9uarkDIyenvSggAnaOfepeo1oXkkCZOSCaejHJ+cgH8az0OchcjFWFYBQcHjrUtGkXckuMlGO5cnjkVQVHyME1dTlckYGakBATC8E9PWlexfLcWPMcQy3OOfeqctzgPyck9ahunfBAY88Yqrgk5Yn6U4x6sTl0Q2YMx3HPvzUO0nuMDrVh+mA2c1JaCAJP9oBDgfJ7n39qtPQzauVvKEjZRgoAJOfb1qILgnGCPyxUrH5yBznnpTCfcVRARqO4BNSqo6HNQqxGMVMrkEZPWgB+1ecipNOluor6I6c7JcswRNp5JPGMHjqR7Uzfu4yOlMG5GDBiGByCD0+h9aYH2B4Kt9XstCt01+7W4viqlgsaqI+PujHX3Pr0rf8AOx2rwD4ffFvU1uLLStZihu42dIhdvJ5bqpwPmPRj0weCffrXv4wCcg5FWhh5x7LQJpOyDFPDgZ60okX1FMCJpnxyn6UnmN6fpU5Ix1FMOO+KQEfmN+NV3jiLFmijJz3TPfP51ZOO2KYce9AHKa54I8PavI8tzZGOZxt8yByh78+mR15rh5fgzbCbdbaxPs3crJCCQufUdT+AFetXbOltK9vEZplBKRltu8+mTwPrXA614s8VWLMbfwoJk/2btWYYHov/ANek0hpmVF8G9LDYm1G9fP8AEiquB6Y55964L4meB7zwxdJLpSPc6VJHnznXLIw6hscds56Y969Ht/ixYRWqPqek6xby4/eYtTsU9+Sa0dR8X+ENb0W6i1SVmtxH5kkFzBJGxA5BXI65xjB68UOMQ3OD8C/DKHxH4eg1K+1eVJJAVMUcS/uyMjBOevftVnWPgeIo3n0vWHnlVSRFPBu3ewwePyrJ+HsOj6h41gg0MaxZ2wLSr/pWBwO+BkHoOtfQm8KhUfK2MBsZx/jQkmgsfIt/4b1uykf7Vps8EafKzyRFRjPv1rO1CFY4SzQbQjhPmIDE+u3rj9O1fSnijRfF17ayxWPiC2lifpHcWqx4HTGVyPx4rxjWvB19pAl/4SDEUzDMXl5dZB0wGycHOOMVk01qOy2RwKGLOTlfwq6lwkmWkkIJ9gM1UvYvKuZI+coSMEEfnnmoAQTgnAzzVWuRextzTi4KCI8DqPcVPb7I2P2pWY4+v86yYFj2kCUhs9mqcs6nMbMSOPmPT8Kz5TRSNMy27BggAQ9sZrPuLXczMgVsjPWoo55cHJUj605798YPQ9ef8KfK+gOSa1GRWa+XvkYKOo6HNJPCskWf4RwCc4poc7ZHBAAwSMjue1RPO7e34/0ppMl2sMSMowKYJ9aO/oab5r5+9yOlJL8mD1JH0xVkkhnAzuIzTBcIAQMZ71GPmHOCKjZfTiiyE5MnEw7EUhkDZ4qJQwHanFsc4FOwriMeQBjB4p4Jxg5qInOTjFJu44zTsFyVgrc7h+VSRxKBywqtvIGMUiOM8n9aLCuWdwGcL+PWonkOTz+lOPThqiYHnmhCYqvmgsQKRQR60YyCcUDQhPFJk8gE4pQKNppiHRMe/SpGCk8YqJODwT+VS43dFFIaImQZ4P6VHt689KnZTz7VG2QaEDRGRSY9qec+35UlUS0Mpcn2pSRim0CHBz6VIJD2J/OohjPIpQVPY0hk5lfruP6Uhkc9WOKjNBosBLFJIudpP5ZqdbydRjJA6dKrKzJ91iPxq3EzshDFyP8AdzUsBftUr8Flx/ujioxISTnaT9P1qRWUZBVsnplcUweWTypzk9e1IBAzEDBA49qkiZ8kByCDUZVW4BP86ltozu2k8UMCXbNjOQT647VXljl5JVSD6DNaO4om0FSPzqCaQspIJJ7YqExXMxsjKtxn1FRk89akkLFjkYI571EOprZDFpDRRQNjQ3BGKcMiiigSEyfwpw75pCabmmA/NGTTKKAuTL05IprCmBjzTwwxSHe56MyIxO5dpHqMUR4iyqqPf/8AXSuzP90849cf5NORSh3KNzYAPHUVxHUNjlOTsZh7Z6/lQbiba21mJHv7+9Sbo8jaQMcdMUjRoASRggAnH86VyiISPInJPTnFKMlflYE96YwCurg8Dv6+1WAVbJTjnP19qLisUnMik4zkVcSQuAAcKcE55/GnBUc4+73z1qKSPHcEfSk3cq3UmEgxkudx7ev4U9ZjyCMj16YqFVxECCW5J6dKRVJb5W+UmhBYtGWVUCq5wAO/fn/61Miv3GQ4JOeeTx9KVo28sAdR6iqrRuGYkZBHTHSi9wSNMyLLhw5A/iHtV1JAyhIl+c8jvu555rn0k8jKgZJ68k1o22sTQDlVK9lIwKhxKTsdnpKiW3HnsSQeQx7ex71M9phyV34fnBPy/rXK23ihFkxPbxMv95QTj8DW5B4qsXttiNIjYGPMbIBz0+lZOEuhtGouoNZmO5DQSRwkEl8ODu/DpU8yRSD9+iyAcFlyTj1q9DqRvkDxSAlRlhuVl4/X+tVo9Ut70NFEi4Y7TsjwPpkdqjXqWuXoZV9pm0edauSD/AecfXPfpWM9sCSZAUkU884x712U2iv5YaNhGuMkhjgD0xWdPpcsc5VwXQAE8Drj2q4zFKBU0qNLdQ5czEggrv6itqDVrGQxRzxvt3BSr8e3Xrj3rMEMcDqHtWBzn5GHQ+1aUVo0lnI4jJiHQupbB9CCeRSlZ6sEmtjVvPDqRxSyaQxmXf8ANHuDtj+8Mf8A181nx6g8MpS/dkkGABIhXP1z/k1N4Xt9JkvGe4MtrIF2goSuWPcH8PajxPY3MF55F/cNf2rAGGU8kqfU9c1HWzHcq3lxgEEYV+hUDjPcetYOtNvgIMbSErxj16ZPpWiElhG2KRnTONjjcMe2eRUot1kXe6hCD24/Ae1XG0SXdnCIrqctEwHc8n/9dXYLy3t1JVmDn73Tn2IrfmzG4/dMQTgbh1H+NctrNu0mpO7J5cJIG8qSMfhWyaluYyXKb0Gr2F3GIGtpEkHRo8HP4HiqV3awsXEEwUgZwGHHtis+2VIog7LMyc4KcKfr3/lTTLE4dFIRSPTkdqFG2wua+4wwsc4uW/OmCCQcidvfgVBcRoseFLDHVsVQaRkYGORueD1rZK5HMjYAK8+acjltvGfrVOaQMzGNGAI/j5z71FlZIyw6kYP1qDzCzHGTnjrQkJssIx6rjNWDJKiK8R+YAkkcj61BCoZWBbjFWgoMJAJIxnOO1LqItjUWkRIjK7oq5JOOT9PT9abHq0EhAMRLcDc571UkgkAAgib5wcDrx6VXFndbx/o54/l609BptGizwuRjYckY71KyxKBlUH4VE5ijAST5X4A4xzQQrDlQT7ipLLIsoprdpg0W1cBuRx/WqKTQ28wKq28HI61ZitYyrllIVe/qT2P86gVLT7QgnZsAhTjufrQgZpi836a4ZyCxynPOKxJjl9oPJ681eu2jjd1MbEKQBzgD6CoECswIQKxHHOa0irIxk7u5Fb2XnHLMdpPPsKmSCJZGBDBV4PAz/wDXq5p+xZMN2x69j1preaHkEHlMT/eXJx1x/nFXzdCeUaYYo4hJtyzEADPzY9SMYx+NNzEx+a3bIPqKsslykSmYxKRxsHOMep6VKLU/ZxLI3zdflTHFFwsyoip5o8vcg7HOMVoXNuZbRyVUunPGRn3/AM96hs7ZGuAHYY5IHatGSLaIyzMUY7WwO4/lTdg1MSKIjqBtxk57j0q6bgeQUEYB4yTxx6UwTIbp1KMRngAe/wCnT/8AVUM7Rb3GSVJOBzkmk2JIhmZmLbQ7n65quyOABISvp3/CprhX2kK5VSPWqasi5ALn5cHkYFCGWVIA+Uk9M59aI1RmJLkcYxnrUAXCFVyQDwf8KkH7thxk8UxBcp/3yuP1/wDr1XfcVzxjv2/Gpp5hIwwBkVA7ehyufypAMfLLywI7/wCfwqMx8YA6mpgDnqMCmMr8kMAc+lFwKbrhsEYHfOeophX2NWnWQg5IPPrVdxhsnPr0/rVJ3JsR4BH5flQeOCKM8fWkzwSTTuIaRkE46UhQIjMx56Aevv8ASrFujM6tsBHuOCKrzKGkYDOB3oAiLuyBDgLnNNIzn9KkZccAU0DnmgB0URc4AOamW2PB3CmQyGMkip2ucjAA6c0C1FFsB1PIqC62hvkPA/z1pHdmGDnB5HNM7nj9KQxAfUc1ahclGVVzu4/+uKihjVmywOO+KuYRGIQ8A4HH60XBK4wRhpNgAwx+uAOKmuNMVwHswQcfdJ6+47imhV3Eqxz16VZilKxkbsn16YrOUnfQ2jFW1MhLhl+RgCV/Sp2mQKBGDkdastbwzsTIoVieoPX8KrrFAjEFhjPfjNVe5m42GxbmOS5xjPFXV2IoaTcwPb1qpLcKo/dEAjrgf1qrLLJIwJdsU7CNSa4h2MkqnbwVAHT8azyd8xYghBnA/wAaZvBAzycdaYJMHAJpgWYN0eRgYNKx805ycDjp2qNJvl6insx28cZ6gUhkhkCgKHGe3aopfNYE4YDGc5GBTBJtJIAJ6Gl89tpXkjvz2piuOjkMYyxLY7ZqzZ6hLayLJDt3D+90Of51VA+UFwcZGT6f5FRmTe+4gY9BxSsGxda4luHw8hcDOCe3+FbFnqTWthJBEd7SEE/N0weo7Z9awYkaYqkRXJ/hyafJHLBlJFcZGSGUjP8AiKTSZSYy8umuHG/qO+TVvTTAMF3XIPQ8ZPvVEKr7iqDH8qVI03jJJ7YUHgetD2BHQoGmR/LnMgB6EYGPp6fSozA8wXJQAnBJHT3NU44I1+aMNjH96rAO0Hpt9C2KxNVqBjETsmSzKdp4xkev9arX0kEbEL5+VJB4Xge+KlULIwVhjGcbaZOY44yqoWk4ALYOMelUtyXsQxGORsN53I+XaoJNS3FlJbFSNxUruOV2lTnpiovtU6hlSV0z1CnGc/SoWZ2cszFm9STk/jVogtlgSMMx+v8A9erDY8kFscjGQc/pVeGMuVIGAB1HekkWRlC8ZHA47VD1NESLyAA4yTjp/nio5NqEgHIPeh0l+UBGwvI46/SmSiPnqTgZBoQySHAG0ruVsYJ5x9KmjihZjgnA65P8qzxMR8uAQDx6inyu4VSzFT2Hr7mm4iUiU7QzbSSnPU9PxphVGU5Yg/SpkaF12zsUfp04P4iopSkbfK6sB0xTGRtCAeo9z1qMsq5B5q0zDYSCSeuPSoSiycsOnPpmhPuS12ISc9FNNZsA5Xn3q0y/JhBVdvlJOD+VNMViFGck7QT+GaUM+cYOakUncMHpzUq45JznvRcEiJVcdSBUkaEMDvGOvpzUocY5UGllkVgMABsY+nvSuVZAF3D+LcfbrT8kI2CfYf4VErZPIz+NLlhyccD86BjBGCcgc9Dz1qbYVTPbpUe7JHAzigl2IJJz29eKLhYsRBWIEhAHAz/Wt3VrWGCOAWLQunkljIFILkE559cfSuYIZcZep4pGZdipuJPfmtIzsrWJauzUs9eurWHyorq6SNjnYrsoP5fzrtNE8VF5orJ7/UUhcY87z5MoxH8WCSVrzdZHaVQhEQBGWAzj3x3+leg6Hpkc1mtppPi4xm6YqUj0/bLkDgFs7gpOMckdfxuE53ViZxjY6zVvFVpY2DsPFbXcgO1Yra2dsHjnJKgnj+lUdJ8ReHdSkM2oan4mlgwTJbiVbaMk9uHz29a4C98MXtjfS2uo6lZJeDLMkk3I+p6A/qax57UbV3XgcDAVcn9B0ArWU5X95EKEbaHU+KdS8LTXSnQdLuoY+mbu5LnPPOAelczPMDgACTByRjOD6VWe3ww3EsRx9BTwithcLknHB/Uk1lzX0RpaxGGJJ2qQc4J9KhczAMowV6cGp9ioeGIIPrSJ5aHJBI/x9anbYe5WUOqfOxzTXX0yT6EVNLGCSwyV7c9KZsUL15+tQxoiEbkZxS+W3Ian8HkH9elRM6KfvZP0qR6Eu5IomBIGRg81nkxK+5HIPepJXU54NVmCZ+4ufrVRRMmKzRE5LZPvnmrUanAYZRh2qO1VCSwTJWmgvcTMHyWxwOg+lAkTvdSYKqzN+PA+o6VULFSQGLZ9O1NnaRfkbj29KSKJpQSCOPeqSSE22W0vG27RkZAHHFOMvGSDUCweX1G4etPCsTjGR9Kmy6Du+o9ZGJ4457Cp0dvmyO1RR4TnYfqf8Ksw7XYcYHuKllJELEkMpYcjkYrPmULzxz0NXboooY7iT0zjGfwrOnyWOM1cSZDGPoDTec45oHue/pUyqB1Yf1qzMjjjLuBg5JwMc1oR6aCuWV89aZZusbMwTBIxv9fpUy3JBPzEAdPm61nJvoXFLqAtY4AThgfc8/lSqyquSSQeOaikmMjHcBk96TIwNpGRilr1HddCTCHkEGopM9iaRtx5AAPsaUMQpLdqYiLGMBj244owB/EaeWA6g+1MZgQSMetUSSJIF78ihZgScZJ7VCufTPbpUq8K3A96lotMkMhByTz2qItJKWUZJ6+mahdycgUkErRPlSM5we9HKPm6EhCpxkn+lQOwwQB+NSTSF2JY8npnFQZ5OQCaaQNgMgHjntQAecg8jOaa7HPGcmozIRkZNNIhsJWYEjv2qMcgg0MSaAeDVEj48H8KmUADpVdc5wDzVlc457UDDg5wTT1j45LUsKguc9qnO3YSepHFK40htjdCzvopvIhuAhyY5l3I31r6B8DfF6w1N/suuRx6VIABFJuJiYDsT29hzn69fn19uQOMEZ5q74esNVu9SjbRbKa6ngcSARxFwCD1I6YppgfWVt4r0K4UtDrWnMAcf69Rg+mDU8fiDSpHCR6pp7uxACi4XJJ9s1h2/hzTNU0i1/4STSrBtQMa+c0CFcN3wRz/ADwazb74YeErpWCQ3FtnkGKXp9N2ar3h6HexzLKpaJkcZxlGB/lSN79q8zvPhfBbu1z4d1u7sbkDKbiQA3TOV6enQ1Tl8L+ObVgbHxDI4AwBJdk4/Bhg/rSu10HY9WH1pRH6HIryn7N8ULbaY7+1uiRtw3lcd8/WtnSL7x5bMiapp9ldRseXRgGUZAxgHB7nOKLisdpf3ENjbmW5chM7eFJ559K8A+MMuk/2muqaFrdx/aDuFltk3KIxg/MCMY6c9TXqnif4haZ4fiMOoW11LdY/1cMeB+JPAxgeteD+K/Ev9p3EssOq3rJMcmKSFcIDnK/h0z3FDYGFHreqRkyrqN4HUnH71zuPp6evNOvNc1bULIw32sSvAeTBK7HdjpnAx7jmr2naPoNzh7rxVHbOfvA2j/zr0G18K/DVbRPtfiJbiZV+aT7Qq5PqFHT6c0khbnl3hgahea9Y2ukzS291PKI0eKQoRn3HT/61fW2nNdxWuy7tZf3aAbmkV3fAxn5epr51bwfp0OrrN4d8Z6WFVt0LyTFJU9iRxnH0r0ePwr41/s8ovi+Vi3zLl27/AO1jOP0prQaOm17xZZadDL9rTU7Pphvsp6/UjFeLeJvF1xqTzWp1O4urInjz0jRgfbAyK6PV/DfxFt4iF1Ca/Q5Dqt0CCPoeTXnur+F/EmnRmTUNPukiPzmTZkKPUkcColzMd7GNq8bIwQlnjUZQls4B5x61mADnpnHpVtiNzNK7Efic+xIqB0Ro94kUHPCc5/OhEvuIE5z+fFPiZFPJPHpxmlgJxtGCT04qZnUsAY1yoxwDyfU5obAR7iEqTsII4HzZqvJJ5hyAM49amBiwcqC3fAx+FJtjIIUAAdcGmgepWUFWySM/WrgutkQ2MjnoUkQHpmoJYejKBhgMH6cc+lRrDITkgYBxknj86NGLVCFc84Az79Ka2MEOG3YqRlKrgquaZIhOc8dqaEyKIHnkDFSOvyg8dKSIkEg0pHp1qhDR9zGOhpzfcOeSKUjGQBwKjc9aSAiz1yamTAX7ucCoPWp4ELAlTVMlBwygYAx370uxOcgE/TFPTCkgjkU549wLKQCOvNTcqxXBGSAAKU/WjAz0zSjHemCQ3n0NOGcc5pePWkY9eaAtYbjnNKHx1xTMjnk0mc9DmgVywrKQemfcUdMkAiq2DThuHQmiwXJi7d+fwqMn86T5yO5pPmHXNFguNOMdqbxzSnPvSdqYgwPSkI9qX8aXBoCwzpShhnkClA5Ioxz0piFBB5FFJ24xSbjQBIgUthiefSrUIRVO2eVD/unmqkUzRtlf5ZrQi1PKFJFHuQaiSYiF5GyQJmce4pdxOeB05zSNIjElSMH26U3IK9uDkc9aBj42AfLYwOOKvqV2E7SAazkxuwceuatpLtXB3cj1qWhMe23HB/XvTduFIG7/AApSR1EmD7im5fHBHY9qVgKs7nd94DFUivJq7cKwG8sOvTmqffrWkdhh2xRxRRTGNApR3oxS0xBTc8UGkoEAoNApaADNA6YNIKcDQB3enhpmBndioz3zg1qLEkasq+nB9KoxWkkecgL/AMCzn/OKkjuHUYKqR+I/WuJ6nWtCXyWwXZsjI59KYZRlt2SWGN3t/Sny3G1FwR83X2qGF2LlT/Fkjv8AjSGGRIRjOO1OQyq+FAYDjnvSQJmQqeNp5Pt/SpIsuzAHhe+eDQ2NEqoMckKe4BzUQLqxAPHTNSHOPlzgfzo4OSSckfSpGMGScFx+dL9x8sCV7gGl8vkEgZNCjkgDuffJp3GWIbqNGC5G317/AJU+RopFySOeMGoUh3tgqAenSrJsC6EAjceRSsg1RnSwhTnseBUBJyQCPSrklq8Z2kHHf61CsarnocUJisxIIfNbBxjGTWpDDb29u5PLDDfN3FU4pLcKwfcCRwQMYqyt1b7CsgV0xjkYqXdlKyRveELpri5aGKFIowu/LEnJ6cep5961r7UYbKdbS3tgcrmST7u3P+yO3vXFw3IRw1tK8RX0bOB+P86uw/brs74i0zsuAe5/KplDW5cZ2Vj0XRxNbWAmtdbsnDDAgcn+Z7/pWPf3U828sUD5+Ykg5x9O1cn/AGRrCyxpJCA0h4Vx8x9+OcVu6XoHk3Zt9WZHlkGYo4XO5c993THtyaycVHVs0UnLSxUgedJD52XGc71PNbum6rat+4vbqfaB8vlrgqe5IPX86o3dlFYK0Rk3Edywb144/nWcnkhWc5cYPDH9KGlILtaHXX/2Kzjt54L+GfzOQpQqwHqe1Gf7QjaZtQVHwNpbBBxx09PpXH2UyhSiSF0zgKOMg9j6VbsZo7GfF0svkEZJjb73tz0pOFilO5tXts8FkZitrIoO0tHIUP5HjHvVeB0aAhvkZhgFWBwfQmm3ktjeoHtyzrj7npU2mjS03QNJPCxTKmQADdnpyOR/Kp6FleJrdlI8woxGDvIwCPf1rP1JFWBjsOcDHGcgj9au3SwyxyLIiLnKl19fU4qibiSGAQTIzoikK3Jyfr6VcSJI5o+Wsj7kdWYYxGwXd7nNJHbPKd4iVyeDz+vHBrRLxRsWMag4JyUz17CmRXyxnKxFcZwQc56810HNyq5Xkt2LuiohTvk81RXSwHLzv+7zwOma1EJkPAfJ7kdc+4qKVIY5PJntm9QS2Rj1pptDaRj3MtmjbBlgOymoluEPywqqDp07Vrz2sbQNLFGqrnB47jpXP3GPMIJIGfpzVqzM22jds47KNN888Zkz065qXUIrNlaS3uCij+624fl1rmY1Cn52OM44OalMhAZVbg/rQoWZLd9i9MGEWY5t4UAkfdyDVR5HXJVjyPWiGUj7x4xjpnFIY2ZQFA5OPamhkJkdmXcSx7ZOa2LJhbsnnRrMRkush4x6ccg1HZW0Kk+ZPCjjIDNnBHsccVJcNCItsTo5B5wTz9KZA0s13cSrabo0OTsViQoHuakSKO2UvMTM/AwTwDVnS5Yhp0myMJMXwzY6rwcfpVabJmAULgjjke/X3p2C7FeYysXkRSe/f8Kla5xAQsaADPIH+NUS7ox2kUquzfxcc8U7BcmeeVmWNdyhcklR978P606G7diUOR9cD86gd2jhJLEkEAcCo1lQSZbLCiwNs07eaRyCACB056/0q7JdhoyiIWK+oPFZsMqtEWCnGMDgf5FOJ+Qxq2GJzywwM/196QXZpWcwCB/48lQPqOuPxxT5rhwGZdu/nPbkVgoWDkBjj6VbdXjhEZbk9Aff19KYncmYlVyQFZhkBjz9c+lVJyDjL7cDLYbOT6j3pJ1Zyd7kgDbgegqFY0bPykj3JoCxEzJh9pJyP85NCRkkkKduMc/41ft7VG3bUUqvJq1HbIwLCMbDwD/jTuKxnRR/KeRyaJFTHLEYz39Kut5a4AACDg471l3kgMhAHsf60XASZ8HCAciom3NnJpoYkYGPTk0iDOcHvzSAAh6E8fSpfur1JApgYnhQPQc5pVDe/HNADX3NwuPxFQSLLtwe3THNWxxjA5659KY6gg9f8OaAsUgj9wSBzSiFiDwN3YdM1Z3HOF49eKSRX8v5s4blT9KdxWHI8f2dolUhwOc+g5rPZOwPGetXY4jzzuGD+NUZFPmANnk00Kw9Yyc4BOKj8p2JwO/at9bEx225BuZgKqlGjP8Aq3XjnK5xV2JvczDbyAfNwD0pyW8jHAX+laDTFlwAQw4OQOntTfMGVRiAxwKEhkMdm+7DMQAPrn6VBNBIGYlcAcCt9zbQWvUFsYyMHP0rFcSSqWzx6nA4pO3QUdSOIgLjOCOo/GlZhuwin65oK+V6luDx2prHrwTxnrUlEw3Bcud/1xx+FPEqAHGBn2qpvz94cY9aaGIPVcUrF3LRZWHc85qvIu7oG456dKVJNvVhjvxUr3Q2FQpbPrQtBNlPbnqy0wrgnJB+lPIBJwMZpnOTiqJFHB7/AJU4L0x2pmTSgnBPTn9PagCUgA5I7Y9aTmT+Lj+lRFuMevtSo2PX0oAcVCr1B/HNMDcnFGByRk4oCN7DPvQA4yHYRk4J5Gf1pqHmmyAhiKT6ZzQBYBXcN2e3erEtxO0PlCZmiHRGYnHqapozFduOB60/zFC4LcjqKAQ+1wu5mHFXbQc7lUDHXnNZsO9pOCSD1rZjVNnUIw55qJFx2JFbIyCeD+dG4dOT7f8A66RWzwWHtSlBIDty2Bms/U03GrliMDaR7U+RVYgsTk4ycYFQ7wjEDPoRipUbJ6Ecdc9qYELQxZBG7I6jrmnKEVeEHHPAod2U8d+uaCw2gnP5Zo1AVXHJC8jkc0ZJ3AnAPX/Paodx5xjBpwZgDgL6H3FOwEgnKLtDHAx/kVDJIGPHy564HWg7iP4aRk4JPNCVhXuAU8EY46etSlckkgE+p5qDp0GOPSjJH8R596YxTb7snP5k0ghUZzgdutOU9sfrTxtyCSCPSi7EkiuygcleKUBl+6Tz7/41IdrH5Qf5UvzDnaaLhYYCxGCefpUbrng/4VK2cc9vamHoc8mgQ1QvYdKNxz0/+vQmSM7ePrSnvQA5TxjjNAzk5pifqKfv+XnHHvigoTb/AJzSB1Bw3alc4Qkc1FCPNYlz7AZoJLEZDcg4qRwz9fz6fyqBFVT1qYMBkLQUhBbsevSnpAysCB3471EZGHQnA60sd00cgYqHwf4uapNCaLl9Zx26I9vP5kXy7mK7SpIzjn34zVvQb97K/hmiuEiaN1kHXkg98c49qoSai80TKWxu4KqBwAc8UzT7q2huka9tWntwcvGkhjLDB4B7c/WtfacrvEnlutT1TTdM8LXwubzV7yxjS7DHzBdFXjf++oPOfXOQa4DW9L0+wv5UsdYi1C3TJVthUnnpjpn3z+VbmkX3gnVITbX9tqOkXCHKTiX7Sjj+6VwGB7g8g9OKyNYsbO1mbyzNJCTmOfyyEkXJ+Zc4I6e/p1qnNT6IlRt1KUcsDQ5EbLITgHcMfTH9aqT7VcjACjnGeal3Rrj0xn5TyDUMrqSRgk47+lZrzKvYEYMpDIcY47Y9/eo2I5wf1qF5H4UscDoMnv6Um7HXoaqwrknynIOSPrUZdUJw31GM0hkABGB0qMsW6EVDHcHmzwtRJIEySCSaVo2xuZsD6ZqF+p64pWQXZHNliTu61LaFOUaMFvUjNJGi9ZAcdhU5Vki8xFXHf3ob6CS6j448NgFQT6Dt9aWaS2t2yPnbuR0H+NUGnkbgN68Y7UCCZxuZQoPTNLl7j5uwlxMkr7tgUn/PNOt4T/rGPy44HrTlgRcbQWbuanCEjnt+FO/RCS6sblmUqvGeOT1qZVZQMDkcZ6UyIbGOPvDqaHduSD0PfipLJjjq7A+tRykjDKwwOneq5kxnLDd361A0jAHLA5/ShRE5Ervn72M9iearSPkck1JtP8Wcn1p3l55wAOvpVqyJ3K20sBkc04pj0JPtUjkKOvHaoTLwdowMU9ydESF9oAPp0HaoyxJJH4U1VLHocVNHGcn1o0QtxUZuoXODzVhWG7IU5NMVCAeB7UBd2QCevpUuxWw8uCDgc96YWGMc+nSneUwz8/14pArKchqEFwWNXOOfyoYbeABTt/YpkkevWl2rt4Uj1piKzZ6qeaackck5qZgMcDr7UzKqCSOfyoArudnB9KSJvmJANOkYOeMioPM2thScninYVySYdSKhUnsDxUhy64JyPpTCu3sfahFb6iBsdDihue9If1+lGcH/AOtTENIOSBjA/SkVT0pxHv1p8Y+cA5x09aAFjQ9z1qxGMIXKnbSouTgD6VbgwqYfA9utRctIbBEpVSDyevtU0tqyRZYqQDwMigxxFMqTwenNEWYp1kgYB1wynHQg+nSlcqx2vw++HN14otWvJrn7FZB9ikx7mkIxnA6Ac4zzzXveg6LY6DpsdlpsAigQc9Nzn+8T3PvXk3gvx9qD6vp+nXDxyWfCSMIMFAfpxjP+NeyrIrjdGQwPQg5BrWFmroloeNnOUNGVxwg/Gmhm7MaTdzyxqxClx1Mak/jQJF7IKAyj+M5+lLvzxuH5Uhi/aD/dXHsMUnnITyoB+lIMHqR+VNdU9qYCXSJPbyDZFK23hJRkH8K8L8Ua/pUfn22qeARDglRIuYsgdwQuc969yIWopQkiFHw6HghhkfjmkwPlma78MSSfPod/CGwP3V4Dj3wRyfxFa3hrwr4c8R30djaaxfWd1IC226tVIyO24NjP5Zr3yXQtJlcvLpdg7HnLW6E/yp0Oh6RC6vFpljG6nIZIFBB9sUkhWPHL/wCDmr2lwp0u/tLsLzljsK4PcHj+ddRpPh34h2VnFCniC1RUXaqO3mY9iSmT+Zr0qea3s4N8mViHXYhOPwHQVWTXNHLRqb6FTISqByVyR256U+VBaxyS6d8Rdjj+2tIJwQD5PT/x3rXH+LNW+IOhWU39uPby2cmULRwI6OD2OOf0r25fJfiORW6cq2ev0NVdVeztrCWTUZIhagYfzQCD+B6n0HWk15jPkG5YvuJt1jXOfunvziqisoIzjH0rv/iVNoVxLHd+HbEJCSQzhyqsT/0z6j+VcCy7mYqCFJyAT/nNTaxDJ0jZiPLfj27fjTGDCQ5Y8nB71JHIFUKVwBz9ashiwwIg2enNSMzyqRjDElifSk3L0TI9auXIQx4MODxznFVw0e0gxke+6mmKwzzGCjaCCPf1oSY8+YP1p8wjKZiZiR2PaqZYE89aaVxN2LW9XUqfpRIBjcBzVcttPGcew605XLEYyD2osFxXChgQS3c9sU8YPoKepiU/vcnuMcVE75bEYwvbPNA9hJflHIxUR6HJpxLEDcKYOW4JprQkRE3NjHtVhFEYwCM0kceDnOD9KeBtyc/XihsaQpfucUjujD7vP50wsMn09KazDtnFIBNwGaaW9KMEk9KMeoqhXE3HtQ3I5zTgpOSDQucc80WAZtFNK4qdUU5ycfjTWQA8UXFYiyR608Ske9KFOOlN2mmIkE3HT9KYXzzimEe9GaLAKRycH9aae+elKpHcU7AI4NAiMd8gU5emB/Ol2j0pNpHNA0B+nSmeuaUk5oyaAD6U0k4pe9B4NMTEzyeKSnYpOnpQIenQ4zT+fWog2KeGBoGODEdz+VTCb5eWNV+OxpRmlYCbzSASZD+XWlEsZ5LEHt8oqvSEUrIRJM+QArAge2OaiNGKQjrTsMUnNL2plHNMLjue9FAJ70UrANpKcelJTEApTikoFACnFNOKPwoxQB6q7uqFpBu2/wB0VSlw0bBCMnnv65xirCXFmxAjPOeOepqxLBjO3oc5zzXAnY7TLaNwuSRgce1LAwY4LkYHI9afcqCCI+HHP1H0rPV2EmSOB07Yx/npVJXJua7QDySsZGT+NV4w0DMXTLdyDnH4UwXhQKwxnHJzwasW0klxuYrtQjrU2a3GrMWORZOQwBzjrmp0UAHaAT/M1Slh2zZiGGYZPoatxEvwvUDk+ntSYxxI2nIHpVZ32two6gjsKt+WDk7jz1+tMa3BAOTwM9eooQx8V2COU/CrazrJjaCfpjis6BVDkAgn3qVS0Mm+MDdg9RSGmaDbVT96RjOdxOPzplxFb+Tu+XJ569R61WS6WaNlkUAjqD0+oqJ44yg2syA8YzkE/j0osO5BcSqpIjA9/rRDEXQHcvJ5zTJ4xuG0HA4bjpTMqDweO461VtCbloQC3lCqQMg4I7fWtfRr64tp4mSZlUH5kQgZFYm1ioMZ6cgZ6CtqwunjiJNsGCj5nVeQfxrOWxcNzvvtVreabeyx3xW58sKseArIR7nsRXCX+q3DzDy5ZvNxtVicZxnpjjHtWo+npqxV4JPsqhQZATnJPAPqP5VTk0nVdNd2uLR57SP5vM2fK49frWUFFG0myvLcahaIpvYxhzgdjz+lThbe5gZwzCUDOMgGojqlr5NyrQeUWI8vgkY5znP/ANaqFnfpBKyqjkYPzOeSfYelaWb6GbaT3LEnmWhLrG7hvvL/AIVNaS3SlHgb92p3FXGcD+ea0bLXYp/kKjJwu4A5X3I9KmvI7a7iZ4WLzA4fnGR7EfpUuXRotRW6ZFqOpLdSRLBFCiKBuIARicdDSwXE+DbxOmJOqyncPwJrBvNKlWUm2lZS3Oxzk/8A16roL63KCWI7jyuVxnHf3pqCa0YnNp6o3RO0dzJHdIpVR96Nvu89D3rViSN7VSchDnbt5Of89qwLSdZ2eRh+/QYePj5gefzq5avPjMZi8kKdo6fkKUkVGRYuNOmeM7lBPcdMjOawbm1SOQgyhMnp3Fb8F0SjhC6uT86nnB/H/Gsm7hQu543dfWnBimluNi2xIqSyu7nrxjGfSs/WrwQyRJ5TNGRkFj1OcVbWVpCRLEGwMKdpFXFsvOtmZ48jH3Sc5/wNaLQyd2c+NQlkySECEcD0/Gsi53sxL9+9aus2aIN8Ee1gPmUcfjis+yguLqYR2sLzSEfdRd2R+FaR01M5X2Kakgkkdqd1AwRit9PC2szs3/EvlQk8ZG3+dTSeENYswn+hmaR/+eZDbfYn196rnj3Fyy7GPo1lLqV8ltF94gnPX862fsNvp1y0F2kMkik/PuOD9a1bSHxJY2z/AGbS/K4wWCLn/Emk0mxupL4JPaxxK4O98HcPfOOtQ5Jj5WZMl6EiysEQhJO3d3+g7iq4FtcjMeI3zkjp+VdZe+C7F8tFqU24DhZEzj2zWb/wjF3ahihilX+8COn40KUWJwkZDE28QWIZGOTjv64qmzEluRknt3rWvrGWBQHVkB6E9/x6ViylVyCRkVqRtuOzg5NI0wVTkDAFVWlLcA8ZpyRvIRnOPpQFyZXaQ8AADuakjEKDO/LZ9Onv71WJ4wo4FC8seuAOPc/0oC5pxiKQMVkbHGeQKmjgXnCErjJyOtZFqzRyb5UZjnjHarD6iRlYldmPqen5UrMaaNGIhJQxUMFIbHA4HY06Ta8u9CX35OMcj/61ZkM5XmRVUkdBkmnOGETXKoyNuwg9TRYVyeRxkhRx0JPepoIS6bjx25xzUGnxE8zkMx5HP64roNOhARppwoUdOP1+tFrBcZa2pWLcAcAdM9cUy6vAqeXGgwvBOetV9RvwQyRO3HTb6VkyTsFI3Pk9Tnr/AI0xE00yncADk+/SsqQvuILfpUrcgks3qeetVW+9wSaEJlmIHZg5Of1qVY1K8gY9qii3lecnjv2qaPOCNw55Ax1oGAwAQCefwprfKOCTmnO3brTVJ5wMUAIpZh04peB1NPC88gcUjjA+ZfcA0ANeMKmSwye3+NNRfMbnoOn+FMkkA4zz370iKx+6SvekgG3AfPGFXqOOcVUjuTDMrKAzL03jNSzI5JzLjuc1UZAp++p+lWiGb1lrssjiOWBWzj7nFaz3O2EuYzk9EbjP1rlbCSCCUPIC7j7voDWrJfiVQGyuT/nmmKyHFeHk43HI2AZx+dZMqw7ch2EhJznnn0xVuSQHeVIJHHNZ88ah/kIJPUZziq06BYQcrjceO3rUokXYFxkA5qBcR8ggt/KnIBtOcdf09KkdiR5MkkEZNRFj6+3SnZGOKMj2pFEf0oz64xT/AMqaV9xQAmeM5/Wk3etLtGKT6daAAn3ppHUnpSnpg0ox0FAhowOgGaRjuGDintjB9ai3HB4piHDJIFBAA5PNNDeg/WhSOTxxQBIsZIJLdeRUh+6FGBjvTYdoBLZAx+tSr5e44Xn69v8AGgCrJyc55HFLHGW5BHFPkCh2UjHpzili2qclivoQM0AEjCNGTO4nBwOMVXRSzY7danG0tng+vNKyqFwpGSOTnr7Zo2AS3GJCRnAq9CGK5LDI7Y7VUto/n2g+pHIrQHMW1yAwOOKiRSGpLkY2gnrUsUhj6KMn/OKiCfKDu57470Kw28g5/pU7lrQccZ3BBuHJFOi3lmAOc/w9cU04IwTx60sYKsCM88DjNMELIpjyjN8/cdcD296YzKhxHnHc0OC0hLngn8qRY8DJ7n60l5gPUbwWGMe/ak3rzgNkUI4XIZTgnrig7OQrMvrzTKGq4PGRmnlsDnPPFQRsFJyDk+v86shVKgOh9aTEiFiQf/r0znnGKndY1Bwg9yQKj4XO0D8sfpTQWG46kMc0obBOF/WplkVgFKg444FWYLMXOSTswPzpOSW41FvYobuSG6DnrTRIOehPQVNNbmOd4mHA6H1FM8sIzEgYp3QtRnr1FPHlhTuyx7Y7UjbewH5VGHwSQpoDYa+8sSuBjpTt+0DHUe1Lv9v1pSwIzjFAiGQl8ncMnjAGKZscdqlbDe1GQODnFO4WIwHGRgdOalXgDHUUwnrg8fzpoIbOAcCgETBvfj+VKVyTjPrUYJGQAB+FLuKjhjzQApAI6DB/CkeJcEhxge9MbDjBJ9qb5Q7Ofb3qlYWoeSCrYUbsg7i3SrCxorMRhz3x3I789ahkeV4UiyAEJwQOfxPeiIlHyAeBj61VriuaGiaXda1q0FhYKhuJ3CJvfaCT2yelekS/BnxfG00El1a7LYhc+c20ZAORxwOeffNeceGNWn0XWLbULUDzrd96bsjJz0OOcdq+iPDvxE8baloX9r2+n6PcmZzBGkcn7/I/6ZA8gYJ6579Kl3uM8E1bSb/SNQns0uI52jOxmt23q2PQ1kuZFJEiFCBjpjNeja1p2oXni69hmEen3zvvkt4o/lViM8YJA+nasbxHapody0Gp3Ek8hA3iOLjHXAY8V1qleCbZk5a2RyLqGUYIyMY5pgLDcuAQO5/zzTrq6tZJCYIGiXP97r+dJt+XcJFIPasHa+jLREWB64pjScHgce9SYBTBX/69CqiZZk4xxUsNyIT9AFbNTpH1aQ8jnA/lUMDmSQ5J2dOOOtaUcJTIIU8DtWcnY0irmPcGVgSUIX0qRZCbQLggheffmrjXEUchBKHtgCoZnAiYRQlgemQeM0X8hW8ynZRGSU8njFXZ2P3ASQBil02MQxMzDDs35UwjLsDyc5P+FDldgo2QRg4yeg46UrFRwM4+mKGbC9s+hqq7ZB9zQtQehOsi45K/409LpMZcJn+lZ3X1z+VOZSQcZxjB4q7EXLMm2RuAozz8ppnlRjkEZ7561V8k4JBH5U5MqCSev60MSZIzLg45P51WldhkZz+lTPnGQOe2BVWUtzkNk0kDYgYsQCKlSMsDjB6duKjjjbPNWUDIODgD9abfYSQ5I2C89DUqIVXgfp0qISc5PUdKRpR3ap1LJXZhzggd6jVgOcHNMNwMY3GojKOSrAnPrTSYrlr7RnPr/IUzzVBBxn8cVX8045HX6U1nDcEYA/HNOxNy4ZBg4U4+ooLA8gfNVQTIOCxP4U15/wC7kY4osFyzJIw6AMO9MMiMvORVNpHPc4qP5yeSMVVhXJZDljtzgdKdboGJLE0wcKfUdKdvPA4oGkT+WmT84wAPXNJIw5U4IHfpVdi5HOQKZz3JpWKuSNtxkHiozz06U9VO3GPxpu3Ax3poQDrUsW3cM5yelRqOeetTRR9zQwRPAGd8DOa0RH5cW9thB4+8Cf8A61QWUJBLN07+9OlVVDE4bJ4H+e9ZM0TEkkRsbT06Ve0nTNQ1m8EGlWrTy4yVXsPcngDpWfbwGV/LjKqW5BY4x3616N8M21rR7hrmy02C8ikHlyrFcKWxxzj1wc1UVdhc6HR/hBCbeN9W1SYTMP3kduAAPbcev5V6L4d0W20Gw+yWLSGINnMj7j6fQdKmtLlprdJJIXhZhzG/VfY44p7SKAckD68VsklsIs8kZJFKFU9c/nVVZM8hgRS7z2pgWxGh6bvyp4iHZj7VTWdlzgmnC8cDk5+tICdoz/ephjI/ipv27PUClF3GRyRmgBxj9TmmHaD93j6077THg9KaZ4tp2r83b60ARsynPyU3K+hp0EjMp88R7s8bAcfj70/CnJGPxqgIsgcjNQTwwzMrTwxyMpypdA20/U9KtlTzgCoyCOwpBcRZGUDGB26AYrjPHngy48UXNpLBqbWiw5DRiMENnvn16+tdng9zTJpIreGSa4lSKJAWZ3OAAO5NDA+dfF3w81rStQkeSQXtu+Wjl3jOPfPf2ripUEU7xuwRgSp3D+g+lesa98W7mHU723tbG3mswSsErAgtjI388Y9sVyPiPxrFrelRW91oVglyrbvtEY2nOMZAHPpkcis2k2TocgCD0/nThvHIYgfWmLjBOeaCeetSBL9okXgEH8KhYlmJOM/lTJDk8elR7m688dDmmkK5K4bOe4qIh2OQP0p/ndM9vWlDK3QketUiXqRgOM5//VSZODxzUgJOVXPpSkhB0Bai4WI0+fO7tTl+Ykg4x0pJHyvp9KiDdgKYXJNx5BOe1TxRrHISXWTHQrnH9DVSpA21cA0mgTLMjZPBAFRZA5LCovMyDg8imbu4pKI3IkduT6UxecnpTSSw5pyLnOQaom5Ko45IpeO5pFBJxninBQOc0DERFY/NkCpDEozgnH1pYxwSSMDn60xnzkDt0pXCxKkBIyACPrSiPAOBjjrioVmkUDDmnG4Y/eJouKwhTnJz+VNYDHGPTpTGc4zn8qjO7J5OKq4rMGXnrSbBjrR25oHei4ChAc0eXxkEUDdnighu+aQCY9TQCOnNJj60q46lTQUBxk8CmlRmnHBPApMHnigVhuPpSkfT8qADyeKQZ5piEwMUm360/caQHntTEIBRxSinKV74oAQYwaXHoak2LjjH50gTnHFSMaAcdOKT2wakCCkx9aAI8UFfandzzQM0xoYVoCjvin84PTNIOnNFwsIVpCKf2ooFYjxTakpDQKwylxTjSdKYDaMCnfhRx6UBY9QW1tHyBGAevTFNhkkinaEncoHHPK//AFqsq6O+VxxxzVO7byJmZcfOe/r7V56d9Gdj01JLsI+GJO0E9O+KyJVDS4BwT1q55nlbIZMtu6e2e1QT2zF8rgZ9/eqjoJ6kMEXmMxc4C+prWtmVVWNc8VT+ztguB2wQeTU1o5DEE7c5PrnFD1BKxZlQbNxYqRkdM1Xty0bbRyCfzq08RZGKkbmB/OqIilifuwHWkhmgWGzLPgH1qpJNGjEF+D6ZIqVZIiuGJXP94UjQo4+UAj65oStuMrxyxtKcbTjpk1Z8yTg7Vz2HrVVrUb224XaPXFNjkkB2yMSx5H/66dl0FcsOryFn2tzweKkiWRFxklT7VBDNK25dxwDjHtVtbgWyhSFwTnd15qXcasSq53AyYPy4BrPmjxKTGmT6VKN0hfy3HPOD/jTCzqxD8enehAzT0zyBgyIo7YYVqTalax2/lgjyyRkAelcsJpN4VAWB4PFakSsoVpFXBHqDUSj3NIy6I67wu8O4zxKPK6FH+bfnuc+1dHqV1aX0C21wDDwB5iNtxjtjpXnW5FUGPB4zgHFXtOlupbkP5CzoBnaZcVhKDepspaWH63pKzTxLavK38KiTnfnpg+vtWe2hiykSS+jYqDzG3HGfTofzrsIdUnt3VX08JjhVD5OfUVS1iYLIXvIGIbkbxgg+lOM5bA4RepiT22lSQQvbQiOQk7xv+6Oep64qrepb2bw/Z7tiHzllHyjHYZ5rV07TtO1CUk3RhkZsMjnhwfTsaq6loRsHCSoU5O394MOPUdqtSV7NktPdIri5Z4V8pizA9TjkfWorlp52Dq7M5GxkPG0H0Paqc9jJbuWjikUH/azn3pjT3RUEByQcYPHP9atR6ojm7k0yXEL/AGlUZGGAehPH9KlN7ujGQ0TZBPyfL65GOhpLRxIhW43I/ThjwfXmnv56I6gLOh4BDbSP6UX7it1RKlwZf3Tyq4Jyr4x+GRQJhCxSRQSBw4OQfxqrYRNJMVit5fODYYBckZ7+ldRp/hyWdna+cJGjfwnkj19v1NJ6FJtmAZIXZVCuJmH+rII//XV6DRNTuFBiheNeu6Rto/x/SuzRIrVI0ghXKD5XYZP59aqTzPKSWlJHfnA/IUk2Dt1M5fDVq0YOoXBnmx8yx/Kv0J6n9K0LG0sdMjKWkcMAP3tg6/XPJqk90uGwRtHfNZ81zLN/qgAM8d8/4VfK3uTzxWx0zXlsASUDY/iZj+gqpNrBRSIYwue4HX8656WSdU2s6Rf72D+IFVnaE586+dzjpnFCp9xOr2Na61ifBzMqgZJB/wDrVRm1WRgFgyxPVjxVAz2CIQMtjrVZtVgjJWJDj6Zq1BdEQ5vqy99vdSTJJKxHULmtmy1qKGMeYHkZuNj9sVyL6zICdsSAD2608azLjcu3PfGOlJwBTsdDqtsdbESRsIMHGQQRzXPaj4J1SMsbdorkDnCna35H/GpYdYuMZDAHsQK3LDWrptoMi9OdwzRecdhe7J6nAXemX1j/AMfVnNF3yynGPqOKfDyMjqwwD0r1T+1kCfvQJIyMOBnH4g9qrSaRpepqzLAsTZzuQbf06Gmqr6oTp9jy/bg7WHIzTTjkH0rpNX8Ni2hnuLa580R8sjKAQM9j0Nc0PmbapzmtFJPYhprRiyA+RhSOuDUu1YogqAAkZb3ppj2HnPHftmpoIyX3yozxjJ4xzVEhb2csoLqvBx19PWtKURxwJEGAVeCOvP8A+us+WRXkzHKVAOPudBVe7zBcFZSpPByM8g+lMRrJqSW+VWAs44Vj2qtNqdxMzbncAjG3tis+OZzgjHHTtxS+YTnJJosBI83AxuGOlRPLkc54oAJJGD/n609YRzlunPNFguQZyTgUqrzn06VLgA9D6daepXsvJouBCC4J5AHrmpFkPRTz3zT1Rscr16cU2S2K5cmgY8OMlcZP505gecD3NQiJgoKscdaZudWOS35UrDuWAGJOCeuOKHYk7WJO38aVWR13EMvGN2cfpVe5ZWYbWJI6npk/SgLiySIuScZzVd5mOcE4NM259aa3y1SRLYjDdnPeonTHQ1MilyQKlaCJc7mJP5YpiKaqx6VMJvLUKMnFOLKMrGOR3P8AhU1zp81pBHNdRvGZfuBh1HsPSi4WK5kZu5HbrUZIHQ+1IWPYcVNZWdxey+XawvK57ICfzovYNyAHGSQafGVOS2KkntZbeQxzoyOOxGKjKYzmluO1hWZc5B/Sm7hzSEcUhA6UWC44v6Y/OmbvTk0bfWjaO9MBCxpCfc08qB0pvXgmgAU9uaM9x2pdoA4pozg5FAC5OeKaw4ySM04ZA6Hmk6dBQAwde+KPoeKccngjmgKWOB1oEIMgdafux1znGDUixFvlUEnjpTXiYDkfTNAWIWY45PJ96swIWQK2Sp7D0quYmLDIwalRdgyH+nNAEch2MRHnbnHIpodmIHftipSAxJbn1wanjjjVRtzkj0ouNBEAXLEDA9qswjPrtY8e1QRfeIB4zVlWCjgHAqGWSANzlvkIxn1pDlEGMHtSBy/QgAUu4dCw9qmwwXI5yMA55p0twy424BwOn9aN5KlVOR34quVIyTj8aEu4XHh95ZhnP5UCVs4HOKE5GWPAqQqGXAxn6YxTBEbrK+Cx4B44pykqpB6n04qL5iDluB/OlMmMDgA9aAuWF5Azgim3BHQ8E+9QCQCQBicHHtipJSpU8ZJ9iKVh3uhp2eZyxOasFUYZUqPYGqXseDUh9n/pTaBMtJCuOZFAHvmkZtuQjMce+M023YqMhwCeOTUbodzEHJJzmptqV0JFDNknO73/AMaZJHxhyfzpi5U5YMD7UM6scEnHfJqhEbKq5wePrTd2chck+wobbnjOKFxk4zz37imSLhh94EZ6UL6DGaDknAySPelCnvjJ/WgojkYL0OW6n2pA+4HgKaVsDoAT9KbuHcDiggOGOTzgU5M9CBimhzjgHFLu4OM/4UAOXIb7wyB0NLt+Y5xmkBLdWGKQR5yBj8aBjwqHPamSR7ejA01l29SPzppkOMAChABYr05HfmjeuCVkAPoQeahJYdaayg4I4z71aZLRbferghhswDwQcV0/gjQ5vEt3Nb6ZqVnZ3sSb447iYxNMw/hQ+tcazFcgMcnrTd7YI4I+tPmdhHv9r4F1i3it5rW90nzJXKPJJPs2Sr1BJ5LYzz/+uvMtX1BIb+4h1ORr9o2ZFZJspjnke1caZHKYDsFznGT19cU+GTLDcTkn9apVZ7N3FyR3Rp3V1bssfkQJEFyOQGLe5qqjb5CVI9T2qJVO/JAIPqe1SjCnIRfyqHUbKURw5PJ6Copx0znbnJ561ahKtgFRyfTrUd2imRkGd/BH09D6VKepTWg+KNVk3Lny8AgimTPLdBkiywJHt/kU5QvlBdxTI+v/AOunW8m2HCFcg9uM/WpuUuwtvClqdxAL4GeO/saa7MzMXJHOcA0NJhiTkt3qNpcnkUBothw+bOM5HXvTSQCeRgD0qMyHH1NRNJxxmqSJbJvvf8tOnXjNRyRElgCvoeKr+Yd2BnP1xSO7uc7j/KqsQ5E6wygErtPrzTZGkQYbHvVcsy9Px5phO7k0xDyeSd1KW45PP0qJRuPB9ulO2lehGaLCQjMB0Y0Lubr3phySc4qRcjqTRZDHLHz15+vSpghxyw/wqPIxjBpUxnrnmpaKHjtkcfSmMozyAfqKmO3b71C2B3osBHiPoVNN8pWB44B9KVueOcCowzDgHgdOtOxAkkcak4Le3FQO23IGfyqyWJzlT+dJzzhT+VNXQiqORjHP0pOcng1ON2chRTnVmGT9enNO4rEAUkYIFAUKSe9SkY4FRkHNBQ1iPWjnuDT8ADJFCZOehH0oCw3JPrTh74pGOOgNNOT17dBQMkDelM7+9Lz9KOxz1oAVCVHoKkRmY8ZqIcjipoAwbd2pMaNBZPKjAA5xUfzu5LHrzUCyO0mCCw6Va2krnj+VRaxRFu3tgZwP1rU8K6zd6JrUF5YzmEhgsmRkMp6gjv396xWnVH4XLdPTFIsrc54PT6VS0Fc+utL1DT9VgWbT723uEYAjY4z+IzkH2q61uGGCAa+PLa7uLWYS2k8sMw6PGxU/pzXu/wAF9e13WLO7XVblbi1t8JHJID5m49tw4I45zzWilcLnpH2UL91QKQwkZqcSMB1B/GgTHuqn6GqGVSrc5Bpn1FXvOToVI/DNMZkPUKaQFQBT1IFKI0wcMKnKxnqAD9aaY4cYDimBCFA7ilUqBkipDDHg4kH5imPEuAA4yPekACVB2/WnC4UZwagMAHRv1qNkx3HFMC35yEHnB7GmRSEH944dcf3cVUyBnmk8wexouBoeZEex/OsXxtay6j4W1Gz09N9zPHsUE46n8hxVxWUjJ6U/evbNDGfLHiTRr7QbsW2pxSpNtDfOdwOe4I4xx+lYhkXBPHWvqrX/AA7o+vqq6tYpOVzhslWGfQqc159rHwcsZI7l9Kv5oZTkwxyruUexbrj36/Wo5SGn0PFxOvTimtMpPIFa3iXwpqnhy4WHUliDOMqY5A2RnqO+KxTC/OBmiyIvIes2c4AGPbNPWZQMA89+Kq+VIOxqQK+RlRRZCuyVpBz3JpN37tjjnOBSBG5+WnoHUkkDGMUx6lYlu7GgeuTUroWJIHX0FREEcEGgmwhJ96QdaXg/Wl2mmAgakJzS7aNvpQALnkUoU09VGealRB2xkUrgkRonrUiqakC89OaR8KDjqeBSuOwgH0pu8DpzUTkk8k4xzR7DFMY923HkAUKDyR0FIq7u/WpcdASABSYJEaKWb2oeMjJ5p5IzgZpm4ZwAaSHYYFOOAcUHPOM0/b9cUcYIwaoViItxyOKWnY79hSAc0BYcuMU4N7GkAFHHbNAWDI9DSHBOefzpckelIcYoExpzmmn6inHvSUDG4pPqadgUhA96AGke9JT/AMabn2FMBvNH5U/OR0FJ+VBIoJ7U8ZxzUYNOAGeKAHd+ppcHtSqme9LsIBwRSuUMKnBpoBH0p+COhzSE9QRzRcBKaacT7Gl4waYDM0hJp5T0pnI7UEgTSGjFJigQuaM0YooGFFFFAHpyr5cRUj5T070xY9wIkJJJyPoKW7Ksu9SyOvG3GevrTLd3YfNtIrhsdRBeIysJVOdq8jHX6UK8ciZdgrEYBJ5BqcKZBlcgjqOeMelQyQvK2YyrL05x1pisNiW4iB3ASqe4PQfSn2kgkBKoQBxyBTmDNEYmJjJ7rUKzSW/7uVVZQBgr/hRuGxfQllbA4zwfUUx5fKOWzyOQBSwXUUqBWYAn8P0okUnIyCuOPrU+pQz91kSMfTnHA+tTxJtQmLBGciqSrhvLQfK3r2qa2Dxkru+UHGDTAYZlWcxyjDN1p8jBuCD6Co9QtjIu8KVcHnjGR6VDavIXEUuOBwenFPcLizw7BlQVIHUZ6+9OjuF2YkUkYx0z+OKuRrgDcTjFRvbxuPmABJPalddR27EVoFQ5Tg5p8suNzFVbHB5xTrYrGPK2NtXkOopJpFJ2tET6kDrS6hsiRXGzzBkDr/nFKEST70hVuxzUa7I4zlwAT0Jx/OoGAyTEwK/XNFguXI7eGRtkcxMmeCD1zXSeGmGj3izSfvW6FXHr7Vx0KFXUxMyvkfjWrc3t/aqrXUatETnJ5I+lTOLehcJJatHQ65rd0+rmZ7dolfhCgzgDvU9pu1KV5dQnJjVfl3IBk5xjP9a5uLUUkiBBzt6DAJFb1nq08OmARqmZG27mHI9/rWLjZaI1jK71ZBLoE1pOfKuYxbPhtyHsccDP/wCutnUIZZEtywS7gQDGCeCPXHWqUX7yOQXAeWTG4SKNoH+NVLXULqy82DEkSNyGAznNCvLcbtHY6GXSopLQTXUywuw6NyBXIXeYptkbBU6rIDkH8DWnFqwaMQzxh0yTvLHkH0qpcvA8TCBEQf72R+VOKcXqJyUloZzxtNIfMuSpbnJGAw9cUscFxHcMkjKyYABB4YetW3tLk26yqIpEHBzjg1a0vQSh+0ahdMmD/qkI6E9Cf/rVadybWOj8N6dHp9m7RvvkmILkHO32Hrwa1zLGFVI8EZyR/WqQlSWPybUcAAn5sYx7+tUop/LlYswPODjnjk/SkoN6hzJaGjfyBLUnGGPTJ/Wudu7wrEFB64yff0q1fTSTEnjaRgc1hywkyKmdzgjAzyT/AIVrCHcznO+xMzGSBdnQnDdetUtR1WGyjEUbZlHYDoamu9RtrNDFOR5oGCidvUH0rl2he7maRI9iMd3c9/1rVIwvYimvLi4csWOSf88U0KQBliT9a0Ft0XACjIIJOM0rJGqglQc9T05qhWKflsUO0gcZ69RTgmz1JIBJp0sy/dC06BSVyQeD+BpARuN4IB4H609Lclcqo56UgaKIkvKAOmOKr3GqOVKRKAvqR1/CmBehj5HBIB5q6JYofmZguPx/+vXMtdTSfedsfzoDLJkyFs9BzS5R8x0b67DGpVFLY56963NIuzdQMY7tEYD5Ekk2568ZA61wJhUAY5qWF0U/Koz25qXBAps7N/FUenrcQ3ulrLOQVU7vlPuTjkVwzSeZMzsAC5yQowMk9MdhVnVHeYJIWO1VC4PY+1UocEnJ6cj604xSCTuXWDHbjGAM4zVyKYNC3BUKMZ65qkh+QszfKOw5/Co5bosoRcqo/WqJJYNrT5Y4BIJJ9qjvI5S5mlztc8HqPzoto2dgqgls8fWpdWaSJktV4hUZx1yT3poCqvt9afHnOR68VAm48girMSE5+daYh+1gvLYzyKjP1pZQFHzE57VGH3HagJ4/GkA7JJ4B496cGOSMjgZqFn5wc8cYpFYjOOn86ALkZbGVJzSXEjsQOufxquJeckEAU3f8xx9aLDJVV0YgnaR156UGTGQQS3TJHH4U7a3kqWB/xNRAGViNw4OKAGEknknH1p48sA8HJpxAjGOM96jZucelFhCyEEDbnPeqzDGSc+3NSk+lNZSRkkD601oDEikCAkk5x0pjsztz0puMHrTxubGPoOKYiSSIDayDBJGe+Ca0dXu5Li0hWd/MePAUn0x0+nFVIGEY3MRtHJyOv0q94ctLfVtTf7ZIUiUAqg789Pp61DfUpa6FnwVoL6veO0kIaBRwzEgZ9K9N060s9F06a1ZImlc5MigKVPoO+K5/WdRa3tYUgaNFiXau1MZx+lcxca9MAQWLN/ez14rF80zRWibPiXT4pcHCTZPJBGR+HUH9K4270+SHJjBdRzz1AqxLq8sh6geveq41GTONwNaRUkTJpmcT1J7U0dOKtXXlyKXUBW6ntVUe9aEAfYUnPenFeuCaAPU0AIPY0mQOBj8qU7c4BNKQqrnvQAmRtGTTCw9TTiRjmkXjGBk0AAbg4BpNwJIwc04segzinBCVzxTAjU9cdR+NSRqzuMKcDrxQF2NyBjrVqPO3Bxg89aQIkhiWNDlgpPU801xvk/dqd/TPTJ9anjdVJ3E+3epNyFxgD6+n+FRcu1zOmhkAIYZP1HpQlupTEu7n0NWjGC5O4YJ4OD0ppHP0p3FykCQKoKqDgnnmpBApXljkde/FJuOeBxTQWzkmgegghCty5NOweSBxTCeTzTlAOcmmIerY6YzRyTzj8qQjA4xTQe5JpegEynAyCM49KRmB61GW2jv1pA2eo/pRYLj/ADdo6CgTZX/69RkjBppxjrxTsMkLnkDp1poIYHI6e9OWMgdetG0YOMAj360gGooIwOcVJucDZgMO3+zio274IoZicbs4+tADHyx4B4p0chTIb+dICcHBIFNILHqTTEPeUgZG1sH0oS4kU5T05BFR7TjpQqnn3osguy4bwyRFXjAYD1/pUQ65HT3qNYj3Ix9alCBeckg0rJDu2KSvcdqVNuDkcGkyikjmhWbaSOR/KlYoOACFBzSKSOf51E1yR97H5U1bkcggfnTsxcyJGbLHKnNGV7qc01ZFL5z2zQ7ehNAC9jjj2pD9c00t6D60wucnA5p2Ex24jg9qUNkcniowCRzSHPIBNFhXJsqPT8qaWBHQ9abuHccinK3y4A60hjG69DTCvcAVIVPU9etMbHJz2piuI698g/hUWOKkHIPJA7VGf1poBpXnj8ealjUjkGmrnHI5pyBs/jQBNsZlGO1PjQ4wT+tLD8vLHgdhzmrMI8x92MDtxUtlpXIk3IRj86VDsEnnEvmn3Ep+4pHPGKrrCVYlySeuAaS1HsyQAPgx4A92pUi8teTknr70i4UEKOvNRPKMHJ/rQhXFnI69zg1Cj5bB78Ux5CemfzqMtjnjI96pIlskLkFge1R4zySc+lCYJyaDzwO/FUTuIVX1pQhI+XBx+FNHsOlSeYcEDAx7UxDGjOPmx+dM8stnaRTxlzgEDFWERFwSwB744oApjpznP0pvlt2YHvWmvlNJh2GMcc/1qpKE3nCjaD+dFwK6qc9BThxwRzS9c4xj60oXjqB9aLghPzpAvrRkDOScj0pFbkjBpAKM9s0FjjmnZ9QaaRwTzQA3IwcZz70wN8x4HpTzjkHpSLHn7vUGmITkDPP50qnrz39aU7wccUEbhgY496BD12NwrD3zSEY600KV5JH5UhOP4u9Axko+YnjBpm3nNPJB5FIOKAGlMg56U0Erk54pznHY0znGBTGIzc5yeRTQoIPJo7bT1zmnH9KAE3D19jzSdTgetOC+woxxxigBwUdKswqChyRnoKqqTvGOh4qyGC/KOvepGSLMkYbC8565qQyblbHTiqpxjjGaehPQ5wBmkNCeWHwwHA6Yp25S3QAj170iME3bW5HOKbGysp3Ag9c56imBKzfSu4+Fela7qmqTLouoyWNpGAbicDcBn+EA8FuOK8/DtIUWJGJAxgc5P0r2X4L2Ou6Q89zfYs9KmTPlT4UyN2YDqB+X404rUEewQQvFbxozmZlUAyOMFyB1OOM96cPM/wCeSmoYtQSRSY2V1z1U5pTdJ3WtRkuHII8sZ+tNMUnJCCozcDtuHvmmG5JziRqAHMrD7yYpAB3FMMzHq5/Gk8xscmgBxC9wajYR+poZ265FMLnpxQAhUc4JpvlkngmlLGk3t6mgBvlNjrQEwecUu89805fcUWAAccUbhUi+XjkGnYhx3oGQZXPQU7g//rrDvv7fjmmeyjsZoS37uOTKsB7np/Op9Jk1MiZtZgtIFGNhilJJ+ueB+dIDlviV4Hn8SzQ3en3EMM8abGEmfnA+nA/L8a8HngkguZoHILxMUJHTIOD/ACr3D4j+NbCz0maz0u+Ml9MCge2cHysHBye3f3rw5pCzFiSWJ5JPr/OoZEhjhgMEjBOKQkEgD/CpiysMHGahkXGcflSEDZHAz/jTMsc+nU0qk89MVIJI9hAUZH609gImYgADrUTEnkmpSVyQc03gk8HFUSyHGc+tJk/WpvlI6U0DBPHei4rDaVVNSKvenBR2FK47DVX3qZUwMk0KMf8A6qfnAwCMmpuOwxmXBBJ5/OoR75qfy+/NNKEHmncLEIXJJxQVOelKytnPalTBPOaoBdoXAANODDgHHtTfXpxTSwzgipAmRQck00qOuKarcd8UuGbJVT/KkMUD5fUU1iOAAachx1p25AffNAEW2kx61KxU5xgfjTMZ45/KmA3j0oHpSlCKUcDnFNiEAPNAX1pc89KPXrTENKjB5puw0uG6g0vzUAN2nPFJsOepp3PpzRuPXmlcBhQ45BppQ1YV88GlOM96LhoV1jJ6CnG3fHAFTjIySRQ/t/Oi4WK5jYZ4FJtPORUvI6tQG45xTAjBb0pwc96Dk55/WlAz9aAG7jRuPtTvLY8UhiPofzoAZu68D86UMPQ00oR1B4pAB70ySTcOlNyCTSYHrTSBnrQA8qvJyKbgdAf0ptH50xDse9NxRk0ZpDCgDNGKPpTA9LuQfM3bCpbgkn/PFRKDAxYEFPXOf/1U+0nM435BXkHI/pVW4CCTEZC45OO4NcCXQ6blsTLMu5UAIHr3pIFYSZB6dvpVa2hZATG+EfgKR096tKo84qXIXjn3ofYZLcIrAnBJ65qnhWiLMAzA4K1qKRtxnp156iqvkDc7AEb+uPX1pIbRTkXMakqMHp3qVl2wlI85Ix0P51DcxvBklw/OB6in2czu4G4DJ79hVWEh8EZjcFmBUVYaRc7h16AitKVojCFSNS/rVV7eMRgk5frjGPyqOYpJlZlaRcHPOMZNMEMiEOEUsOM57elOhlIR+hYcY9PpVd5Js4BAbPP0P8qpCuSLceYxQrgj1qZX5xnj3GaywxE/B+fvnnvV+Tcyh1Bz0YZ/WhoEy0pDZAyCeOv8qgRZoyTtJHTrnFRo5WTYuQSOuPuk1JDO23bLksO/qKVmir3FlkEi4kAJ4ytUzEY5f3YyrcDtVmaFZXySw+lV3R04Rye53D+tNaEvUVS8bOR0+vem+bJIxS5LupGAc5xSK5PLqV9+orf0oWstpJnB2rliRxxnpRJ2VxxXNoQaZpBZJGRQwVdwIbORVeZJLeUtAZVYHkL0P4Va32aqDbztGSeg4/D2qW60+TyBNaXDuT13NwfxqObXU05dNC6mtSTWgiGC4Uf73BqAXd60YEsbY55Uf09ayHlvFJynzgEEjjNOjuLpcnLH03nv+NLkXQOd9S9JOin94jYPBypGaki8homePjHZien41YtbiYooea2BHUMBn8PesyVWuJ2+YAKOdpx+o4JojroDstS7bSM5MalQrHJUHqB7Vsy6hArnEm1lX/Vsma5s7rV08mNVZhjIPJz3q5GFhQucSXOMncc+2K0VPUzdTQ17a+YWoku0QOxO1enB9famrK8iu0TeXu+p6elYYE905DdRjPHYVoiVreAKzgL05HQ1paxF7lt5n2ZUk5x8zdj9KznuHjnZrdv3uDmT+77fWktp2uC62pyB1kbjH09f5UnllS0YB445OM/WhCZVitIlYvKwd27tz+ee9OkdQpyRsHYd6dPHs3AMd3QDOcVnXSbUO09f0p2ZI6a5RXO3PuKrvMXwQTt7A9vpVRs8YJOD+YqdFbyy5GFX1oAckYZ1O/IHP19qpXdxKzMmSiA4Cj/PWpGuliz5RBb1x/KqjHeSSSSTzTQhqcnGM1II+CG7c0gHl8jBPamySsx+b/8AXTESRquGy3NaEAj2ZIRgO3c/nWWkgJ96kWRh0xt/KhoZbuDEZSIkAUj6c496ZG8O9d4GeuR/Wo4zvYtkAd+MUvlLGrOSPb60gLM+5rWVxGdvUdqz0hGxX3DcTkr7e/vVmG+eFSrYdD1DDOaRJrSY4YvEOgxyAPpQk0NkHLjav3QeTirNnFbxur3JYjPTB5qBodm543EidRg4/SommJzuNG4jfOrQRgLbWyRAHjA/Xmor27stRfzbqMpN0LIMA/UVho/XOfQU7OR3pciQ7suvDaBx5TuwI67sYpo8hcHBODzlutQBRjkHH1zSkR8gKaoViUzRliUiX8ef50hlbG3cqg8cYpkfygk7uf5Uk4WMBkyxPPSkBBK4MjEeuBSK5B4IAHtSgBhkKcUhUcYHIpgdNYarp81tFa6hYR+UAQZI+G3epz1NZWoWlvBdt9luPNtzjaxGCfb3pumB/JlYnMQIOCMg/hmkuYkYFlAVTnK/3fepWjG9URzTM64TOwH86Zbqchh0BrT8M3FpY6gG1C3+0REfdPHNa+pf8I/fTb7Ey2DsSTEw3IDnt7UOVmHKcy+WJx09aYI+7Hp6VqTaXIgJgmiuB/sHGPbBqk8TxgiUMD16H8qd7isVQmTxmkdVHXJIFWlUFcKDknAq3bacWQTz4AJwq55J/wD10cyQWZStbUFMsoyxyOc4H0q7caXJDF5ksexQMjJ49akuL7+z3YSBfNA+TaAMe31rHvb+a7UvO7YBGE7E+9JXYaIiuZfNYBPu4+masQKLVlfnzMdQfu/Sq9jgkyEAnnv/AEp8rcZ45qvIRJd6hLOoVmOxeMVTLEg8nFK2SfpSKvBwaa0EMZuOppoY9qlKZHWoyuM80wHO2Yxgd81ECamiA/xpJAo54zQBHzQcnjiikzQMD05xml5/GgY60nHrxQAvPQ1IgwOc4qMgkjFGOvPSgESDABphkYAhScd6cELuAe5xmniECYqCSBwM+tIY23yWyAT6irSYYnHA7/TNJFHtJBKjHNOVCMEuvp1zUt3GiwQDxHgmo5UeIjepBbBHH8qbHJtYkHofzFOuLlpMDHyryB6fSgYLudCVUkDgtSfMpwR+dRxSPEm1DweT9aGkO35jmgLituz2FRnHJPP4UbiTznH1oDfKegFMQHByewoU5Bxj60ikA8mk4zQA7JxjJwKYc84pwBxSBW64Hp1oATnnP86M9s0FcMQcn8acvB2kY7mmAhxj6UDJzgCnEgHBHJprOM8DikBIAxPJ4pWC989Ki8w9vSkLknJNFh3FPXpx2oz6YzTCcnrQM880CHgbupP50qqADgimAn1FCvyeaNQJCDg9cCmH2JoZsjkmo8nPSiwXHljjGT+FNQ8k55ppJx0GaVSR6UxEhc80hcqnB47+9RgnueaRt3OAetFh3Ecl2JbPtTPlBwRS/NzkdKQ55J6UySSLBPy9f5U+ZXGcNx+VRRtg8ZoaTeSDjFIdwj+cfMx49TTgNucMKjjJGQBT/cjPpQCJATjAFNO7kdBRvz6CkP1pDEA5Jp4PHNID78+9AA5OTTAGY4qM5zwKeVGepx9aD7DpQA0BgO1MJI+tSZO0mlDj0HFADESQ8lcDtU6I2OSKZ5oIOTSeYewyO1LUNi4NoA3gZHPFKJiBjB9u1V0Zj949KcZCTtHfjmpsVck4X5wvznqajB+YkE800lueRx6d6N2eT1p2C4rHrVSXvipmYAZLZ+hqCRs5wDVITYzPYUhXmjJx70v41RAinilPtShPlyM0BTnpQADvnNI3GeeaecgVGQeT2+lAAuc8UjHnipFQsOM+9TxW3XeBj+dFwKfPcn/Gm8kYI/WtNbeM9F46dahuVhTIVPm46mi4FRAOeTTWwDgMcU4kdqiDcnK0ASDjknGKTjcc4yetIQW5zUTeYPSjRgSuwzyeRTd+MjJqMHI5HP8AOlOKehLF3cnPWlRhnnOPrimgZHUU8JzgZodgJCwI47dKTaCevU0wKOnr7U9EIOSePSloOwvlk8g8U0xjnOfyqTAxwSM8jtigqMZ3H8DSGV8AZAz7UCpxHxnt2oKgZyP0zTArsQcgfjSDHtUrou0gHntUQHyEjFAEjqijtzjFR8bjweOlSW8fmEZzg8UsyBMncD1BpFdLkEmc/JTenB708nAwOuKgJOSe9NEvQlU4xk96kZ92SPT0qqxxwxznrQshHAPHTpVWFctRkMW9celSRfKeAKoqxyTmrCyDYRzk0nEakAyzMwHJ6jpmmzNnAHGB607IAph+YnGeOtFgvc9Q+DuvaNpkMkGpzW8N3JJ+7ZoPmOcdZOcD0HFezm3tdRtyWCTRNzkHr3618m2kzW8qSxkeYjBlyM9Dnoa73T/ixr1qgUx2Mie8RHQY6g8flVJjTse7WelW1qWNtFs3AA4Y1Y8g9s1zPwy8Ut4u0m5nuIFgubeURsI+VIIyCO4PY12Ihwc5NUUimYmGeuKPLPU5q95XHXrSiMd6AKHl47mjZ71dMIz1phjA70gKmAOCKMJ3zU7J15qNkXnOKYEREfqaYVHODTyqZpuFpgIQcUDPOaAoJ4bFOCN2waAEx6Hml+bsRSnIHKflTht96Q7mNqfiHTNLtmnvryOONX2cZPPpxzWZb+PvDdwGVdSiXHXzFZMj2z1qt8QrHUp7ctpelWl6oHzbwCwGD29c9K8Tn8O61GxaXSb1AemYWFRJtMDt/GVz4E1OwmNhMlvqGdySJBIA3JOCOmPevLpFA5Vsj/PNWbuzuLRit5BNC3GA6Fev1qrzg4FSQxFGeRnioxknOTx709ztznv096jV+Tu6U0ICRzjFNXuMU8KG5GR+FOWP5uGGfegREB61J8uO1PaIoeSKBGRyRx0ouOw1Qu0gHHQ0hj9COtTFdvHGKeEwuanmGokapkBMCnrEBwOT9KsW0LSk44x096sRW6oD5hyfTFTcpRKPlnDZAxjP0pNh4KKPyq0ybJCFGV7ZFCfKcNgfhRcOUqMHOcnI+lRsW6E/Tir0+V6DrzVTBY9hVJiaIe5603b9Kkf5SQDzUXUknP41RIxs+tSRpuPbpUO7nmpEA6hjn6VQkS5K5AxxSBiSck4oC9dzHmgKOgzipHqN6t/OjaM4pDwSAKDkHkGgBTgD1NAJ5xSfjTqoQgyeMnFB6daFIB4xQfpUgAIpOM0oU4xijy8gnNAhR3xRk46U3b6E0Zb1oC4MfYU3NLkdyPypNy9zj9aoA57U4H1NNA64IP4YoO4ZoAeTSbj6U0MccgUGT0FABk+lNx6CnGQ4PIppkOOP5UAKF9TQMDof1qPzM5oB96ZJPu96N/GCaiXrxTjjvQUPLZ64xSFVx0/Ko+nQikLDmggacDOKZmnHrSUwF3Uhb2FN49aSgLjixoDHmkxRQIXcaWm0uaBnqc9sjSLJEoifI+mfT0xWfdwHzG/hfGeOfx+ntVm+vQtuWUsWDAhSMVDNqEL7WGfMxyM9q4EmdbsSWyebCASOnOexHtUUsRjyGzjk8DORUiHzQXXAIx36GrcoDRE9xnGKV9R2KKMNiSKwwOMeox705rwnbjpkAY4qukij5GALD1GP50+W3LFBEvHVsHr9BVWQixcQhlEgbcpH5VWEasB85R152+3rUweNo2R1aIMMZxjGKeunsX8wTN0AyBwRRtuG5NZXaxsBcodh+7IOf0rQD200cm0scDuMCsuaOe3iR2QTQjrtGMe5qSycOpEW4c52MKTinqCbWgyeJNxZSdgPB6flUBHGf71XXUncAoVcZqCaElcqp6Z9fzoQzLnDRzFtpIHerUFzHIpB4OMc96Y+RjIw2ajlyEJKAr9On41W5K0LrRo4BjdlkHYjg1CWlUsGTkdcH+hqLzysauVyvqOMVbgljmA2sCTjOTS1Q73Ig0jDgn0xQZCqESk7ulaEVuXt5ZBtGzr79aqOV4J6H2pXGRBlAGCOf1pVuDGT5SjHQ47/AIUyTb0Vff0pgbPVSG9fU07CvY07OWCQEyBN+OBjvWxb3dtbWxCBmLD5lBzjmuZDbsFk+bAww61bW2khIdJCWIGRnH4VEopmkJtbG1ZXEVxIzrEcZ6Y6VbvLONYwJIwc4x6Vz0F9NHMCYshSSFzwT68VdOseavkTqE29M5zn8e1ZuDT0NVNNajDoInulVC23I3c4+uPwo2x27PDbD92hwx3bs47Ch7+SJmWNuHGAM+o71JDbKIy+MJx+JreCe7MKjjtEqtOqTPcsh2j5VUHpnvzVa0ld7h5pBvUc4zjrxVqOzmuCSynyv7o/rmm6li2iURJgdD7mtDEsrqAtUZxCQG5J3Vmrem4uC+x8EkZ47mooj5sTbgdpIIBP17dantJNqiEQ78c7lHvRZDua9tJsQqHKscY9P8agklkkb5VHozYzg1NbWJk+WLPB+cEdD6ZqPULhbN2SOPJGM89x7VRJTld449zbs5+UdP8A9VZk8kh+ZsgZyPepbm6luHG5QqjmouWfoCFOT7UhkkEfDSSkIgGRx19qp3d0ZXIGQmeh9fU0Xkwkmby2O0dPr7VV7ndntzTEAIz1+lSIw3DJ49qYduKQqAM84xTEWEjR9wUncPUVBJkZzSK5Byp5FKXMjcjk9fegY1Md/wD9VTBjgkAbeg71HtxniiJSSeaTAt26qw3u3ToAOtMnlLtkrtVeAMdKVAV3HJDgZAz/ACqozGRmLE570luNi7iSRk4+lKzEqoVQMdfc0IMoxDDIHT1+hpm4c/8A66oQDcCOT+dPCevQ80ideefWjJ79M5oAcQAOO1ER+bnGKTOcnA4pFySc0CuTSoo5TG3HrnFJFC74ZWUd6jGcnBxT1VcnLZpDJgpX/WSrmknKiIbGLbTknGMZqMCMZzgnsMmlzF5ZyDknI59KBkYlYDJHH9aYZM9hS5j7J+tDsuAAuOKBE9tMQmAQP0q/vRwMbRx8x9ayY2wRnip45BnBIFJoaZadFJJU9+lN2Bm74PNDOnAL+1T26oVwrDdj1oQMhDvE2VJ4PrWhZaopcJfJ5sJ4bPUD1BrNmcK5yD15qMSIxI5oauCZsSwC1laW0JuLVsnK8so9COxqne3ex2AifgYXd296rCV4iTG7KfY1NcSvqNsRKf30f3XA5I9D60rdwvfYyLl5JZd0hy31zSBVJwScdRTnUIMAc9801cZqyCeMhVKADGckj/GmPIoPHpimswxgdqhJySecZ44oAkL+lAbvzUY4NPUZFMAD8knrTCxI60m0scdqftCrnOe30oAZuKqeetMLluc0kmT06U1Rz7UAPz15opeOaABg4FABn8aTPXijAzinArswRzQMA3YetKG4wBUeeTS5oEWFkYhVUDjoenNALFiSORUSnkc45p+5txwSfwpDJFOWBYE81ZSJWB9B3PH4VVjd13EZznI/WrazyH5W27Rj8KTGhJ4xGwJIwRkH1+lQgq3KkYzgnPc0+6RTEeS3PAznHNMhXbbhmH8XpQMWU+UwEmRn8aeUUxlo8vj0prxPdOZHICgcAe31p3YBMgemP50gIBKucYIGfSr0UULg5kYYwPu9agWMZOAMdeKcoKnknHfnFDYWNH+zrQQStLdssgAKEAdD6isQNIs5jZsgdD6irDqO2f8AGou/QcUIGP5JzxwPzpg3A59Onem5OOCcUANzhqdgHODzyKZluaGRgTkn3oC4HWmIQk+9JmnexpMc5xQAmOvXijaakBFG7njpQOwzafejB9vypM8k8/TNICfQfnQIX69frTcc5pTk4wB+dAyTxj60wHAgDvio5Ceo6U8qVBzjpSBf0pAMBLHknApc/WnkdAM/X1oWMkkvQAwkY609VYnING1Vzk89uKaWfPBX86AFIAPzGmcDoDj6UoxhtwNKMY4P4UARsRjAzTeMH1/KnbufagDOeOlMQi5zxinoxycgYqPnPfBoBwaAJG3ZPTHbFIGIXBz6UhfkcjGO9BbPPWgYuT26UA9s/pTQeT1oBGef5UhD8jnFALcgY9KT2JGPpSrjsaBhg4447mmEc5J5p5BAPftSDjvTAQegz09KBSgZ7j8qnQKFG4g0gGLnkc80oVgCc/ShpecIBjp0qNnJPJ5NAXJAw54HAxUbSNgjOBTC2KYWPXvRYLi8joR/OkYHuTijd1GeaQ598UxACB25pAfmOKQ0hPoelMROGO04NKT0yagVuSafuB5PPNAxW6Yz0oBNI3zEgY9/anKuBktQAquV4GMUpnfjkcVJEFb5SD6illIjHzKQccetAEQupBzwPw61WkcsxOOtSuxxnB59qiGW9TigQL+HpSMVBOSBRtwCRwaidhkg8fXmlYLjZGXJwTzSLgHgik2nJxigKf1qhDyhI4agRtjAPv0p8SrnJOTipQMZwMfjU3KSIFBHBFPBA4yKkjjaQkAH86c8BUncR+VK6AgLkZAIpCzY68mnlF6nNN8oFiA2ePSmrANErAZJ/ClErHBC4oMTDtzTXUD5cnJFMBxmOc5NHnActUHQc5pPf1piJ2nRuAOaYGzwKhBx0HWpAMgetAImEh5UED6CmfNtweeelNxgEk8+9N37eM/SlYq4rhsZFR7c80jOR1OBmoy3YdKpIhsRl5zk5NIflNHNKo5pgPUZ5p6+o601DjipFx13YpMYr8AdaYzkDAPFK7kcDBqI+pxmhITJI45JOIkd/XapOPyrt/DHw21rWQ73SHTYVxg3CEF8+g9MV6/8KLHTbfwdZS6ZAyGZd00kq4d3HB59Ow7Y/GuteEtzVJFKJznw/wDC9r4P0+aCK7e5lnbfI7AKMjsB9K6oXKc/MKp+Q3OelRNDtbO39KZaRp/aV7EfnQbrn7v61lFSOmaT5wOCcUh2NX7R7frUb3A56Vlnf6n86TaepY0xF57lT6VCZs9MVWKY5DD86b+JoAsNKcEYqMyelRZPel3UwJPMbsacsxHXP1qEMfal3+wpDLInJHJPNPWQEcMKo7vWjPpRcC9v9xUE91BCMzToik8Fmxmql3C1xayRq5Qtxnqce1eP+PfCF5pSrdx3c11aseWkJ/dEnp16dMGpbKOp8aeP9HSzuLKyRdRuCCoJTMSn1JPU/T868an+ZmdsKWJJwMdfTFOVeT83IqGaUlTkCovczZVkKnjHfGaYeO3NWoos/Mw59KjmReQCM+wppkkSscdqkRjg+1RKoPencjpQJEzSFsfzoDN2z/jSRYBy2atB0AO1B7c5qWWiAB3IFWOFjKDknjNCyEH7oUfSpUCs43ZGT6ZzUsaJrSQQgAA7gOc1LCCdznG7sKaPLViZQRk8Ypu9ipjjDZJ5xzx6VJoNkZQ5wSB09eaaseRlu/T3pr/L8rIc0STccjp0FMQlyyhQoYFhx9KqMRnJ/GnO2SSRz3qCRs9MVcUZtjJG7Cow3UE9eKTcenekzuNWiLgYwrcc1IinOAR/hTG4xnvUkeKGCJFUA/Mw49qeAu3IGe3WouvUGnYGcAfXNSxoUjapIAwDj8ai3DJJyTSTtyducd+c1Hzwe1NIGyRsHt+VIMGmr0OaeuOmfy7VQgX0HrUgX16037p+UnFKCSOlSA7PYYoHTGKAvBNLtb0IqRiYBHJpGXGcGnKpzzSStjgHmgREV9RTJEGMgcdKk+bGTik3bgQelUIgI4OD+tKjFeDTtuM0wiqJHlifSmseOAc0HoaTJ7UAJkYpoJz1NLzyaSqAXDc4pB70ZozQAKTnrTieec0YBBOKQkg0gF49aTim8c4NHQ0WC4vHvSZpc+1IO9MQmaM0EcUlAgFLSUCgBaKKKAPTYUt7hcggp33cZ/KqN5p0YLSQyYHBIJ/rVmKS1uSXjbai4yvT9KW/uyP3YUGEgAkf1riV0zr0sULK5G4xu+wj+LPWtBbnZghw6nuMVUi0qK6XdBIA2M9ehqtLYXETFQyk596dot6C1sWrxfORsj5xkhh6elQwPOdvIGOAc9afbwXSEb+V9yKQkLcSADcoPb+lHkFyeCVJZHjuHOWPHTirVvG8SyJFIChOQM45rMeA7jIgJzzioJmmkcL8wYYzRa4XsdEl46YinT5cdjkD3pzMrgtGDg8AjkGucaSVB+8LMh4PJrcsrqGC2xGm5WGSuTx+FK1tilK403DIzKfkZfbg+9Ks7qV8xVyRneO49h60hu45ssuwY7GoLlhMB86jHoehp+pJFLuKnPTPrjk0u8gIRhgODVdWkd2UlSoPep48gPg5UYx/+uk0NMlgKksoKhKcbFvNBt1CyDkgd6qscPkNjPGfStbQ7+MSSrOQZEGEJGMj3NS7rVFJp6FUzHLRSqyNnB6kfjTGRVQlWPP6e9SXMokmLS4Xccn3+lRMIl5jl3pnJHpQBE7gAiTp/Dx3pkEm6RwcEds/yxTxKjZAzwOhHSqk3PKkHHHFUkTe2pejI3BOAc8cU797FKSWLJ39qr20oBO5xwPXoKtwNG5yHJUc8Gk9ClqWjatI+TcBQOeO3sfekLyr8yBmiHAZ1zz7Go7lnK9tn93JyffPSobzUvOAQxhY14AXjBpRTY3JIsRxGeQMUkK5ycDt34q9d3ULxxC1EqlTxnHJHPSsnT9Wkt5kDfPF6E4xnjNWbq5tVO+IuXP8OMDP/wCqtbWMr3NBb8rE+47eB/kntWbc3xn+UgBOv41VmmaQlmxyc4FOiVFy0mWx0C8/nTFcmKDaqrhsjgYxWtaGBRskYJHtA3evFY6yBn3uwVQOmMZ/GiWdJDw5wBgDI6/Si47FmbVZIpXWBio3Y47/AF9uM1Svbx5nJU/OcAkd6rmPDkO2wdScjioDPsG2EnHQt1OKCS5ApCl5CPQAnNVZ5nziQ7UPG1f60gZdhEbHcfXNU2yXBJyaEhkxfuF4x3qNuTnilY/KAfw5qMGqEKchsg04sSTkj6YpU2EnJO7HWkdGGOmD3FADT8xO09uacvAOR0pVXYSQelKH288c9aADeC3BNSQudy7SOD0xUBGQTxwc8VJBtwxJ6foaTBDrh9znB6HP1qJsk5AyPWkYYOSDj3yKVWwMD/8AVRYBpPoaT1zSn1/kKKYDom2kj1GKd0OB3pi49eacTycmgTHDb7H1o+TdxnFNUjPOPehR14PtQCFJGelGRTSwyc5/OnphskIfyzQNCgpyOT+lIzj+6KeIznlSPTim+WSxwcj6UXCxCceppVXPBBzUhjG0kk8e1JtAGQWzSuDG7cc9qaDjpQ3XvSqo+vHrTAVSSRkirkcghAPOTzUcYjUZIOMfrT2KyDhD+NAEEkhd8np+VSRsg6KahPU44puT3NAF0SArhcA/SoA8kUgZW59qajEdAcVJIQF4xzigRHOoYGZeCfvL9fSqxBx1qwXG0rj8c1WaQdAKEJjScdCfWgY96aTzQG5pgOPHQipIW4PSoSeDTk5XA4xQA/nPGDnrSvs2/eHPUVHI5xtH/wCuoyD3oAViCab34oCnBNG00ALxnilA4JJpu36UoHFAICRnjpSA8HmjBxgd/ak2HNADu3WnZj3ZAOB2oSFiwBBx3PpUhgCnLEY6jn+lAw2hkkdQQqYH5+lSqFXbtB6c9+aj6RhMjaCDUjyls5A5xnt/k0gHxxmRiUyMcnGaVlJfLnn3702OY5BBAI6HpRKxkxluB+FIaFOOcEcmkyQ2R1/OlQHnBFSMjhQdrbcZBCk8etA7EfmPnduOe9Bdjkgc0m9QOCKA2QQDQAqu2Tg89etDM2Occ8/WmggdSKXeOQM/lSAQEngnJoIPQilBGeTTsjIzRcCMj3pNp685px2bsjpSjOODxTQhoJwQDjPWkPCnOc08EdM9famnGCQB+dMZHjsTQTx1NG4gHj8qaWPfNAhc+hPWlP4UwZJPXHbmjaaAHc9P5UmOeT0pM4/zmkB9qAHqByeKeABznmoz7AGjnngUAOeTJwKFB79DTOfSl3cdBQBKG5xxkHJ/wpzNvGASBiq4bB4xQXyTnFKw7gNpOMn86fHhRwBxTAB2IFKN3vTEOLYOSaiZhzgc/SpPKJ5JyaQoQcDigBmRjng0obPT6UhXrxTdhzTAN2GOe3SgDd1Wl24yOaAp75pAJt/2RQAMn5RTinrmhVXGf60XEAxnkCgHPIHHagDLEccc07HqTxQMQdaCQM5xTgRjkdKhdtxIA5zQBIrjmms/pn8aaAccAA0oDY5ximAc9zxQTg/Sl28ZB+tNx/nNACFjznpTc+pNH9KTB55/SgQHOeBQ3AzxQefpSZx0ApgICAOetG7HGePelOTnHQGm7STyaADPqOKcCOwpCMAjr/WmluuOpoESDn0zRsOegwaSPPfp708njkH060DE6ZzSM/HQUd+2aQ4B+YfpTERhyGzkjHoamFy2RuAPbmprQozH7p/DpRNGnIEY654oAryyh29qG4GMce1NYbecDHriomY46nApWC4/Jxx37Uh24yeoFRhien+FOG45zRYBNy4wMgdqYPQ5xSlevWlCkfNigQ5DtAwKmGCOOPxqt9epp67lGTkD680mikSx5V+MY6dcYq5sDxfNgN7d6ogrg8EmnmdwnBCgVDTewCSjBIycfTpSwgZLA4PSoDI75Jz1qNiwBOTirsBYd2zyT7c5pBg/eYZ/Oq245OaTucmnYVyZ9vqKibAppI6jNIW+uadgGnrxUsbnHFRbcninADHJFUA9slTk8jn61XOSeakL1LY6fd38u2zt5ZmzjCLn8zSQmR2c4guFlMMU23+CQEj8hULsGcnaFyScDoP/AK1a8vhvWIbCS9lsJ47eP7zMu3AHU4POKyAOeh4pgKFBNOCdc0KOTk/SlyMH0oGkNZsZxUZbmkJ54ptNIhsdmr2l6jLpt0LiCOGRgOk0YcA/41QFS7VwuCenIxjB9qAPpH4a+MJPE+jO8sSQXFsRHIqHhsjIIHUDg/41132h/Wvm34f+Lp/C16wZGuNPlx5sS9R/tL7/AF4Ne5aL4q0TWLYTWeoQ9MskjbWXPqD3/SmjWLujo1nYj71Akcg5IqtHJGwBV1bPoQal3YzQWP3eppCwxwf0qItSZHrQArPzURc+h/Kn8UZUdhQBAWJpOfepyy9MCoyU55oEM59aUD60Hb60w0AOxnpQFptHPY0DHhSelSJCfamKxA46inbm28NyP1pXGiby8ZwePpWB4yutPtfD11Lqdubm2XbuiPy7iT29+/4VPP4i023lMc9/bRyDqrSAVynjPxVcpZTppx068gZCWy+4qvuM478VLaGePX08UtzO9rEYbdmzGhOdo9M1QEmXA2mrDYIJI59BTFXa2Tj6AVCMmGSScNioXRgTyamL8nao4qFmbcSxpoTIeR24705T604kNwADjrTcjGByf5VYh4PBFWbf6nHrVNBkgCrkDY/Os5FRJo0Ms20EL/nNWlSOPBLsSOeg5qqD85K855qXfkgAHjg1BohzOWJG0kVIshS28sDBzzj3/nTd4KbF6jk5PWqkkrZK0WuO9hxkGCMknOPWombPSmcBetCPxgA1VibiuMrwCTUYhLZ+U4FTjAjzuIJPPHamzs4GFPyn9KaJZXniKDJA2/XrTYFVsliBjmmSMxOCTjtzToP9ZyODwavoZ9R+YmyMc08ROvTO2q5XZMyirCeaRgZx9aTKQkancQQcd6VhhffNPHmA43DH0pfL3dyam40im/TBHOaWNTjrVholA5FREhc4x1qrisNZSASelRDj1qVnyMVDnsMk00Jkyc9AamQnHH0qFFwPmNSowU5AP51LGhSGzTgVX77/AEGacX81yzAZ/KqEww555zQlcHoWpJA3AxiodpHTBJ/Sq2WJx0qQOAMZJqrWI5rkm7B+YDP1oyeoUYqMMCc4p+4EY6fSmNCHORTSeDxTwB/eBppPUdTQKwwHnml3DBpDmjn0oEITxSDnrQetIaYCt35FIp60maSmIfmkbpSA9c06gBhoFOIpuDQIXJpR9abS9qBjqacUCkzQIKKWk7UAFGaPxooA9FbSogM28hR+2ec/lTA7hmiuFUuo4cDr9au+anZlyeO4qC4wNhHVmx/n1rhTb0Z12S2M5ZGjuB5DmPJwfT8a0PthYFbpBu6Z7N757VDNa+cd0YUH6YzUFrG5by3znBI5z+lXoydUbEUkTKSpHA7jv6VRNsePLJDHJ+oJzUEiTquIs57r3q3o0rKZfOJChSefWpStqVe+gFWQKFYMM88c10qR6bZafHLqEai4lQ4U5/pXJac2blZZWwu7OPx610ep+TerBK0nmqilCVA7d+O1NxFcu2q6Lf2uFaOJ342ZGfyrntXsBa3gW1Zgpx949SKkuVtViYWsIVych8HPWq0ksknMzvvHOW5B/Gi1hK7KdzbSHPmAbx39ahRXXkAZyPetCTDLl8FT6NzmoJodjja56cd80Jg0VAxWQtgA55A4qzbNJtcEfKT69KhDc7ZF+bI4/vCrEOxdwBYZ6DqBTYIbJjeVbCj86lR/kxERntT8hcAqMH2pjoYsvFnjqKncsYxlK/NgkdKhRv3nMfzdeDV2HMkQkI9abIEKHbgMT1ouFhjKsik8jj8aqKpjYhvut+VTbpFBBwacibkK7R+dNaEvUZHCrja+Fbsc44qUq0I2pucZ7DP6Cq7xAKSzkKOPwqa2uHjYmMDHY55zRYLkrsdpUDuOtWHmh8hVAAwOeOvvVMyMSdzZyct35qOUOoBA+U1SQmx8sURiMgA9seuaa0Egh3rgqVycmo03MQDjHXmp764LxIi9Mc4qkTcgWdQueQRj8amS8mf5Yoifw4qzYm2WBFYAyZy2RTyVB+Qtuycf1yKAKjyXrqVZVUdeccVVZpQTkgEVfu5gYwAoVxyTnqPcVQLAnJ4H86YiJ9zsWZiSepoDYUYzkHFDNv6CkUYP16UDFUkNlQc1IVypYLz3PXP+FNICgZ6n2oErbTtPWgCFupPem85NTbASSTyOgx1qPaeQetO4hC3txTgxHIJpuB2zzRkY9DSAcDnqafEpYjB6n1xUPXpxThnJOTQMtfZZTnYhbvwQakS3ePJkidQB1I96prIyn5XI/HFSGaaRNrSMwPYk0tQRZETXEe88Rg4GeOfXHoKmvPsRRI41bKjlz1Y1TQ+XkFizdMdhTSMnLHgUwIihH3ckdabnnpUjyE/KvTNRn0oAcGXBGMntSbhjmmjvUkcZc4HU0AIpBBAHXr70uCSAFarUUGzkgE4p+05zgDmlcdinvMbnco9OlPW4c9FHHt0ouEGWYuCewqGMNn5c0C2L0e8pucDrjFRna7kAn+gNPgbjYzE88nFIytyA49KRQuQF+Yiq8snULikZRk5kqIkc4PA9qdiWxCfU05PfvTD1yB15pyuufmHFMRMSAvB5FSK67Oc5qEkY+UEDr9aTeOwHNFhj2YHk4zSBlIAAFMLe36UgJ96BFhWxjAFQyht5Y4x9etNBHrSluAMDjrQBGcknnjrUTd/WpTg5HNMKHBBpiIhSjOKXHtSdMc0AHbOelOXjP6fSmg9O5pdx6UAIxJOakVHyABkk8UxeW57VdtyZMBMKwOcmgCEKNpz1FJsDHAPaiTIYgnJ7mowCuMd+eaQxxiGDk0gUDOOtKmSetAyD7ZxxQABR69KltlQyIkjYBIBPpUfG4YPHv1zQsmzPygnpzQB0d+LCw1aW3hE7wBB5bSgIQxGckZ6ZJPY1Q1KxiikzFeRSrgD7wO0+hxwRz1qlaw3F5NHDbxPNLIwSNFUksfQDuadfWd3YzGG/tZbeQDJSVSp/KpSt1LvdbFYkY5P6Ug6n29qHHHBH50R4wRjqaogeAMUoU46gAUEgdRUkMTysFjVmZuiqCSfoOtIdjd8J6xp2jySy6hoVtqjYBTzXICY746H8q2tU+KGt3NqbXT4LDTbbkbbeAElfTJ4x09P6VX0H4b+KNY8l4NMkhgmGRLcny1C+pzzj+danjb4Uar4Z0YaktxFfRIf36wqwMQPfnt6nt1paF+8loef391PfXT3F06tK+NxVFQcegHA/Kq4UHjOP60pYHoaaWHc1RJIsYAJ46etO+Xgkf/qqHdnjPBoHHGaLCuSEgDtx1pu8DPAqPJ5xmjn1/SgLkgYYORTd3bPHWmbTngmgL170AP3Lnk0jN+VNwccgUu0lc4FAAGB7HFG5elMxxSD8aYiYEAdKQHdmo8HGec0vTI60rDF45xQPwpKBnpQAEnnGKQM2OT+lLzzyKTmmIcpOeSPyo9cmkjUkE0hVuaQwJWkGOwpwX1xmj5cZzTAF/SnFyOlMYnBweKbu60Bck8w9s5pMsxJLf0qPf9TSb/agRMrEdcUBu5IqHk9qTJzQFyyMk9RRj1aoAx9acHIosMn2KQCSaaY0296jErZ6D8qC3HHGaQAwC9M0nXHOKM+5pv55pgLnBOabupeeTQOh5oACxpQxINNC9c04kY4FAhC31phJ7Up55yaMj8PrQAAEnnFGB1PagHPT8aaSOaAHHHPNMODk8YoyOx/SkGCT7UwF+XkA5oGOx5p2wd8U1sAEUAJ9eadGinJI6UwYxk9Kdu+U449KBEpC8mhF3MfQd81X3E9zU0eFUkk5HQU7AIyhc4pFXeDhgD7jFGTk4zin5wQGUigCExujHAP4UnmSDOSc1e+UoCDzjIFKqhuXXjHPYA0XAo+Ye4yaY2ApOOBUkpHmMBjAqu55wDSsIQtySDxQHxnA/SlHqRTe544pgP3HHXk0DJBBbj6U3d0z6c1Ku4kFQuDSGM+7yByOKaWJJOae0b7mzwPrUR+Xgc5osIC5AOCaazkqc8g0nrkUoHFMYKTjA6UZxxTD1OOlNBIPXNOwiQEY60hIzkUn1IxTcqB0osFxT60oGF96RDu5xzThx1/lTAYinJBpHPJA6U8nGcZ561ATk0lqJj0OTzjiut8OR6uls0mk3EWCwOzP3j7kce1cjHyOnNdF4c1W7tXSKBU8tTlgcDqevPWmOJ12tTa9d6ZcWVwXimZf4RhW46BvQ/8A1q84uLS4tZGiuIZI2XqCpHA/p716xZeInjtozLHEW5LGTnP4f1qLxd4iTU9CvLe0t03sgUuSPu98Z5zkflRa5bPJWPpTC3GD6U0txTadjO4Z5oxzS4Panqpzz2ouK1wVOOetP56Y4+lOjAZwuQAeMntT3VQzANnB4IqblWEtppLaXzIXKuO+M/hz1q7eX63kiy3FvEpVAoMI29PUdCazSDnPBAOBTo95O0ZPt60wuWY7+5ibMF3NGQMfK7Lx6cVq2XjLxBZLtg1W5xnI3tu/nWVLaXEcZeSB1Tj5iuOKqnPOKB3aO6sfij4gtlC3DW9yB3kjwx/EcfpXX6J8Tv7SHlro17LchQSluN4/xArxQDJOPqa6Hwr4pv8Aw40n2QRPFKQXjkX72M9COR1ouCkz27S/FAvXWOXT7+1kPB82E4BGeMg1svcqoDM4XOMbuM/nXAaD8SbPUXMN3aSW0+flCNuDD8ec+2DXW2up2N9EsiOpDEDDrgg5xj8xTNE7mp5vrSrIDVVHRyQjq2ODgj9aefxoGWQ47UBveq/0pQSKLgWQwPWkyKgDketKpPJyaLgTg9eakRiDkAE+/aq6sfXinCRulIaOS+J9vbf8I+85hj+0mRVWTaN3XJ9/5149PDgB8Zz0r0b4sao0YgtCJFw2cgja2R1x1z+OK89eSIQBjJlzwEA/nWMr3HoVJAqD5lGRzVWSQYO09f5+lWyRnLAsPTGM1SdQA2OmTj2pozZGrgLim8scnAoIG0ZpjHnA7VZI8gBcD1pgG0cjk07GAAOvenKCRg55oAfEoZO3vU3AUhTUaqFU88VIg4JGMdzmpepSJIlAPDcdamDDyyD1Hp2qsoBHU49uKR2ATaDznJ96kdxzMcnng1ESQOOppu7A57GmsxweTx0qkgbFxSqMng9aj3Eqc1JH0pskmLBT8w6U2d2kO44UY6etNcM2SMYFQ7xvywzSSBsjcYZjnrSwMFfcwyBSzNknryabEheTaPxrQksW+0uzOoP1qdmZgMkAdMDsKrA+SxD9Og96eT8wK5OeazZaZKVC8E0wyBOByaaxBBzmoDJztQe1CVw5iSWTjJxiqpJJ+UU4EZIYEn3PFO3dcAYq1oRuNCHGWI/OnKoUcCgEtwBSn5R8xApgL06mk70oPGcjH1pmcg4oAkBIHGajdQxyQaVWGcHA/GiRwq9KlCZE2BghRTS2euKRnXnj9aZweKtIhseuO1SKMgkgc0xEAGcGnLnkkcUmNDwmBk9Kbz6CnKBnqc0/ZuPPTvSuVYgyPSkz6VO0eORioXHPSmmJoZSEUEH04oHNUSJjikqQL2NKFA6UgsMAp2KWlHNADcUYp+B3oouOxFijAp+DSUCGYFJjtmn8UmaYDccUUtGKBCUUuKMUAd7aXJmYggj8c5qe4IwiucKGyRiiiuM61sXEYBQQBtIrNu4JkkLqPlK44PUGiilEGWbSdYoXEmN453Y61GxS7YlmaNv9noaKKbWoIqOTGGBcOOi9uKWC6aL5SzeWeynHPrRRVIl7lnKOn7uVueTk5wfSpbedEGJiMgce9FFSV1CRFmUspGAcnAqsd20DkqDjB9frRRSQMrzTkDaw5HAqaG4LAAqQ31Ax9KKKoRYhZpEdWHAOM+tPZMRgZOevXrRRU9Ror2zbpyxcgg4x61aZUY5A6miih7hESW2RkyASR1OMVGq4UkngUUUi3FELnaWJUlDx/wDqpsmxV2xDG6iirRmOgXzHCr1PA4qW5kCQCEMGOeP15/WiiqJKJYngdBTt/I3DgUUUxE3mxLlgp5/zzUXn7WJXOaKKBETyM7EnrTTkDletFFAxMjtwKTd1A/lRRTEwJ3Dnt600cZ5JzRRQA5W4J4/xpS2f0BoooAa2OenApvXk8UUUAB9u1Hp1oooAcqg1IuASBRRQMfgAZPemSHjiiigSIwAOtNPHpRRQMMenNPjkZDkUUUCRN9pc8YAPrTDI7Z3NweuDgUUUhiKVBOVBJ9TUglUA4A9BRRTAjEzKTtx78U+QllHzcn6jiiikIj8rkA4yf5UhXY56EDrRRTGI6khTgAfWoyvOD0oooEO/hAxzQCelFFMBwzSnHOetFFICP8KMnt0oopiYlOUZGQaKKAEMfcmmlAcgdR60UUgGrA7/AHRn+dSw2dxJP5UcTNKTjYBzRRQOxpaZ4c1XUrgwWduHlAyRvUY5/wDriquo6fcaTqMtneqFuIWAcA98Z49etFFItxVivtypI6k0FQVxyTRRQQh3EeQACDUZGWyc8UUUIbAYBBPbpSe+T/hRRTEdD4K1m+0zX7Gawa3eWMlVW85iXdxyO3Y5655rpfjTd399q9nNfSxlkh2PDCD5cMmMnGeecg/T8RRRWb+NGq/hs8/htmmdcyxKDjqcfhivTvCfwe1DU4FutRuRa2siK8fl7XZ8juCcAc98miim5MIRR29p8EfD4jX7Teag7D7xV1XP4Y4rsPCXgLQPC8rTadal7gjHn3BDuuD29D+AoooRfKjqyzE5Gc1l+ItU0/S9Kmn1uaOGy27X3gnIPGMDk/hRRQxI+Z/iLrfhPU5XXw1or20xcE3W7YrAcYCDjHQ54Oa4Q+w6+1FFVEynuAznjNOGcHpRRVMQKMHPJzTsjGBmiikNCbVJPJ/OlXHIGfyoopAOVRjLGhe+BRRQDGt16DFIVXbkZoooATbwSORTMH8qKKYhQuegqZITjLEZ/OiigBfJGOOlN8vr2oopANY7eMioSx96KKoQhJ65pM5J60UUCE6+tIaKKBhj3oGMUUUCA+1HPeiigYu3NAHXNFFACqCDxTx0NFFDGKFPOKY2B6miikA0sKTce2KKKYg5wc0mT70UUAJ/kU3H1zRRTAFPUZowKKKBMT1xyKcOBx+NFFNgAweRmkI9cfnRRSBjQPWjk5JIxRRTQDkUnOBT2zgAAZH6UUUAhUPJ4/pU6Jv5JGaKKTBDZWVXHPT9KhluCyFQCM9feiimIr4PYdabgAUUUhjDScZOSKKKYhAdzcfSp4VK55OKKKGCHysNpx0qq2etFFADOp5NKM4PpRRQA1iB0HWmjqR+VFFUAm004R5PTiiigCRV45GMVGW9SaKKkZGzZpqjmiirRPU1NJ0u41BwIsIhbaXNdjbabHo9mWETTSgcuYwef6dx1oopIpbC3y3UZi8+MAMNyZTOFz09On6GreuaHqV7YSy28axSOgkUDjeQc4x2PoKKKaH0PLnVhIysCGBwQex9DQq84OeKKKRmh33Rx0oOf8miigoA2M5IxTQ2eAOOlFFAmOGeakjJ3AgnPr6UUUmNEzX84yPOchgQQTuyDVZW6nJ60UUWE9xc55BpRkDJFFFIpFmwuDZ3KzCJZCB0bP8ASvRNA1zxILH/AIl2jWs0LEvuV+ueeeaKKaKRDqXjS7tJ3tta0FITIPmKttJHqD3/ADq34Y8UG6nWKy1J4iWAEF6Qc8dm6/hmiimSpO56HDLc7B5qxbsc7SeTVlZB3oooNRwYeuKUN1wcUUUFDg4wRnoKkjdAhJI3ZwB/WiipBGL4n0eHWbPymSATLkpI6btpOeh/WvK9X8H6hptvcXN6qmCLnzIzncOnTtRRUsGcs0jHqAB27ZqJtm3AP60UUGRE23dwBge9MKKcnGDRRVCFX27daeM9iMfyoopAhTnoQOtSc7QR0FFFIY9xx29ahz1I6flRRSGMZ+Tx0NMLZ7c0UVaJY0A8kdKkVtvcUUUCEMhIwMimdAM9c0UUAOZhzkU+BSg3HAJoooAbJlnBP4Uiuwzg/jRRQhjQzP8AKvIPU06KNVySRRRR0BCeWJHwCSOtSGBFIDA+oPrRRQxpIQAb+2KBtOQccHmiikAx0TJAA6Z+tRYKk4zRRVIhiFsqeDxTCw75IooqkJkRxk46Uq9RRRTI6k6jj9Kd7f1ooqTQVcdTn61KnQ4HHWiipY0MeQdCDgU04YcDrRRTQ2RMOxzke1Rr96iiqRmx1L9aKKYAaRepoopMB9NoooAQ+lAoopiFHXmjK+lFFSUJlfSmcZNFFUSGKOaKKAR//9k='%3E%3C/image%3E%3C/svg%3E)
The Cobra Unit in Metal Gear Solid Delta is a massive section that will start from the protagonist’s encounter with Ocelot. The section ends with the final fight against three members of the Cobra Unit. This guide can help fans get through the entire adventure and defeat all the bosses that challenge the protagonist in this section.
This article will highlight the entire section of Metal Gear Solid Delta after Snake's fight with Ocelot till the clearing of Sokrovenno South.
Note: Parts of this article are subjective and reflect the author’s opinion.
Looking for Crossword hints & solutions? Check out latest NYT Mini Crossword Answers, LA Times Crossword Answers, and Atlantic Crossword Answers
Cobra Unit in Metal Gear Solid Delta: Walkthrough
Here is a quick overview of the Cobra Unit walkthrough for Metal Gear Solid Delta:
How to get out of Chyornaya Peschera Cave Branch
After the battle with Ocelot is over, you will find yourself in a deep and dark cave system. This area will require you to utilize the map of the thermal vision goggles to navigate. You can pick up some resources from this area for food reserves.
Walk through the caves and find the tunnel where you can crawl through to find some supplies. Continue crawling through tunnels into a cave with waterfalls. You can find a Torch, a battery, and some more ammo at this location. There are more pathways along the wall of the waterfall to find additional supplies. You can then exit the location through a tunnel while moving toward the objective marker.
How to defeat The Pain boss (Chyornaya Peschera Cave)

After you exit the Cave Branch, a short cutscene will transition you to the Chyornaya Peschera Cave. The tunnel follows a simple route, so you can use the Torch to get through the area and reach a well-lit underground cave with water around it. Once you reach the entrance to this main area, a cutscene is triggered, showcasing massive numbers of Hornets and introducing the boss of this stage, The Pain.
The fight against this enemy is quite straightforward, as you need to jump into the water and take cover behind the rock. Occasionally, you need to dive underwater as well to avoid the Hornet attacks. During these gaps, you should use your guns to shoot The Pain and chip away at his health. Repeat this process while avoiding as much incoming damage as possible to defeat The Pain.
After the boss disappears, a group of Hornets will vanish from the cave and open a path for you to go through. Navigate to this point to trigger another transition to enter the next stage of the section.
How to escape from Chyornaya Peschera Cave Entrance
You will find yourself in another dark tunnel with a singular path. Follow the objective marker on the compass to navigate, and you will find yourself in a dimly lit area to trigger a cutscene. Collect as many resources as you can find and head over to the exit location. It is important to note that there are explosive mines at this location, so you should use a Mine Detector.
Following the marker, you will be able to drop down from the cave into shallow water. You can then simply walk out of the area from below the stones.
How to get through Ponizovje South in Metal Gear Solid Delta
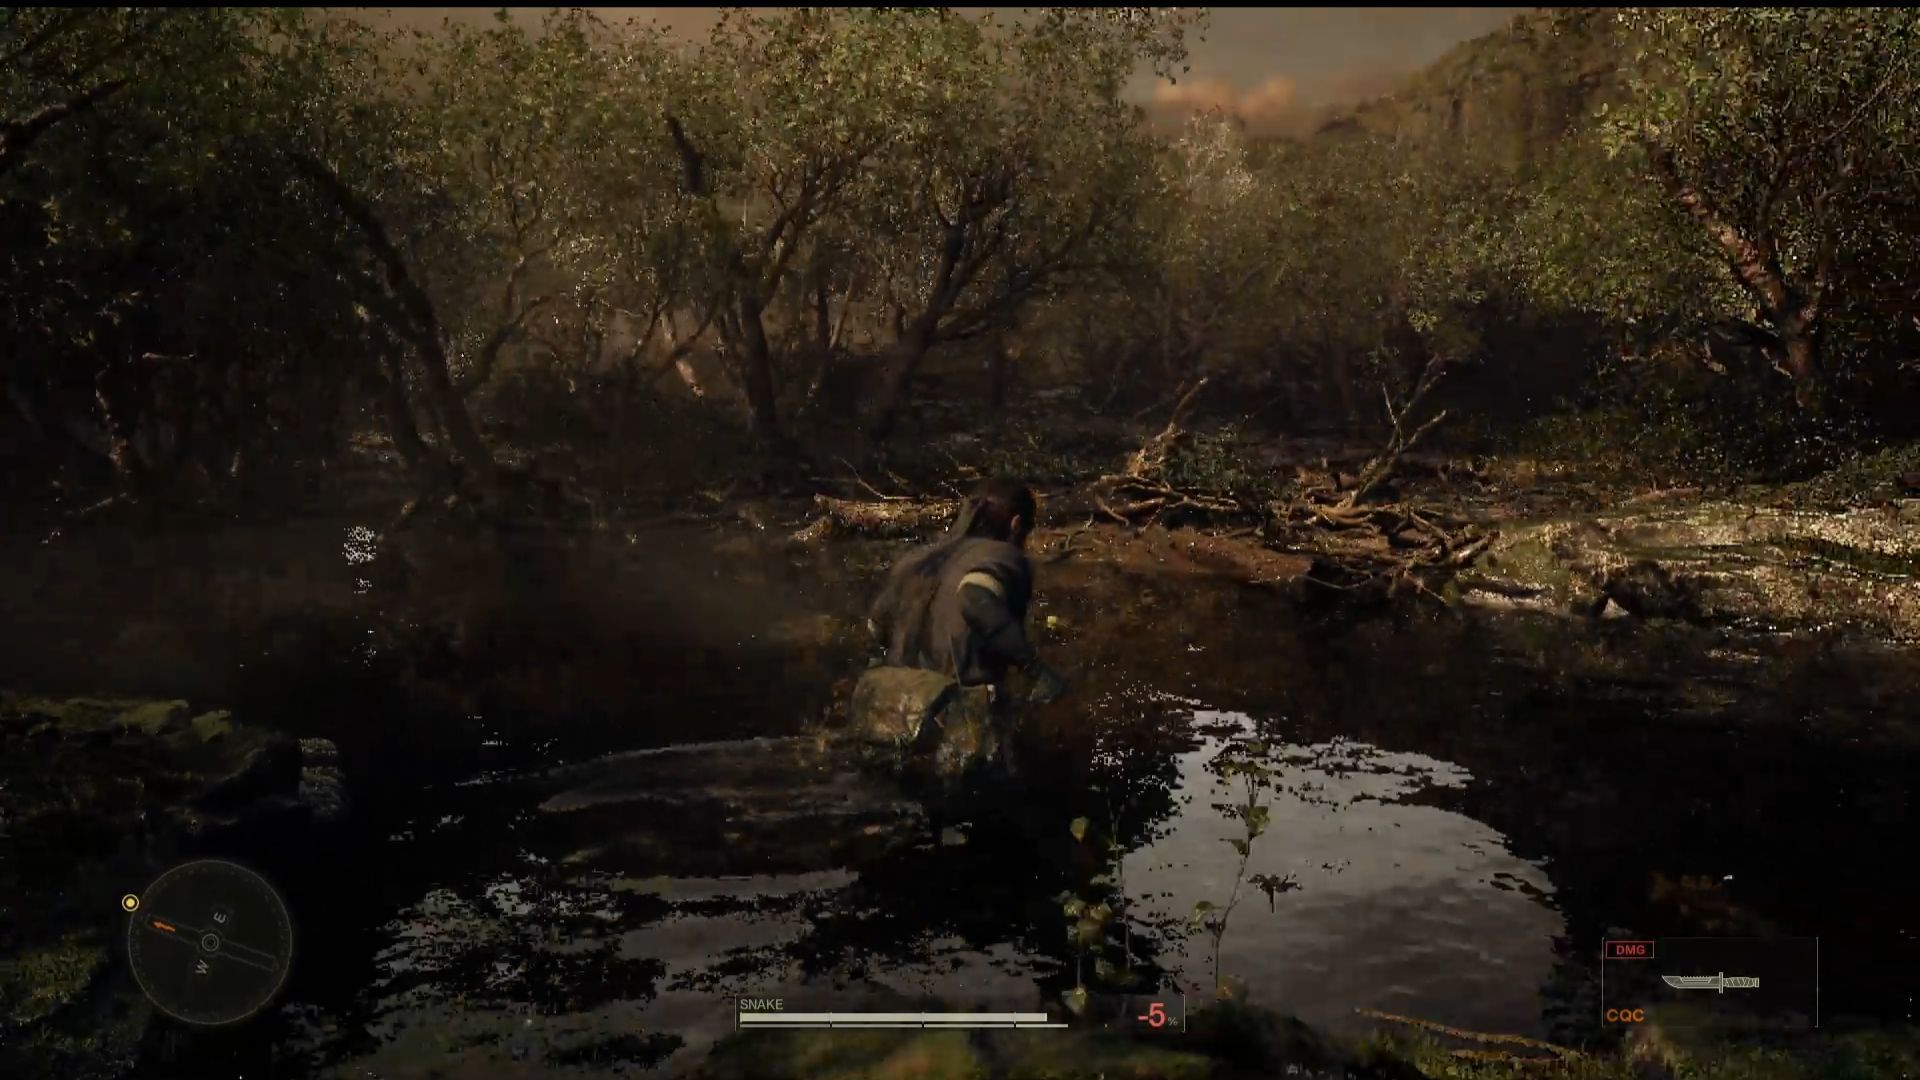
The Ponizovje South is a mangrove location with several guards around the place. Stealth is crucial for this section of the game as you need to avoid being spotted by the guards. Swimming underwater may not be an option throughout the entire route, so you should make sure to avoid walking into the lights of the guards.
After the mangrove area, you will enter a shallow canyon. The path will diverge into two, and you will need to take the one toward the West instead of continuing straight.
Gearing up in Ponizovje West
Once you climb out of the water in Ponizovje South, you will be transitioned to the Ponizovje West area. This location will also have some guards, so be sure to utilize stealth as far as possible. Swim underwater toward the docks and take out the guards with your weapon. This will make it easier for you to loot supplies from this location.
Be sure to explore the area, as you can find a Suppressor, the Dragunov Sniper Rifle, some ammo, and grenades here. Once you are done, you can head back to the route you came from and take the North path from Ponizovje South.
How to navigate Ponizovje Warehouse: Exterior

The cutscene will showcase Snake spotting Volgin and Sokolov outside the Warehouse. Ocelot also makes a brief appearance alongside The Boss, who informs Volgin about the demise of The Pain.
You can choose to use the sniper rifle after the cutscene ends to take out The End, who is in a wheelchair. This will help you skip the boss fight and will result in a loss of rewards that you could collect later in the mission. However, this is a risky task as the alert level will reach full and land you in a difficult skirmish.
If you choose not to engage with and eliminate The End here, you can simply take out the guards outside, causing The End to retreat inside the warehouse. Once the area is clear, you can go toward the small tunnel that leads into the warehouse
How to clear Ponizovje Warehouse in Metal Gear Solid Delta

This location is a great place to gather more supplies. Take down the guards present on the ground floor and explore the warehouse for healing items and other gadgets. A guard will be present on the top floor and will likely spot you if you initiate a gunfight inside the warehouse.
Eliminate all the threats and then exit the warehouse after treating any necessary injuries.
How to get through Graniny Gorki South
Once you exit through the double doors inside the warehouse, you will be met by a heavily-trapped region. It is best to use the thermal goggles in this region to avoid the traps. Weave through all the obstacles and escape the forest area. Simply follow the objective marker on the compass to climb your way out and enter the next stage.
Graniny Gorki Lab Exterior (Outside Walls)
After the forest, you will reach the outer walls of the Graniny Gorki Lab. The fence will be electrified, and a few guards will be patrolling the area. A part of the fence will be broken on the west side, allowing Snake to crawl through. Once inside, you will be transitioned to the inner wall stage.
Graniny Gorki Lab Exterior (Inside Walls)
The inside walls are risky and will pit you against some more guards. Use your stealth skill and take cover from the trucks on the East to avoid detection. You can crawl through this area and then enter through the door with the number “10” marked on the wall.
How to cross Graniny Gorki Lab 1F in Metal Gear Solid Delta
This is a relatively simple area that you can get through without raising much suspicion. Simply remove any face paint you have equipped and use the Scientist Camo from your inventory. This will help you get past guards and other workers in the lab. Navigate to the stairs that lead below to enter the next stage.
Graniny Gorki Lab B1 West

Walk down the stairs and take out the guard, and enter the room on the side with several computers. Wait out and evade any suspicions in this area, and follow the objective marker to reach a small room at the end with a white door. A cutscene begins here as Snake searches for Sokolov and instead meets Granin.
Escape from the area and return to the 1F Lab. Follow the marker and head over to the stairs. Keep on your Scientist Camo to avoid guards and unnecessary attention. Exit the lab and then move out through the crawl space to cross the outer walls. Crawl back outside the electric fence and then head back to the Graniny route.
How to defeat The Fear boss in Metal Gear Solid Delta (Graniny Gorki South)
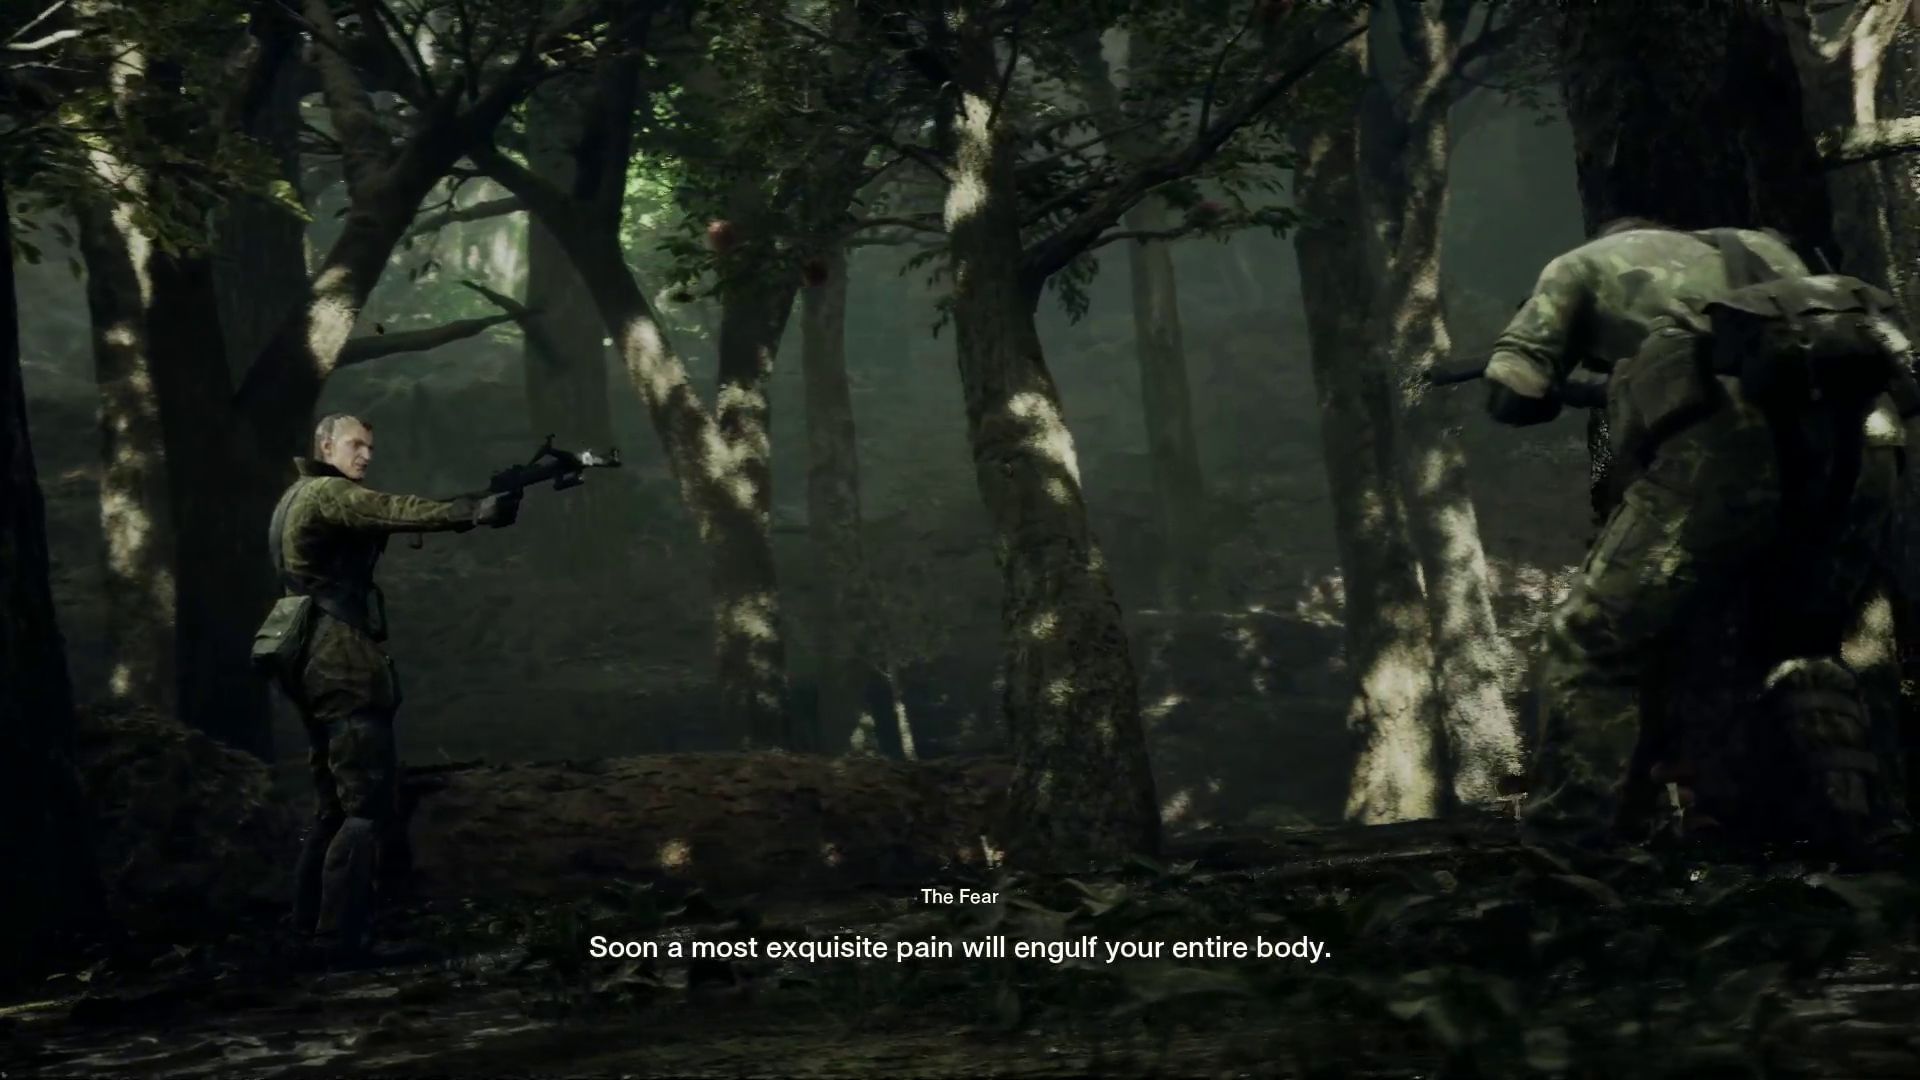
As soon as you head back, another cutscene will start, and begin a boss fight against The Fear. When the fight begins, make sure to heal yourself and recover from any of the injuries that you have sustained so far.
The most effective way to defeat this enemy is by using the thermal goggles and tracking him through the trees. It can be difficult to land shots on this boss as he lunges away from one place to another and targets you from high ground. The Fear uses a camouflage technology that makes it difficult for Snake to spot him in the forest.
Take cover from the trees and shoot him down with your weapons to defeat him. Once defeated, you can follow the objective marker and head back into the warehouse. Take out the guards and take the second set of stairs to climb back up and exit through the locked gate.
Svyatogornyj Region
After you exit the warehouse, Eva will call you and provide information about Sokolov completing the Shagahod. Continue on the path and simply walk toward the exit that is marked on the compass to escape Svyatogornyj South.
In the Svyatogornyj West area, you will encounter quite a few guards. You can take out the guards with stealth to avoid raising alert levels and any unnecessary gunfights. Take the North route to exit the location. You can also wait out the patrol patterns of the guards to go out without being noticed in most scenarios.
How to defeat The End boss in Metal Gear Solid Delta (Sokrovenno South)

Once you enter the main stage, a cutscene will play and mark the start of your boss fight with The End. This is a tedious fight as the boss moves from one location to another whenever he sees Snake approaching. This is where you have to practice patience and spot him first while approaching slowly.
Equipping the thermal goggles is great for this stage as they help you spot The End quickly. Track the boss through the forest, as there are only a few locations he slips in and out of. Damage him with your weapons and drain his health. Once this boss is defeated, you will be able to pass through the forest to begin the next stage of the game.
Move through the Sokrovenno North and follow the objective marker to reach the forest tunnel and enter the Krasnogorje Tunnel area.
This concludes the entire walkthrough and getting through some of the most dangerous Cobra boss enemies. Stay tuned to Sportskeeda for more updates, guides, and news.
- Will Metal Gear Solid Delta have multiplayer co-op at launch?
- Metal Gear Solid Delta: Snake Eater trophy list
- 5 key differences between Metal Gear Solid Delta Snake Eater and The Phantom Pain
- 7 biggest changes in Metal Gear Solid Delta
- Can you play Metal Gear Solid Delta Snake Eater on Xbox Game Pass

Are you stuck on today's Wordle? Our Wordle Solver will help you find the answer.