
'%20x='0'%20y='0'%20height='100%25'%20width='100%25'%20%0A%20%20%20%20%20%20%20%20%20%20xlink%3Ahref='data:image/jpg;base64,/9j/2wBDAAYEBQYFBAYGBQYHBwYIChAKCgkJChQODwwQFxQYGBcUFhYaHSUfGhsjHBYWICwgIyYnKSopGR8tMC0oMCUoKSj/2wBDAQcHBwoIChMKChMoGhYaKCgoKCgoKCgoKCgoKCgoKCgoKCgoKCgoKCgoKCgoKCgoKCgoKCgoKCgoKCgoKCgoKCj/wgARCAAGAAoDASIAAhEBAxEB/8QAFQABAQAAAAAAAAAAAAAAAAAABQf/2gAIAQEAAAAAgQP/xAAUAQEAAAAAAAAAAAAAAAAAAAAC/9oACAECEAAAAD//xAAUAQEAAAAAAAAAAAAAAAAAAAAC/9oACAEDEAAAAF//xAAbEAACAgMBAAAAAAAAAAAAAAABAwISABETJP/aAAgBAQABPwBJ8YslU5VJvIm2OczrPTGAWOhbP//EABURAQEAAAAAAAAAAAAAAAAAAAAB/9oACAECAQE/AI//xAAVEQEBAAAAAAAAAAAAAAAAAAAAAf/aAAgBAwEBPwCv/9k='%3E%3C/image%3E%3C/svg%3E)
BIOS (Basic Input/Output System) is a program that the computer's microprocessor uses to boot the system. It is the main link between the operating system and the attached devices like hard disks, mice, printers, cameras, etc. During the initial start-up of the PC, the system loads up the BIOS before the OS.
The order can be modified in BIOS to force the system to use another storage device, such as a DVD, USB drive, or even a network. The default is set to the first hard drive connected to the system. Changing the order of the system is done to fix problems in the main OS of the system or even to install a new one. This article will guide you on how to change the booing device of your PC.
Change the computer's Boot Order
1) Enter BIOS

The first step is to enter the BIOS of your system where you will be able to change the order and make your preferred storage device a priority. Your system will use that storage to load the OS from. There are multiple ways to access your PC's BIOS, they are:
• Restart your PC and wait for it to reach POST (Power On Self Test), which is the screen where you will see the manufacturer's logo. Press the DEL key or F12 key during this screen to get to BIOS instead of the system OS.
• Go to Windows Recovery System by searching for 'Recovery Options' in Windows Search and navigate to 'Advanced Startup.' This will restart your PC and take you to advanced options. Select 'UEFI Firmware Settings.' This will restart your PC once again and take you to the BIOS menu.
• Download and install a unique software from ASUS, which allows you to get to BIOS at the click of a button. The software is called 'ASUS Boot Setting Utility,' which can be downloaded from the ASUS download center.
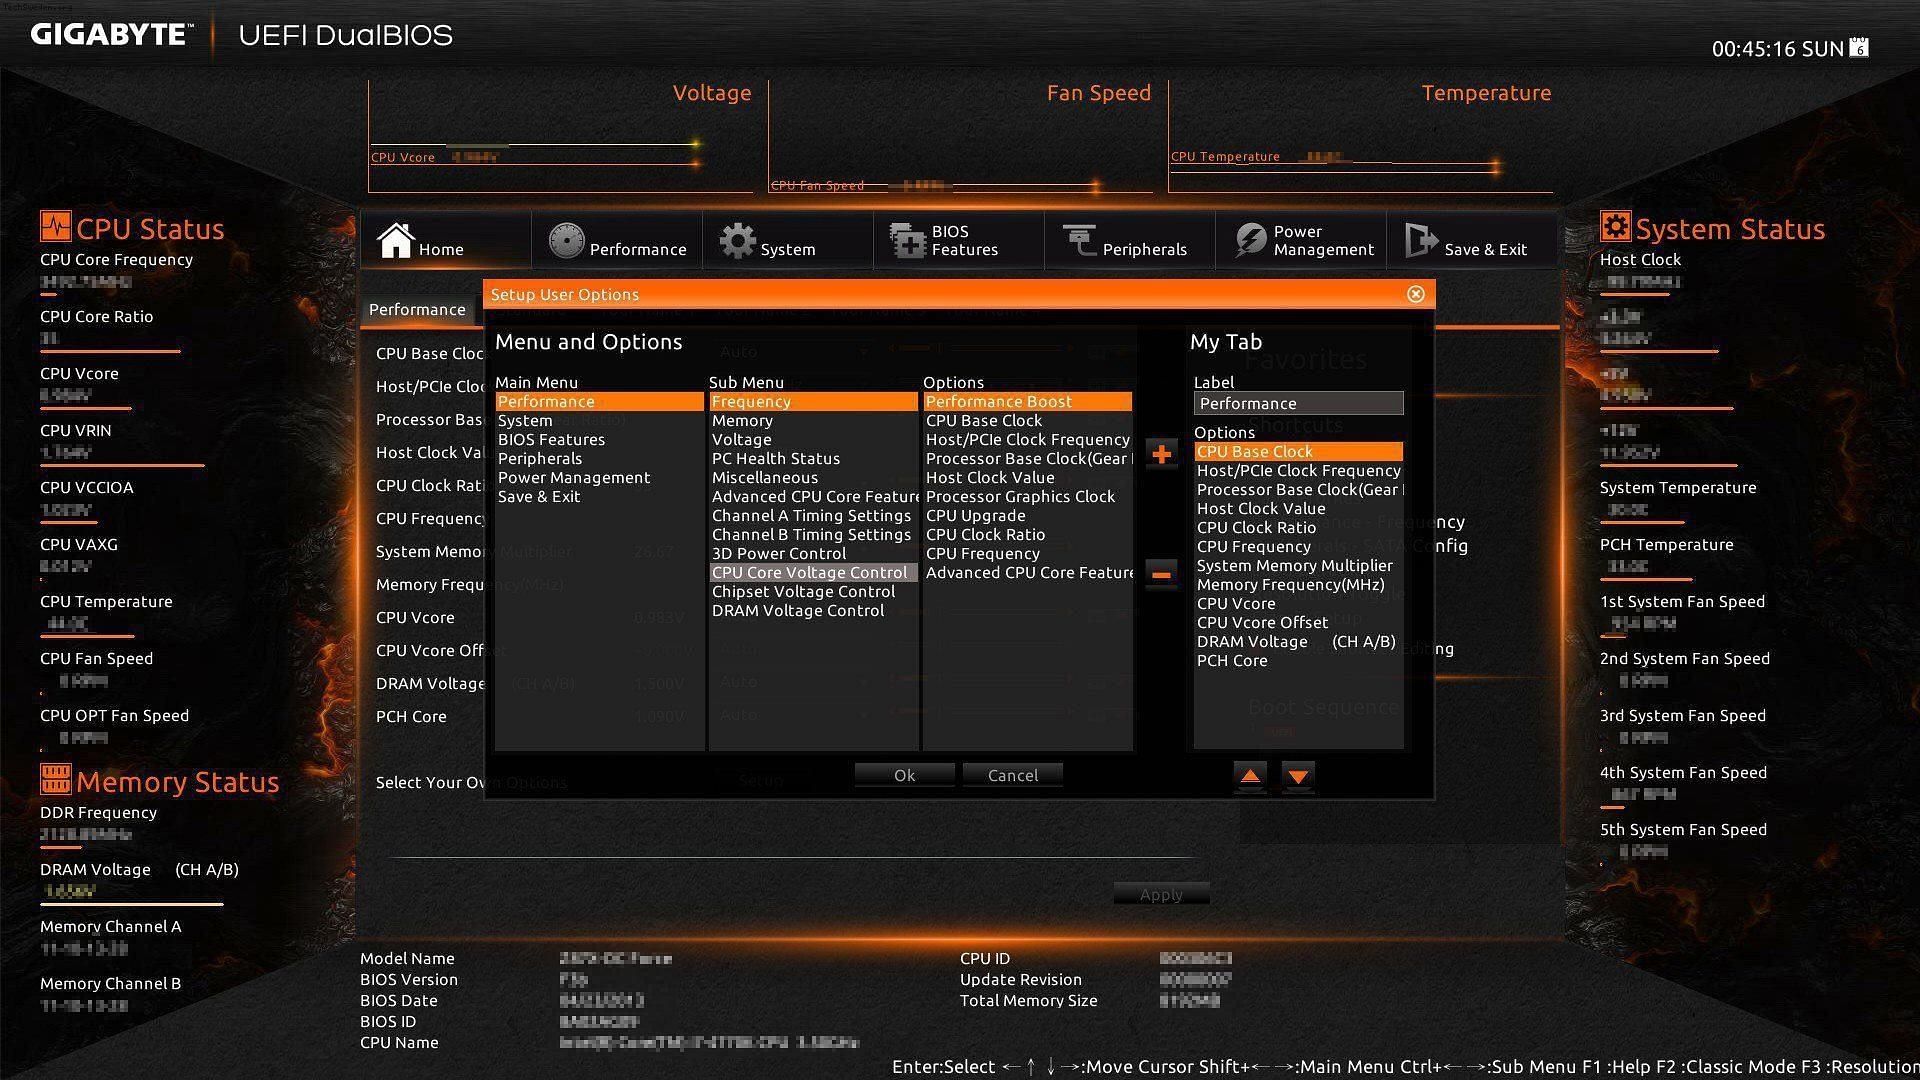
2) Navigate in BIOS
All BIOS programs look different with varying designs and fonts. However, all of them have roughly the same set of menus, depending upon the features of your motherboard. Some BIOS can only be navigated using a keyboard and mice will not always be supported.
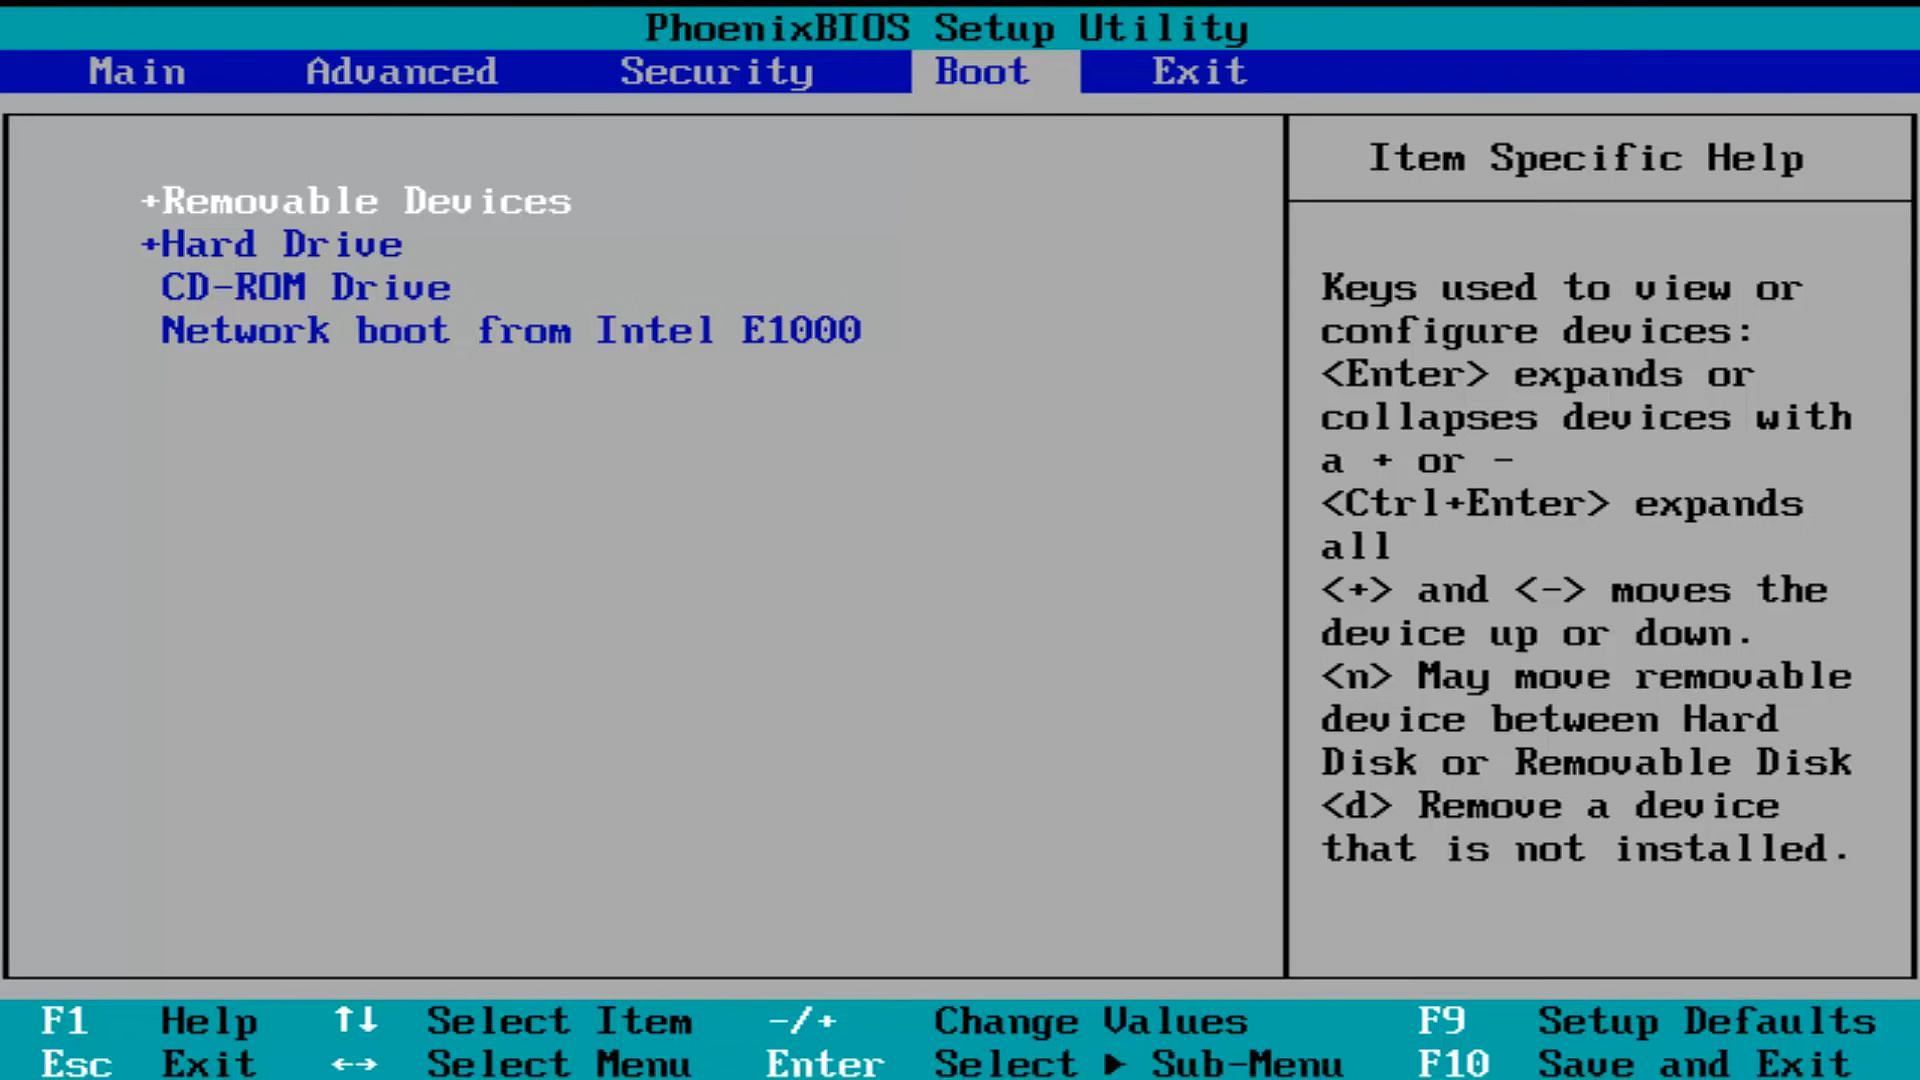
Navigate to the 'Boot' tab in BIOS, which should be at the top of the screen, where you will find a setting called 'Boot Priority' or 'Boot Sequence.' Under this setting, you will see all the storage devices your system can start with. Select the device you want to use, and make it a priority.
3) Save Changes
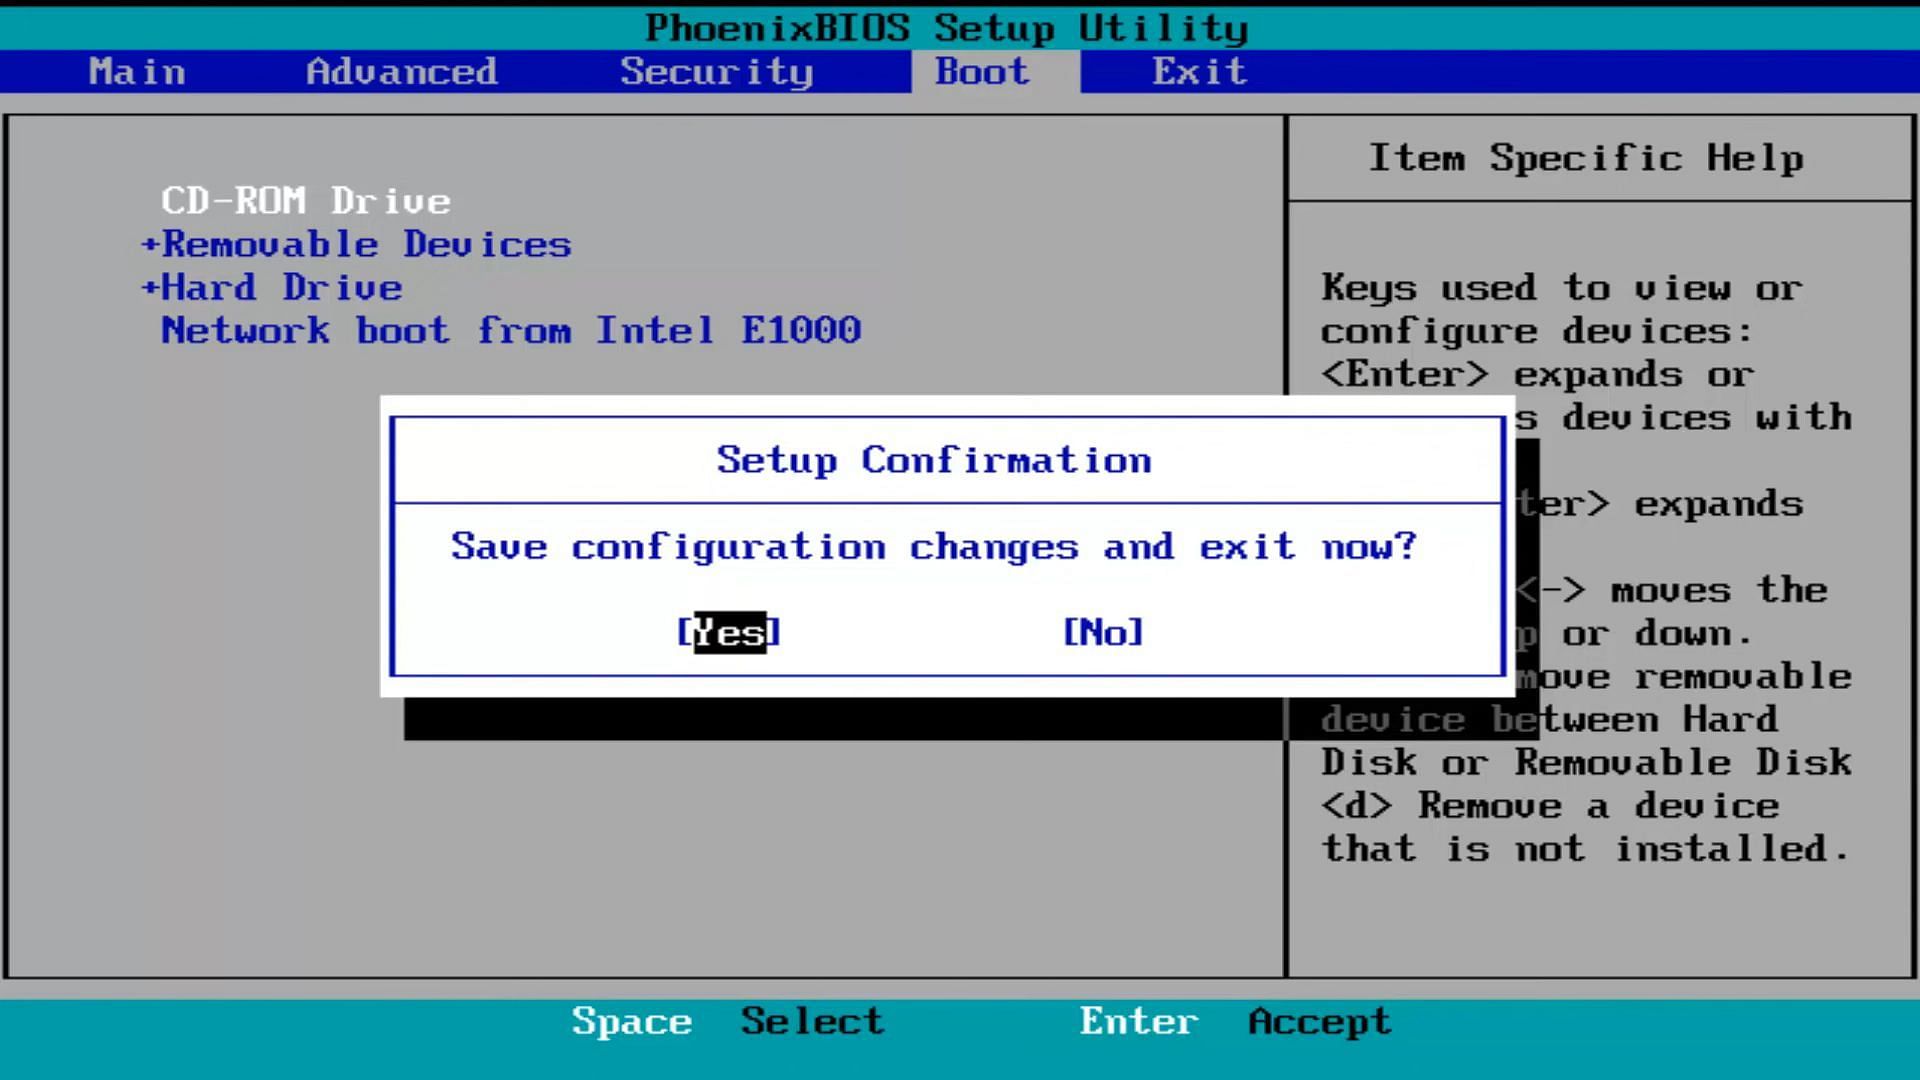
For the changes to take effect, you need to save them before exiting the BIOS. Navigate to 'Save and Exit' to do so. Pressing the F10 key can also work as an alternative for saving and exiting. Finally, your computer will restart once more and boot through the selected device.
