'%20x='0'%20y='0'%20height='100%25'%20width='100%25'%20%0A%20%20%20%20%20%20%20%20%20%20xlink%3Ahref='data:image/jpg;base64,/9j/4AAQSkZJRgABAQAAAQABAAD/2wCEAAMDAwMDAwQEBAQFBQUFBQcHBgYHBwsICQgJCAsRCwwLCwwLEQ8SDw4PEg8bFRMTFRsfGhkaHyYiIiYwLTA+PlQBAwMDAwMDBAQEBAUFBQUFBwcGBgcHCwgJCAkICxELDAsLDAsRDxIPDg8SDxsVExMVGx8aGRofJiIiJjAtMD4+VP/AABEIAAUACgMBIgACEQEDEQH/xABiAAEBAQAAAAAAAAAAAAAAAAAABAUQAAMAAgICAwAAAAAAAAAAAAECAwAEBTEGERITQQEBAQAAAAAAAAAAAAAAAAAABgcRAAEDBAMAAAAAAAAAAAAAAAECAwUABBFCBmGh/9oADAMBAAIRAxEAPwC/kvE+f2Rszl5Rs606a60AlEK6fZNSArfLtfw5p20L6dqa77b1aLtNqFQC5U+ix77xjLPxS3ablJEpByc7E7UakFqLDOT51X//2Q=='%3E%3C/image%3E%3C/svg%3E)
Display Driver Uninstaller (DDU) is one of the most useful utilities on a PC. Removing display and audio drivers is necessary while swapping GPUs or troubleshooting video output issues.
Faulty drivers are the culprit behind many issues on PC. A new driver update might often result in poor performance or stability issues. With DDU, users can uninstall faulty drivers and roll them back to an older, more stable release.
Downloading and installing DDU can be a bit of a chore. Thus, in this guide, we will guide users through downloading, installing, and using the utility.
A guide to installing and using Display Driver Uninstaller (DDU)
DDU is a relatively easy software to download and use. Guru3D has designed a robust app that is exceptionally light. Thus, users can easily run it even on the most misbehaving systems.
The detailed steps to download and install the Display Driver Uninstaller are listed below:
How to download and install DDU?
Step 1. Head over to the official Guru3D to download a legit piece of the software. One can use this link: Display Driver Uninstaller website.
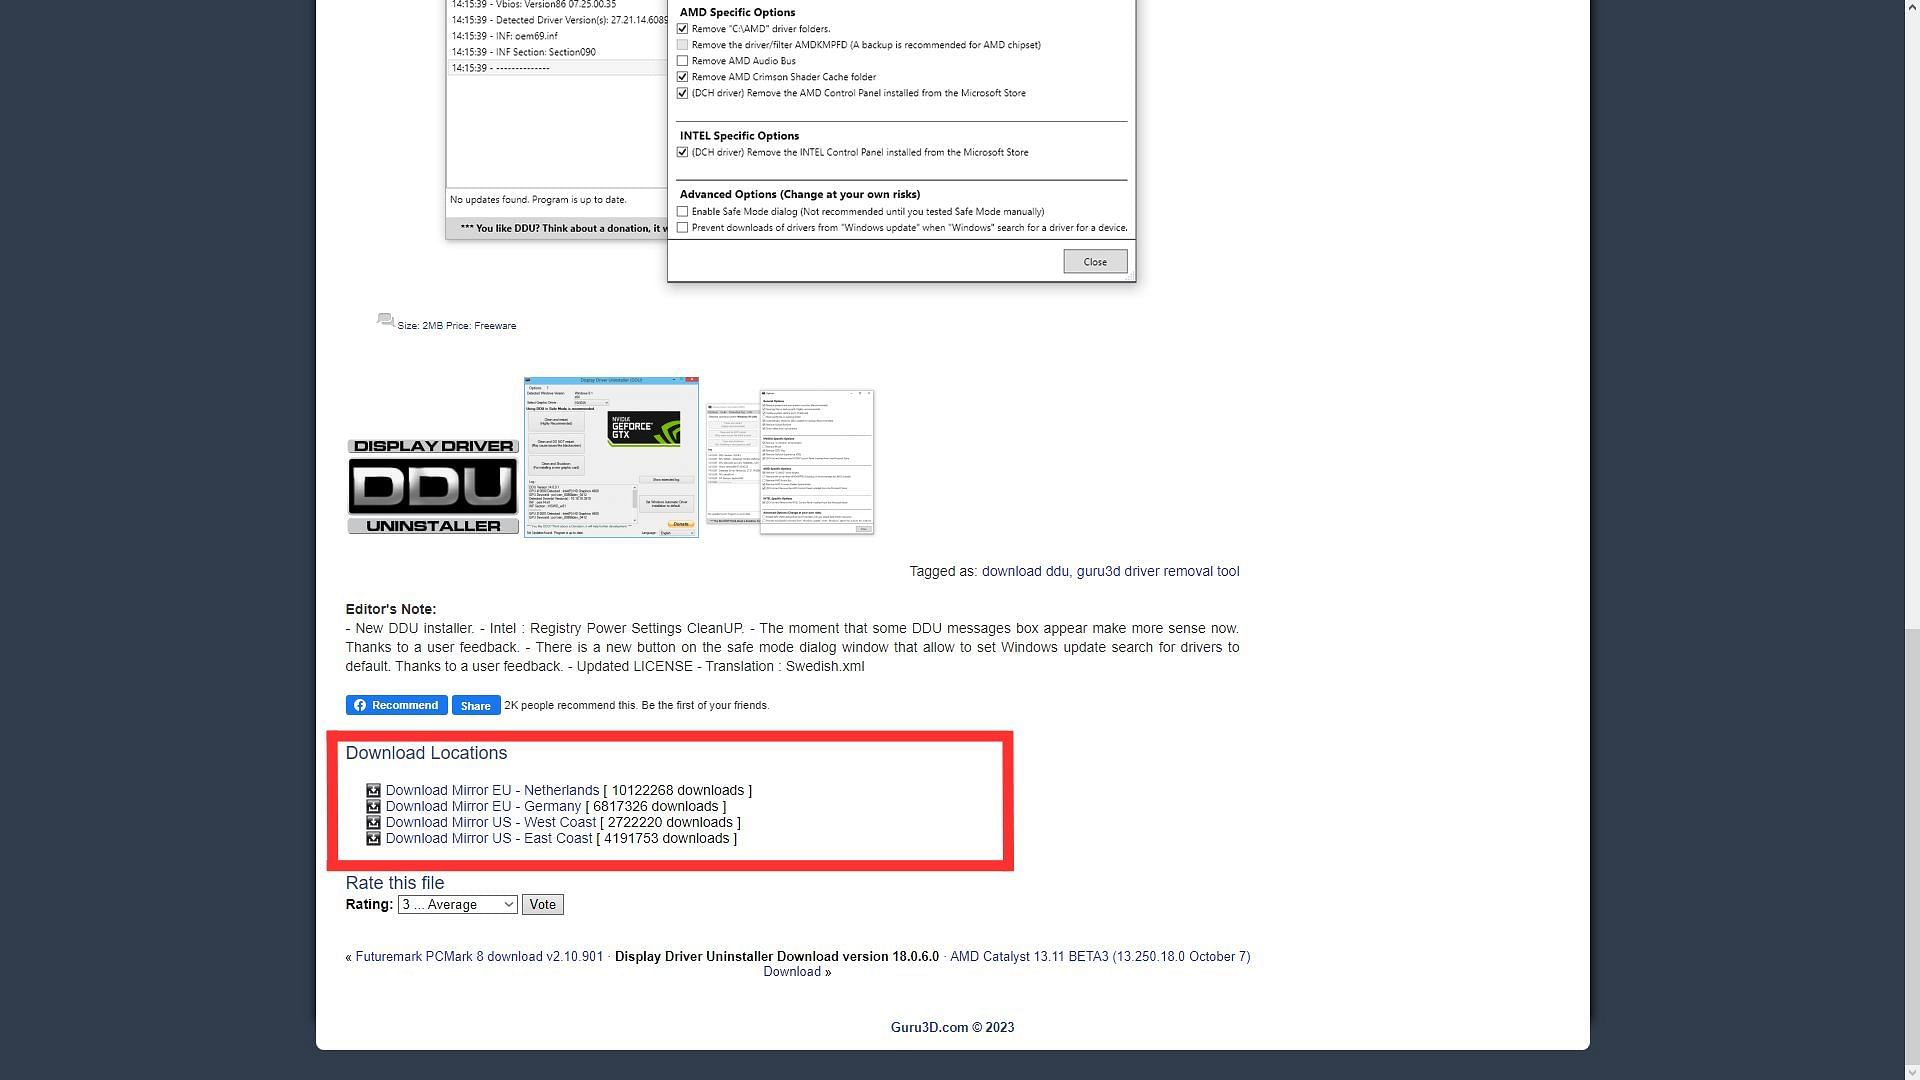
Step 2. Once on the website, scroll down to the very bottom of the page. A bunch of download locations is listed in the highlighted area, as shown in the image above. Users can choose the closest location to get the best download speed.
Step 3. You will be redirected to another page, and the download will begin automatically.
Step 4. Once the download is complete, users will need to extract the software. You can use a third-party application like 7-zip, WinRAR, or Windows' in-built extraction tool. The software comes pre-installed; thus, there is no setup wizard involved.
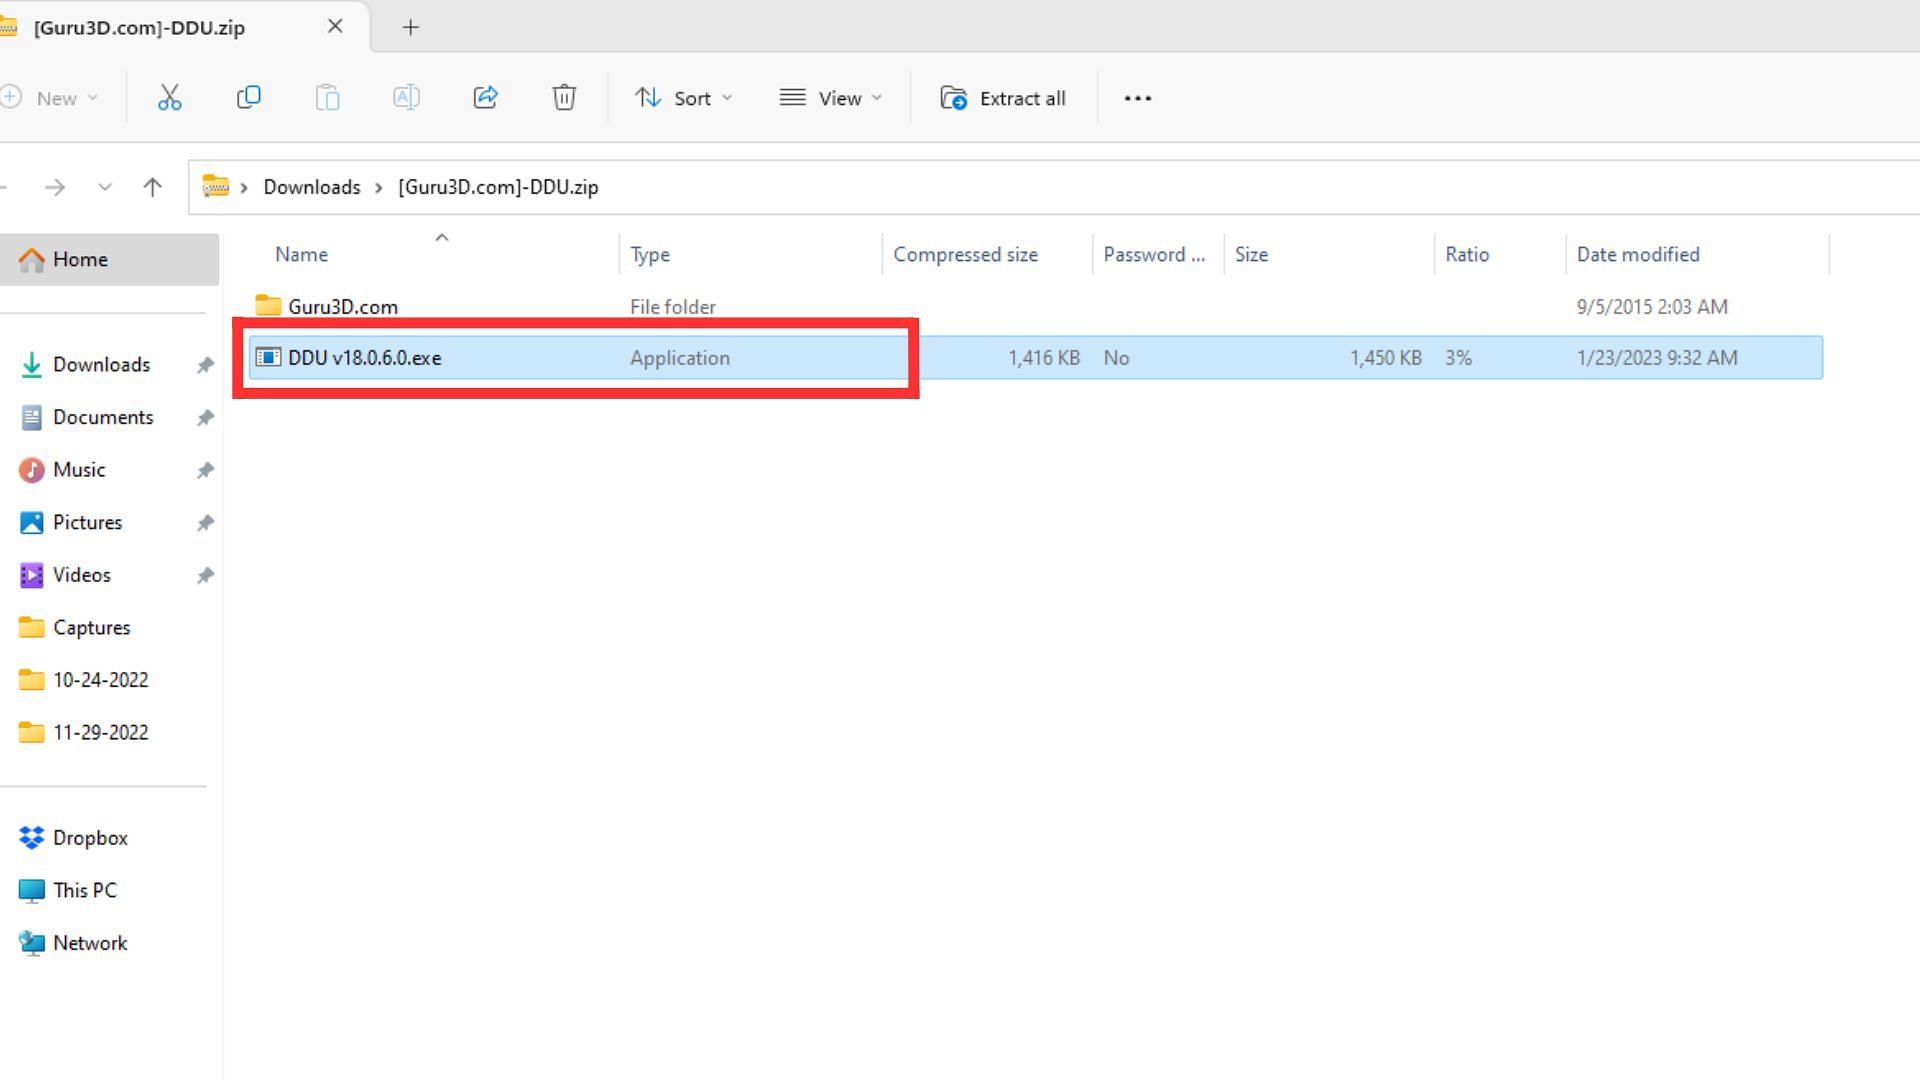
Step 5. Once the folder is extracted, open it. Then double-click on the file named "DDU v<version name>.exe." This will launch Display Driver Uninstaller.
How to uninstall drivers with Display Driver Uninstaller?
Uninstalling drivers is pretty easy with DDU. One can follow the steps listed below:
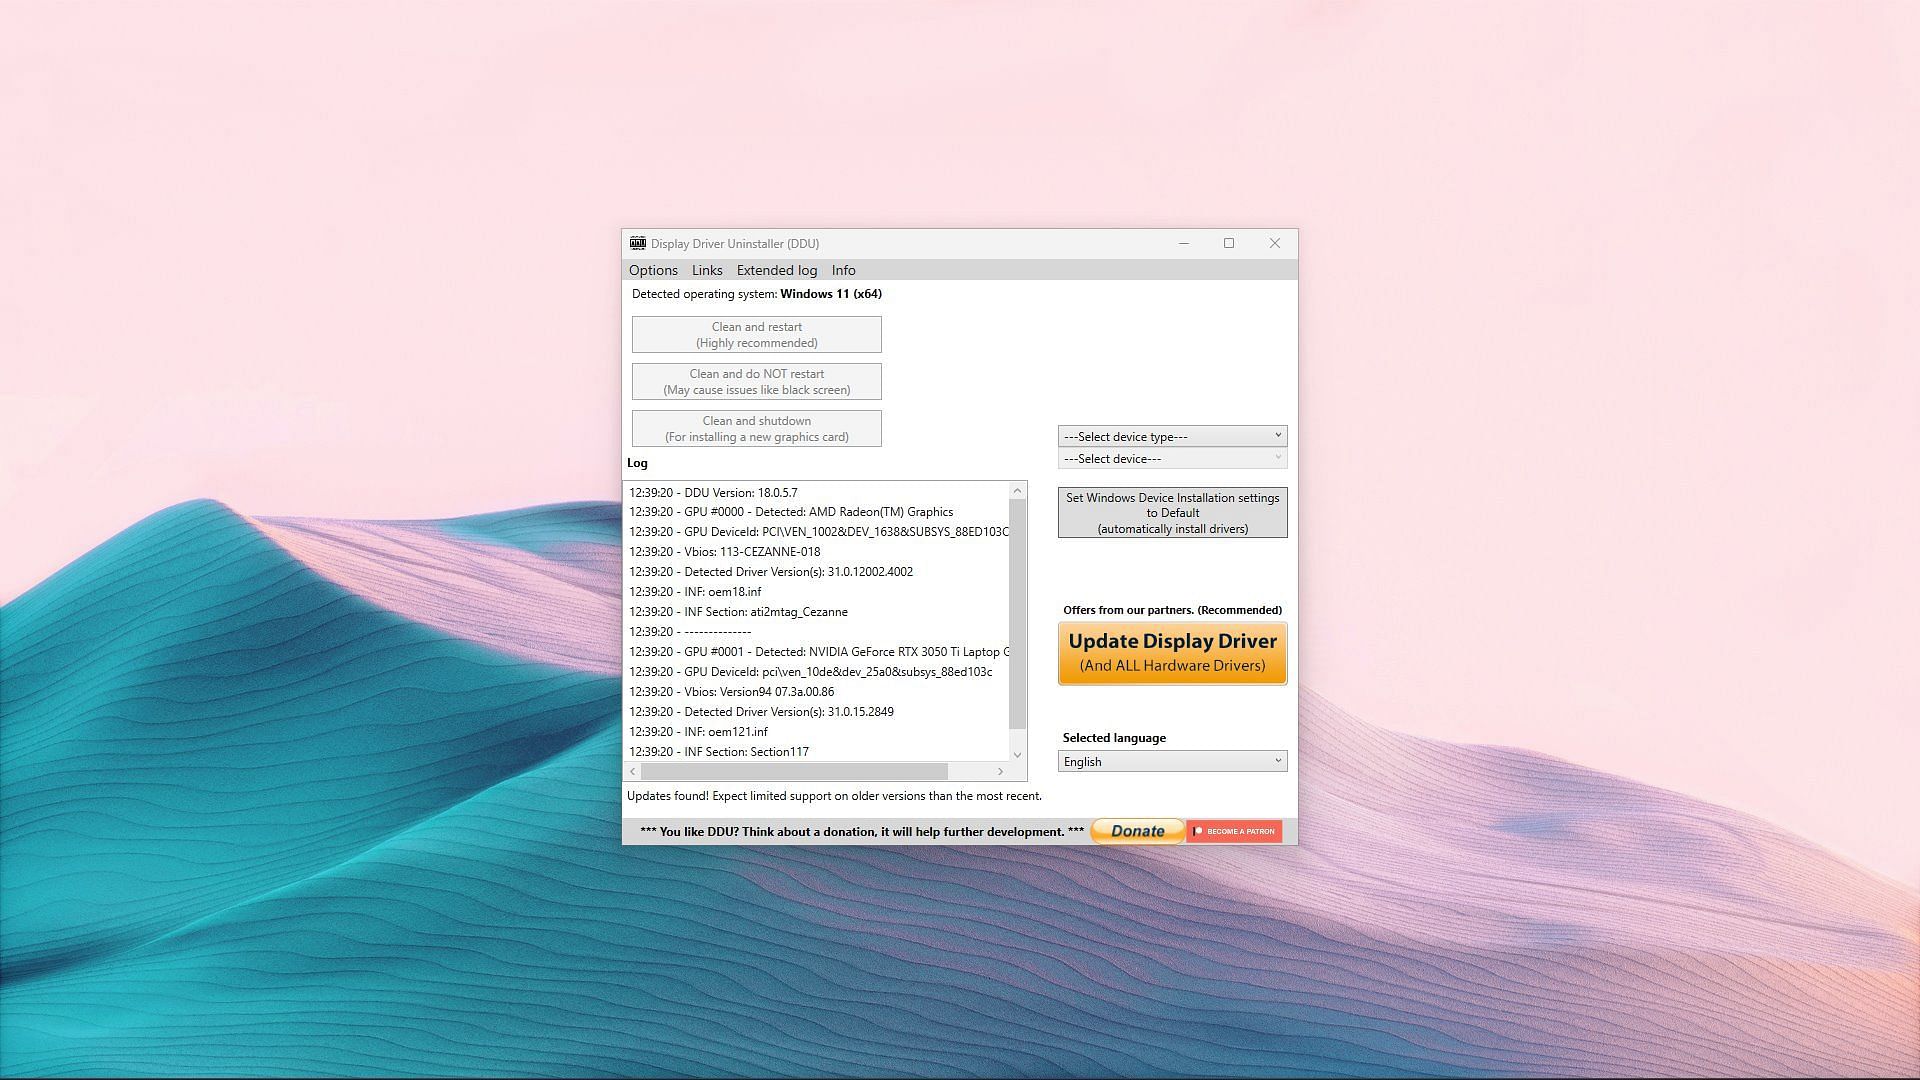
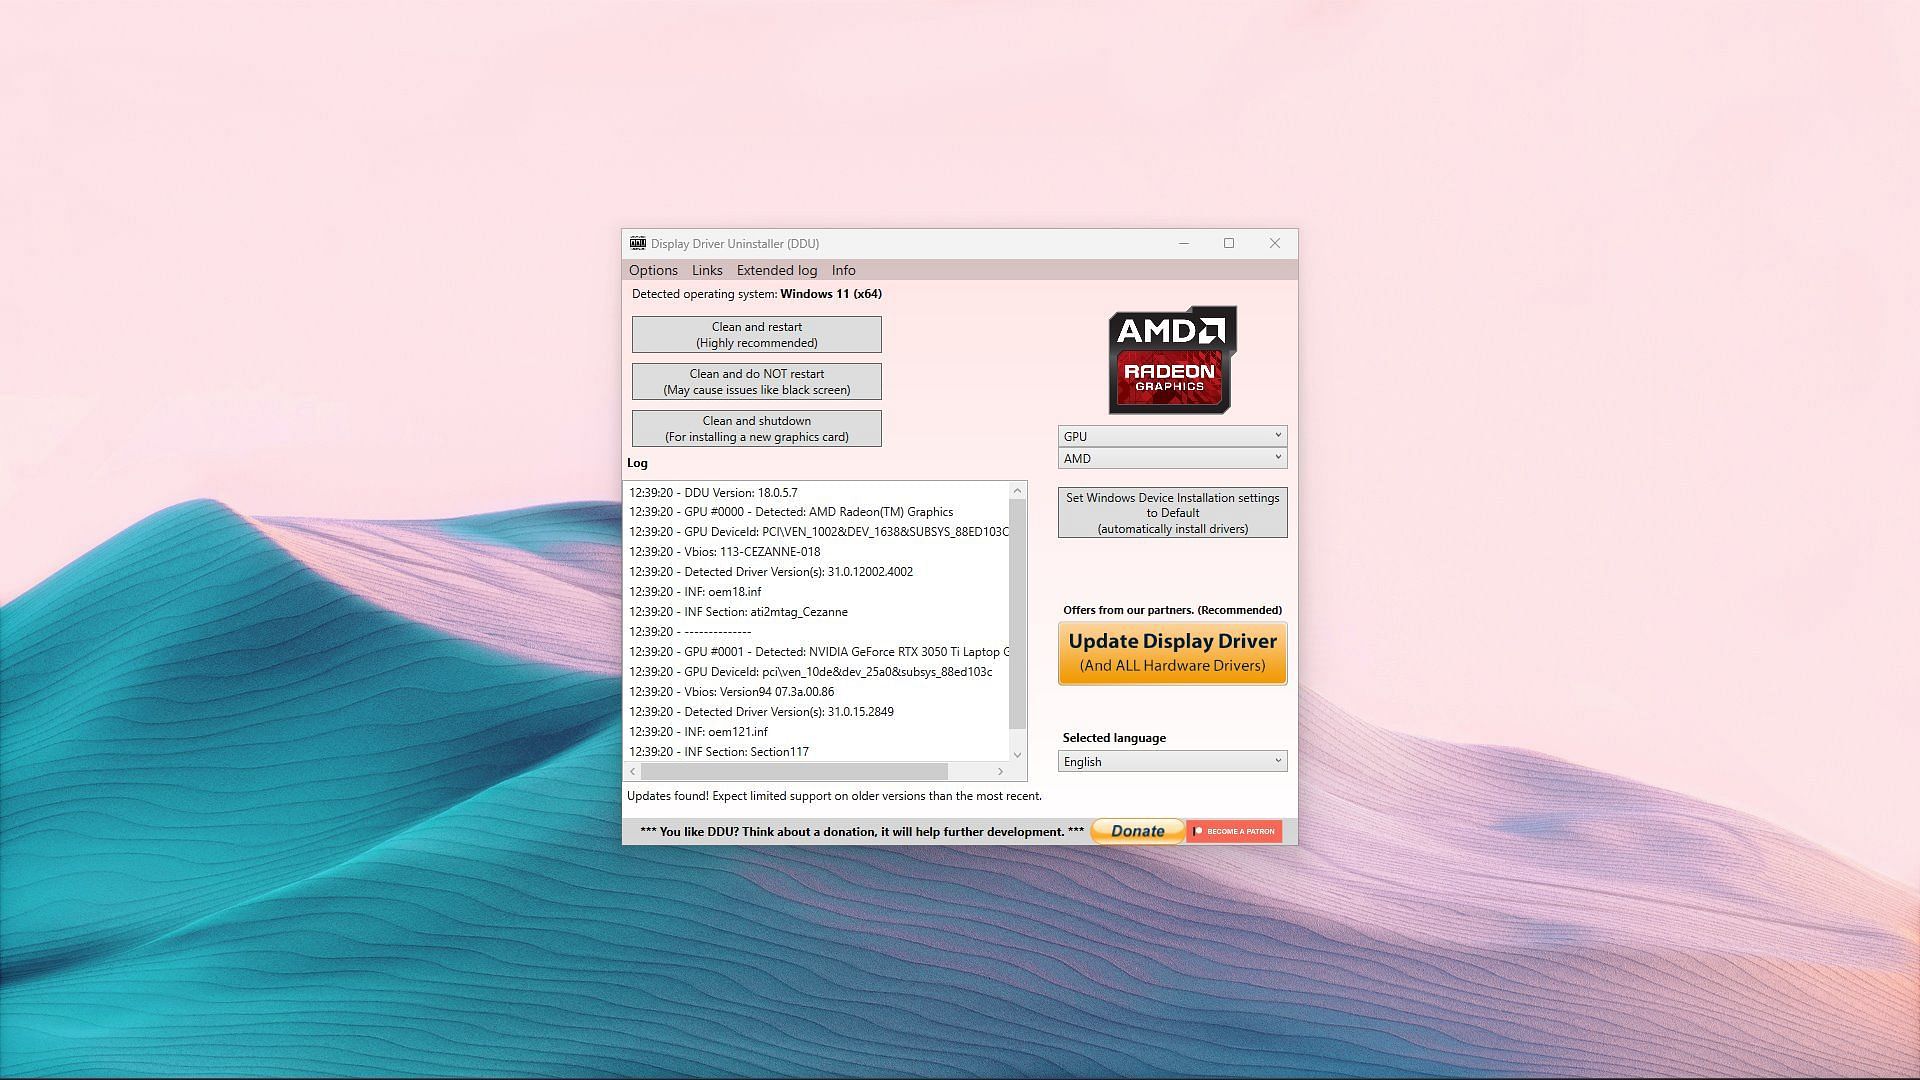
Step 1. Launch DDU. You will be greeted with a screen like in the image above.
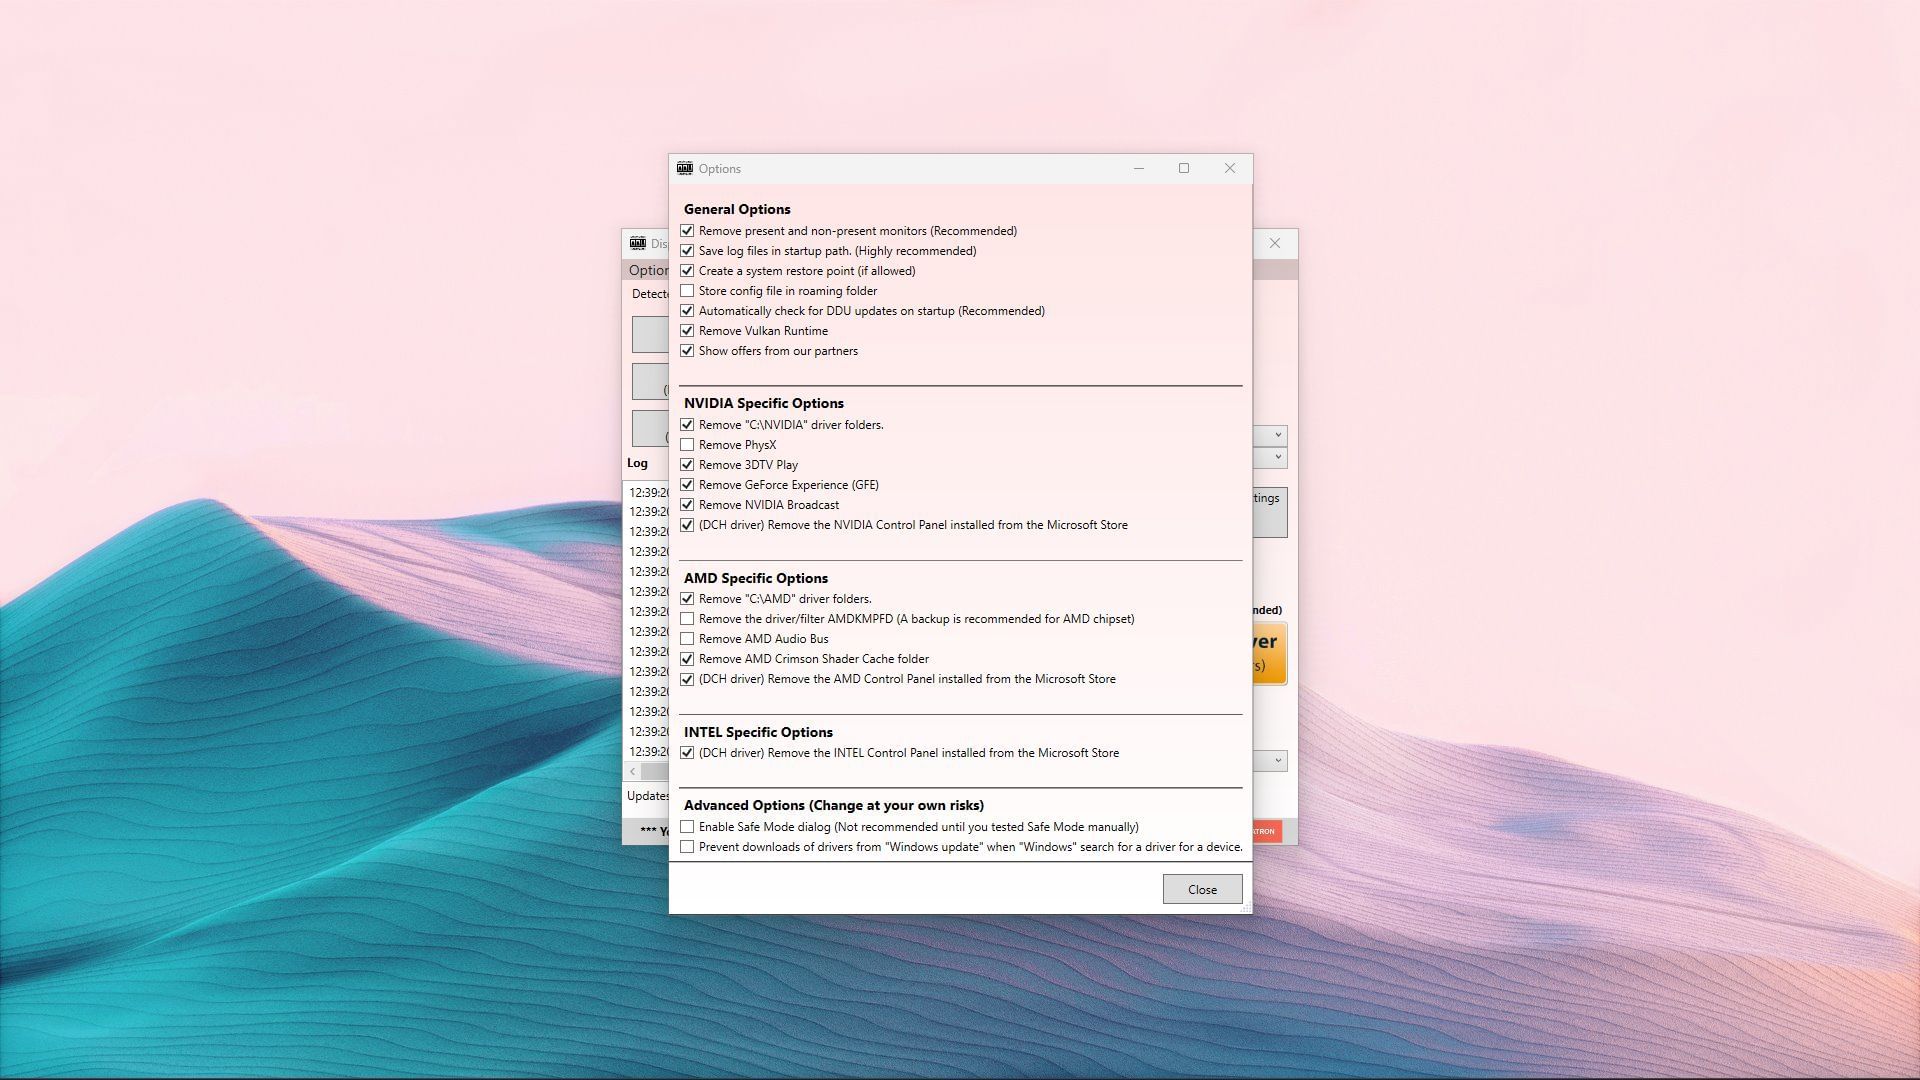
Step 2. Click on the Options tab from the ribbon at the top. Ensure you check the correct options, as shown in the following image. With these settings, the correct features are removed when you attempt a driver uninstallation.
Step 3. Select the drivers you want to remove from the drop-down list on the top-right of the window. It can either be audio or display drivers.
Step 4. Once you have specified which drivers to remove, select whether you are running an AMD, Nvidia, or Intel GPU. The screen should look like the image below.
Step 5. Now, just hit "Clean and restart (Highly recommended)" from the three buttons on the top left. This will take a while.
Step 6. The display might turn off and back on as the drivers switch from the third-party software to the Microsoft basic display adapter. Once DDU is done removing the drivers, restart the computer. This will altogether remove the display drivers from the system.
Using the Display Driver Uninstaller is quite simple. Users can get rid of faulty drivers or perform a clean reinstall with just a few clicks.