'%20x='0'%20y='0'%20height='100%25'%20width='100%25'%20%0A%20%20%20%20%20%20%20%20%20%20xlink%3Ahref='data:image/jpg;base64,/9j/2wBDAAYEBQYFBAYGBQYHBwYIChAKCgkJChQODwwQFxQYGBcUFhYaHSUfGhsjHBYWICwgIyYnKSopGR8tMC0oMCUoKSj/2wBDAQcHBwoIChMKChMoGhYaKCgoKCgoKCgoKCgoKCgoKCgoKCgoKCgoKCgoKCgoKCgoKCgoKCgoKCgoKCgoKCgoKCj/wgARCAAGAAoDASIAAhEBAxEB/8QAFgABAQEAAAAAAAAAAAAAAAAAAAQH/8QAFAEBAAAAAAAAAAAAAAAAAAAAAP/aAAwDAQACEAMQAAAAzGUP/8QAIRAAAgIBAwUBAAAAAAAAAAAAAgMEBQEABhESFCMxQcH/2gAIAQEAAT8A3Na2ECyq3vf3EdUWPGjqHxivBoAvX7qVuKoOS05dMl8kjzlrcqXjrL6XHGv/xAAUEQEAAAAAAAAAAAAAAAAAAAAA/9oACAECAQE/AH//xAAUEQEAAAAAAAAAAAAAAAAAAAAA/9oACAEDAQE/AH//2Q=='%3E%3C/image%3E%3C/svg%3E)
It can be tricky to manage disk partitions in Windows. Perhaps you want to boot two operating systems simultaneously, or maybe you don't want to reinstall Windows when partitioning a hard disk. There are a lot of third-party software on the internet for this process. However, Windows 10 and 11 provide a simple tool to easily manage disk partitions.
In this guide, you'll learn to create, remove, and organize disk partitions in Windows without any software.
Manage disk partitions in Windows: Resize, create, format, and delete partitions
The Disk Management tool is a fantastic built-in feature in Windows to extend, create, and format partitions, as well as shrink volumes. Hence, you don't have to download any third-party software that might compromise your privacy in any way.
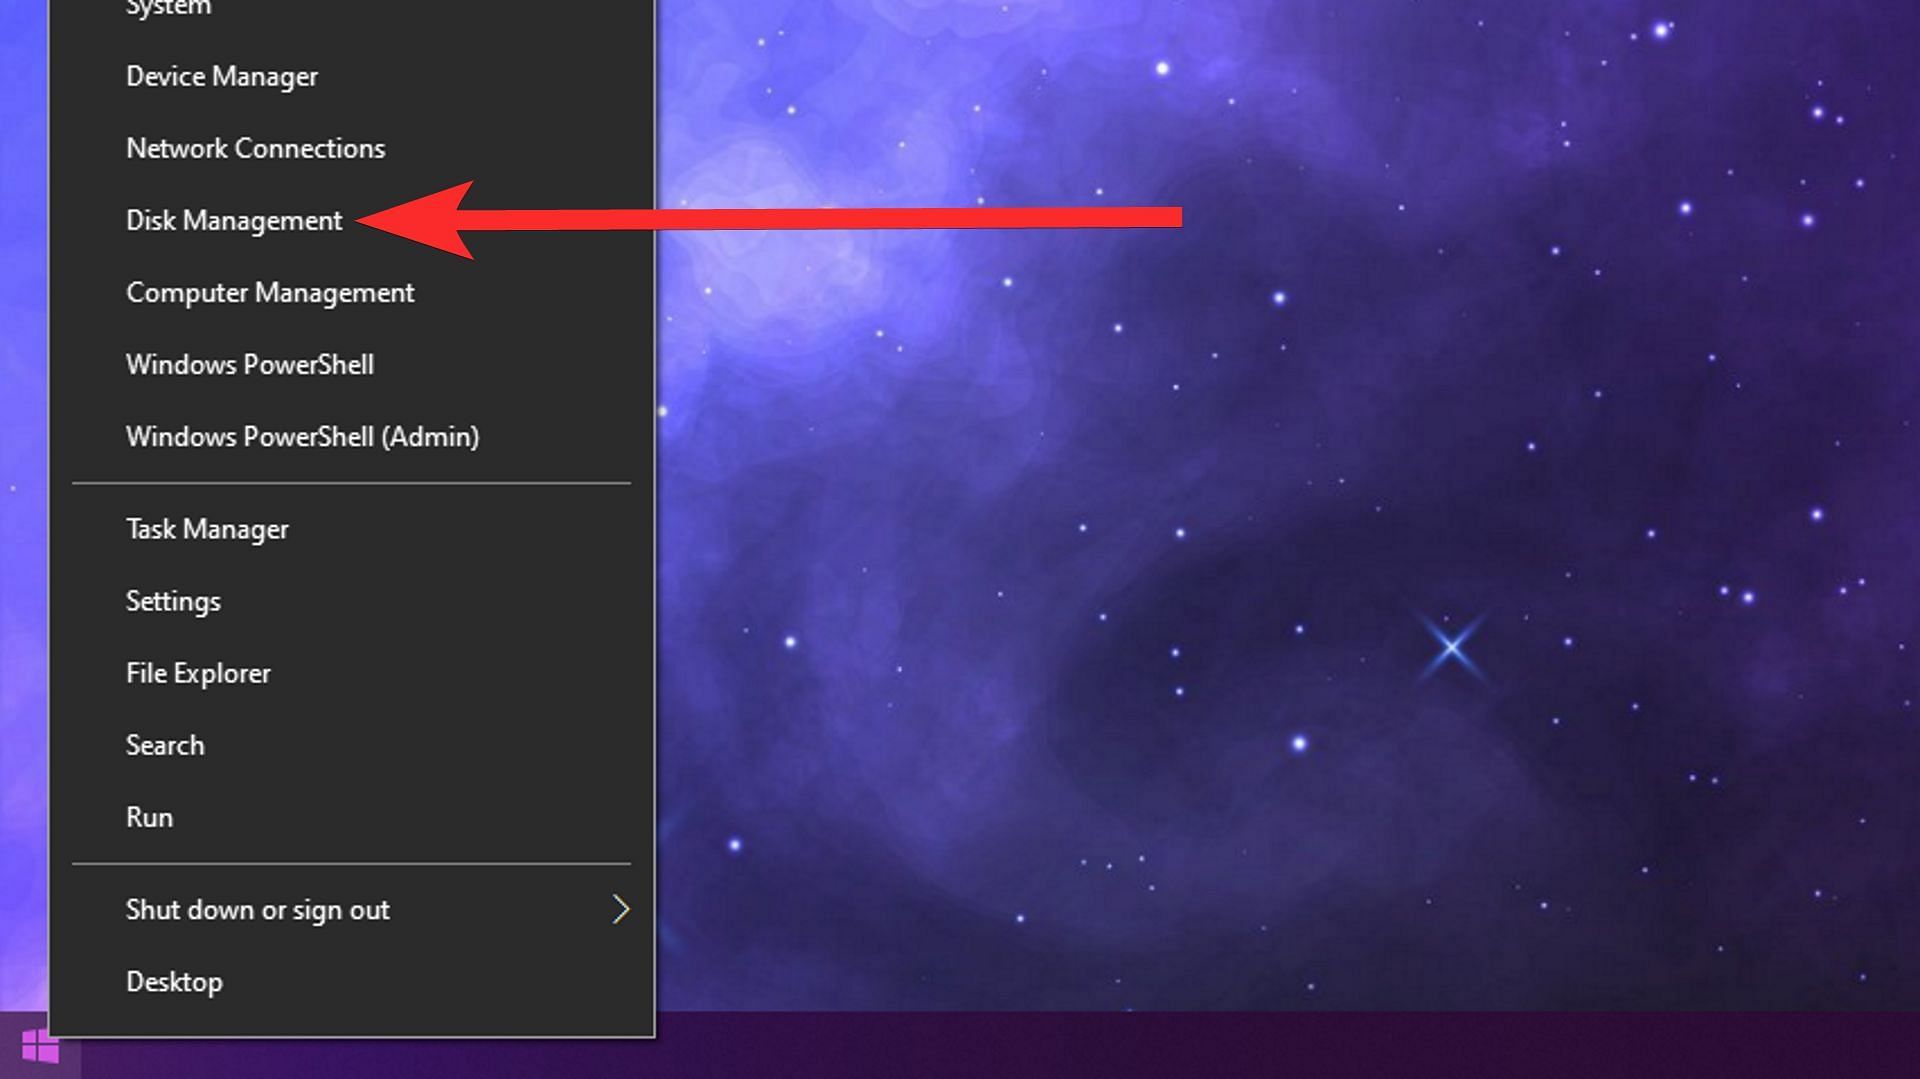
To launch the tool, right-click on the Start button and choose Disk Management.
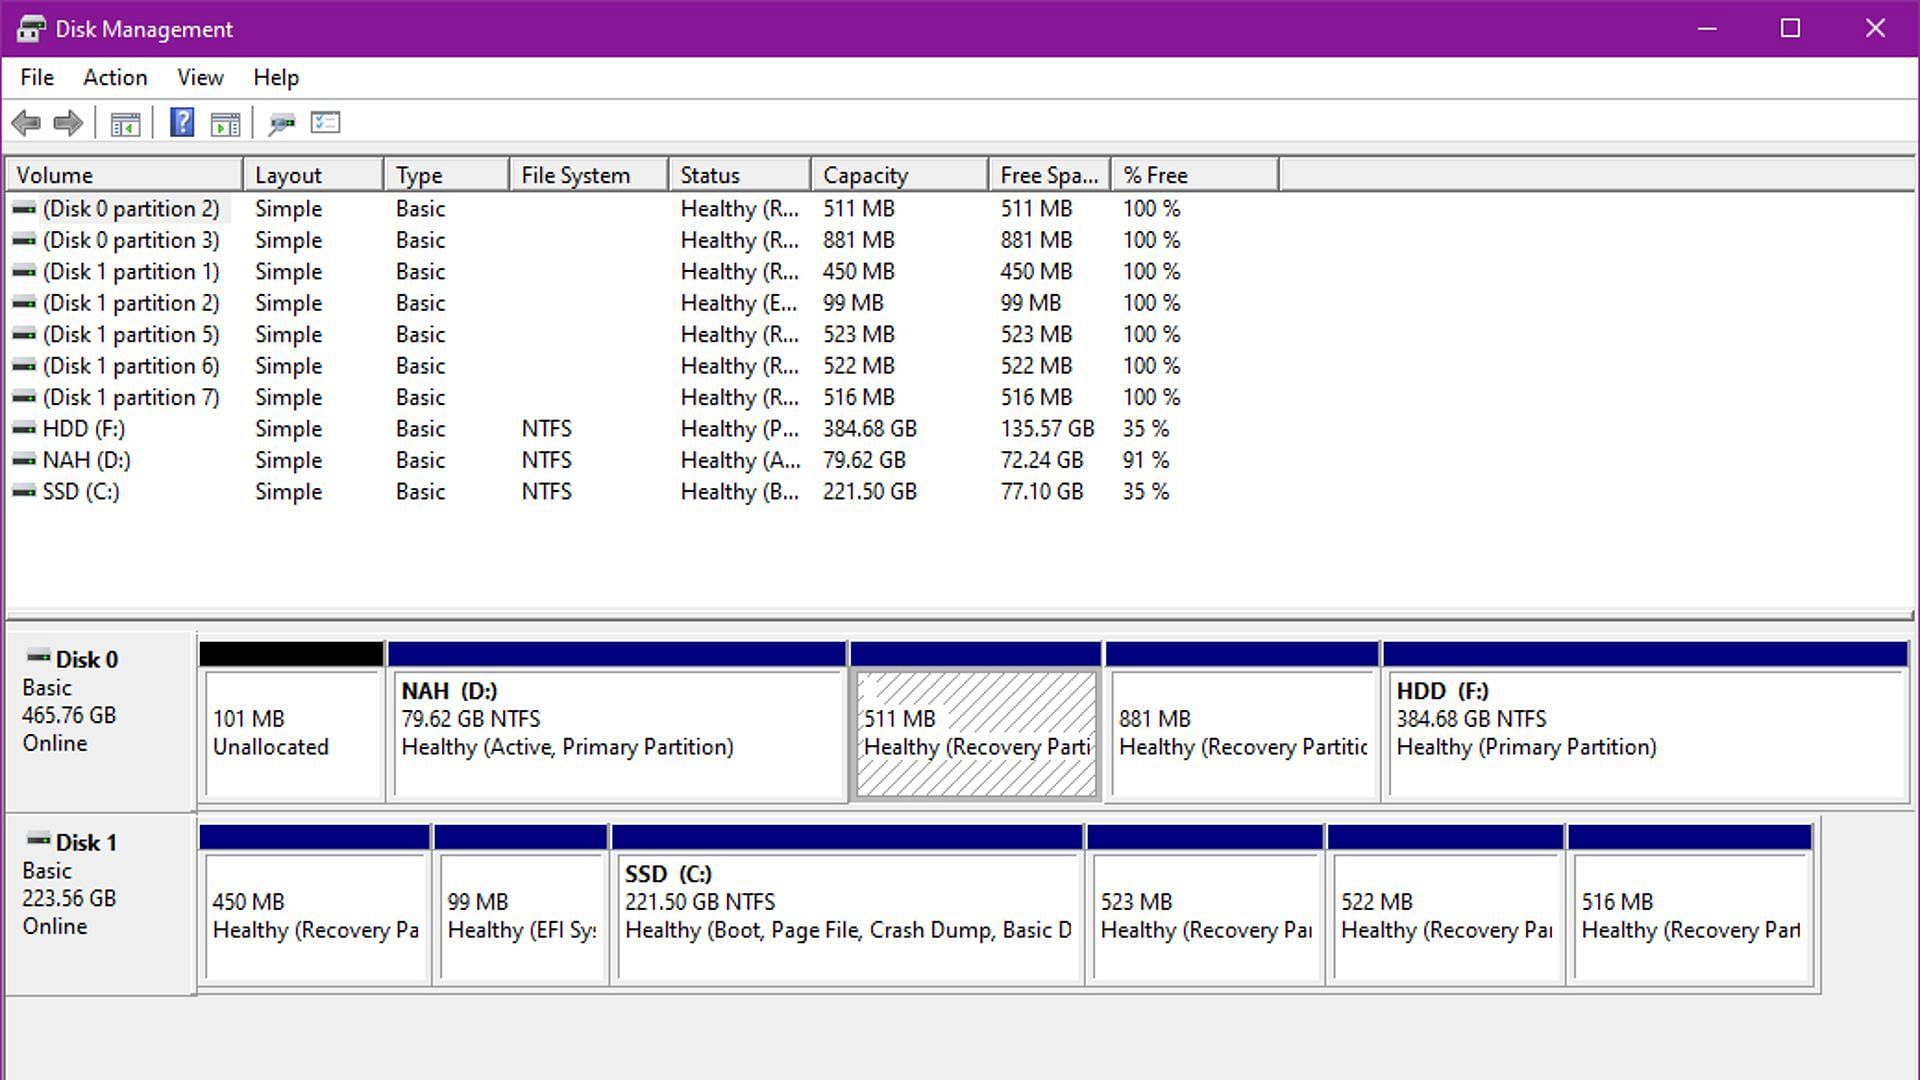
In the Disk Management window, the top pane shows a list of your disk partitions, referred to as "volumes". Here you can find information such as status, total capacity, and how much free space is available.
In the bottom pane is your physical hard drive, which provides a clear picture of which partition is located on which drive.
1) Resize a partition
Step 1:
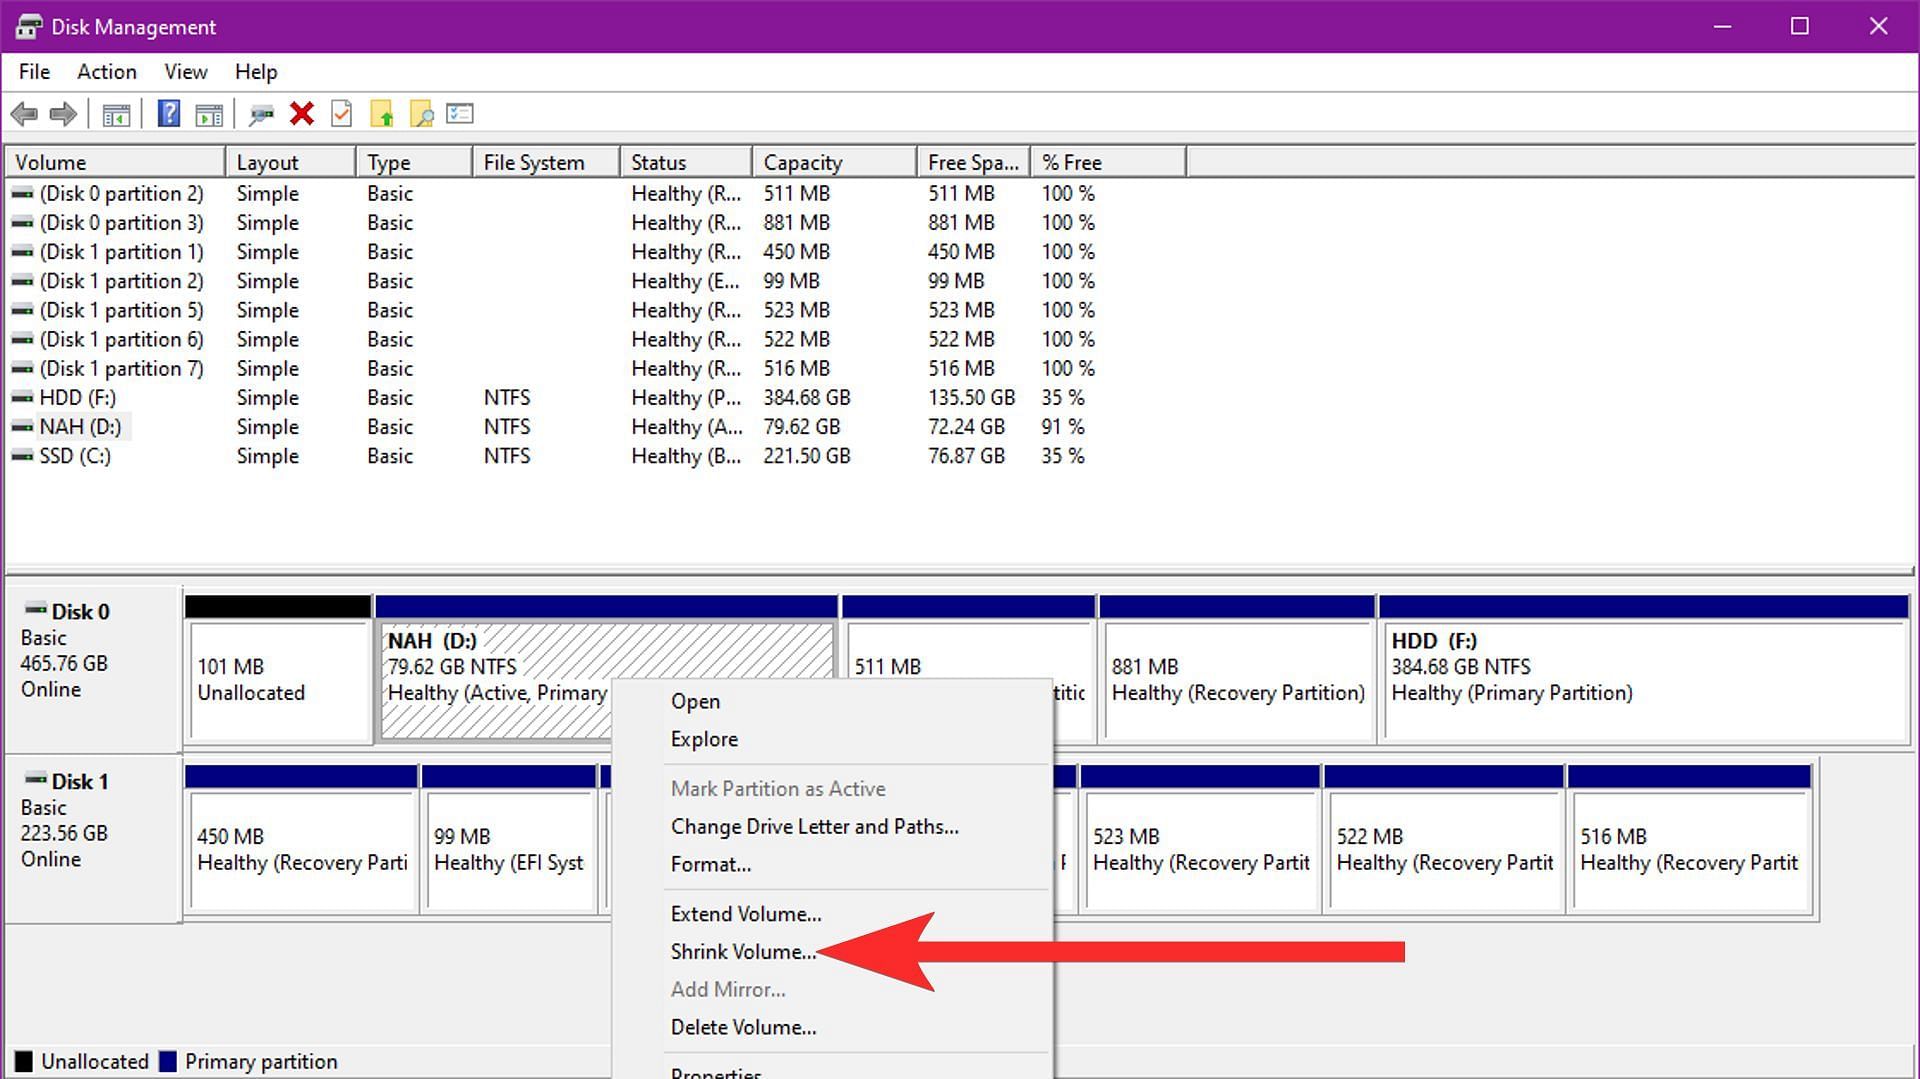
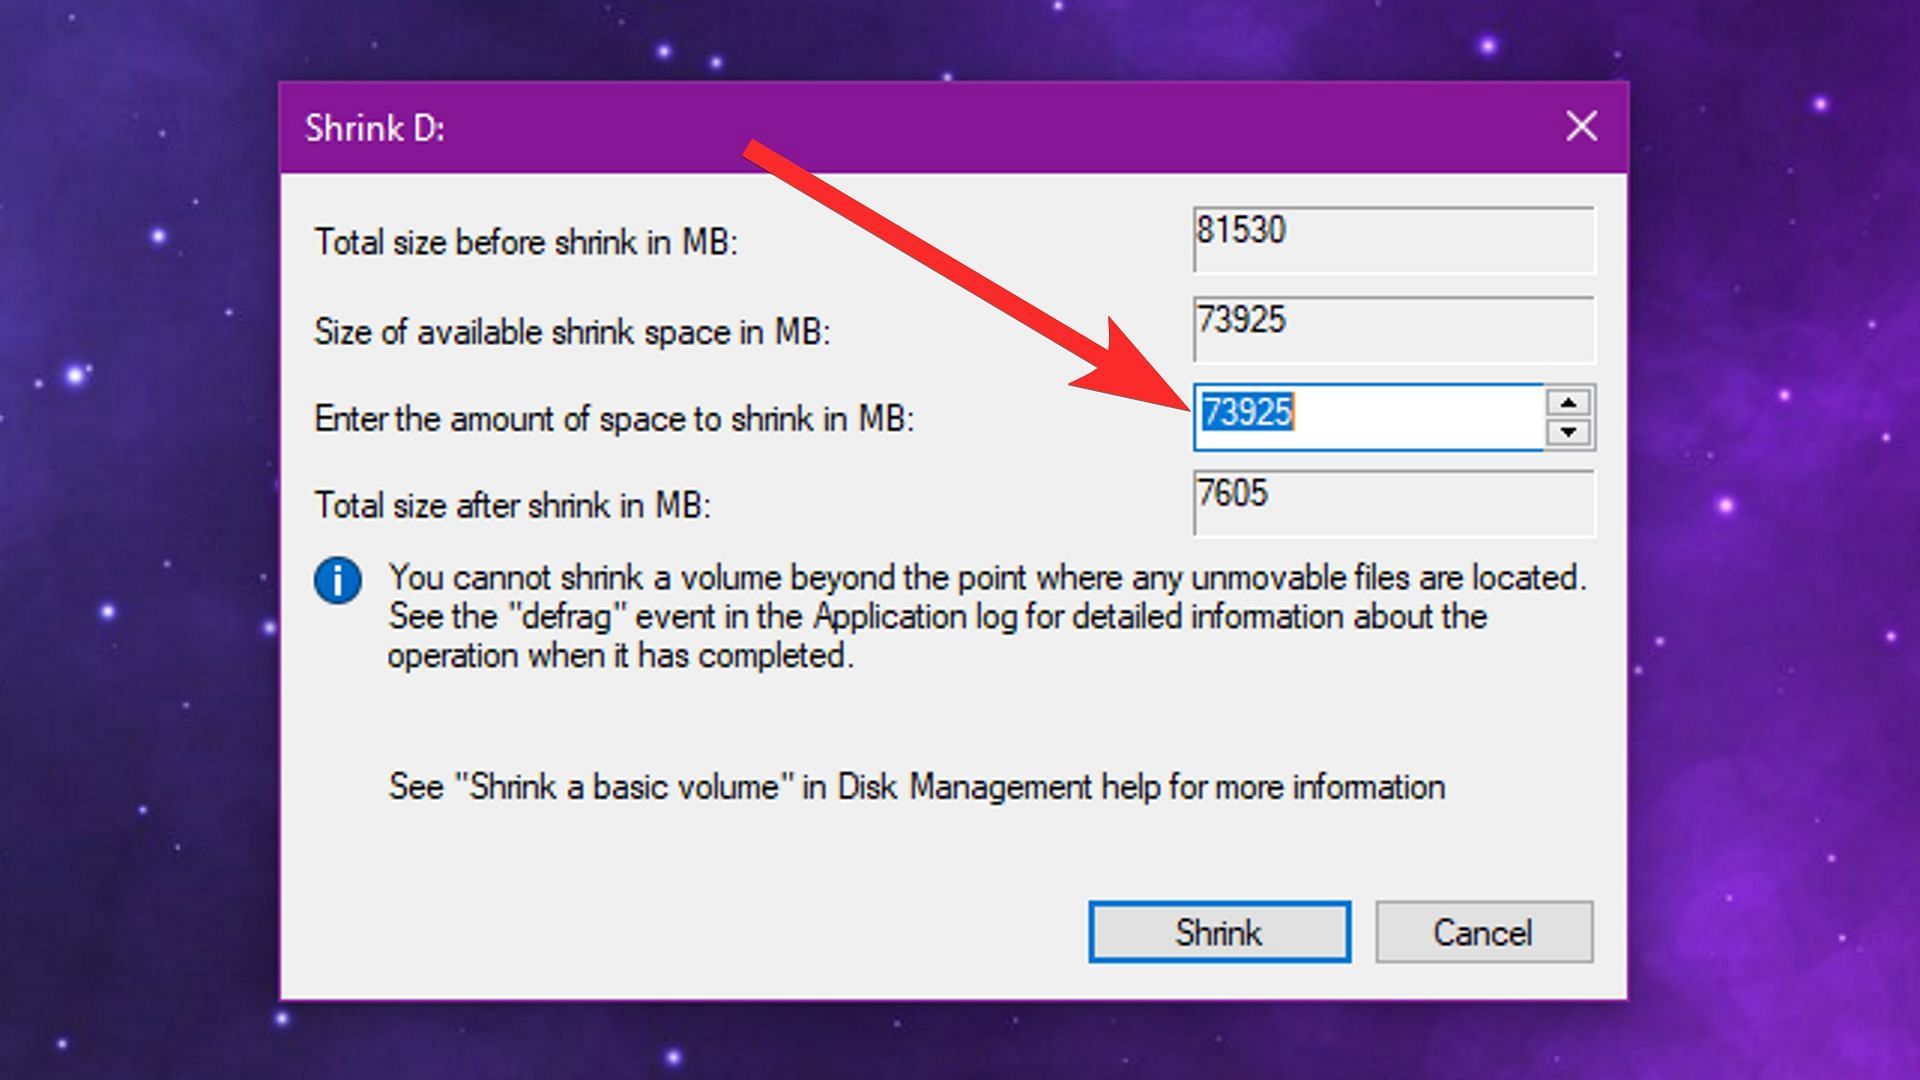
To change the size of a disk partition, right-click on it and select Shrink Volume.
Step 2:
Enter the amount of space you want to decrease and click on Shrink. The remaining amount will now appear as "unallocated," and it can be added to another partition by extending.
Step 3:
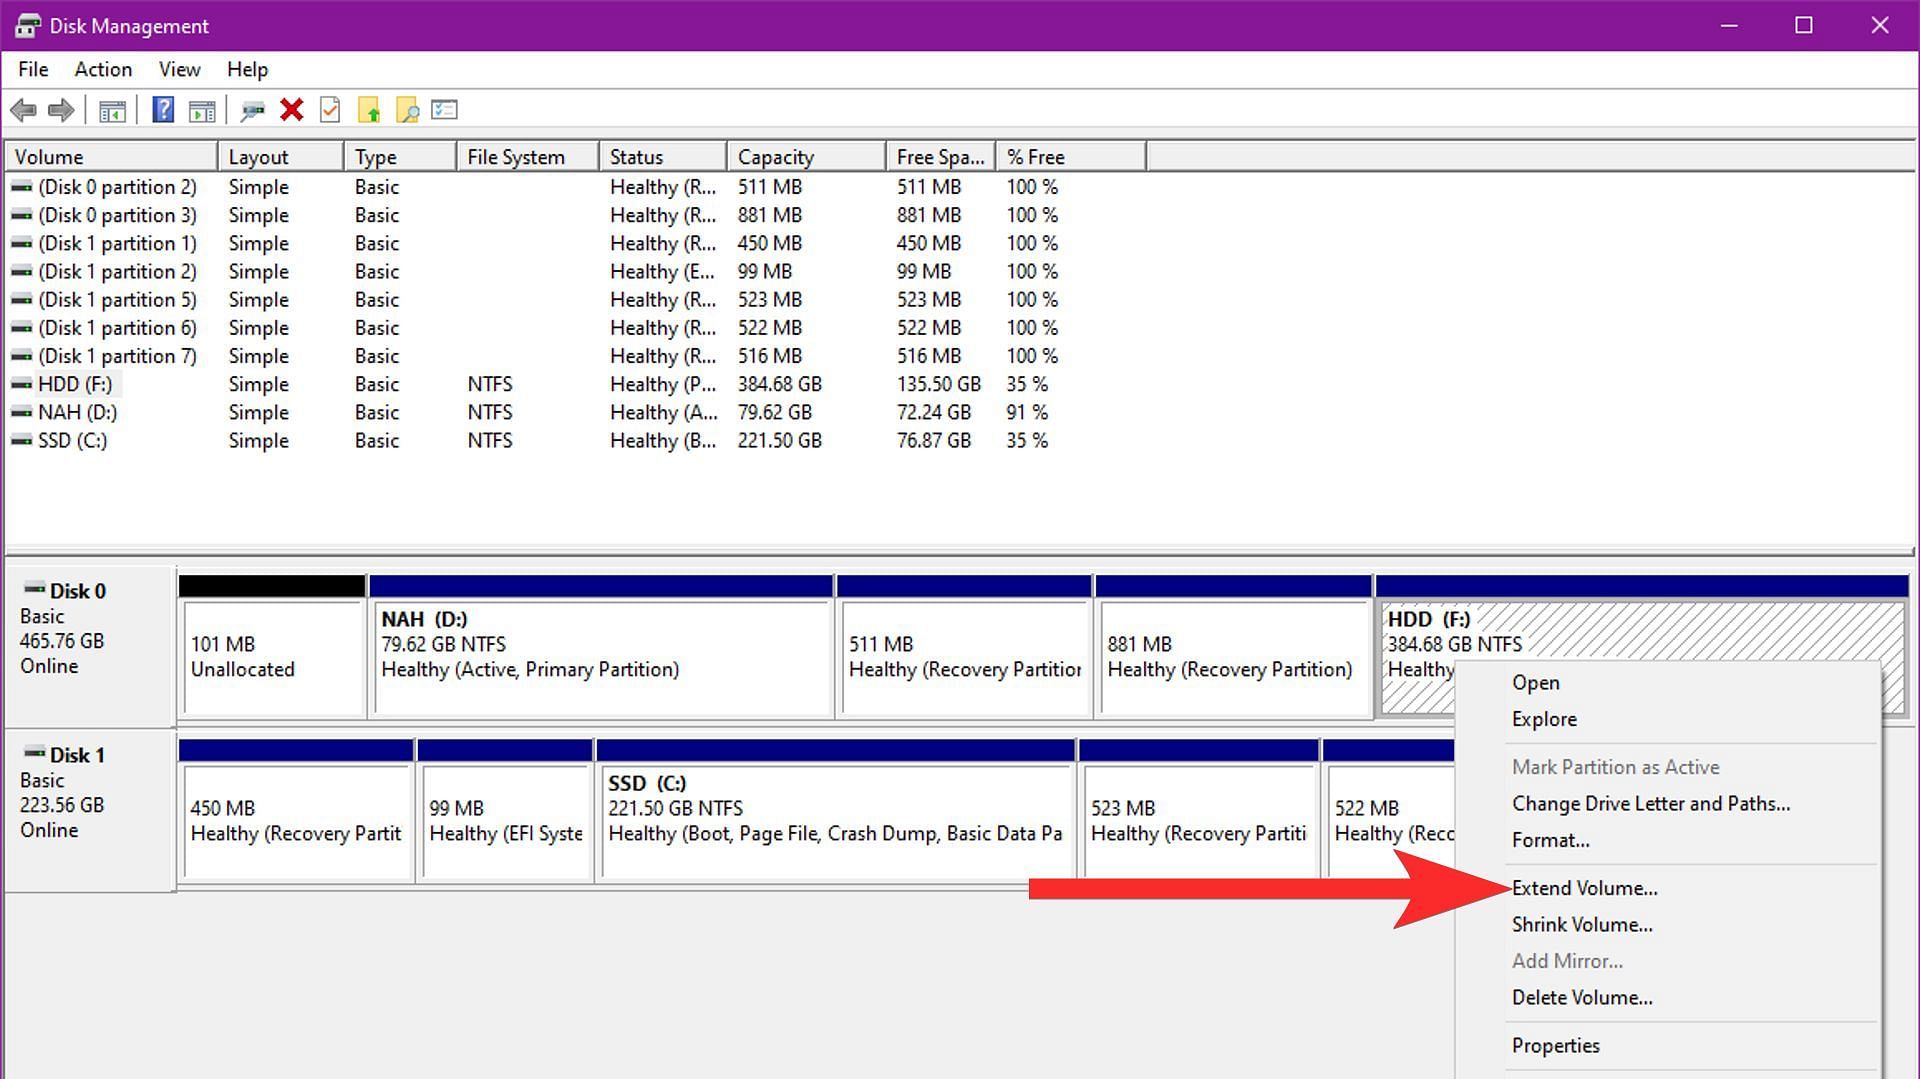
You can add the "unallocated" space to another disk partition by right-clicking on the partition and selecting Extend Volume.
2) Create a partition
Step 1:
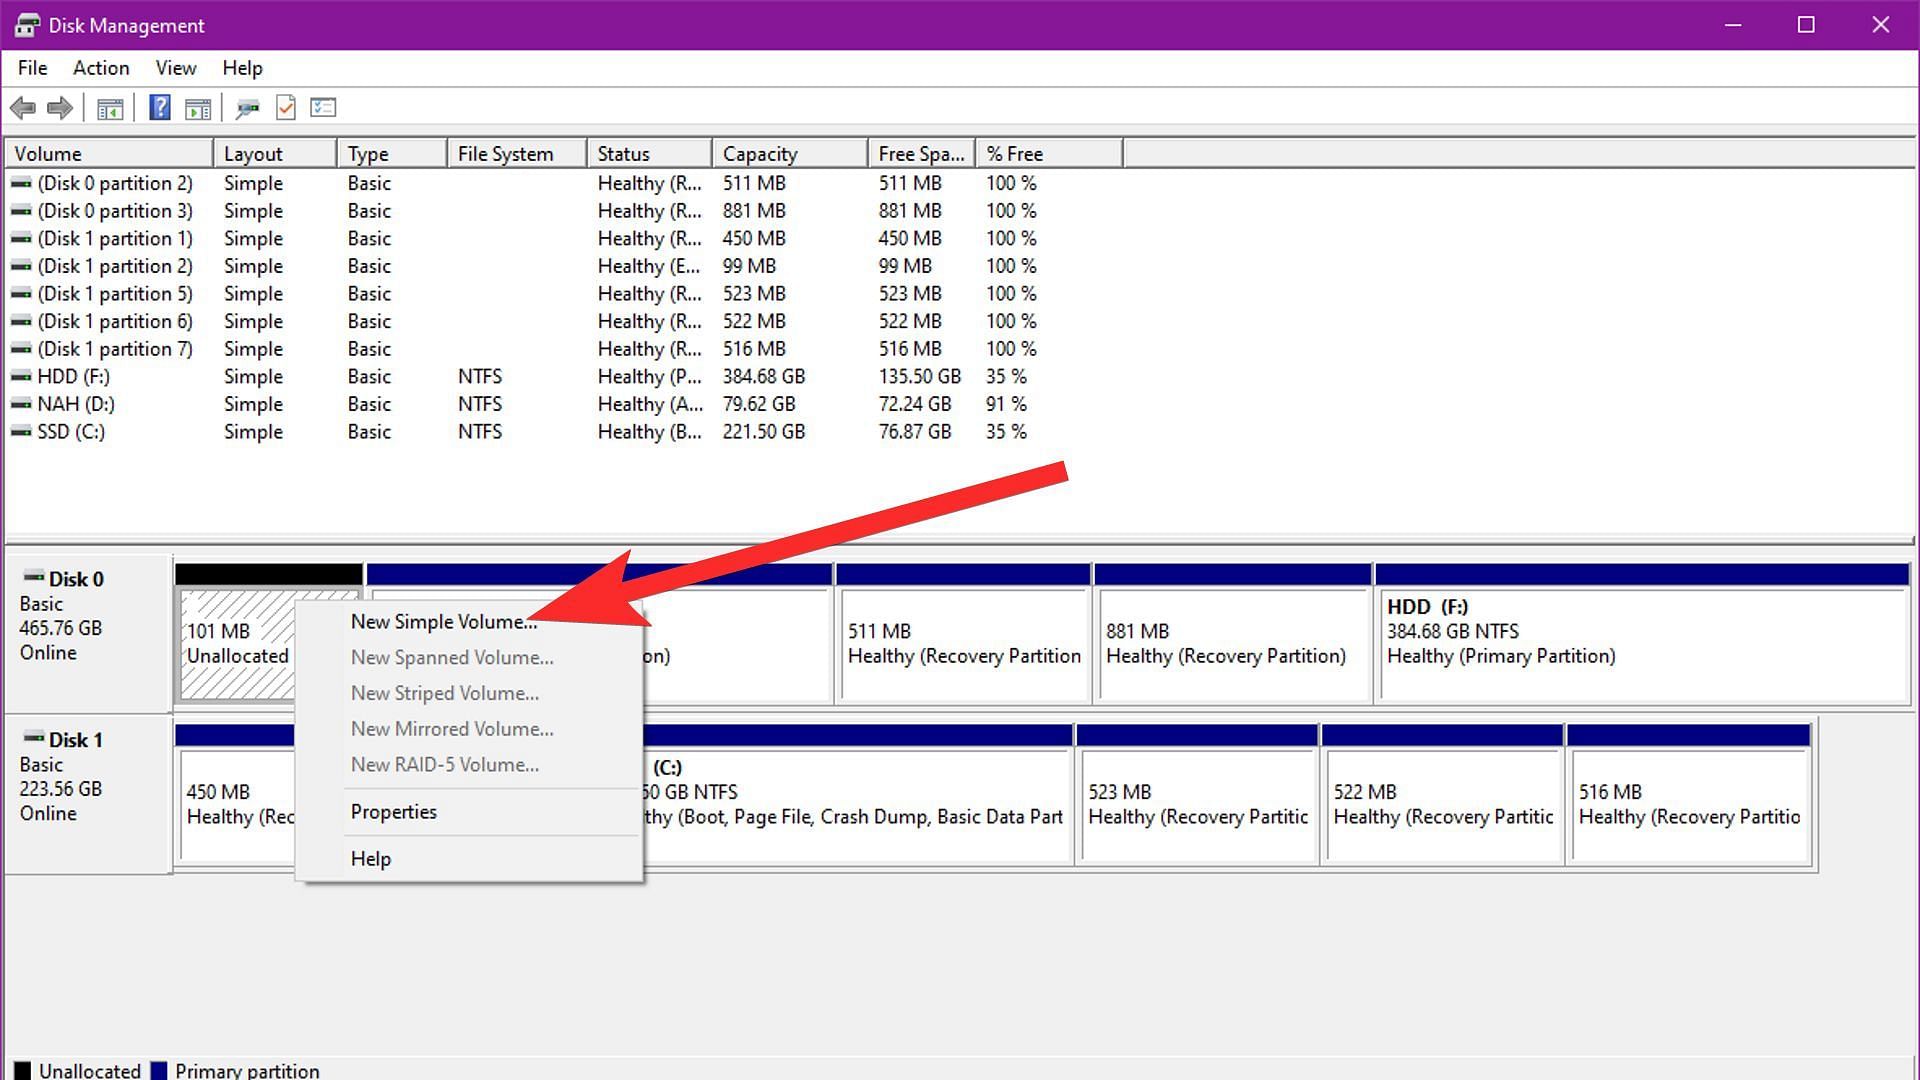
If you have any "unallocated space" available, you can create a new partition. Right-click on that space and choose New Simple Volume.
Step 2:
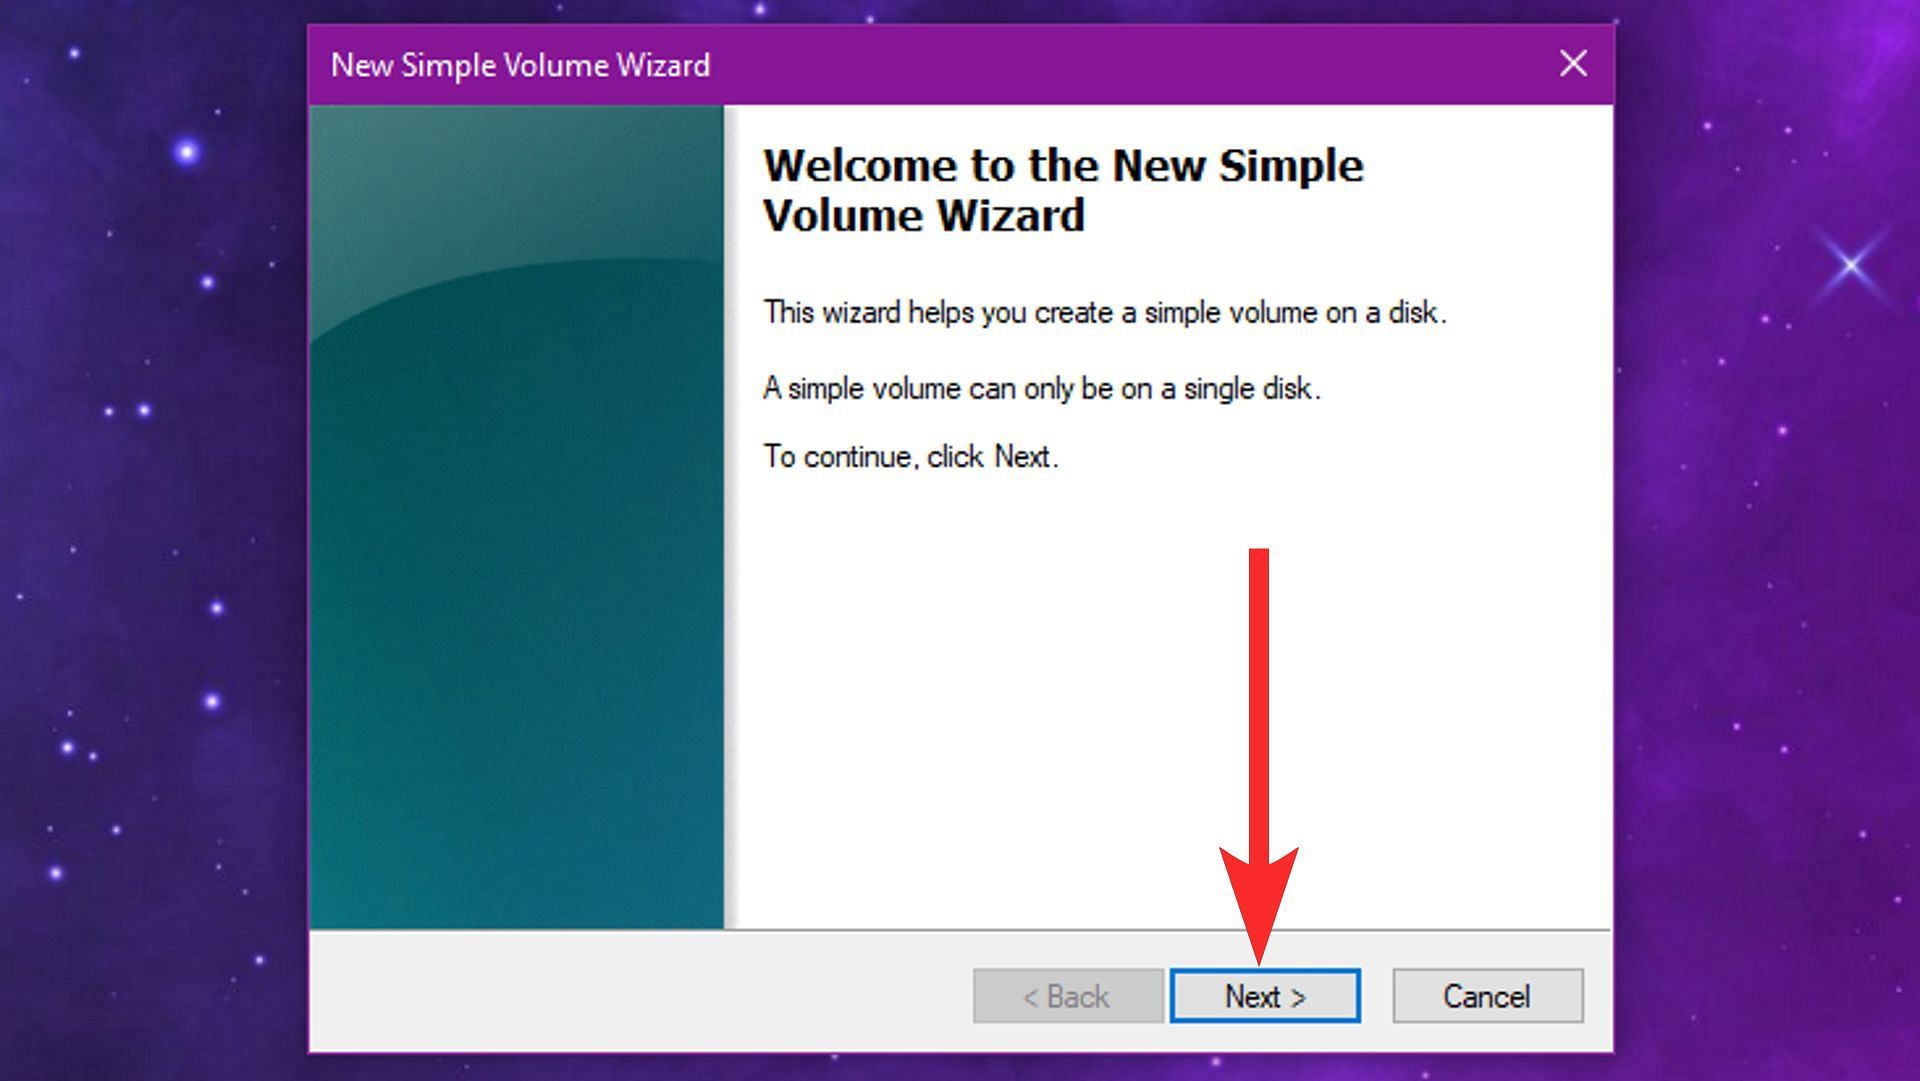
A new wizard will open. Click on Next.
Step 3:
Choose the size of your partition and click Next.

Step 4:
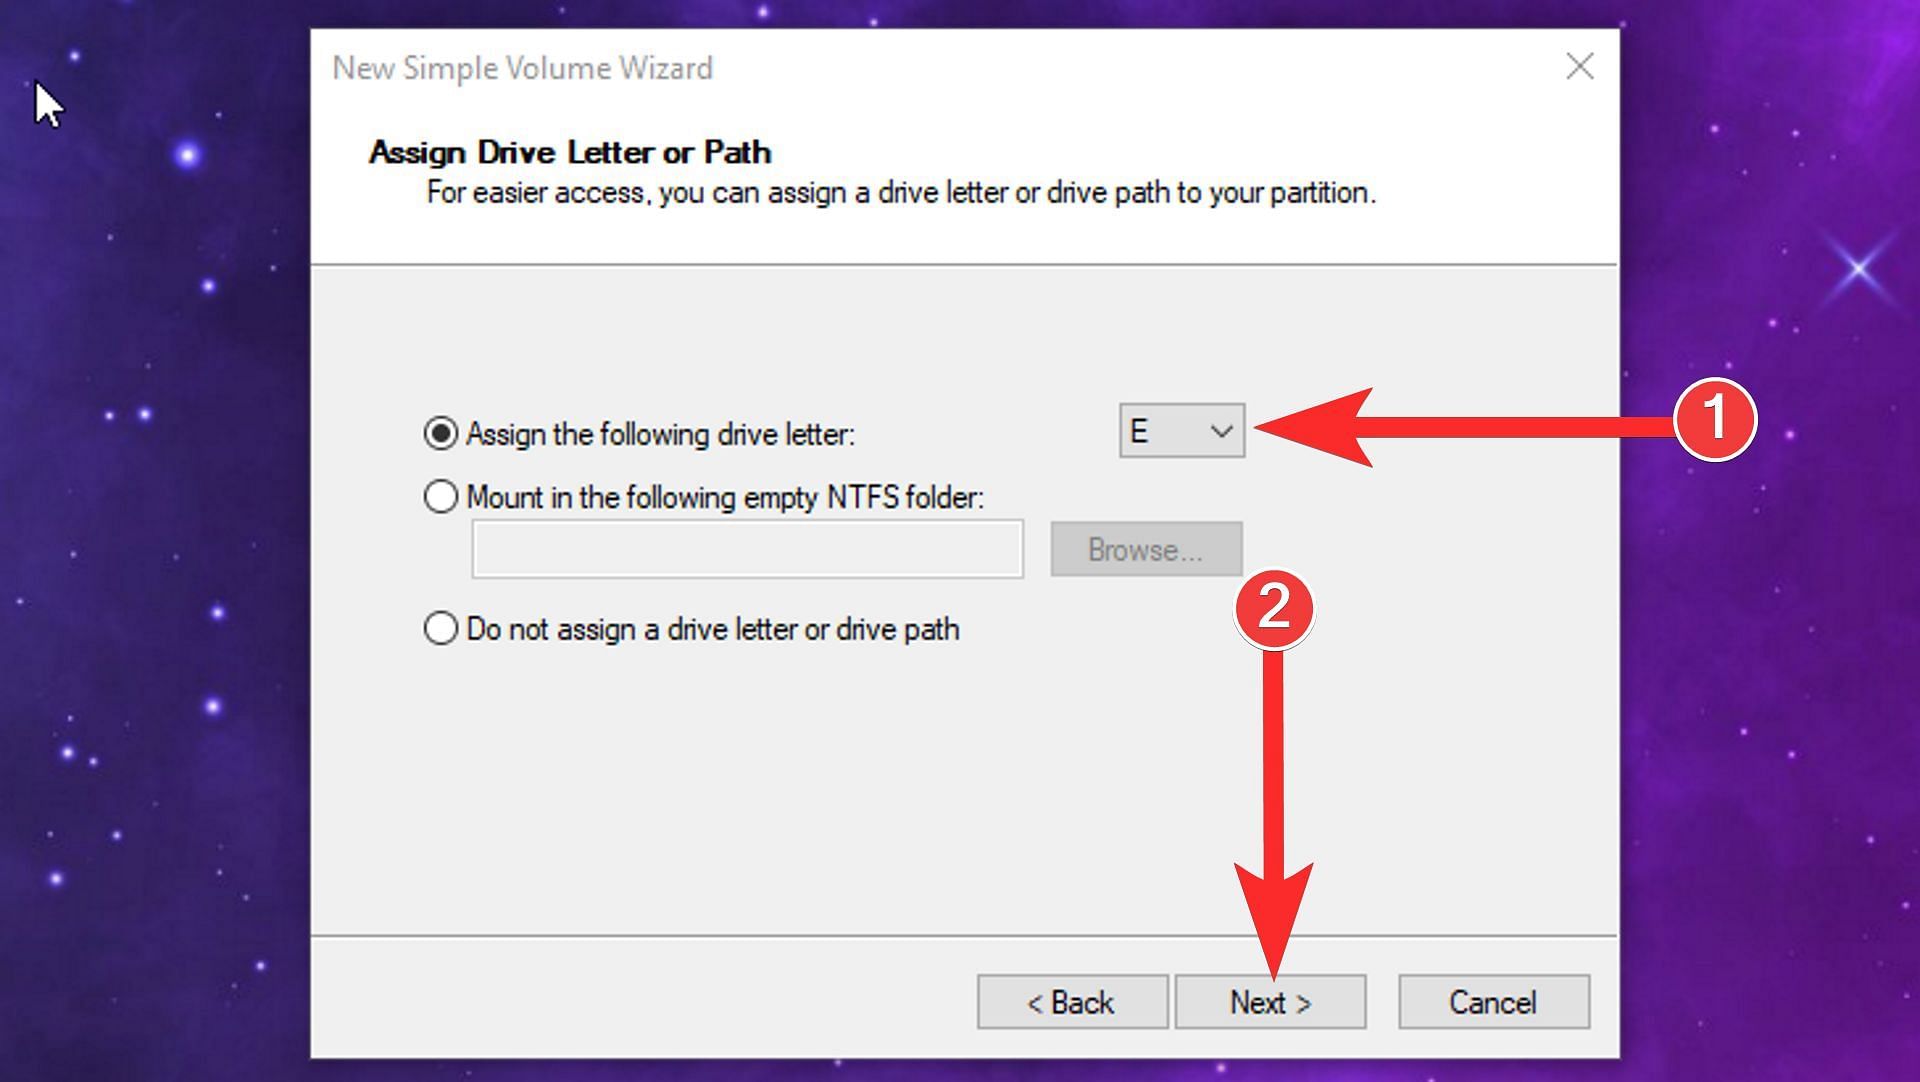
Choose your drive letter and click on Next.
Step 5:
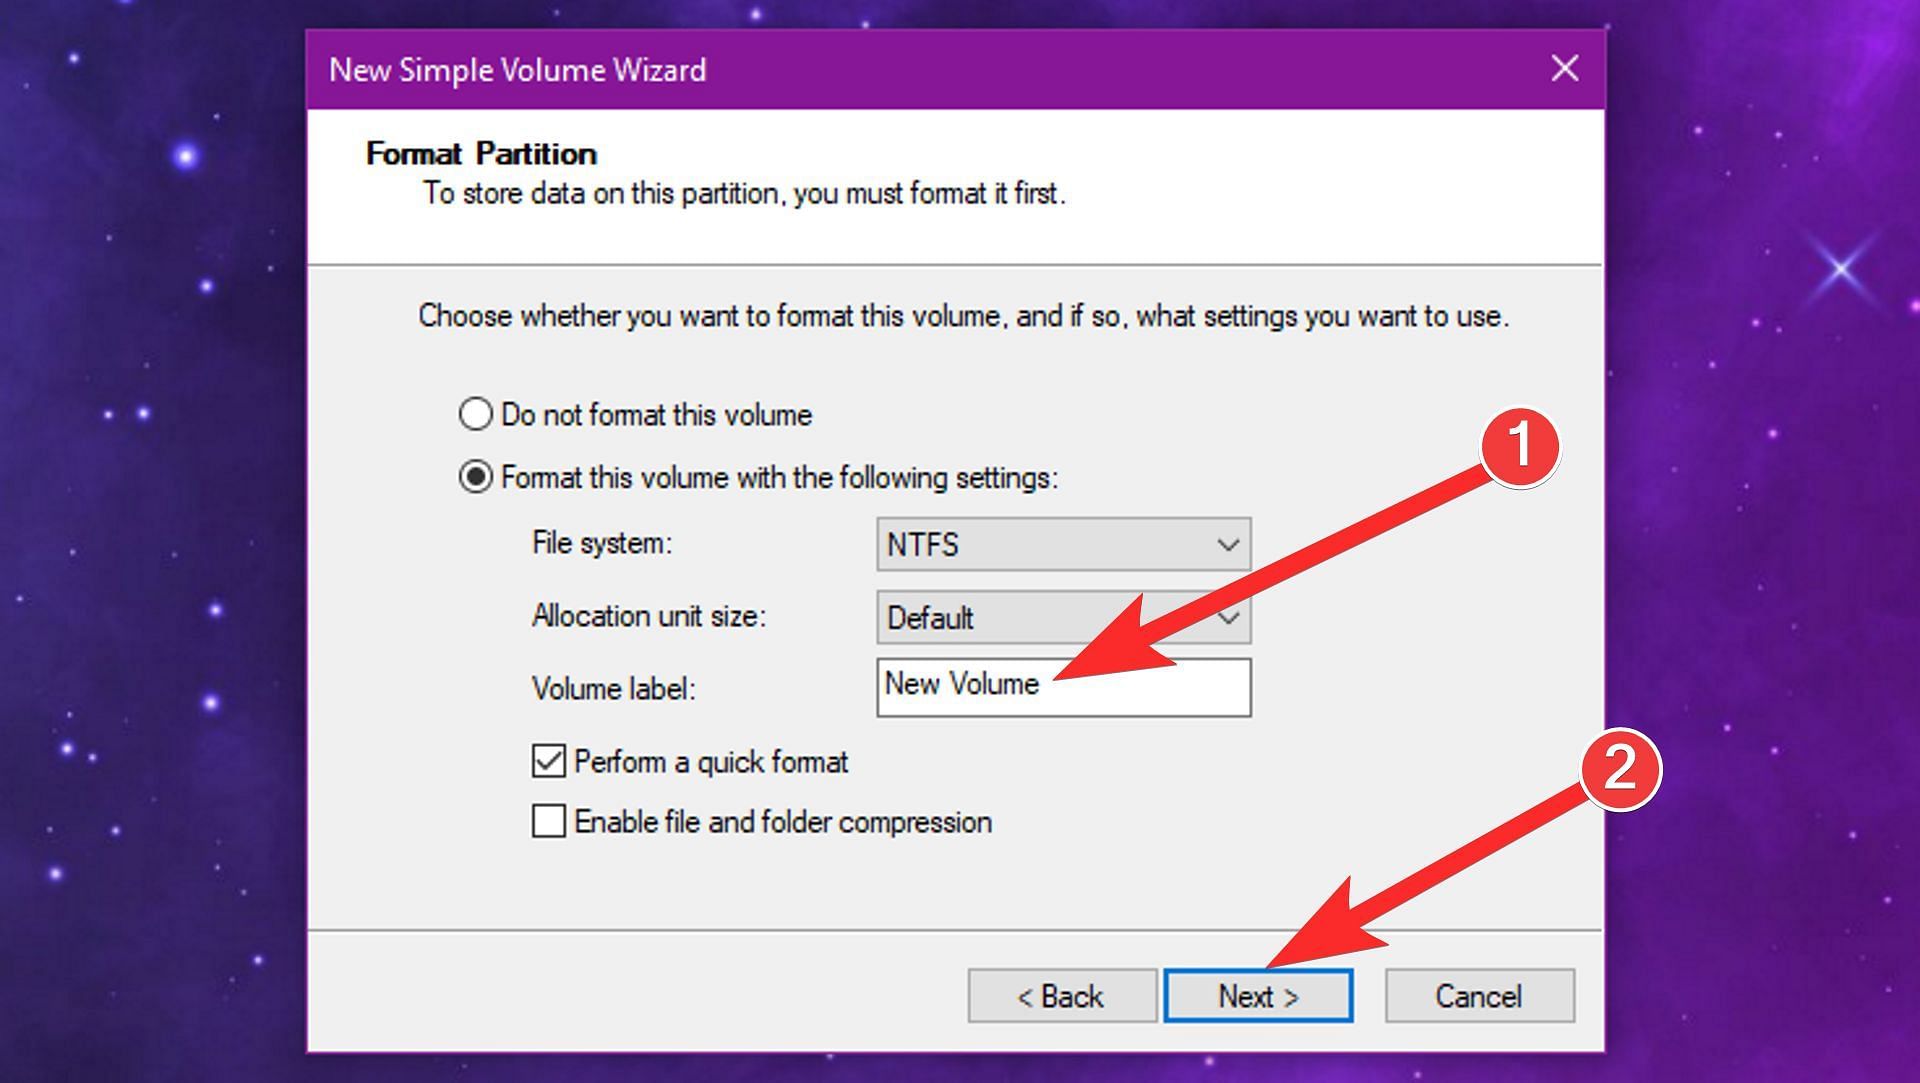
Do not change any settings in the Format Partition window. However, you can enter a new volume name if you'd like. Then, click on Next. When finished, you'll have a new volume to use.
3) Format a partition
Step 1:
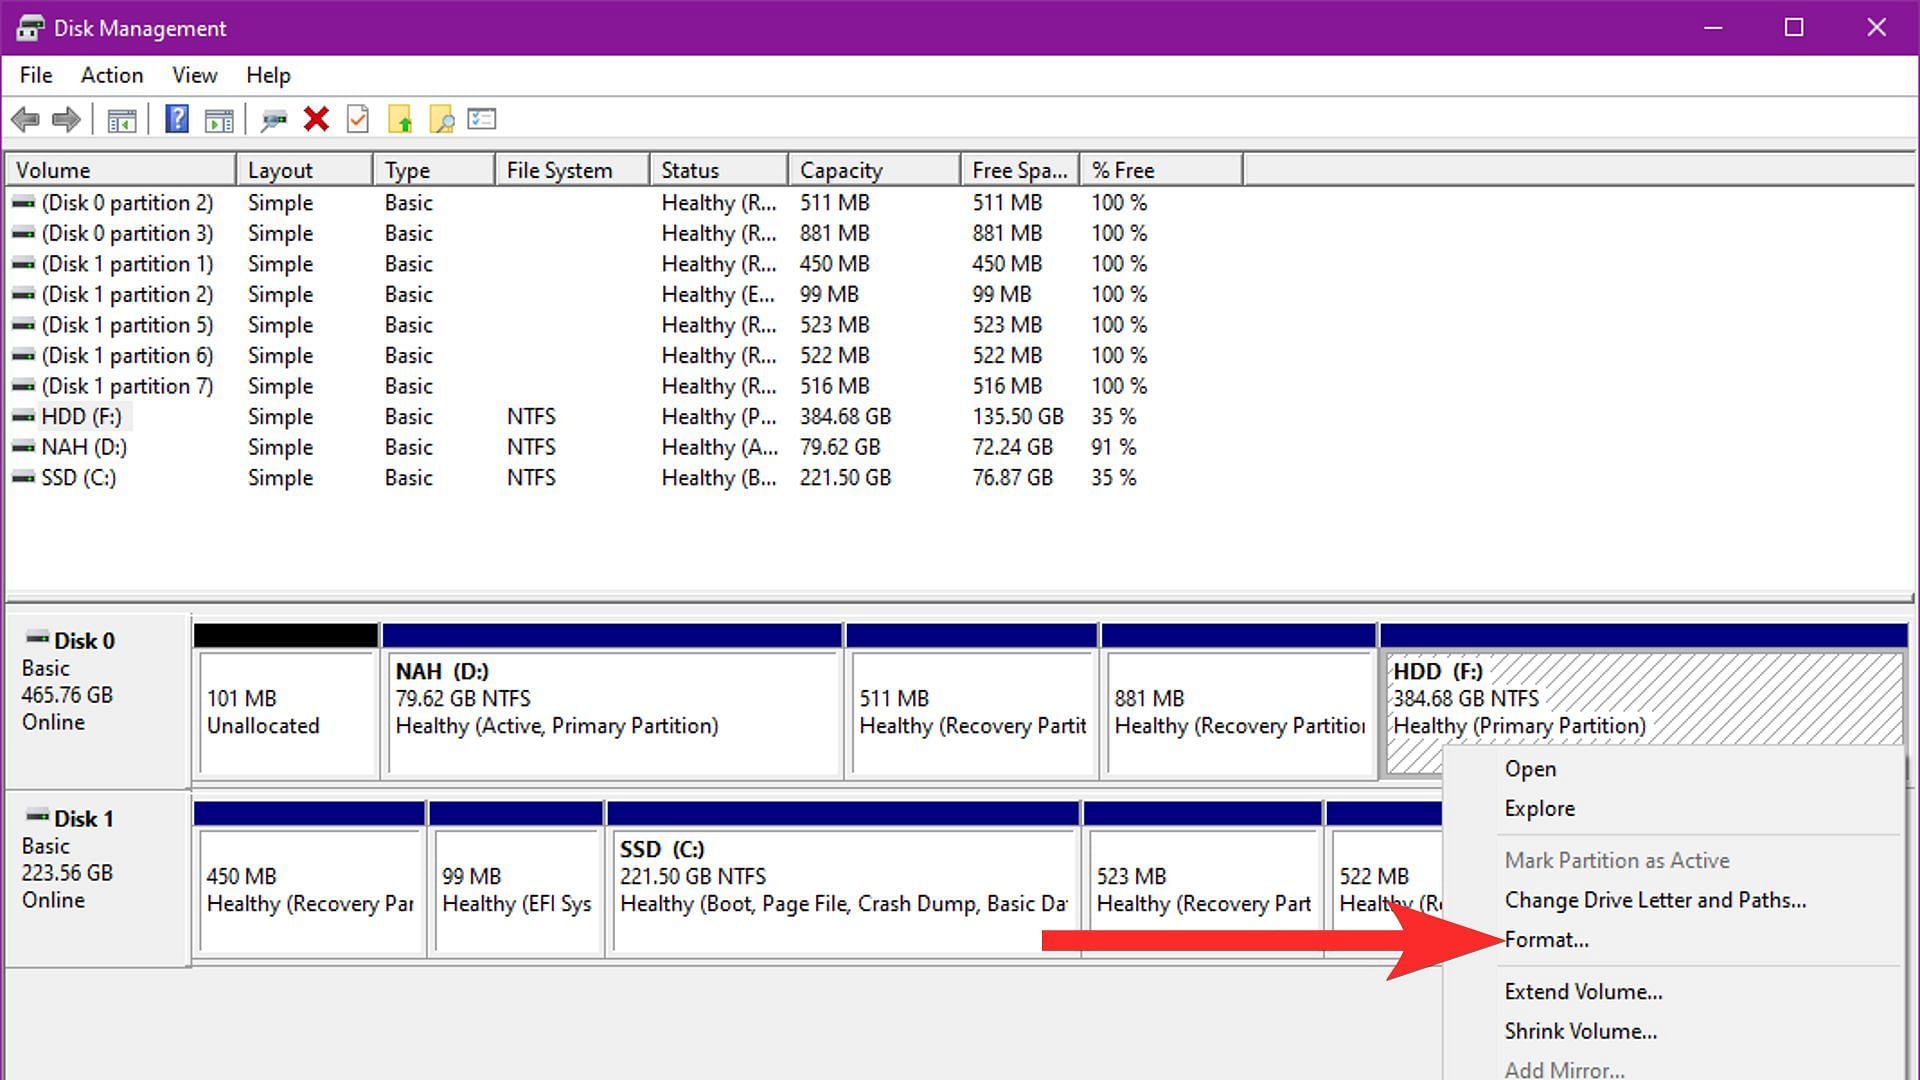
To format a disk partition, right-click on it and choose Format.
Step 2:
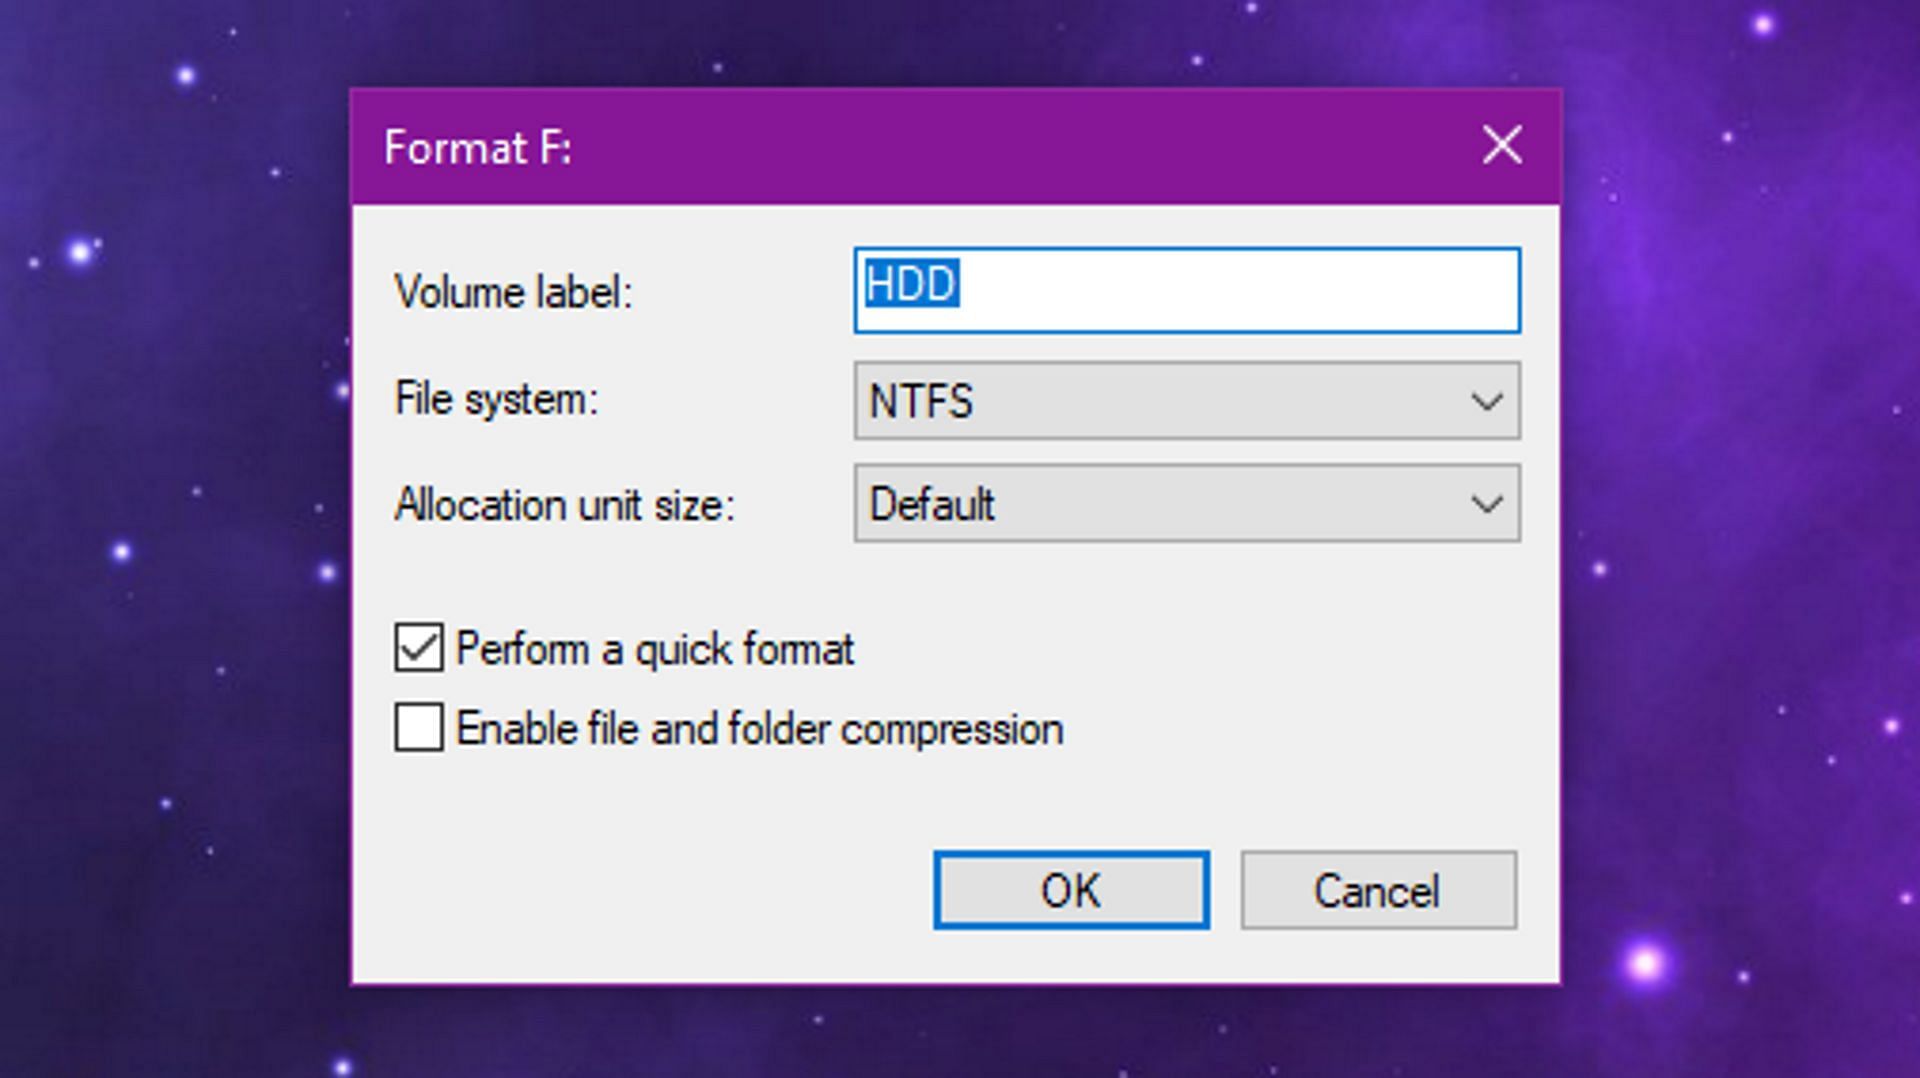
You can now change its name, file system, and unit size. After that, click OK to proceed. When you format, make sure to keep a backup of files, as all the data on that partition will be lost.
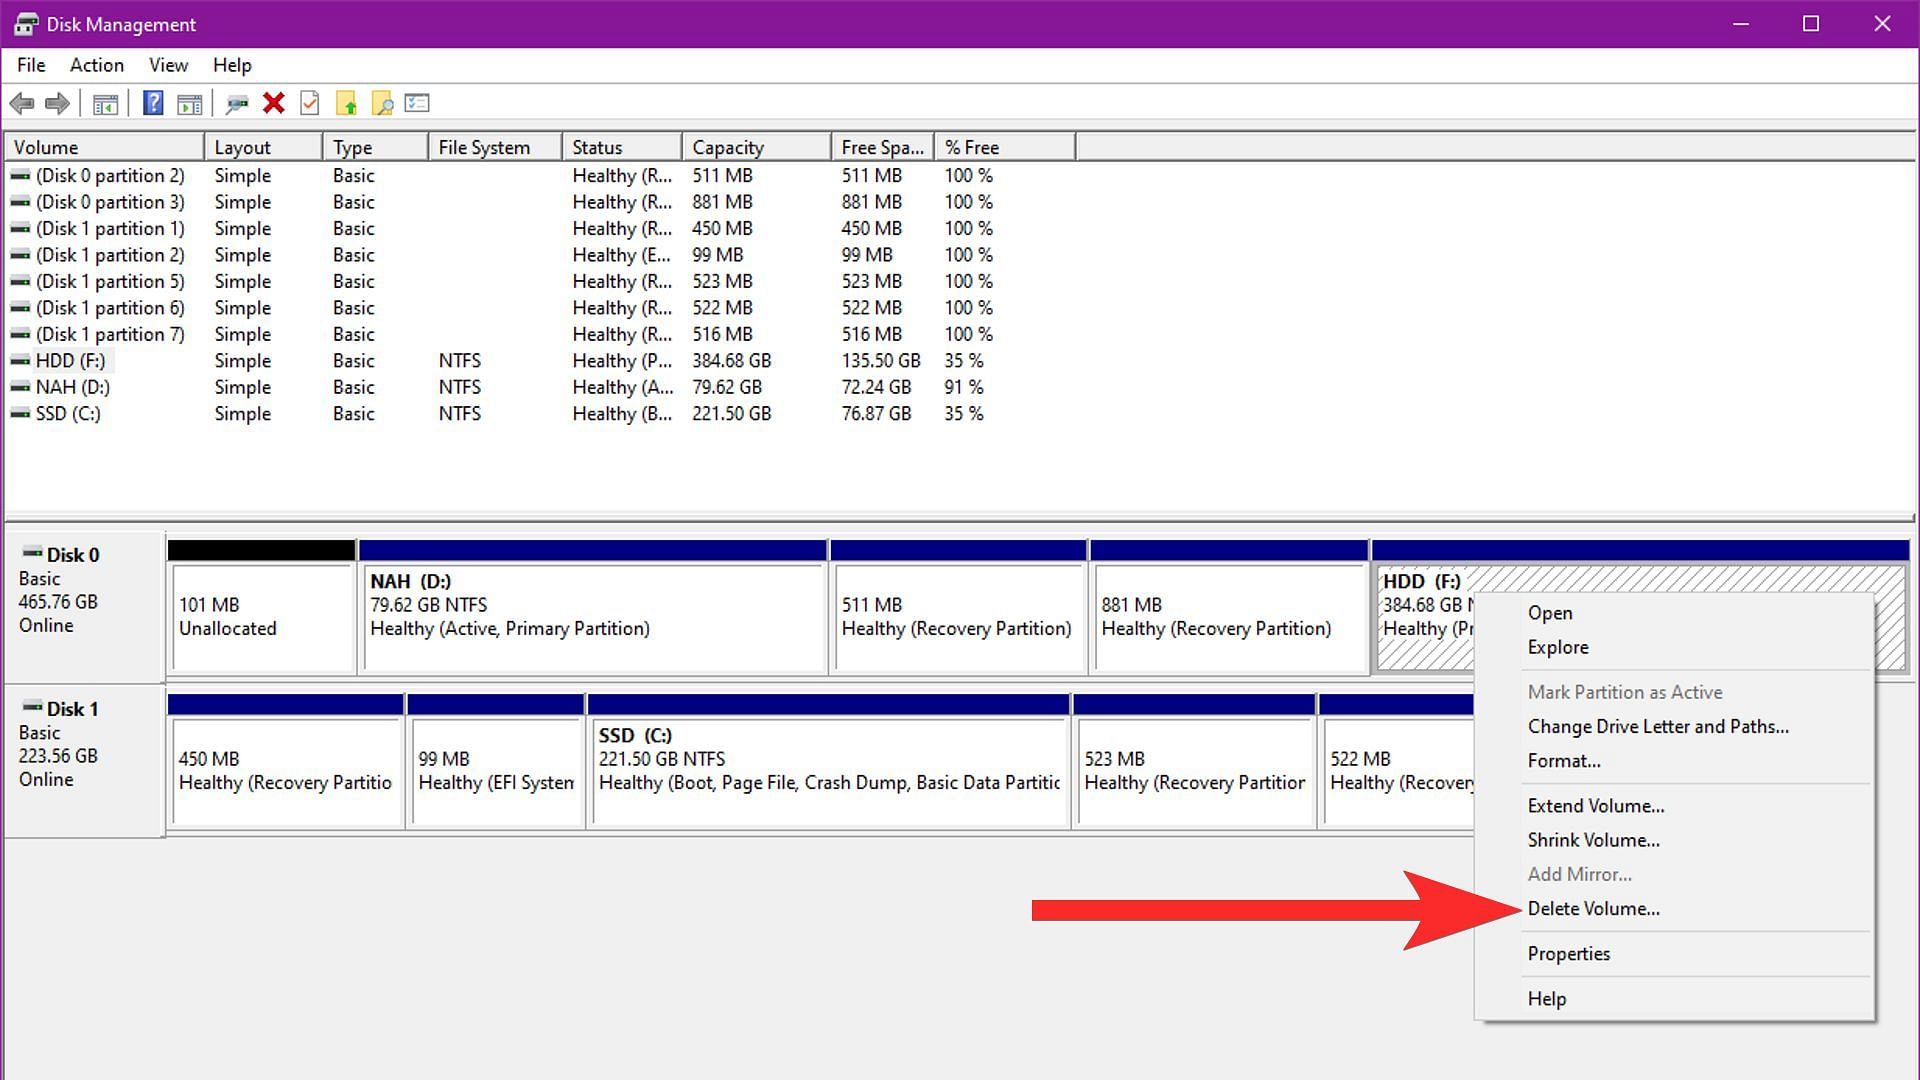
4) Delete a partition
To delete a disk partition or volume, right-click on it and select Delete Volume. The deleted space will be found as unallocated, and any data that was on that partition will be deleted too.
Although the Windows Disk Management tool is very simple to use, it lacks some advanced features. However, if you want to perform simple tasks to manage disk partitions, it gets the job done properly.
Follow Sportskeeda for more technology and gaming-related news and guides.