
'%20x='0'%20y='0'%20height='100%25'%20width='100%25'%20%0A%20%20%20%20%20%20%20%20%20%20xlink%3Ahref='data:image/jpg;base64,/9j/2wBDAAYEBQYFBAYGBQYHBwYIChAKCgkJChQODwwQFxQYGBcUFhYaHSUfGhsjHBYWICwgIyYnKSopGR8tMC0oMCUoKSj/2wBDAQcHBwoIChMKChMoGhYaKCgoKCgoKCgoKCgoKCgoKCgoKCgoKCgoKCgoKCgoKCgoKCgoKCgoKCgoKCgoKCgoKCj/wgARCAAFAAoDASIAAhEBAxEB/8QAFAABAAAAAAAAAAAAAAAAAAAABf/aAAgBAQAAAAAlH//EABQBAQAAAAAAAAAAAAAAAAAAAAT/2gAIAQIQAAAAB//EABQBAQAAAAAAAAAAAAAAAAAAAAP/2gAIAQMQAAAAD//EACEQAAAEBQUAAAAAAAAAAAAAAAECAwQABQYREgcyNJLh/9oACAEBAAE/AJ1VE8dCk0K6btgsYoqIIYnHGw7soHUV1fgo9vI//8QAGREAAQUAAAAAAAAAAAAAAAAAAAEEBRIx/9oACAECAQE/AEkHO3P/xAAYEQACAwAAAAAAAAAAAAAAAAAAAhESMf/aAAgBAwEBPwCi5B//2Q=='%3E%3C/image%3E%3C/svg%3E)
Minecraft capes are fabled to be given out only to special members of the community. They have long been seen as an extremely rare item to own.
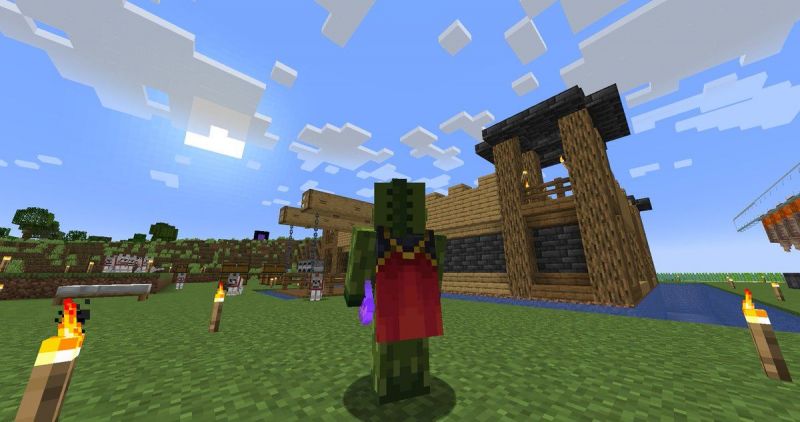
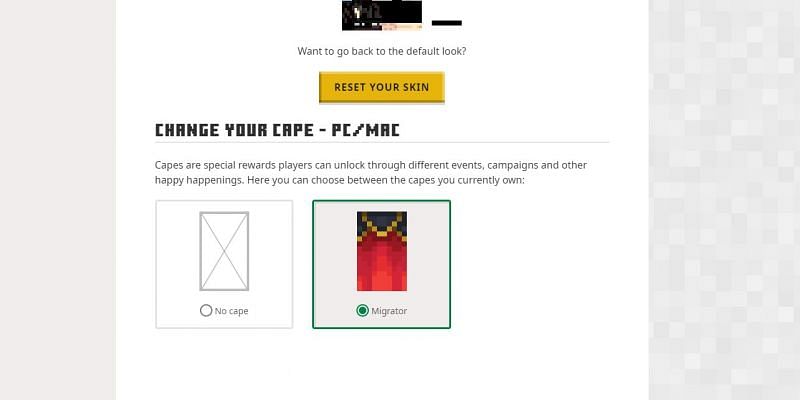
There are several cape designs in Minecraft, but the Migrator cape is the newest to arrive. The cape has a royal red and gold color, with a design that somewhat resembles the letter, "M."
All Minecrafters who currently have a Mojang Minecraft account will be eligible to obtain a Migrator cape at one point. This article will detail exactly how players can get their very own migrator cape to show off.

Chart New Territories with the ultimate Minecraft Seed Generator!
How can players obtain the new Migrator cape in Minecraft?
As mentioned above, the Migrator cape is available to every player who chooses to migrate their Mojang account to a Microsoft account.
At this point in time, Mojang is allowing players to migrate in waves. This is to test the system and slowly scale up. As a result, not all players will have the option to migrate yet.
If players are able to migrate, they will see the message below in the Minecraft launcher after logging in to their account:
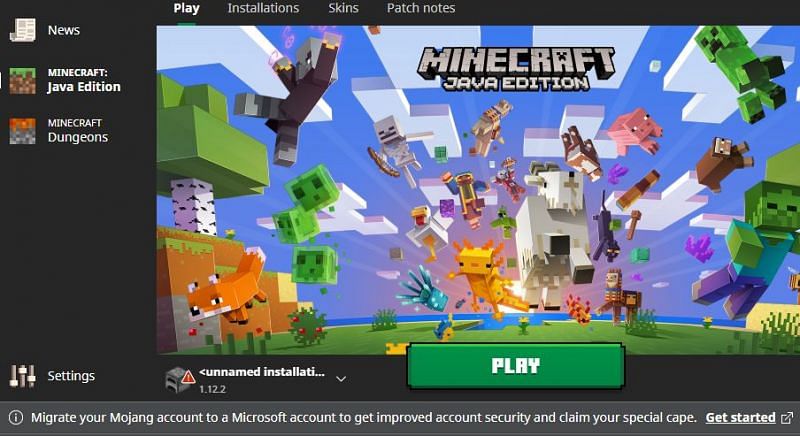
If players see the message "Migrate your Mojang account to a Microsoft account to get improved security and claim your special cape," they should be able to migrate.
Migrating a Mojang account to a Microsoft account:
Step 1)
Players need to visit the official Minecraft website to initiate the migration process. The link to the website can be found here.
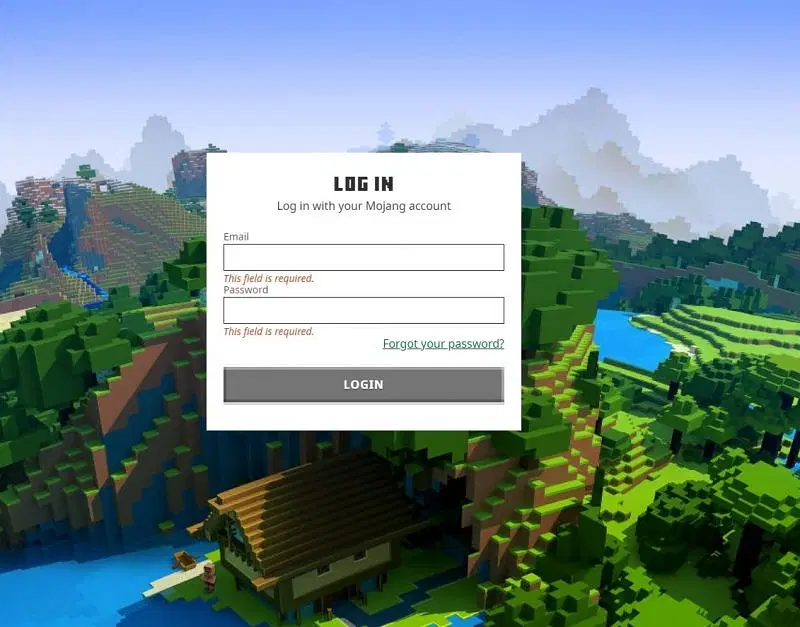
Players should then enter their Minecraft account details and hit "Login."
Step 2)
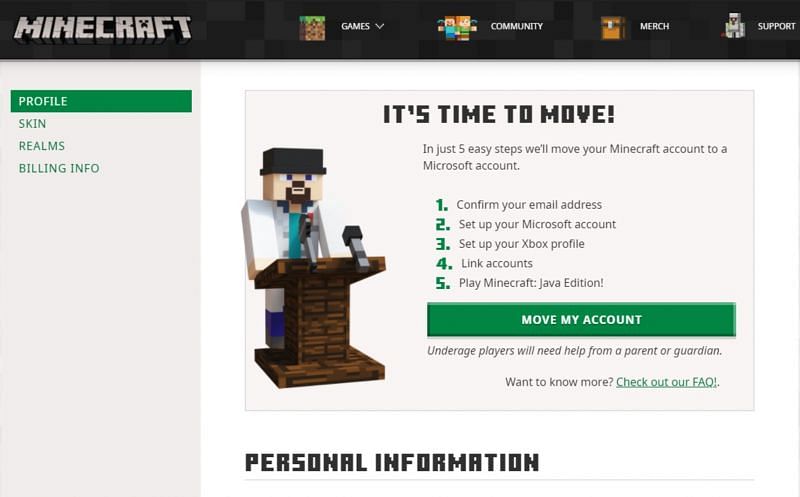
Upon logging in, players should be greeted with the screen below. They should hit the "Move My Account" green button.
Step 3)
Minecrafters will now need to verify their email address. This can be done by confirming the code that will be sent to the email address associated with their Minecraft account.

Players should confirm the code sent to them in order to move on to step 4.
Step 4)
After confirming the security code, players need to link a Microsoft account to their Minecraft profile. If the player already has a Microsoft account associated with the email, this should be done automatically.
If players don't have a Microsoft account, they can easily create one.

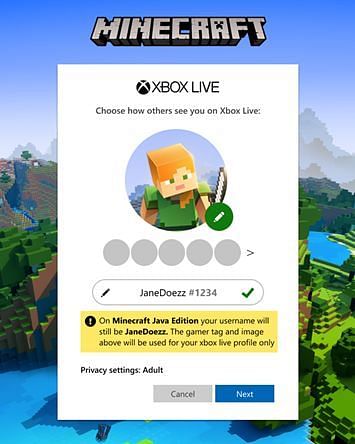
Step 5)
After creating a Microsoft account, players will need to create an Xbox profile and Gamertag.
It should be noted that the Xbox Gamertag can be anything, and it doesn't really matter. It's independent of the Minecraft IGN (in-game name), and other Minecraft players won't be able to see it.
Step 6)
If all has been done correctly, players should finally be greeted with the screen below. This will confirm that the migration was a success, and players should now have access to the sleek new Migrator cape.

Enabling the migrator cape:
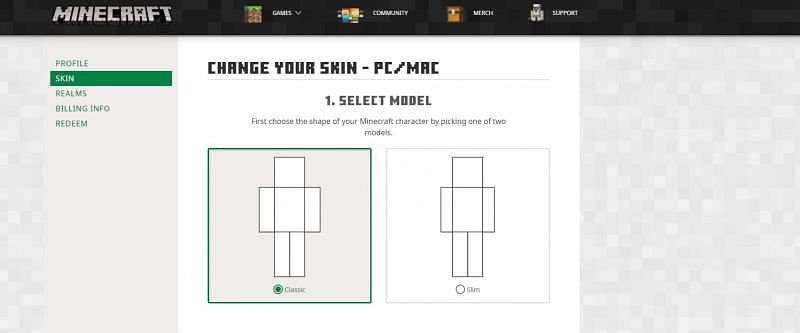
After migrating the account, it's time to claim the reward. Players can select their brand-new Migrator cape by logging into the Minecraft website and navigating to the "skin" section.
Also Read: Top 3 Minecraft servers with dropper

Uncover new worlds with our Minecraft Seed Generator!