
'%20x='0'%20y='0'%20height='100%25'%20width='100%25'%20%0A%20%20%20%20%20%20%20%20%20%20xlink%3Ahref='data:image/jpg;base64,/9j/2wBDAAYEBQYFBAYGBQYHBwYIChAKCgkJChQODwwQFxQYGBcUFhYaHSUfGhsjHBYWICwgIyYnKSopGR8tMC0oMCUoKSj/2wBDAQcHBwoIChMKChMoGhYaKCgoKCgoKCgoKCgoKCgoKCgoKCgoKCgoKCgoKCgoKCgoKCgoKCgoKCgoKCgoKCgoKCj/wgARCAAGAAoDASIAAhEBAxEB/8QAFQABAQAAAAAAAAAAAAAAAAAABAf/2gAIAQEAAAAAmIf/xAAUAQEAAAAAAAAAAAAAAAAAAAAF/9oACAECEAAAACf/xAAUAQEAAAAAAAAAAAAAAAAAAAAE/9oACAEDEAAAAEf/xAAeEAACAgICAwAAAAAAAAAAAAACAwEEBREAFCExQv/aAAgBAQABPwCjea3AMxpXbh0ZXrrtgDAYA4PY7jxPH3bdh7HTlL+2FJ/Me+f/xAAZEQABBQAAAAAAAAAAAAAAAAABAAIDBCH/2gAIAQIBAT8ANqYnXL//xAAWEQEBAQAAAAAAAAAAAAAAAAACAAH/2gAIAQMBAT8AwG//2Q=='%3E%3C/image%3E%3C/svg%3E)
Many players can be heard complaining about the graphics of Minecraft. They complain that it's one of the main turn-offs of the game. A lot of these players are unaware that there are ways to improve the graphics of this incredible game. This article gives a complete guide on how to improve the graphics in Minecraft.
Despite its massive popularity, the graphics of Minecraft always feel like a chink in its armor. Minecraft is a 3D world building game. In this game, players test their creative skills by building huge worlds using only blocks. The thrill of building one's own world attracts people from every corner of the world. The creators of the game keep it interesting with frequent updates.
The massive success of the game can be perceived from the fact that it became the most popular game in the history of video games in the month of August 2021 when 166 million players played the game.

You can find the complete list of Minecraft skins , here.
Chart New Territories with the ultimate Minecraft Seed Generator!
There are players who complain that the creators of this beautiful game chose to neglect the improvements in graphics. They say it looks shabby and lifeless. They want the biomes to look more vibrant and lively. They want grass, sky, water, etc to be a bit realistic. They want the sunrays to be bright, the rain to be clear, the sky to be starry.
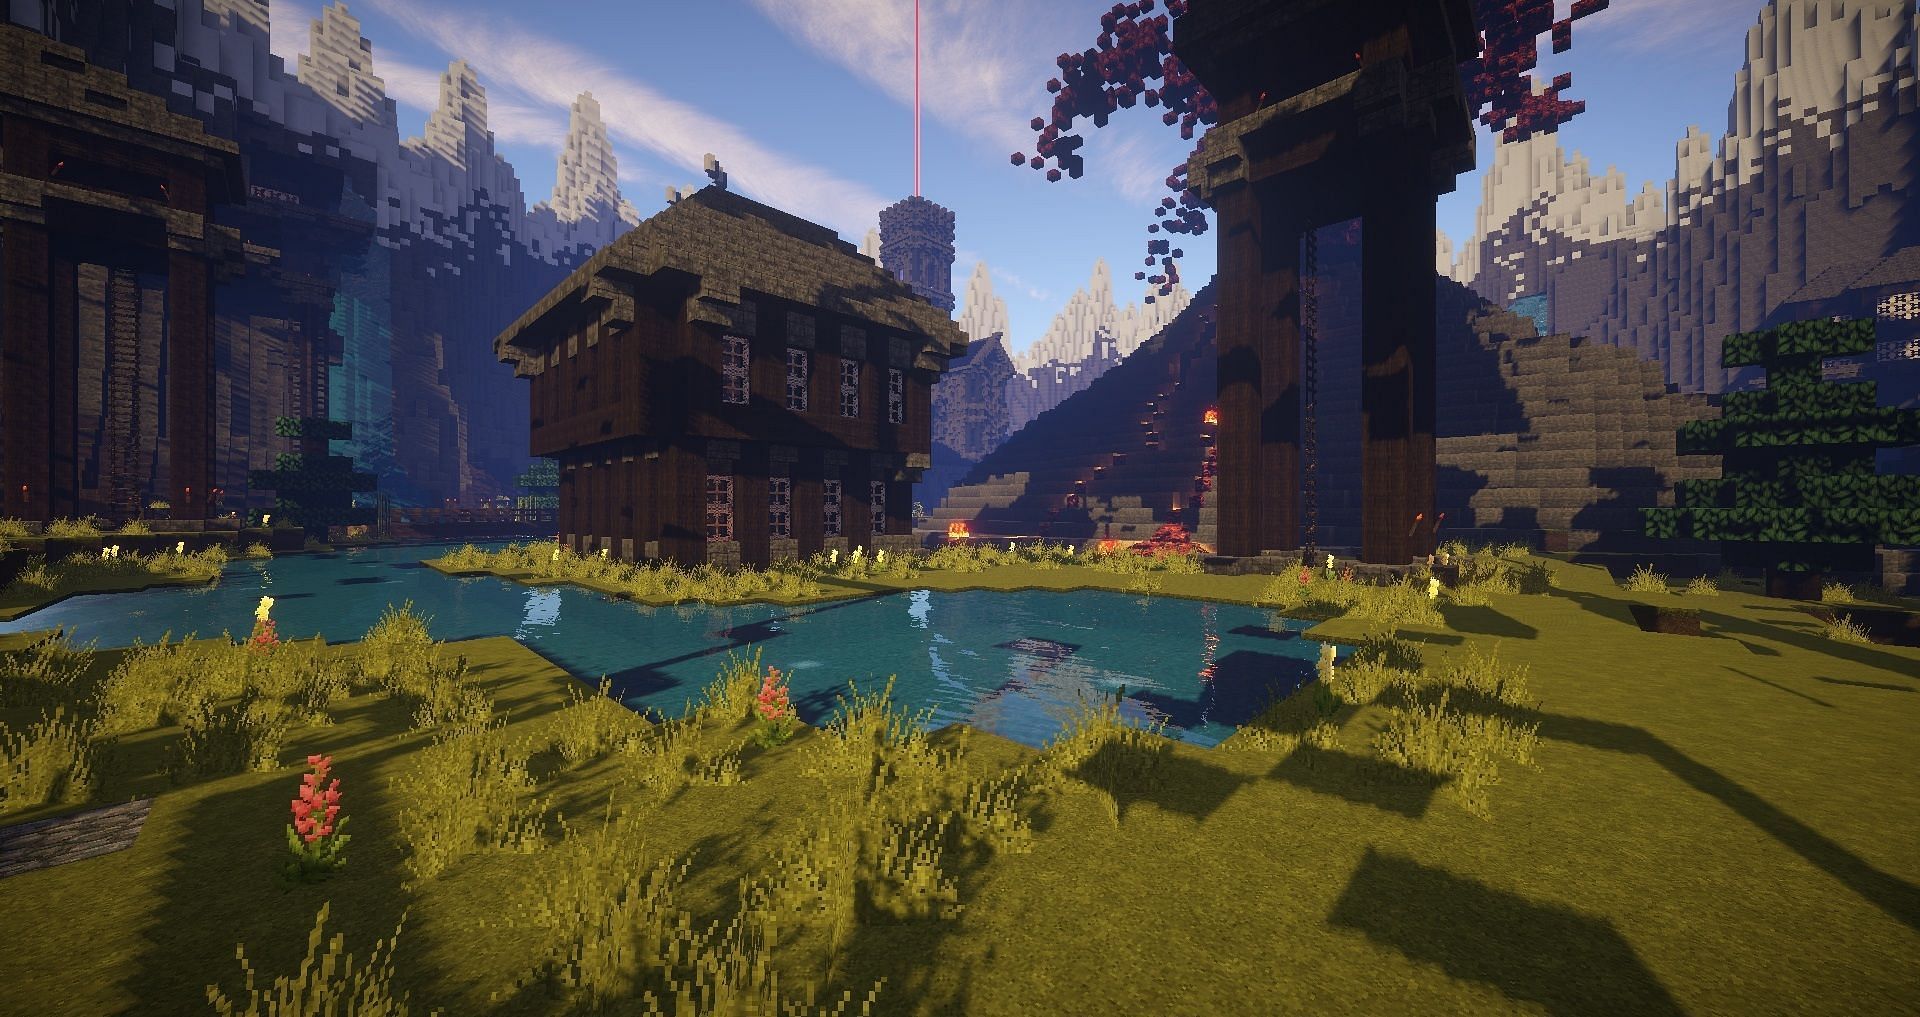
Minecraft mods can be used to improve the graphics
Though there are problems, there is a thriving modding community in the game. They have built many shaders to make this game visually pleasing for the eyes. Kuda Shaders, Acid Shaders, Oceano Shaders, and Sildur Shaders are some very popular shaders within the gaming community.
All these mods created by the amazing shaders can be installed in the game very easily using a Minecraft optimization mod, Optfine, and the shaders pack by players to their liking.
Before installing shaders, players must ensure they have the updated version of Java installed on their PC.
- First, players need to download a very small software called Optifine from the official website and the shader packs they want to use. Optifine must be installed in the Minecraft folder. Installers should choose the right path for installation.
- Upon completion of the installation, players will need to start the game launcher. They need to choose Optifine_HD_U_H4 version of the game from the drop-down box.
- Next, players need to add the shader packs previously downloaded in the shaderpack folder. To do that, players simply need to copy the zip files. Then, they need to open the mincraft folder from the launcher and paste the files in the shaderpack folder.
- Players can now enter the game and access the video settings from the options. they need to nevigate the shaders. Players now need to choose the shader they want to use. Once all this is done, they can return to the game loading page.
For the complete information on Minecraft Server , click here.
Now that the game is set, now is the time to enjoy the graphically improved world of Minecraft. If anyone wants to turn the active shader off, it can easily be done from the video settings.

Uncover new worlds with our Minecraft Seed Generator!