

'%20x='0'%20y='0'%20height='100%25'%20width='100%25'%20%0A%20%20%20%20%20%20%20%20%20%20xlink%3Ahref='data:image/jpg;base64,/9j/2wBDAAYEBQYFBAYGBQYHBwYIChAKCgkJChQODwwQFxQYGBcUFhYaHSUfGhsjHBYWICwgIyYnKSopGR8tMC0oMCUoKSj/2wBDAQcHBwoIChMKChMoGhYaKCgoKCgoKCgoKCgoKCgoKCgoKCgoKCgoKCgoKCgoKCgoKCgoKCgoKCgoKCgoKCgoKCj/wgARCAAGAAoDASIAAhEBAxEB/8QAFgABAQEAAAAAAAAAAAAAAAAAAAYH/8QAFAEBAAAAAAAAAAAAAAAAAAAAA//aAAwDAQACEAMQAAAAjM4FD//EACAQAAIBBAEFAAAAAAAAAAAAAAECAwQFERIAISIkMWH/2gAIAQEAAT8AoL1BHZrbCKfxNZRVJgbOdO3U/D149epdswoTn2V5/8QAFxEBAAMAAAAAAAAAAAAAAAAAAQACEf/aAAgBAgEBPwCi6z//xAAXEQEAAwAAAAAAAAAAAAAAAAABAAIh/9oACAEDAQE/ALGE/9k='%3E%3C/image%3E%3C/svg%3E)
Deadlock is the latest Sentinel added to the Valorant roster since Chamber. Among a handful of Sentinels, this is one of the hardest to master. She is a Norwegian agent who uses a network of advanced nanowires to protect the battlefield from the deadliest attacks. Before her release, Killjoy dominated the Sentinel meta field because of her unique set of skills.
Her arrival is anticipated to change the stagnant Sentinel meta, which is going on for a long time. It’s been a week or two since Deadlock has released in Valorant. Regardless of stature, players are utilizing her over different maps in Valorant.
There are a plethora of lineups that can be used to maximize her abilities. Although she isn’t ideal for Split, here are some of the best setups and lineups for Deadlock on this map.

Deadlock’s Barrier Mesh (E) usage on Split in Valorant
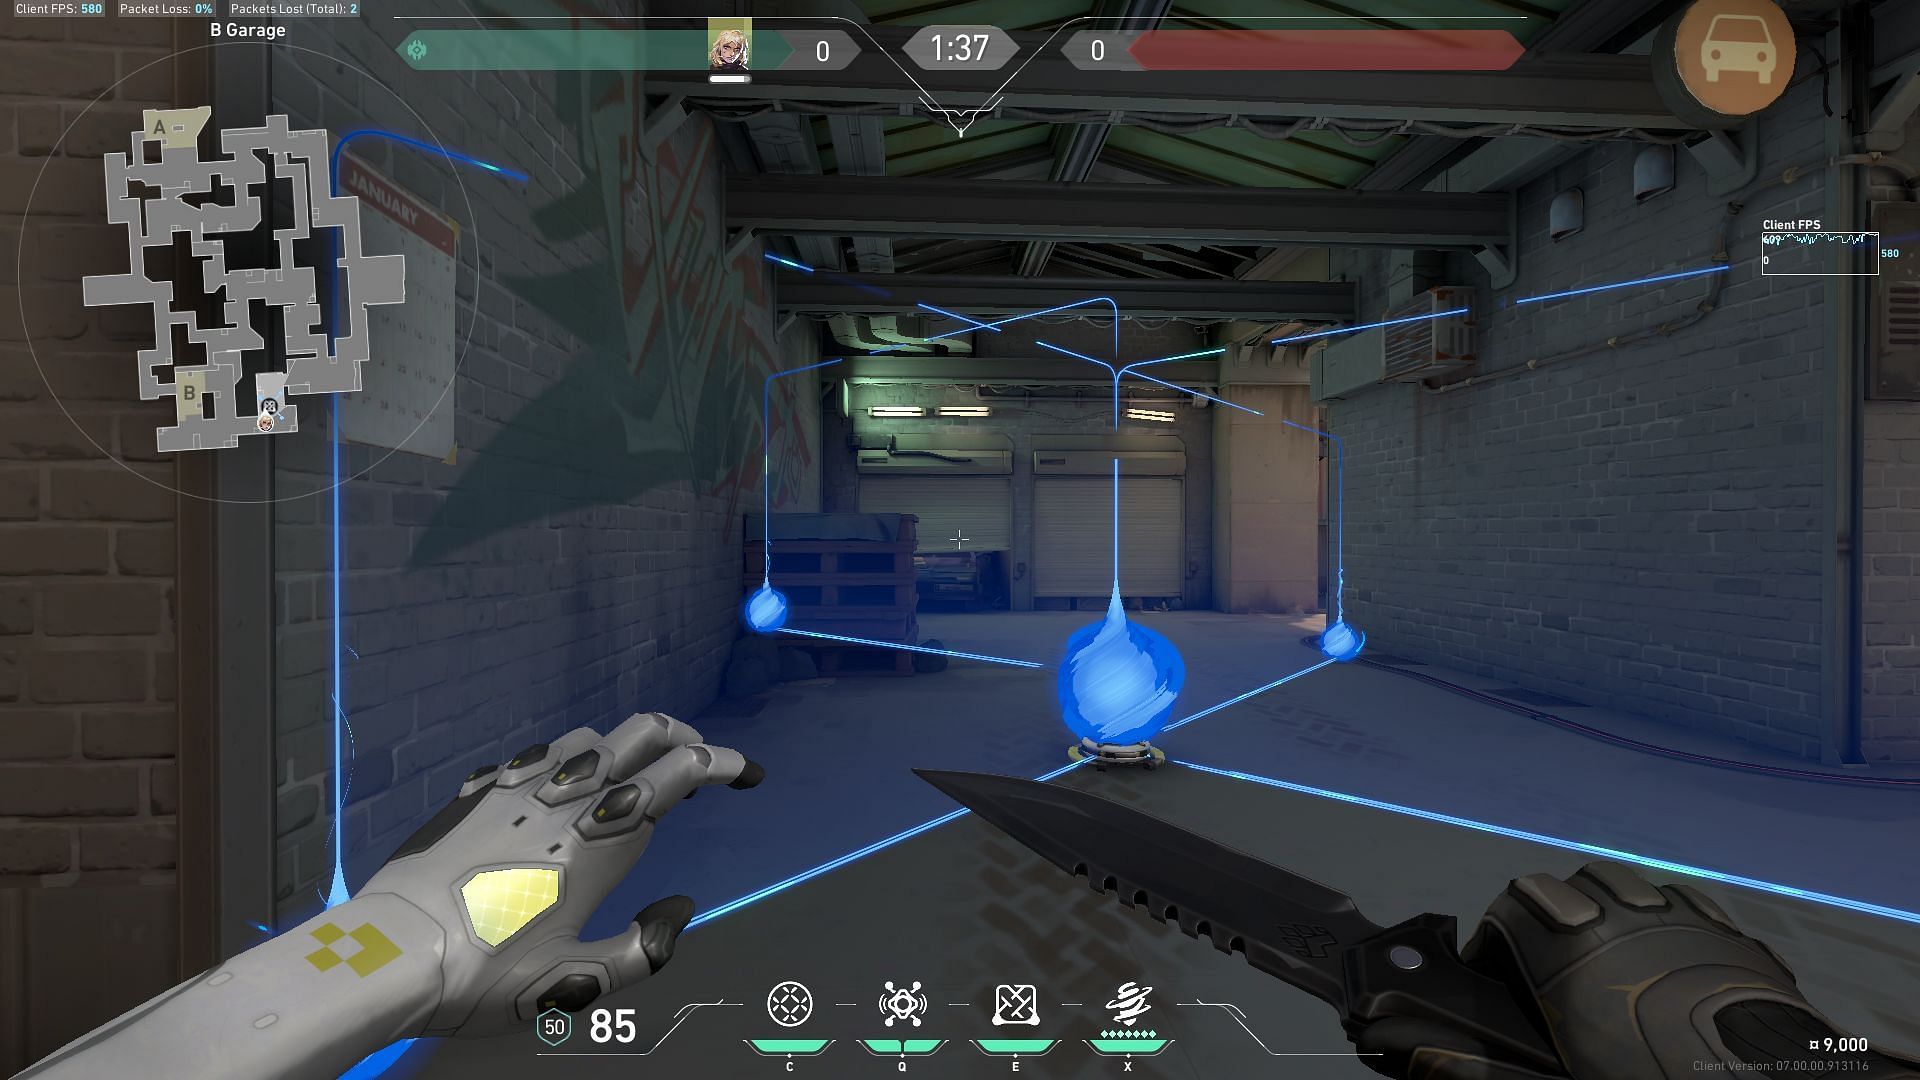
You can use Deadlock’s Barrier Mesh to delay your adversaries by blocking off any particular area. It’s very much similar to Sage’s wall of Valorant. So, the enemies have to use as many bullets as possible to break the Mesh resulting in having less ammunition and time to shoot you.
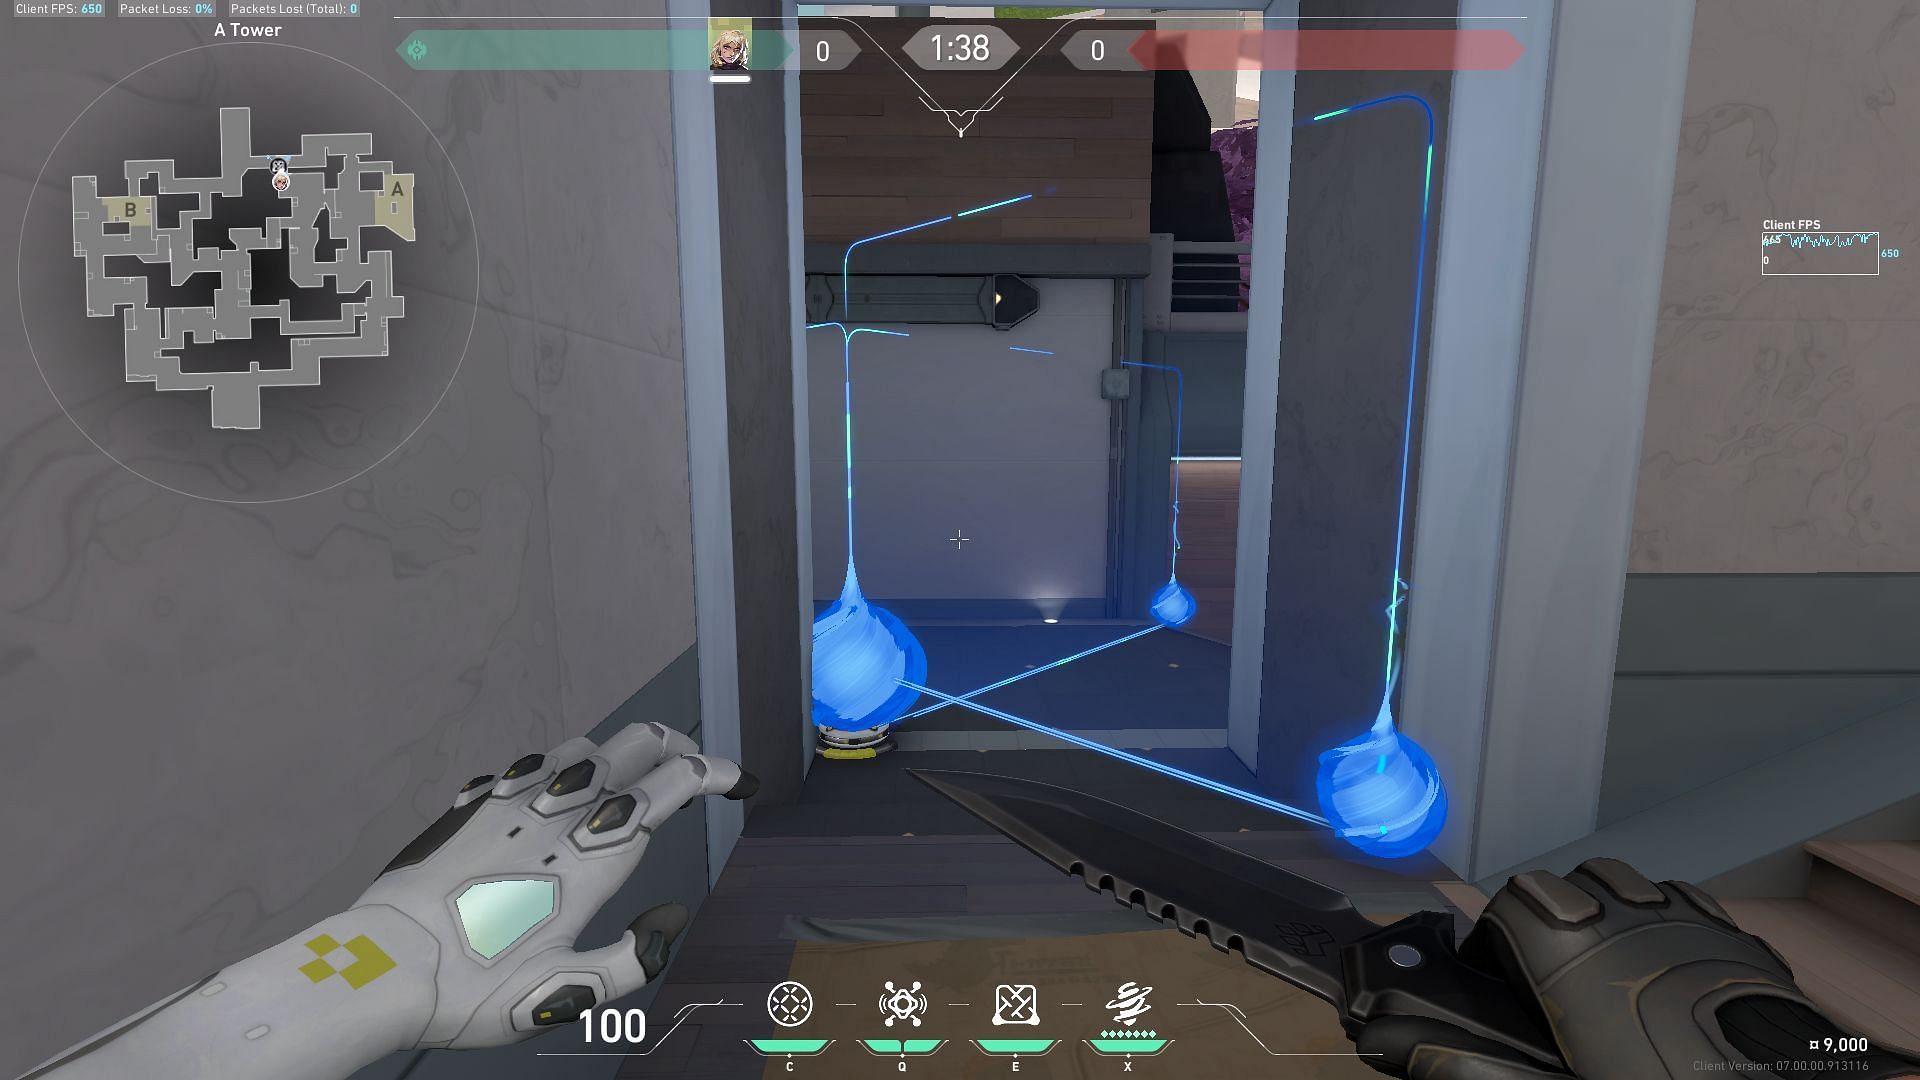
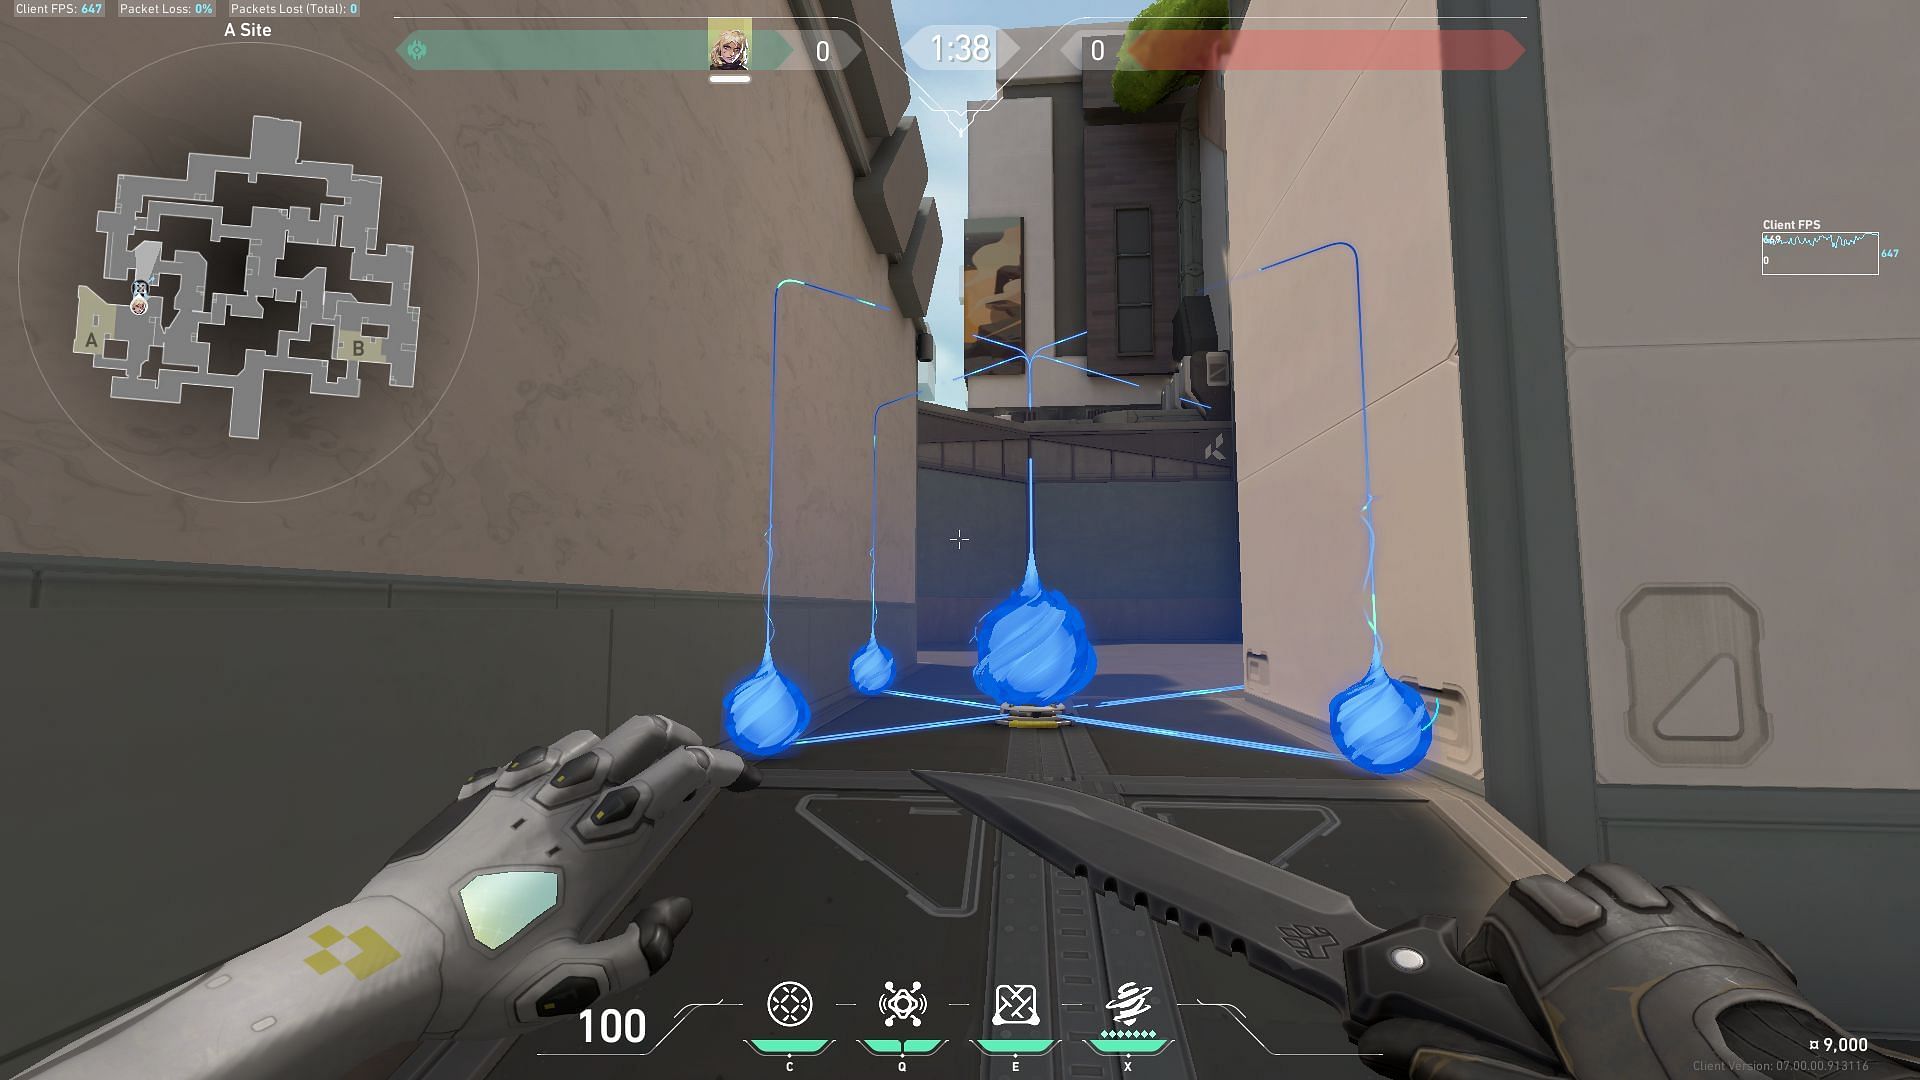
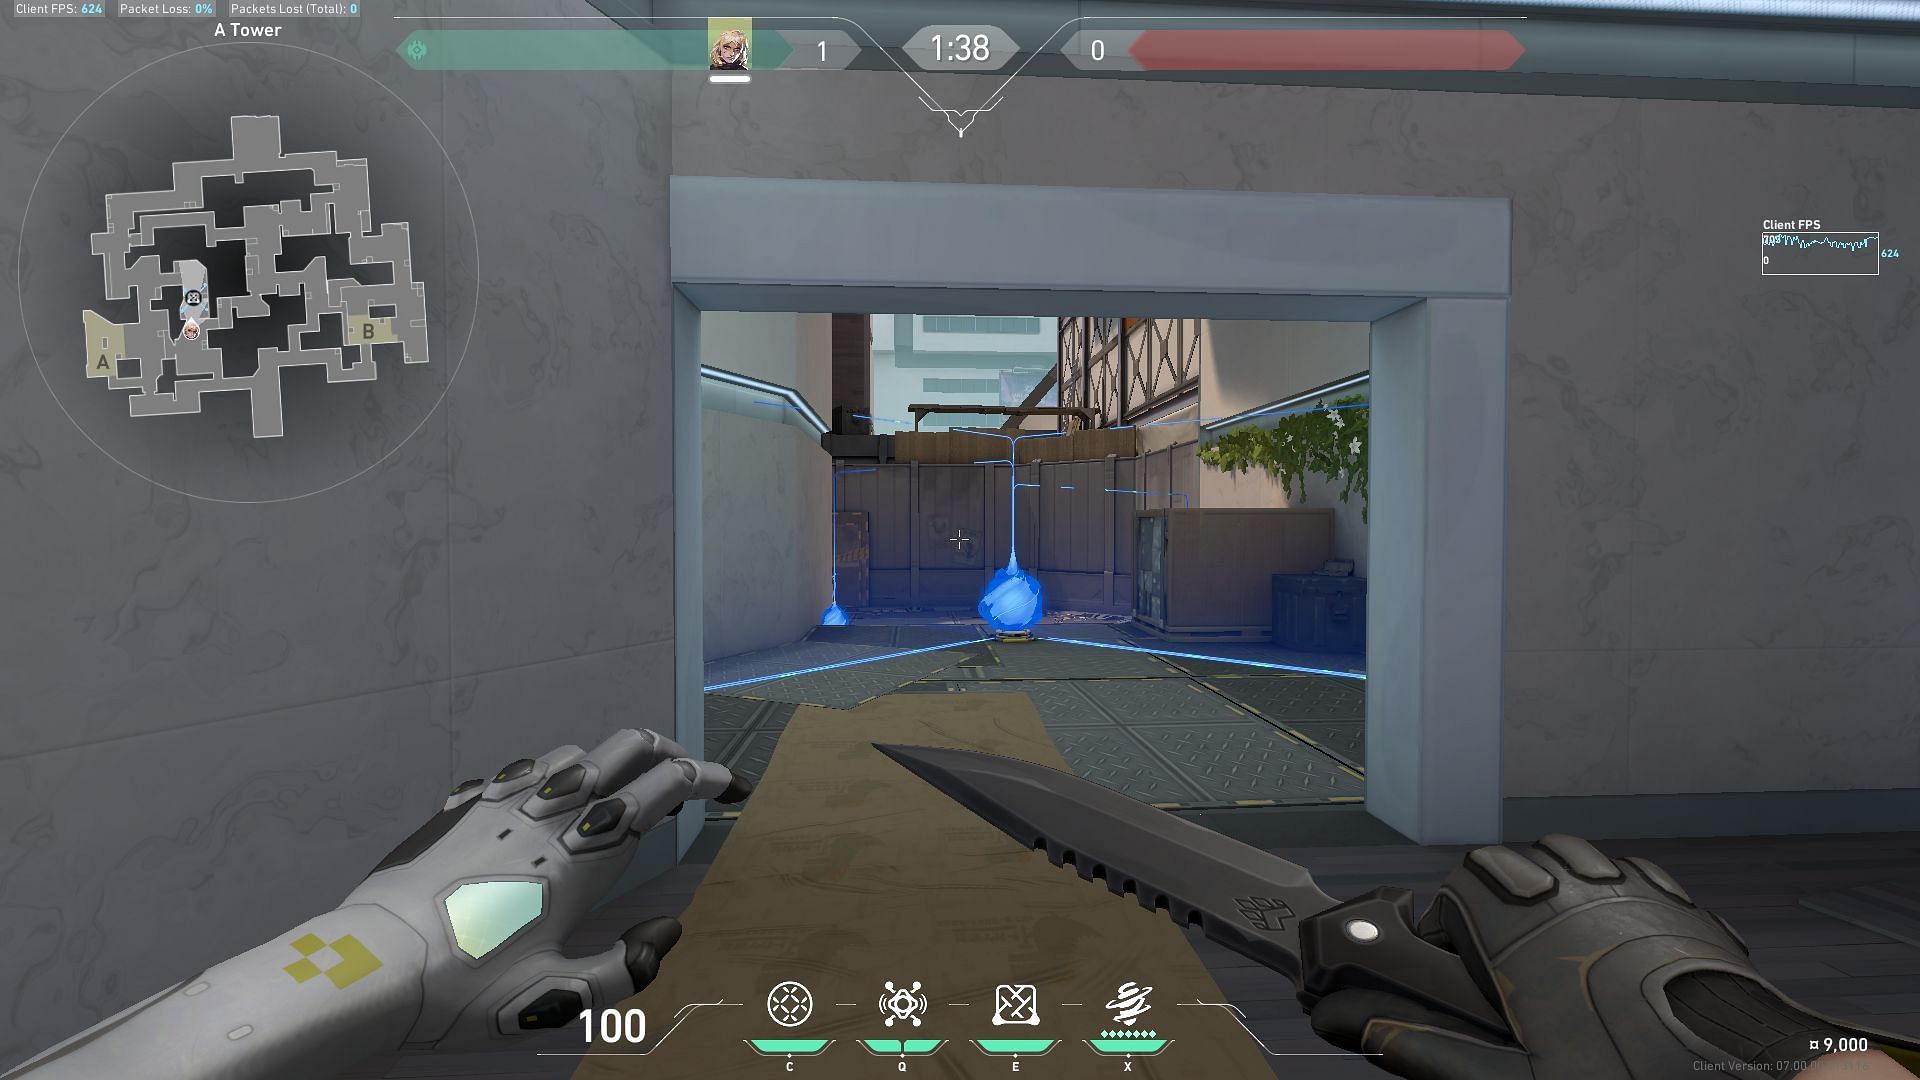
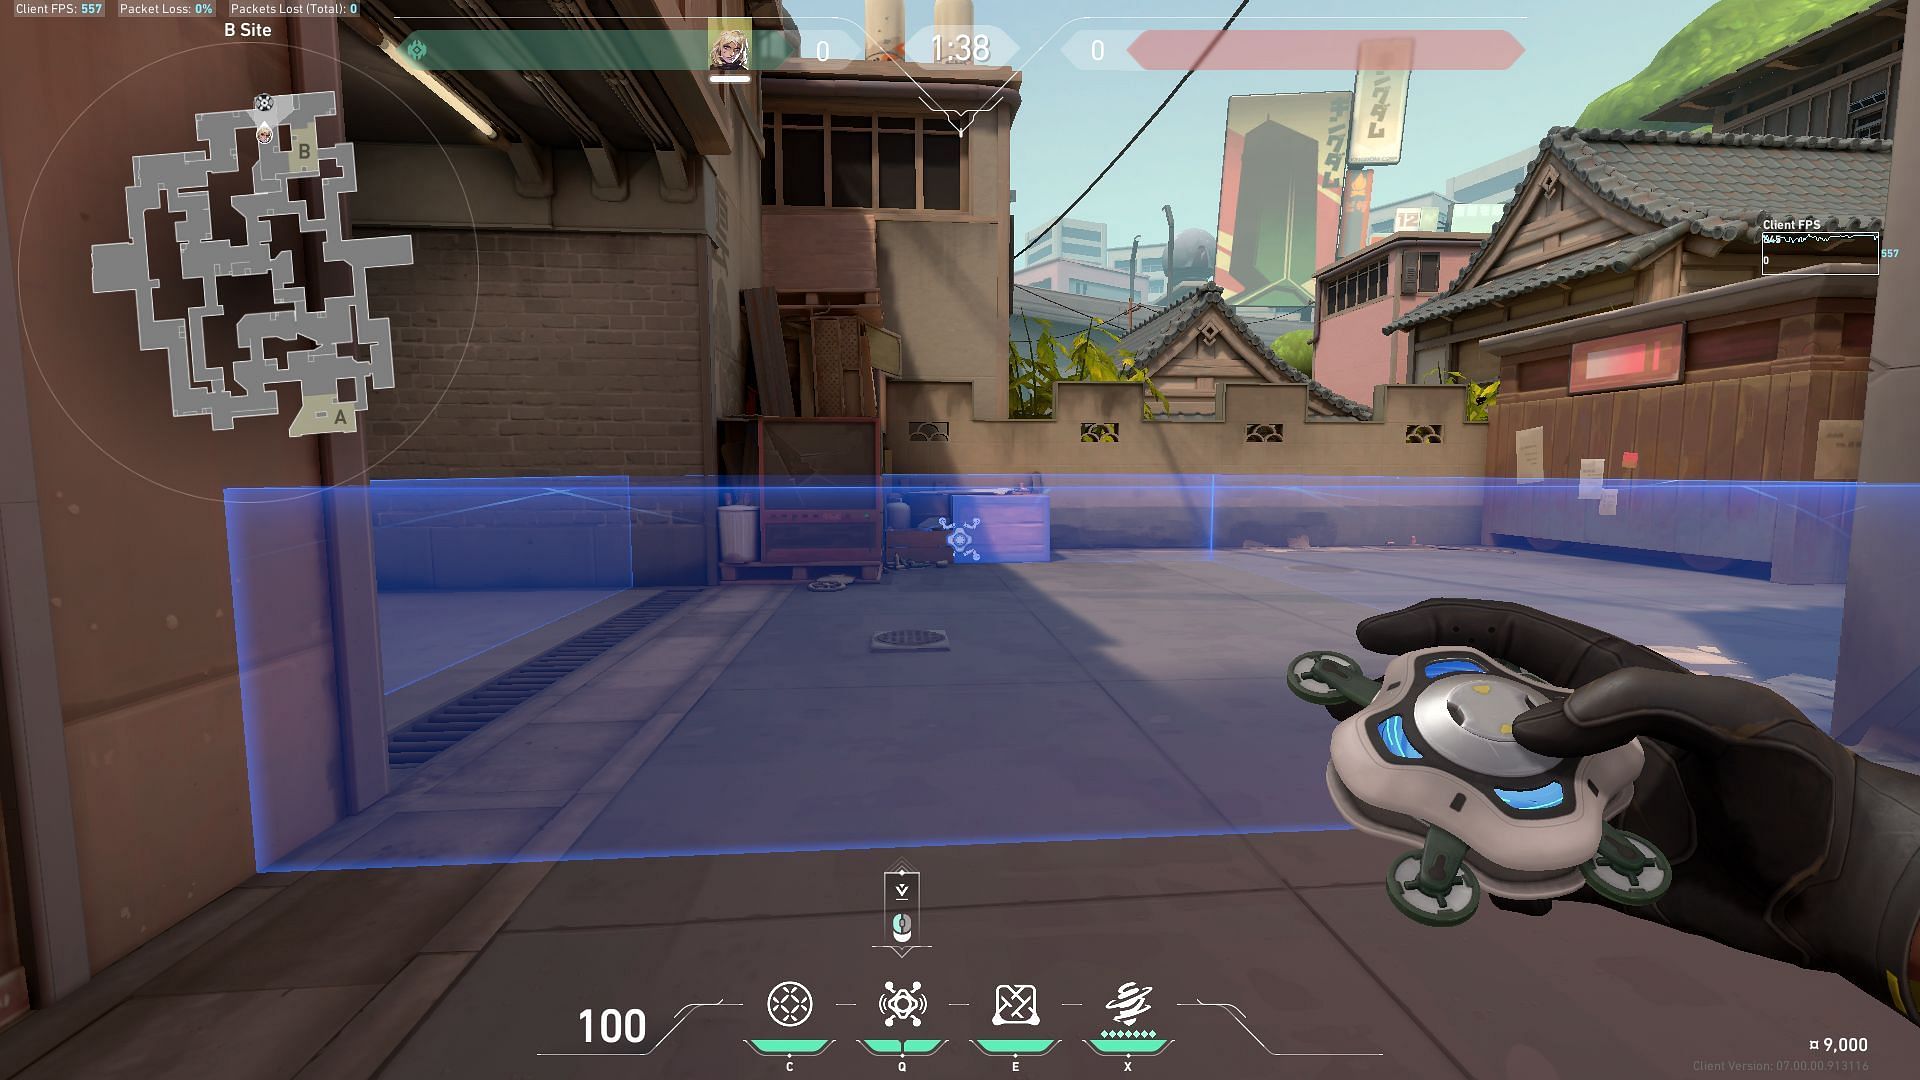
In case of attacking, Deadlock can use her signature ability to block off some key retake areas. It will be hard for enemies to retake that particular bomb site. On the A site, these are the best spots to block:
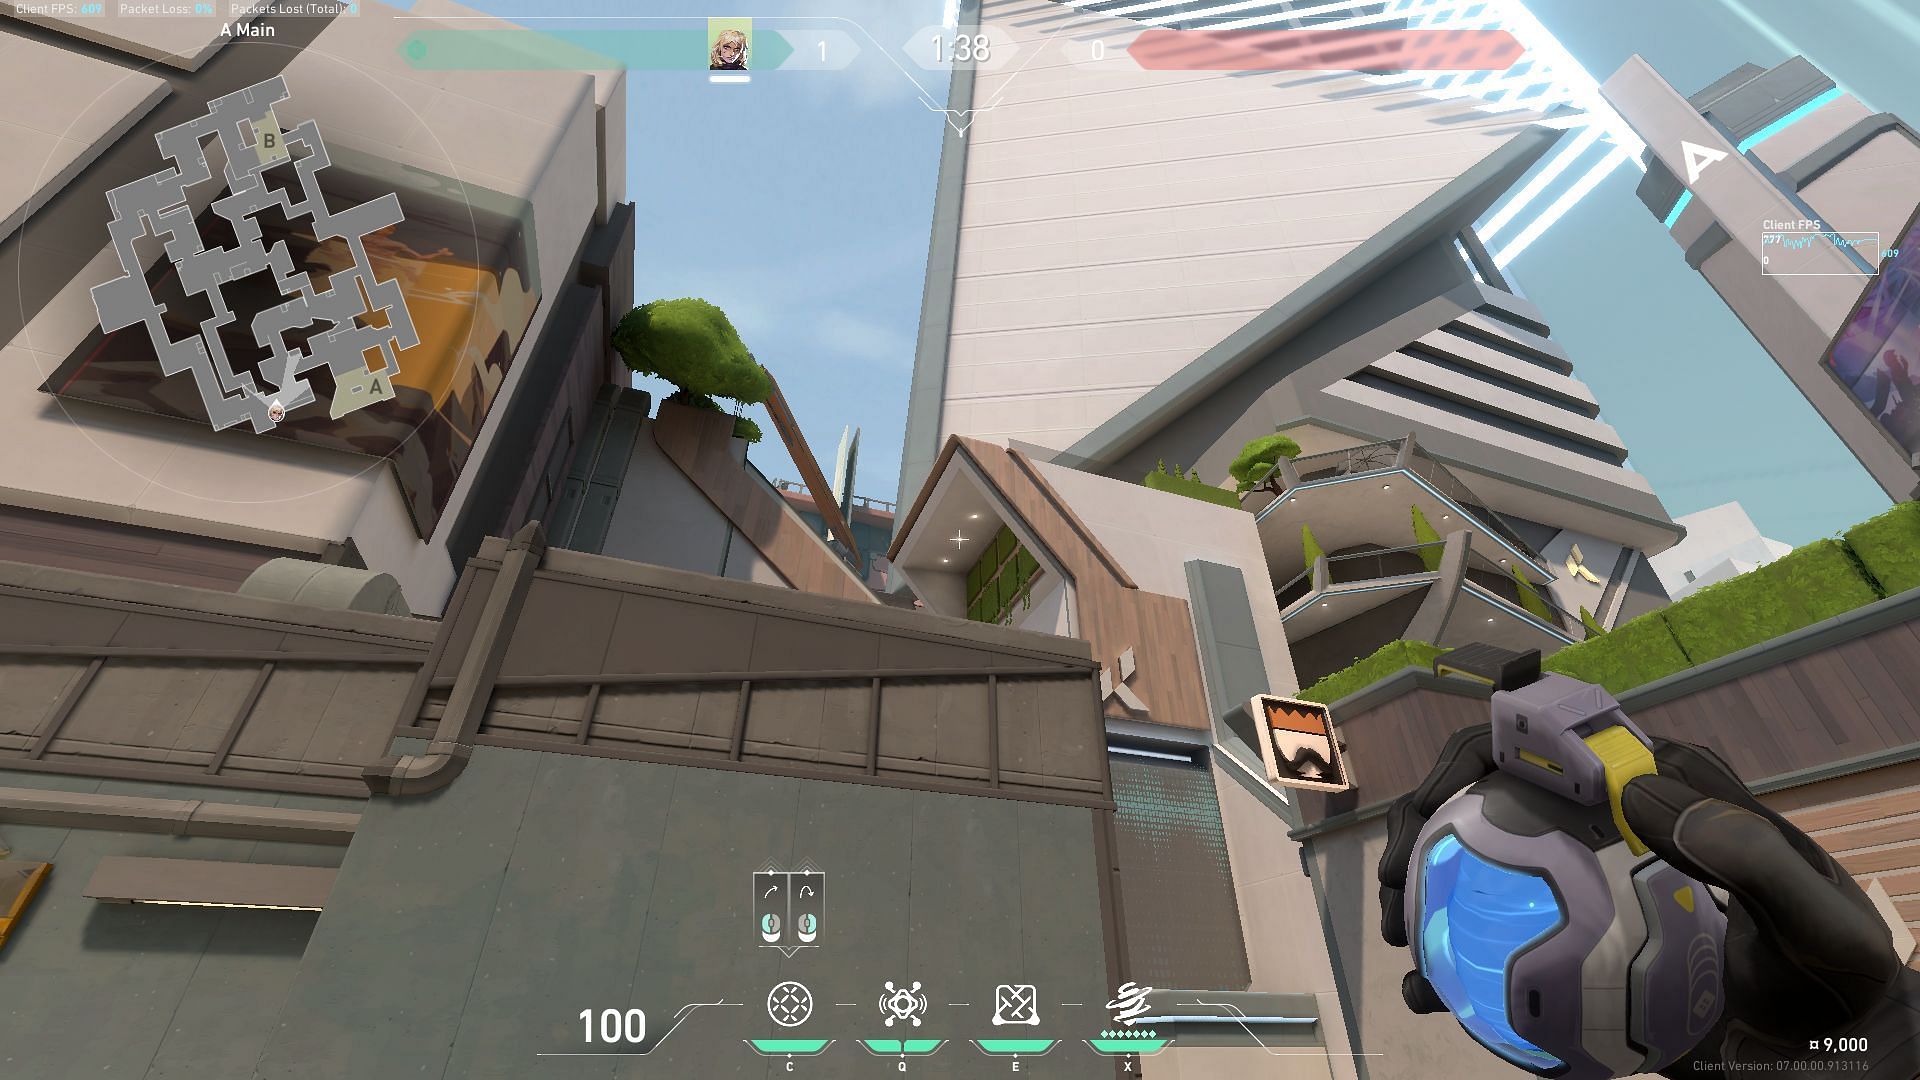
1) A-tower
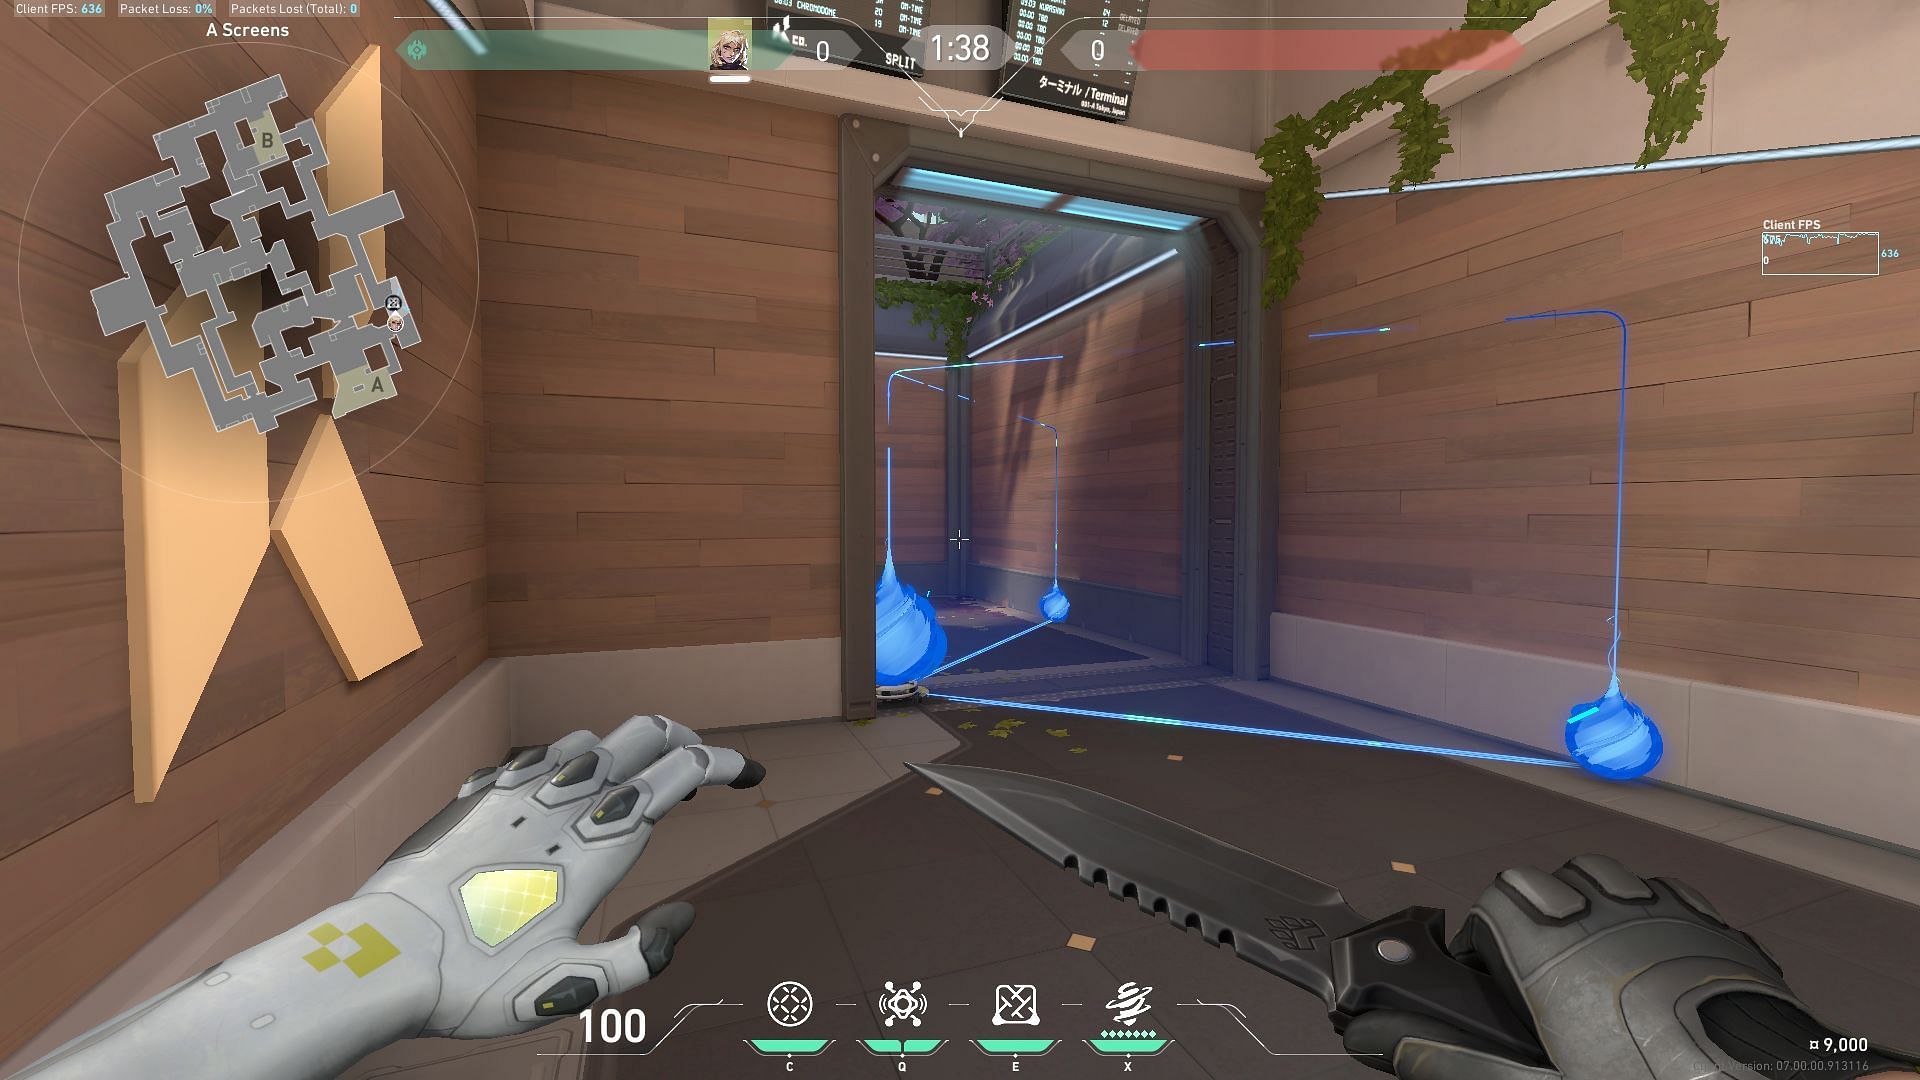
Instead of this, we can use this setup too.
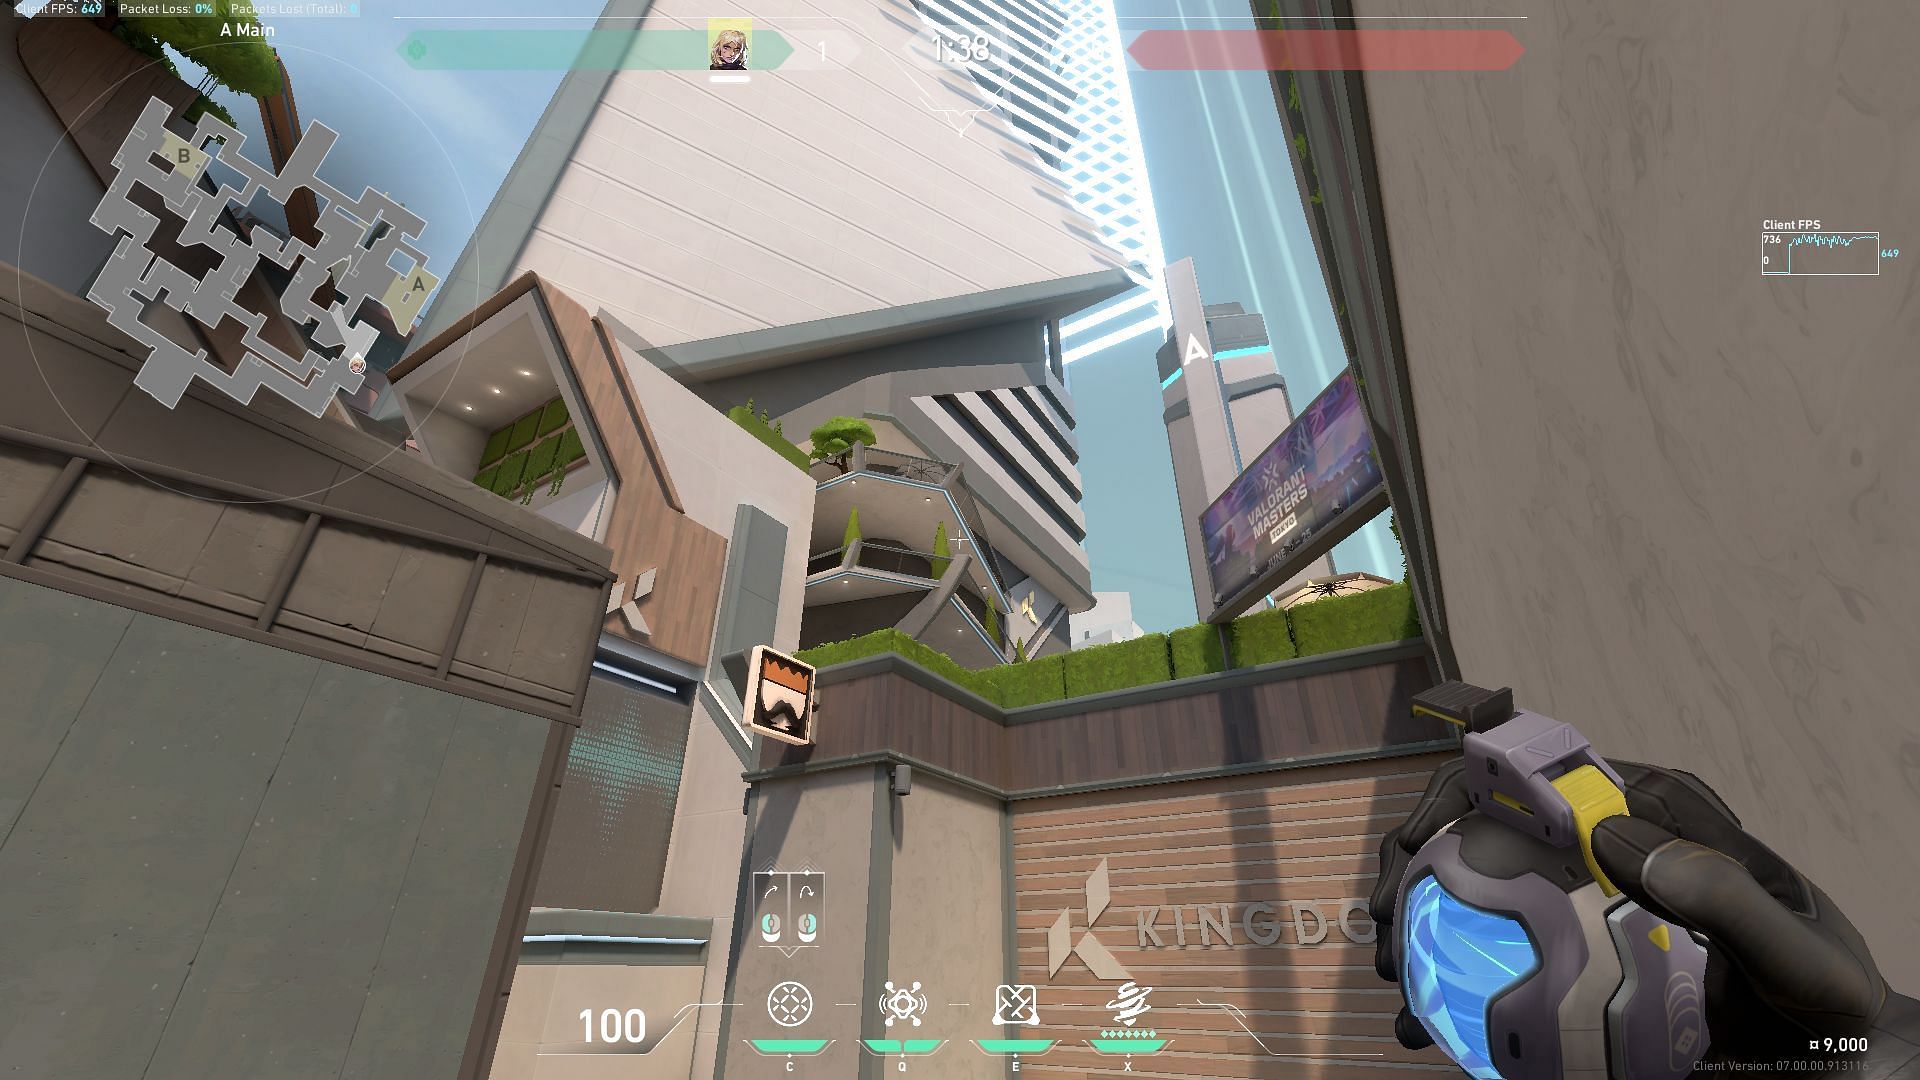
2) A-screen to defender site
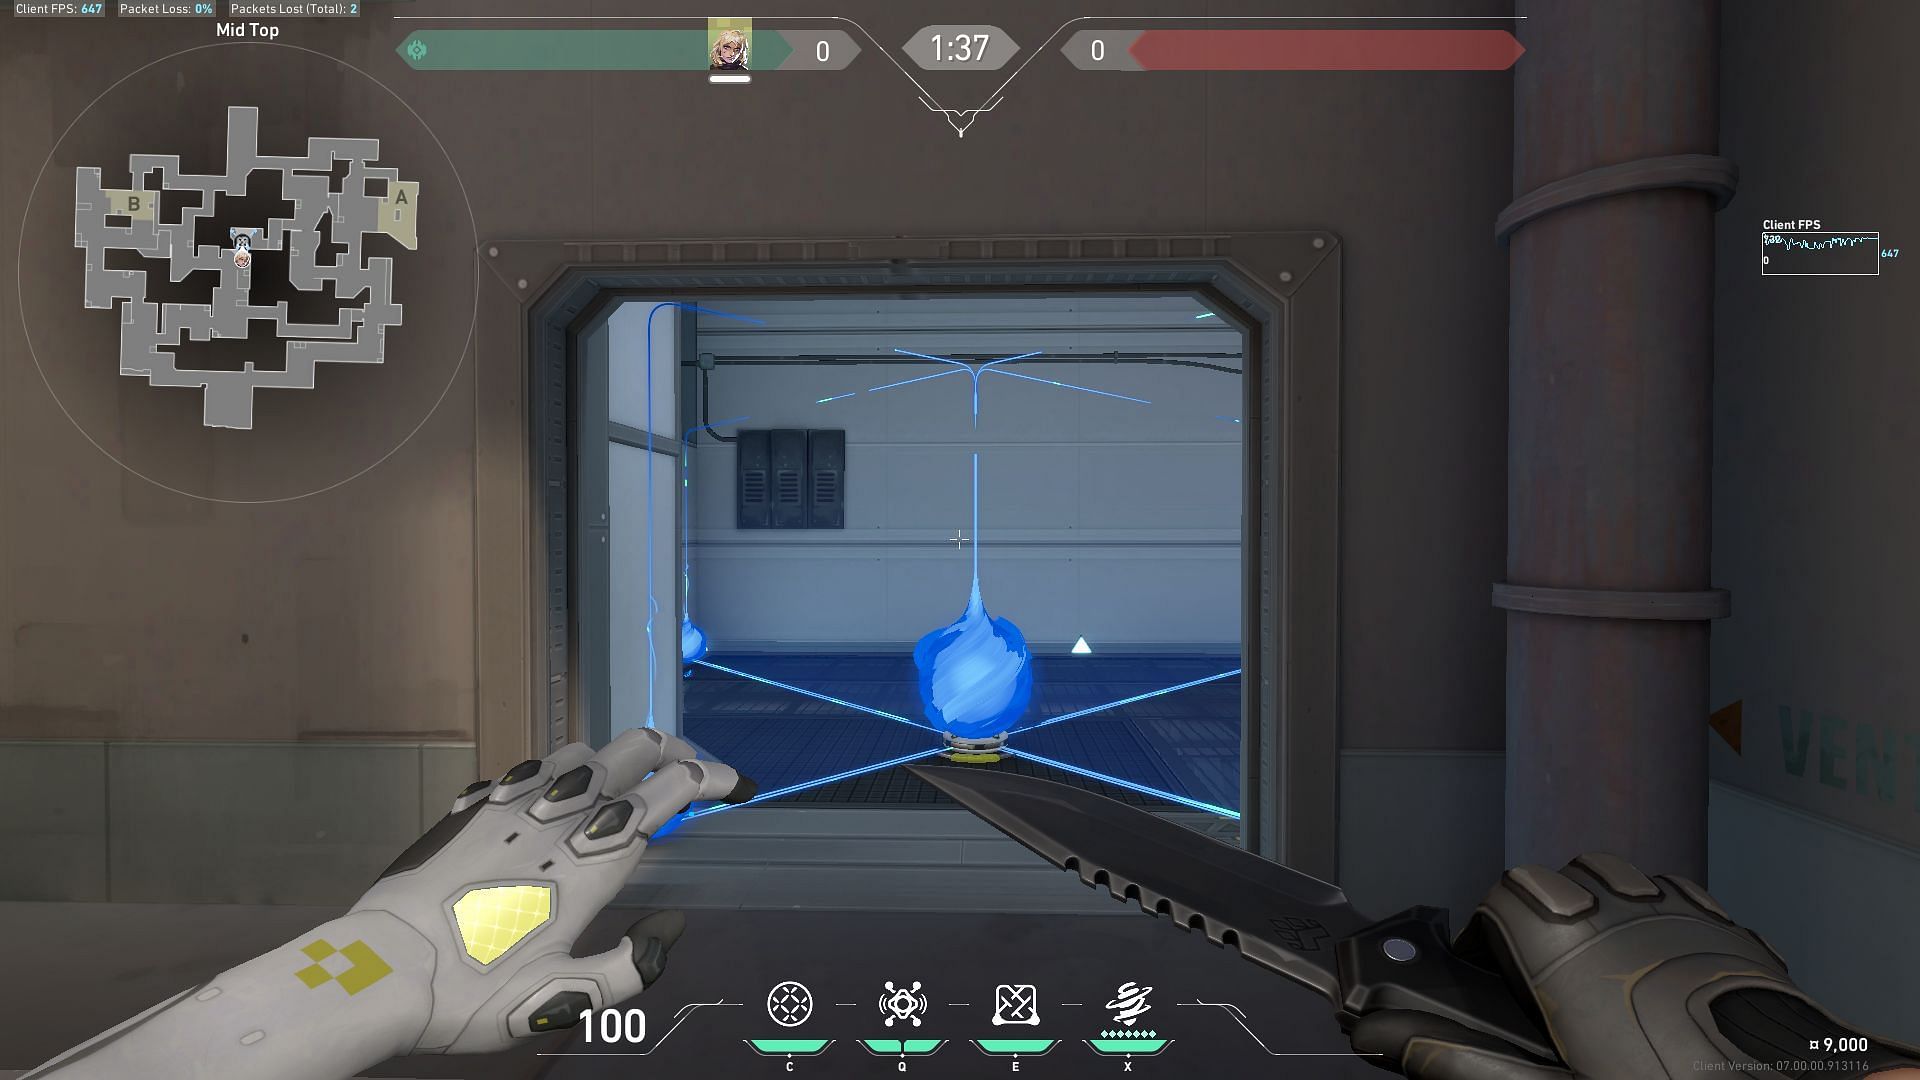
Taking control of the mid is very essential while playing Split. So here is a setup you can use during this play:
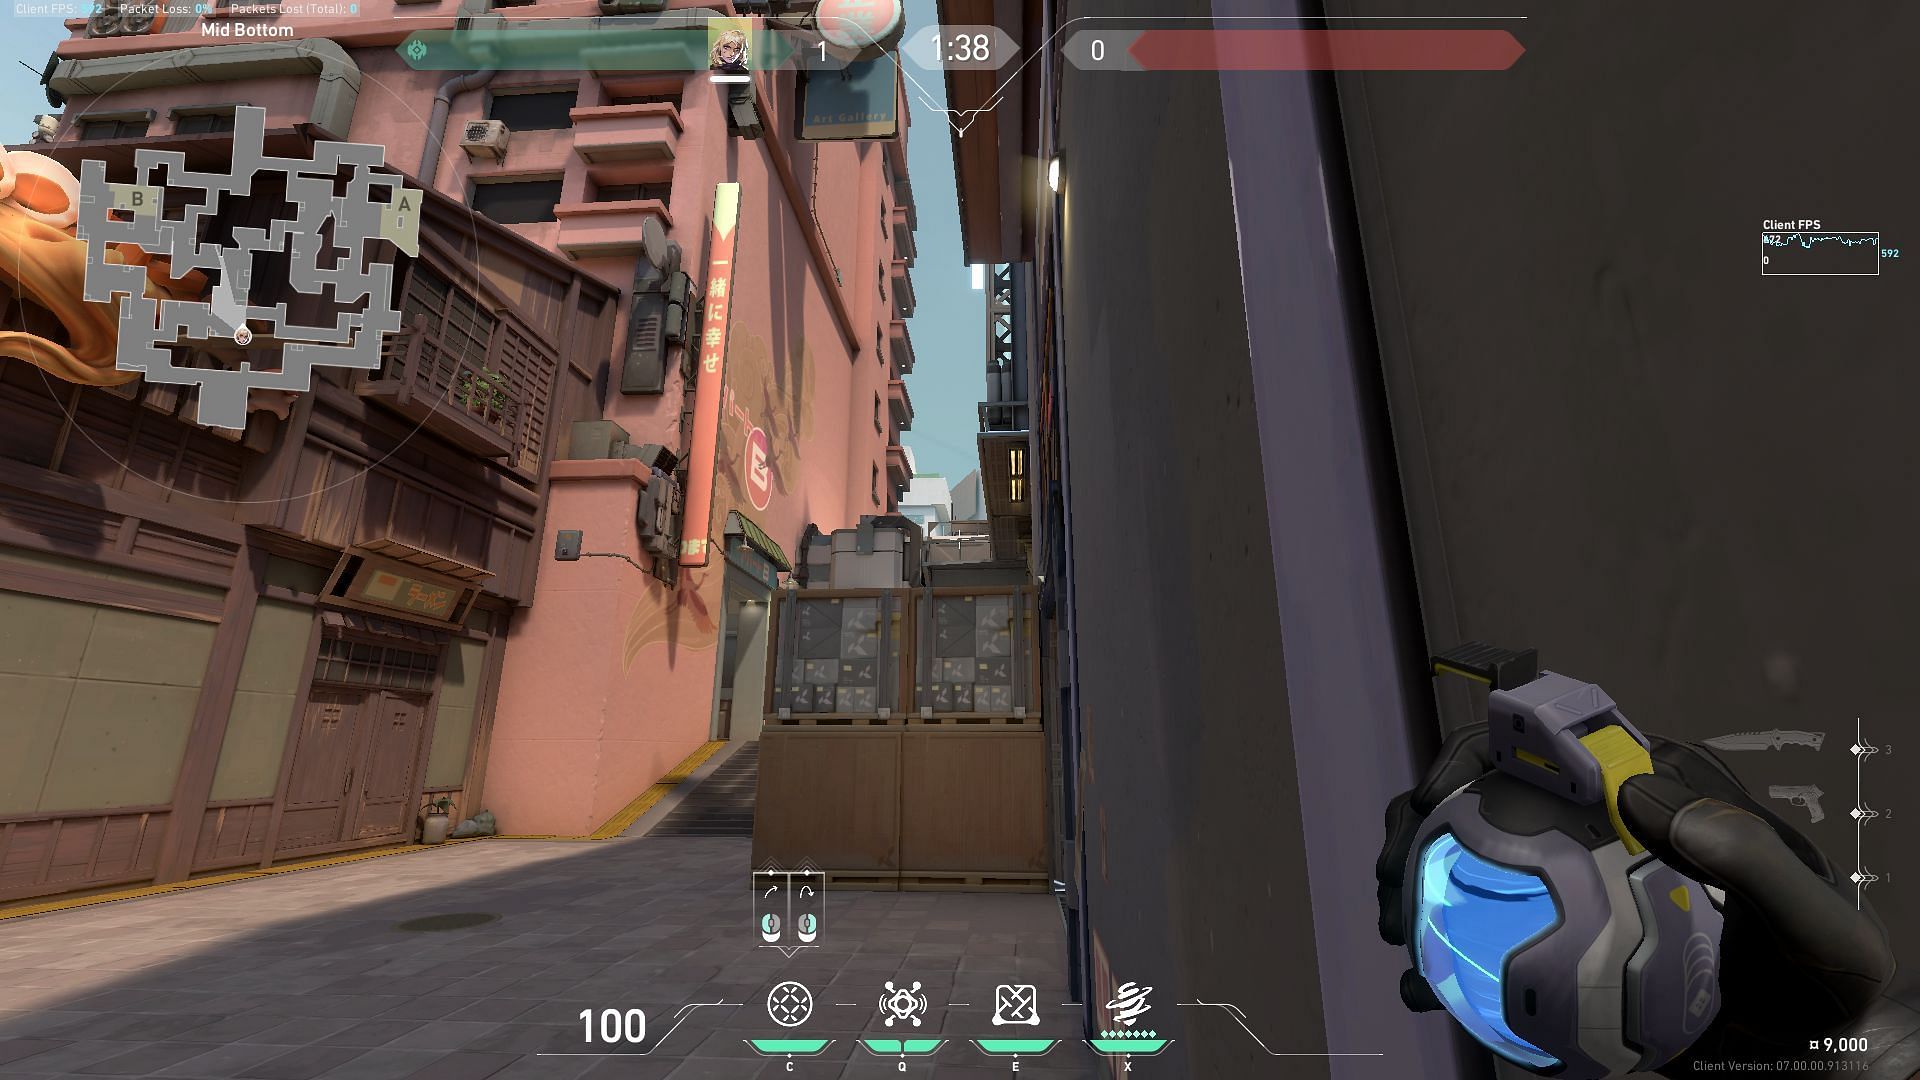
3) Mid-vents
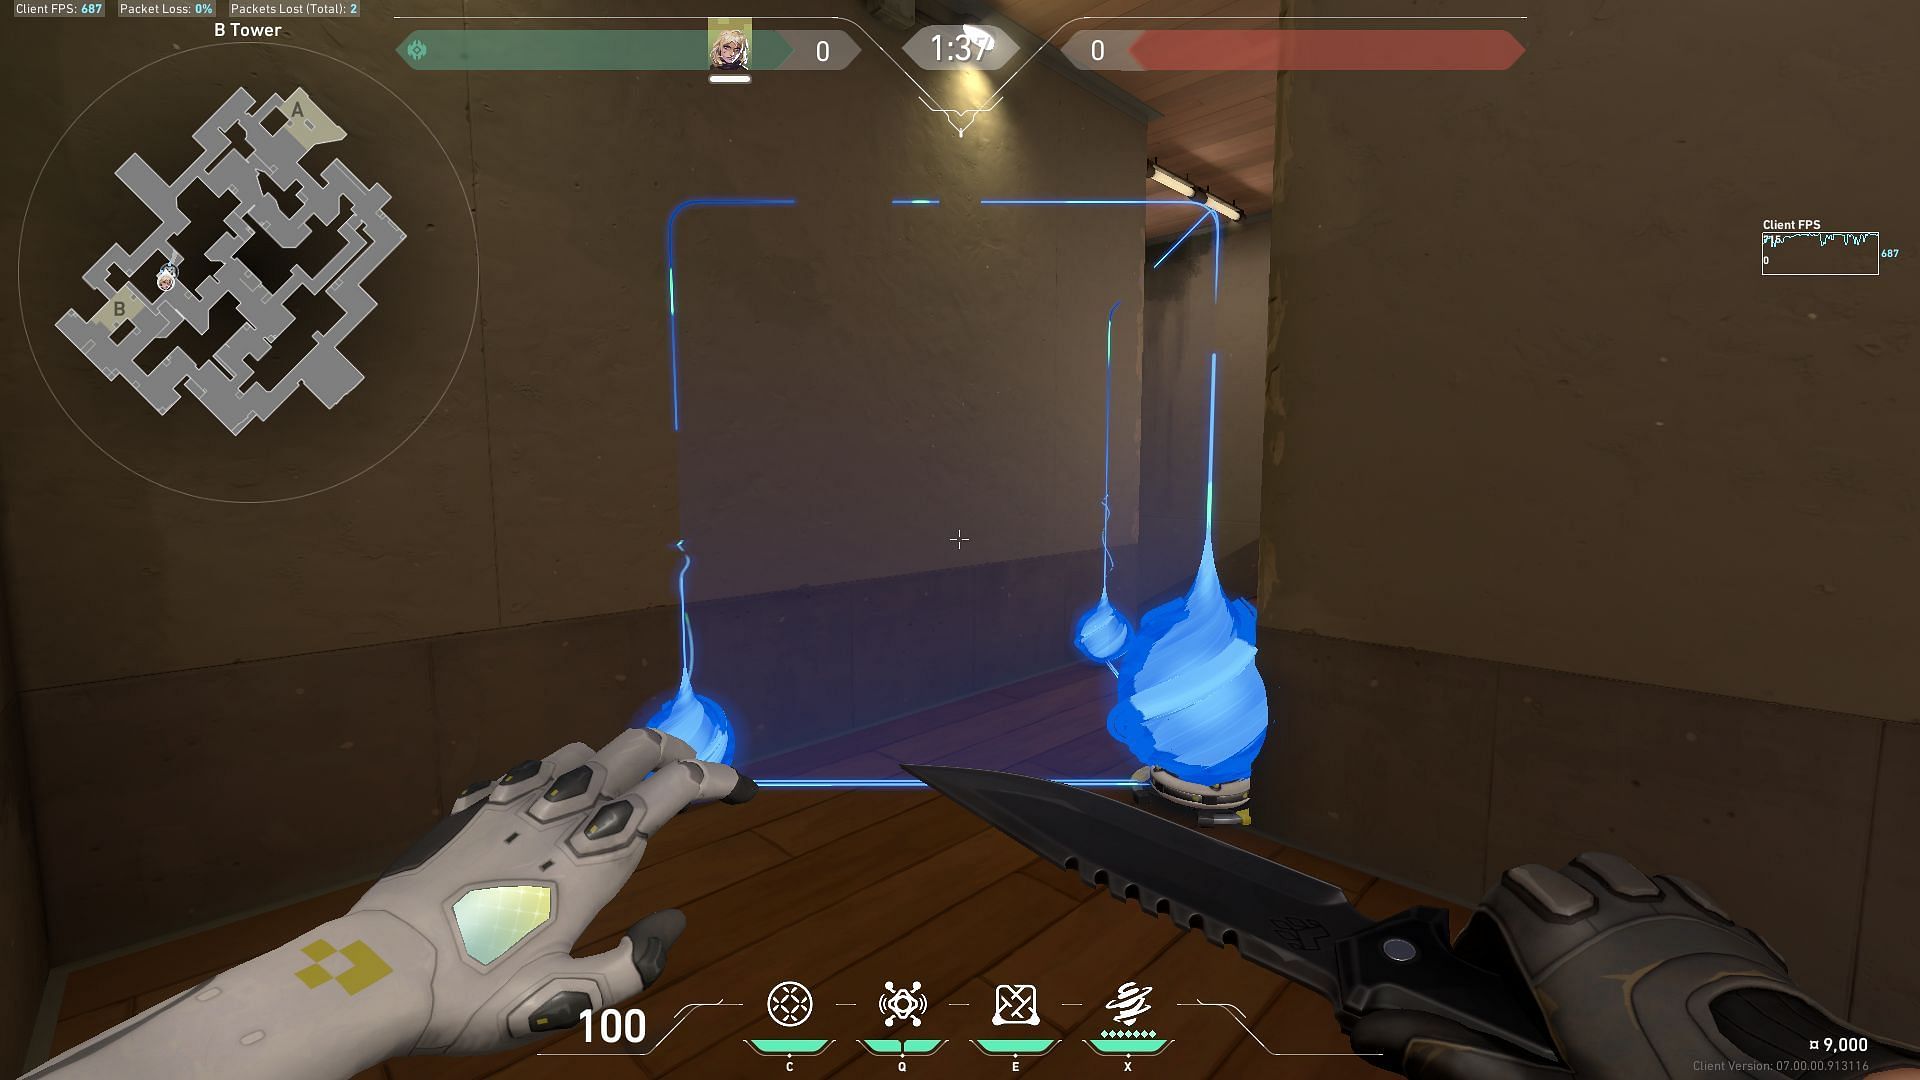
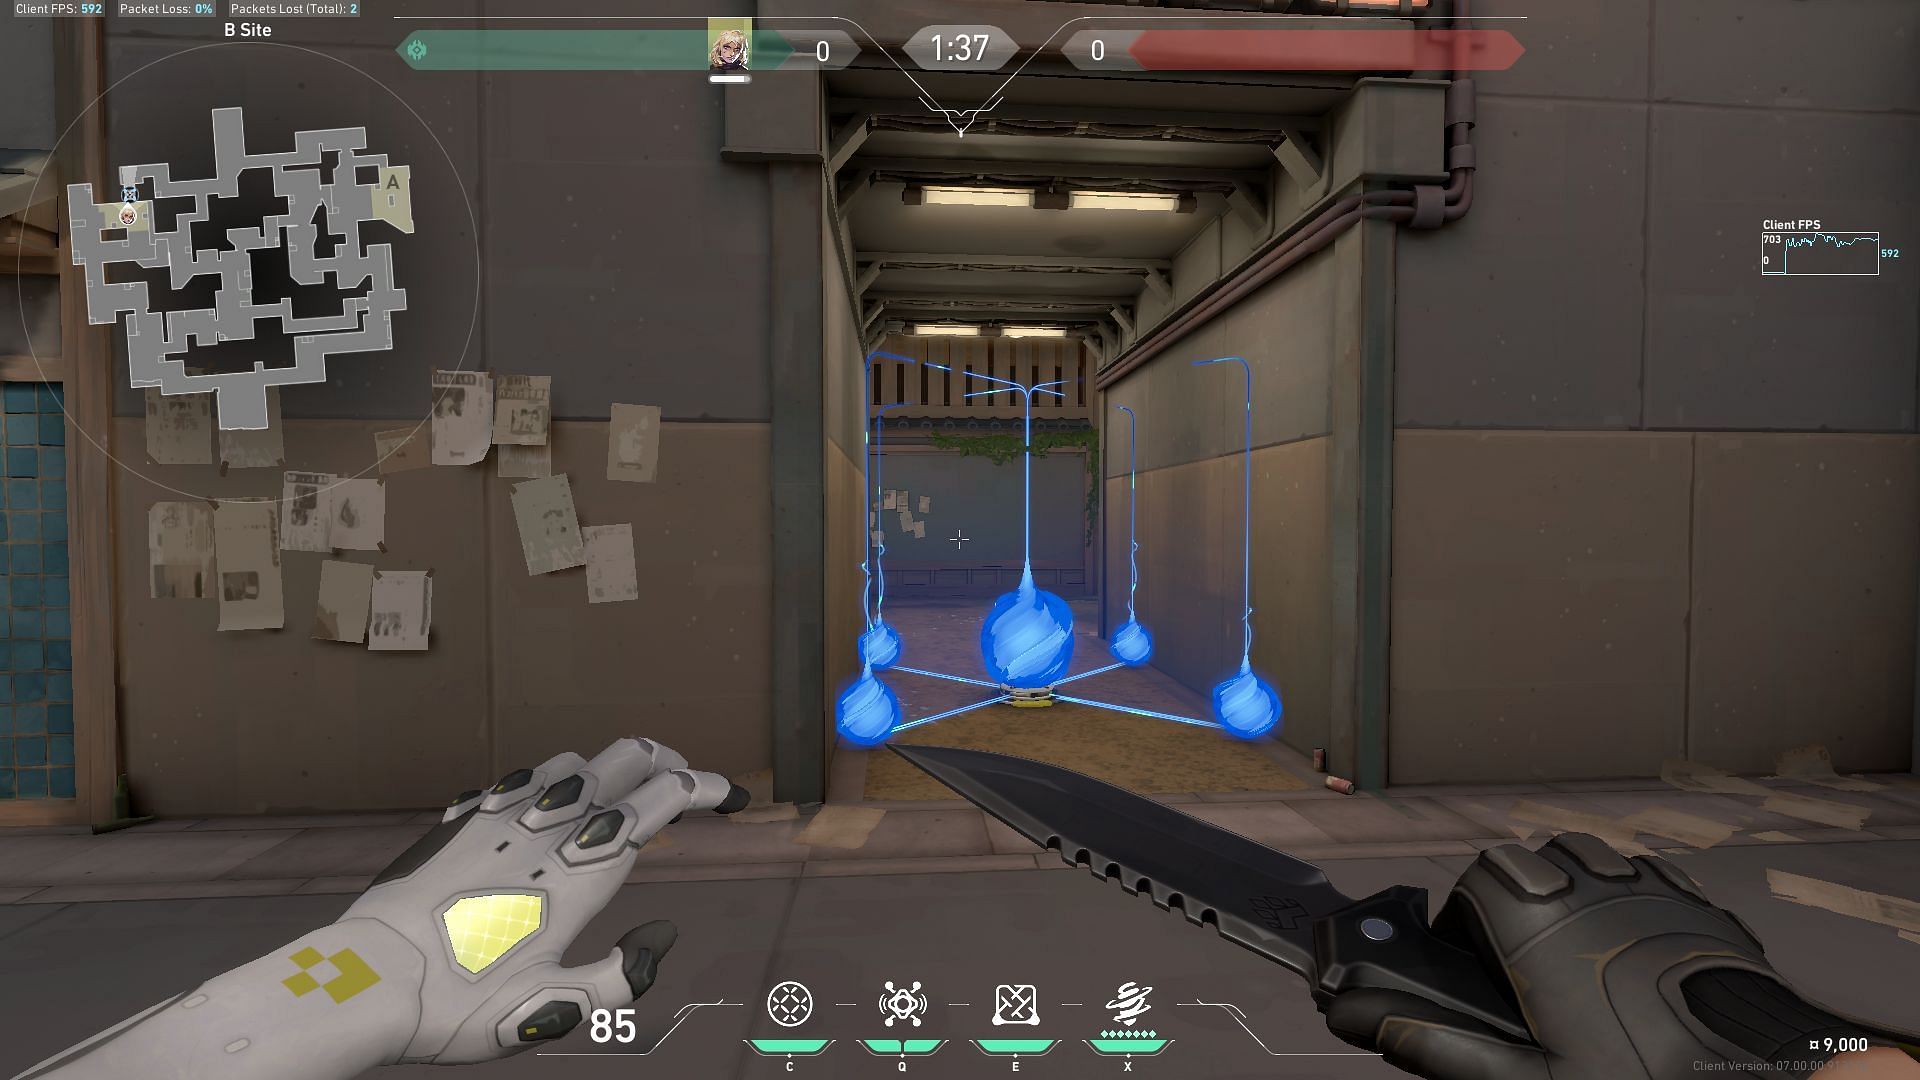
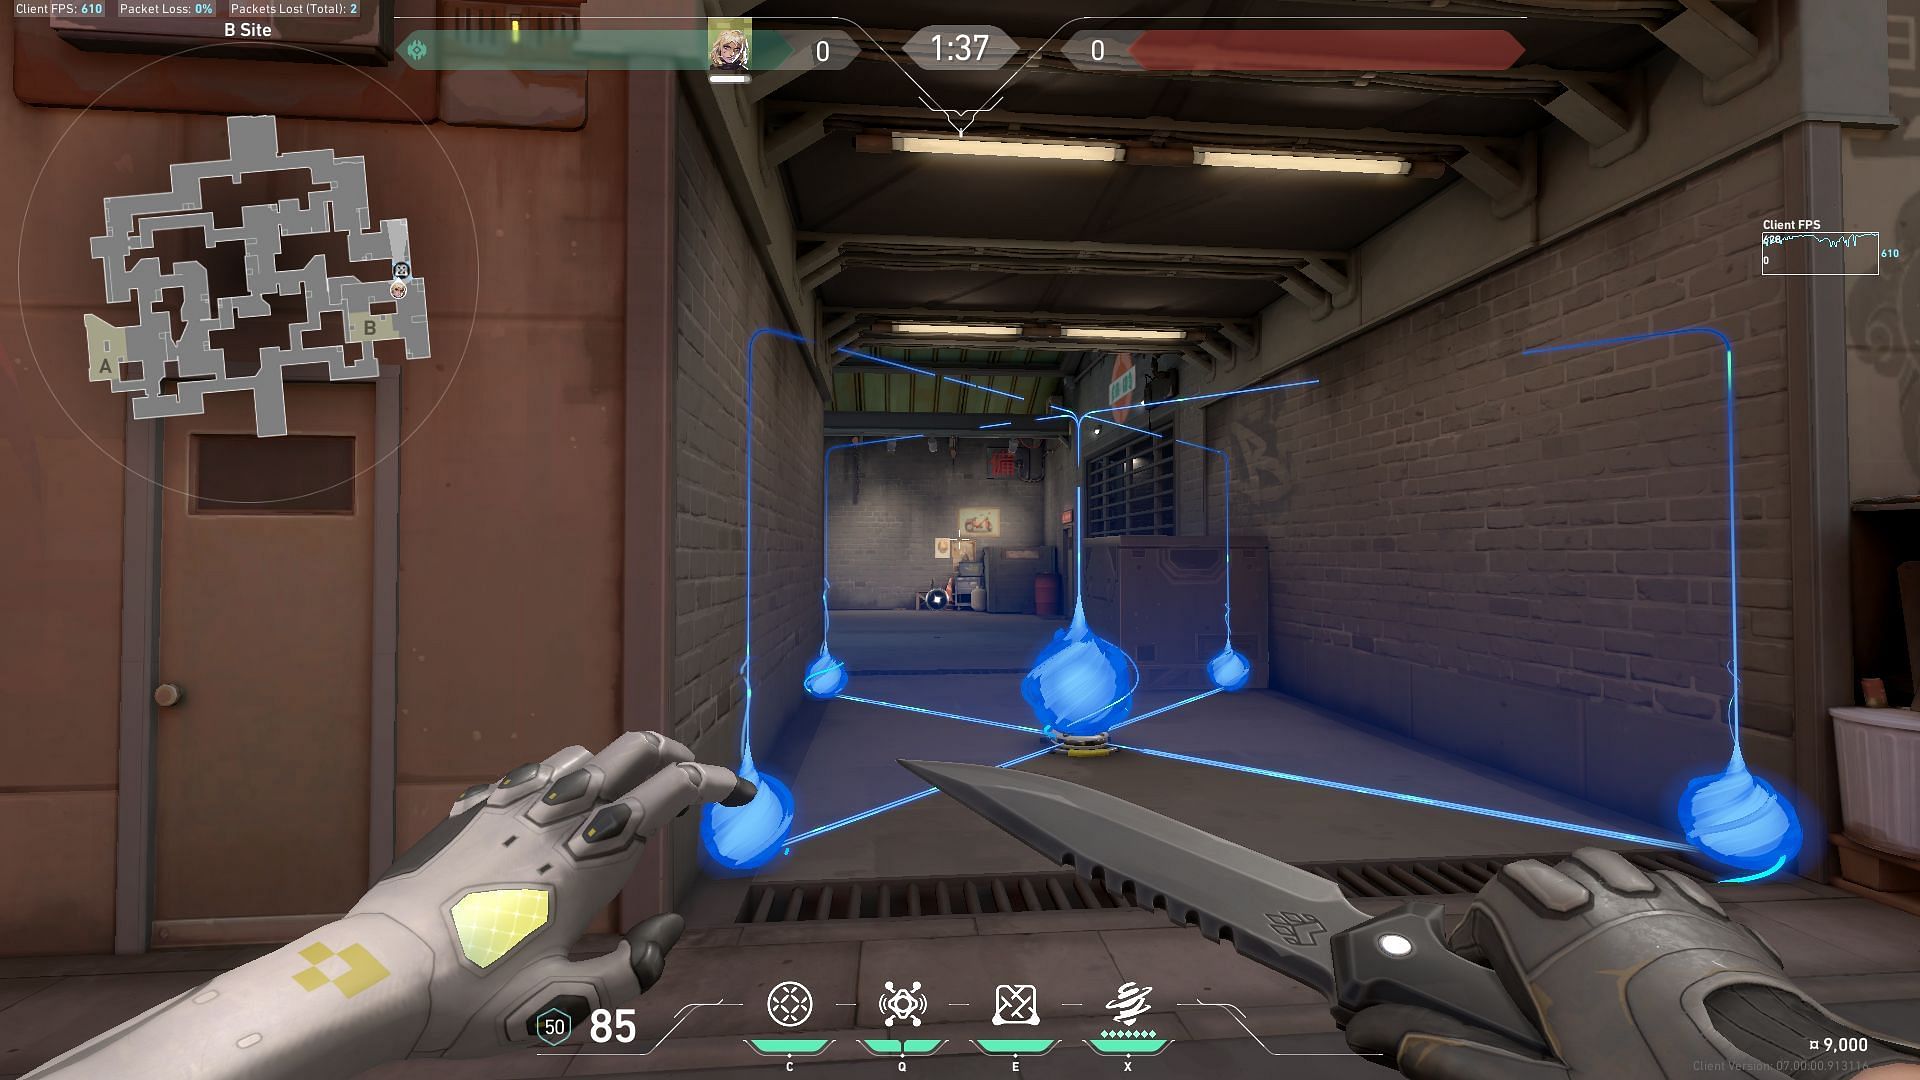
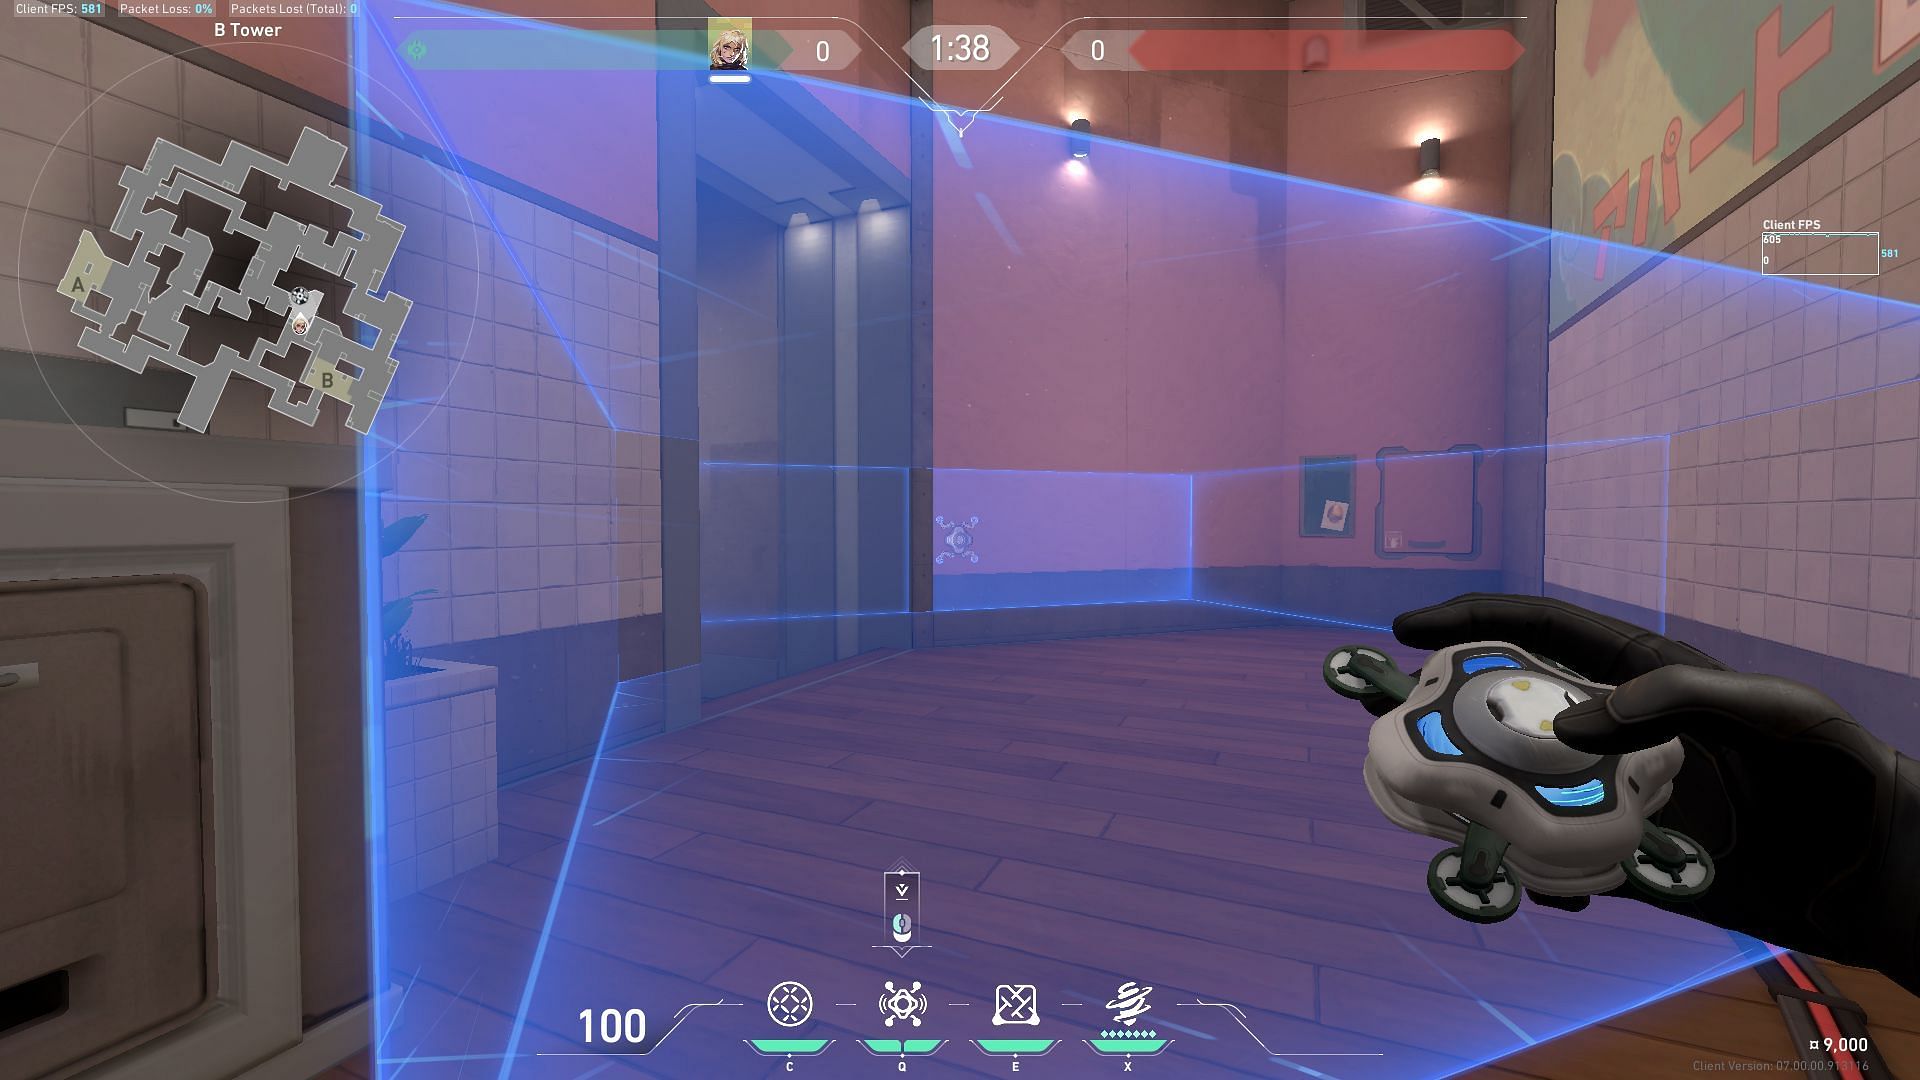
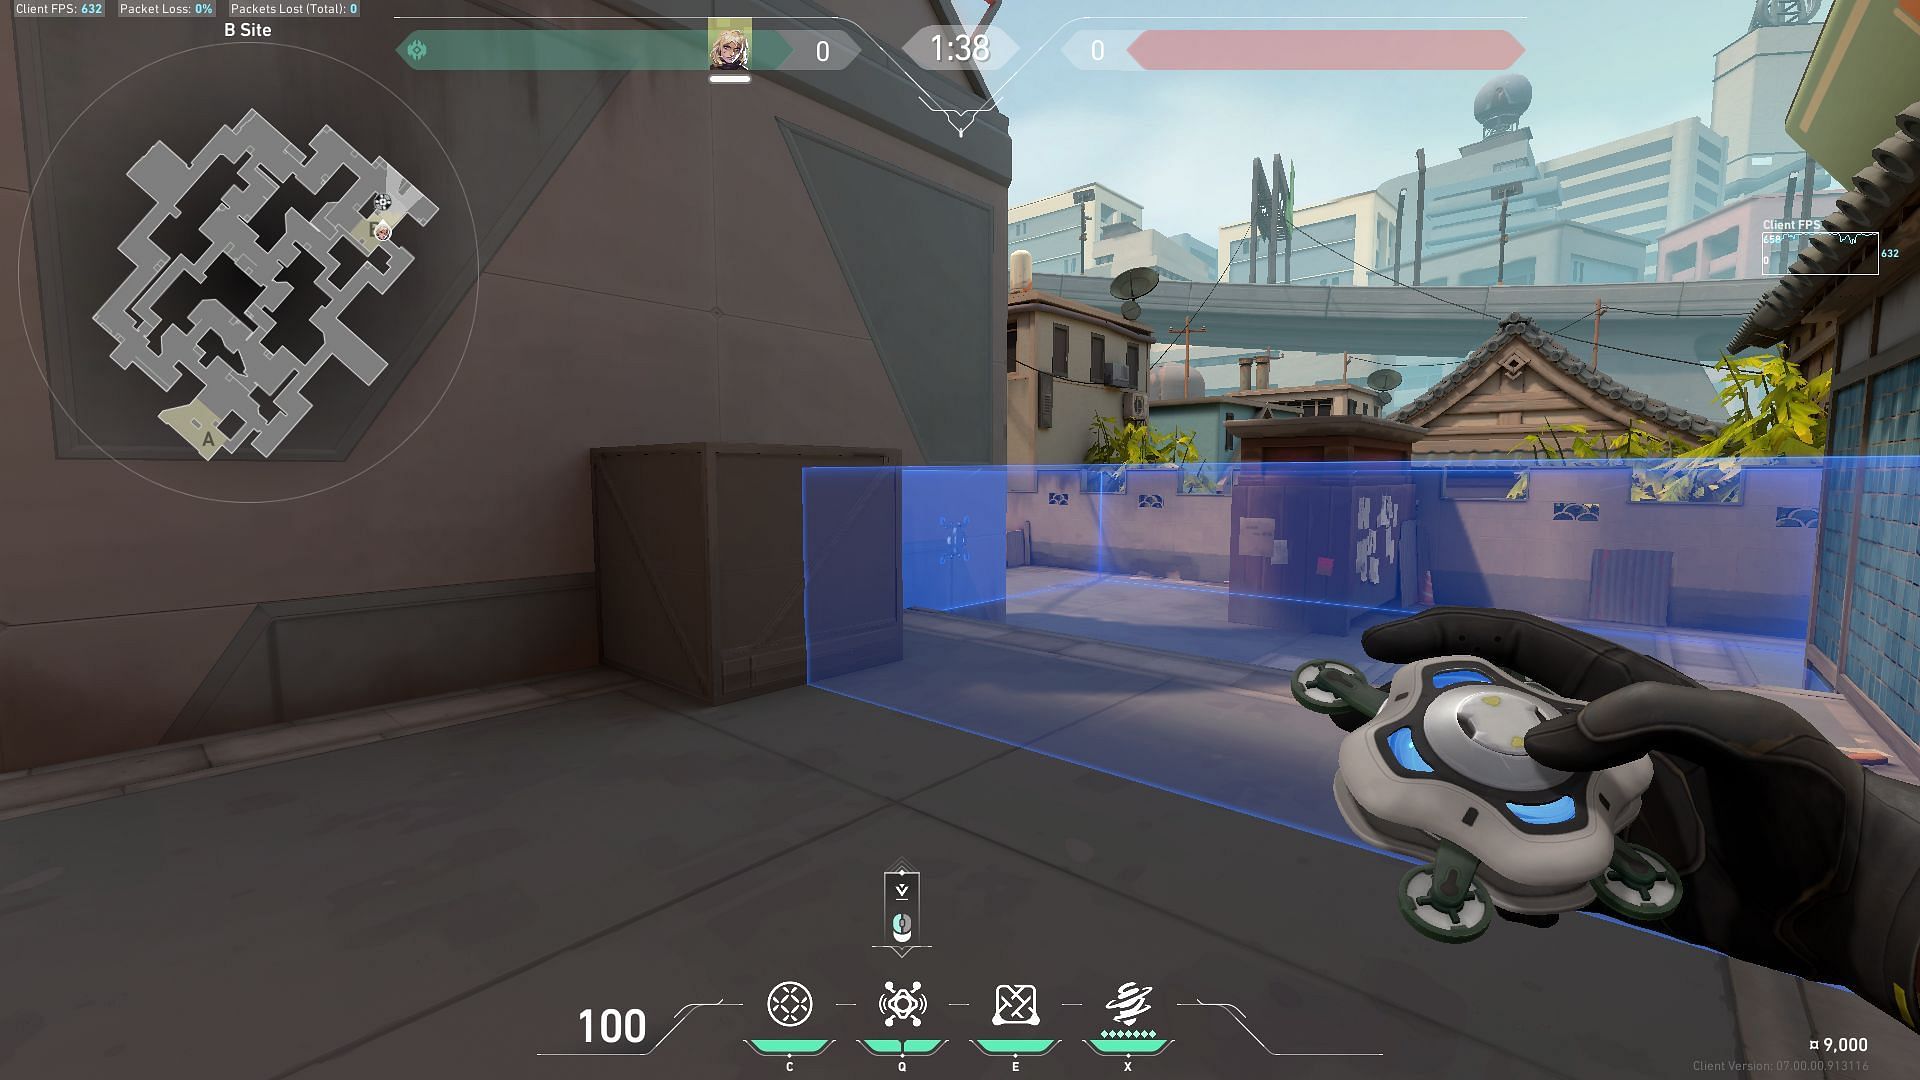
On the B site, there are many places you can block off to stage an after-plant situation or before capturing the bomb site:
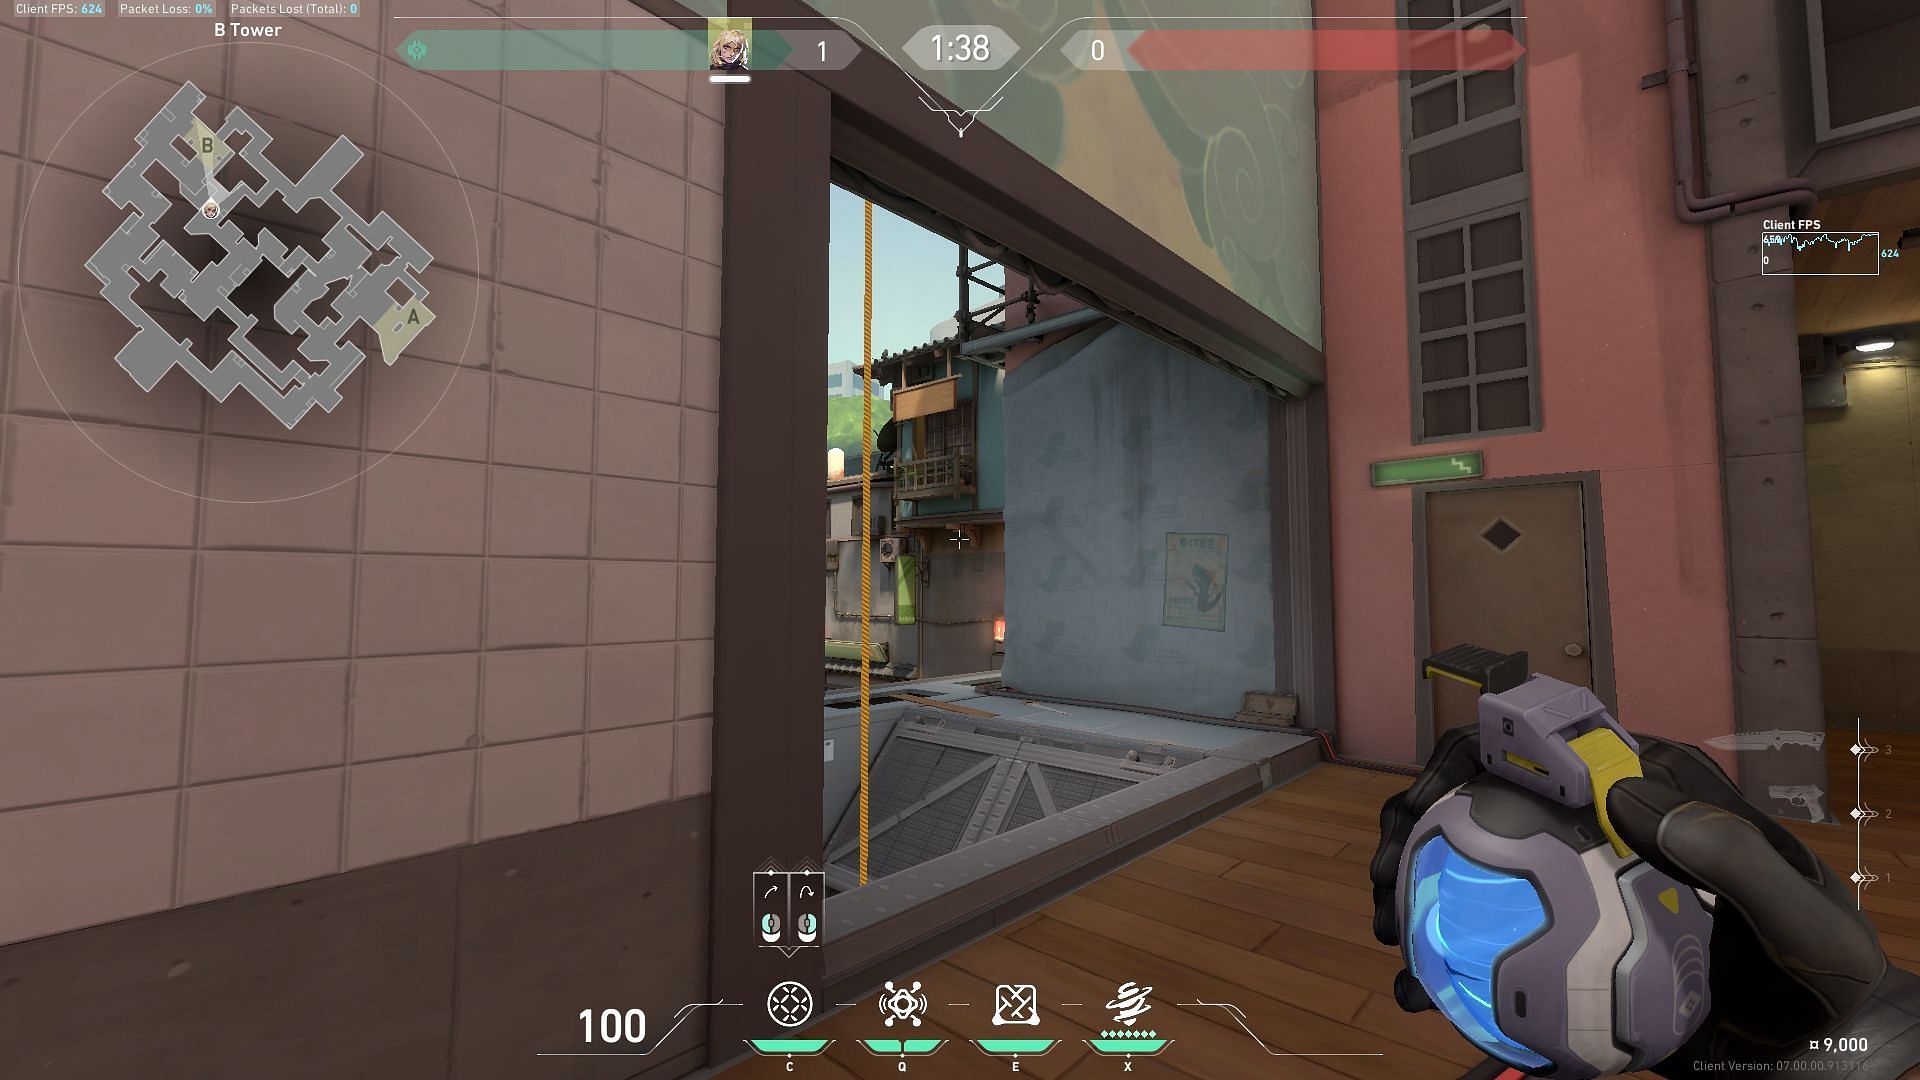
4) B-tower
5) B-alley
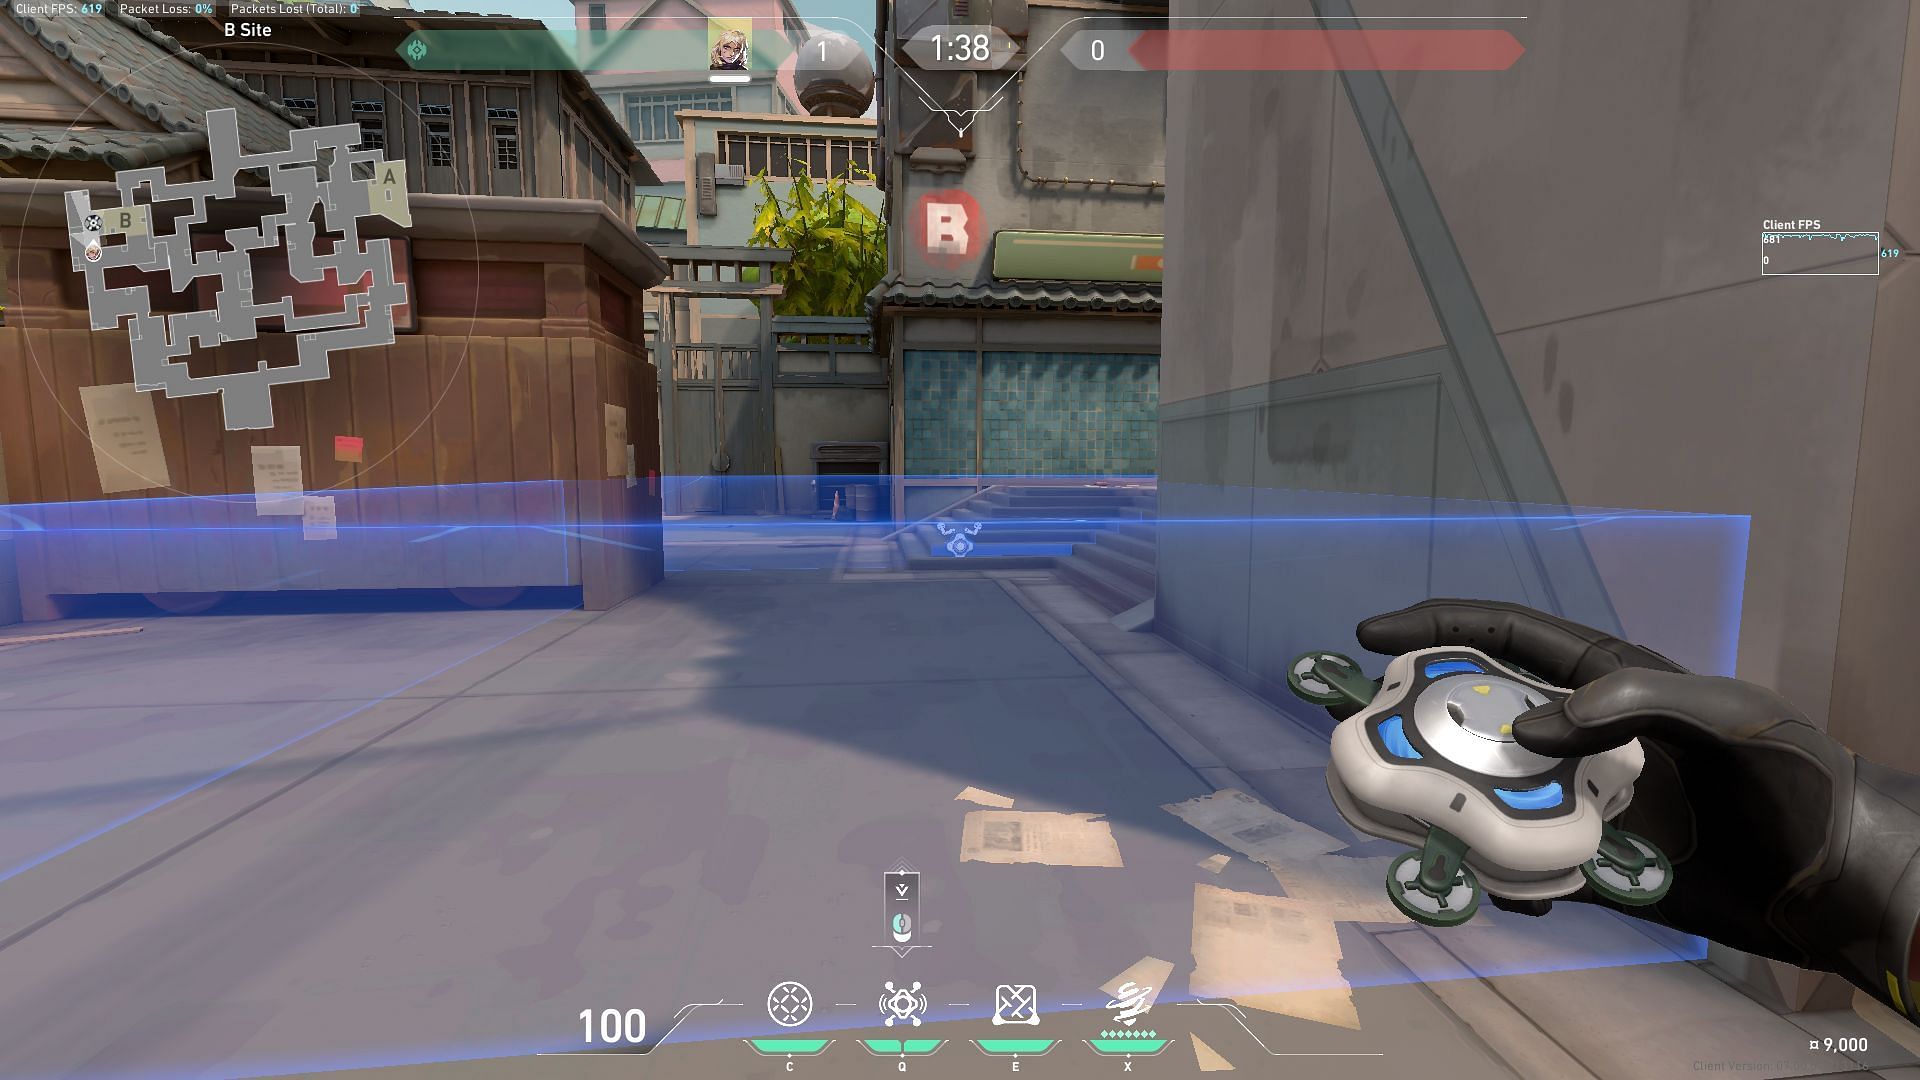
In the case of defending a bomb site, a sentinel’s utility is the most effective ploy to delay Attackers. So here are some essential areas you can block off:
1) A-main
2) A-ramp
3) B-main barrier
If you want to take an early control instead of that passive barrier, here's a more aggressive barrier you can use:
4) B-main aggressive
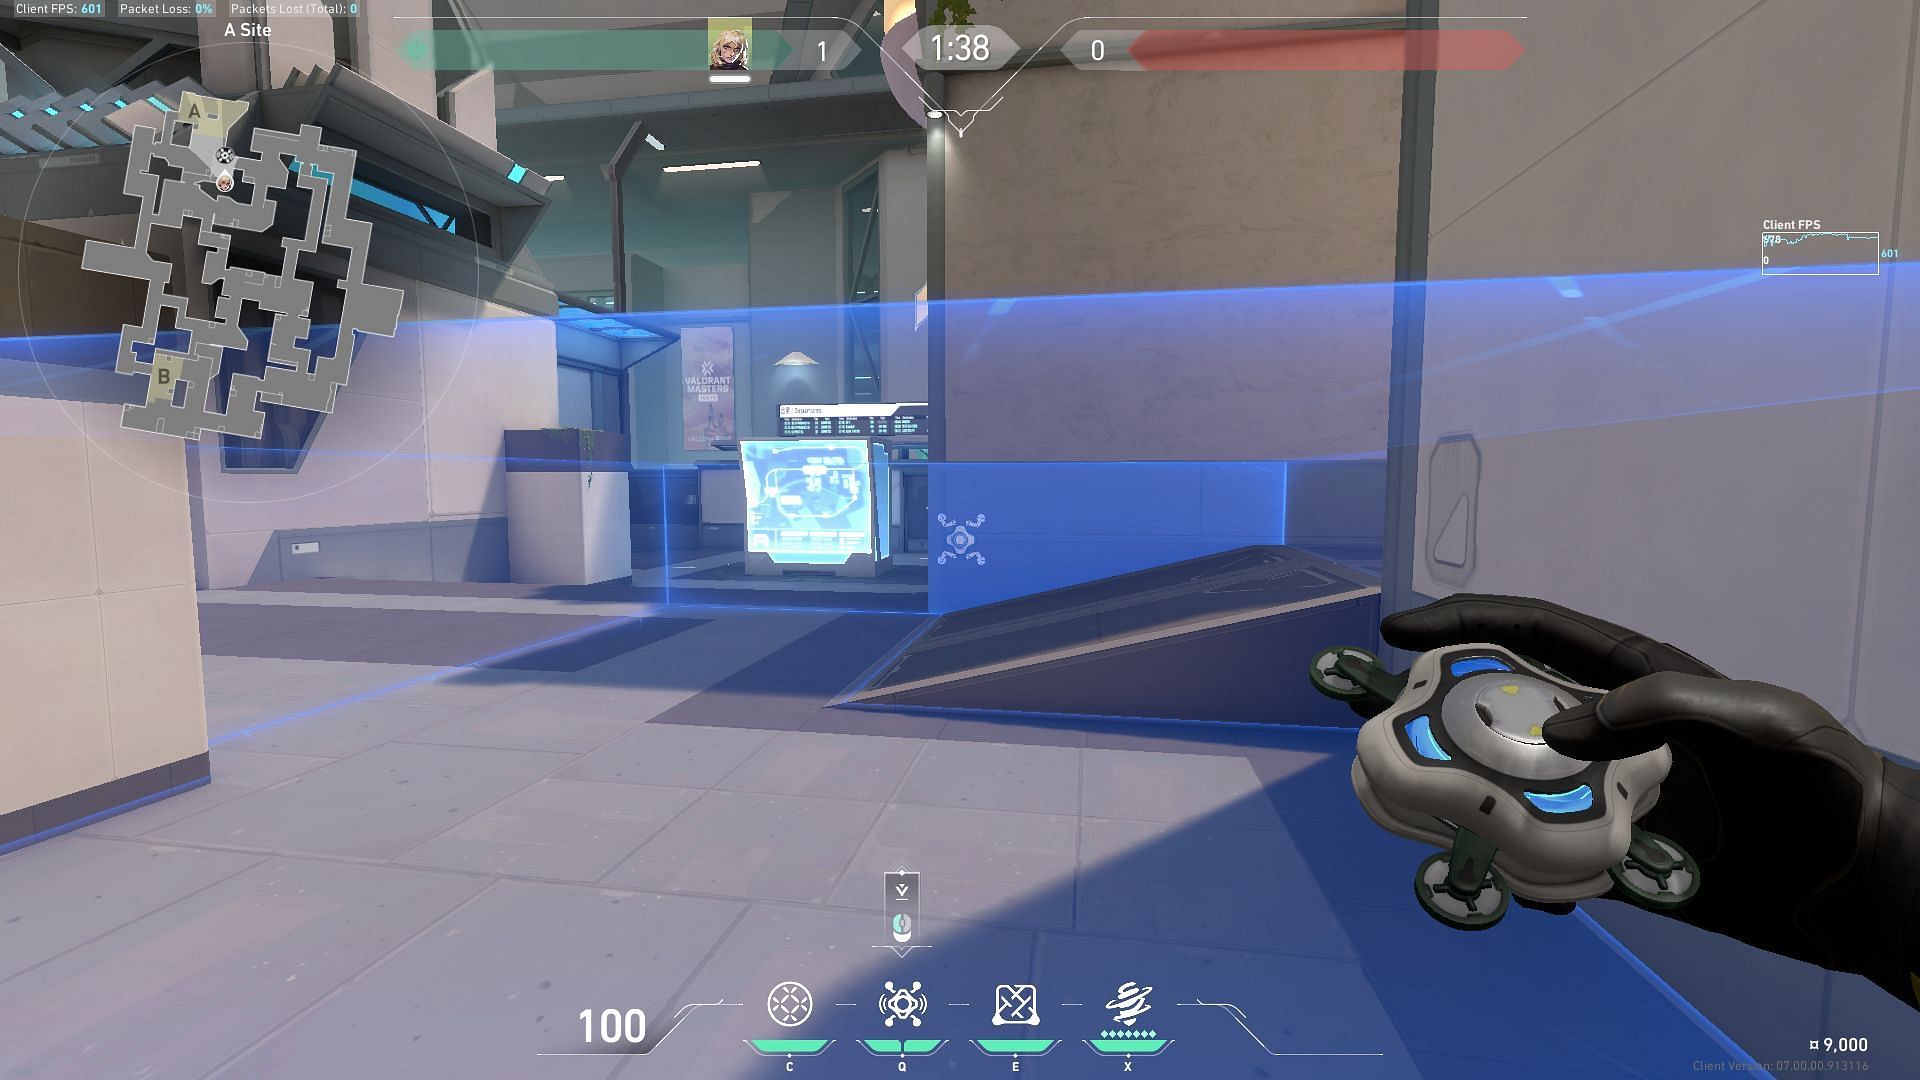
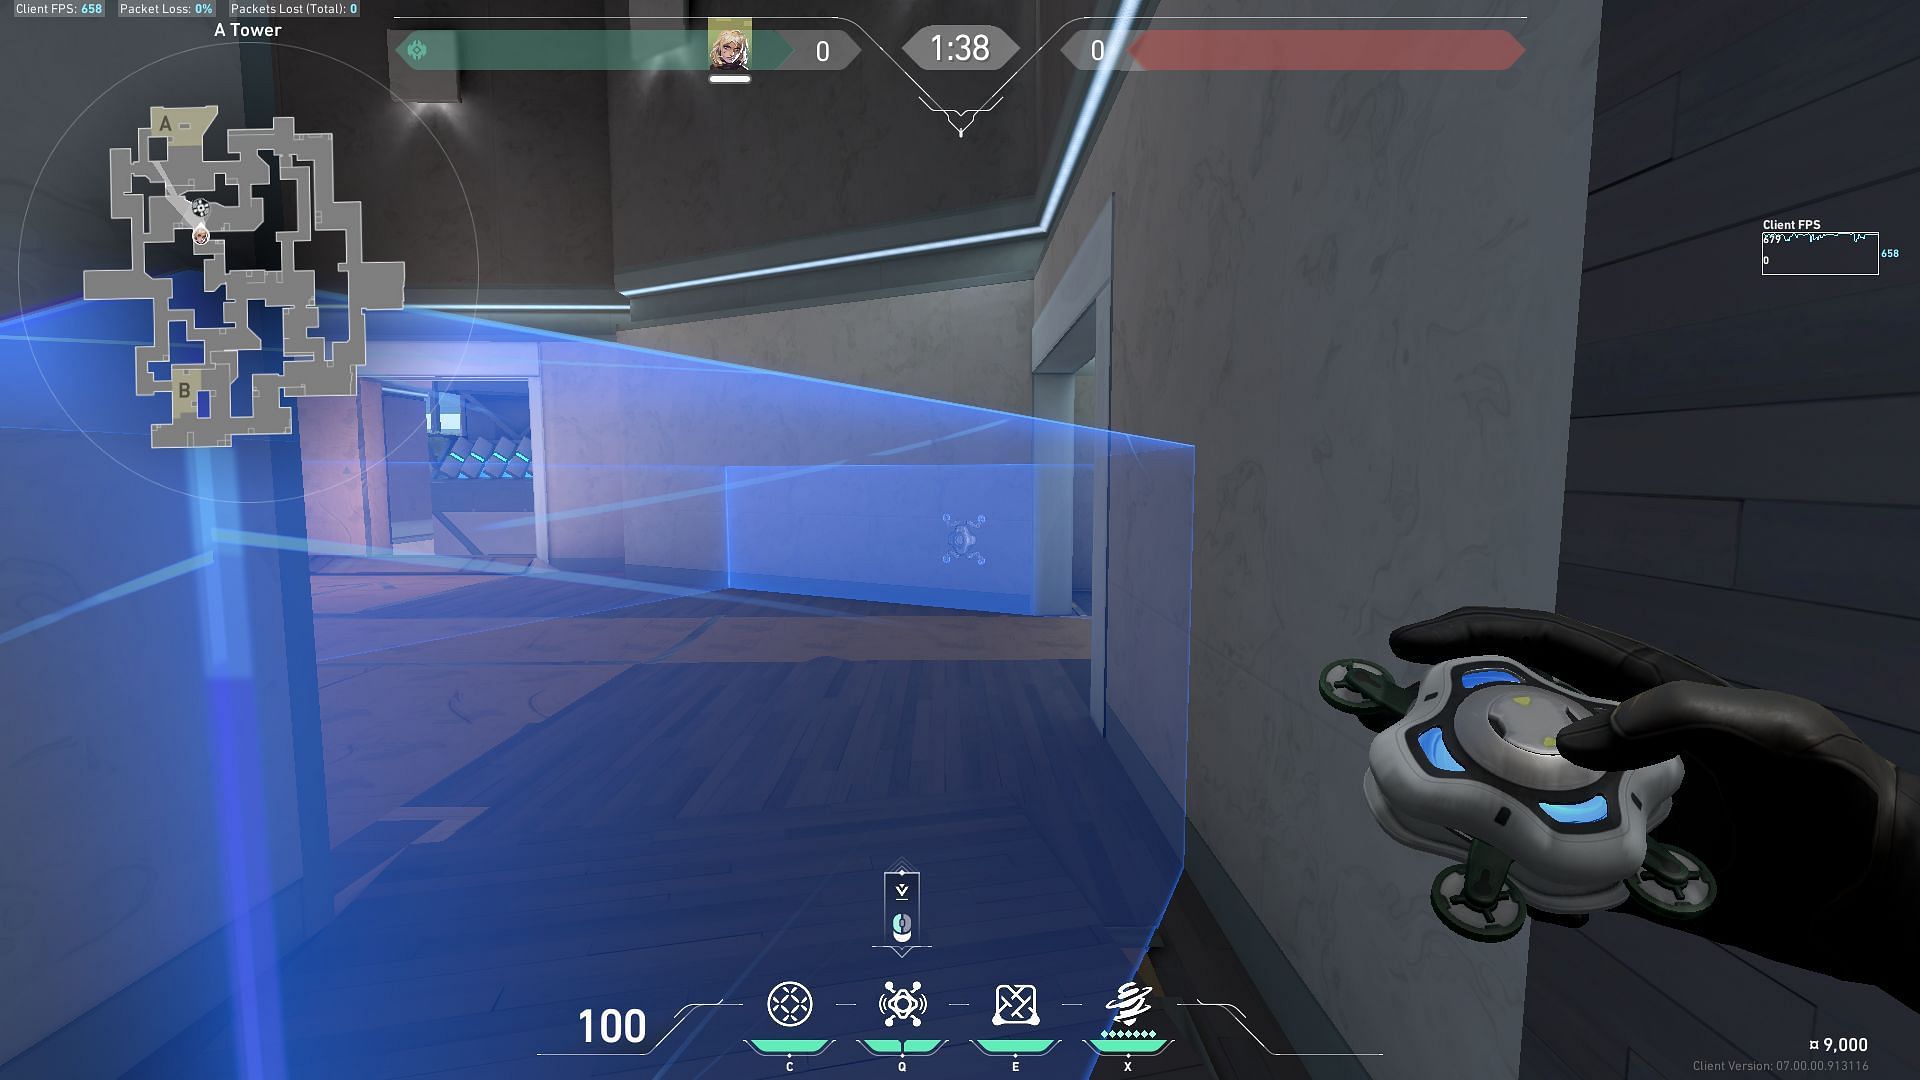
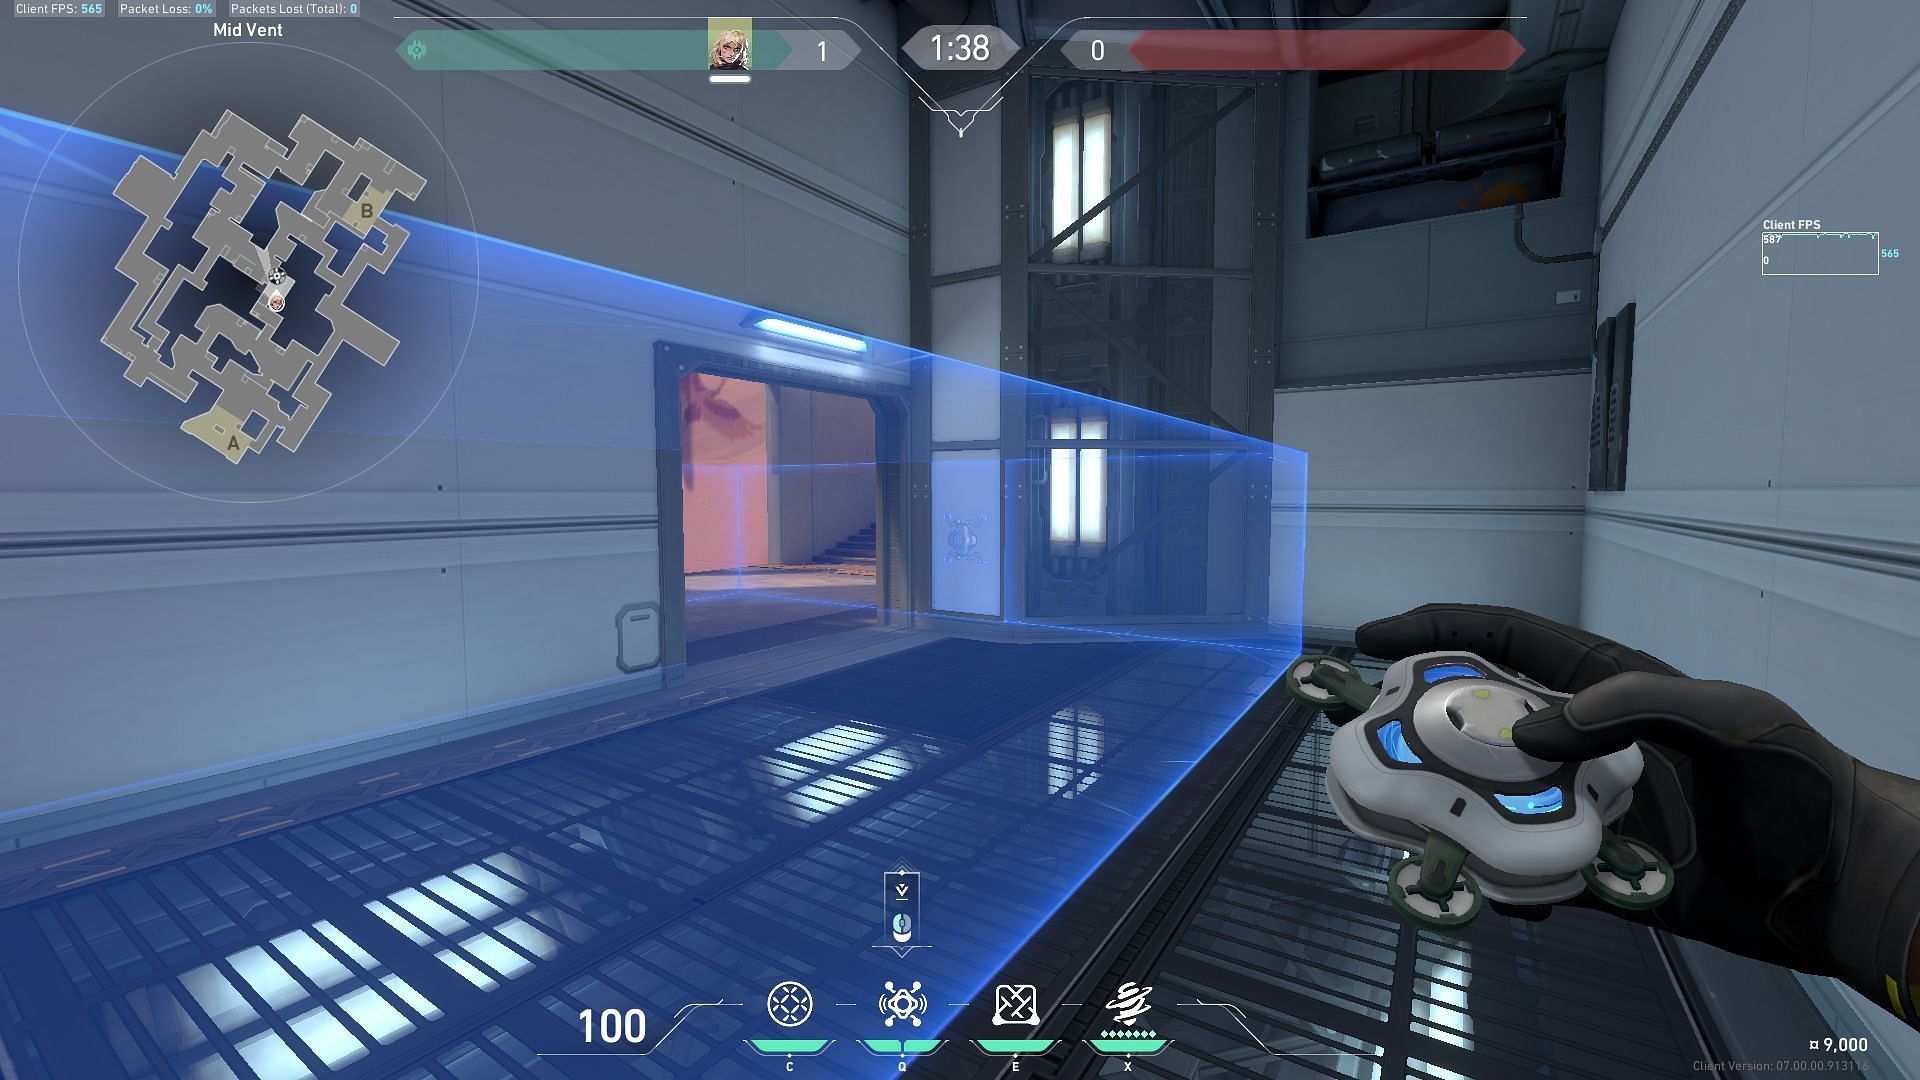
Deadlock’s Sonic Sensor (Q) usage on Split in Valorant
Sonic Sensor activates when an adversary is approaching it. In simple language, this sensor relies on sound queues to function. At first, it remains hidden, but if someone from the enemy team approaches it, the sensor activates by stunning anyone caught in its vicinity.
So as a Sentinel, you have to choose an area where you expect your adversaries to run around and shoot. Here are some spots on the A site:
1) A-site entrance
2) A-tower entrance
If you can’t play mid or want to help the mid-player, your Sonic Sensor can do the job.
3) Mid-vent
In the B site, you can try putting the Sonic Sensors in these spots:
4) B-site entrance
5) B-tower entrance
6) B-site default plant
7) B-site stairs
Deadlock’s Gravnet (C) usage on Split in Valorant
Deadlock’s Gravnet works similarly to Sage’s Slow Orb. It delays your adversaries, making it hard for them to run around. This renders them vulnerable to your teammates.
Here are some of the lineups you can use while attacking, defending, retaking, or capturing any area, depending on the situation:
1) A-ramp
2) A-tower
3) Mid-vents (run throw)
4) Default plant spot from B-main

5) B-tower to default plant (run throw)
Deadlock’s Ultimate Annihilation (X) usage on Split in Valorant
Like other sentinels, Deadlock’s Ultimate is a little bit tricky to use. You have a limited time to use this Ultimate, or it’ll get wasted. Since it costs seven points to generate the Ultimate, it’s not easy to acquire. All you need to do is watch out for tiny crevices and edges that could send it off in the wrong way.
If you want to know more about some of the team compositions with Deadlock in Valorant, check out our guide.
And if you want to use other Sentinel to keep alive the old school Sentinel meta, you can check this team composition. For more guides, stay tuned to Sportskeeda.
