
'%20x='0'%20y='0'%20height='100%25'%20width='100%25'%20%0A%20%20%20%20%20%20%20%20%20%20xlink%3Ahref='data:image/jpg;base64,/9j/2wBDAAYEBQYFBAYGBQYHBwYIChAKCgkJChQODwwQFxQYGBcUFhYaHSUfGhsjHBYWICwgIyYnKSopGR8tMC0oMCUoKSj/2wBDAQcHBwoIChMKChMoGhYaKCgoKCgoKCgoKCgoKCgoKCgoKCgoKCgoKCgoKCgoKCgoKCgoKCgoKCgoKCgoKCgoKCj/wgARCAAGAAoDASIAAhEBAxEB/8QAFQABAQAAAAAAAAAAAAAAAAAAAAb/xAAUAQEAAAAAAAAAAAAAAAAAAAAC/9oADAMBAAIQAxAAAACPiRj/xAAeEAACAQUAAwAAAAAAAAAAAAABAgMABAURIRMUMf/aAAgBAQABPwBYsWpxKeq/imSQyd6fhFXMdobiUokiIXOl5wbr/8QAGBEAAgMAAAAAAAAAAAAAAAAAAAIBAzH/2gAIAQIBAT8AraW0/8QAFhEBAQEAAAAAAAAAAAAAAAAAAQAR/9oACAEDAQE/AEAMv//Z'%3E%3C/image%3E%3C/svg%3E)
Valorant has many characters that utilize different abilities to fulfill their roles in the game. These characters are Agents and have unique talents for specific tasks. Players have utilized throwable abilities to win games from a safe distance.
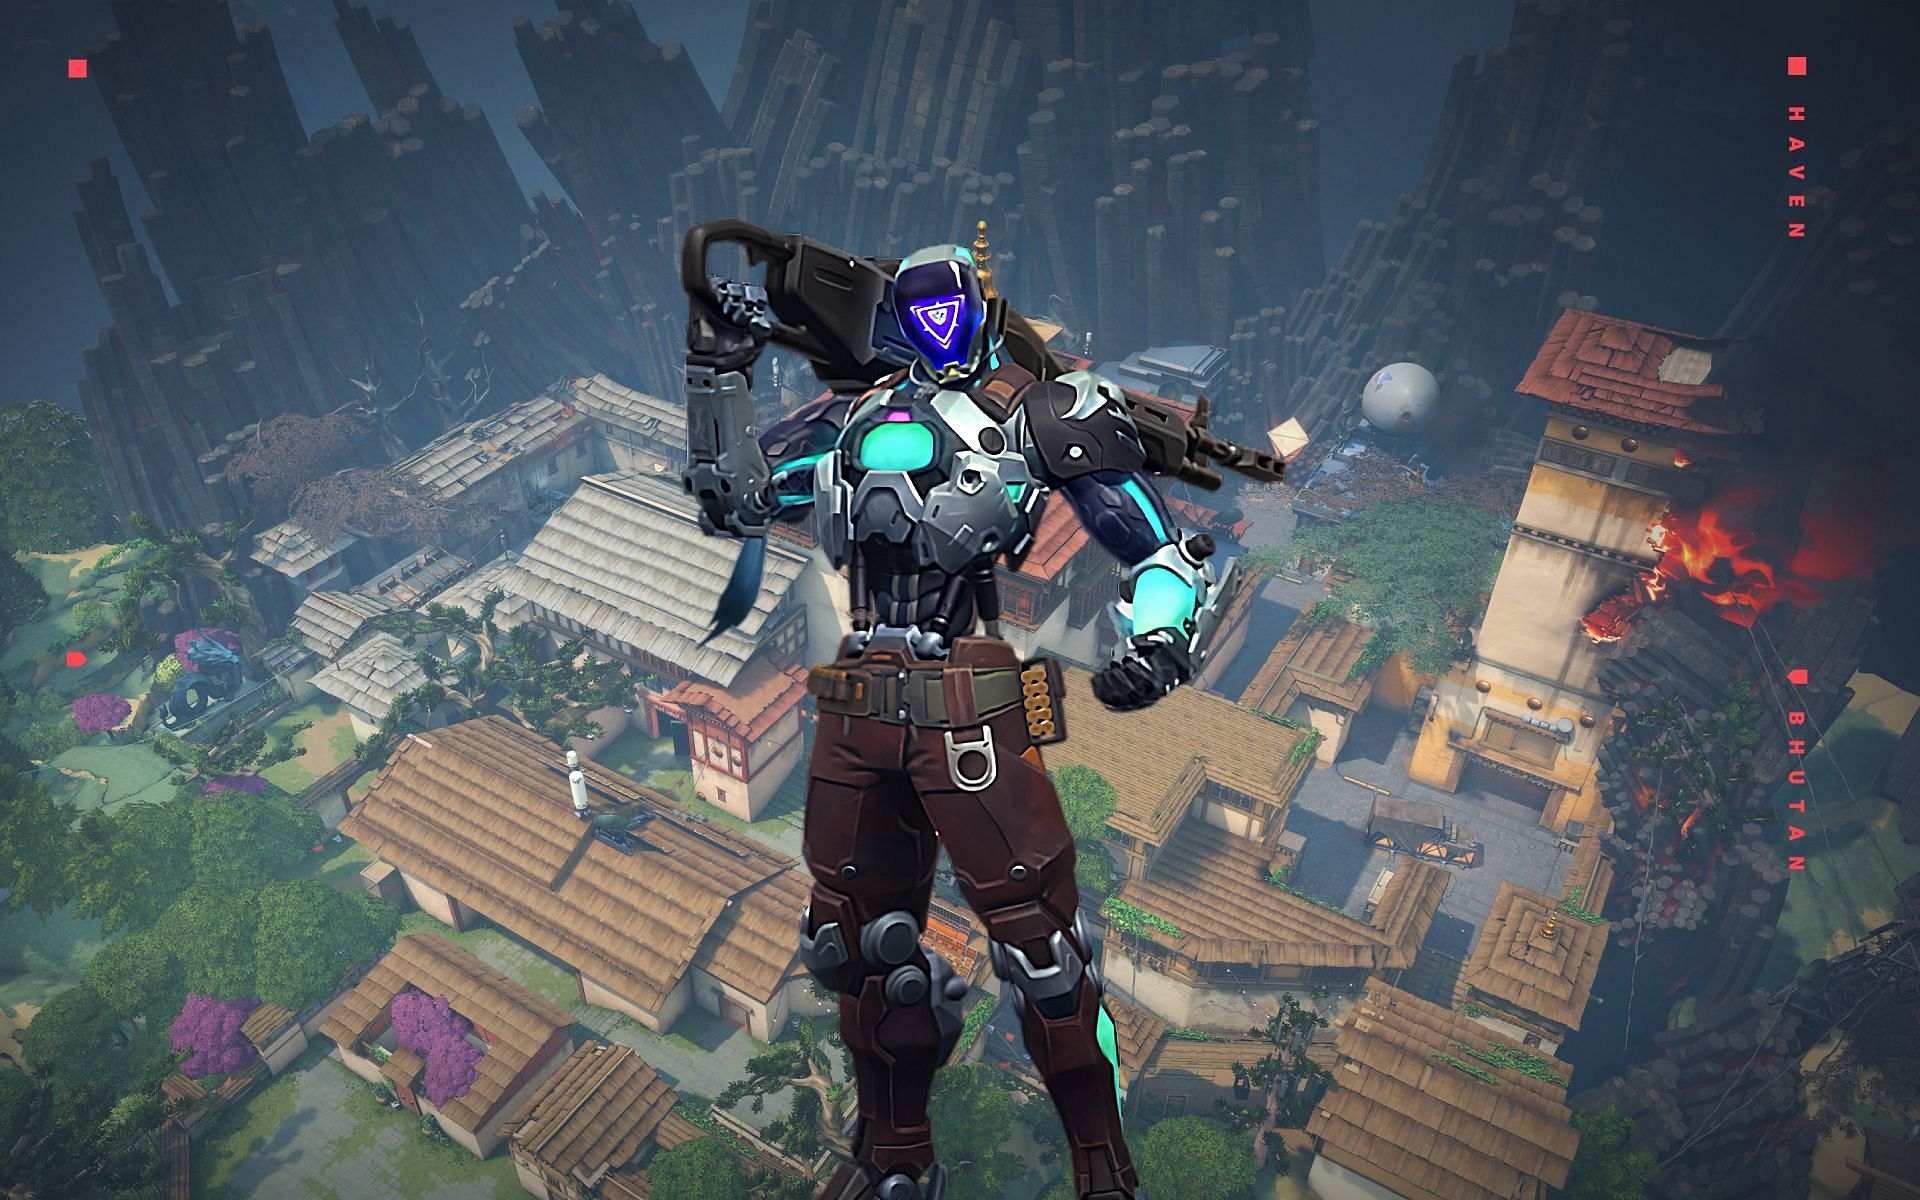
Kay/O is an Initiator Agent by role in the game. His abilities revolve around detecting, disabling, and disorienting enemy players. He also has a high damage output grenade ability that can be thrown remotely to flush out enemies from their positions.
Haven is a massive map with three bomb sites with multiple low-rise roofs. It makes the map very suitable for Agents like Kay/O to utilize lineups to either attack or delay attackers as a defender. The map has several nooks and crannies that players like to play. These can be cleared from a safe distance using lineups and other utilities.
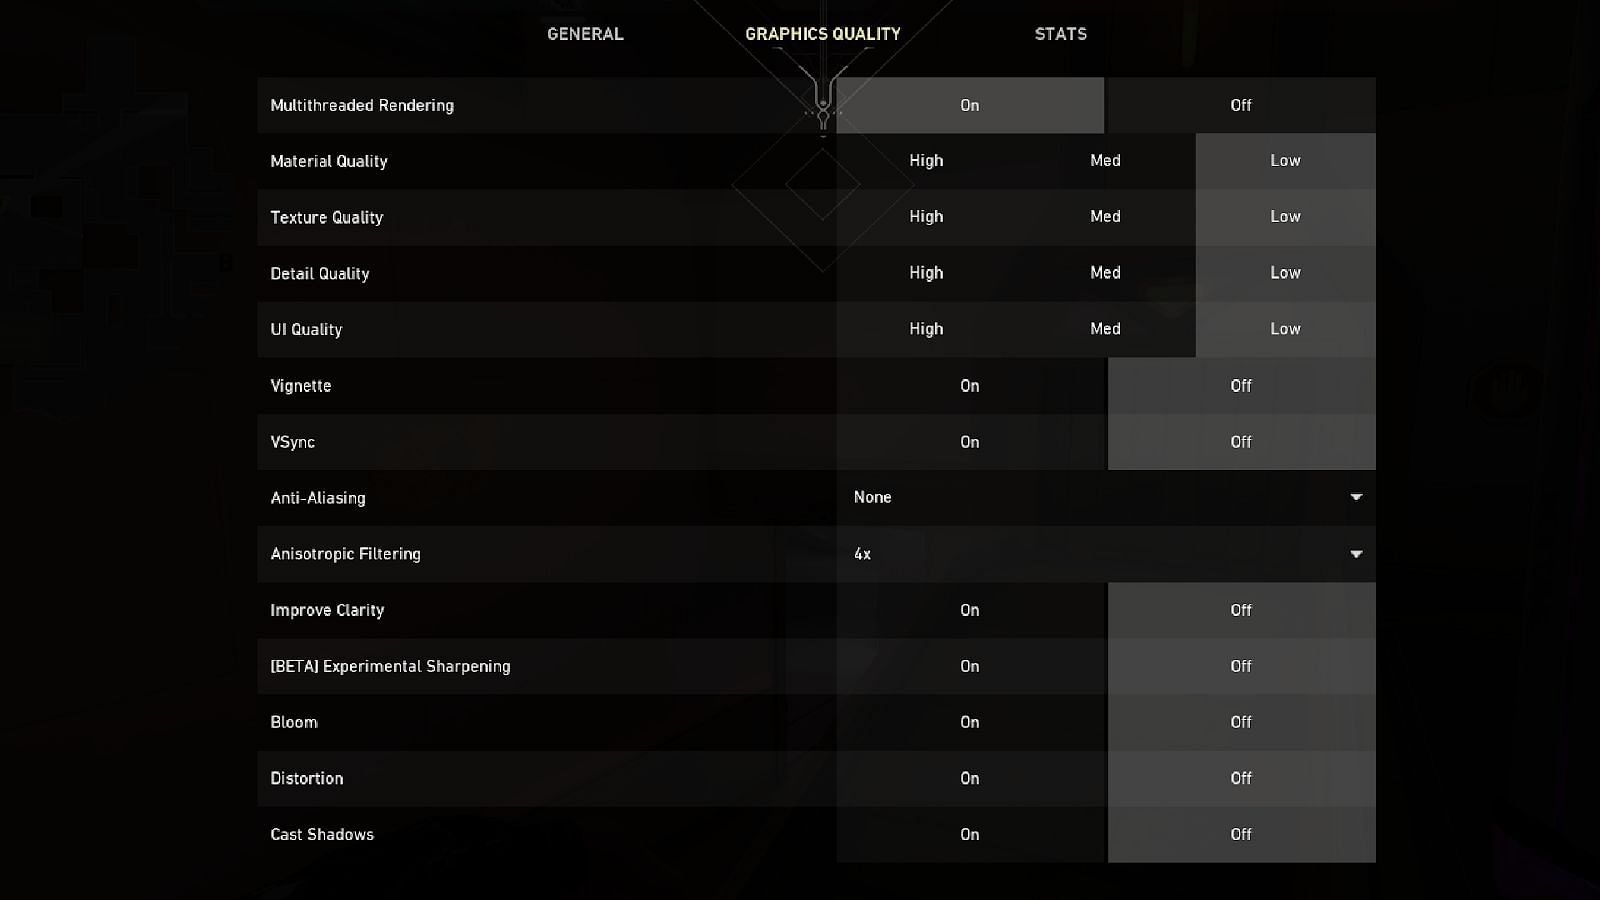
It is important to note that the following lineups are performed in LOW graphics settings.
Note: This article is subjective and solely reflects the author's opinions.
Valorant KAY/O’s most effective and best nade lineups in Haven
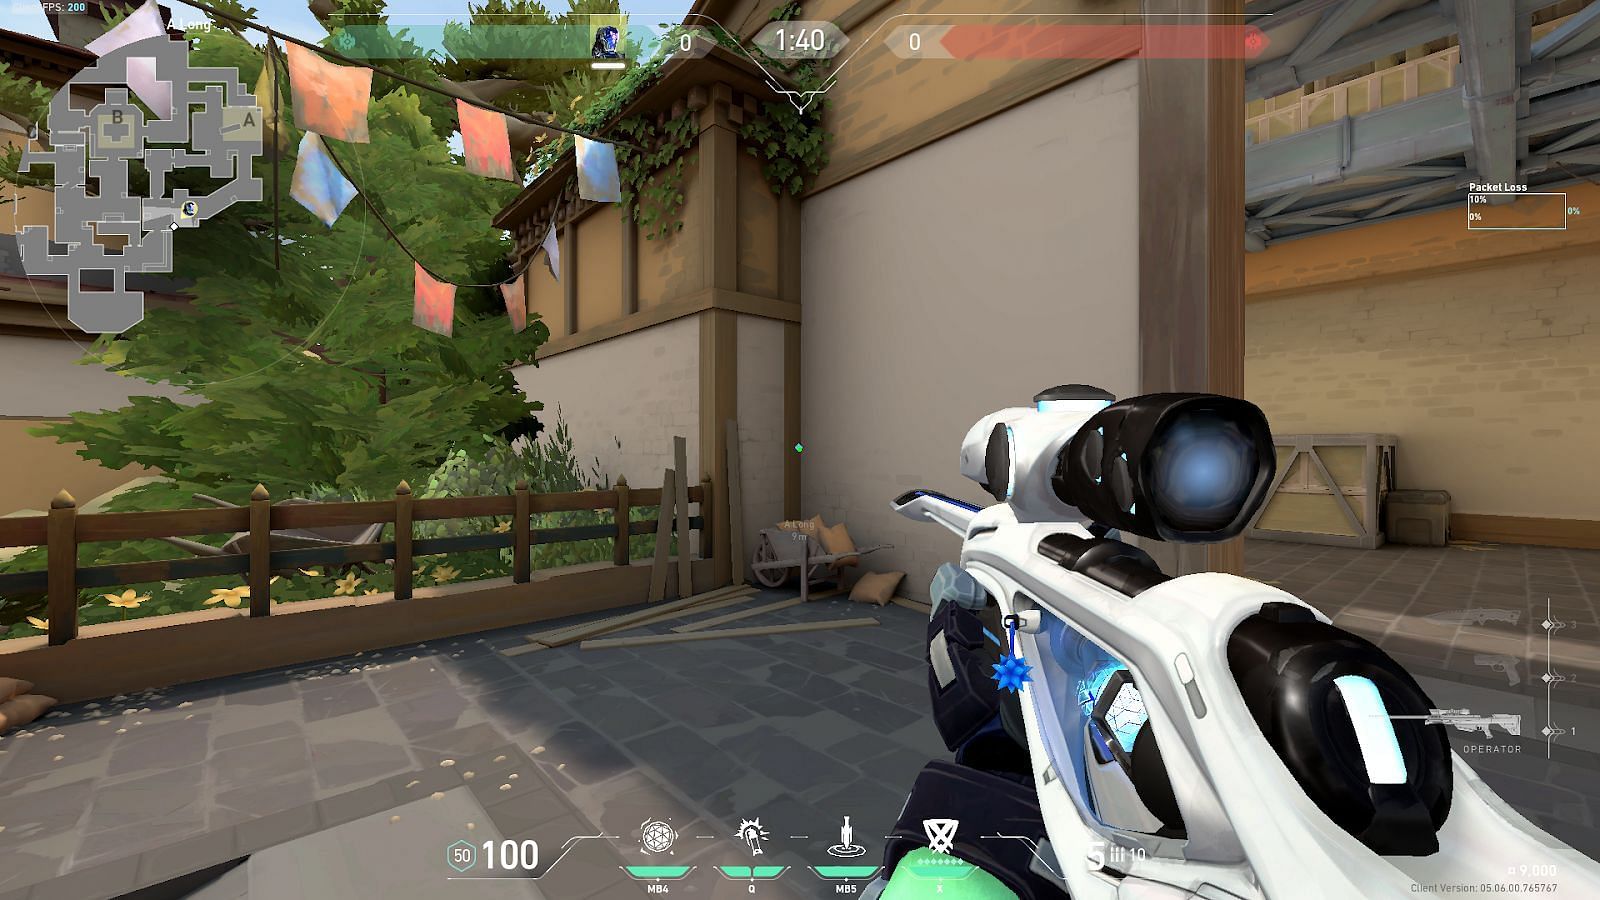
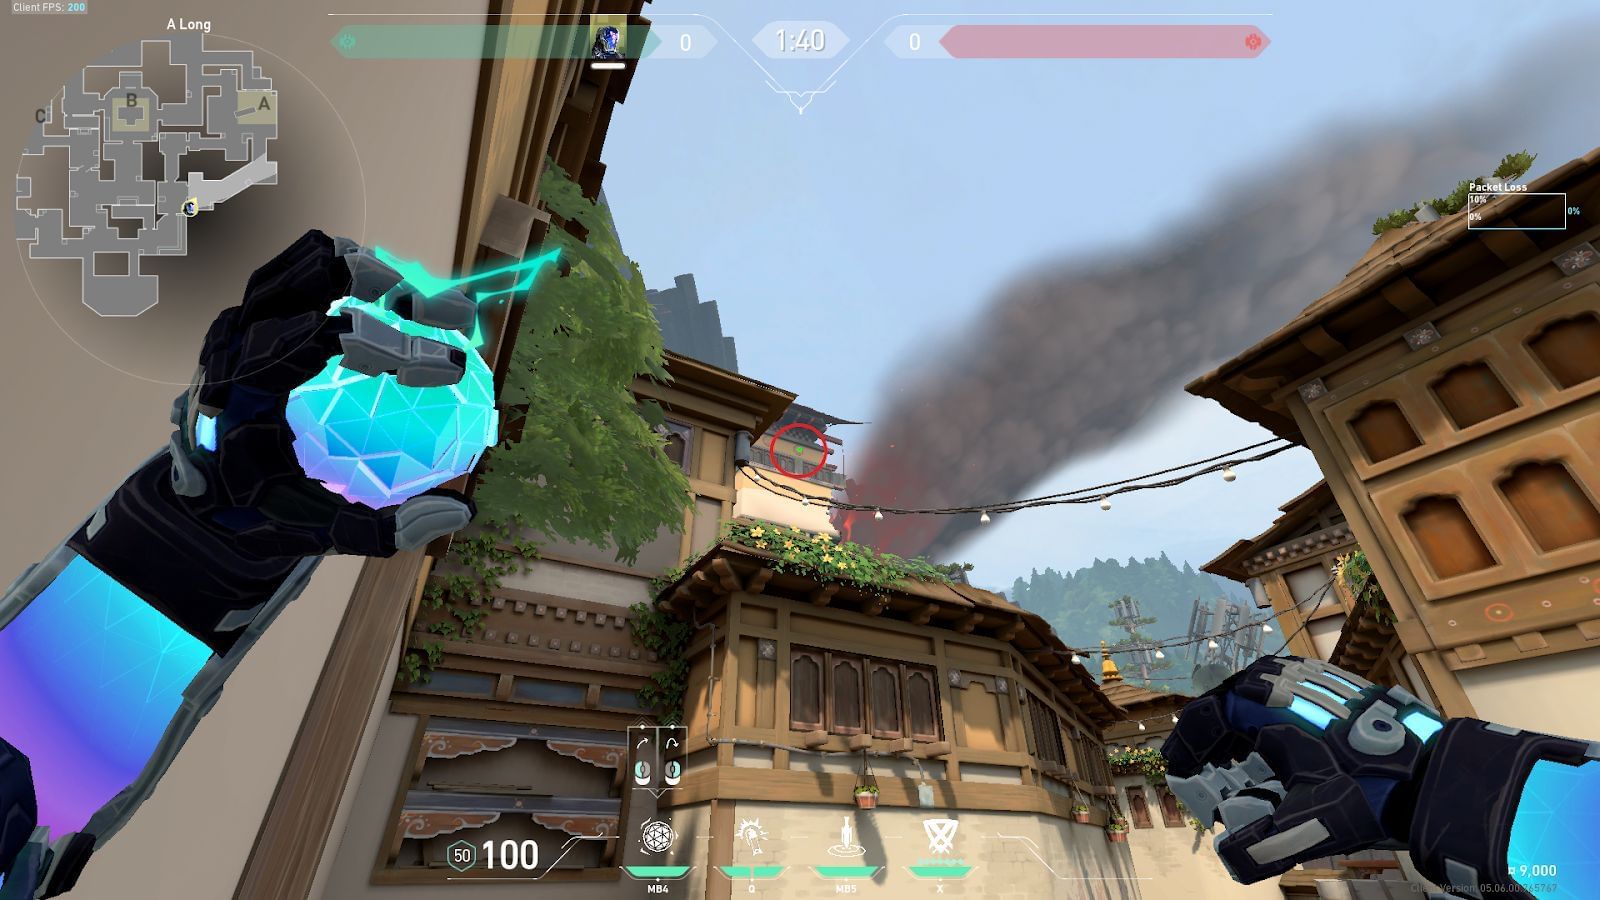
1) A-Long to A-Sewer
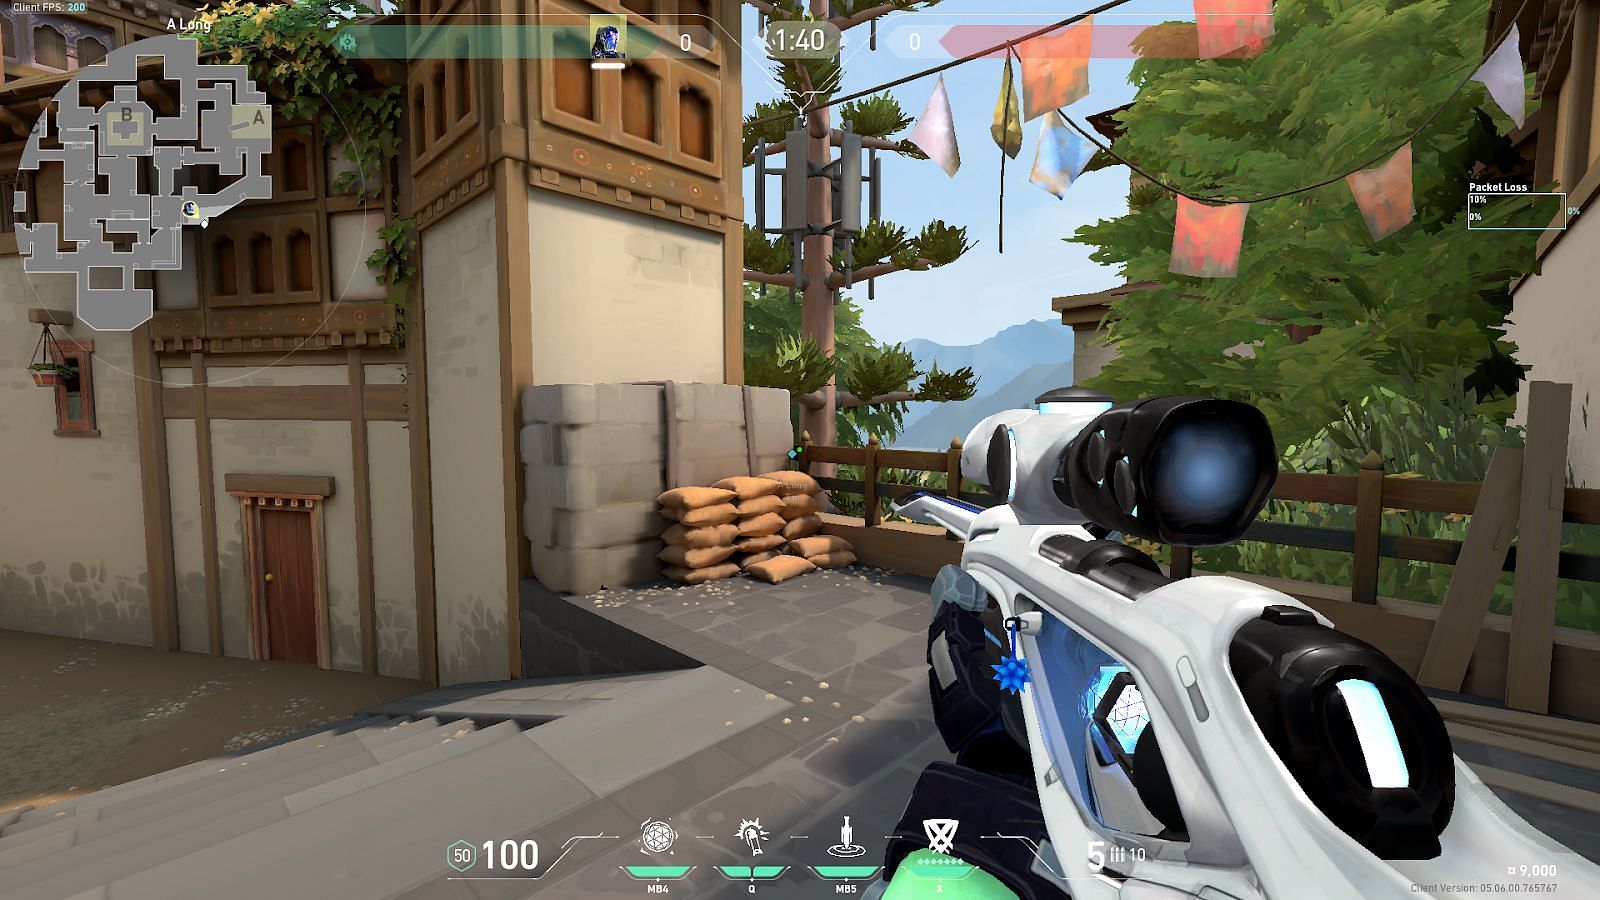
Position yourself in the shown corner above the sandbags and tuck inside.
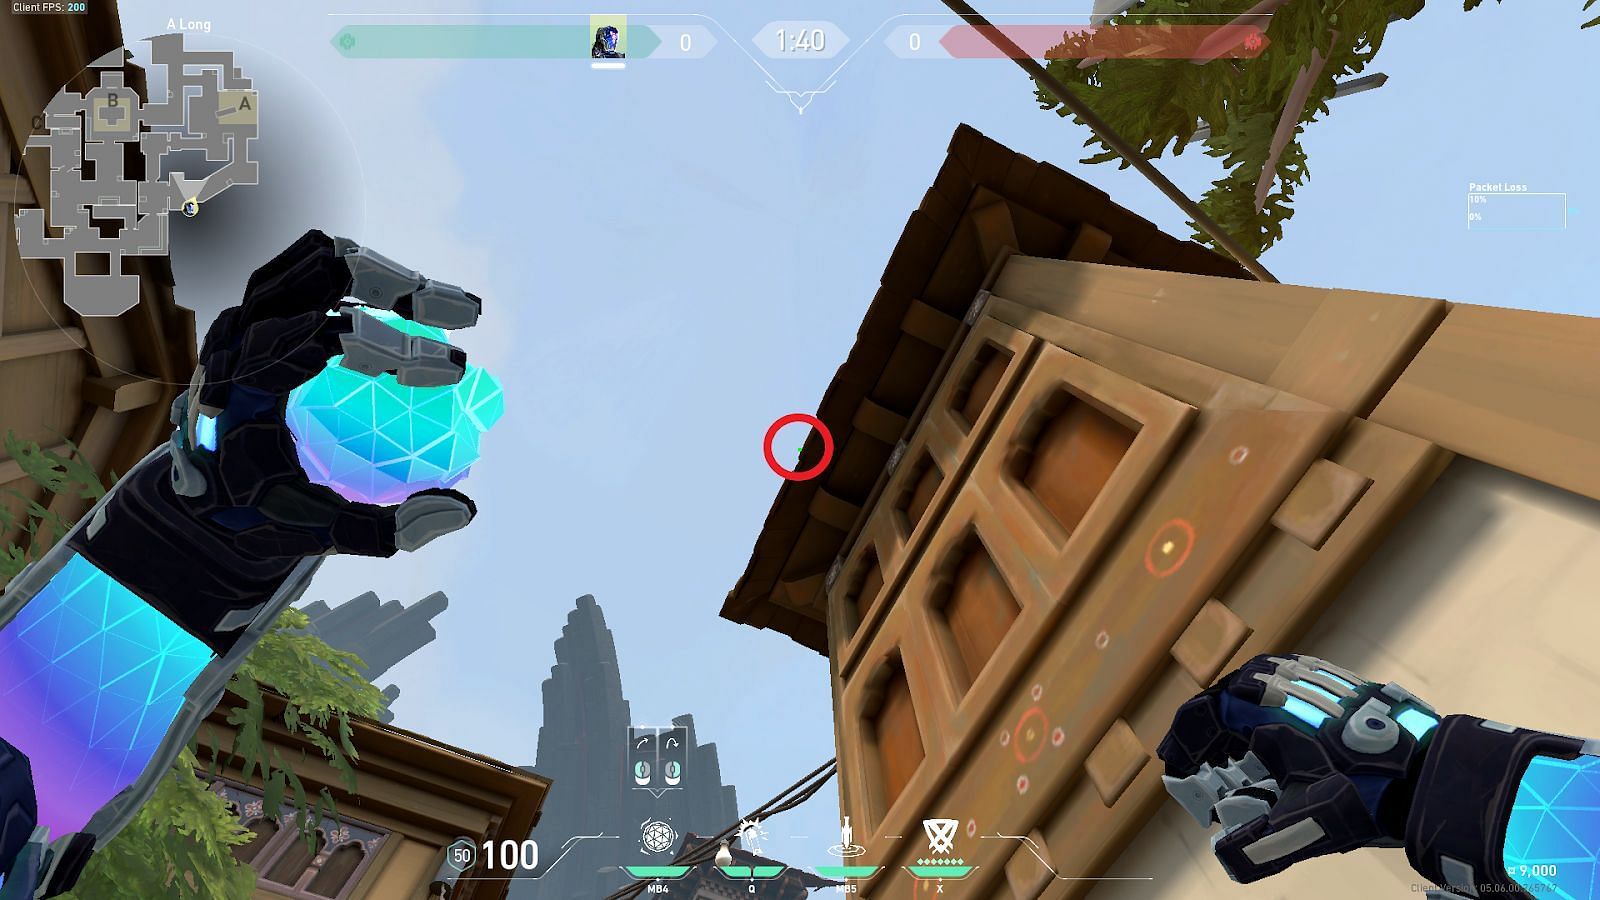
Place the crosshair on the roof ledge (shown in a circle) and perform a simple left-click throw.
The nade travels above the roof and lands directly on the A-Sewers entry. It is a great lineup to support teammates from A-Long who are trying to enter A-Site via A-Sewer.
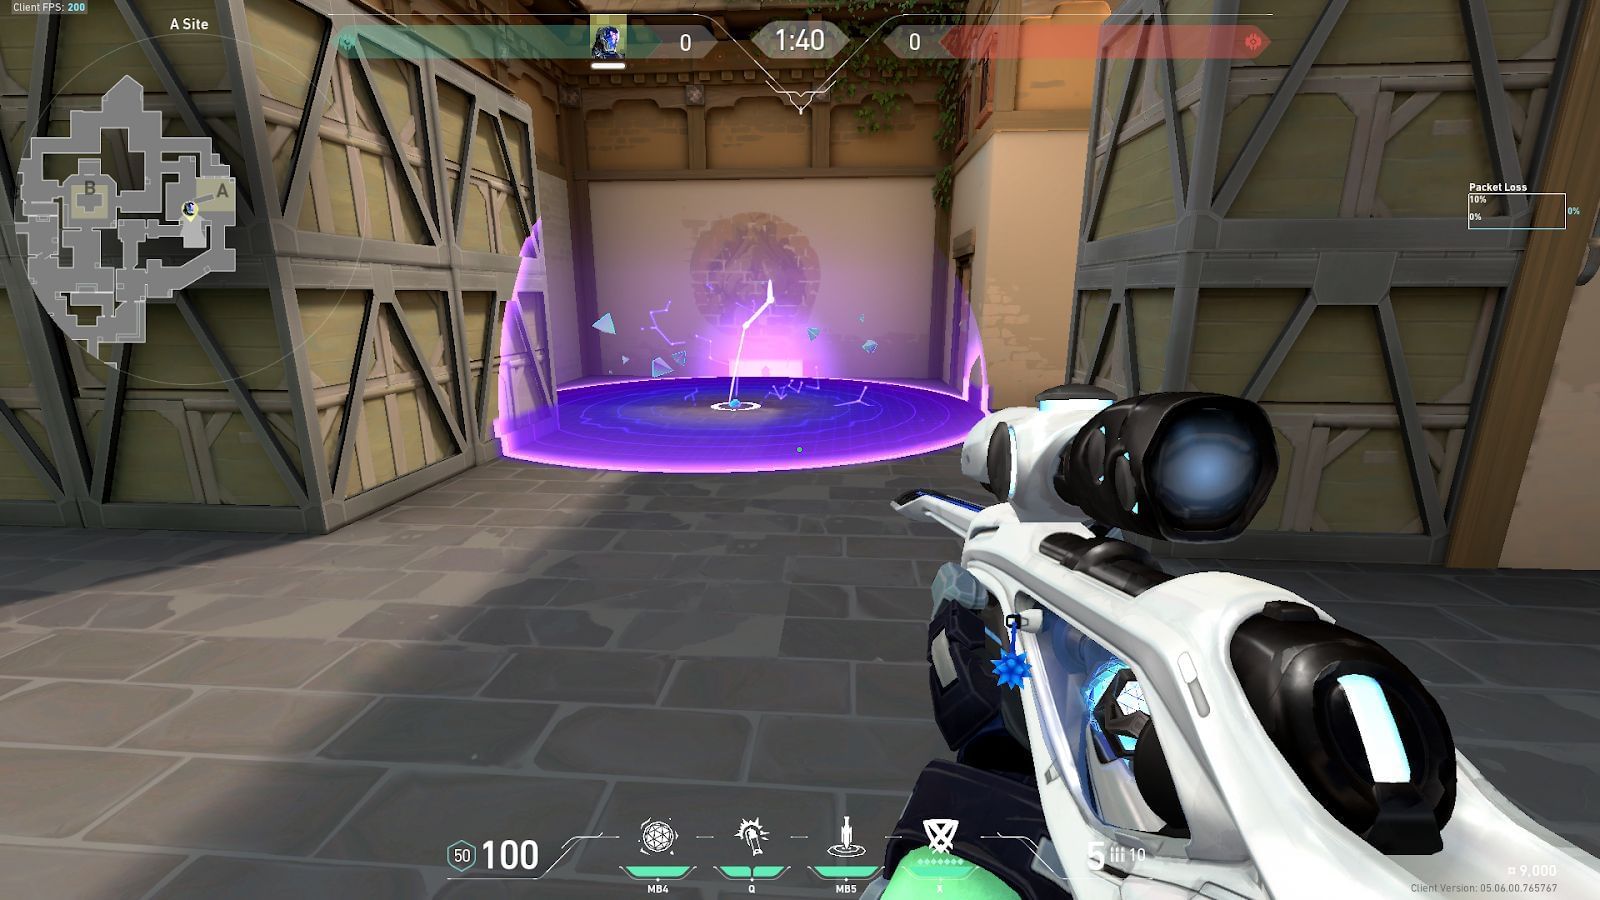
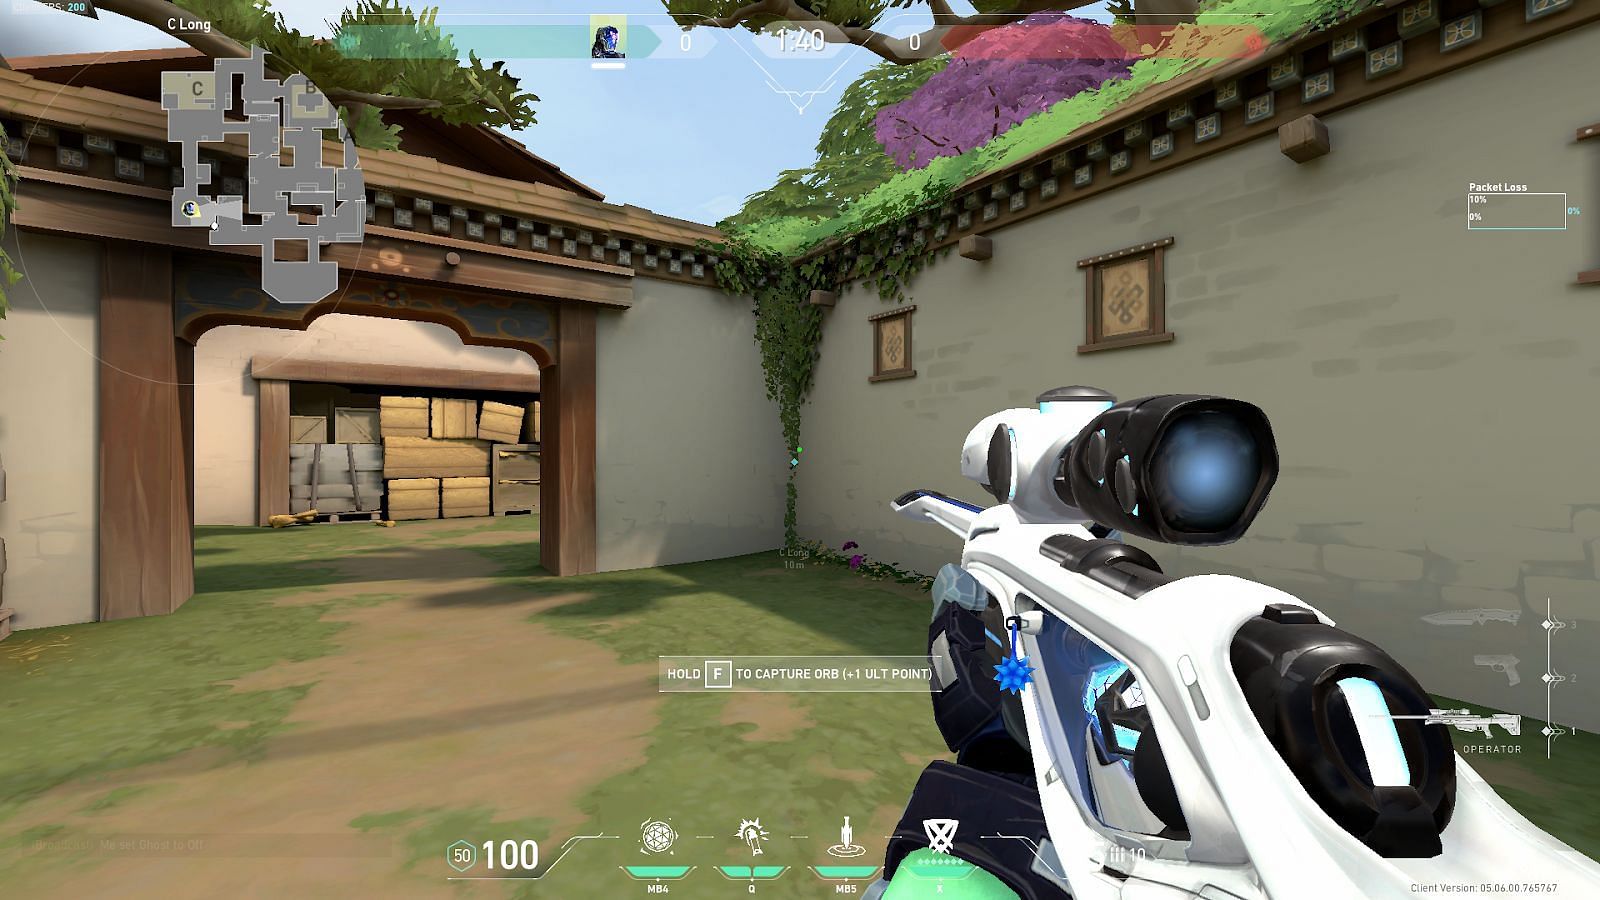
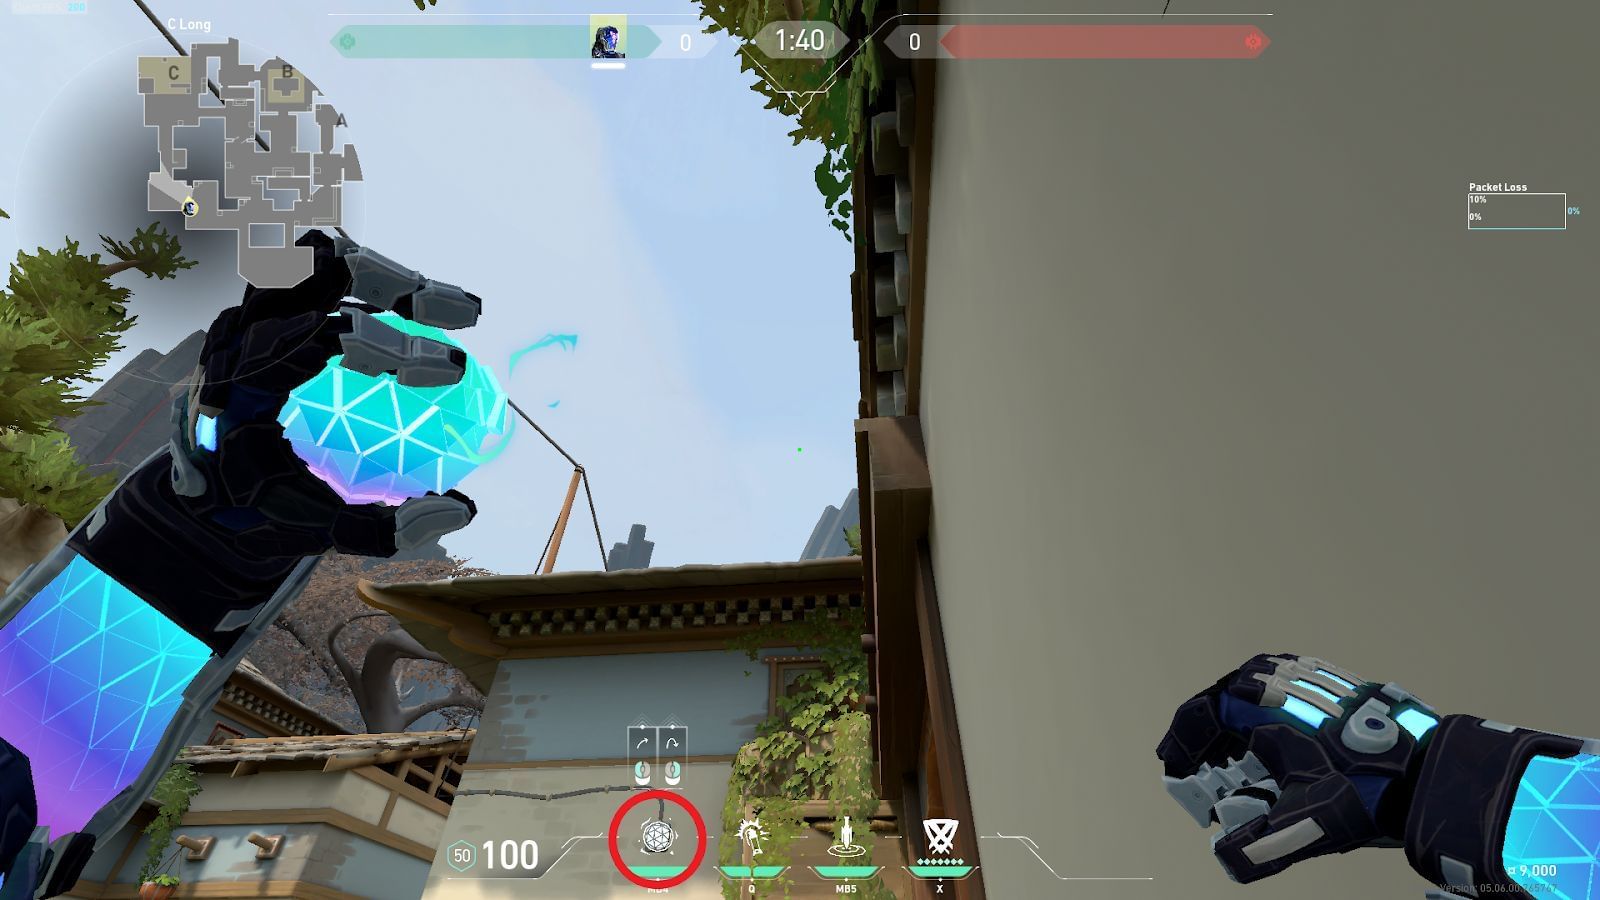
2) C-Long to C-Site Safe Plant
Position yourself in C-Long and tuck inside the shown corner.
Place the Zero/Point ability icon in the Heads-Up Display (HUD) (shown in a circle) under the C-Long entry ledge and perform a simple left-click throw.

The nade will go over the structures in C-Long and directly land on the C-Site Safe Plant position. This lineup is primarily useful in a post-plant scenario. It provides ample time for players to push through the Garage as well.
3) A-Long to A-Tower
Position yourself in the shown corner, jump above the cart, and tuck inside.
Place the crosshair on the A-Tower wall (shown in a circle) and perform a jump left-click throw.
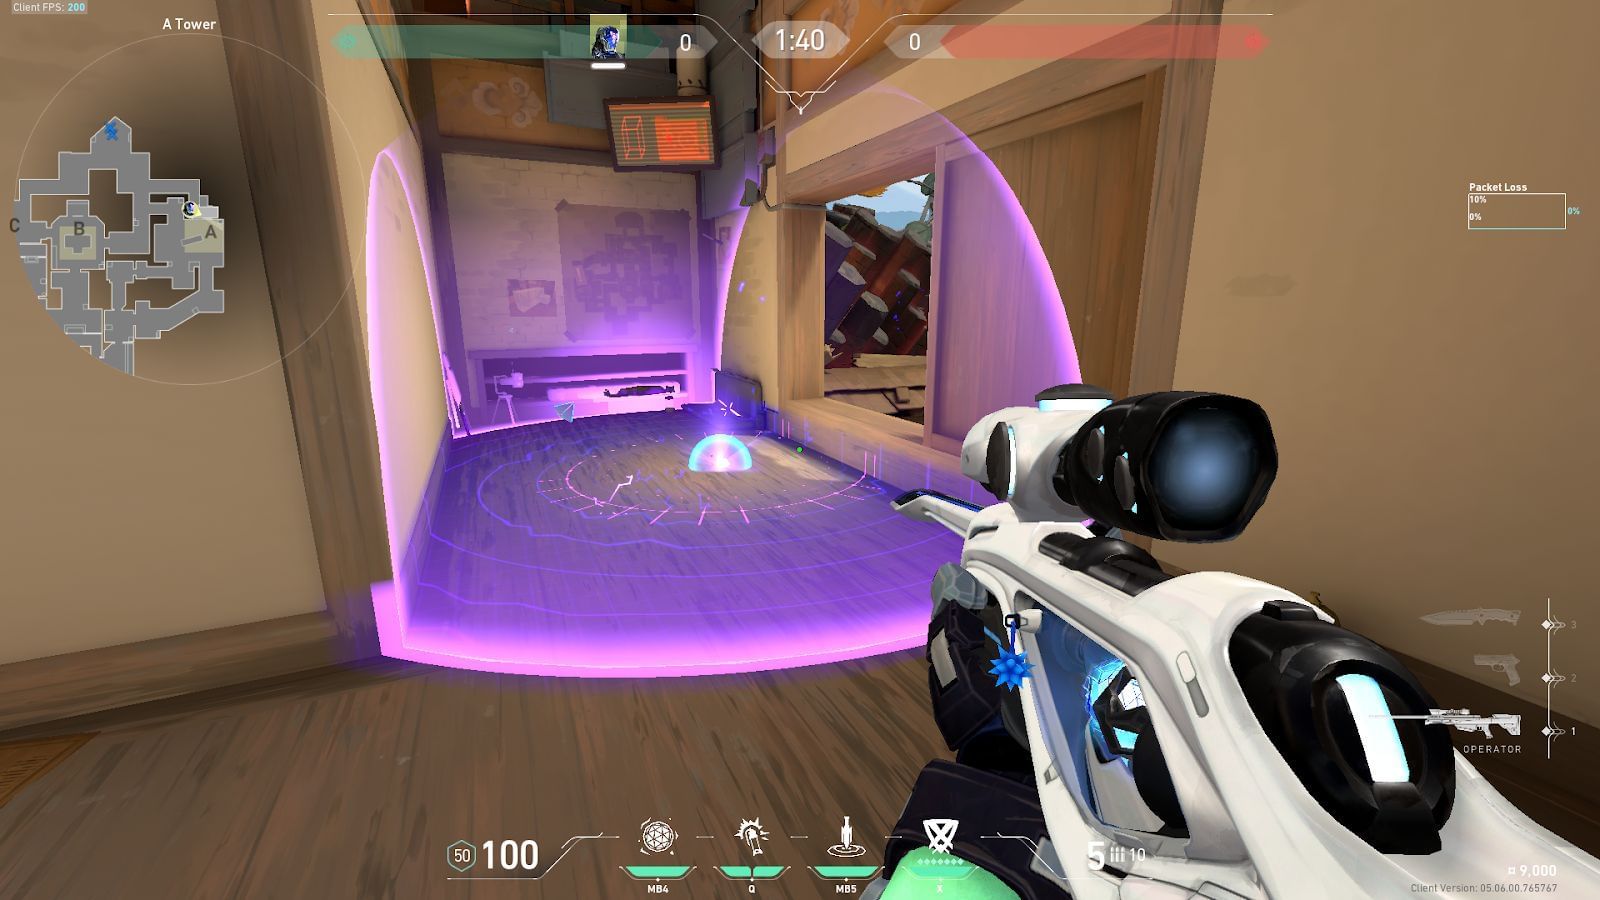
The nade goes over the roofs and directly lands inside A-Tower. The lineup requires a little practice but quickly becomes muscle memory. In the absence of a Controller, this lineup can be utilized to flush out enemies in A-Tower.
4) A-Garden to B-Site Default Plant
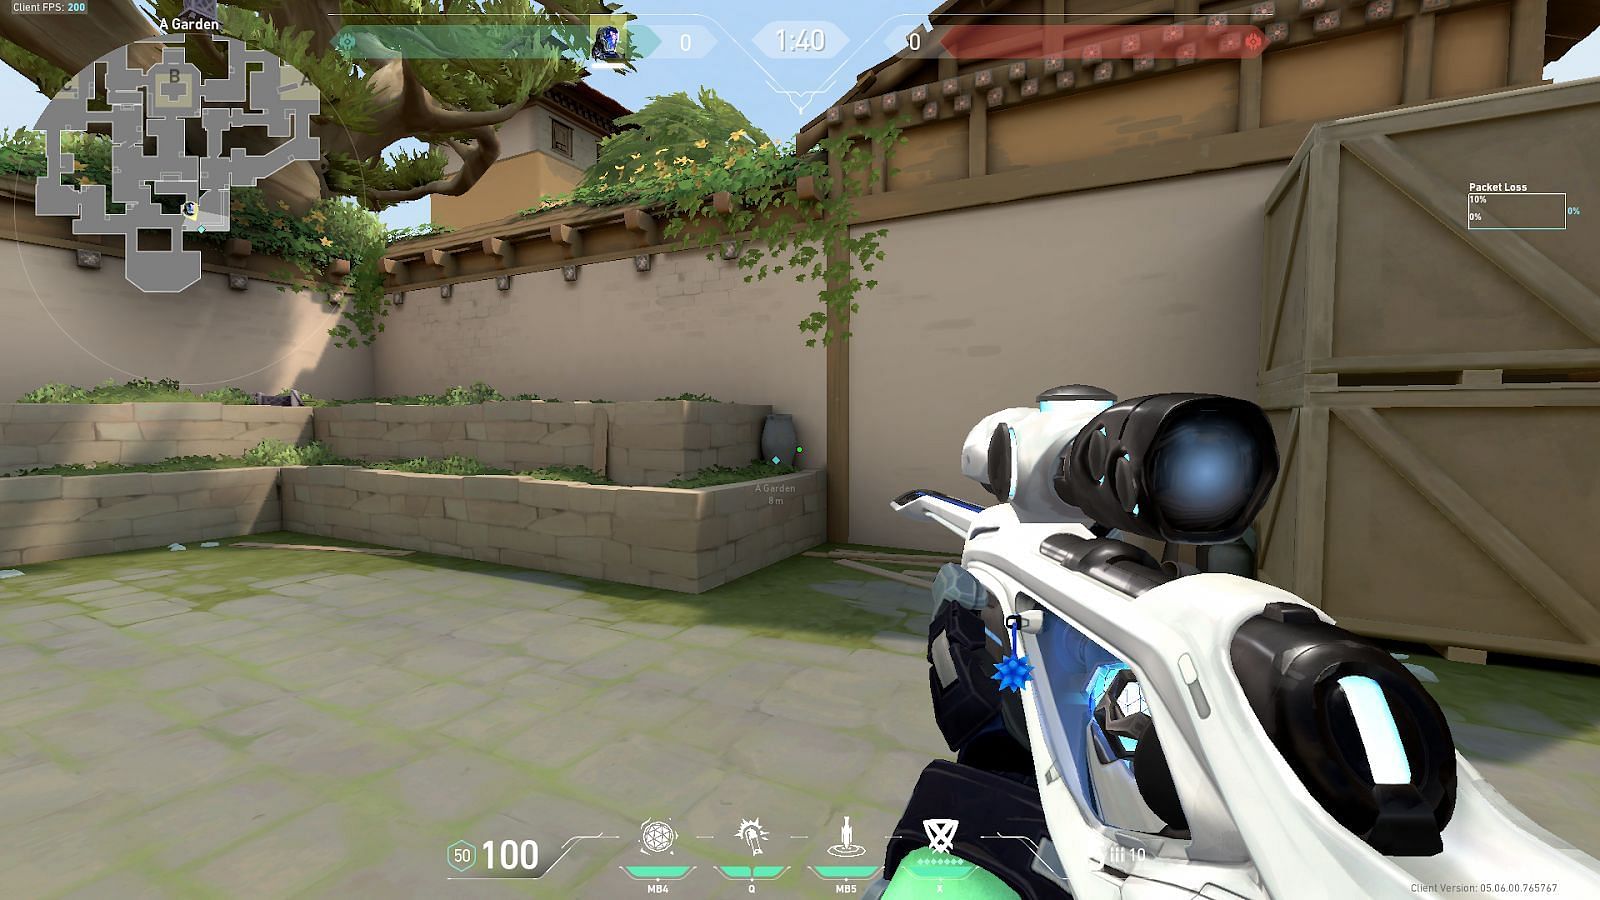
Position yourself in A-Garden and tuck inside the shown corner by the vase.
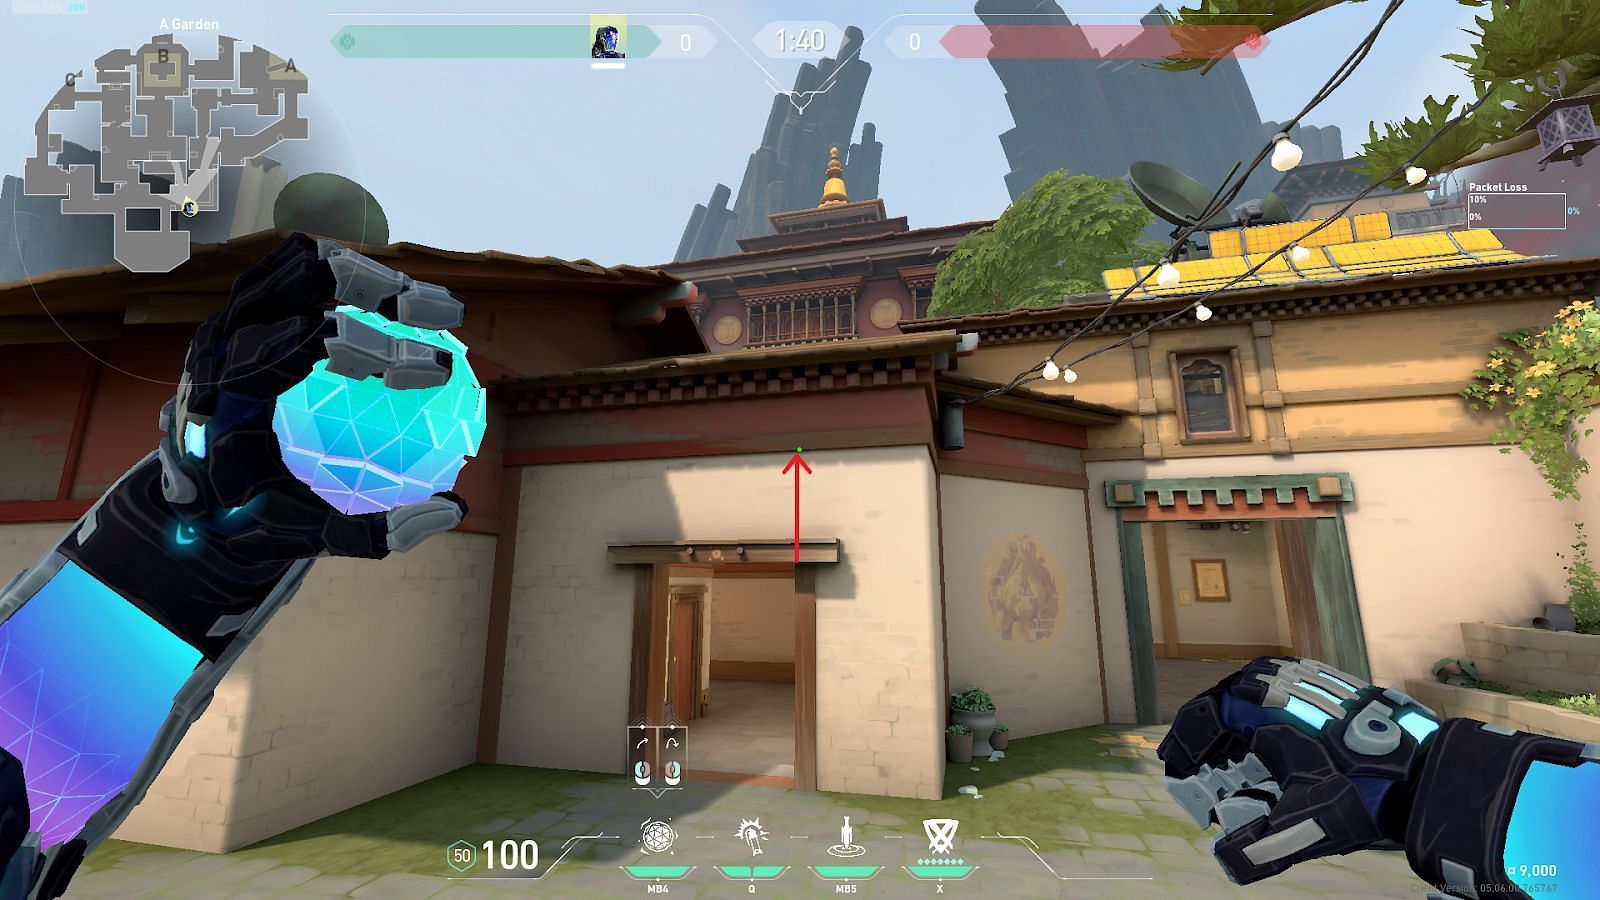
Place the crosshair so that it is directly above the door frame (shown with an arrow) and perform a jump left-click throw.
The nade will fly over Mid Window and directly on the B-Site Default Plant position. This is a lineup that both sides can utilize. The lineup can be used to deny spike defuse and also delay attackers with a well-timed flank.
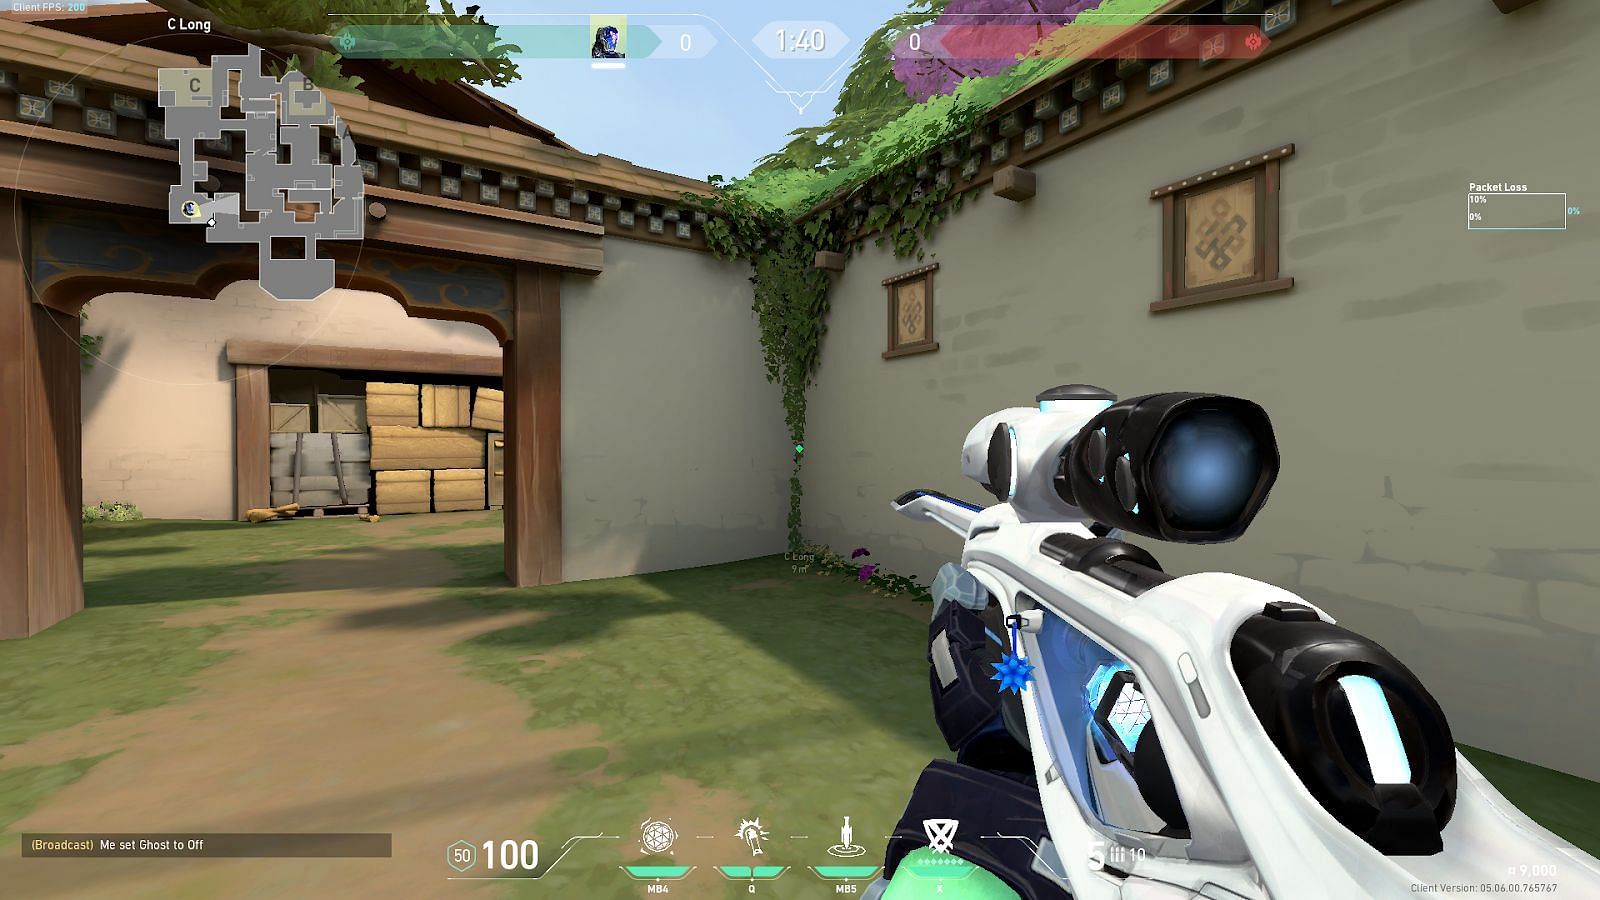
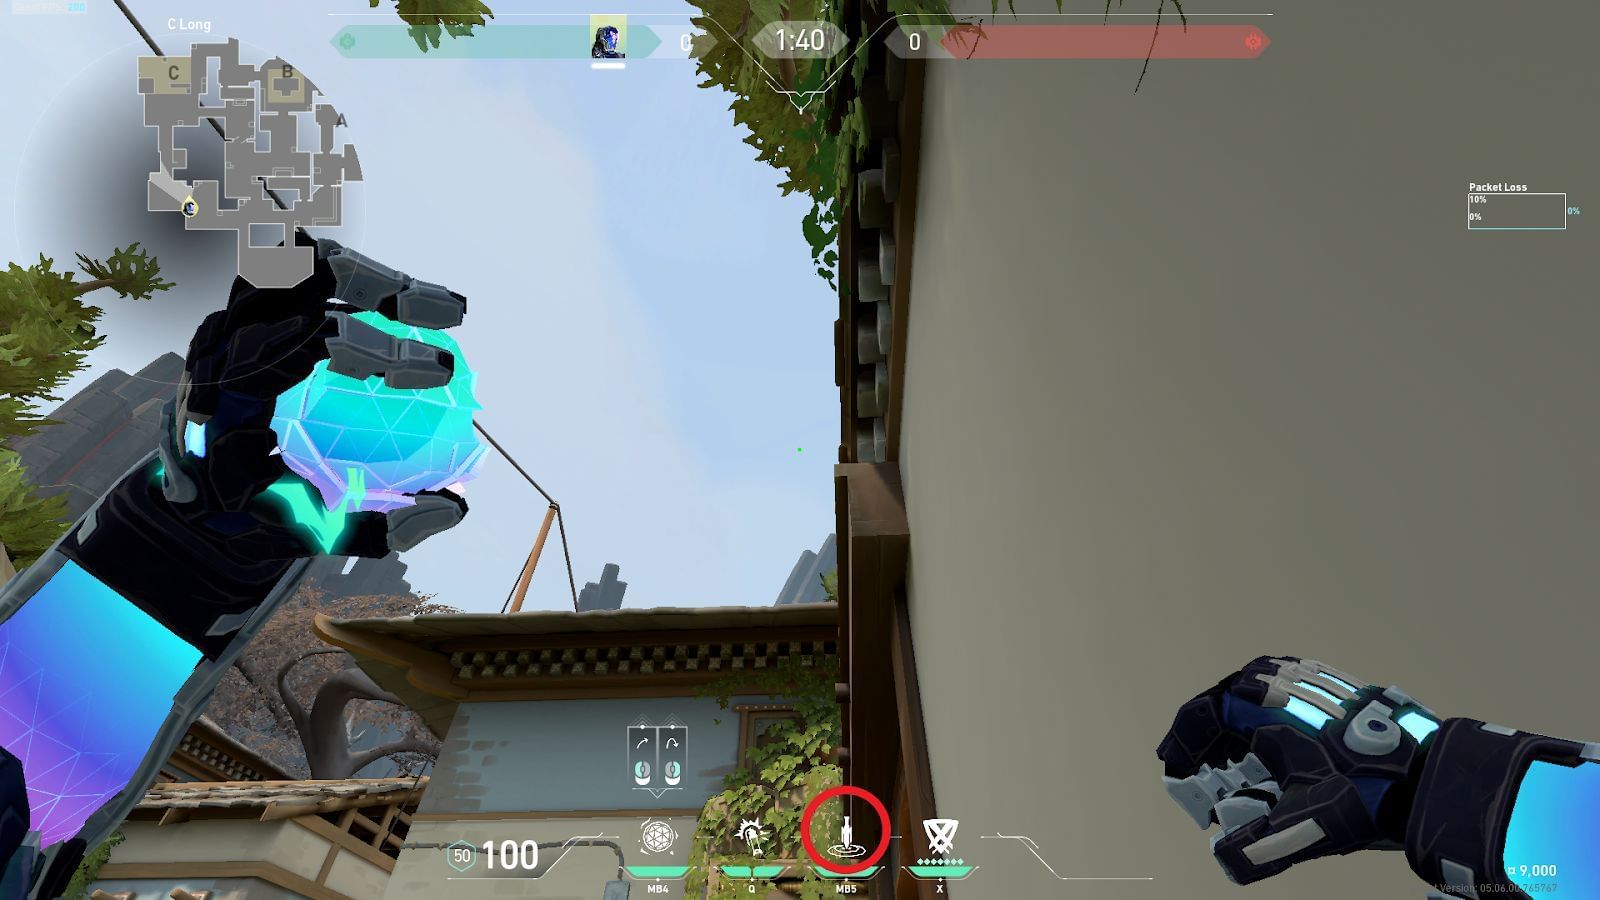
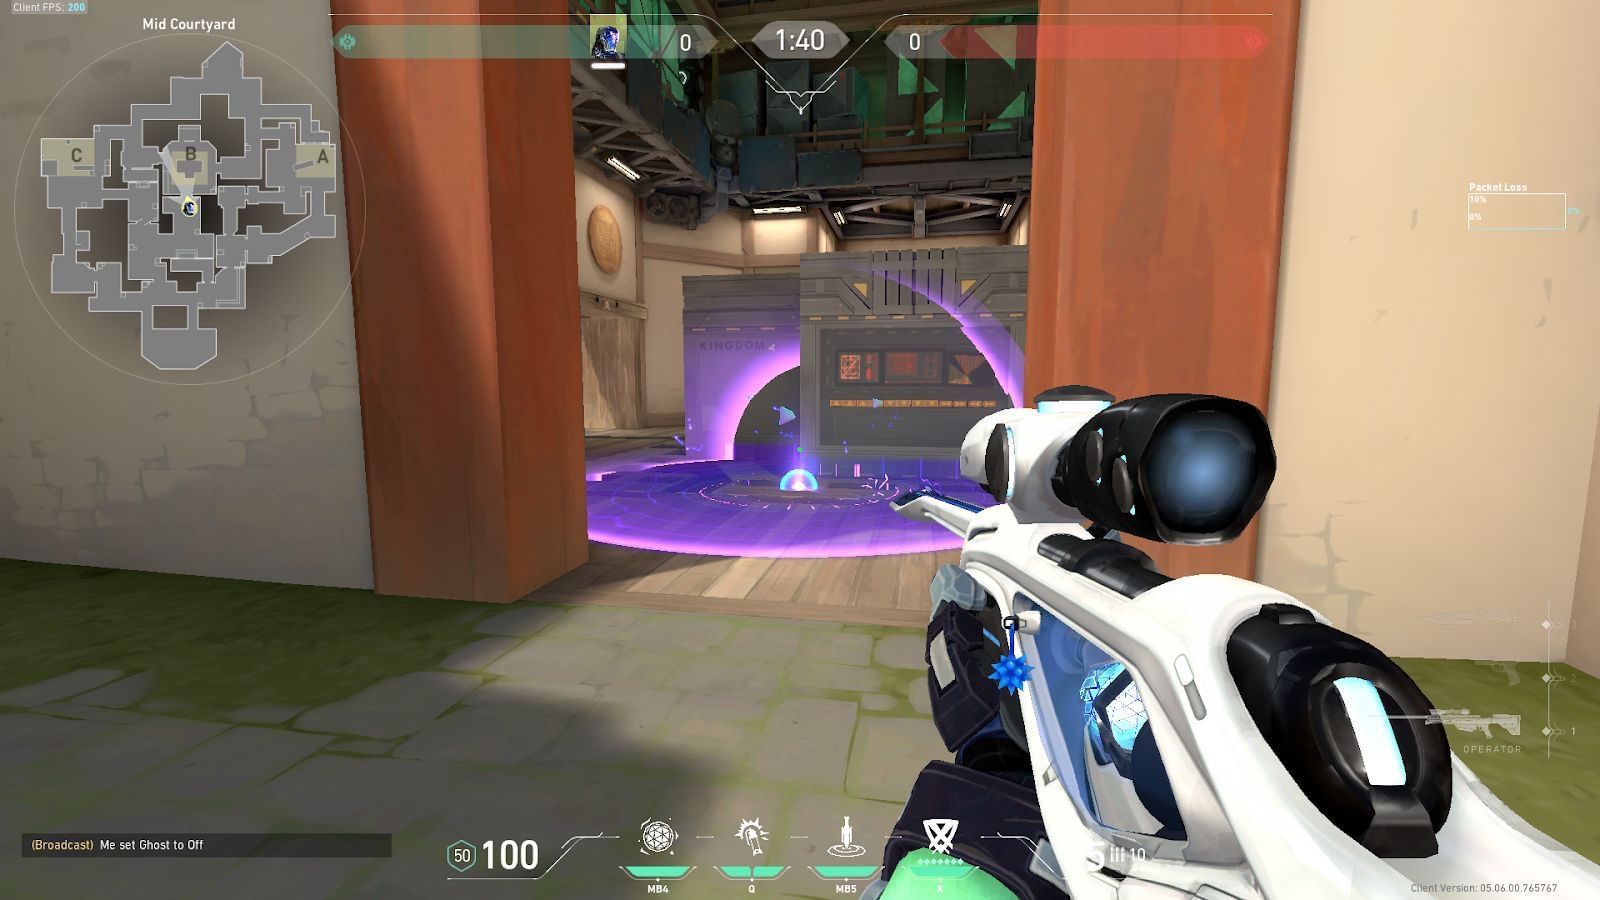
5) C-Long to C-Site Default Plant
Position yourself in C-long and tuck inside the shown corner.
Place the Fragment ability icon on the HUD directly above the electrical outlet structure on the wall (shown in a circle) and perform a simple left-click throw.
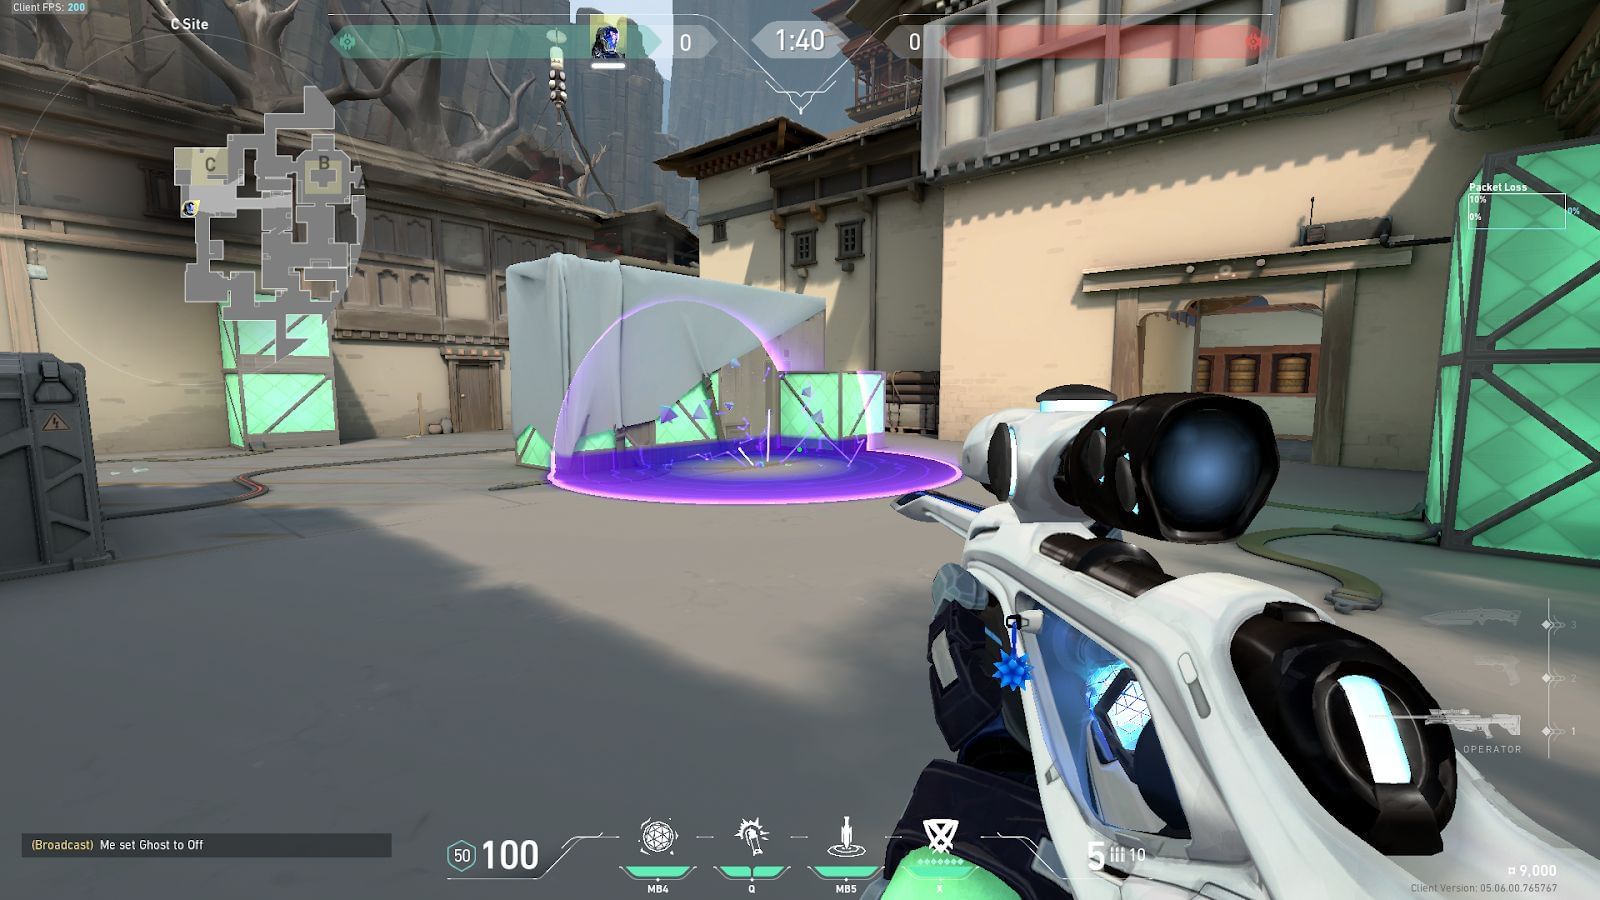
The nade flies over the roofs of the C-Long area and lands directly on the C-Site Default Plant position. This lineup is primarily useful in post-plant scenarios.
