

'%20x='0'%20y='0'%20height='100%25'%20width='100%25'%20%0A%20%20%20%20%20%20%20%20%20%20xlink%3Ahref='data:image/jpg;base64,/9j/2wBDAAYEBQYFBAYGBQYHBwYIChAKCgkJChQODwwQFxQYGBcUFhYaHSUfGhsjHBYWICwgIyYnKSopGR8tMC0oMCUoKSj/2wBDAQcHBwoIChMKChMoGhYaKCgoKCgoKCgoKCgoKCgoKCgoKCgoKCgoKCgoKCgoKCgoKCgoKCgoKCgoKCgoKCgoKCj/wgARCAAHAAoDASIAAhEBAxEB/8QAFQABAQAAAAAAAAAAAAAAAAAAAwb/2gAIAQEAAAAAmR//xAAUAQEAAAAAAAAAAAAAAAAAAAAE/9oACAECEAAAAEf/xAAUAQEAAAAAAAAAAAAAAAAAAAAD/9oACAEDEAAAAF//xAAfEAAABwACAwAAAAAAAAAAAAABAgMEBREhABIiMrH/2gAIAQEAAT8AYOoVspH00KoyKkoDiyacwABg+1ec7QSvmEV7bg8//8QAGBEAAgMAAAAAAAAAAAAAAAAAAAECEkH/2gAIAQIBAT8AtJ6f/8QAFhEAAwAAAAAAAAAAAAAAAAAAACFR/9oACAEDAQE/AFD/2Q=='%3E%3C/image%3E%3C/svg%3E)
Valorant has become one of the most played games and a big Esports title. The unique ability-based element of Riot’s famous title blew a fresh concept through the First-Person Shooter community.
Kay/O is an Initiator Agent in Valorant. His abilities are most effective in disabling, disorienting, and forcing enemies out of their corners. Kay/O has a high damage output grenade ability that can be thrown from afar. Deployable abilities like such are immediately tried with different lineups.
Ascent is a classic Valorant map with multiple openings and short walls. This enables the possibility of using lineups for various scenarios. This article will take a look at some of the best Kay/O lineups for Valorant’s Ascent.

It is important to note that the following lineups are performed in LOW graphics settings.
Note: This article is subjective and solely reflects the author's opinions.
Valorant Kay/O’s most effective nade lineups in Ascent
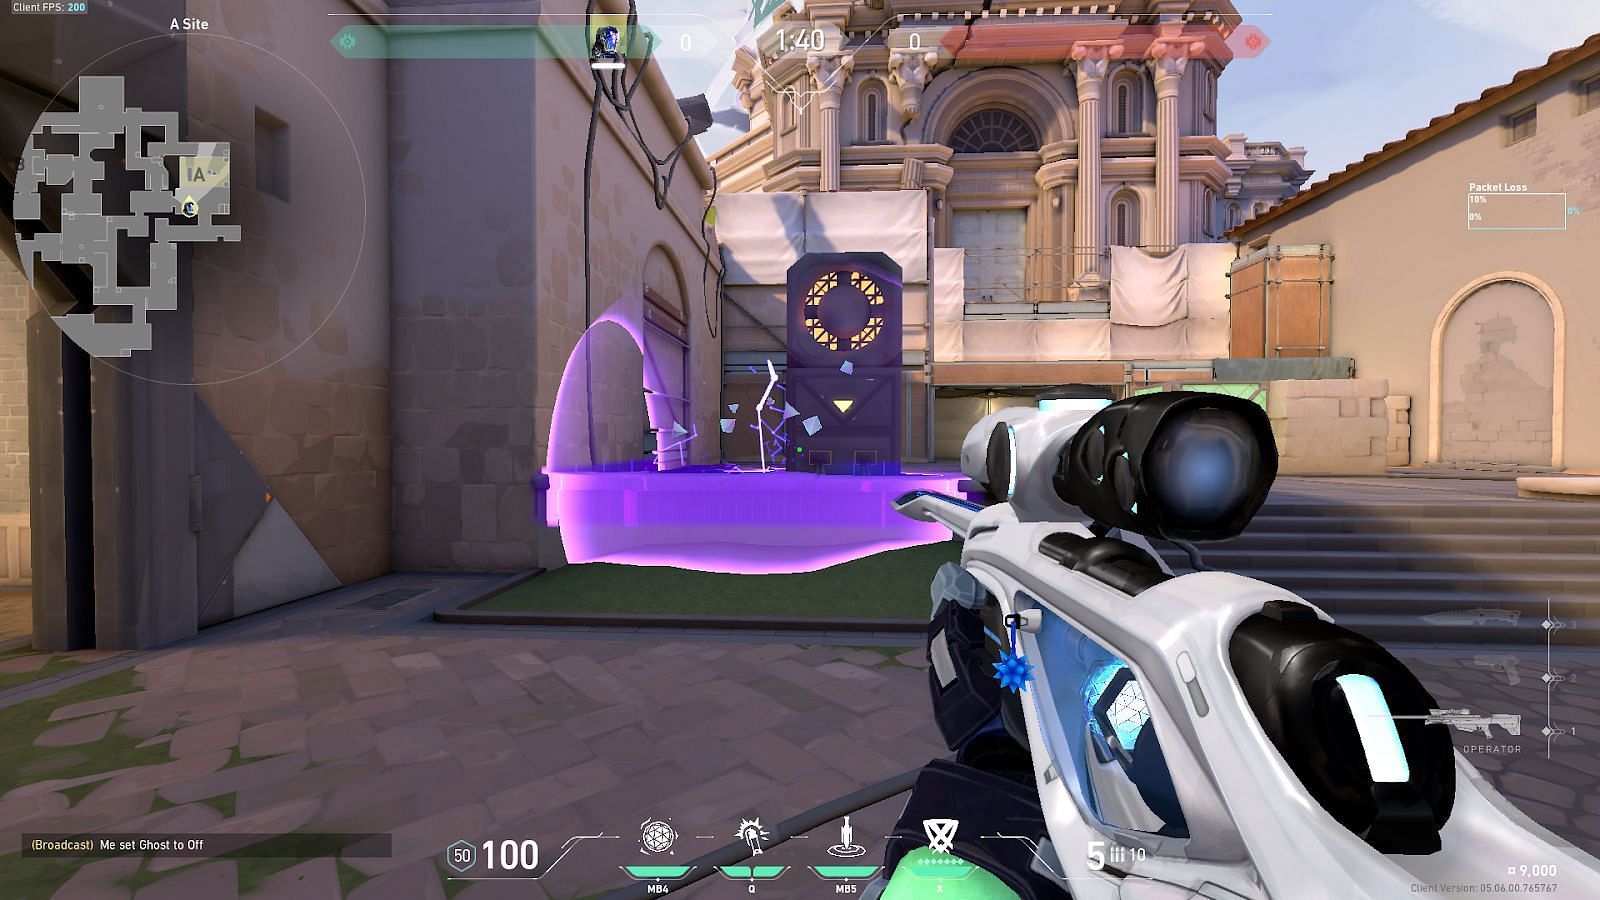
1) A-Wine to A-Site Default Plant
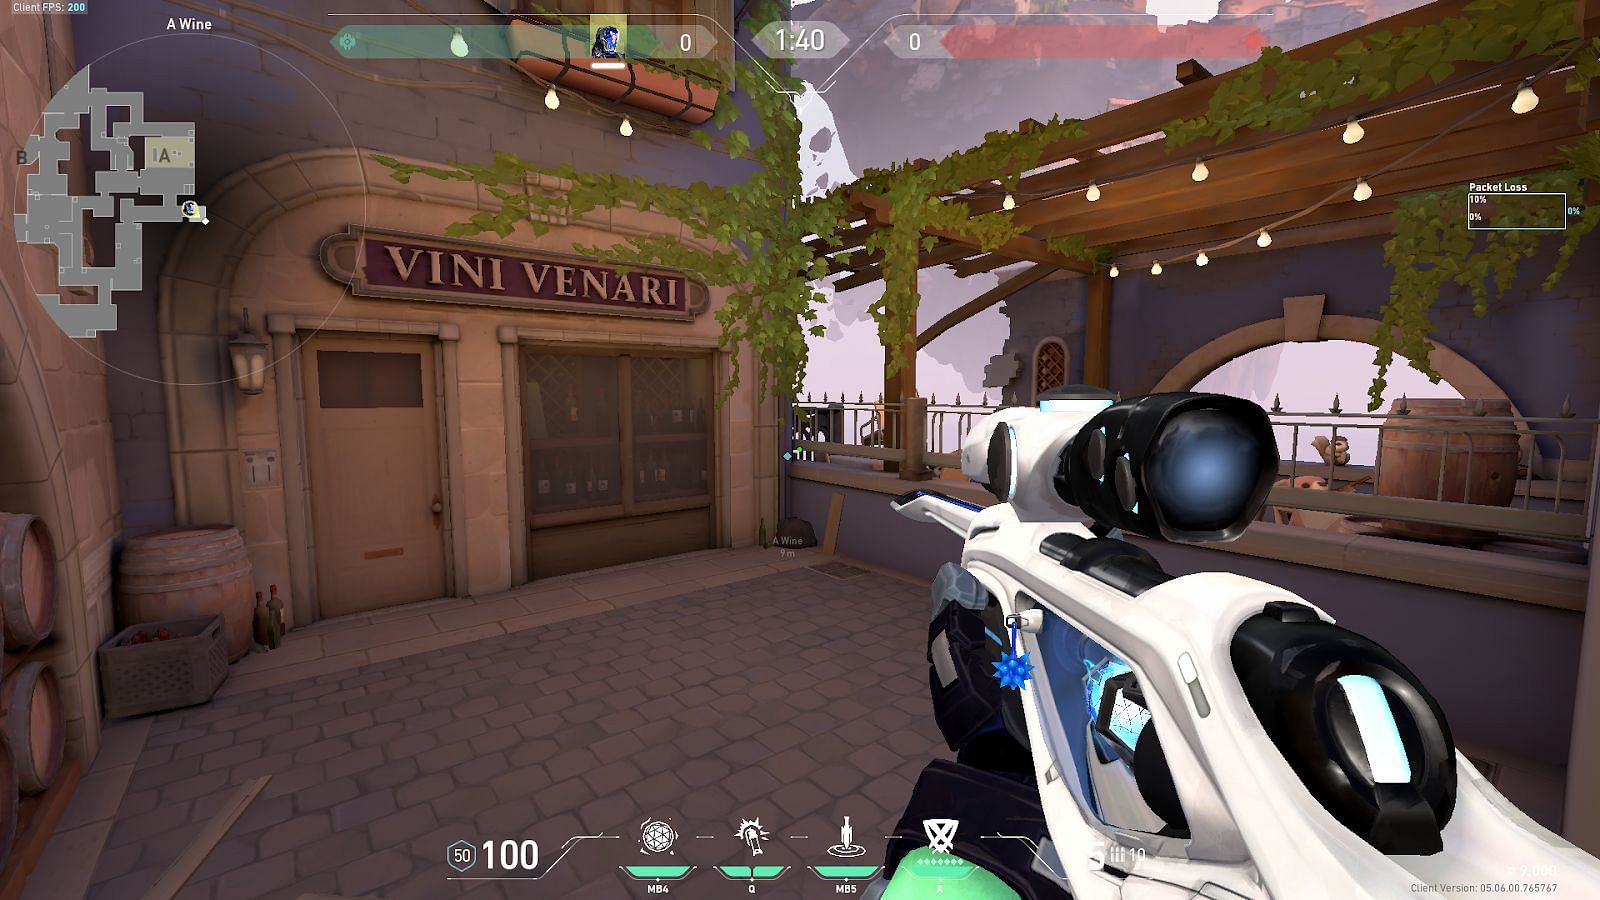
Position yourself in A-Wine and tuck inside the shown corner.
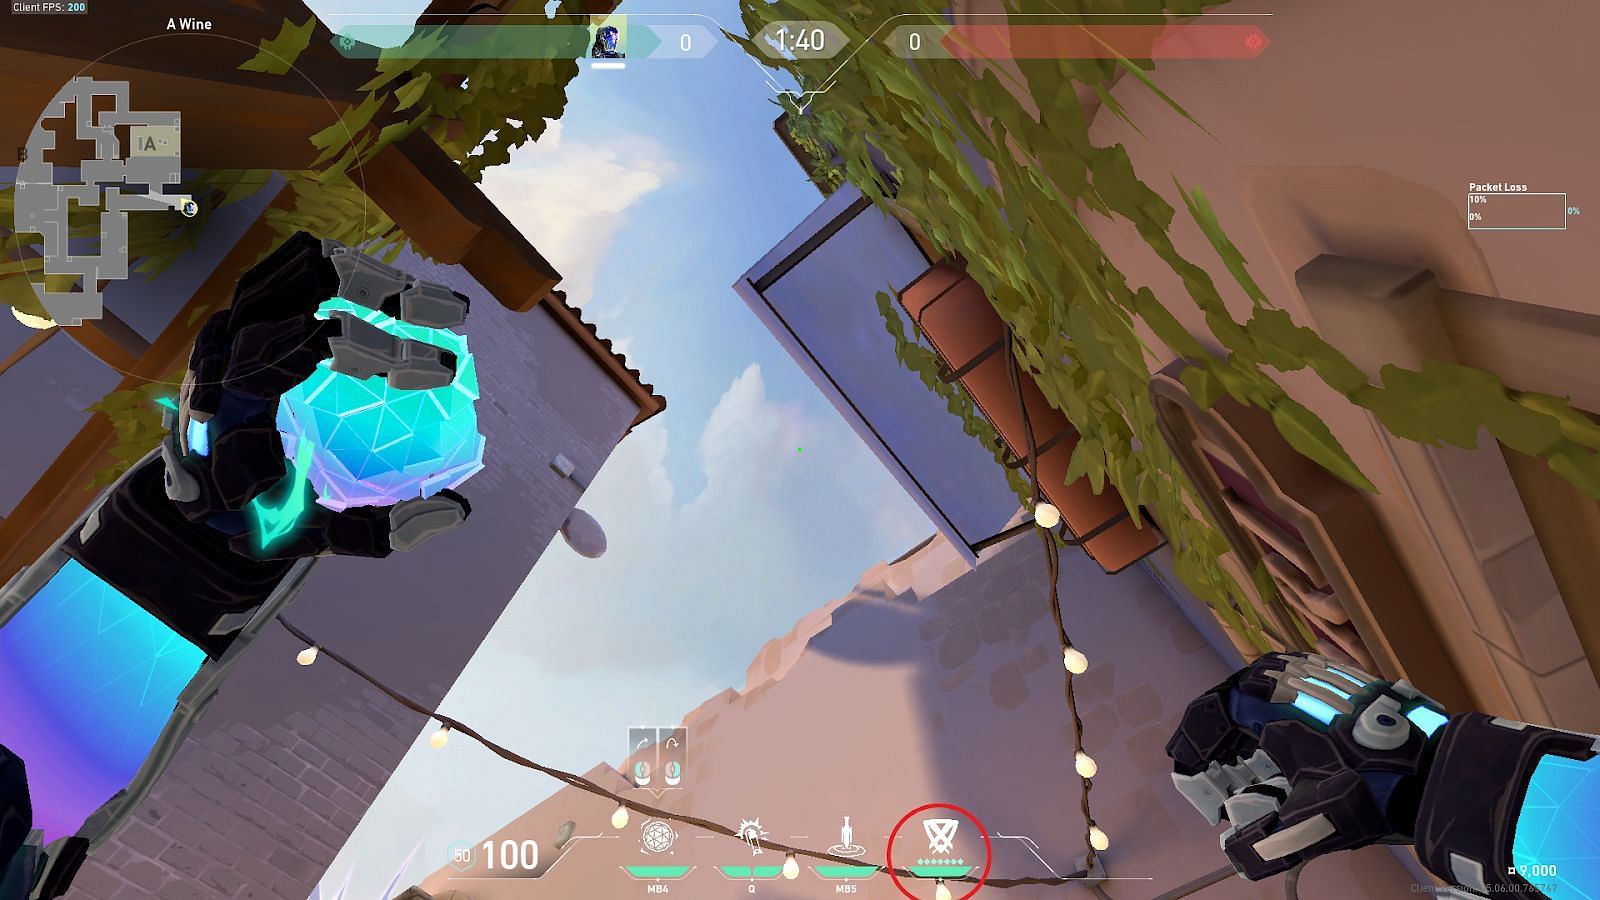
Position the ultimate ability icon on the Heads-Up Display (HUD) (shown in the circle) just above the light bulb and perform a simple left-click throw.
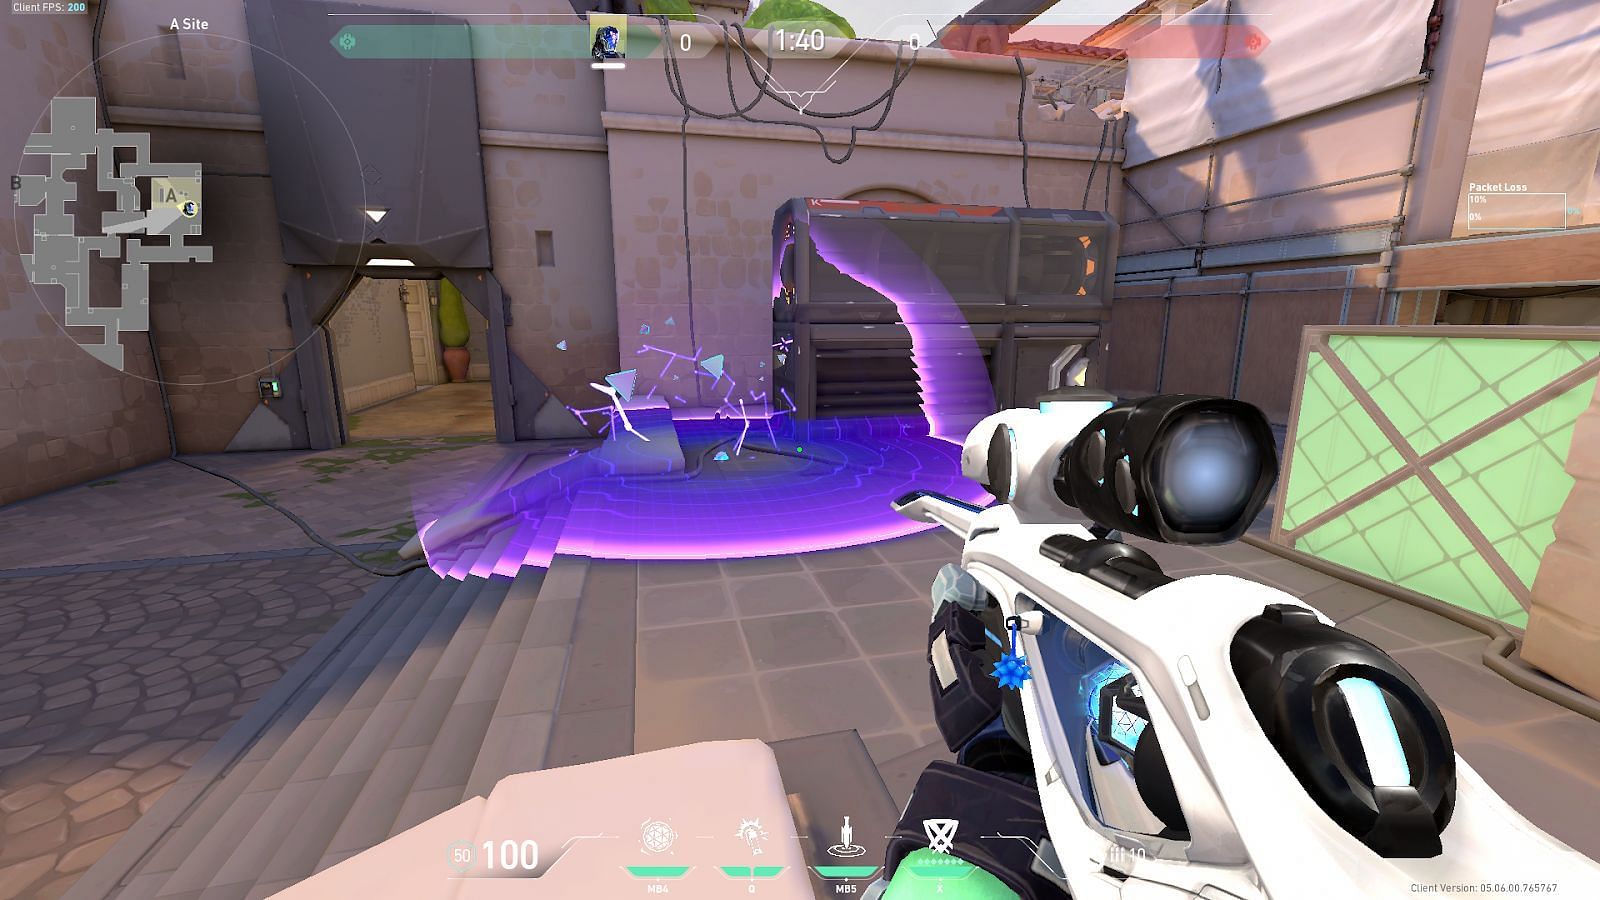
The nade goes over the A-Main wall and lands in the A-Site Default Plant position. This lineup is a great way to deny defenders from defusing the spike to secure rounds while staying close to the bomb site.
2) A-Lobby to A-Site Default Plant
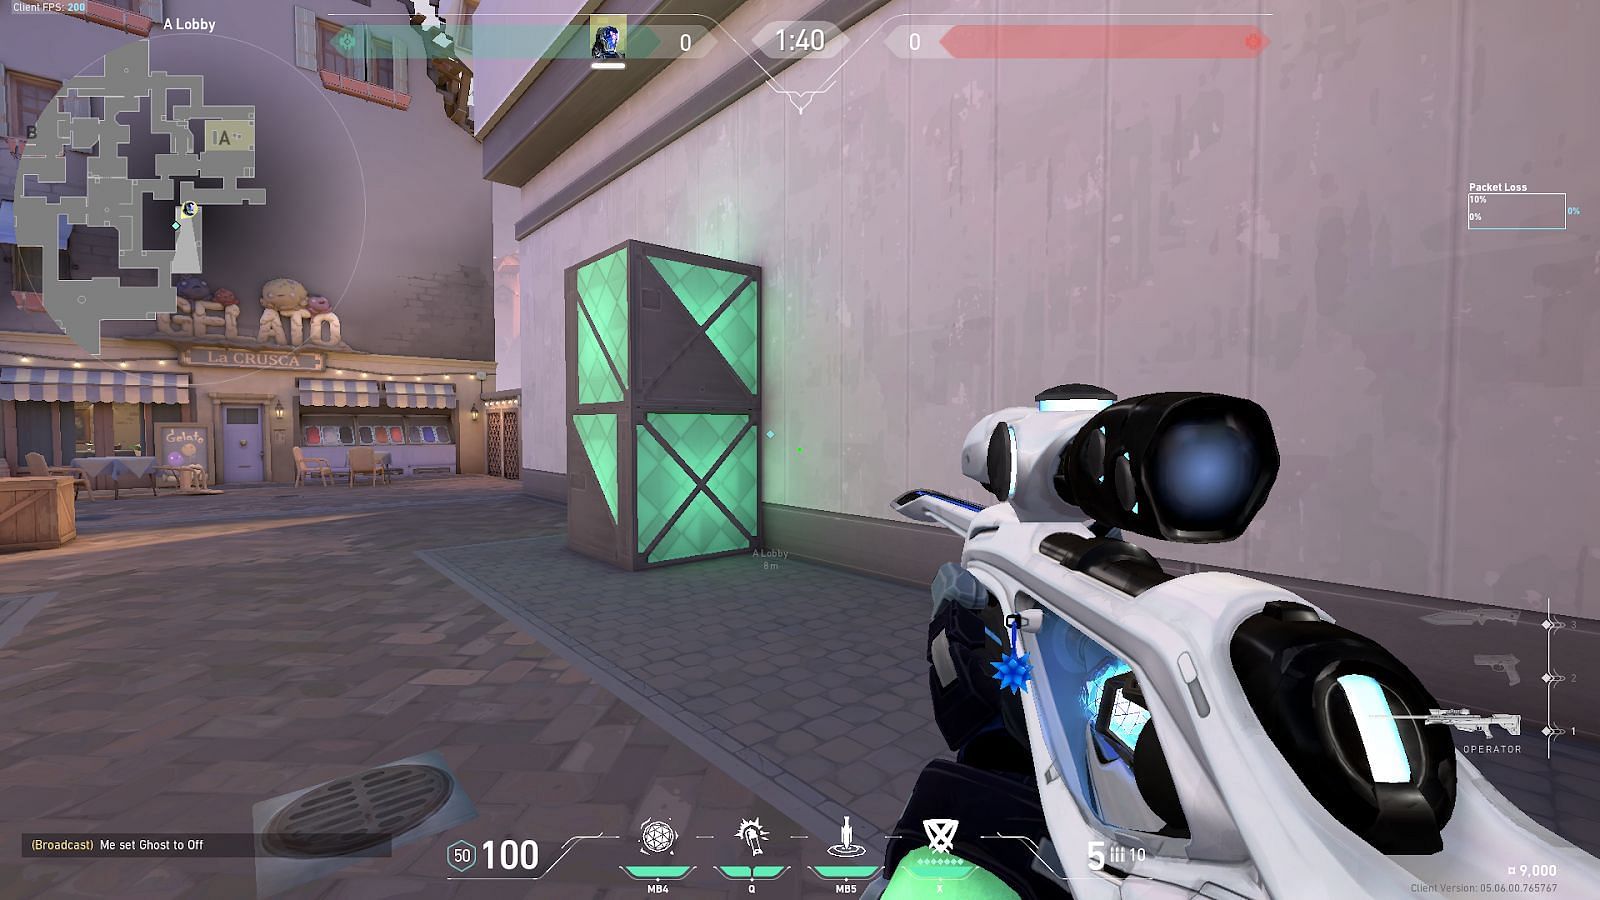
Position yourself in A-Lobby and tuck between the Radianite Crates and the wall.

Place the mouse indicator icons on the wall ledge (shown in the circle) and perform a simple left-click throw.
The nade similarly goes over the A-Main wall and lands directly on the A-Site Default Plant position. This lineup is primarily utilized on the attacker side in post-plant scenarios but can also be used by flanking defenders to delay the spike plant.
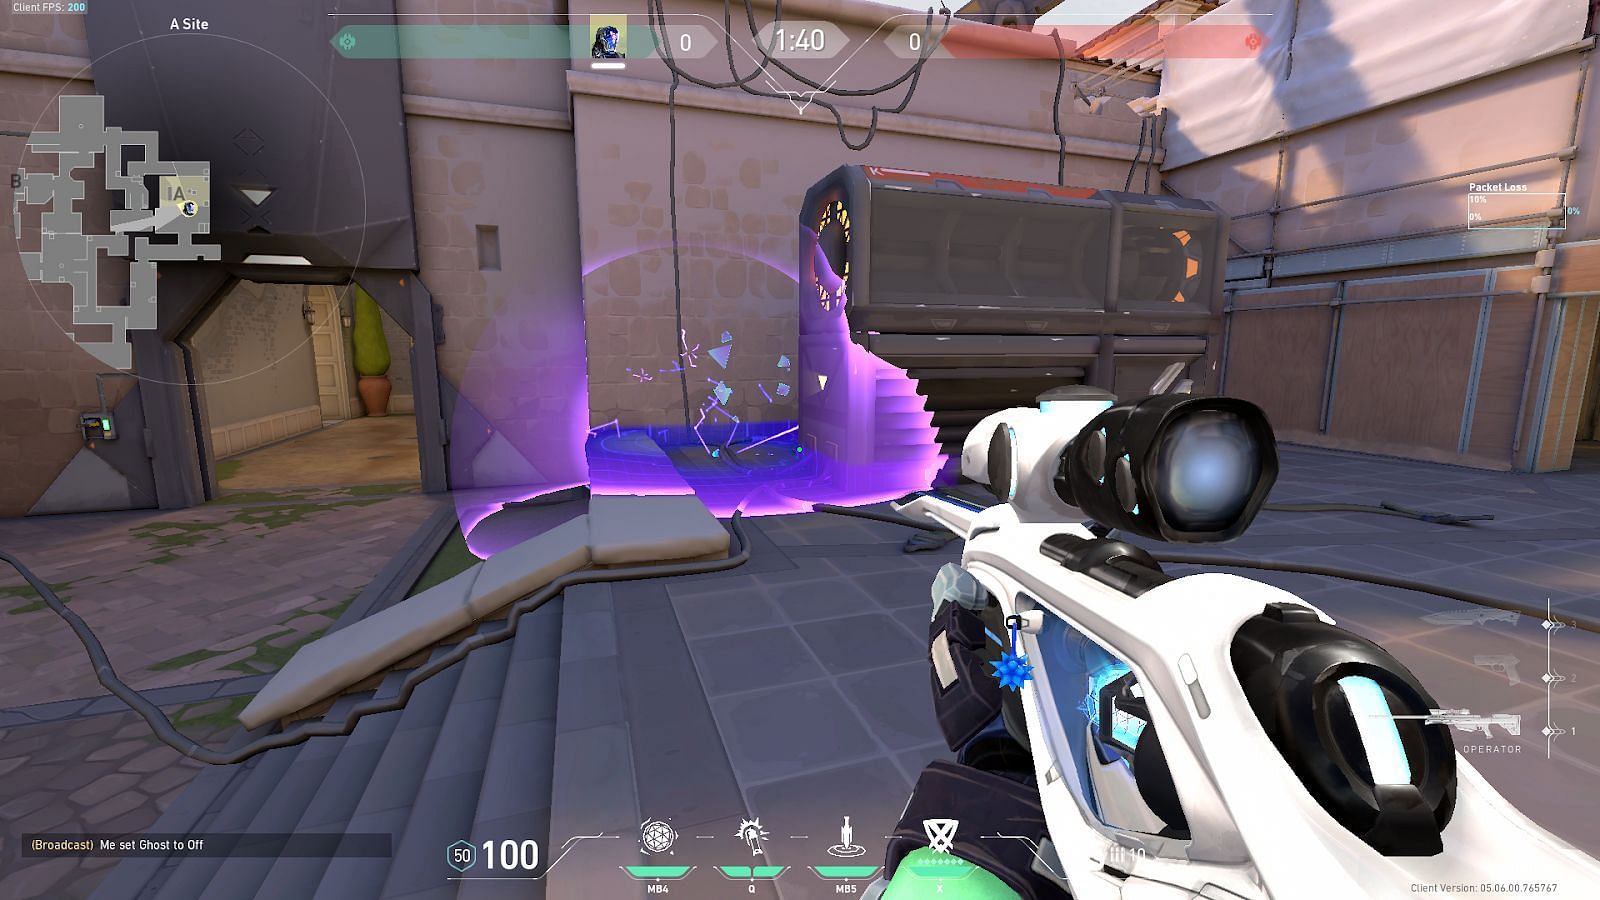
3) A-Heaven to A-Site Default Plant
Position yourself in A-Heaven and tuck inside the shown corner.

Position the Zero/Point ability icon on the HUD (shown in a circle) exactly below the roof bar and perform a simple left-click throw.
The nade bounces off the generator and falls directly onto the A-Site Default Plant position. This lineup is primarily used by the defender side to delay the spike plant.
4) B-Lobby to B-Site Default Plant
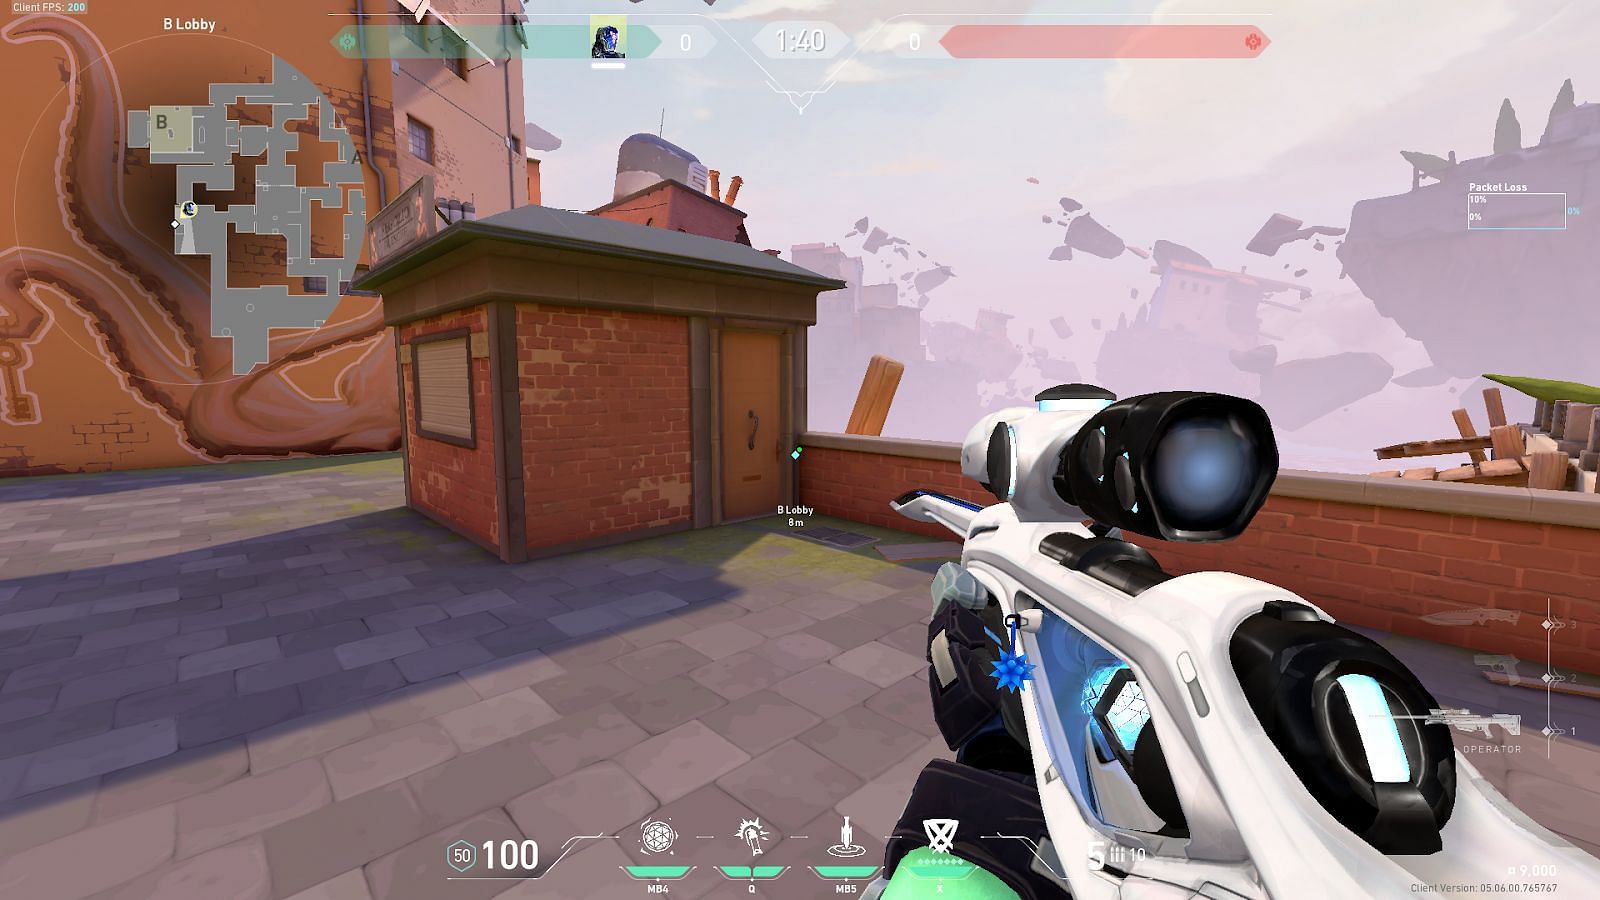
Position yourself in B-Lobby and tuck between the stall and the guard wall.

Place the crosshair (shown in a circle) on the distant tip in the sky and perform a simple left-click throw.
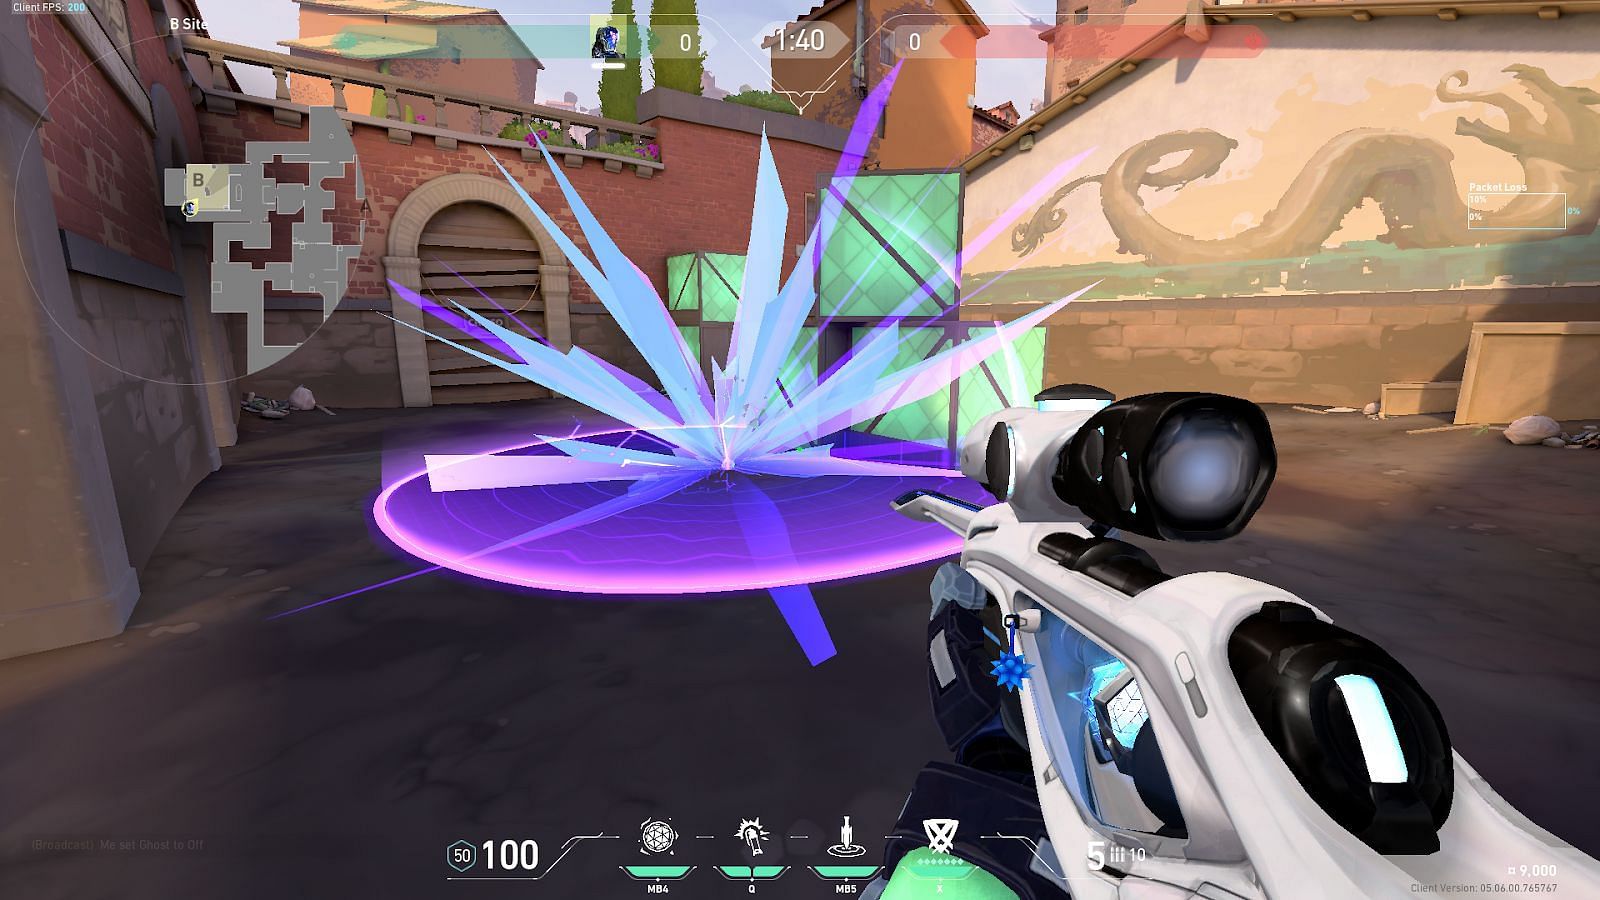
The nade will fly over the side of the B-Main and cross the wall to land directly on the B-Site Default Plant position. This is one of the most effective post-plant lineups for the attacker side as players can hold a safe position outside and delay the spike defuse.
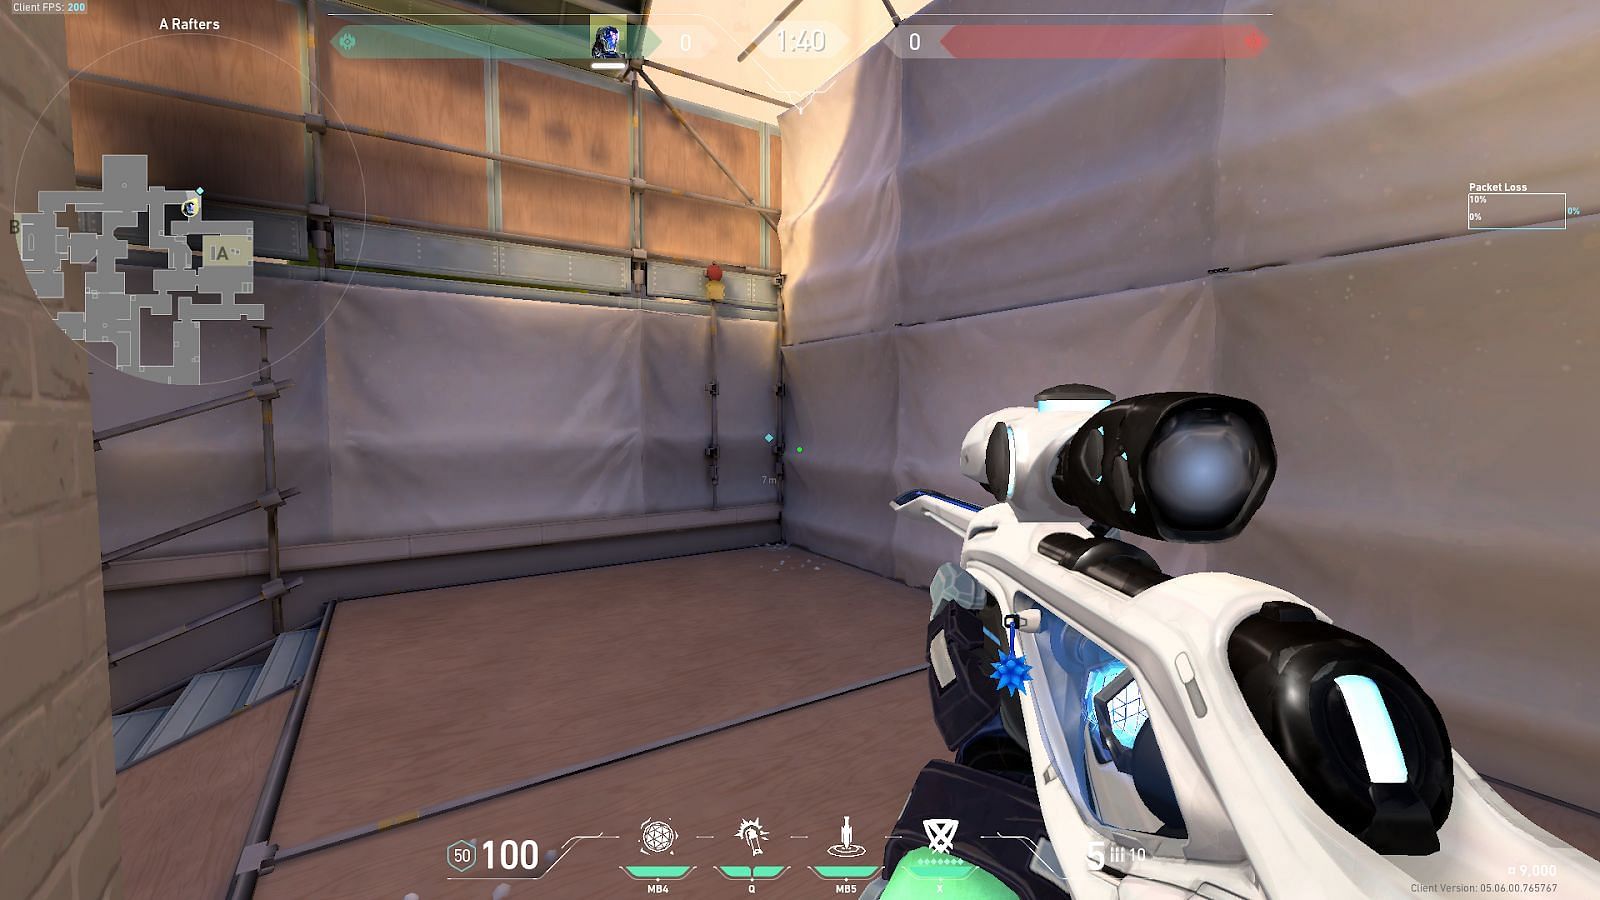
5) Defender Side Spawn B to B-Site Default Plant
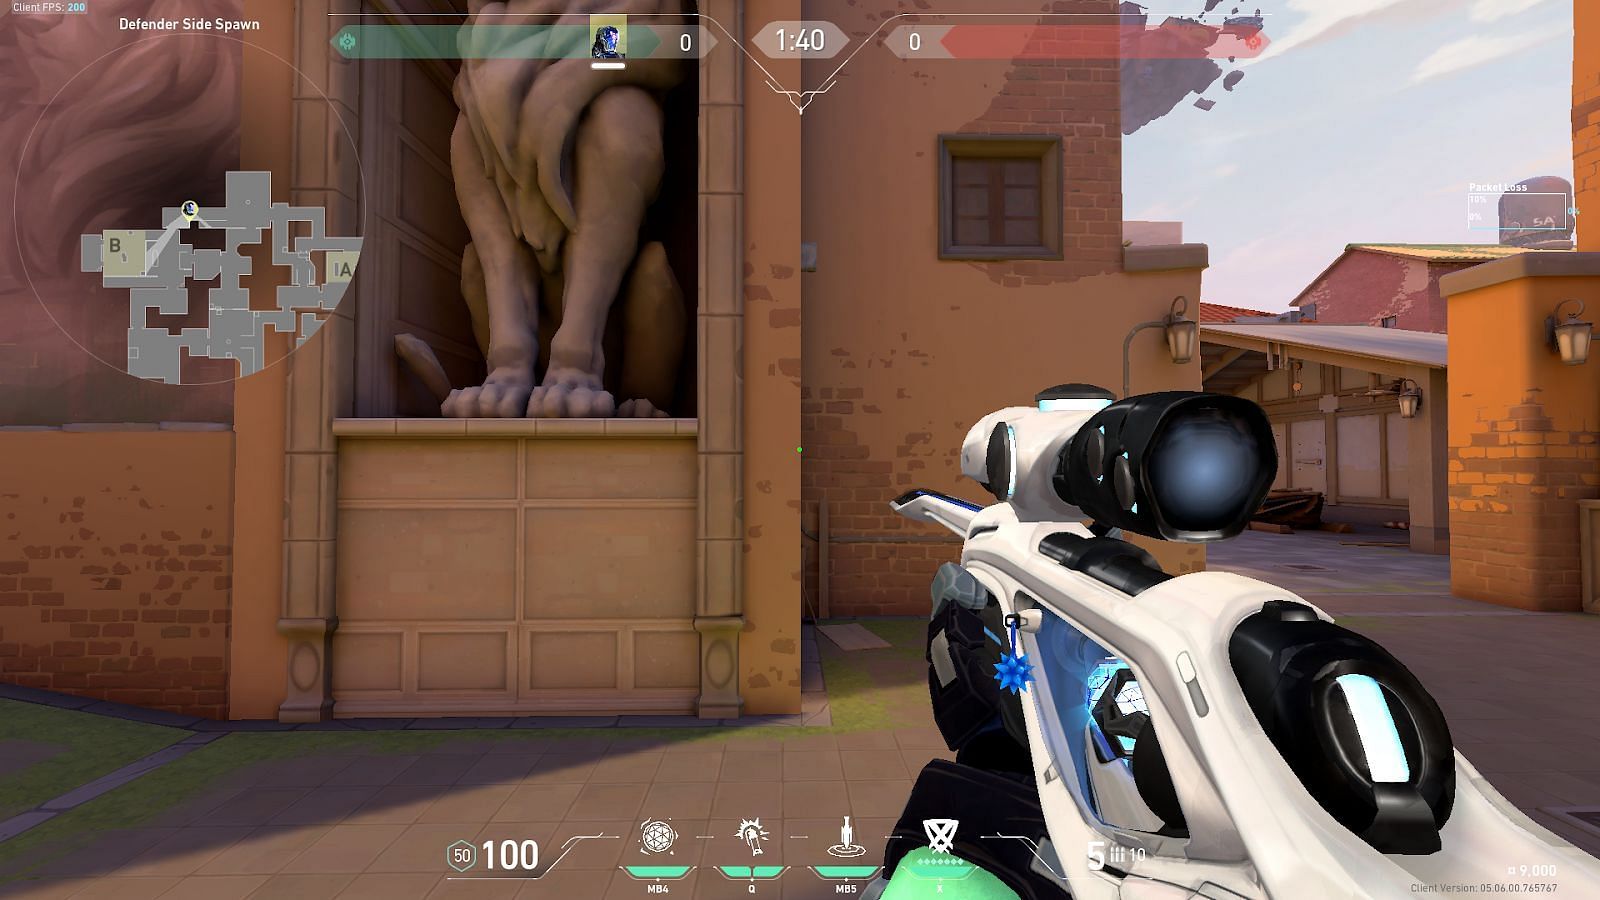
Position yourself in Defender Side Spawn towards B and stand directly in front of the shown wall edge and hug the wall.
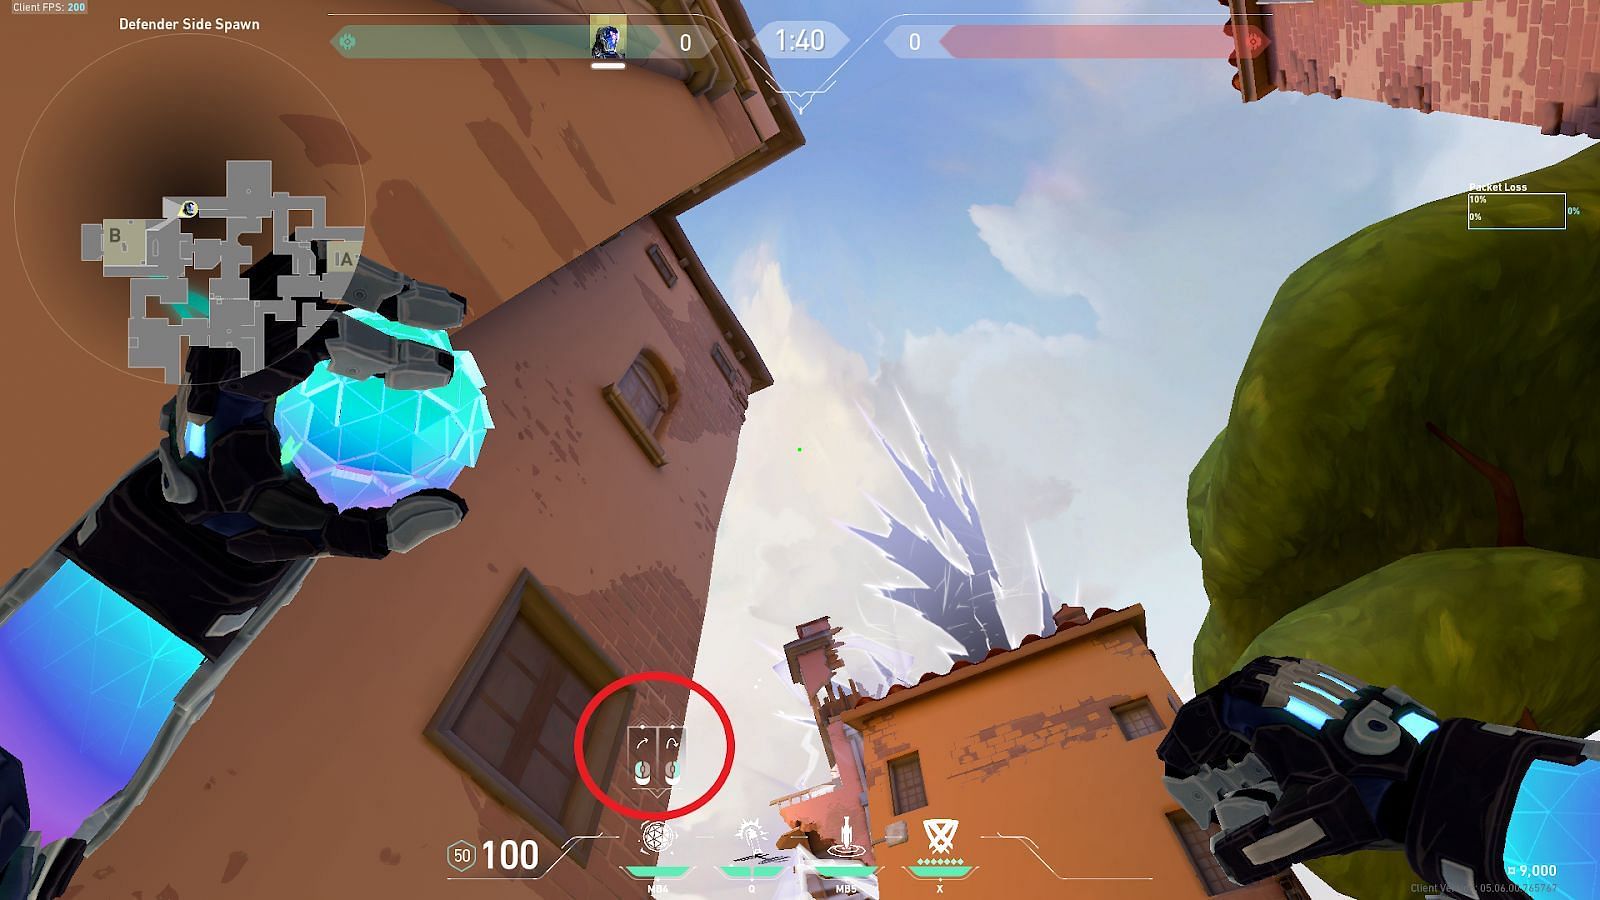
Position the mouse indicator icon (shown in the circle) and perform a simple left-click throw.

The nade will go over the B-Site and land directly on the B-Site Default Plant position.
