

'%20x='0'%20y='0'%20height='100%25'%20width='100%25'%20%0A%20%20%20%20%20%20%20%20%20%20xlink%3Ahref='data:image/jpg;base64,/9j/2wBDAAYEBQYFBAYGBQYHBwYIChAKCgkJChQODwwQFxQYGBcUFhYaHSUfGhsjHBYWICwgIyYnKSopGR8tMC0oMCUoKSj/2wBDAQcHBwoIChMKChMoGhYaKCgoKCgoKCgoKCgoKCgoKCgoKCgoKCgoKCgoKCgoKCgoKCgoKCgoKCgoKCgoKCgoKCj/wgARCAAHAAoDASIAAhEBAxEB/8QAFQABAQAAAAAAAAAAAAAAAAAABQb/2gAIAQEAAAAAgTP/xAAUAQEAAAAAAAAAAAAAAAAAAAAE/9oACAECEAAAAEf/xAAUAQEAAAAAAAAAAAAAAAAAAAAE/9oACAEDEAAAAA//xAAfEAABAwQDAQAAAAAAAAAAAAACAQMEAAYjQQURMdH/2gAIAQEAAT8A4q9J0eKyhPOKwiEJs9413R3ZIUyxj7pw/tf/xAAYEQACAwAAAAAAAAAAAAAAAAAAAQIDUf/aAAgBAgEBPwBWS0//xAAYEQACAwAAAAAAAAAAAAAAAAAAAgMEUv/aAAgBAwEBPwBa8WT/2Q=='%3E%3C/image%3E%3C/svg%3E)
Valorant is a game where the community always tries to devise new ways to outplay other players. There are multiple Agents in the game who utilize abilities that can be deployed from afar.
These abilities are usually used to clear corners and force enemy players out of their spots. One of those Agents is Kay/O, who is an Initiator in Valorant. His abilities are optimized towards disabling, detecting, and disorienting enemy players.
Kay/O has a powerful grenade that can be thrown from quite a distance and deals massive damage to enemies in its area of effect. Pearl is a huge map with multiple low-rise walls, making it possible for players to throw utilities over such places. With a proper lineup, players can ensure consistency and pull off amazing wins.
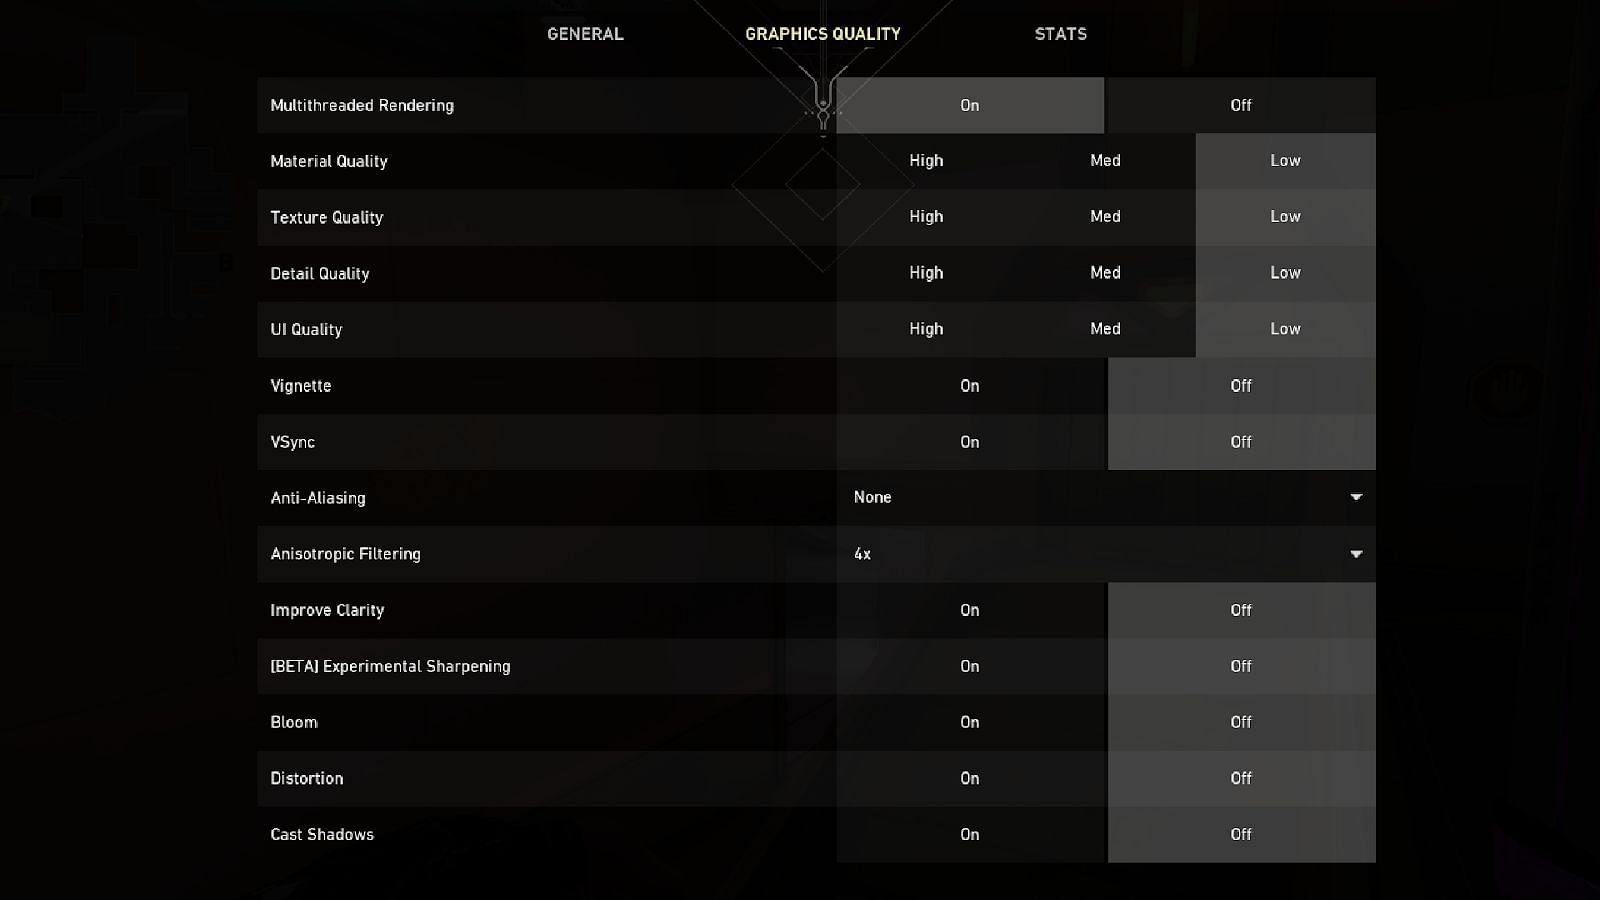
It is important to note that these lineups were performed in LOW graphics settings.
Note: This article is subjective and reflects the author’s opinion.
Valorant Kay/O`s best and most crucial Nade lineups for Pearl
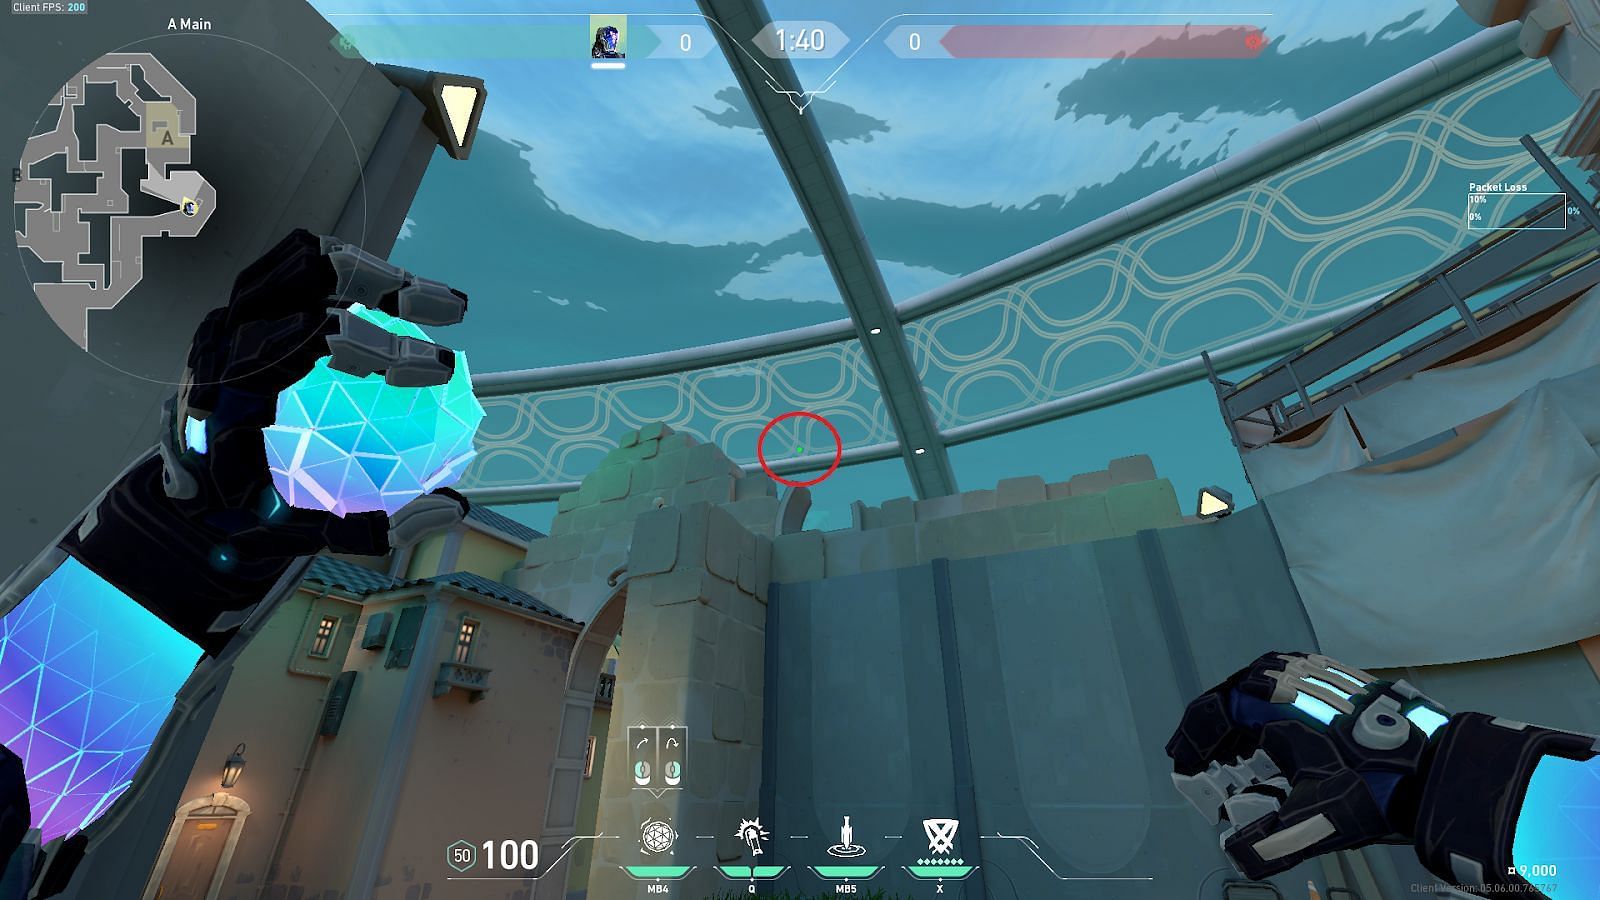
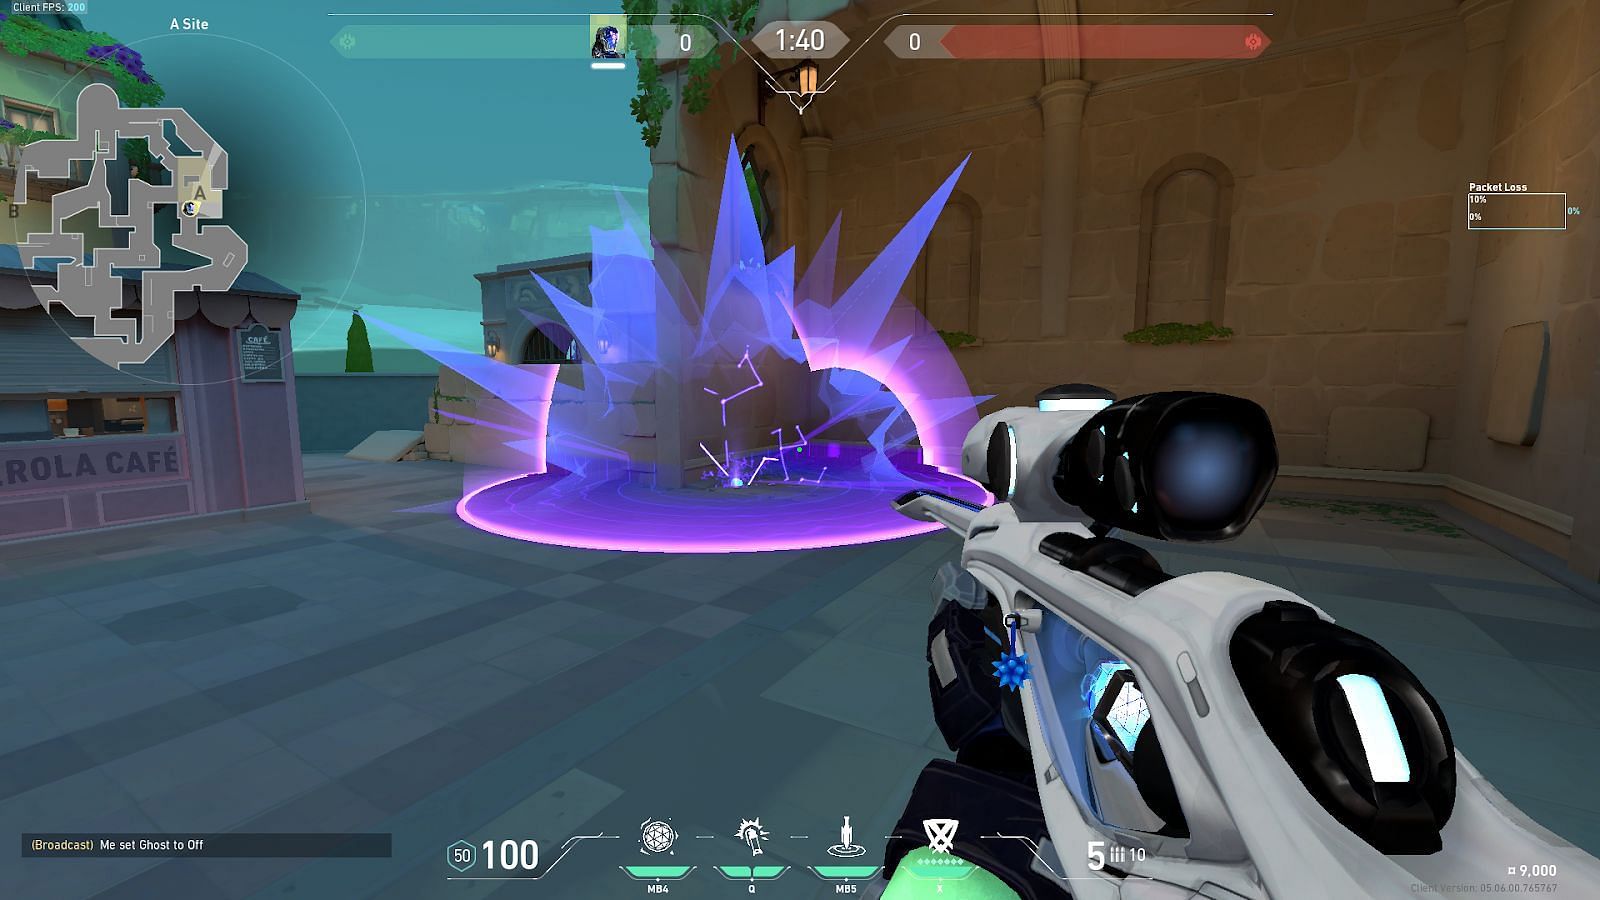
1) A-Main to A-Site Default Plant
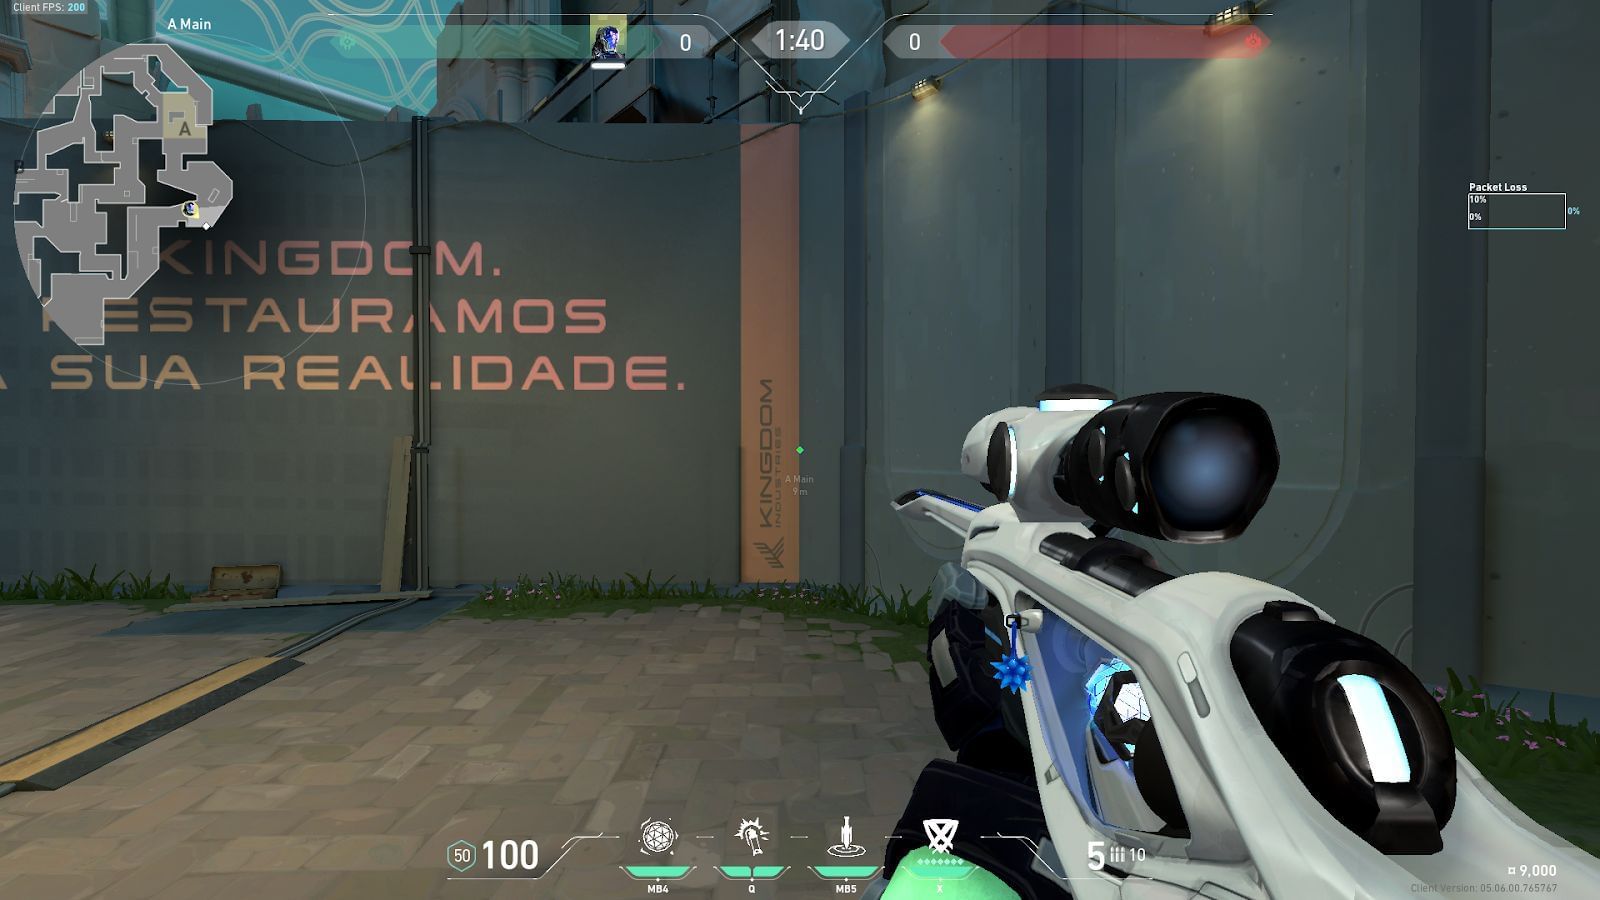
Position yourself in the shown corner and tuck between the wooden plank and the wall.
Look towards the Dome area above the A-Site. Position the Zero/Point ability icon in the Heads-Up Display (HUD) with the light on the beam of the Dome. Then perform a simple left-click throw.
The nade will go over the walls and land directly on the A-Site Default Plant position.
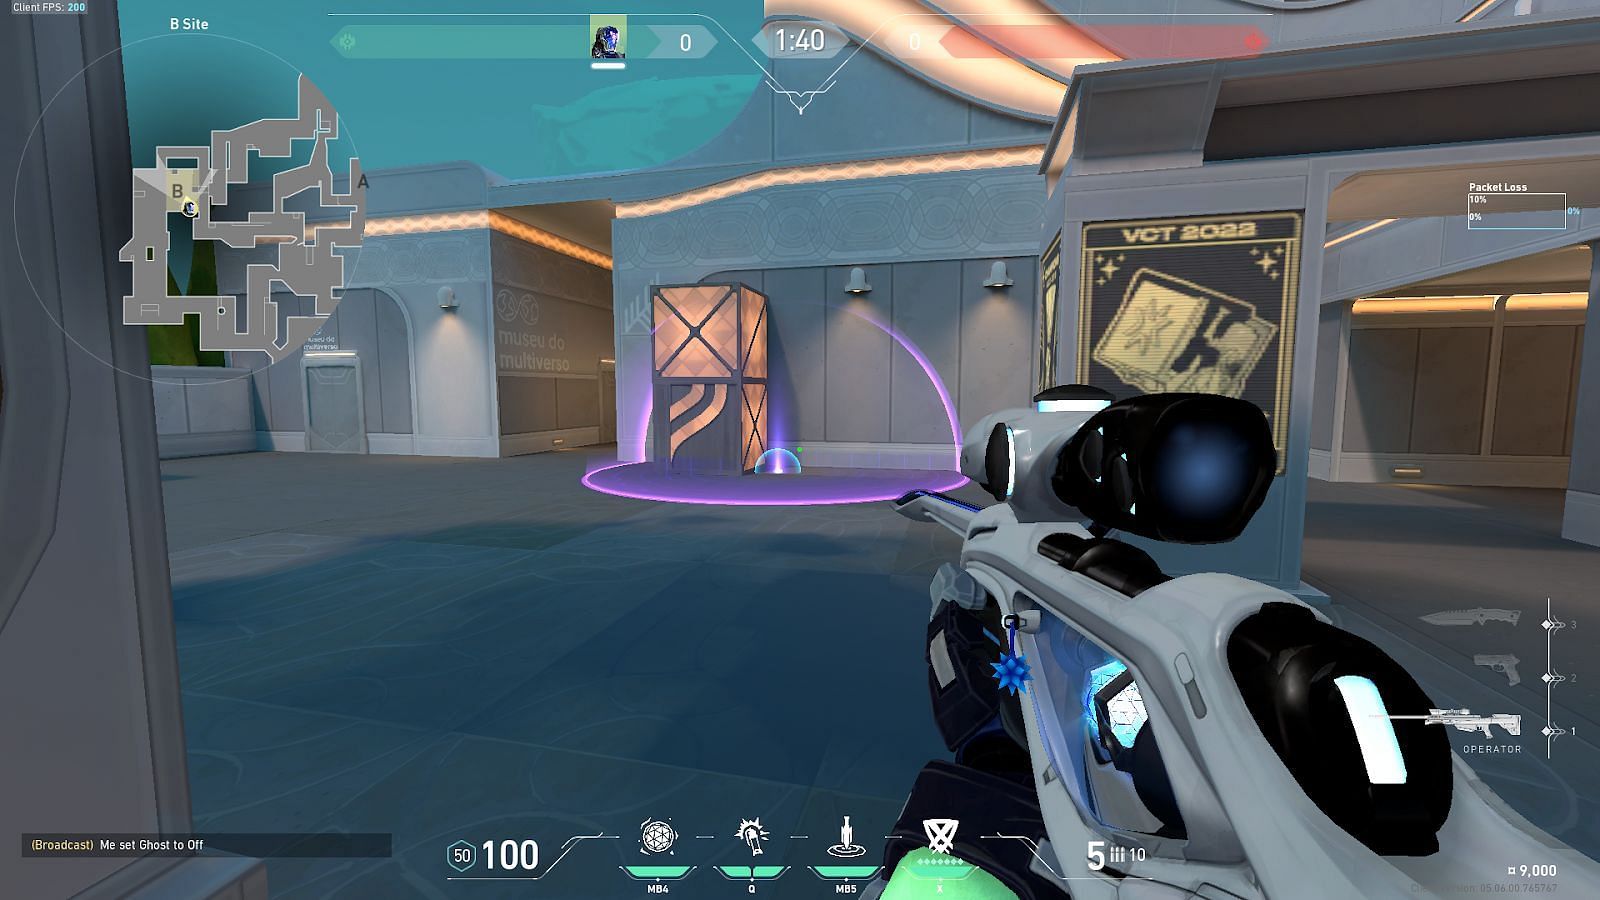
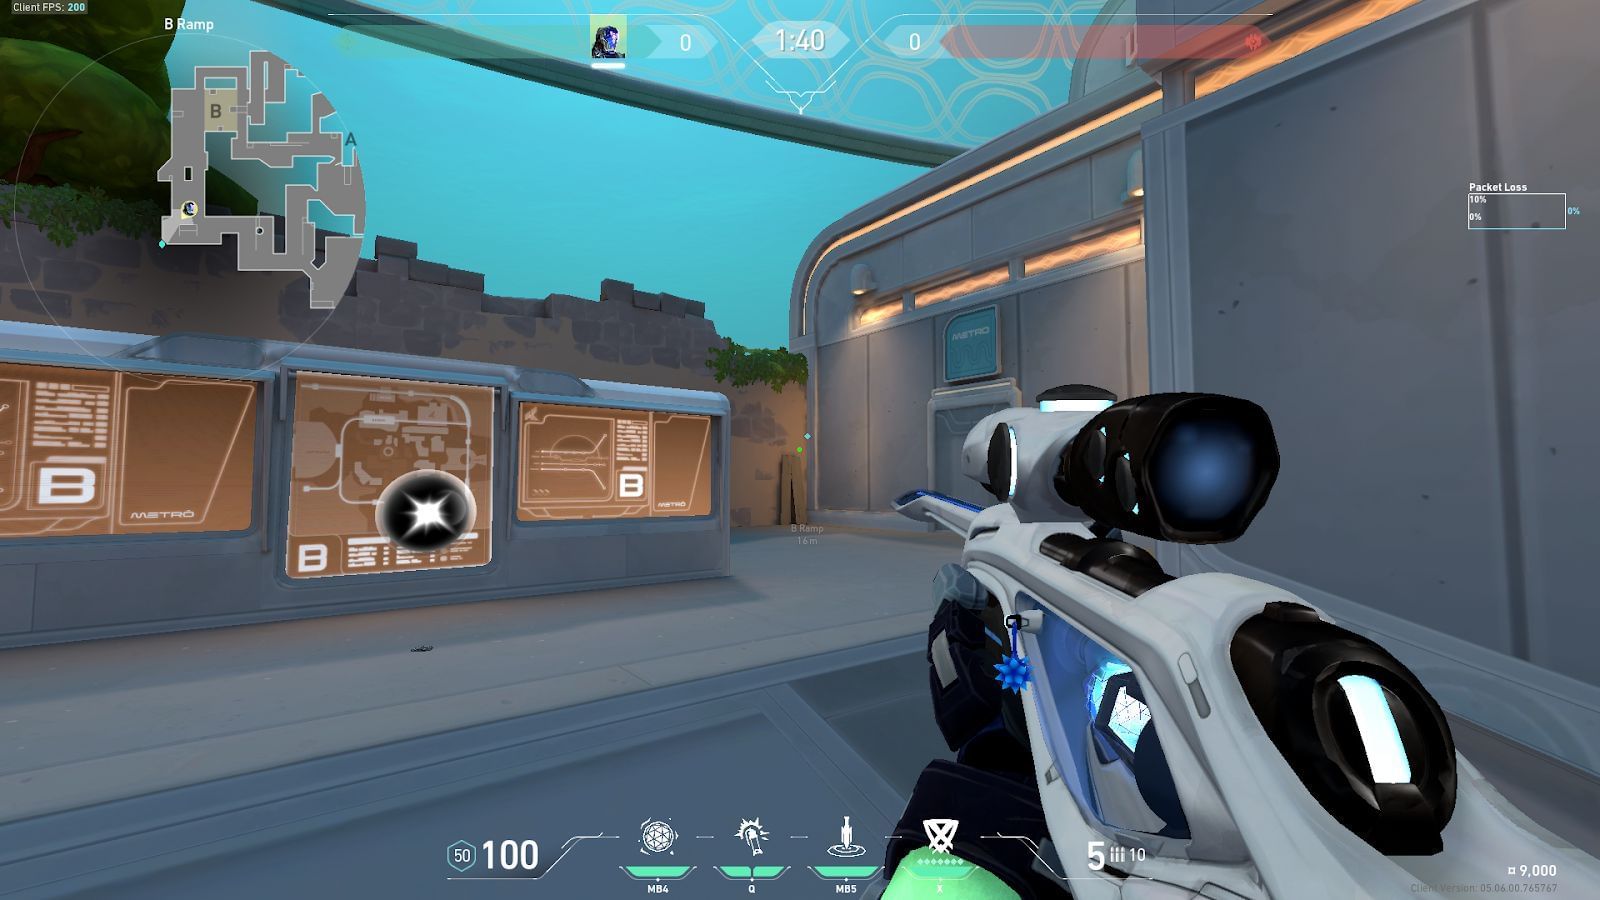
2) B-Ramp to B-Site Radianite Boxes Plant
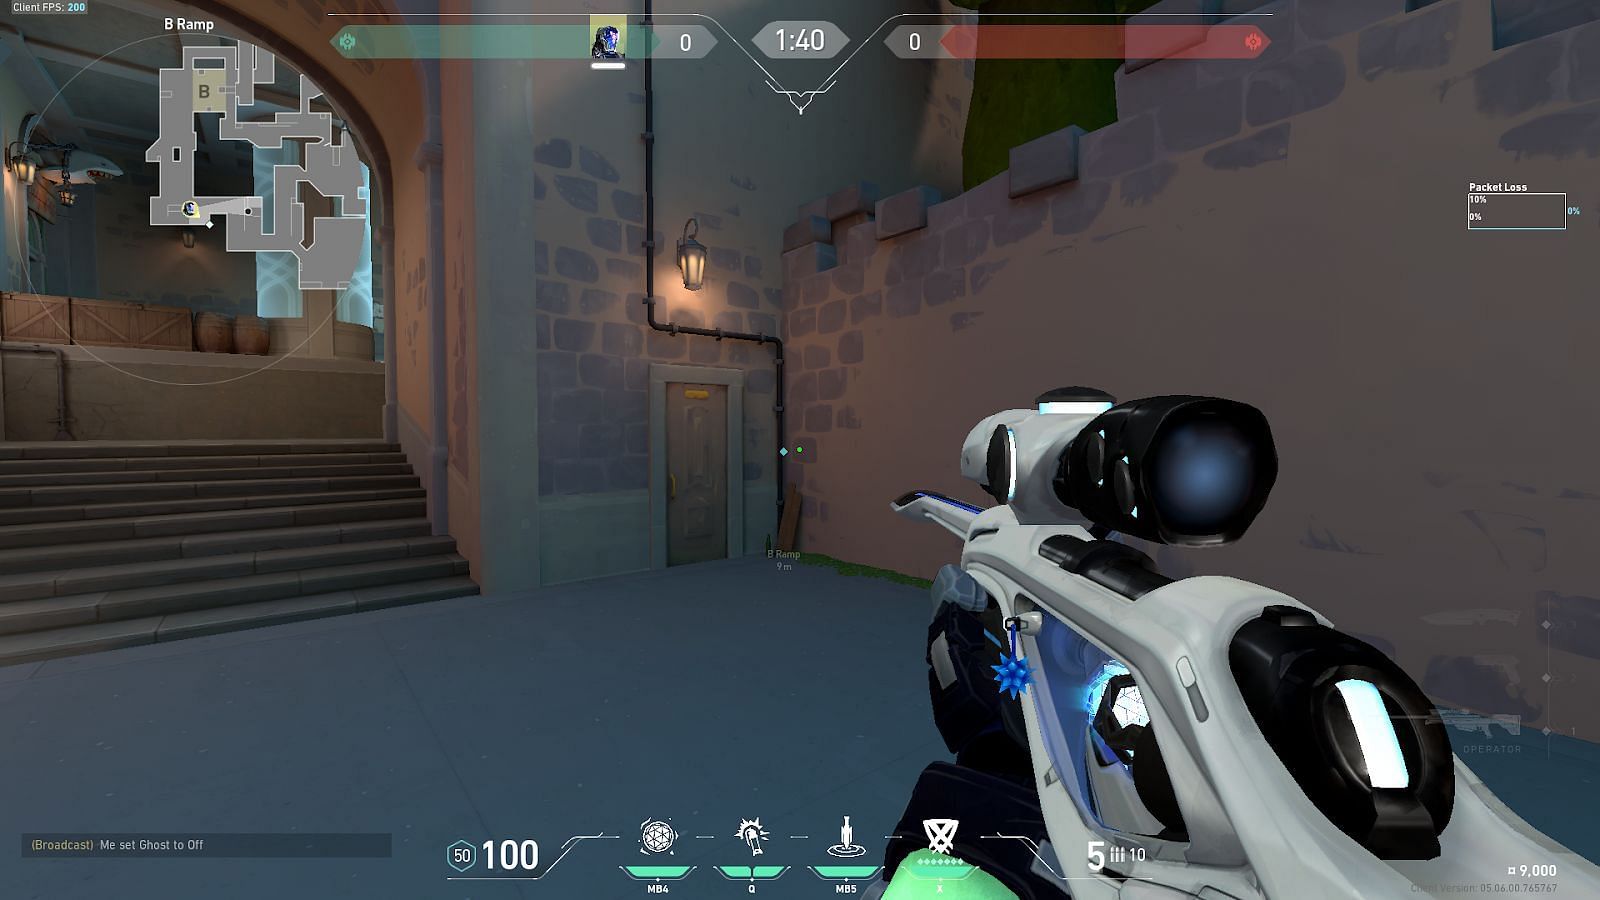
Position yourself in B-Ramp and tuck inside the shown corner.
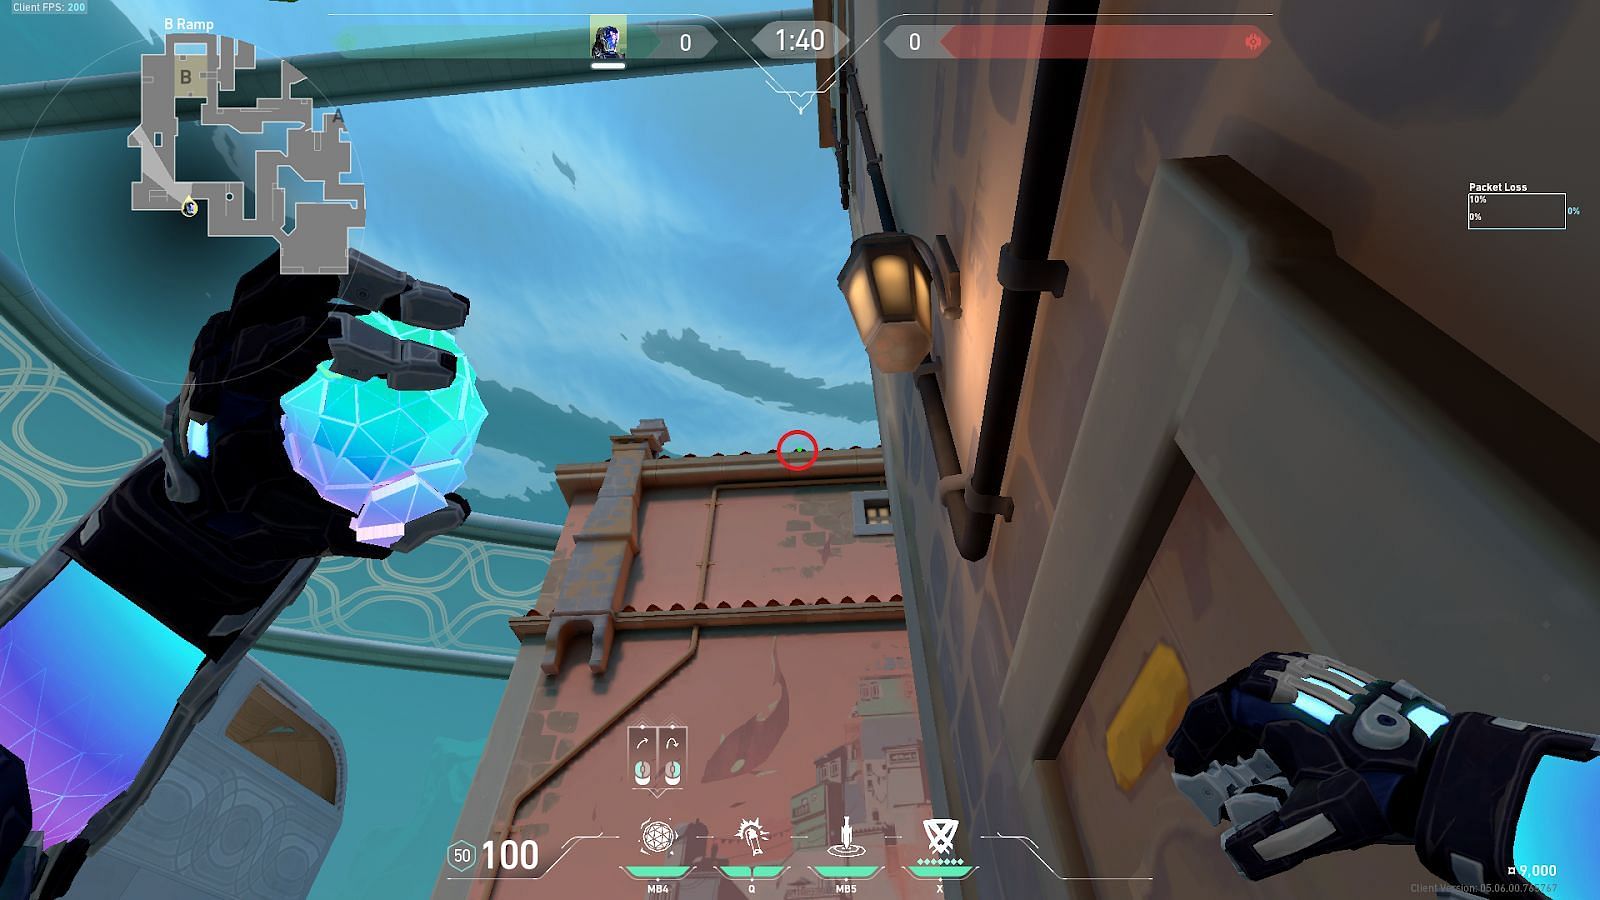
Look towards the B-Site and place the crosshair on the roof ledge (shown in the circle) and perform a simple jump left-click throw.
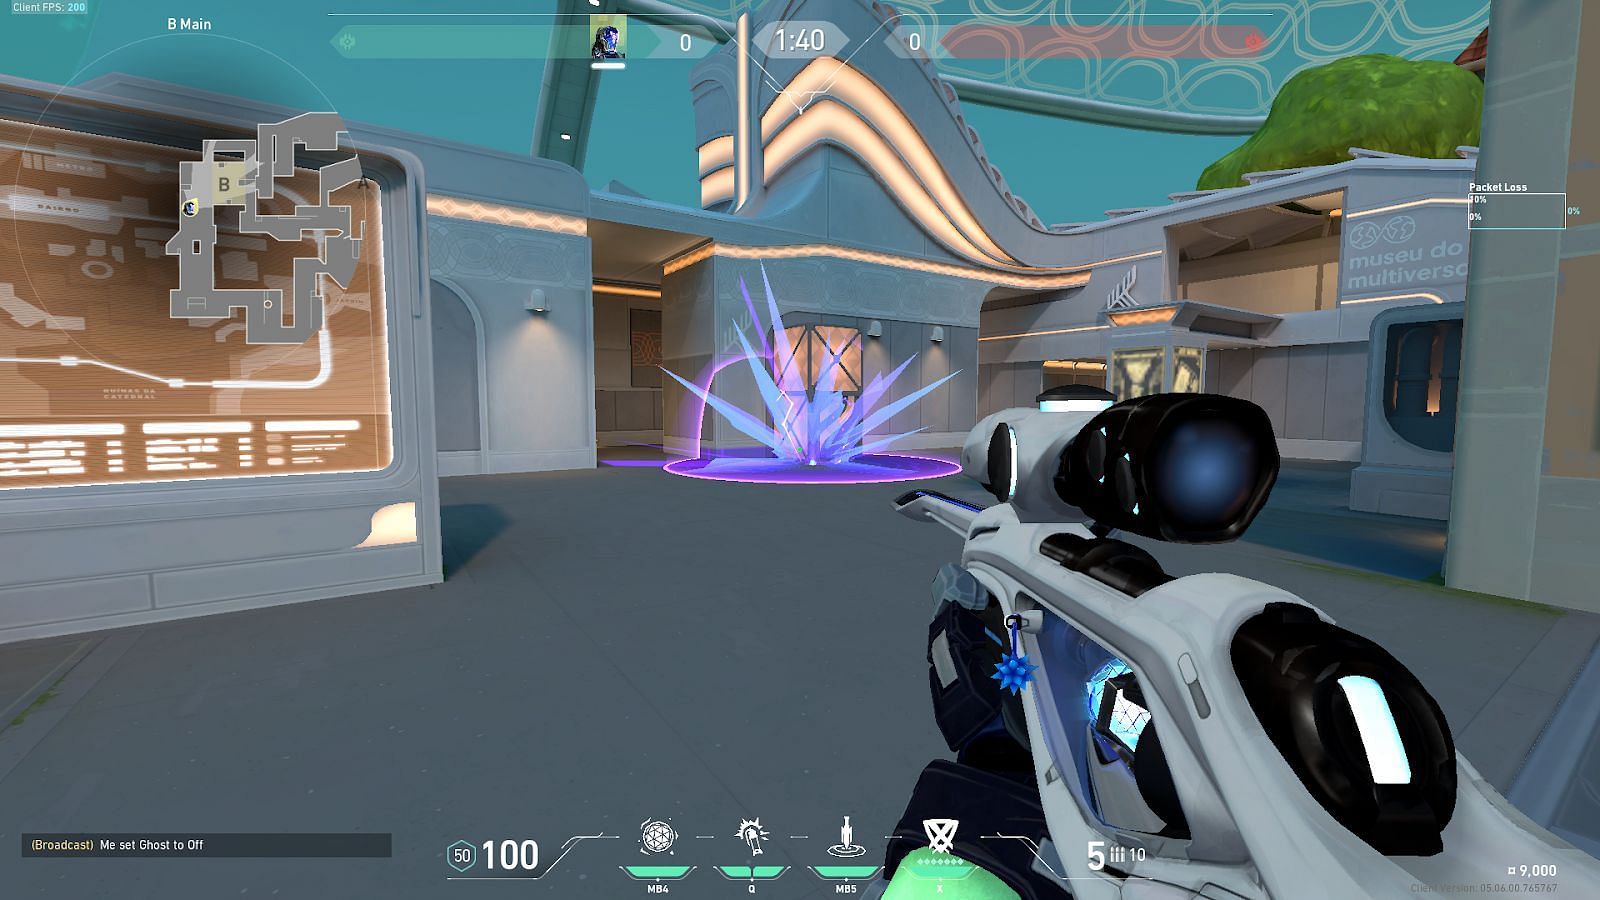
The nade flies over the buildings and lands directly on the B-Site Radianite Boxes Plant position.
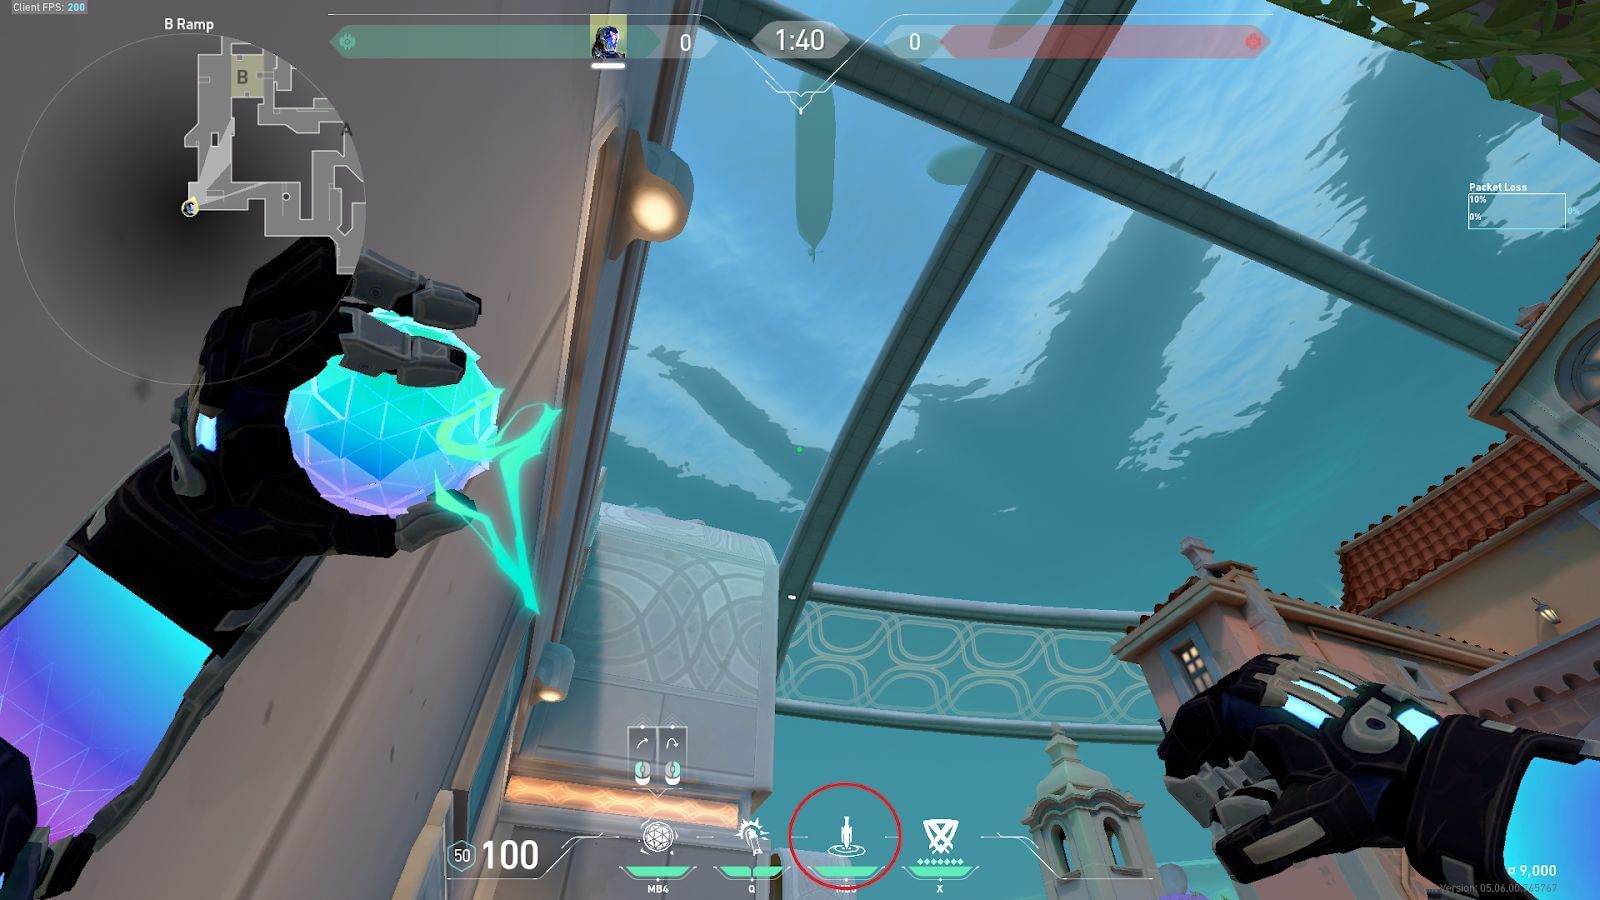
3) B-Link Stairs to B-Site Radianite Boxes Plant
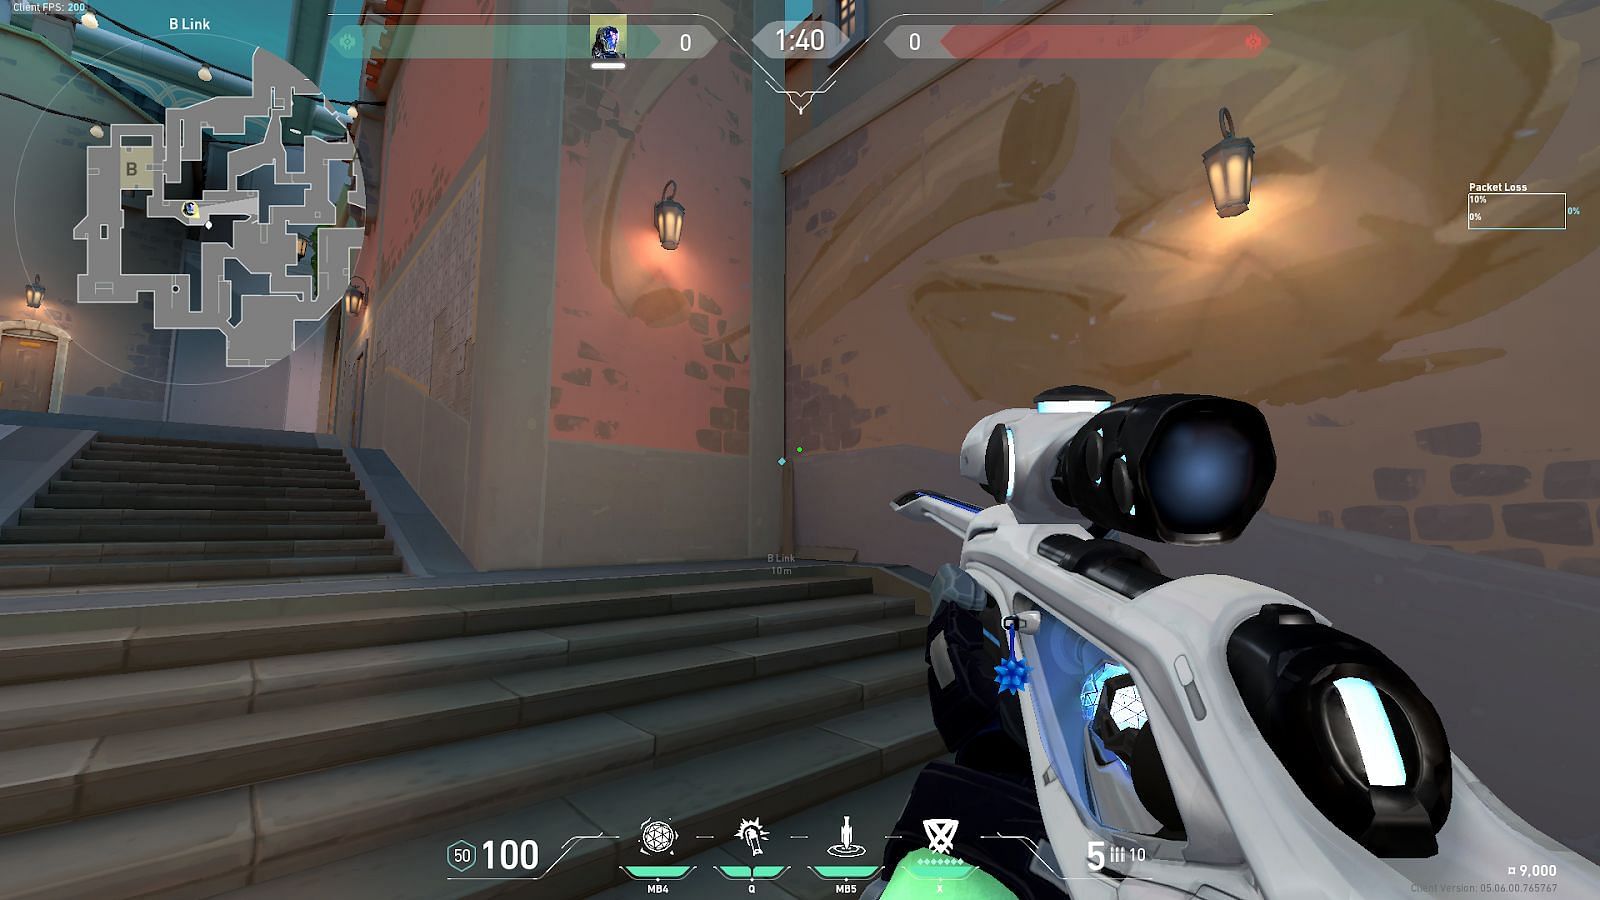
Position yourself in B-Link Stairs and tuck inside the shown corner.
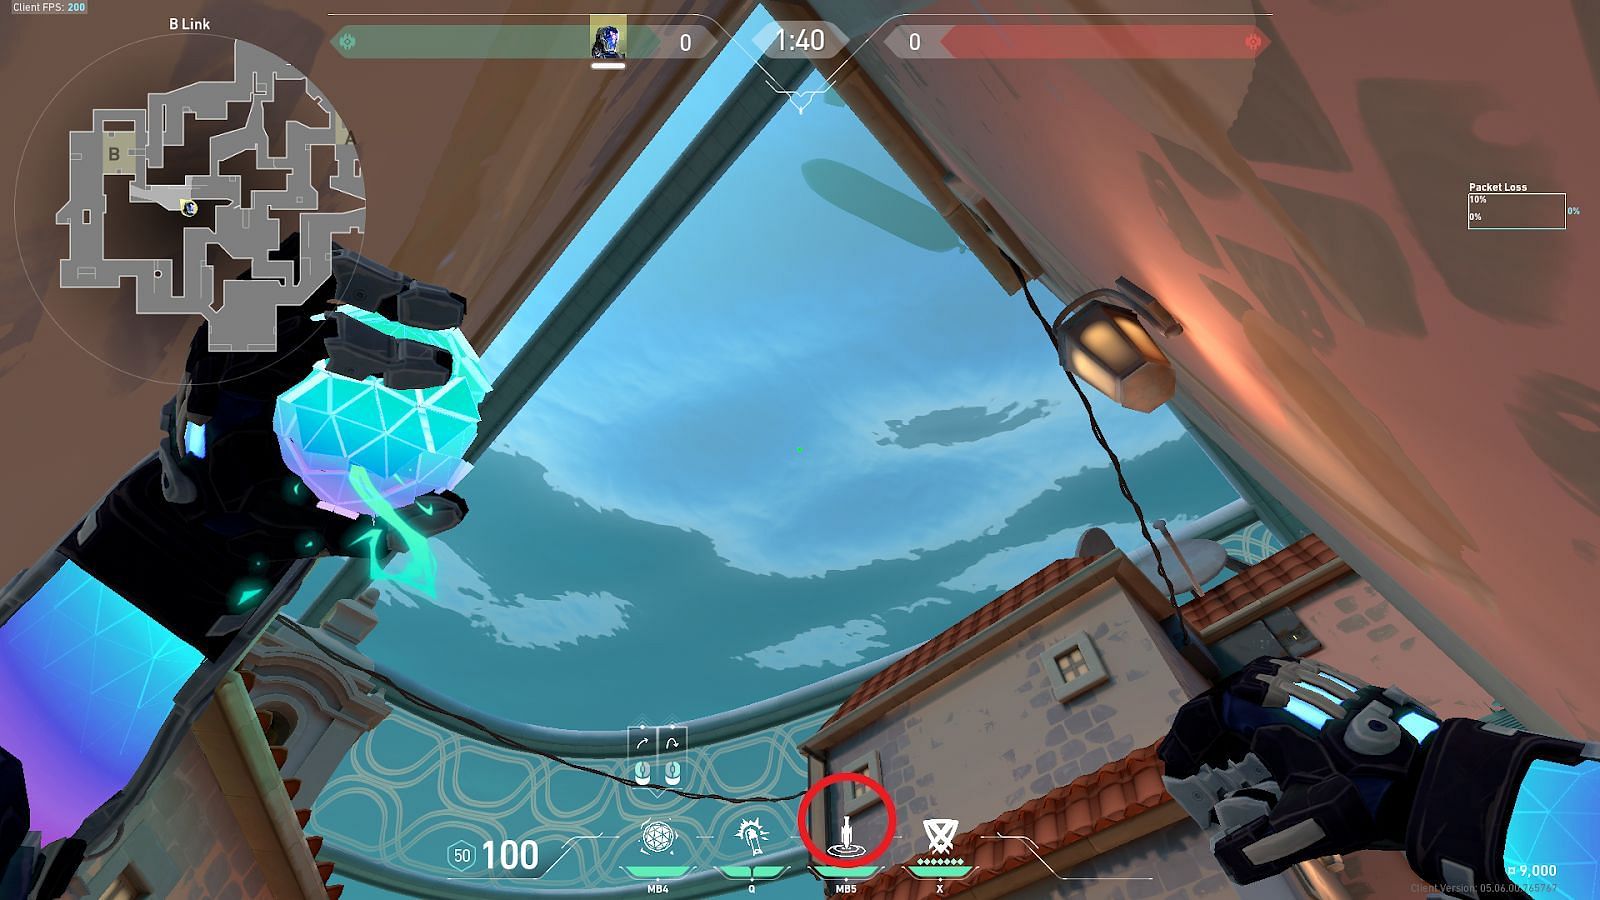
Look towards the B-Site and position the Zero/Point ability icon on the HUD below the bottom left corner of the window (shown in a circle). Perform a simple left-click throw.
The nade will land near the B-Site Radianite Boxes Plant position. This lineup is only useful if the spike is planted for B-Link instead of B-Ramp.
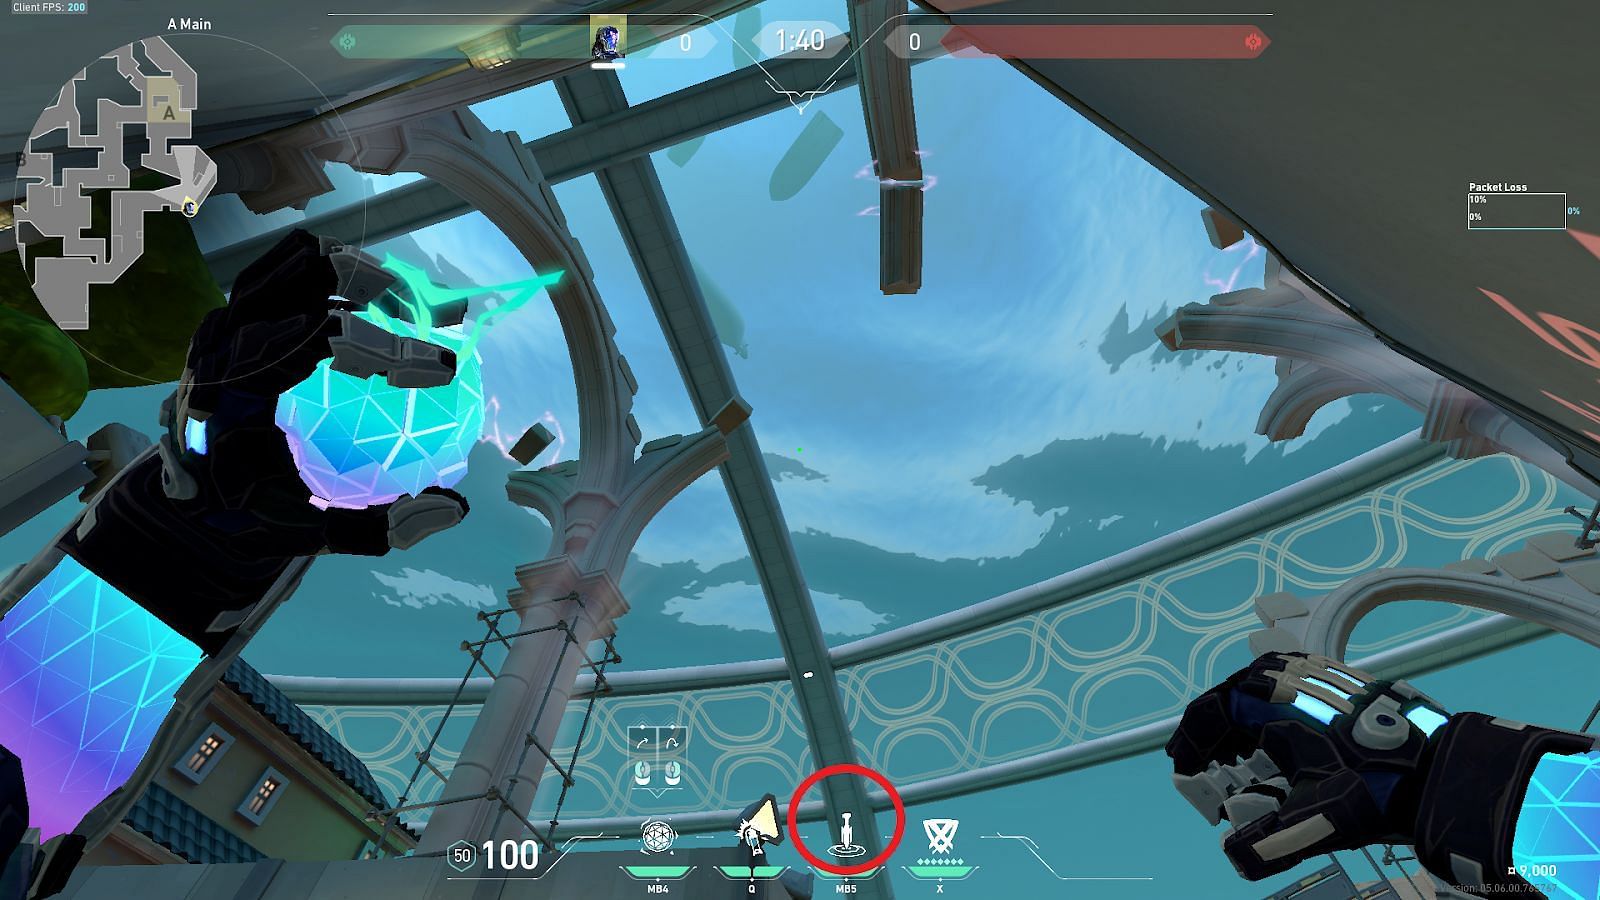
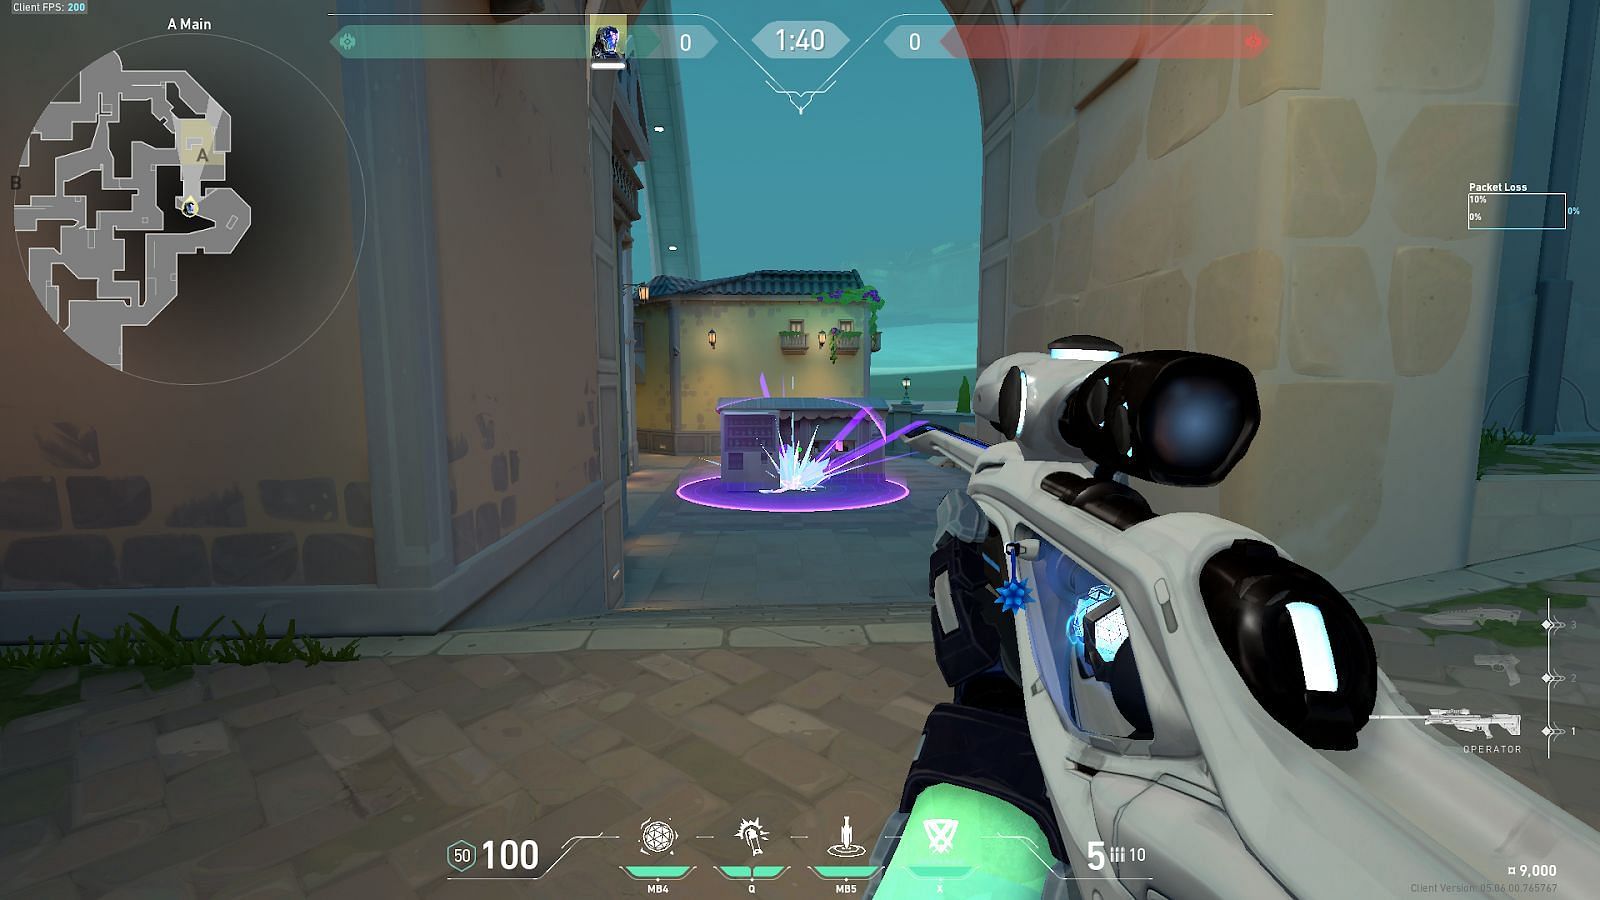
4) A-Main to A-Site Safe Plant
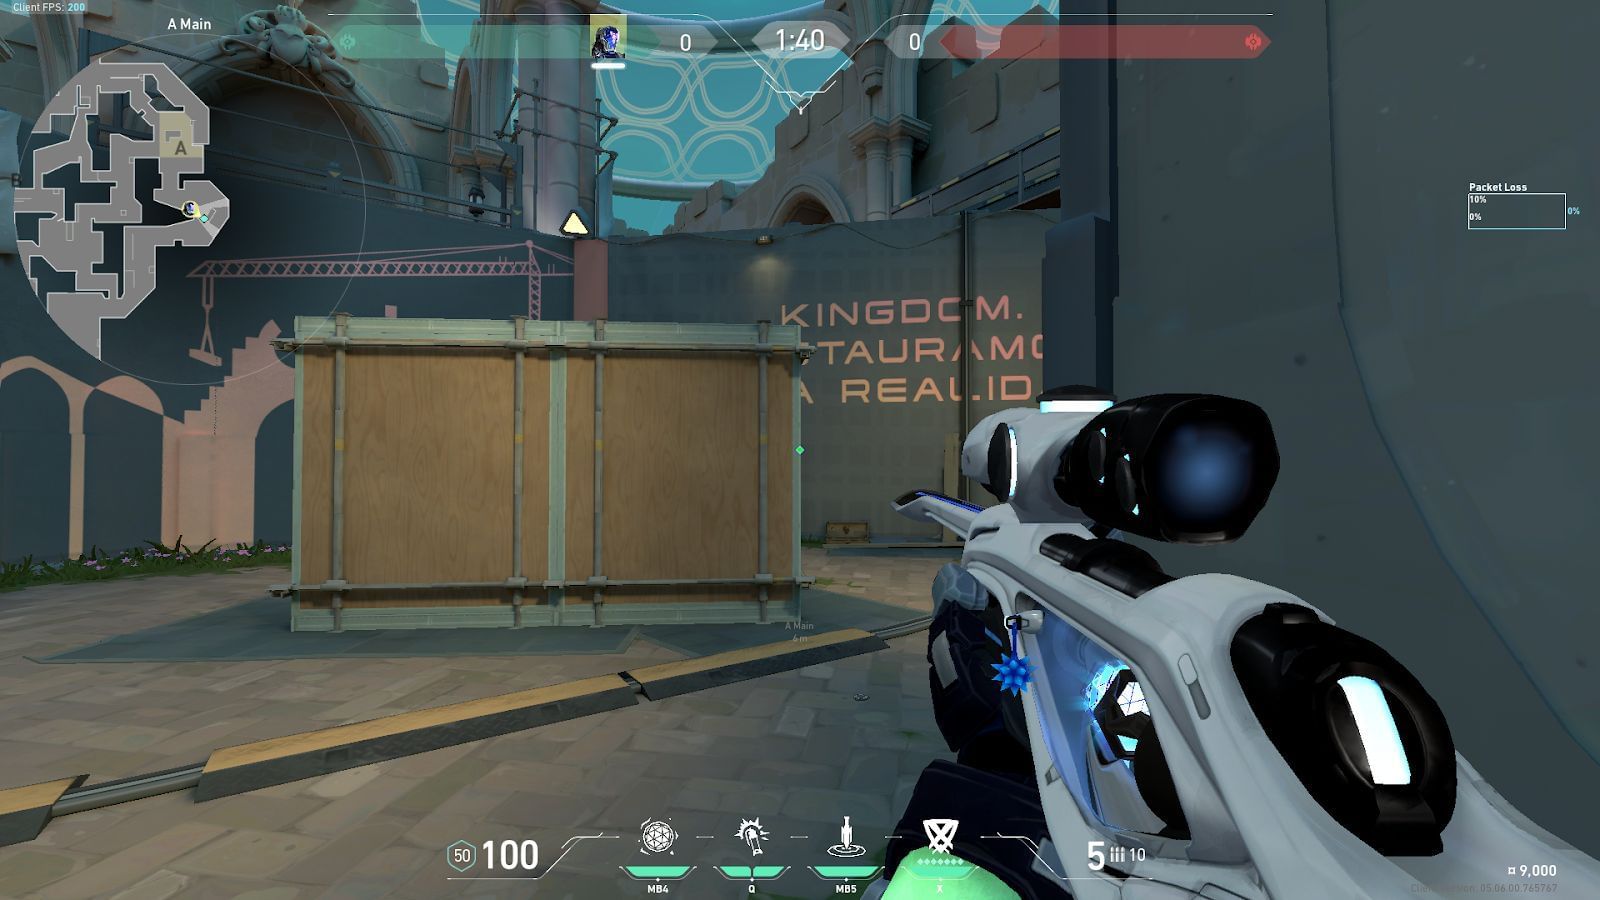
Position yourself in front of the wooden stall in A-Main. Align in front of the right border and tuck to the wooden stall.
Place the crosshair on the Dome (shown in the circle) and perform a simple left-click throw.
The nade will bounce off the wall and land in the A-Site Safe Plant position.
5) B-Ramp to B-Site Default Plant
Position yourself in the shown corner and tuck inside in B-Ramp.
Look towards B-Site and place the Zero/Point ability icon on the HUD just above the B-Pillar (shown in a circle) and perform a simple left-click throw.
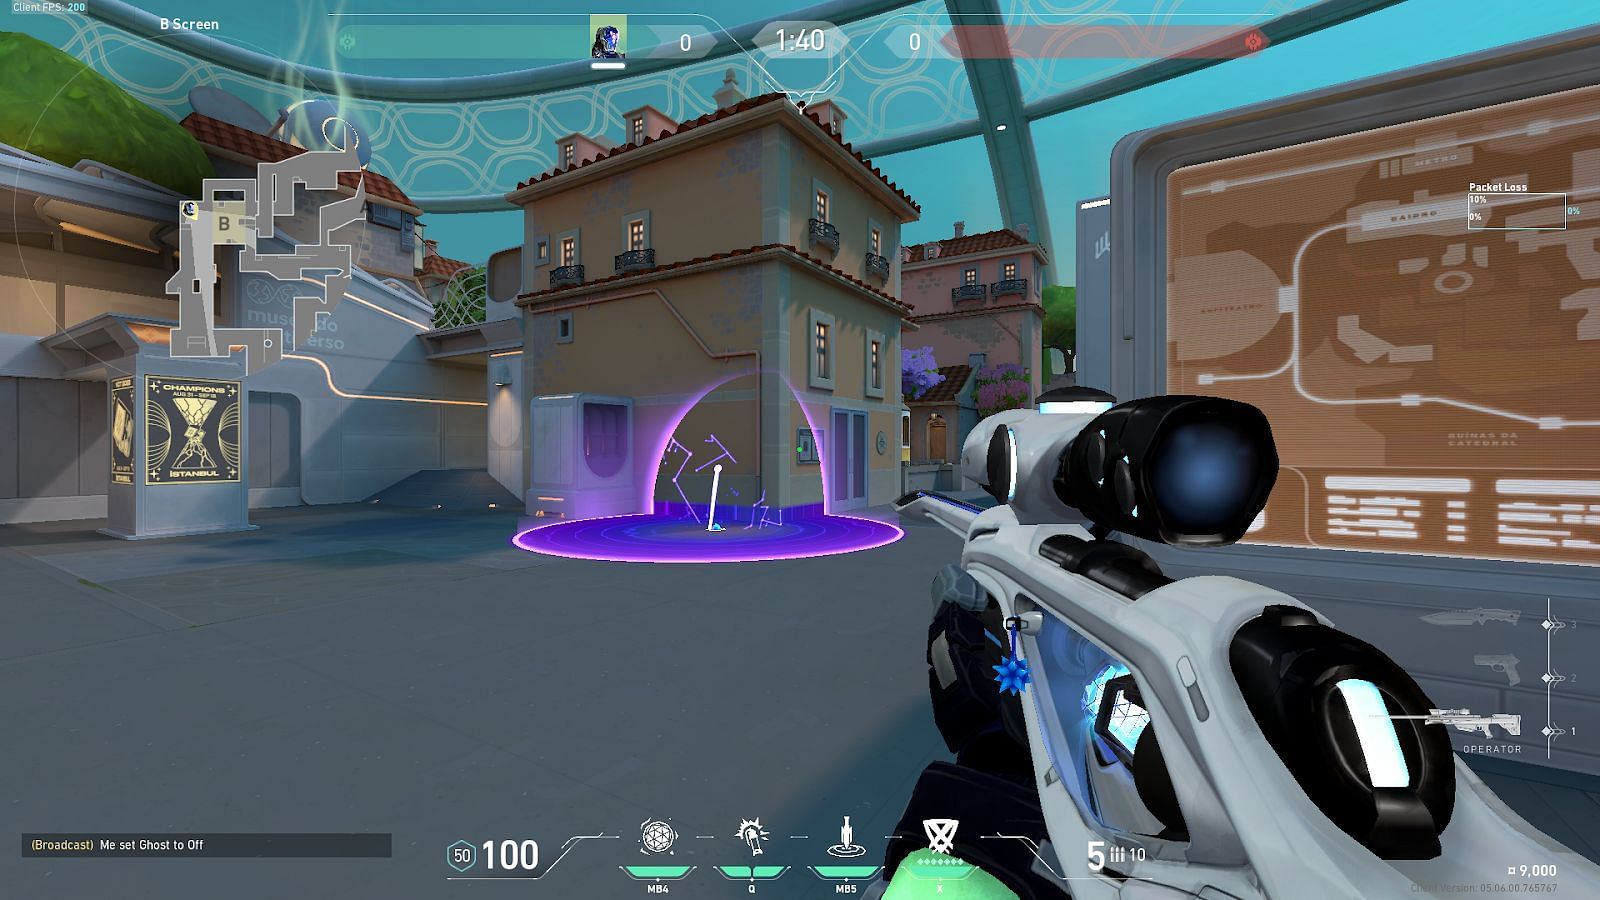
The nade will cross over the pillar and land directly on the B-Site Default Plant position.
