
'%20x='0'%20y='0'%20height='100%25'%20width='100%25'%20%0A%20%20%20%20%20%20%20%20%20%20xlink%3Ahref='data:image/jpg;base64,/9j/2wBDAAYEBQYFBAYGBQYHBwYIChAKCgkJChQODwwQFxQYGBcUFhYaHSUfGhsjHBYWICwgIyYnKSopGR8tMC0oMCUoKSj/2wBDAQcHBwoIChMKChMoGhYaKCgoKCgoKCgoKCgoKCgoKCgoKCgoKCgoKCgoKCgoKCgoKCgoKCgoKCgoKCgoKCgoKCj/wgARCAAHAAoDASIAAhEBAxEB/8QAFAABAAAAAAAAAAAAAAAAAAAABv/aAAgBAQAAAAAIQ//EABQBAQAAAAAAAAAAAAAAAAAAAAP/2gAIAQIQAAAAT//EABQBAQAAAAAAAAAAAAAAAAAAAAP/2gAIAQMQAAAAP//EAB8QAAIBBAIDAAAAAAAAAAAAAAIDAQAEBREUQRITMf/aAAgBAQABPwDm4rWJVbJVx2bO68wKTketT1TzsDewl+wQIpkR18iv/8QAFhEBAQEAAAAAAAAAAAAAAAAAAQAC/9oACAECAQE/ADTf/8QAFREBAQAAAAAAAAAAAAAAAAAAAAH/2gAIAQMBAT8Aj//Z'%3E%3C/image%3E%3C/svg%3E)
Valorant brought a highly talented community together, one that has both an abundance of time and patience. These players have successfully mastered the skill of remotely inflicting damage on enemy players using certain deployable abilities of multiple Agents.
One such Agent is Sova. He is an Initiator and his toolkit is based on being able to safely impact rounds from a distance. Lineups for such deployable abilities came in like an absolute clutch that could damage and potentially kill unsuspecting enemies.
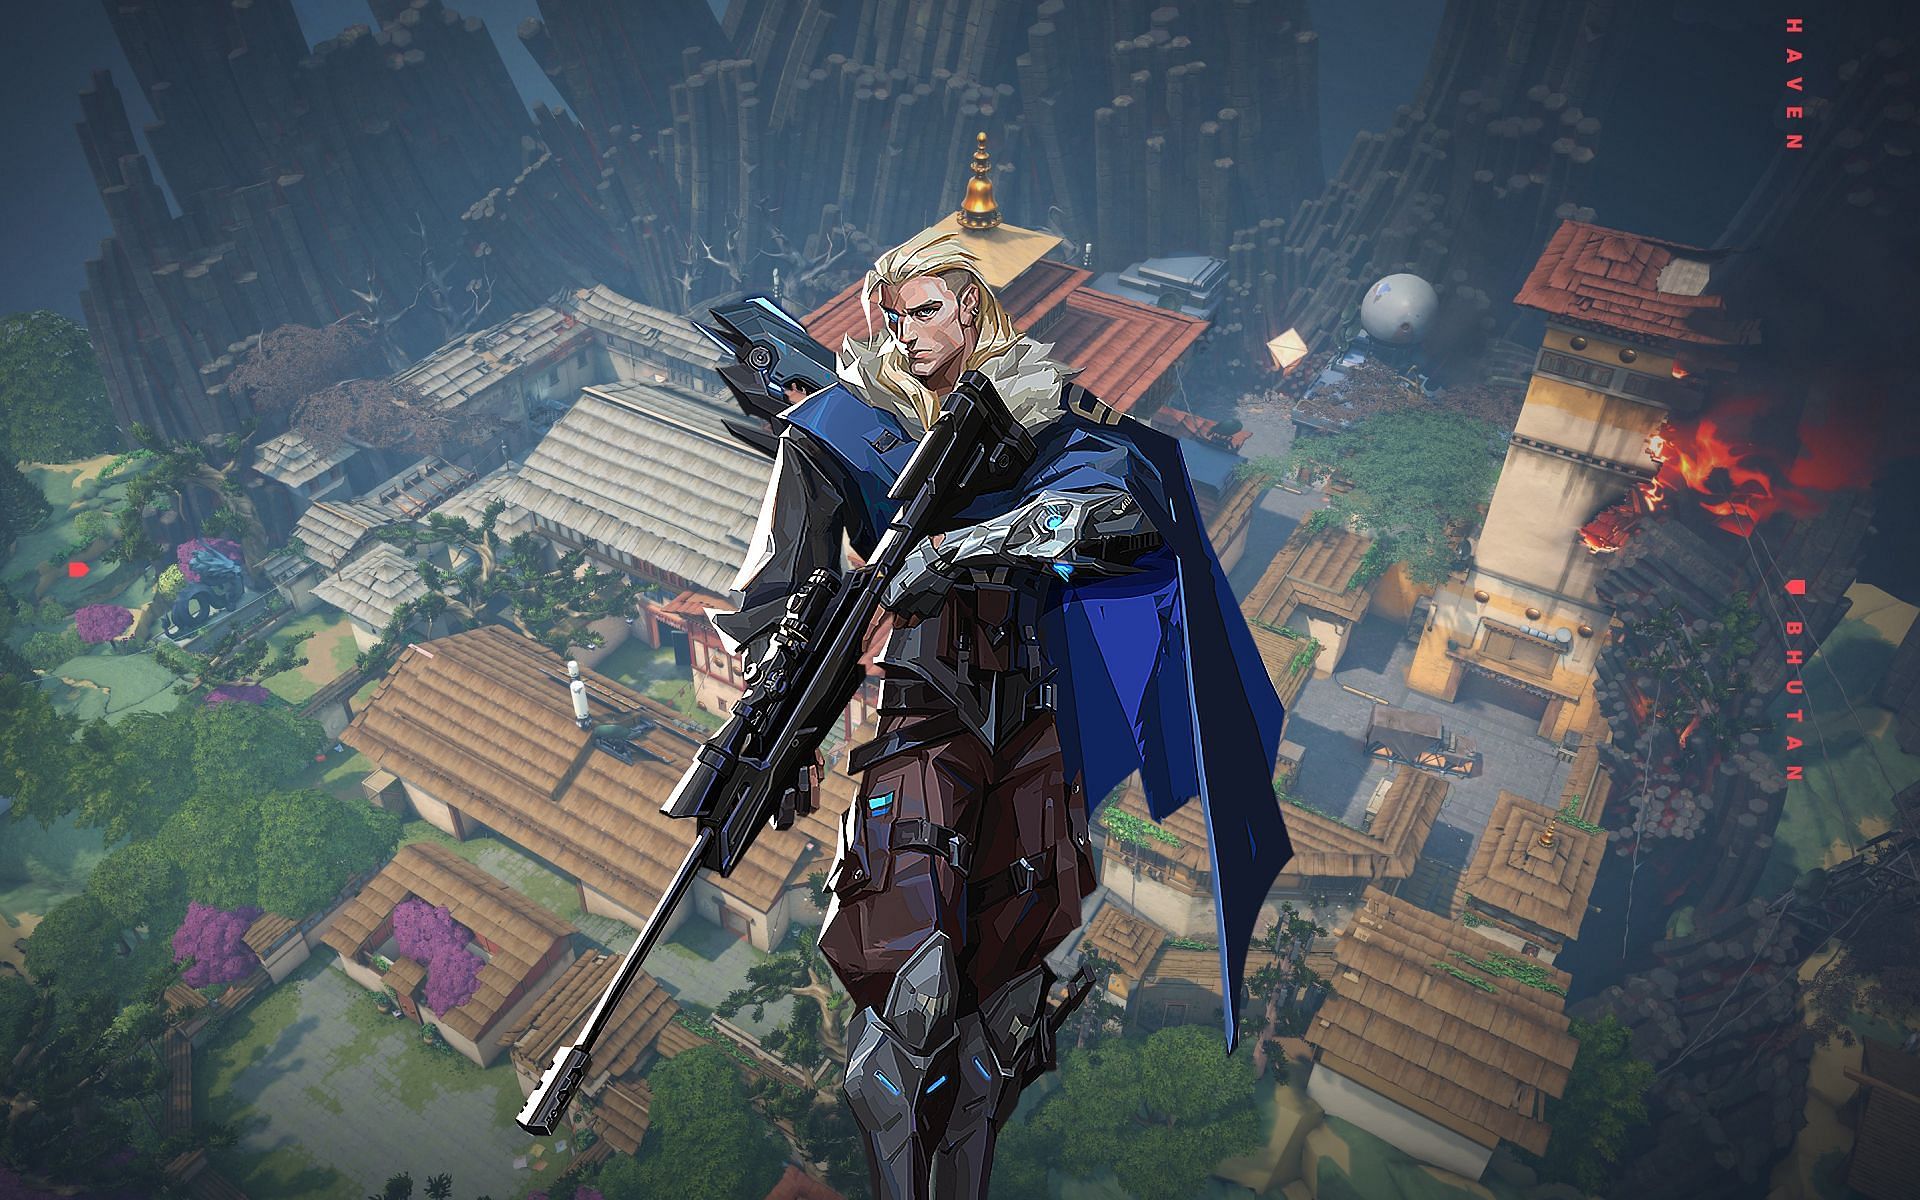
Haven is a massive map with three bomb sites, making it crucial for Sova players to know lineups to help their teammates. This Valorant map has great openings over roofs and ledges, making it one of the best maps for Sova.

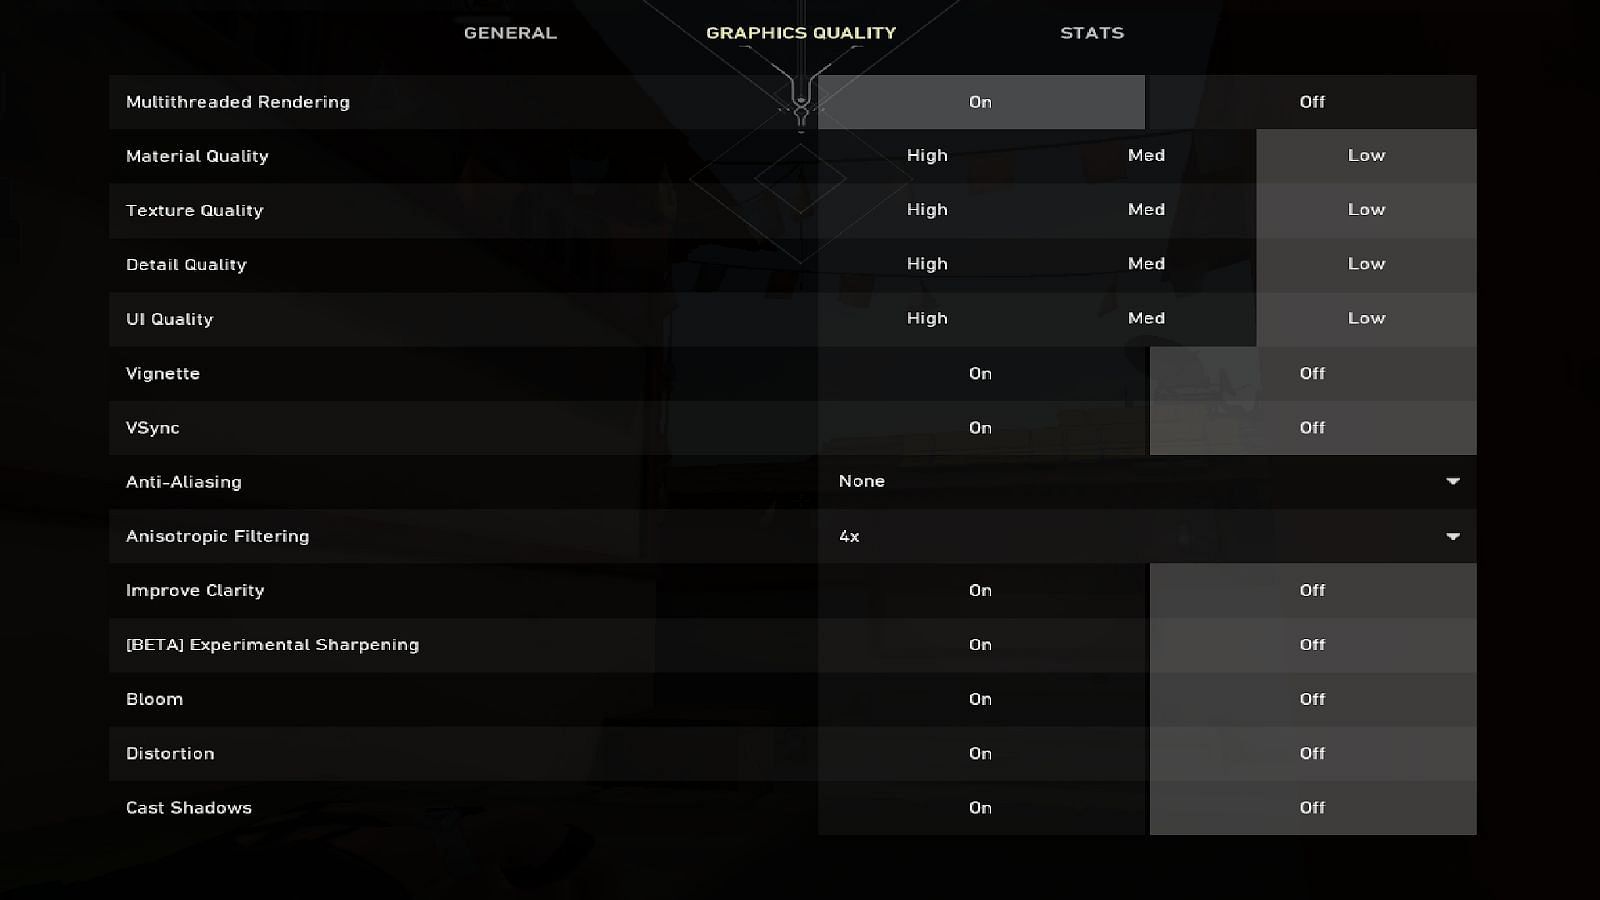
It is important to note that these lineups were performed with LOW Graphics Settings.
Let’s take a look at the most effective Sova double shock dart lineups for Valorant`s Haven.
Note: This article is subjective and reflects the author’s opinion.
Valorant Sova`s best and most crucial lineups for Haven
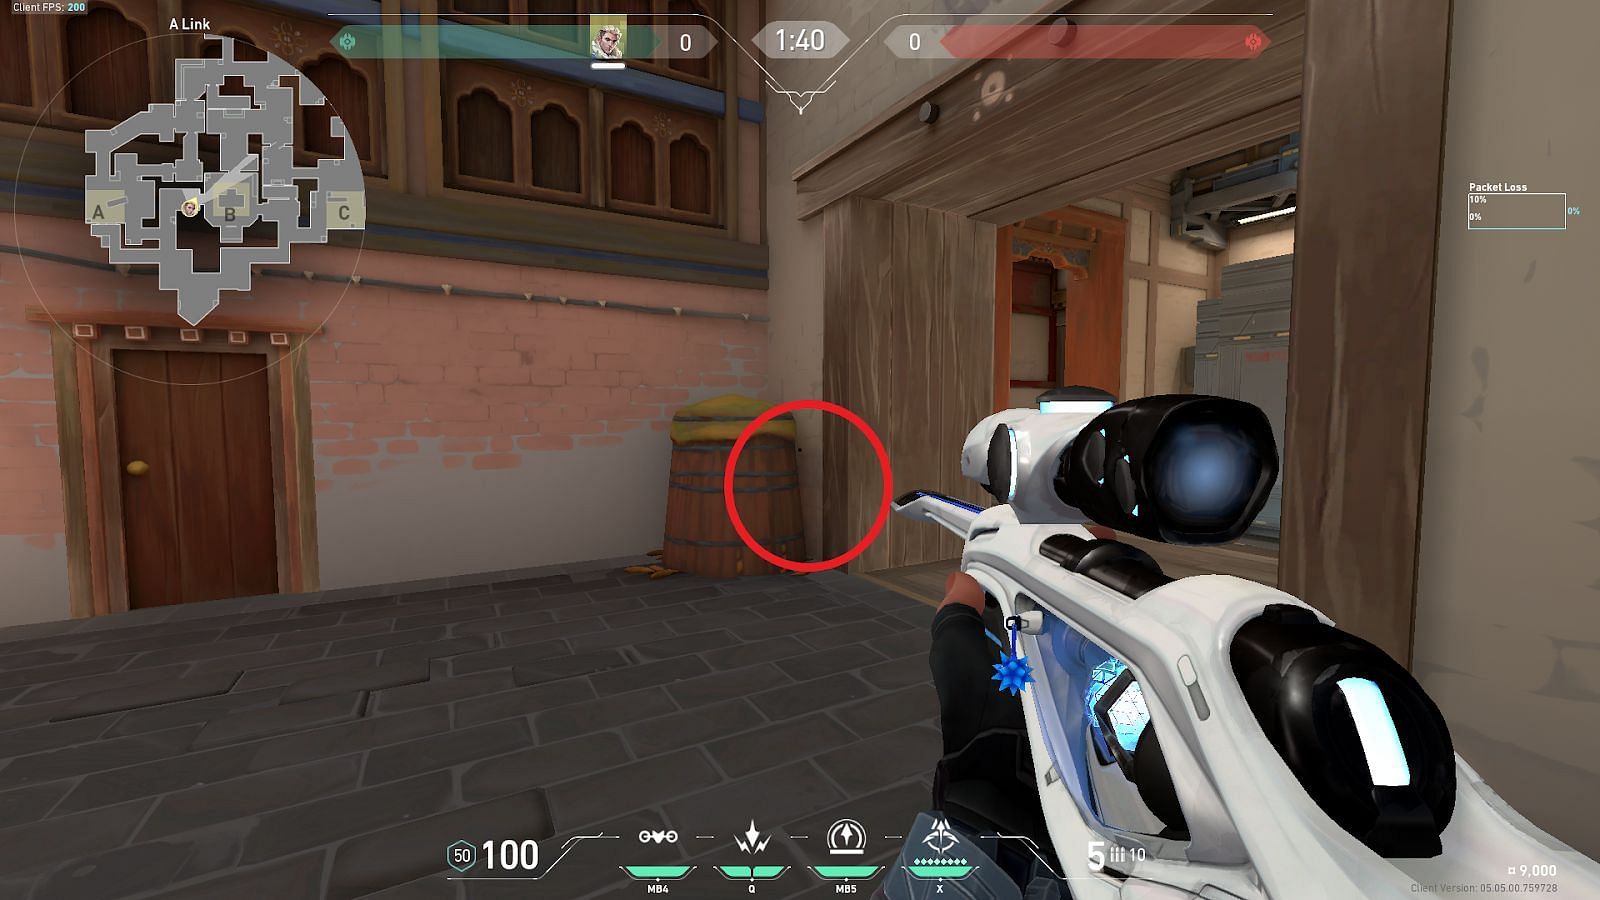
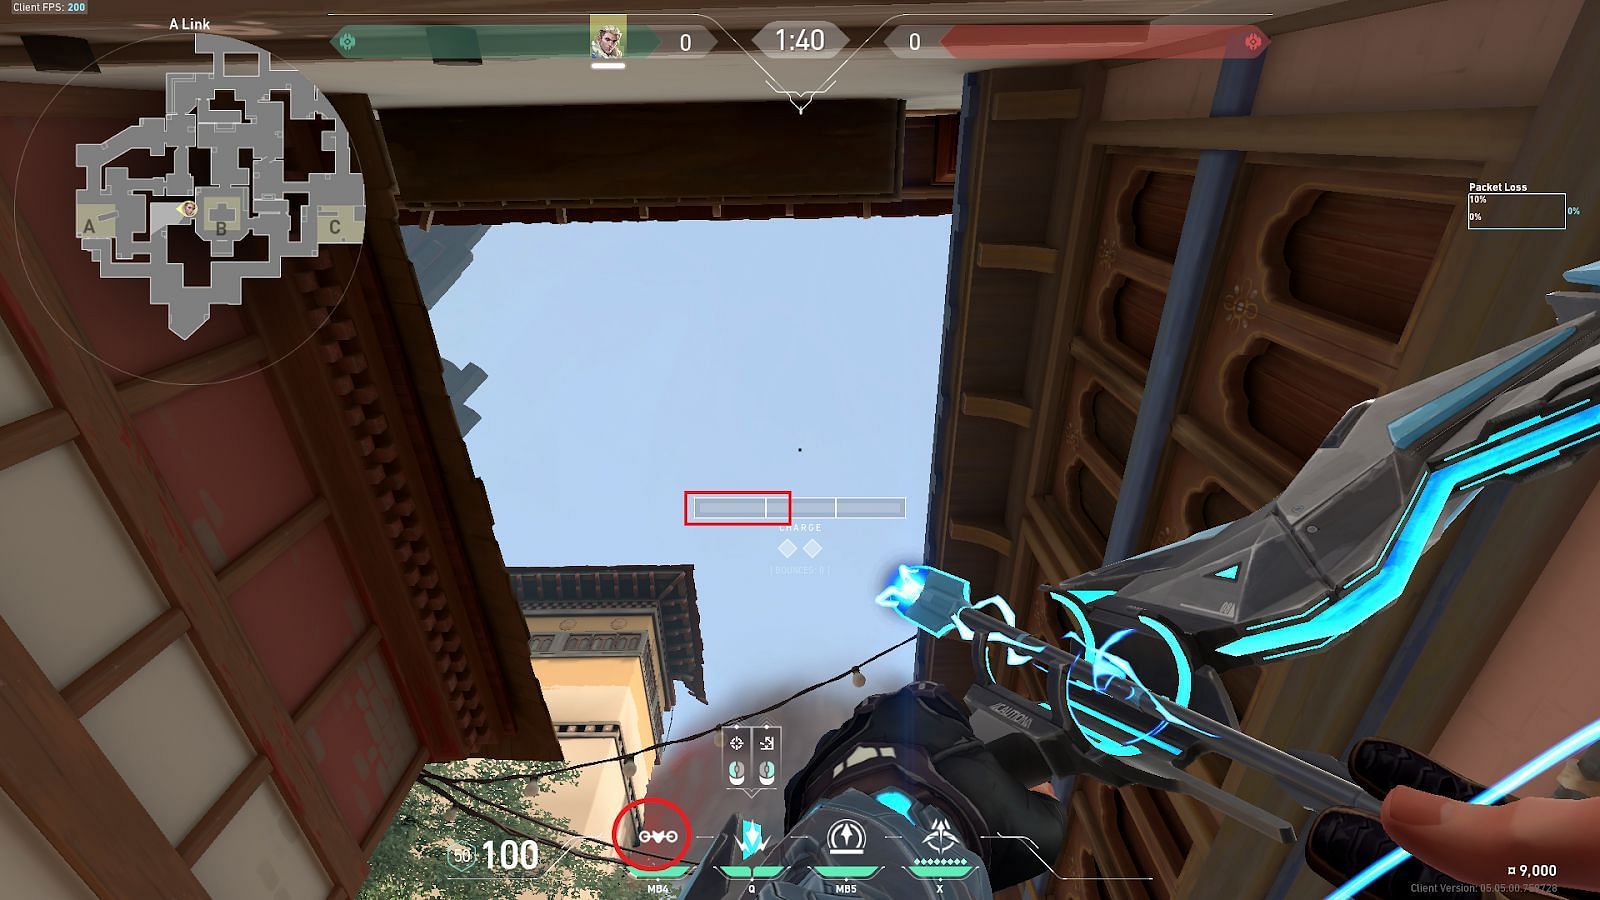
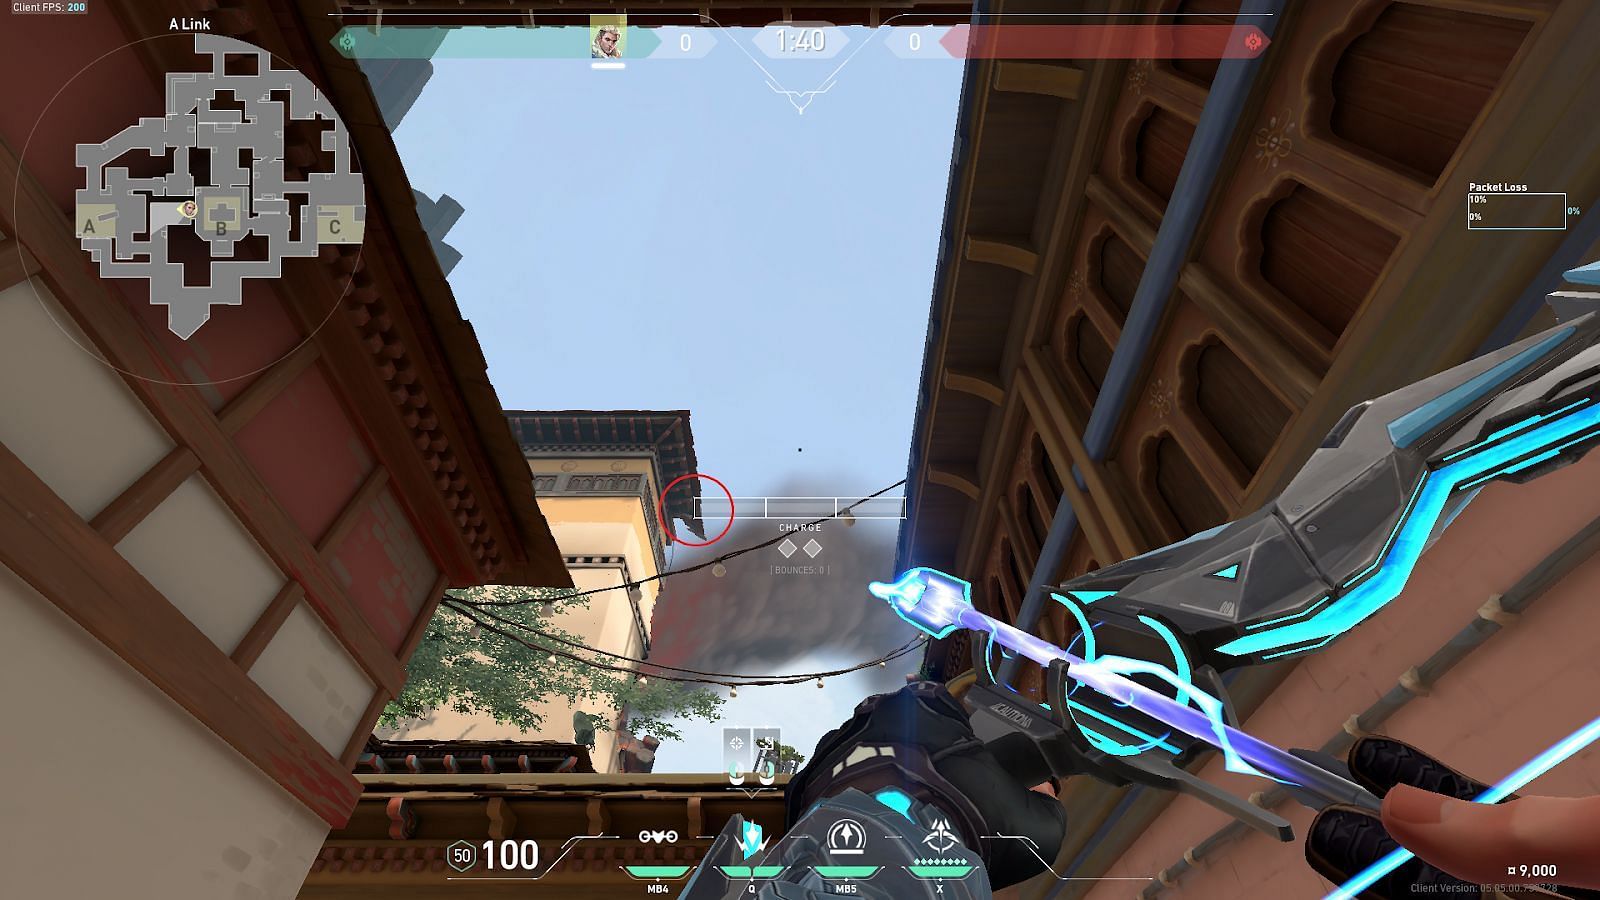
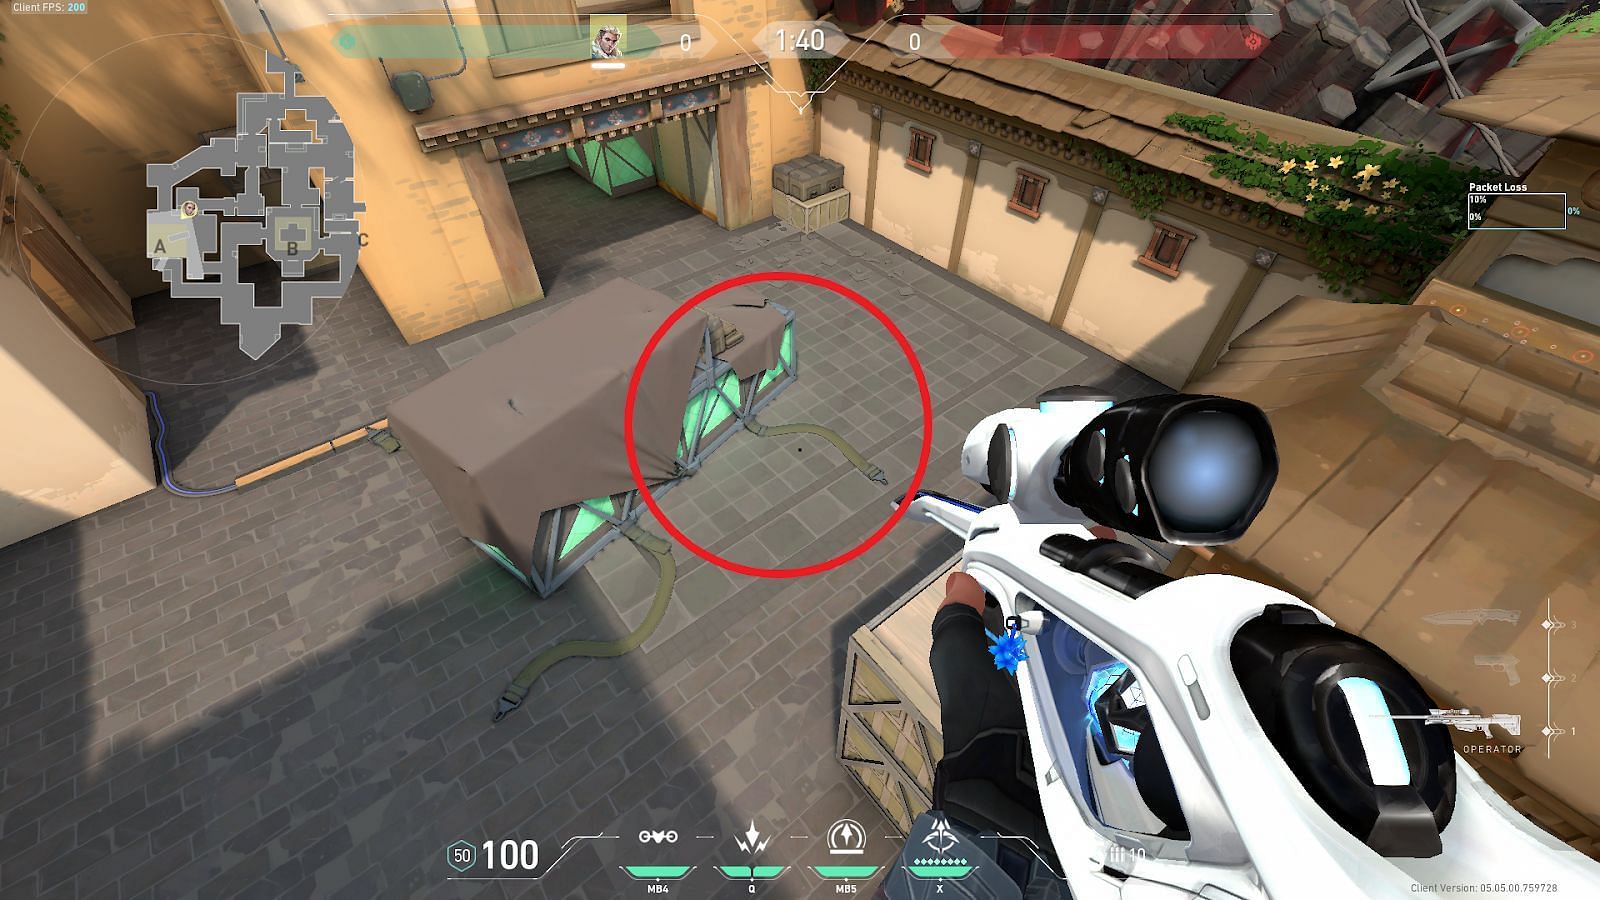
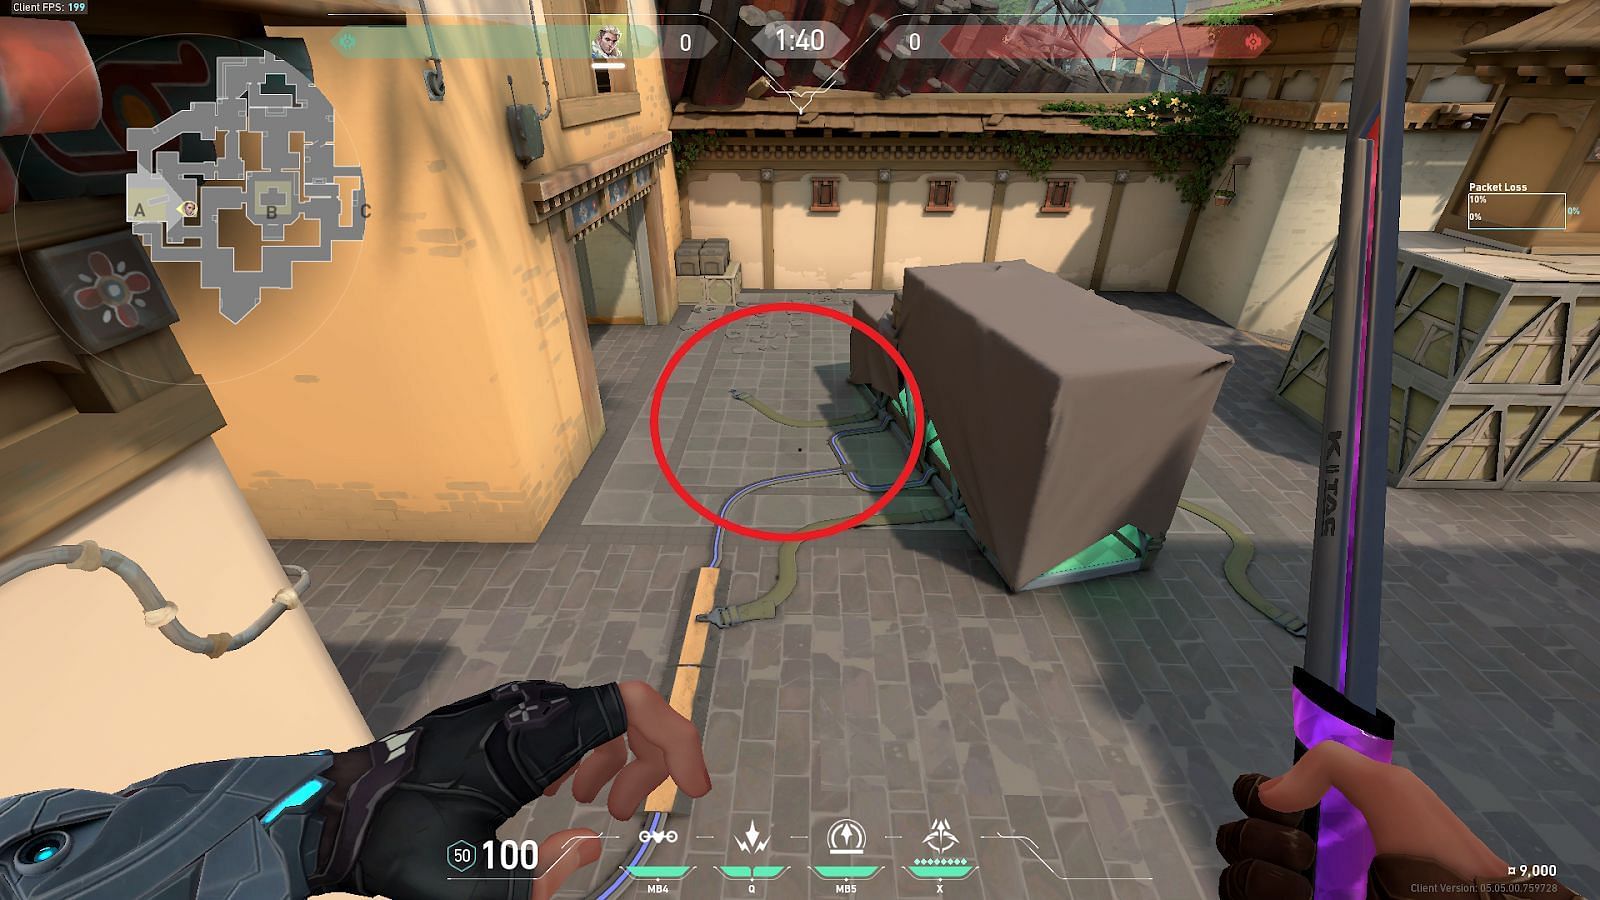
1) C-Link to C-Site Default Plant
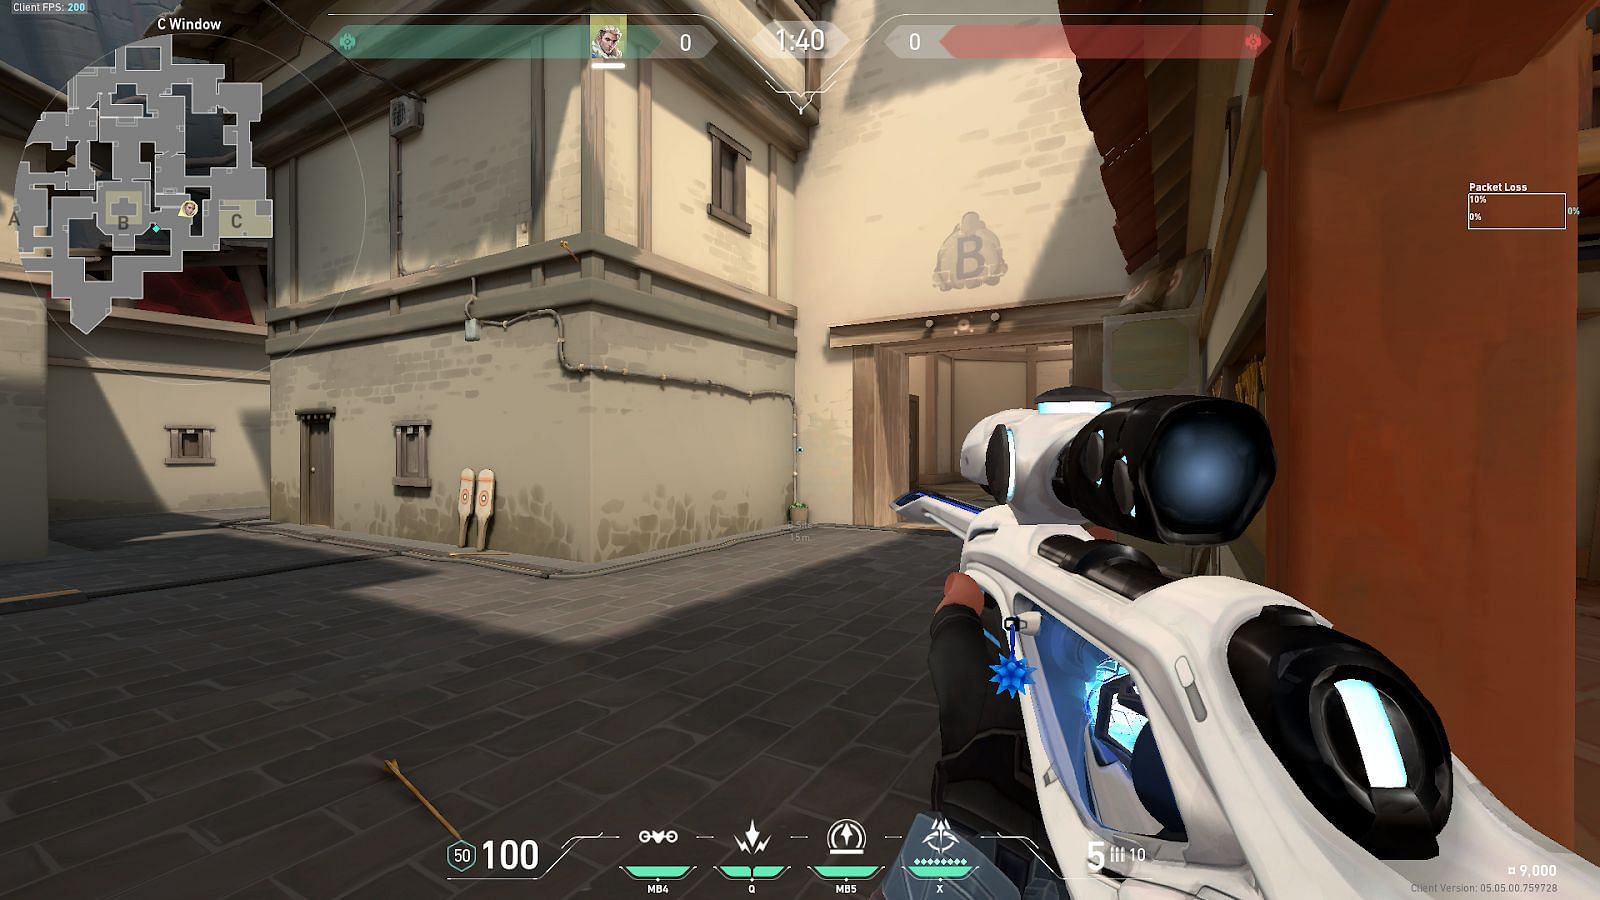
For this lineup, players will need to position themselves in C-Link and tuck themselves into the shown corner.

For the first Shock Dart, players will need to align their charge bar (shown in the circle) with the roof ledge and deploy it with one bar charge (shown in the rectangle).

Players will then need to align the mouse indicator above the Shock Dart icon (shown in the circle) above the banner on the wall. The ability needs to be deployed with a simple left click.
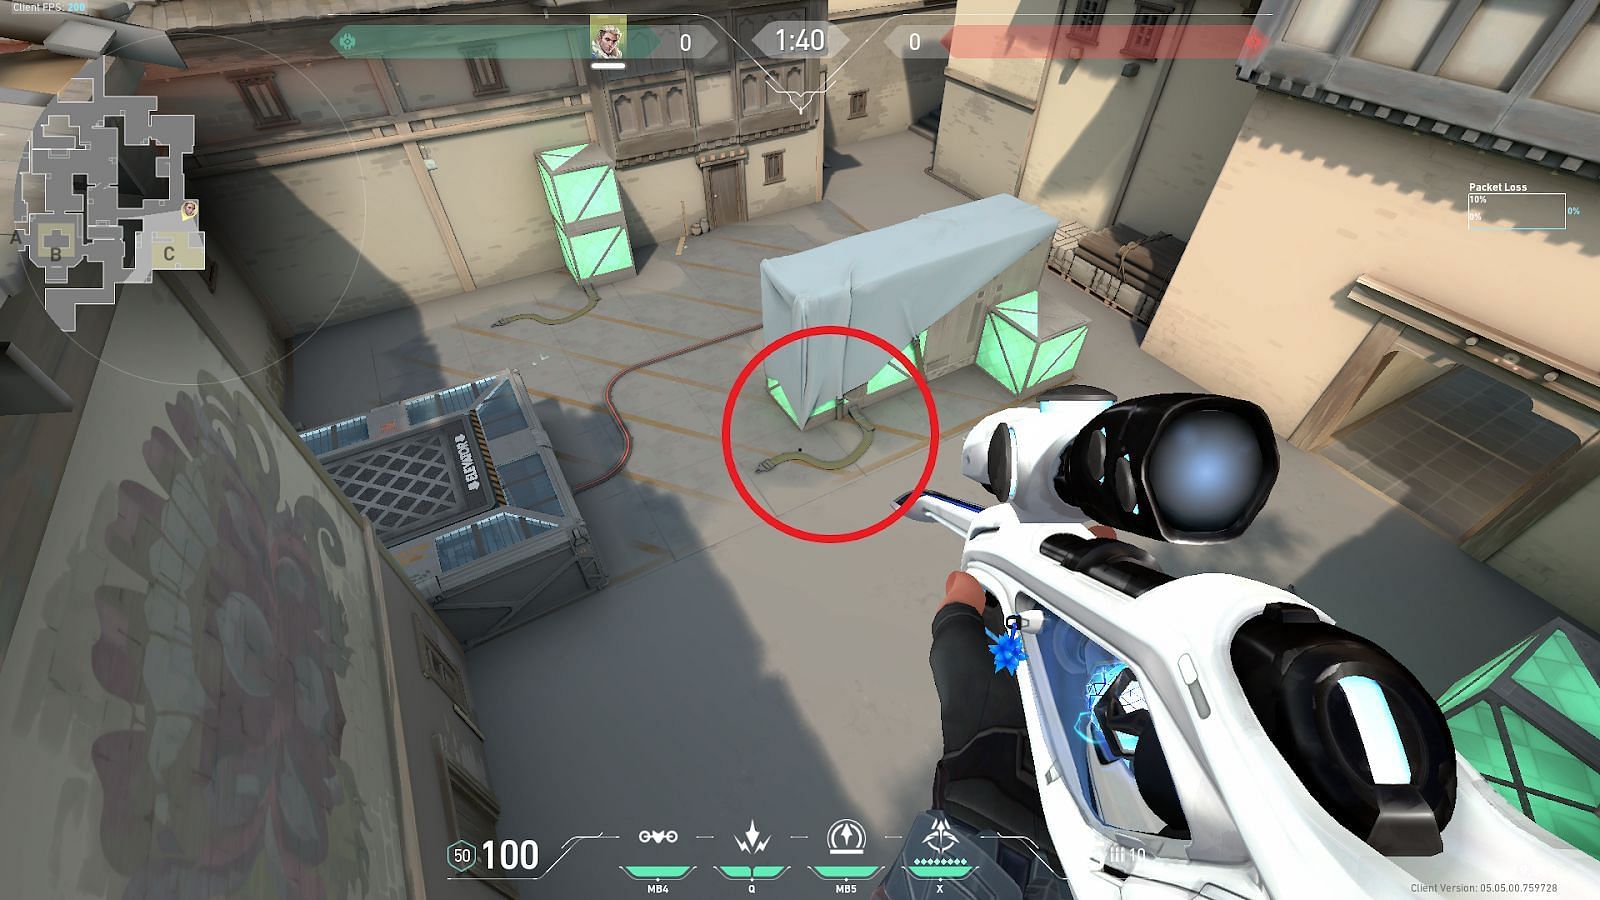
Consecutively deploying both darts will result in them landing simultaneously in the C-Site Default Plant position.
2) A-Link to A-Site Default Plant
For this lineup, players need to position themselves in A-Link and tuck themselves in the corner shown.
For the first Shock Dart, players need to align the Owl Drone icon (shown in the circle) along the ledge on the wall and deploy it with one bar charge (shown in the rectangle).
Players need to align the charge bar (shown in the circle) with the roof of the building in A-Site and deploy the second Shock Dart with a simple left click.
Consecutively deploying both darts will result in them landing simultaneously in the A-Site Default Plant position.
3) A-Long to A-Site Radianite boxes
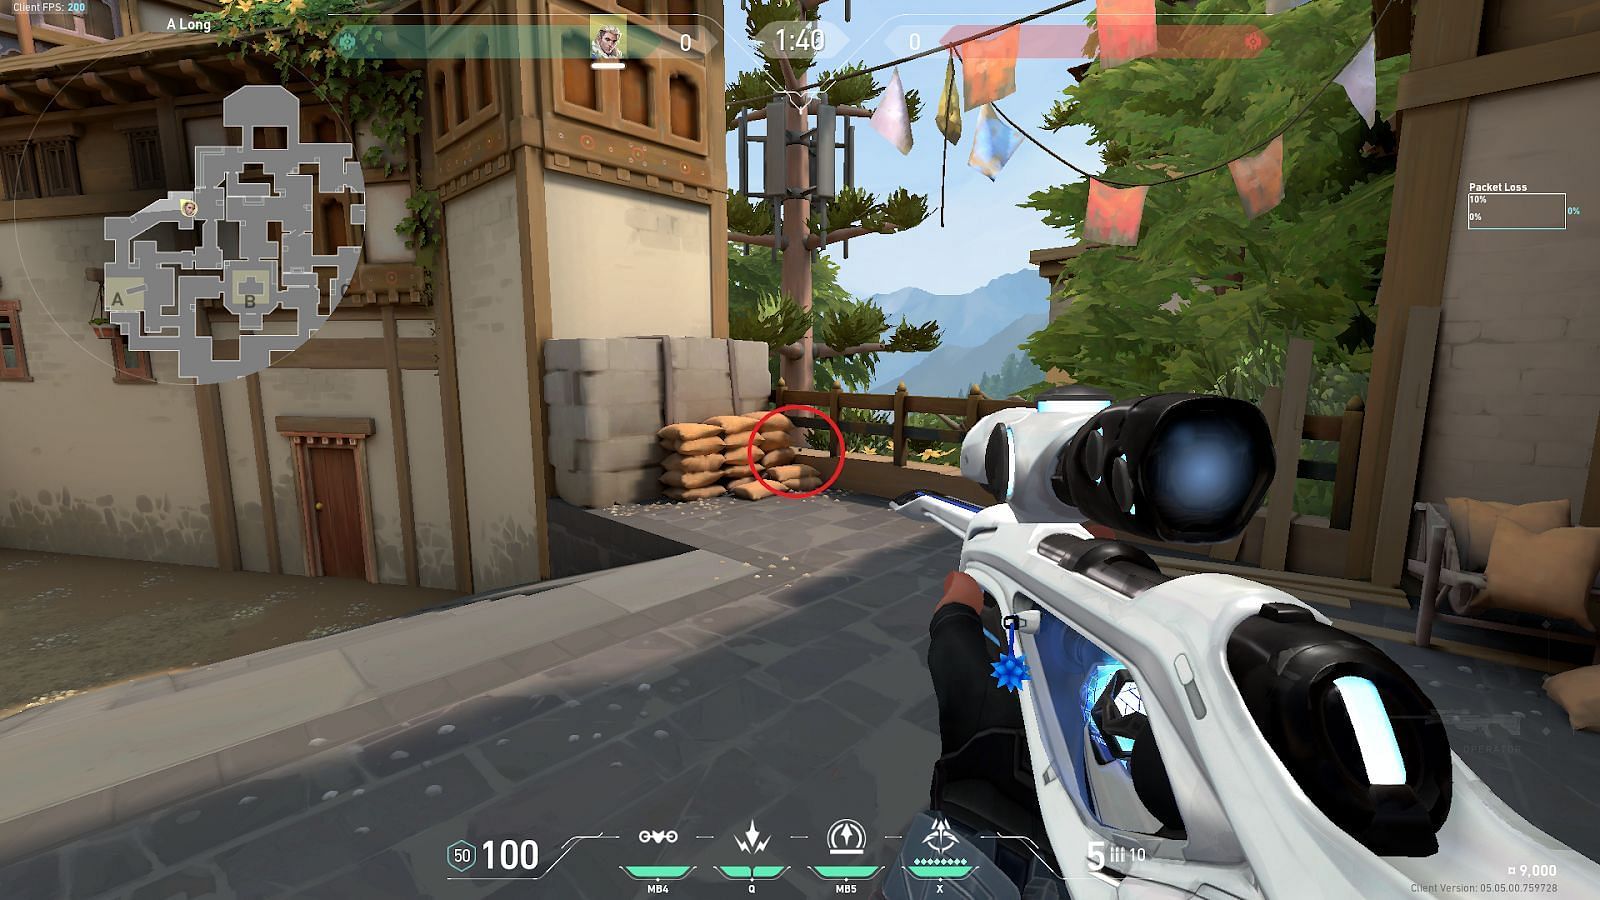
For this lineup, players need to position themselves in A-Long outside A-Lobby and tuck themselves into the shown corner.

This lineup will use the Heads-Up Display (HUD) to align for the perfect shot. For the first Shock Dart, players will need to position the left-most end of the HUD line under the HP count (shown in the circle) just below the window corner as shown and deploy the ability with a two-bar charge (shown in the rectangle).
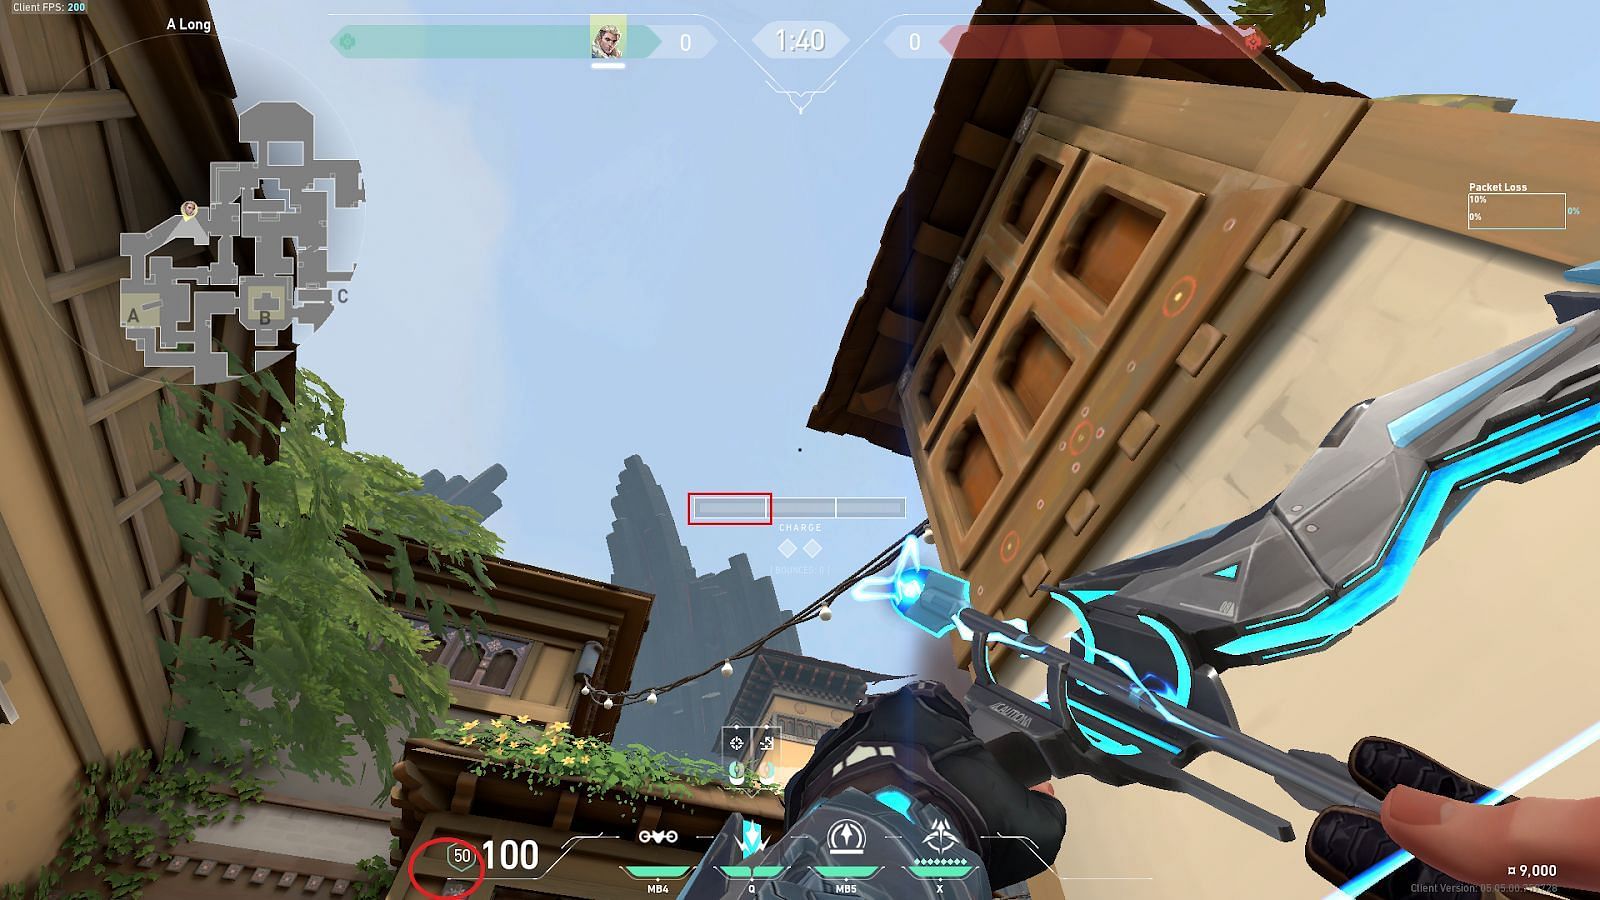
For the second Shock Dart, players need to align the same with the flower tile on the wall (shown in the circle) and deploy the ability with a single bar charge (shown in the rectangle).
Consecutively deploying both darts will result in them landing simultaneously in the A-Site behind the Radianite boxes.
4) C-Long to C-Site Behind Platform
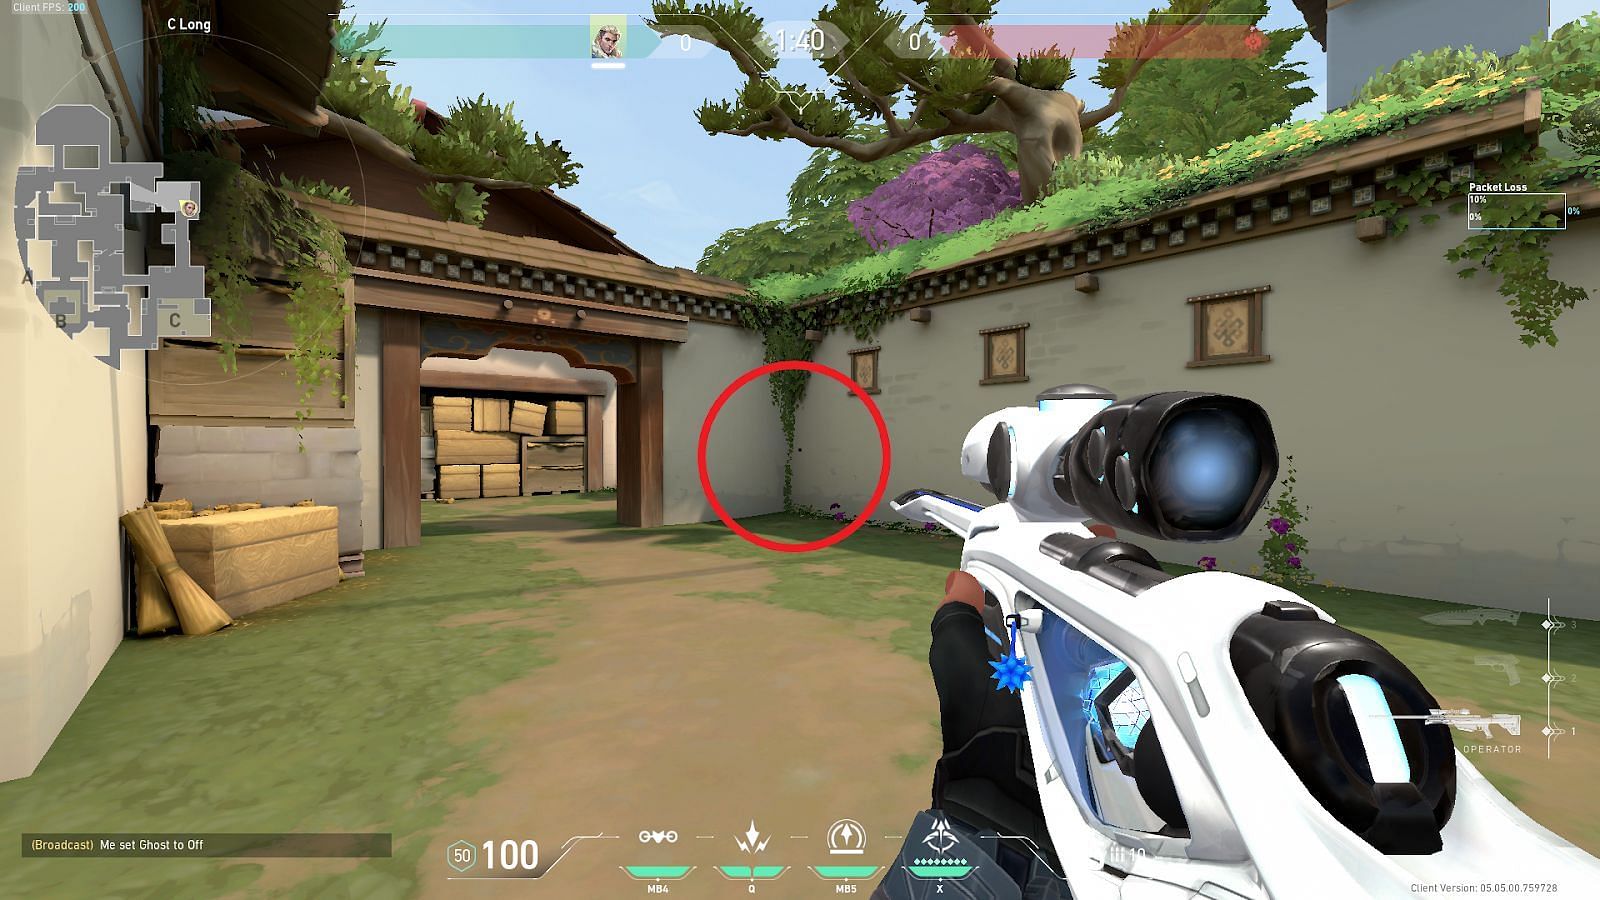
For this lineup, players will need to position themselves in C-Long and tuck themselves into the shown corner.
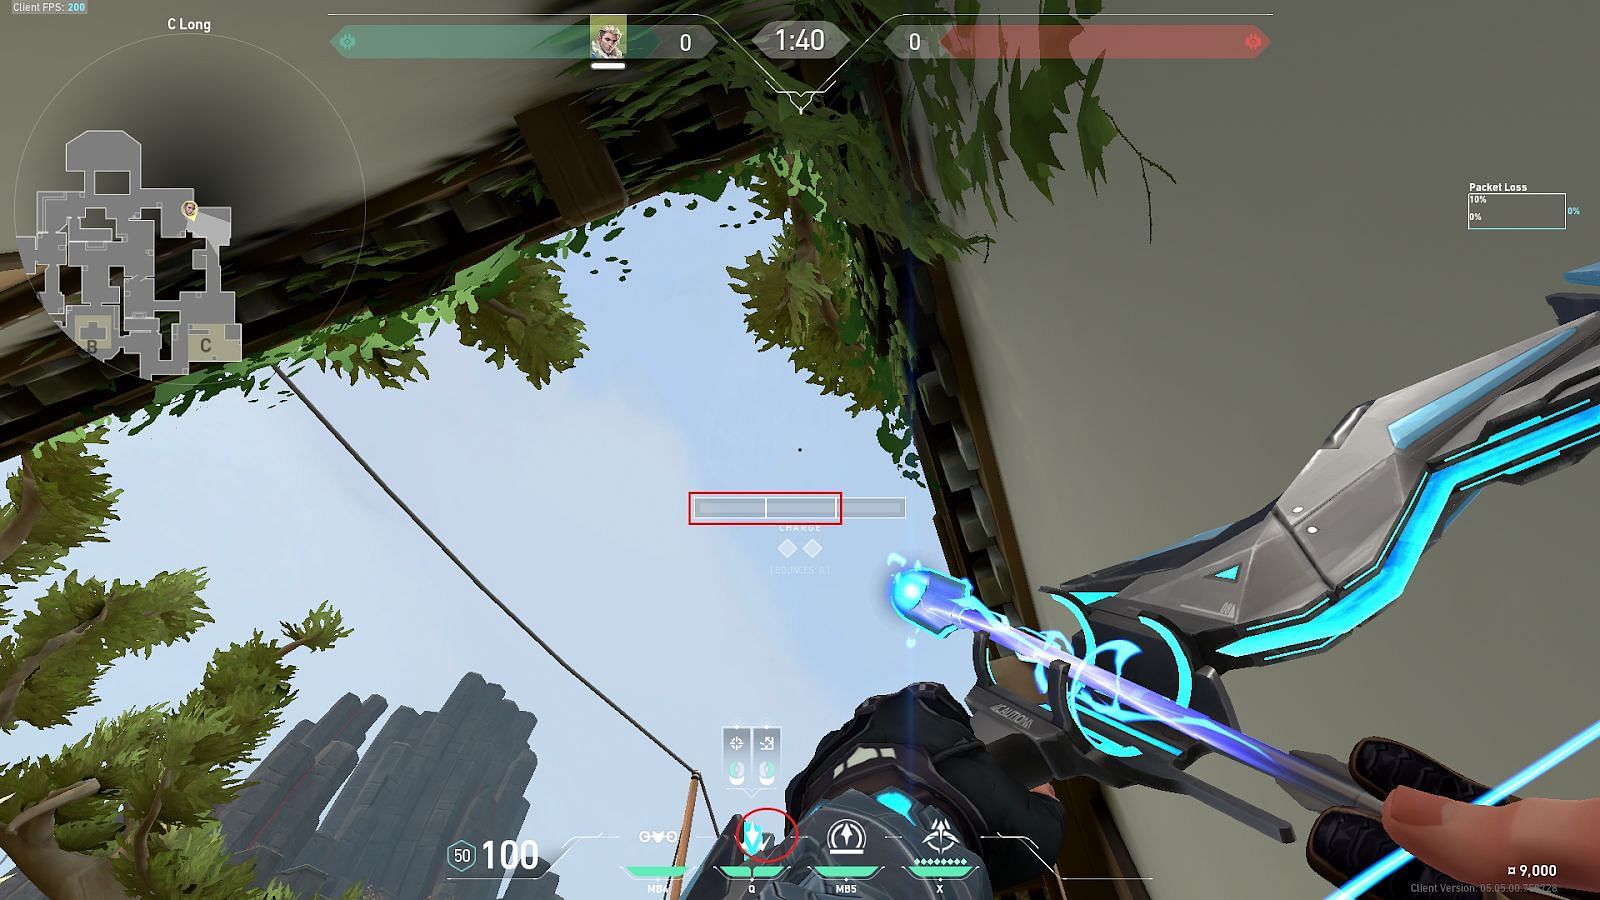
For the first Shock Dart, players need to align the right corner of the Shock Dart ability icon (shown in the circle) with the top right corner of the distant mountain. The ability needs to be deployed with two bar charges (shown in the rectangle).
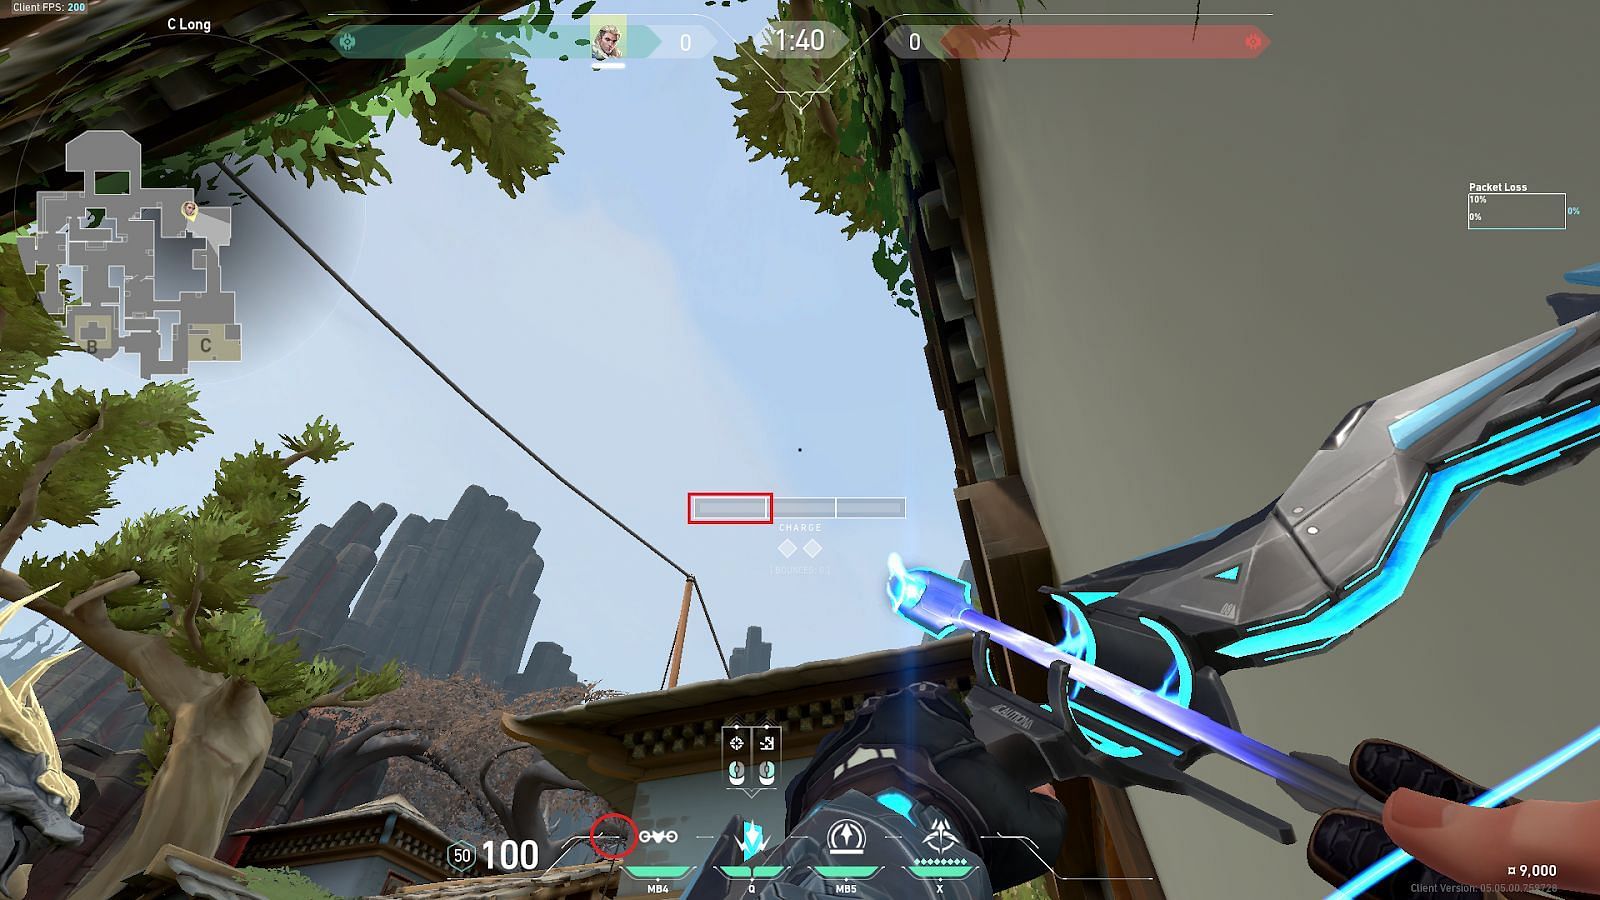
Players will need to align the HUD line on the right of the HP count (shown in the circle) with the branch at the point where the wire intersects it. The second Shock Dart needs to be deployed with a single bar charge.
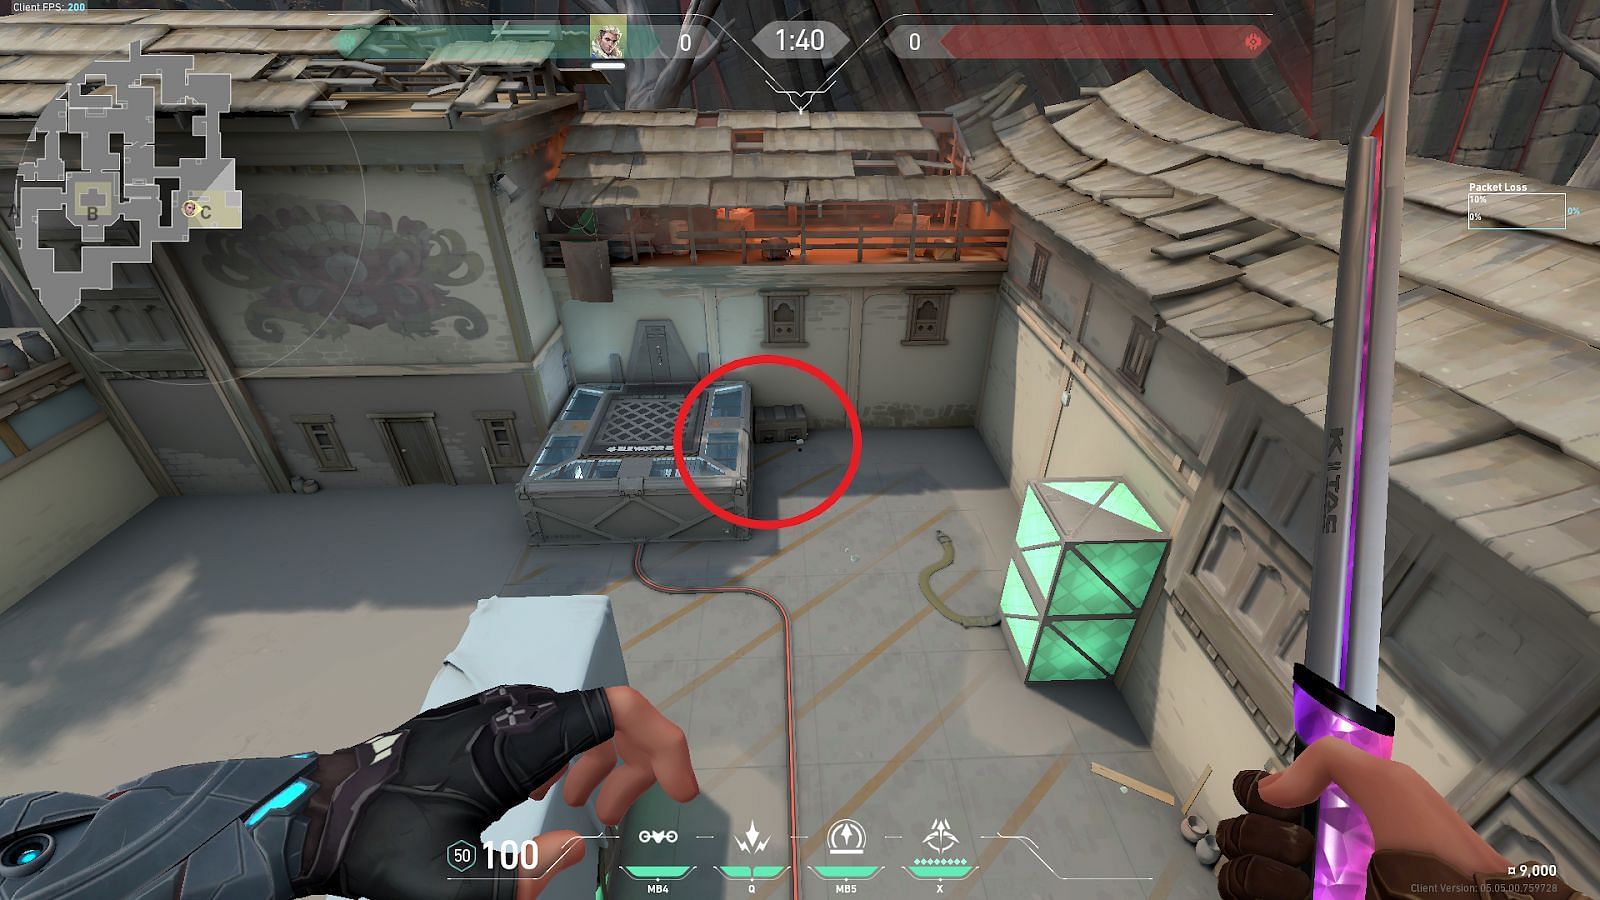
Consecutively deploying both darts will result in them landing simultaneously on the C-Site behind the platform.
Players in Valorant carry a heavy while weight selecting an Agent to play. The role of an Initiator is one that not most players can carry. Finding positions and disorienting enemies in an area for the team to execute a strategy is no easy task. It is crucial for players to understand their role and the impact they can have on a match accordingly.
