
'%20x='0'%20y='0'%20height='100%25'%20width='100%25'%20%0A%20%20%20%20%20%20%20%20%20%20xlink%3Ahref='data:image/jpg;base64,/9j/2wBDAAYEBQYFBAYGBQYHBwYIChAKCgkJChQODwwQFxQYGBcUFhYaHSUfGhsjHBYWICwgIyYnKSopGR8tMC0oMCUoKSj/2wBDAQcHBwoIChMKChMoGhYaKCgoKCgoKCgoKCgoKCgoKCgoKCgoKCgoKCgoKCgoKCgoKCgoKCgoKCgoKCgoKCgoKCj/wgARCAAGAAoDASIAAhEBAxEB/8QAFgABAQEAAAAAAAAAAAAAAAAAAAUG/8QAFAEBAAAAAAAAAAAAAAAAAAAABP/aAAwDAQACEAMQAAAAz0YYH//EACEQAAECBQUBAAAAAAAAAAAAAAIBAwAFERIhBBMxMnHh/9oACAEBAAE/AH5m+3LWXUoYt3KV3JIiJn3MGepIyLePK17fI//EABcRAAMBAAAAAAAAAAAAAAAAAAABAiH/2gAIAQIBAT8AidZ//8QAGBEAAgMAAAAAAAAAAAAAAAAAAgMAEiH/2gAIAQMBAT8Aa46js//Z'%3E%3C/image%3E%3C/svg%3E)
To kick off Episode 7 Act 2, Valorant introduced the Sunset map on August 29, 2023. This map features a dual-site layout and includes a central area with closely positioned spawn barriers, as well as a network of complex, interconnecting alleys, all within the Los Angeles setting. While it's still too early to make predictions about which Agents will dominate on this map, there is one who would thrive on it.
Chamber excels at aggressive yet advantageous defensive positions and serves as a valuable lurker during attacks on Sunset due to the Valorant map's design. If you are eyeing the Match MVP title in your next ranked Sunset match, we've got you covered with this excellent setup guide for Chamber.
Note: Some aspects of this article are subjective and solely reflect the opinions of the writer
Chamber A site defensive setup on Sunset in Valorant
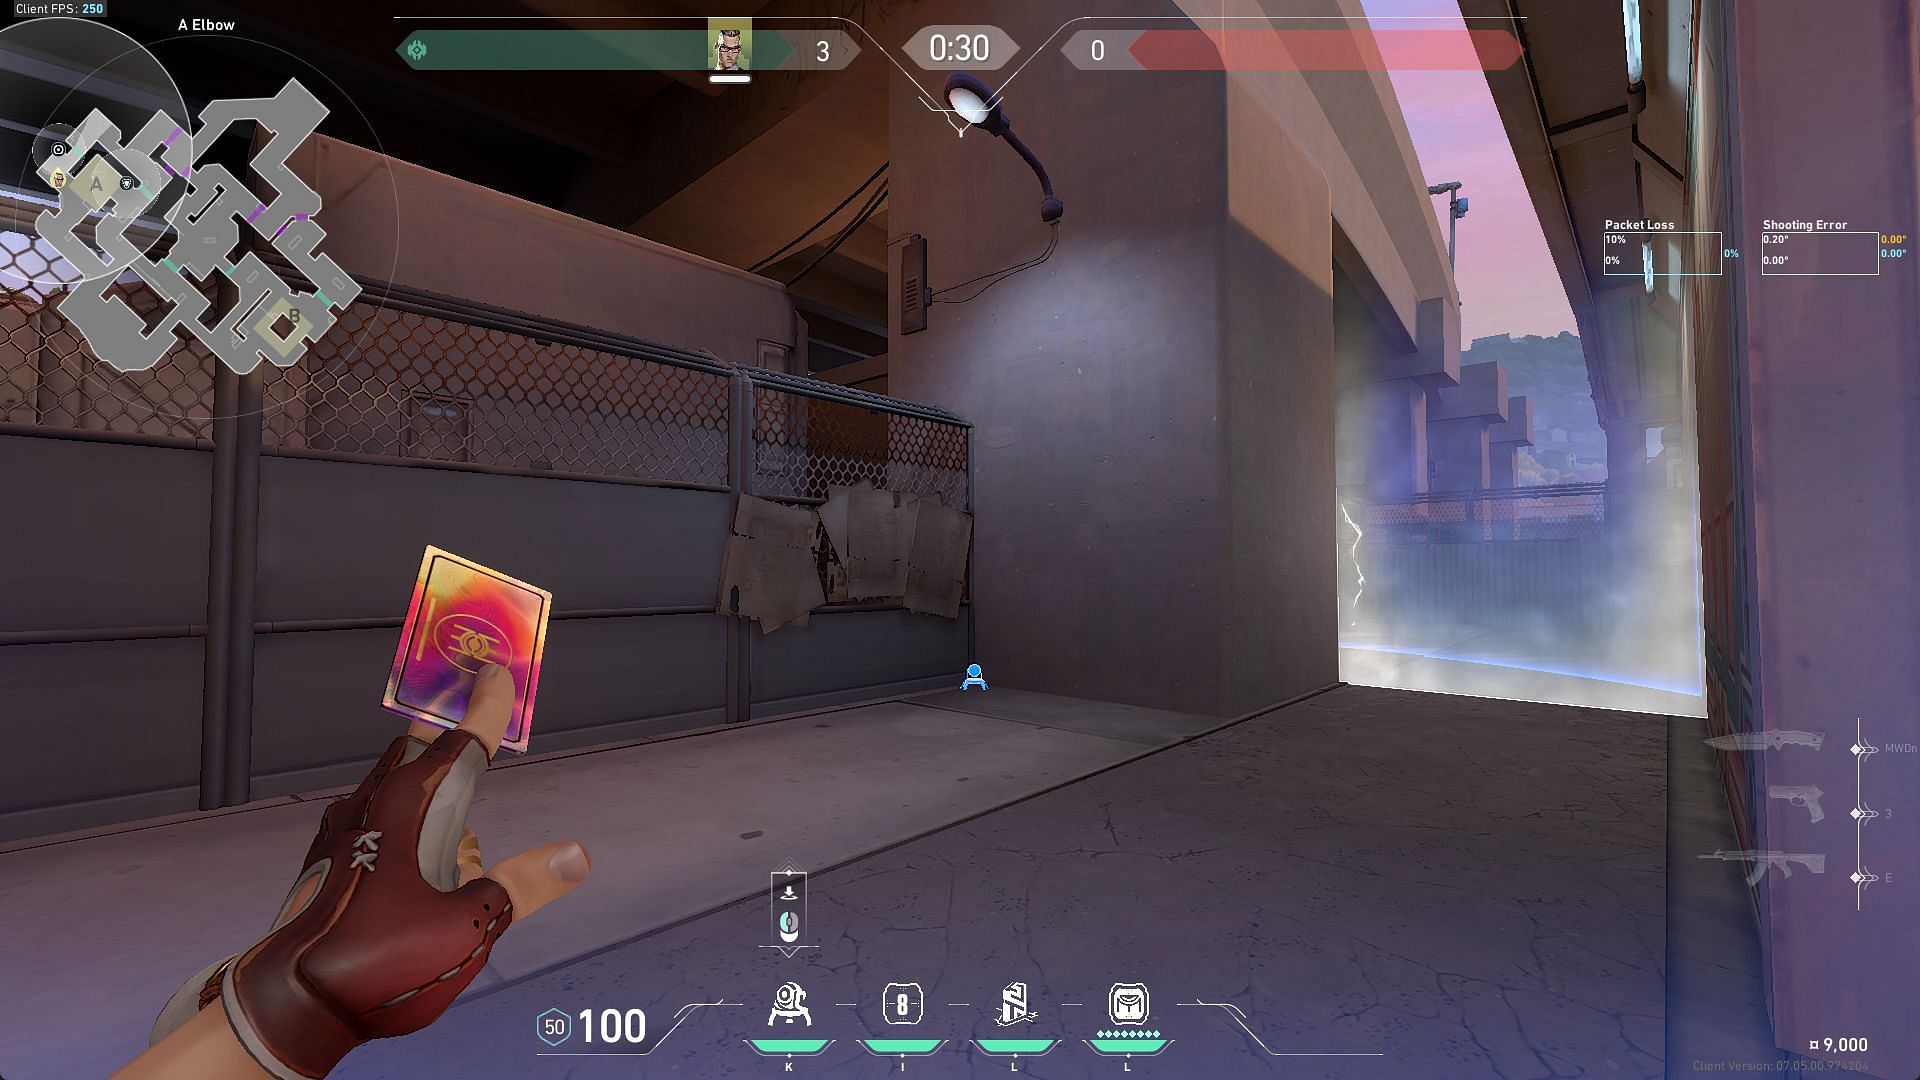
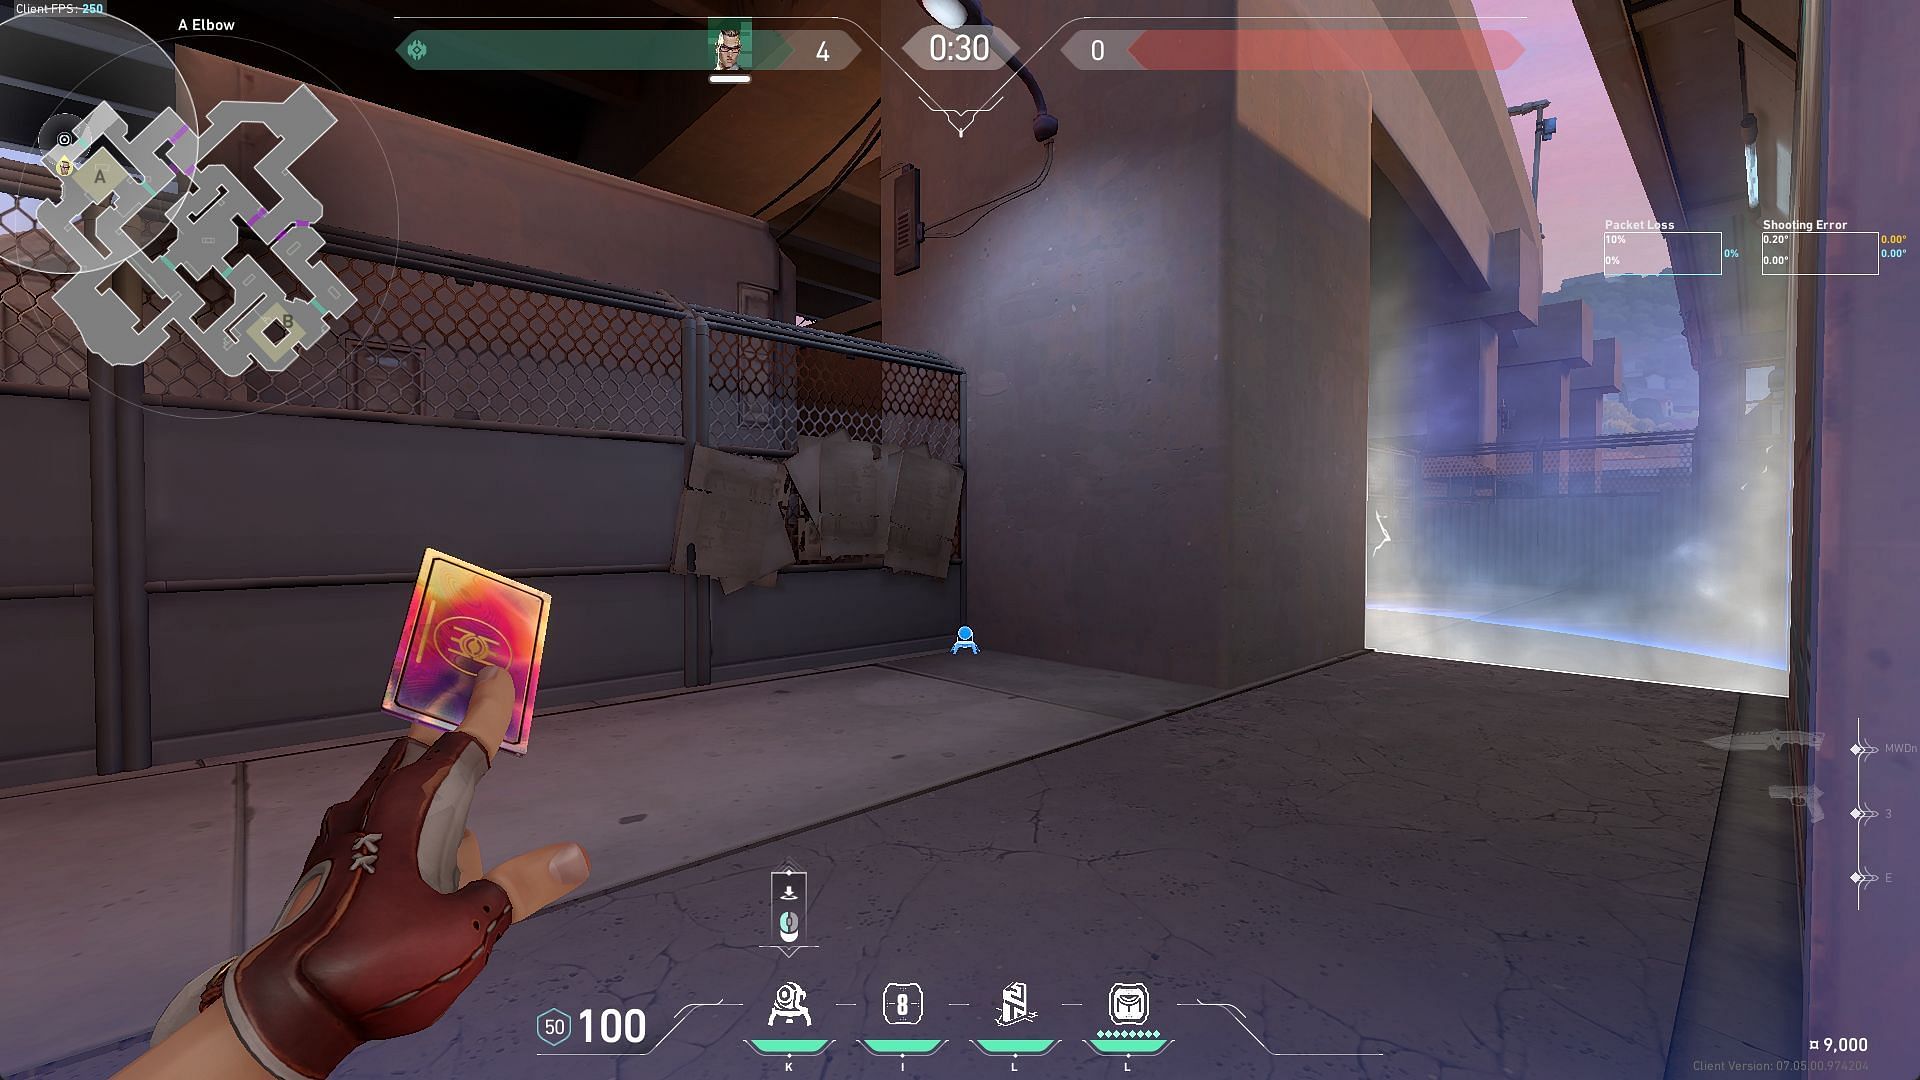
1) Setup to hold A Elbow
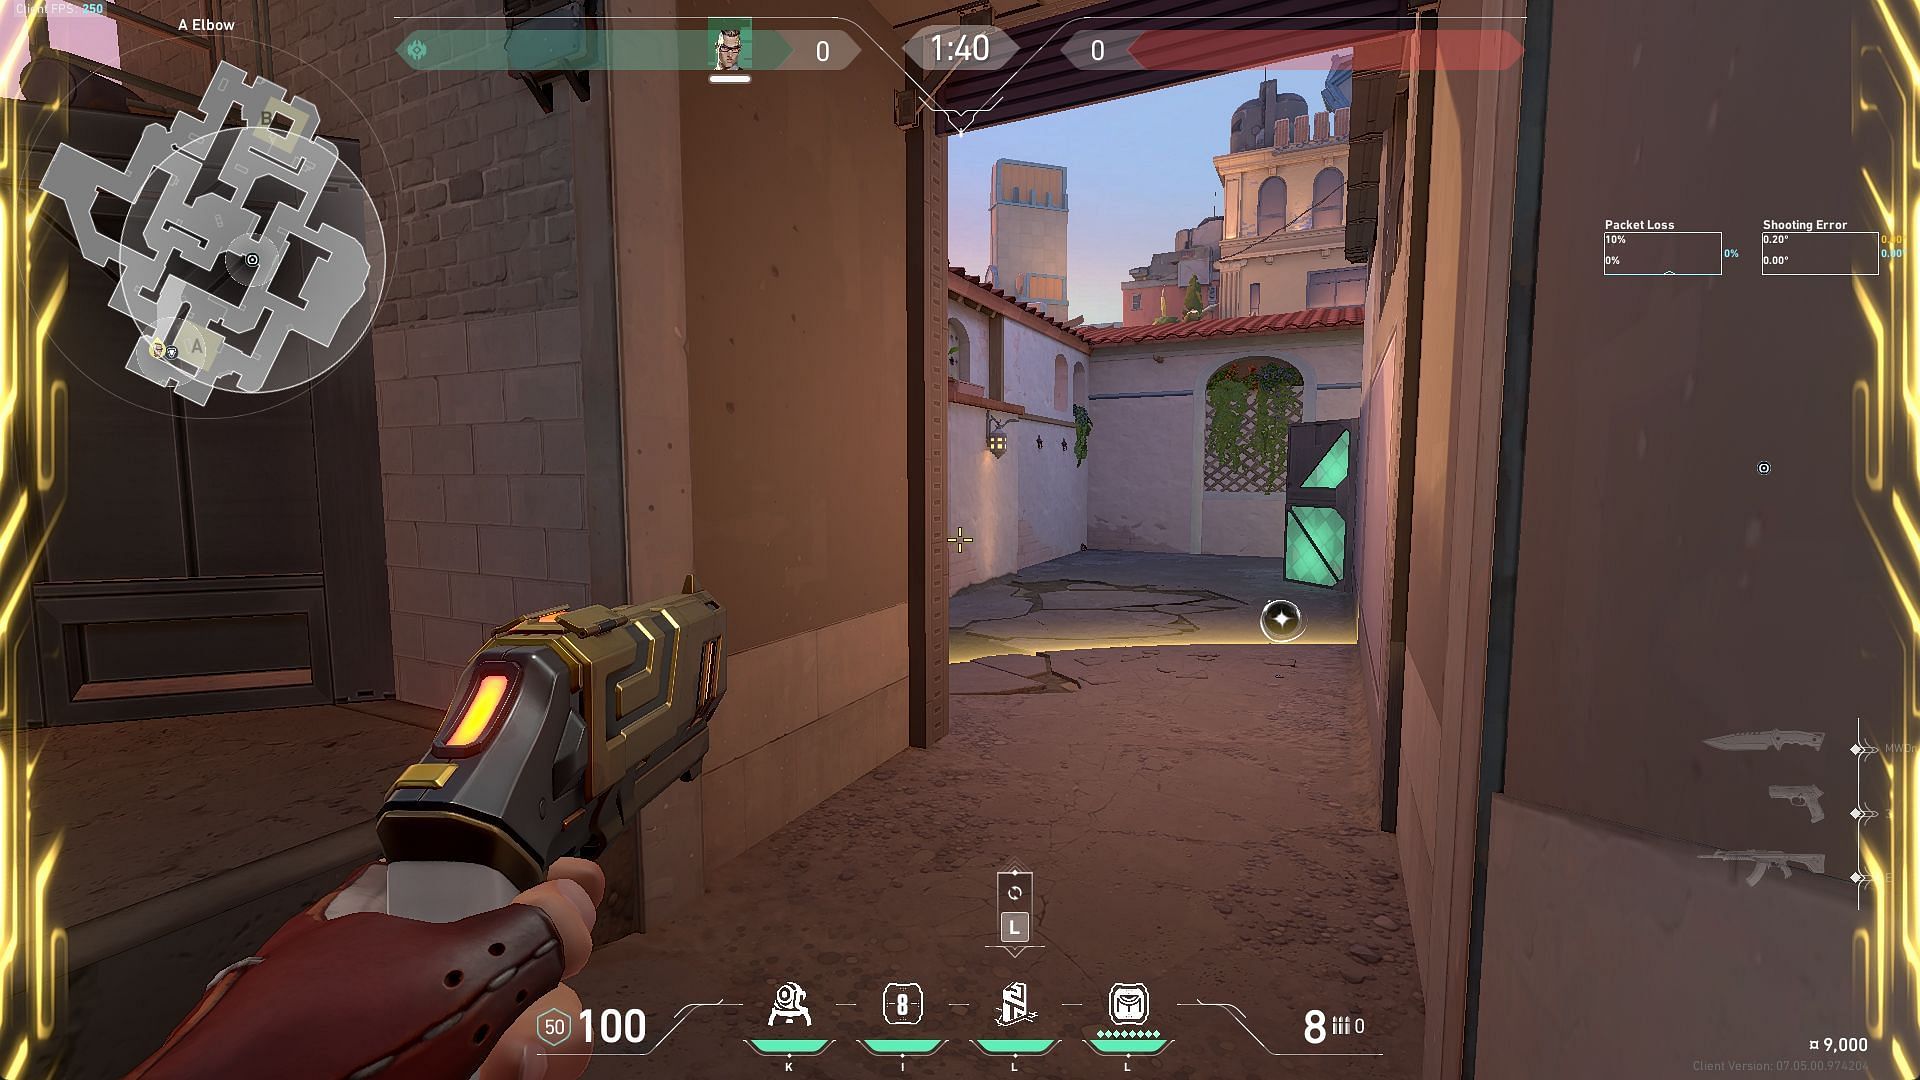
Chamber excels in defending A Elbow on Sunset with a highly confrontational Valorant setup. This setup allows you to eliminate enemies approaching A Main and then retreat safely, all while staying vigilant for any attack-side lurkers attempting to breach the defender's spawn via Mid Top.
Trademark position
By placing a Trademark, Chamber can bolster the defense by fortifying Top Mid. Any attack-sided lurker will get spotted instantly while trying to sneak into either A Link or B Boba.
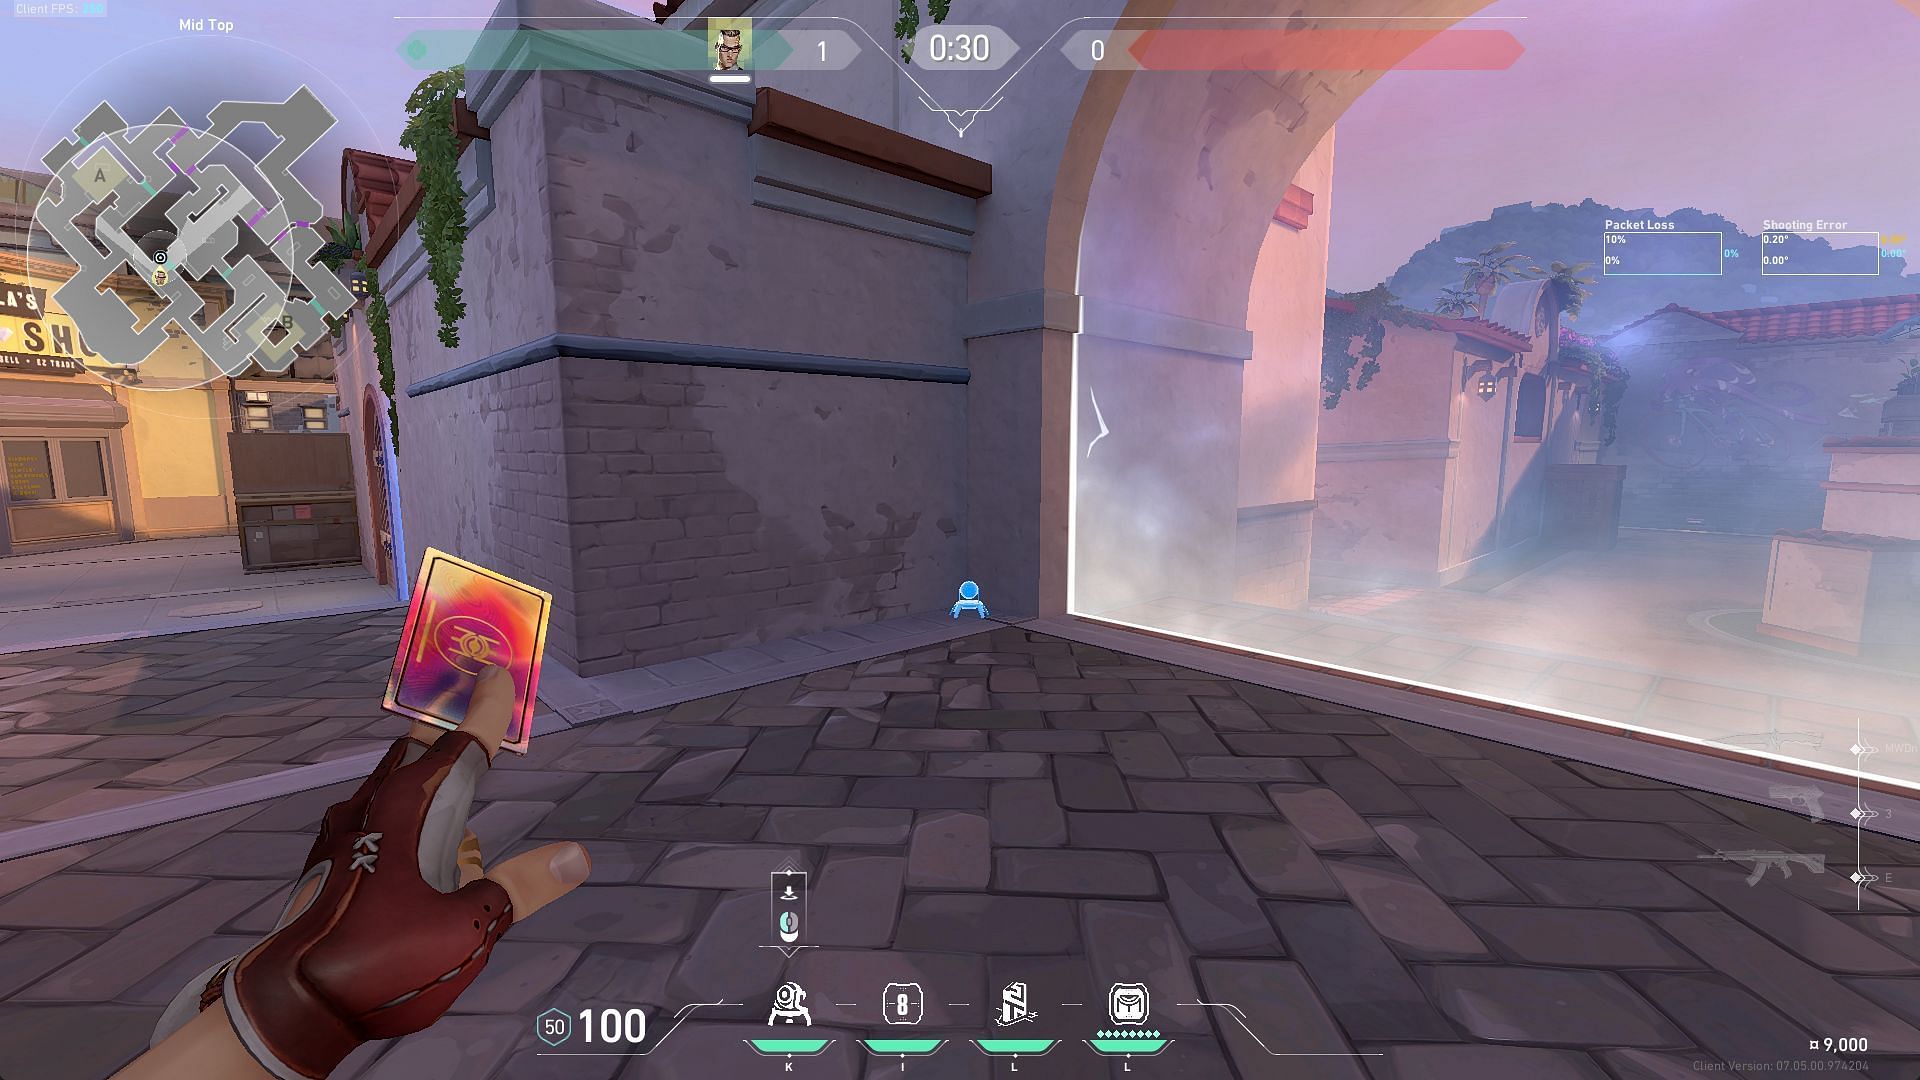
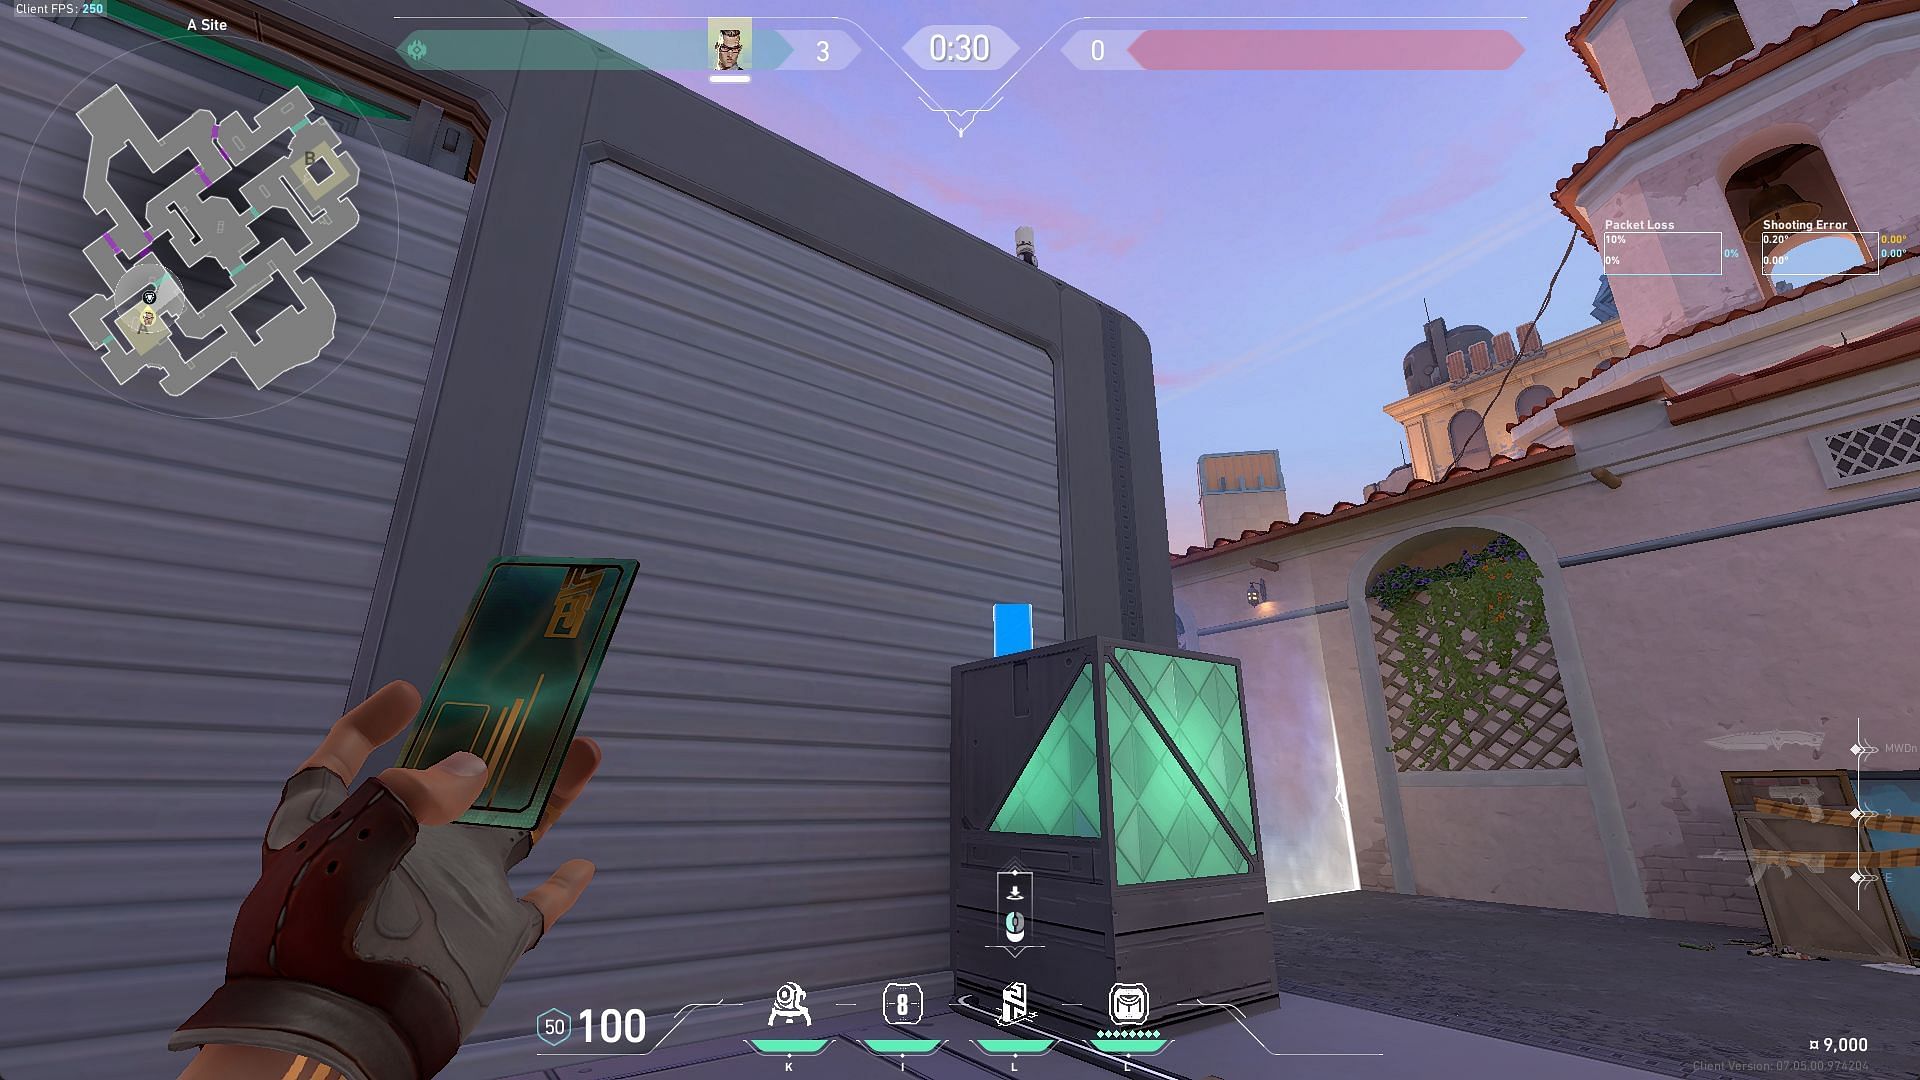
Rendezvous position
The rendezvous spot tucked into the corner of the A site behind the black boxes extends the ability's radius to cover A Elbow.
This allows Chamber to peek into A Main from A Elbow and retreat safely to the site if confronted by a formidable attacking force.
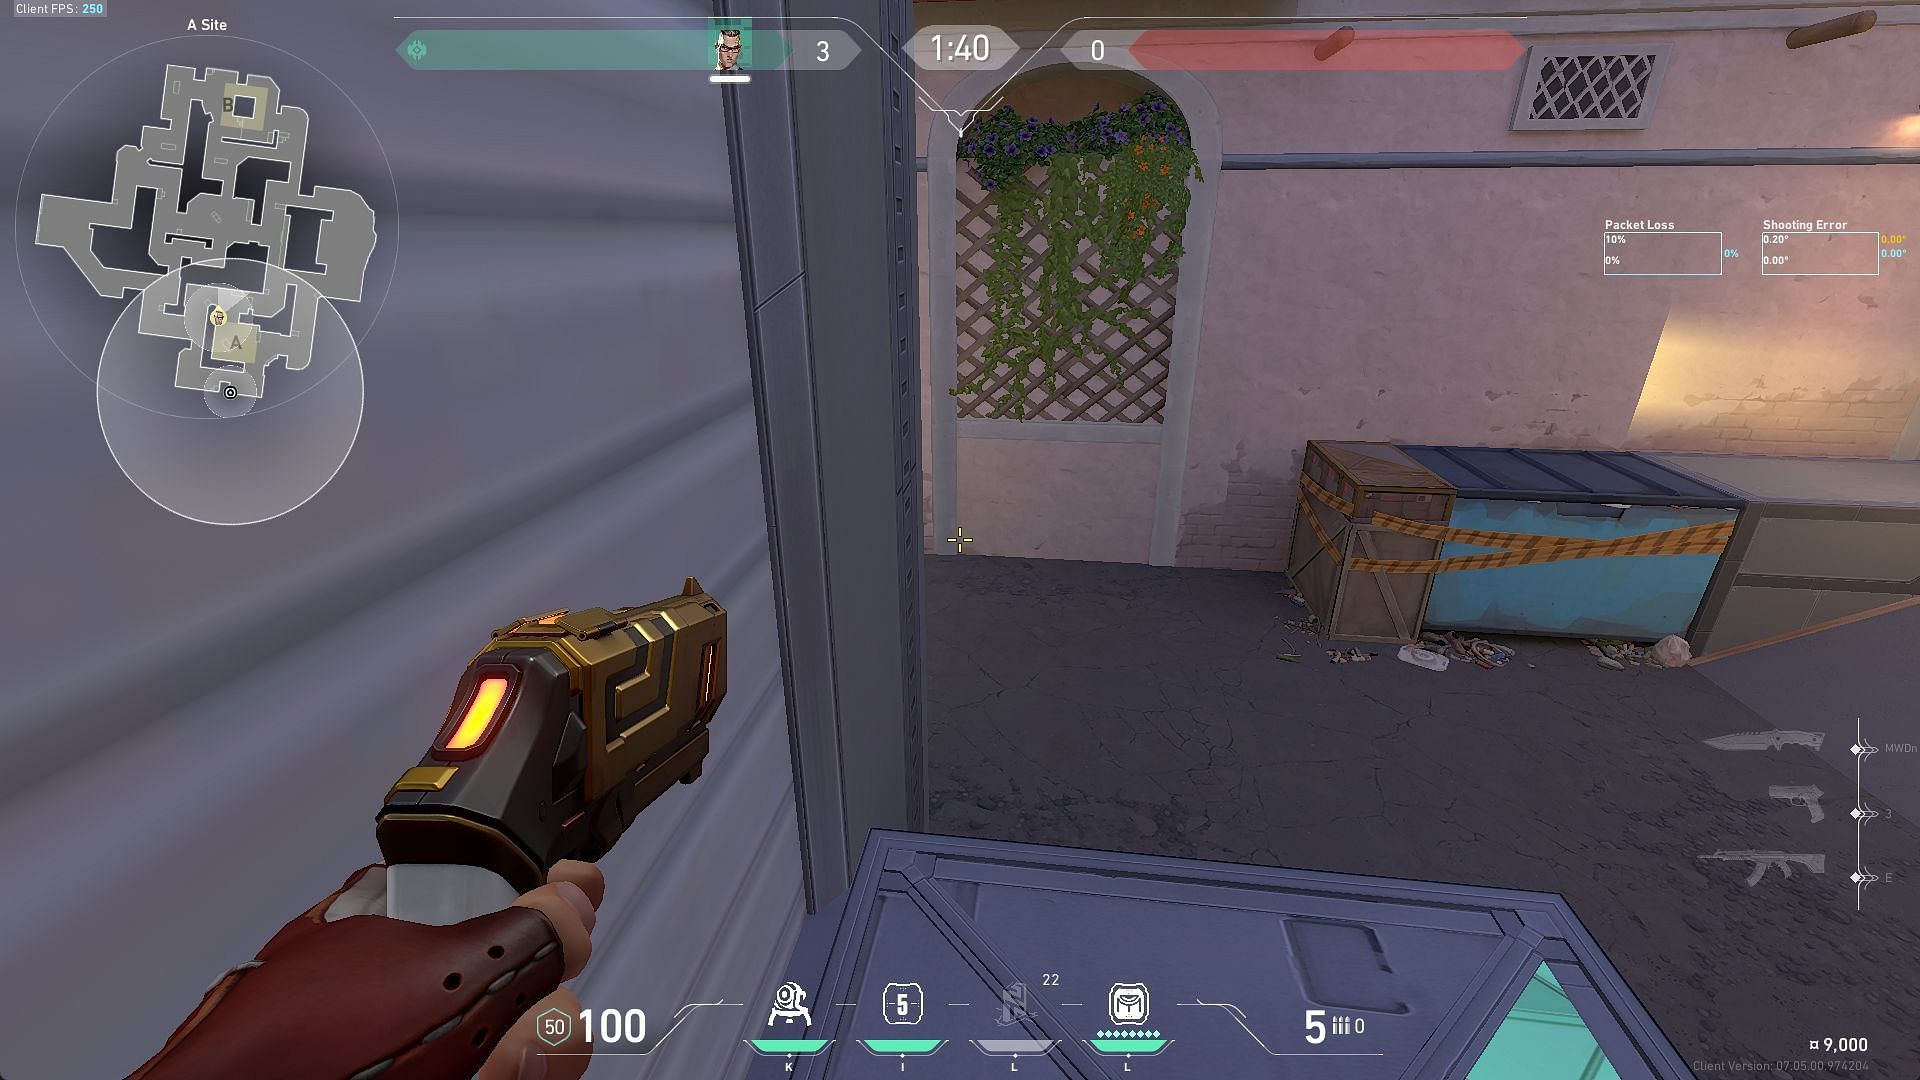
2) Setup to hold A-Main

A site layout features closely spaced spawn-barrier for attackers and defenders, encouraging swift confrontation around A-Main in the early round. This style of gameplay suits Chamber's design as he can teleport out of trouble instantly.
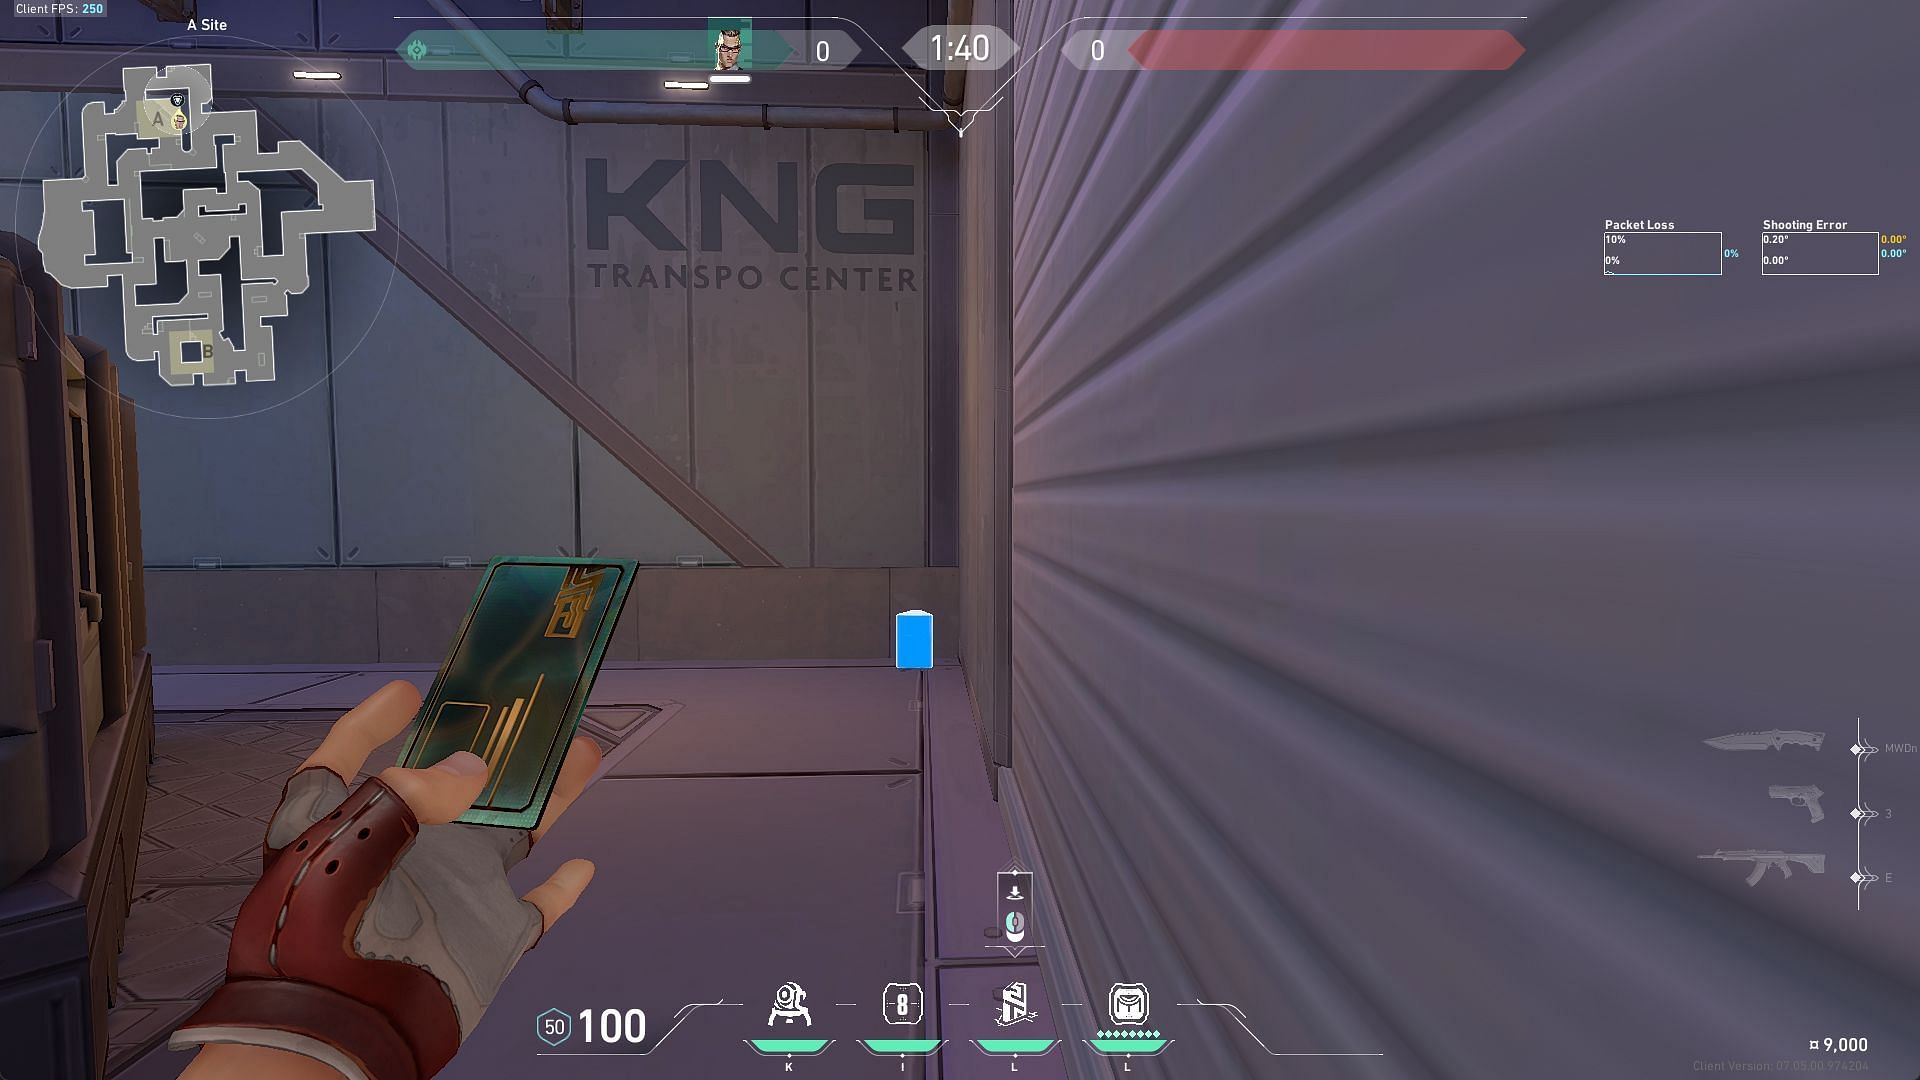
Trademark position
Put a trademark in the cubby position in the alley extending from A Elbow to counter late-round lurks around the A-site.
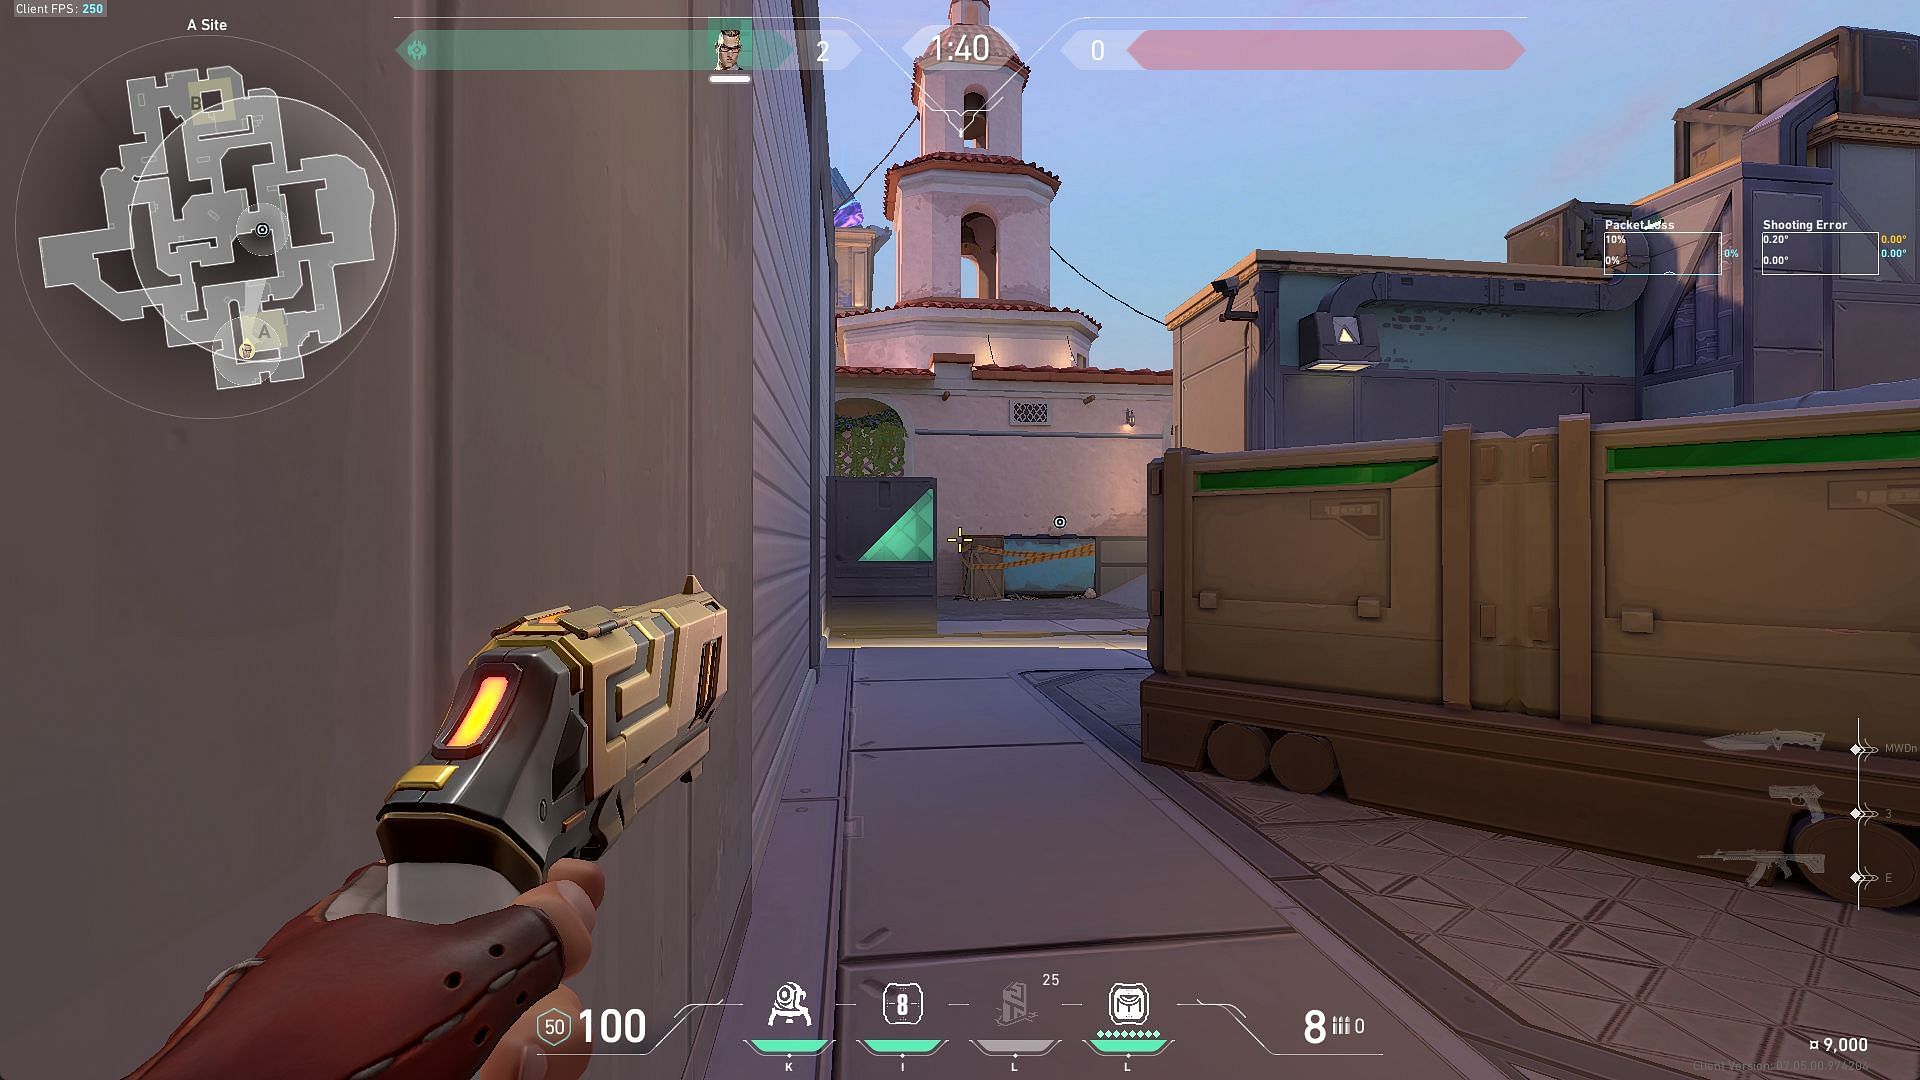
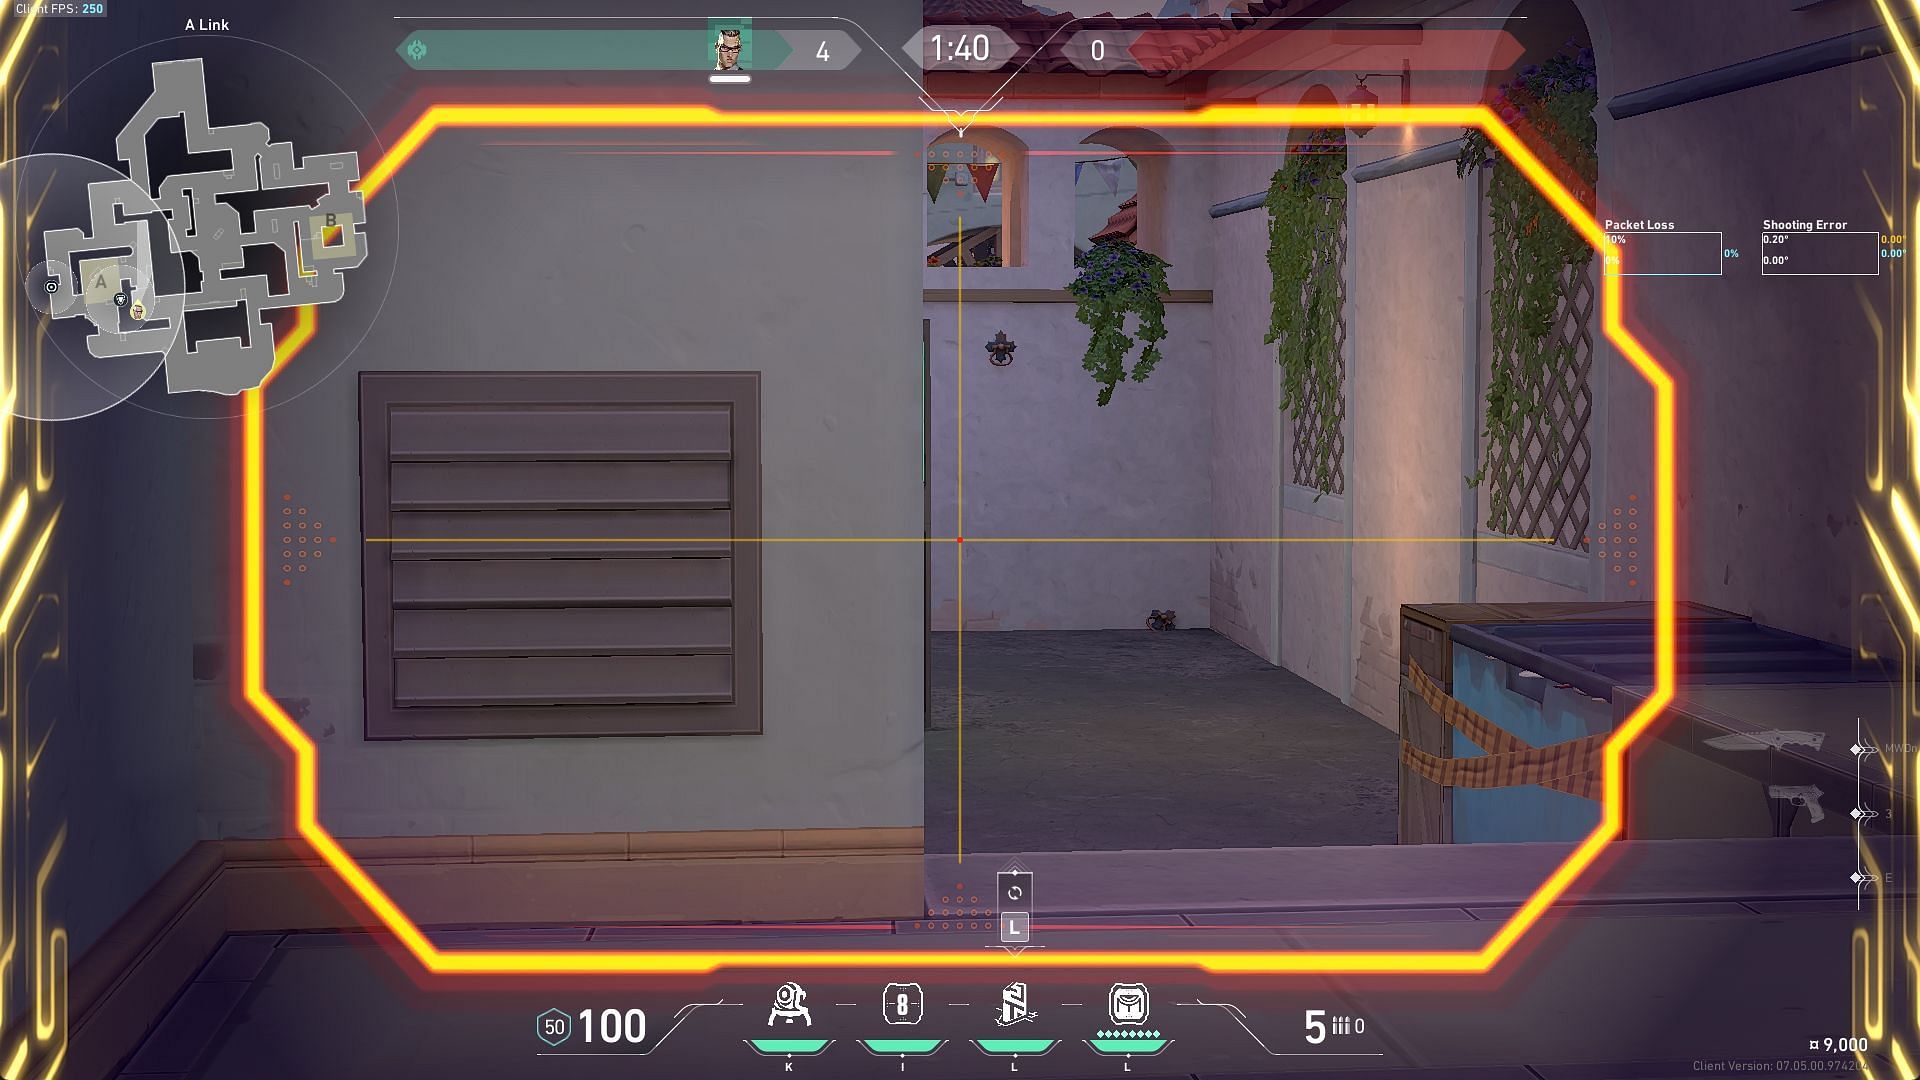
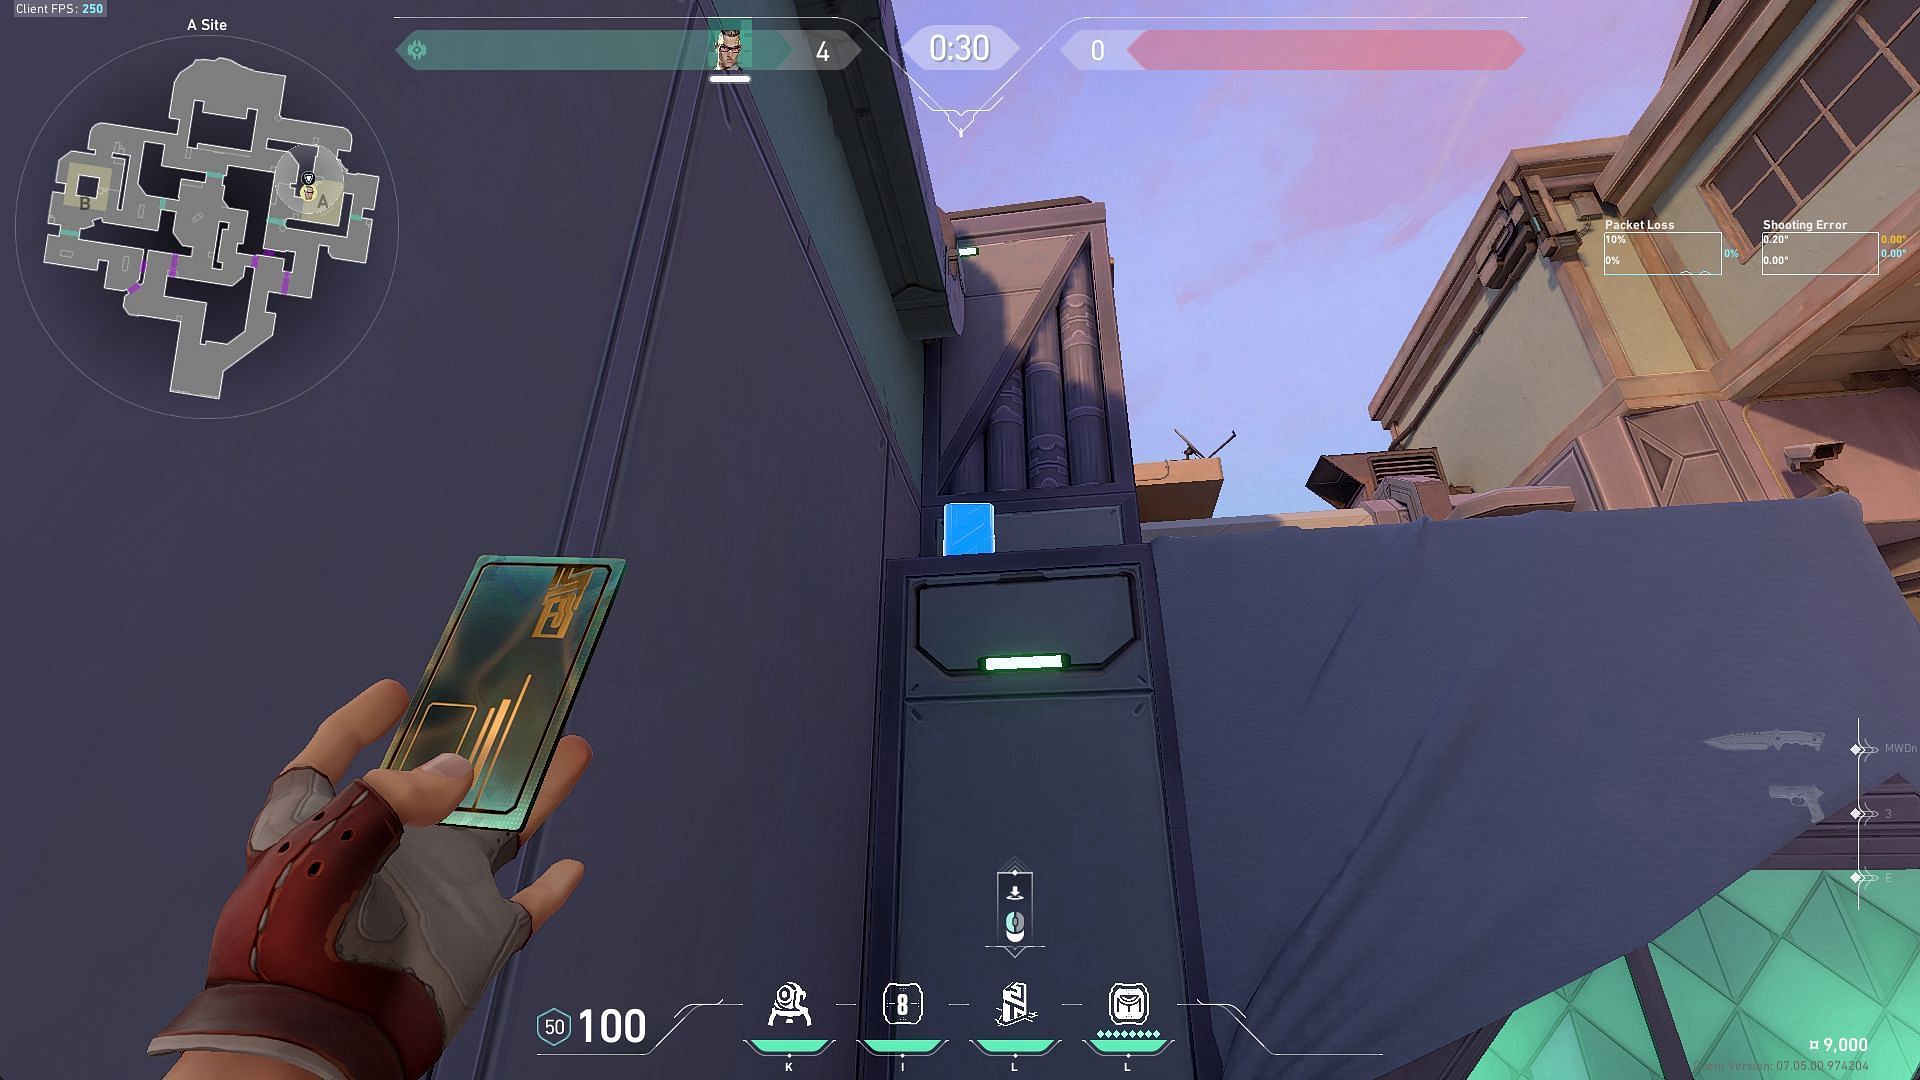
Rendezvous position
By placing the Rendezvous on top of the radianite crate on the left of A-Main, Chamber can peek aggressively into A-Main and TP back on top of it safely.
Standing guard on top of the crate, Chamber gains access to an unconventional angle, premium to the character, for the attackers to clear.
3) Setup for Operator
Chamber is made for utilizing the Operator weapon to its fullest capability. This setup allows Chamber to hold down A Main using either the Operator or his ultimate ability Tour De Force with the safety net of teleporting instantly into a safe position on the site.
Trademark position
Put a Trademark in the cubby position in the alley extending from A Elbow to counter late-round lurks around the A-site.
Rendezvous position
The rendezvous spot tucked on top of the A site radianite crate extends the ability's radius to cover A Link.
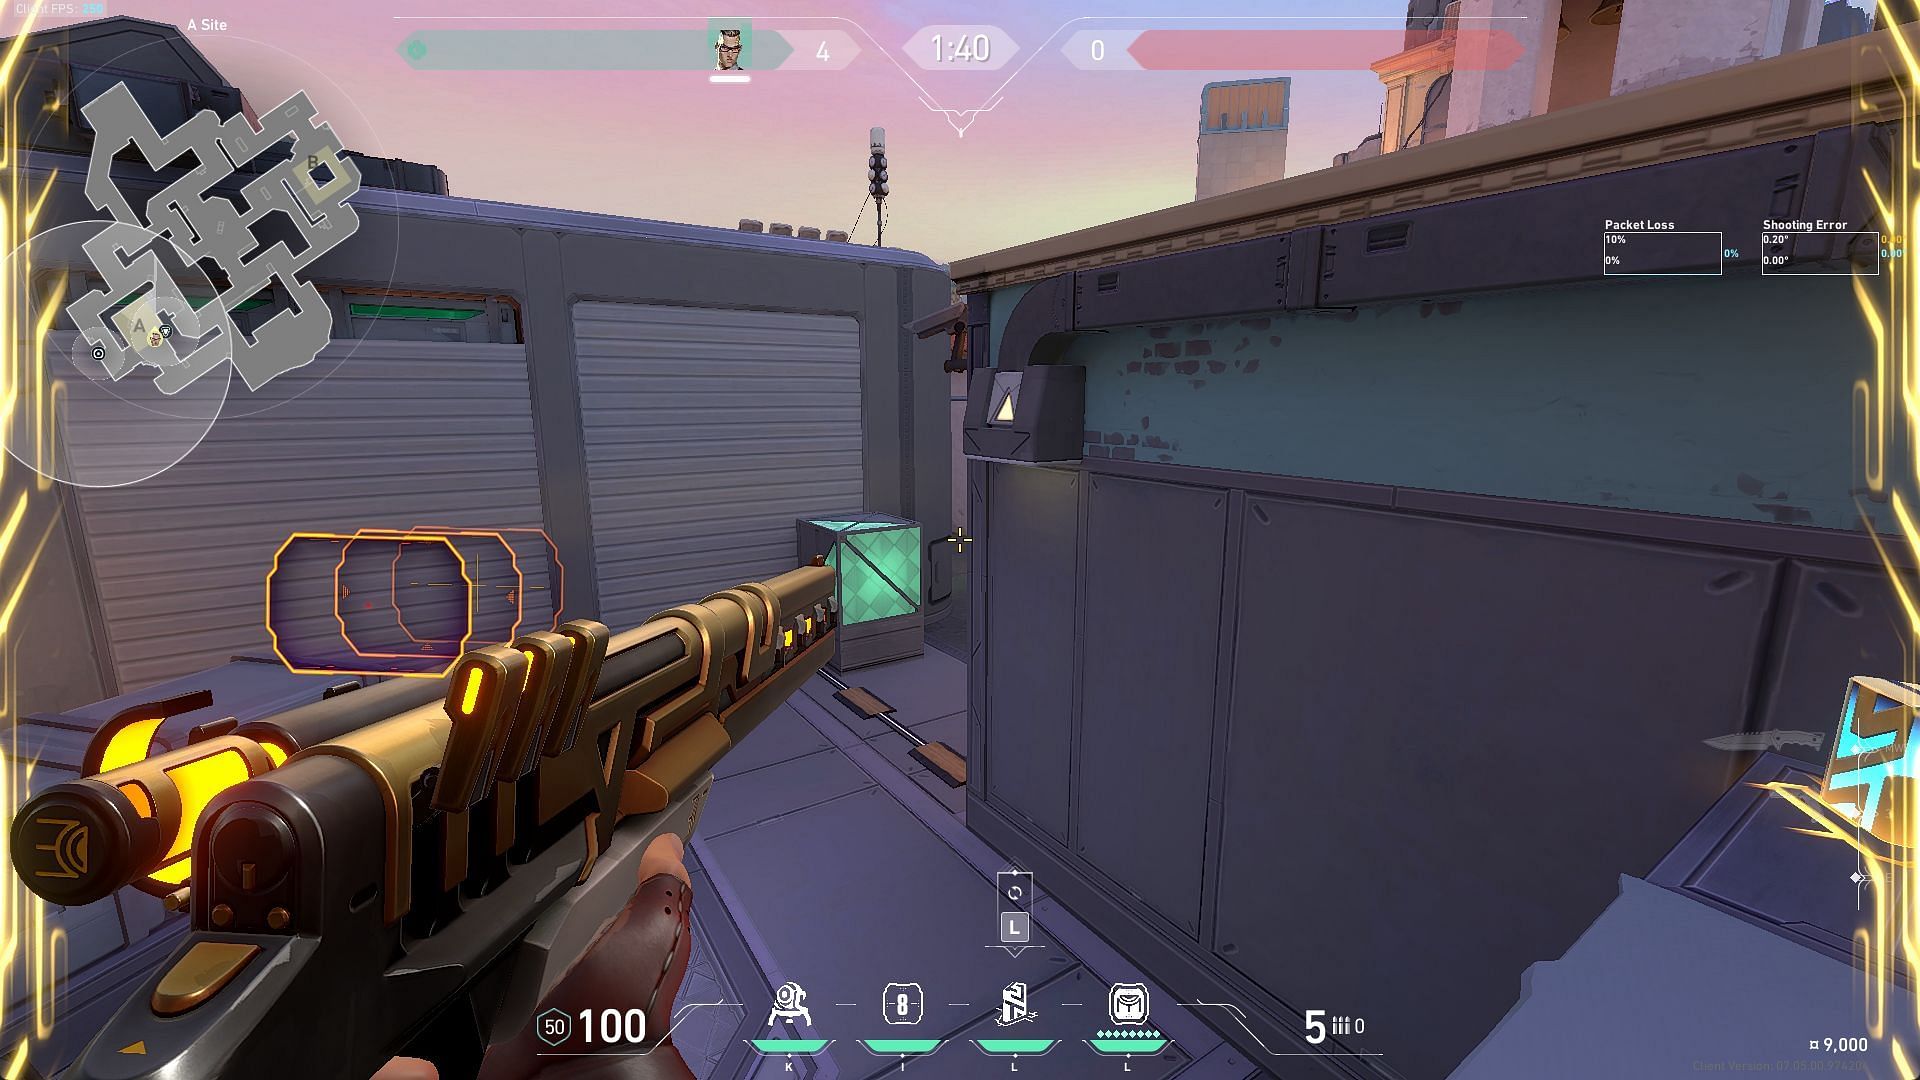
This allows Chamber to hold A Main from A Link and retreat safely to the top of the crate, successfully eliminating one attacker and setting up an angle for another peek into A Main to maybe get one more.
Chamber B site and B Market defensive setup on Sunset in Valorant
1) Setup to hold B Main
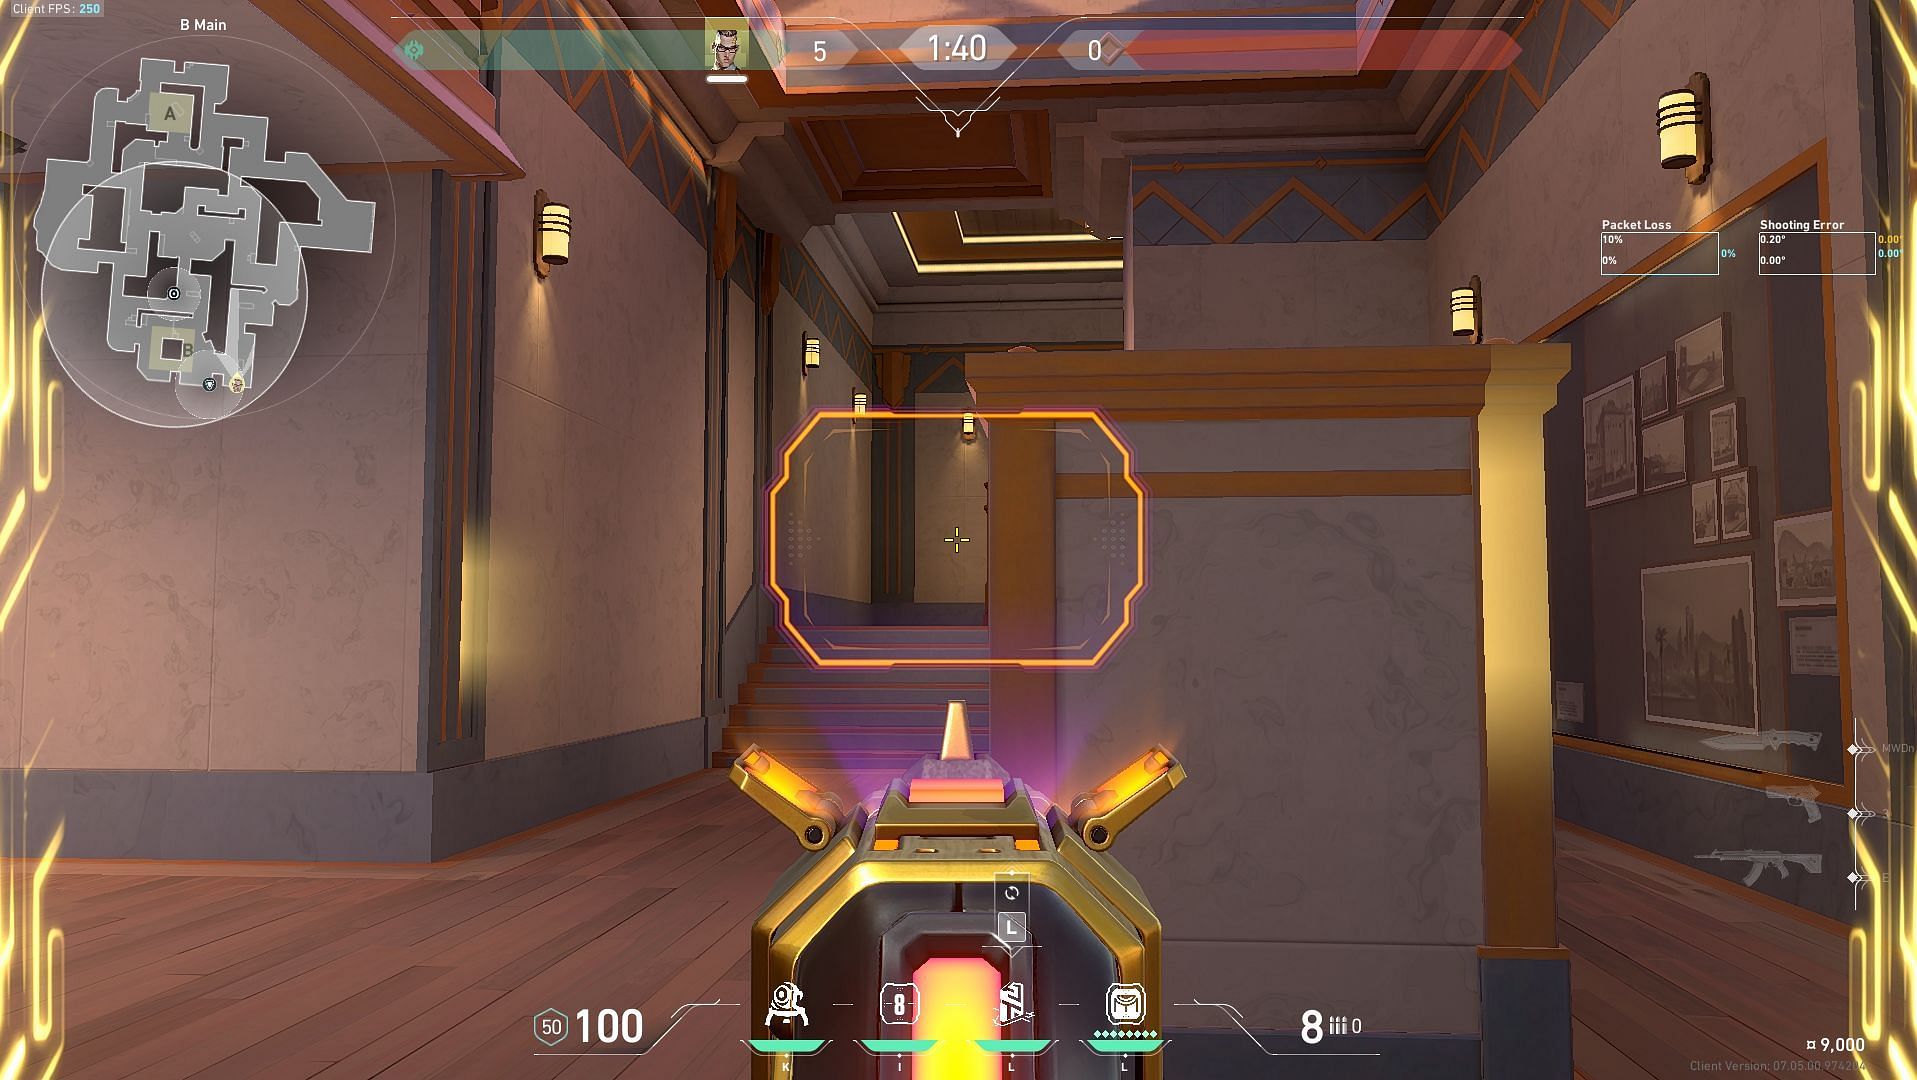
The B Main part of Sunset is designed to entice early confrontation among the contesting players. Chamber excels in taking early gunfights that are generally riskier in nature for the other Valorant Agents. Chamber can lock down B Main and B Market better than others.
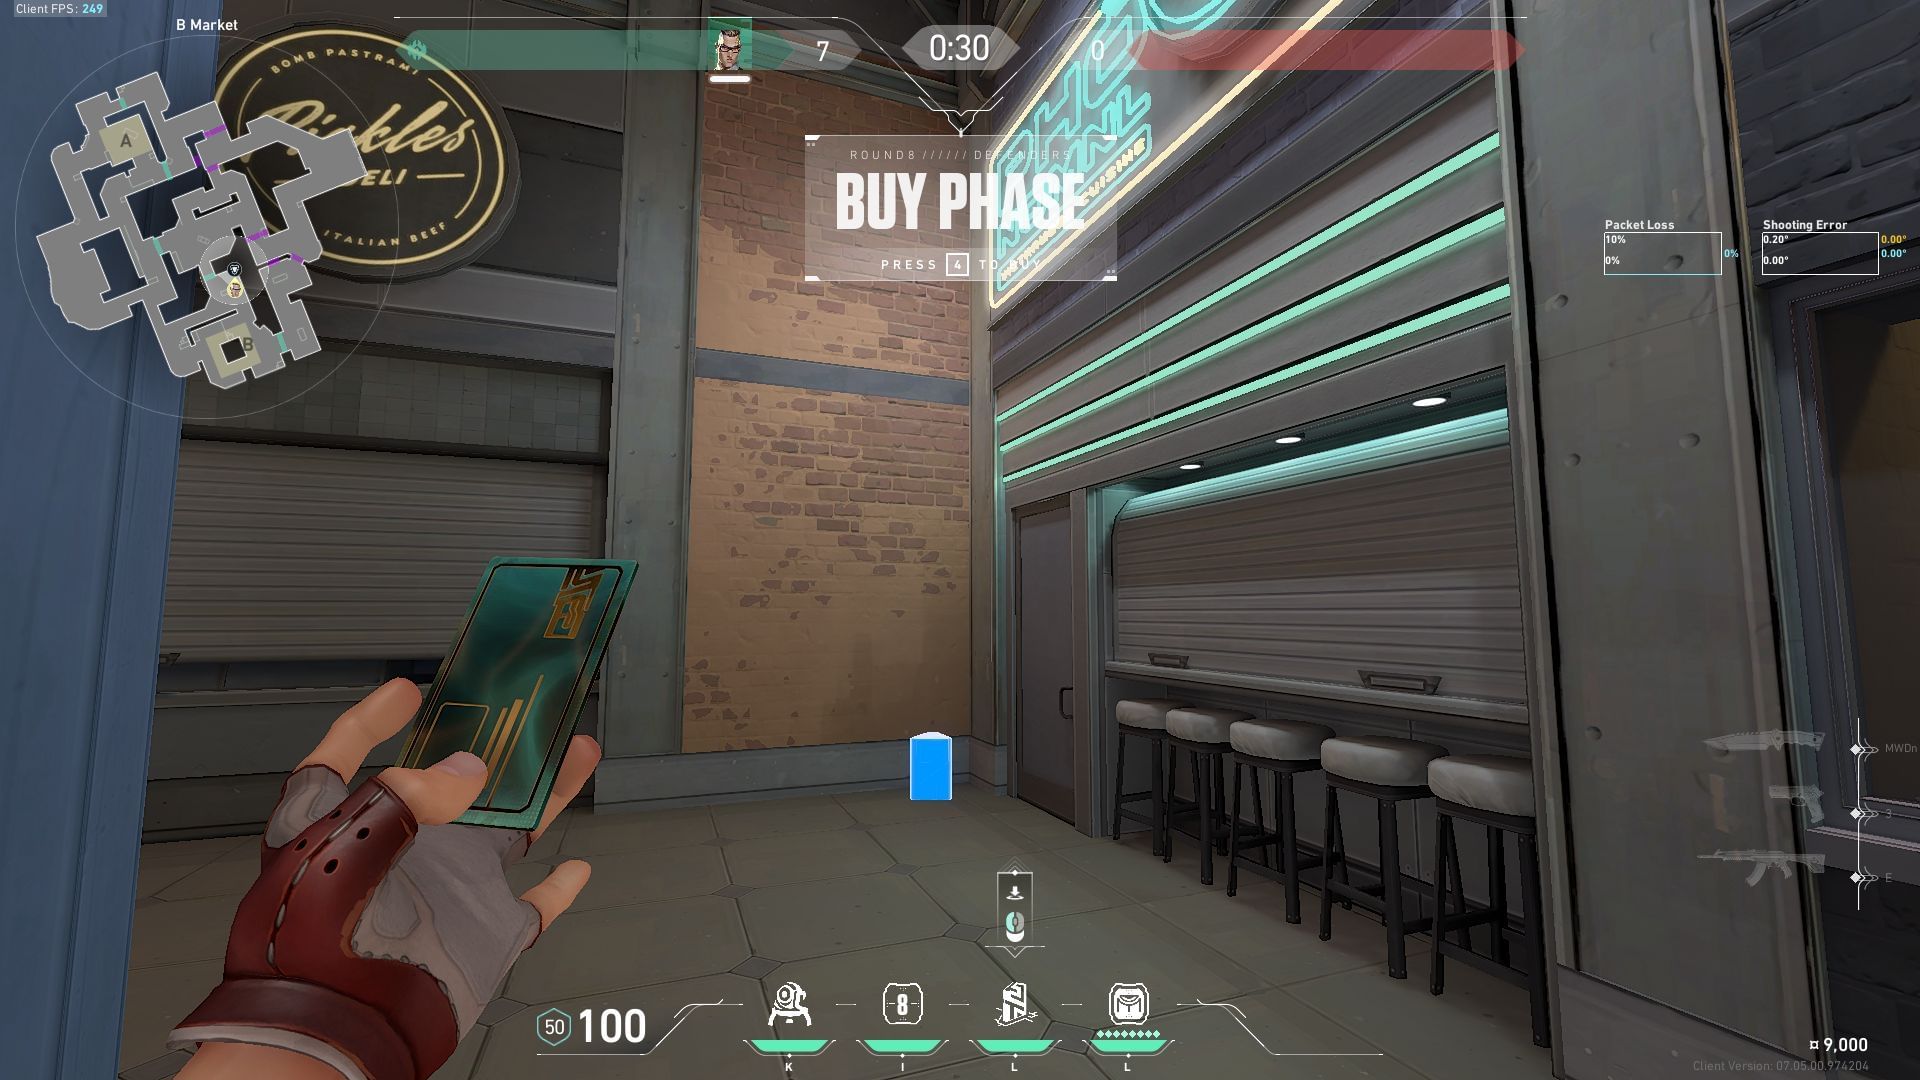
Trademark position
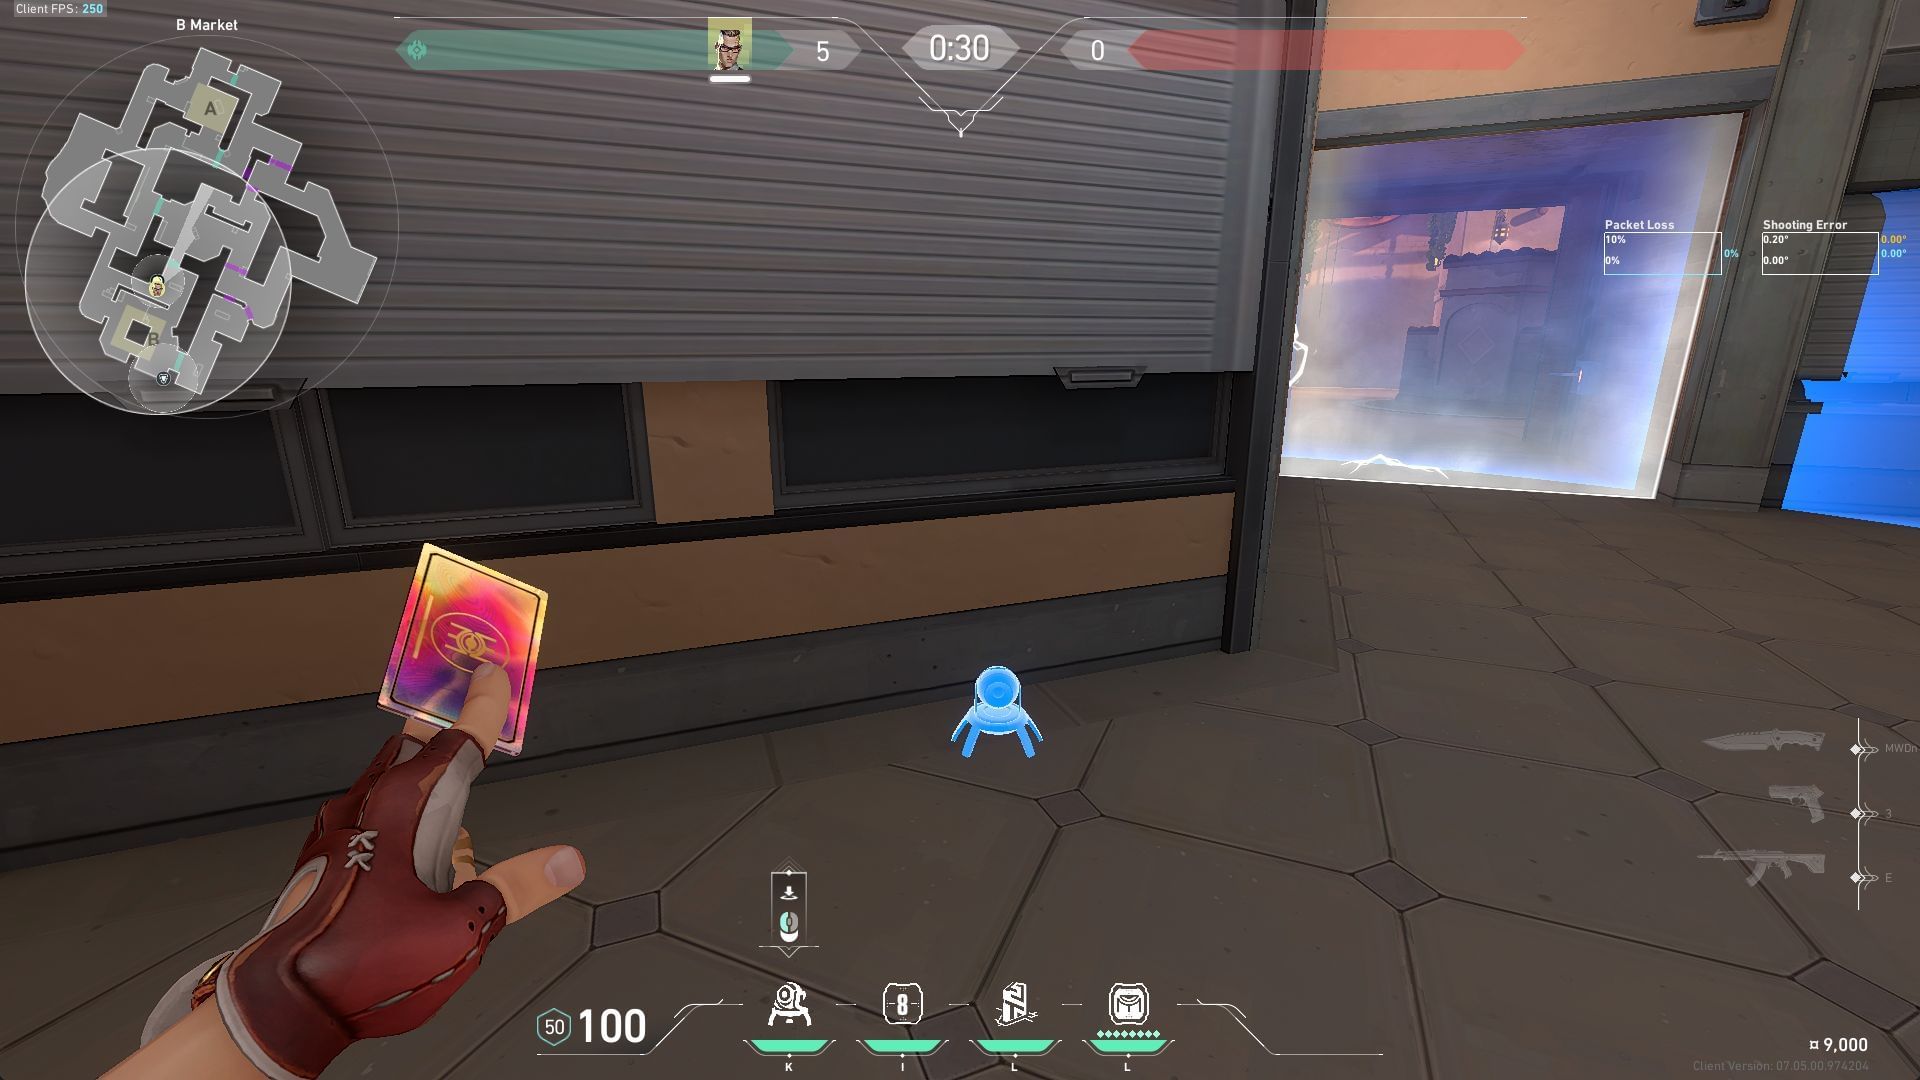
This intelligent positioning of Chamber's Trademark fortifies B Market as the utility guards the space from oncoming attackers from Middle Courtyard and can notify the defending team about attack-side lurkers creeping around B Boba.
Rendezvous position
The rendezvous spot tucked on top of the grass-laden step near the B site choke point extends the ability's radius to cover a significant area in B main.

This allows Chamber to hold B Main aggressively and retreat safely to the top of the step, successfully eliminating one attacker and setting up a pixel angle for another peek into B Main to maybe get one more.
2) Setup to hold B-Market
A site is a harder site on Sunset for the attacker. While attacking, you might want to take control of Middle Courtyard in the early rounds. Chamber thrives in playing aggressive spaces and seeks early confrontation due to his teleporting ability.
Trademark position
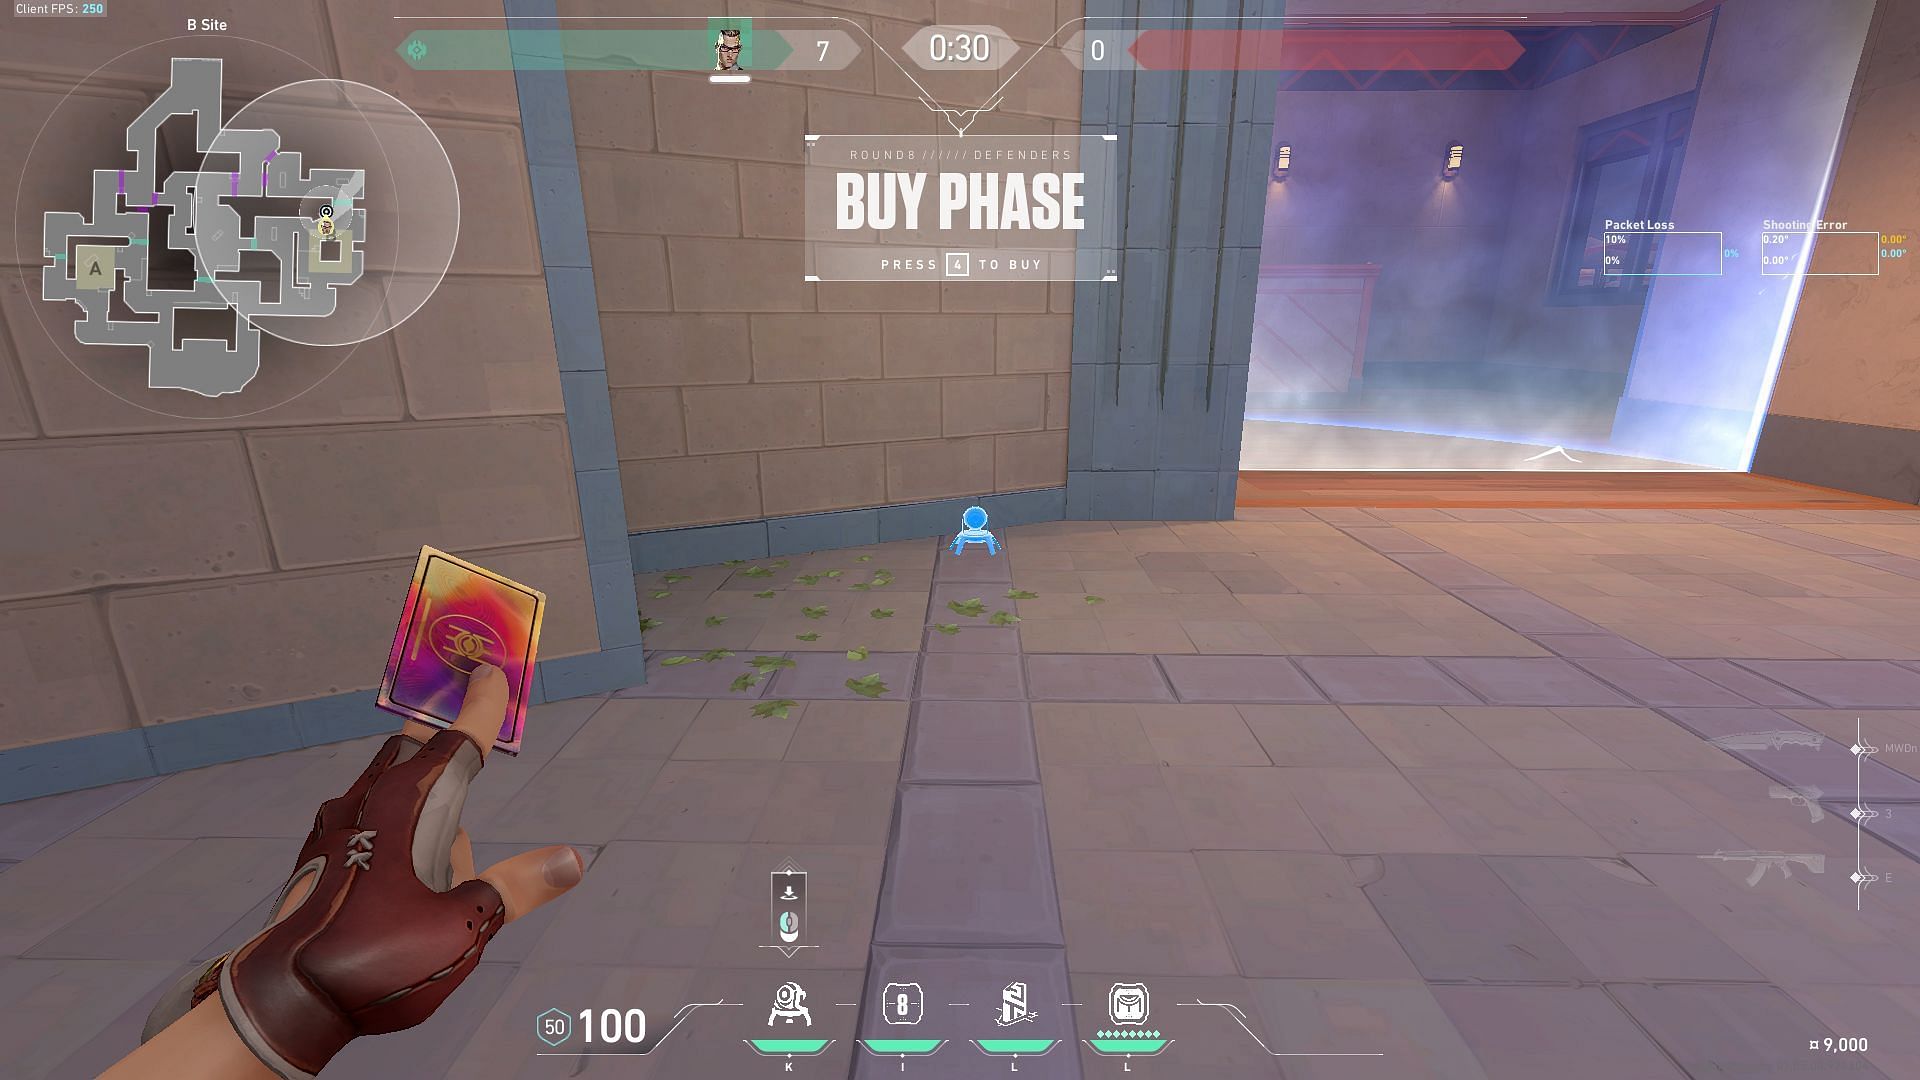
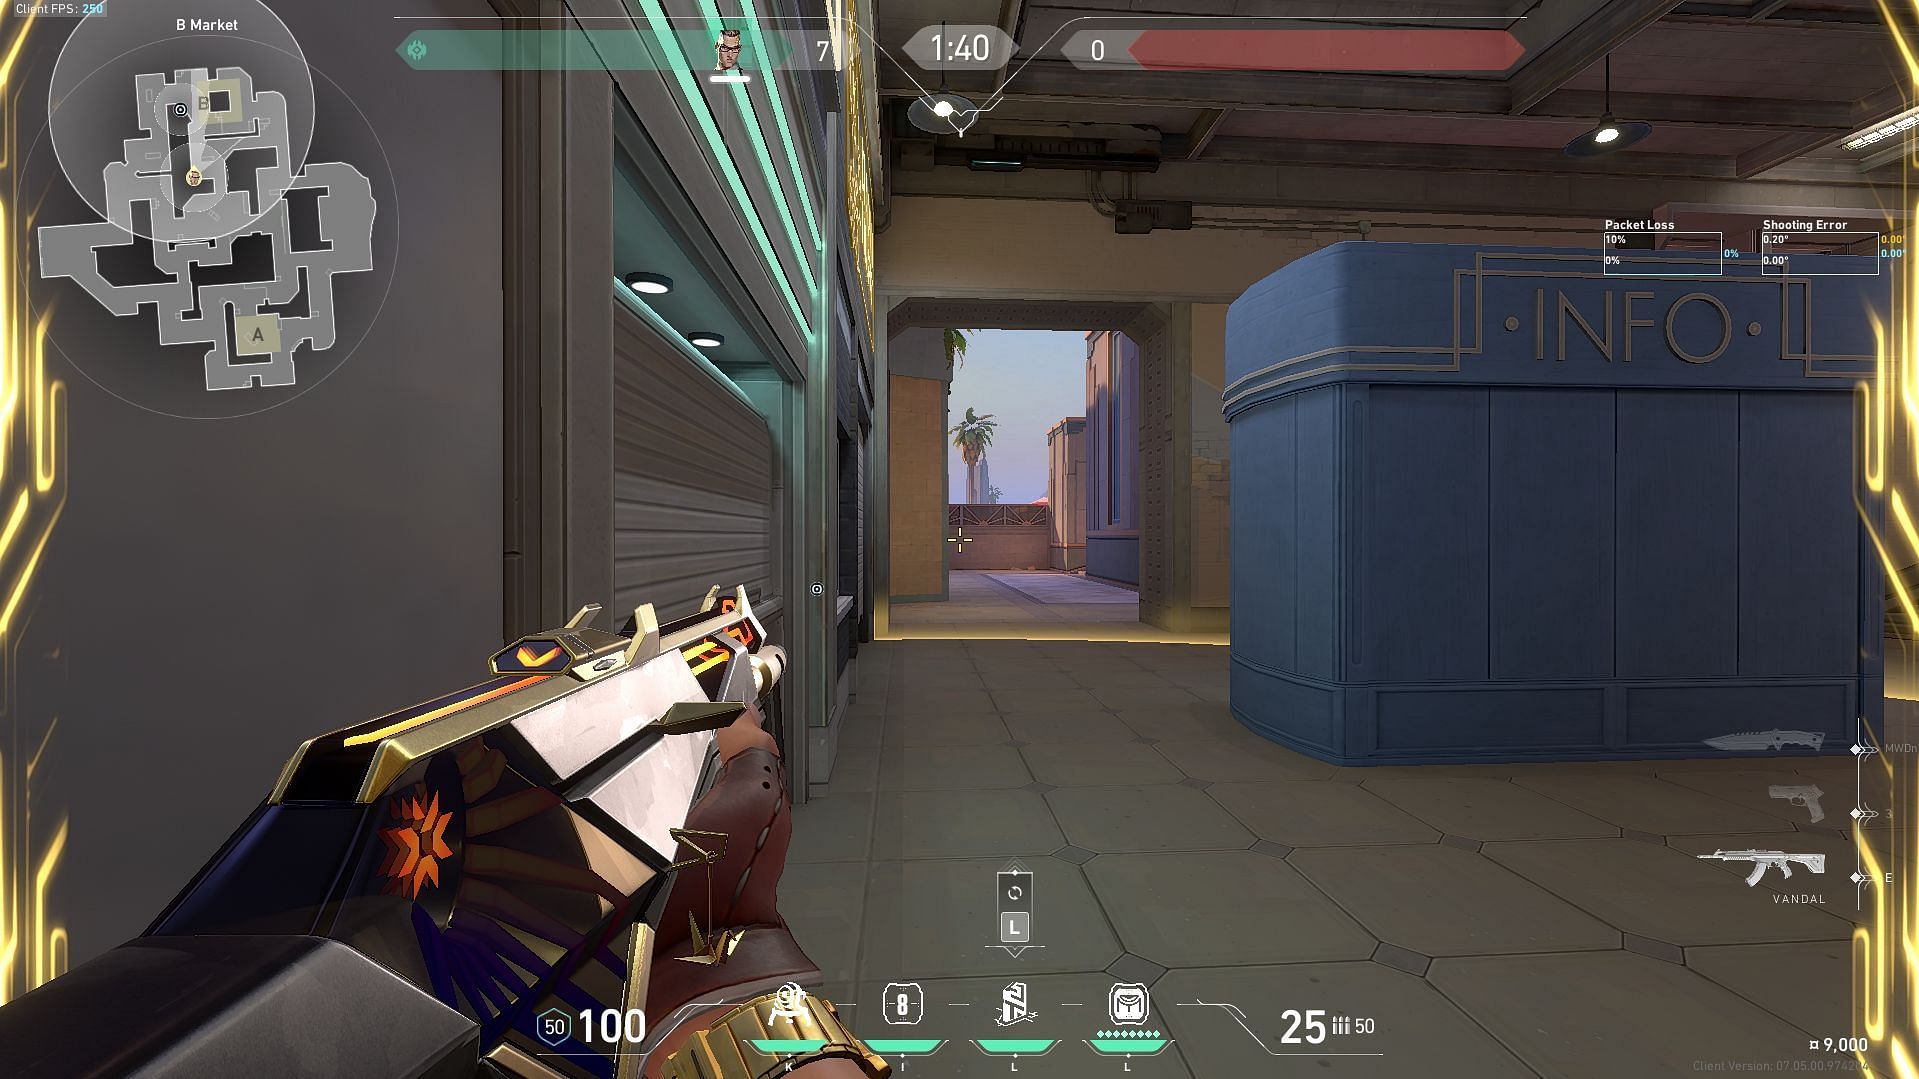
Positioning Chamber's Trademark on the left side of the B site choke enables Chamber to explore the middle of the map during the early rounds while remaining watchful of any enemy movements in B Main.
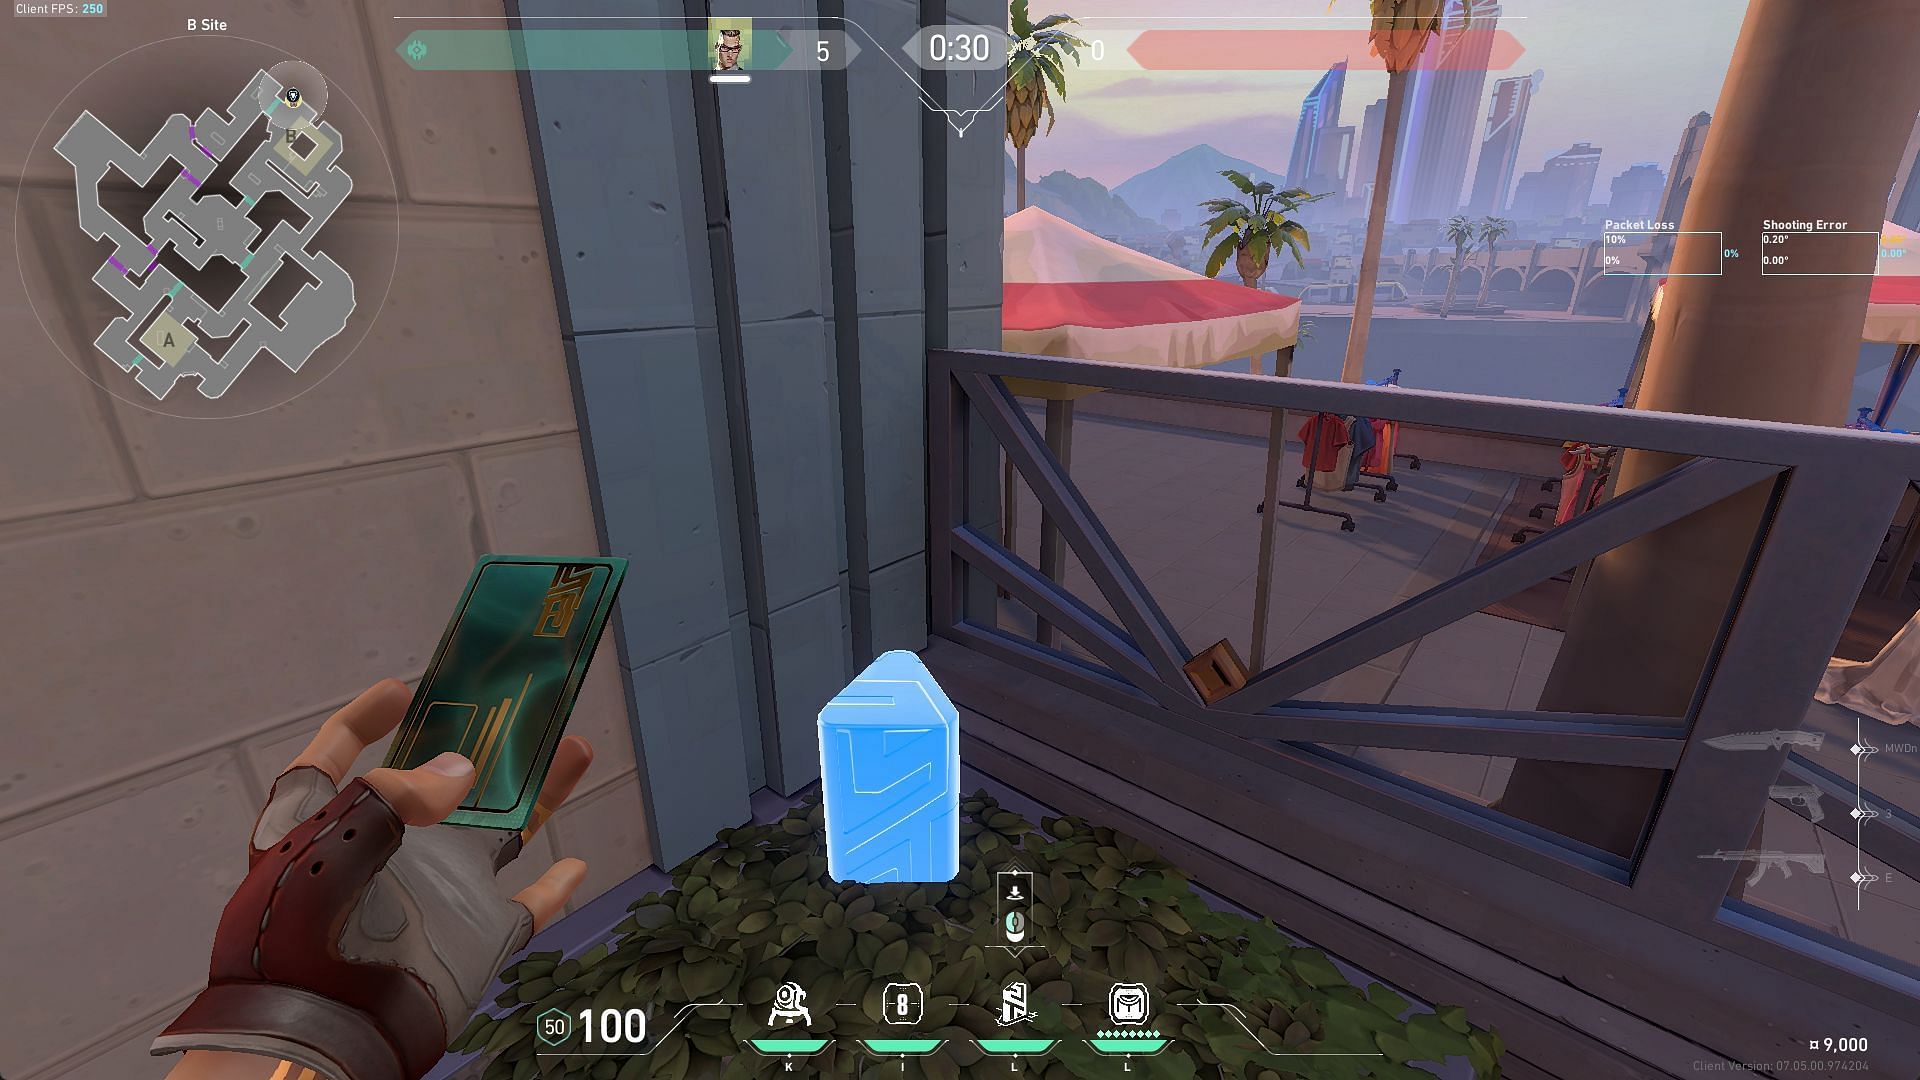
Rendezvous position
The rendezvous spot tucked in the right corner in front of the 'blue board' in B market extends the ability's radius to cover the right side of the outside middle courtyard.
This setup allows Chamber to handle both quick escapes from the attacking side and return instantly to B Market after lurking in the middle courtyard to check for enemy presence. The Trademark trips them at B Main.
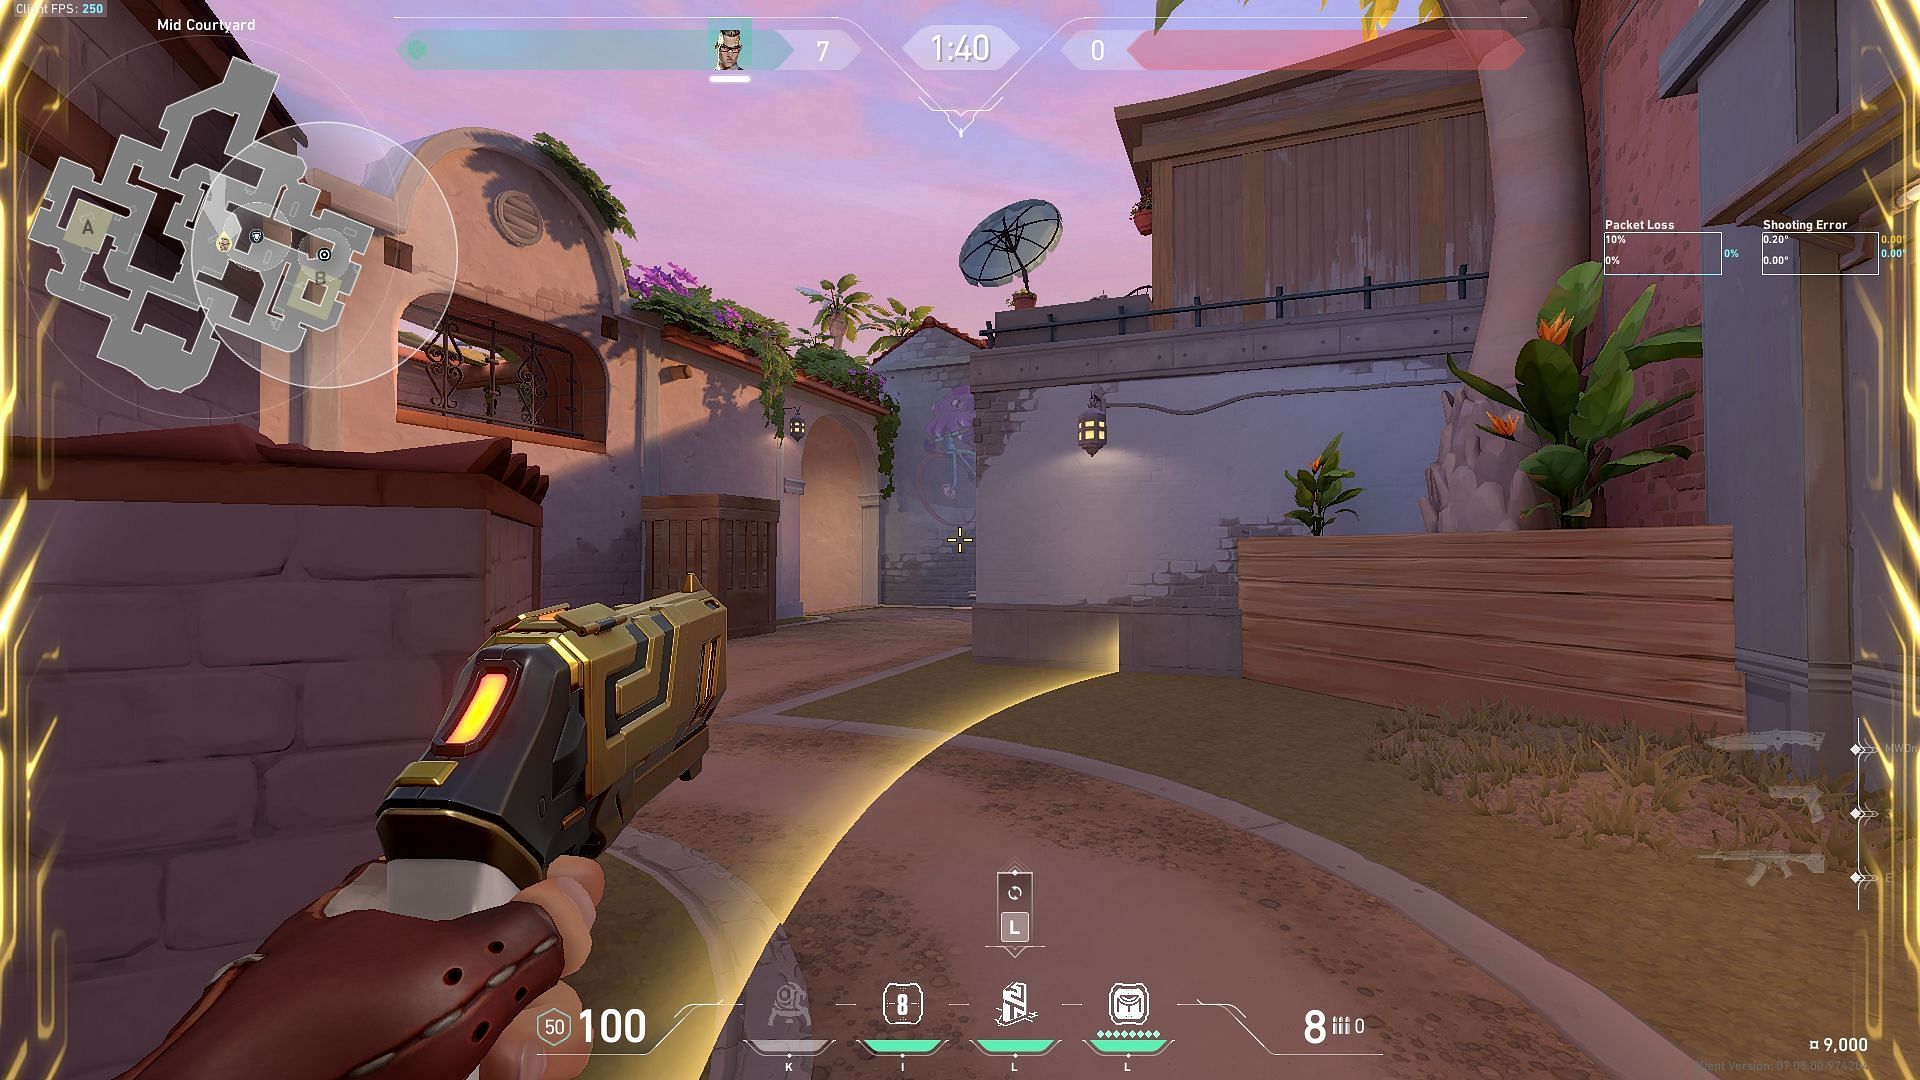
3) Setup for quick rotation
After the Chamber nerfs in Valorant's patch 5.12, whoever plays Chamber must use map knowledge to craft a web of utilities across the map. One way to do this is by aggressively taking space in the Middle Courtyard in the early stage of the round and challenging Mid-Tiles while having a Trademarks guarding B site. This setup provides quick rotation towards A site through A Link.
Trademark position
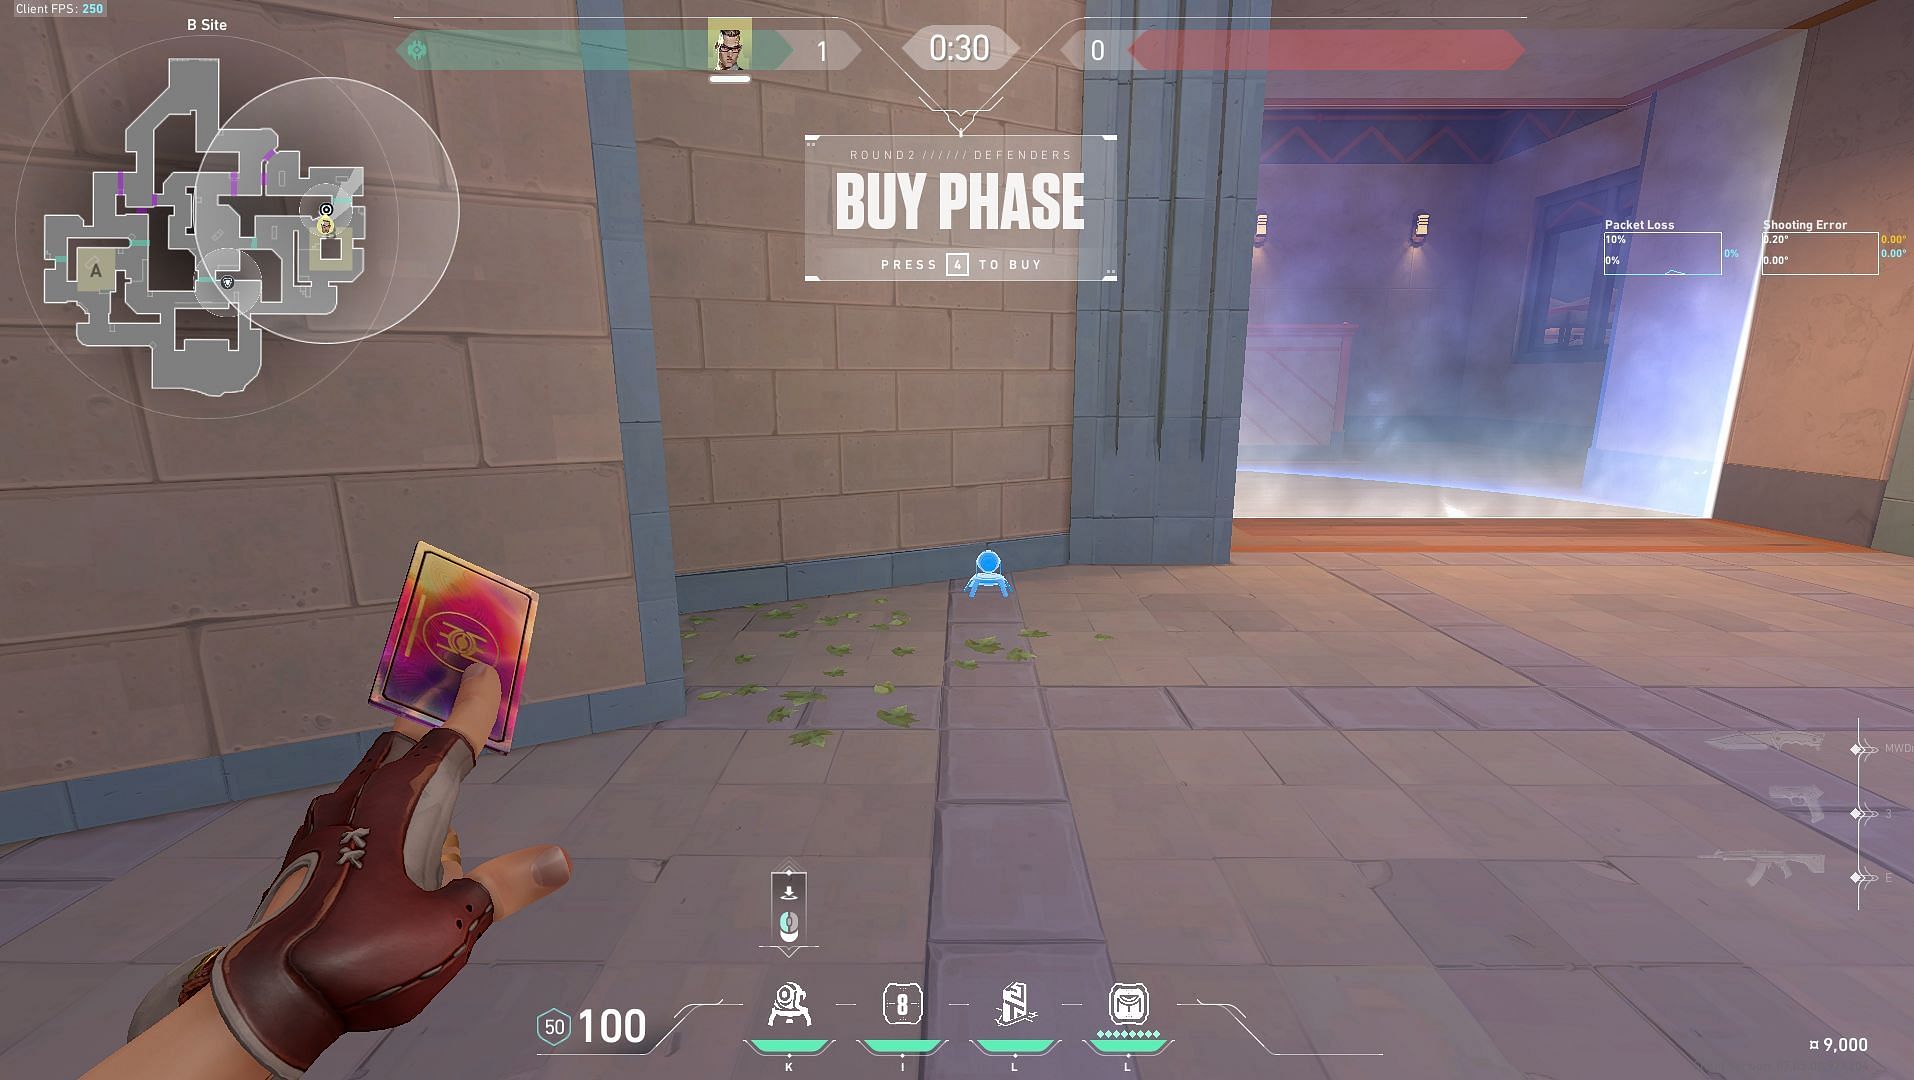
Positioning Chamber's Trademark on the left side of the B site choke enables Chamber to explore the middle of the map during the early rounds while remaining watchful of any enemy movements in B Main.
Rendezvous position
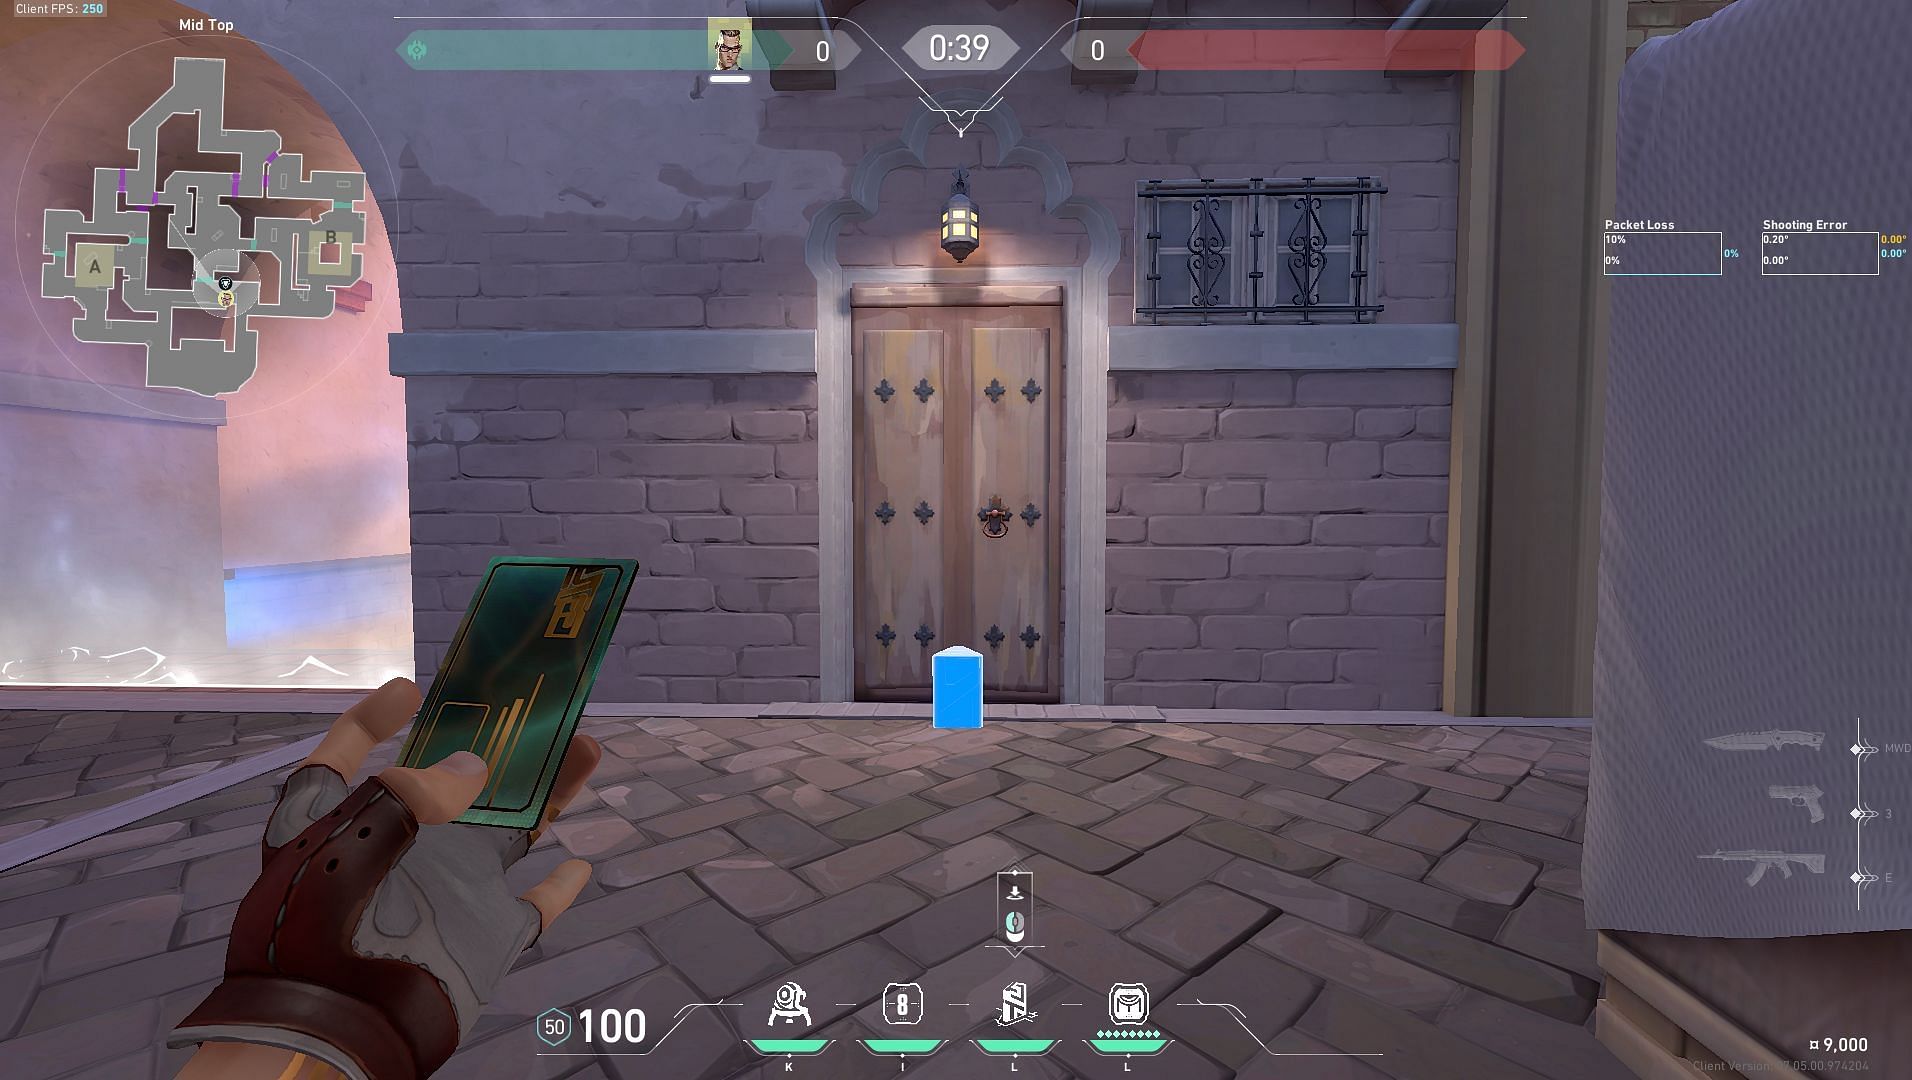
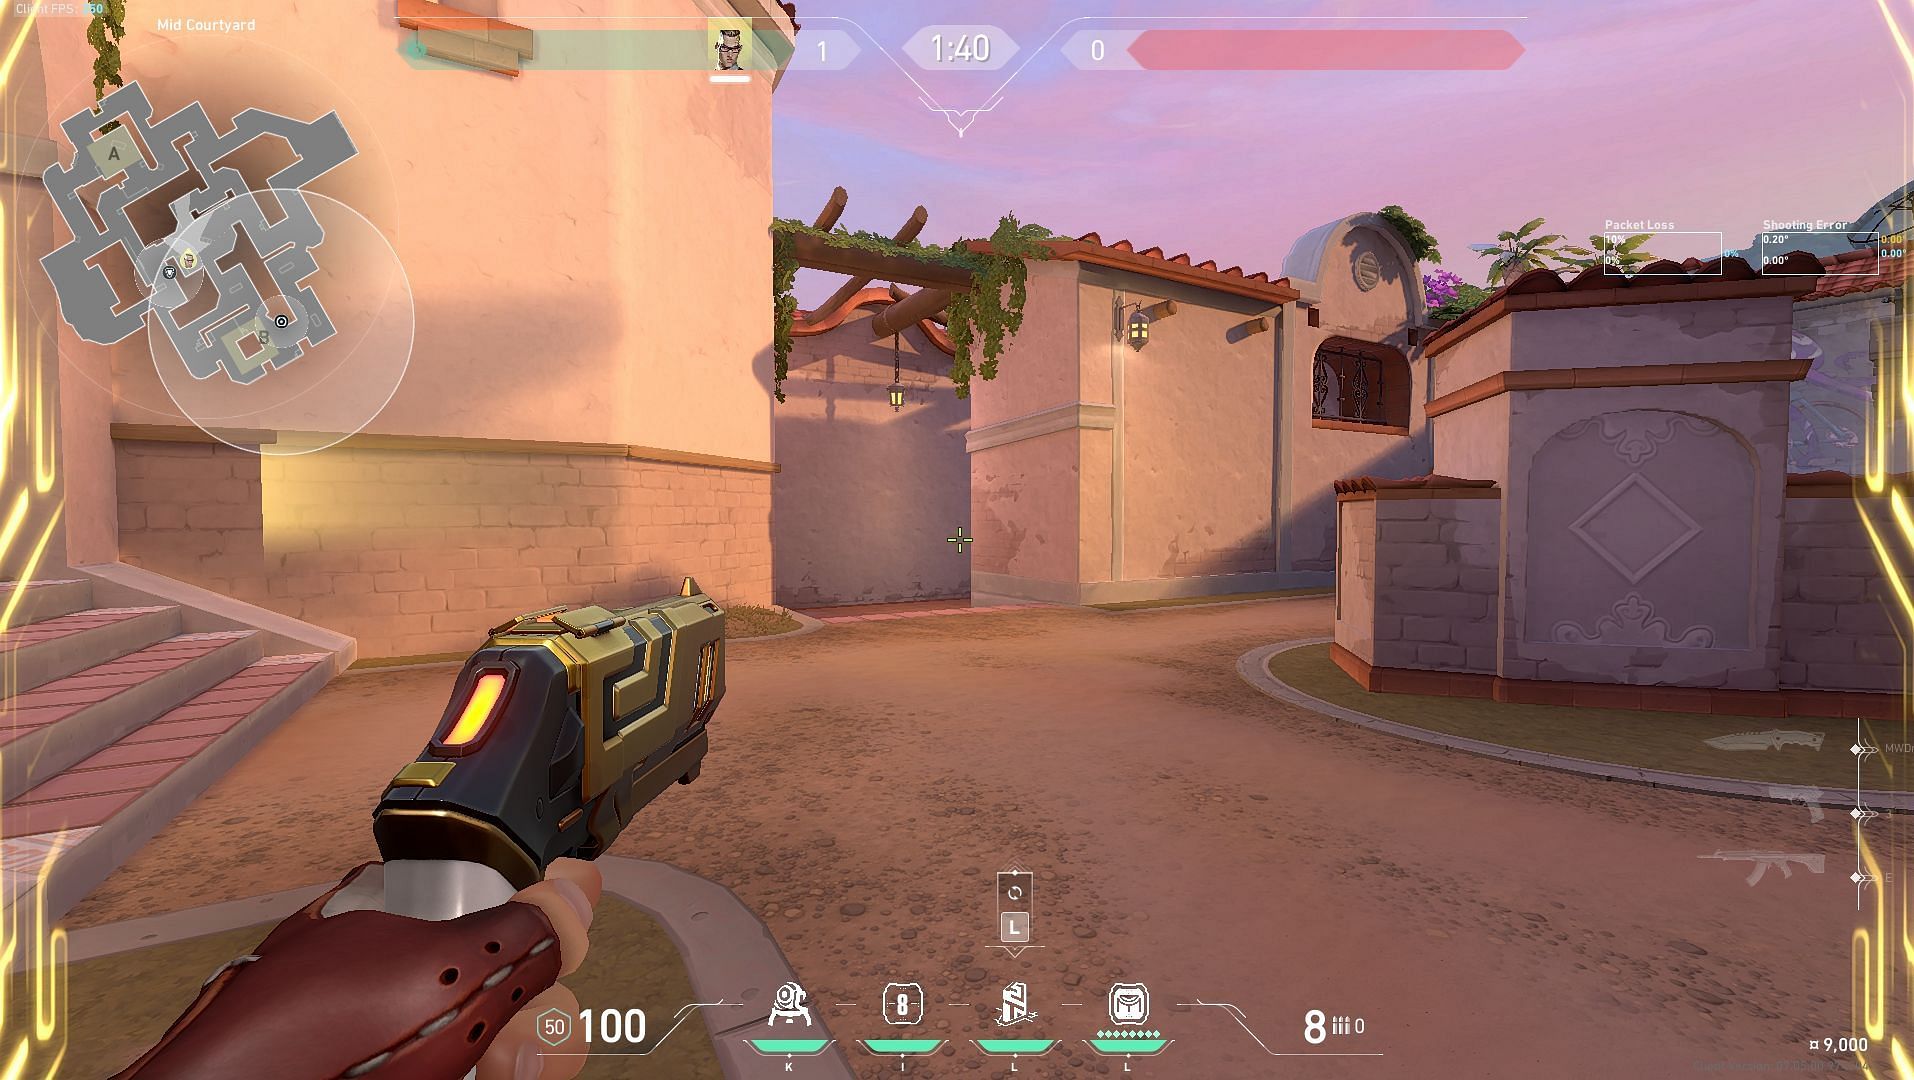
The rendezvous spot placed in front of the wooden door in Mid Top extends the ability's radius to cover the left side of the middle courtyard B Market.
This setup allows Chamber to take an aggressive duel towards Mid Tiles, then teleport back to Mid Top and rechallenge Mid Tiles or Bottom Mid. This enables the Agent to quickly rotate to either site, depending on the attacking pressure on the map.
Best Attacking Trademark spots for Chamber on Sunset in Valorant
Chamber does struggle to accompany the attacking team directly onto A site, but the power of this Valorant Agent lies in creating map space in a more covert fashion, i.e., by lurking.
Instead of blindly following your teammates into the site and having a Trademark watching flank, it's better to put pressure on different sides of the map while the Trademark utility watches your back.
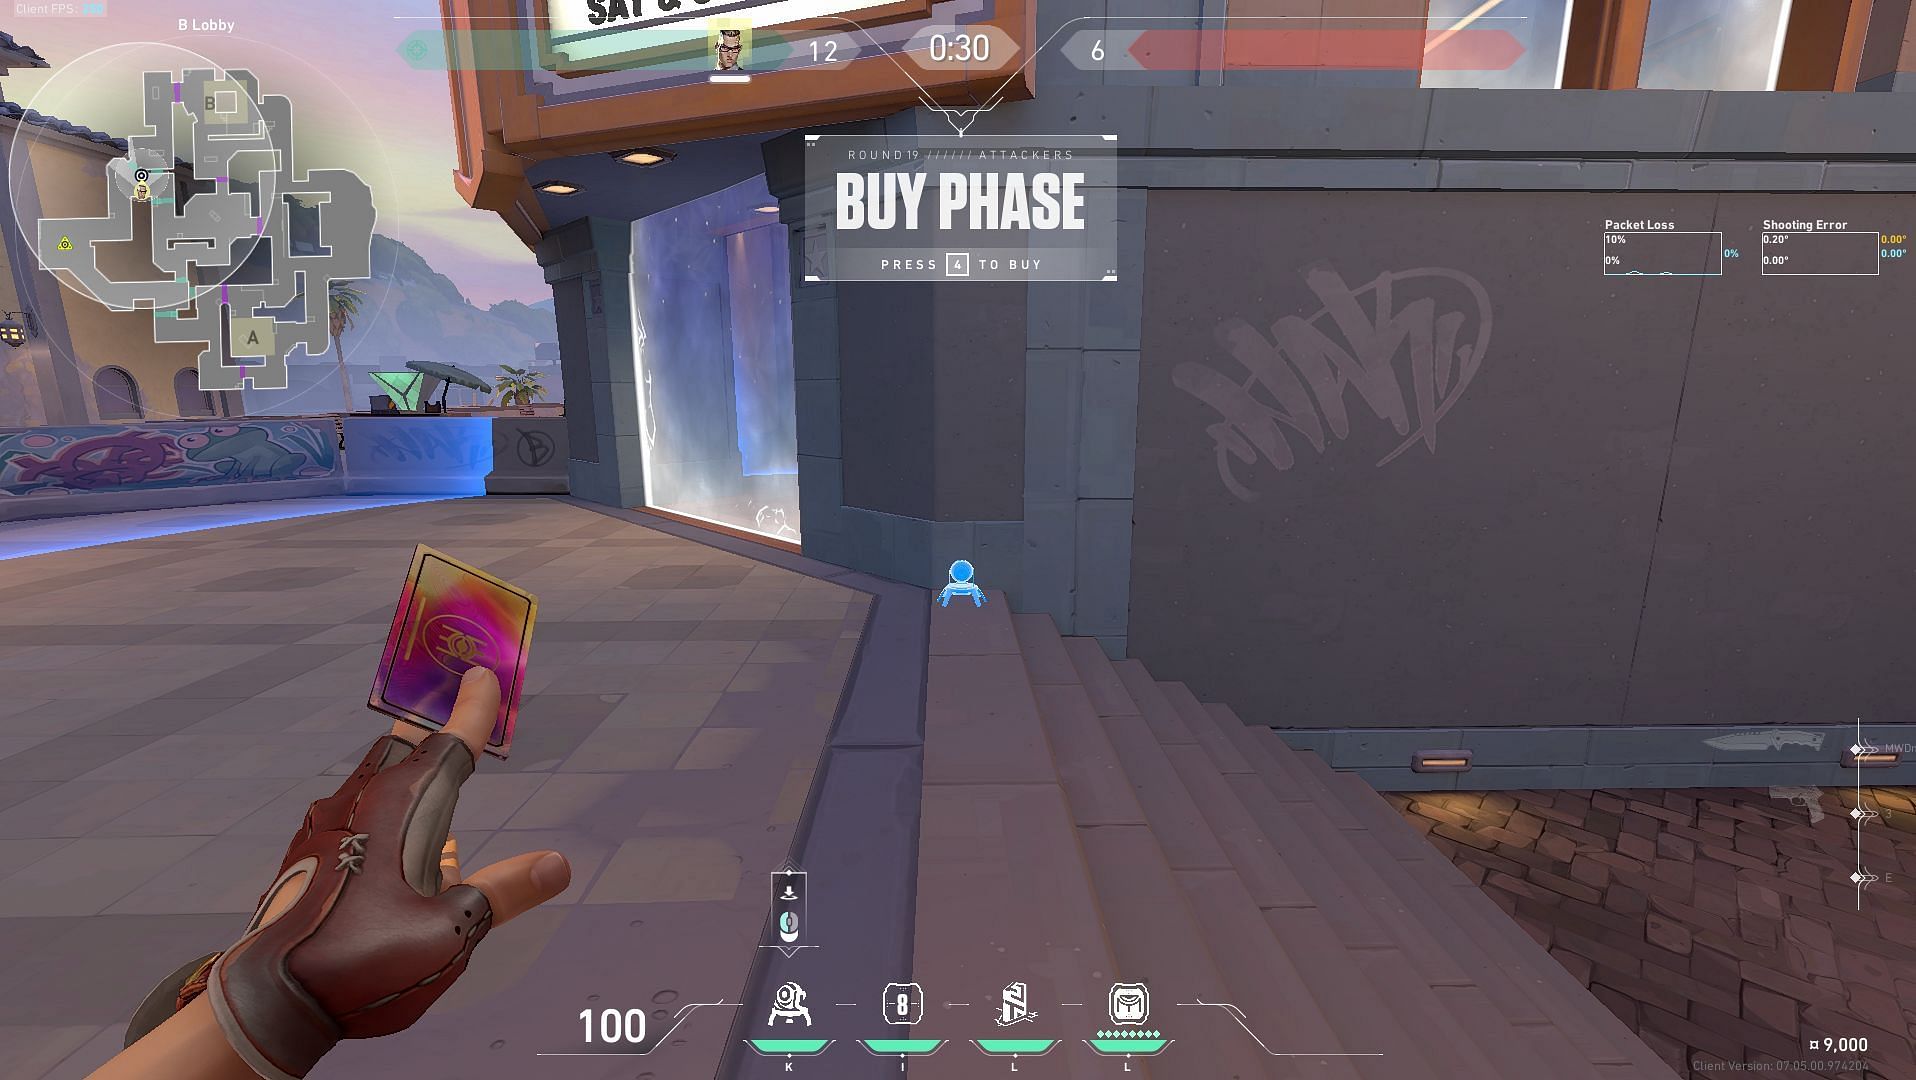
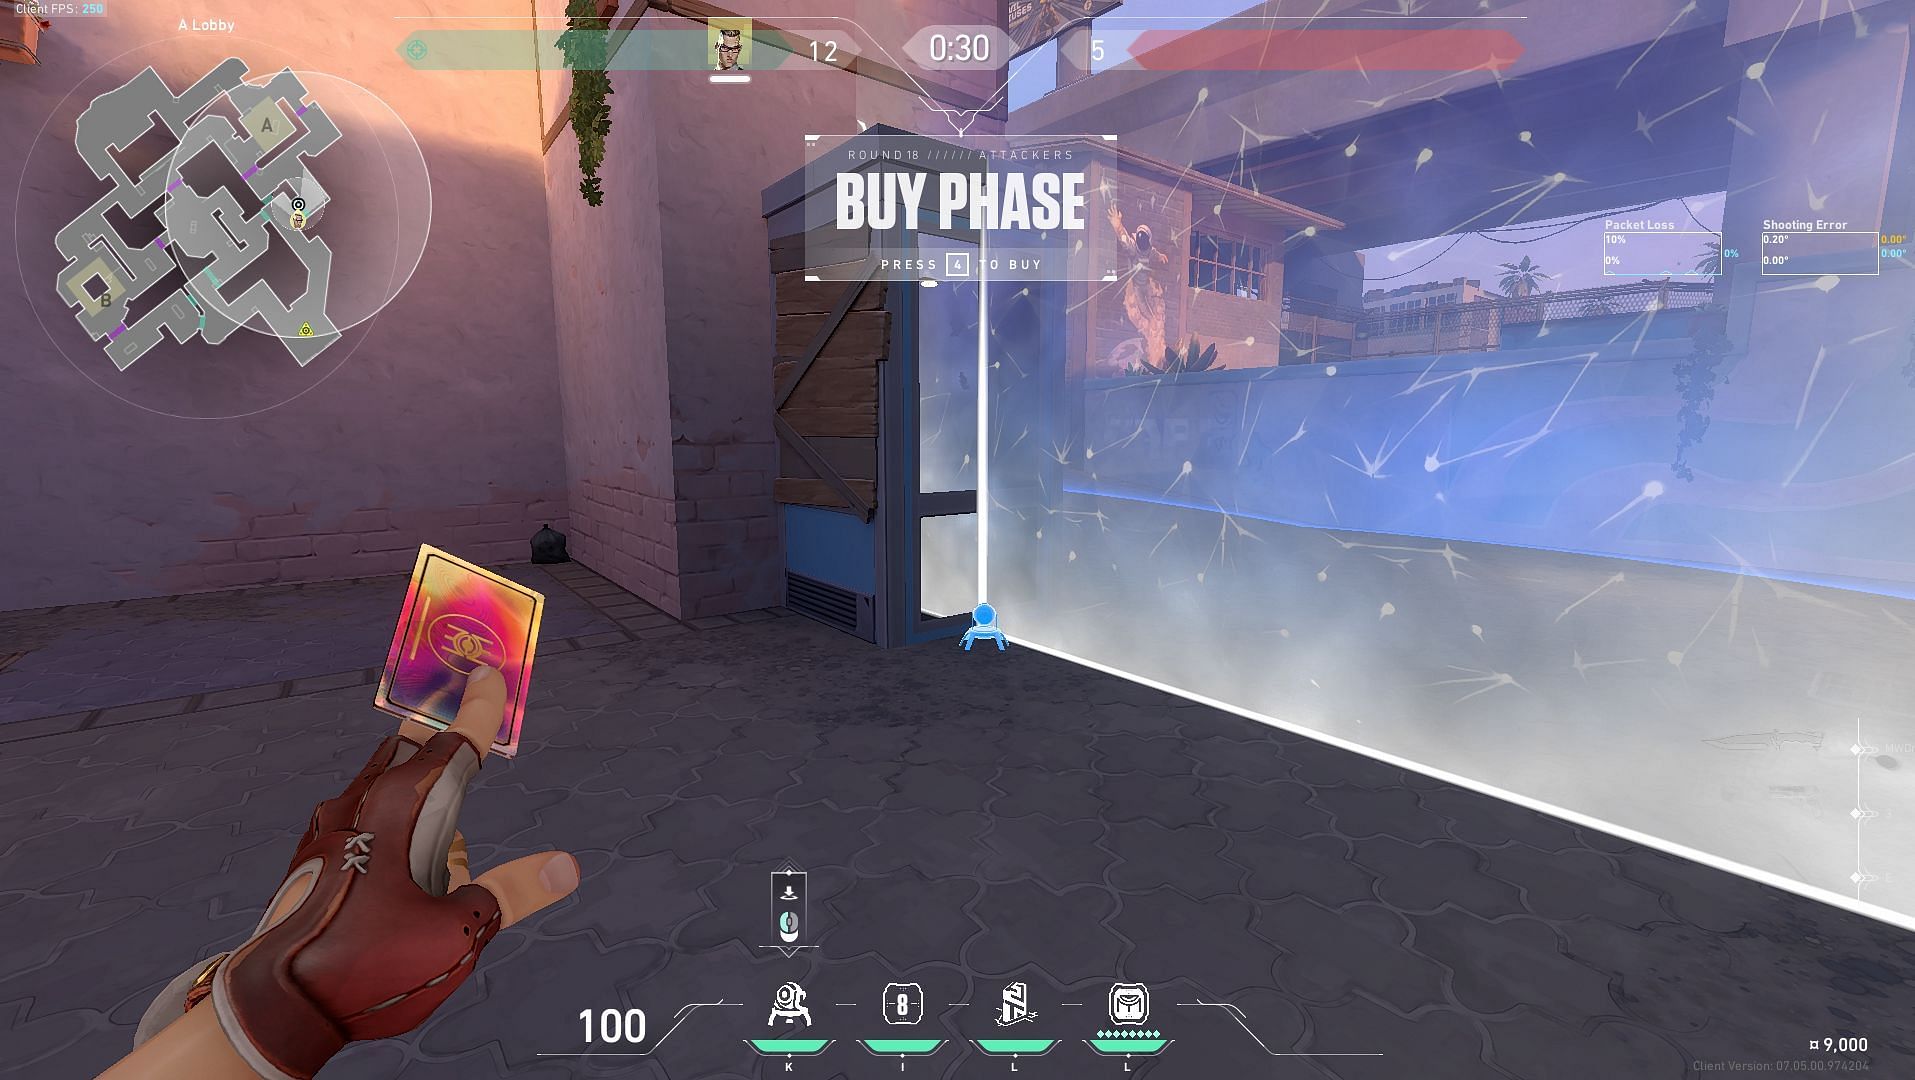
1) Trademark at B Lobby
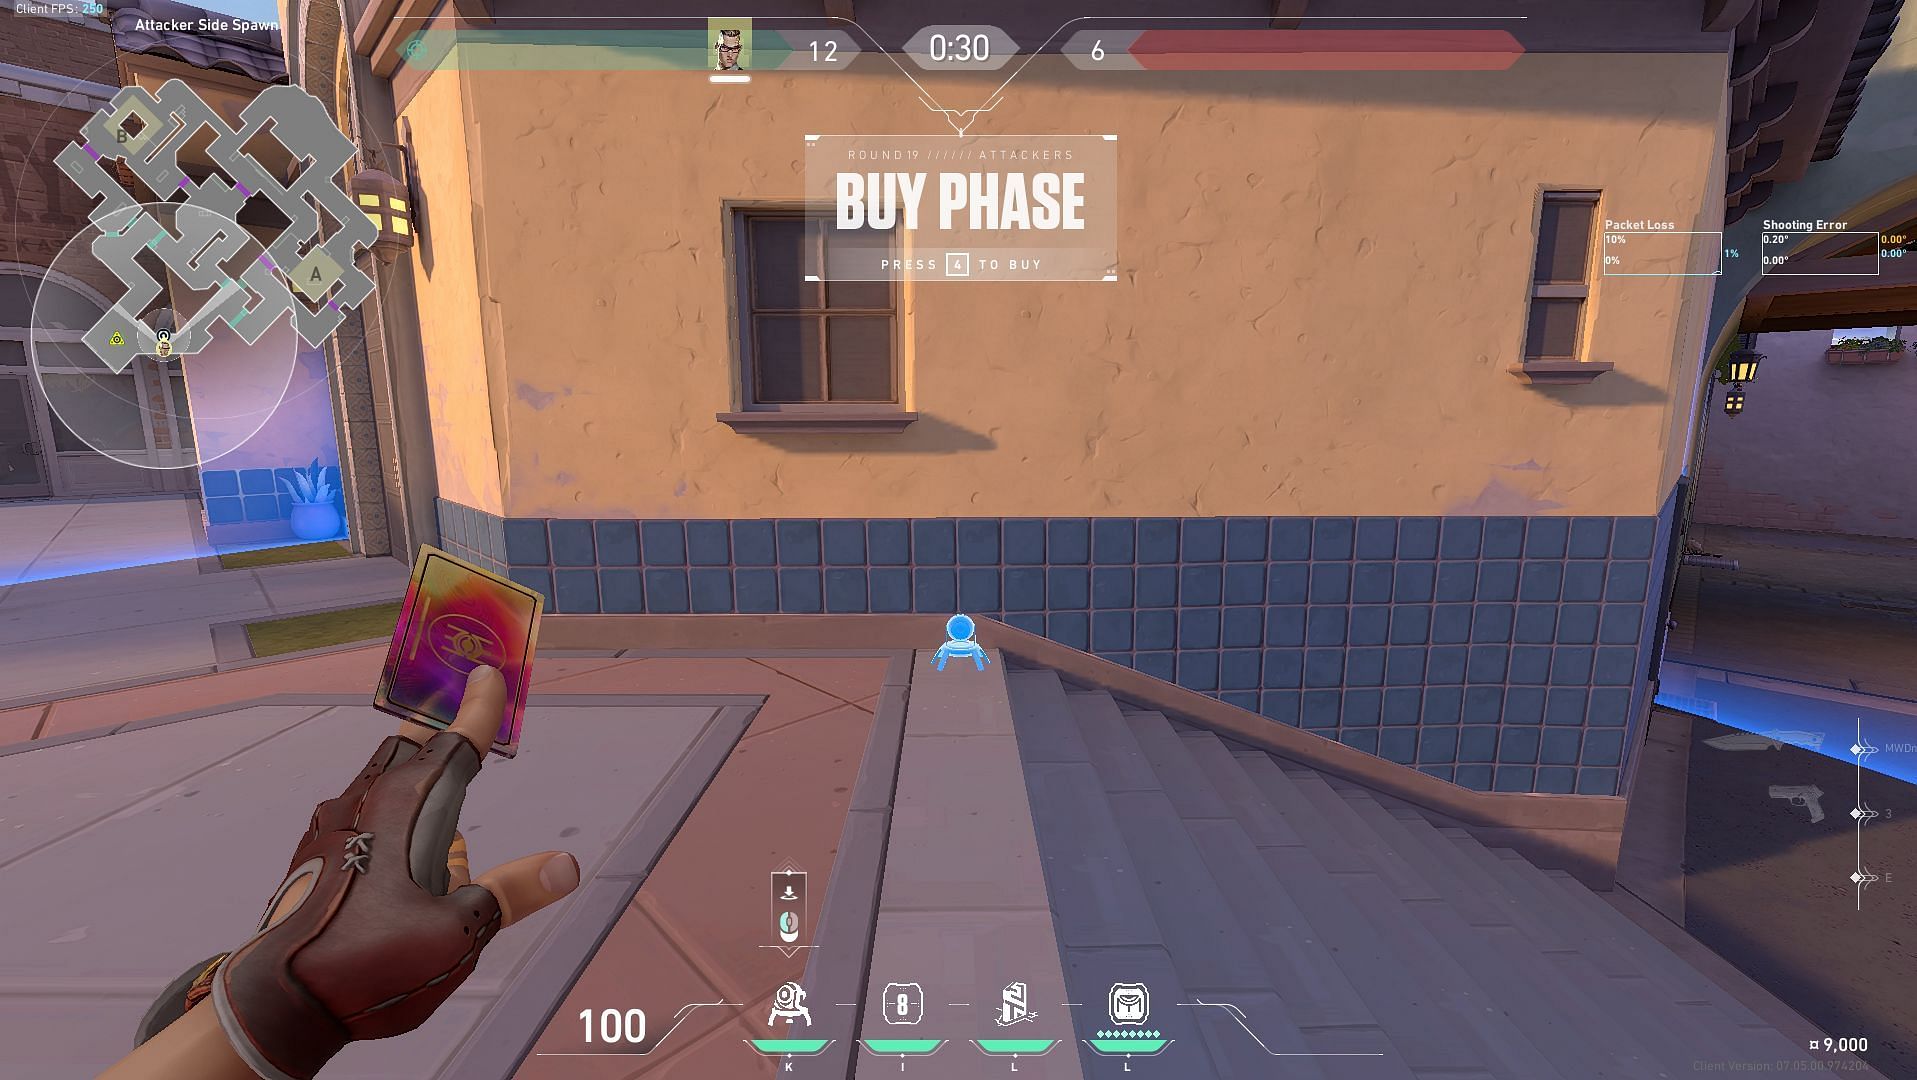
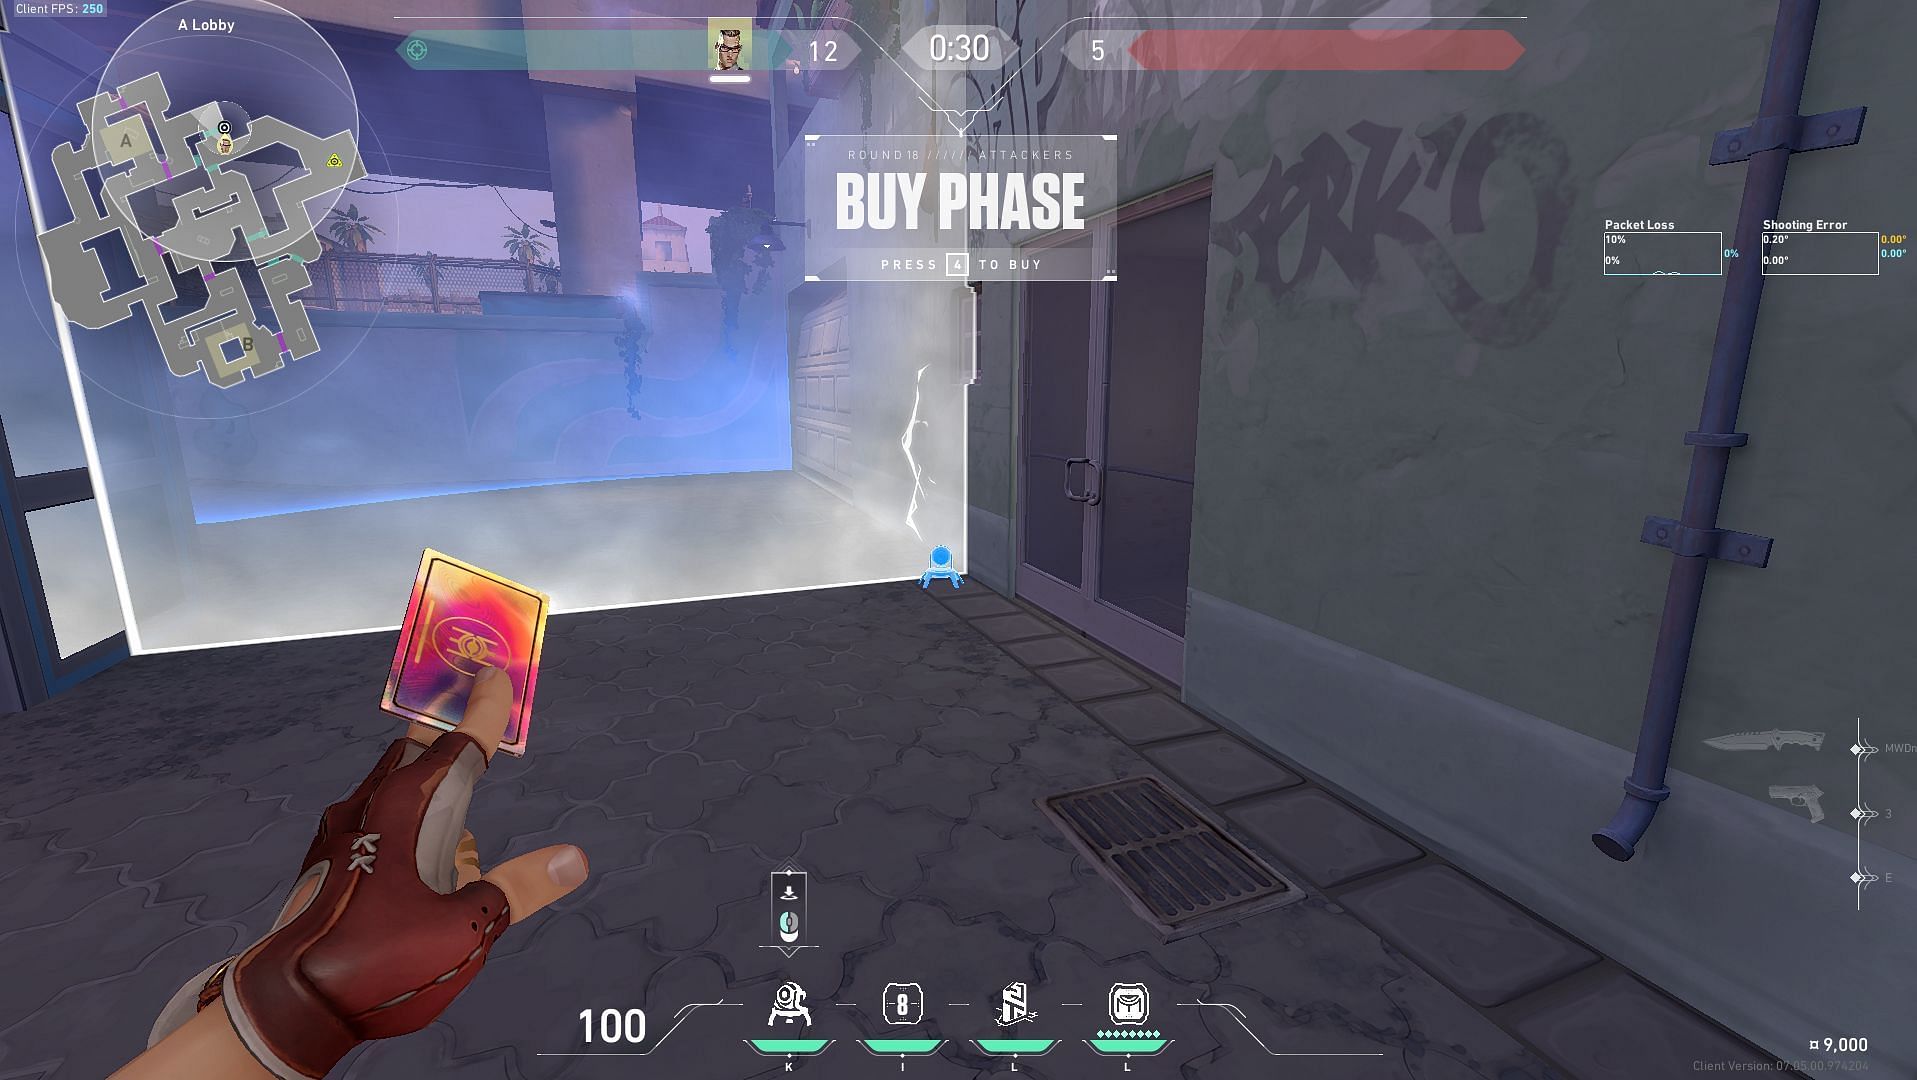
2) Trademark in Attacker Side Spawn
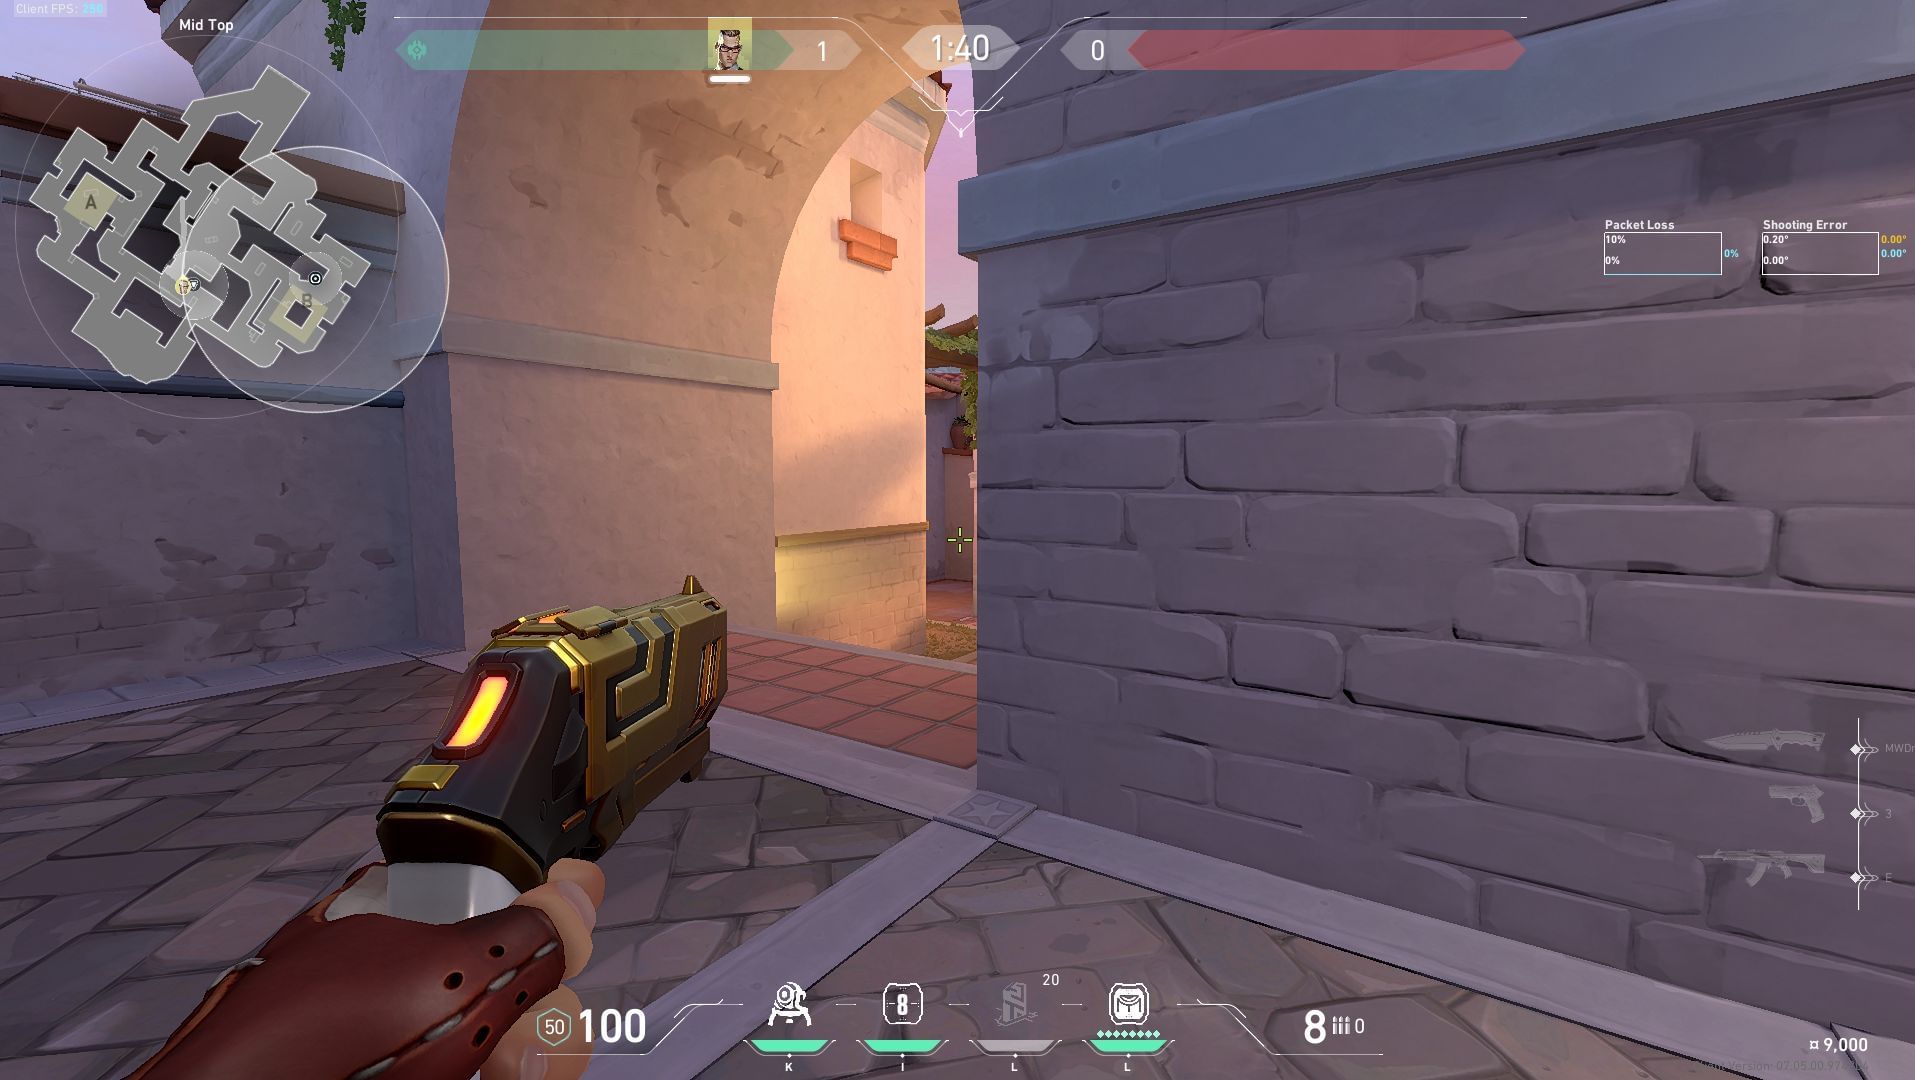
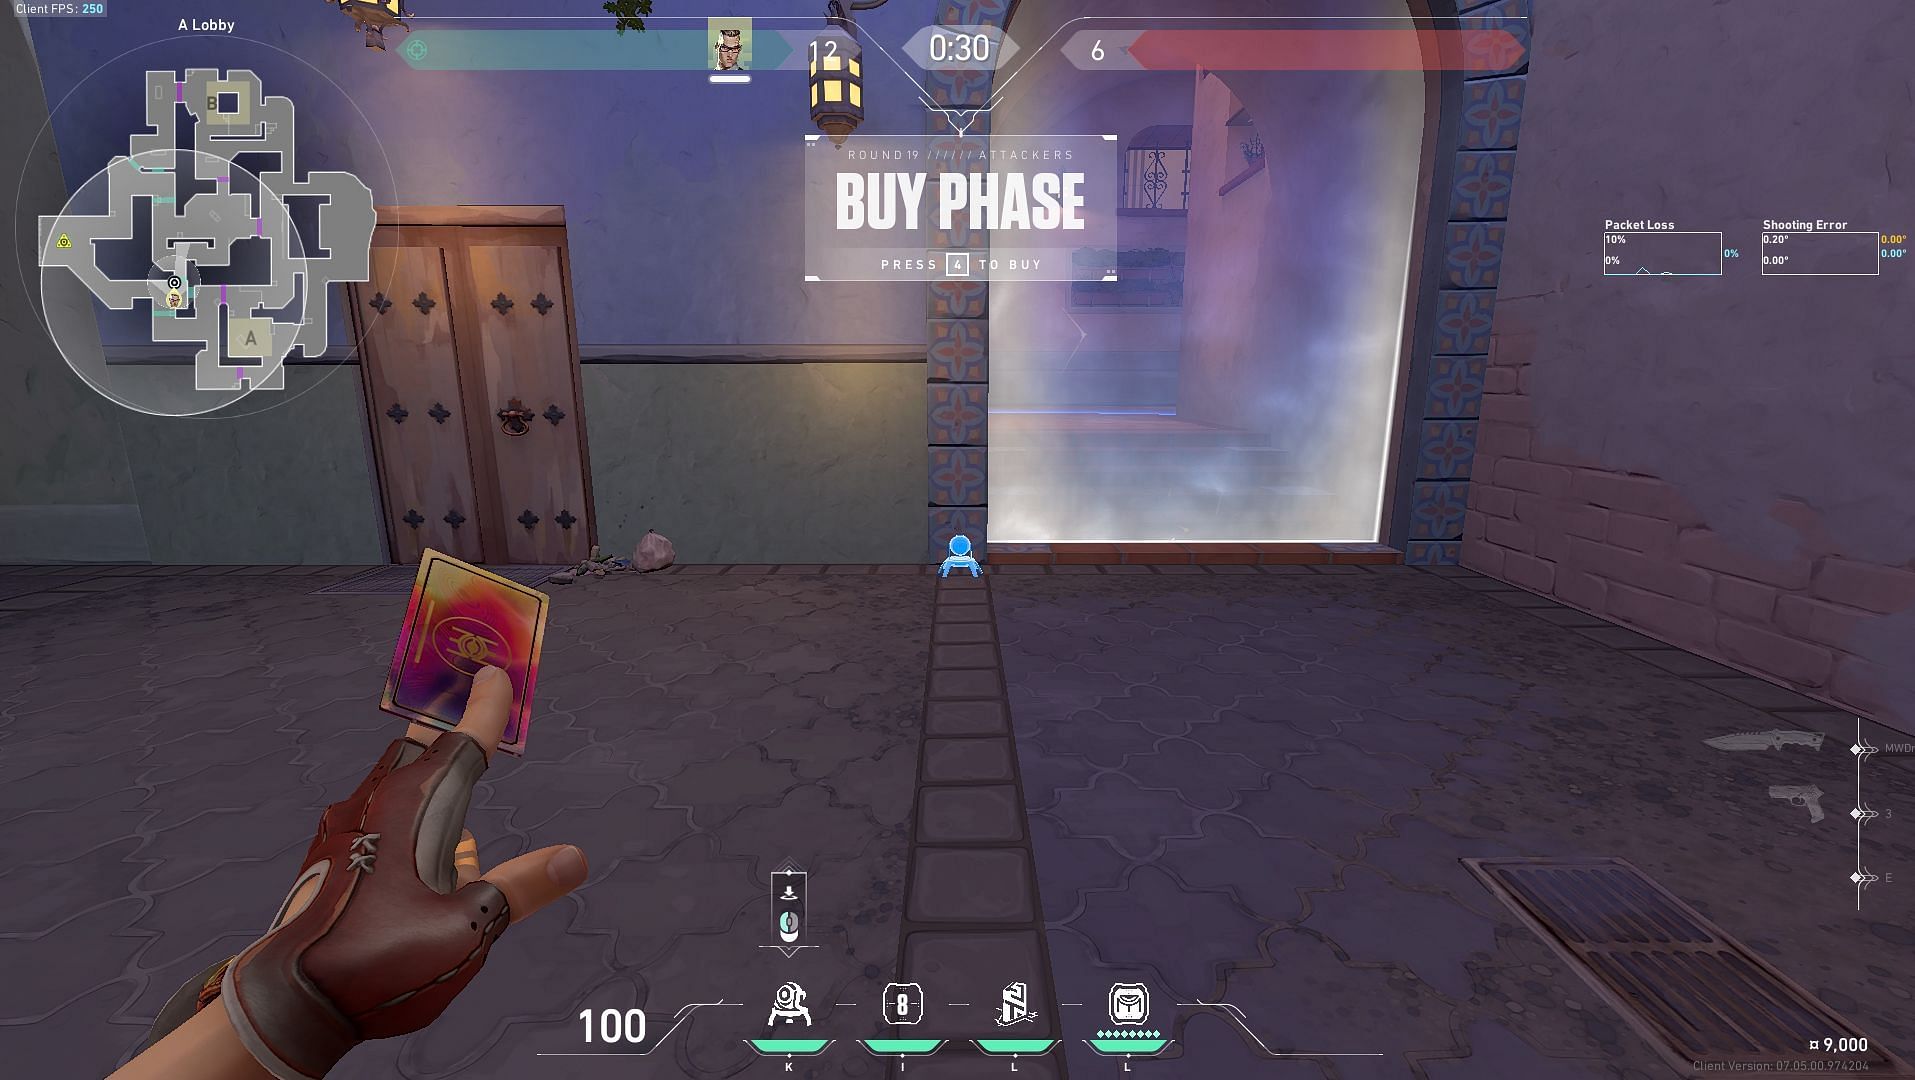
3) Trademark for contesting Middle Courtyard
4) Trademark for contesting A site
With this guide, you are now fully prepared to step into the role of Chamber, the sophisticated French sharpshooter, on Valorant's recently introduced Sunset map.