'%20x='0'%20y='0'%20height='100%25'%20width='100%25'%20%0A%20%20%20%20%20%20%20%20%20%20xlink%3Ahref='data:image/jpg;base64,/9j/2wBDAAYEBQYFBAYGBQYHBwYIChAKCgkJChQODwwQFxQYGBcUFhYaHSUfGhsjHBYWICwgIyYnKSopGR8tMC0oMCUoKSj/2wBDAQcHBwoIChMKChMoGhYaKCgoKCgoKCgoKCgoKCgoKCgoKCgoKCgoKCgoKCgoKCgoKCgoKCgoKCgoKCgoKCgoKCj/wgARCAAGAAoDASIAAhEBAxEB/8QAFQABAQAAAAAAAAAAAAAAAAAAAAb/xAAVAQEBAAAAAAAAAAAAAAAAAAADBP/aAAwDAQACEAMQAAAAjZUqf//EABwQAAMBAAMBAQAAAAAAAAAAAAECAwQABTEGEv/aAAgBAQABPwDpfr9cu0zWu9PzCRmqJ4o8HN3bVvu0WTFlVKUZwpdiQCef/8QAFxEBAAMAAAAAAAAAAAAAAAAAAQARMf/aAAgBAgEBPwBL2f/EABYRAQEBAAAAAAAAAAAAAAAAACEAAf/aAAgBAwEBPwDBv//Z'%3E%3C/image%3E%3C/svg%3E)
Riot game’s team-based competitive shooter, Valorant, hinges on crystal clear communication, and a lack of that is one of the prevalent problems across all ranks. Properly calling the areas of action on a map can determine the excellence of a ranked team. Victory in competitive mode, commonly called ‘Ranked’, can be difficult without proper knowledge of the different locations on various maps in the pool.
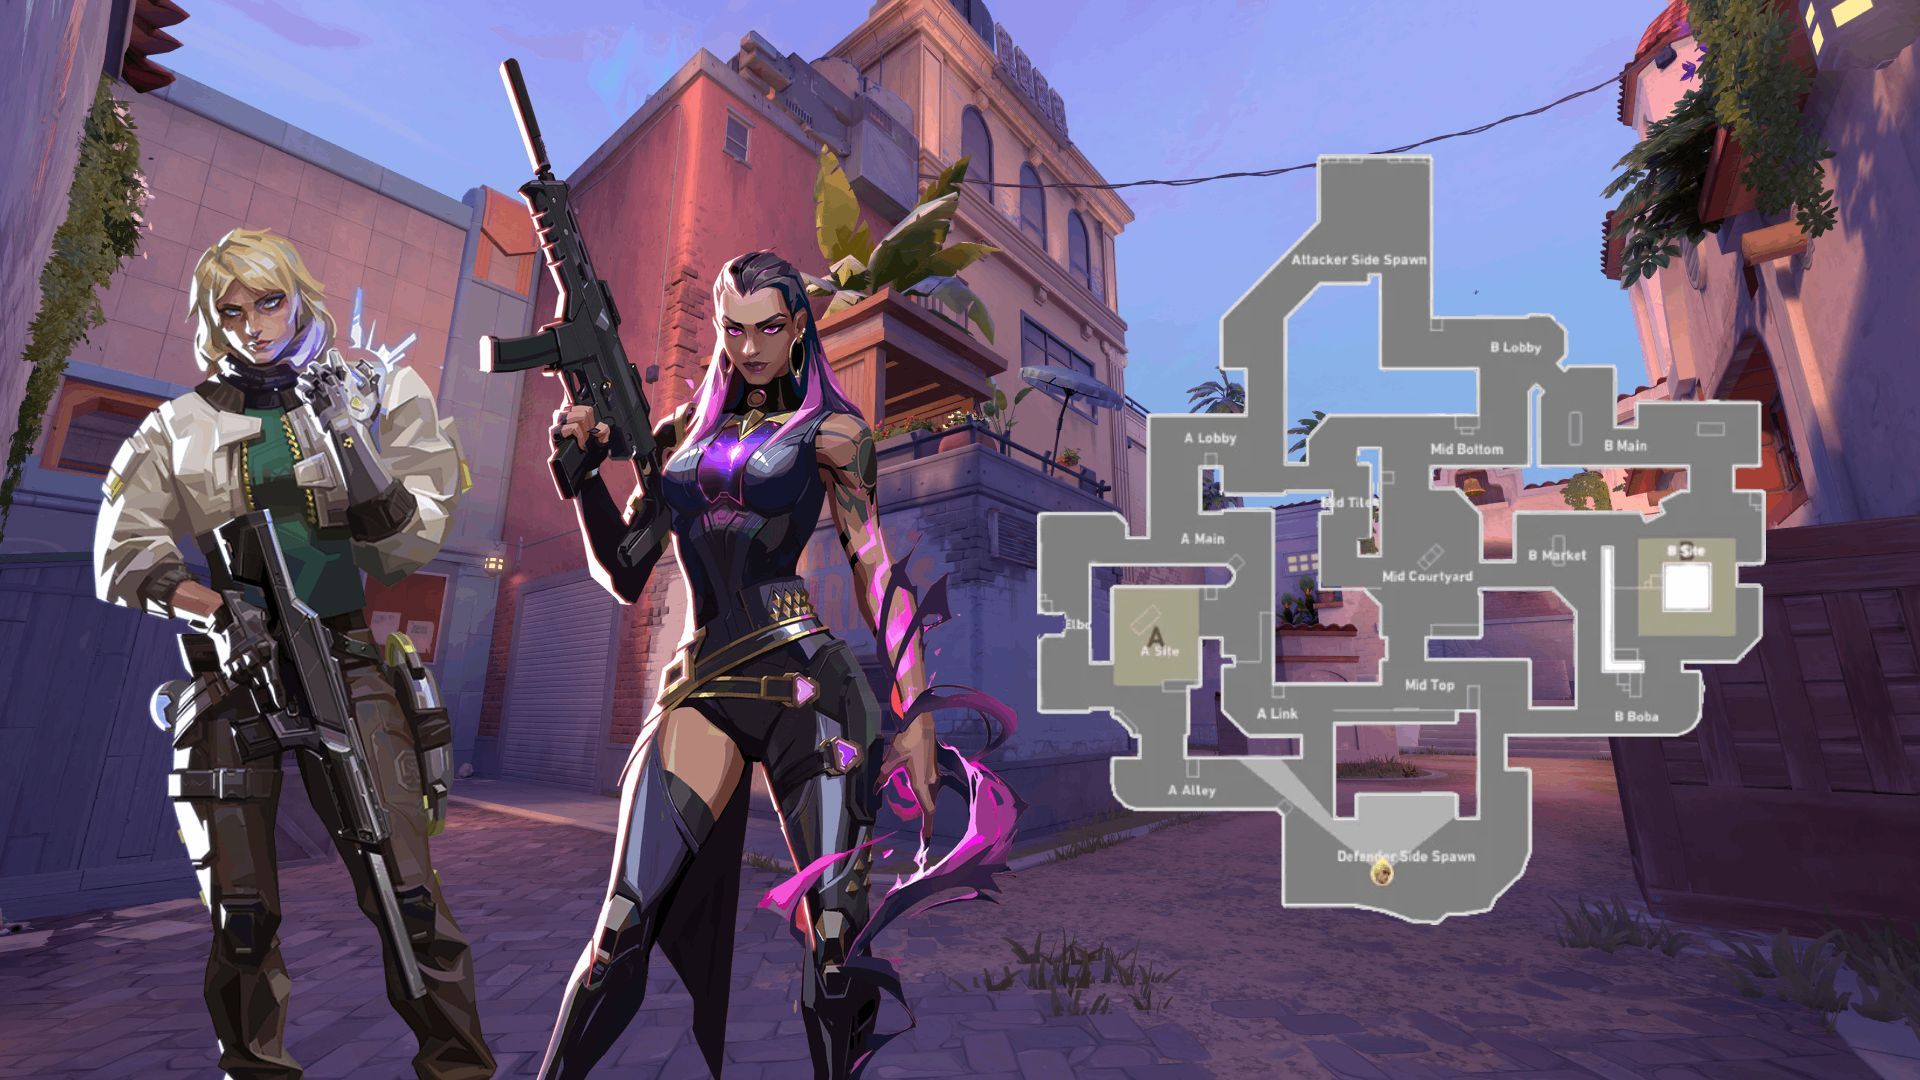
In Episode 7 Act 2, a new Valorant map named Sunset joins the competitive mode’s map pool featuring a 2-site style design and no gimmicks. The clever design of the maps requires astute map knowledge. Therefore, the following article delves into the important callouts you should be aware of on Sunset.
A-Elbow, B-Market, and three other Sunset callouts Valorant players must know
1) B-Main

Split into two rooms, B-Main of Sunset provides early access to both the attacker and defenders in Valorant. Ultimate Orb placement favors defenders as it is positioned in a corner in front of the defense side barrier. The layout of this part allows for early-round utility exchange and one-on-one gun fights.
Duelists are expected to lock down this part of the map on their defense rounds. Therefore, attacking teams must use abilities like Trailblazer, Owl Drone, Guiding Light, or other recon/clearing utilities. After planting the spike on the B-site, B-Main offers a great spot to defend the spike from diffusers in the post plant.
2) Mid-Top
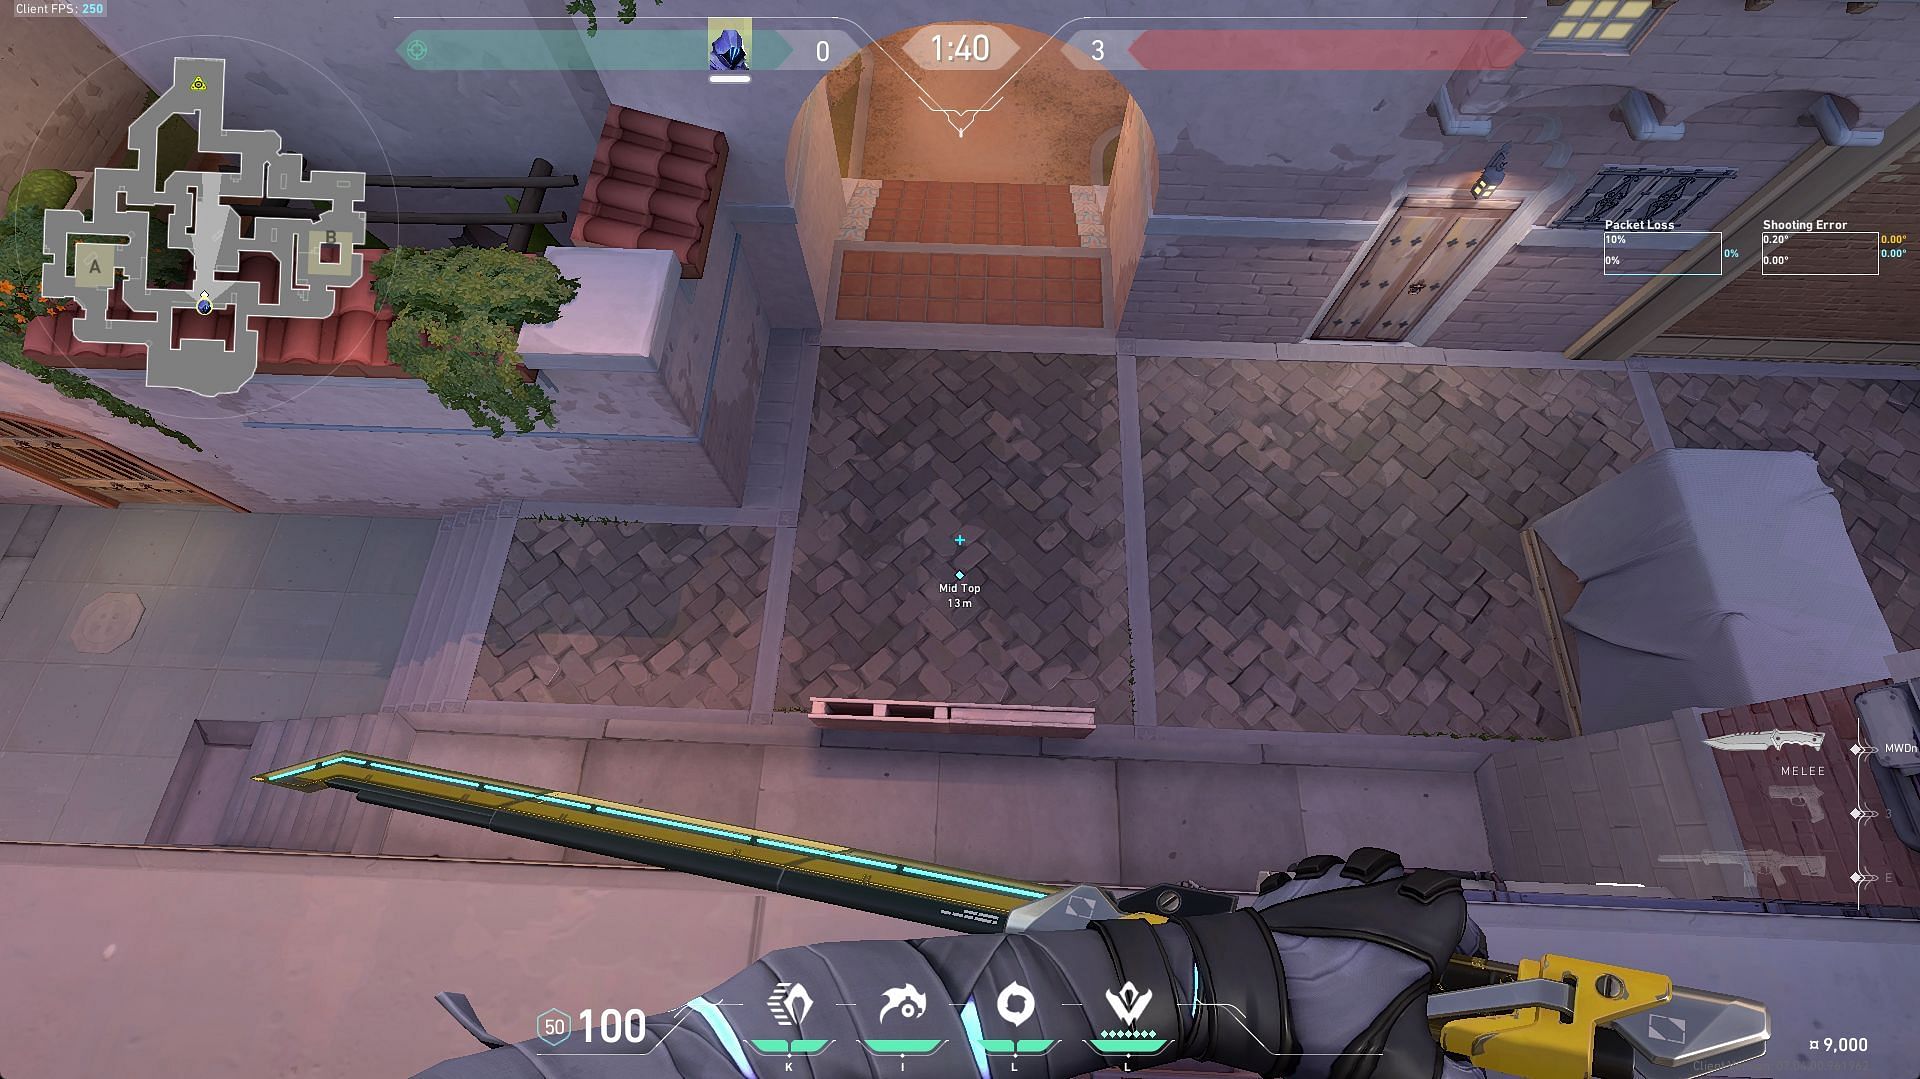
The Middle Courtyard of Valorant’s new map is very important to control throughout the round. Defenders stationed at Mid-Top of Sunset can get a clear line of sight into attackers peeking from Mid-Bottom and Mid-Tiles. However, defenders can opt to hold passive angles from A-Link or B-Boba to trap the attackers as they push into the Mid-Top area.
A-site being a tougher side to attack on the map, the attacking team might want to split towards B-site from B-Main and B-Market. So the attack smoke will cover the Top-Mid area.
In such cases, Sentinel agents might want to put alarm bots/trip wires to notify them if any attacker is lurking around defender spawn. The attacking team can choose to take control of the top middle from Mid-Tiles with initiator utility and smoking off B-Market.
3) A-Elbow
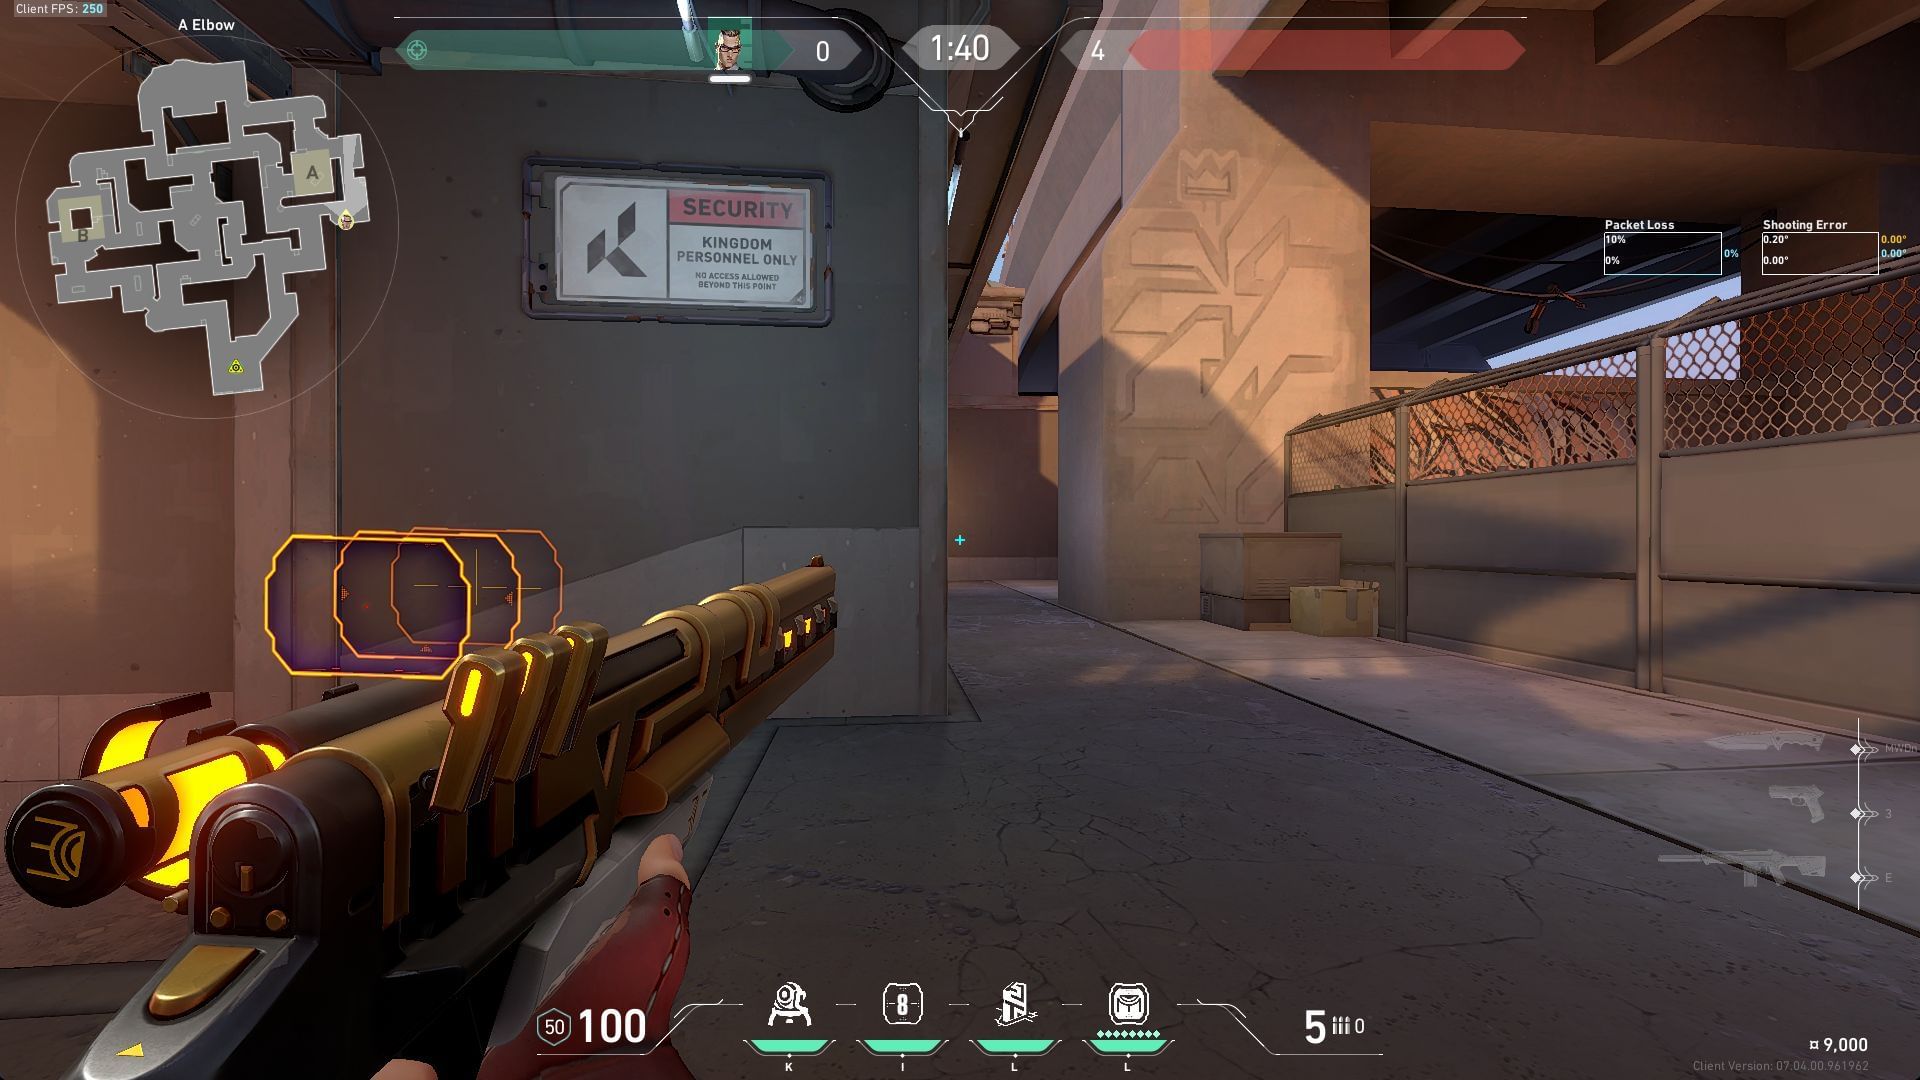
From A-lobby, leading up to A-site, attackers may find themselves in the lane splitting into A-Main and A-Elbow. The layout of A-Elbow features three cheeky angles defenders can hold, with a long lane leading up to A-Alley and A-site on the left side.
Controlling this part of the map is essential for attackers in order to set up a flank presence around the site anchor or comfortably get the spike planted in a favorable spot for the post plant.
Defenders can set up crossfires between A-Main and A-Elbow so attackers might need to use initiating utilities like Trailblazer and Owl Dorne. A-Elbow lane is about 32m long, so Sentinel utility like Killjoy’s turret or even a Chamber stationed with the Operator can deter the oncoming attackers.
4) Mid-Tiles
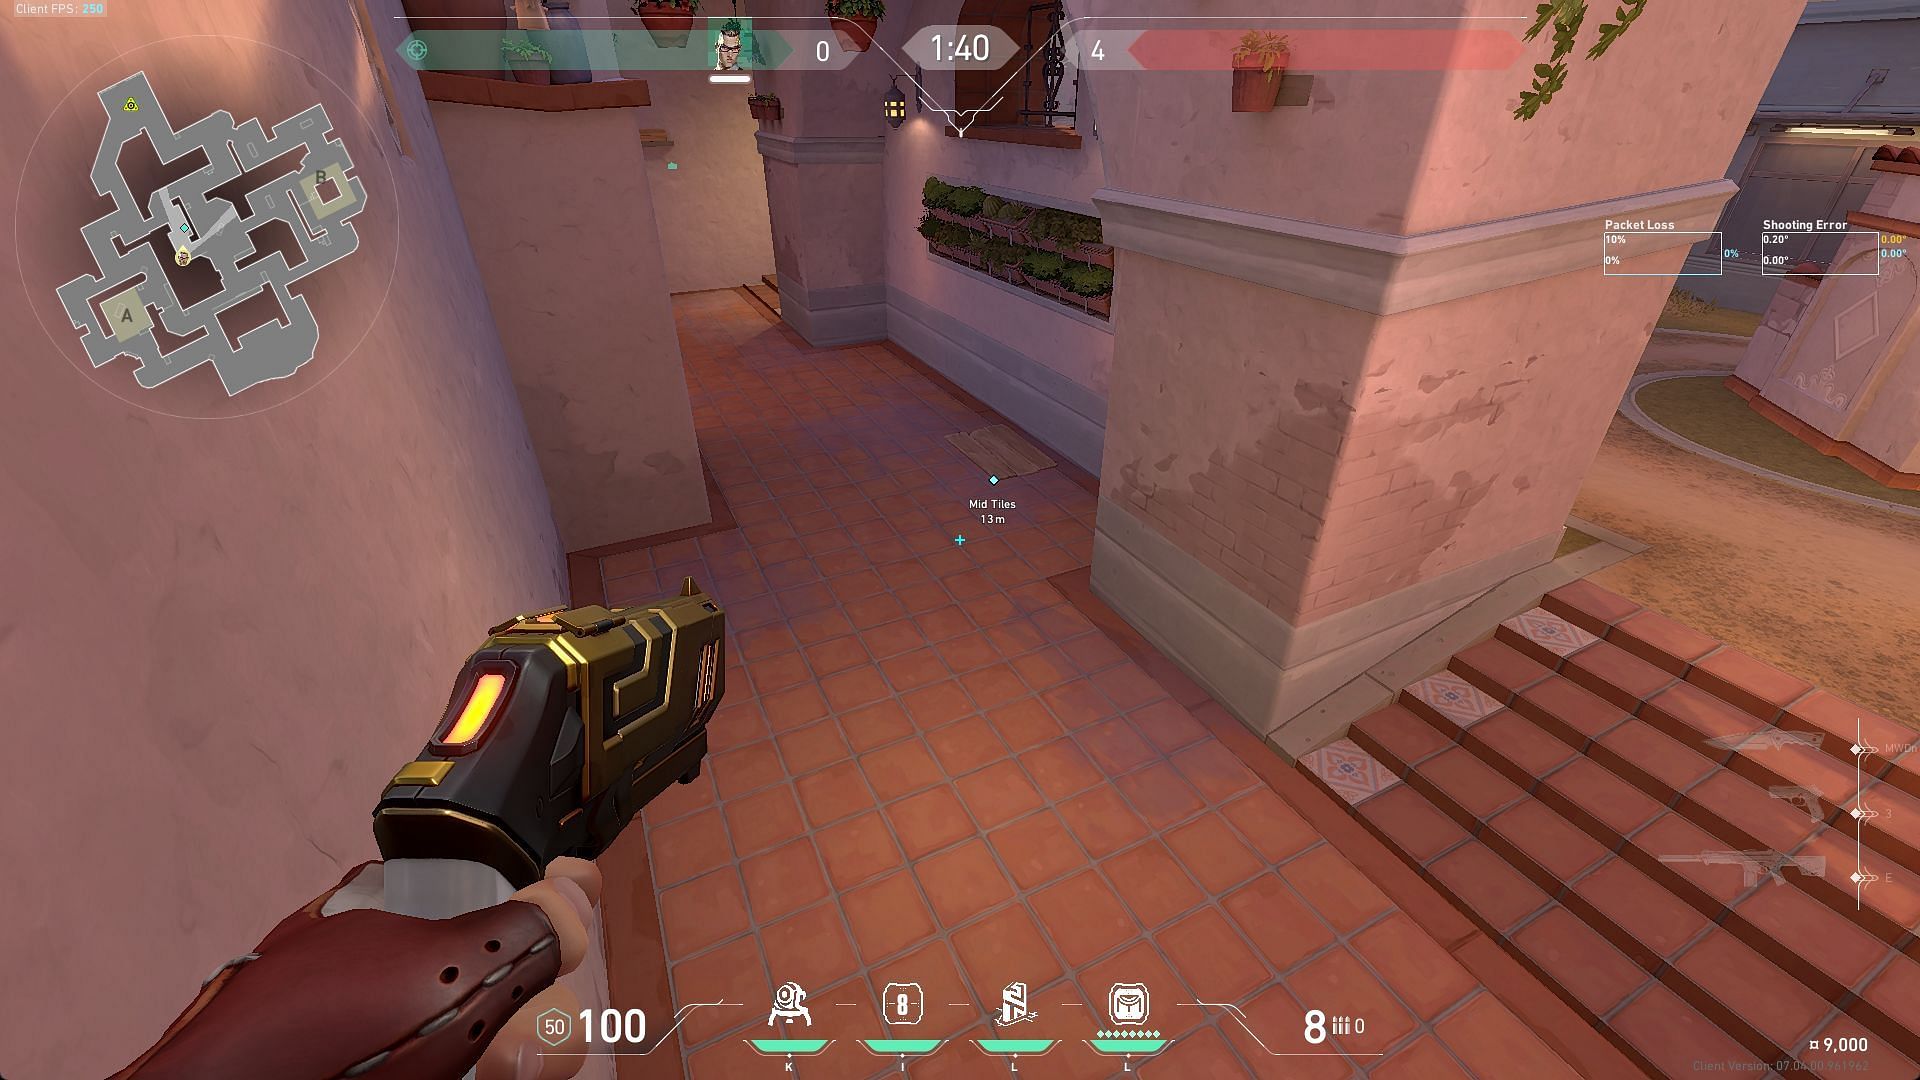
As the barriers around the Mid-Bottom and A-Lobby drop-down, stationed attackers can instantly threaten the control of the Middle courtyard area of the map in a very safe yet assertive manner from Mid-Tiles. Attackers can isolate major confrontations early on one by one while navigating their way to either A-Link through Mid-Top or B-Market in most cases.
A window grill in A-Tiles Wall is accessible for attacking initiators to use their utilities to clear the Middle Courtyard from A-lobby while the attacking duelist pushes further into the Mid-Tiles area.
To clear nearby spaces like Mid-Top and B-Market, Mid-Tiles offers a safe spot for attacking Sova or Skye to use abilities like Owl Drone or Trailblazer, respectively. If the attackers beeline to A-site from A-Main, Mid-Tiles grants instant flanking opportunities to defenders who can quickly push behind the enemy line.
5) B-Market
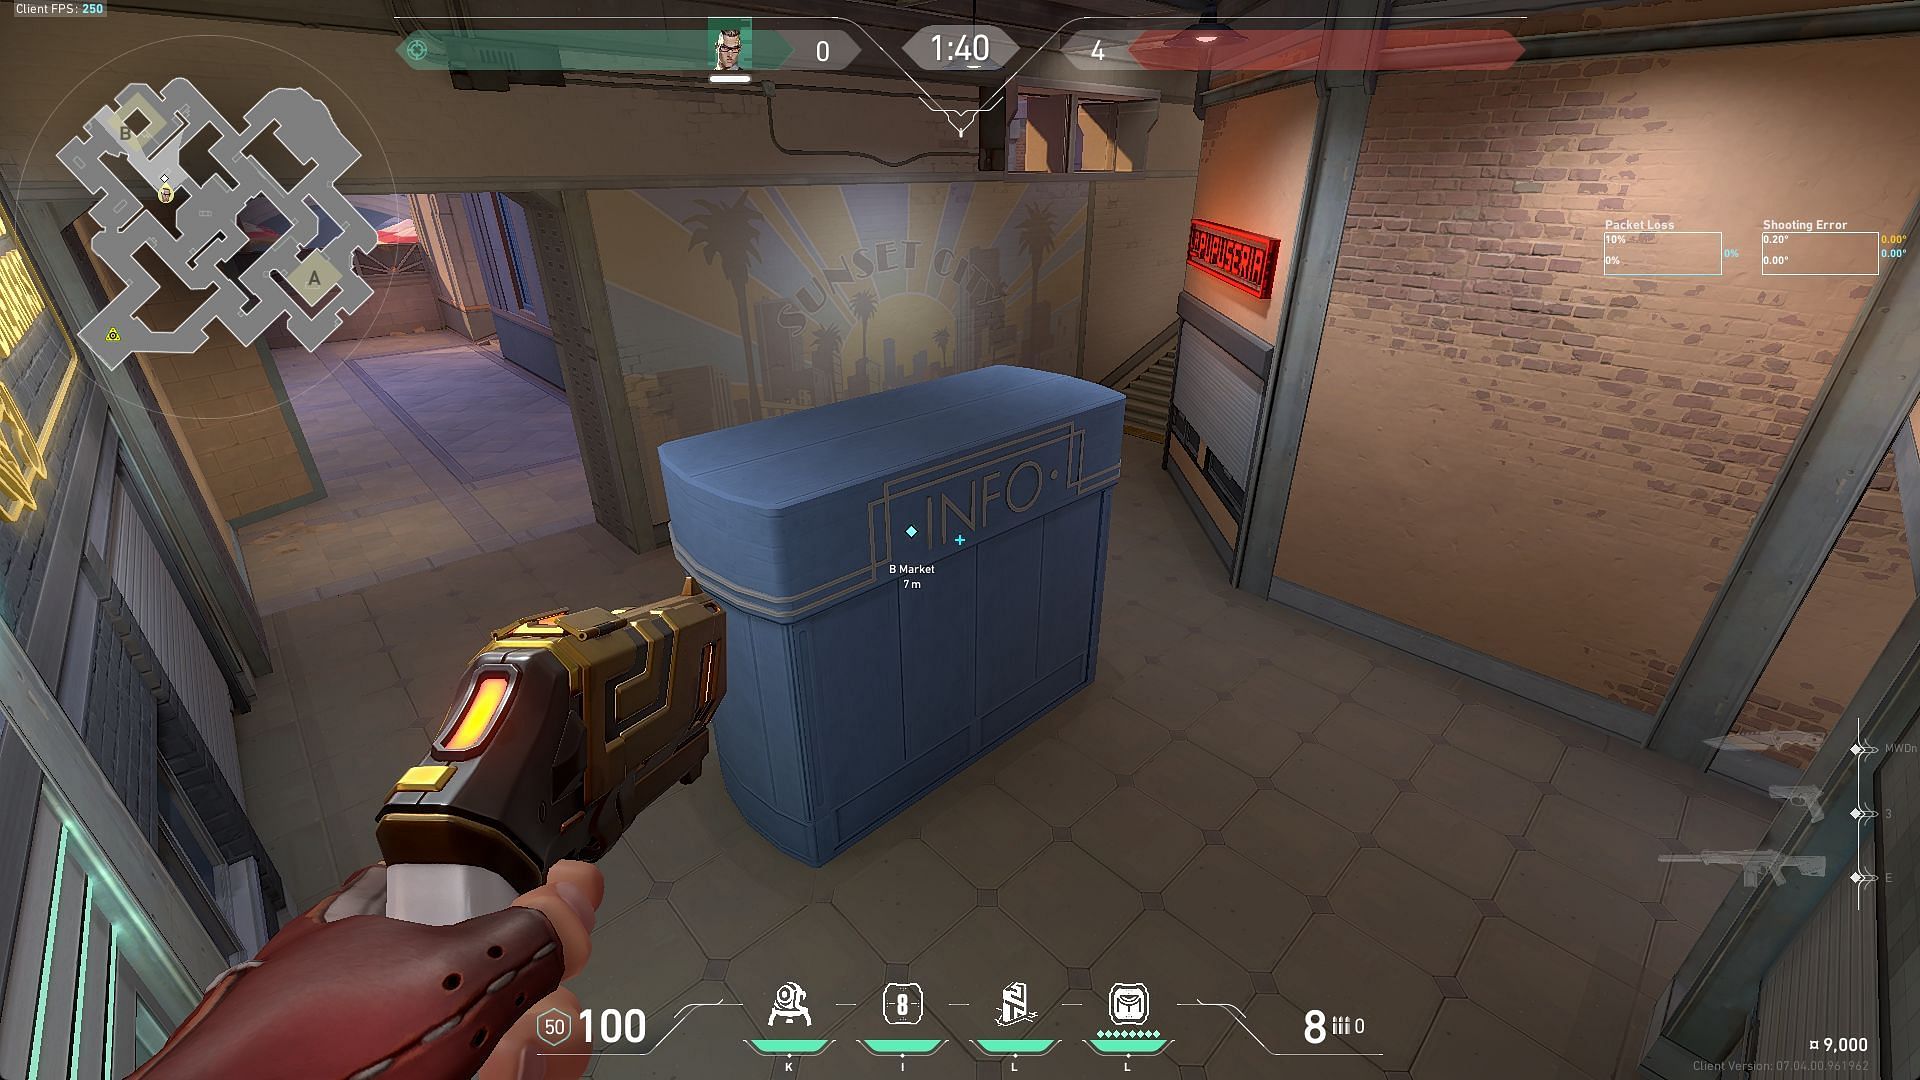
Placed adjacent to the Middle Courtyard and B-Site, B-Market is the only spot on the map that has a door like Ascent. Access to this door is nearer to the defense side barriers so they can use this door to block off attackers executing a split attack onto the B-Site.
Once the door breaks down as the attackers force their way in, they are faced with a part of the map that has deep corners and tricky angles.
Similar to Mid-Tiles, B-Market has a similar window opening near the ceiling to send initiating utility into the B-site for the duelist rushing into the site from B-Main. When a team composition lacks Valorant agents like Sage, Harbor, or Gekko who can ensure a safe spike plant, the B-site attack execution pivots on the control of B-Market.
The above list consists of some of the important Valorant new map’s Sunset callouts. Some of the other official and unofficial callouts are B-Boba, A-Link, backsite B/B pillar, middle hop up, A ramp, ‘Default’, door, and more are also very important.
Players playing the brand new Sunset map must take their time to understand all the new callouts and identify map areas with similar callouts to the other Valorant maps.