
'%20x='0'%20y='0'%20height='100%25'%20width='100%25'%20%0A%20%20%20%20%20%20%20%20%20%20xlink%3Ahref='data:image/jpg;base64,/9j/2wBDAAYEBQYFBAYGBQYHBwYIChAKCgkJChQODwwQFxQYGBcUFhYaHSUfGhsjHBYWICwgIyYnKSopGR8tMC0oMCUoKSj/2wBDAQcHBwoIChMKChMoGhYaKCgoKCgoKCgoKCgoKCgoKCgoKCgoKCgoKCgoKCgoKCgoKCgoKCgoKCgoKCgoKCgoKCj/wgARCAAGAAoDASIAAhEBAxEB/8QAFQABAQAAAAAAAAAAAAAAAAAABQf/2gAIAQEAAAAAlZn/xAAUAQEAAAAAAAAAAAAAAAAAAAAF/9oACAECEAAAAHP/xAAUAQEAAAAAAAAAAAAAAAAAAAAF/9oACAEDEAAAABv/xAAgEAACAQMEAwAAAAAAAAAAAAABAwIEBRIAERMhUqHi/9oACAEBAAE/ALVdaF+aF2tNHPDeZTNjOYnyzmfWnVWLpjkYNpHoD61//8QAFhEAAwAAAAAAAAAAAAAAAAAAACEx/9oACAECAQE/AIj/xAAXEQEAAwAAAAAAAAAAAAAAAAABAAIi/9oACAEDAQE/ALGln//Z'%3E%3C/image%3E%3C/svg%3E)
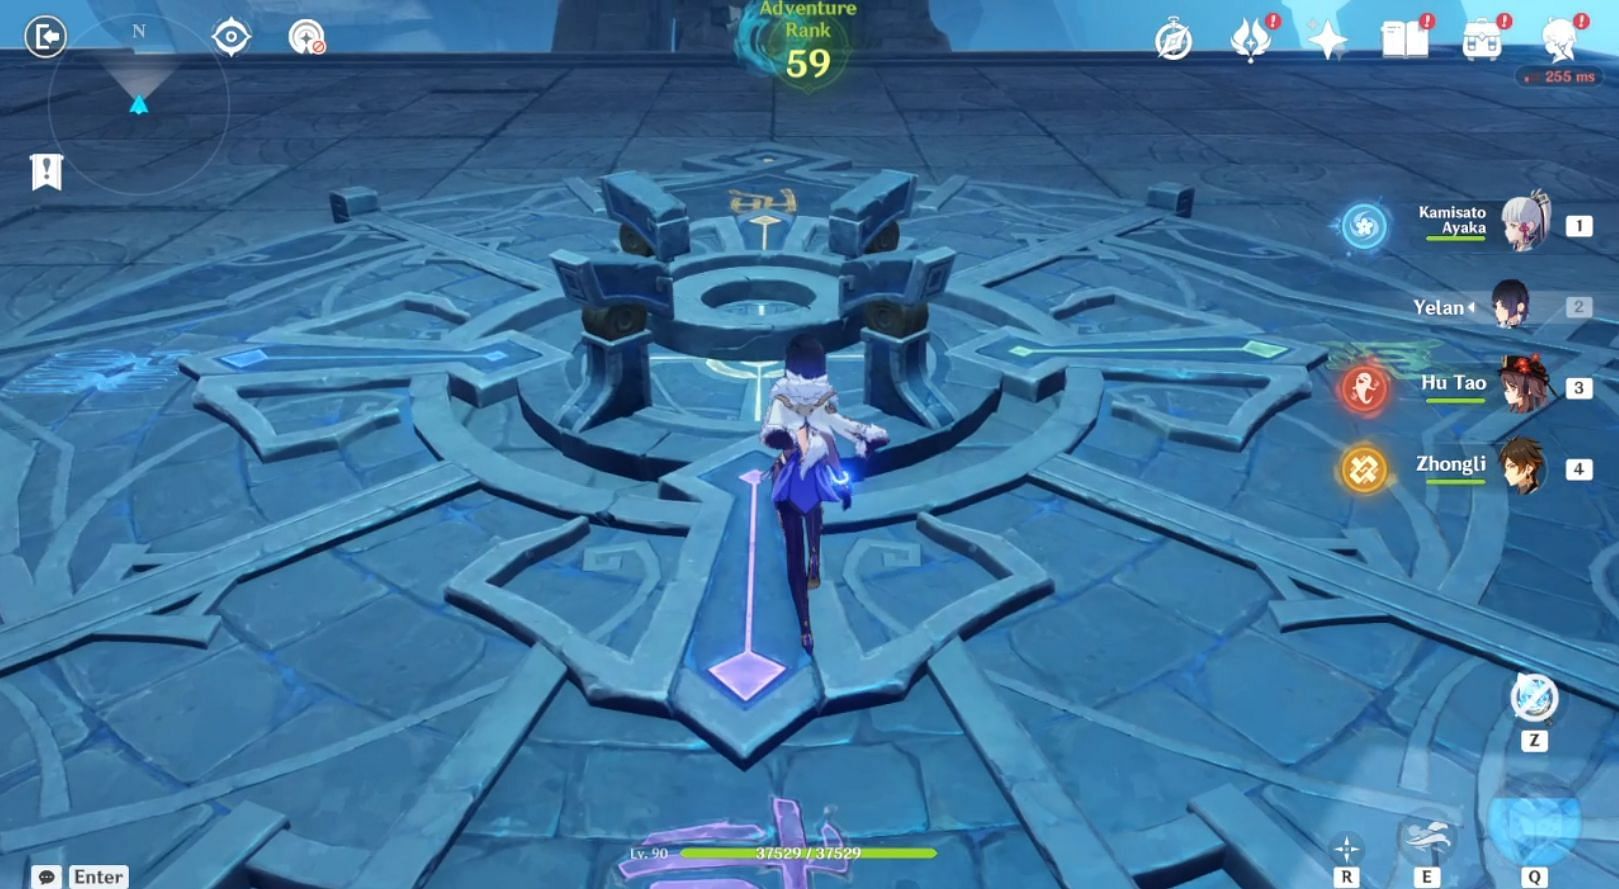
A new domain has been unlocked on the second day of the Perilous Trail event in Genshin Impact. Before entering it, players must complete the continuation of the Archon Quest, 'Danger All Around.' Inside this quest, one puzzle has proven to be hard for beginners to solve.
Travelers must step on the correct symbols on the ground and then operate a device to shine a beam of light onto the symbol. This article will show gamers how to solve the puzzle inside the Danger All Around domain in Genshin Impact.
How to solve the Danger All Around domain in Genshin Impact
Looking for Crossword hints & solutions? Check out latest NYT Mini Crossword Answers, LA Times Crossword Answers, and Atlantic Crossword Answers
There are a total of four symbols with different colors and images inside the Danger All Around domain in Genshin Impact. Note that players do not need to start the symbols in any order.
If players step on the correct symbol, it will be activated to solve the puzzle. However, if they accidentally walk on top of the wrong one, their active character will take some damage. While it is not lethal damage, gamers should still be careful when doing the puzzle.
1) Purple symbol
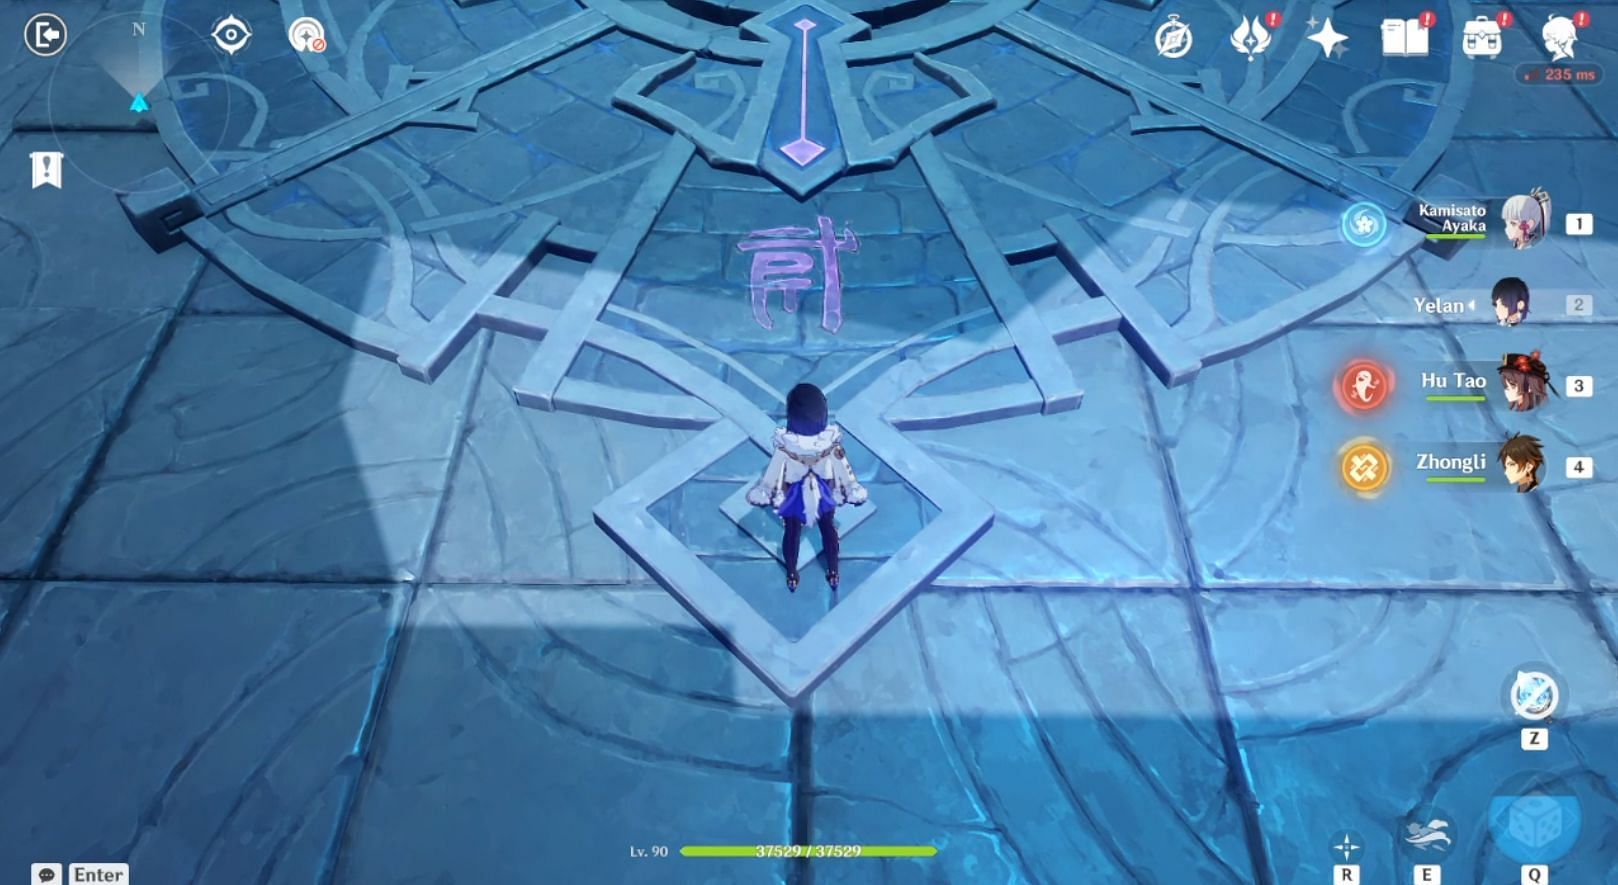
Before starting, make sure to remember the purple symbol icon like in the image above. There are four similar symbols of the correct purple icon on the floor, and players need to step on all of them.
Once all the correct icons have been activated, a single Lawachurl will appear, and Genshin Impact players must defeat the enemy to continue the puzzle. The next puzzle uses Lightshapers to light up and activate large symbols.
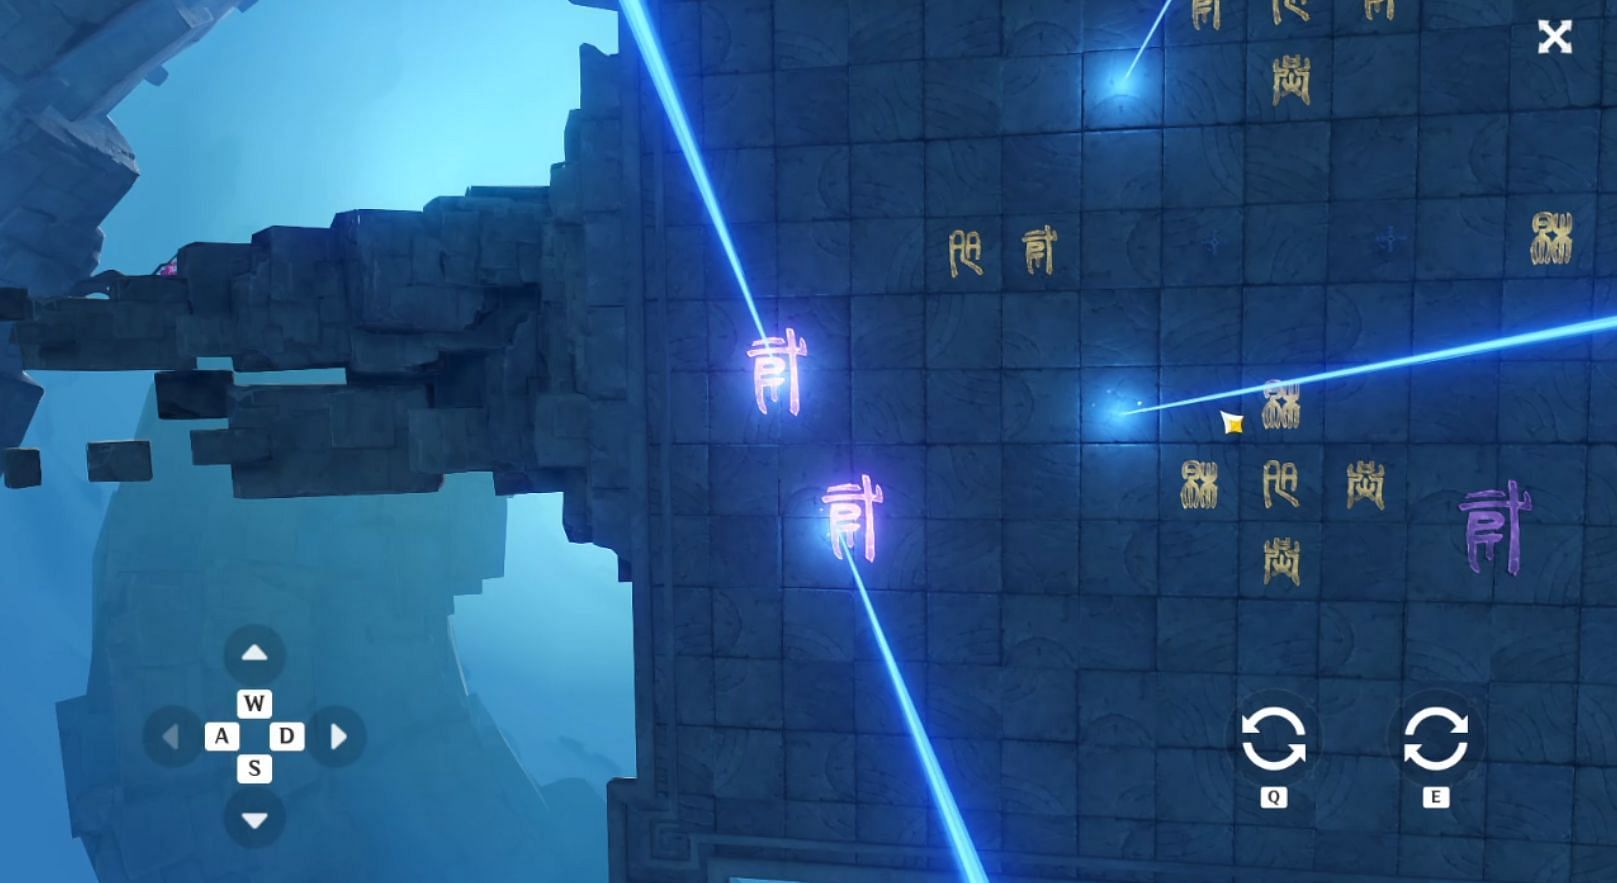
Move the beam of light from both mechanisms to its corresponding set of runes. Players can also rotate the light using the Q and E button, so it perfectly fits the set of runes. A short cutscene will start to show that players have completed the puzzle once this step is completed.
2) Blue symbol
Continue to the blue symbol and remember the icon clearly. The symbol is akin to two forks combined together. Enter the portal behind the symbol to teleport to the puzzles. This time, there are also four correct symbols on the ground. Three of them are near each other, so players can spot them easily.

Once all the correct icons have been activated, three Vishap Hatchlings will appear, and Genshin Impact gamers will need to defeat them. After that, go to the mechanism and move the beam of light to its corresponding set of runes similar to the images above.
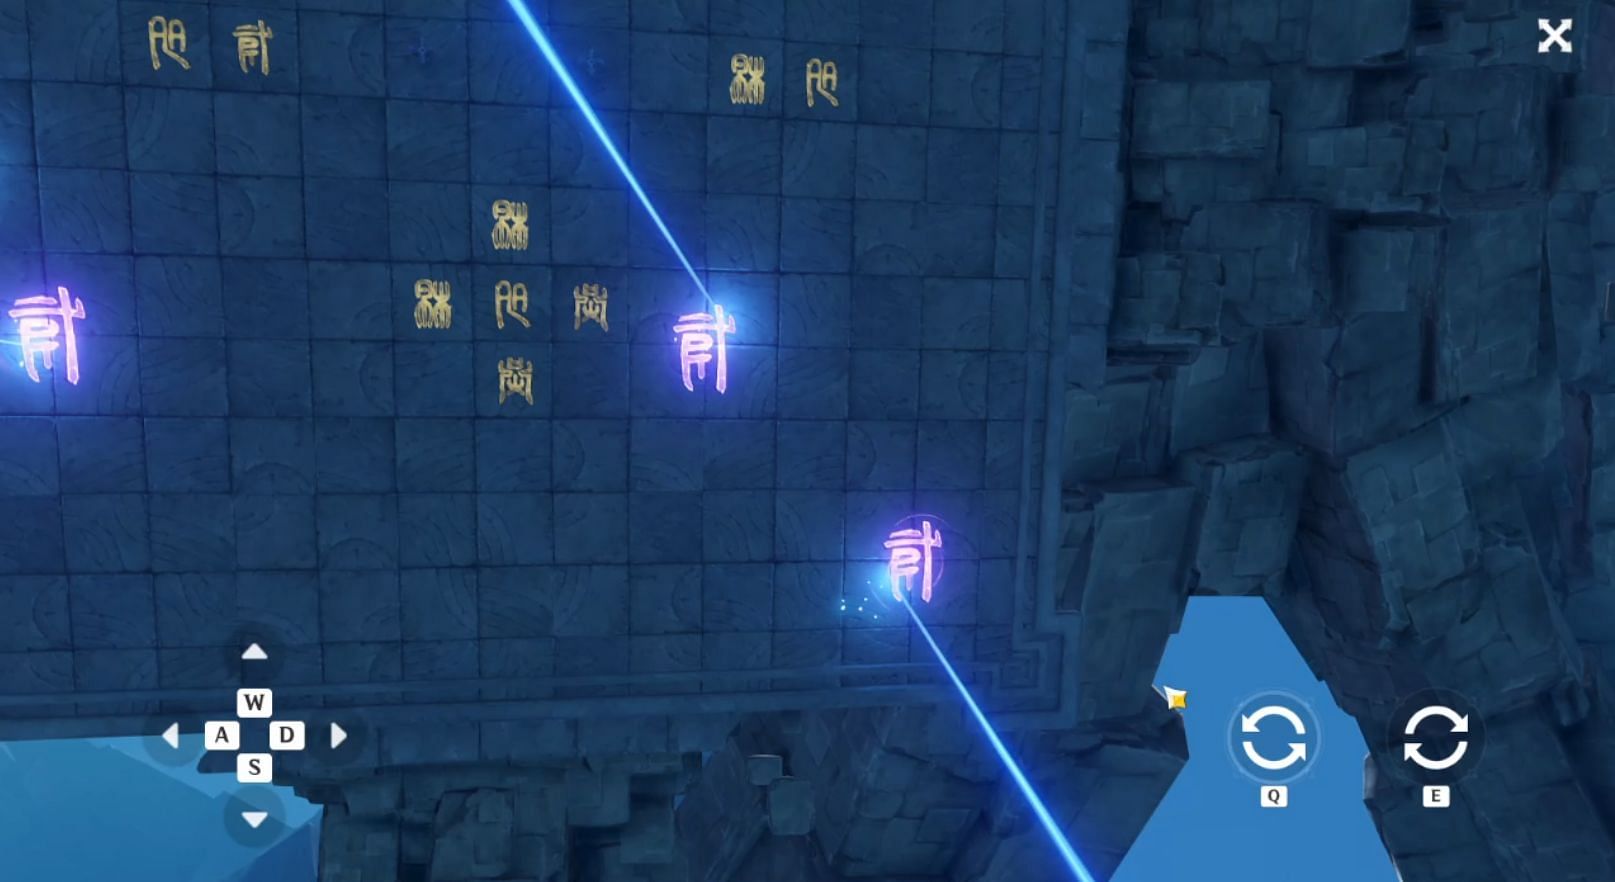
3) Yellow symbol
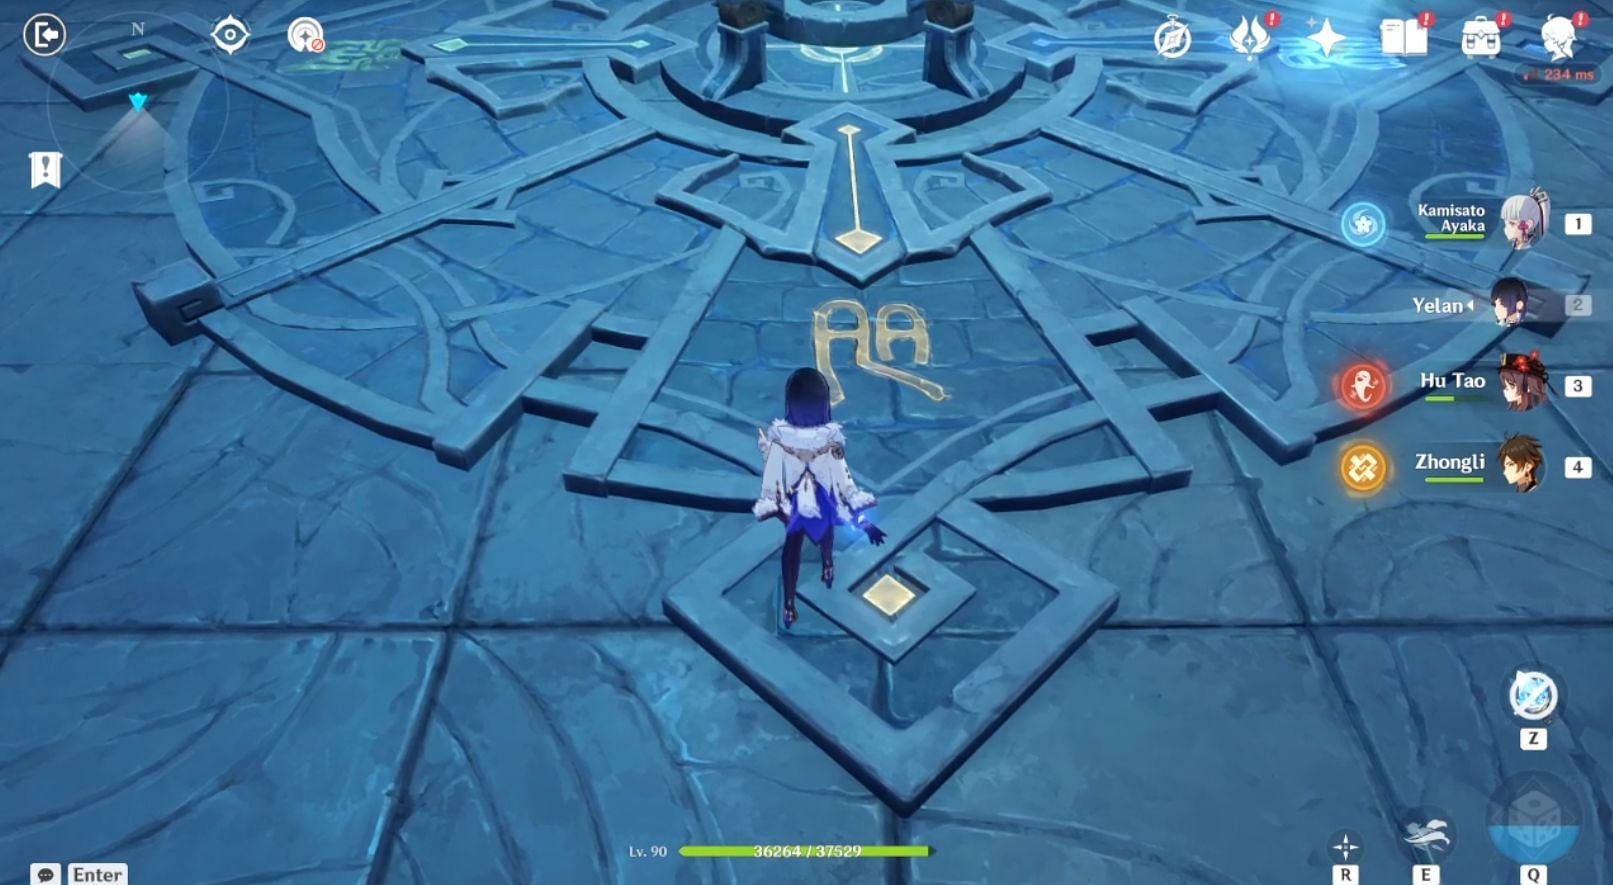
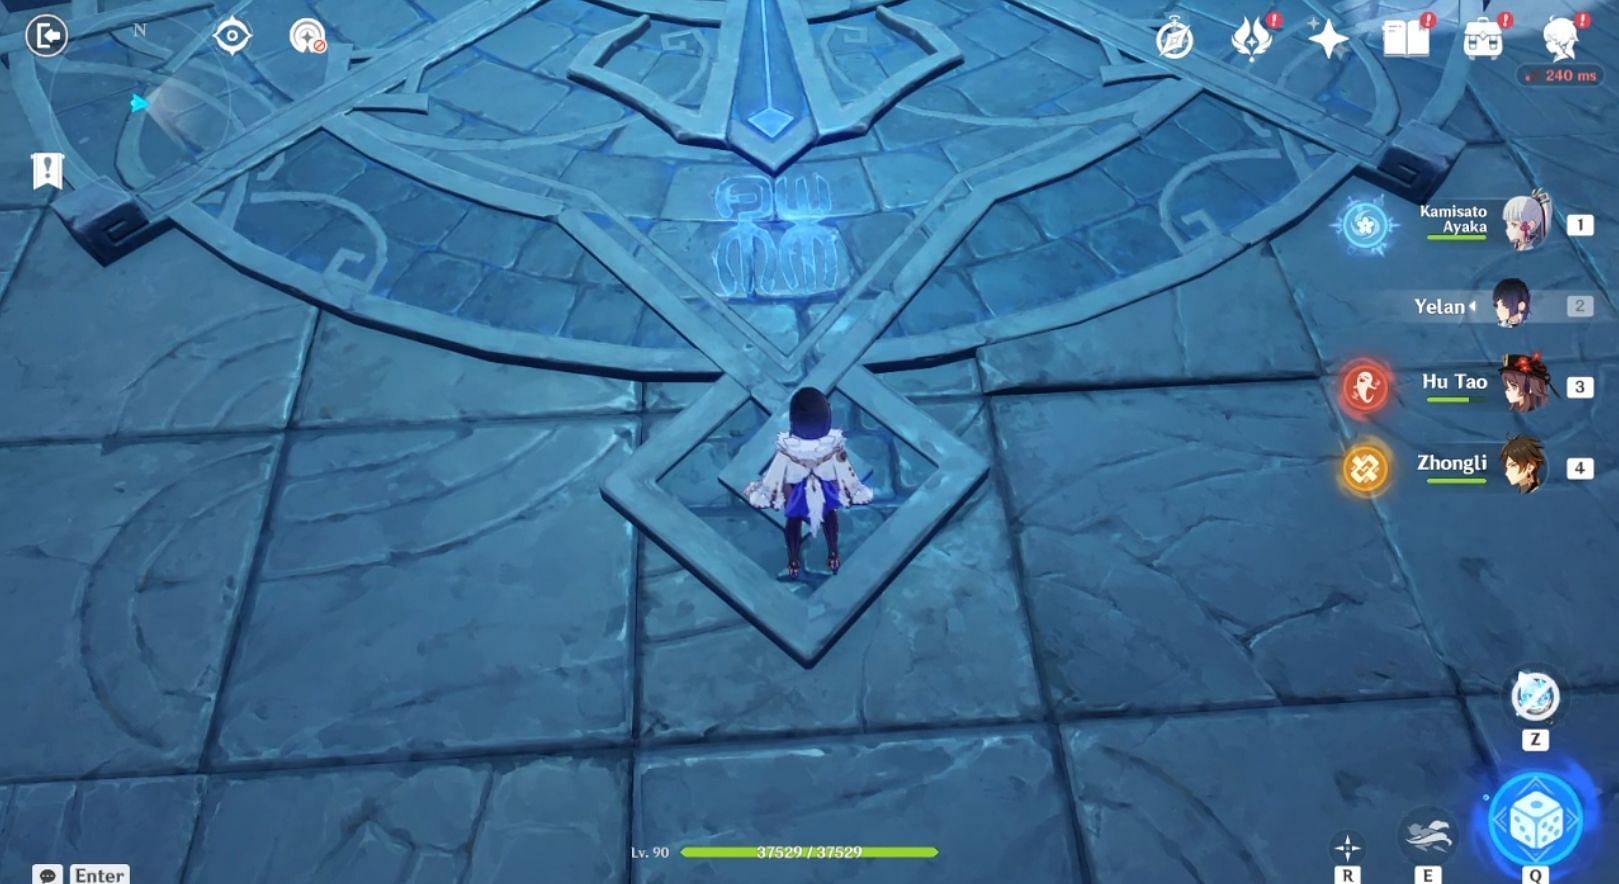
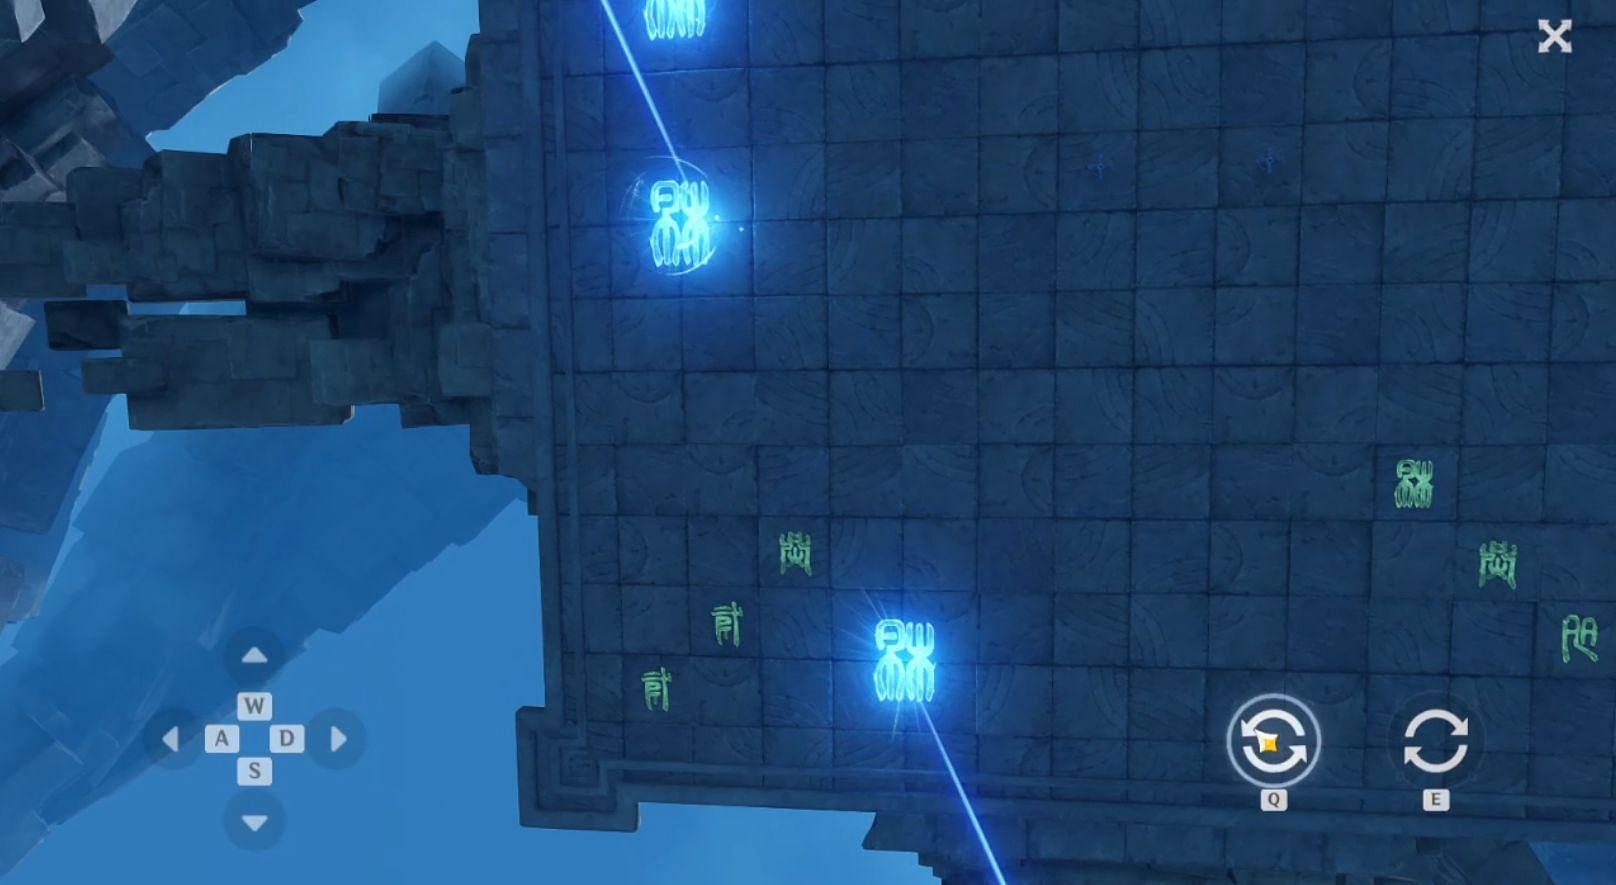
The third symbol is a yellow color, and its icon looks similar to the 'AA' alphabet. Identical to the previous two signs, the yellow colors also have four correct icons on the floor. Step on all of them to continue the puzzle.
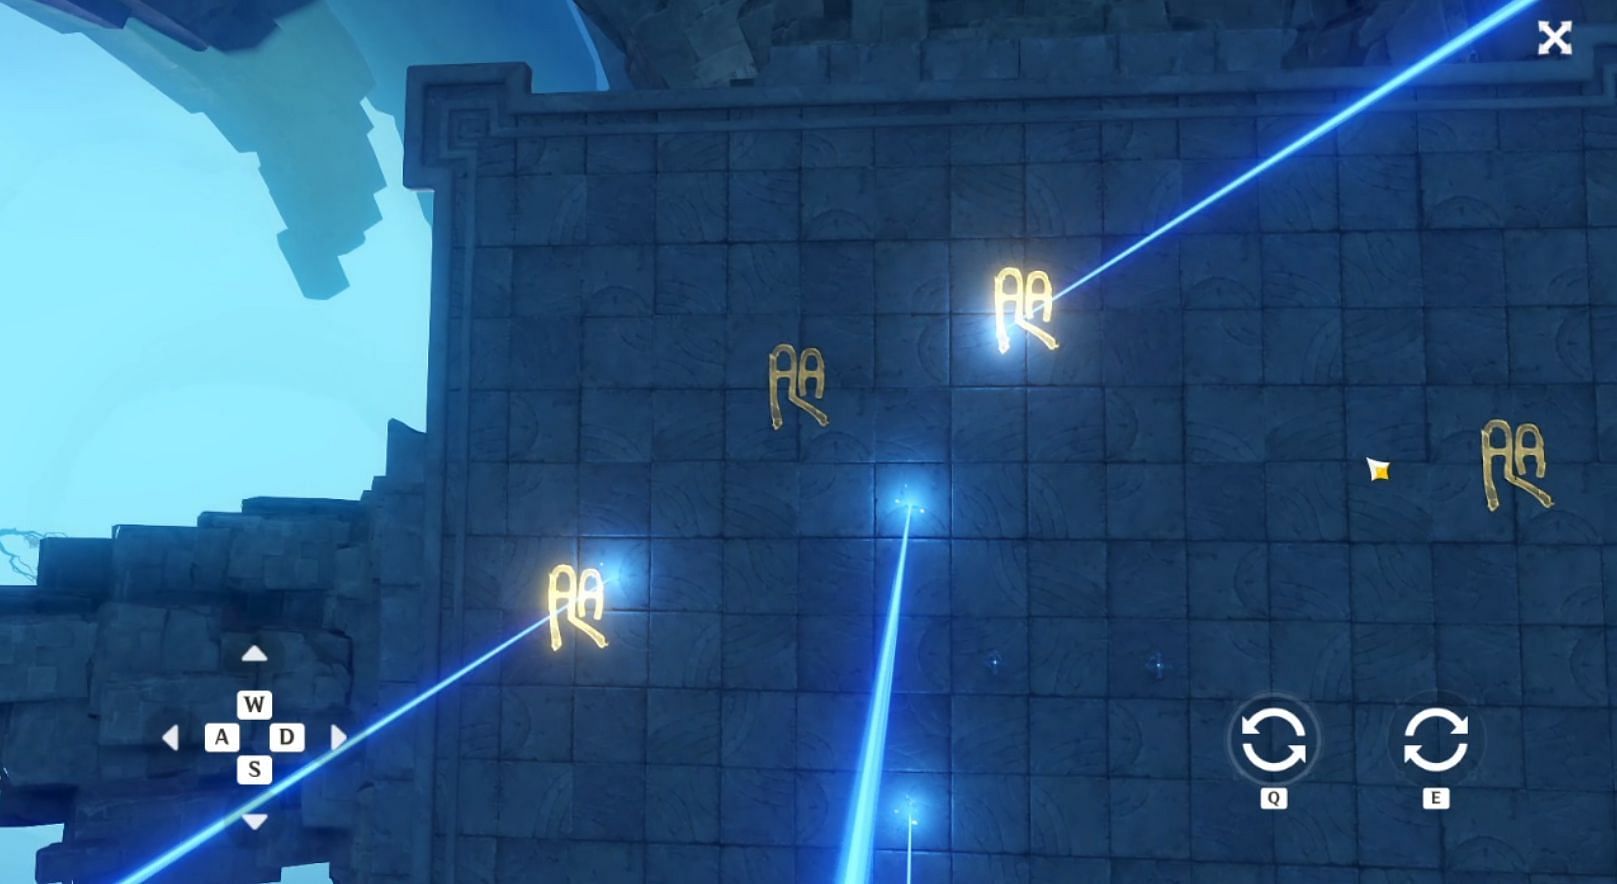
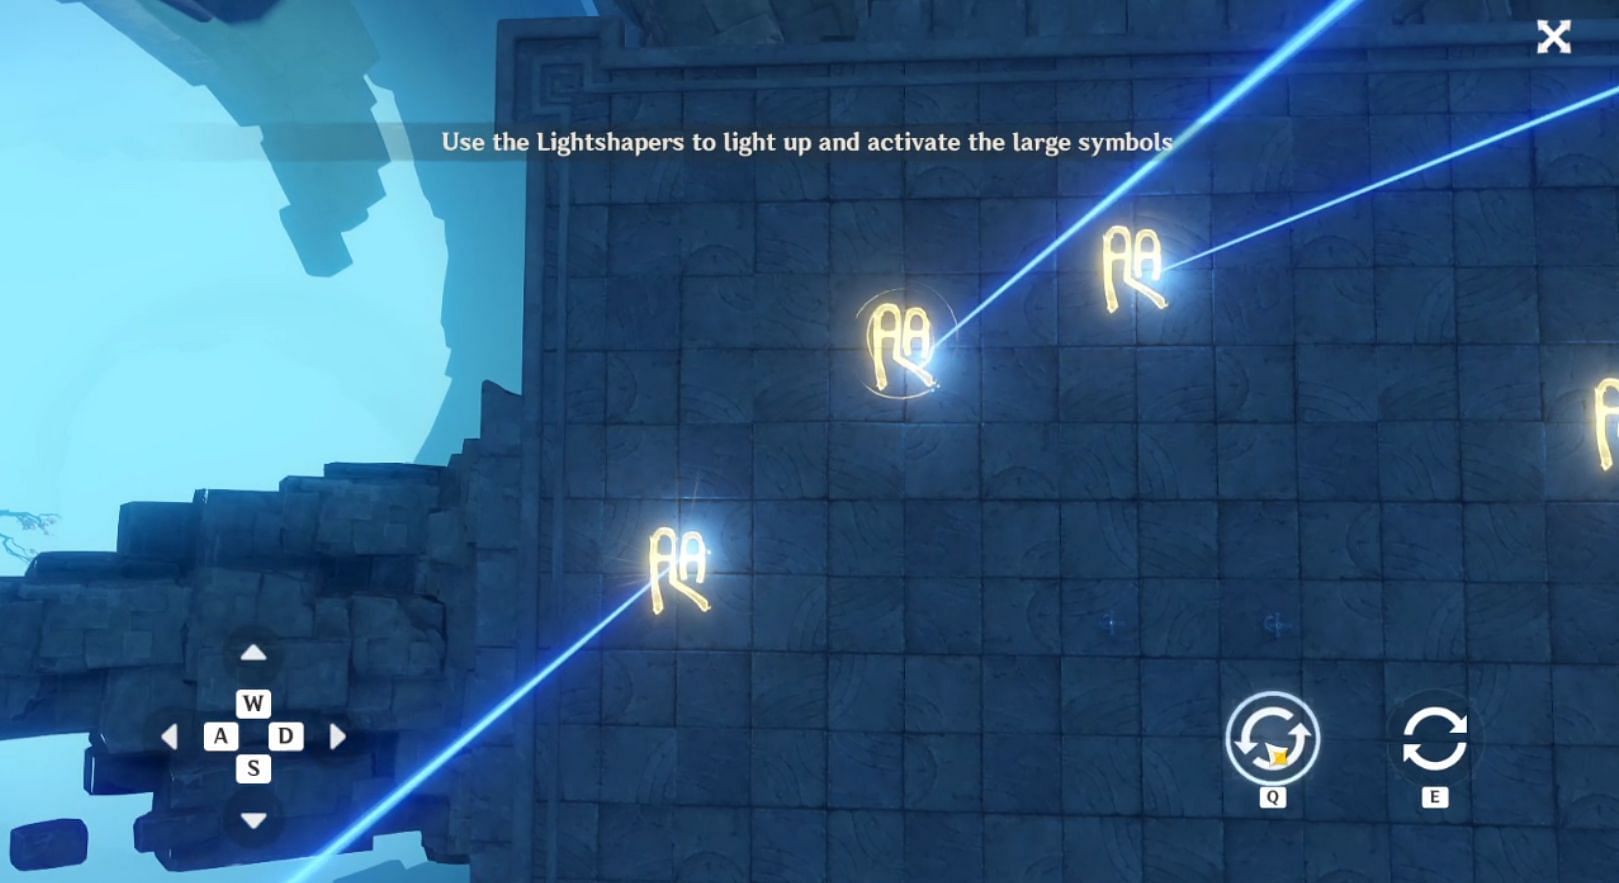
Three Mitachurls will appear once all the correct icons have been activated, and Genshin Impact players need to defeat them to continue the puzzle. The yellow runes' beam of light could be the hardest one among all symbols, so players should check on the image above before trying it out.
4) Green symbol

The last symbol is the green one with an icon similar to a temple roof. Enter the portal behind the symbol to start the puzzle. This one also has four correct symbols on the floor. This time, two Geovishaps will appear once the puzzle is completed. As usual, defeat the enemies to continue the task.
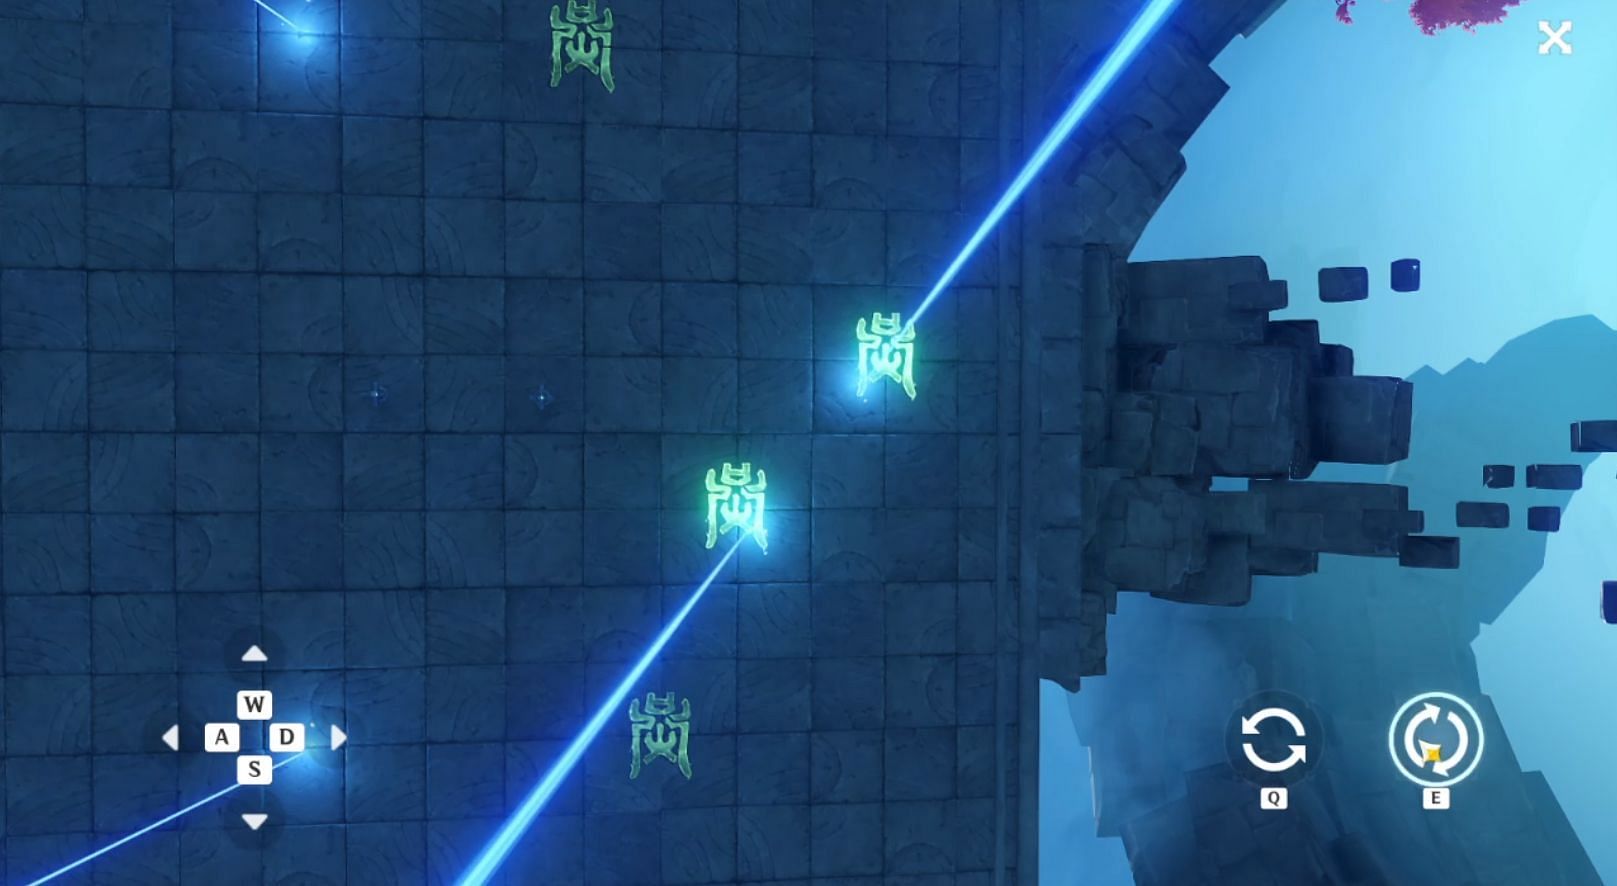
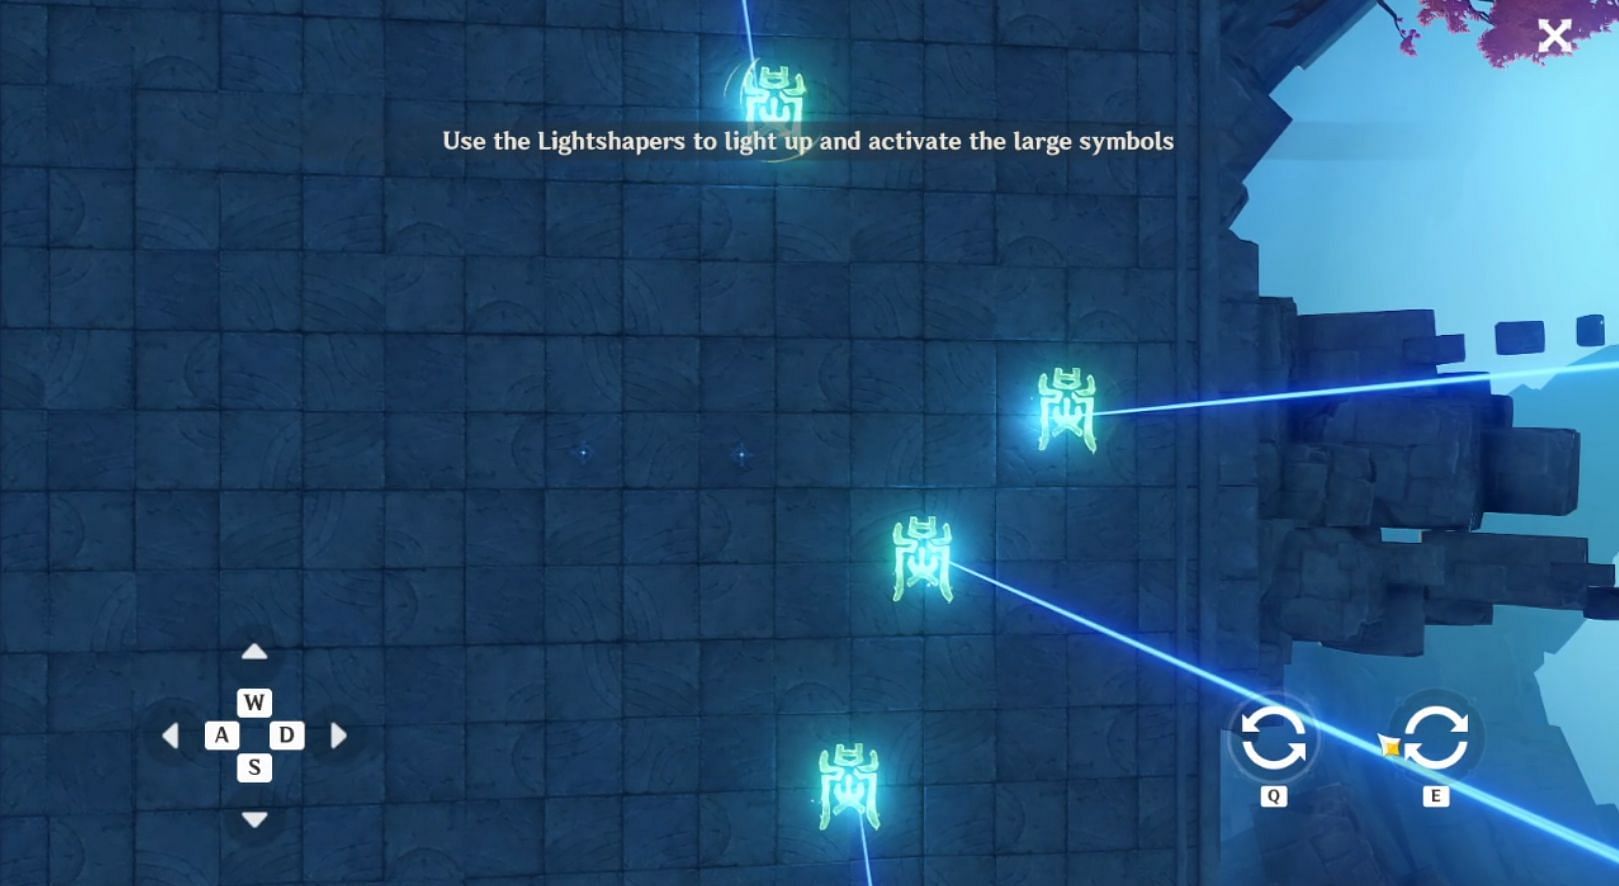
The beam of the light puzzle is the easiest one, and players won't have a problem completing it. Once all four symbols have been activated, the puzzle is considered complete, and a hidden pathway will appear on one of the platforms.
Once Genshin Impact players have entered the hole inside the platform, they can continue the quest by following the navigation. They will receive Mora, Mystic Enhancement Ores, and Hero's Wit at the end of the quest.
In addition, the Kaleidoscope Cage domain in the Realms of Guile and War gameplay inside the Perilous Trail event will also be unlocked, and players can complete it to obtain Primogem rewards.

Are you stuck on today's Wordle? Our Wordle Solver will help you find the answer.