
'%20x='0'%20y='0'%20height='100%25'%20width='100%25'%20%0A%20%20%20%20%20%20%20%20%20%20xlink%3Ahref='data:image/jpg;base64,/9j/2wBDAAYEBQYFBAYGBQYHBwYIChAKCgkJChQODwwQFxQYGBcUFhYaHSUfGhsjHBYWICwgIyYnKSopGR8tMC0oMCUoKSj/2wBDAQcHBwoIChMKChMoGhYaKCgoKCgoKCgoKCgoKCgoKCgoKCgoKCgoKCgoKCgoKCgoKCgoKCgoKCgoKCgoKCgoKCj/wgARCAAGAAoDASIAAhEBAxEB/8QAFQABAQAAAAAAAAAAAAAAAAAAAQj/2gAIAQEAAAAAmZ//xAAUAQEAAAAAAAAAAAAAAAAAAAAD/9oACAECEAAAAA//xAAUAQEAAAAAAAAAAAAAAAAAAAAE/9oACAEDEAAAAFf/xAAZEAEAAwEBAAAAAAAAAAAAAAABAAIhAxL/2gAIAQEAAT8AatPQlXI8bCmZP//EABQRAQAAAAAAAAAAAAAAAAAAAAD/2gAIAQIBAT8Af//EABQRAQAAAAAAAAAAAAAAAAAAAAD/2gAIAQMBAT8Af//Z'%3E%3C/image%3E%3C/svg%3E)
ARK: Lost Island is a famous survival game. This journey takes players from deserts, snowy mountains to jungles and caves of the Jurassic period. There are even different modes to regulate the difficulty of the game. One can have a calm, laid-back experience in easy mode or take it to the next level in hardcore mode.
To ease survival in any mode, ARK has several beacon loot crates and drops that spawn at specific locations. These loot crates and their drops contain several useful materials and resources to give the player anything from a small to a huge boost.
On ARK: Lost Island, one such loot drop spawning location is the Desert Labyrinth or the Temple of the Forgotten. It is the easiest and safest loot drop location in Ark Lost Island.
Looking for Crossword hints & solutions? Check out latest NYT Mini Crossword Answers, LA Times Crossword Answers, and Atlantic Crossword Answers
All details regarding Desert Labyrinth in ARK: Lost Island
Desert Labyrinth is located in the extreme southwest of the ARK: Lost Island map, in the desert biome. The GPS tags are 92.3 LAT 80.5 LON. Reaching that location, one can see a beautiful stone gate with four arches on the cliffside. That is the entrance to the Desert Labyrinth or Temple of the Forgotten.
One needs a flying or gliding tame to access the entrance. When playing on an unofficial server, creating a base in this area is also recommended, as it makes looting and storing much easier.
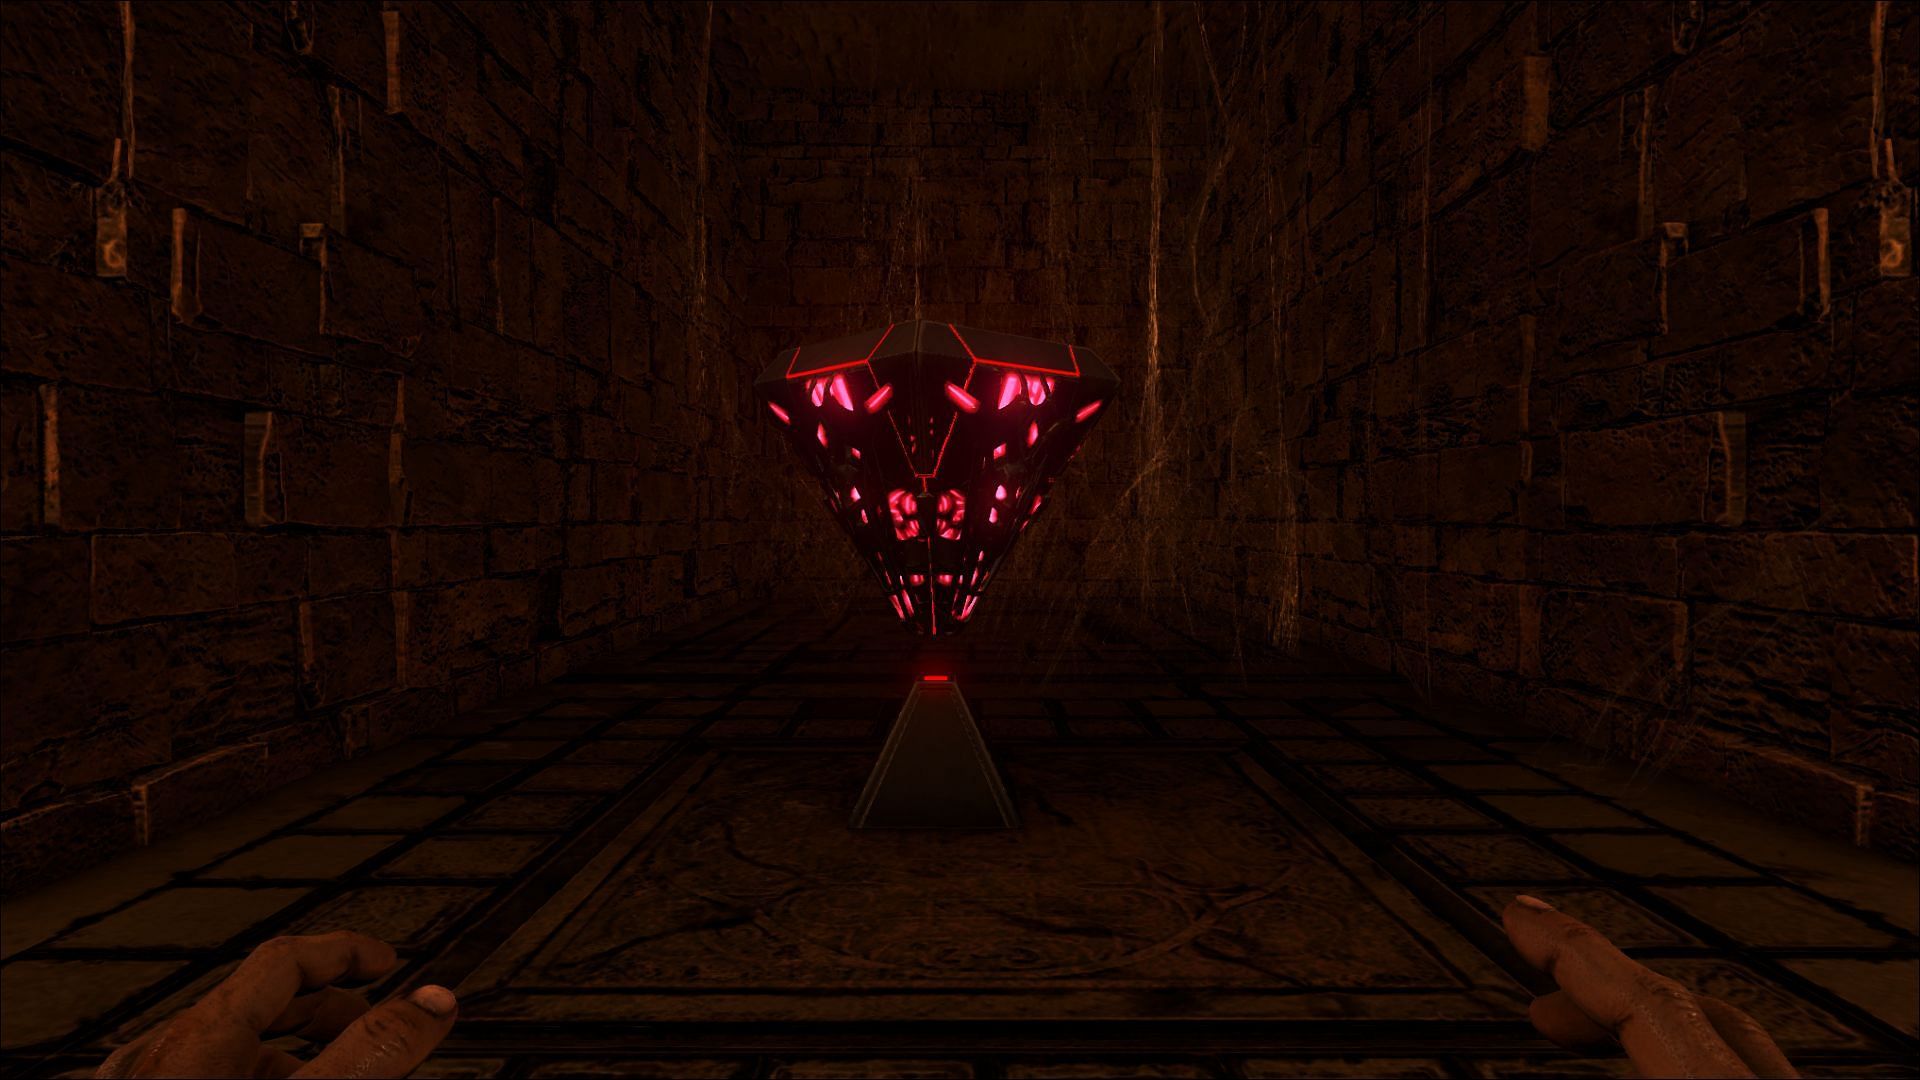
Here, six red loot crates spawn every 45 minutes, and only have a few traps. One can loot all the six drops under nine minutes without the use of any mounts. Or if possible, players should use a Maewing or Sinomacrops, as they will make the looting process seamless, as they do not trigger most of the traps.
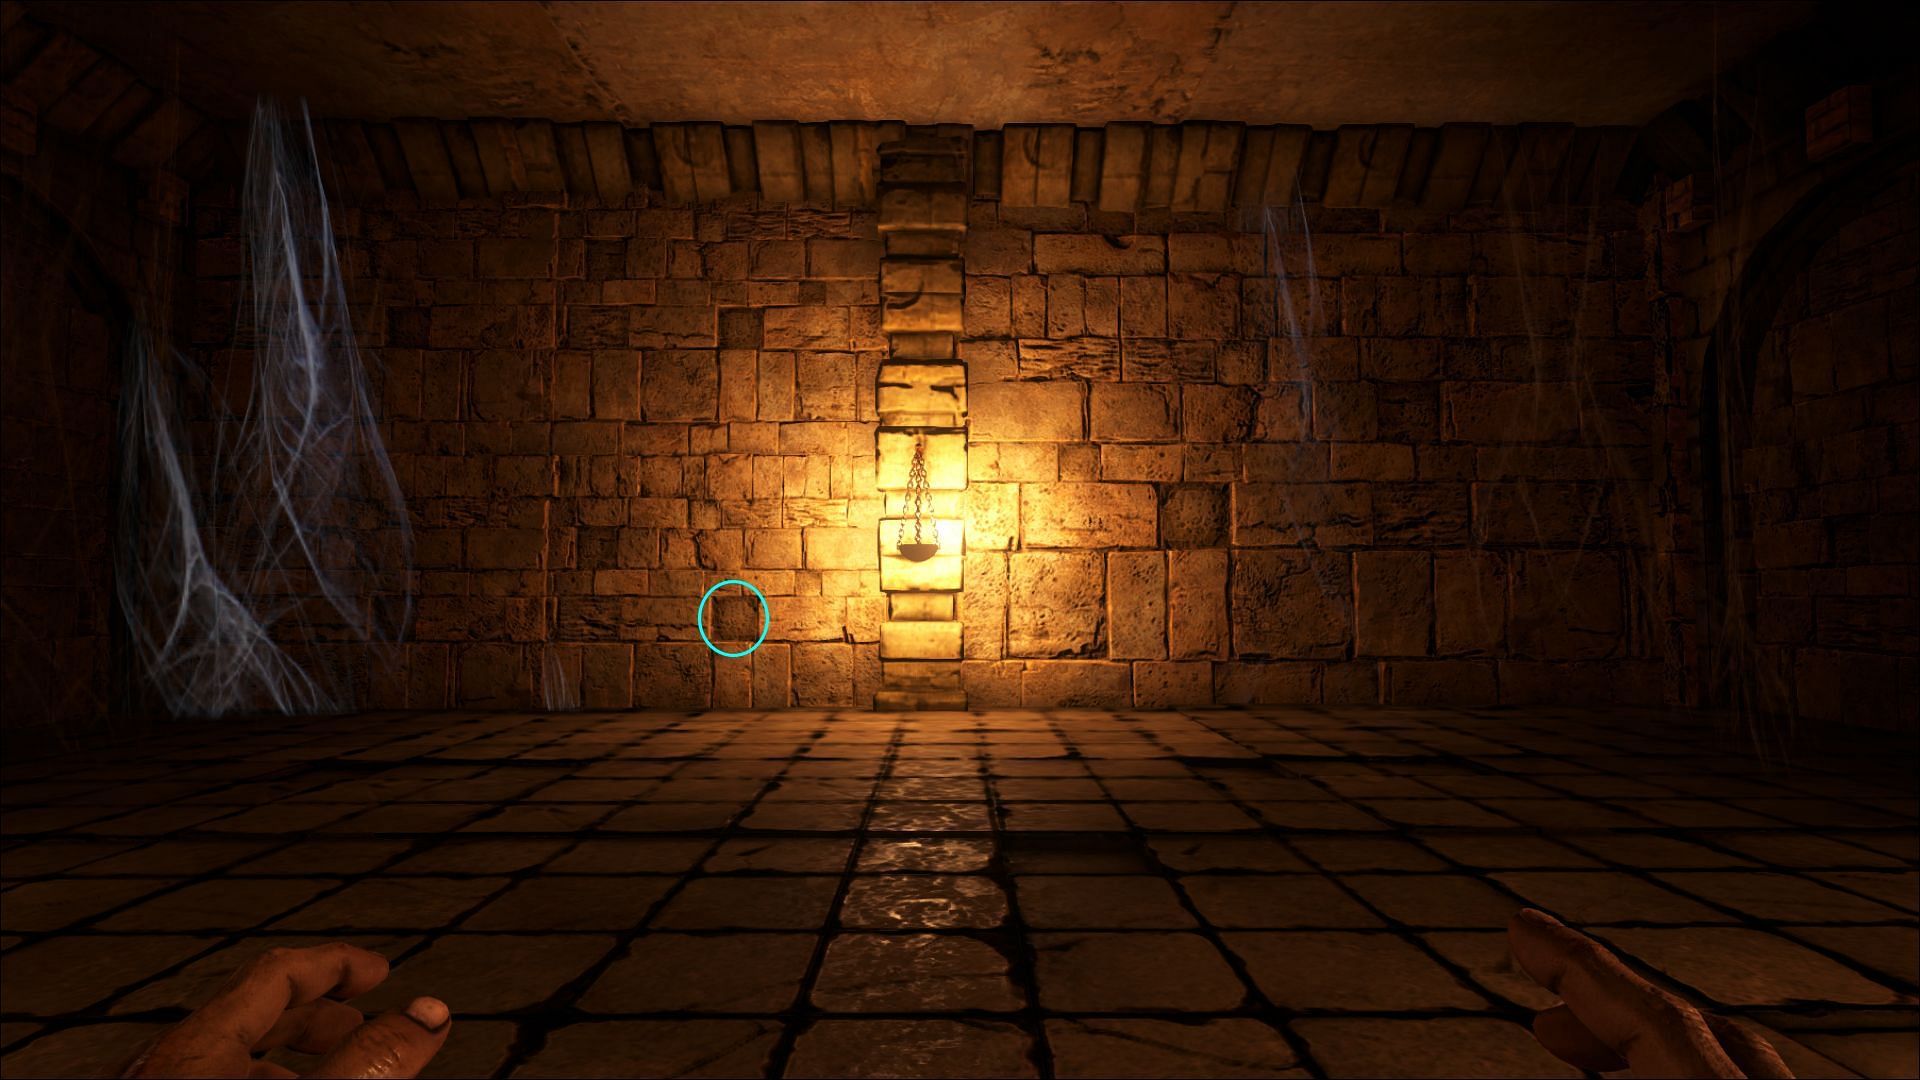
After entering the cave one has to turn right, but they'll meet a dead end instead. On the wall they'll see a lamp, and on its left side of the lamp, there will be a hidden button. Pressing that button will open a hidden door, revealing a passage.
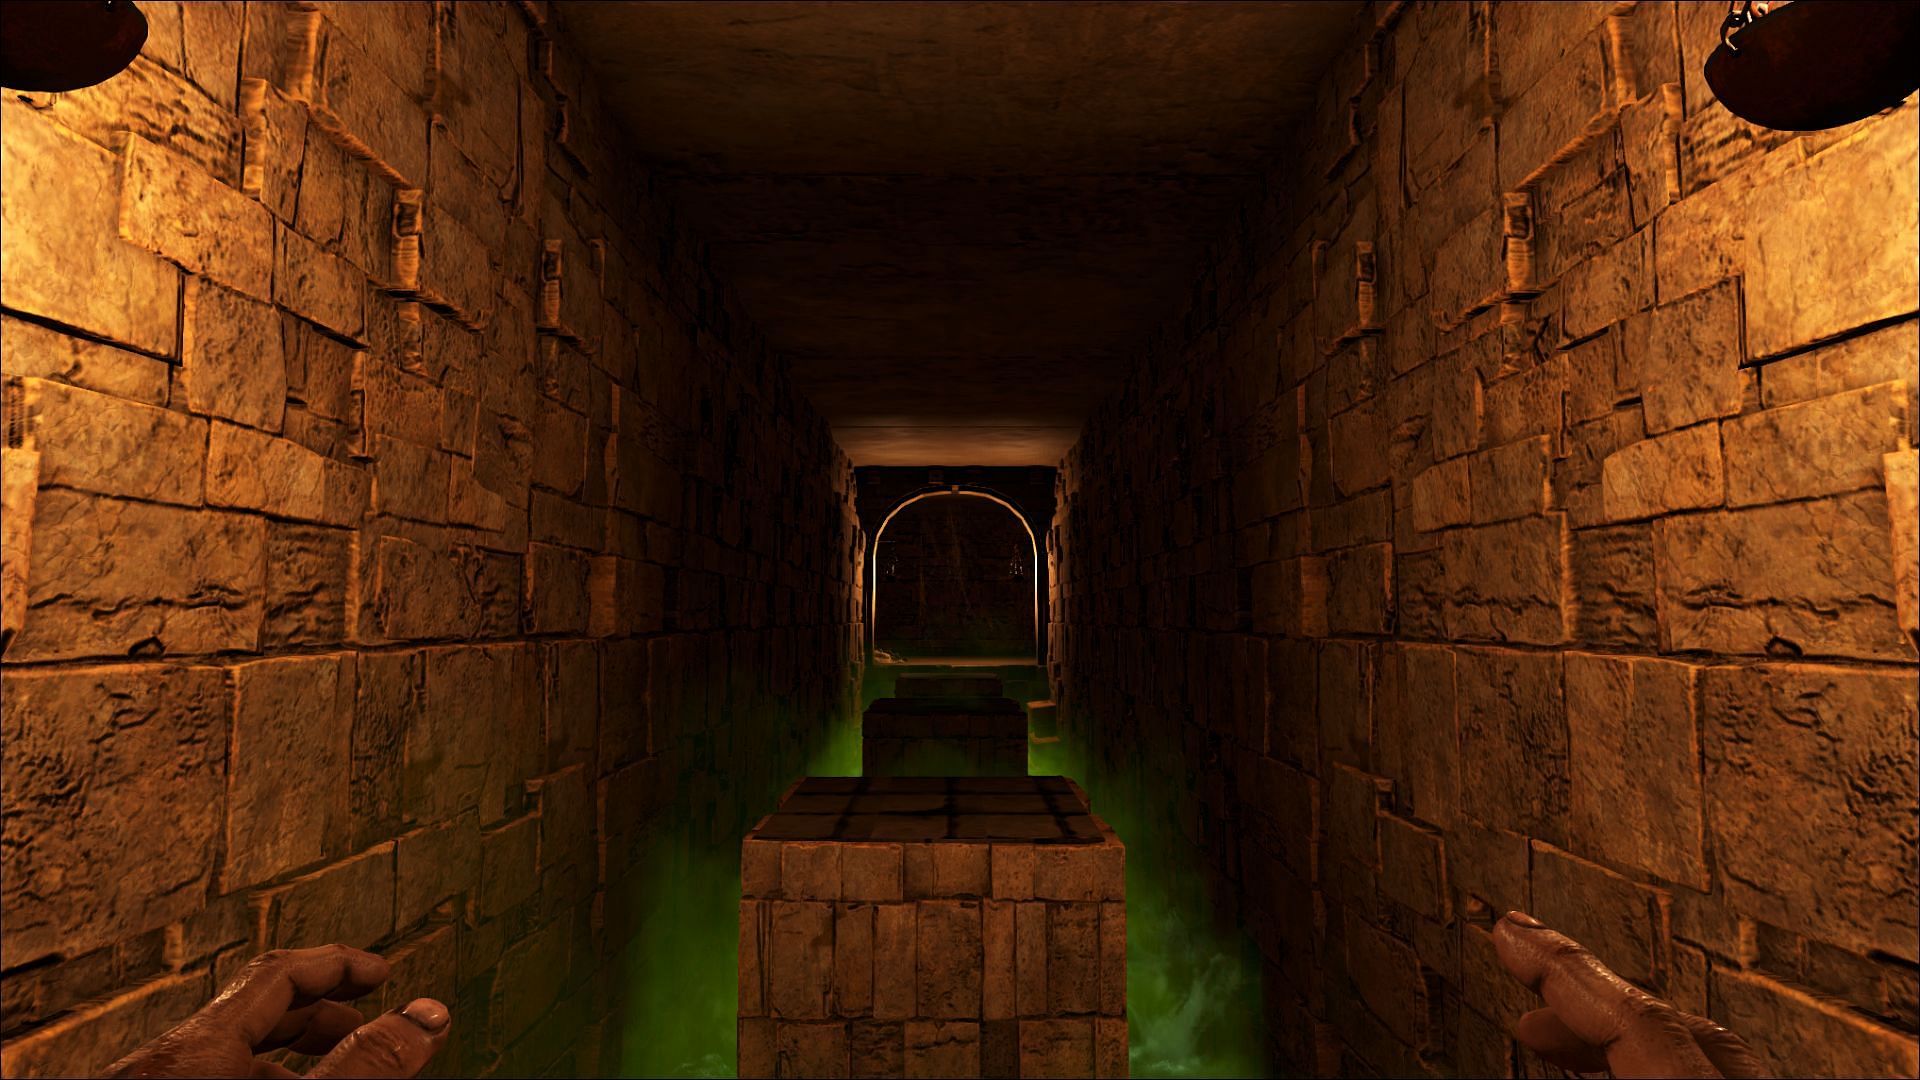
There will only be one way that leads into a pit of poison gas. The pit has mini platforms built on it, which allows the player to jump across, avoiding the poison gas.
After crossing the pit, the player will be faced with a passage which will eventually be divided into two passages, the correct one being the right. Here, one has to stay alert to the traps.
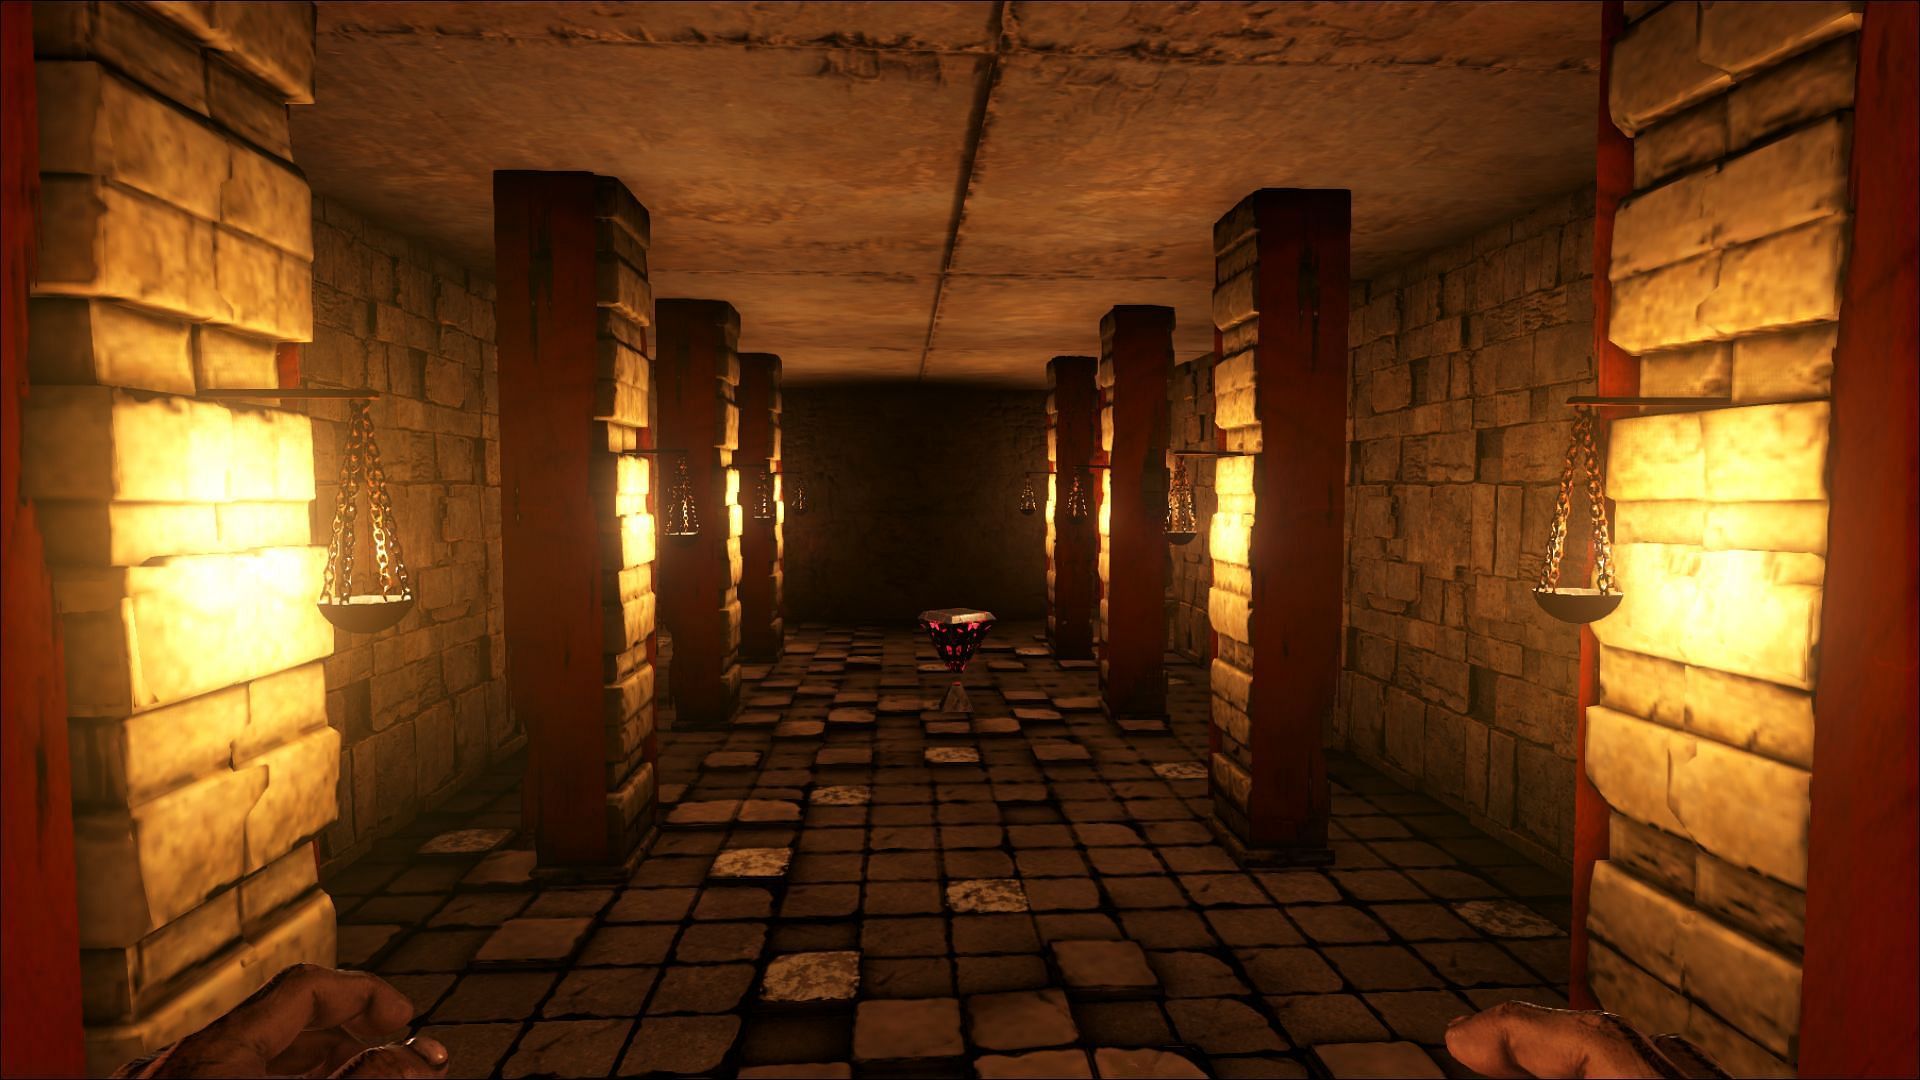
At any cost, one must avoid square tiles in the middle of the floor as they will spawn everything from scorpions and poisonous bugs to grenades. The best way to do this is by staying close to the walls. There one can see several passages and chambers, and the first drop will spawn anywhere in there.
One must also look out for small pipes sticking out of the walls. These are sleep dart throwers, sleep darts, won't kill the player but can knock them down unconscious.
The only way to avoid sleeping darts is by sprinting through the trigger points. Walking along the passageway, the player will be able to see another drop spawning on the same floor. Right after that, a staircase will also be seen.
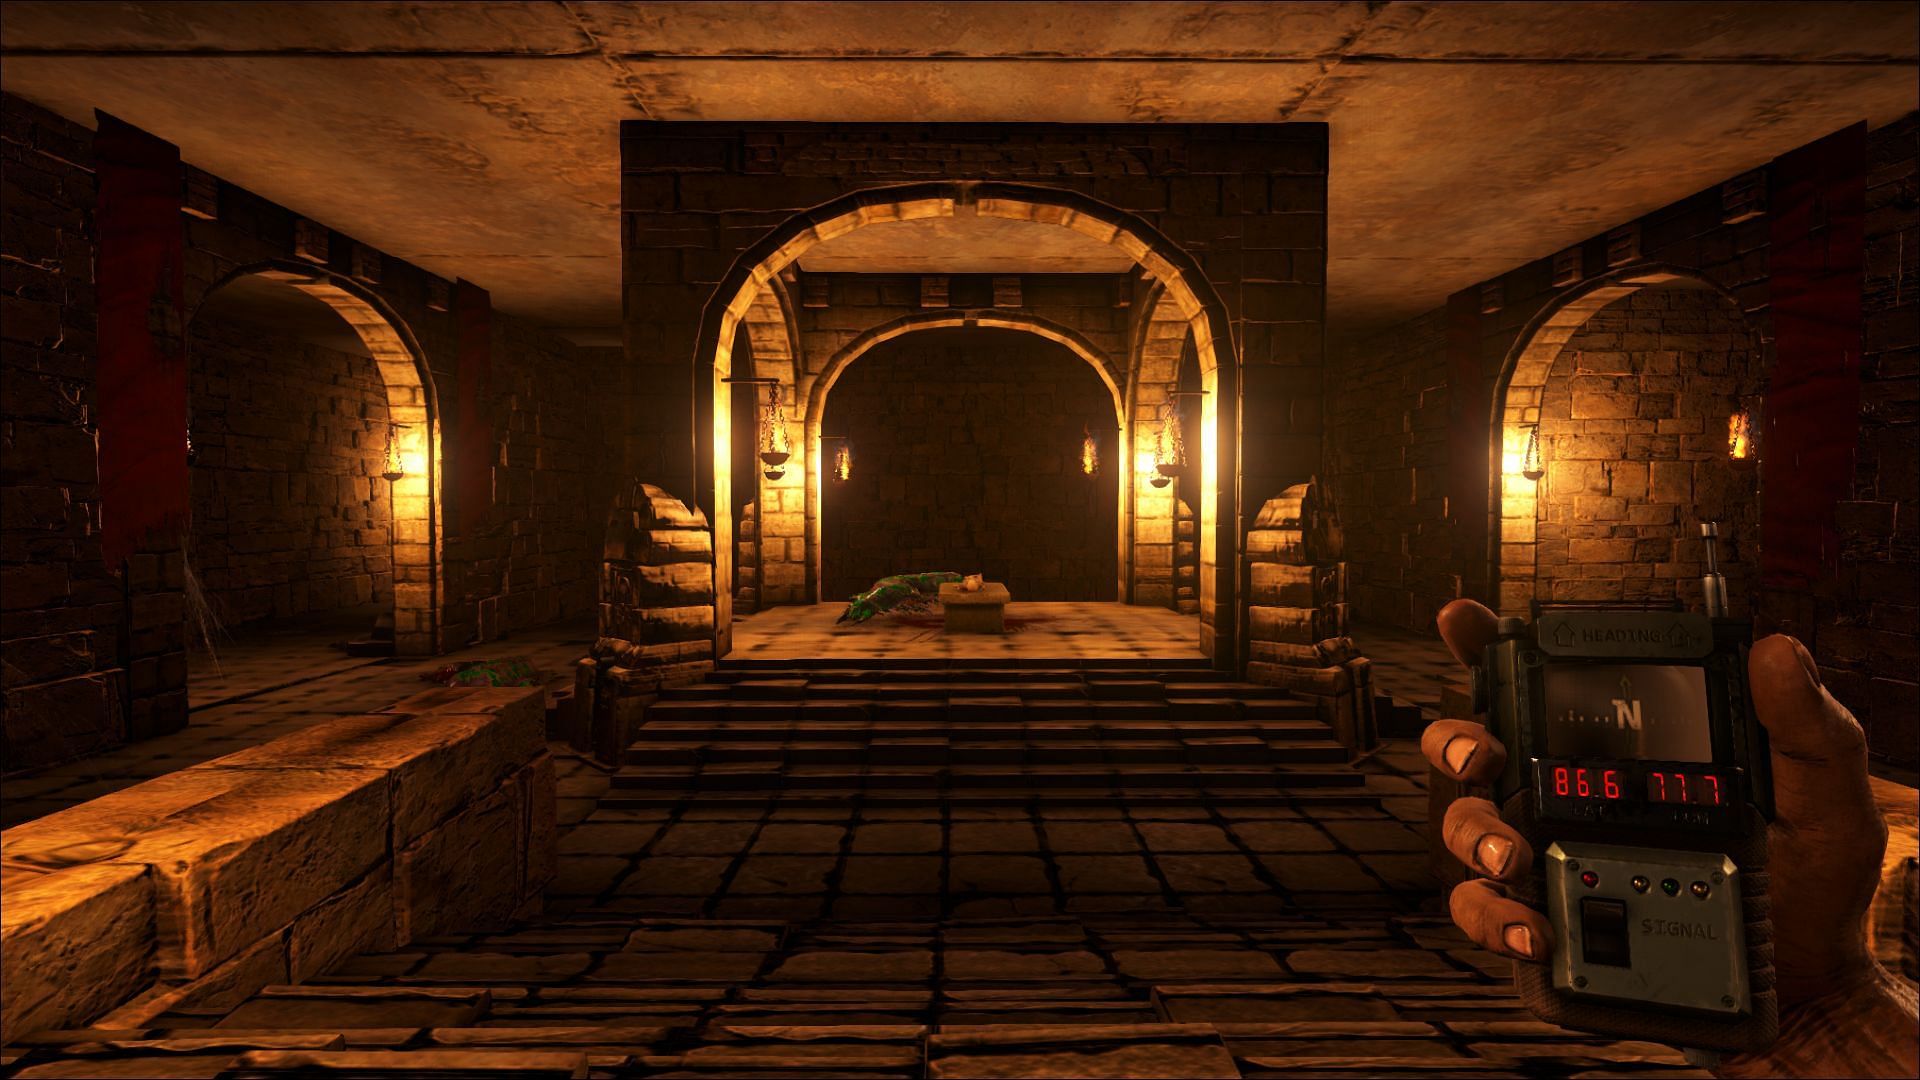
Climbing down the floor, one has to again stay cautious not to step on any abnormal tiles. The alleyway will eventually lead the player into the central chamber of the labyrinth. This is an important landmark.
Heading right from there, one will end up facing another similar pit of poison gas. Sometimes scorpions spawn at this point, and hence one must stay aware and jump across the pit as soon as possible to lose the scorpion.
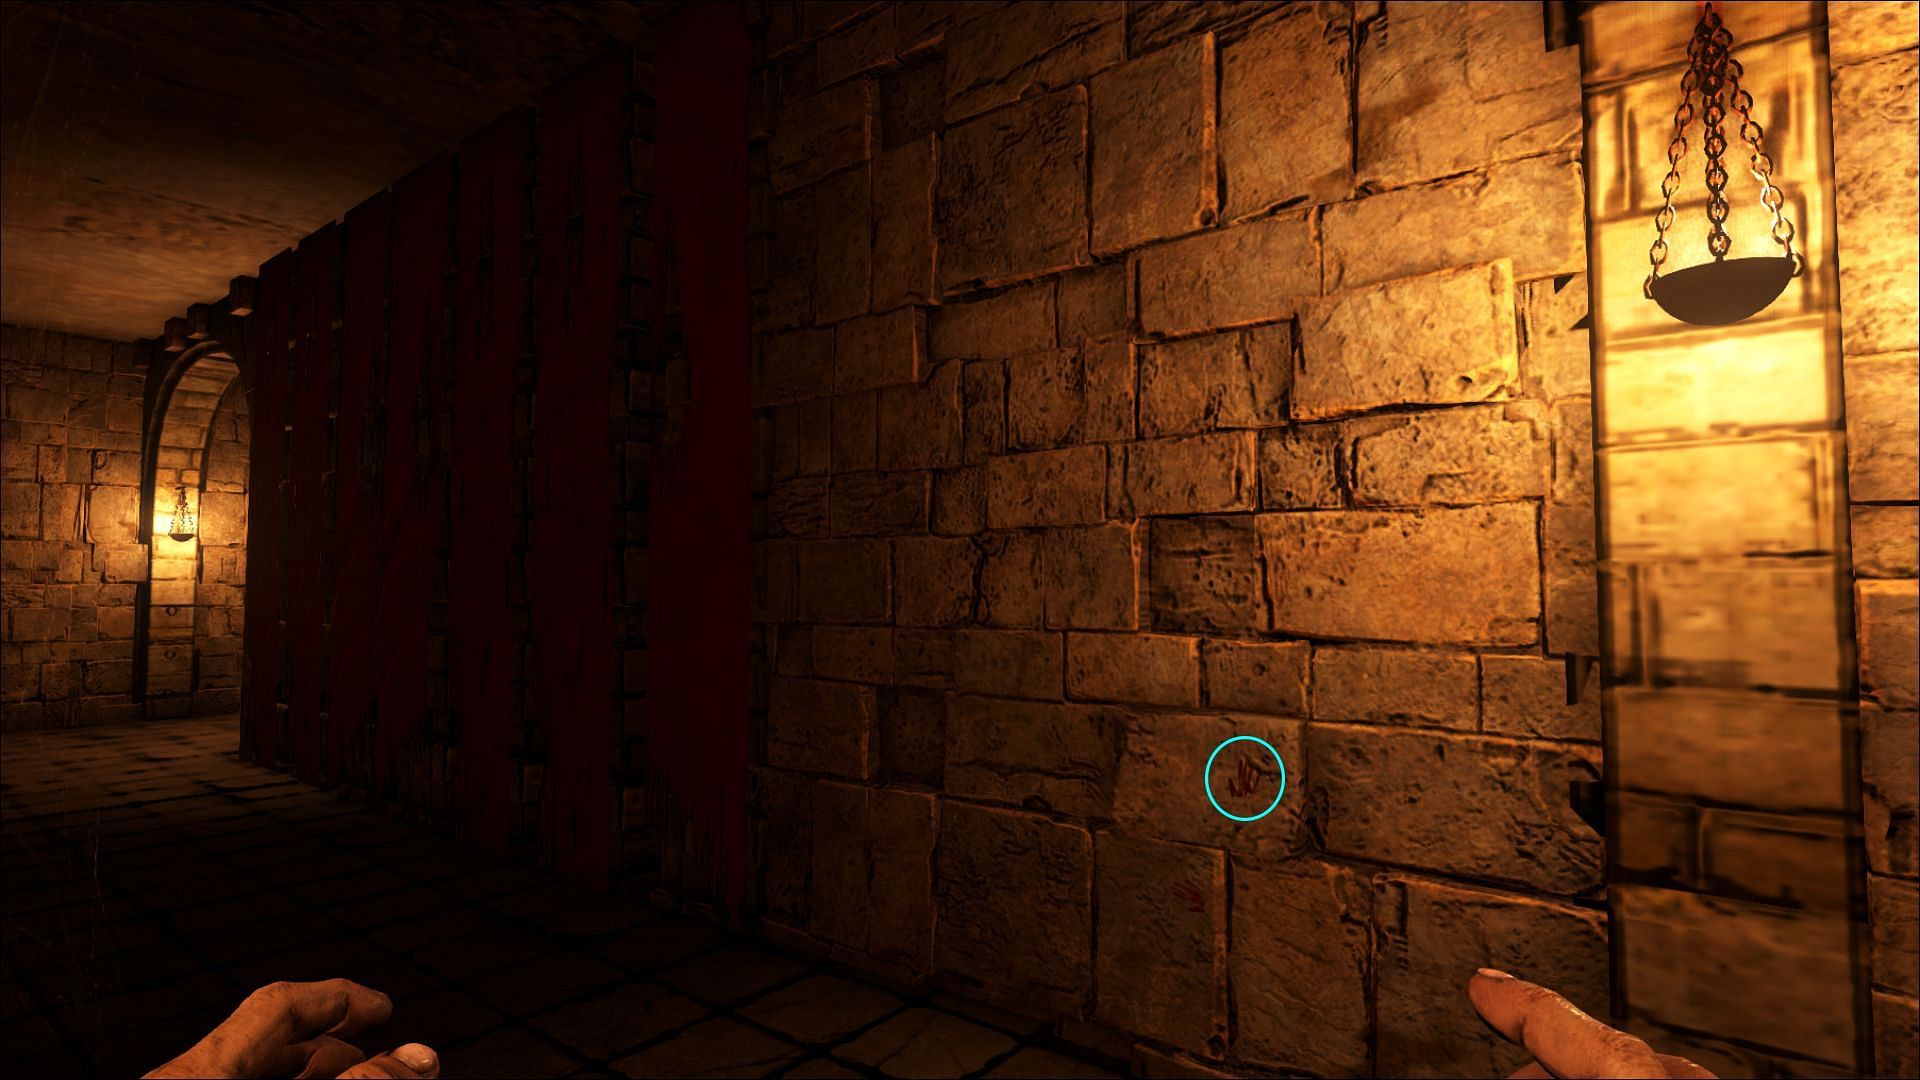
Turning left, the player will be greeted with a third loot drop in the labyrinth. Passing that section, one would end up in a long passage with banners on both sides. On the right side of the banners, a bloody handprint on the wall will become visible.
It is another button that would open a secret chamber where the third drop would spawn. As soon as the drop is collected, a bunch of bats will start chasing the player. The best way to get rid of them is to lure them inside the room and lock them up.
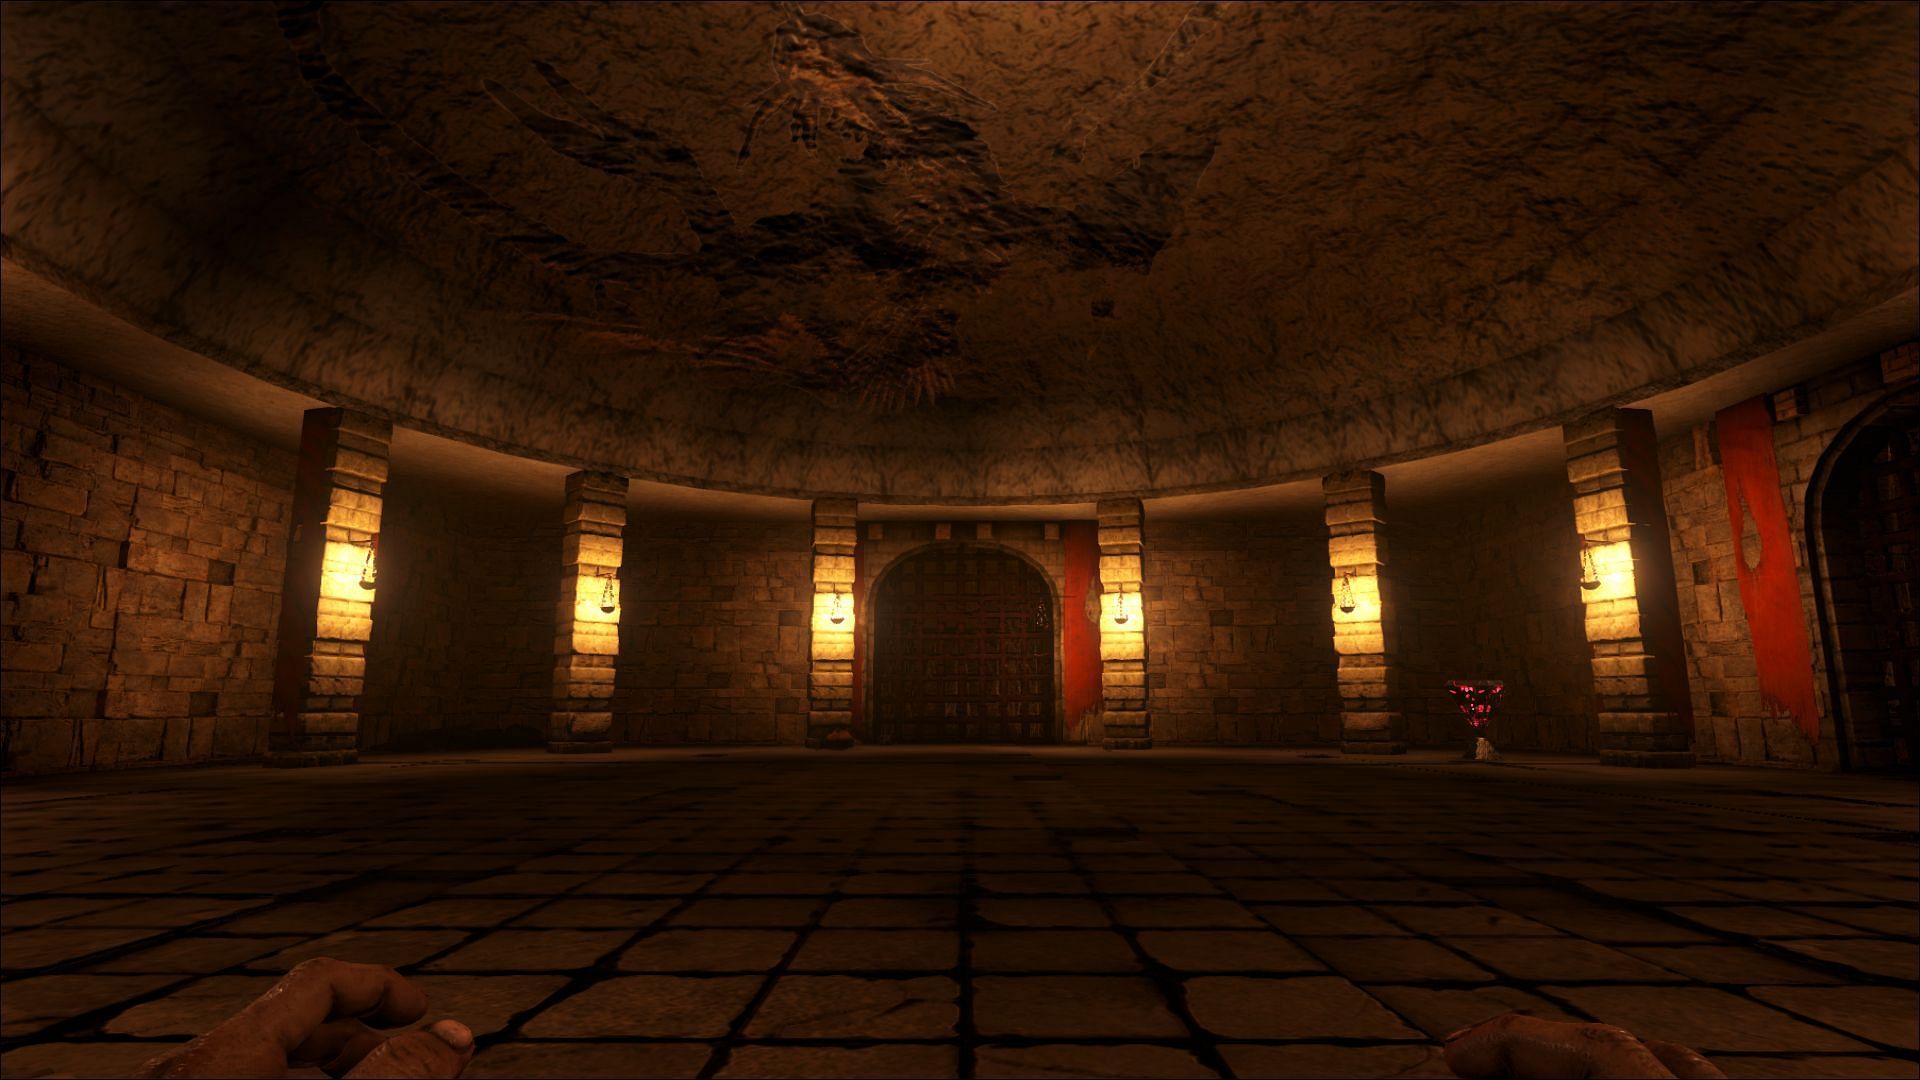
Once again, running down the passages and avoiding traps, players will find themselves in a large circular hall, which is the location for the fourth and last loot drop. Getting out of the hallway, one must head straight without turning in any direction. They will see multiple staircases going up.
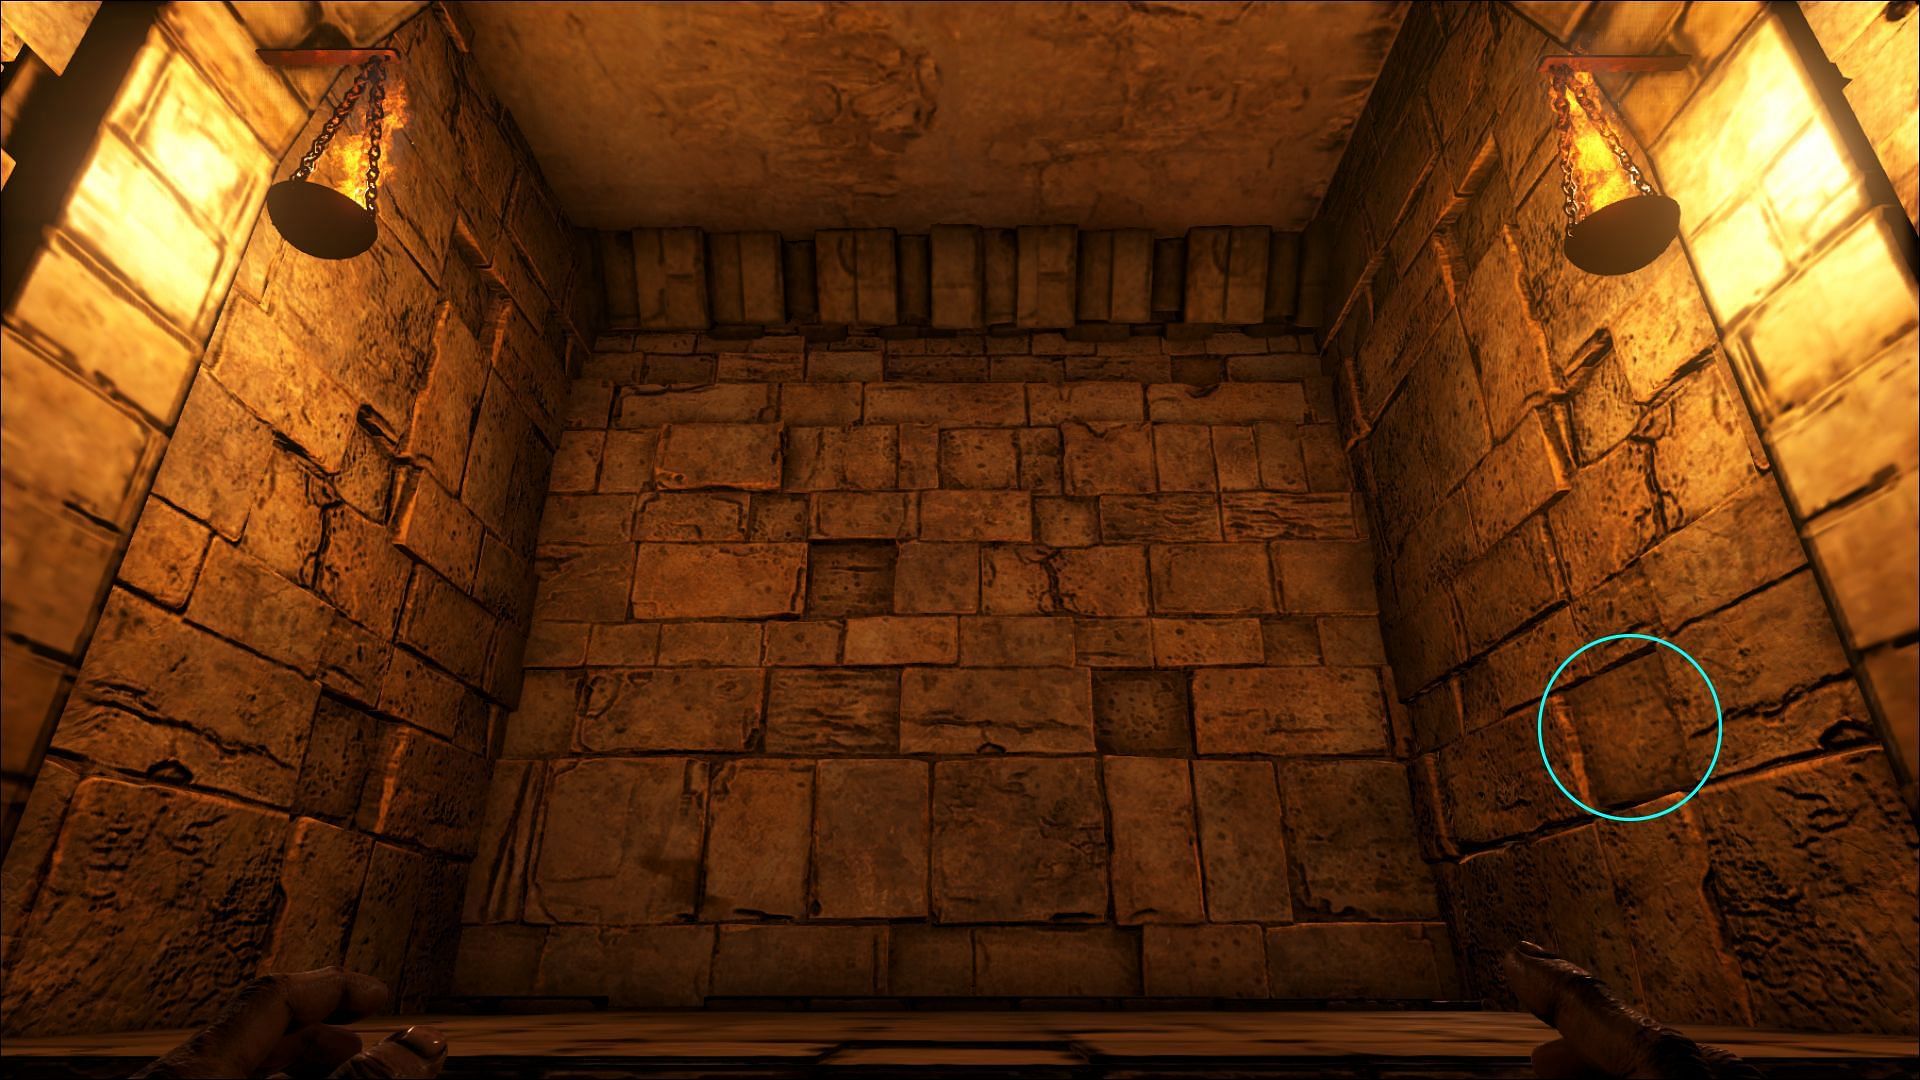
This is the only way out of the labyrinth. At the end of the climb, one will face another fake dead-end. On the right side of the walk, there will be a third hidden switch which will leave the dead end open right from the middle, which will lead the player again to the main entrance of the labyrinth.
Now one might ask, there are only four loot drops, where are the other two? Immediately after reaching the entrance, if one runs through the entire labyrinth again, two more loot drops will respawn instantly at any of the previously-mentioned locations. It'll take 3-4 minutes to run through the labyrinth again. Then there will be a 45 minute cooldown period, after which another four drops will respawn.
Looting Desert Labyrinth is an unbelievably easy way to get a lot of rare items like high-level armor, weapons and rare blueprints in ARK: Lost Island. One just has to watch out for the traps. Again, if any of the mentioned tames are used, running this place is going to be as easy as eating a pie.

Are you stuck on today's Wordle? Our Wordle Solver will help you find the answer.