
'%20x='0'%20y='0'%20height='100%25'%20width='100%25'%20%0A%20%20%20%20%20%20%20%20%20%20xlink%3Ahref='data:image/jpg;base64,/9j/4AAQSkZJRgABAQAAAQABAAD/2wCEAAMDAwMDAwQEBAQFBQUFBQcHBgYHBwsICQgJCAsRCwwLCwwLEQ8SDw4PEg8bFRMTFRsfGhkaHyYiIiYwLTA+PlQBAwMDAwMDBAQEBAUFBQUFBwcGBgcHCwgJCAkICxELDAsLDAsRDxIPDg8SDxsVExMVGx8aGRofJiIiJjAtMD4+VP/AABEIAAUACgMBIgACEQEDEQH/xABZAAEBAQAAAAAAAAAAAAAAAAAABQgQAAICAgIDAAAAAAAAAAAAAAIDAQQAEQUxEiFBAQEBAAAAAAAAAAAAAAAAAAADBBEBAQEAAAAAAAAAAAAAAAAAAAEx/9oADAMBAAIRAxEAPwDJTLtrlQbbttN1ixaaxzmFJmZlrZEU+5mcjm9nmXXc/MYyiYN//9k='%3E%3C/image%3E%3C/svg%3E)
If you like to communicate, socialize or hang out with new people, the Discord server might just be the right thing for you.
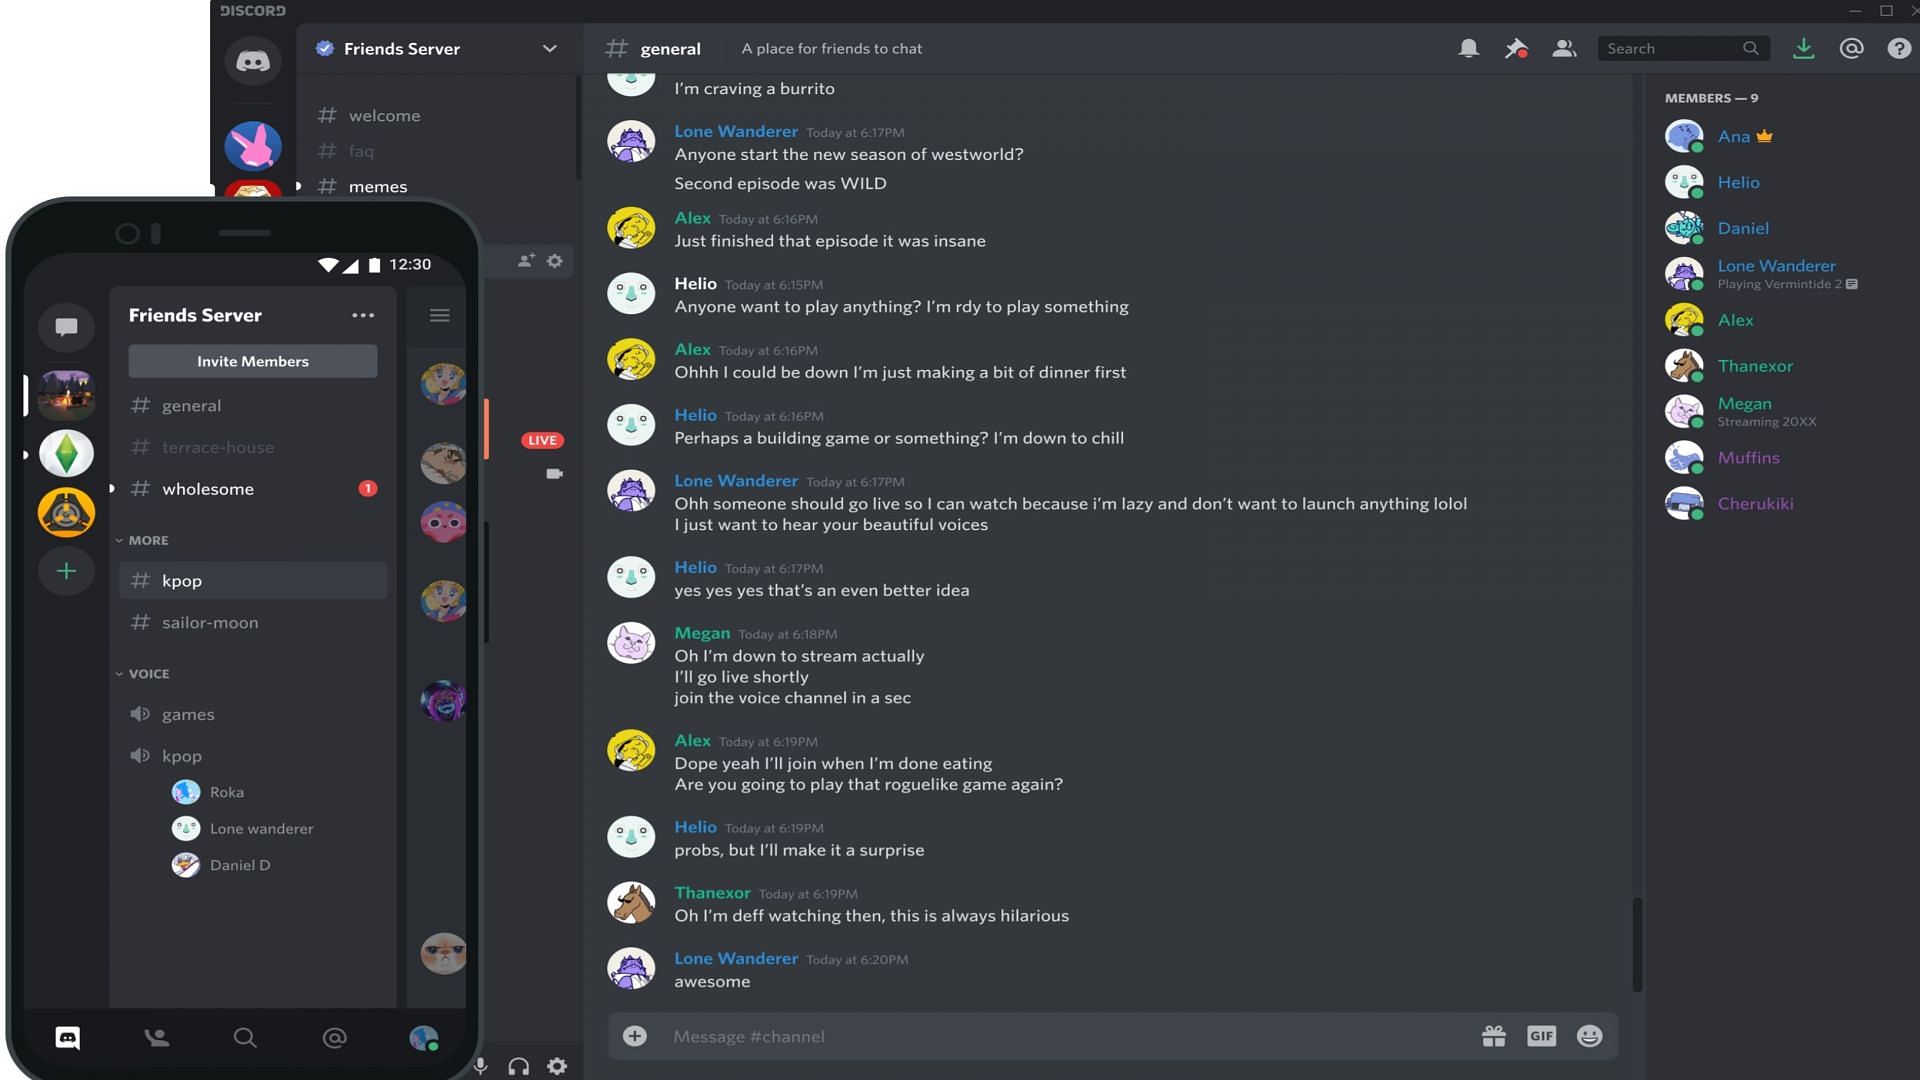
The application is tailored for gamers and communities to communicate or collaborate. Users can communicate with each other via text, voice, or video. It also allows live streaming and screen sharing, while integrating with applications like Twitch and Spotify.
While it is fun and easy to use, creating a server can be a complicated task. However, one can follow the steps given below to do so.
Steps to create Discord server with different channels and invite members
Step 1: Setting up a server
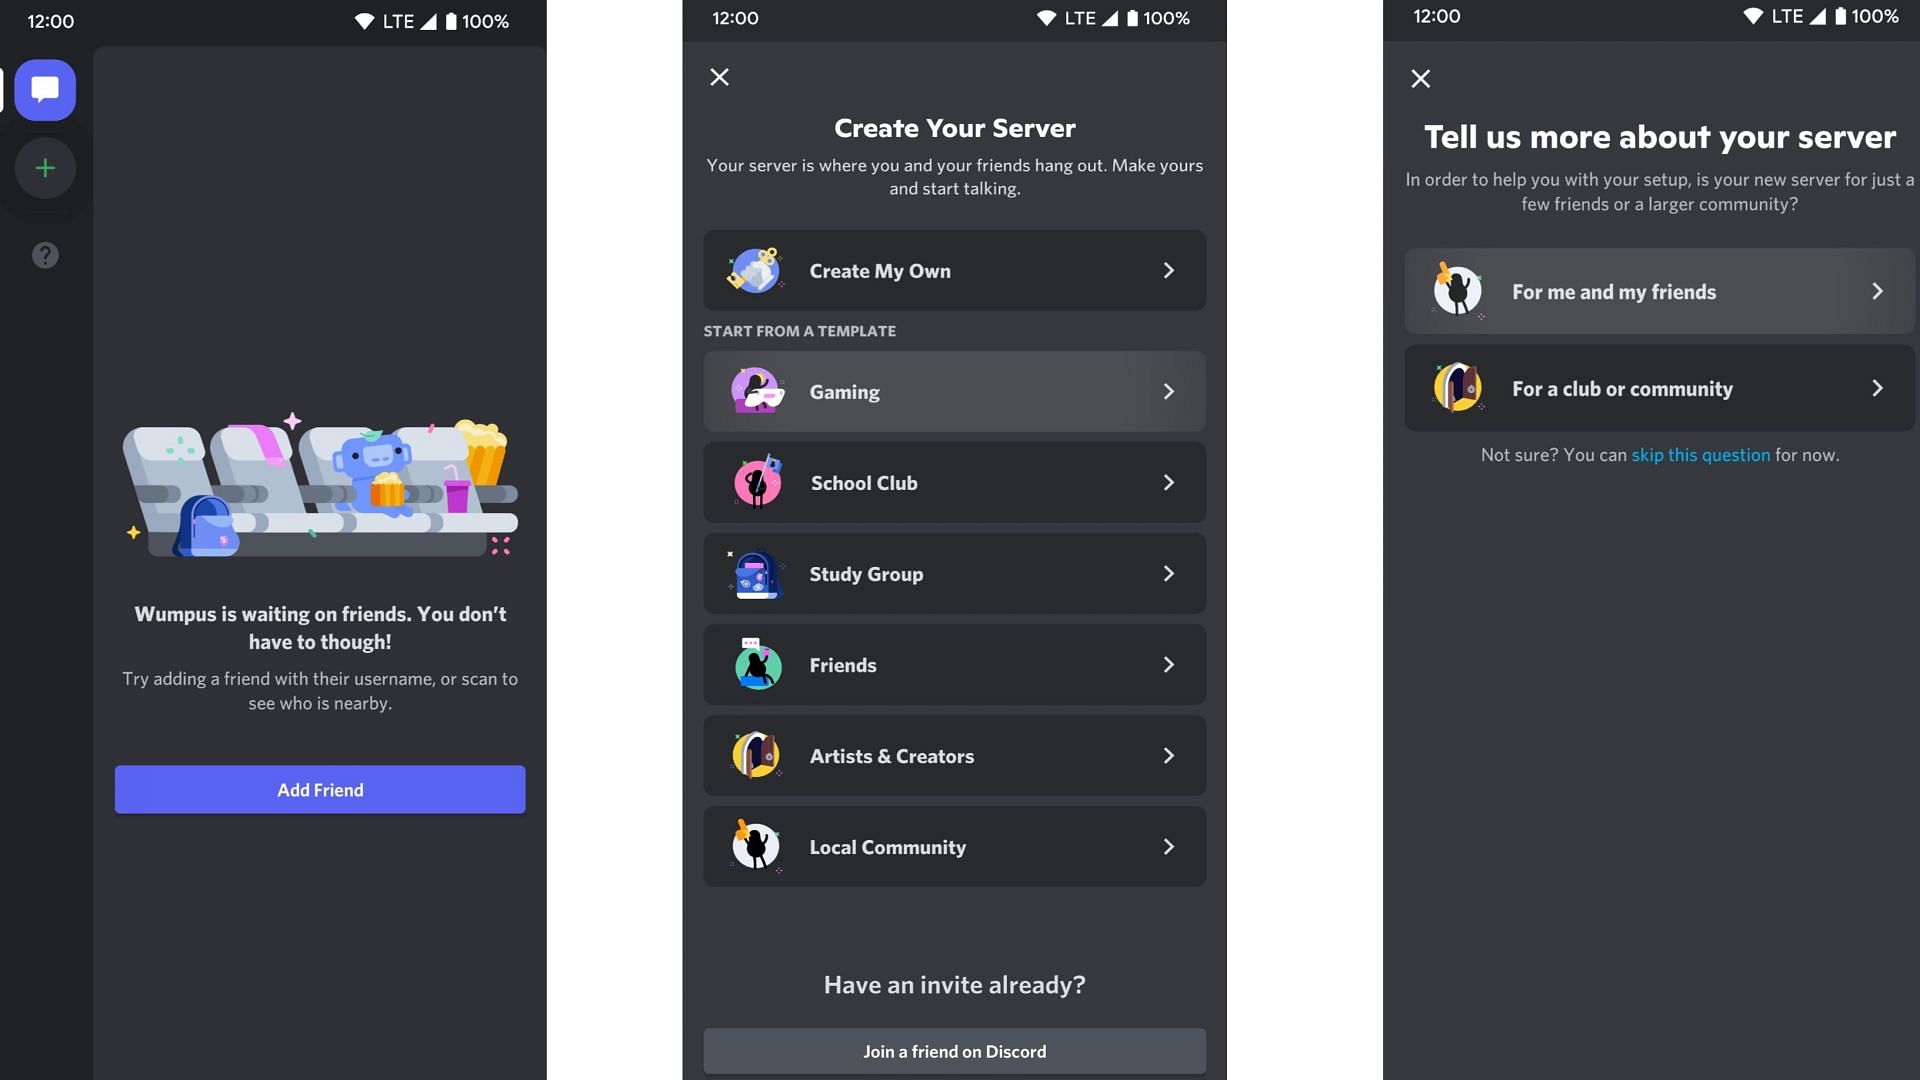
To start off, head to Discord.com and download the application to your device.
Once you have completed the installation and setting up of your account, click on the + icon in the upper left corner of the main screen.
You will need to click on the Create My Own option to create a fresh server or select from the given templates to create a server.
Choose whether you want to keep your server public or only for you and your friend.
Finally, give your server a name and picture to make it unique and easy to identify. Many servers are already created for different communities, so you can join them.
Step 2: Creating different channels
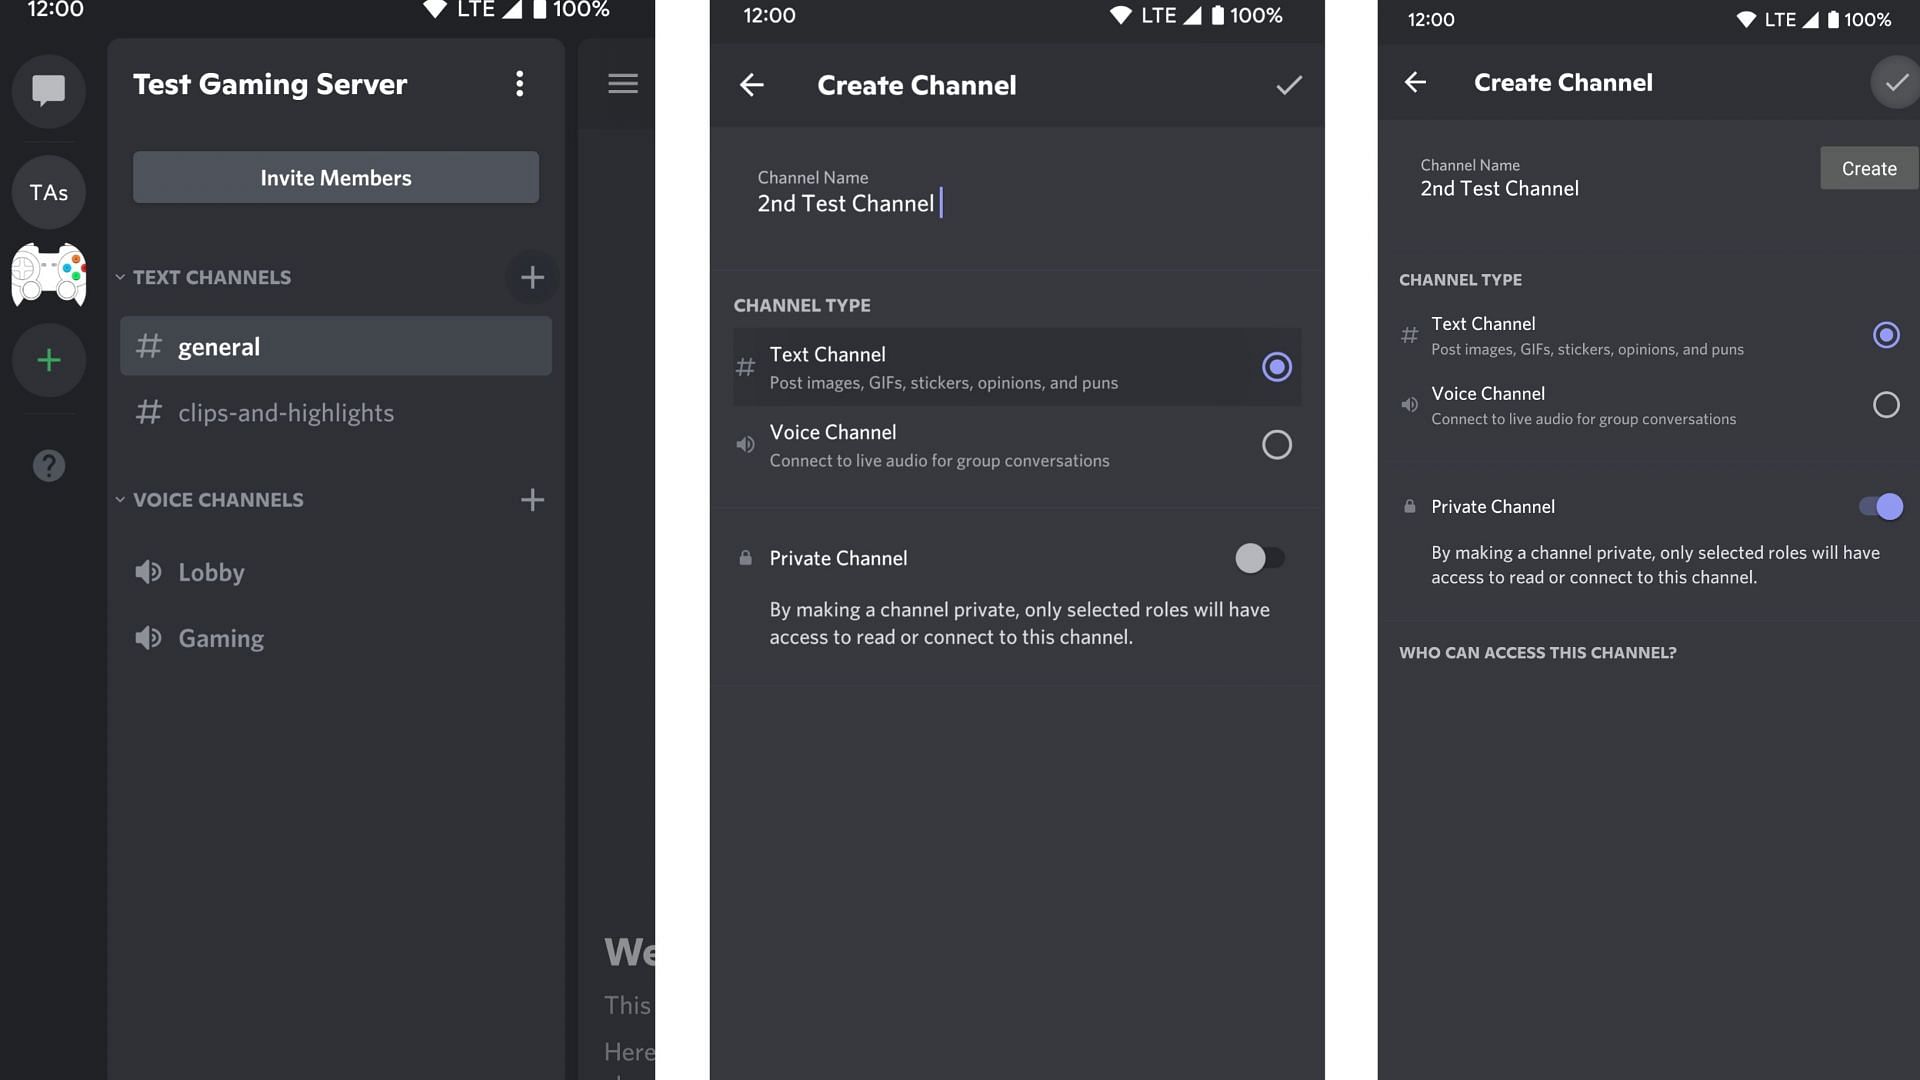
To keep things organized, you can create different channels aside from the few premade ones on the platform's server.
To do so, click on the + icon on the right of TEXT CHANNELS and name the channel. Choose whether you want to set up a text or voice channel. (You can also make the channel private if you wish to share it only with the allowed users).
Finally, check the box in the upper right corner once you’re done, and you will be taken to the channel's main screen. You can always make custom changes from the settings.
Step 3: Inviting members
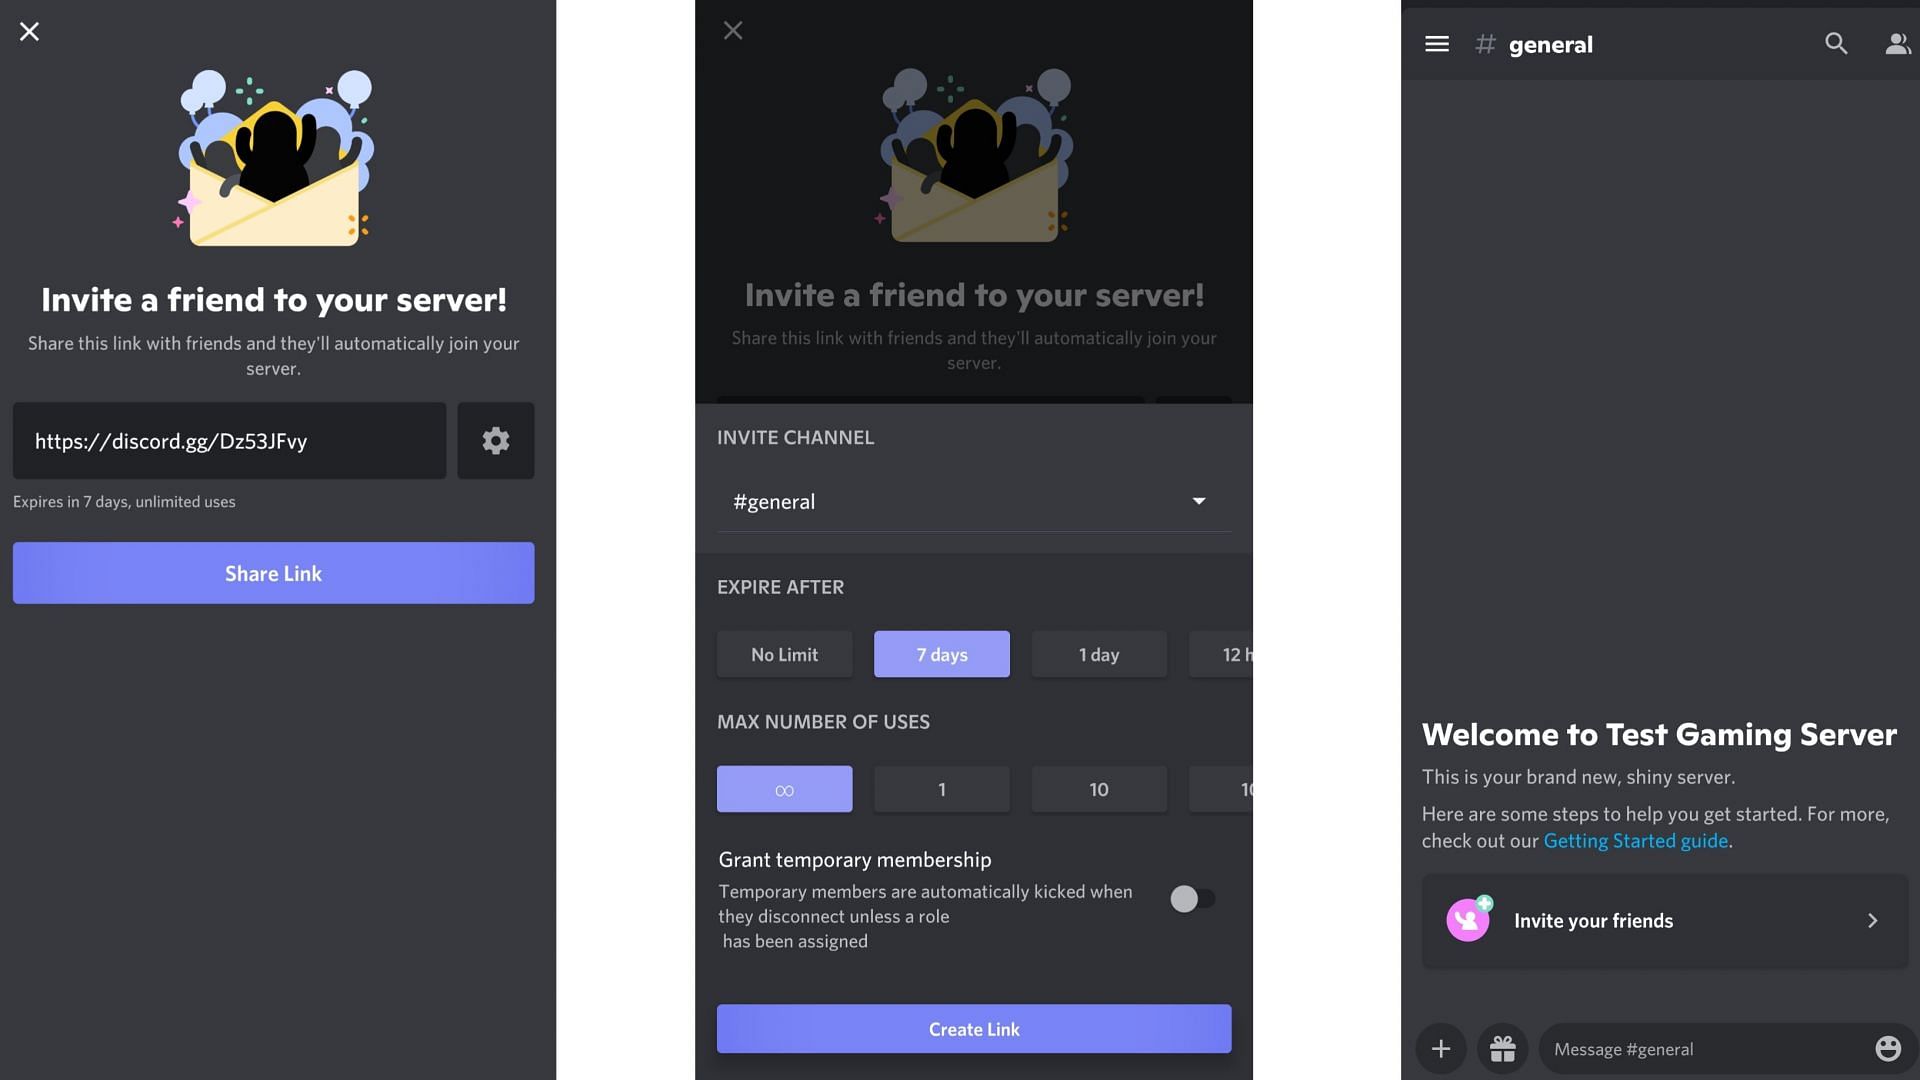
After completing the steps mentioned above, all that's left is to invite members to the server. You will see the 'Invite a friend to your server' option.
Another method is to go to settings, click on Invite People, adjust the custom invite settings, click on the create link, and then share the link to invite new members. You can also invite bots to automate various functions on the server.
Conclusion
Users can follow these three simple steps to use the application. As a gamer, you can use this platform to communicate with your team, set up important meetings, screen share, or stream movies and shows.
Discord is an all-in-one platform that offers many features, one of which is live streaming, making it an effective communication platform. To learn more about it, the platform has a detailed guide on everything a new user needs to know. You can also find the link to the guide in the # general channel.
