'%20x='0'%20y='0'%20height='100%25'%20width='100%25'%20%0A%20%20%20%20%20%20%20%20%20%20xlink%3Ahref='data:image/jpg;base64,/9j/2wBDAAYEBQYFBAYGBQYHBwYIChAKCgkJChQODwwQFxQYGBcUFhYaHSUfGhsjHBYWICwgIyYnKSopGR8tMC0oMCUoKSj/2wBDAQcHBwoIChMKChMoGhYaKCgoKCgoKCgoKCgoKCgoKCgoKCgoKCgoKCgoKCgoKCgoKCgoKCgoKCgoKCgoKCgoKCj/wgARCAAGAAoDASIAAhEBAxEB/8QAFgABAQEAAAAAAAAAAAAAAAAAAAYH/8QAFQEBAQAAAAAAAAAAAAAAAAAAAgT/2gAMAwEAAhADEAAAAMbiSgf/xAAdEAACAgIDAQAAAAAAAAAAAAABAgMRBBQABSEx/9oACAEBAAE/AMTvsRekgxdAA4cbvLTuNok1TEMKFc3ZR4jOij4oY+Dn/8QAGBEAAgMAAAAAAAAAAAAAAAAAAAECAxH/2gAIAQIBAT8Atk3h/8QAGBEAAgMAAAAAAAAAAAAAAAAAAAECEjH/2gAIAQMBAT8Aiq4f/9k='%3E%3C/image%3E%3C/svg%3E)
Night Light is an intriguing feature in Windows 11 and Windows 10. It makes the display colors warmer by reducing the blue light. Since blue light interferes with the body's natural sleep-wake cycle, the Night Light feature becomes extremely important for users who stay up late working on their PCs. It is especially recommended for users who use their devices for long hours.
On Windows 11, users can turn on this feature manually or set it to turn on/ off automatically. This comes in handy and allows users to set up the feature depending on their use case.
In this piece, we will help you set up the color-dimming feature of the Windows 11.
Guide to using the Night Light feature in Windows 11
Night Light works by reducing the blue lights and replacing them with reddish and warmer hues. This reduces eye strain and fatigue, allowing you to work long hours without harming your eyesight. The feature is available on both Windows 11 and 10 and is fairly easy to set up:
1) First, right-click on the Start Menu and head to Settings. Alternatively, press "Win key +I" to bring up the Settings menu.
2) Head to System and select Display.
3) Under Display, in the Brightness and Color section, find Night Light.
4) Toggle it 'On' to turn on the feature. The screen should automatically change its color to display warmer hues.
If users want to customize the color levels of the feature, they can do so by clicking on the arrow next to the Night Light option and moving the Strength slider to adjust it as per their preference.
However, if users want to set a schedule for the Night Light feature to turn on and off automatically every day, follow the steps below:
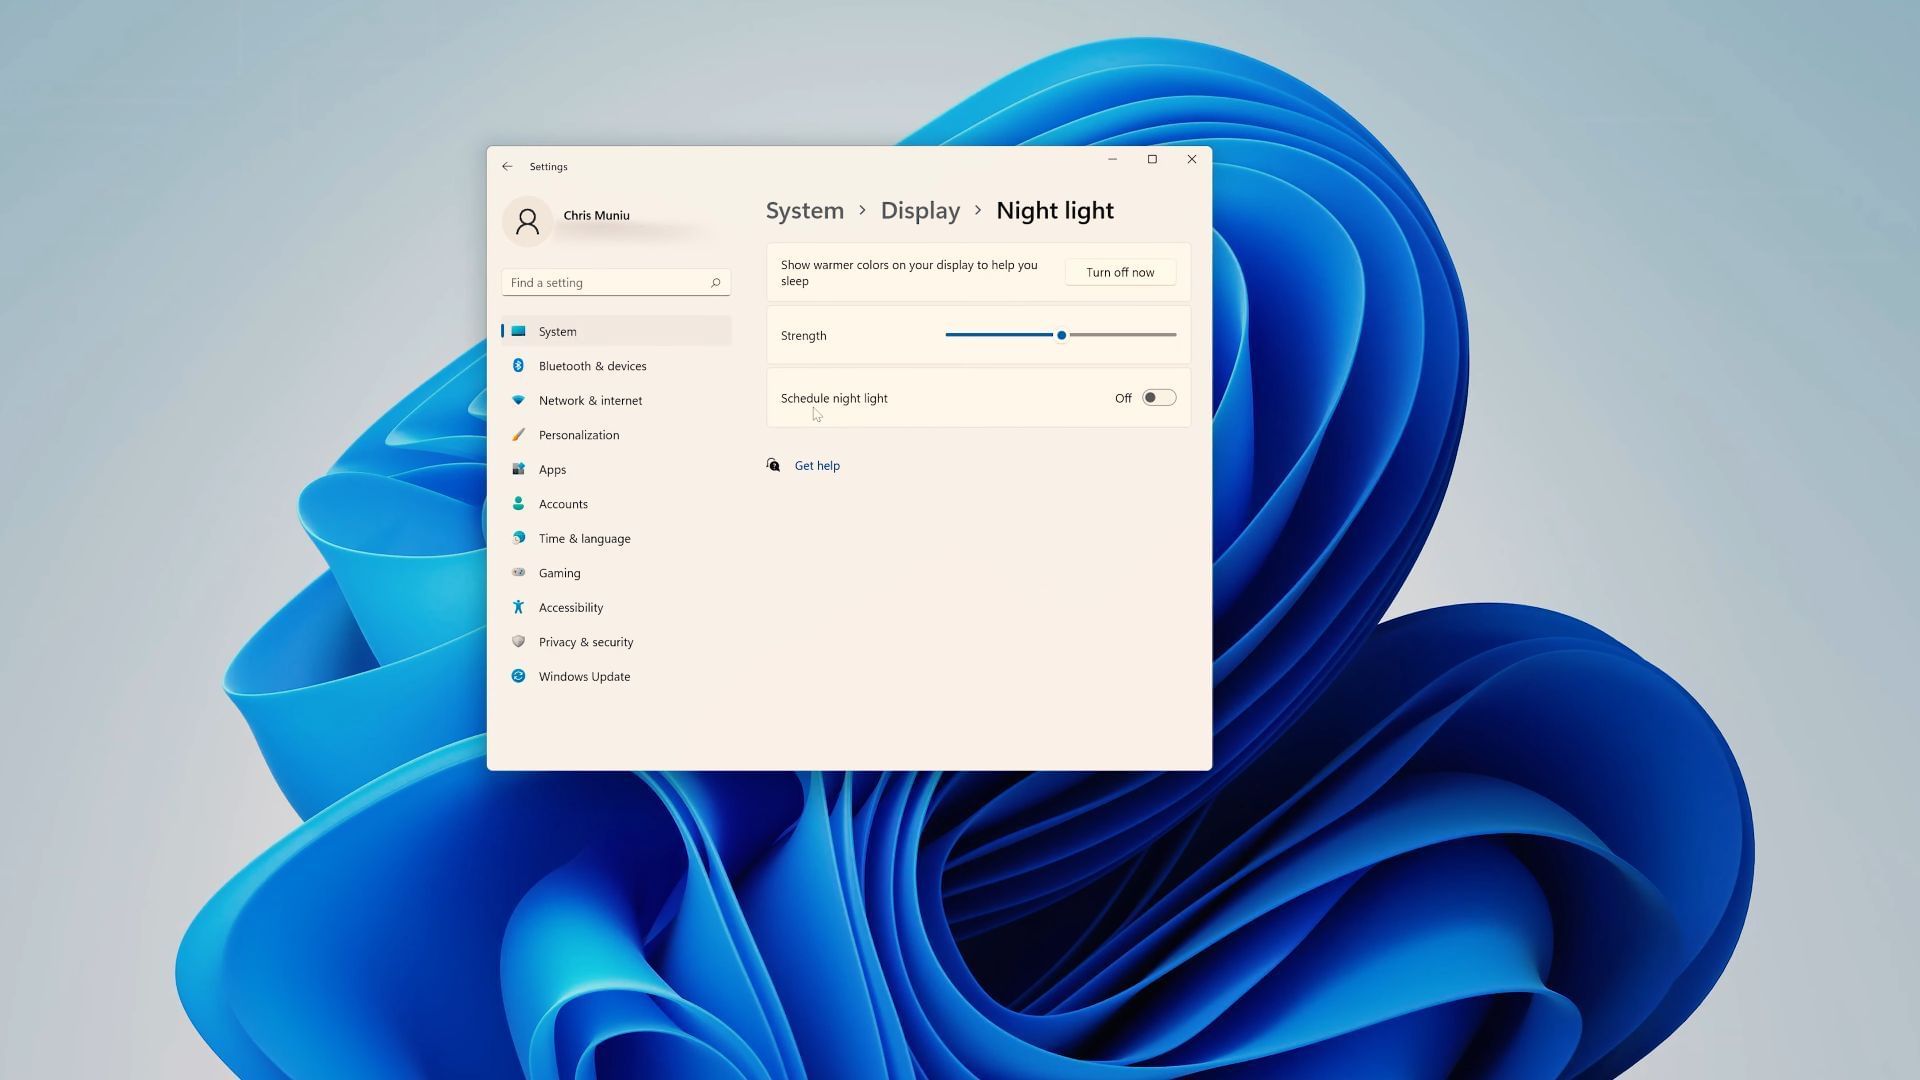
1) Under the Night Light option, find the Schedule Night Light toggle button and turn it on.
2) Doing so will prompt users with two options - Sunset to Sunrise and Set Hours.
If users select the former, the Night Light feature will turn on and off according to the sunset and sunrise time in their location; however, if users want even more customizability, they need to click on "Set Hours."
3) Now, select the time you want Night Light to turn on/off under the "Turn On" and "Turn off" options. This will allow you to shift to warmer hues automatically. Do note the feature when used with dark mode will help you the most.
In some instances, the feature may not be available to the user. In such scenarios, Microsoft recommends that they update their display drivers. Also, it won't be accessible if the PC uses certain drivers such as DisplayLink or Basic Display.