
'%20x='0'%20y='0'%20height='100%25'%20width='100%25'%20%0A%20%20%20%20%20%20%20%20%20%20xlink%3Ahref='data:image/jpg;base64,/9j/2wBDAAYEBQYFBAYGBQYHBwYIChAKCgkJChQODwwQFxQYGBcUFhYaHSUfGhsjHBYWICwgIyYnKSopGR8tMC0oMCUoKSj/2wBDAQcHBwoIChMKChMoGhYaKCgoKCgoKCgoKCgoKCgoKCgoKCgoKCgoKCgoKCgoKCgoKCgoKCgoKCgoKCgoKCgoKCj/wgARCAAGAAoDASIAAhEBAxEB/8QAFQABAQAAAAAAAAAAAAAAAAAAAwf/2gAIAQEAAAAAmh//xAAUAQEAAAAAAAAAAAAAAAAAAAAC/9oACAECEAAAAD//xAAUAQEAAAAAAAAAAAAAAAAAAAAD/9oACAEDEAAAAG//xAAiEAABAwMDBQAAAAAAAAAAAAAEAQIDAAUSERMhJDFUcdH/2gAIAQEAAT8AthR8AaiEHlSE4uwdu6tRE981Hcr5g3rX9vJm+1//xAAYEQACAwAAAAAAAAAAAAAAAAAAAgESIf/aAAgBAgEBPwC7LGH/xAAXEQADAQAAAAAAAAAAAAAAAAAAAQIR/9oACAEDAQE/AJeH/9k='%3E%3C/image%3E%3C/svg%3E)
With the first part of the vast Minecraft 1.17 Caves & Cliffs update officially being released two days ago, Minecraft fans have been keen to finally try out the new features.
Some players, however, may not be ready to make the leap onto 1.17, or their favorite Minecraft Servers may not be fully updated yet to support version 1.17.
Whatever the reason may be for wanting to use version 1.16 for just a bit longer, this helpful guide will explain exactly how players can switch back their game version in the easiest way possible.

Chart New Territories with the ultimate Minecraft Seed Generator!
How to Downgrade Minecraft version 1.17 to 1.16.5 on PC (Java)
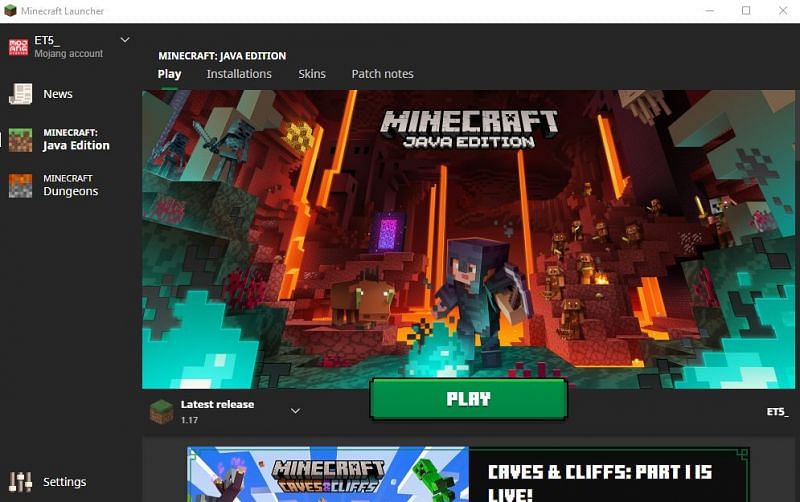
Step 1. Opening the launcher:
Players will need to open the Minecraft launcher and sign into their Minecraft account.
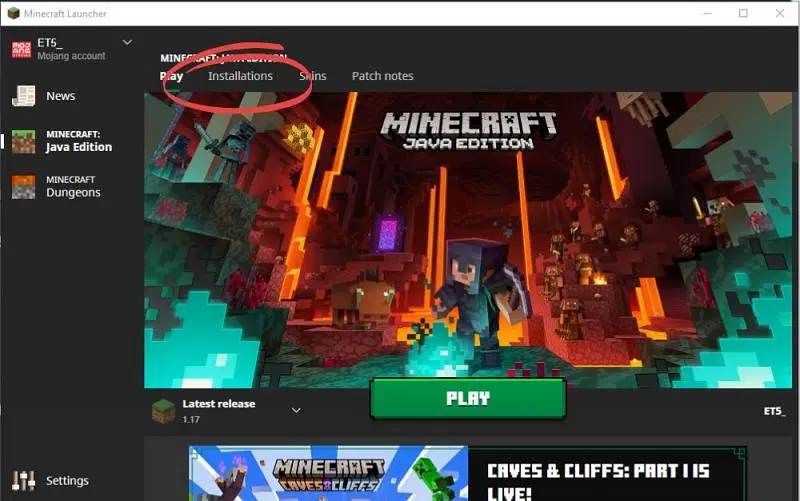
Step 2.1 Click "Installations":
Next, players will need to create a new installation profile. The first part of doing this is by clicking on the "Installations" tab at the top.
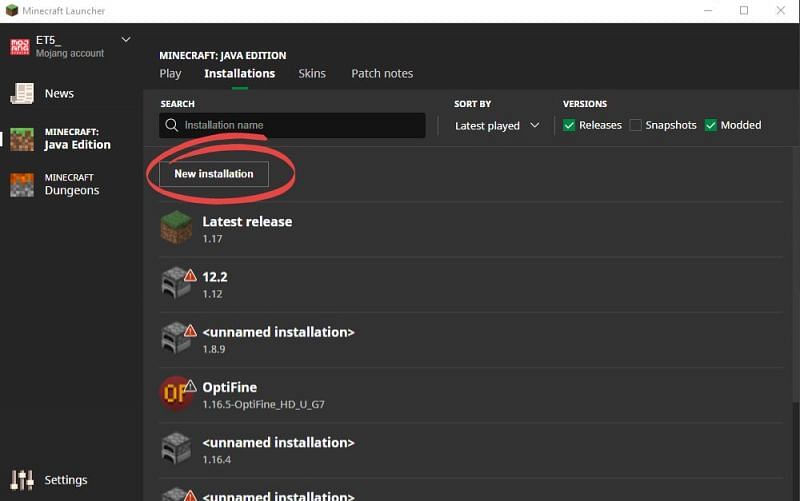
Step 2.2 Click "New Installation":
After doing this, players must now click the "New Installation" button. This will allow a new installation profile to be selected and created.
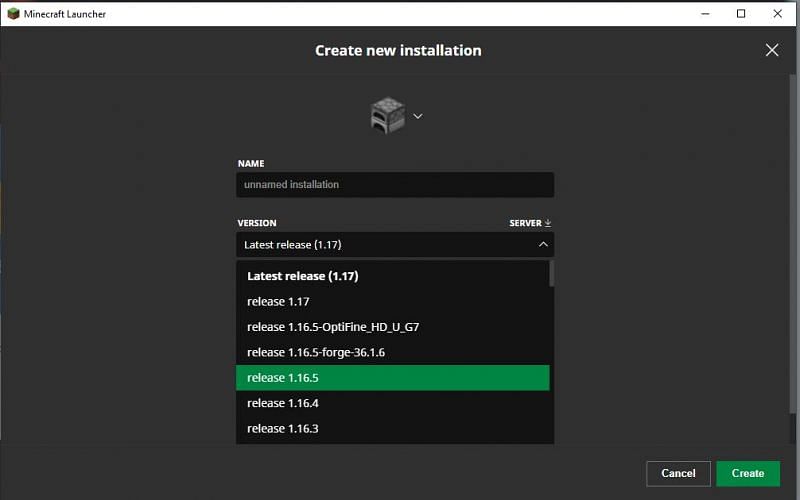
Step 2.3 Select "Release 1.16.5":
Players must now select which Minecraft version they want to play. This can be absolutely any Minecraft version that is available in the dropdown menu, but in this case the option "release 1.16.5" needs to be selected.
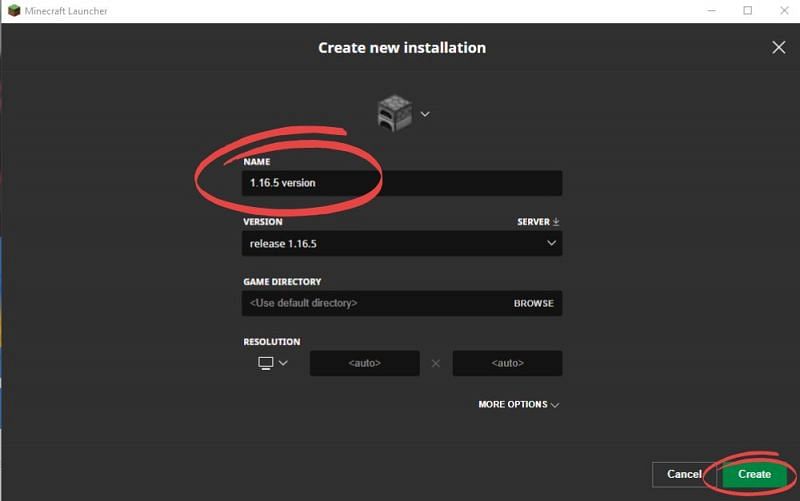
Step 2.4 Name and create the installation profile:
After selecting the "release 1.16.5" option from the dropdown menu, players must now choose a name for their installation. This can be any name desired, here it is named "1.16.5 version".
After a name has been entered, players can simply press "create profile".
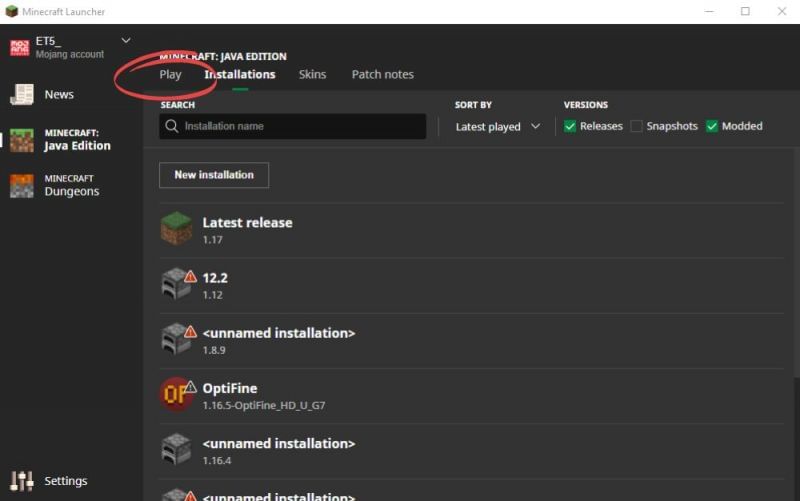
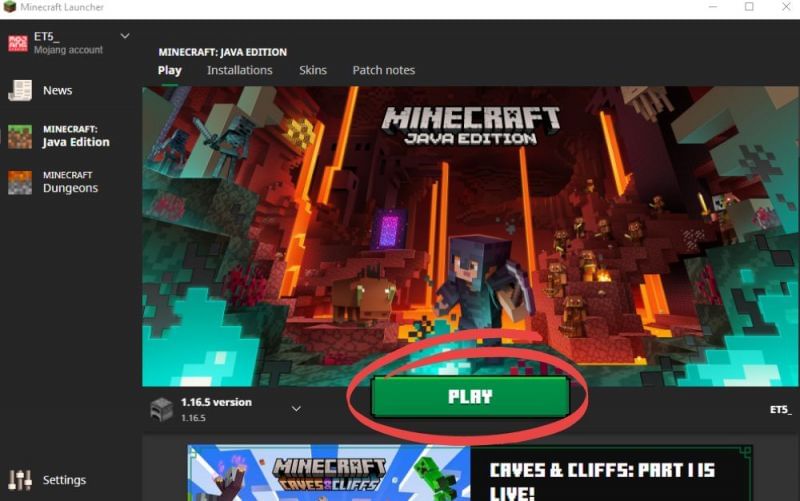
Step 3 Go back to the main menu:
After creating a new installation profile by following the previous steps, players must now navigate back to the original menu. This can be easily done by pressing the "play" button as seen below.
Step 4 Select the new installation profile:
The next thing to do is click the button as highlighted below. This will bring up the dropdown menu and players must now select the newly created installation profile from said dropdown menu.
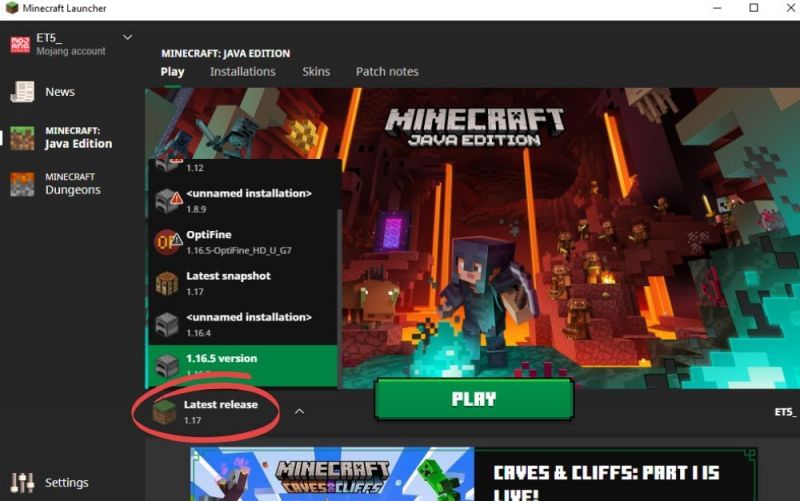
Step 5 Hit the big green play button & enjoy!
After selecting the new 1.16.5 game version successfully, players can simply hit "Play" whenever they are ready to launch Minecraft in version 1.16.5.
Also Read: 5 best Minecraft 1.17 Survival Servers to play

Uncover new worlds with our Minecraft Seed Generator!