'%20x='0'%20y='0'%20height='100%25'%20width='100%25'%20%0A%20%20%20%20%20%20%20%20%20%20xlink%3Ahref='data:image/jpg;base64,/9j/2wBDAAYEBQYFBAYGBQYHBwYIChAKCgkJChQODwwQFxQYGBcUFhYaHSUfGhsjHBYWICwgIyYnKSopGR8tMC0oMCUoKSj/2wBDAQcHBwoIChMKChMoGhYaKCgoKCgoKCgoKCgoKCgoKCgoKCgoKCgoKCgoKCgoKCgoKCgoKCgoKCgoKCgoKCgoKCj/wgARCAAGAAoDASIAAhEBAxEB/8QAFQABAQAAAAAAAAAAAAAAAAAAAAb/xAAVAQEBAAAAAAAAAAAAAAAAAAABBP/aAAwDAQACEAMQAAAAk5UK/wD/xAAiEAACAQMCBwAAAAAAAAAAAAABAgMABBEFBhITFiIykuH/2gAIAQEAAT8A6gdNvQXEisU5pBYHLv28S59cVLrN28jsJJMEk+fyv//EABYRAAMAAAAAAAAAAAAAAAAAAAABEv/aAAgBAgEBPwCmf//EABYRAQEBAAAAAAAAAAAAAAAAAAEAEf/aAAgBAwEBPwDBb//Z'%3E%3C/image%3E%3C/svg%3E)
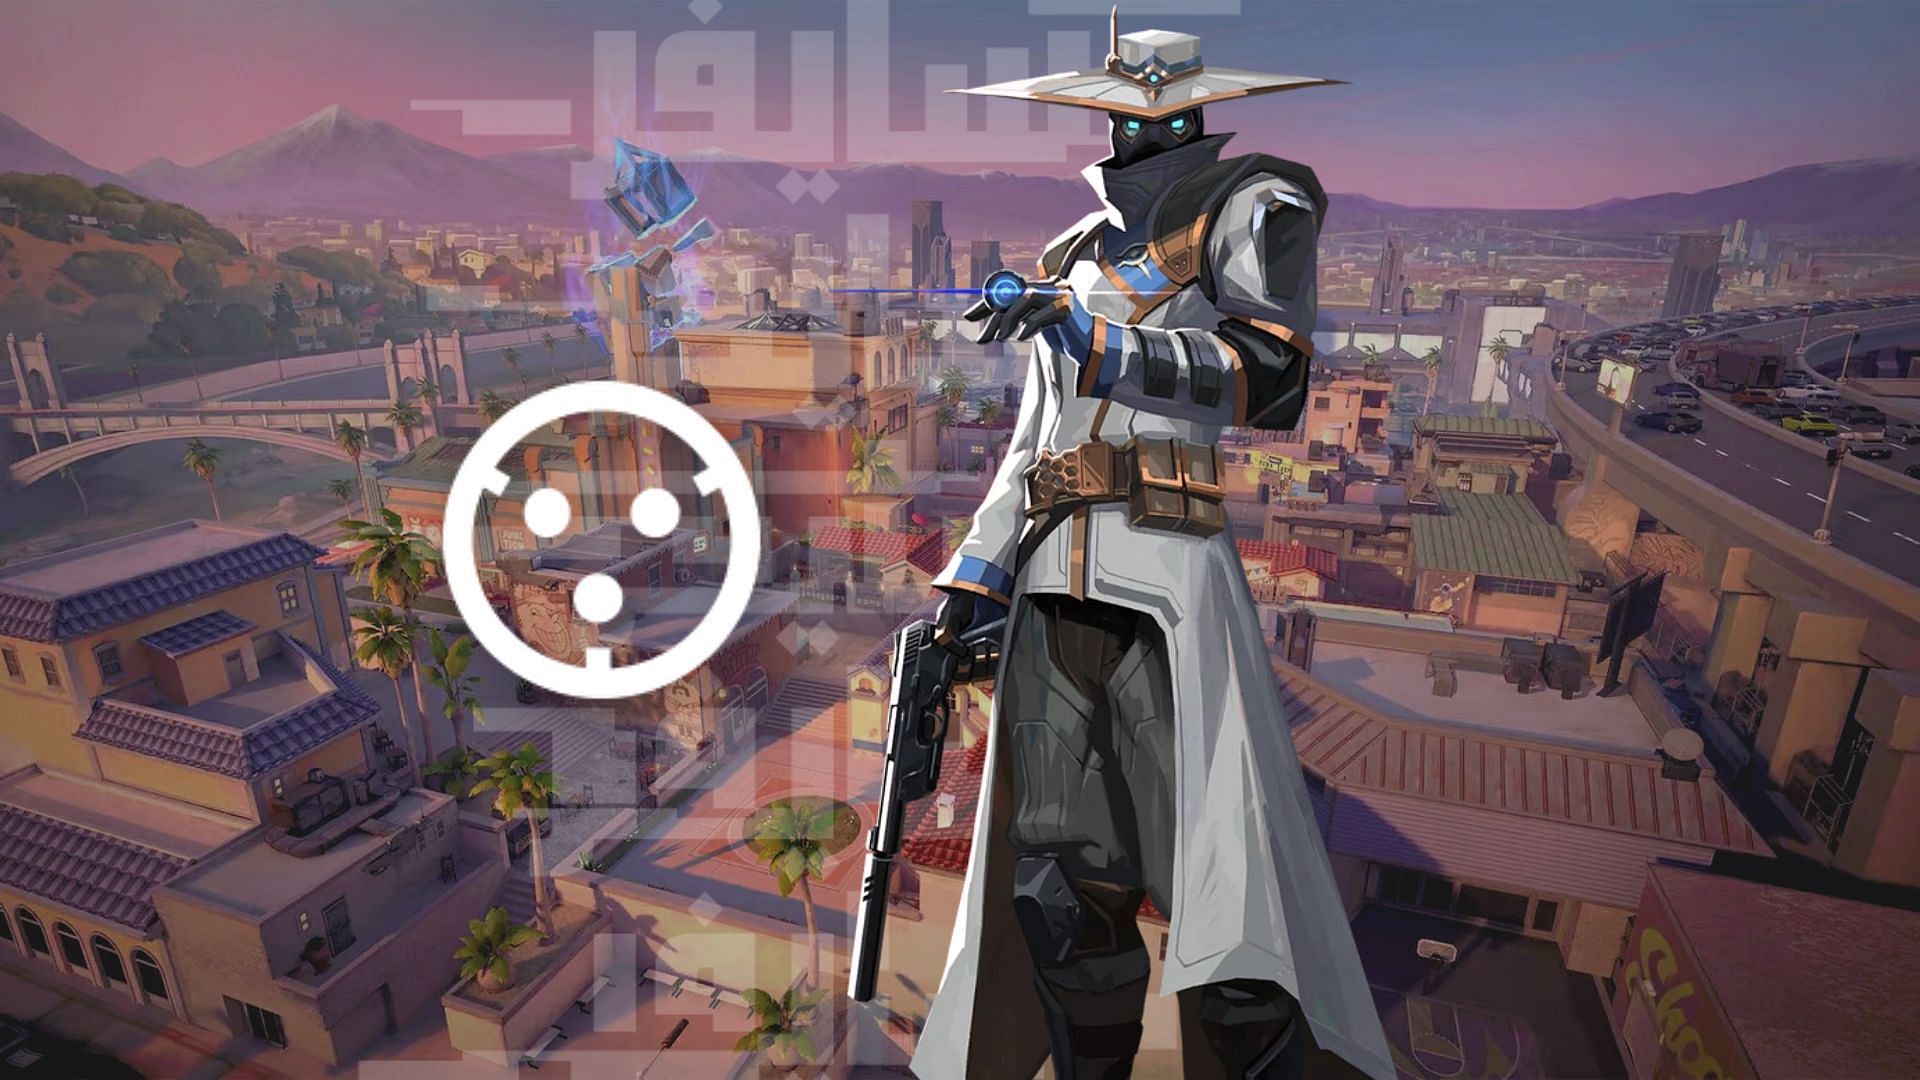
Valorant's newest map, Sunset, has a straightforward two-site layout devoid of gimmicks. Close attacker and defender barriers increase the chances of early skirmishes, with interconnected pathways for strategic flanking. On Sunset, Cypher's toolkit positions him as an A-tier Agent due to its effectiveness in impeding enemy advances, making him a valuable asset on this map.
Mastering Cypher's Cyber Cage for one-way setups is essential to gaining an advantage when defending specific areas on Sunset. This article will guide you in effectively utilizing Cyber Cage to secure advantageous angles while disrupting your opponents' vision.

Best Cypher one-way cages for A-site, B-site, and more on Sunset in Valorant
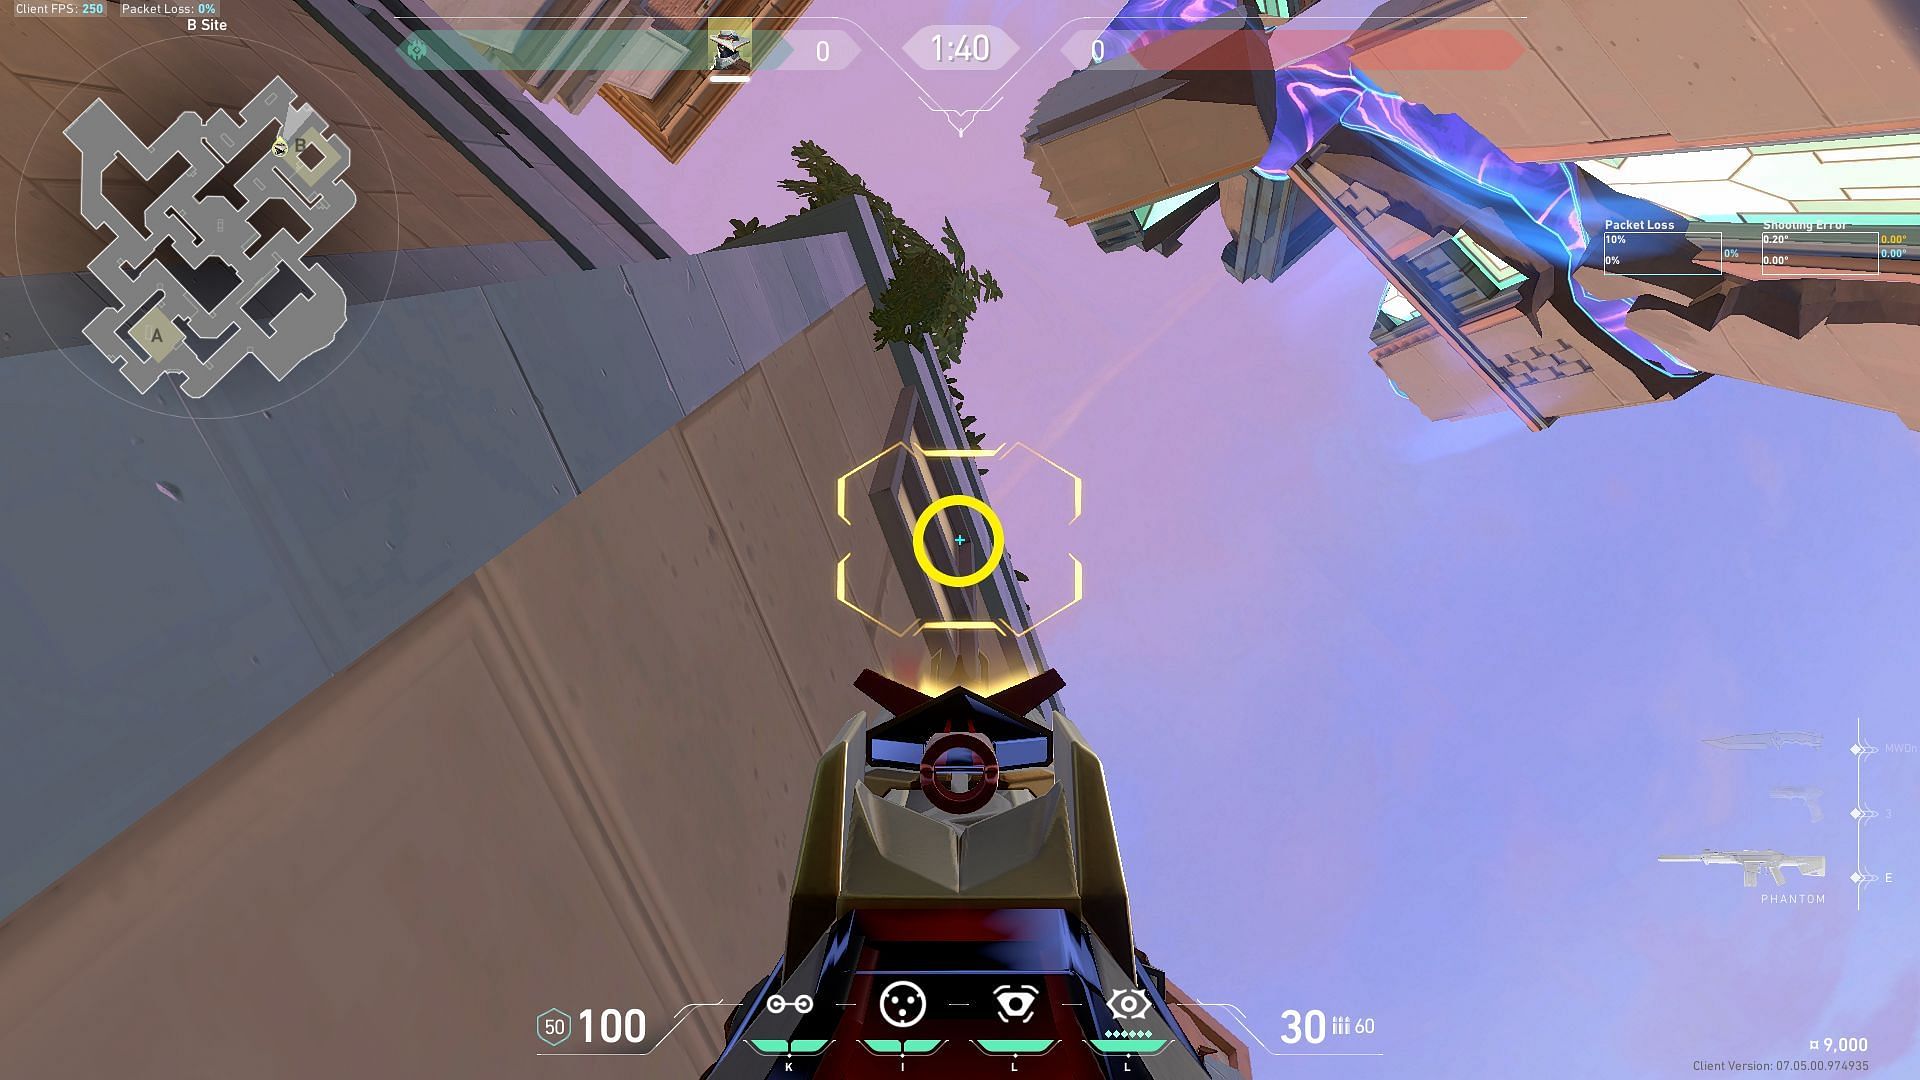
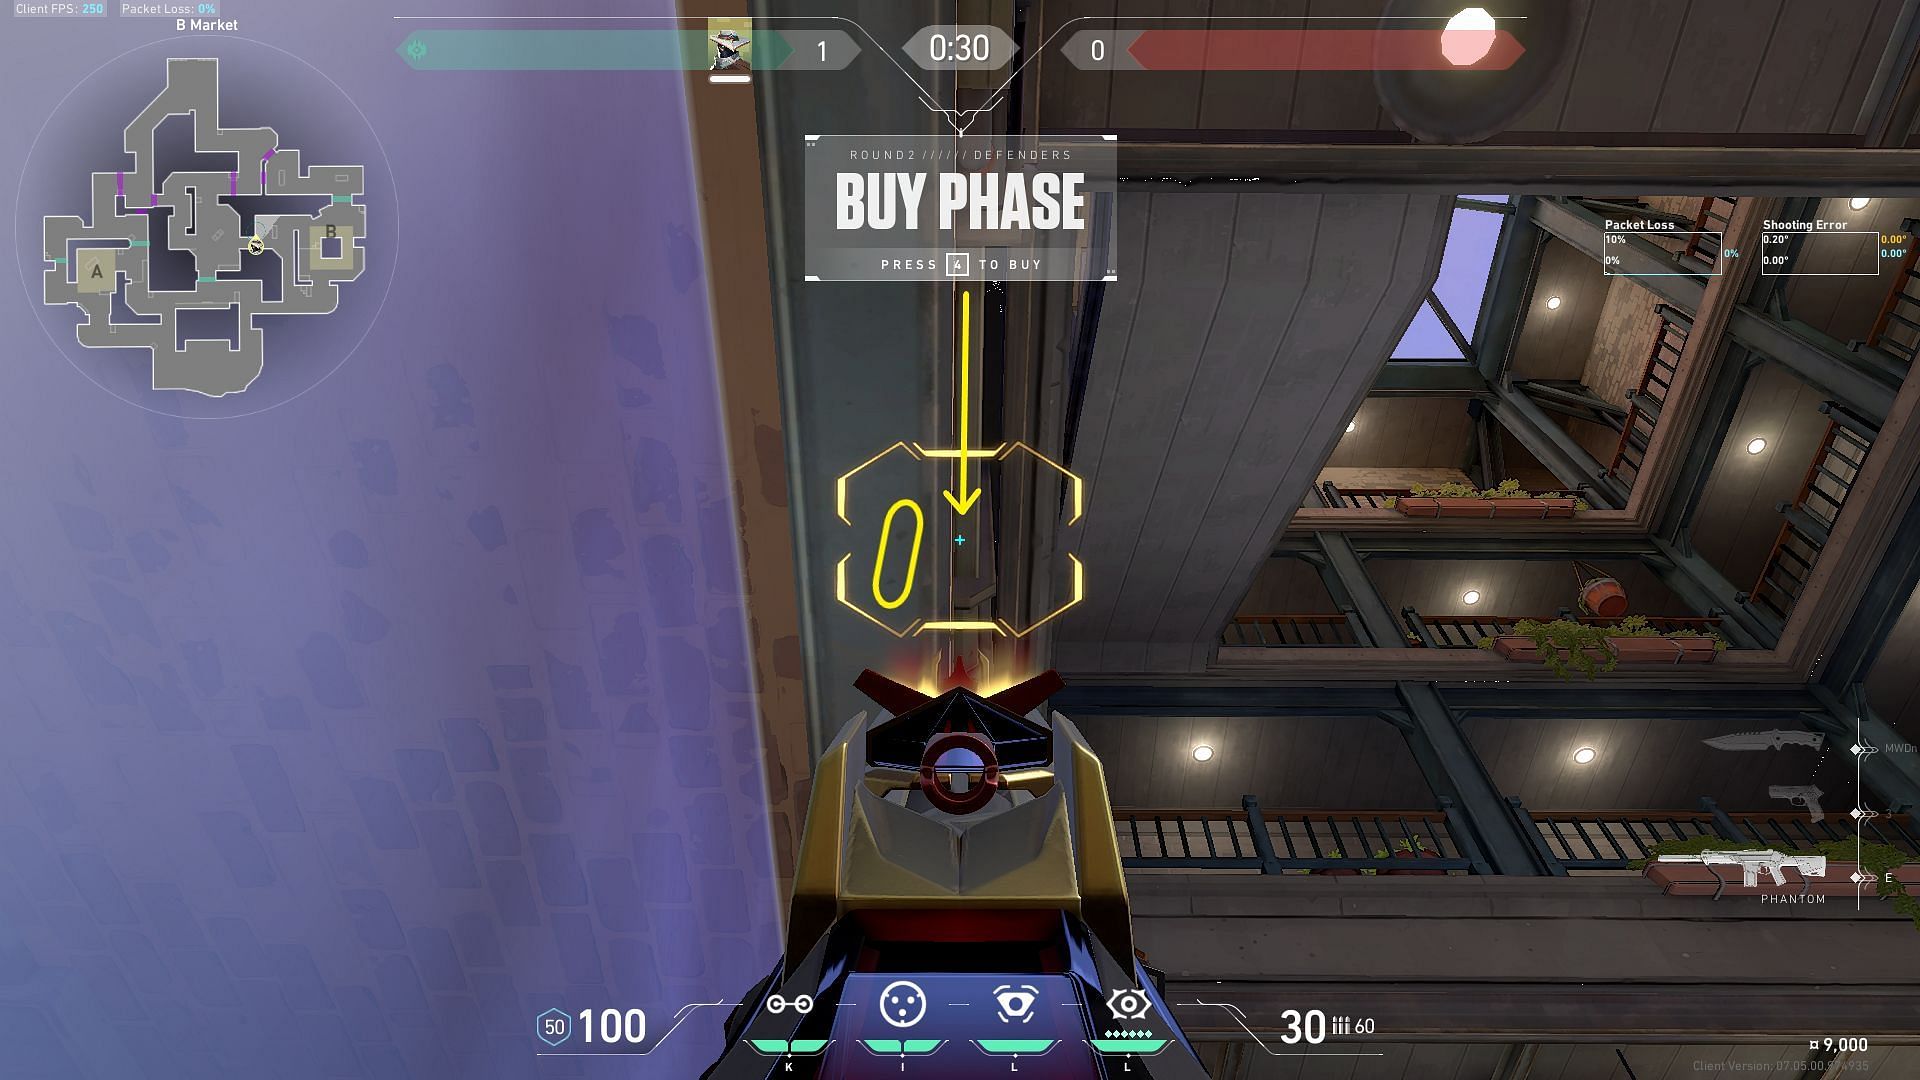
1) B Main one-way cage
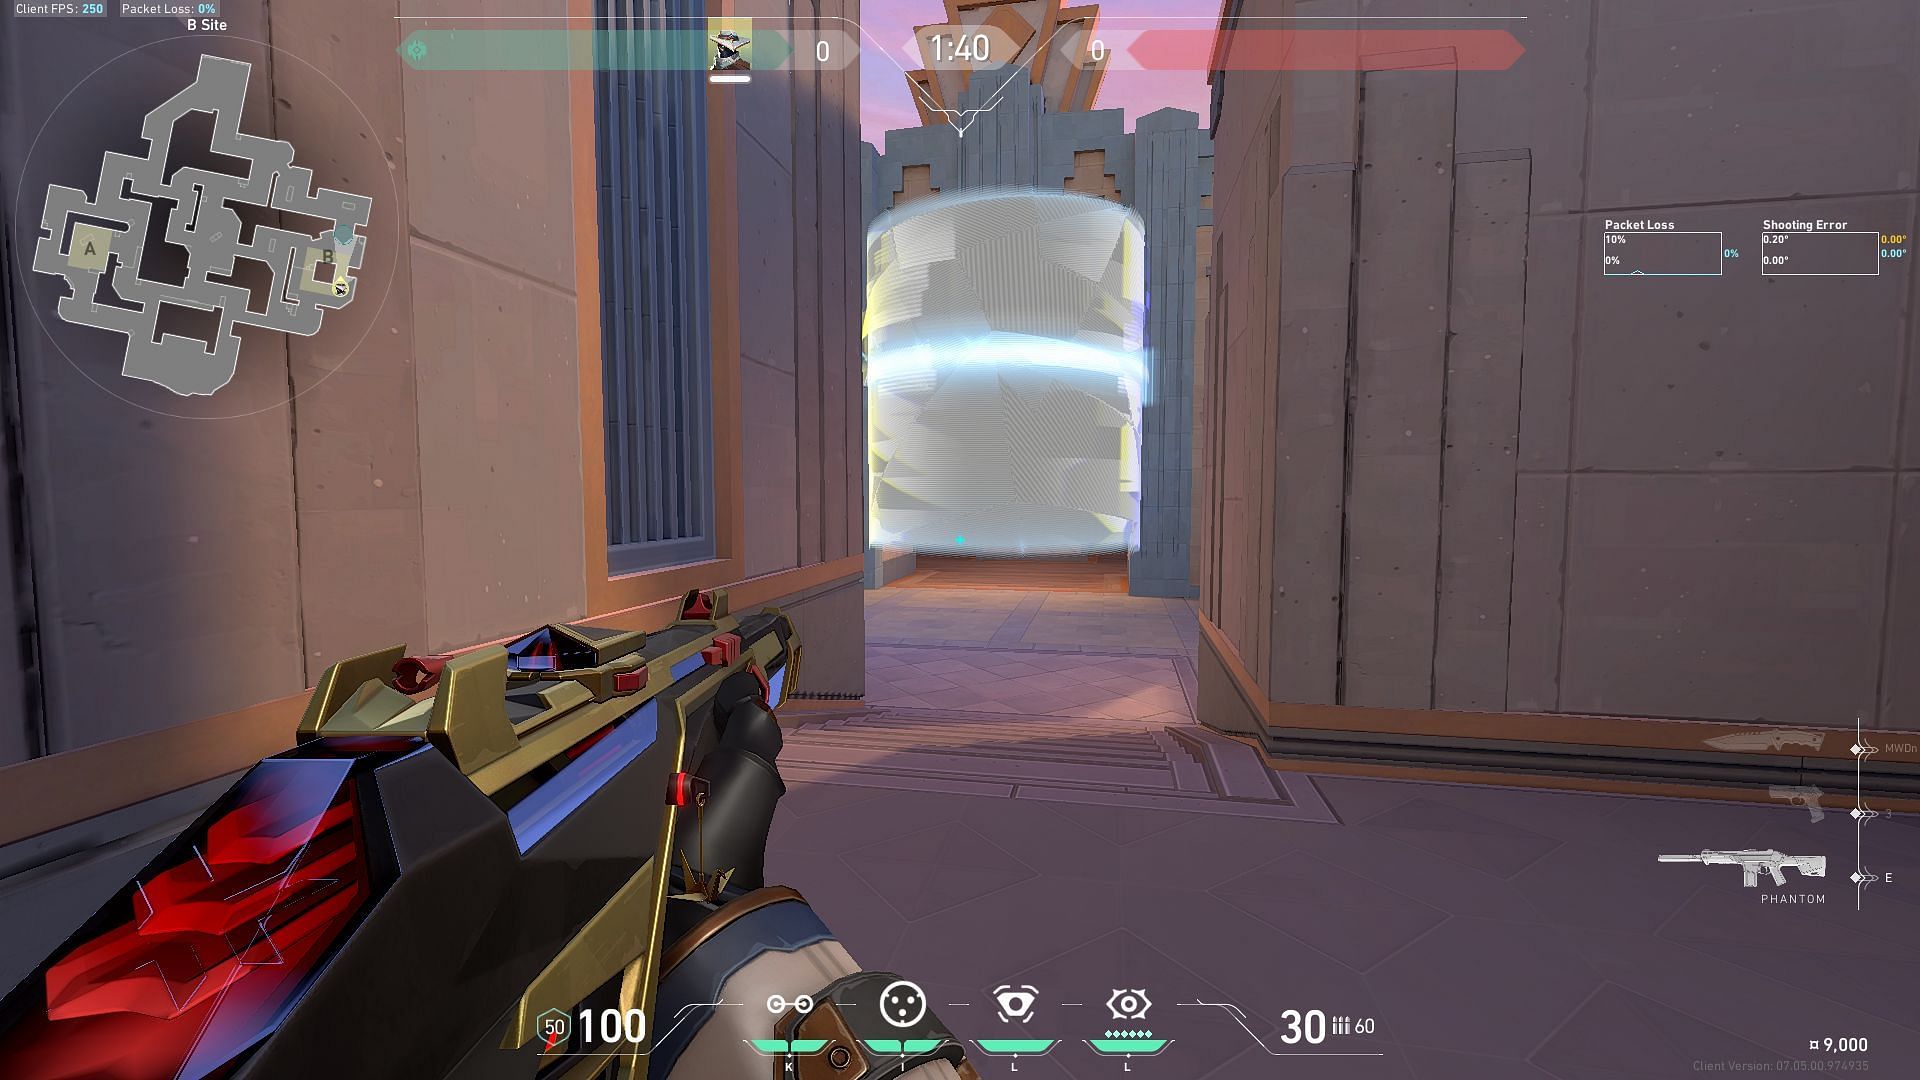
This superb one-way cage will grant you easy eliminations on the approaching attackers as they attempt to advance from B Main to the B-site.
While setting up for A-site on defense, step up on the first box and align yourself in the corner.
Now aim at the protruding ledge above the B-site chokepoint and carefully line up the HUD line below your ammunition counter to match up with a black speck on the brick lining of the right wall. Use your Cyber Cage to throw a perfect one-way cage covering B on Main.
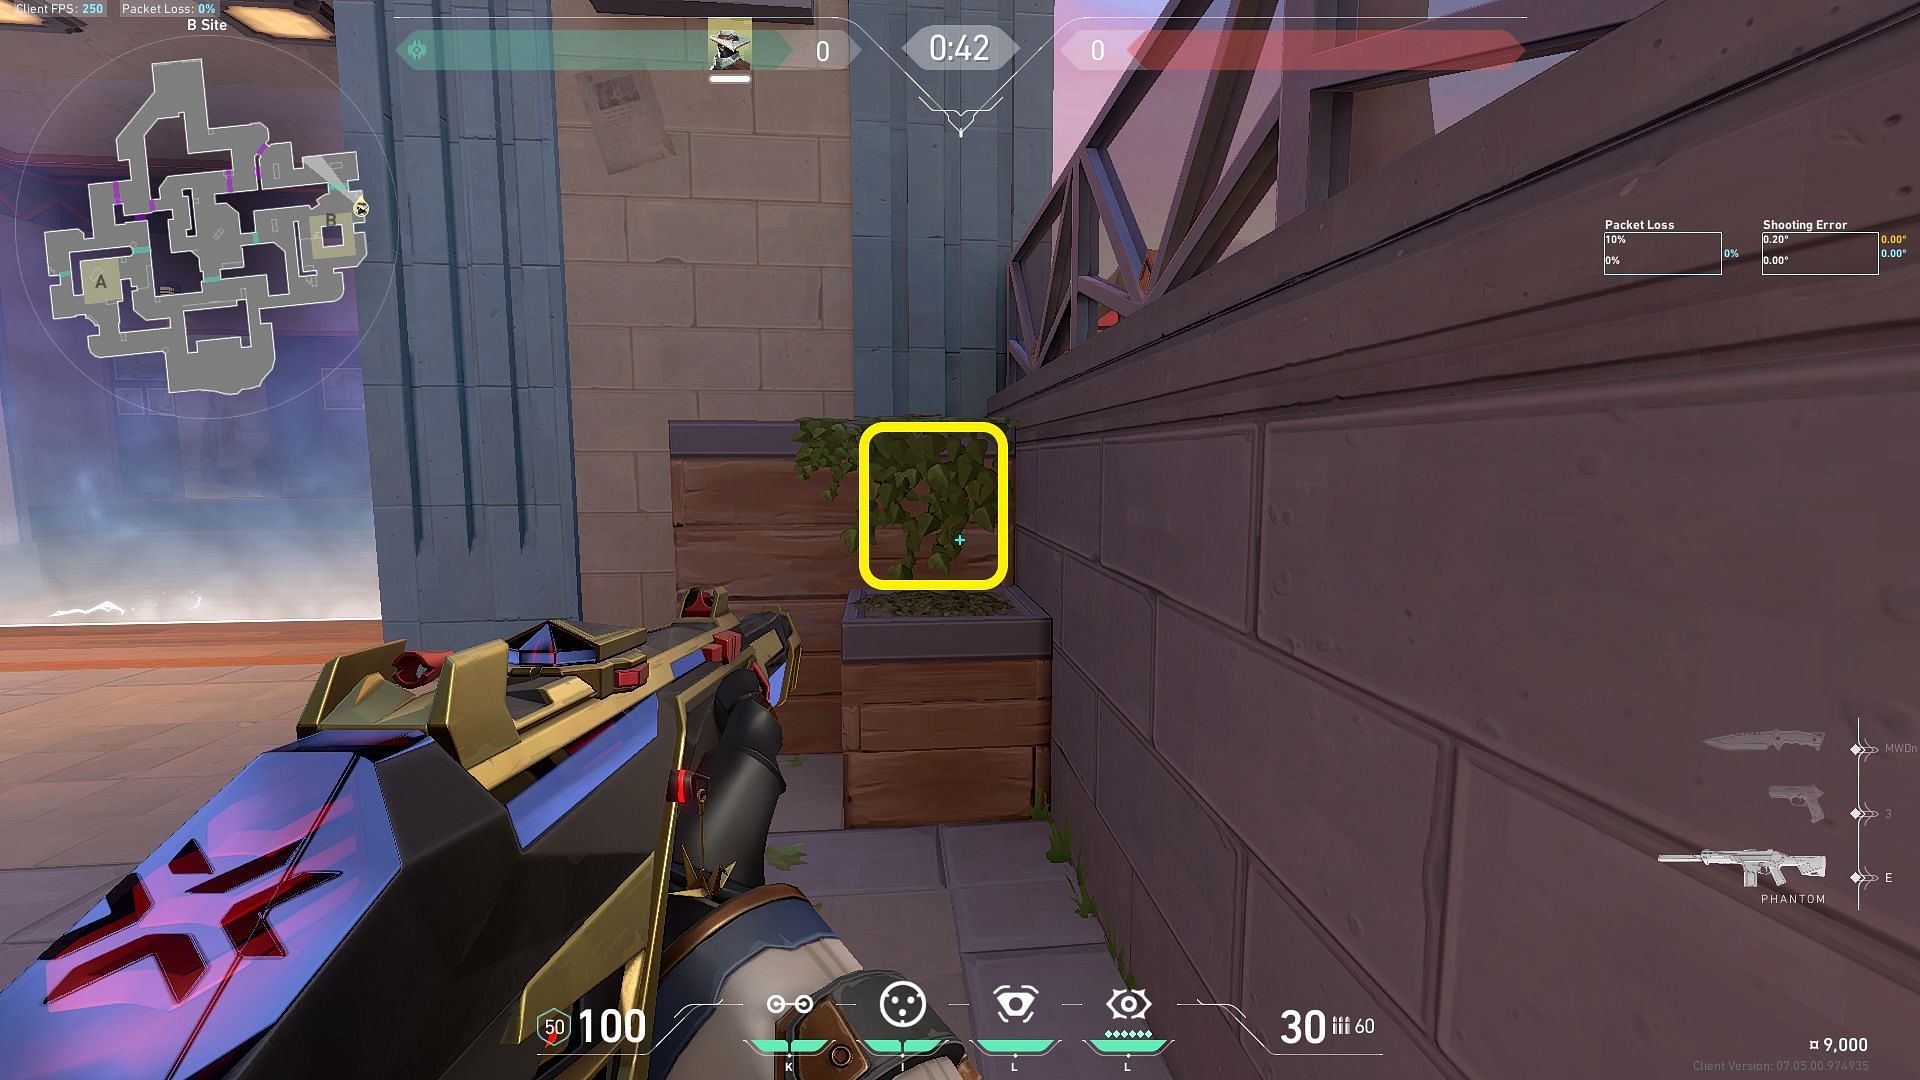
2) B-site one-way cage
if you've observed that in prior rounds, when defending the B-site, enemies tend to path their attacking formation towards the B Market side on the site, this one-way cage will catch them off guard and provide you with effortless eliminations.
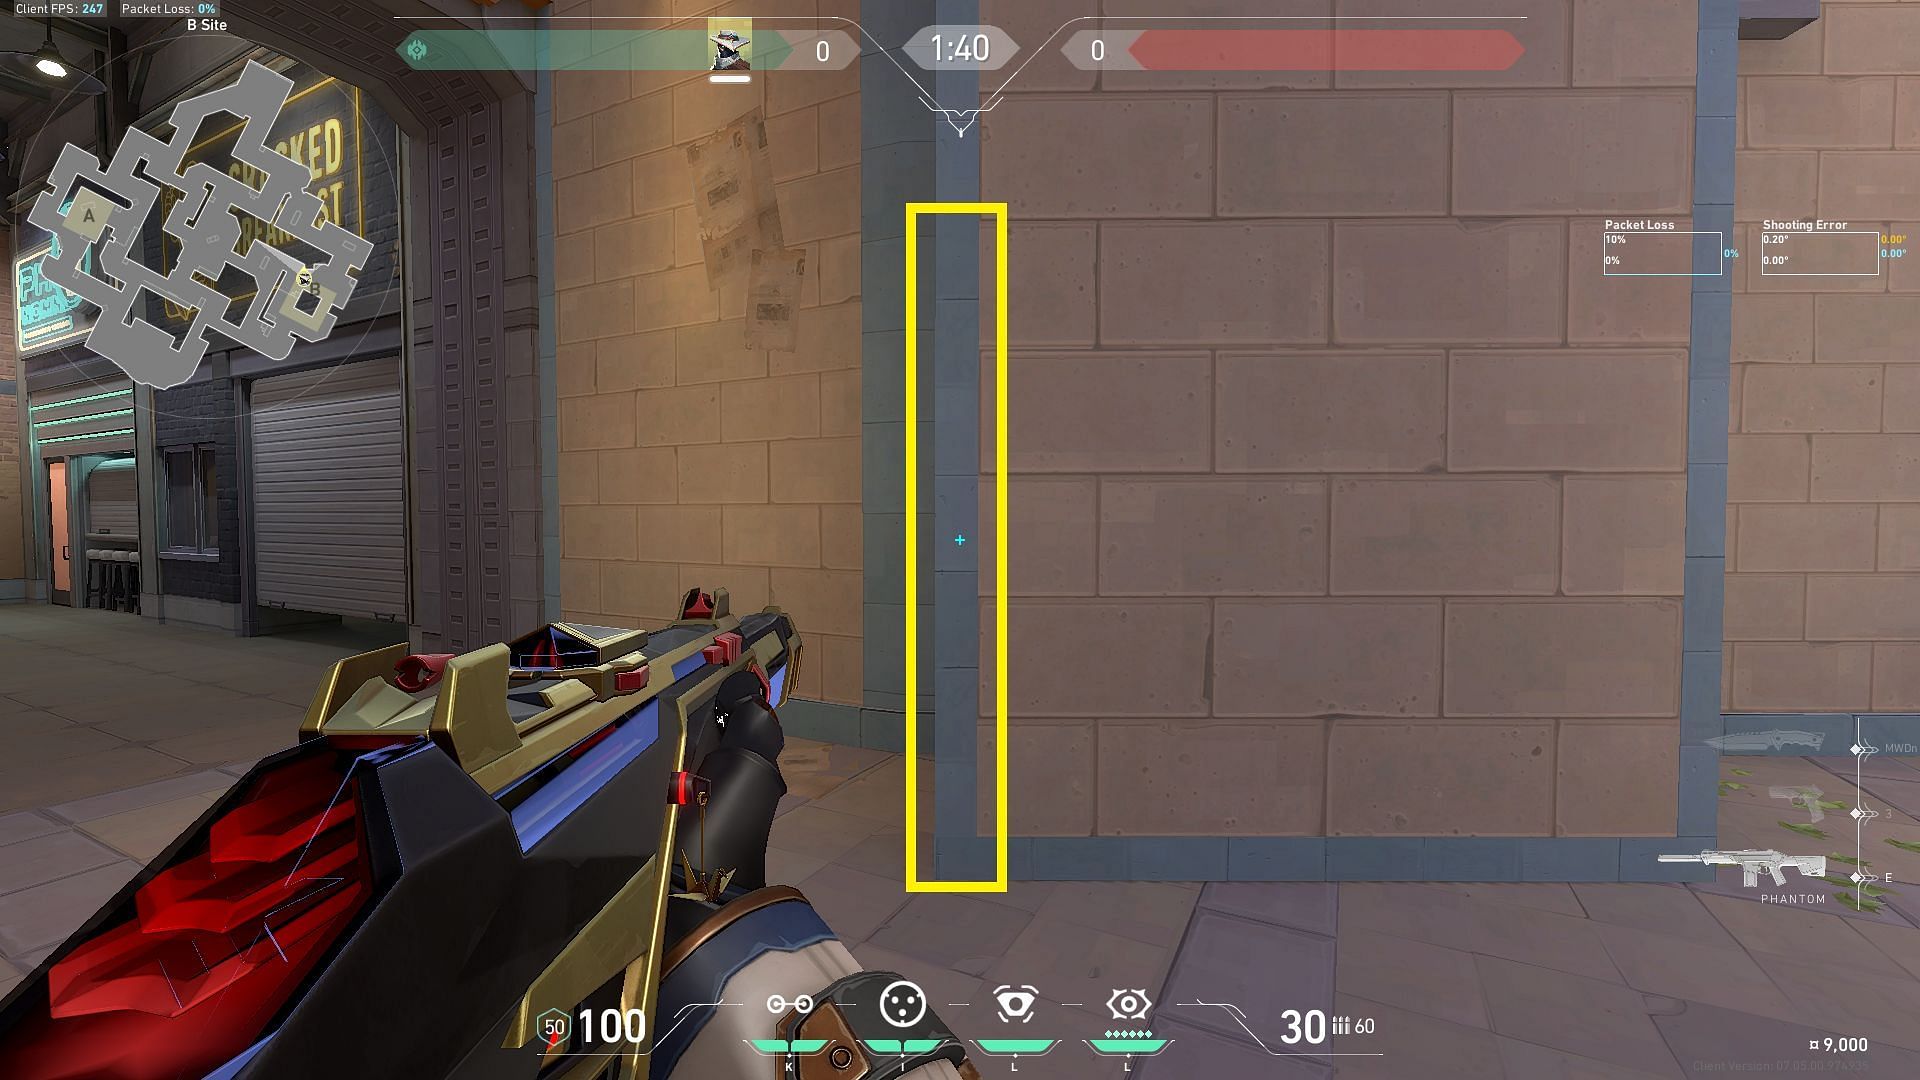
Align yourself with the wall in a way that you are standing in front of the highlighted blue line.
Now drag and aim your crosshair at the top right corner of the window on the wall. Use your Cyber Cage to throw the one-way cage on the middle ledge protruding out of the window.
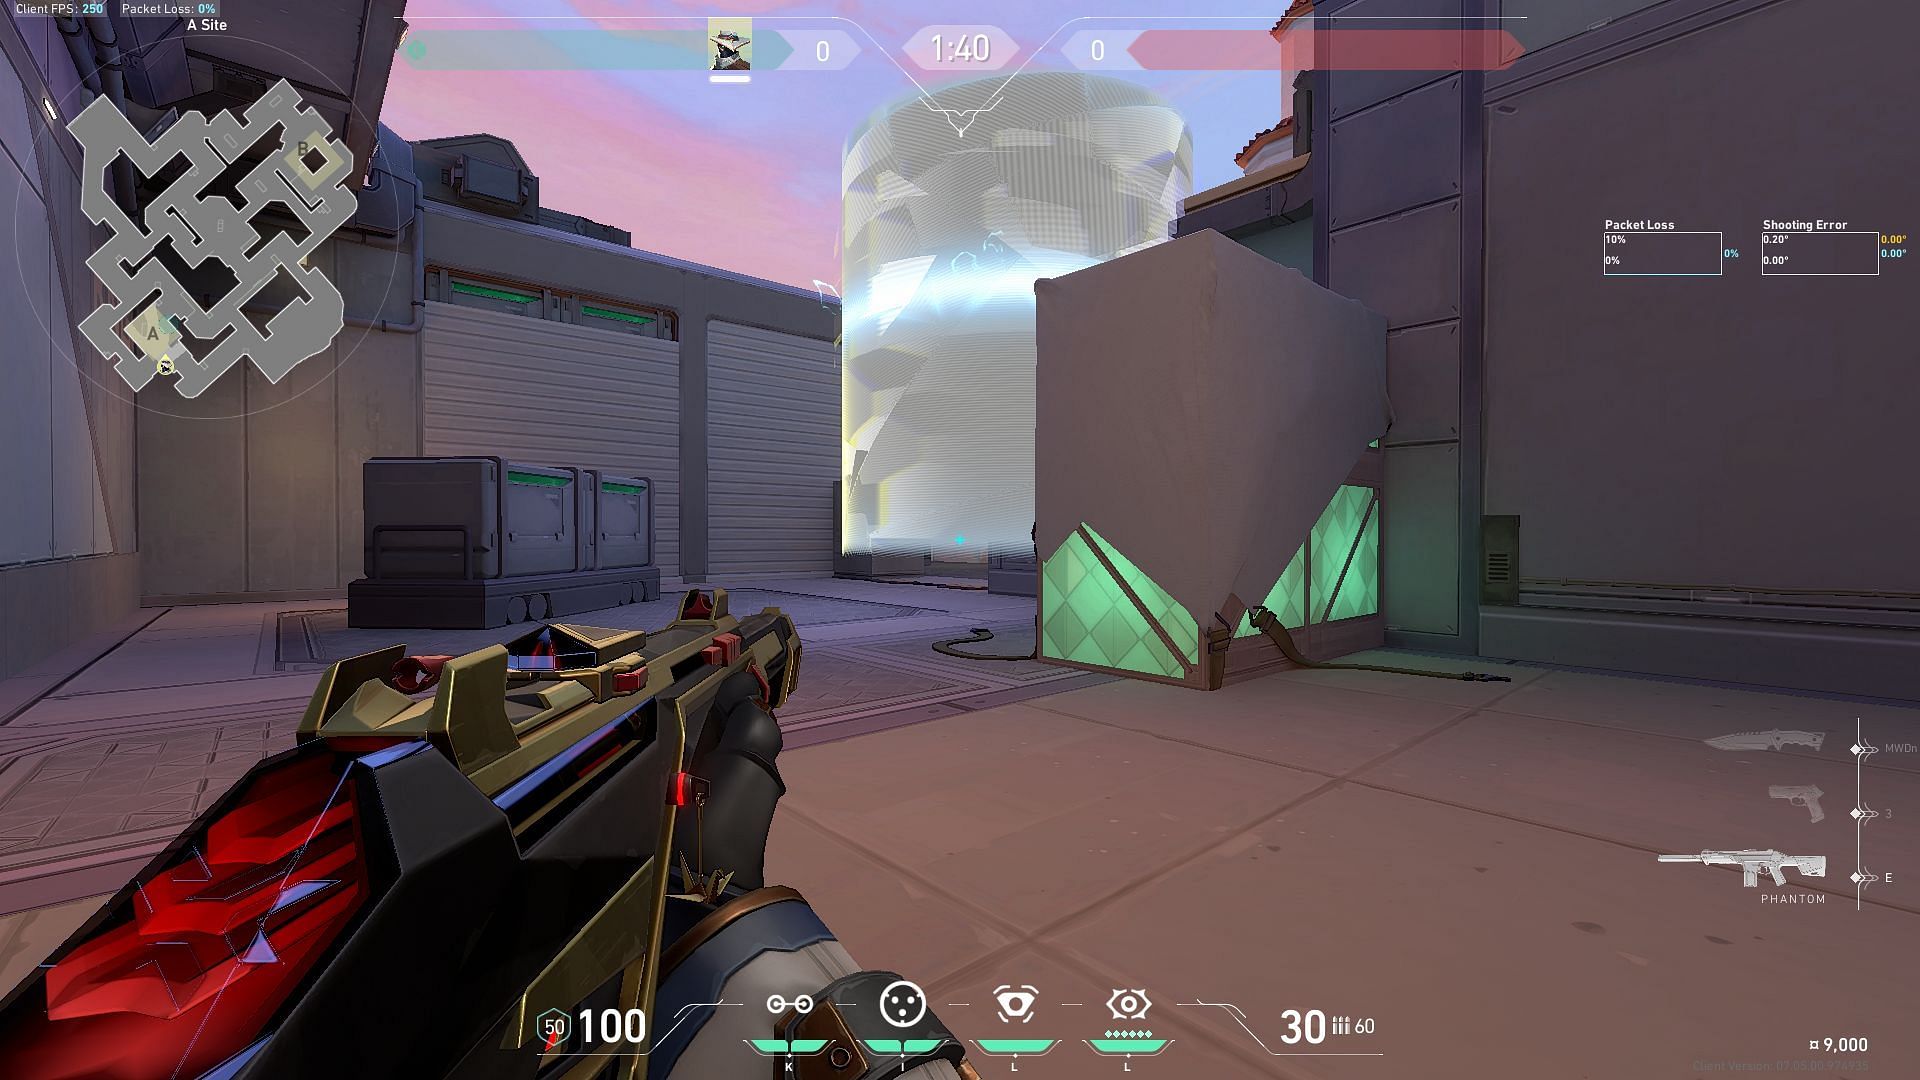
3) A Main one-way cage
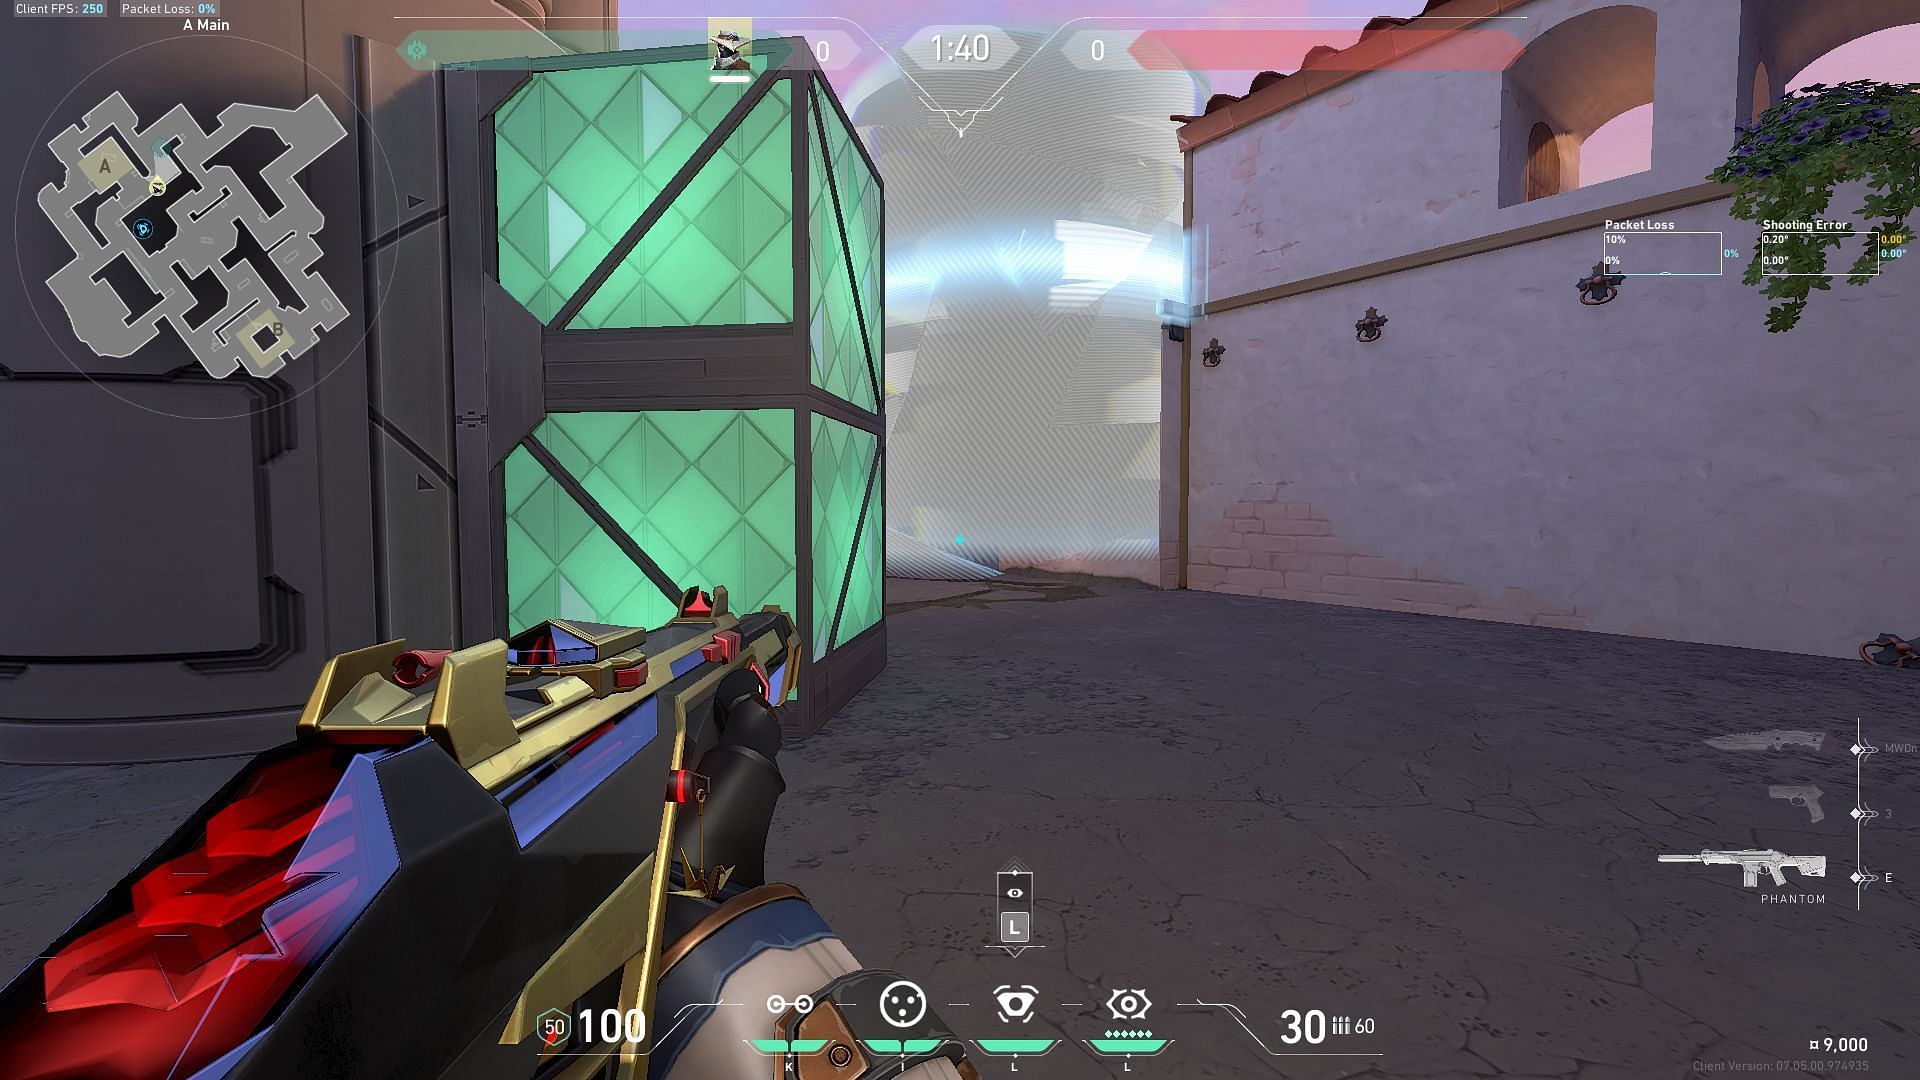
Sunset's A-site exhibits a defensive advantage. When attackers apply pressure to A Main, defenders can use a range of area-denying utilities and establish a formidable crossfire to seize early control of A Main and A Elbow. Utilizing a one-way cage at A Main can prove to be one of the most effective methods for impeding attackers.
In the pre-round phase, place yourself in the highlighted corner in front of the A Main barrier, as shown in the image above.
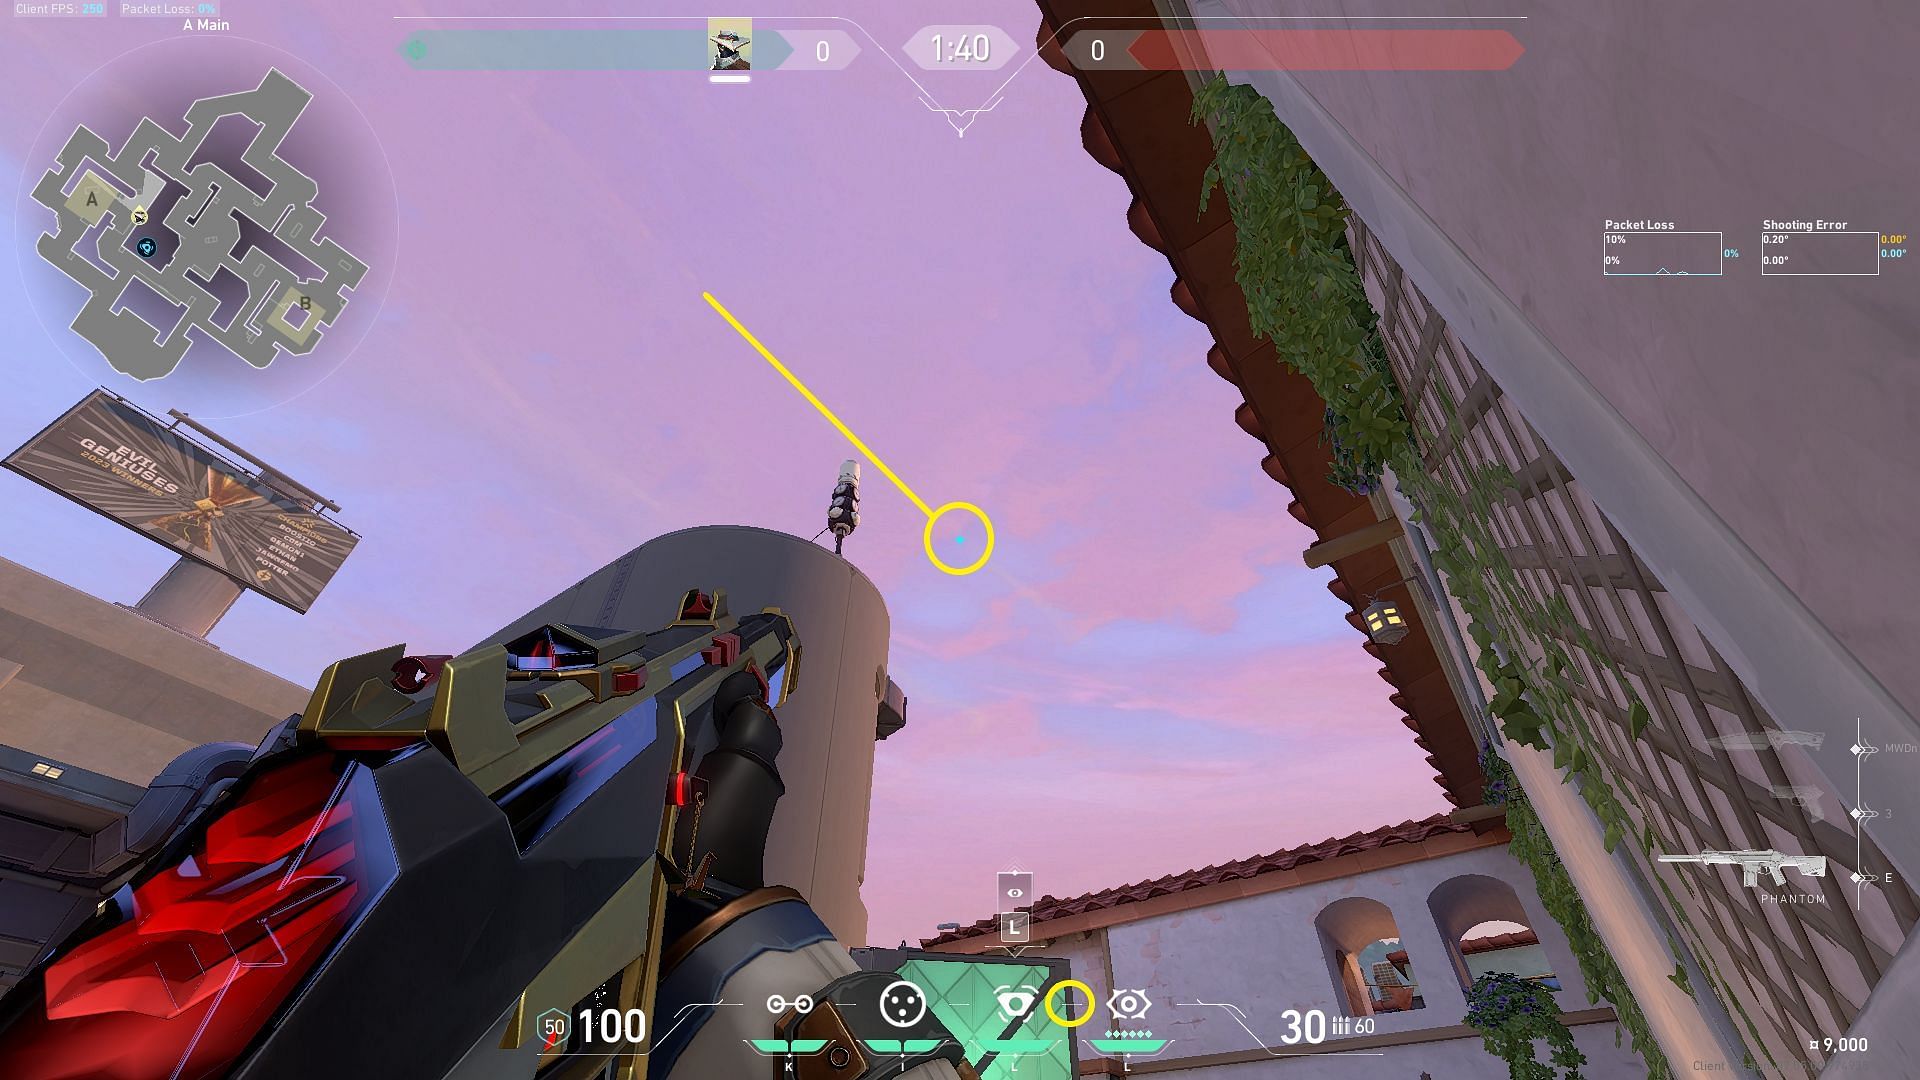
Then, drag your crosshair up and follow the thin cloud streak until the HUD line between the Spycam icon and the Neural Theft icon is in line with the top right corner line in the radianite crate. As soon as the barriers lower at the start of the round, use the Cyber Cage to toss your cage, which lands on the ledge of the white wall in A main.
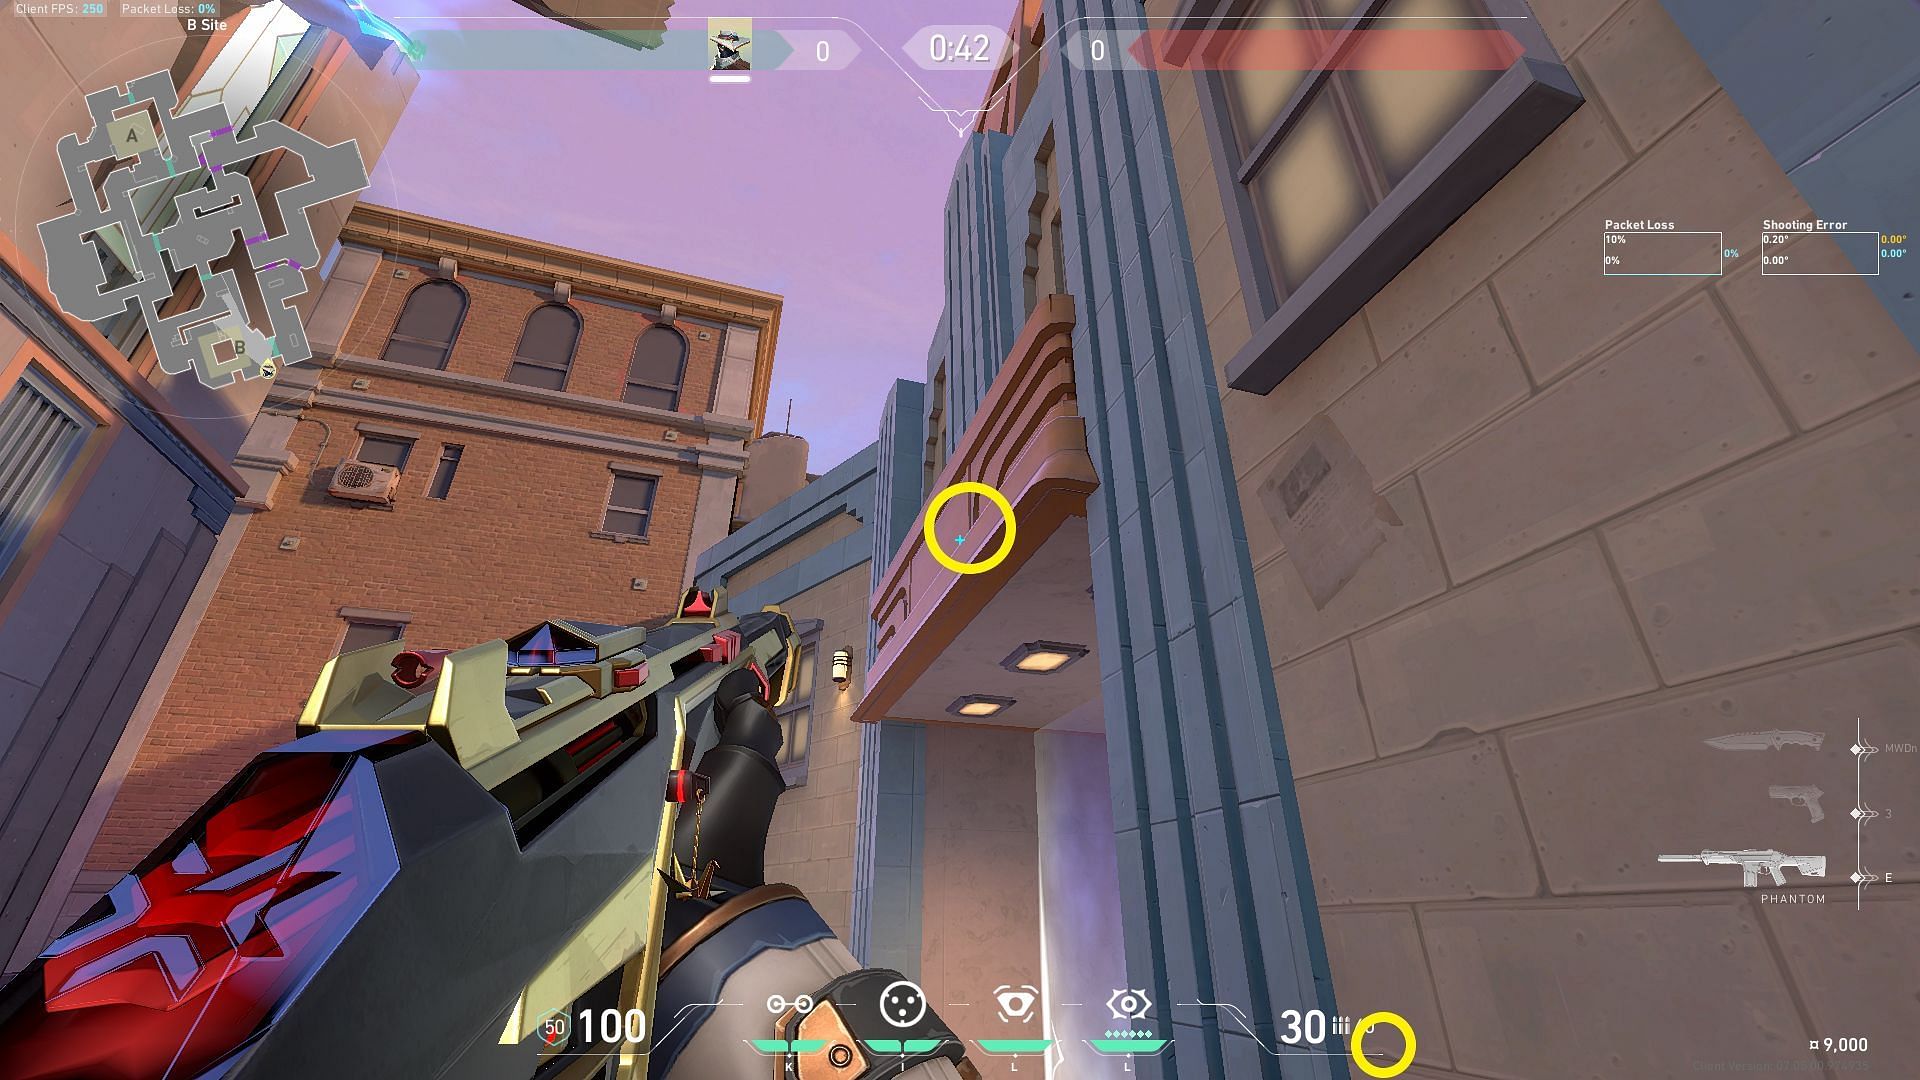
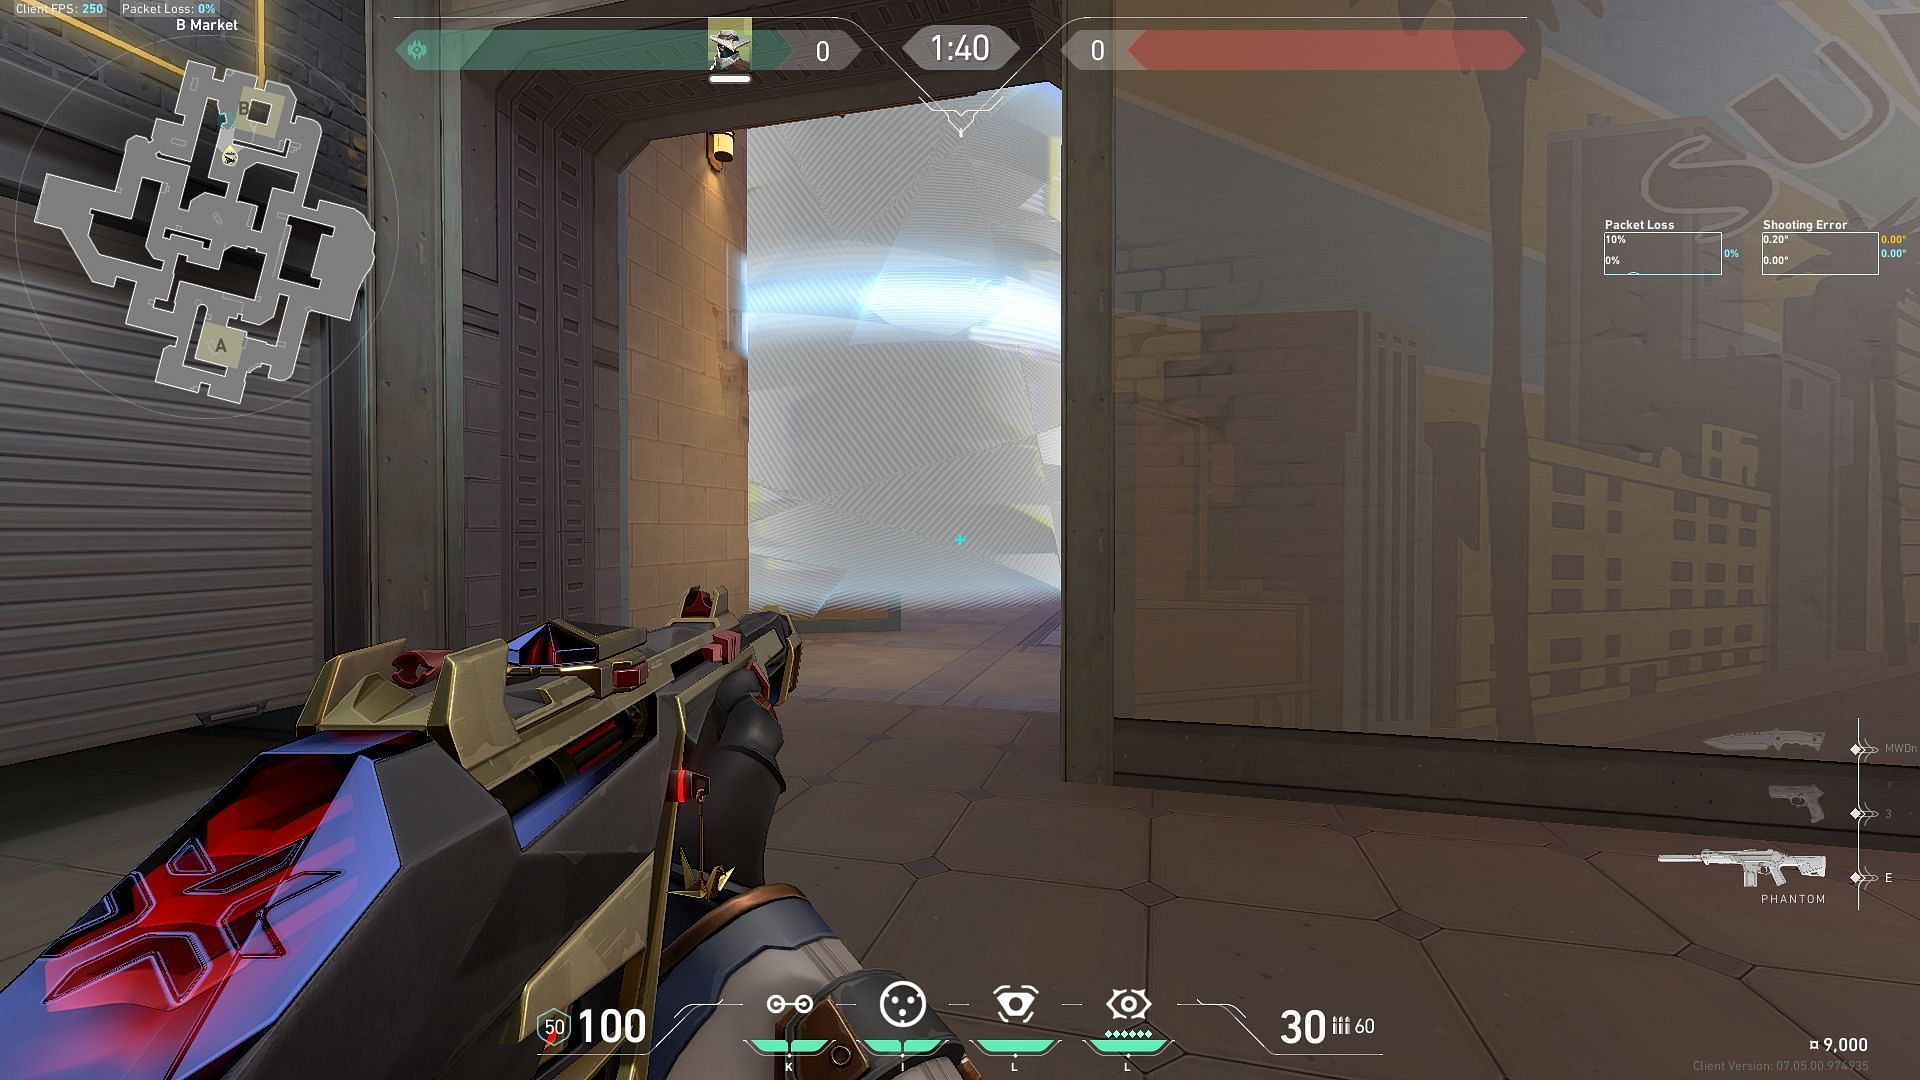
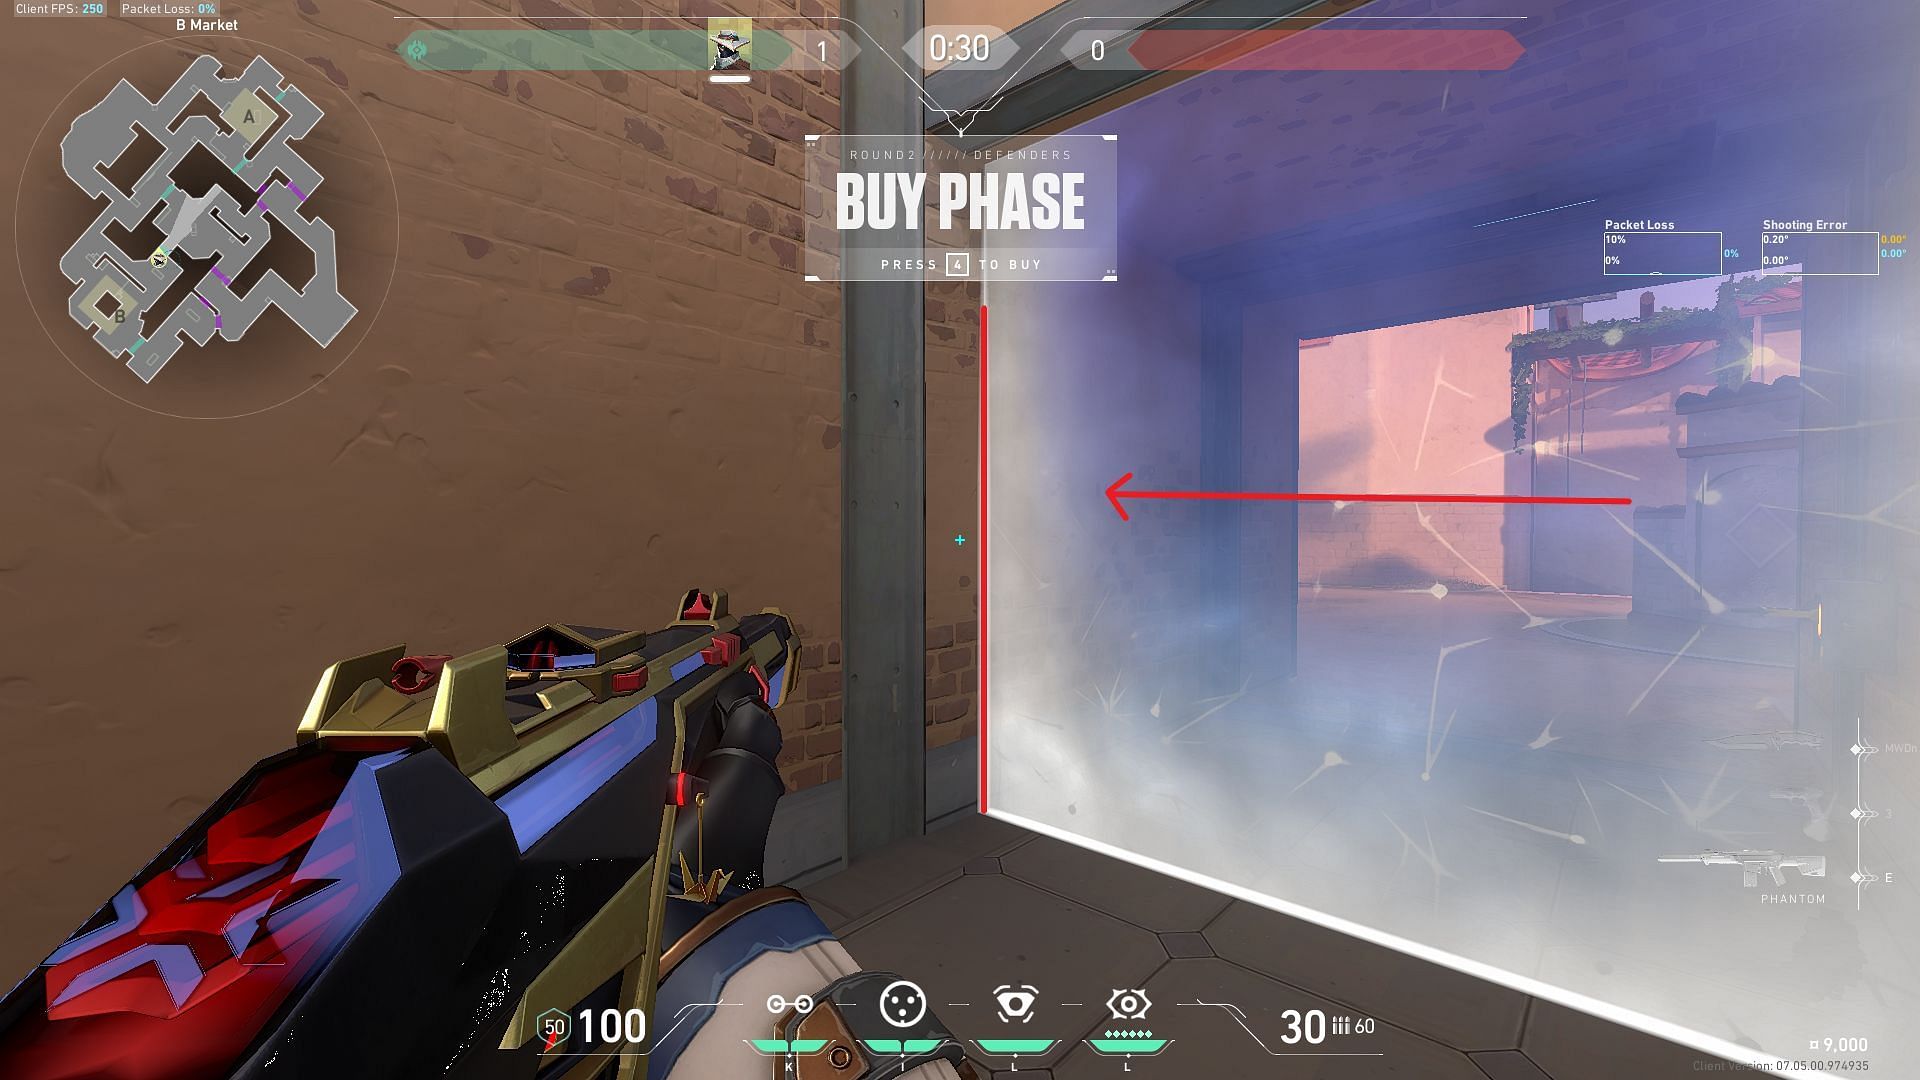
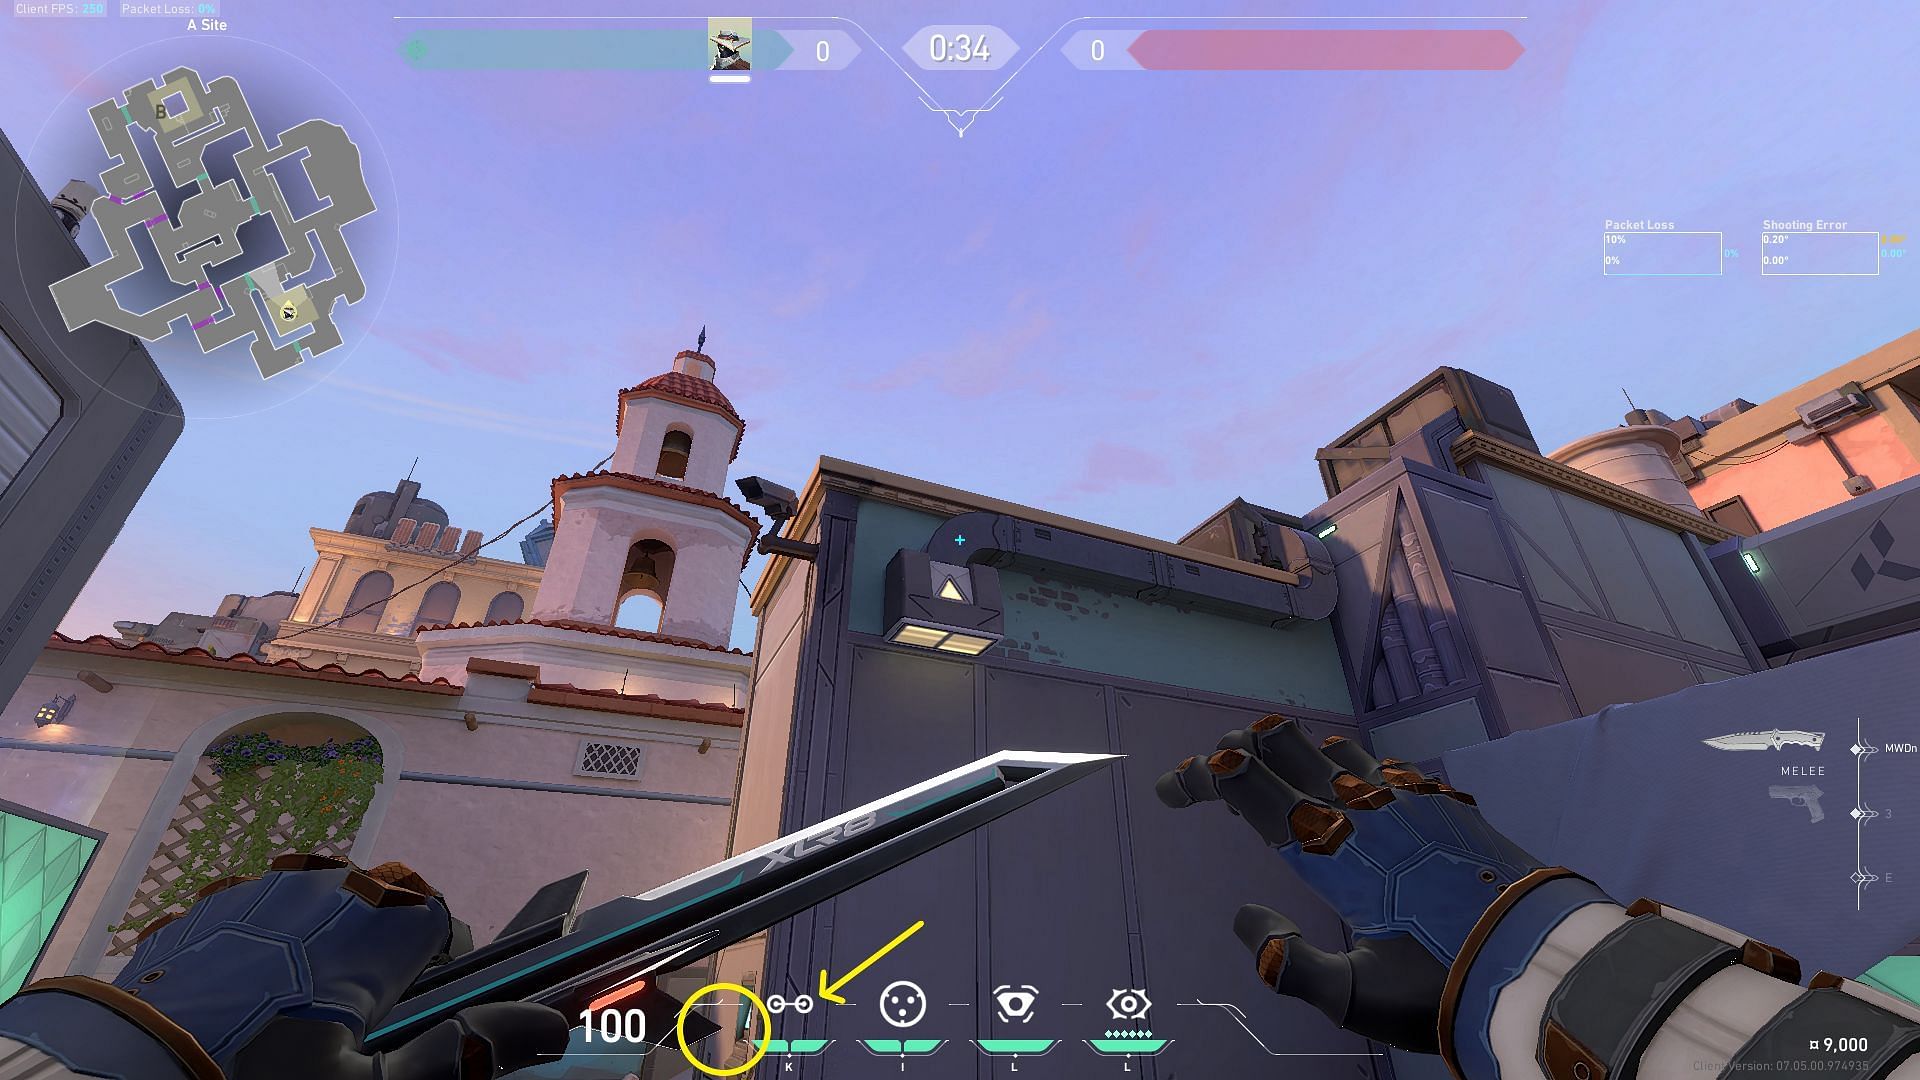
4) B Market one-way cage
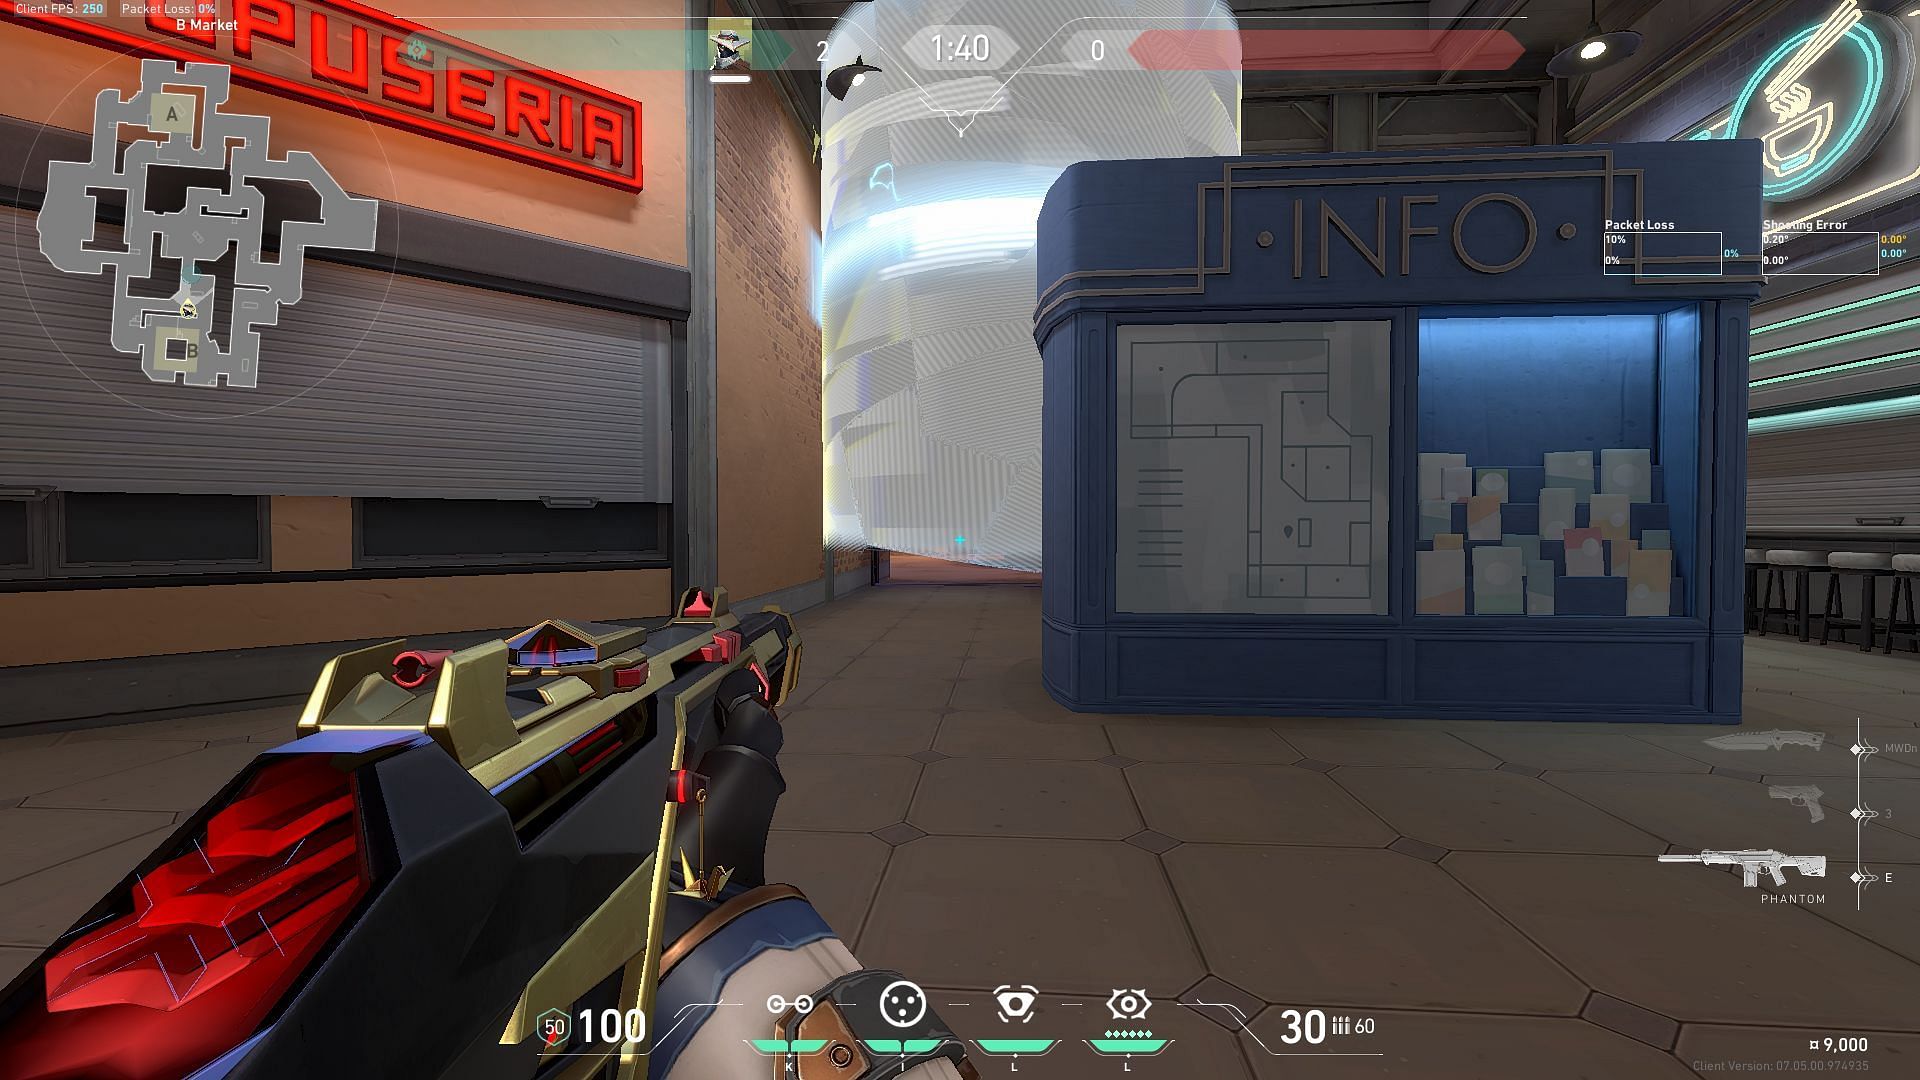
Due to the layout of Sunset, attackers in Valorant might find it advantageous to execute split-style attacks, where they simultaneously apply pressure to defenders on the B site from both chokepoints: B Market and B Main. This one-way cage will stop aggressing attackers dead in their tracks in the Middle Courtyard, leaving them vulnerable.
In the pre-round phase, position yourself in the highlighted corner formed by the B Market barrier, as shown in the image above.
Aim your crosshair on the dots in the B Market grey beam and then drag it right until it reaches the green protruding ledge. Use your Cyber Cage to toss it in a way that it bounces off the ledge and gets placed above the B market door, perfectly covering it when activated.
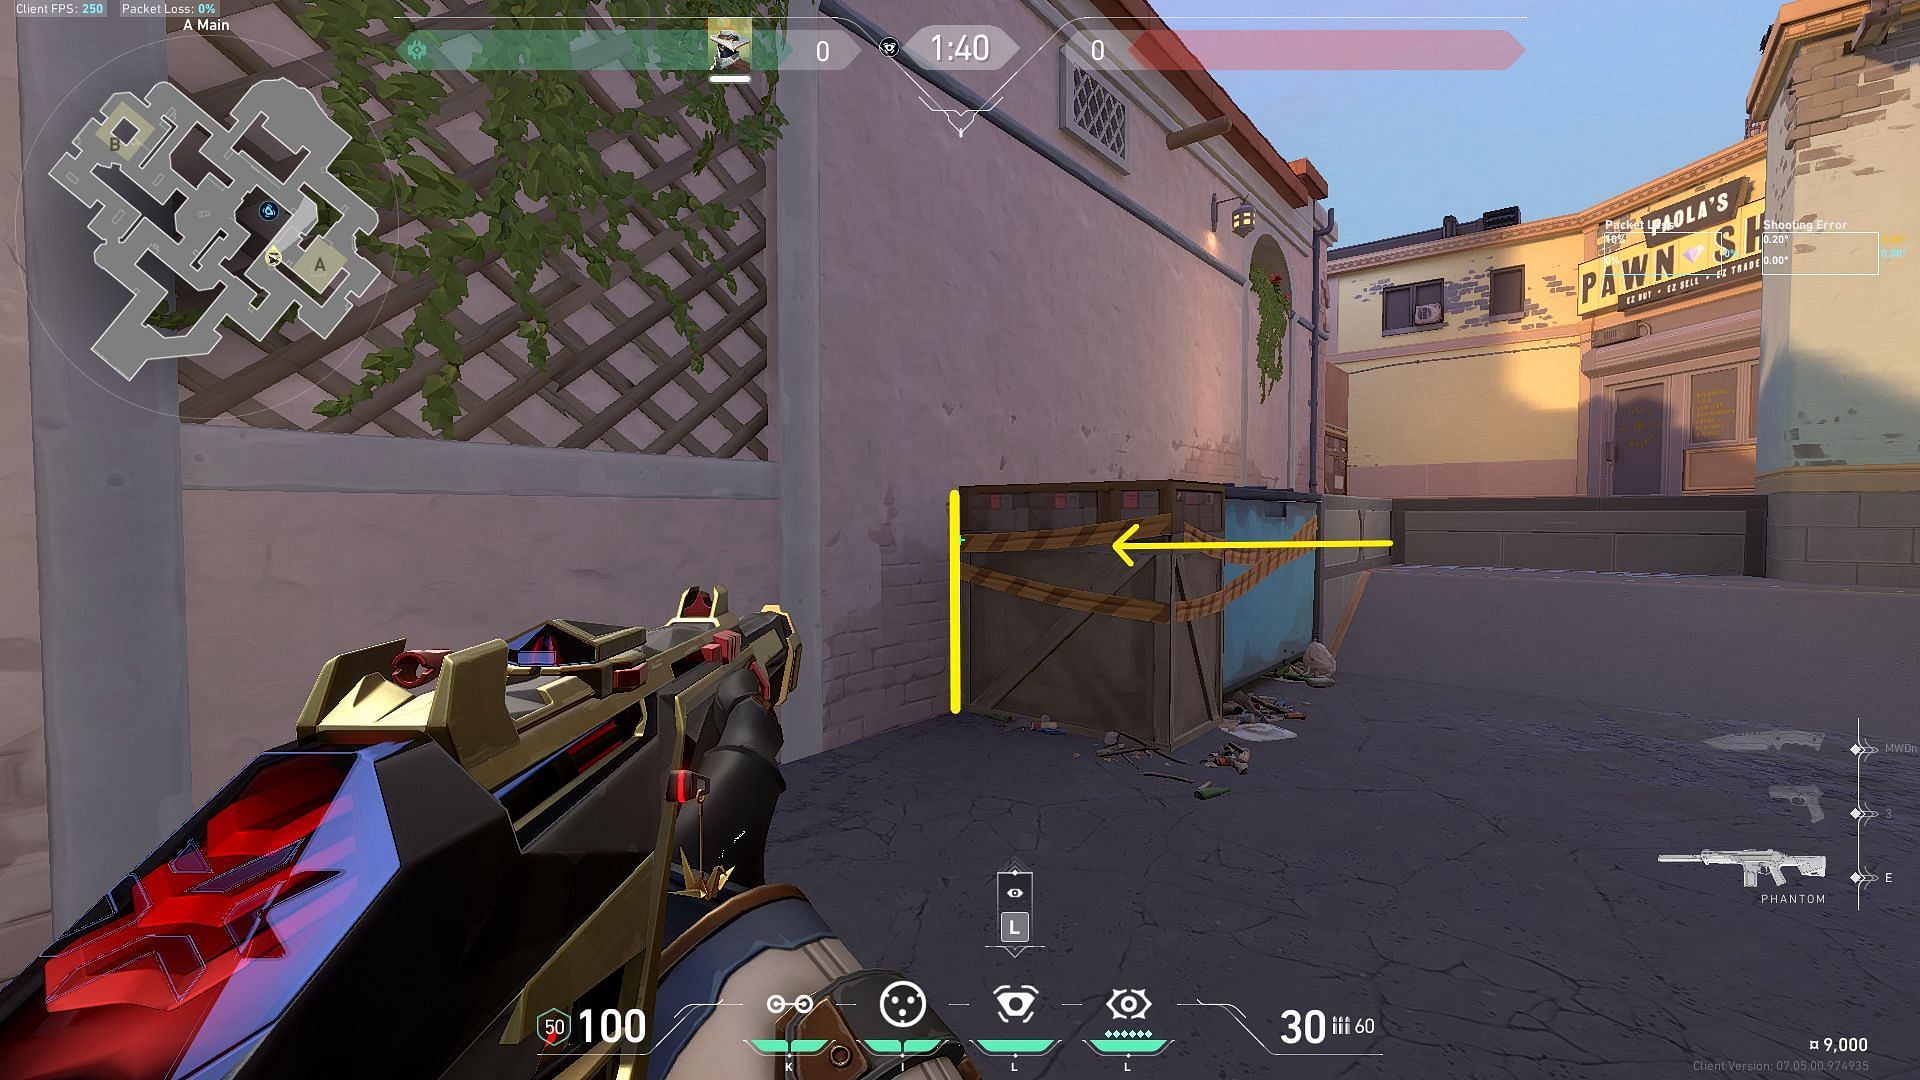
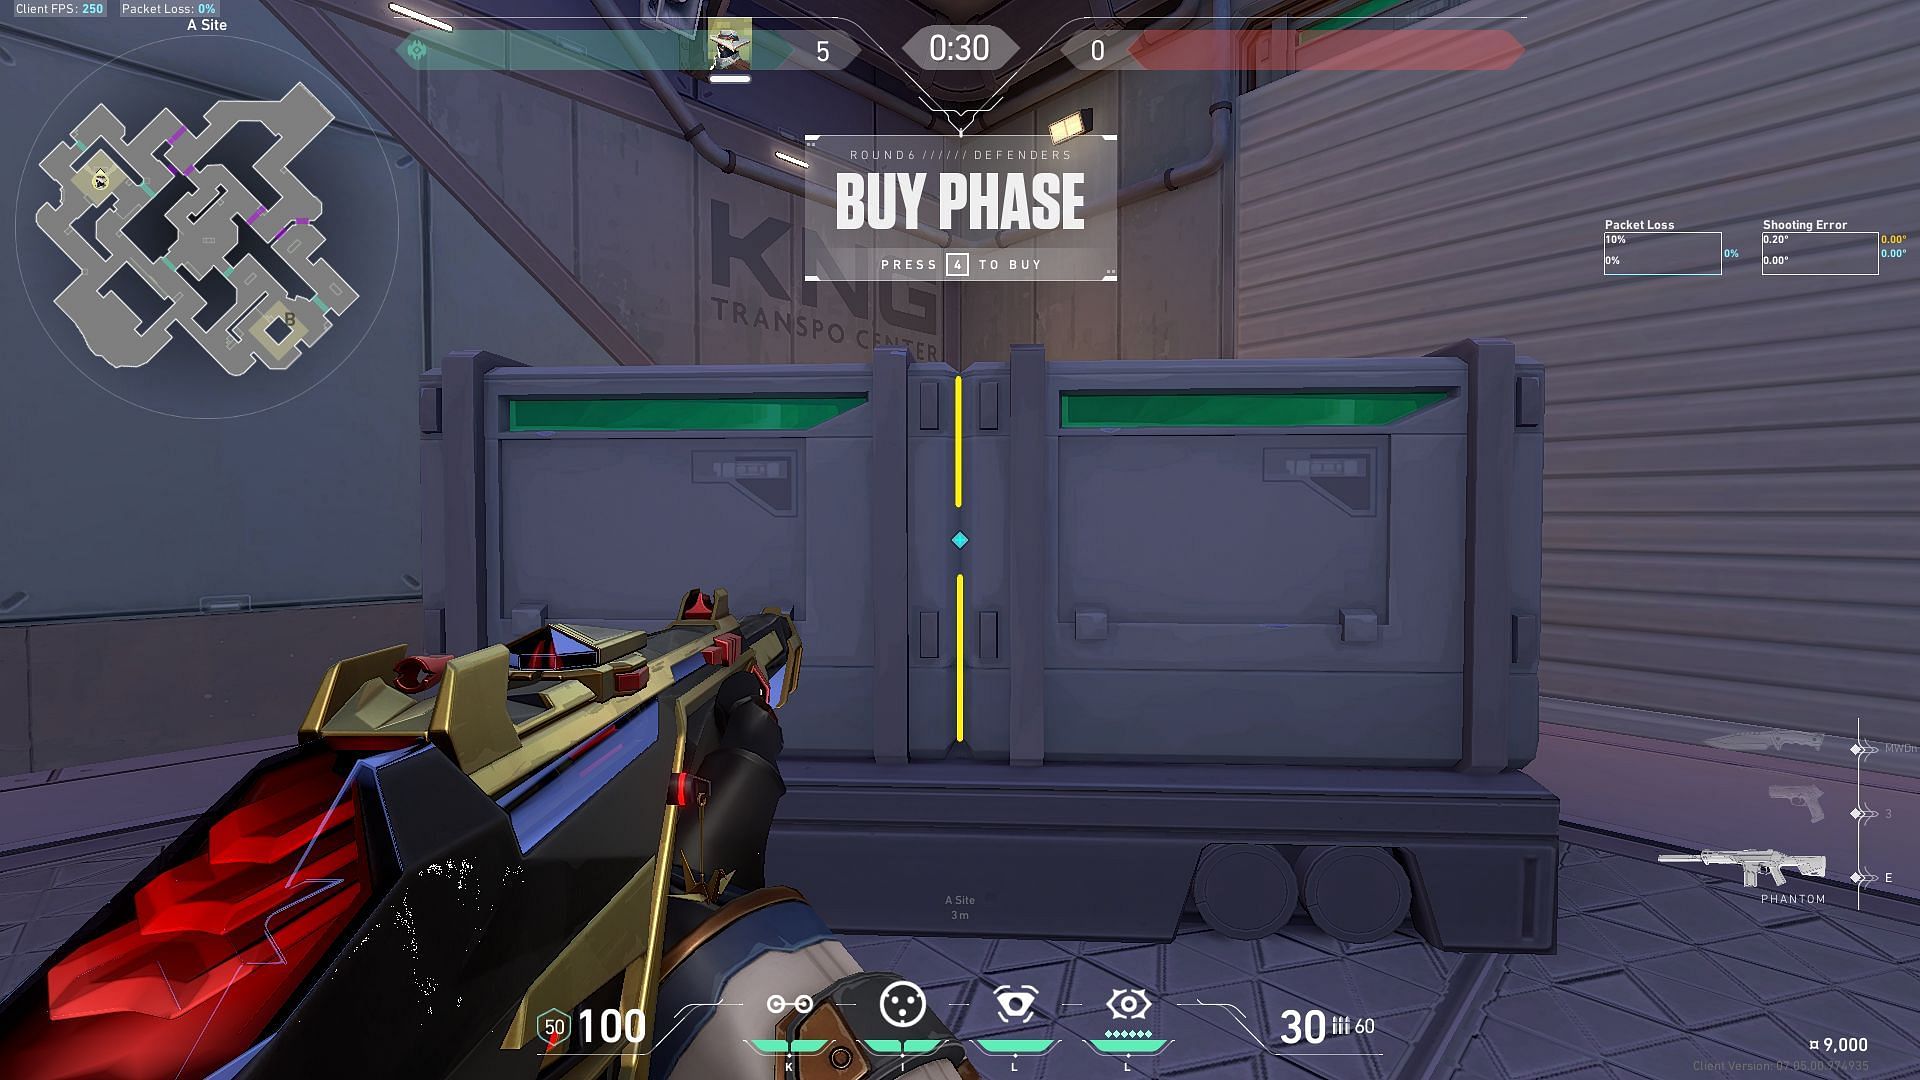
5) A-site one-way cage
Cypher's role as an anchor is to be a reliable source of information and a formidable obstacle for attackers, making it difficult for them to take control of the site. This one-way cage for defenders coming onto A-site through A main is instrumental to a round-winning defense setup.
To set up this one-way cage, align yourself in the middle of the crate as highlighted in the image.
Align the right side circle of the Trapwire icon so that the middle of the circle aligns with the corner of the lines in the wall, as displayed above. Use your Cyber Cage to toss the expected one way.
Be sure to follow Sportskeeda for more updates and guides for Valorant's Sunset map.