'%20x='0'%20y='0'%20height='100%25'%20width='100%25'%20%0A%20%20%20%20%20%20%20%20%20%20xlink%3Ahref='data:image/jpg;base64,/9j/2wBDAAYEBQYFBAYGBQYHBwYIChAKCgkJChQODwwQFxQYGBcUFhYaHSUfGhsjHBYWICwgIyYnKSopGR8tMC0oMCUoKSj/2wBDAQcHBwoIChMKChMoGhYaKCgoKCgoKCgoKCgoKCgoKCgoKCgoKCgoKCgoKCgoKCgoKCgoKCgoKCgoKCgoKCgoKCj/wgARCAAGAAoDASIAAhEBAxEB/8QAFgABAQEAAAAAAAAAAAAAAAAAAAUG/8QAFAEBAAAAAAAAAAAAAAAAAAAAA//aAAwDAQACEAMQAAAAh5QBv//EAB8QAAICAgEFAAAAAAAAAAAAAAECAwQAEQUGEhNBRP/aAAgBAQABPwDkpnpdDcdeqv8ABGpV0HtzsDWWL1R7EreKQdzE60M//8QAFhEAAwAAAAAAAAAAAAAAAAAAAAER/9oACAECAQE/AKz/xAAWEQADAAAAAAAAAAAAAAAAAAAAESL/2gAIAQMBAT8AVH//2Q=='%3E%3C/image%3E%3C/svg%3E)
Riot Games introduced Harbor as the fifth Controller to Valorant's Agent pool with Episode 5's latest Act. The Episode finale will revamp the shooter's meta with a brand new Controller alongside many planned changes coming in the near future. Fans are extremely excited to witness the developers' plans for the game after the addition of the Indian Agent.
With his versatile kit, Harbor immediately became the first choice for many Controller players. The only downside to his utilities is that they do not deal any damage, unlike Brimstone's Molly and Viper's Snake Bite. However, this will not stop him from making some aggressive plays in Valorant.
Harbor can particularly shine on maps like Bind that have much narrower spaces. The Indian Agent's kit carries a plethora of abilities to help the team execute both attack and defense on Valorant's Bind.
Unique Harbor ability lineups on Valorant's Fracture
Harbor possesses various abilities that can essentially replace traditional smokes like Brimstone's. That said, Varun Batra also excels at creating inconveniences for the opposition using his flexible kit.
For example, Harbor's walls can slow down enemies on contact, and his Cove can protect the team against spam fire for a short duration. This makes him much more useful on specific maps and situations.
Harbor can use all these abilities to their full potential on a map like Bind, which is uniquely designed with two teleporters and narrow spaces. Harbor can spread out and send his abilities to multiple spots to maximize his kit.
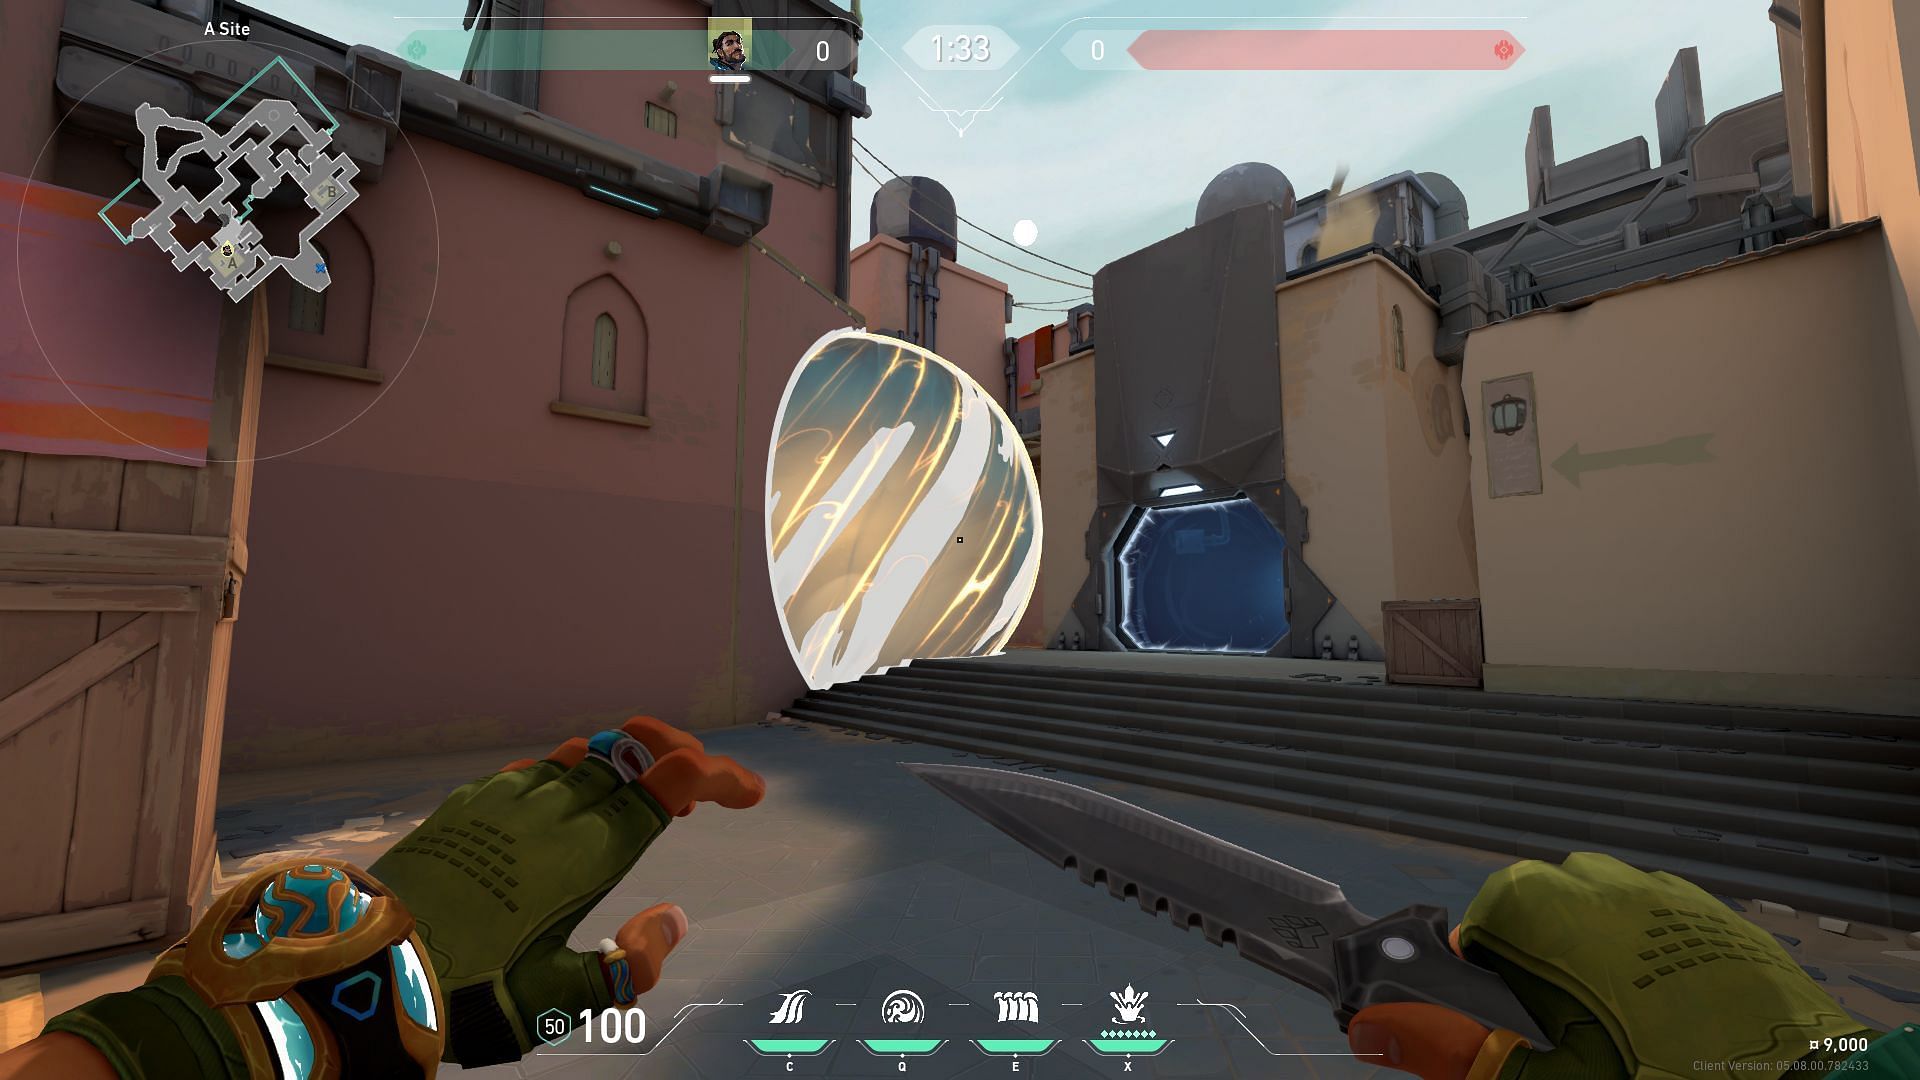
High Tide
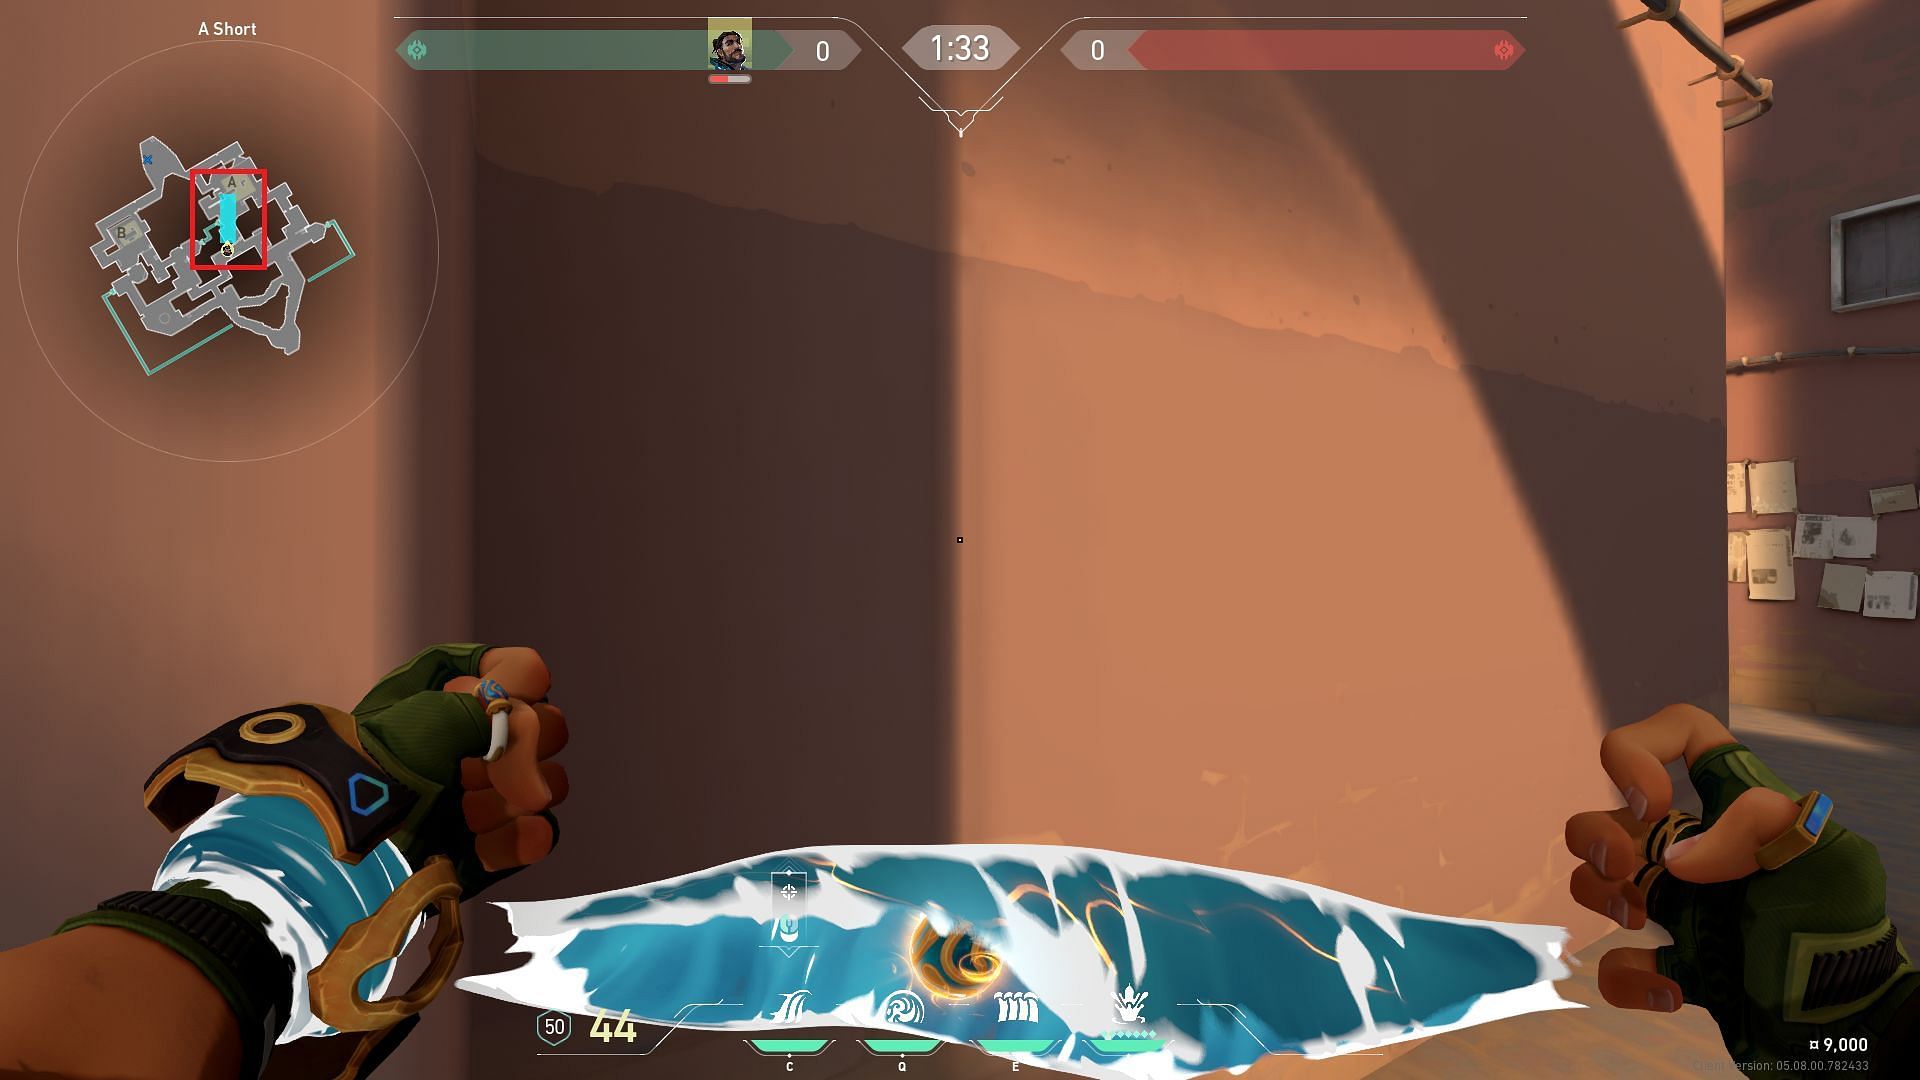
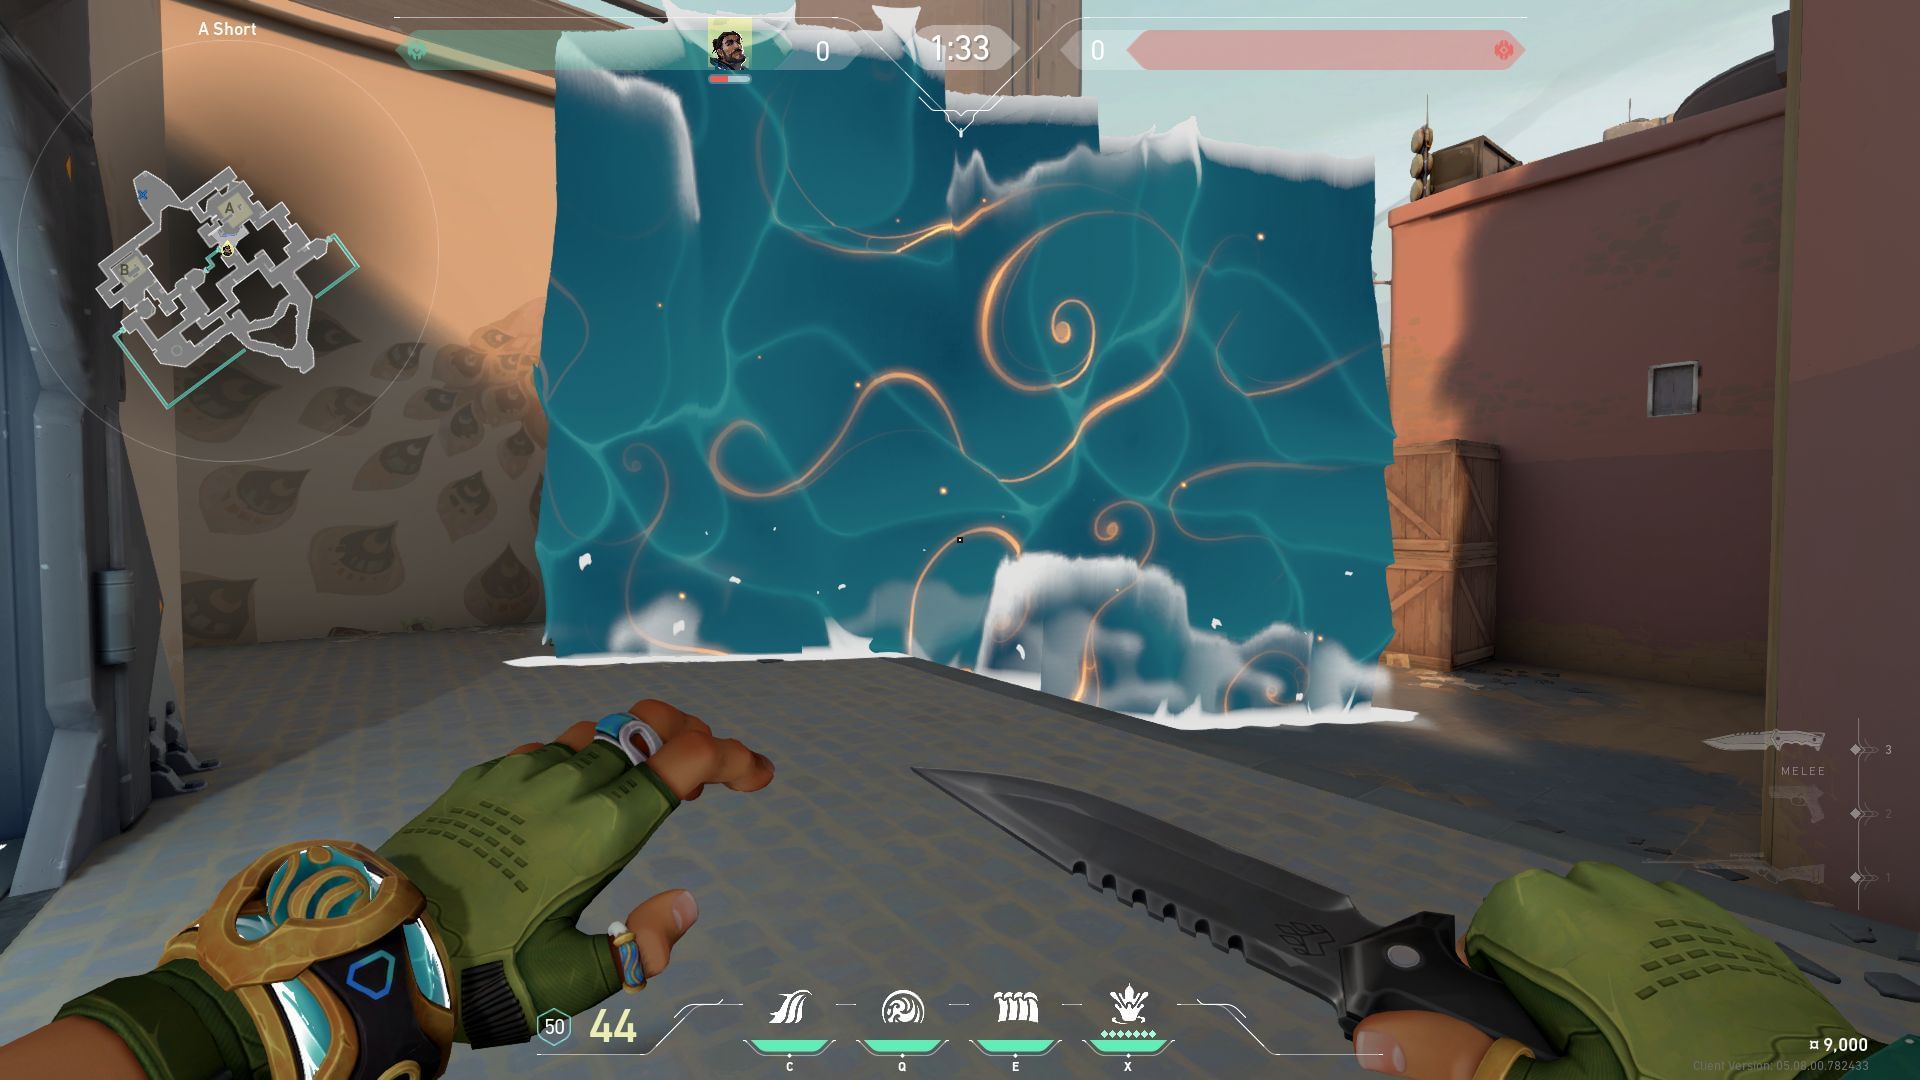
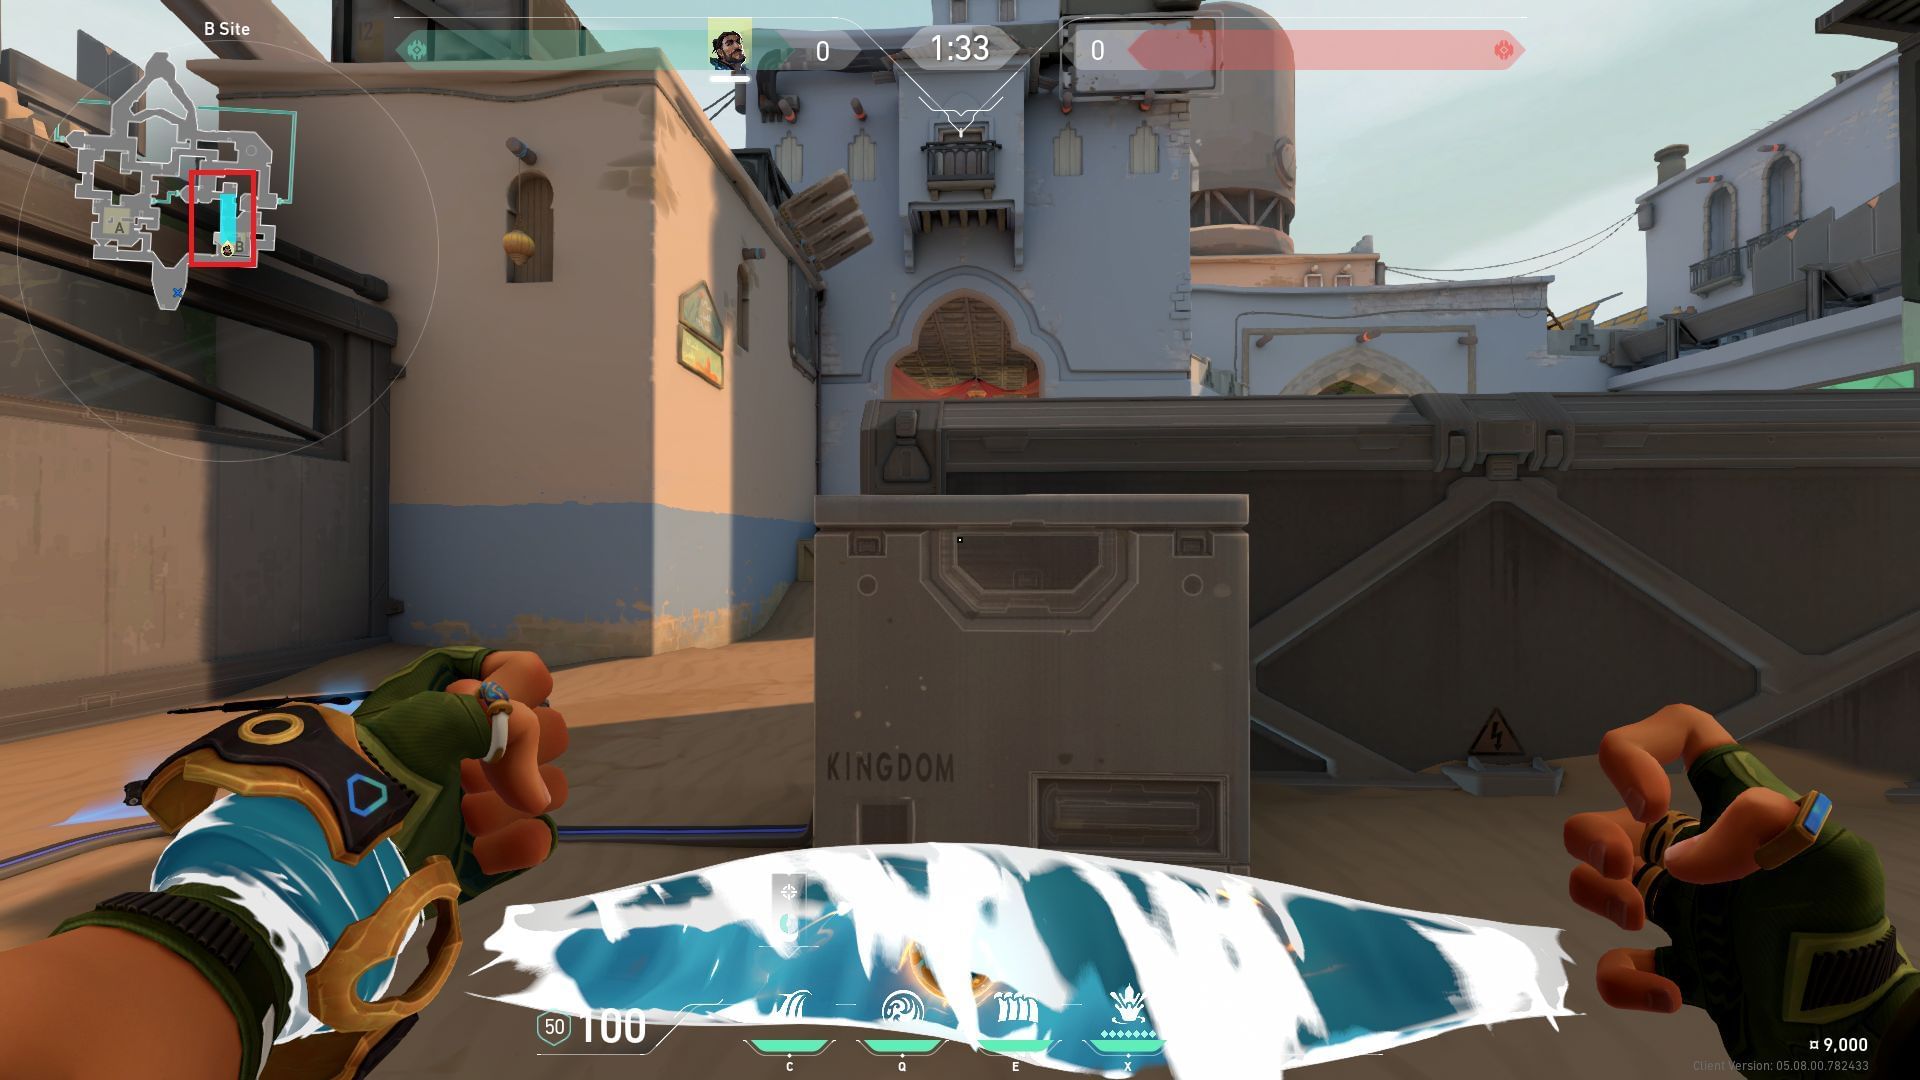
A-site default High Tide
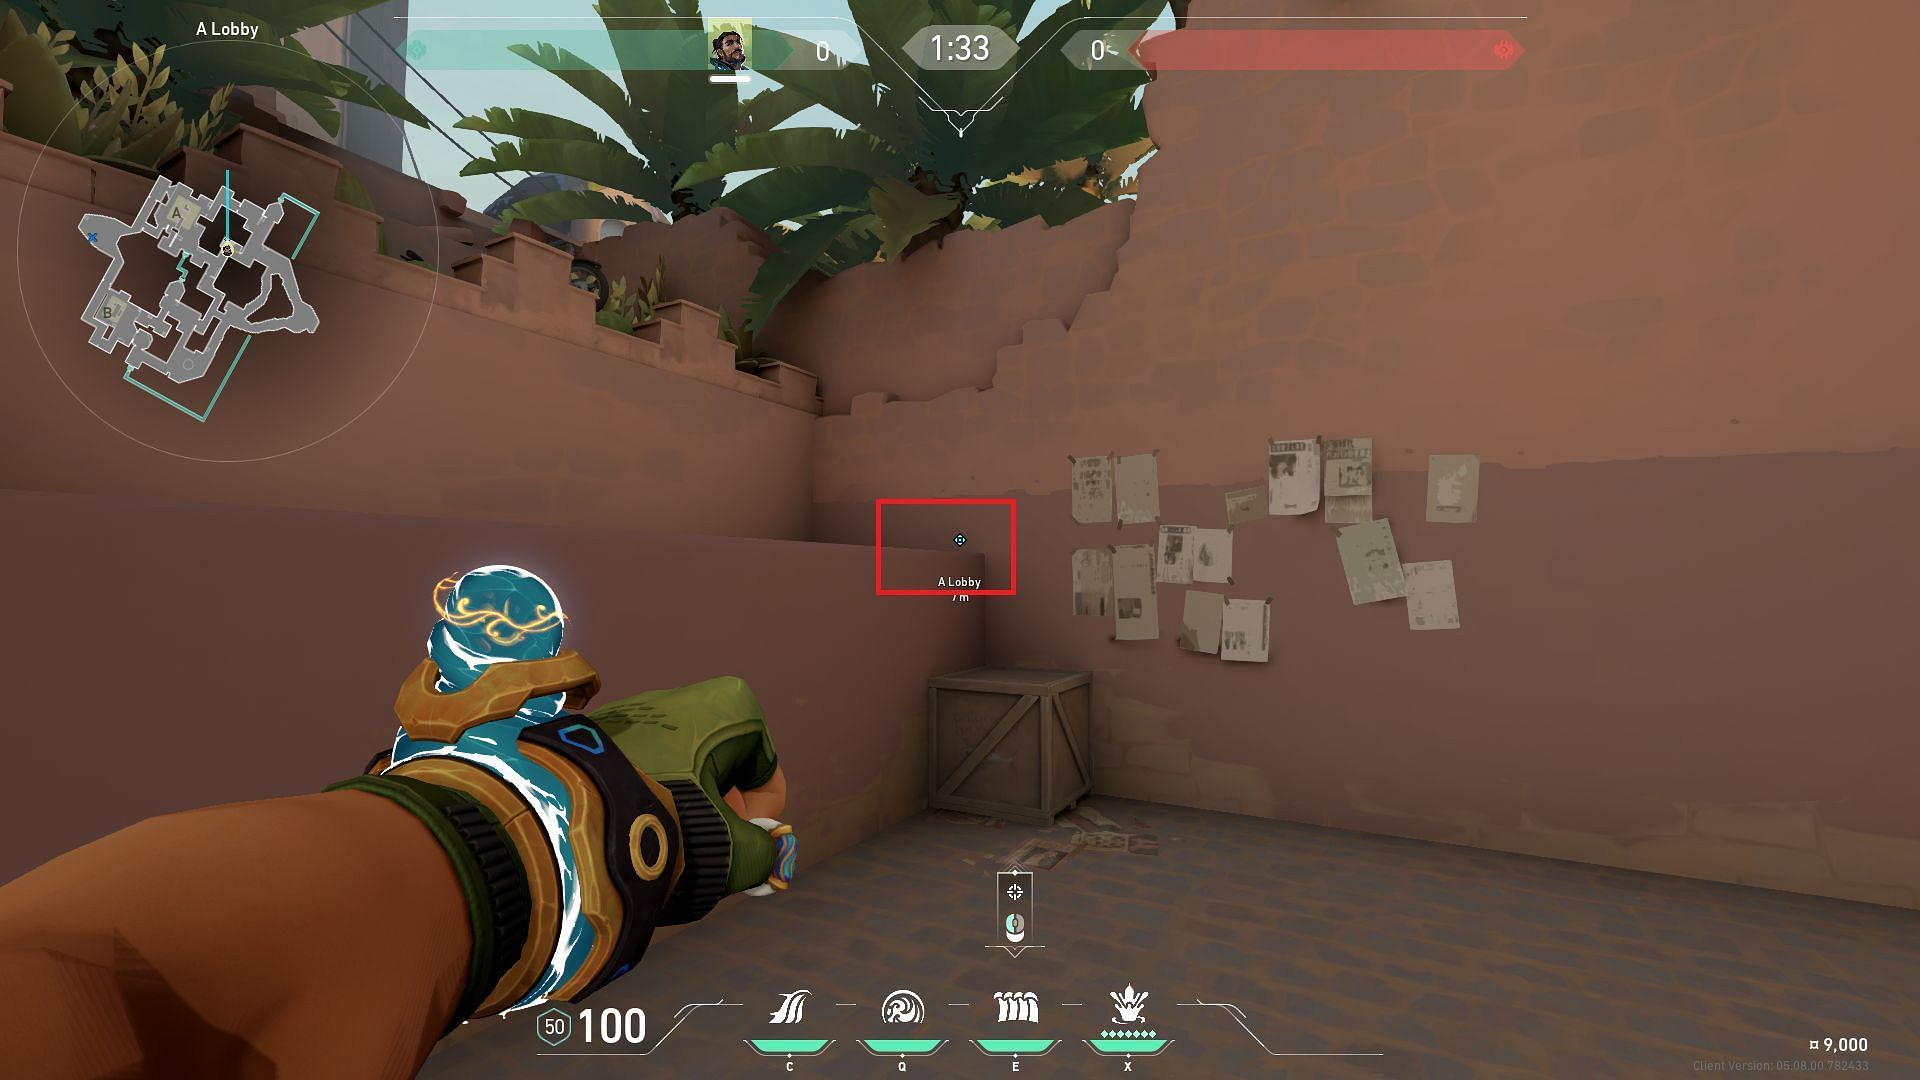
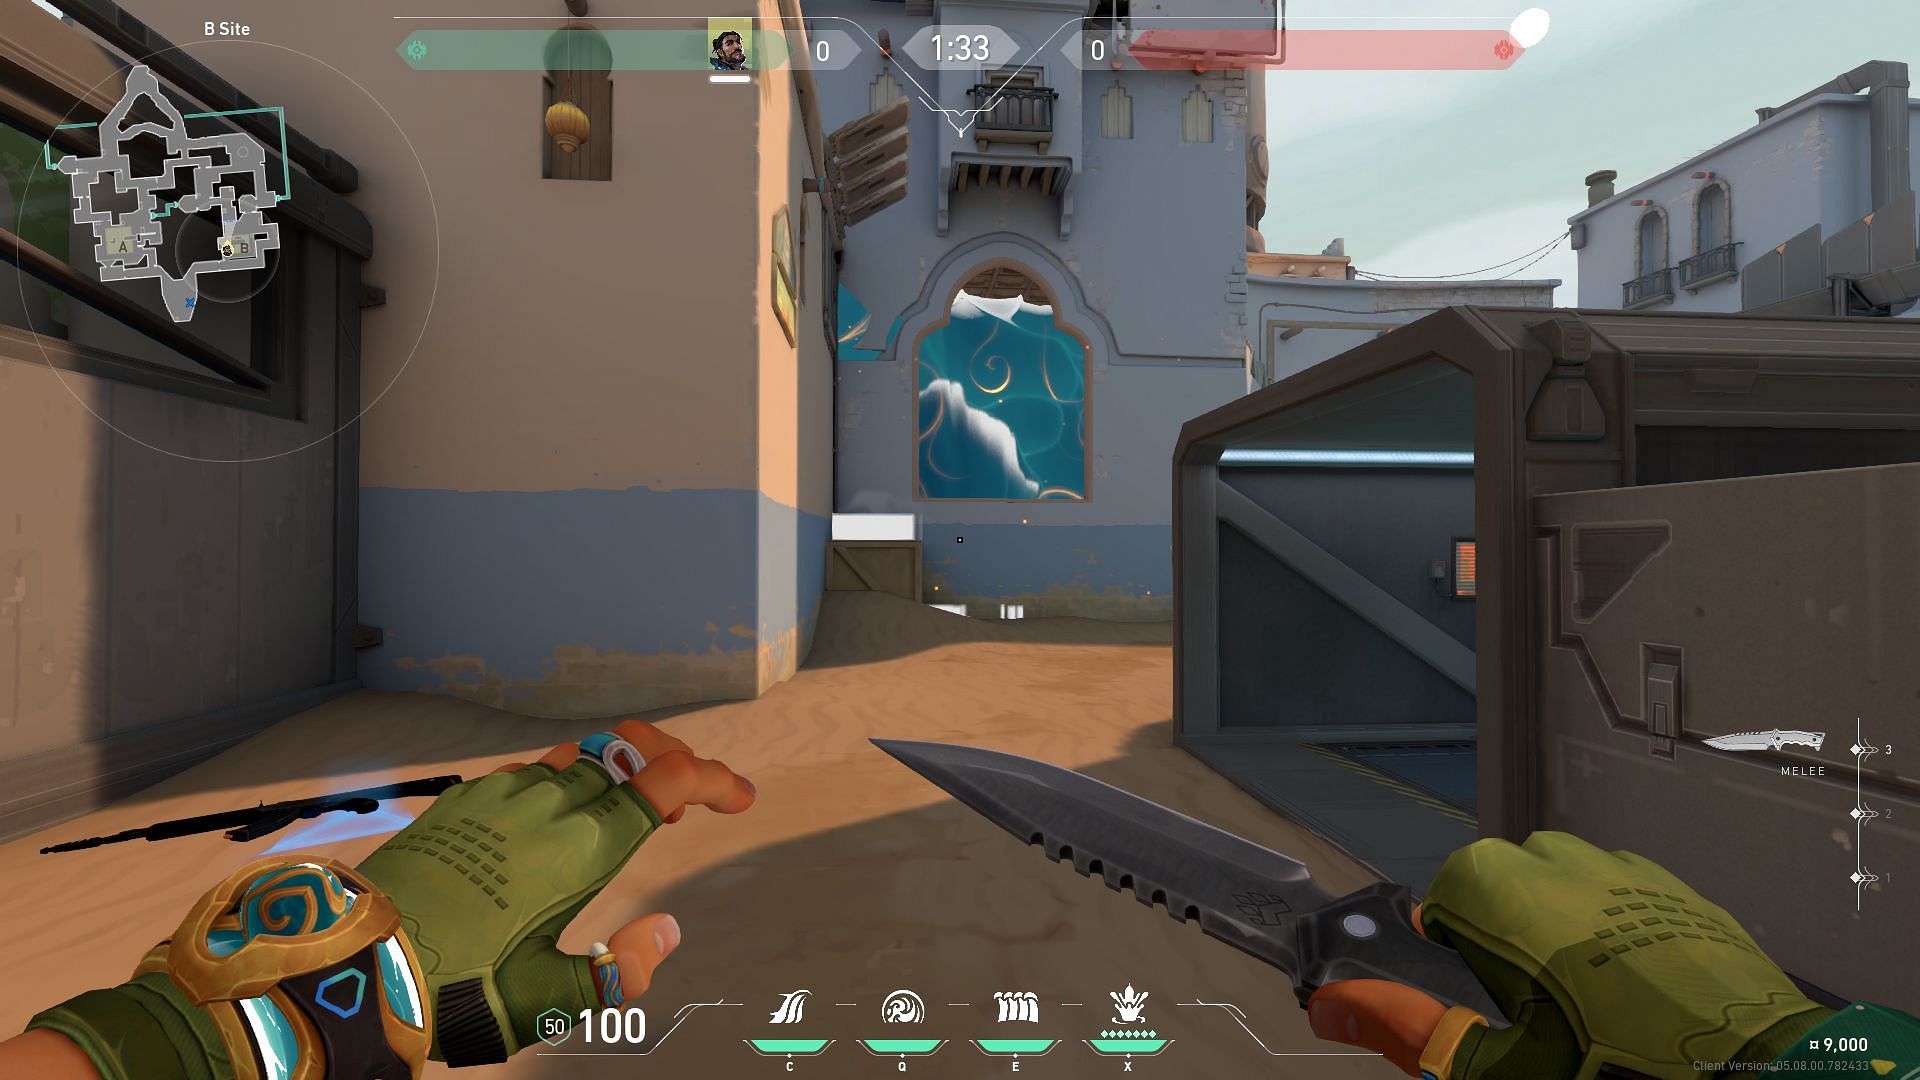
Players will have to find a small box on the right of A-short's entrance to perform this High Tide lineup. After finding the box, you can climb to the top to reach the platform, as shown in the image above.

Upon climbing, you will have to align the gaze of the High Tide, so it covers the Truck and Pocket. Then you will have to slightly curve the wall to the left after it reaches Truck.
This High Tide will provide cover from Heaven and Triple-boxes with ease.
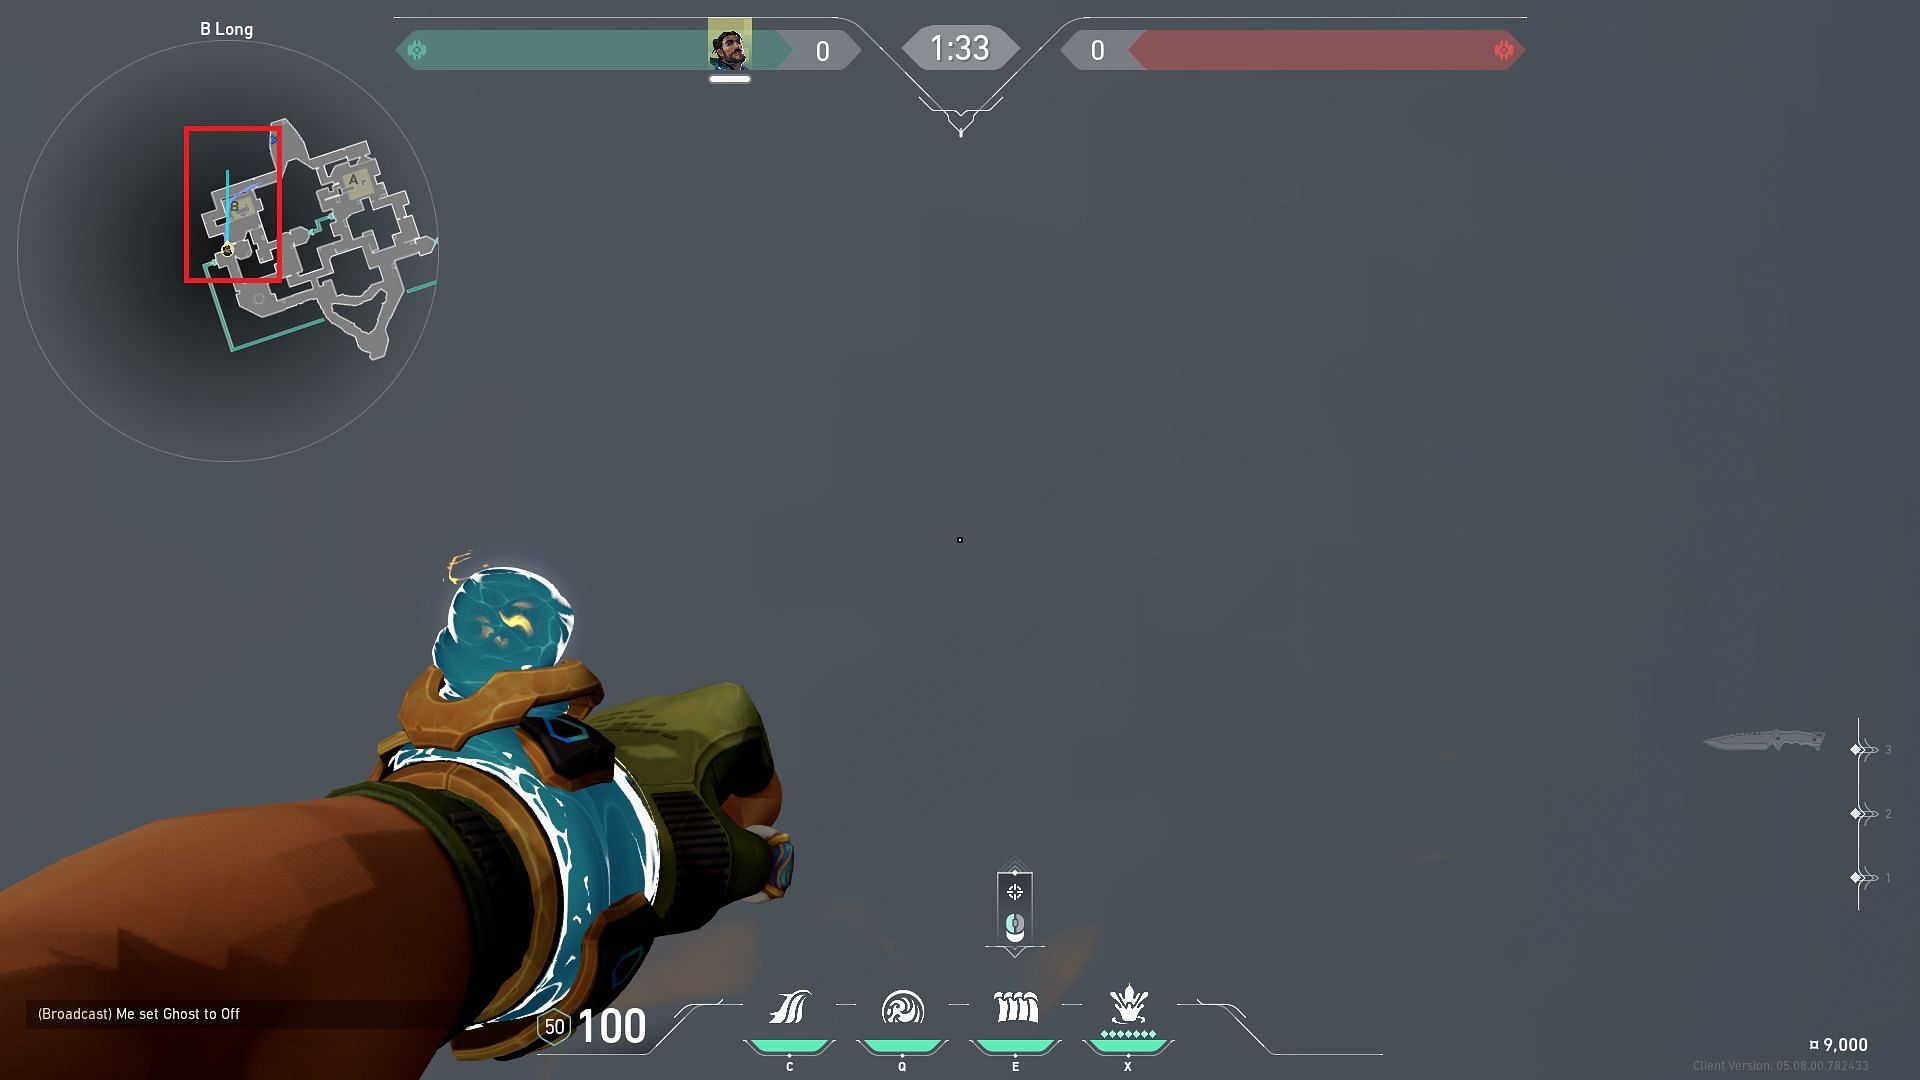
B-site default High Tide
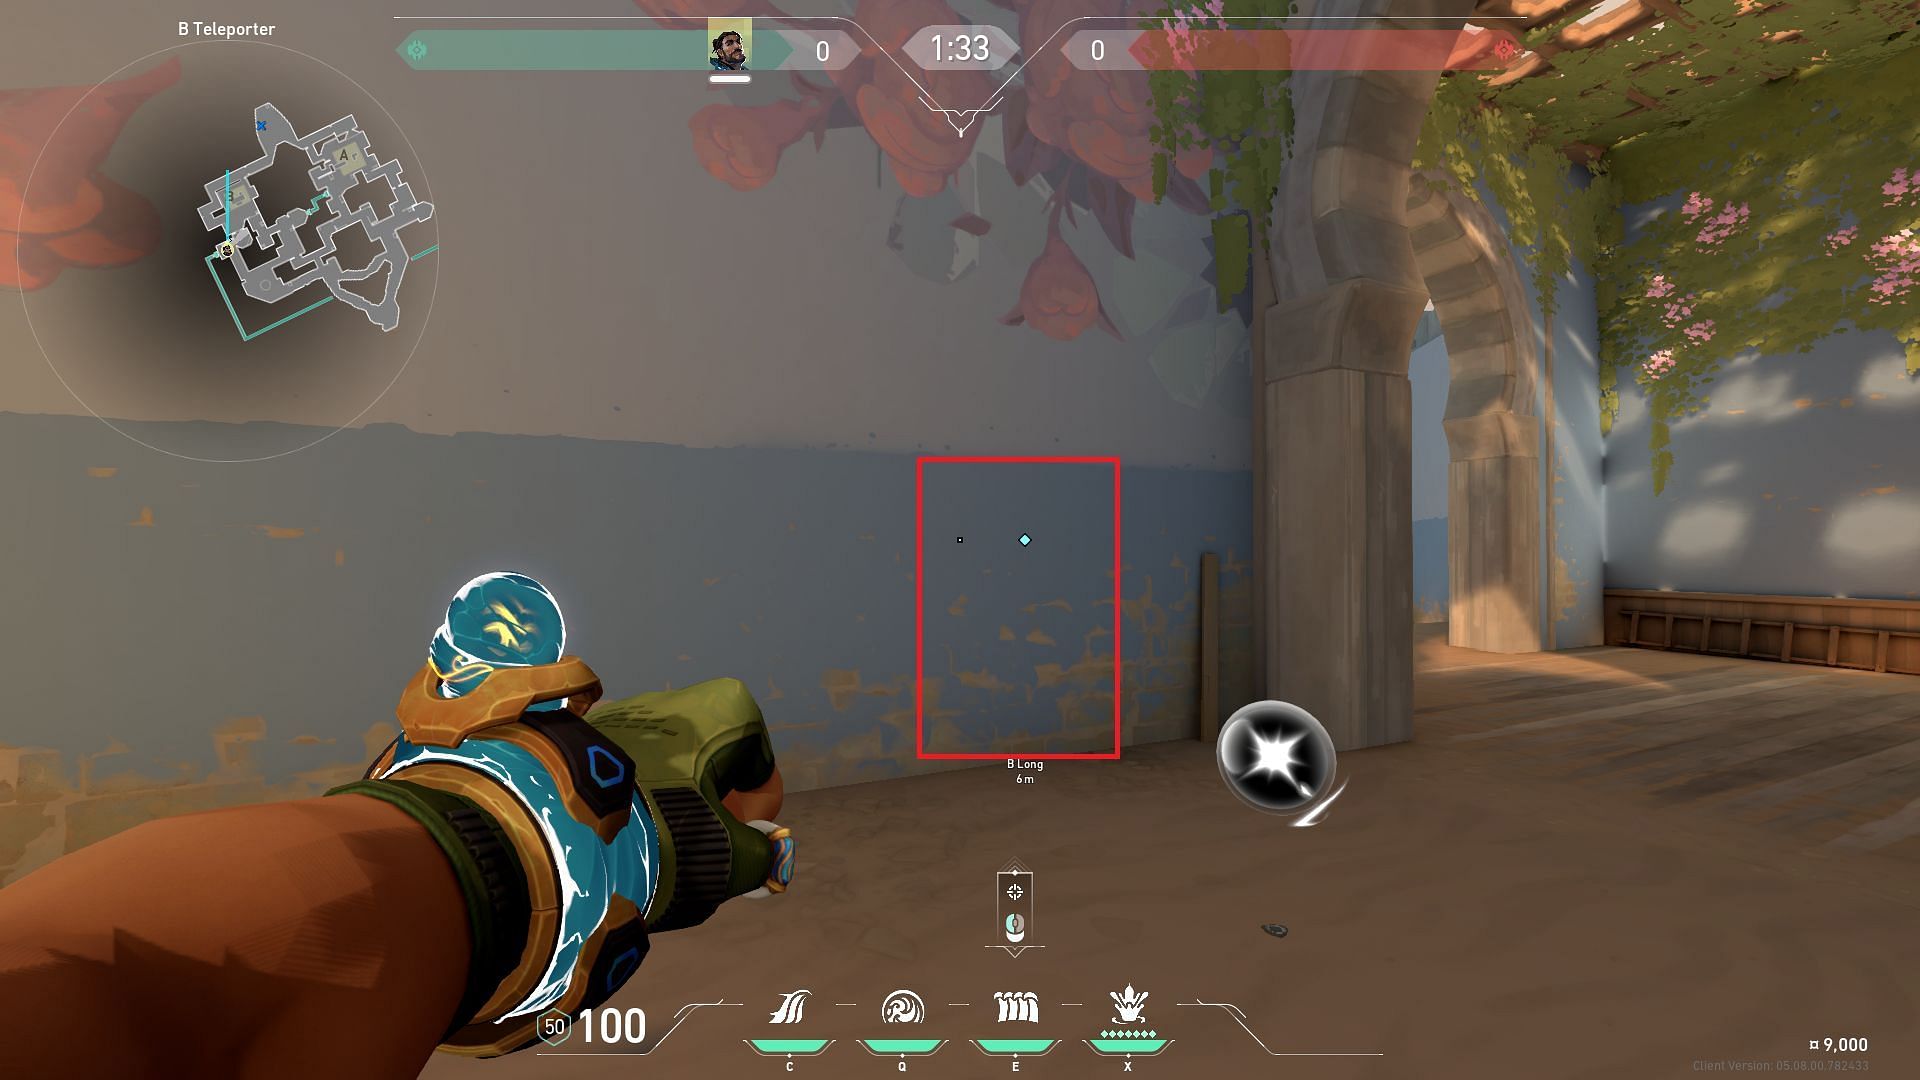
Players can stand beside the B-long entrance and find the spot near a wooden log, as shown in the image above.
Upon aligning yourself with the wall, you can deploy the High Tide with the help of the mini-map and wait till it crosses Elbow, then carve it to the right, so it covers the Lab door.
The default High Tide for B-site can provide cover from Elbow and Labs, but players must be careful with the pockets it creates within the site.
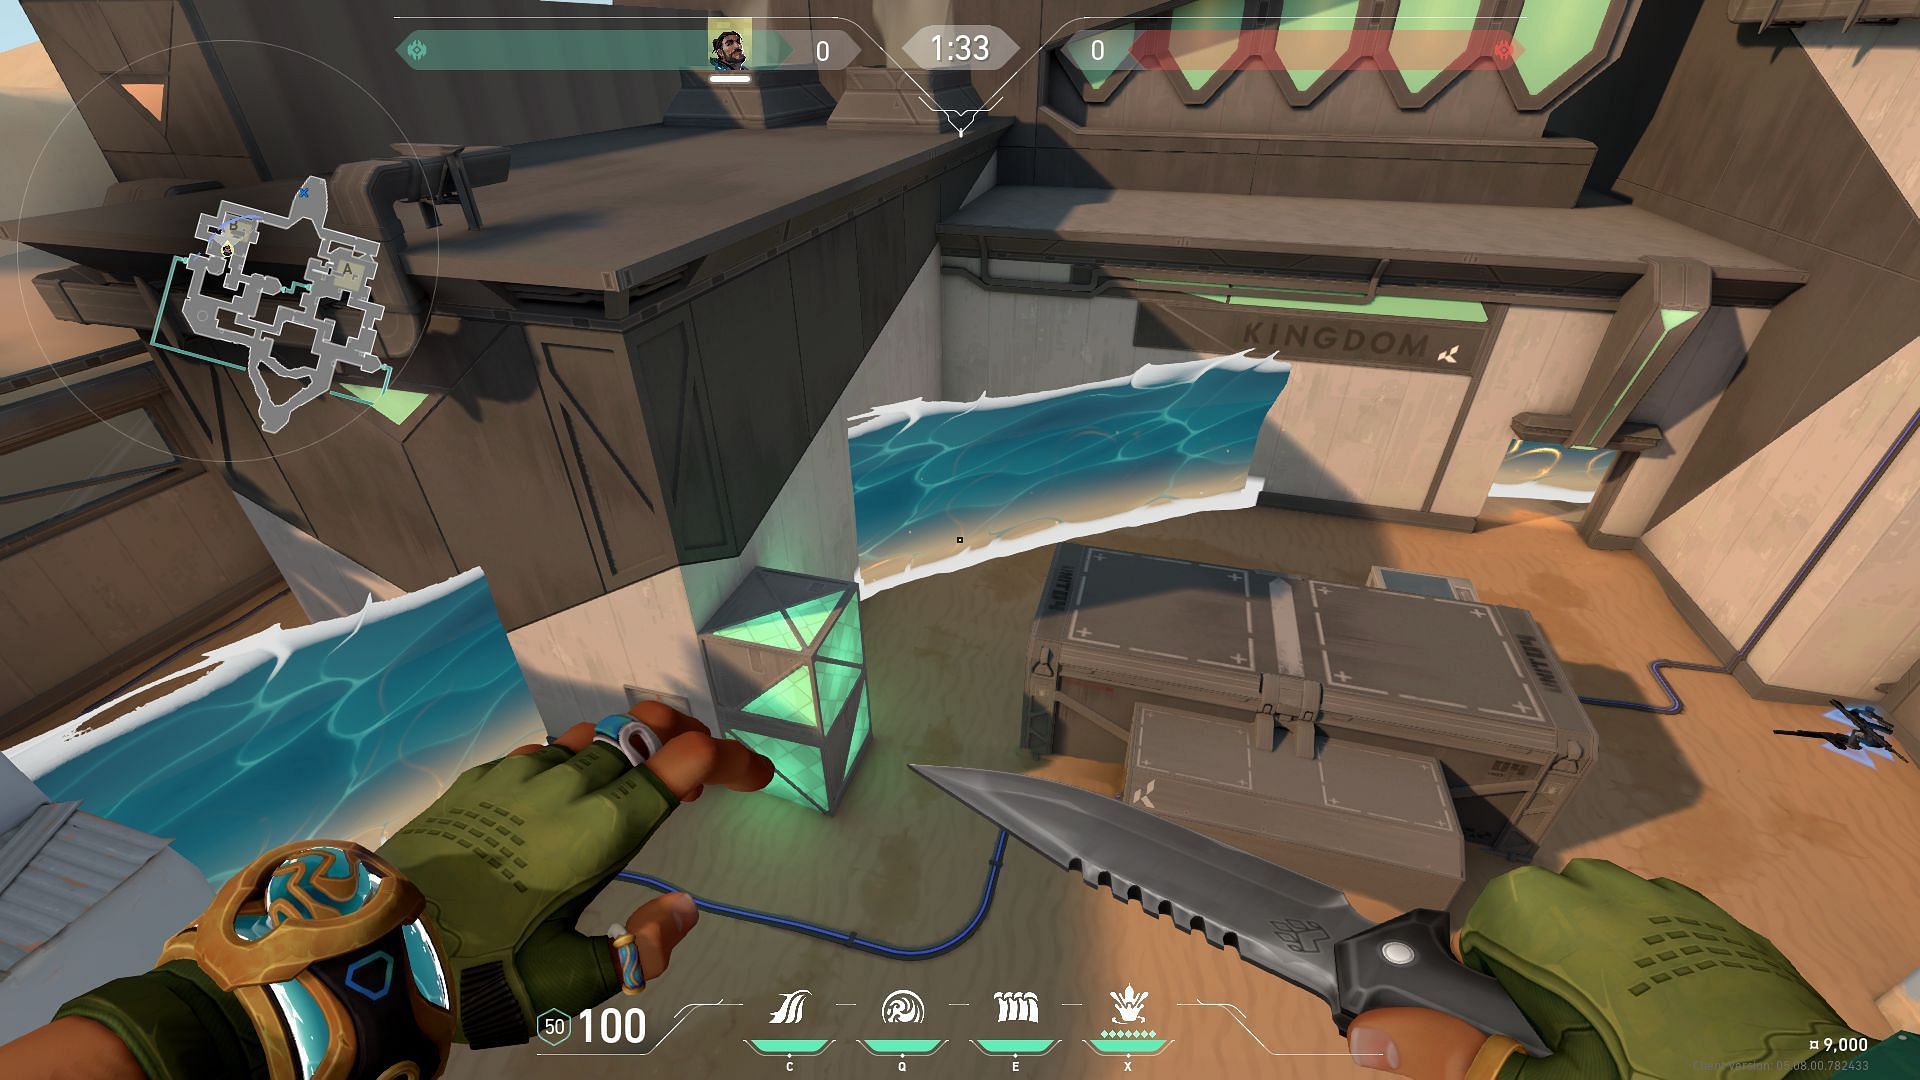
Cascade
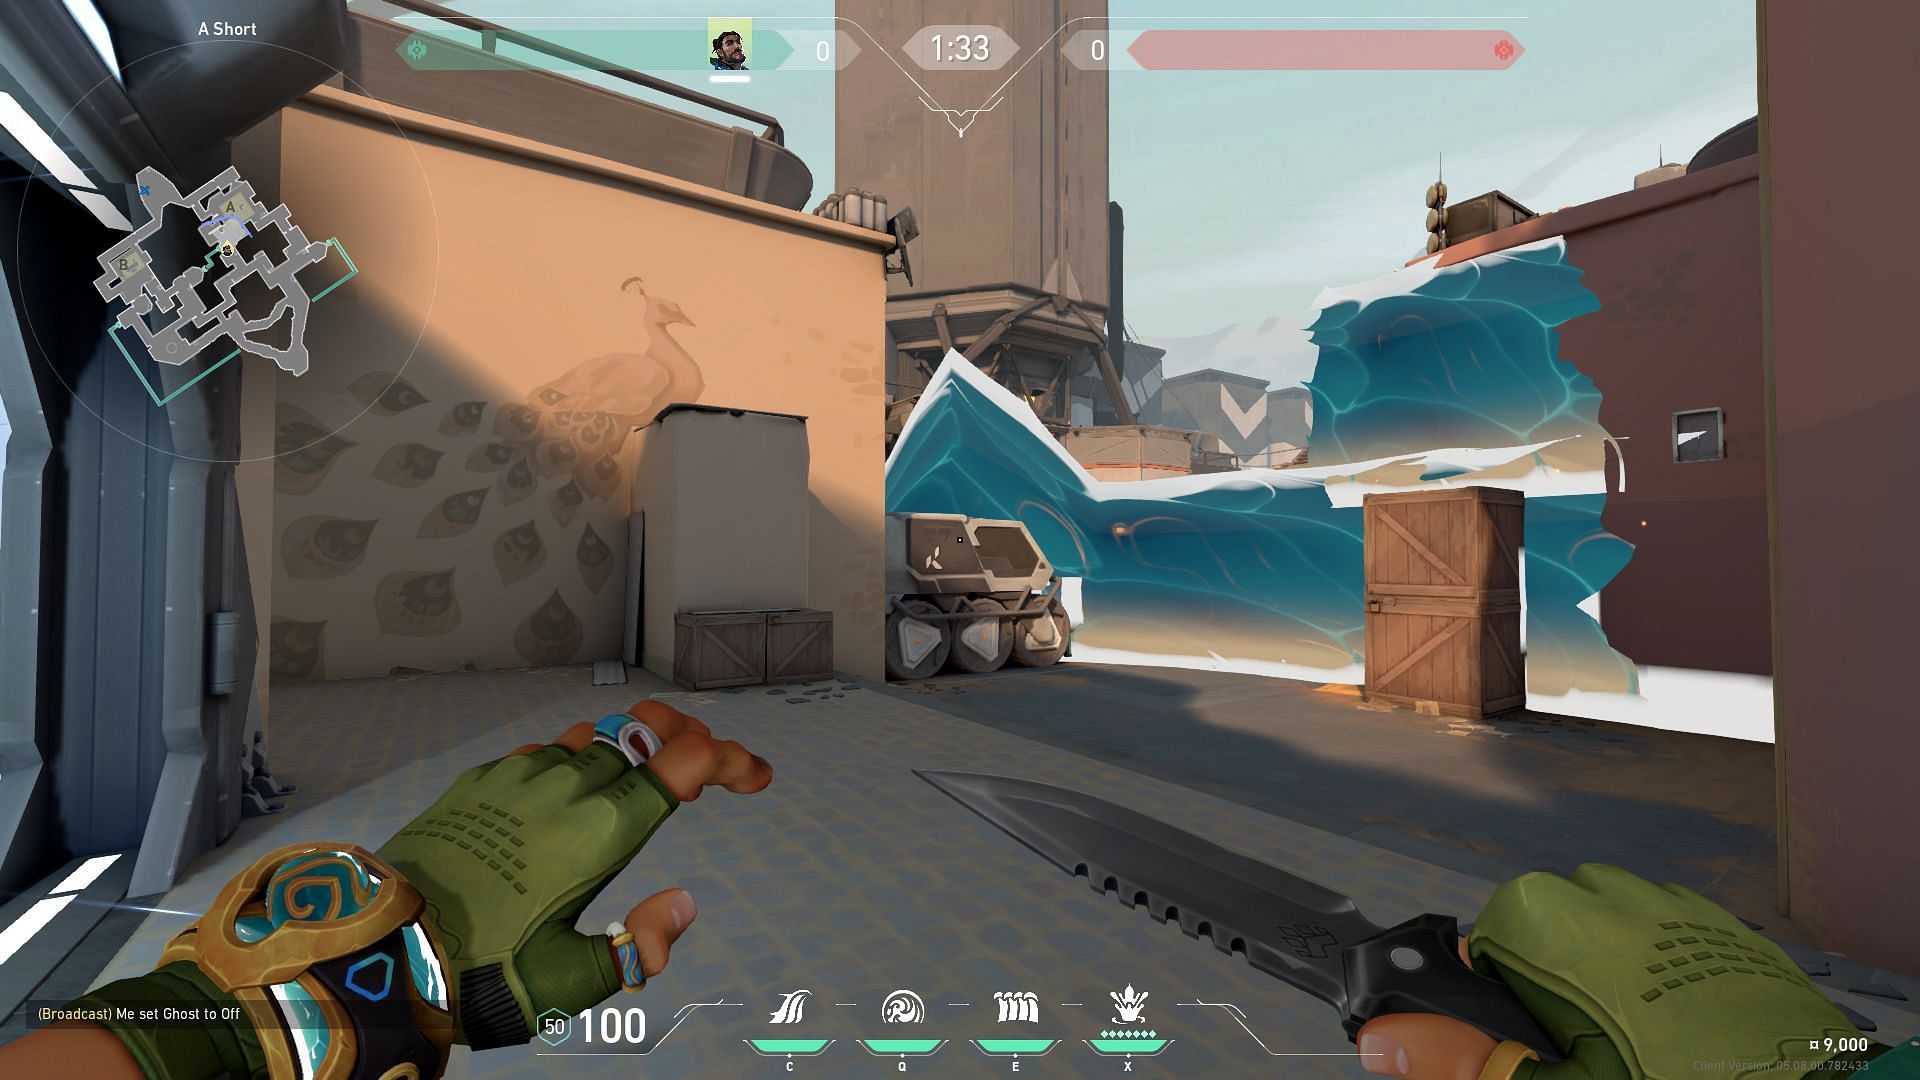
A-main safe push Cascade
This Cascade can be deployed outside A-short with the mini-map's help so it reaches the Truck.
This particular Cascade can provide cover from Hookah and players in-site.
B-Hookah defense Cascade
Players can try this Cascade from behind the Labs as well, but it is recommended to deploy this from the site. With the help of the mini-map, you will have to deploy the Cascade so it reaches right into the Hookah window.
Cascade can cover up the visions of any attacker pushing Hookah.
Cove
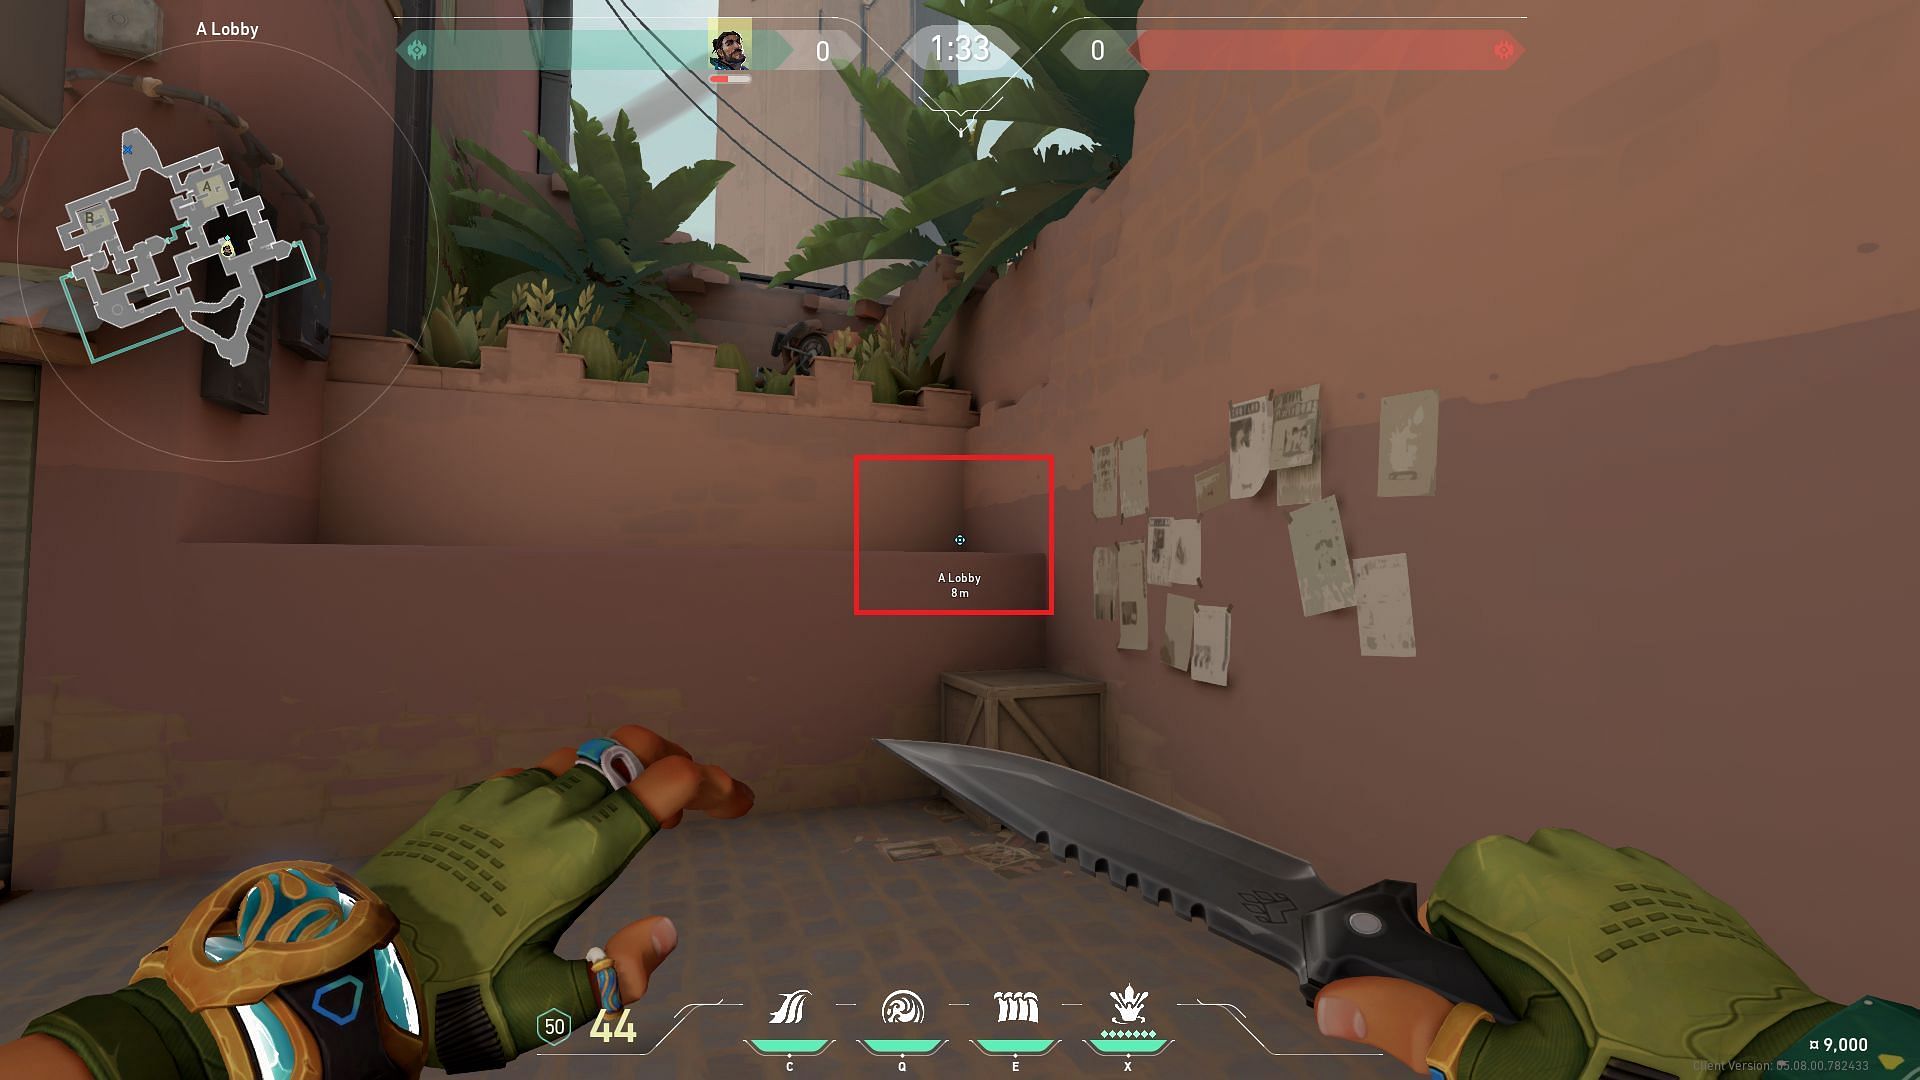
A-site defender one-way Cove
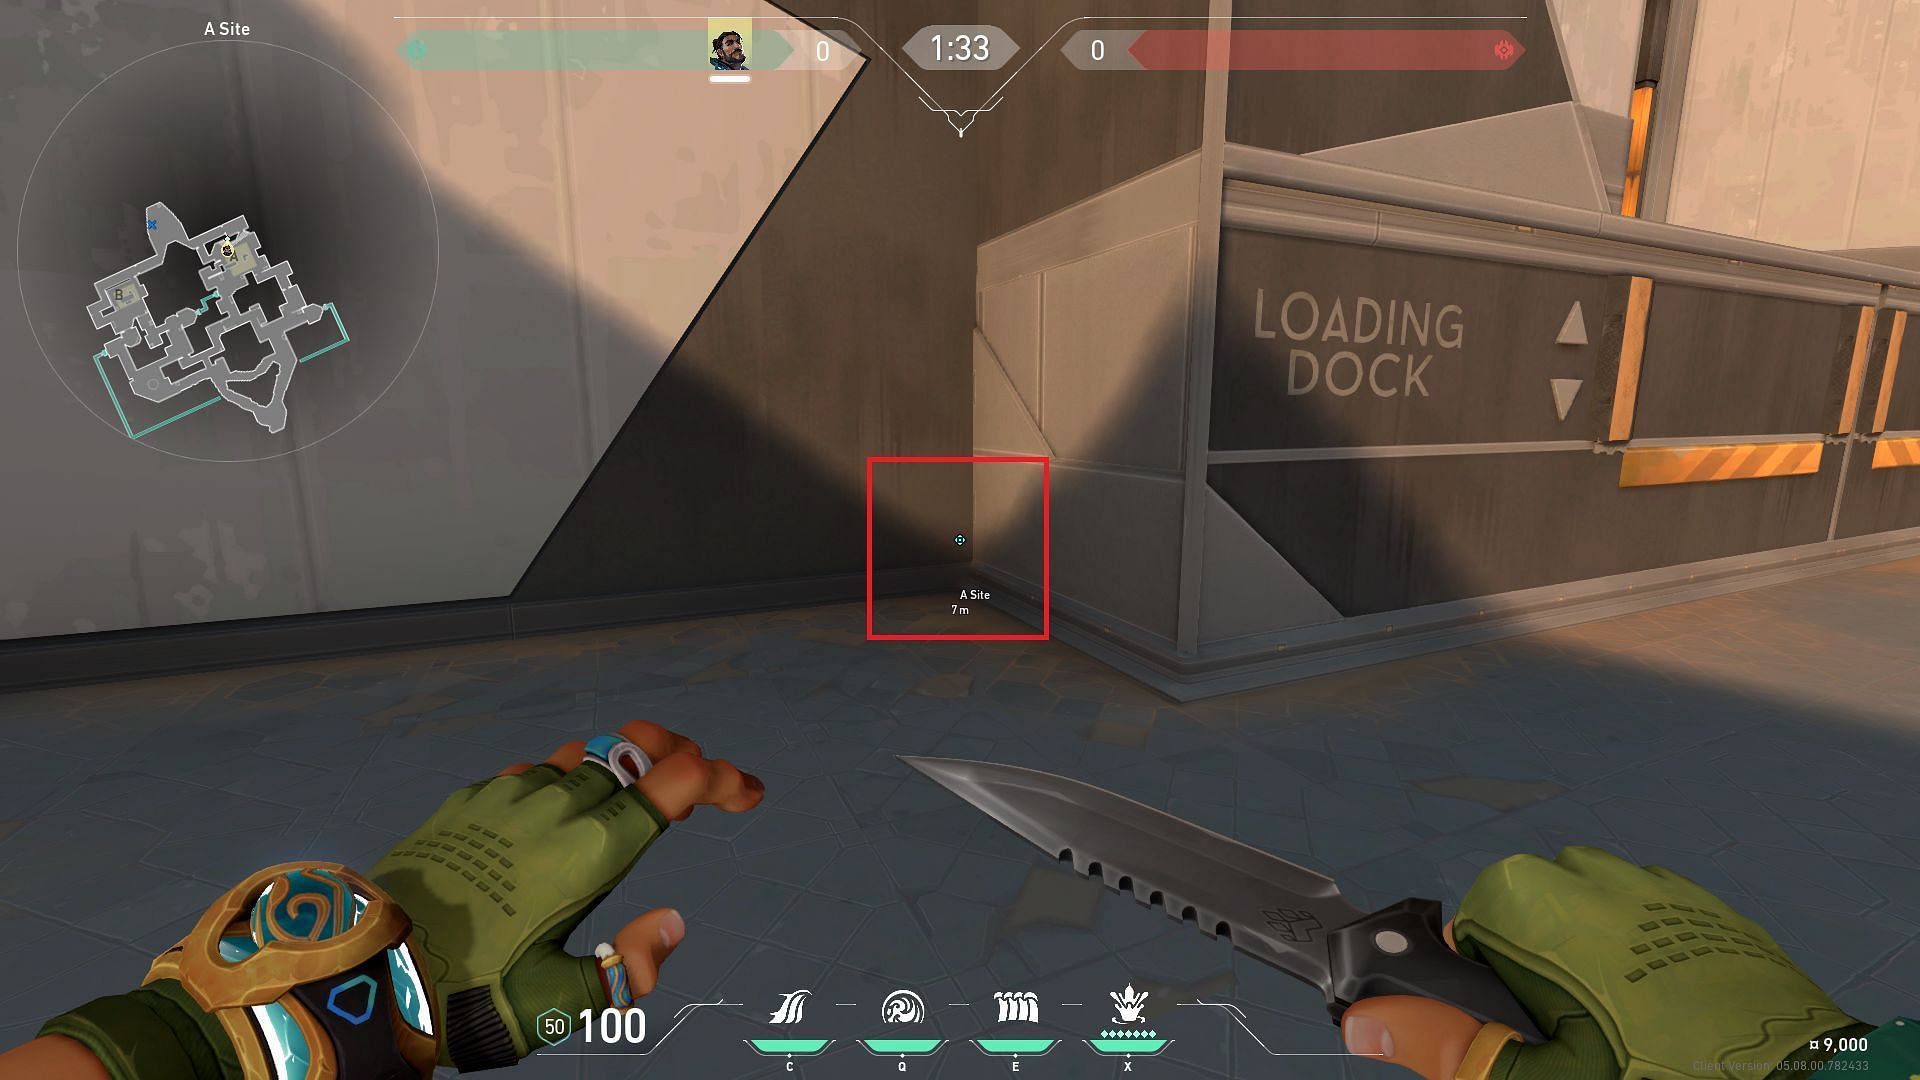
Players will have to find a spot near A-heaven, as shown in the image.
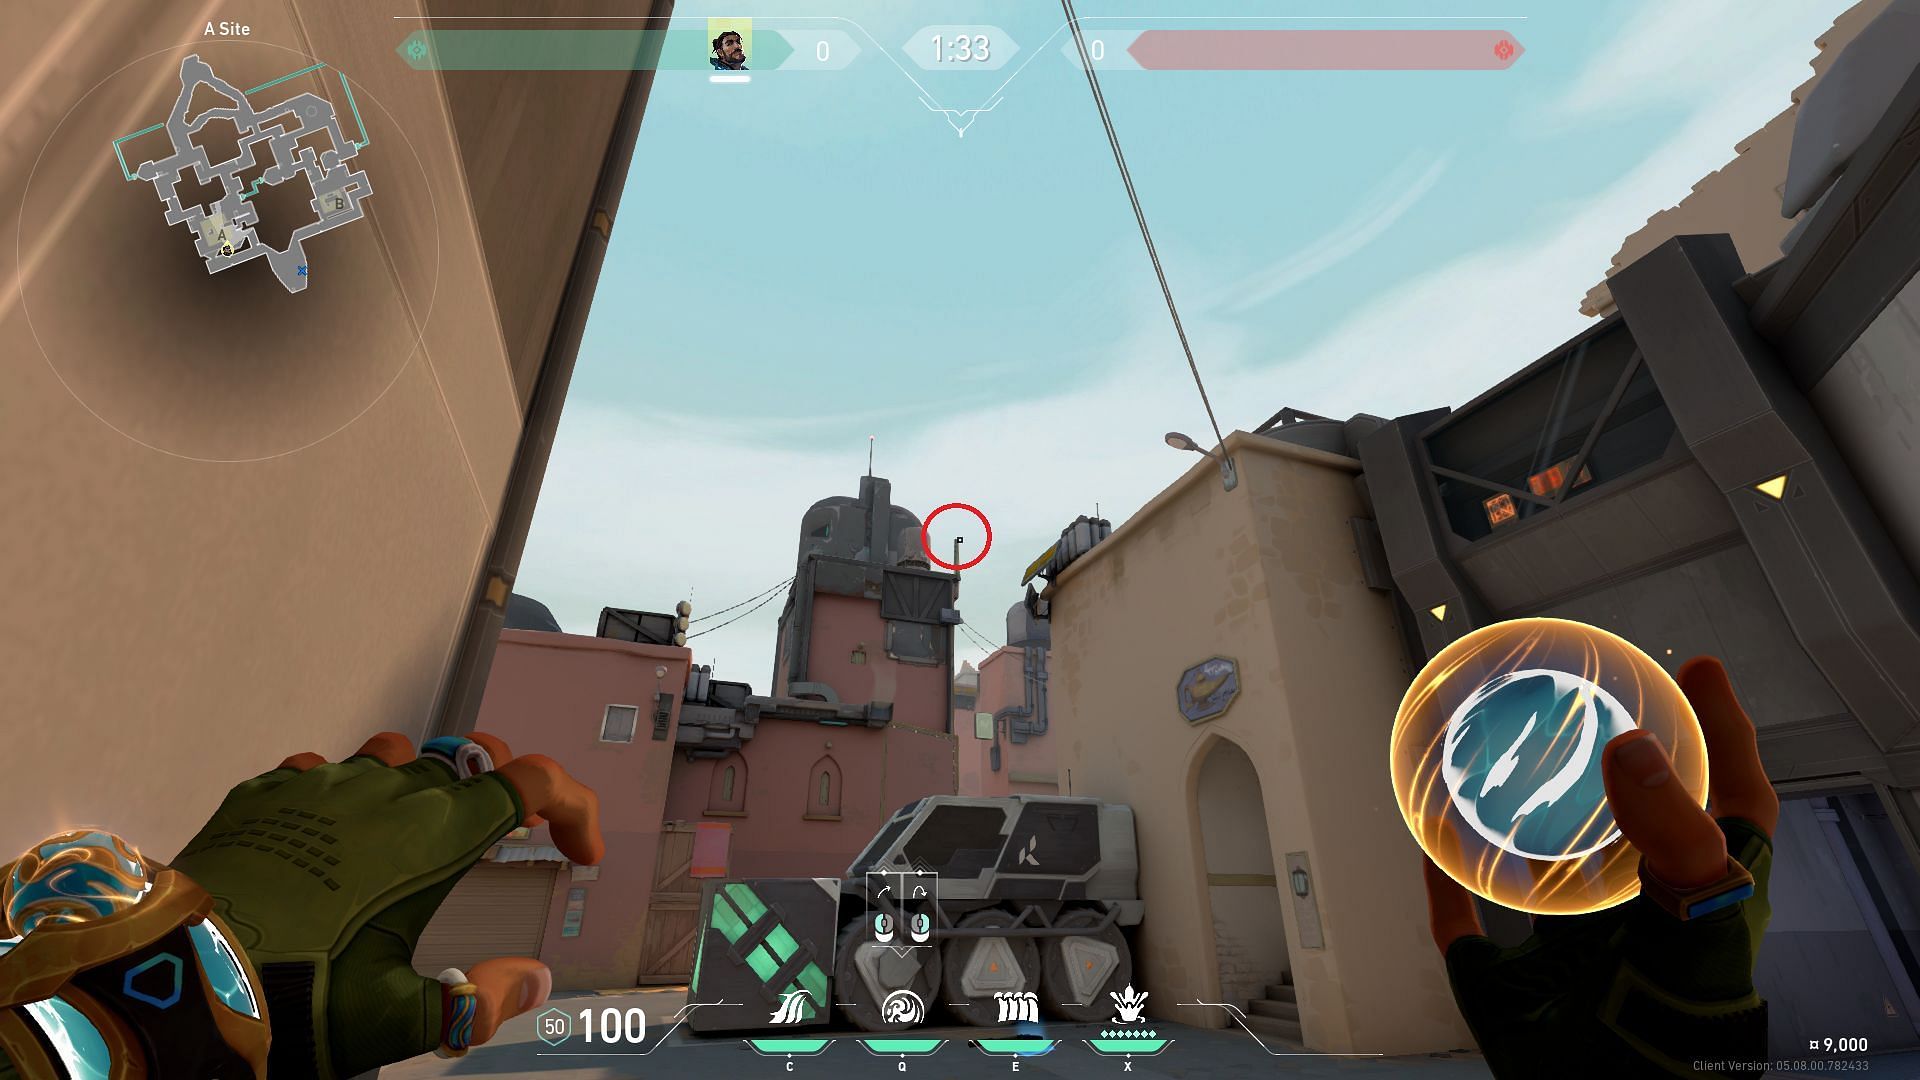
Upon reaching, you can line up the Cove with the left tip of the antenna, as shown in the image.
The Cove will become a one-way cover where the attackers will not be able to spot any players in-site.
A-heaven Cove
The spot for the default Cove in A-heaven is similar to the default High Tide, as shown in the image above.
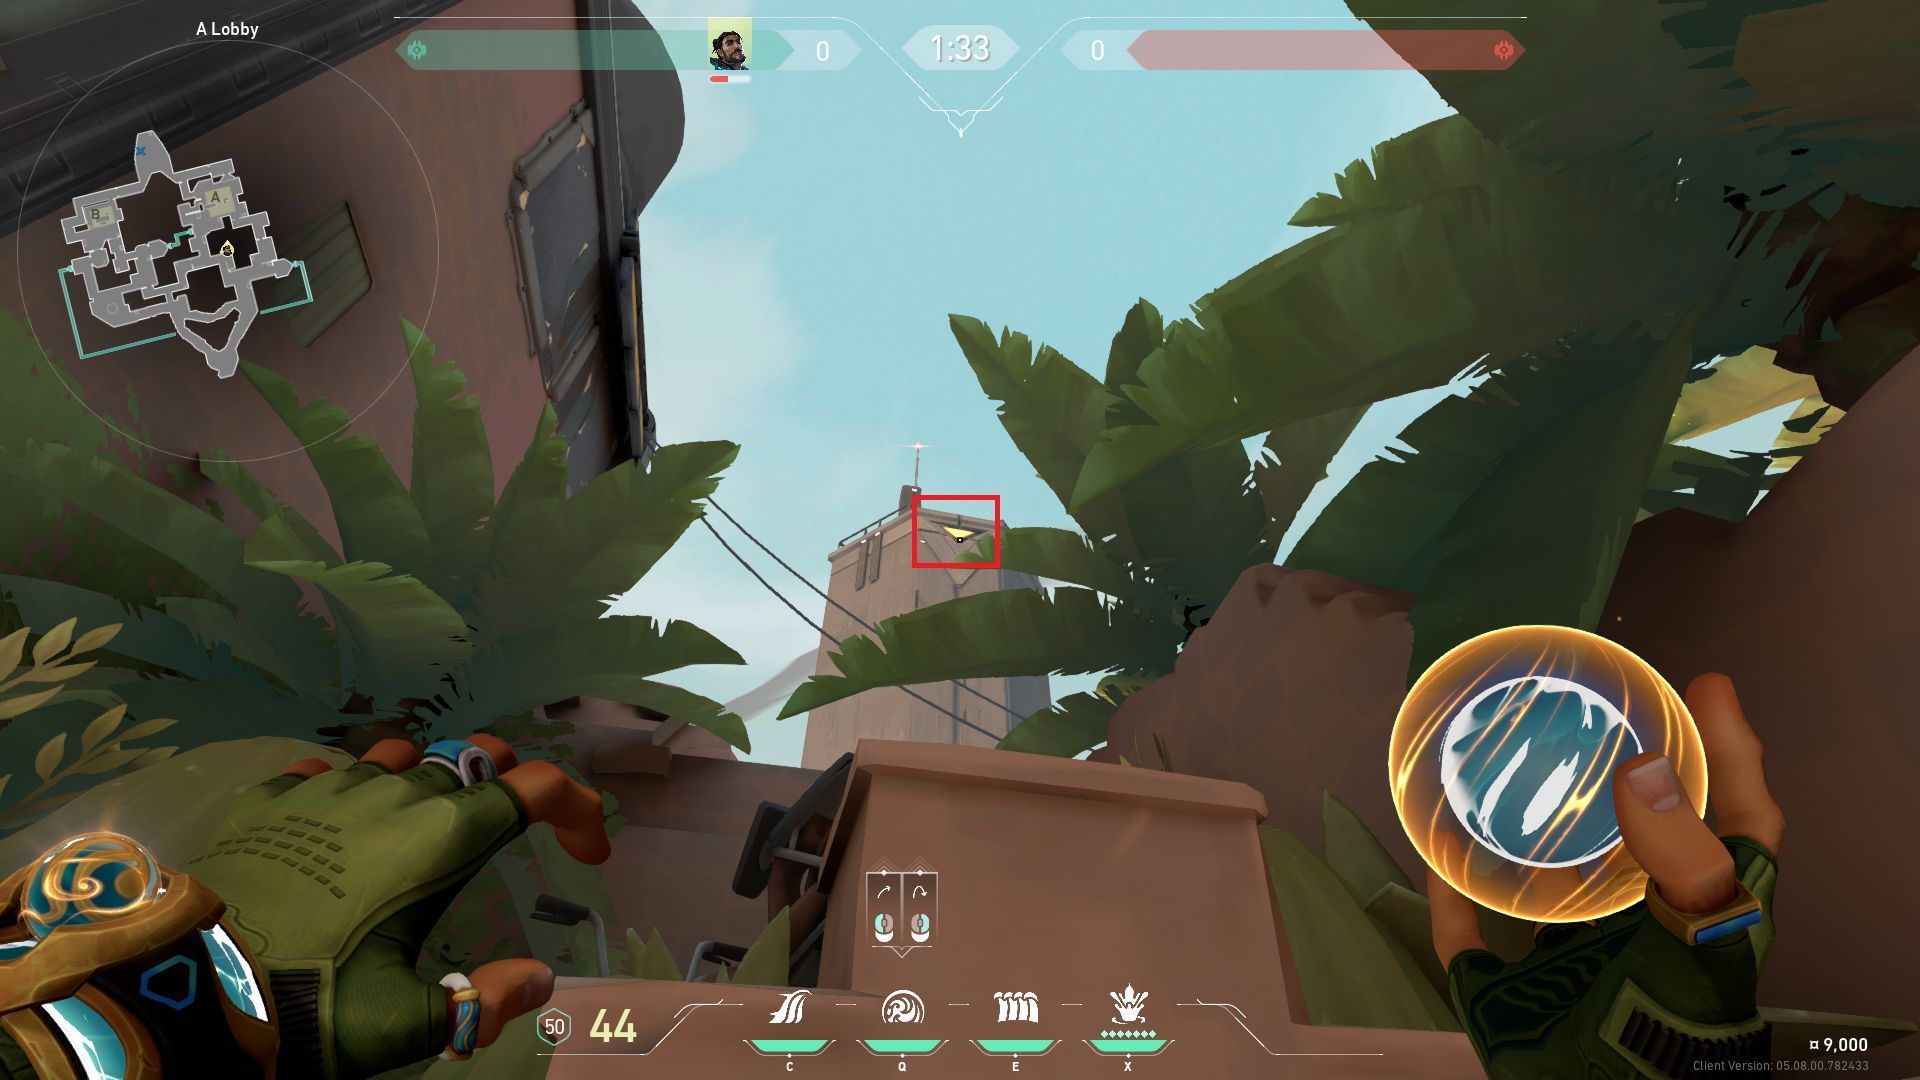
Upon climbing the boxes, you can aim for the bottom of the diamond on the tower and throw the Cove.

The Cove lands perfectly in Heaven, where defenders will not be able to spam for a few seconds.