
'%20x='0'%20y='0'%20height='100%25'%20width='100%25'%20%0A%20%20%20%20%20%20%20%20%20%20xlink%3Ahref='data:image/jpg;base64,/9j/2wBDAAYEBQYFBAYGBQYHBwYIChAKCgkJChQODwwQFxQYGBcUFhYaHSUfGhsjHBYWICwgIyYnKSopGR8tMC0oMCUoKSj/2wBDAQcHBwoIChMKChMoGhYaKCgoKCgoKCgoKCgoKCgoKCgoKCgoKCgoKCgoKCgoKCgoKCgoKCgoKCgoKCgoKCgoKCj/wgARCAAHAAoDASIAAhEBAxEB/8QAFQABAQAAAAAAAAAAAAAAAAAAAAX/xAAUAQEAAAAAAAAAAAAAAAAAAAAE/9oADAMBAAIQAxAAAACNOHG//8QAIBAAAQQBBAMAAAAAAAAAAAAAAQIDBAURAAYSQSJRcf/aAAgBAQABPwDcd7Xx6mthwIMZbciC0EFocCAEK55ykeWfufemLraq2G1Saecp8pBcUktYKu+tf//EABcRAQADAAAAAAAAAAAAAAAAAAEAAhL/2gAIAQIBAT8A0tp//8QAFxEBAAMAAAAAAAAAAAAAAAAAAQARIf/aAAgBAwEBPwAdqf/Z'%3E%3C/image%3E%3C/svg%3E)
Valorant has introduced its fifth Controller to the Agent pool with Episode 5 Act 3. The finale of the Episode has brought a plethora of game-changing tweaks. Harbor's addition to the roster has already started making shifts to the shooter's meta.
Valorant players are keen to learn more about what the Indian Agent can bring to the table. Varun Batra's utility consists of smoke that is controlled through water-like abilities. Like Viper, Harbor can use his walls and smoke bubbles to conquer tight areas on maps like the Icebox.

This article dives into some of the best lineups with Harbor's Cove, Cascade, and High Tide abilities for players who plan to bring the Controller on Icebox.
Unique Harbor ability lineups on Valorant's Icebox
Harbor's water abilities are very similar to Viper and Phoenix walls and simultaneously share similarities with traditional smoke Agents such as Omen and Brimstone. That said, Harbor's kit does not include a utility that can damage enemies. This makes him an extremely passive Controller.
Harbor possesses two water wall abilities similar to Viper's. The High Tide wall can be bent in any direction according to the player's desire. The Cascade is a tall wall that can slow enemies in contact and keep advancing once deployed. Lastly, the Cove is a smoke bubble with a shield layering that can be broken with a few bullets or even a melee.
High Tide
Default A-site wall
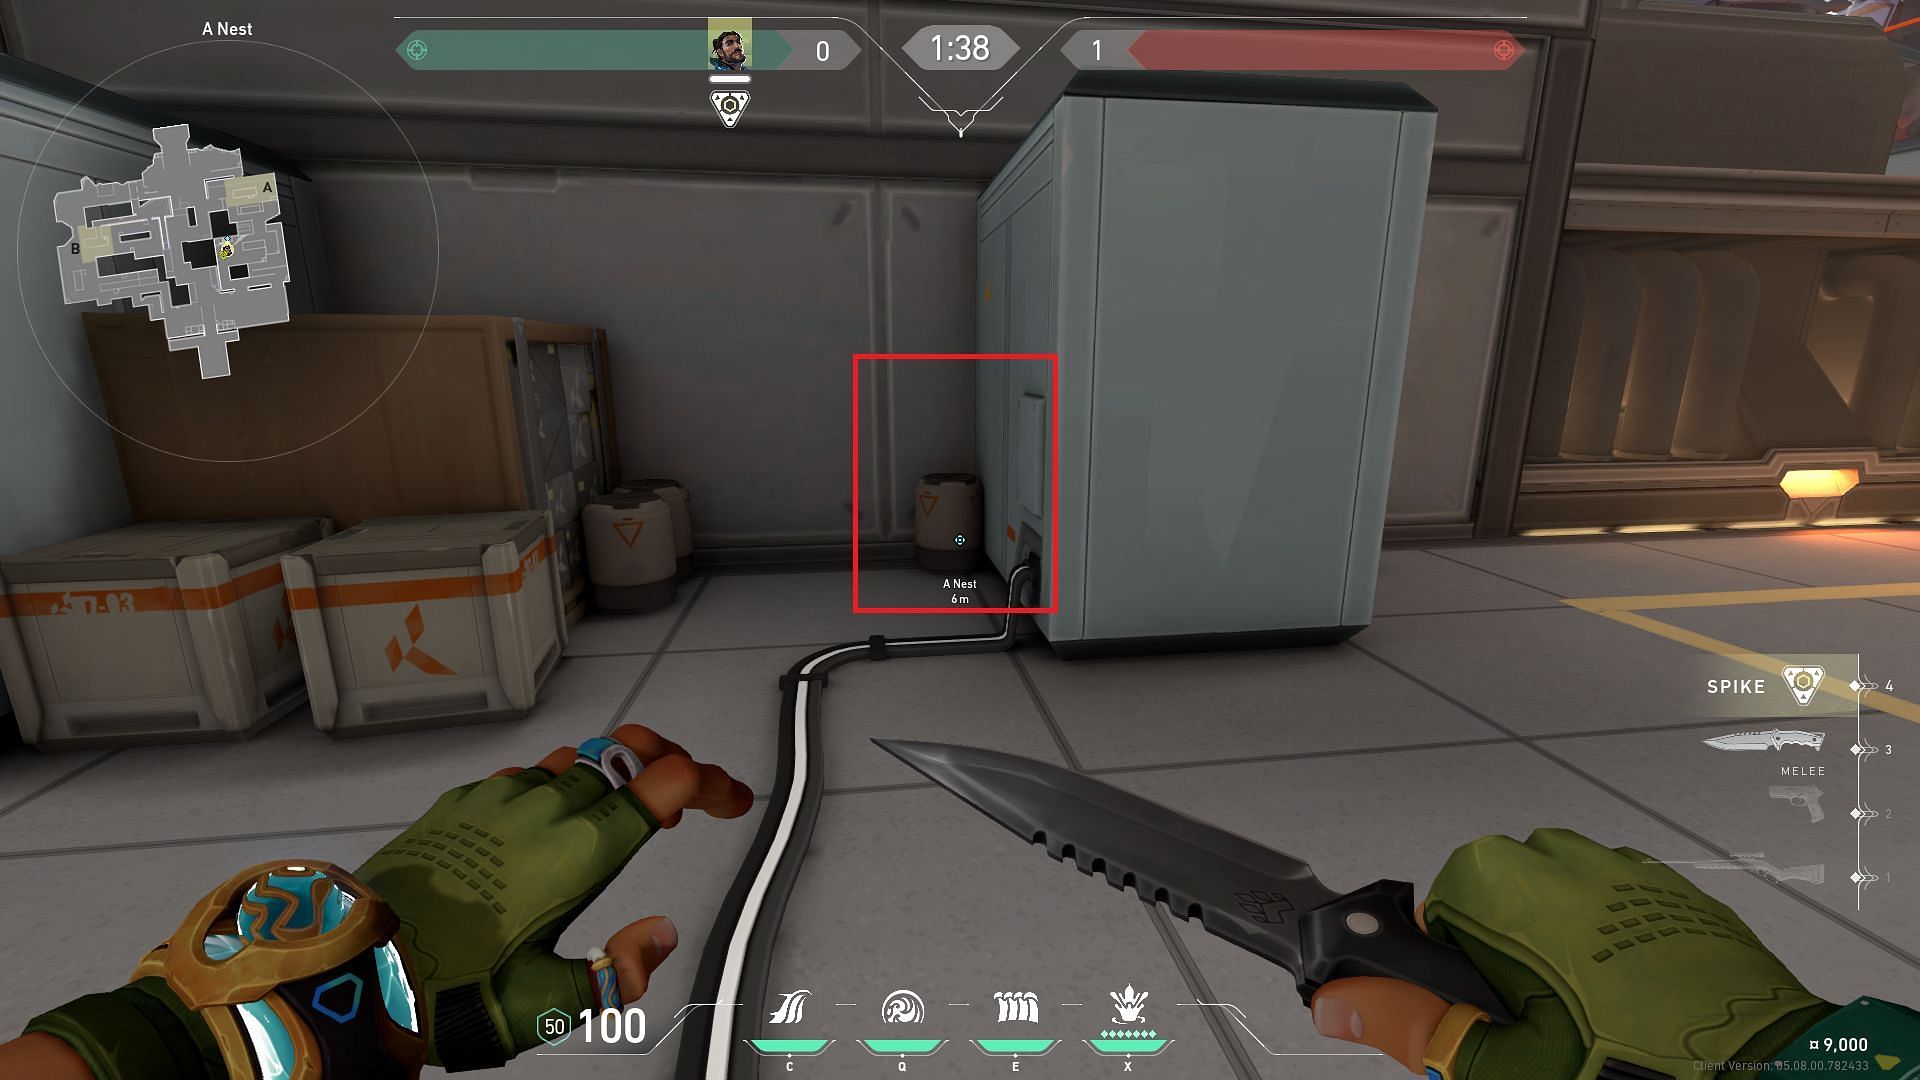
Find a small cylinder near A-main and position it near it. You do not have to stand on it.
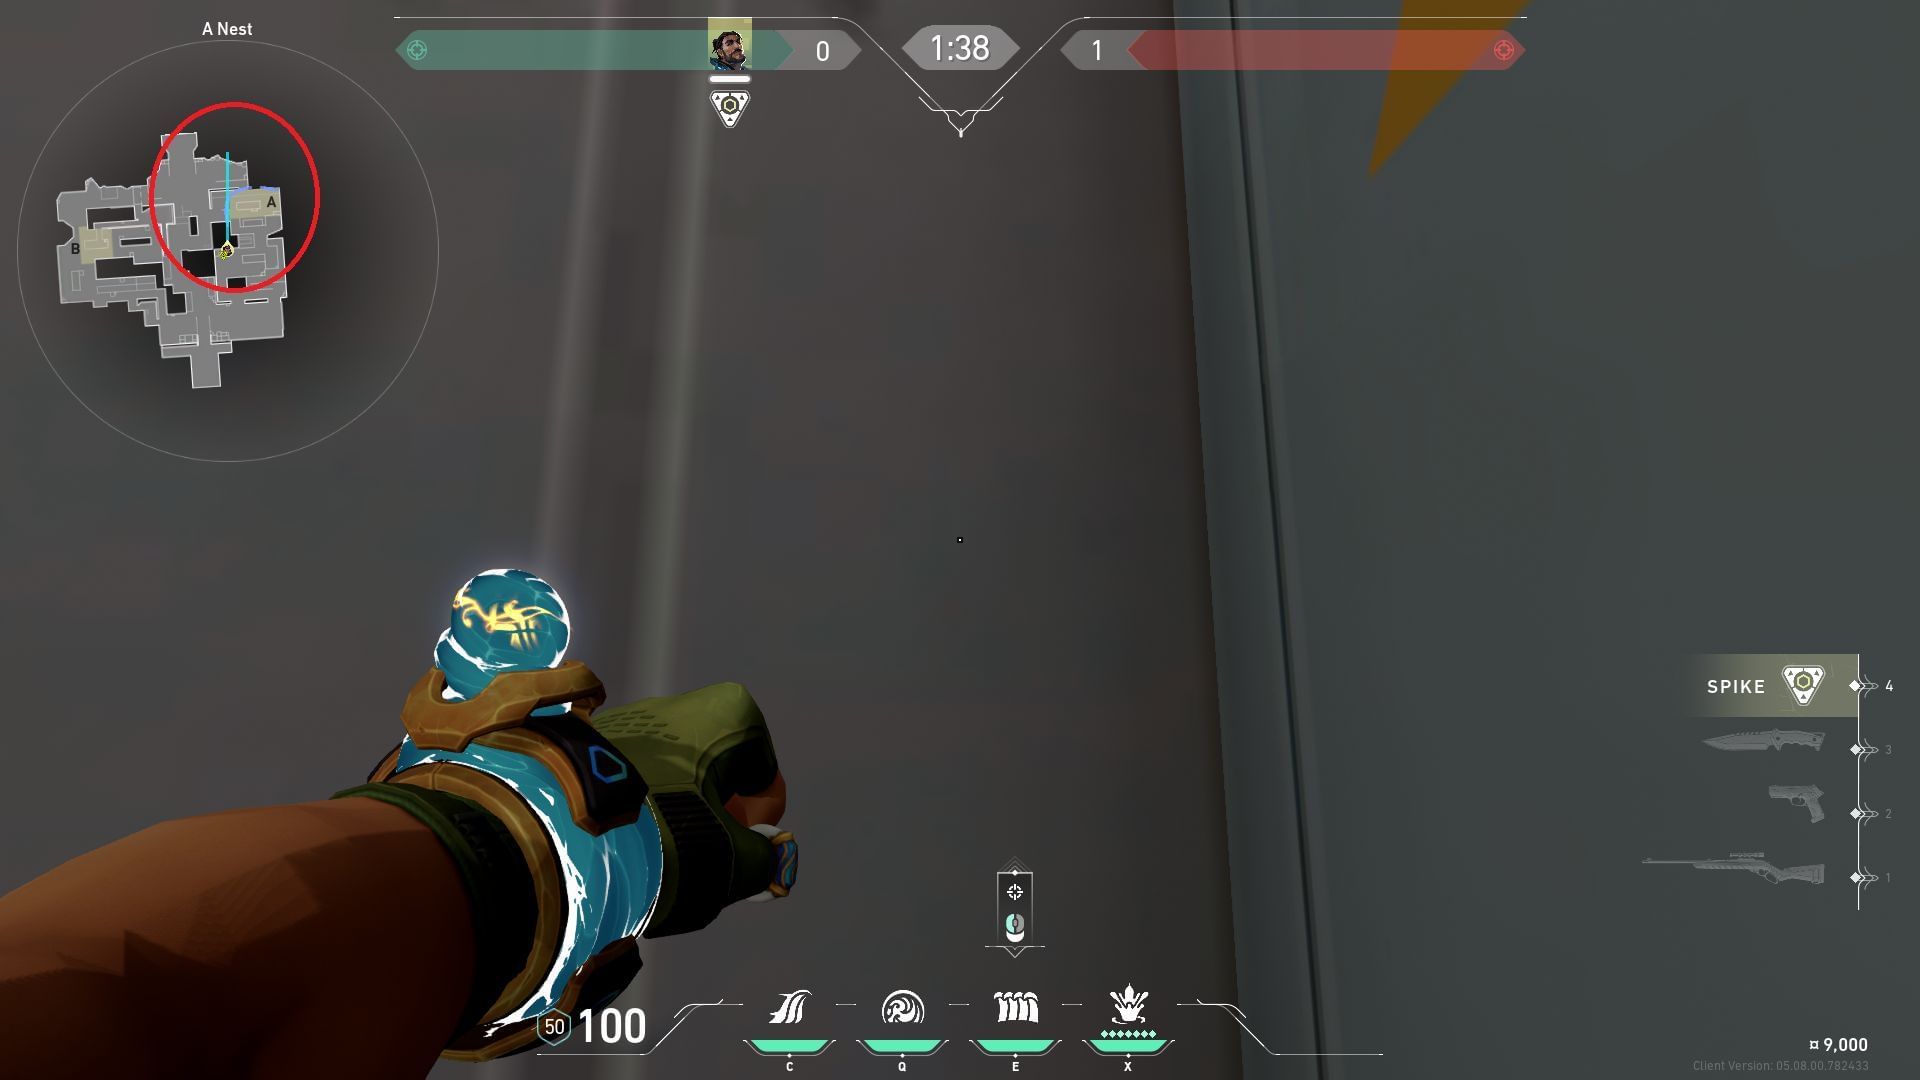
Once positioned, use the mini-map to align the High Tide from on top of the Screens and bend it to the right side as soon as the mark reaches A-rafters.
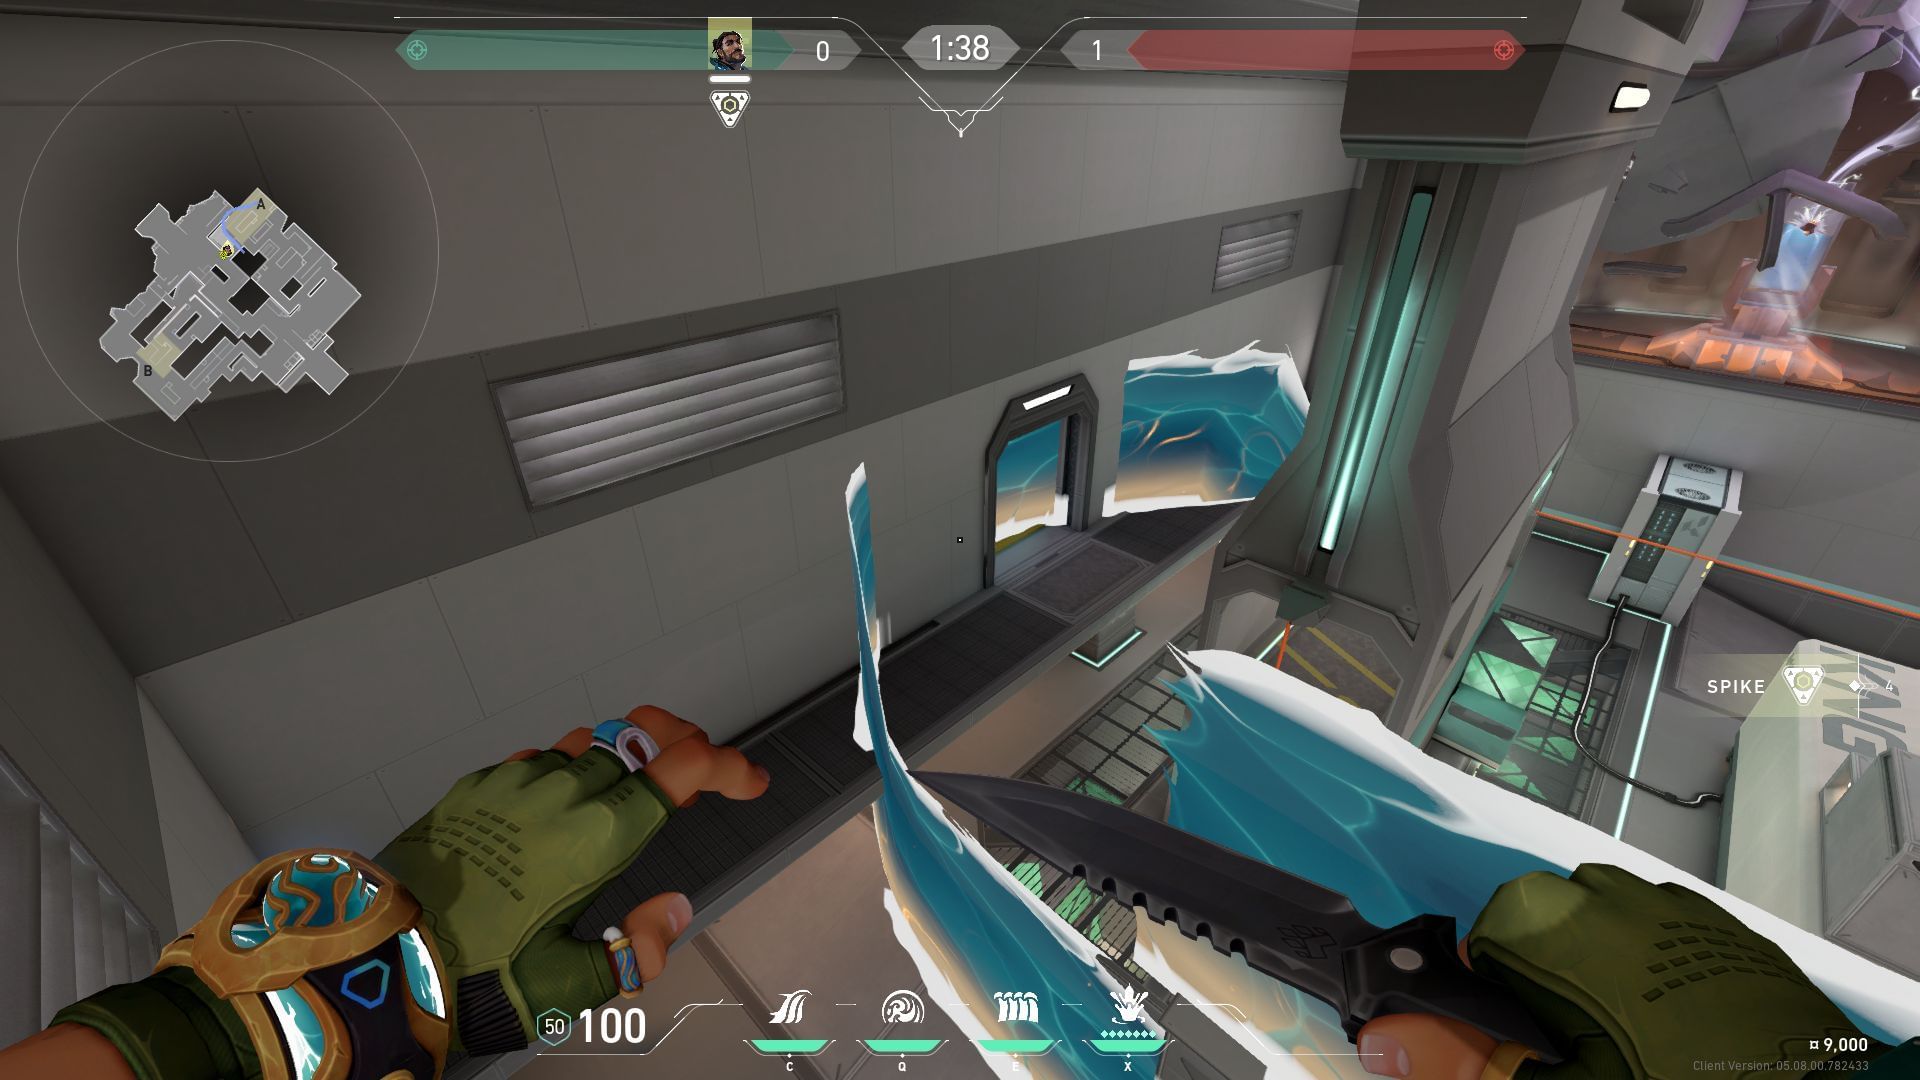
block Screens and Rafters simultaneously once the High Tide is deployed.
Default B-site wall
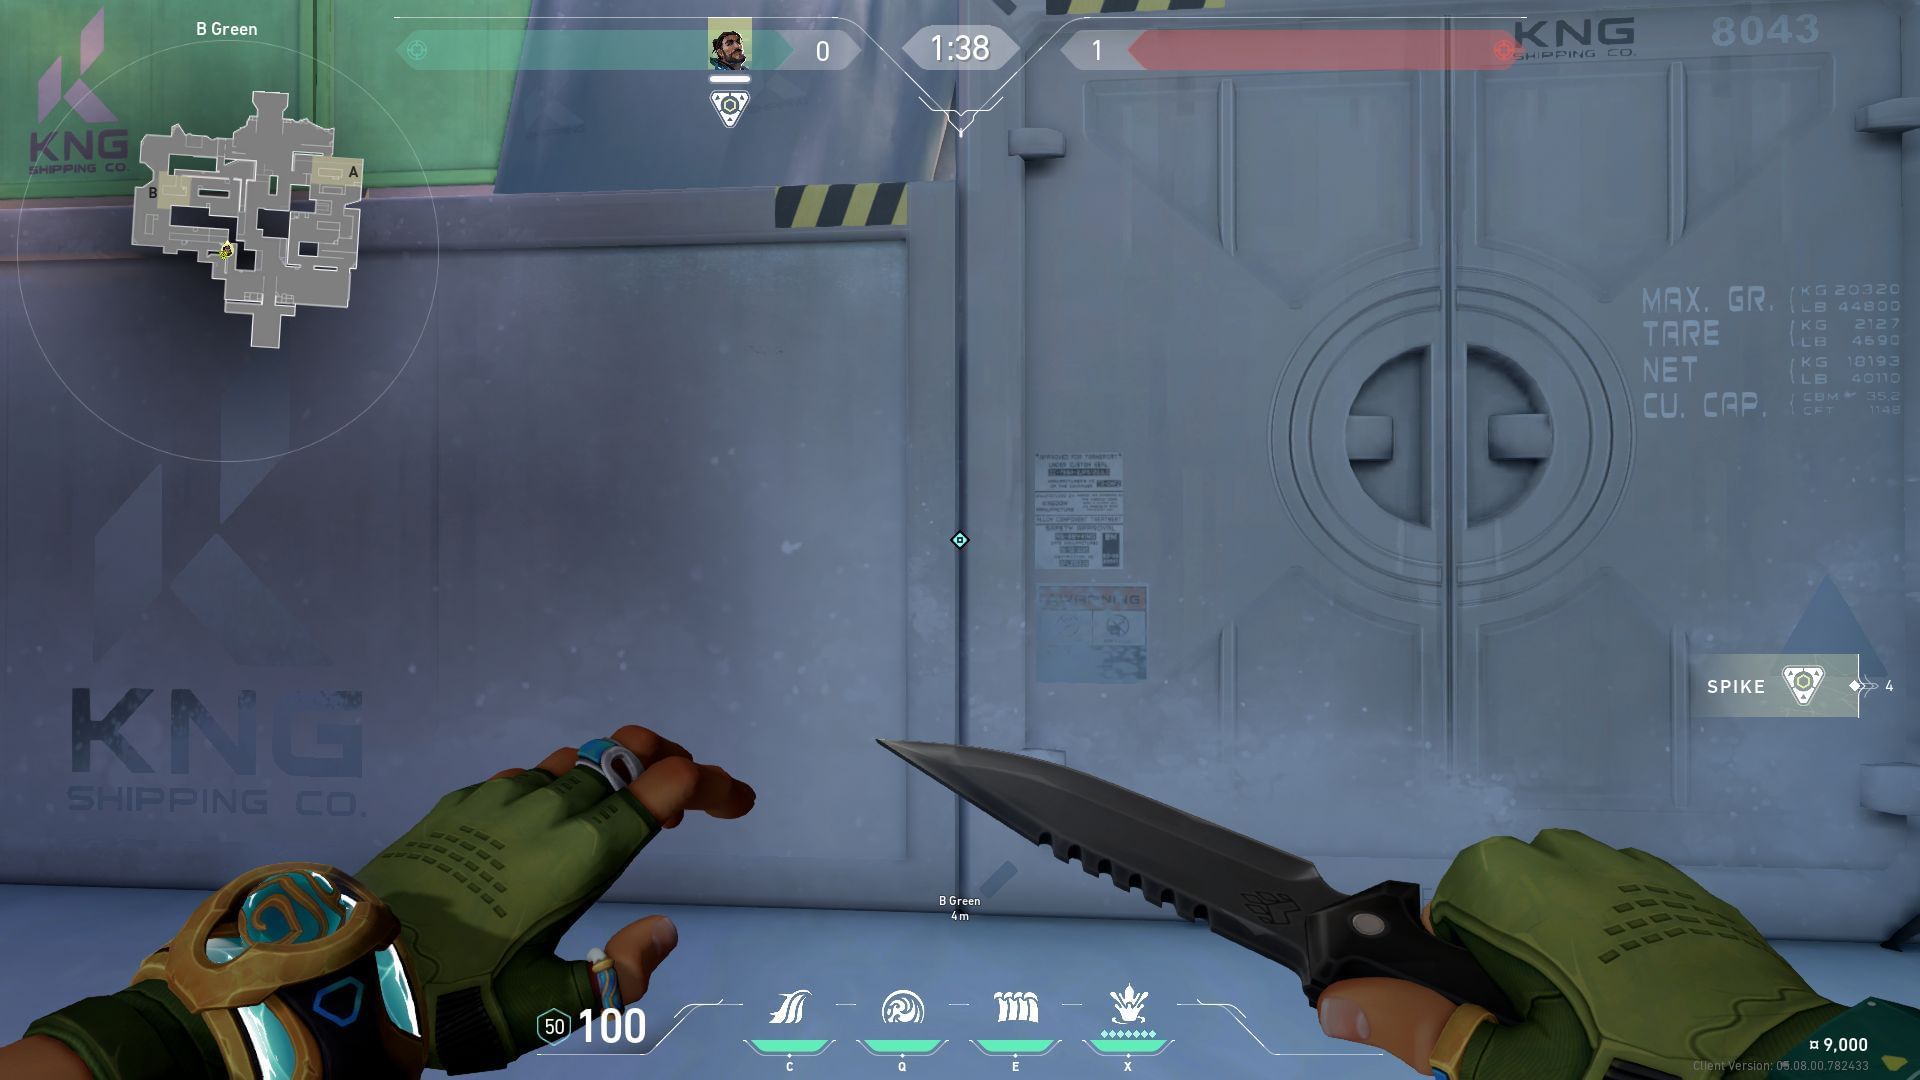
Align with the crack between the two containers on B-main, as shown in the image.
After positioning, use the mini-map to ensure the High Tide reaches the end of a certain edge of the map, as shown above.
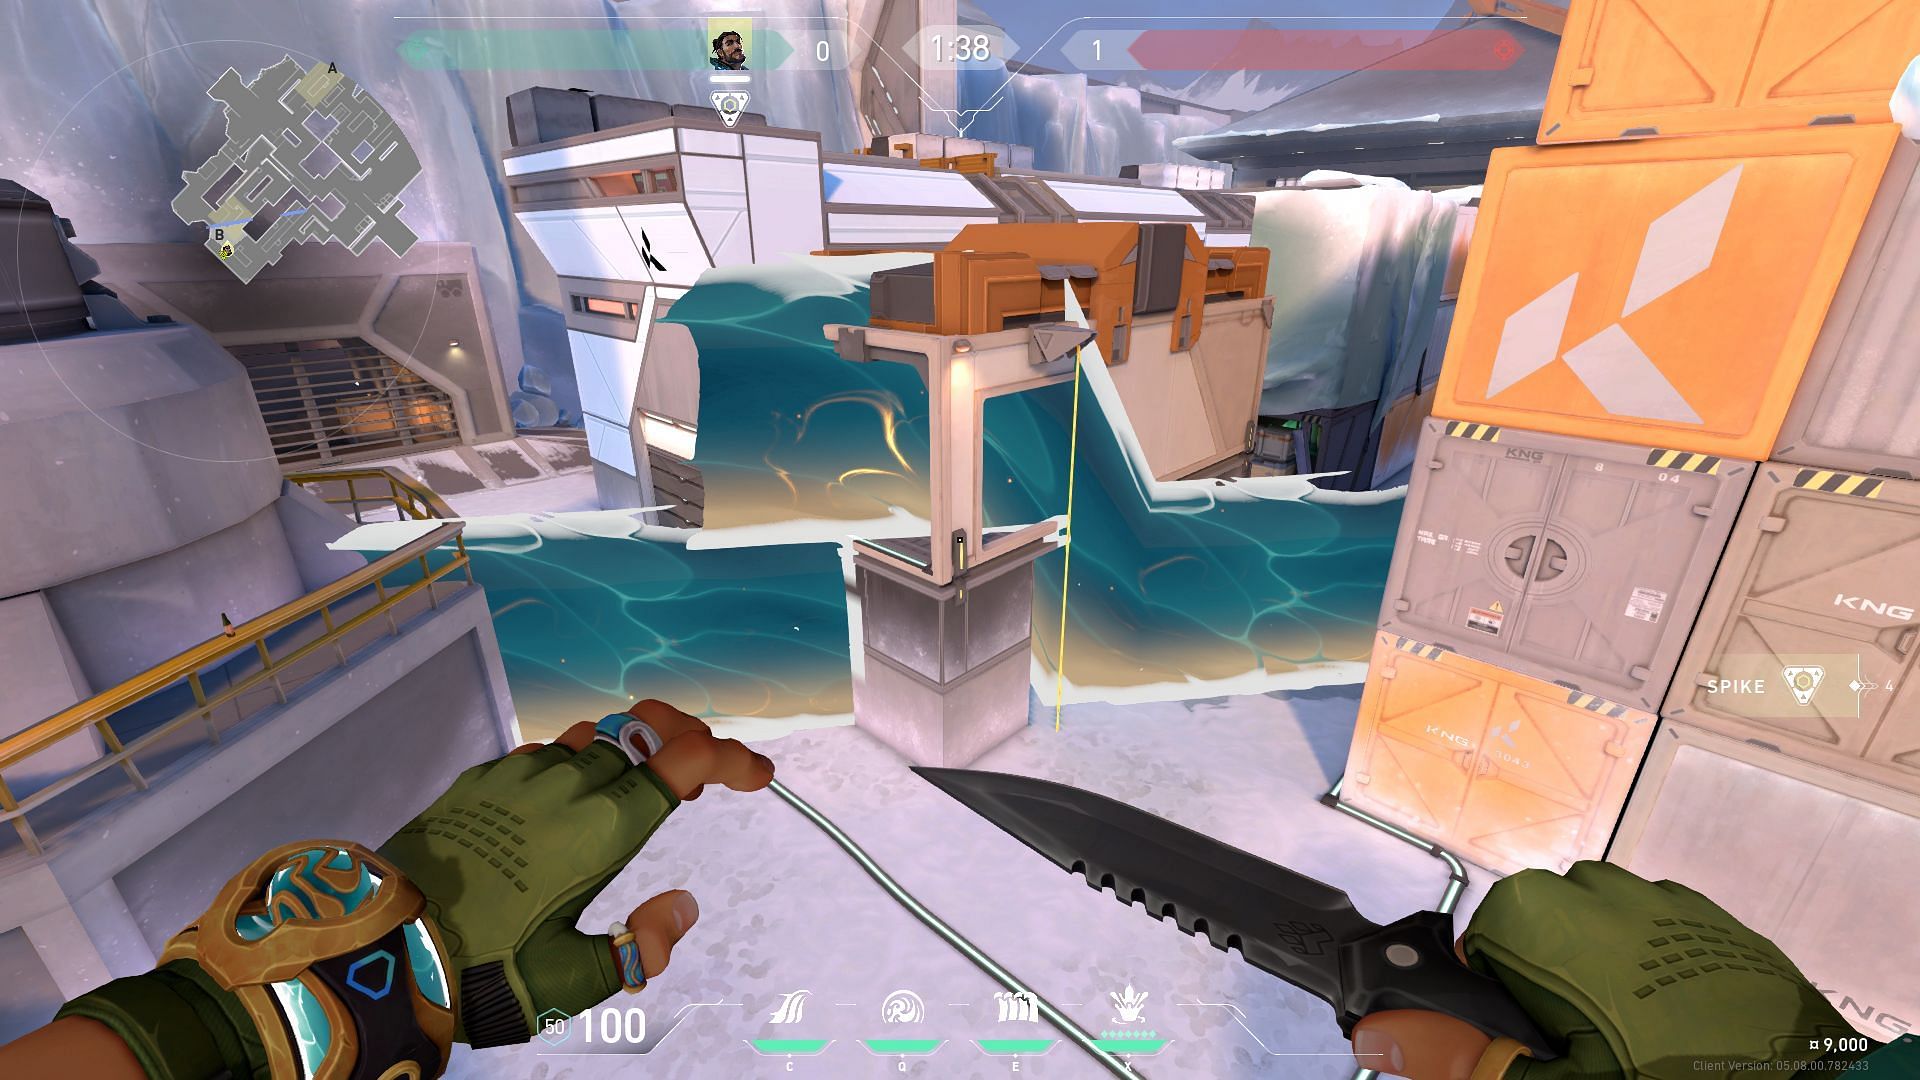
This particular High Tide can provide cover from defender spawn, Nest, and Orange boxes.
Cascade
A-site retake Cascade
The A-site Cascade can help defenders retake the site if attackers have planted on default. Align the Cascade with the help of the mini-map, so it reaches just near the pipes.
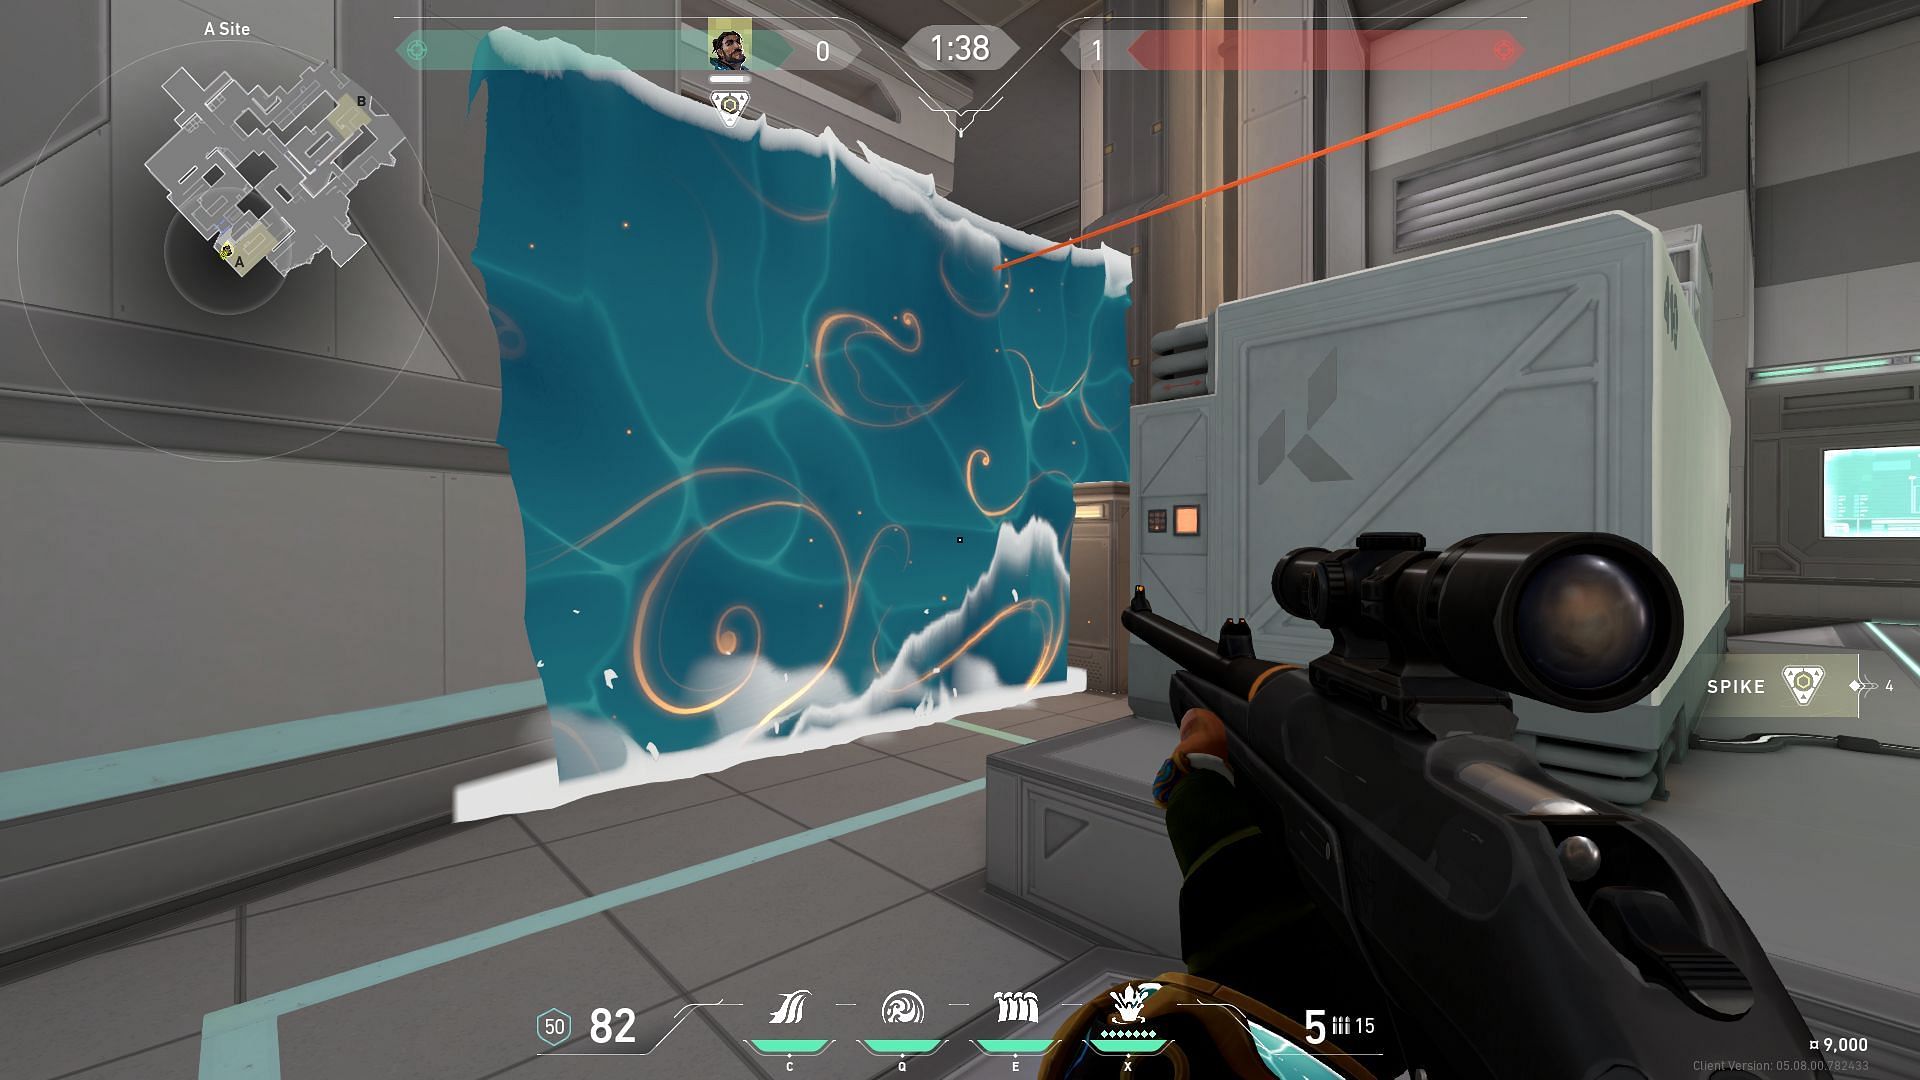
Upon reaching the marked area, the Cascade can cover defenders from angles like pipes, nests, and belts.
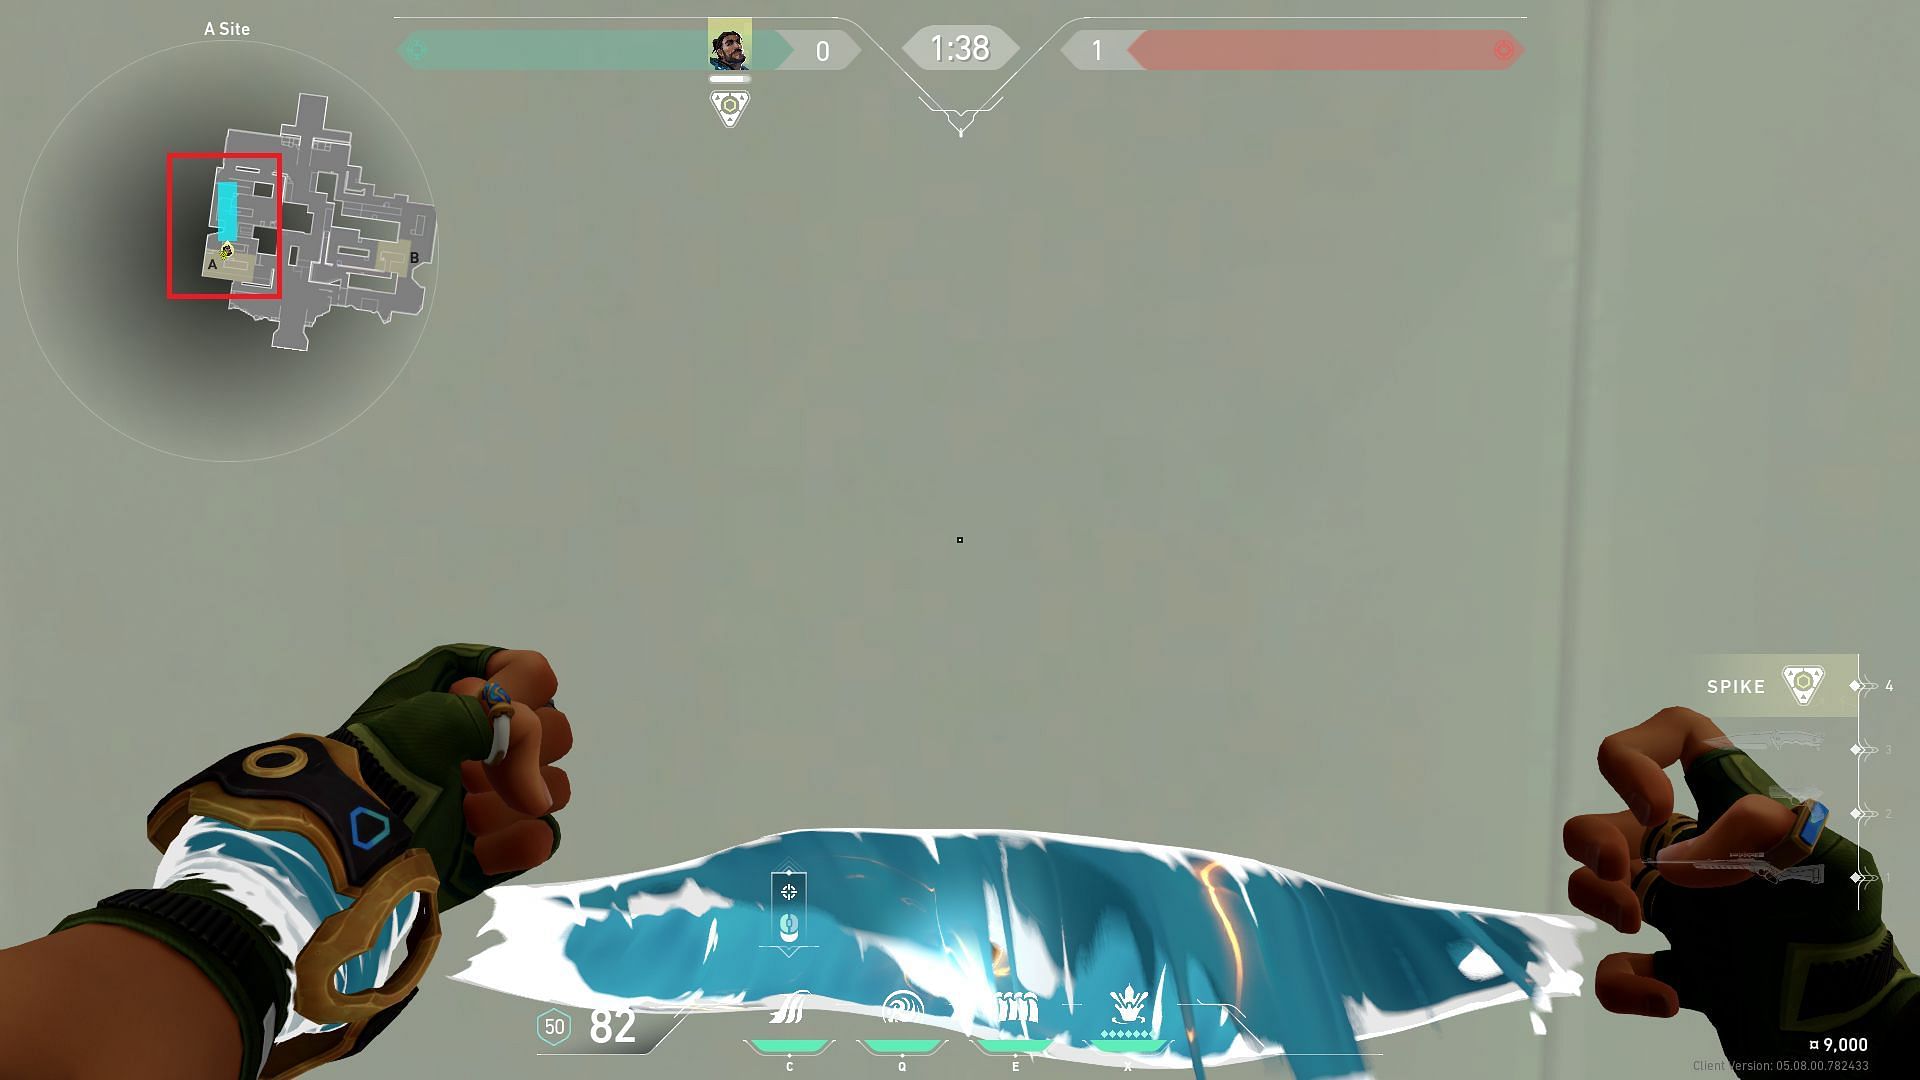
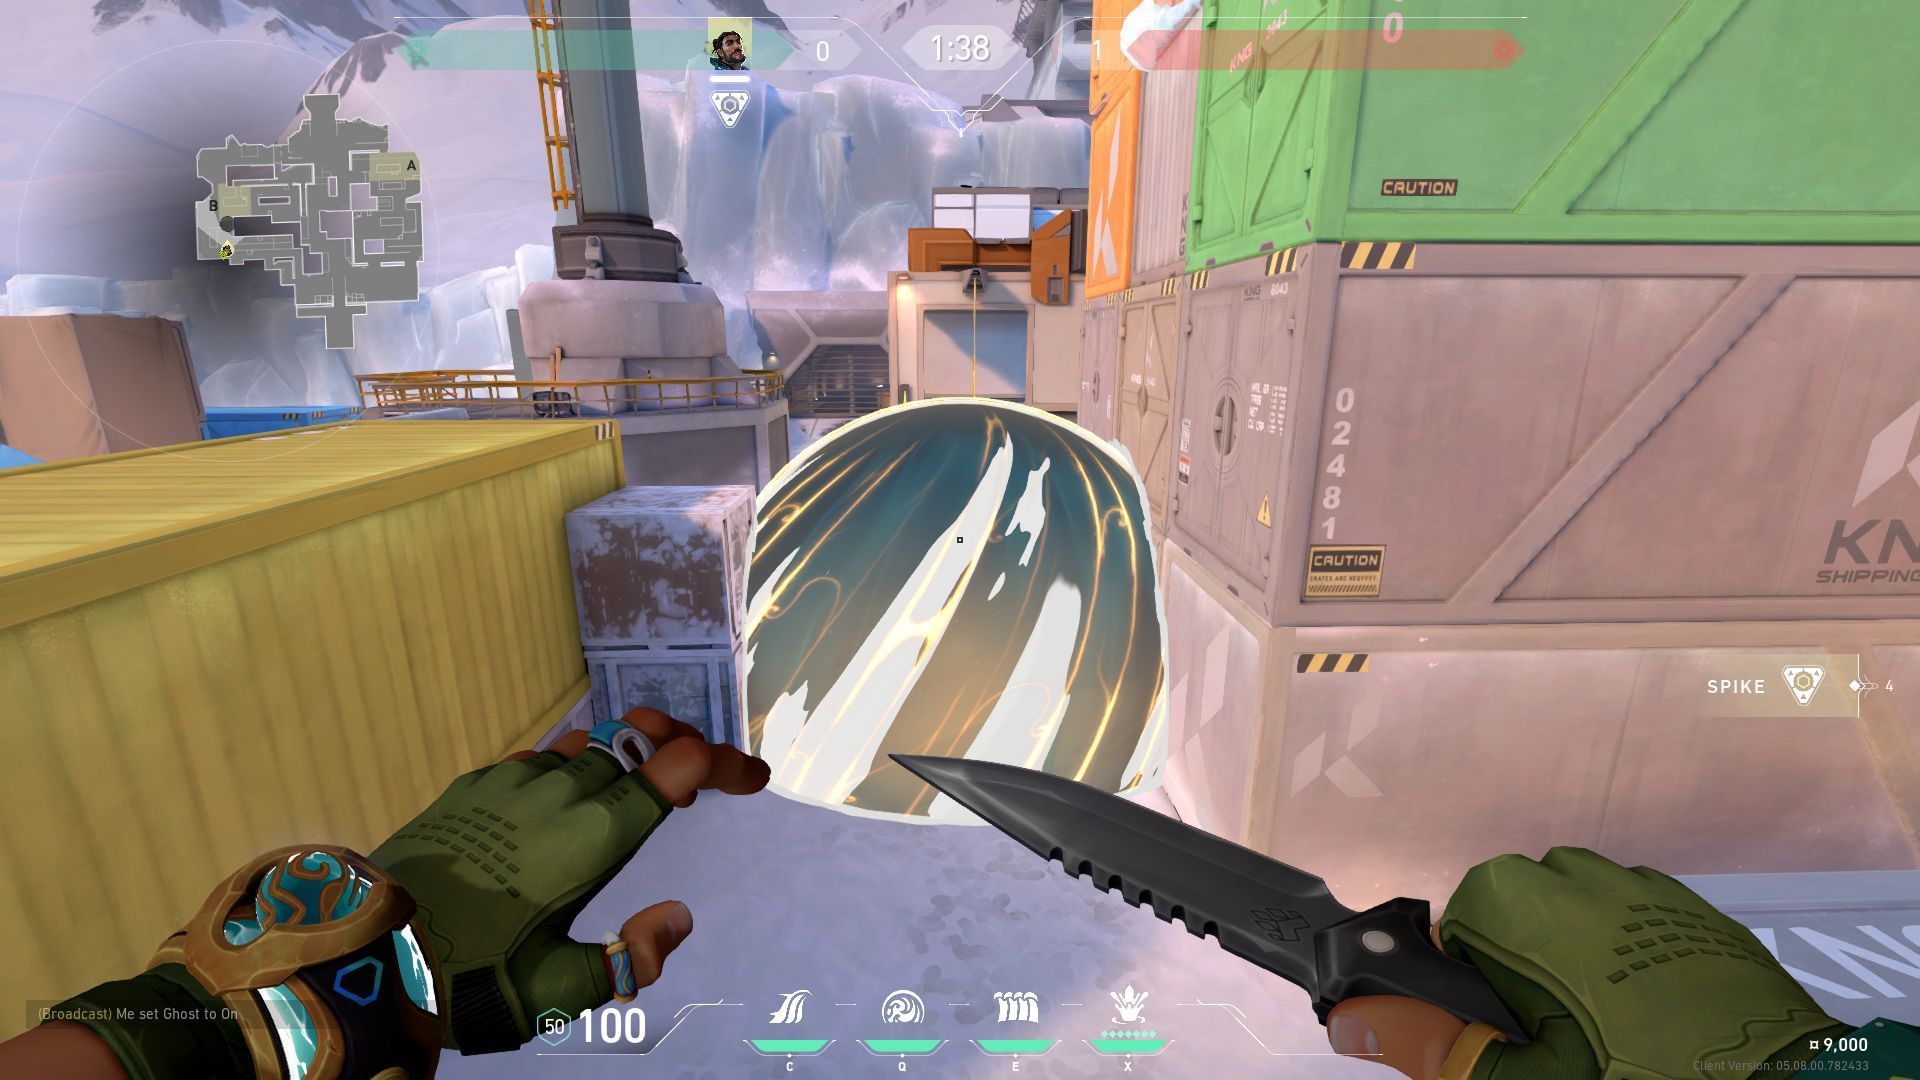
B-site safe push Cascade
Use the Cascade to safely push B-main while covering the team from the Yellow box. The Cascade can be aligned safely with the mini-map to reach the Yellow container.
Any enemy holding a long angle with an Operator will be forced to leave, as there will be no vision of the attackers.
Cove
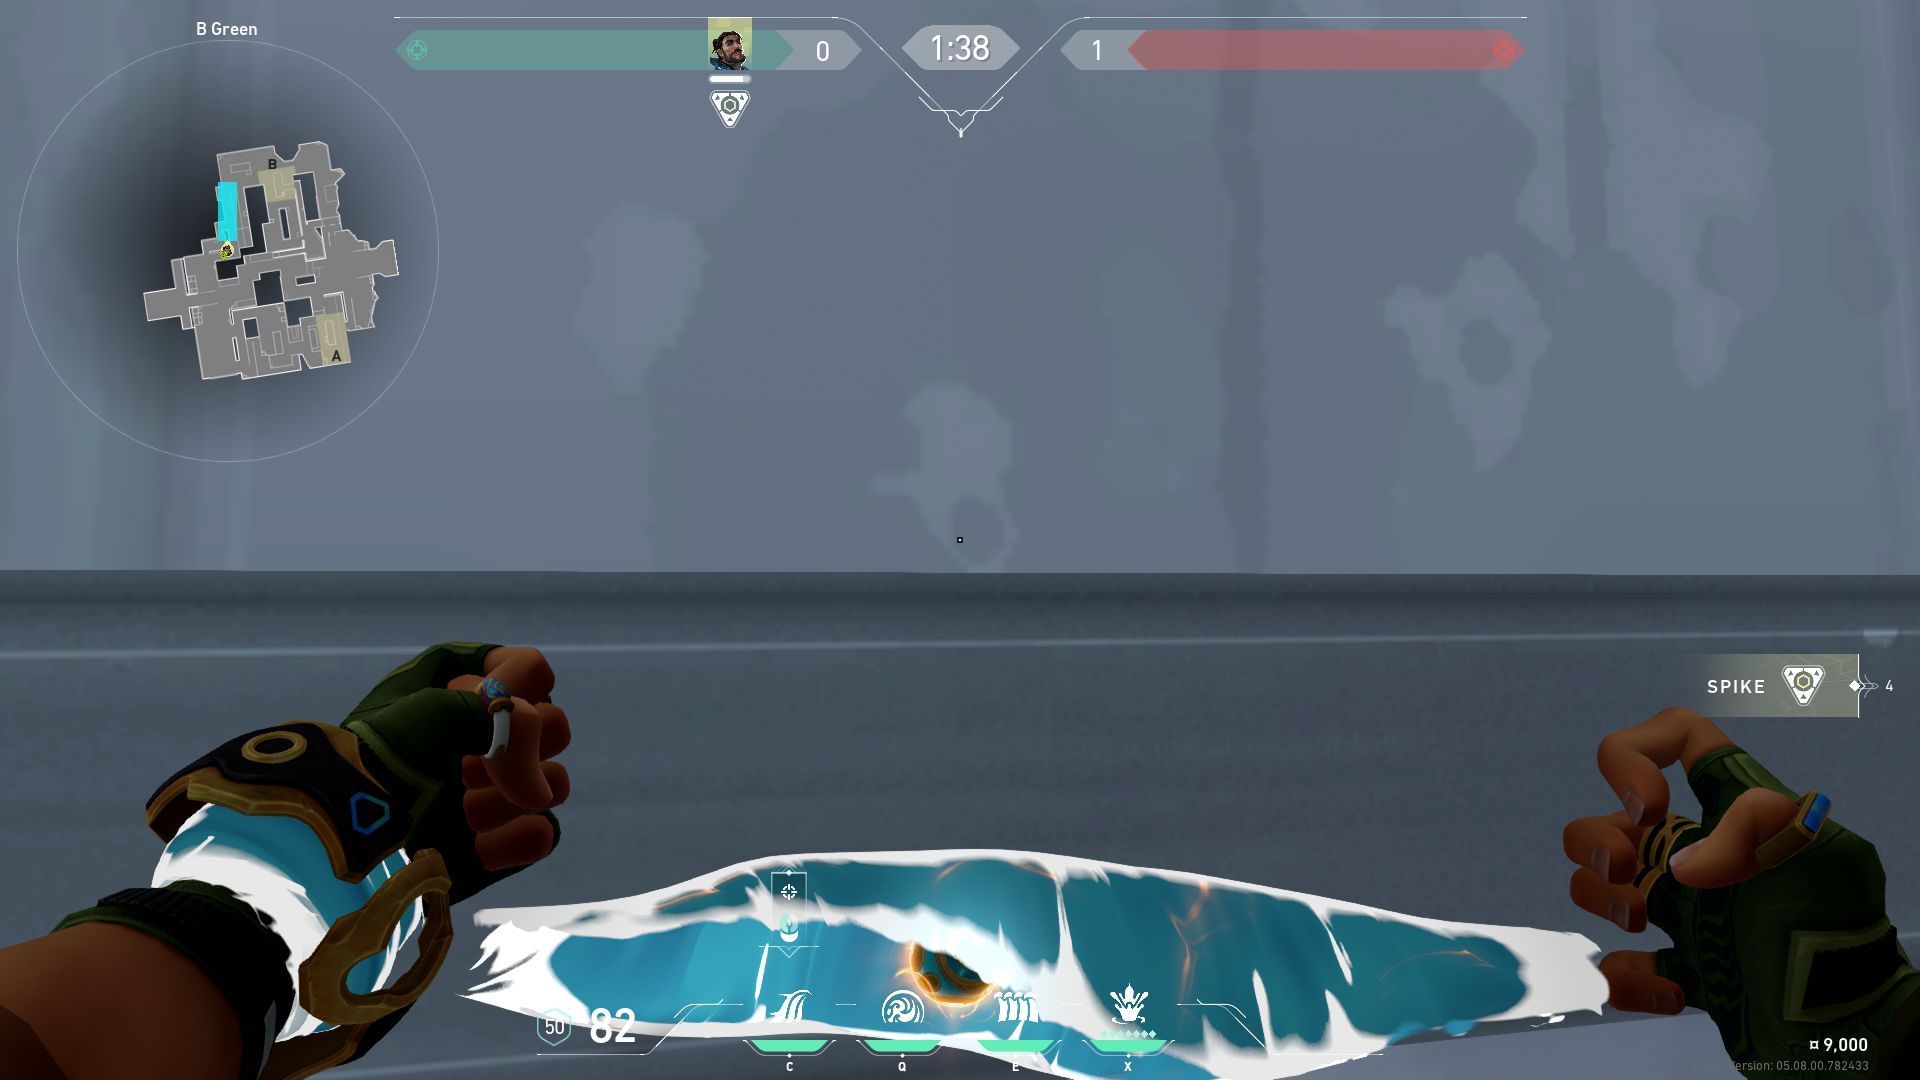
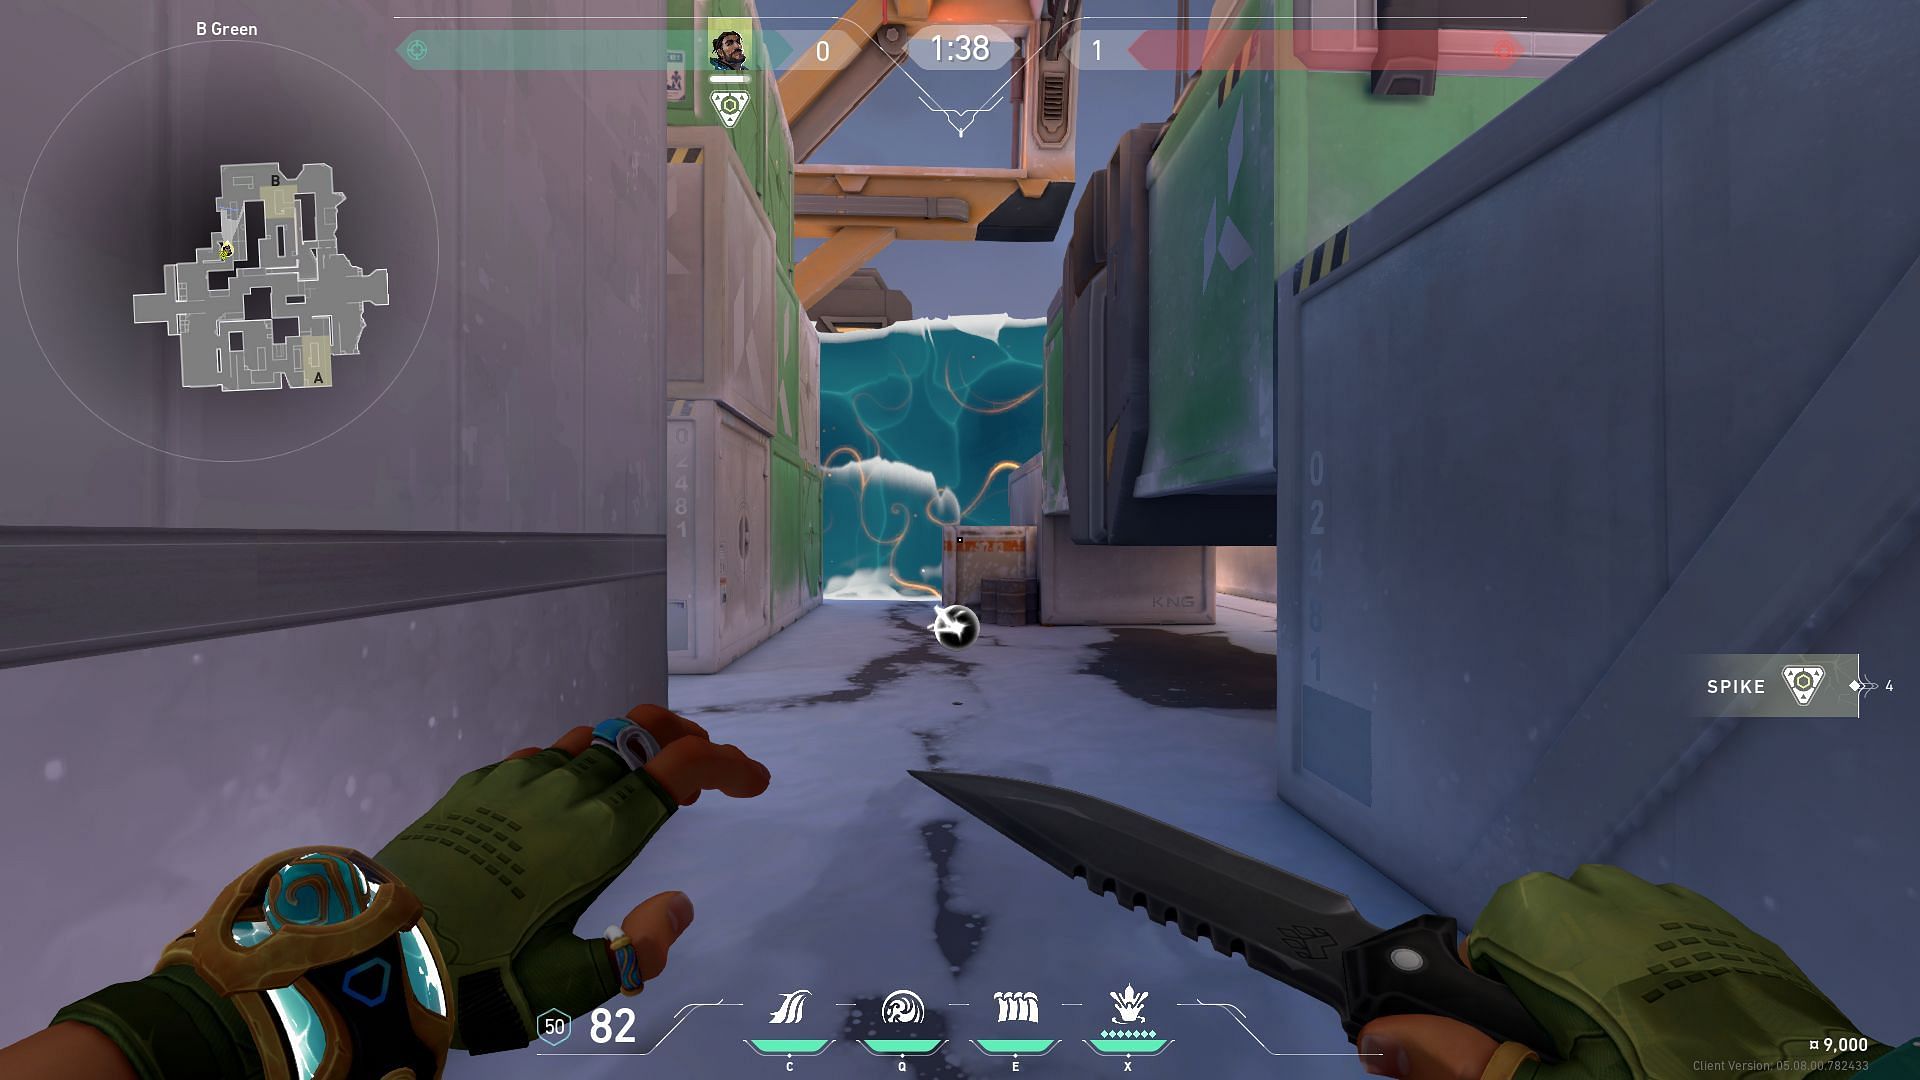
Mid to boiler Cove
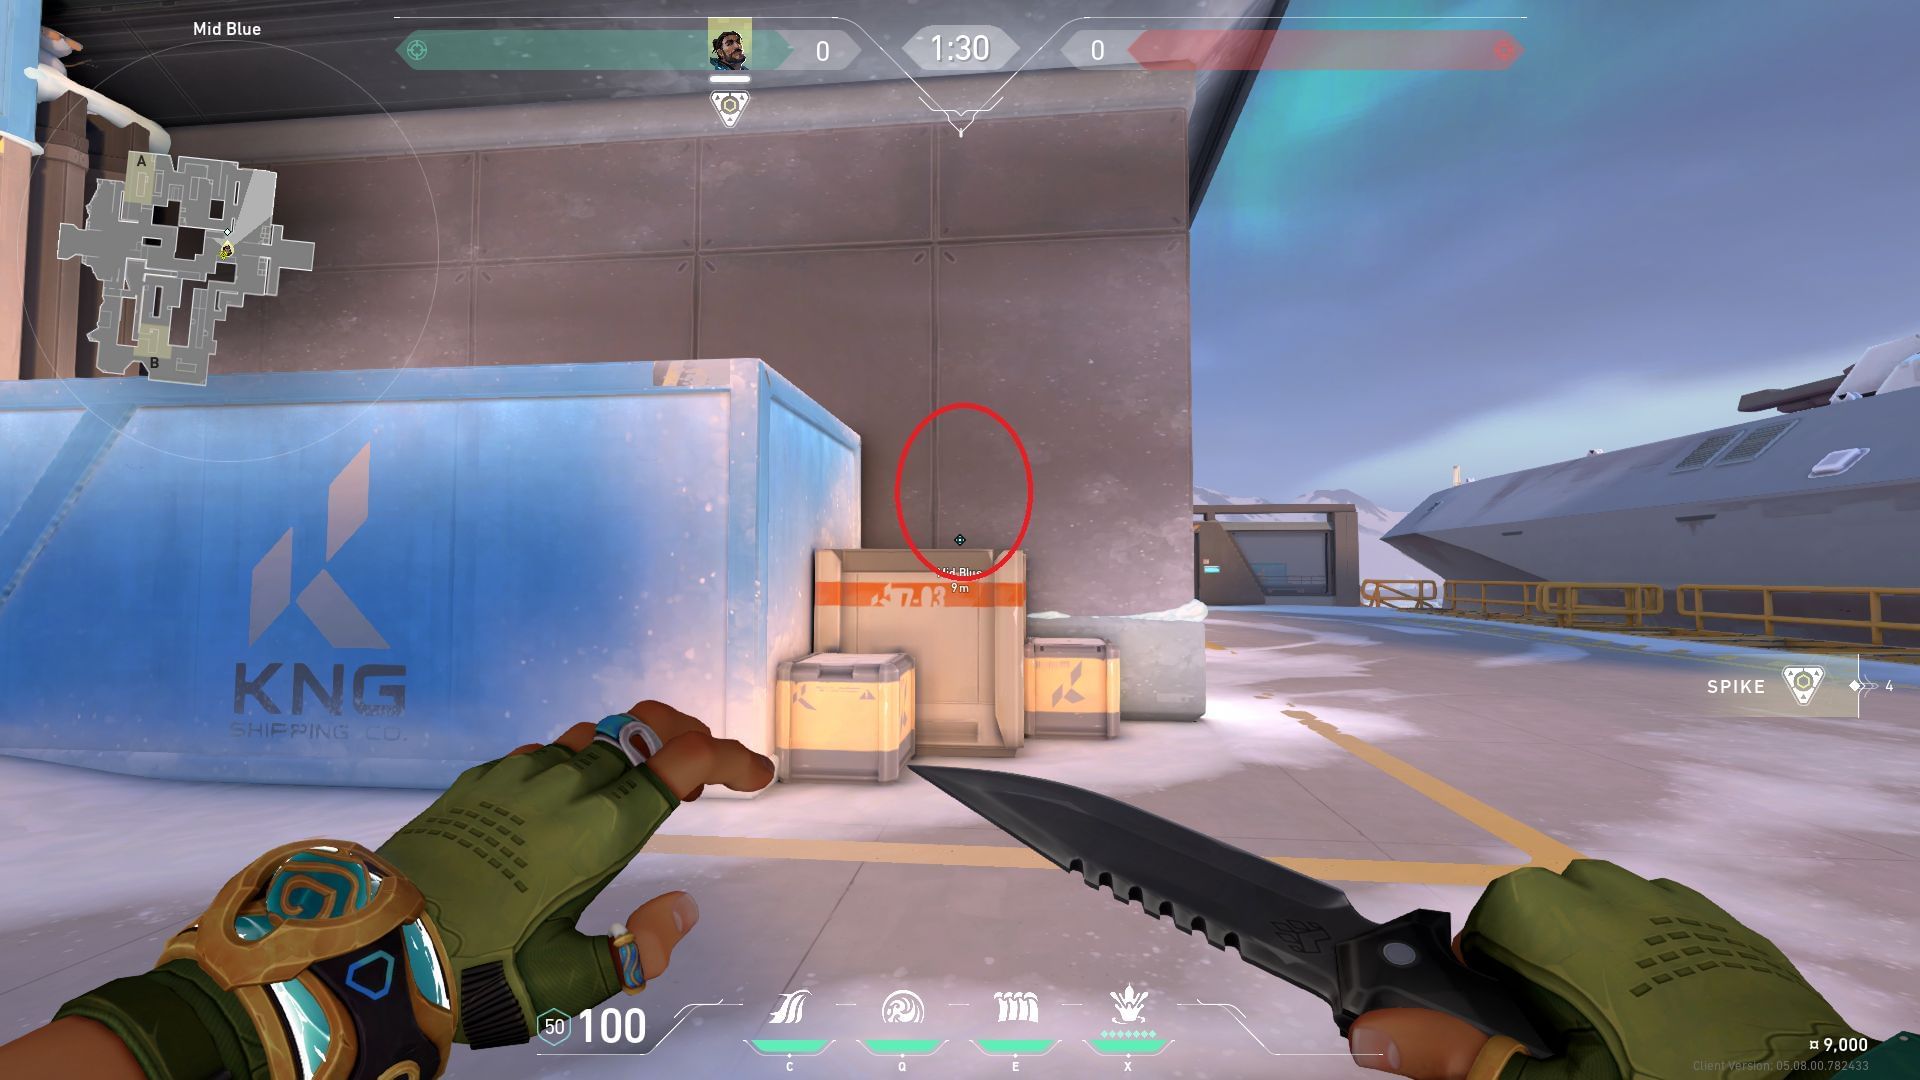
Find the boxes attached to a Blue container on the mid-section to perform this lineup.
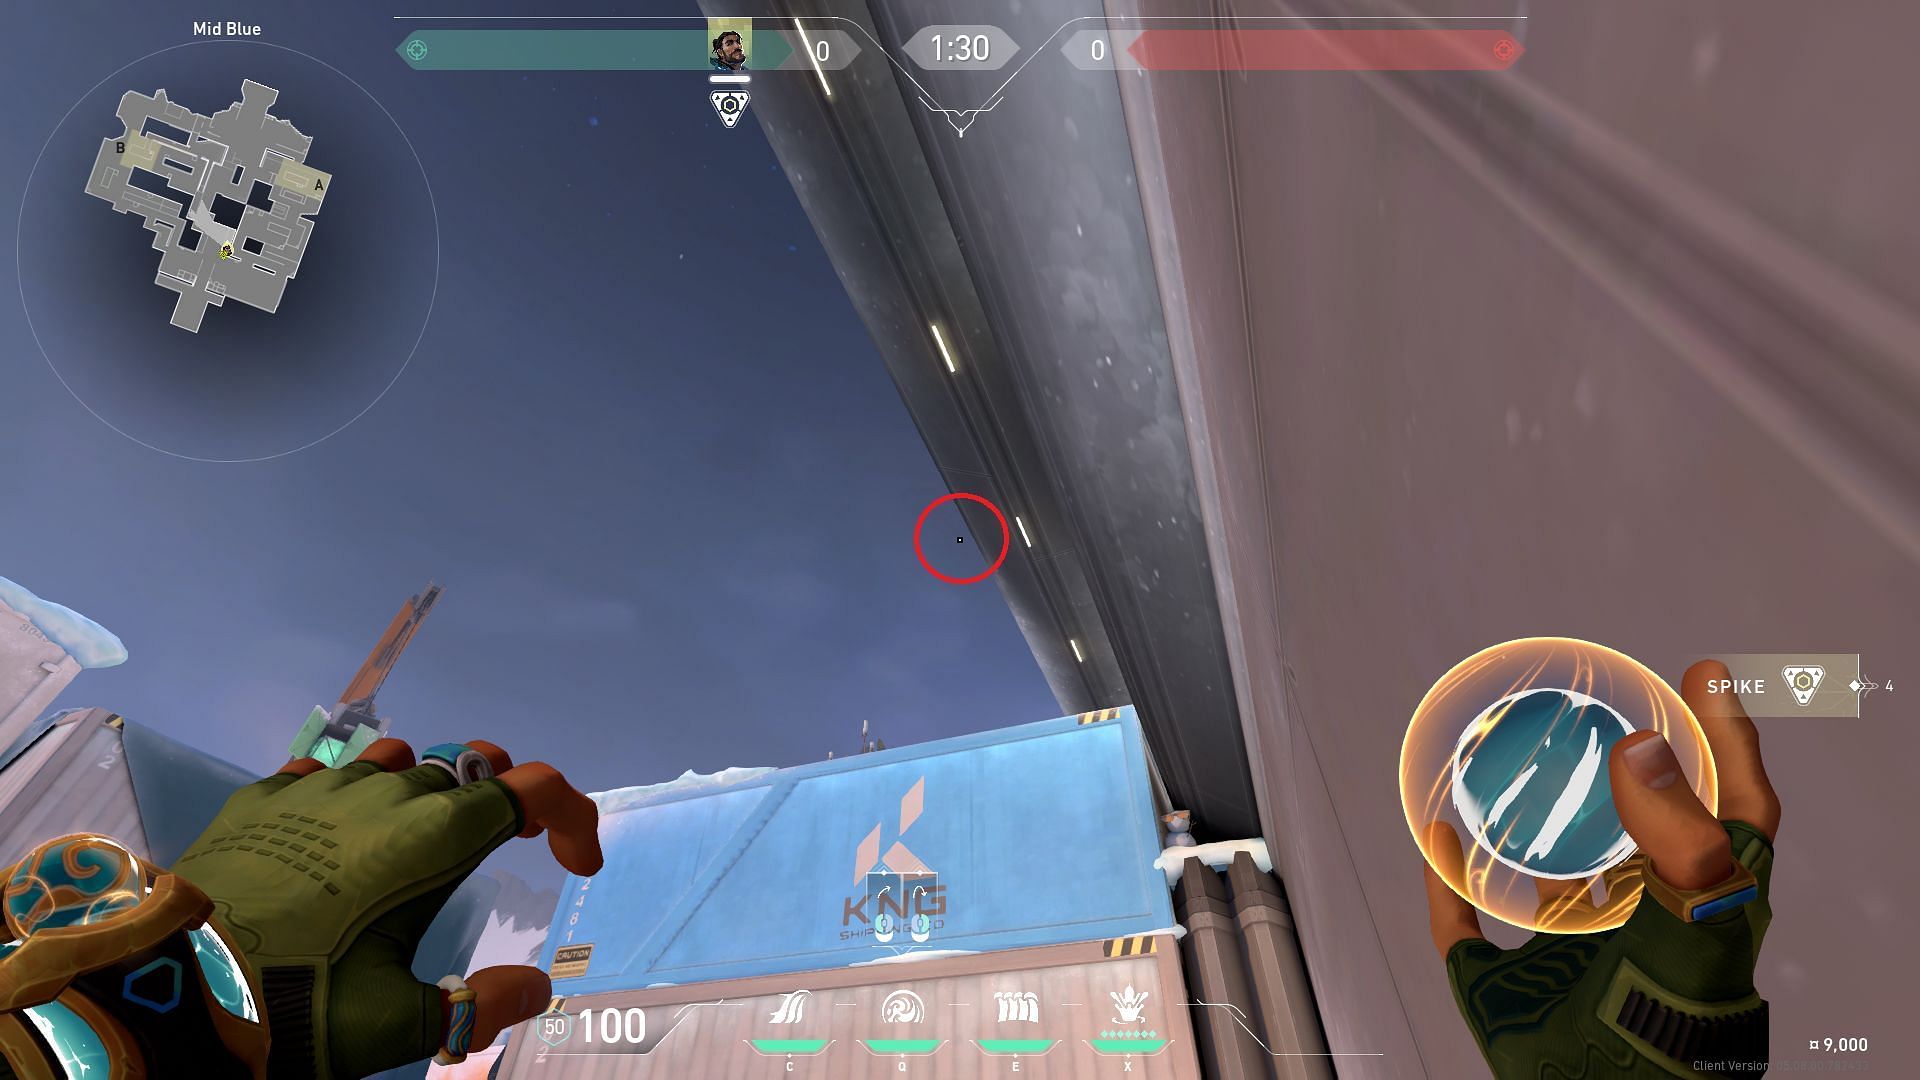
Once reached, align the Cove with the third light, looking above and slightly to the left.
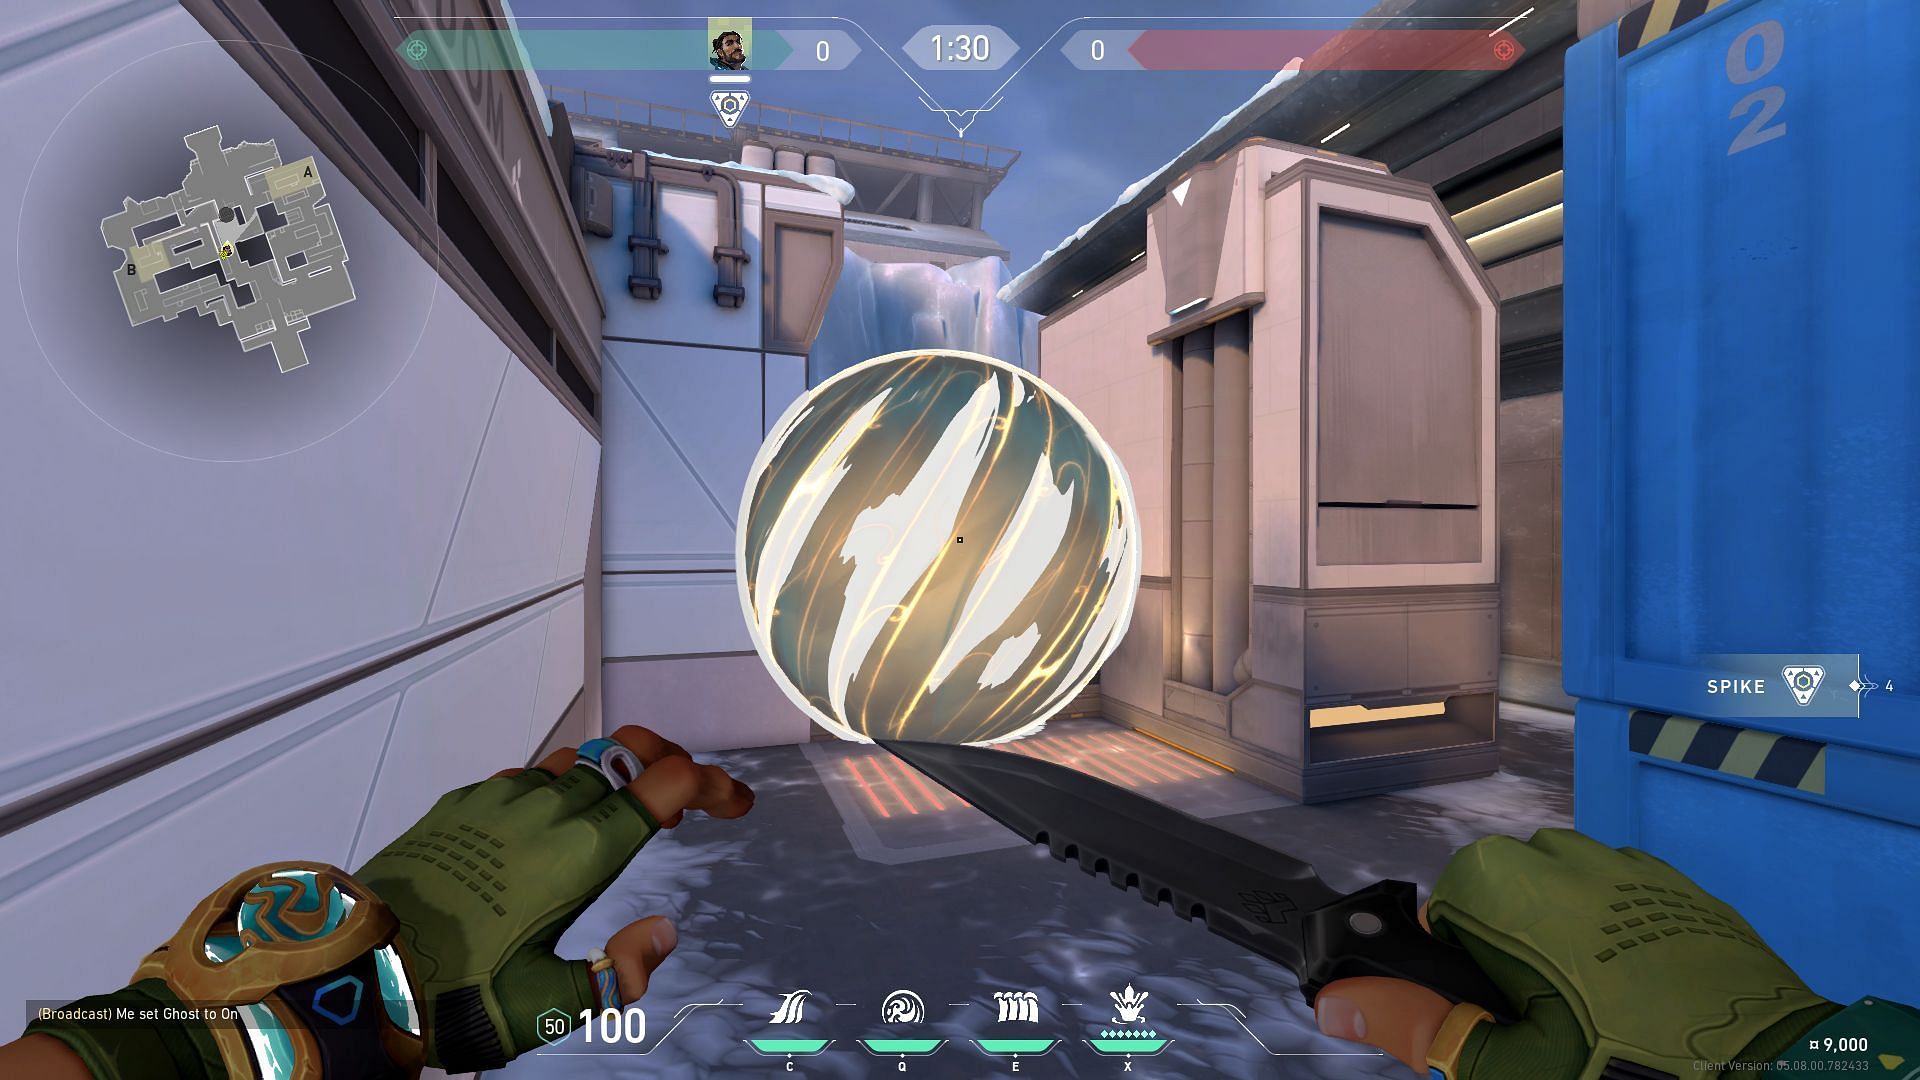
No jump throw is required for this Cove lineup, and the smoke will land directly on the Boiler.
B-garage to default plant Cove

Perform this Cove lineup right outside the Garage section of the B-site. Upon reaching the line shown in the image, look up.
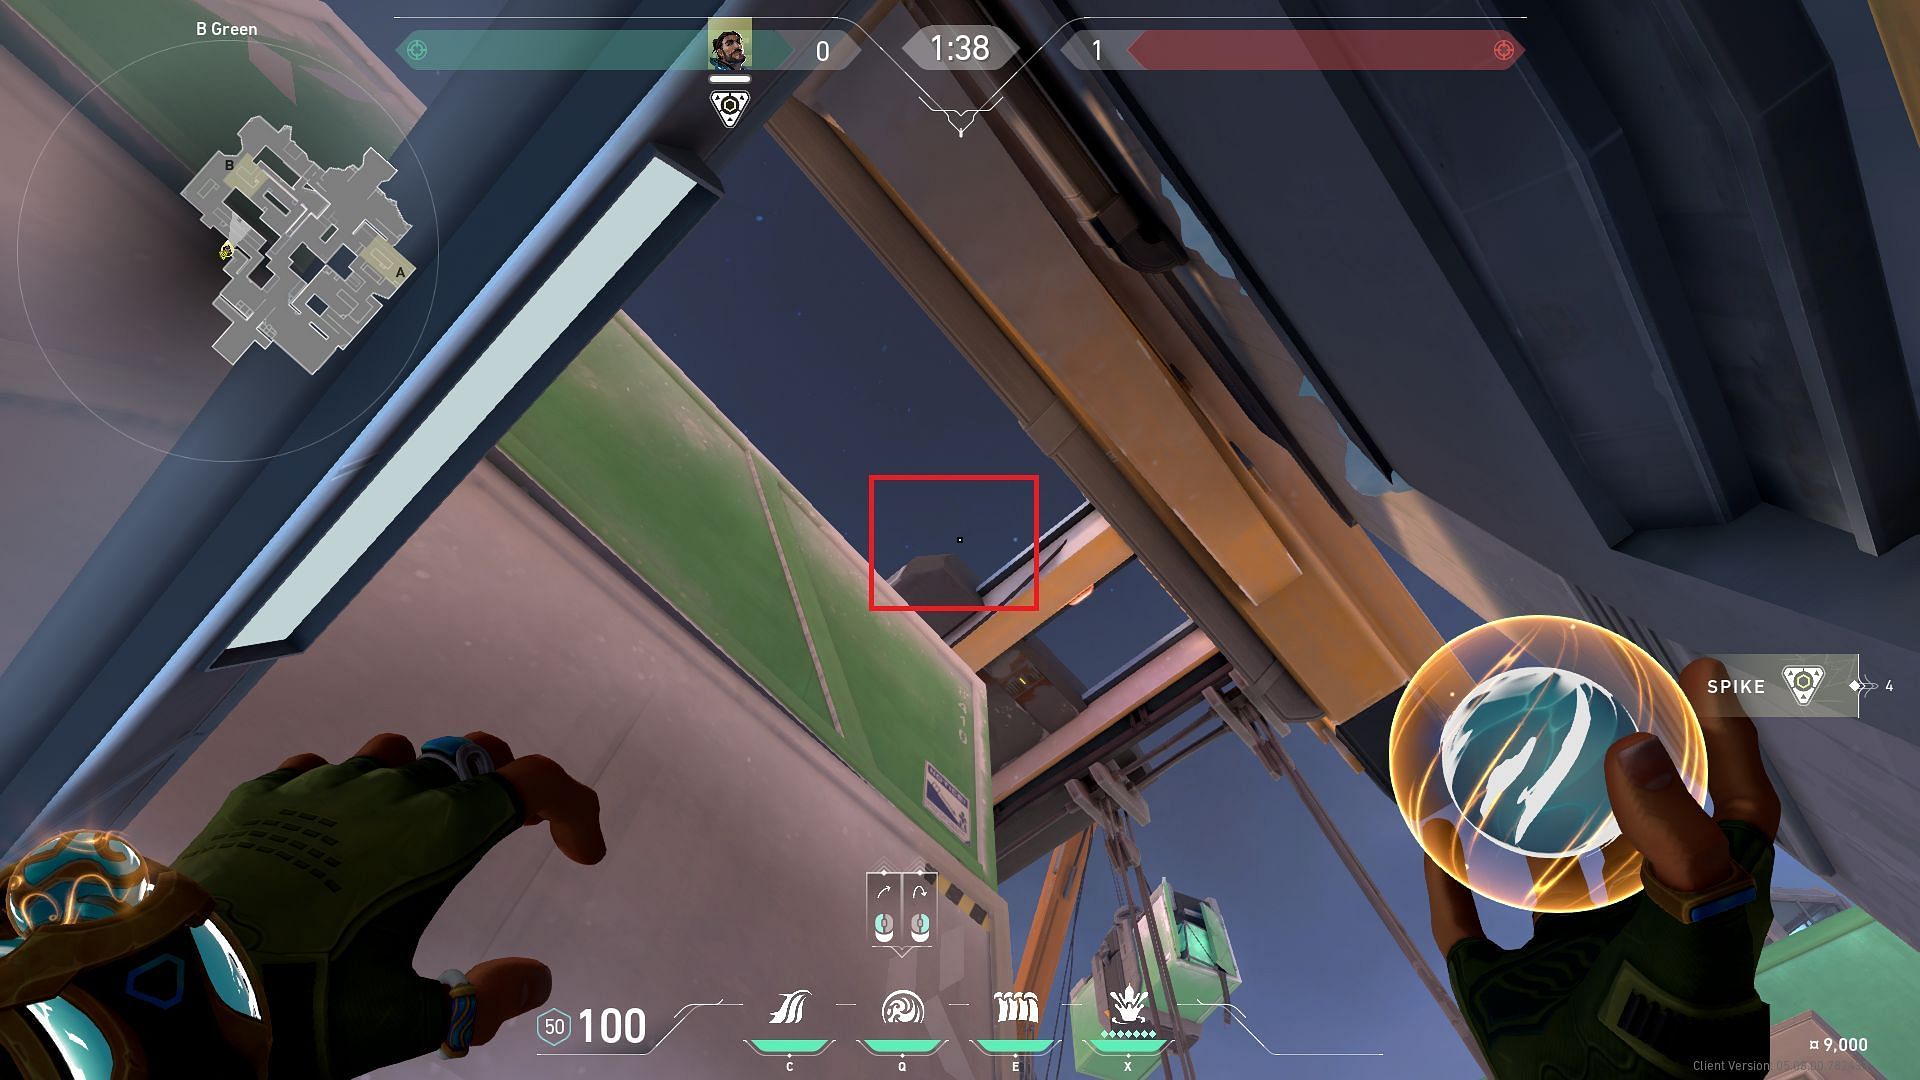
Align crosshairs on the diamond-shaped exterior of the Crane and then perform a jump throw.
The Cove will land in the default plant spot for B-site, protecting the attackers from bullets when planting.
Players should stay tuned for upcoming map-based guide articles related to Harbor. It has only been a week since his release, and gamers are already developing plenty of tricks to make the most out of the Controller's kit.