
'%20x='0'%20y='0'%20height='100%25'%20width='100%25'%20%0A%20%20%20%20%20%20%20%20%20%20xlink%3Ahref='data:image/jpg;base64,/9j/2wBDAAYEBQYFBAYGBQYHBwYIChAKCgkJChQODwwQFxQYGBcUFhYaHSUfGhsjHBYWICwgIyYnKSopGR8tMC0oMCUoKSj/2wBDAQcHBwoIChMKChMoGhYaKCgoKCgoKCgoKCgoKCgoKCgoKCgoKCgoKCgoKCgoKCgoKCgoKCgoKCgoKCgoKCgoKCj/wgARCAAHAAoDASIAAhEBAxEB/8QAFgABAQEAAAAAAAAAAAAAAAAAAAIE/8QAFQEBAQAAAAAAAAAAAAAAAAAABAX/2gAMAwEAAhADEAAAAJwCZ3//xAAfEAACAQMFAQAAAAAAAAAAAAABAgQAAxEFEhQhMRP/2gAIAQEAAT8Aic++YPI1hounOHZlRWuAAIcAeH3FXZUz6PiaxGT3vbuv/8QAGBEAAgMAAAAAAAAAAAAAAAAAAREAAgP/2gAIAQIBAT8AviE2Z//EABgRAAIDAAAAAAAAAAAAAAAAAAECAARB/9oACAEDAQE/AEtMcE//2Q=='%3E%3C/image%3E%3C/svg%3E)
Breeze is the biggest map in Valorant. It is known for its hidden paths and numerous routes. The map has two bomb sites that are far apart from each other, which means you have to travel a lot to get from one point to another. Due to the map's large structure, certain Agents are more suited to playing on it, and one of them is Yoru.
Yoru can teleport from one location to another, regardless of the distance, in just a second. Mastering this ability is key to securing important rounds.
Note: Some aspects of this article are subjective and solely reflect the opinions of the writer

What are the best Yoru teleport lineups on Breeze in Valorant?
In Valorant, utilizing lineups strategically is a key factor in maximizing the impact of Agents' abilities. These lineups require careful placement and exploitation of each Agent's unique ability to achieve optimal efficiency. This ultimately opens up opportunities for team success. Therefore, mastering lineups is crucial for elevating gameplay in this title.
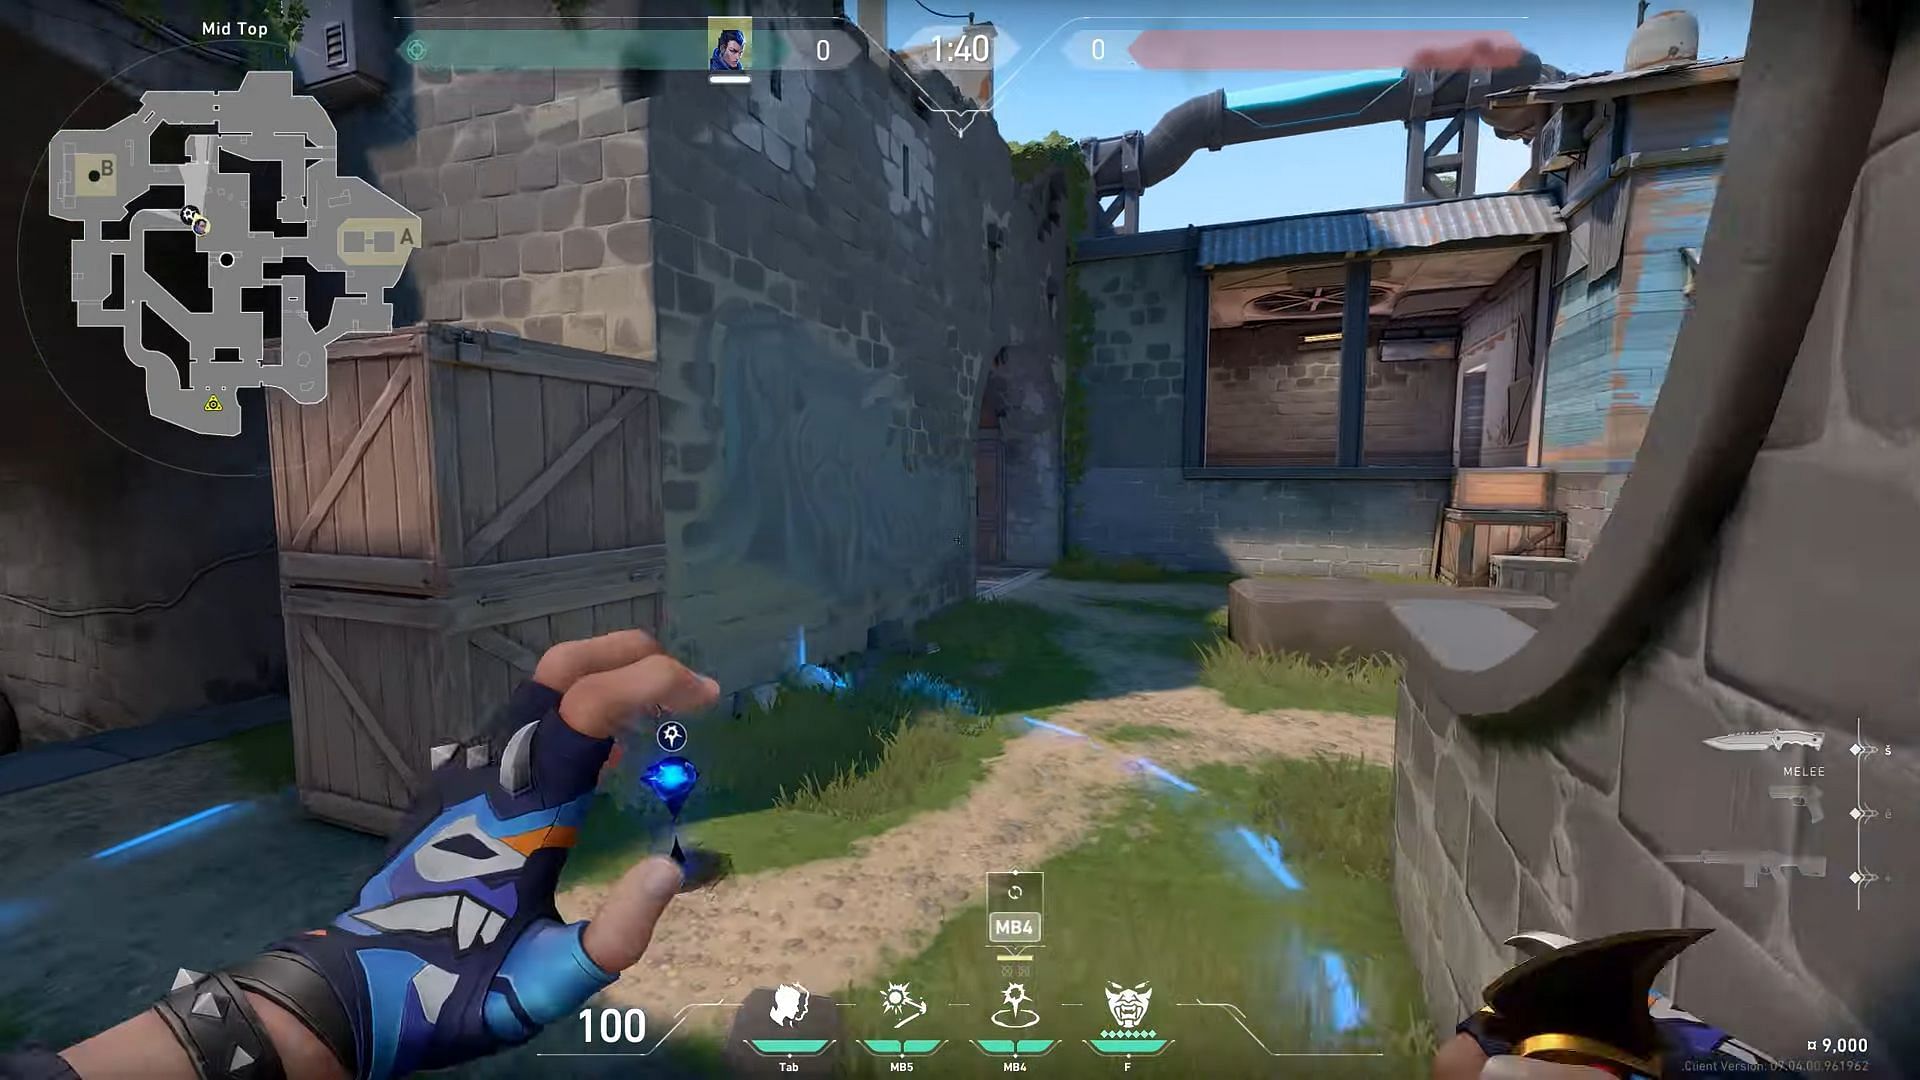
1) Attacking Mid-Bottom lineup (Mid Bottom to A back site)
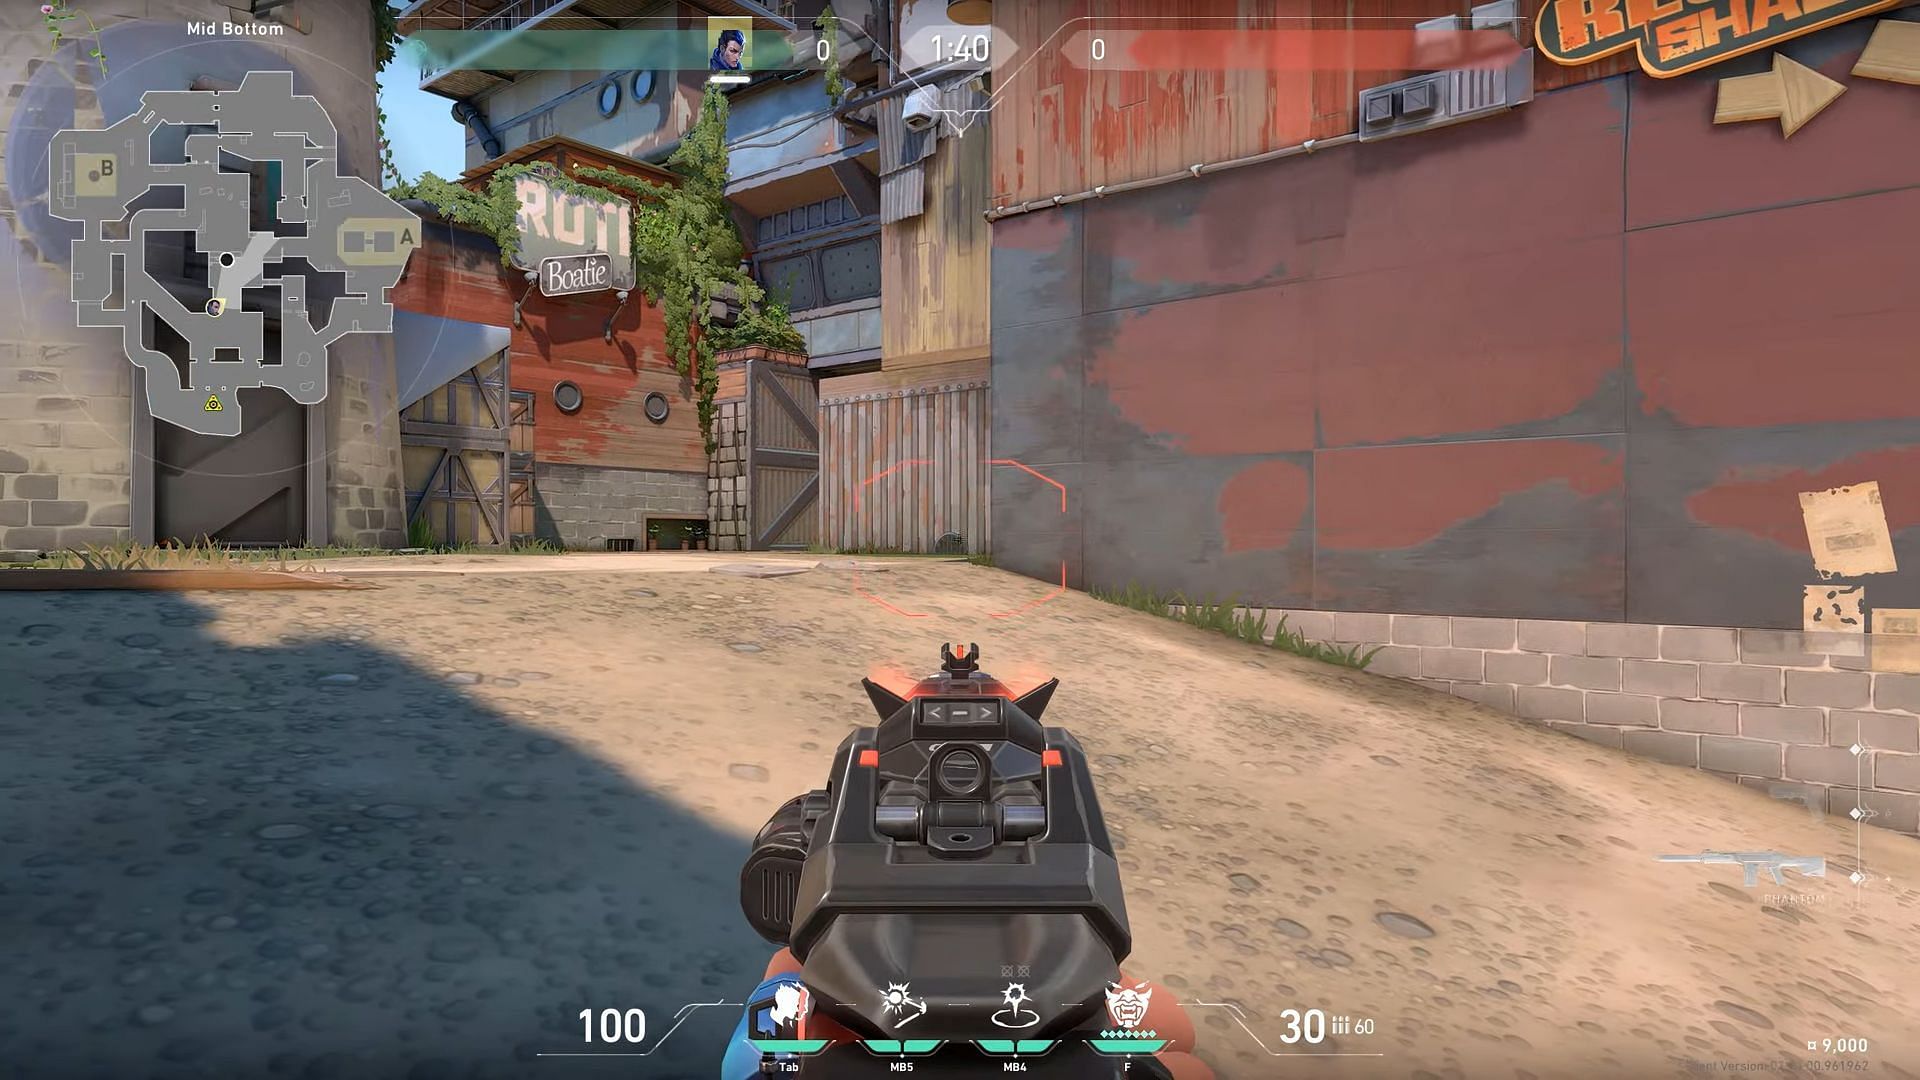
For this lineup, you have to begin from the left side of the Mid Bottom Place and place the crosshair precisely at the designated point, as shown in the image above. You can then use the Gatecrash ability. Release it to allow it to travel to the A back site and then teleport. This is a useful tactic to catch the enemy team off guard and execute the site easily.
2) Attacking Mid Bottom lineup (Mid Bottom to A Bridge)
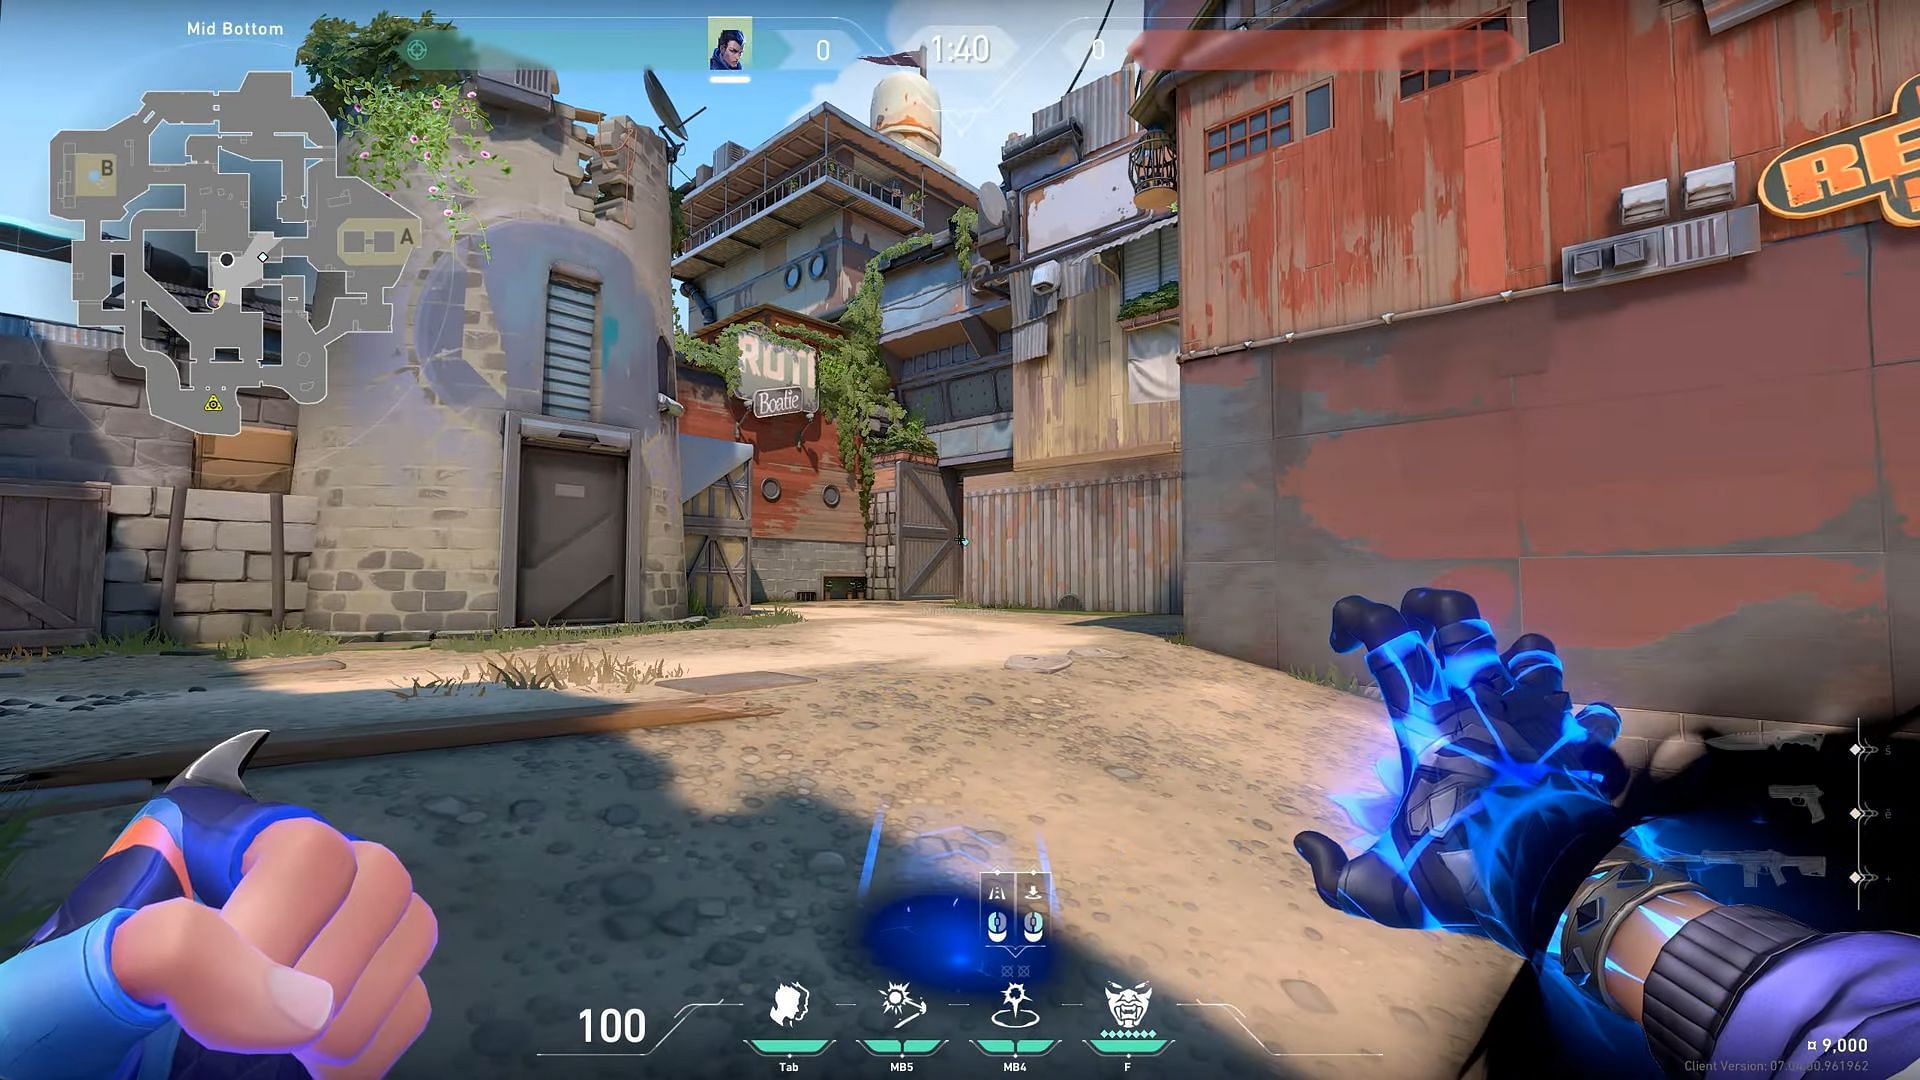
To use this lineup successfully, you should stand behind the wall in the Mid Bottom area and align the crosshair with the point shown in the image above. Then, you should use the Gatecrash ability, which will take you close to the A Bridge area. After doing this, you can teleport and kill enemies who may be rotating or hiding at the back side of A.
3) Attacking A main lineup (A main to A back site)
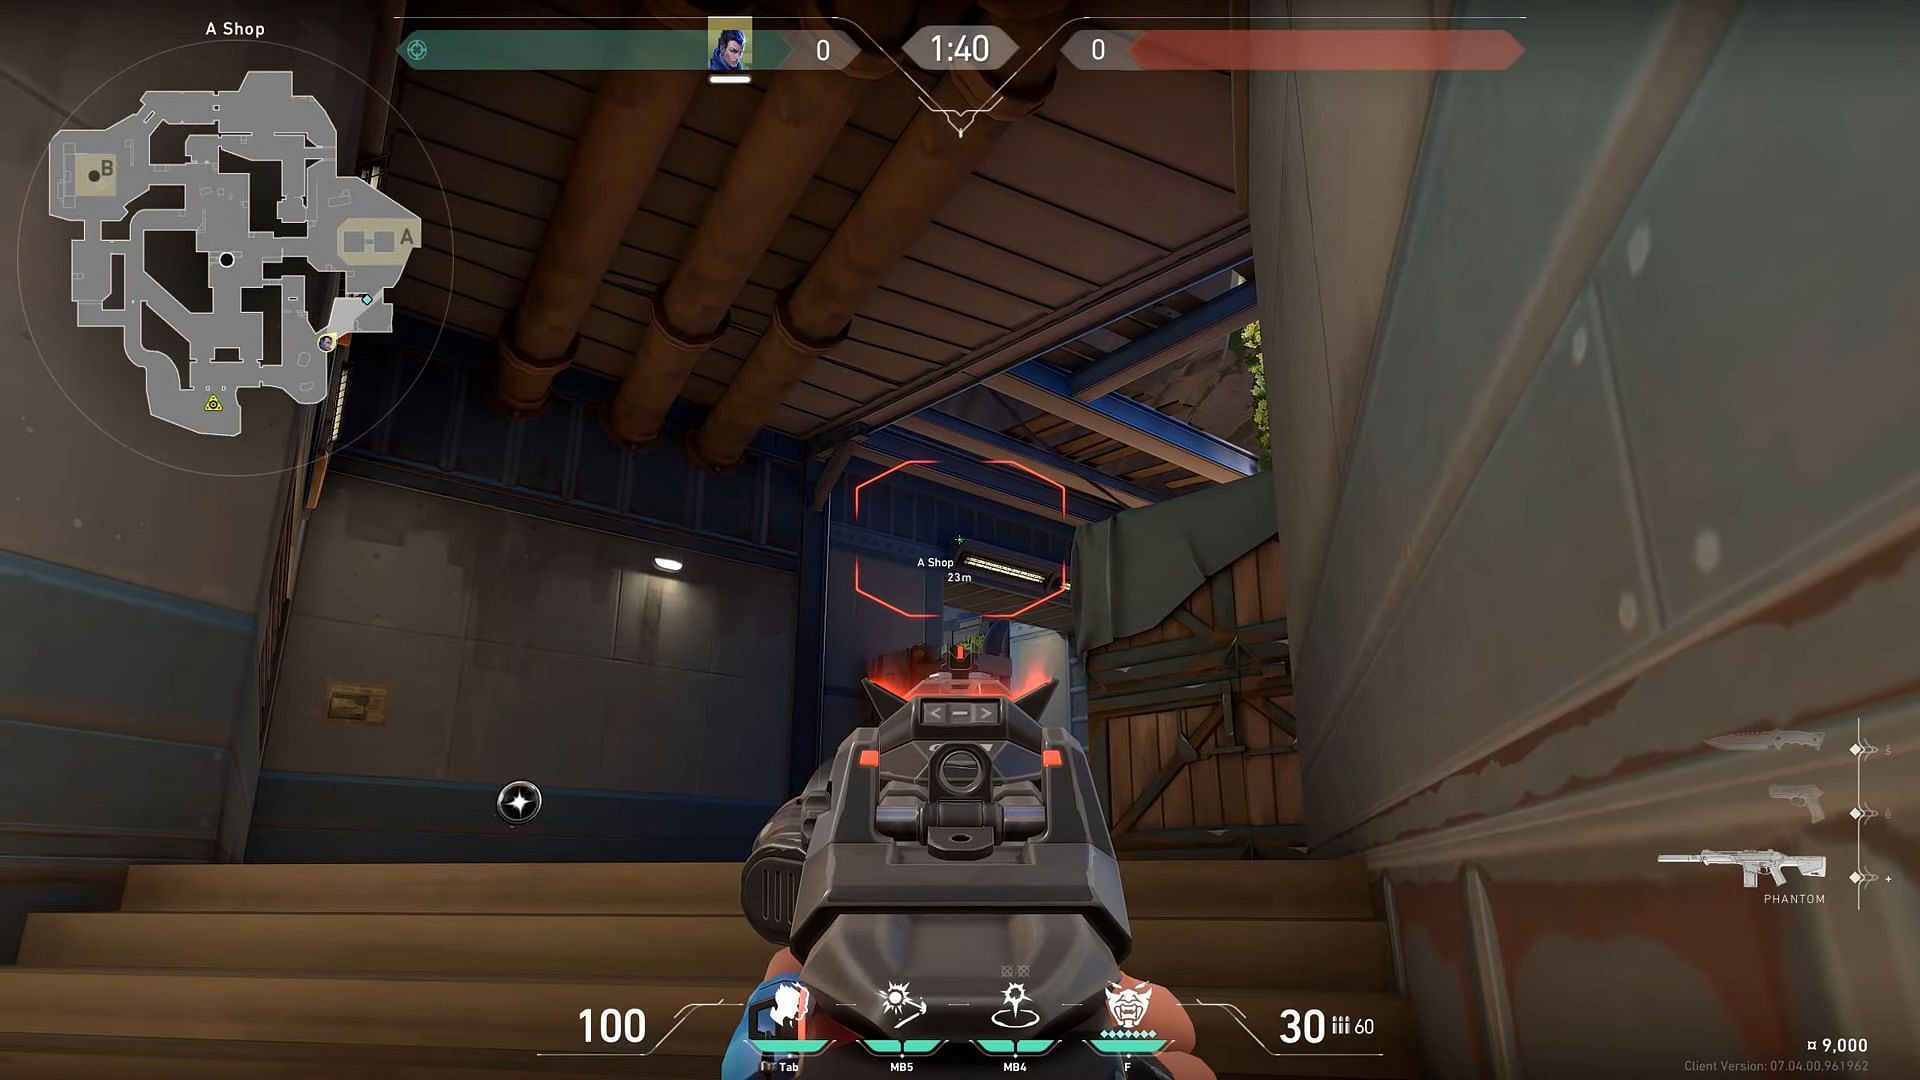
In this lineup, you need to stand at the A main and place your crosshair on the designated point, as shown in the image above.
You should then activate the Gatecrash ability and allow it to travel to the back site before using the Blindside ability to teleport. This lineup is particularly useful when entering the A site.
4) Attacking A main lineup (A main to A Bridge)
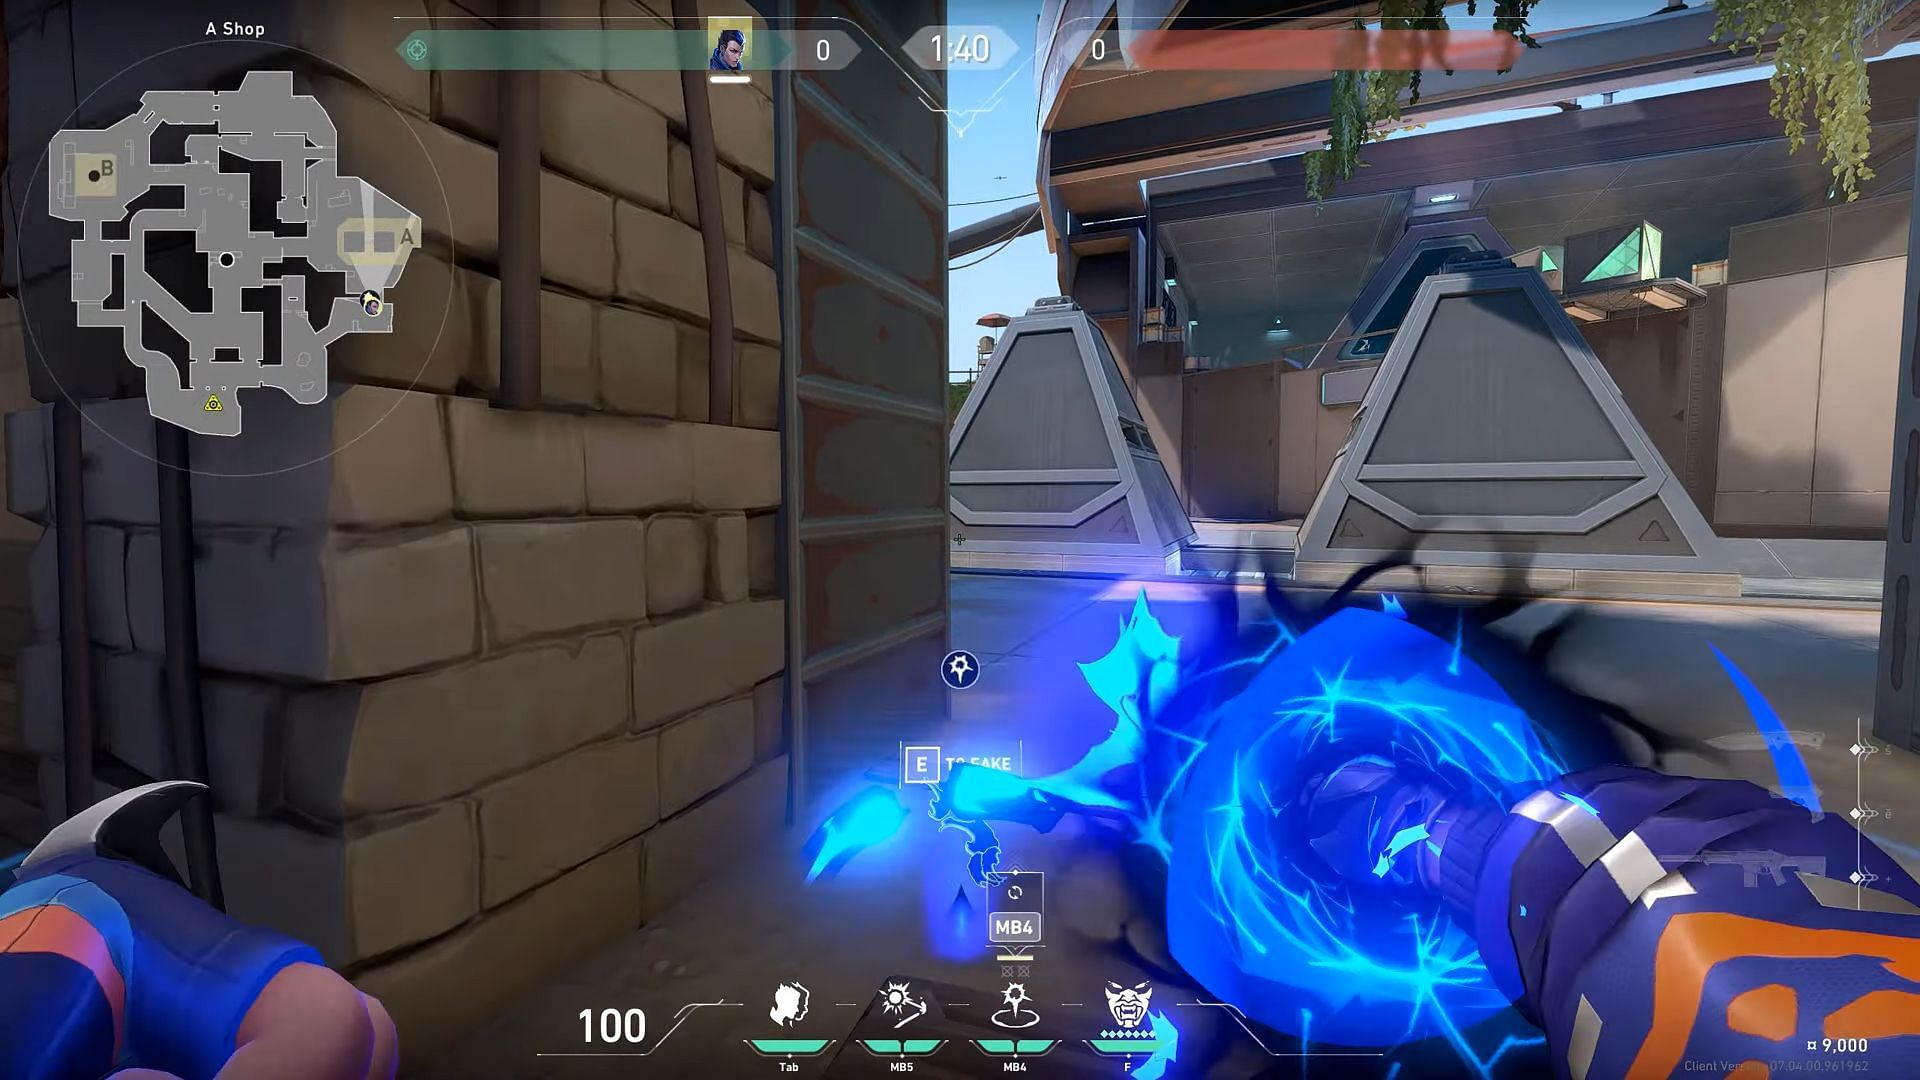
To use this lineup, you must position your crosshair to the point indicated in the image above. Then, you can use the Gatecrash ability and allow it to travel to A Bridge before teleporting.
This lineup is particularly helpful for post-plant situations, as it enables the player to surprise enemies with a backstab.
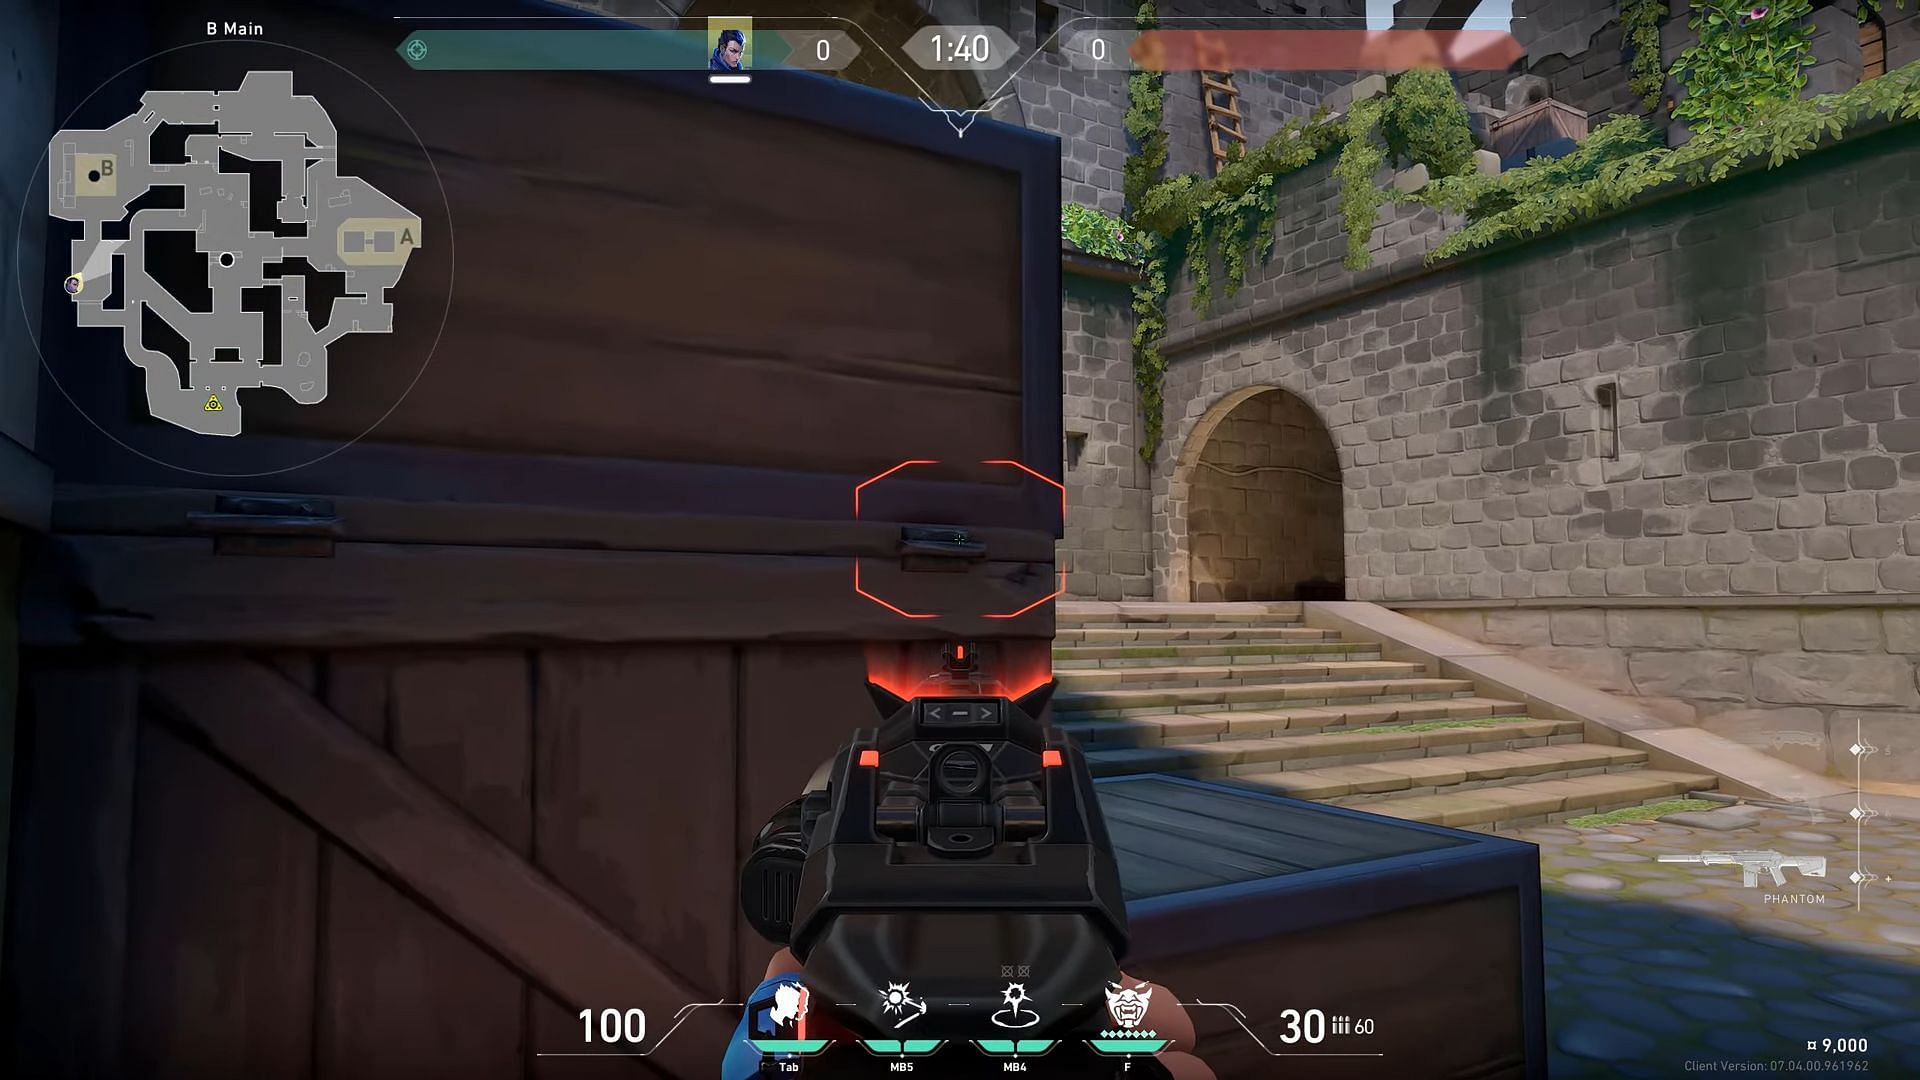
5) Attacking B tunnel lineup (B tunnel to B back site)
For this lineup, you need to stand at the B elbow in front of the boxes. Then, place the crosshair on the point shown in the image. After that, use the Gatecrash ability. It will pass through the B tunnel and reach the B back site.
This lineup is useful for entering the B site and applying pressure from both the B main and B back site.
6) Attacking B Main lineup (B Main to Defender side Arches)
For this lineup, you need to stand behind the B Main boxes and place the crosshair on the hinge of the box, as shown in the image above.
Then, use the Gatecrash ability. The ability will go through the B wall and to the Defender side Arches. Once it's there, you can teleport.
7) Defending B site lineup (B site to A-main)
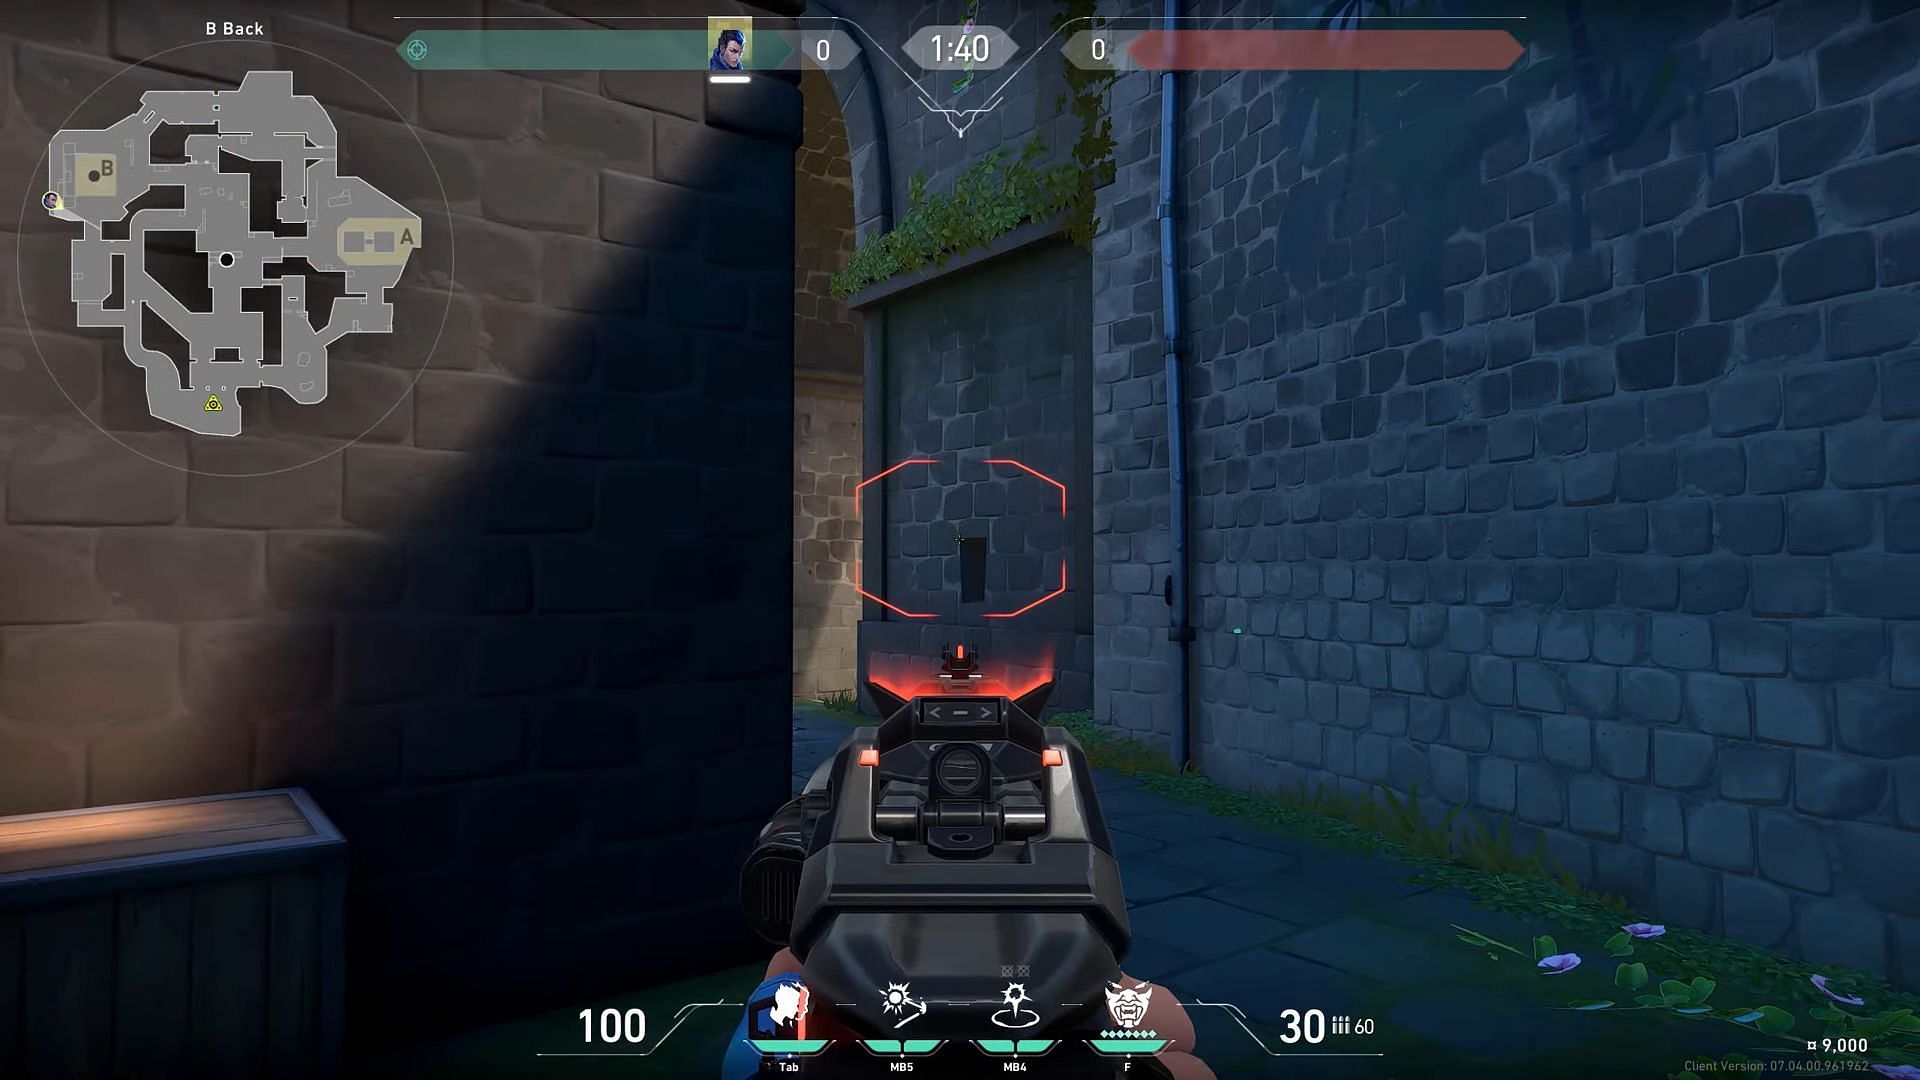
To successfully implement this lineup, you need to stand at B back near the boxes. Then, place the crosshair on the point shown in the above image. After that, simply use the Gatecrash ability, and it will go all the way to A-main.
This lineup is particularly useful for backstabbing the opponent team.
8) Defending A site lineup (A site to Defender side Arches)
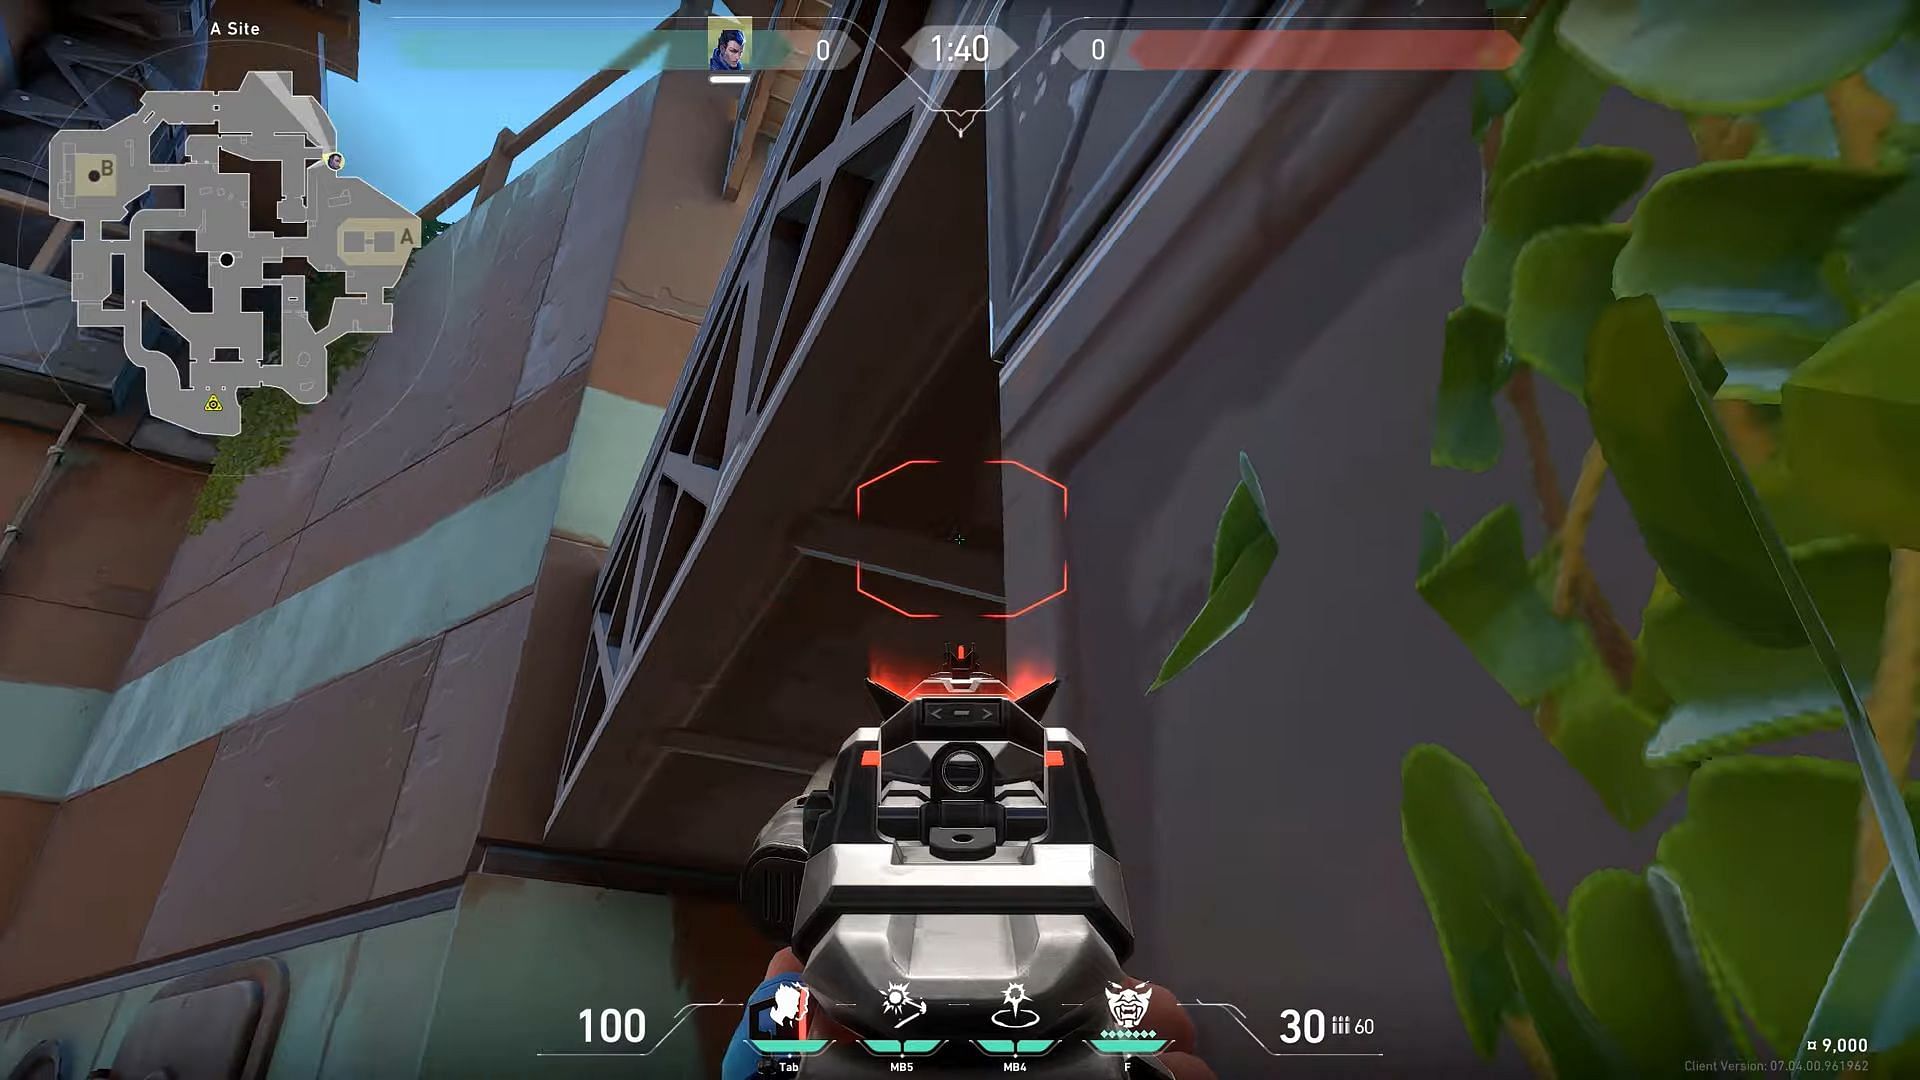
To execute this lineup, you must position yourself at the A bridge and aim the crosshair at the designated point in the image above. Then, use the Gatecrash ability. The crosshair will travel all the way to the spawn and end up at the Defender side Arches, allowing for a quick rotation if the enemy team is not coming to A and going to B site instead.
This lineup is especially useful for making fast rotations.
Check out our other Valorant guides:
Best Yoru Teleport trick on Icebox in Valorant || Best Valorant Deadlock-Breach combos on Ascent || How to check Valorant ranked stats || Valorant Breeze Agent tier list || Valorant Emberclad skin collection weapon price || Valorant Split Agent tier list January 2024