'%20x='0'%20y='0'%20height='100%25'%20width='100%25'%20%0A%20%20%20%20%20%20%20%20%20%20xlink%3Ahref='data:image/jpg;base64,/9j/2wBDAAYEBQYFBAYGBQYHBwYIChAKCgkJChQODwwQFxQYGBcUFhYaHSUfGhsjHBYWICwgIyYnKSopGR8tMC0oMCUoKSj/2wBDAQcHBwoIChMKChMoGhYaKCgoKCgoKCgoKCgoKCgoKCgoKCgoKCgoKCgoKCgoKCgoKCgoKCgoKCgoKCgoKCgoKCj/wgARCAAGAAoDASIAAhEBAxEB/8QAFgABAQEAAAAAAAAAAAAAAAAAAAQG/8QAFQEBAQAAAAAAAAAAAAAAAAAAAgT/2gAMAwEAAhADEAAAAJ8uG7//xAAgEAACAQQBBQAAAAAAAAAAAAABAgMABAUREhMhM1HB/9oACAEBAAE/AIszdvhpMr1SYbFebRsNmZWKr3PsbqbNXryuwlk0WJ8mvlf/xAAXEQADAQAAAAAAAAAAAAAAAAAAAQJB/9oACAECAQE/AFVLT//EABcRAAMBAAAAAAAAAAAAAAAAAAACIjH/2gAIAQMBAT8AatP/2Q=='%3E%3C/image%3E%3C/svg%3E)
Agent 23 in Valorant, Deadlock, is the newest addition to the game and is frankly one of the worst Agents ever released. Deadlock belongs to the Sentinel class, but her utility falls short by a huge margin compared to meta picks like Killjoy and Cypher. This was proved in the recent Valorant Champions 2023 where she was not even picked once in the entire event.
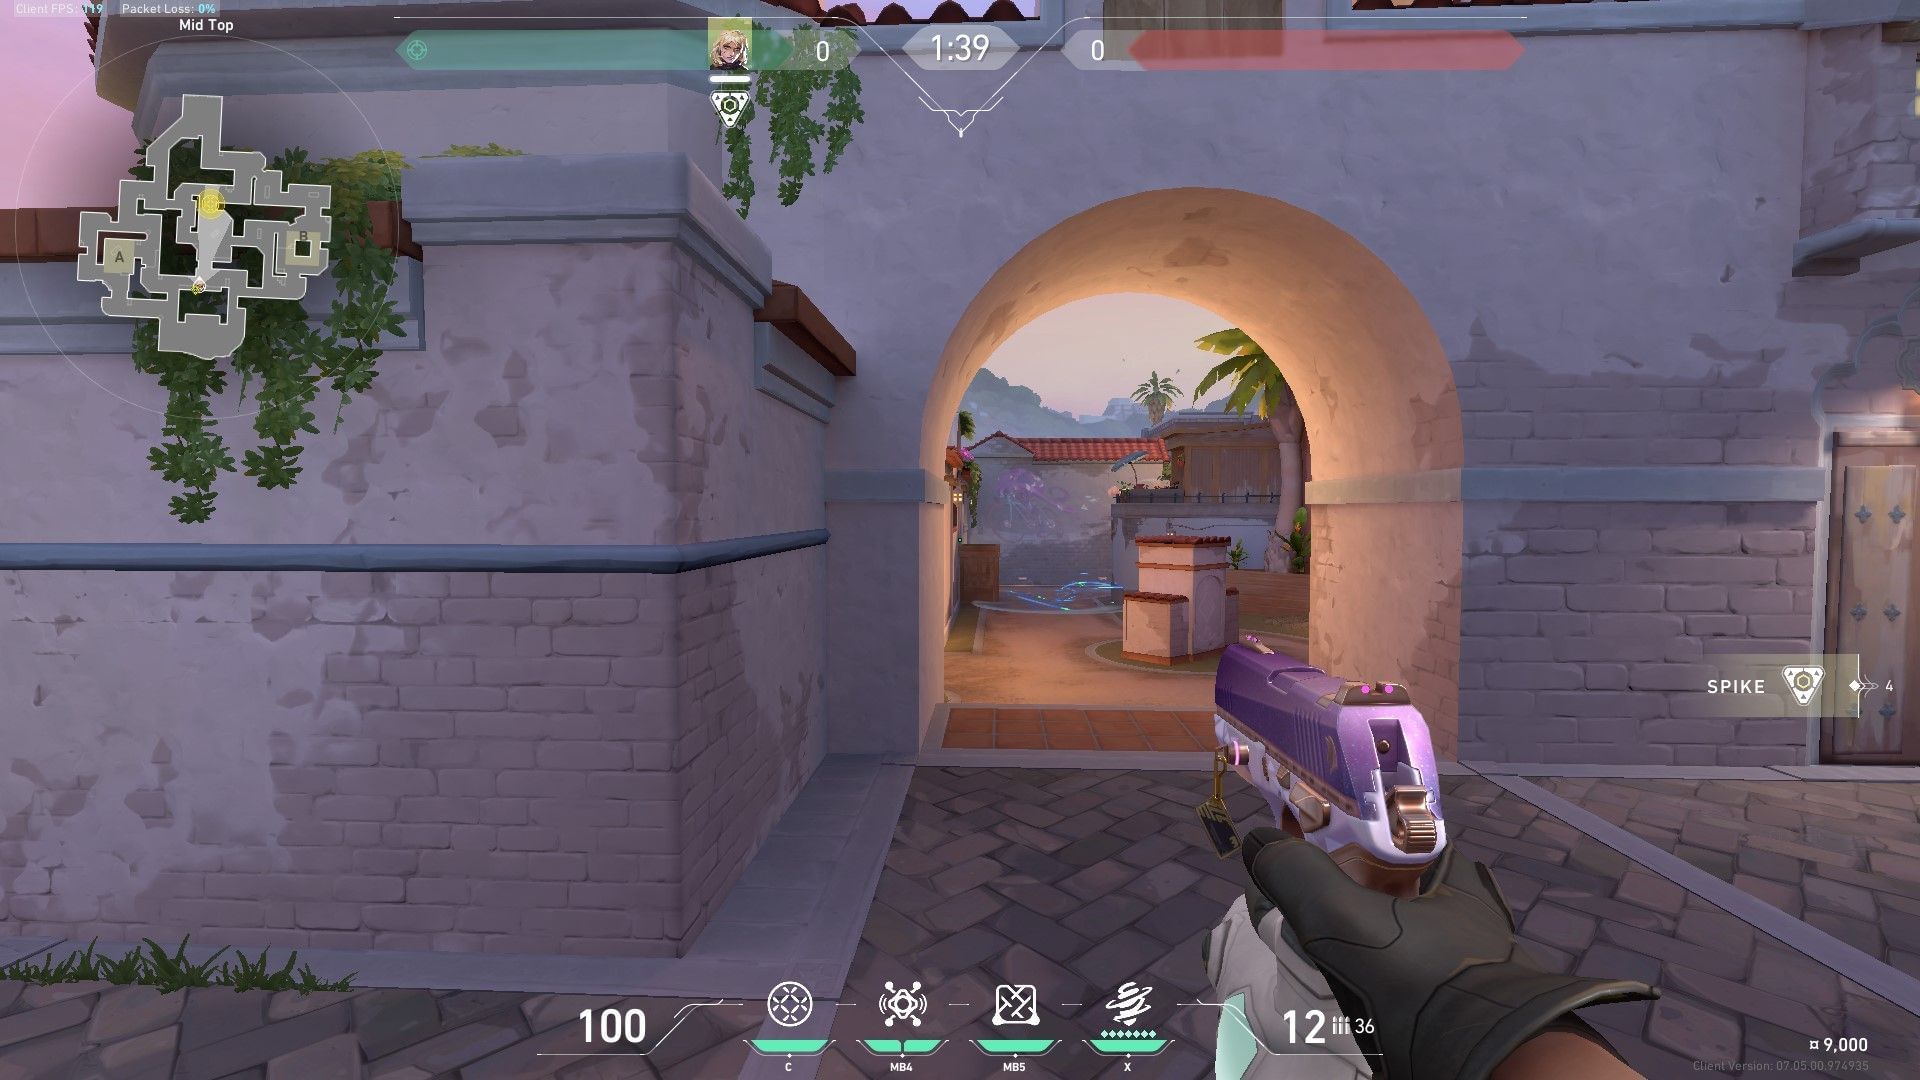
Valorant's tenth and latest map, Sunset, features a lot of wide lanes and corners where Deadlock's entire kit will be of use. So, with the following setups and a little creativity, you can compete against top players in your ranked games.

Use Deadlock on Valorant's new map Sunset to anchor bomb sites on defense and be an annoying lurker on attack
Deadlock has been a disappointment since her release in Valorant. She lacks the typical strengths that other Sentinels in the game have and can even be currently considered the weakest Agent in the game. However, she has her niche when it comes to Valorant gameplay, and Sunset's map layout might just suit her particular playstyle.
Deadlock's abilities in the game are:
- Gravnet: A grenade that forces enemies to crouch and move slowly.
- Sonic Sensor: A covert sensor that stuns enemies making noise within its area of effect.
- Barrier Mesh: A criss-cross barrier that blocks enemy movement.
- Annihilation: A wave of nanowires is released, capturing one enemy in its reach. The captured enemy is killed if pulled back to her location. The cocoon is, however, destructible.
Let us dive into Deadlock's uses on attack and defense on Valorant's new map, Sunset.
Deadlock Attack guide on Sunset map in Valorant
Gravnet
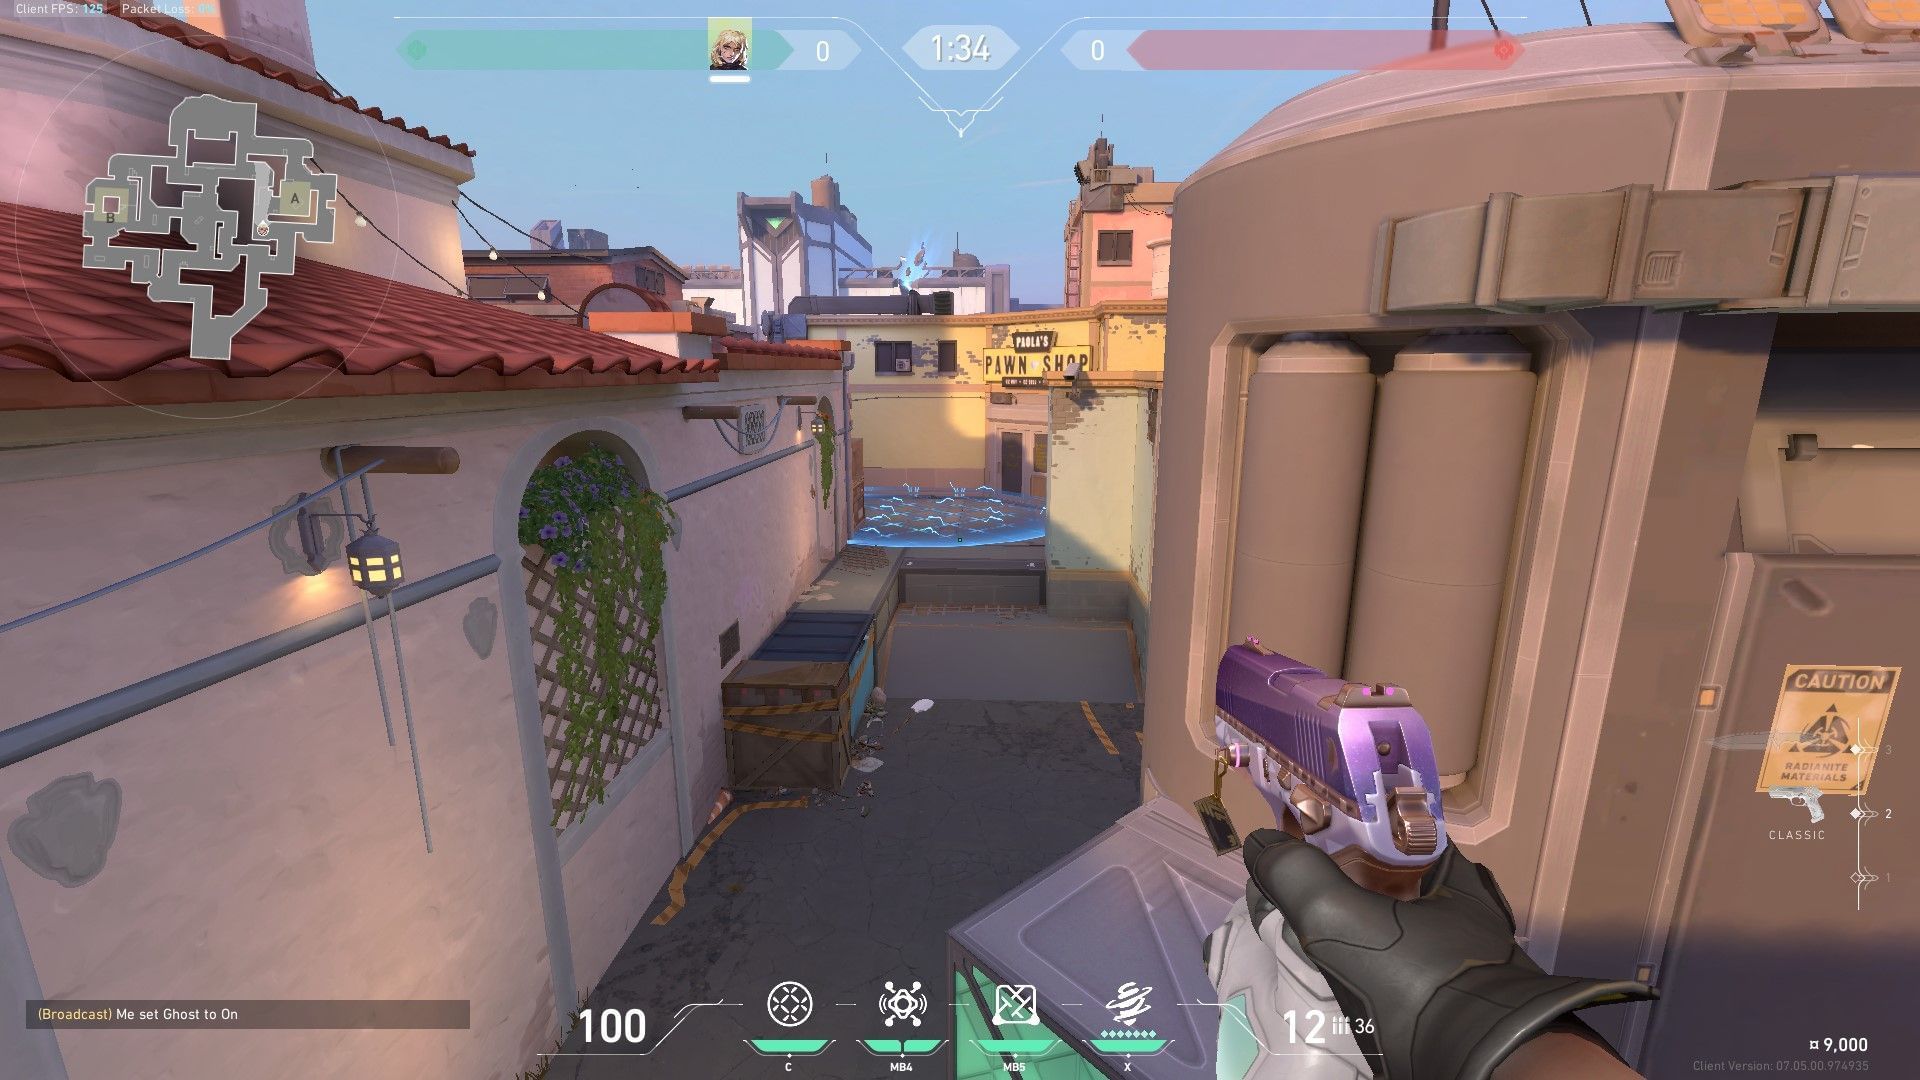
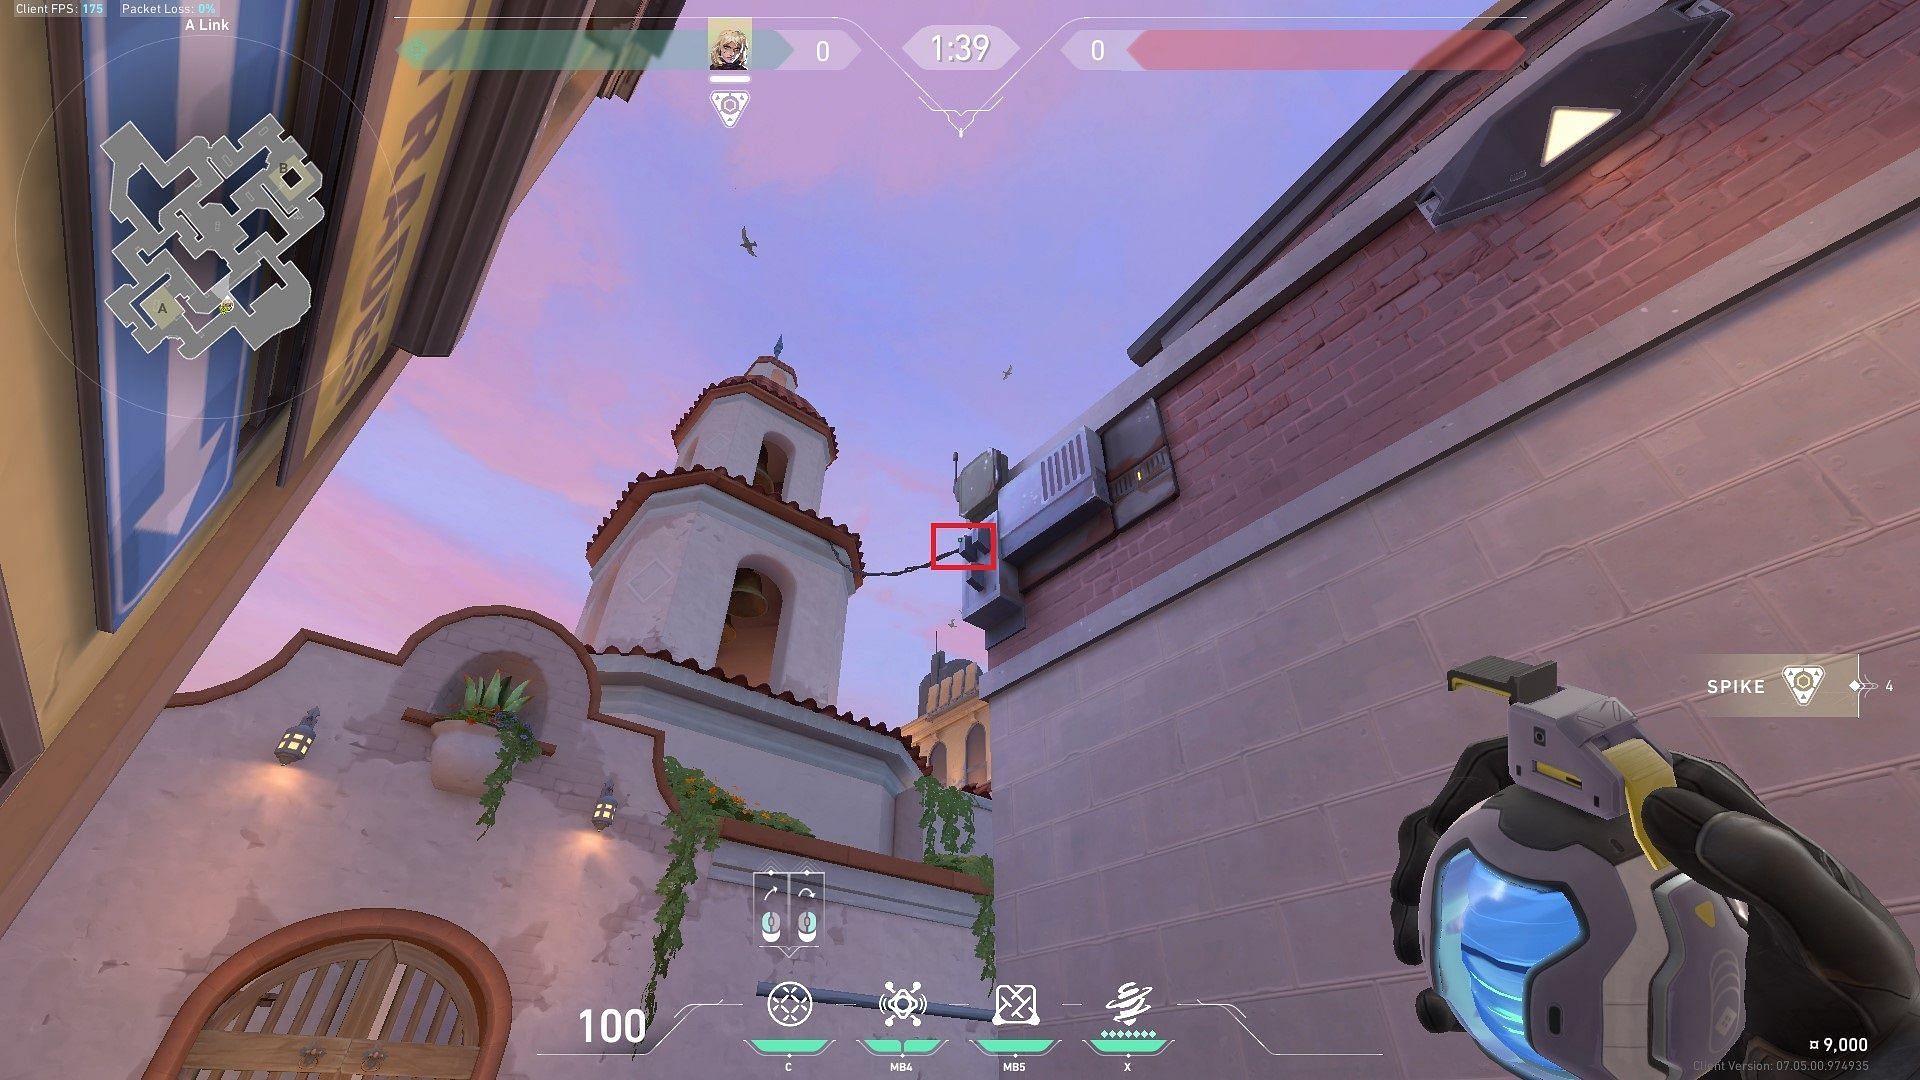
Your Gravnet is especially useful in taking early advantageous duels and getting map control. Coordinate with the team's Duelist to catch enemies off-guard. Useful locations are A Lobby, A Elbow, and B Main. One example is to throw your Gravnet through the right window in A Lobby towards A Link (PAWN SHOP) to help one of your teammates successfully win the fight.
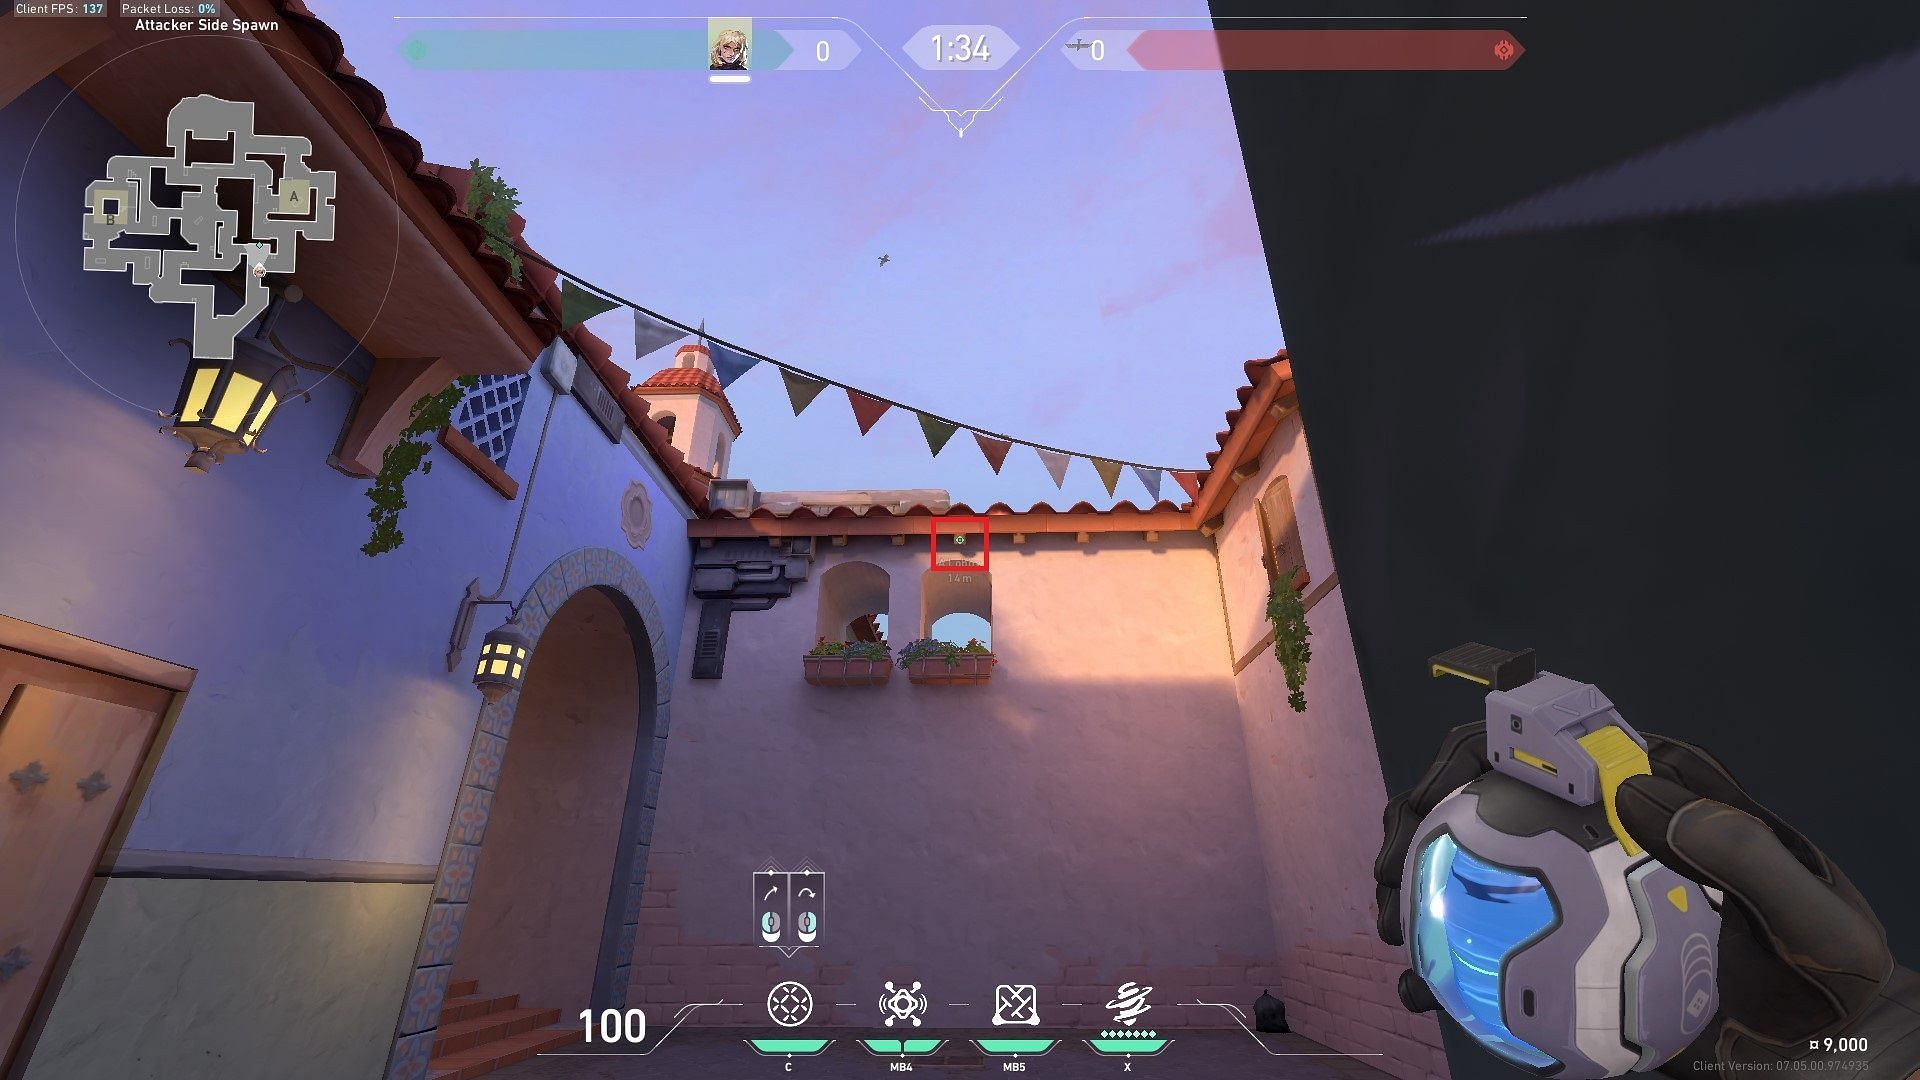
Position yourself against the wall in A Lobby as shown, and place your crosshair on the fifth wooden ledge (As shown in image #1). Run forward and throw your grenade at the start of your runup for a successful Gravnet.
Players are also highly encouraged to learn other lineups for your Gravnet, which might often come in handy. Additionally, you can use Gravnet during site executions.
Sonic Sensor
Even though this ability was designed to hold the flank while attacking, it can be rendered useless if an enemy walks by without making any sounds. You need to adjust your sensor placements to where the enemies are expected to fire or make noise, for example, near the spike in post-plant scenarios. If you plan on using this to hold flanks, make sure to place them directly near choke points, like A Main or B Main entrance, with a teammate holding along with it.
A unique way to use your Sonic Sensor is to place them at incredibly unpredictable spots while lurking. You can catch enemies rotating if your timing is good.
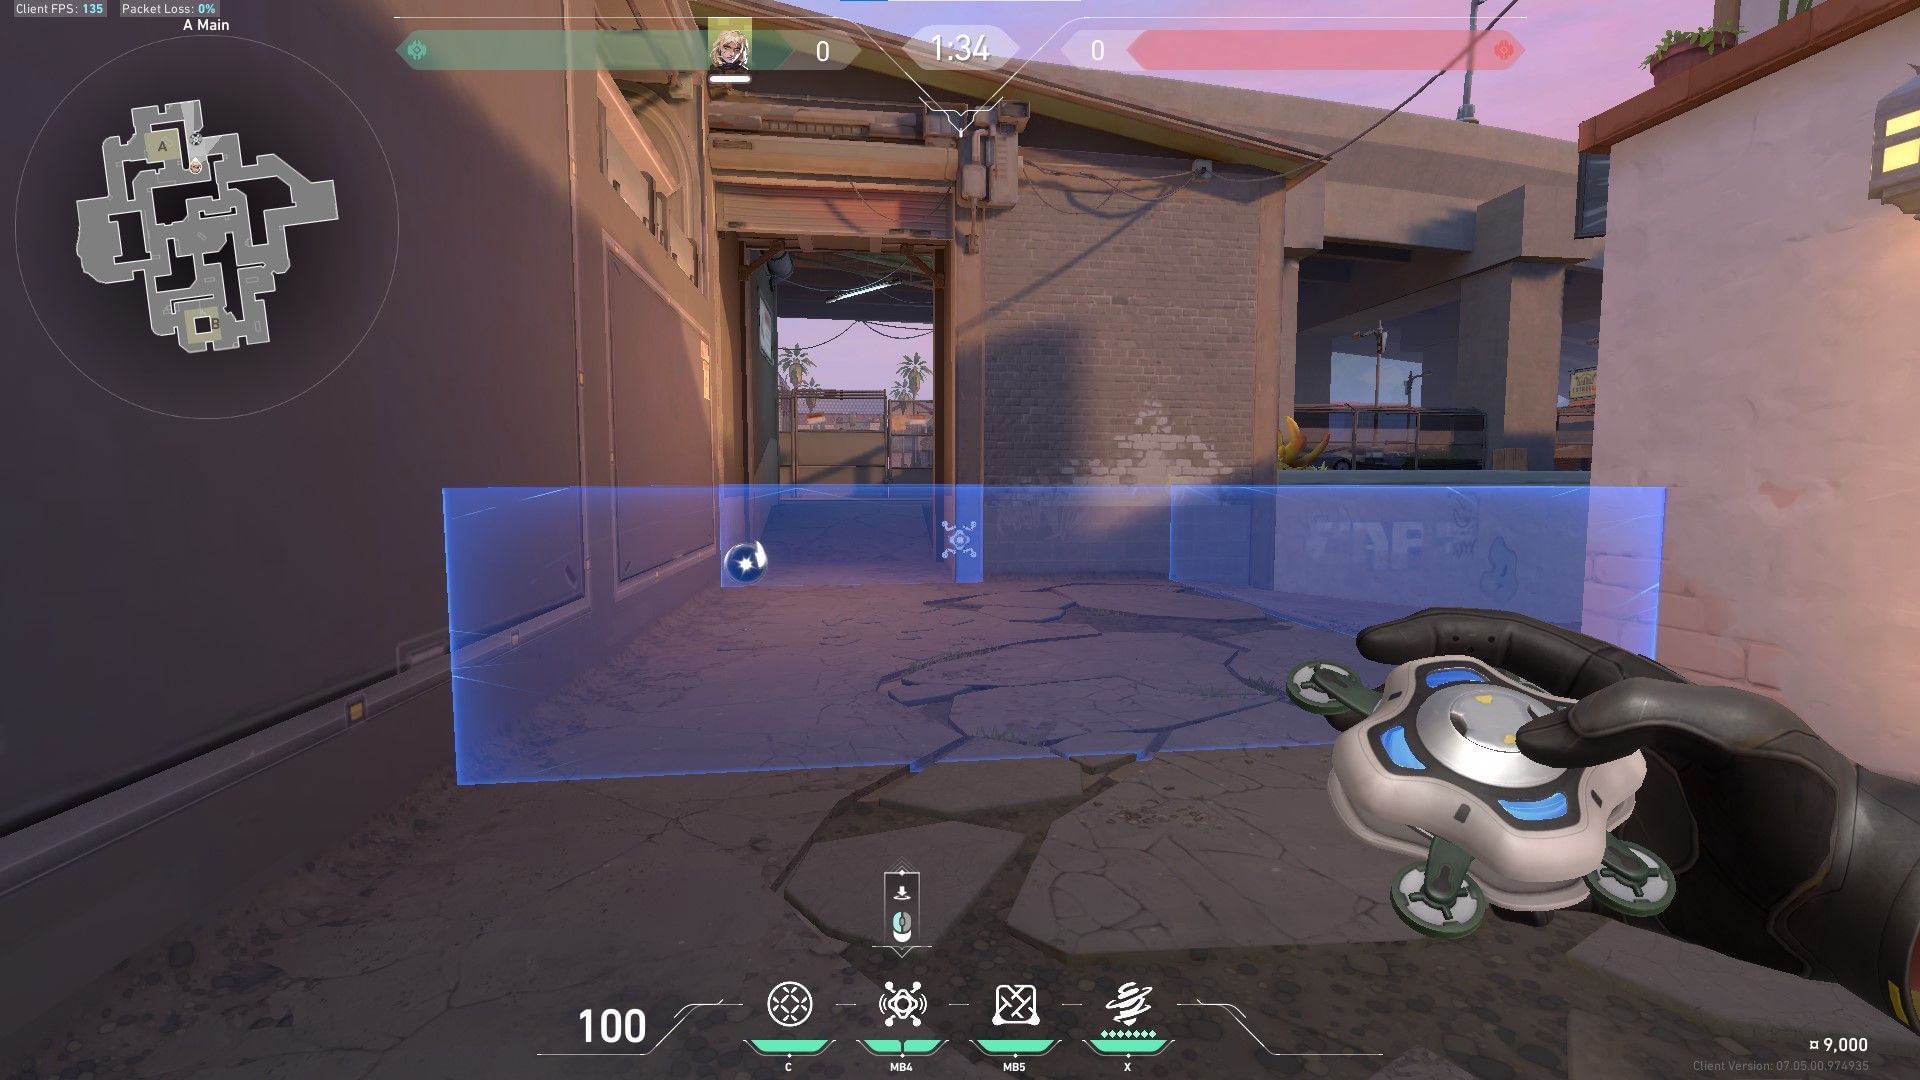
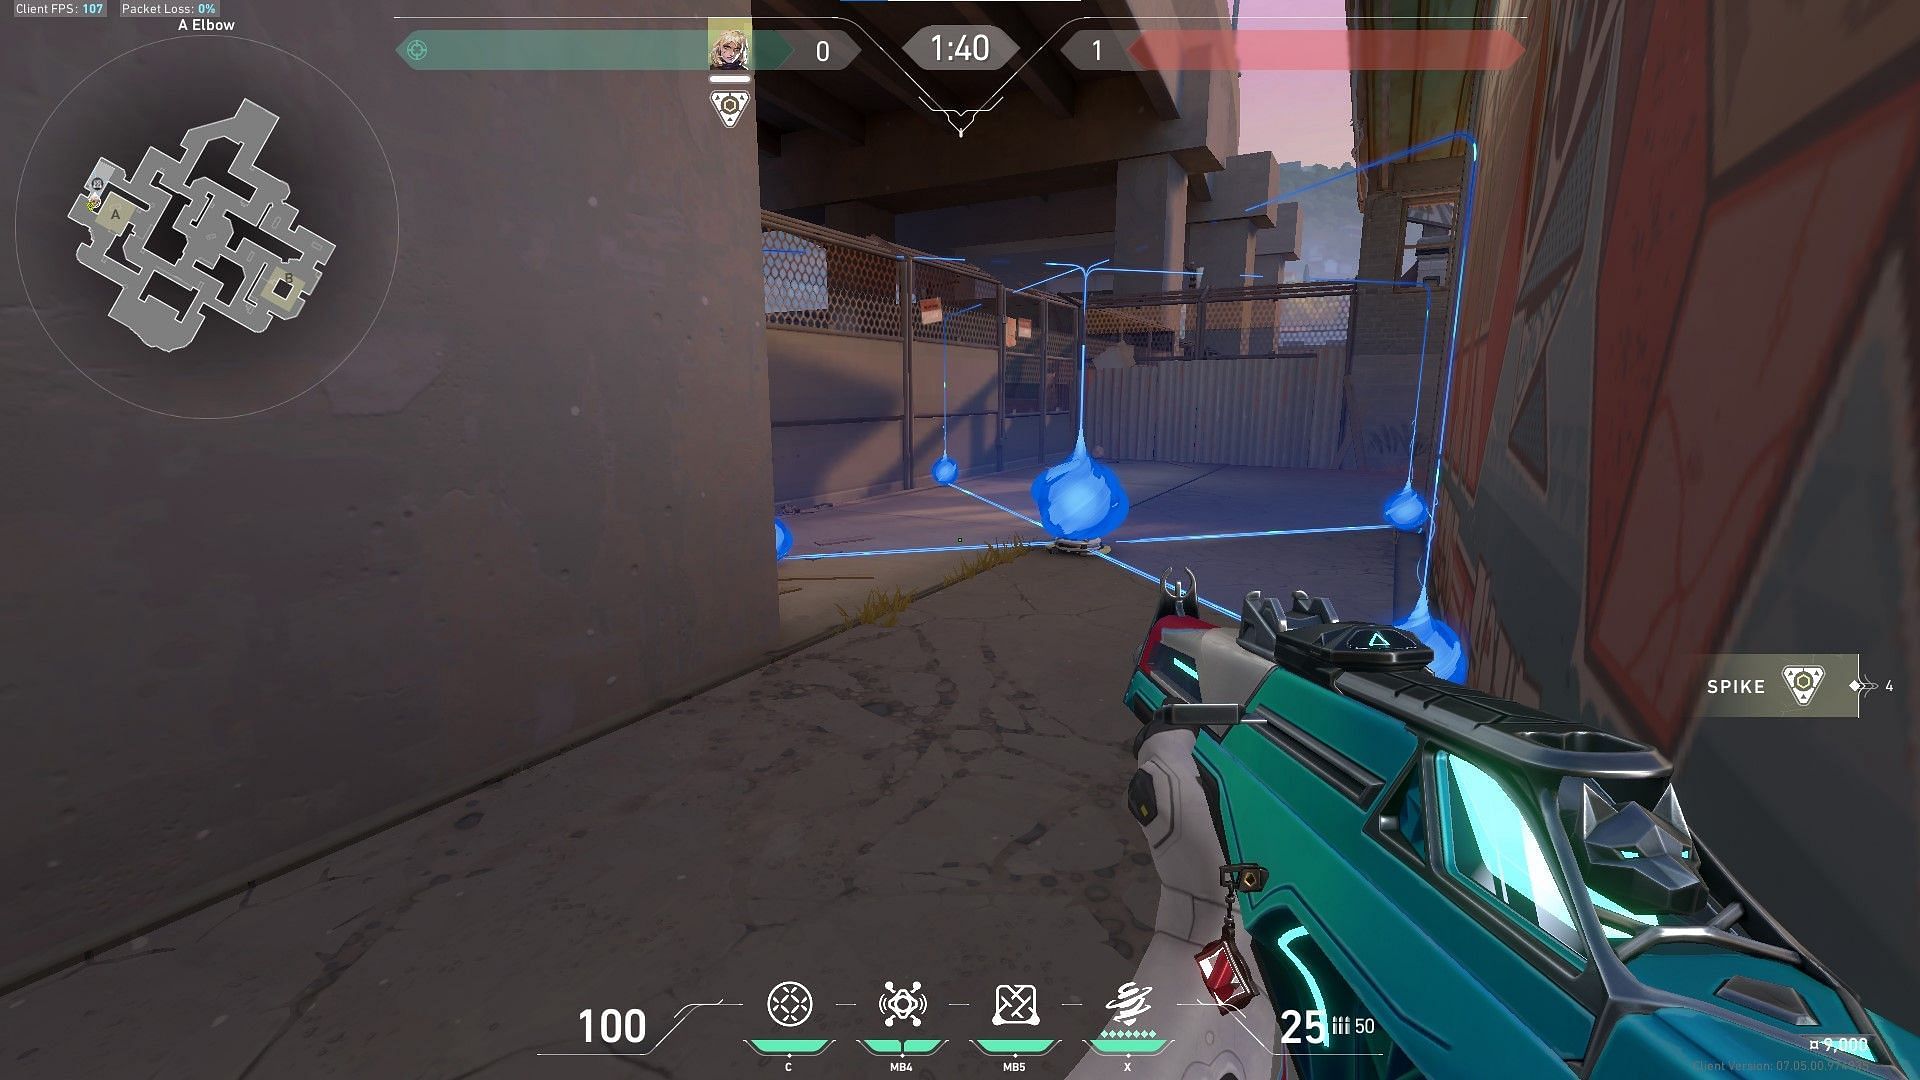
Barrier Mesh
Barrier Mesh is currently the most useful utility in her kit. You can use it to block off defender-side choke points, like A Alley and B Boba, after the spike has been planted to hold off retakes.
Additionally, it can be placed to stop flanks (A Main or B Main), but you should keep in mind that in doing so, you block off your own rotation. Thus, use it wisely.
Annihilation
Probably the easiest to use out of all her abilities, Deadlock's ultimate Annihilation can confirm a kill when it catches its target. Use it early on in the round or to stop defusers, depending on the situation. However, this ultimate is difficult to hit, so ensure the target has limited movement or space before you go for the kill. Players stuck in A Elbow will find it especially hard to dodge your ultimate.
Deadlock Defense guide on Sunset in Valorant
Gravnet
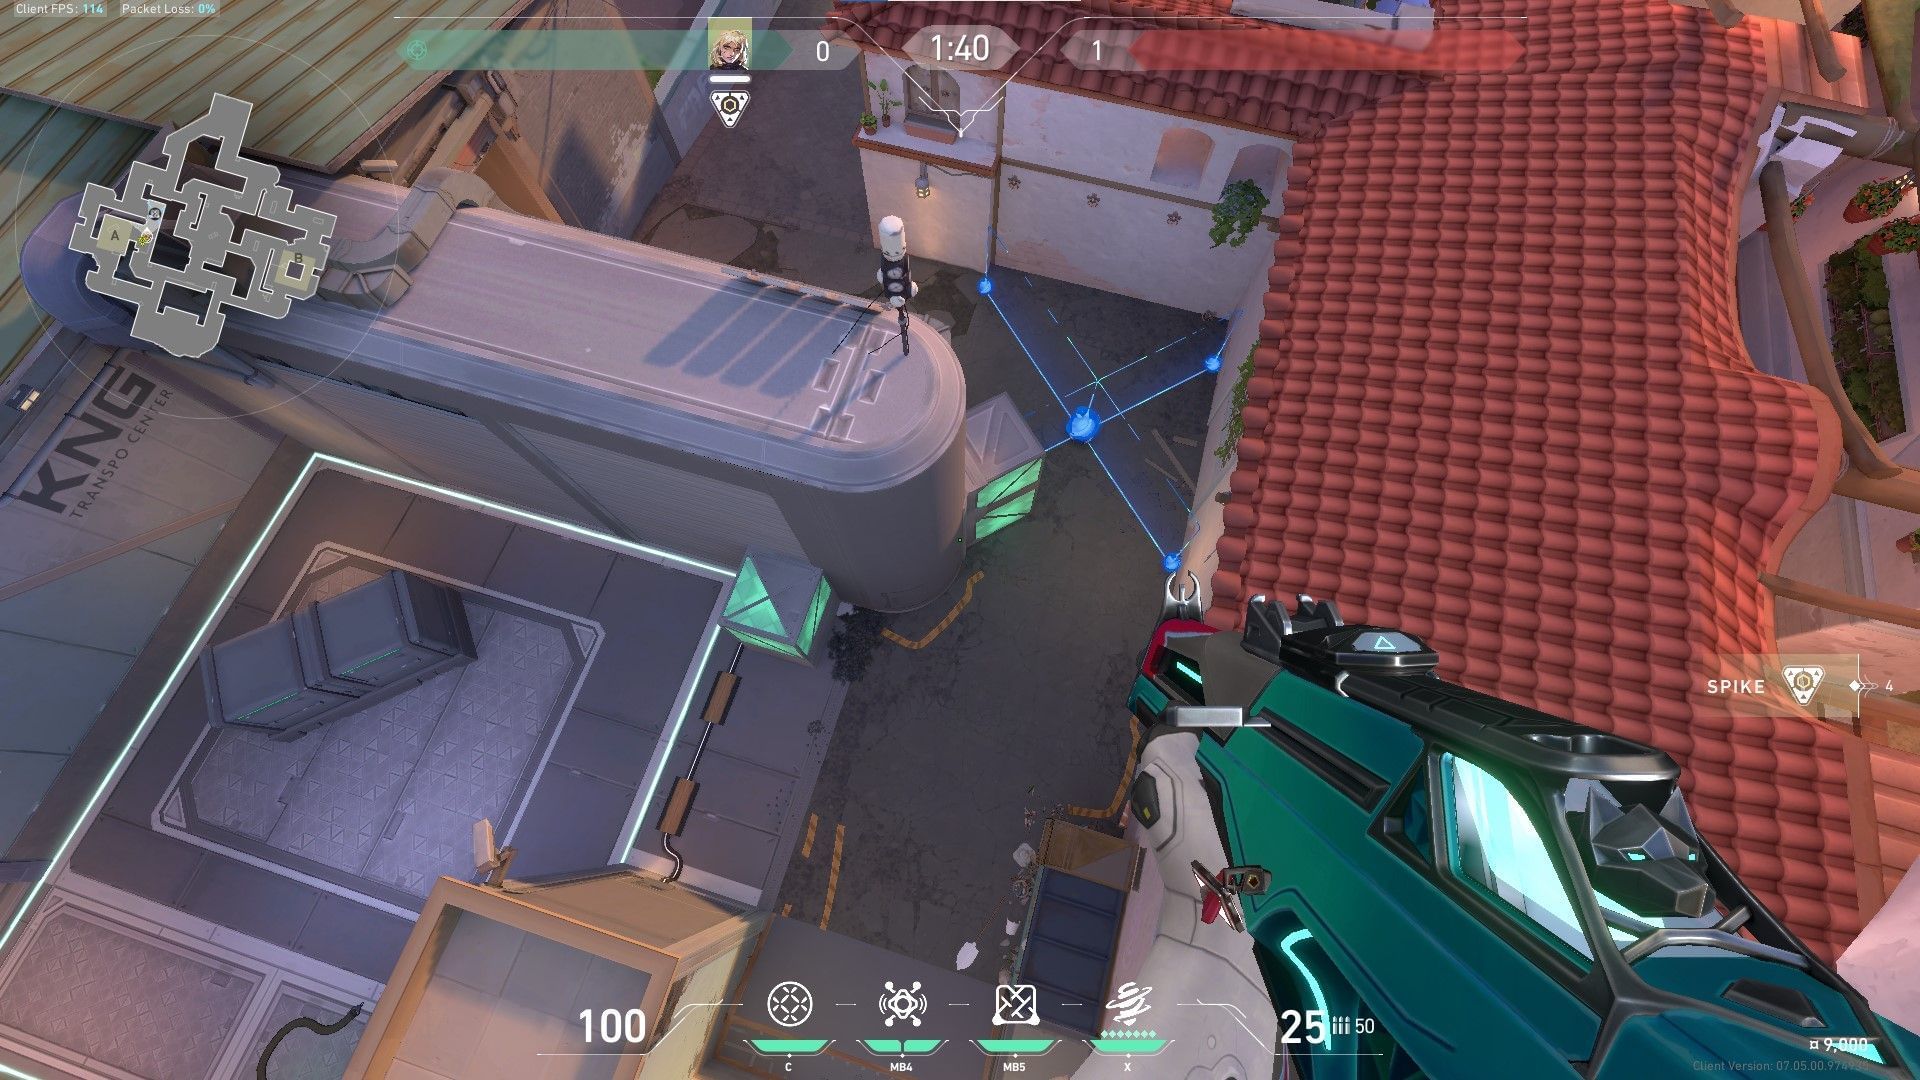
While defending, Gravnet can be used to take early map control, similar to the Attack side. Again, lineups can be extremely useful to execute such plays. Moreover, your grenade can be used during retakes behind the box on A Site or behind the pillar on B Site for easier gunfights. Gravnet is also very useful in taking early Mid control. You can use the following lineup.
Stand under the ATM sign near Defender spawn and align your reticle with the metal protruding from the building (As shown in image #1). Run forward and jump throw to land your grenade at the entrance of attacker side Mid.
Sonic Sensor
It is much easier to place your Sonic Sensors on defense. Simply put them near entry points of the bomb sites, like A Elbow, A Main, B Main, and B Market, or common plant locations for maximum chance of activation. Communicate with your teammates and combine this with other damaging abilities like a Raze grenade or Breach Aftershock to confirm kills.
Barrier Mesh
Treat your Barrier Mesh similar to a Sage wall on defense. Block off choke points like B Main, A Main, or A Elbow at the start of the round to deny enemies from taking control.
Annihilation
The use of your ultimate does not change much when switching sides in Valorant. Use it at hard-to-escape locations to confirm kills and get your team the much-important man advantage. One example is you can often catch someone trying to plant the spike at common locations.
Deadlock, at the moment, seems very difficult to use on Sunset; you can hardly play your role in the team. However, once she is buffed and her potential increases, you can easily start picking her frequently if you are familiar with her kit in Valorant.