'%20x='0'%20y='0'%20height='100%25'%20width='100%25'%20%0A%20%20%20%20%20%20%20%20%20%20xlink%3Ahref='data:image/jpg;base64,/9j/2wBDAAYEBQYFBAYGBQYHBwYIChAKCgkJChQODwwQFxQYGBcUFhYaHSUfGhsjHBYWICwgIyYnKSopGR8tMC0oMCUoKSj/2wBDAQcHBwoIChMKChMoGhYaKCgoKCgoKCgoKCgoKCgoKCgoKCgoKCgoKCgoKCgoKCgoKCgoKCgoKCgoKCgoKCgoKCj/wgARCAAGAAoDASIAAhEBAxEB/8QAFgABAQEAAAAAAAAAAAAAAAAAAAQG/8QAFAEBAAAAAAAAAAAAAAAAAAAABf/aAAwDAQACEAMQAAAAzsgSx//EAB8QAQABBAIDAQAAAAAAAAAAAAIDAQQFEgAREyFhcf/aAAgBAQABPwCPOZDKX+NjvbxqKejjZAMZIJ9GhGtOXddLqY+V16ap3r9/ef/EABkRAAIDAQAAAAAAAAAAAAAAAAECAAMEIf/aAAgBAgEBPwDRYxYdn//EABkRAAEFAAAAAAAAAAAAAAAAAAEAAgQREv/aAAgBAwEBPwCIA3VL/9k='%3E%3C/image%3E%3C/svg%3E)
Viper has been one of Valorant's most popular Controllers since the title's release. Riot Games decided to buff up her kit to make her more essential to the game's meta with recent patches. With that being said, recent UI changes have forced Viper players to learn new lineups on most maps.
Viper has the ability to damage the opposition with her Snake Bites and decay them through her Toxic Screen and Poison Cloud. Her utilities work best on certain maps such as Fracture, and as a Controller, she can easily take on sites as the primary smoker.
This article will help players learn a few of the best Viper lineups for Valorant's Fracture.
Uncommon Viper ability lineups on Valorant's Fracture
Viper possesses various abilities that can turn the tide of a game in the blink of an eye. Her Toxic Screen wall is not a traditional smoke like Brimstone's or Omen's, yet it can be deployed multiple times throughout a round due to its fuel-based system. Any player who comes in-contact with her walls or cloud orb will decay overtime.
Her Snake Bite mollies are a great way to plant denial and play post-plant situations. Viper thrives on maps like Fracture, where players have to cover multiple angles from the opposition.
Fracture is a uniquely designed map with ropes for traversal and a central defender-spawn system. Furthermore, the sites are also designed with much more verticality compared to any other maps in Valorant.
Toxic Screen
A-site default wall
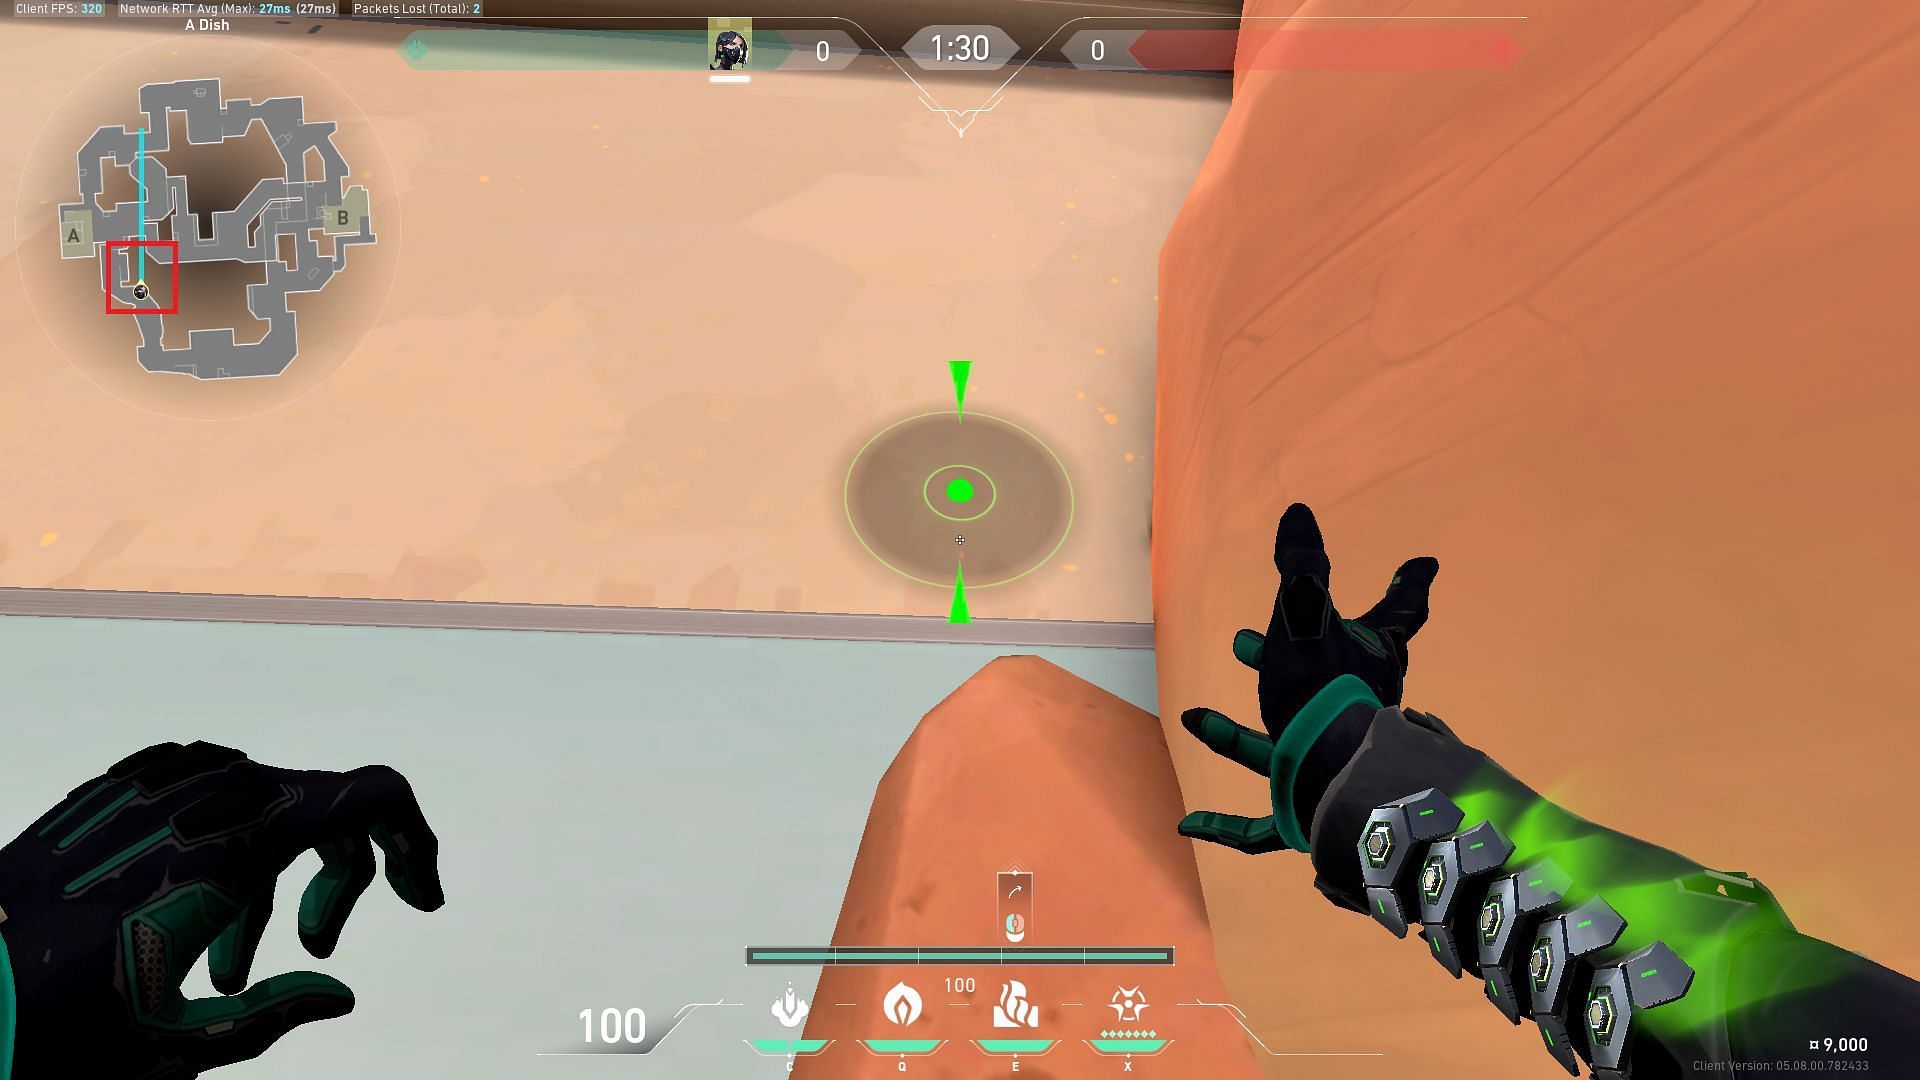
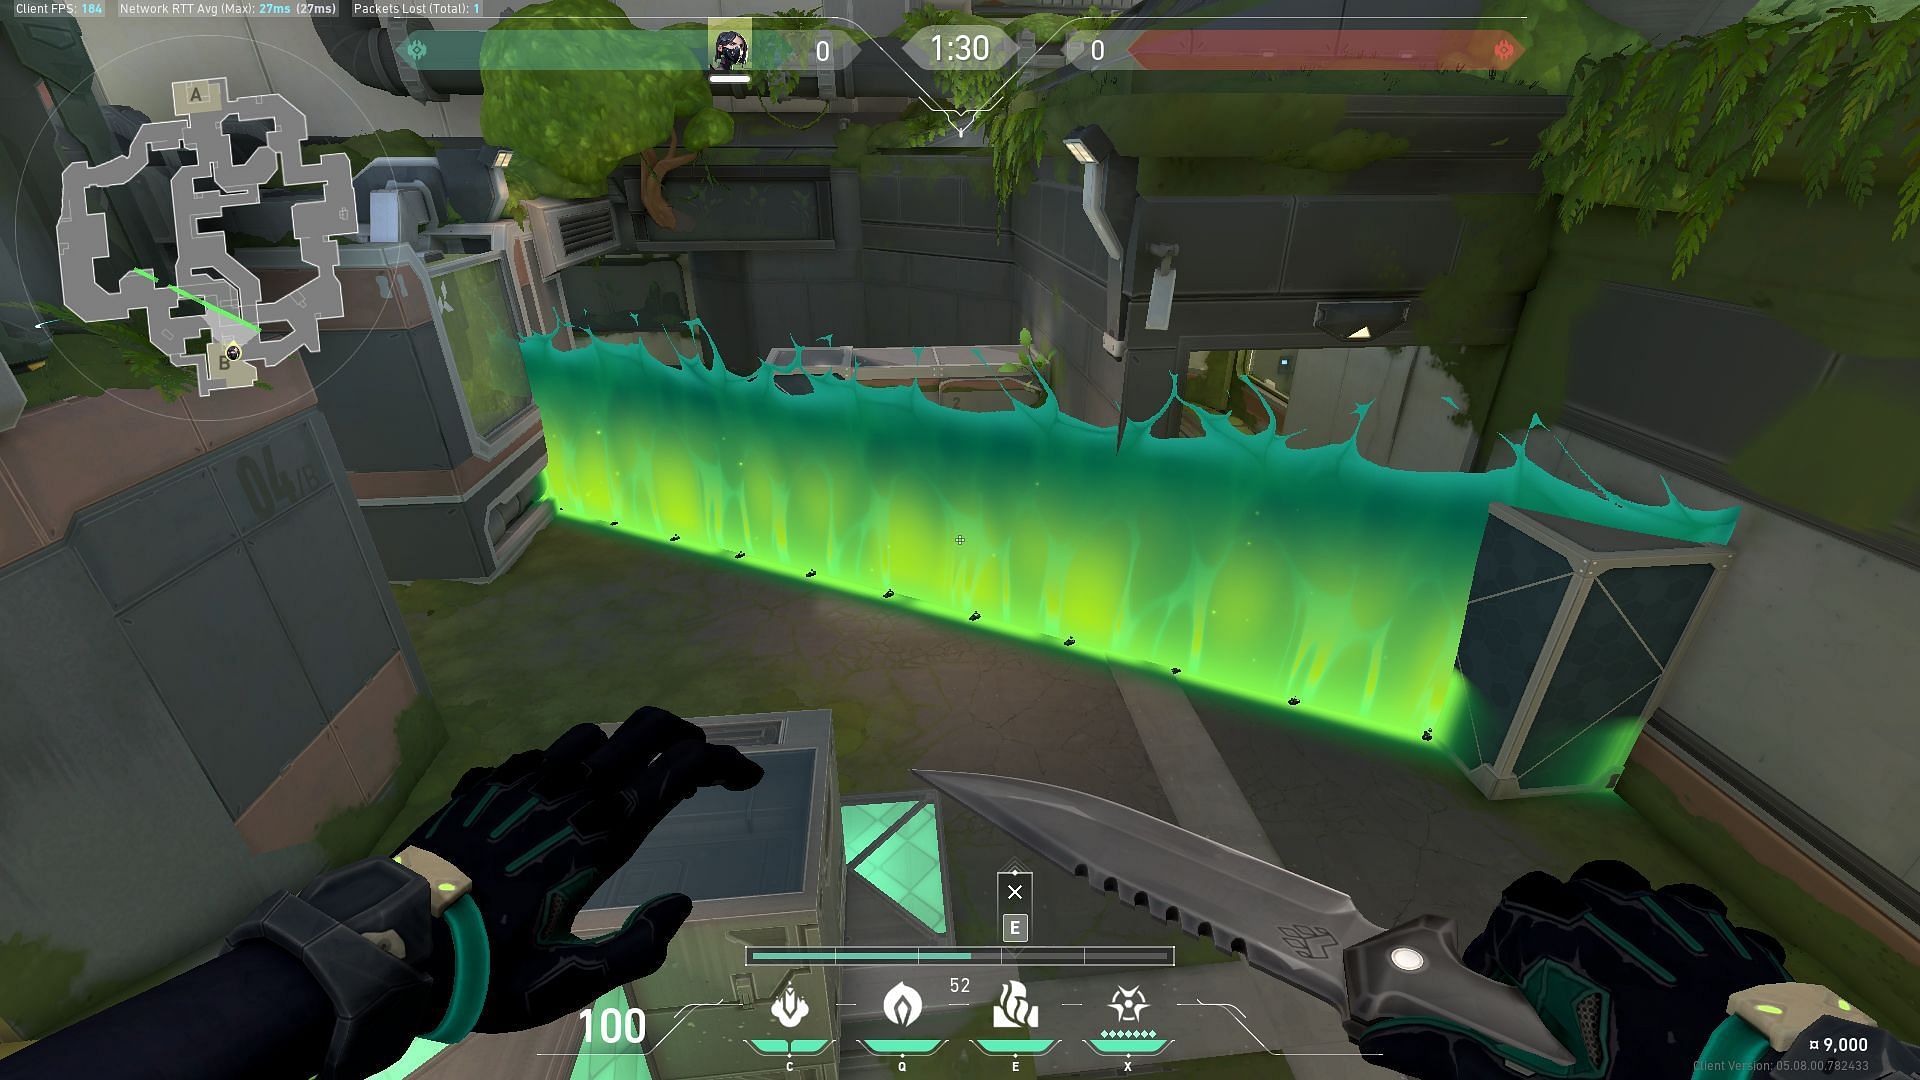
The default Toxic Screen for A-site can be deployed from the Satellite area as shown in the image above. Once in position, you can use the mini-map to deploy the wall so it can cover Defender Spawn and Sands.
The Toxic Screen can cover up Spawn and Sands, and cut off a defender's field of vision.
B-site default wall from Arcade side
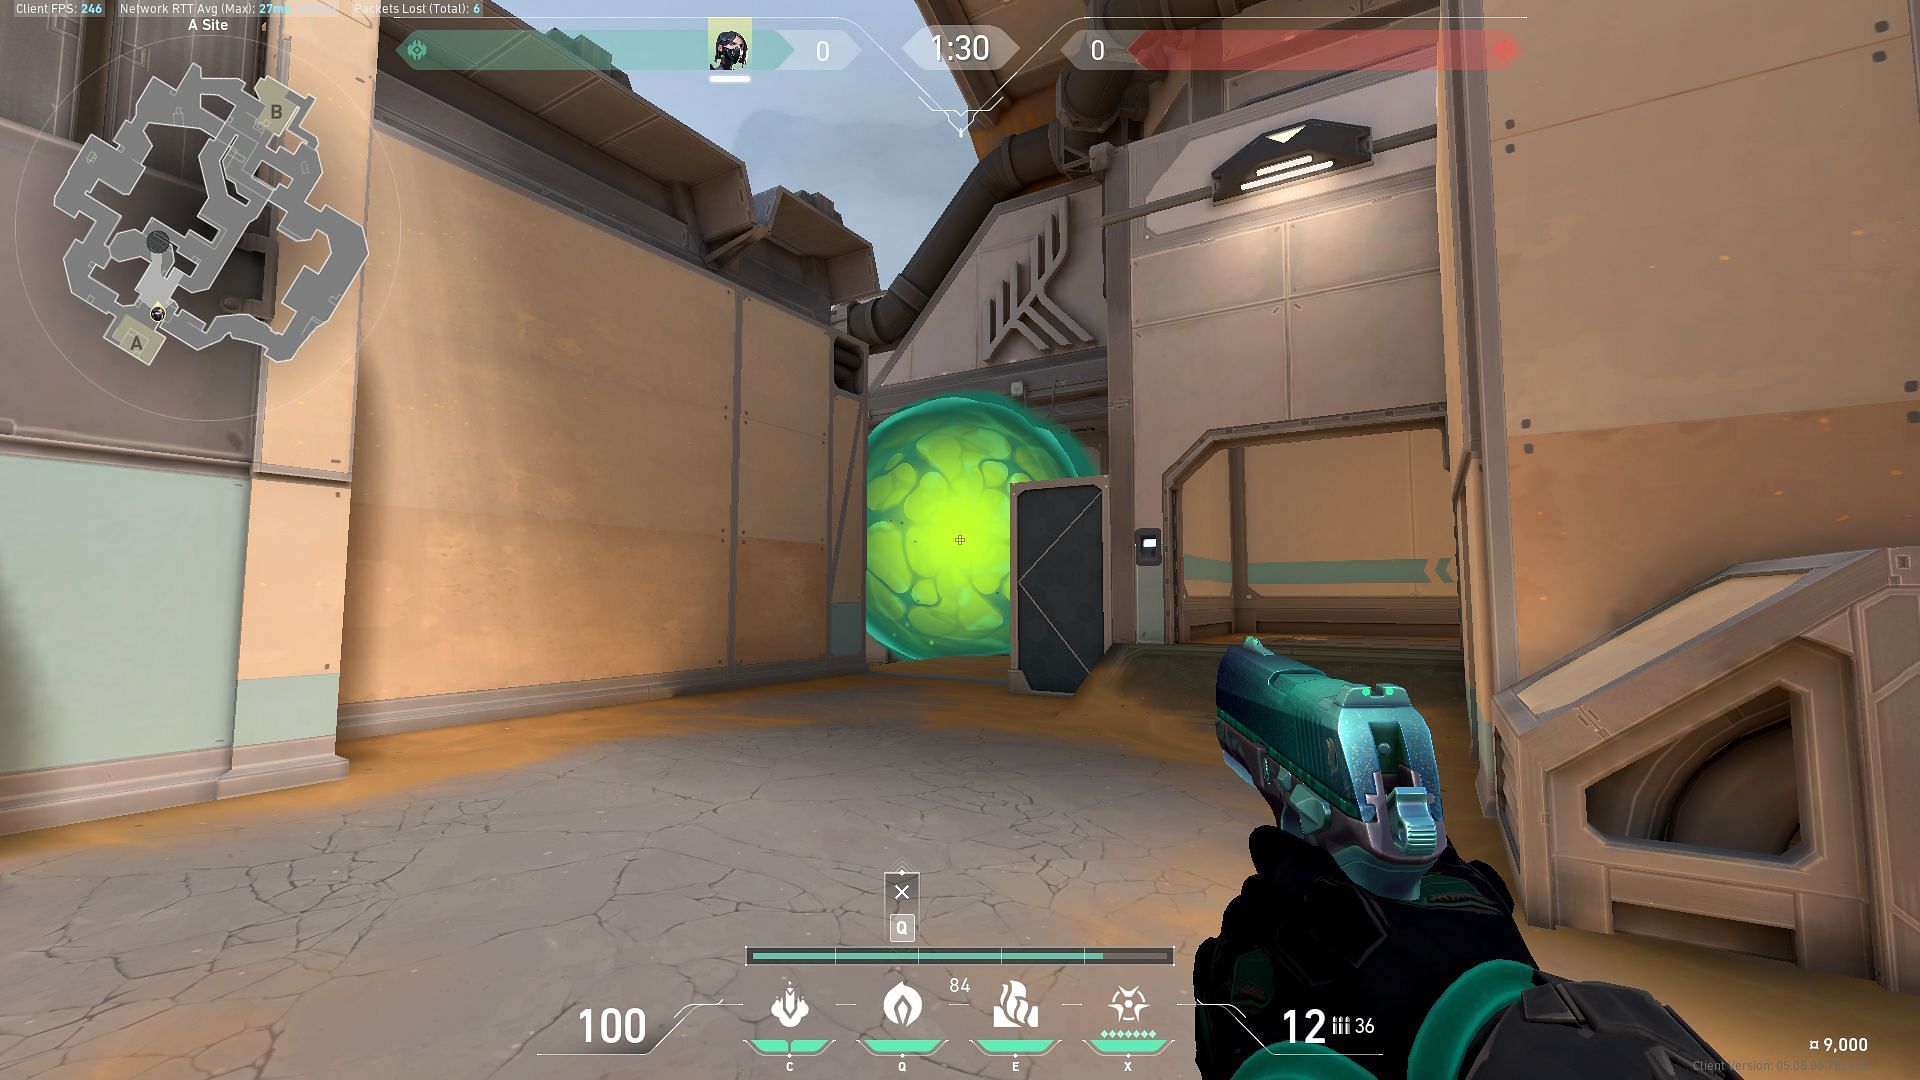
The default B-site wall can be used from outside the Arcade area in Fracture. Once in position, you can use the mini-map to align the wall through Generator and Canteen.
This particular Toxic Screen can provide the attackers with cover from Defenders playing behind the Generator and Canteen entrance.
Poison Cloud
A-site Ropes Poison Cloud
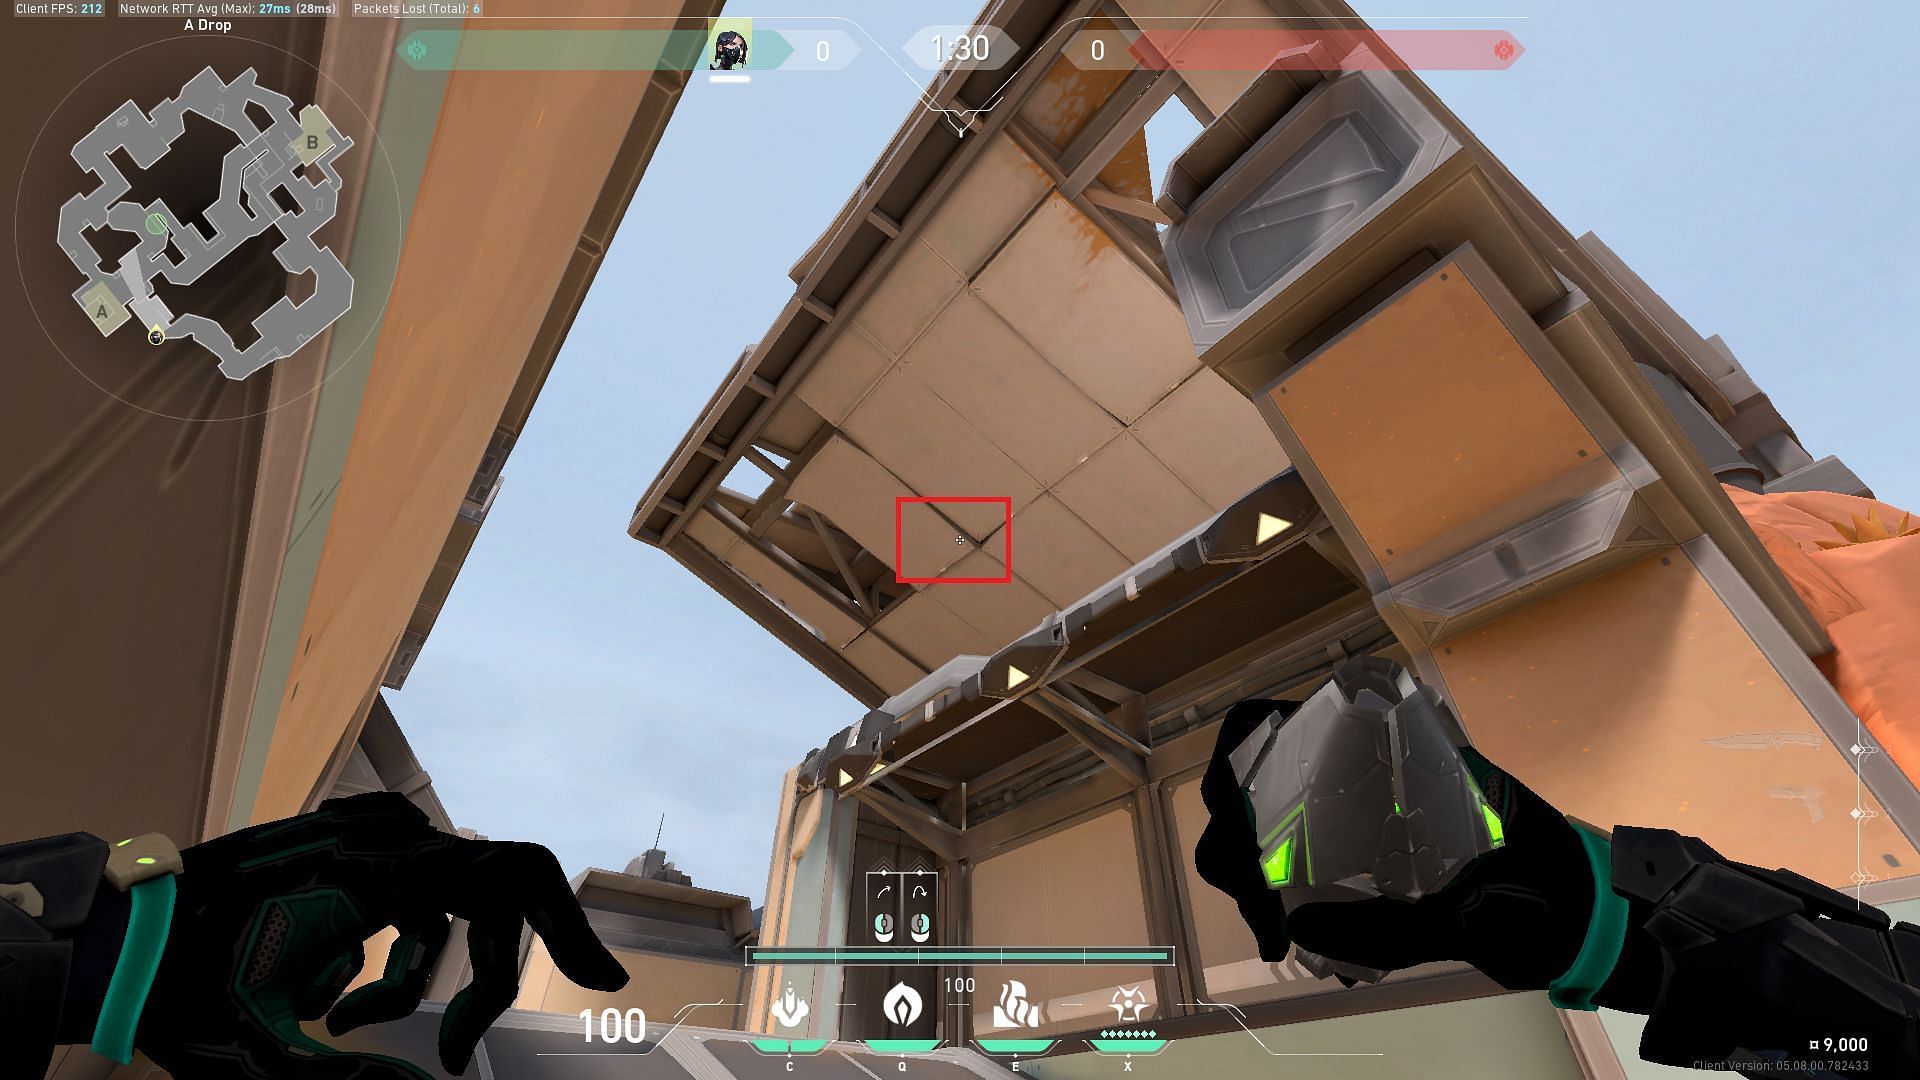
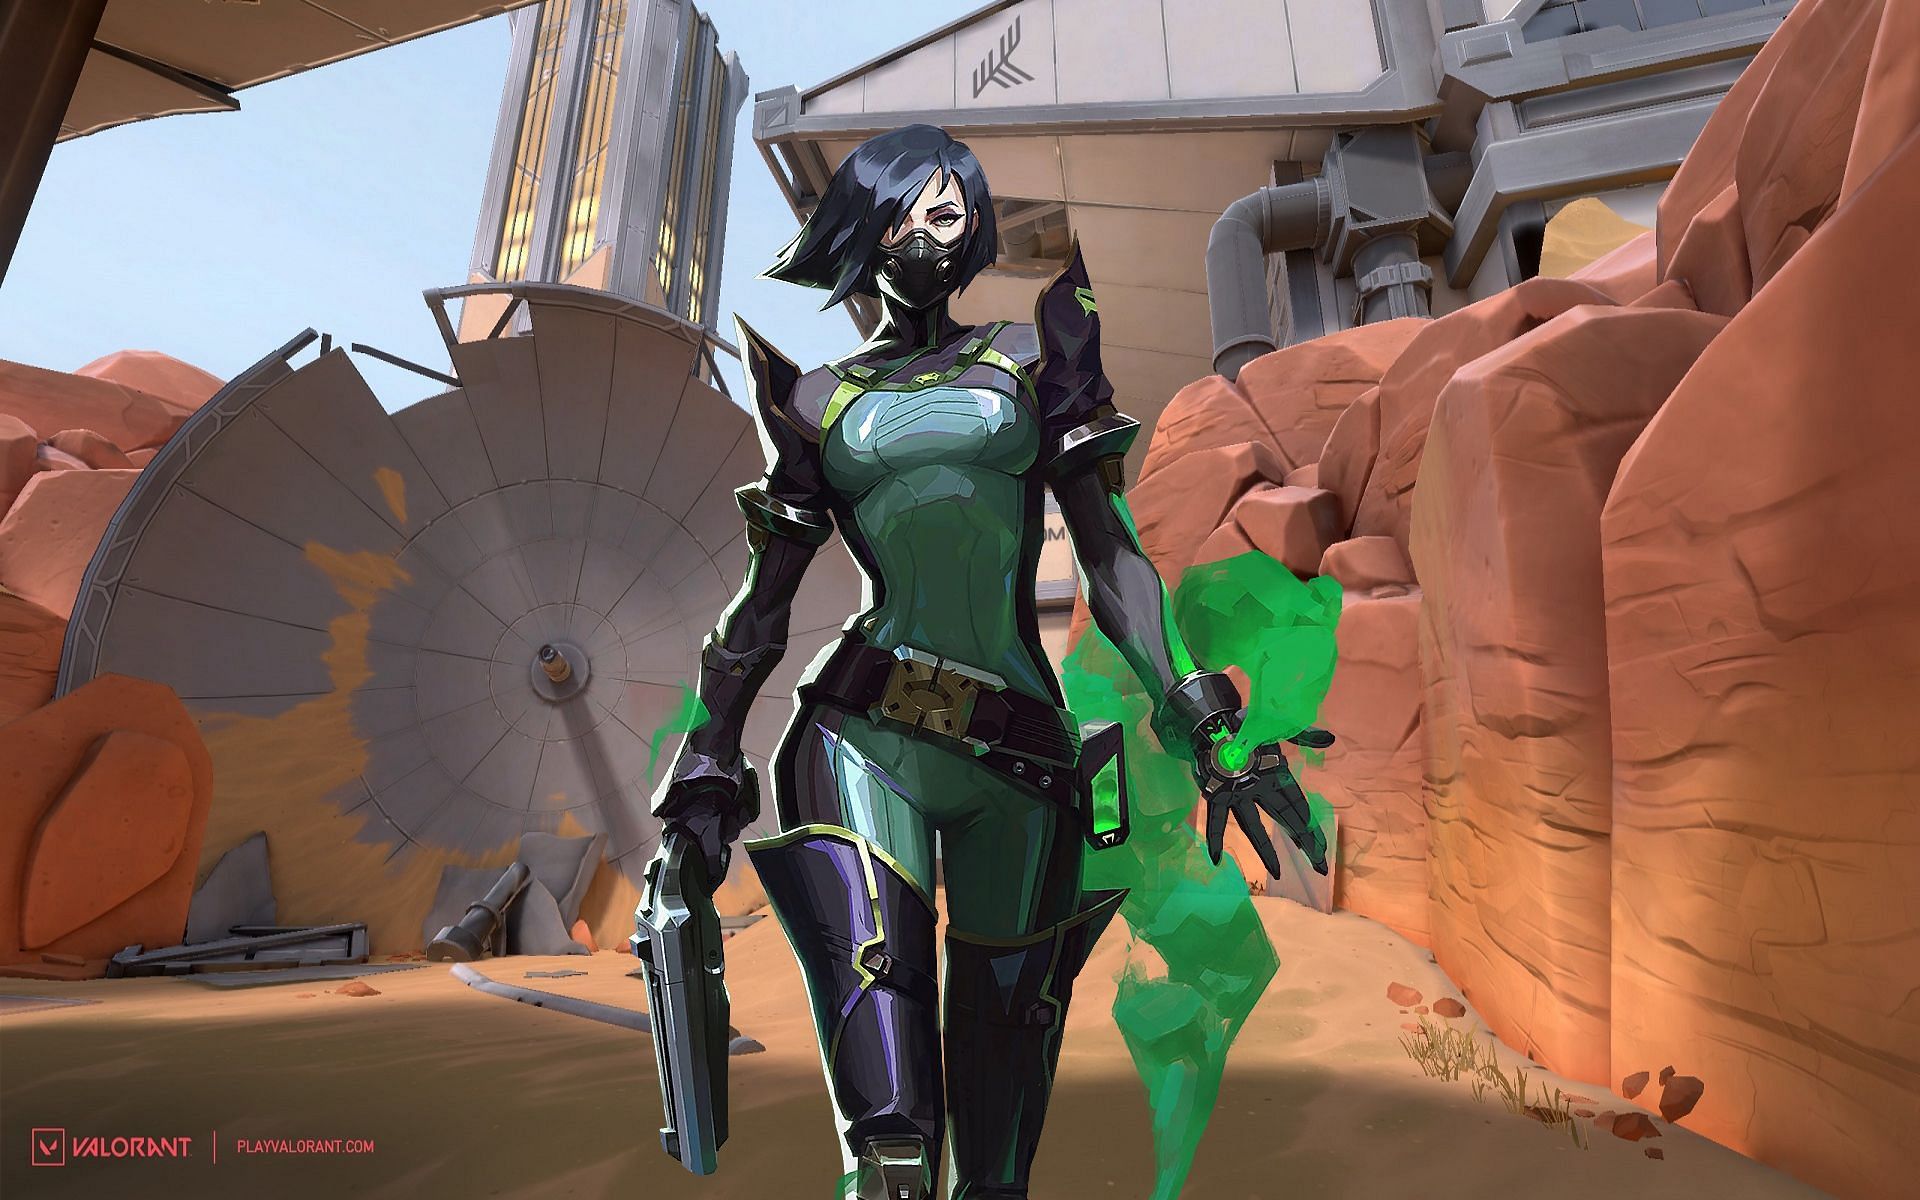
The A-site Poison Cloud lineup can be performed from Satellite. Upon reaching the positon with the help of the mini-map, you will have to aim on the roof of the structure as shown in the image.
The Poison Cloud will land on Ropes, providing cover while the attackers jump from Drop.
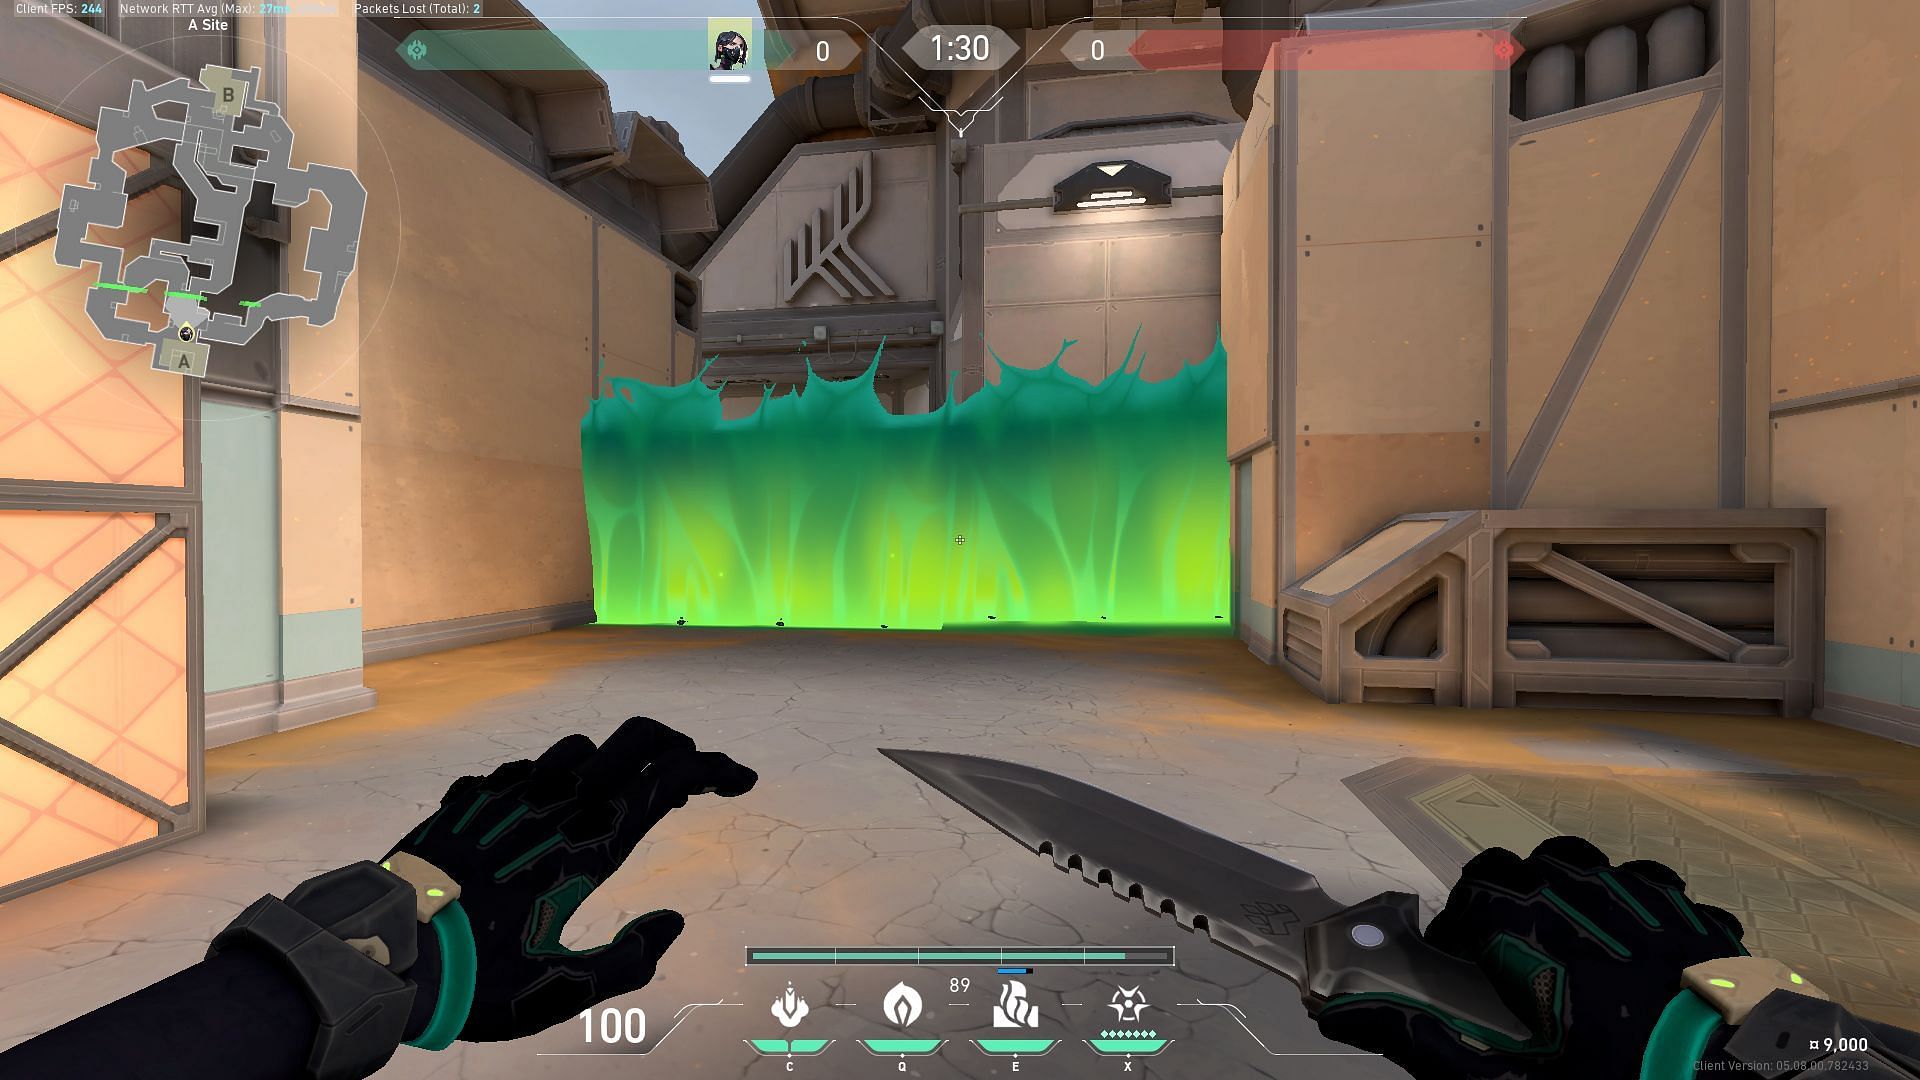
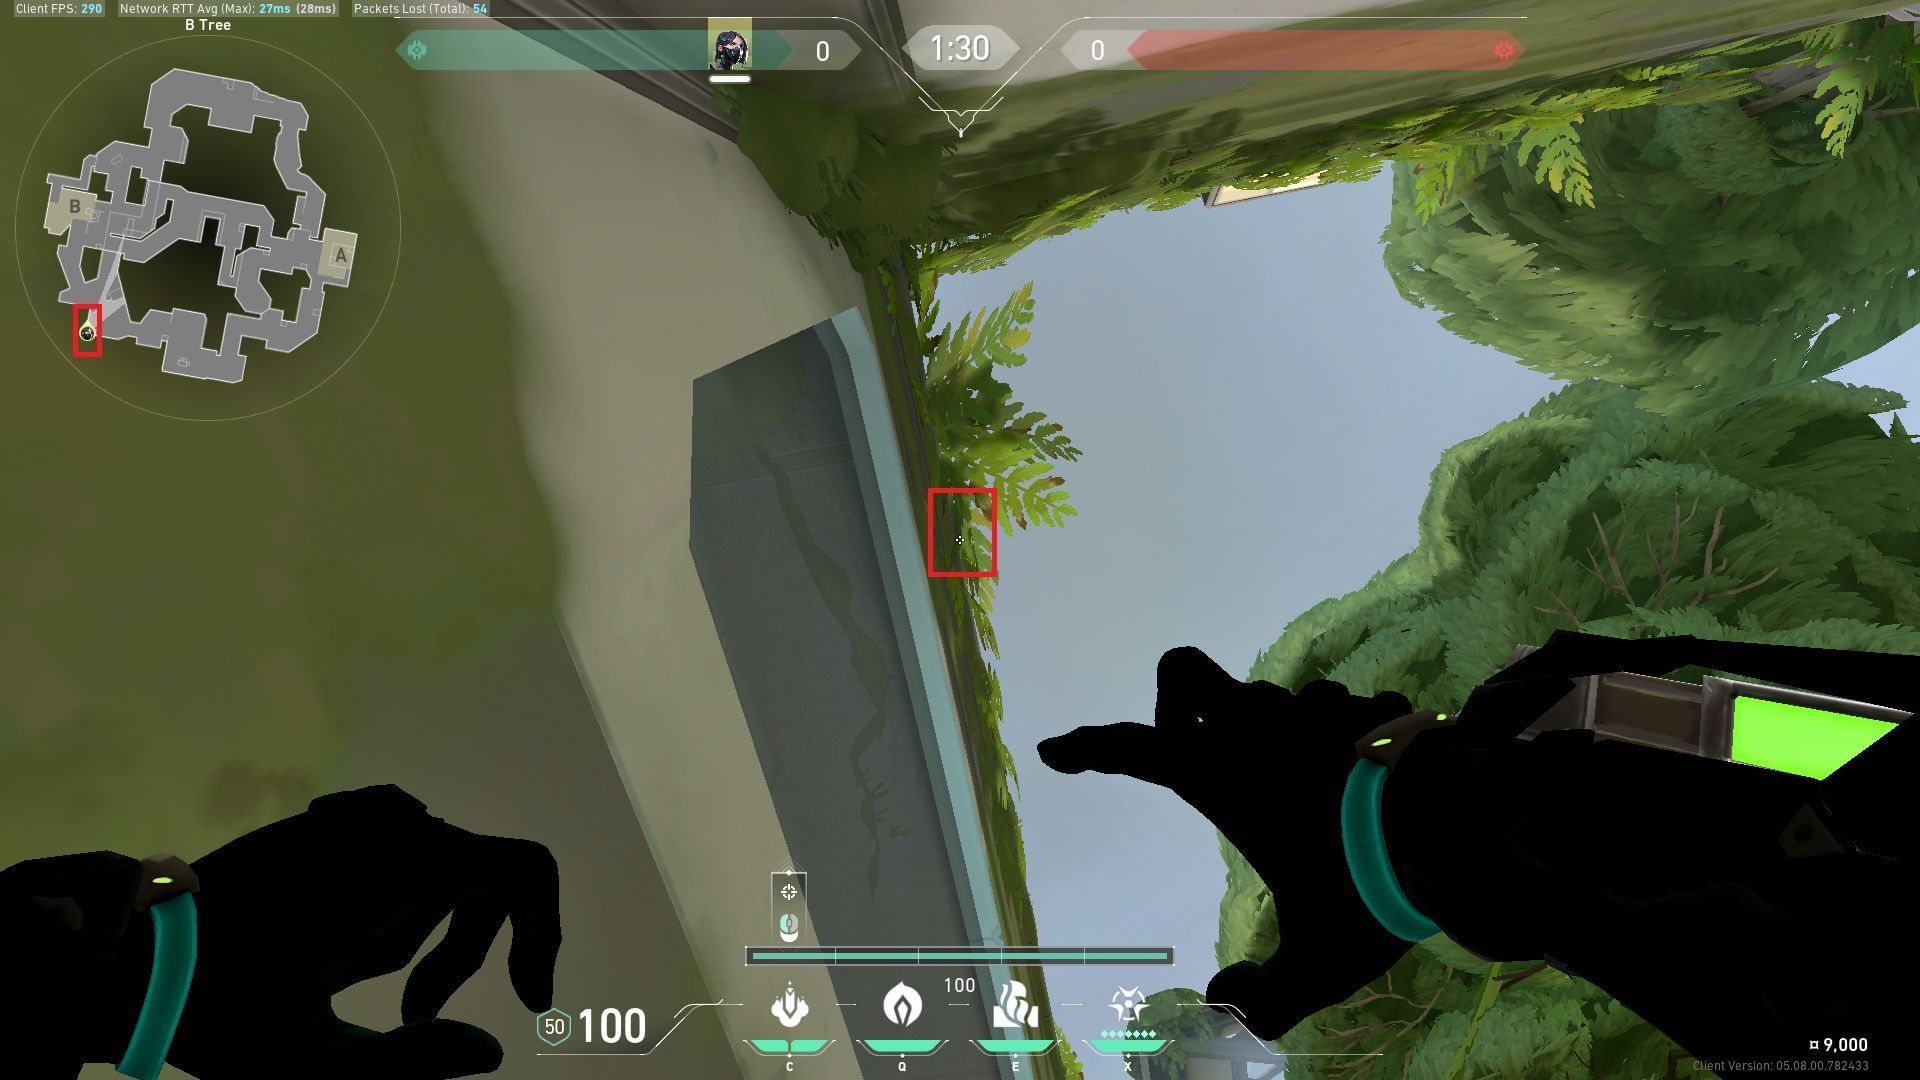
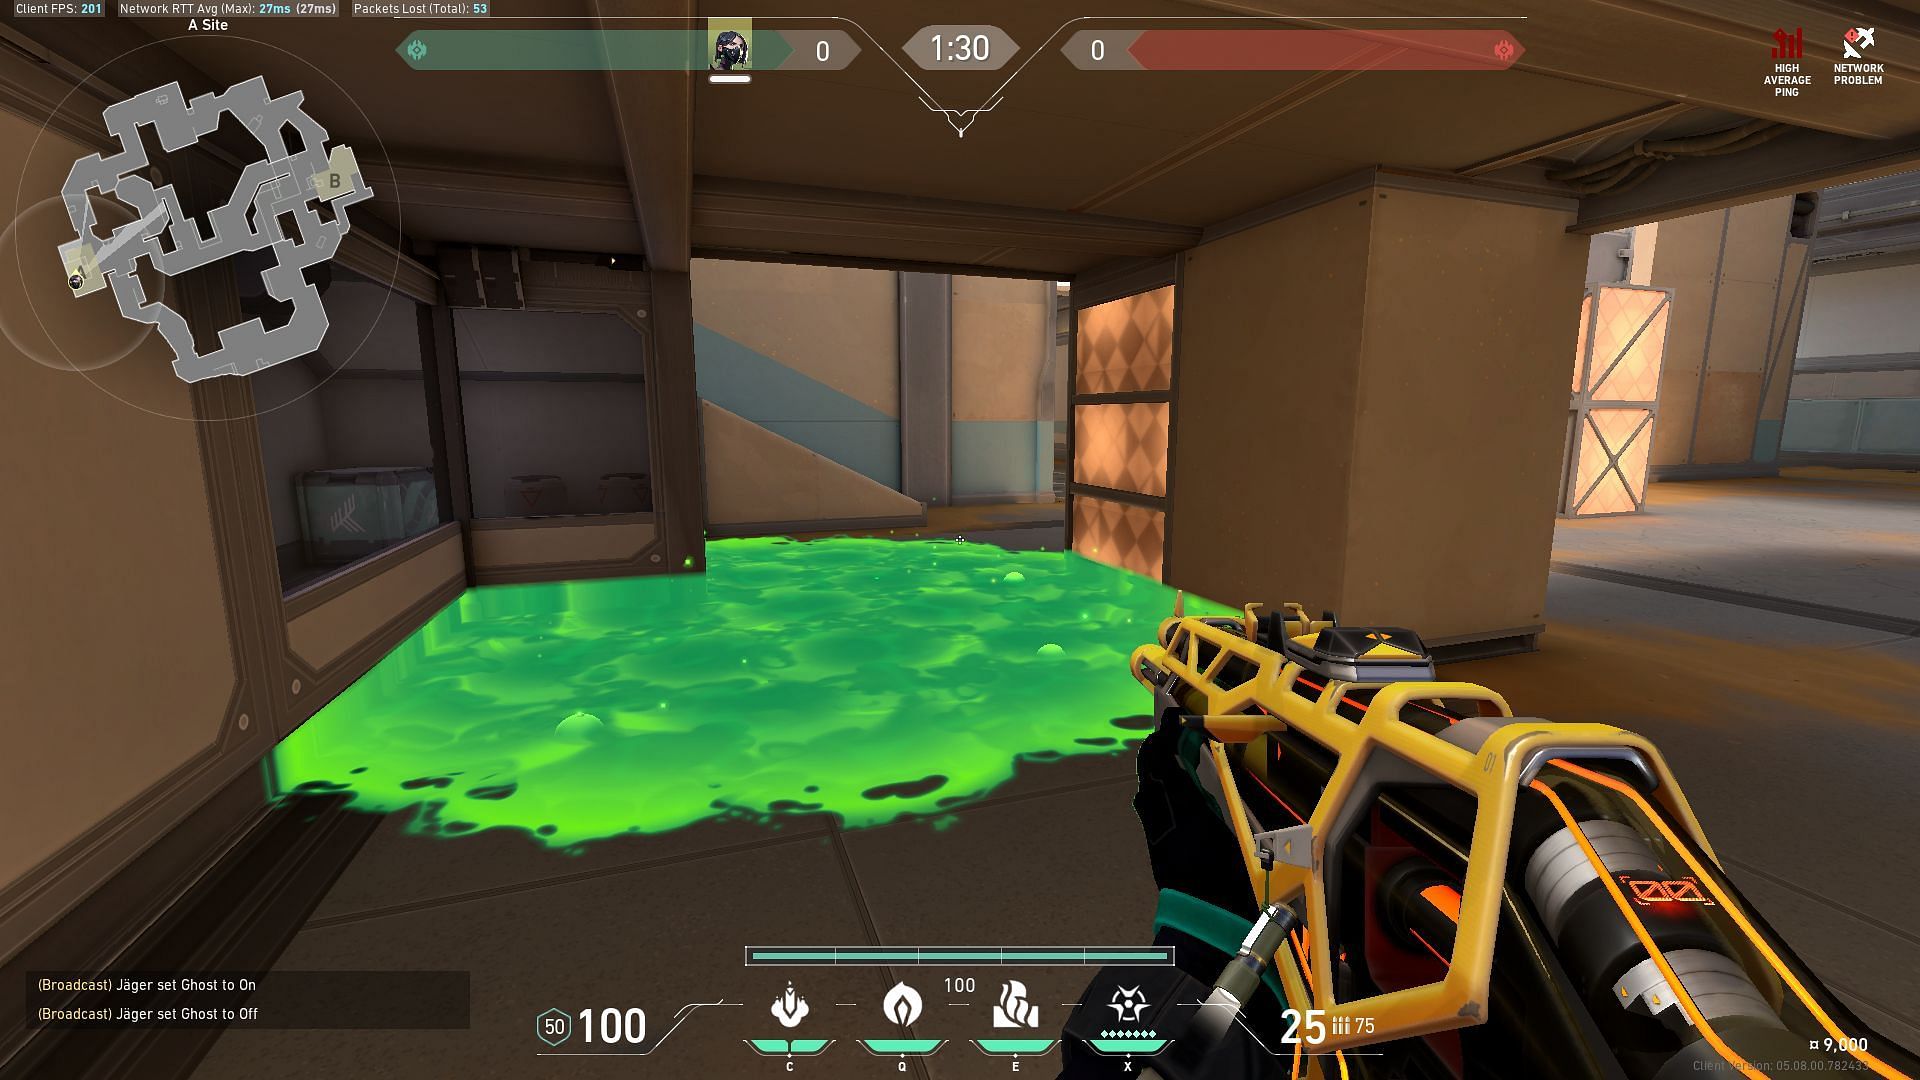
A-main one-way orb
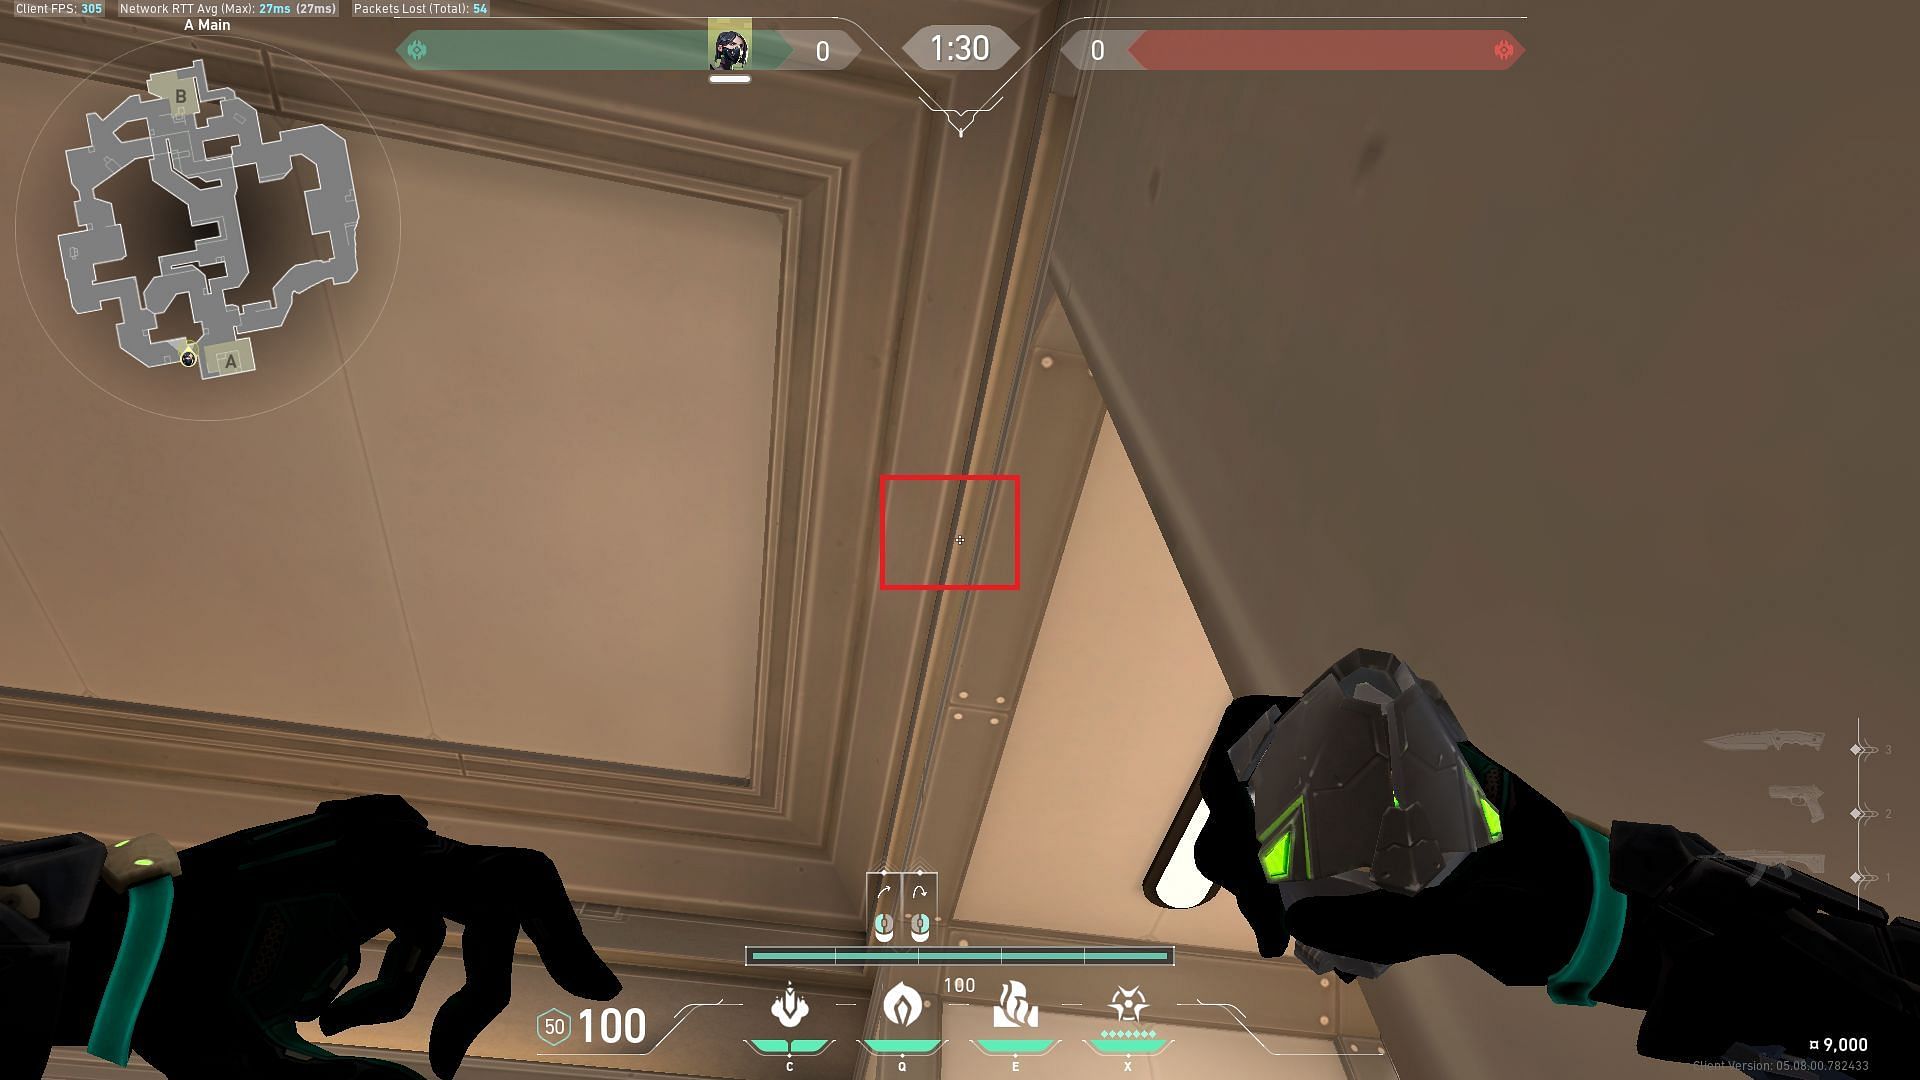
You can use the one-way Poison Orb on A-main by standing inside the entrance as shown in the image. Upon standing, you will have to look up at the ceiling as shown in the image and throw the Orb.

This one-way Orb can prove to be extremely beneficial for defenders when stopping an attempted rush.
Snake Bite
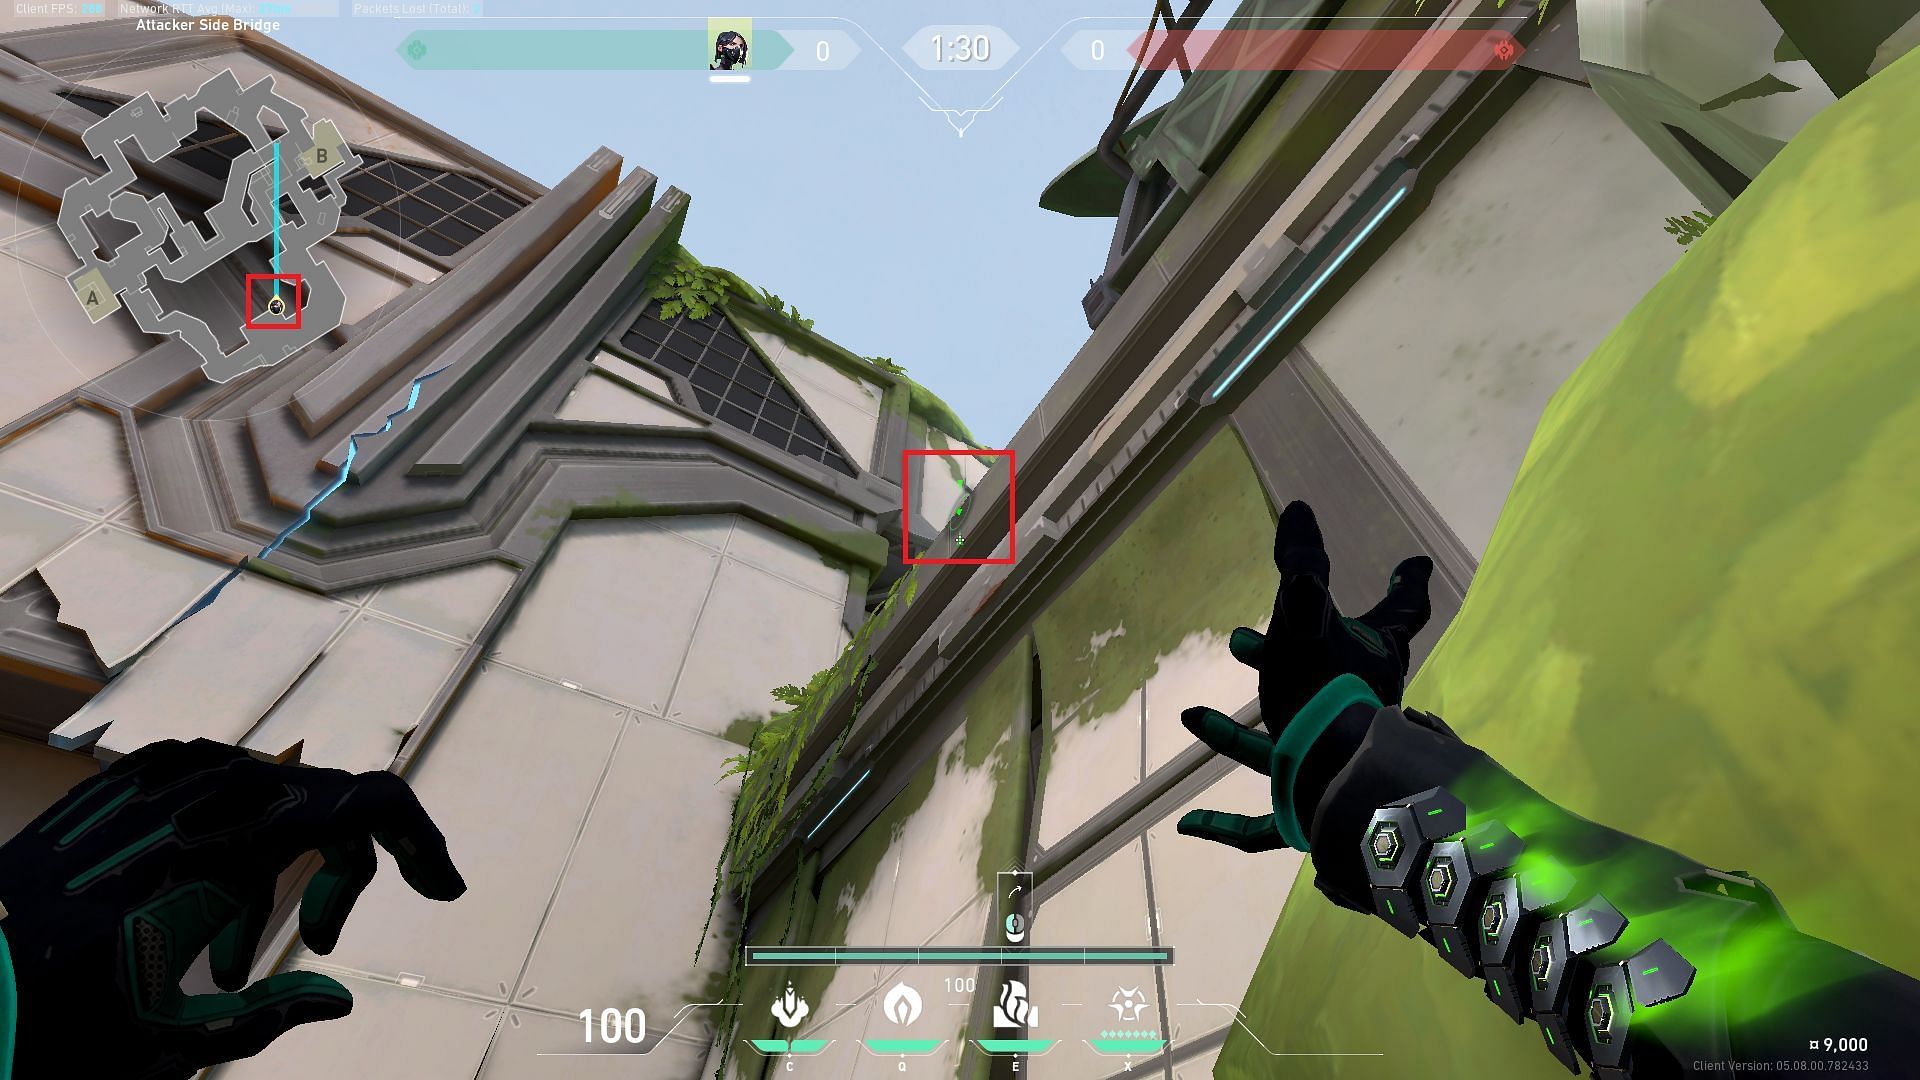
B-site boxes plant lineup
This particular lineup is great for playing post-plant on the Default Boxes of B-site. You will have to stand on the marked position outside B-main as shown in the map, then look up inside the leaves and throw the Snake Bite.
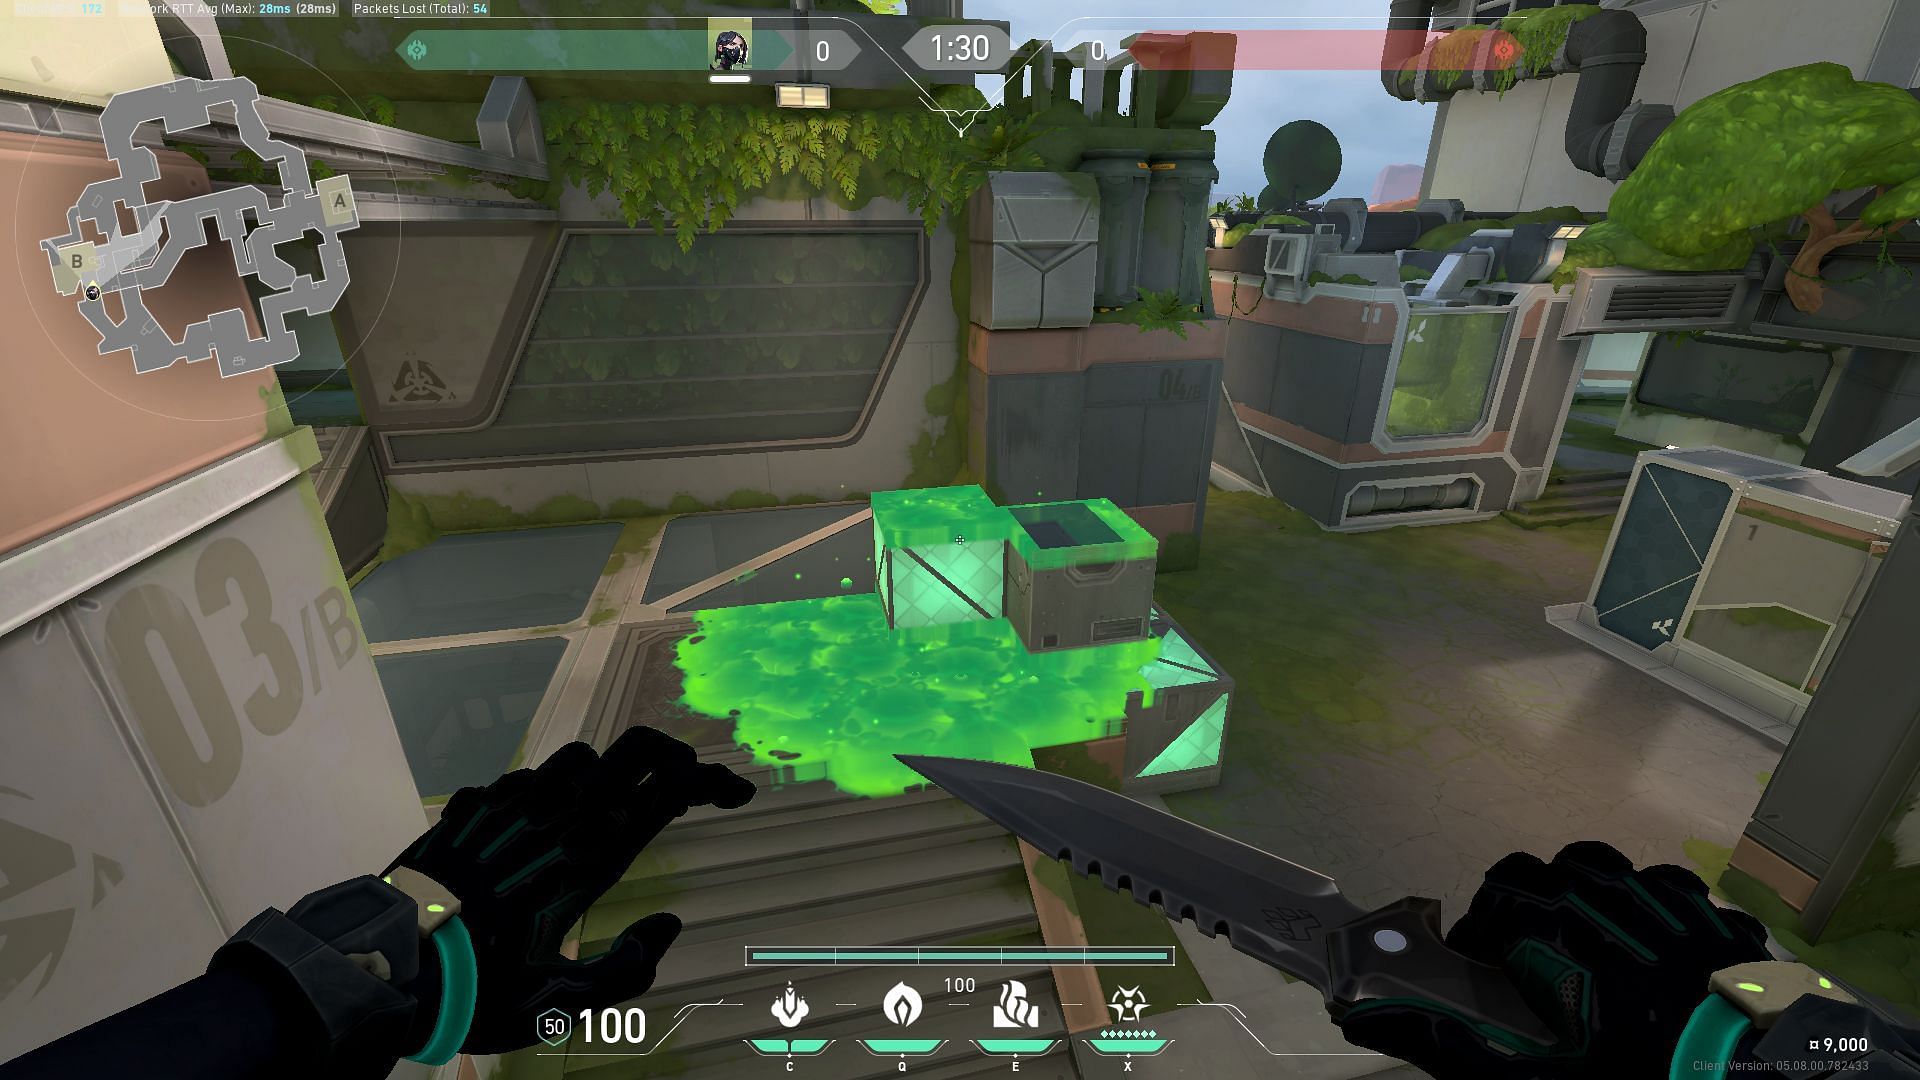
The molly will cover up the entire space, forcing the defusing Agent to leave the area.
A-site default Snake Bite lineup
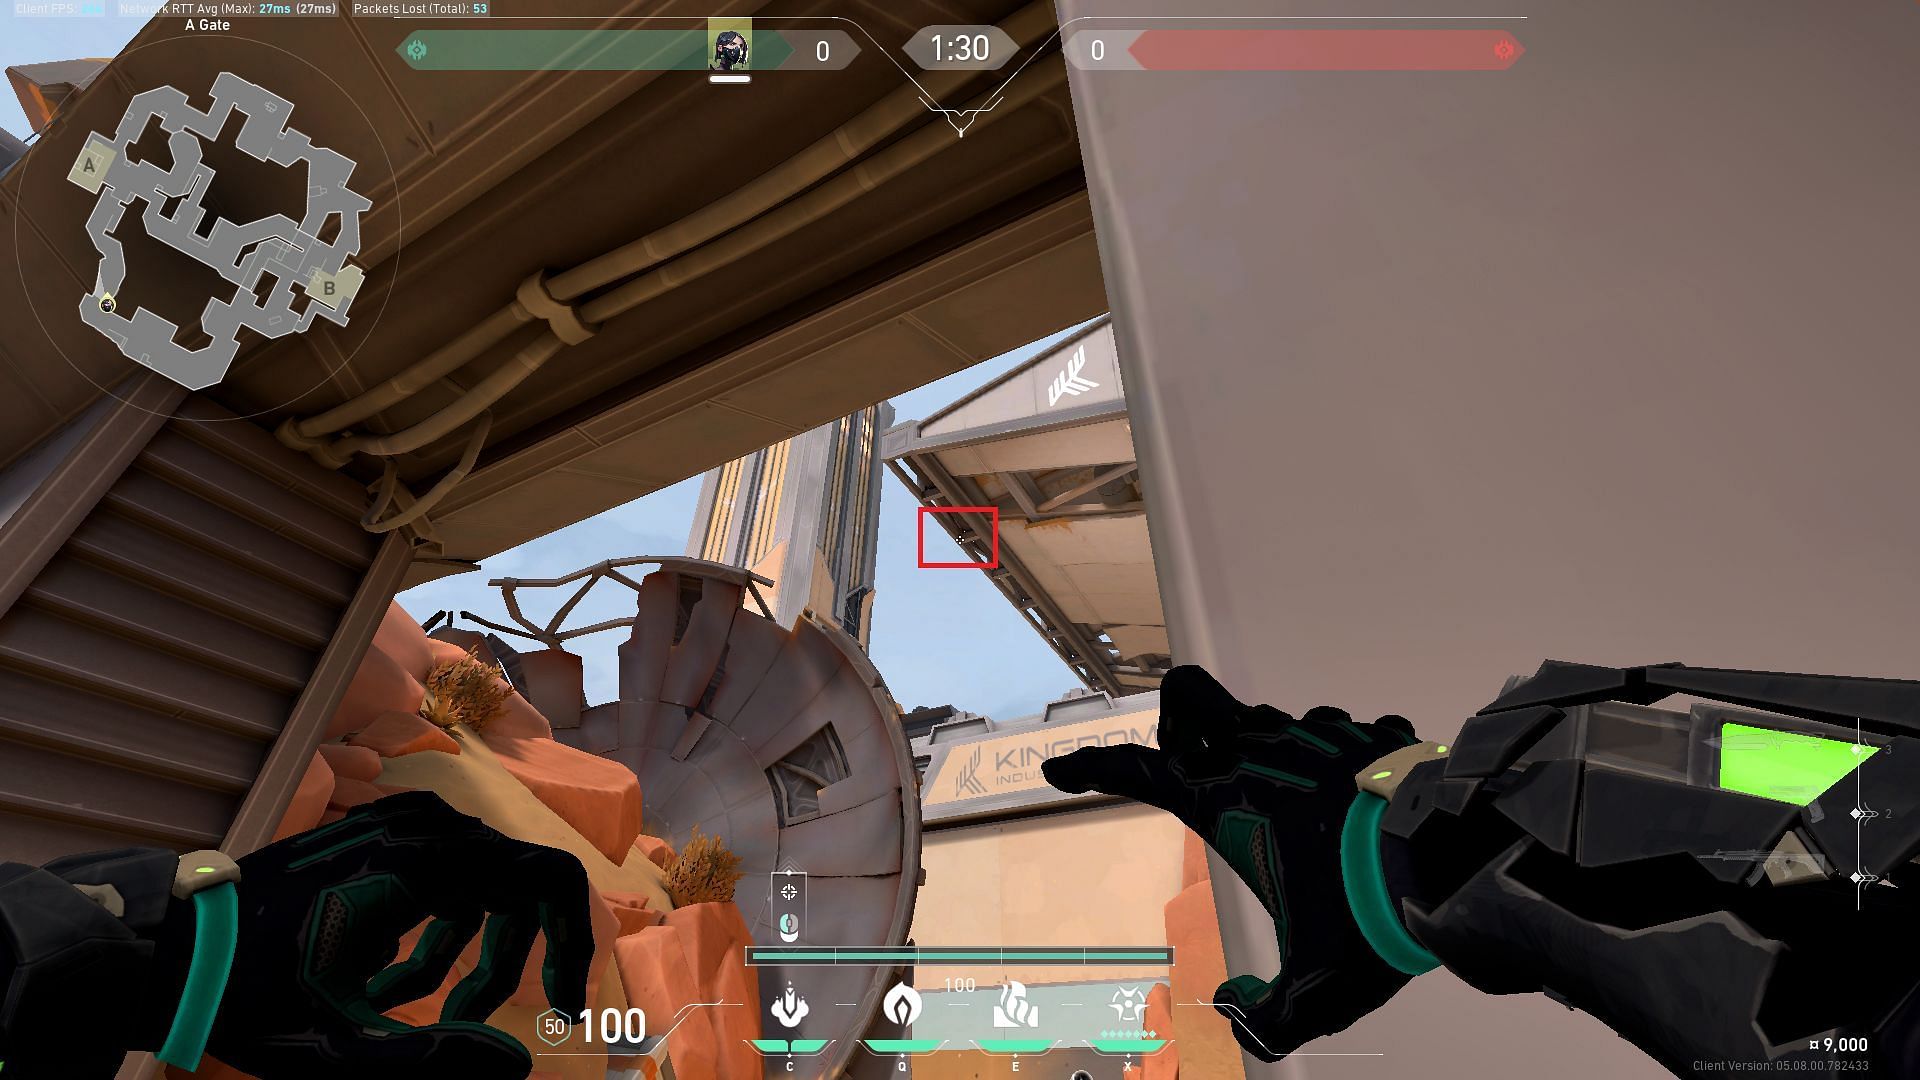
The lineup for the A-site default plan can be performed from outside the Dish area. Upon reaching the location, you can look at the area as shown in the image and throw the Snake Bite.
The Molly will land right on the default plant, forcing any players who are present to leave the area.