
'%20x='0'%20y='0'%20height='100%25'%20width='100%25'%20%0A%20%20%20%20%20%20%20%20%20%20xlink%3Ahref='data:image/jpg;base64,/9j/4AAQSkZJRgABAQAAAQABAAD/2wCEAAMDAwMDAwQEBAQFBQUFBQcHBgYHBwsICQgJCAsRCwwLCwwLEQ8SDw4PEg8bFRMTFRsfGhkaHyYiIiYwLTA+PlQBAwMDAwMDBAQEBAUFBQUFBwcGBgcHCwgJCAkICxELDAsLDAsRDxIPDg8SDxsVExMVGx8aGRofJiIiJjAtMD4+VP/AABEIAAUACgMBIgACEQEDEQH/xABhAAEBAQAAAAAAAAAAAAAAAAAABwgQAAIBBAIDAQAAAAAAAAAAAAIDAQAEBhEFEhMVMWEBAQEAAAAAAAAAAAAAAAAAAAQGEQACAgMBAQAAAAAAAAAAAAABAgMEABEhBRL/2gAMAwEAAhEDEQA/AM6Zdnr2YnjPM+q49QN45CHWiRNYXDIYwYe+e0+Q9L/IqLvye5Y9pivoJGUwPbeomfm6UpdixNYgLSt9lbMwGwOAMcvY016COXkLS0Incl2O2J6enP/Z'%3E%3C/image%3E%3C/svg%3E)
A bootable USB drive is a convenient disk for installing an operating system. Some modern computers don't have a CD/DVD drive for installing or upgrading an operating system. You can create a bootable USB using a command line on Windows operating systems (7,8,8.1,10, and 11). A bootable USB drive has many advantages, such as installing or upgrading an operating system, troubleshooting and repairing, data recovery, and testing new software and portable operating system.
Unfortunately, early versions of Windows cannot be used to create a bootable USB.
Note: Before we begin, ensure you have a USB drive with at least 8GB of free space and a valid Windows license key.
How to create a bootable USB drive for a fresh Windows installation
Step 1) To use the USB drive effectively, ensure it is properly formatted (exFAT) before use.
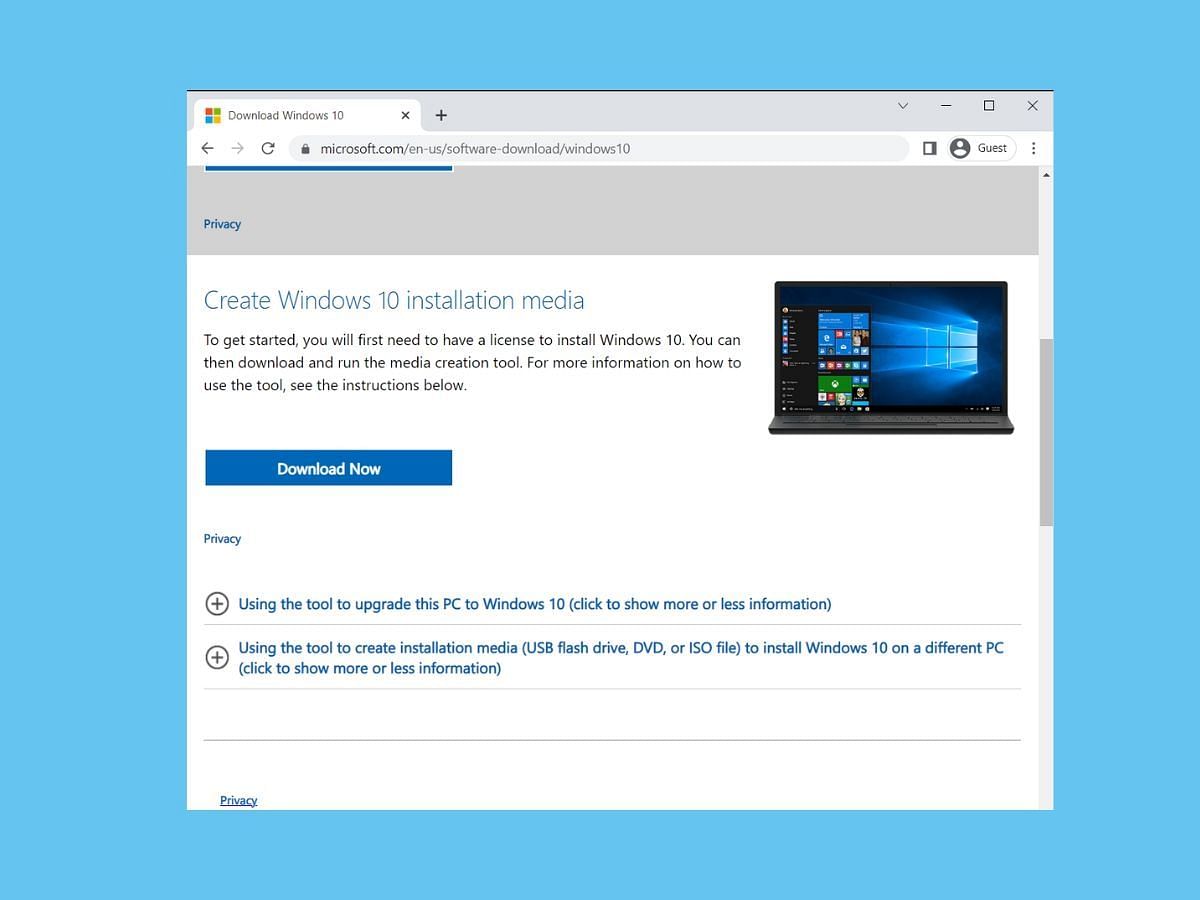
Step 2) Next, navigate to Microsoft's website and download the Windows 10 Media Creation Tool by clicking the "Download Tool now" button under "Create Windows 10 installation media."
Step 3) Navigate to the folder where you downloaded the Media Creation Tool and double-click on the file to run it.
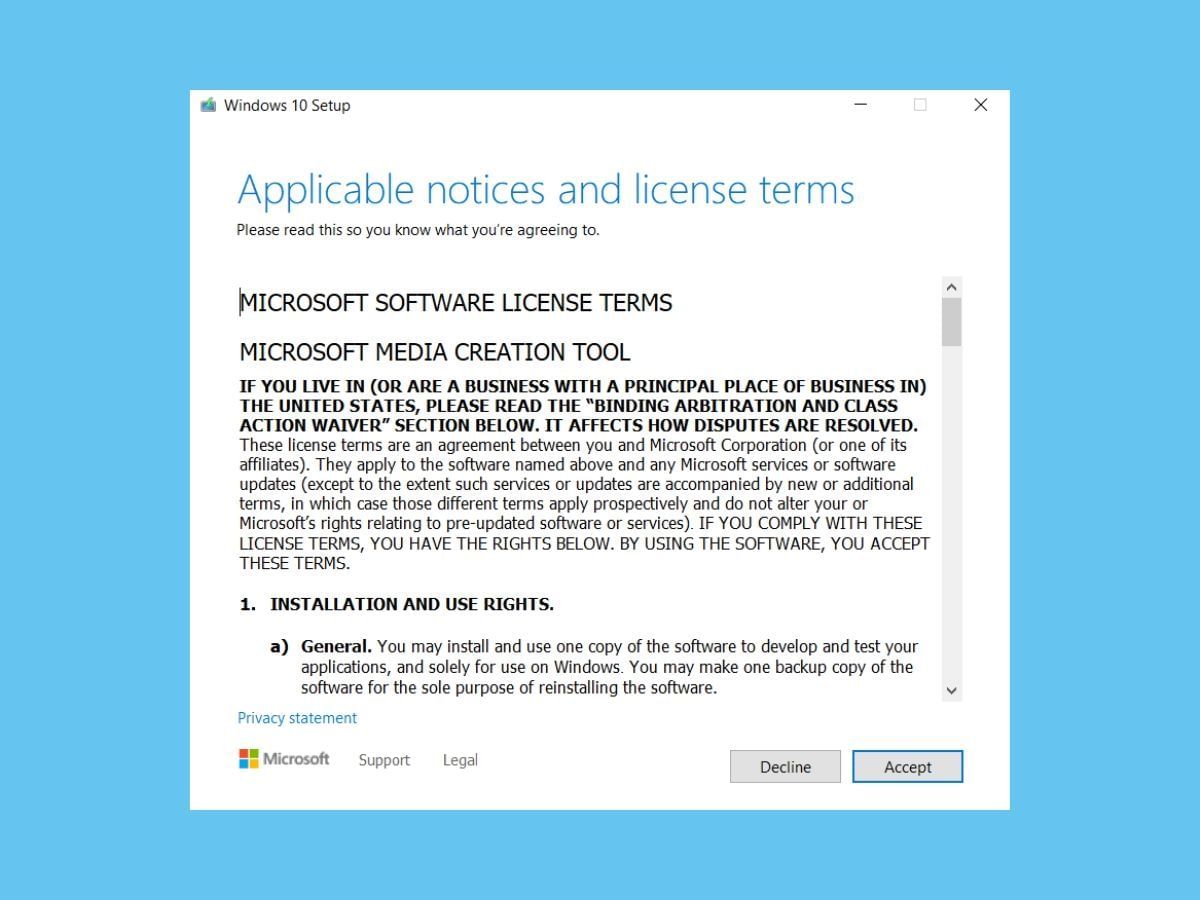
Step 4) Accept the Microsoft terms and conditions by clicking "Accept."
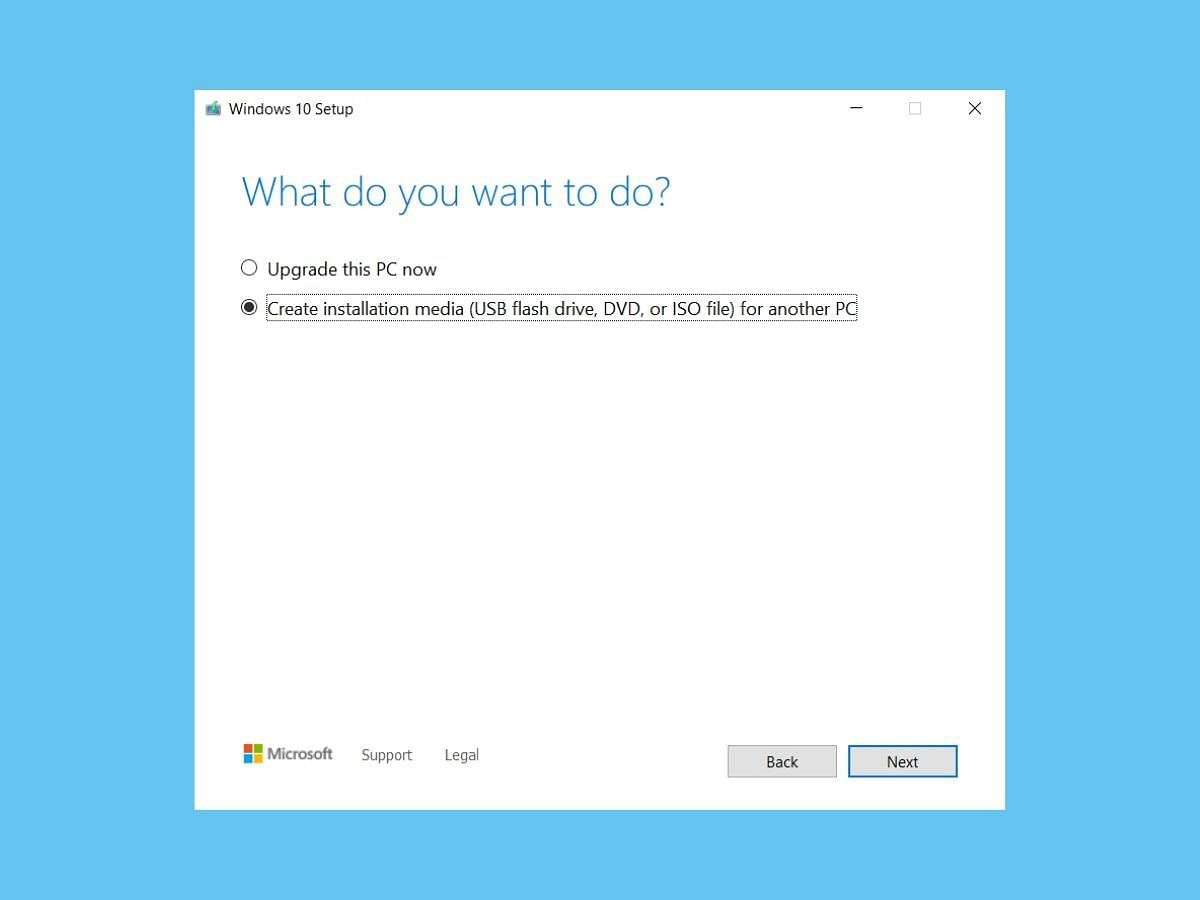
Step 5) Select "Create installation media (USB flash drive, DVD, or ISO file) for another PC" and click on "Next."
Step 6) Choose the language, architecture, and edition you wish to use. You can use the same language, edition, and architecture as your current setup by checking the "Use the recommended options for this PC" box. Alternatively, you can also modify these options by using the drop-down menu. If you're doubtful about whether you need a 64-bit or 32-bit architecture, you can select "Both" from the Architecture drop-down menu.

Step 7) Select the USB flash drive option and click Next.

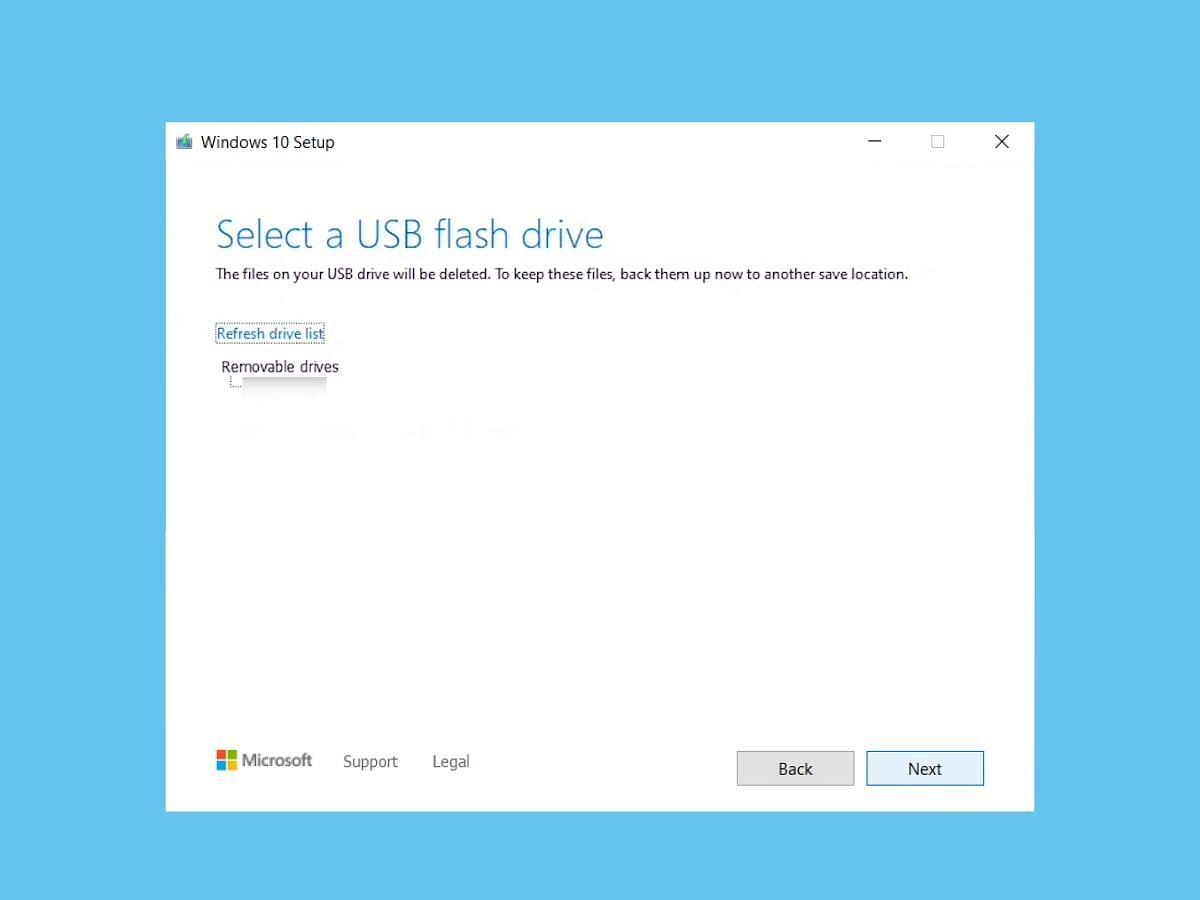
Step 8) Choose your USB drive from the list, or click "Refresh drive list" if you can't see it. Click on "Next."
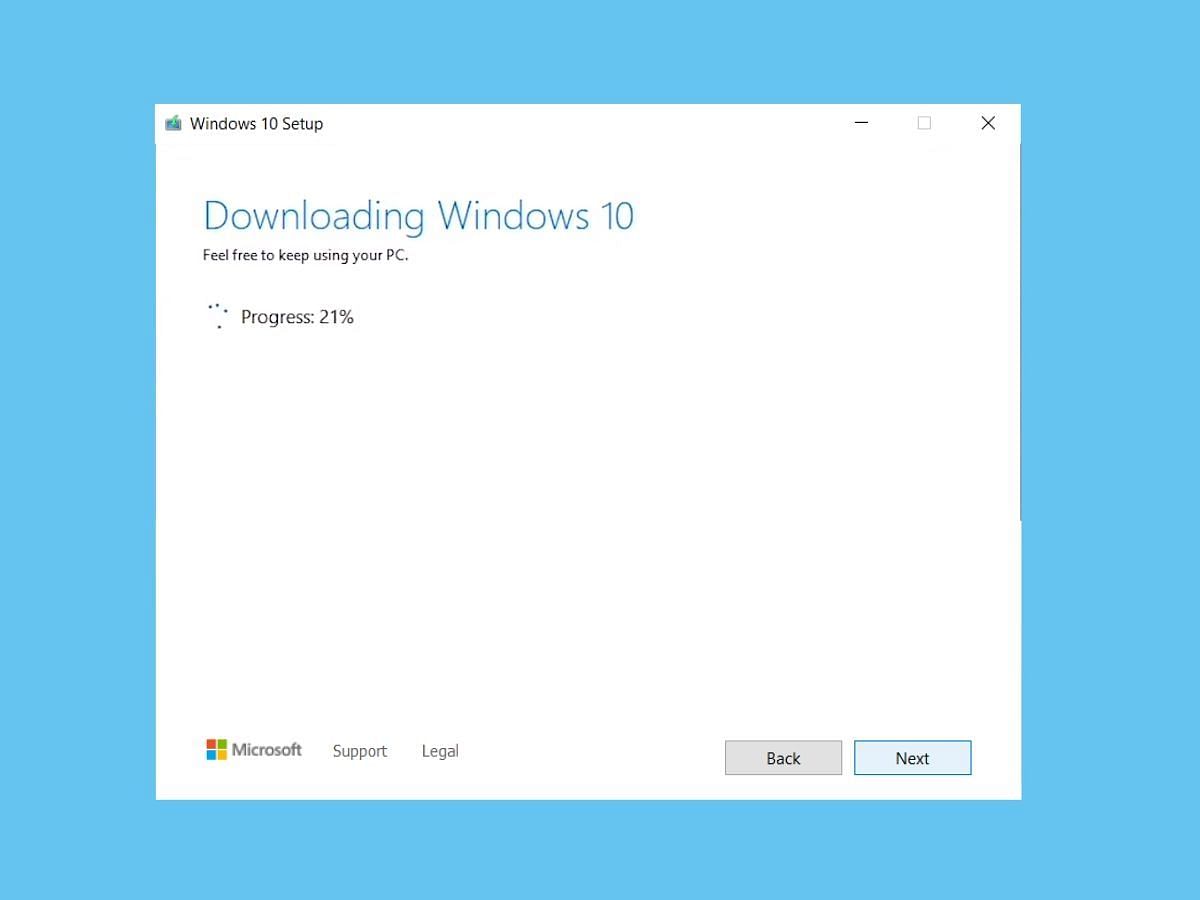
Step 9) The Media Creation Tool will download and install the files to your USB drive. Depending on your internet speed, this process may take several minutes or longer.
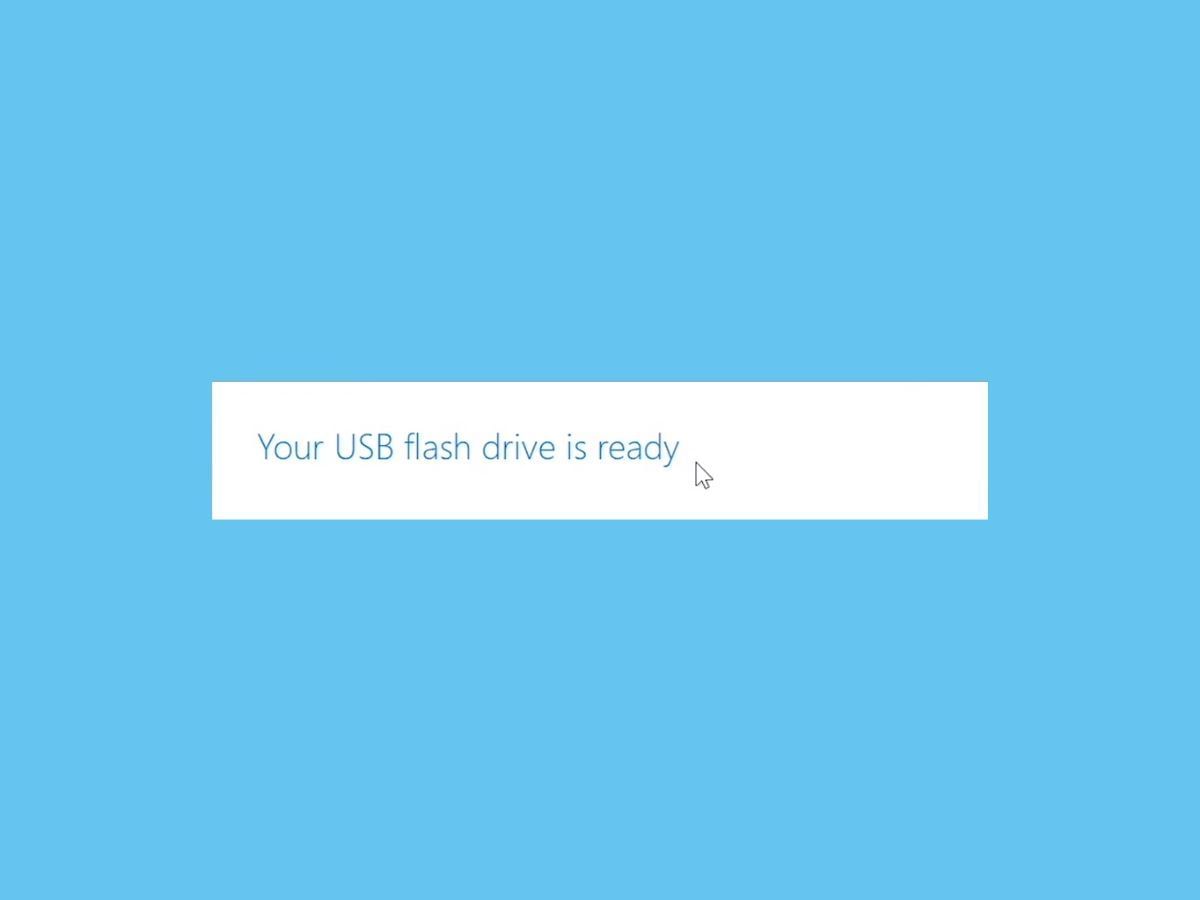
Step 10) To verify that you have successfully created a USB drive that can boot with the Windows 10 installation software, head to File Explorer and check your drives under the 'This PC' section. Your drive should now be identified with a name like 'USB-ESD,' which stands for Electronic Software Delivery. Upon opening the drive, you should be able to view the boot files alongside a 'setup.exe' file.
Bonus Step: To use the bootable USB drive:
- Plug the USB drive into your computer.
- Restart your computer and enter the BIOS firmware.
- Change the boot drive to your USB drive. If you don't know how to enter the BIOS, check with your computer's manufacturer for instructions. The process can vary depending on the manufacturer.
- Save the changes and exit the BIOS.
- Your computer should now boot to the USB drive. If not, repeat the steps above or contact the manufacturer for further assistance.
