
'%20x='0'%20y='0'%20height='100%25'%20width='100%25'%20%0A%20%20%20%20%20%20%20%20%20%20xlink%3Ahref='data:image/jpg;base64,/9j/4AAQSkZJRgABAQAAAQABAAD/2wCEAAMDAwMDAwQEBAQFBQUFBQcHBgYHBwsICQgJCAsRCwwLCwwLEQ8SDw4PEg8bFRMTFRsfGhkaHyYiIiYwLTA+PlQBAwMDAwMDBAQEBAUFBQUFBwcGBgcHCwgJCAkICxELDAsLDAsRDxIPDg8SDxsVExMVGx8aGRofJiIiJjAtMD4+VP/AABEIAAUACgMBIgACEQEDEQH/xABZAAEBAQAAAAAAAAAAAAAAAAAABQgQAAEEAgMBAAAAAAAAAAAAAAMAAQIFB0EGERIxAQEAAAAAAAAAAAAAAAAAAAAGEQADAQAAAAAAAAAAAAAAAAAAAUER/9oADAMBAAIRAxEAPwDPNbk3k0K9hCPIfW2dRiZIvpEm/r7J9oiWaDa1Ef/Z'%3E%3C/image%3E%3C/svg%3E)
There are several ways to capture screenshots on Mac. Moreover, the quality of the screenshots is quite decent, and you can edit or share them however you want. Every method to take screenshots requires the "Shift," "Command," and number keys. Although there are a total of three methods to take screenshots, if your Mac has a touch bar, you can use the fourth method.
In this article, we'll learn about the four ways to take screenshots on Mac properly.
Shortcuts to take screenshots
If you have MacBook laptops or Mac desktops, there are four basic ways to take screenshots on Mac using keyboard shortcuts.
- Shift + Command + 3 = Captures the entire screen
- Shift + Command + 4 = Captures a specific location of the screen
- Shift + Command + 5 = The screenshot menu opens to edit captured screenshots or to record video
- Shift + Command + 6 = Captures a screenshot of your Mac's Touch Bar
How to take screenshots on Mac: Four simple methods
1) Shift + Command + 3
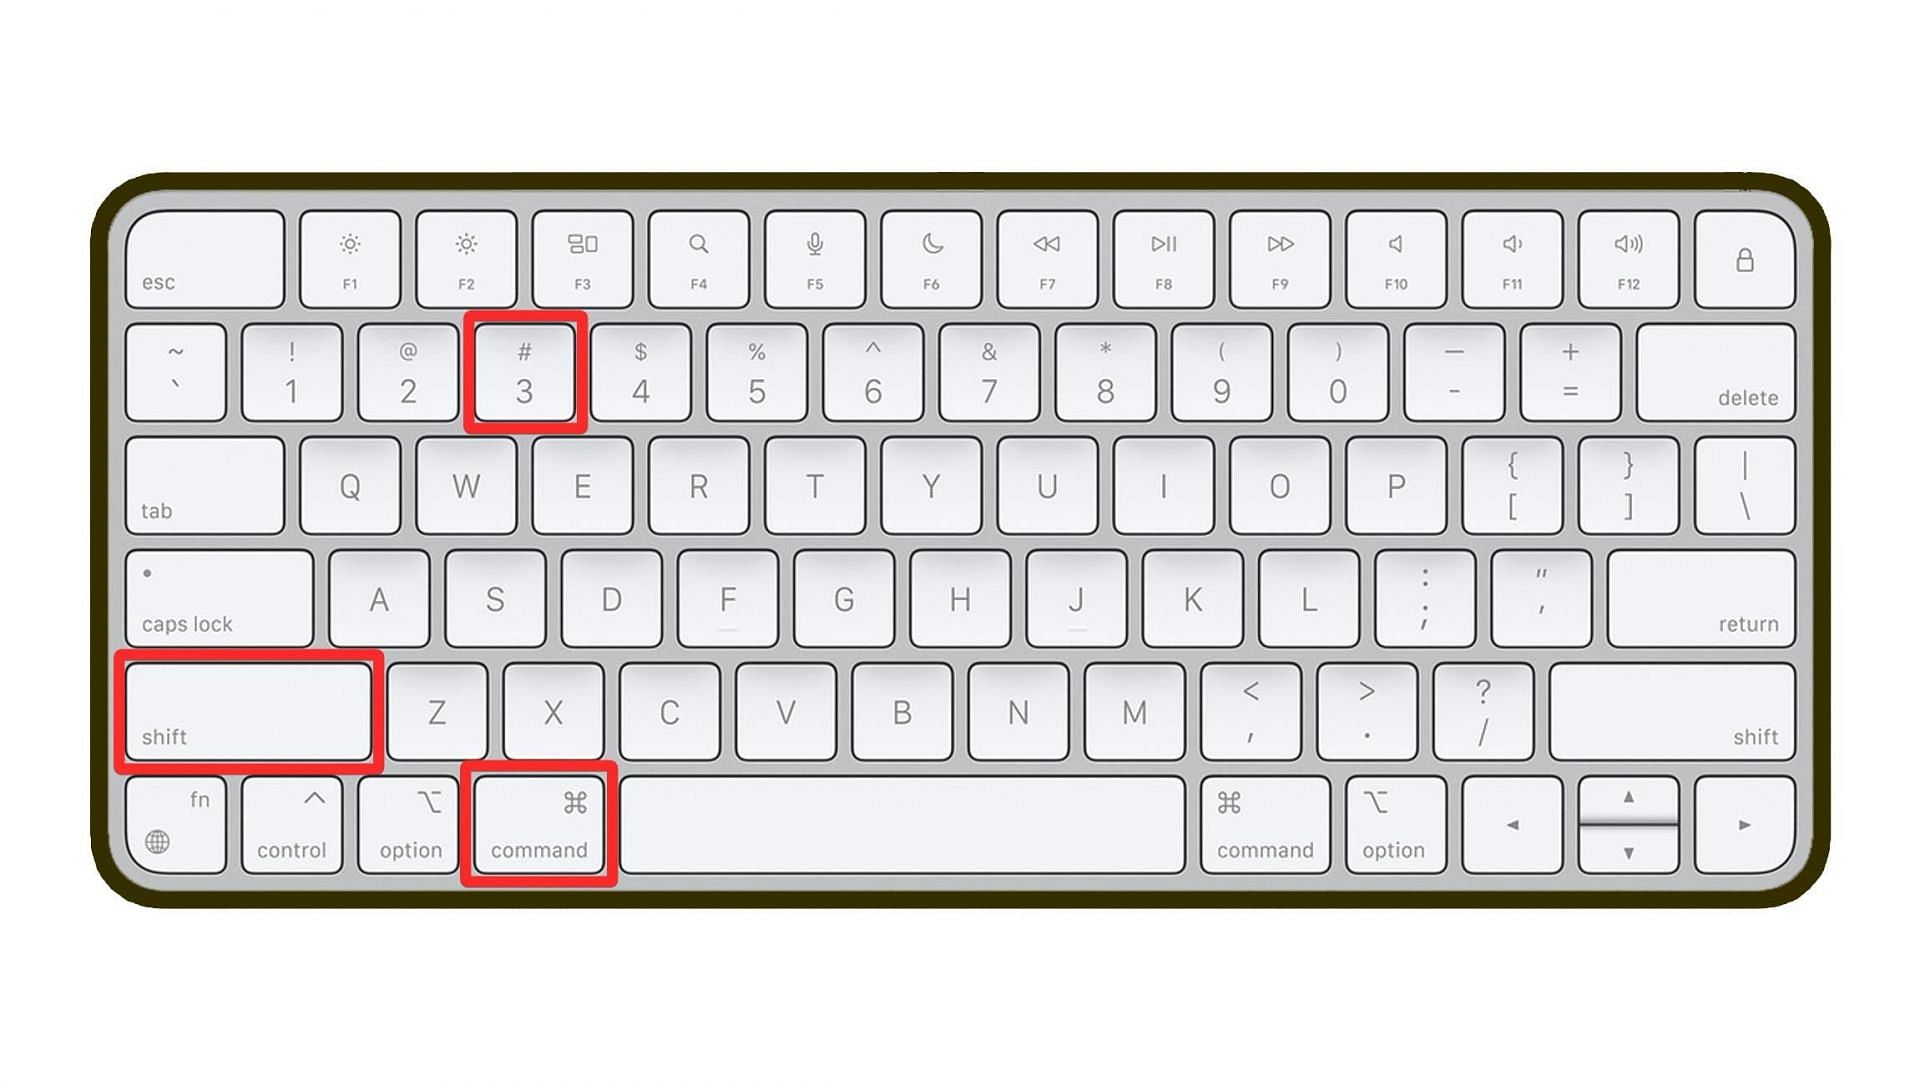
If you want to capture a screenshot of your Mac's entire screen, press and hold Shift + Command + 3. After taking a screenshot, a small icon will be shown in the bottom-right corner. You can click on it to customize the screenshot.
2) Shift + Command + 4
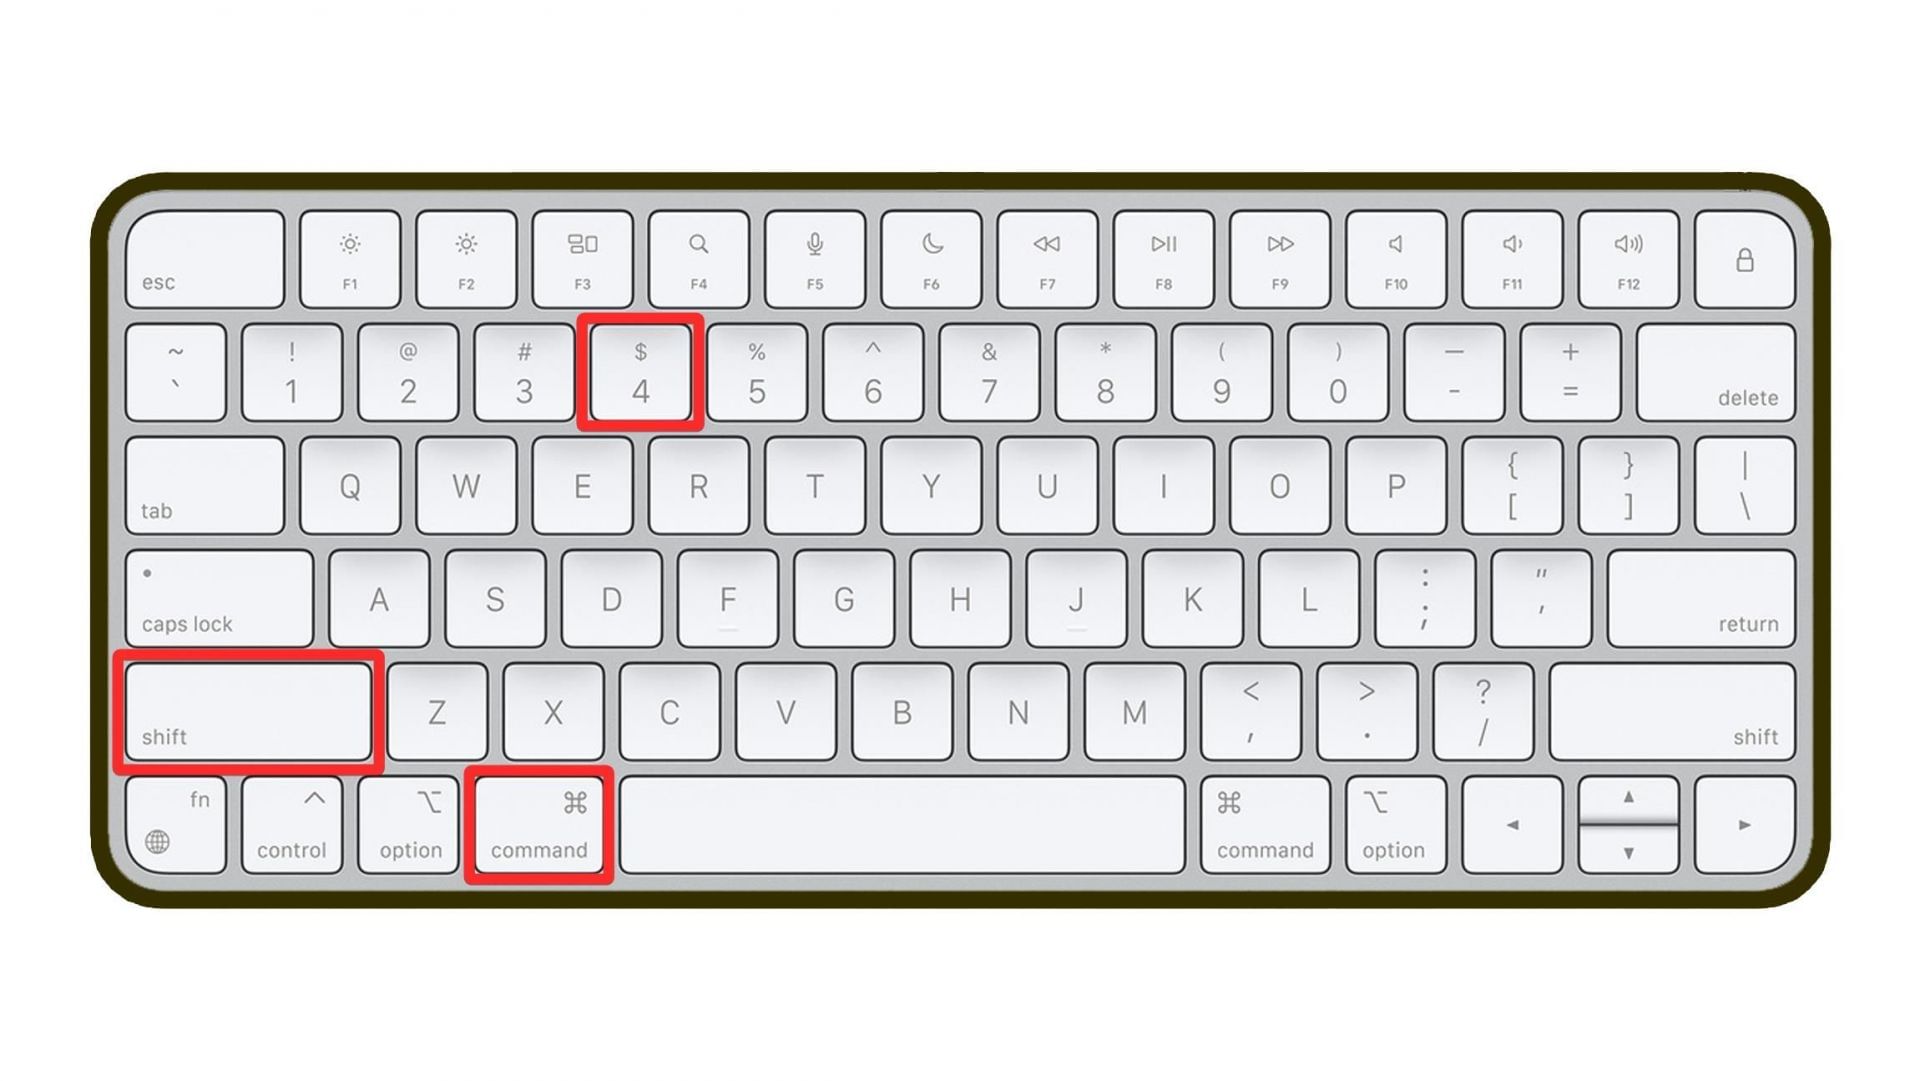
If you want to capture a specific part of your Mac's screen, press and hold Shift + Command + 4, and your cursor will change into a crosshair. Then select the particular area using the crosshair and let go of it to take a screenshot.
Furthermore, it will unlock more features, including:
- After pressing the shortcut keys, if you press and release the spacebar, the crosshair will change into a camera icon. Then you can use it to take screenshots of any window with a gray border around it.
- After pressing the shortcut keys, if you press and hold the spacebar, you can lock the specific area you have highlighted with your crosshair. It locks the selected area, so you can drag it to a specific part of the screen. Finally, if you release the spacebar, it will take the screenshot
- After selecting a particular area using the shortcut, press and hold the shift key to adjust the height and width of the area. It can be adjusted again using the touch pad, mouse button, and shift key.
3) Shift + Command + 5
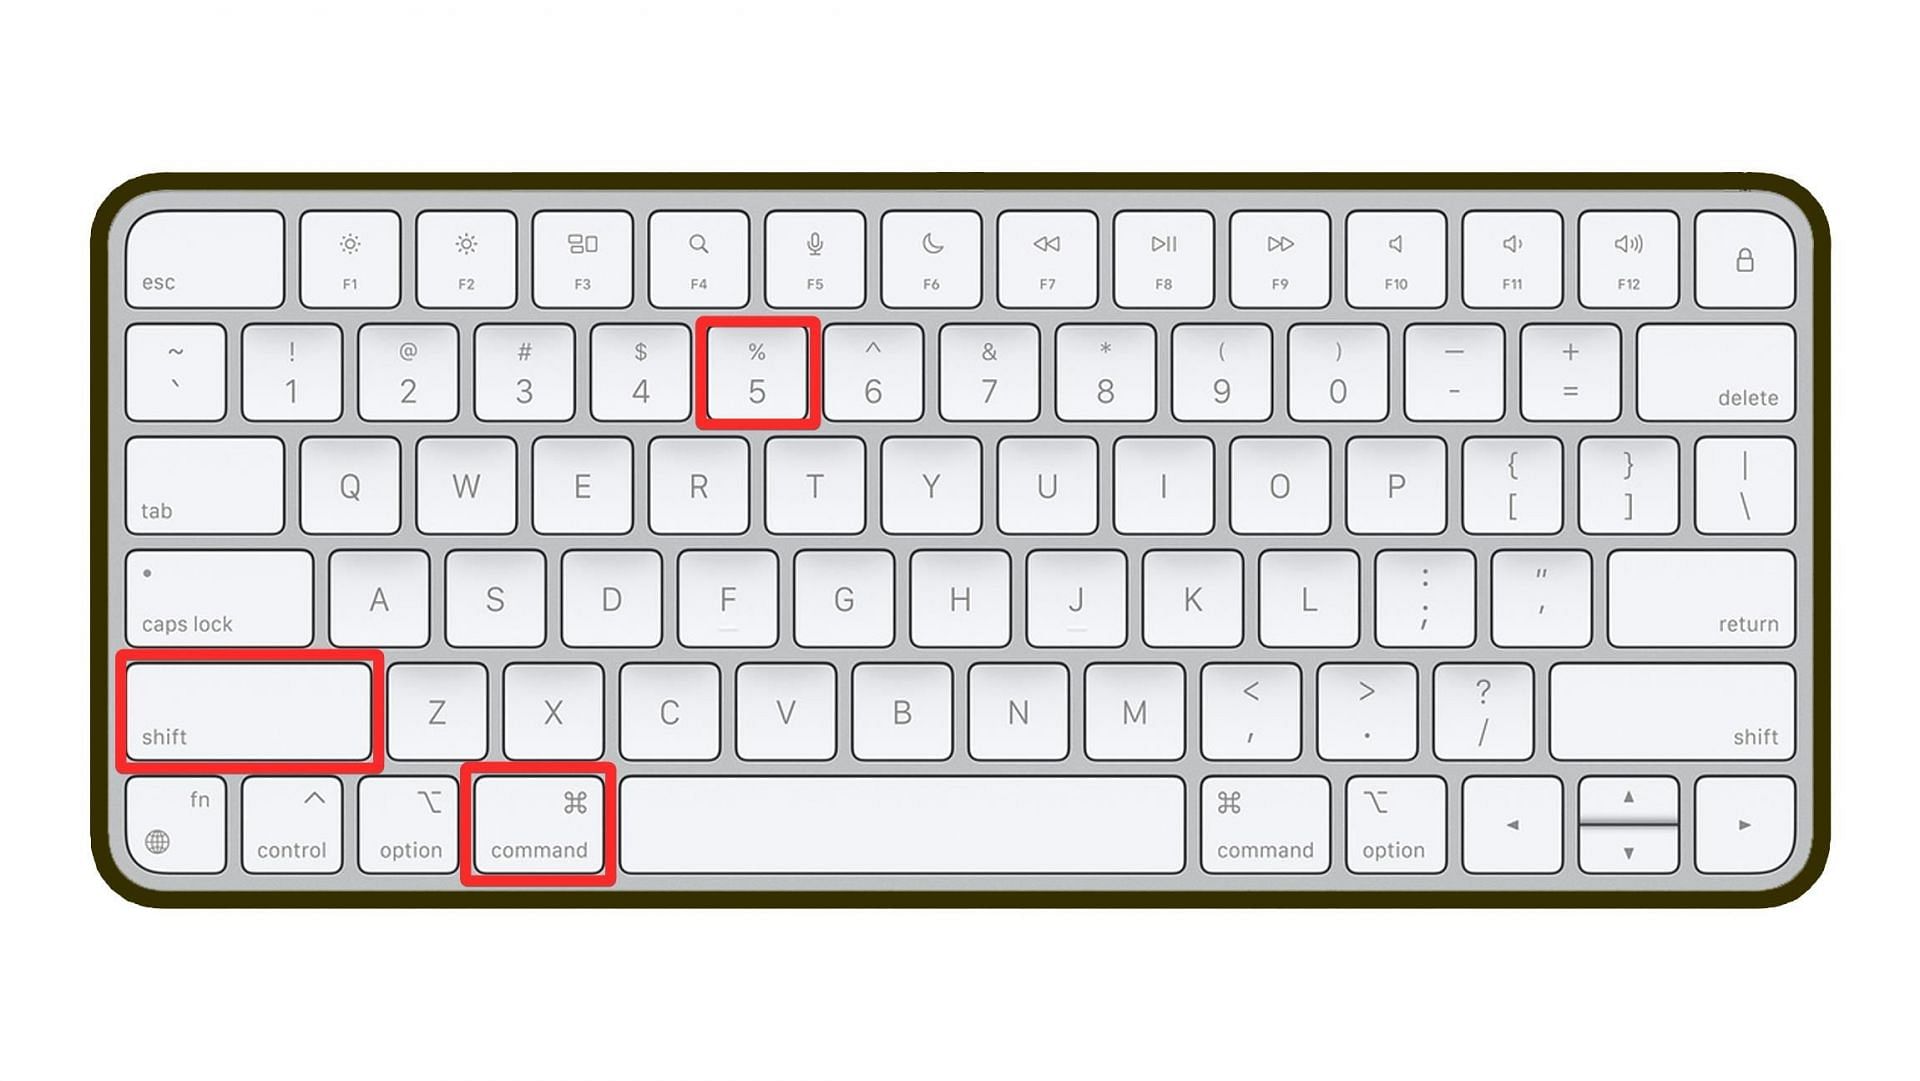
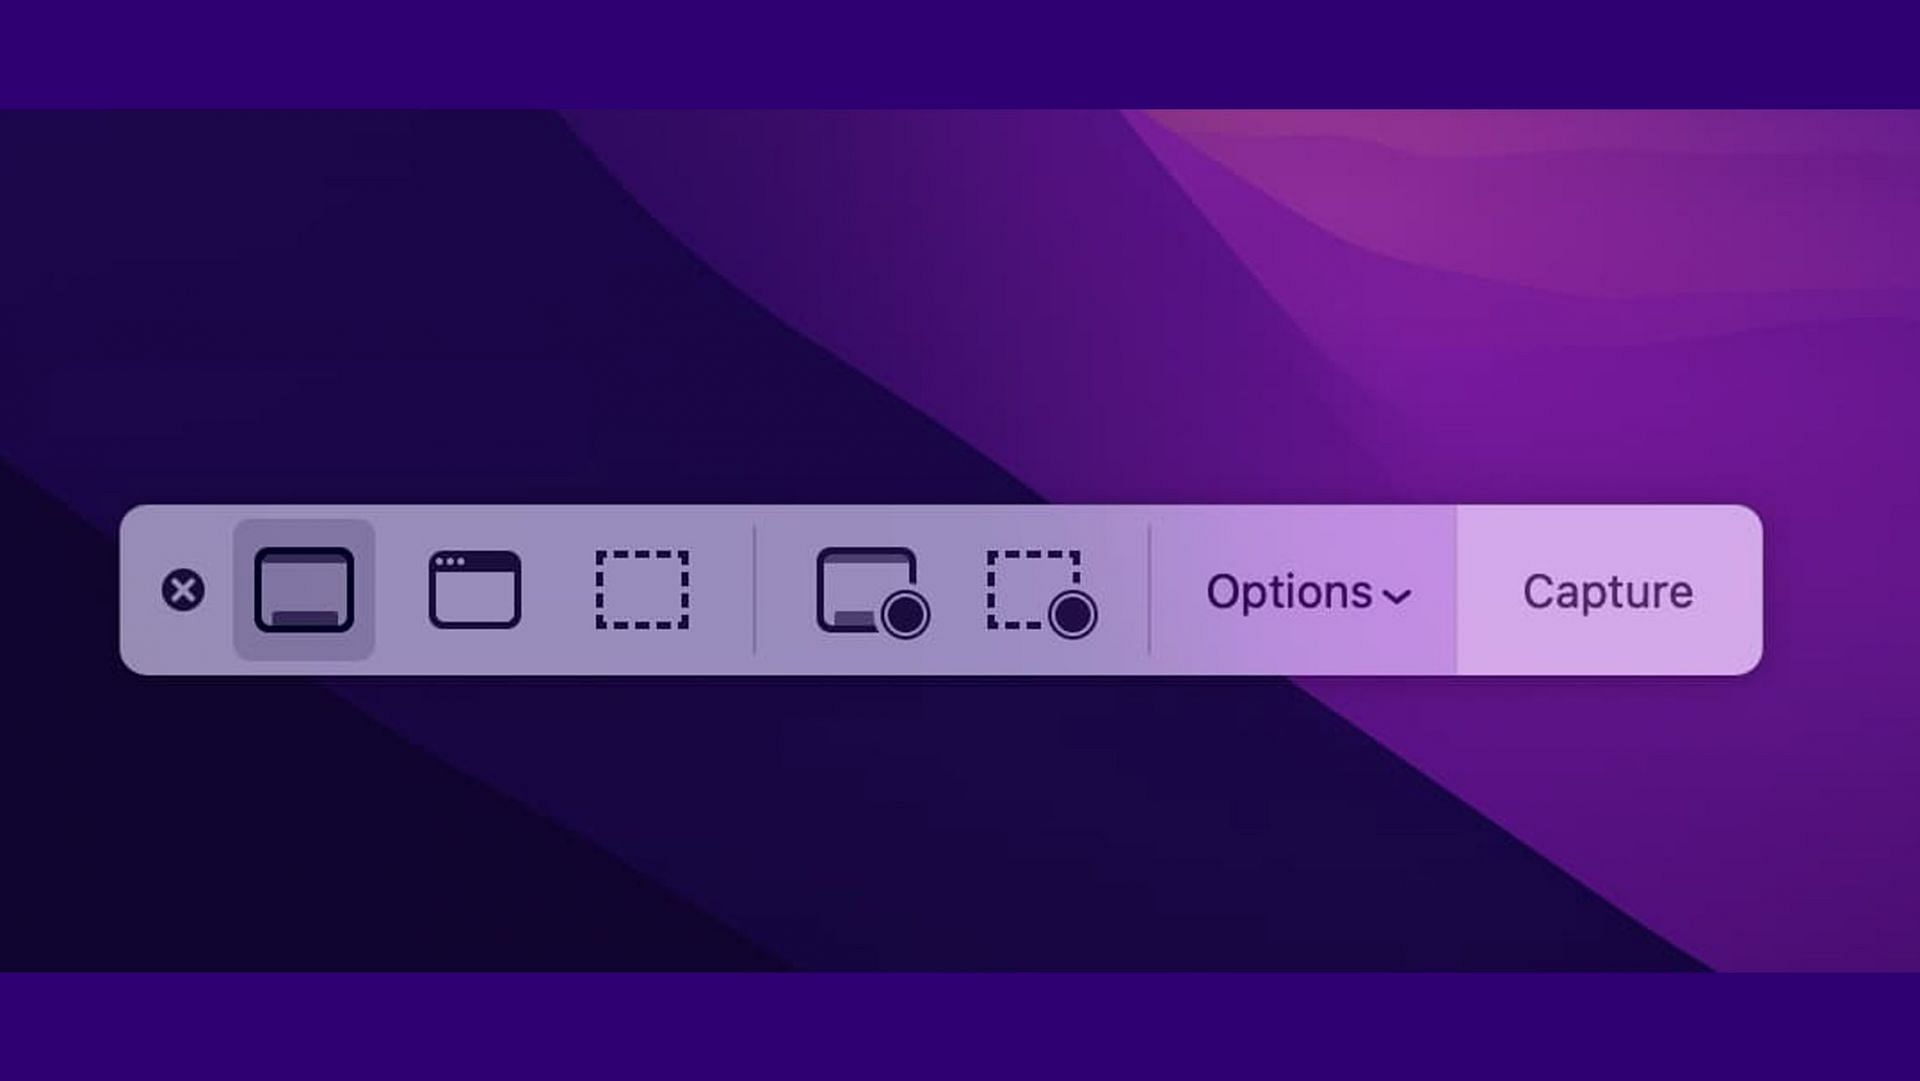
If you press Shift + Command + 5, it launches a menu at the bottom of your Mac's screen. There will be several options available to take screenshots on Mac.
- The first three options help you take different types of screenshots on Mac.
- Then the next two options are for recording the entire screen or a specific part of the screen.
- The "Options" button lets you choose where to save the screenshots. Furthermore, there are options to edit and share the screenshots.
- The "Capture" button on the right takes normal screenshots.
4) Shift + Command + 6
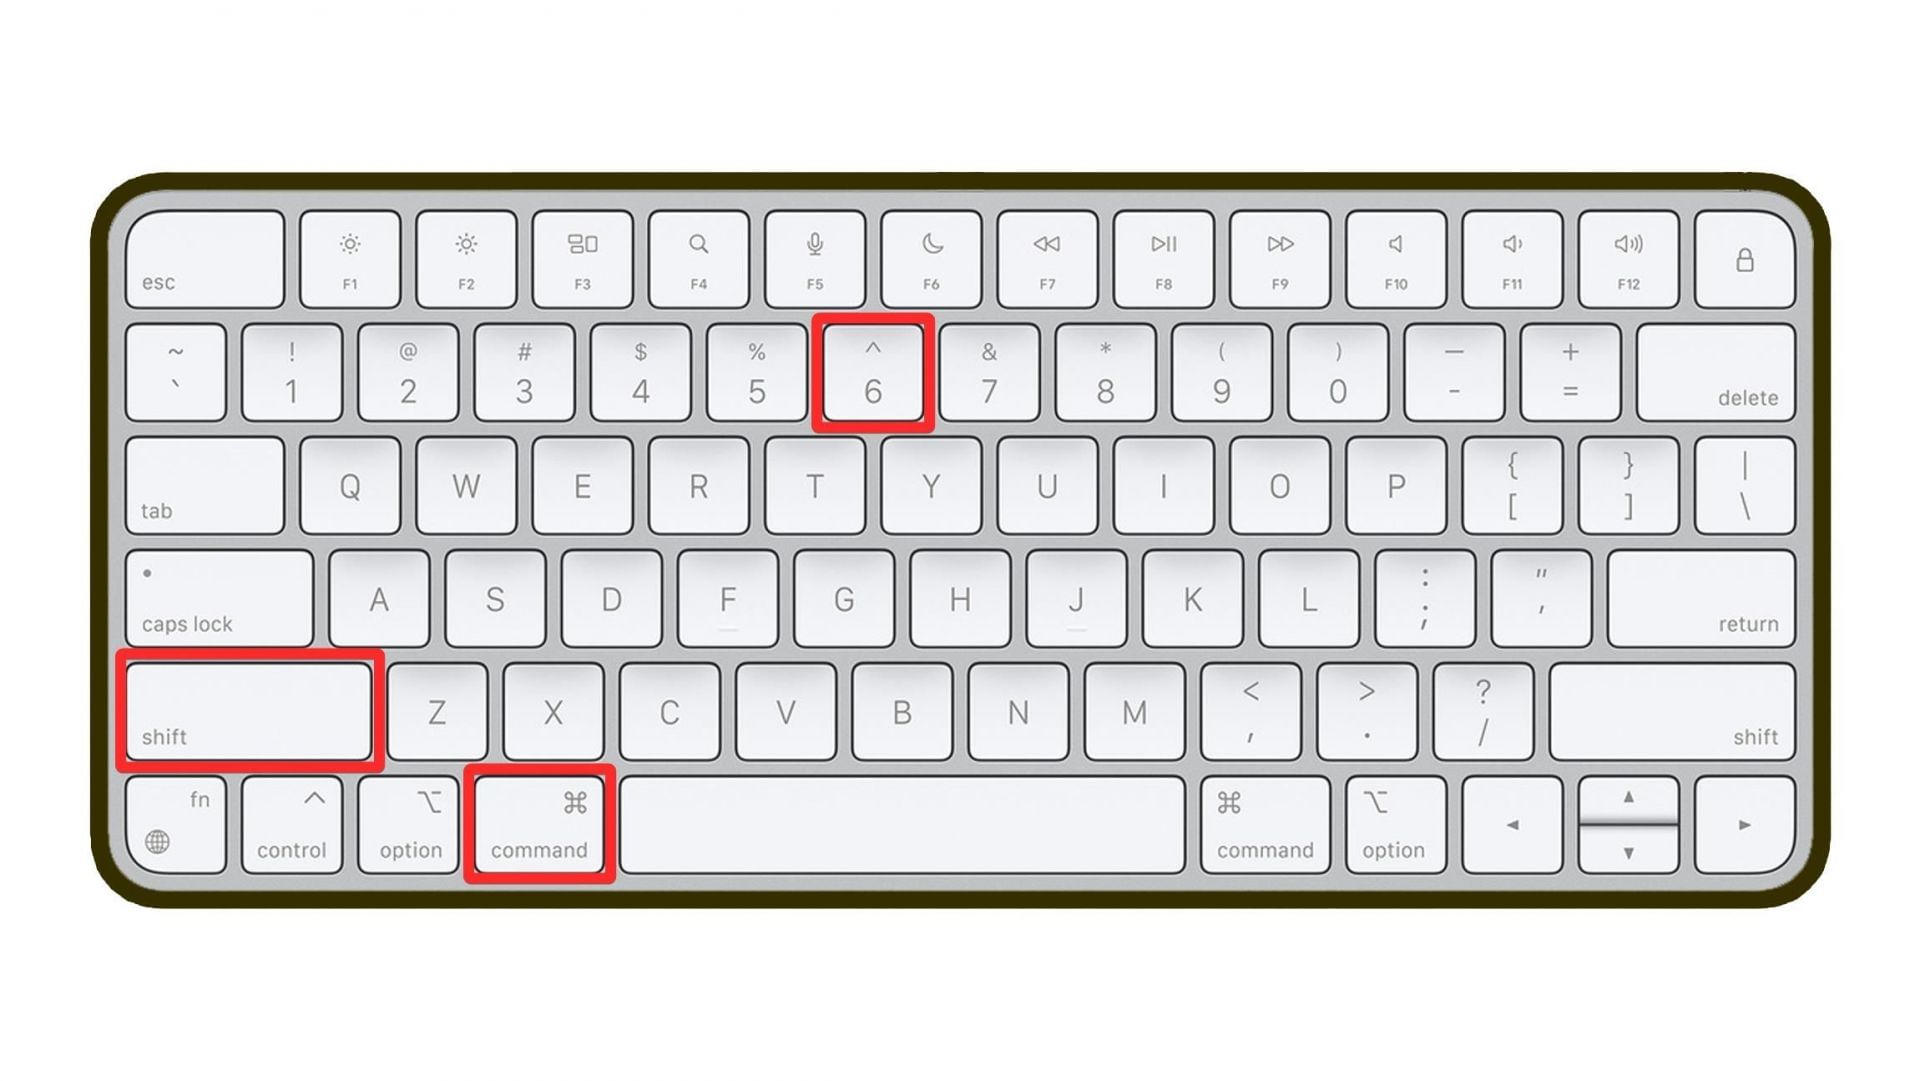
If your Mac has a touch bar, you can take screenshots by pressing Shift + Command + 6.
Saved location of screenshots on Mac
The default location of your captured screenshots on Mac will be your desktop. It will be titled "Screen Shot," with the time and date it was taken. You can change the save location by opening the screenshot menu and clicking on "Options."